sophos安装方法
Sophos 全线产品介绍

欧洲排名第一的防杀病毒软件-Sophos随着计算机网络的迅速普及,搭乘了网络信息高速列车的计算机病毒,传播速度倍增。
国际间的新病毒只需在几小时之内便会出现在我国用户面前,使他们的计算机体系时刻处于新病毒的威胁之中。
因此,反病毒产品技术的优劣,对用户的计算机安全起着至关重要的作用。
如果用户能够真正判别反病毒产品的优劣,那么,计算机安全其实近在咫尺。
对于用户来说,防病毒产品的质量直接关系到计算机体系的防护。
但是,选择质量优秀的反病毒产品,对用户既是重要的却又是困难的。
重要性体现在防病毒产品是否能够有效查杀病毒,查杀时是否具备安全性,它与软、硬平台是否存在兼容性、可靠性的问题,以及运行效率如何… 这些都直接关系到用户的切身利益。
而困难性则体现在当前我国反病毒产品市场, 受广告宣传主导因素的影响非常大。
用户在没有专业测试手段的情况下,对反病毒产品的优劣难以判断。
其实,国际权威机构的测试及其认证是解决用户上述问题的最好方式,因为被测试产品只有完全通过严格的专业测试-,才能获得认证标志。
作为欧洲最大防病毒提供商,Sophos的反病毒产品提供了全方位的的防毒和杀毒的功能。
其频获大奖的技术、完备的产品系列, 以及杰出的工程设计水准能为企业用户提供全方位的病毒防护。
SOPHOS产品系列由Sophos Anti-virus、MailMonitor、SAV Interface、SOPHOS SBE中小企业版四部分组成:其中Sophos Anti-virus用于文件服务器、桌面工作站以及移动设备的病毒防护;MailMonitor用于邮件系统(SMTP server和Email Server)的病毒防护;SAV interface则是提供给第三方的二次开发接口,允许用户把Sophos病毒引擎整合到他们的产品中。
SBE中小企业版可以支持WINDOWS和苹果MAC操作系统,分为Sophos Small Business Suite、Sophos Anti-Virus Small Business Edition、PureMessage Small Business Edition三个产品,支持5用户、10用户、25用户、50用户和100用户五个用户数量等级。
Sophos Mobile 管理员帮助(产品版本号:9)说明书
内容关于本帮助 (1)关于 Sophos Mobile (2)关于 Sophos Mobile Admin (3)仪表板 (3)表格视图 (4)前提条件 (4)用户角色 (4)更改您的密码 (5)密码恢复 (5)使用 Sophos Mobile 管理设备的主要步骤 (7)报告 (8)任务 (9)监视任务 (9)警报 (12)安装 (13)配置个人设置 (13)配置密码策略 (13)配置 SMC 应用设置 (14)配置电子邮件 (14)配置 IT 部门联系人 (15)配置隐私设置 (15)配置 iOS 设置 (16)Apple 推送通知服务证书 (16)配置 iOS AirPlay 目标 (19)Android 设置 (19)设置 Android 管理模式 (20)在您的 Web 服务器上托管 Sophos 应用 (20)配置 Sophos Mobile Control 应用的同步间隔 (21)启用百度云推送服务 (21)注册 Samsung Knox 许可证 (21)配置 Windows 设备的轮询间隔 (22)检查您的许可证 (22)简单证书注册协议 (SCEP) (22)创建客户属性 (23)配置 SSL/TLS 证书 (24)配置 EAS 代理 (24)配置网络访问控制 (24)配置电子邮件服务器连接 (24)配置代理服务器连接 (24)配置门户访问权限 (24)配置文件上传限制 (25)开启审核日志 (25)创建系统消息 (25)配置自助服务门户 (26)配置自助服务门户设置 (26)创建注册文本 (27)可用的自助服务门户操作 (28)合规性策略 (31)创建合规性策略 (31)可用的合规性规则 (32)将合规策略分配到设备组 (37)检查设备合规性 (37)设备 (38)添加设备 (38)注册设备 (39)取消设备注册 (46)管理设备 (47)自定义设备属性 (58)Zero-touch 注册 (59)Knox Mobile Enrollment (62)Apple DEP (64)Duo Security 集成 (74)TeamViewer 远程控制 (75)设备组 (77)创建设备组 (77)删除设备组 (77)用户 (78)配置自助服务门户用户管理 (79)配置外部目录连接 (80)联合身份验证 (81)配置 LDAP 连接 (83)创建用户 (83)导入用户 (84)创建用户组 (84)配置文件和策略 (86)开始使用设备策略 (87)创建配置文件或策略 (87)导入用 Apple Configurator 创建的 iOS 设备配置文件 (88)导入 iOS 应用的设置配置文件 (89)关于 macOS 策略 (89)Windows 密码复杂性规则 (90)Samsung Knox 支持 (90)配置文件和策略中的占位符 (91)在设备上安装配置文件 (91)向设备分配策略 (92)卸载配置文件 (92)下载配置文件和策略 (93)Android 设备配置文件的配置 (93)Android 企业工作配置文件策略的配置 (109)Android 企业设备策略的配置 (120)Android 的 Sophos 容器策略的配置 (132)Android 的 Mobile Security 策略的配置 (141)Knox 容器配置文件的配置 (144)Android Things 策略的配置 (148)iOS 设备配置文件的配置 (148)iOS 的 Sophos 容器策略的配置 (175)iOS 的 Mobile Security 策略的配置 (183)macOS 设备策略的配置 (185)macOS 用户策略的配置 (199)Windows Mobile 策略的配置 (215)Windows 策略的配置 (224)Windows IoT 策略的配置 (234)任务捆绑包 (237)创建任务捆绑包 (237)可用的 Android 任务类型 (238)可用的 iOS 任务类型 (241)可用的 macOS 任务类型 (243)可用的 Windows 任务类型 (244)复制任务捆绑包 (246)将任务捆绑包传输至个人设备或设备组 (246)应用程序 (247)添加应用 (247)安装应用 (248)卸载应用 (249)应用设置 (Android) (250)应用设置 (iOS) (252)应用设置 (macOS) (254)应用设置 (Windows Mobile) (255)应用设置 (Windows) (256)确定 Windows MSI 链接的设置 (257)iOS 的托管应用 (258)管理 Apple VPP 应用 (258)将 VPN 连接分配给 iOS 应用 (263)将托管应用配置添加到 iOS 应用 (263)应用组 (265)创建应用组 (265)导入应用组 (266)企业文档 (268)添加公司文档 (268)Android 企业 (270)设置 Android 企业 - 概述 (270)设置 Android 企业(托管 Google Play 帐户方案) (271)设置 Android 企业(托管 Google 域方案) (272)配置 Android 企业设备注册 (275)管理 Android 企业用户(托管 Google 网域方案) (276)创建工作配置文件 (277)锁定工作配置文件 (277)从设备删除工作配置文件 (278)用户启动的工作配置文件删除 (278)Android 恢复出厂设置保护 (278)托管的 Google Play 应用 (280)Intune 应用保护 (286)设置 Microsoft Intune 集成 (286)创建 Intune 应用保护策略 (287)将应用分配给 Intune 应用保护策略 (287)将用户分配给 Intune 应用保护策略 (287)Intune 应用保护策略设置 (Android) (288)Intune 应用保护策略设置 (iOS) (292)管理 Sophos Mobile Security (296)Sophos Mobile Security 合规性规则 (296)配置第三方 EMM 集成 (298)创建管理员 (300)向设备发送消息 (301)Sophos 容器 (302)配置 Sophos 容器注册 (302)Mobile Advanced 许可证 (302)管理 Sophos 容器应用 (303)重置 Sophos 容器密码 (304)锁定和解锁 Sophos 容器 (304)企业 Keyring 同步 (305)将内容传递到 Sophos Central (306)导出内容 (306)导入内容 (306)用语表 (308)技术支持 (309)法律声明 (310)Sophos Mobile1 关于本帮助本帮助提供了有关Sophos Mobile Admin管理控制台的信息,并对操作程序进行了详细解释。
Sophos_Solutions

• 简单的使用方法
• 用户透明的加密 • 不对用户日常工作产生影响 • 开机直接登录OS
SGN Data Exchange 外设加密
• 加密可移除设备,如 U 盘,外接硬盘,可读写CD/DVD,内存卡。 • 文件复制到外设设备进行透明文档加密 • 内部使用完全透明
与同事安全、透 明的交换数据
SGN Configuration Protection 外设管控
通过Sophos SafeGuard Data Exchange加密文件交换方案, 可以解决
电脑丢失后数据安全无法保证?
通过Sophos SafeGuard Device Encryption将硬盘加密,就 可以解决
电脑外设无法控制?
通过Sophos SafeGuard Configuration Protection可以灵 活控制外设
Sophos端点安全与控制
Web Security and Control
评估、控制和防护只需要一个产品
• • • • • • • • • • • 防毒 主动防御 (HIPS) 反间谍软件 流氓程序 云安全 网页保护 管理、控制应用程序 (VoIP, IM, P2P等) 设备控制 DLP数据泄漏保护 个人防火墙 密码保护
• 防御机密数据泄漏
• 端口控制 • 设备控制 • 支持白名单 • WiFi, Bluetooth, IR Control • 基于设备类型或序列号限制其使用
• 阻止 „
• 密钥记录器, 混合网络
文件共享加密:FileShare (Safeguard LanCrypt)
• 通过加密保护重要数据
• 与数据存储介质无关 • 保护备份数据
内存 硬盘 电源
11
Sophos Anti-Virus vShield安装配置手册
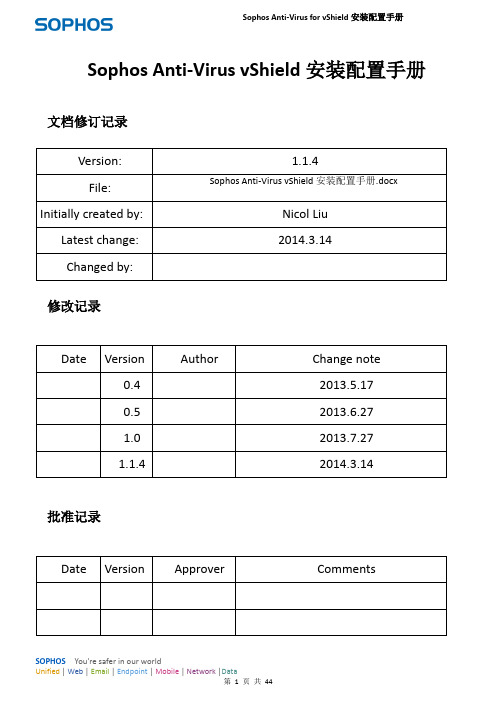
Sophos Anti-Virus for vShield安装配置手册Sophos Anti-Virus vShield安装配置手册文档修订记录修改记录批准记录Sophos Anti-Virus for vShield安装配置手册目录1.关于Sophos Anti-Virus VMware vShield (3)1.1关于Sophos Anti-Virus VMware vShield (3)1.2支持的Guest VM平台 (3)1.3安装中的关键步骤 (4)1.4系统要求说明 (4)1.4.1VMware要求 (4)1.4.2vMotion (6)1.4.3Guest VM要求 (6)1.4.4检查防病毒产品不兼容 (6)1.4.5Sophos 软件要求及设置 (6)2.安装Sophos security VM (7)2.1环境说明 (8)2.2参数配置图文说明 (8)2.3下载并安装SSVM (10)2.4检查系统时间同步 (19)2.5检查是否安装成功 (20)2.6设置SEC管理SSVM (20)3.安装vShield Endpoint Thin Agent (22)3.1检查是否安装 (23)3.2准备安装 (23)3.3安装Agent (24)3.3.1手动安装 (24)3.3.2自动安装 (25)4.检查SSVM是否工作正常 (26)4.1检查SSVM是否工作正常 (26)4.1.1查看防护效果 (27)4.1.2停止、启用vShield Endpoint Agent (27)4.2查看Agent是否启用 (27)5.反安装SSVM (29)5.1删除SSVM主机 (29)6.参考引用与术语 (33)6.1参考引用 (33)6.2术语 (34)7.技术支持 (34)Sophos Anti-Virus for vShield安装配置手册1.关于Sophos Anti-Virus VMware vShield1.1关于Sophos Anti-Virus VMware vShieldSophos Anti-Virus VMware vShield是一台安全虚拟机(SSVM),您可以设置如下:注意:Sophos security VM,安全虚拟机,以下简称为SSVM。
Sophos Firewall XGS 系列设备说明书

Sophos Firewall 强大的防护和性能Sophos Firewall 强大的防护和性能Sophos Firewall Xstream 架构设计提供极佳的可见性、防护和性能,帮助解决当前网络管理员面临的最大挑战。
TLS 1.3 检查现在约 99% 的 Web 流量加密,对大多数防火墙不可见。
许多组织发现,保护自己的网络防范越来越多的利用这一盲点的勒索软件、威胁和潜在有害应用程序时无能为力。
Sophos Firewall 能够实现高效且有效的 TLS 检查,不牺牲性能。
我们集成 Xstream Flow Processor 的 XGS 系列设备将 TLS 流量放在 FastPath 上以加速检查。
我们的高性能 TLS 检查引擎支持 TLS 1.3 而不降级,最新加密套件实现最大兼容性,同时增强了从仪表板检视加密流量的可见性。
深度数据包检查我们相信您再也不必在安全与性能之间取舍了。
Sophos Firewall 采用高速深度数据包检查 (DPI) 引擎扫描流量中的威胁,不使用减慢处理速度的代理。
防火墙堆栈可以将处理工作有效转移至 DPS 引擎,显著降低延迟,提高整体效率。
Sophos Firewall 通过高性能流传输 DPI 阻止最新勒索软件和外泄,包括下一代 IPS、Web 防护和应用程序控制,以及 SophosLabs Intelix 支持的深度学习和沙箱。
应用程序加速网络流量的很大一部分是受信任的业务应用程序流量,目的地是分支办事处、远程用户或云应用服务器。
因此,无需对威胁或恶意软件进行额外安全扫描,可以智能引导至 FastPath,减少延迟,优化整体性能,释放性能用于需要深度数据包检查的流量。
Sophos Firewall 自动或通过您自己政策加速您的 SaaS、SD-WAN 和云流量,如 VoIP、视频和其他受信任应用程序 – 放在 FastPath 上通过 Xstream Flow Processor。
Sophos XG Firewall - 基础 Firewall 安装和配置

策略概述
- 策略类型 - 未用,禁用新,已改变的
报表
消息和通知
SOPHOS TRAINING 21
常见问题
SOPHOS TRAINING 27
© SophSosOLPtdH. AOllSrigThRtsAreINseIrNveGd. 28
网络配置导向
• 配置User用户/Network网络策略
SOPHOS TRAINING 14
网络配置导向
• 配置邮件 通知设定
SOPHOS TRAINING 15
网络配置导向
• 设置日期,时间,NTP
SOPHOS TRAINING 16
网络配置导向
• 检查配置信息 • 发送匿名数据SophosLabs
○ 同步许可
S
○ 用户序列号 ○ 应用同步许可
1
2 3 4 5
SOPHOS TRAINING 5
注册
• 通过Web控制台检查订购
○ 系统> 管理> 许可
SOPHOS TRAINING 6
激活
SOPHOS TRAINING 7
激活
SOPHOS TRAINING 8
SOPHOS TRAINING 17
网络配置导向
SOPHOS TRAINING 18
网络安全控制中心 报表 策略 防护 系统 对象
SOPHOS TRAINING 19
系统通知
- 性能 - 服务 - 连接 - VPN - CPU, 内存, 带宽, 会话 - HA
- SFM
数据流量详细信息
用户和设备详细信息
Sophos XG Firewall培训
基本防火墙配置
sophos防火墙操作手册

sophos防火墙操作手册一、介绍Sophos防火墙是一种网络安全设备,用于保护企业内部网络免受恶意攻击和未经授权的访问。
本操作手册将指导用户熟悉Sophos防火墙的基本功能和操作方法,以便能够有效地配置和管理防火墙,确保网络的安全性和稳定性。
二、安装与设置1. 安装Sophos防火墙- 确保设备符合系统要求,并从官方网站下载最新的Sophos防火墙软件。
- 按照安装向导的指示,将软件安装到防火墙设备上。
2. 连接与初始化- 将Sophos防火墙与企业内部网络连接,并确保连接稳定。
- 首次启动Sophos防火墙后,根据界面提示完成初始化设置。
三、功能配置1. 设置网络接口- 进入Sophos防火墙管理界面,在网络设置中配置外部和内部网络接口,分配各个接口的IP地址和子网掩码。
2. 创建防火墙规则- 在防火墙规则设置中,创建和管理规则以控制网络流量的访问权限。
- 根据企业需求,设置允许或拒绝不同协议、端口和IP地址的访问。
3. 配置虚拟专用网络(VPN)- 通过设置VPN,实现远程办公和安全访问企业内部网络的需求。
- 配置VPN连接的加密方式、身份验证和访问权限。
4. 建立安全区域- Sophos防火墙支持创建安全区域,用于将不同部门、服务或区域划分为独立的网络区域。
- 在安全区域设置中,配置不同区域之间的访问规则,确保网络的安全和数据的隔离。
四、日志与监控1. 查看安全日志- 在安全日志界面,可以查看Sophos防火墙所记录的安全事件和操作日志。
- 根据需要,设置日志记录级别和存储周期,以及发送警报的方式。
2. 进行流量分析- 使用Sophos防火墙提供的流量分析工具,监控网络流量的状态和趋势。
- 通过流量分析,可以及时发现异常情况和潜在的安全威胁。
五、固件升级与维护1. 升级Sophos防火墙固件- 定期检查Sophos官方网站,获取最新的防火墙固件版本。
- 在固件升级界面,下载并安装最新的固件,以获得更好的性能和安全性。
Sophos XG Firewall软件应用程序入门指南说明书

ContentsIntroduction (1)Installation procedure (2)Configuring XG Firewall (4)Activation and Registration (4)Basic Configuration (4)Legal notices (8)Sophos XG Firewall Software Appliance1 IntroductionWelcome to the Getting Started Guide for Sophos Firewall Software Appliance (referred to in this document as “Sophos Firewall”). This guide describes how to download, deploy, and run Sophos Firewall as a software appliance on custom hardware.Minimum hardware requirementsThe device will go into fail-safe mode if the minimum requirements are not met.• 2 Network interface cards• 1 GB RAM•10 GB HDD/SSD sizeRecommended hardware requirements• 2 GB RAM•64 GB HDD/SSD sizeNoteSFOS 17 supports hard drives with a maximum of 512 GB.Sophos XG Firewall Software Appliance2 Installation procedure1.Download Software Image (ISO)a)Download the software image (ISO) from https:///en-us/products/next-gen-firewall/free-trial.aspx.b)You can install the downloaded ISO file on custom hardware, using an Installer.c)To create the Installer, see Creating an Installer.2.To install the software, you need to write the ISO to a standard USB thumb drive. On Windows:a)Download the Win32 Disk Imager utility from /projects/win32diskimager/.b)Run the utility, and browse the downloaded ISO file. The application will look for .IMG files.Change the file filter to (*.*), then locate and select the Sophos Firewall ISO file.c)Select the USB thumb drive on which you wish to install the ISO. The thumb drive should haveat least 1GB space. Writing the ISO to it will erase its current data.d)Once the process is complete, your thumb drive is ready to use.3.To install the software, you need to write the ISO to a standard USB thumb drive. On OS X:a)Open the Disk Utility included on OS X.b)Locate the thumb drive in the list of disks.c)On the partitions tab, change the volume scheme to “1 partition”, and the format to “FreeSpace”, then click apply.d)You need to convert the downloaded ISO file into a new format. Open a terminal window, andgo to the path where the ISO is stored.e)Run the command: hdiutil convert -format UDRW -o sf.img.dmg SW-SFOS_15.01.0-376.isof)The converted ISO will be renamed “sf.img.dmg”.g)Run the diskutil list and locate the path of the USB device.h)Write the converted ISO to your thumb drive, using the following command for reference: ddif=./sf.img.dmg of=/dev/rdisk9 bs=1mIn this command, the USB thumb drive’s path is /dev/disk9. Make sure that you use theactual path.Note:•The = path adds an “r” before the device path name. This is deliberate, and enables RAW disk access. You may leave the ‘r’ out, but the process will take place much more slowly.•You may need to run “sudo dd <rest of command>” for the imaging to work on your system.The process will take a few minutes to complete. When you are returned to the commandprompt, the thumb drive is ready, and can be ejected.If you face a problem, see http://borgstrom.ca/2010/10/14/os-x-bootable-usb.html for detailedinstructions.4.Installing Sophos Firewall.For the thumb drive to boot, you may need to change the BIOS settings since this is a SoftwareAppliance. You will also need to connect a monitor, keyboard, and a serial cable to the system tocomplete the installation. You will be prompted twice to start the installation.Sophos XG Firewall Software Appliance5.Booting: When the prompt appears, type y <enter> to start the installation procedure.The installation progress will be shown on the screen.6.When the installation is complete, remove the thumb drive, and reboot the device. The device willtake a few minutes to boot the first time.The system is now running Sophos Firewall Software Appliance.Sophos XG Firewall Software Appliance3 Configuring XG Firewall1.Browse to "https://172.16.16.16" from the management computer.2.Click Start to begin the wizard and follow the on-screen instructions.NoteThe wizard will not start if you have changed the default administrator password from theconsole.3.1 Activation and Registration1.Review and accept the License Agreement. You must accept the Sophos End User LicenseAgreement (EULA) to proceed further.2.Register Your Firewall. Enter the serial number, if you have it. You can also use your UTM 9license if you are migrating.Otherwise, you can skip registration for 30 days or start a free trial.a)You will be redirected to the MySophos portal website. If you already have a MySophosaccount, specify your sign-in credentials under “Login”. If you are a new user, sign up for aMySophos account by filling in the details under “Create Sophos ID”.b)Complete the registration process.Post successful registration of the device, the license is synchronized and the basic setup is done.3.Finish the basic setup. Click Continue and complete the configurations through the wizard. Whenyou finish the process, the Network Security Control Center appears.You can now use the navigation pane to the left to navigate and configure further settings.3.2 Basic ConfigurationYou can:1.Set up Interfaces2.Create Zones3.Create Firewall Rules4.Set up a Wireless Network1.To set up interfaces:a)You can add network interfaces and RED connections in the Configure > Network >Interfaces menu.b)You can add wireless networks in the Protect > Wireless > Wireless Networks menu.SSIDs will also be shown in the interfaces menu once created.c)You can add access points in Protect > Wireless > Access Points.Sophos XG Firewall Software ApplianceSophos XG Firewall Software ApplianceYou can see both these wireless networks in Protect > Network > Wireless Networks.e)Go to Protect > Wireless > Access Point Groups.f)Click Add to add a new access point group.g)Add both the wireless networks, and the new access point.If new APs have been installed, you can view these in Control Center.h)Click the pending APs to accept the new access points.i)Configure the settings of the new APs as shown in the image.Sophos XG Firewall Software Appliancej)Click Save.Sophos XG Firewall Software Appliance4 Legal noticesCopyright © 2020 Sophos Limited. All rights reserved. No part of this publication may be reproduced, stored in a retrieval system, or transmitted, in any form or by any means, electronic, mechanical, photocopying, recording or otherwise unless you are either a valid licensee where the documentation can be reproduced in accordance with the license terms or you otherwise have the prior permission in writing of the copyright owner.Sophos, Sophos Anti-Virus and SafeGuard are registered trademarks of Sophos Limited, Sophos Group and Utimaco Safeware AG, as applicable. All other product and company names mentioned are trademarks or registered trademarks of their respective owners.Copyright © 2020 Sophos Limited. All rights reserved. No part of this publication may be reproduced, stored in a retrieval system, or transmitted, in any form or by any means, electronic, mechanical, photocopying, recording or otherwise unless you are either a valid licensee where the documentation can be reproduced in accordance with the license terms or you otherwise have the prior permission in writing of the copyright owner.Sophos and Sophos Anti-Virus are registered trademarks of Sophos Limited and Sophos Group.All other product and company names mentioned are trademarks or registered trademarks of their respective owners.。
Sophos Endpoint Security and Control 獨立電腦 安裝指南
Sophos Endpoint Security and Control 獨立電腦安裝指南Sophos Endpoint Security and Control 9.5Mac OS X 系統的 Sophos Anti-Virus 7:文件日期:2010 年 6 月目錄1 操作前準備事項 (3)2 防護Windows 電腦 (4)3 防護 Mac OS X 電腦 (9)4 技術支援 (11)5 法律聲明 (12)2獨立電腦安裝指南1操作前準備事項1.1系統需求如欲瞭解系統需求的相關資訊,請參閱 Sophos 網站的系統需求頁面(http://ww /products/all-sysreqs.html)。
另外,您必須連結至網際網路,才能透過 Sophos 網站下載防護軟體。
1.2您需要的資訊您將需要以下資訊,以便進行安裝與配置:■所需的Sophos Endpoint Security and Control獨立電腦安裝程式與/或Sophos Anti-Virus Mac OS X 獨立電腦安裝程式的網址與下載憑證。
■更新來源的位址 (除非您要直接透過 Sophos 網站下載)■需要用來存取更新來源的憑證■您可能用於存取更新來源的 proxy 伺服器資訊 (位址與埠號,使用者憑證)。
3Sophos Endpoint Security and Control2防護 Windows 電腦2.1安裝Sophos Endpoint Security and Control您必須以系統管理員身分登入,才能安裝Sophos Endpoint Security and Control.如果您已經安裝其他廠牌的安全防護軟體:■確保該廠牌的使用者介面已經關閉。
■請確保其他廠牌的防火牆與 HIPS 已經關閉,或者已經配置為許可 Sophos 安裝程式執行。
1.使用 Sophos 或您系統管理員所提供的網頁位址與下載憑證,並前往 Sophos網站,為您使用的Windows 系統版本下載獨立電腦安裝程式至您的電腦上。
Sophos XG Firewall Virtual Appliance 部署指南说明书
ContentsIntroduction (1)Installation procedure (2)Configuring XG Firewall (4)Activation and Registration (4)Basic Configuration (4)Legal notices (8)Sophos XG Firewall Virtual Appliance1 IntroductionWelcome to the Getting Started guide for Sophos XG Firewall Virtual Appliance (referred to in this document as “XG Firewall”) for VMware ESX/ESXi platform. This guide describes how you can download, deploy and run XG Firewall as a virtual machine on VMware ESX/ESXi.Minimum hardware requirement1.One vCPU2.2GB vRAM3. 2 vNIC4.Primary Disk with a minimum of 4 GB space5.Report Disk with a minimum of 80 GB spaceNoteSFOS 17 supports hard drives with a maximum of 512 GB.XG Firewall will go into fail-safe mode if the minimum requirements are not met.NoteTo optimize the performance of your XG Firewall, configure vCPU and vRAM according to the license you have purchased. When configuring a number of vCPUs, make sure that you do not exceed the maximum number specified in your license.Sophos XG Firewall Virtual Appliance2 Installation procedureMake sure that VMware ESX/ESXi version 5.0 or later is installed in your network. For VMware ESX/ ESXi installation instructions, refer to the VMware documentation /support/ pubs/vsphere-esxi-vcenter-server-pubs.html.You need to:1.Download and extract the OVF image2.Access the ESX/ESXi Host via vSphere Client3.Deploy the OVF Template4.Power on1.Download the .zip file containing the OVF image from https://secure/en-us/products/next-gen-firewall/free-trial.aspx and save it.2.Log in to the ESX/ESXi host server on which you want to deploy the OVF template throughVMware vSphere Client.NoteIn this guide, we are using VMware vSphere client to connect to the ESX/ESXi host server onwhich the OVF template is to be deployed.a)Go to File > Deploy OVF Template to open the downloaded .ovf file in the vSphere Client.b)Select the sf_virtual file and click Open.3.To deploy the OVF template:a)Select the location of the .ovf file for XG Firewall and click Next to continue.Sophos XG Firewall Virtual Applianceb)Verify the OVF template details and click Next to continue.c)Specify a name and location for the OVF template to be deployed and click Next to continue.d)Select the host/cluster within which you want to deploy the OVF template and click Next tocontinue.NoteHere, we are deploying the OVF template on a single/standalone server. The configurationmay be different in a cluster environment.e)Select the format in which you want to store the virtual disks from the available options:Thin Provision: It uses the minimum required space for the OVF template, saving the restfor other use.Thick Provision: It uses the entire allotted virtual disk for OVF template installation, wipingout additional data on the disk.In case of VMware ESXi 5.0 or later, three storage options are available: Thin Provision,Thick Provision Lazy Zeroed and Thick Provision Eager Zeroed. For more information,refer to /.f)Click Next to continue.g)Select the networks to be used by the OVF template and click Next to continue.h)Verify the deployment settings for the OVF Template and click Finish to initiate the deploymentprocess of XG Firewall.This installs XG Firewall on your machine.4.Right-click the deployed XG Firewall and go to Power > Power On.a)Enter the administrator password: ‘admin’ to continue to the Main Menu.Sophos XG Firewall Virtual Appliance3 Configuring XG Firewall1.Browse to "https://172.16.16.16" from the management computer.2.Click Start to begin the wizard and follow the on-screen instructions.NoteThe wizard will not start if you have changed the default administrator password from theconsole.3.1 Activation and Registration1.Review and accept the License Agreement. You must accept the Sophos End User LicenseAgreement (EULA) to proceed further.2.Register Your Firewall. Enter the serial number, if you have it. You can also use your UTM 9license if you are migrating.Otherwise, you can skip registration for 30 days or start a free trial.a)You will be redirected to the MySophos portal website. If you already have a MySophosaccount, specify your sign-in credentials under “Login”. If you are a new user, sign up for aMySophos account by filling in the details under “Create Sophos ID”.b)Complete the registration process.Post successful registration of the device, the license is synchronized and the basic setup is done.3.Finish the basic setup. Click Continue and complete the configurations through the wizard. Whenyou finish the process, the Network Security Control Center appears.You can now use the navigation pane to the left to navigate and configure further settings.3.2 Basic ConfigurationYou can:1.Set up Interfaces2.Create Zones3.Create Firewall Rules4.Set up a Wireless Network1.To set up interfaces:a)You can add network interfaces and RED connections in the Configure > Network >Interfaces menu.b)You can add wireless networks in the Protect > Wireless > Wireless Networks menu.SSIDs will also be shown in the interfaces menu once created.c)You can add access points in Protect > Wireless > Access Points.Sophos XG Firewall Virtual ApplianceSophos XG Firewall Virtual ApplianceYou can see both these wireless networks in Protect > Network > Wireless Networks.e)Go to Protect > Wireless > Access Point Groups.f)Click Add to add a new access point group.g)Add both the wireless networks, and the new access point.If new APs have been installed, you can view these in Control Center.h)Click the pending APs to accept the new access points.i)Configure the settings of the new APs as shown in the image.Sophos XG Firewall Virtual Appliancej)Click Save.Sophos XG Firewall Virtual Appliance4 Legal noticesCopyright © 2020 Sophos Limited. All rights reserved. No part of this publication may be reproduced, stored in a retrieval system, or transmitted, in any form or by any means, electronic, mechanical, photocopying, recording or otherwise unless you are either a valid licensee where the documentation can be reproduced in accordance with the license terms or you otherwise have the prior permission in writing of the copyright owner.Sophos, Sophos Anti-Virus and SafeGuard are registered trademarks of Sophos Limited, Sophos Group and Utimaco Safeware AG, as applicable. All other product and company names mentioned are trademarks or registered trademarks of their respective owners.Copyright © 2020 Sophos Limited. All rights reserved. No part of this publication may be reproduced, stored in a retrieval system, or transmitted, in any form or by any means, electronic, mechanical, photocopying, recording or otherwise unless you are either a valid licensee where the documentation can be reproduced in accordance with the license terms or you otherwise have the prior permission in writing of the copyright owner.Sophos and Sophos Anti-Virus are registered trademarks of Sophos Limited and Sophos Group.All other product and company names mentioned are trademarks or registered trademarks of their respective owners.。
SophosUTM基本防火墙上手手册

内容过滤
总结词
过滤网络流量中的恶意内容,保护网络免受攻击。
详细描述
防火墙具备内容过滤功能,能够检测并过滤网络流量中的恶意内容,如病毒、 蠕虫、间谍软件等。通过实时监控和扫描网络流量,防火墙能够识别并阻止恶 意软件的传播,保护网络免受潜在威胁。
入侵检测与防御
总结词
检测和防御网络攻击行为,提高网络安全防护能力。
常见问题处理
防火墙连接问题
检查网络连接是否正常,防火墙 IP地址是否配置正确,防火墙端 口是否开放等。
防火墙规则配置错
误
检查防火墙规则配置是否正确, 包括允许或拒绝的IP地址、端口、 协议等。
防火墙性能问题
检查防火墙硬件资源使用情况, 如CPU、内存、磁盘等,根据需 要进行优化或升级。
系统监控与性能优化
报告生成
定期生成防火墙运行报告,展示网络流量、安全事件等信息,帮助管理员了解网络安全 状况。
用户与权限管理
用户管理
创建和管理用户账户,设置不同的权限 级别和访问控制策略,确保用户只能访 问其所需资源。
VS
权限控制
根据用户角色和职责,分配相应的管理权 限,实现精细化管理,降低安全风险。
05
故障排除与维护
sophosutm基本防火墙上手 手册
• 引言 • 安装与配置 • 功能与使用 • 安全策略与管理 • 故障排除与维护 • 高级特性与扩展
01
引言
防火墙简介
防火墙定义
防火墙是用于阻止未经授权的网络通信通过的网络安 全设备。
工作原理
防火墙通过检查网络流量中的数据包,根据预设的安 全规则来决定是否允许该数据包通过。
重要性
在网络安全防护中,防火墙是第一道防线,能够有效 地防止恶意软件、黑客攻击和未经授权的访问。
Sophos SG Hardware installation Guide

Quick Start Guide SG 105/115/125/1351. PreparationCongratulations on your purchase of the Sophos SG appliance to protect your data networks and computers. This Quick Start Guide describes in short steps how to assemble the appliance and explains how to open the web-based WebAdmin configuration tool on the security system from your administration client PC. WebAdmin allows you to configure every aspect of the security system.Scope of SupplyLicenseThe security appliances are delivered with a 30-day trial version. During or after thetrial period, you can activate the full license you purchased from your Sophos partner by creating an account at https://, activating the provided activation and upgrade keys, and uploading the created license file into your appliance.Support & DocumentationFor more information and technical support please visit /en-us/support or contact your local reseller.Before you begin pleaseconfirm that you have a workingInternet connection and makesure you have the accountinformation available that wasprovided by your ISP.SG 105/115/125/135RJ45 to DB9 adapter cable RJ45 Ethernet cable, 1 power cable SG 105/115/125/135Power Supply2. Mount and connect the device Connect the ports to the internal and external networks.1) C onnect the eth0/LAN port via a hub or switch to the internal network. For this purpose, please use the RJ45 Ethernet cable of the scope of supply. Note that your administration client PC must also be connected to this network.2) C onnect the eth1/WAN to the external network. The connection to the WAN depends on the type of Internet access. The UTM appliances are shipped with the following default settings:Internal network card (eth0)IP address: 192.168.0.1Network mask: 255.255.255.0Default gateway: None DNS proxy: Enabled Firewall: Block all DHCP service: Disabled Mount the appliance to a rack If you want to mount the appliance within a rack please use the optionally available rackmount kit for this device* Available via WebAdmin >> Support >> Manual 3. Power it onConnect the appliance to the power socket and turn it on Connect the appliance to the power supply using the power cable from the scope of supply. Turn the appliance on. The power switch is on the back side of the housing next to the power supply plug. Once the security system has booted completely, you’ll hear an acoustic signal: five beeps in a row.4. Configure the device Use your browser to make the initial connection to the WebAdmin GUI You will need to configure a workstation with the necessary LAN properties to access WebAdmin. You can change these settings later to match your existing network. The location of the menu for these settings depends on the operating system of your client. Example: With Windows 7, the menu can be found under Start >> Control Panel >> Network and Sharing Center Start the browser and enter the management IP address of the appliance: https://192.168.0.1:4444 Accept the security notice by clicking OK (Mozilla Firefox) or Yes (MS Internet Explorer). For configuration you can follow the initial setup wizard described in the WebAdmin Quick Start Guide** or cancel it and perform a manual setup (see the UTM Administration Guide*).Workstation connection properties:IP address: Any address in the range192.168.0.2 through 192.168.0.254Netmask: Enter 255.255.255.0Standard gateway: Enter the IP address ofthe appliance’s internal network card(eth0/LAN): 192.168.0.1DNS server: Enable this option and enterthe IP address of the internal network card(eth0/LAN): 192.168.0.1Power switch1. VorbereitungWir beglückwünschen Sie zum Kauf einer SG Appliance zum Schutz Ihres Netzwerkes und Ihrer Computer. Dieser Quick Start Guide beschreibt in kurzen Schritten den Aufbau der Appliance sowie den Zugang zum web-basierten Konfigurationstool WebAdmin von ihrem Administrations-PC.LieferumfangLizenzDie Sicherheits-Appliances werden mit einer 30 Tage gültigen Testversion ausgeliefert. Während oder nach der Probezeit können Sie die Lizenz, die Sie von Ihrem SophosPartner erworben haben, aktivieren. Legen Sie hierzu unter https:// ein Benutzerkonto an, erzeugen Sie mit dem erhaltenen Aktivierungs-Schlüssel Ihre Lizenzdatei und laden Sie diese in die Appliance hoch.Support & DocumentationWeitere Information und technischen Support finden Sie unter /de-de/support oder kontaktieren Sie Ihren lokalen Sophos Partner.Bevor Sie beginnen, stellen Sie bittesicher, dass Sie eine funktions-bereite Internetverbindung sowiedie Zugangsinformationen Ihres ISPzur Verfügung haben.SG 105/115/125/135RJ45 zu DB9 Adapterkabel RJ45 Ethernetkabel,1 StromkabelSG 105/115/125/135Netzteil2. Montieren und Verbindung herstellen Verbinden Sie die Ports zum internen und externen Netzwerk.1) V erbinden Sie den eth0/LAN-Anschluss einen Hub oder Switch mit dem internen Netzwerk. Verwenden Sie hier hierfür das mitgelieferte RJ45-Ethernetkabel. Beachten Sie, dass Ihr Administrations-PC ebenfalls an diesem Netzwerk angeschlossen sein muss.2) V erbinden Sie eth1/WAN-Anschluss mit dem externen Netzwerk. Die Art der Verbindung hängt von Ihrem Internetanschluss ab.UTM Appliances werden mit folgenden Standardeinstellungen ausgeliefert: Internal network card (eth0/LAN) IP address: 192.168.0.1 Network mask: 255.255.255.0 Default gateway: None DNS proxy: Enabled Firewall: Block all DHCP service: Disabled Montieren der Appliance in einem Rack.Falls Sie die Appliance in einem Rack montieren möchten verwenden Sie bitte das hierfür optional erhältliche Rackmount Kit.3. Gerät anschalten Verbinden Sie die Appliance mit der Netzsteckdose und schalten Sie sie ein Benutzen Sie für den Netzanschluss die mitgelieferten Netzteil.Schalten Sie die Appliance ein. Die Netzschalter befinden sich auf der Rückseite neben dem Netzanschluss. Sobald das System komplett gebootet hat, hören Sie fünf Pieptöne nacheinander.4. Konfiguration Starten Sie Ihren Browser für den Zugriff auf die WebAdmin-Oberfläche Sie müssen die LAN-Einstellungen Ihres PCs evtl. temporär ändern, um auf den WebAdmin zugreifen zu können. Diese können später wieder geändert werden. Die Einstellungen variieren je nach Betriebssystem.Beispiel: Mit Windows 7 finden Sie das Menü unter Start > Systemsteuerung > Netzwerk und Freigabecenter Starten Sie danach den Browser und geben Sie die IP Adresse der Appliance ein: https://192.168.0.1:4444Akzeptieren Sie die Sicherheitswarnung durch Klicken auf OK (Mozilla Firefox) oder JA (MS Internet Explorer).Die initiale Konfiguration können Sie per Setup Wizard (beschrieben im WebAdmin Quick Start Guide**) oder manuell durchführen (siehe UTM Administration Guide*).Workstation LAN-EigenschaftenIP Adresse: Beliebige Adresse zwischen192.168.0.2 und 192.168.0.254Netzmaske: 255.255.255.0Standard Gateway: IP Adresse derAppliance internal network card (eth0/LAN):192.168.0.1DNS Server: Aktivieren Sie diese Optionund geben Sie die IP Adresse der internalnetwork card (eth0/LAN) ein: 192.168.0.1Netzschalter1.准备工作恭喜您购买 Sophos SG 设备来保护您的数据网络和计算机。
sophos安装指南

5.22015 3目录1 关于本指南 (4)2 安装什么 (4)3 哪些是主要步骤 (5)4 下载 Enterprise Console 安装程序 (6)5 检查系统要求 (6)5.1 硬件和操作系统 (6)5.2 Microsoft 系统软件 (7)5.3 端口要求 (7)6 您需要的帐户 (8)6.1 数据库帐户 (8)6.2 更新管理器帐户 (8)7 做好安装准备 (9)8 安装 Enterprise Console (9)9 加强数据安全 (10)10 下载保护和加密软件 (11)11 创建计算机组 (12)12 设置安全策略 (12)12.1 设置防火墙策略 (12)13 查找计算机 (13)14 保护计算机的准备 (13)14.1 删除第三方软件的准备 (14)14.2 检查您是否有可用于安装软件的帐户 (14)14.3 准备安装防病毒软件 (14)15 保护计算机 (15)15.1 自动保护Windows 计算机 (15)15.2 手动保护Windows 或 Mac 计算机 (16)15.3 保护 Linux 计算机 (17)216 在计算机上安装加密软件 (17)16.1 预订加密软件 (17)16.2 准备安装加密软件 (18)16.3 自动安装加密软件 (19)16.4 手动安装加密软件 (20)16.5 安装后首次登录 (20)17 检查网络的健康状况 (21)18 故障排除 (22)19 就通常的任务获得帮助 (22)20 技术支持 (23)21 法律声明 (23)3Sophos Enterprise Console1关于本指南本指南将告诉您怎样使用 Sophos 安全软件保护您的网络。
本指南可供您使用 如果■您是首次安装这些软件。
■您将安装保护和加密功能 加密功能是选项 。
如果您要进行升级 请参见Sophos Enterprise Console 升级指南。
您可能需要的其它文件如果您具有非常大的网络 您可能会考虑Sophos Enterprise Console 高级安装指南中说明的各种安装选项。
Sophos ES1100电子邮件设备安装指南说明书

Sophos ES1100Email ApplianceSetup Guide1. Preparation2. Rack Installation3. Appliance Rail Attachment4. Cabling the Appliance5. Software/Network SetupCopyright 2000-2019 Sophos Limited. All rights reserved.Sophos is a registered trademark of Sophos Limited and Sophos Group. All other product andcompany names mentioned are trademarks or registered trademarks of their respective owners.0BEnsure that the ship kit includes two power cords, the correct number ofscrews and cage nuts (pictured below), and the 19-inch and telco-style rackrail assemblies (described below).Rack screws and cage nuts (19-inch and telco-style)Both the 19-inch and telco-style rack assemblies consist of:The telco-style rack assembly consists of:19-inch and telco-style rack assemblies both include:brackets have threaded holes for securing the appliance in the rack (asshown in step 2b).Unpacking the Appliance Setup locationfloor loading capacity for the current installation and for future growth.inches) in the back of the rack to provide access to appliance componentsand allow for sufficient airflow.1. Preparationtype of installation or use is not supported.proper airflow, keep the front and back sides of the appliance clear ofappliance. Wear a wrist strap with an appropriate ground connection.safely shut down its software and the fans will stop. Remove the power cordbefore servicing the unit.protection from electrical shock. Use only mats that have been specificallydesigned as electrical insulators.grounding-type plug or by using a power outlet that is improperly grounded,can create a potentially hazardous electrical situation. Please read before proceedingappliances in a rack, make sure the overall loading for each branch circuitimproved weight distribution and easier access to appliance components.appliances closed when not servicing to maintain proper cooling.Rack and Appliance precautions2. Rack Installation1p e t SFCC Notice: This device complies with part 15 of the FCC Rules. Operation is subject to the following two conditions: (1) This device may n ot cause harmful interference, and (2) this device must accept any interference received, including interference thatmay cause undesired operation. No Telecommunications Network Voltage (TNV)-connected PCBs shall be installed. This class A digital apparatus complies with Canadian ICES-003. Cet appareil numérique de la classe A est conforme à la norme NMB-003 duCanada. CE Mark Warning: This is a Class A product. In a domestic environment, this product may cause radio interference, in which case the user may be required to take adequate measures. VCCI Warning: This is a product of VCCI Class A Compliance.This Sophos Appliance uses specific ports for internal and external connections. Configure your network to allow access on the ports listed below.Some ports are required only for specific situations, such as when you enable directory services, or when the appliance is part of a cluster.Step 2 - Configure the Sophos ApplianceEnvironmental WarningPerchlorate Material - special handling may apply. See /hazardouswaste/perchlorateThis notice is required by California Code of Regulations, Title 22, Division 4.5, Chapter 33: Best Management Practices forPerchlorate Materials. This product/part includes a battery that contains Perchlorate material.RatingsV: 100 - 240 VAC (auto-range)Hz: 50/60 A: 4 MaxYou can view the online documentation at /docs/seaTo launch the Sophos Appliance configuration wizard:255.255.255.0 and the IP address to 172.24.24.1https://172.24.24.172. You may need to add this address to yourbrowser's Trusted Sites. When prompted, accept the certificate.Note: On the Network Interface page of the Configuration Wizard, the Speed option is set to Auto bydefault. If selecting another setting from the drop-down list, it must match the speed of your managedswitch for the appliance to operate correctly.Note: After setup is complete, administer your appliance via a web browser athttps://<Appliance-Hostname-or-IP>:18080Activation code from SophosDefault gateway IP addressDNS servers IP addressHostnames and DNS types for internal mail delivery serversMail accepting domainsIP addresses or hostnames of mail relays allowed to relayoutbound mail through the appliance(server, port, etc)To configure the Appliance you will need the following:External connectionse s o p r u P.n n o Ce c i v r e Sn o i t c n u Ft r o PPCTHSSe c n a t s i s s ae t ome R22PCTP TMSr e f s n a r t l i aM52PCTP T THs d a o l n w o de r a w tf o S08PCTSP T THn o i t a r t s i g e R344mo c.s o h p o sd n ae c n a i l p p an e e w t e BPCTP T THk c a b d e e F44410443/443 SPX secure web portal HTTPS TCP Between appliance to internet (configurable)Internal connectionsr e v r e sP T Fd n ae c n a i l p p an e e w t e BPCTP T Fp u k c a bP T F12,02Between clustered appliancess e c n a i l p p ad e r e t s u l cn e e w t e BPCTP TMSr e f s n a r t l i aM52Between appliance and DNS serverSNMP monitoring server(s) to applianceAppliance to SNMP monitoring server(s) 389, 3268, (636, 3269) Directory services synchronization LDAP(S) TCP Between appliance and directory server443/10443 (redirect from 80) End user web quarantine HTTPS TCP Between appliance and intranet (configurable)5432Between clustered appliances18080Step 1 - Configure port accessRear connections5. Software/Network SetupPower SocketPower Supply Fan Network (1)Config (2)1. Connect power cord to the AC inlets.your LAN.3. Temporarily connect theusing either an ethernet cable or a crossovernetwork cable.4. Press the powerbutton to theright of theLEDs on thefront of the unit.ResetButtonPowerButtonPowerIndicatorHDDStatusConfigurationNetworkTemperature4. Cabling the Appliance。
Sophos XG Firewall Virtual Appliance 安装指南说明书

ContentsChange Log (3)Preface (4)Base Configuration (4)Pre-requisite (4)Installation Procedure (4)Step 1: Download and Extract QCOW2 Disks (4)Step 2: Add QEMU/KVM connection (5)Step 3: Start KVM and create new virtual machine (5)Step 4: Browse to locate the primary disk (5)Step 5: Import the primary disk (6)Step 6: Choose virtual memory and CPU for the appliance (6)Step 7: Choose the Advanced options for more settings (7)Step 8: Configure advanced settings for primary disk (7)Step 9: Add auxiliary disk (8)Step 10: Configure network settings for the appliance (8)Step 11: Configure network interface card (9)Step 12: Start the installation (10)Step 13: Accept EULA (10)Configuring XG Firewall (11)Activation and Registration (11)Step 1: License Agreement (11)Step 2: Register Your Firewall (11)Step 3: Complete basic setup (12)Basic Configuration (13)a. Setting up Interfaces (13)b. Creating Zones (14)c. Creating Firewall Rules (14)d. Setting up a Wireless Network (14)Copyright Notice (19)Change LogPrefaceThe Getting Started Guide describes how to download and deploy Sophos XG Firewall Virtual Appliance on KVM.Base ConfigurationIf the following minimum server requirements are not met, XG Firewall will go into failsafe mode:1.One vCPU2.2GB vRAM3.2 vNIC4.Primary Disk: Minimum 4GB5.Auxiliary Disk: Minimum 80GBNote: For optimal XG Firewall performance, configure vCPU and vRAM according to the license you have purchased. Do not exceed the maximum number of vCPUs specified in the license.Pre-requisite1.Make sure you have an x86 machine running a recent Linux kernel on an Intel processor with VT (virtualization technology) extensions, or an AMD processor with SVM extensions (also called AMDV).e commands given below to check if your CPU supports Intel VT or AMD-V:3.For Intel VT: grep --color vmx /proc/cpuinfo4.For AMD-V: grep --color svm /proc/cpuinfo5.Install Virtual Machine Manager (virt-manager), a desktop Graphical User Interface (GUI) application for managing Kernel Based Virtual Machines.6.For more information, refer to the FAQ section on KVM website:/page/FAQInstallation ProcedureStep 1: Download and Extract QCOW2 DisksDownload the .zip file containing the QCOW2 disk fromhttps:///en-us/products/next-gen-firewall/free-trial.aspx and save in your machine.Step 2: Add QEMU/KVM connectionOpen Virt-manager. Go to File -> Add Connection.Step 3: Start KVM and create new virtual machineIt opens New Virtual Machine Wizard.Step 4: Browse to locate the primary diskSelect location of the .qcow2 file for XG Firewall. Click Open.Step 5: Import the primary diskBrowse to the location of Primary disk. Click Forward.Step 6: Choose virtual memory and CPU for the applianceSelect vRAM as 2048 MB (recommended) or higher and CPU as 1. Click Forward.Step 7: Choose the Advanced options for more settingsSelect the options as shown in the image below. Select Customize configuration before install and click Finish. You will be redirected to the Customization configuration screen as shown in the step 8 below.Step 8: Configure advanced settings for primary diskIn Disk 1, click Advanced options and set the following:∙Disk bus: Virtio∙Storage format: qcow2Step 9: Add auxiliary diskGo to Add Hardware -> Storage.Click Select managed or other existing storage and browse to add the auxiliary disk. Click Finish.You will be redirected to the Customize configuration screen.Step 10: Configure network settings for the applianceGo to Add Hardware -> Network and configure as shown in the image below. Click Finish.You will be redirected to the Customize configuration screen.Step 11: Configure network interface cardIn Customize configuration screen, set the following for Virtual Network Interface (NIC 1):∙Device model: Hypervisor defaultIn Customize configuration screen, set the following for Virtual Network Interface (NIC 2):∙Device model: VirtioStep 12: Start the installationAfter configuring all options, click Begin Installation to start the installation.Sophos XG Firewall has been installed on your virtual machine.To continue to the Main MenuStep 13: Accept EULAConfiguring XG FirewallBrowse to https://172.16.16.16:4444 from the management computer. Click Start to begin the wizard and follow the on-screen instructions.Note: The wizard will not start if you have changed the default administrator password from the console.Activation and RegistrationStep 1: License AgreementTo proceed, you must accept the Sophos End User License Agreement (EULA).Step 2: Register Your FirewallEnter the serial number, if you have it. You can also use your UTM 9 license if you are migrating. Otherwise, you can skip registration for 30 days or start a free trial.You will be redirected to the MySophos portal website. If you already have a MySophosComplete the registration process.Step 3: Complete basic setupAfter you register the device, the license is synchronized and basic setup is complete.Click Continue and complete the configurations through the wizard. When you finish the process, the Network Security Control Center appears.You can now use the navigation pane to the left to navigate and configure further settings.Basic Configurationa.Setting up Interfaces1.Add network interfaces and RED connections: Configure > Network > Interfaces.2.Add wireless networks: Protect > Wireless > Wireless Networks. The SSIDs that you create will appear on the interfaces menu.3.Add access points: Protect > Wireless > Access Points.b.Creating ZonesZones are essential to creating firewall rules. The device provides default zones. To create custom zones, go to Configure > Network > Zones.c.Creating Firewall RulesYou can create the following types of firewall rules in Protect > Firewall > Add Firewall Rule:1.Business Application Rule: To secure a server or service, and control access to it.er/Network Rule: To control user access to web and application content, or to control traffic by source, service, destination, zone, and user.d.Setting up a Wireless NetworkTo create wireless networks from the XG Firewall Wizard, refer to theinstructions below:1.Go to Protect > Wireless > Wireless Networks.2.Click Add to add a new wireless network.3.Configure the wireless network as shown in the image.The wireless network will be added.1. Similarly, add another wireless network for guest access.You can see both wireless networks on Protect > Network > Wireless Networks .2. Go to Protect > Wireless > Access Point Groups .3. Click Add to add a new access point group.4. Add both the wireless networks, and the new access point.You can view newly-installed APs on the Control Center.5.Click the pending APs to accept the new access points.6.To configure the settings of new APs, refer to the image.7.Click Save.Copyright NoticeCopyright 2015-2017 Sophos Limited. All rights reserved.Sophos is registered trademarks of Sophos Limited and Sophos Group. All other product and company names mentioned are trademarks or registered trademarks of their respective owners.No part of this publication may be reproduced, stored in a retrieval system, or transmitted, in any form or by any means, electronic, mechanical, photocopying, recording or otherwise unless you are either a valid licensee where the documentation can be reproduced in accordance with the license terms or you otherwise have the prior permission in writing of the copyright owner.。
SophosEndpointSecurityandControl9进阶安装指南
Sophos Endpoint Security and Control 9進階安裝指南文件日期:2009 年 12 月目錄1 關於本指南 (3)2 規劃安裝 (4)3 系統需求 (8)4 決定在何處安裝管理工具 (9)5 使用資料庫在不同的伺服器上安裝管理工具 (13)6 使用額外的更新管理員在另外的伺服器上安裝管理工具 (25)7 在網路伺服器上發佈安全防護軟體 (41)8 建立電腦群組 (42)9 設定安全策略 (43)10 尋找電腦 (46)11 防護Windows 與 Mac 電腦 (47)12 防護 Linux 電腦 (52)13 防護 NetWare 伺服器 (54)14 決定如何防護 UNIX 電腦 (56)15 使用 Sophos Anti-Virus 4 防護 UNIX 電腦 (57)16 使用 Sophos Anti-Virus 7 防護 UNIX 電腦 (59)17 檢查您網路的安全狀態 (63)18 防護獨立電腦 (64)19 技術支援 (65)20 著作權聲明 (66)2進階安裝指南1關於本指南本指南描述在複雜網路或具有超過 1000 台工作站的網路上,安裝SophosEndpoint Security and Control軟體的進階程序。
本指南涵蓋在Windows、Mac OS X、Linux、NetWare 以及 UNIX 電腦上進行進階安裝的內容。
如欲在少於 1000 台Windows 與 Mac 工作站上的簡易網路上進行安裝,請參閱Sophos Endpoint Security and Control快速安裝指南,而非參閱本指南。
如欲進行升級,請參閱Sophos Endpoint Security and Control快速升級指南或Sophos Endpoint Security and Control進階升級指南,而非參閱本指南。
Sophos 發佈於/support/docs/與 Sophos 光碟。
斐海服务器安装说明
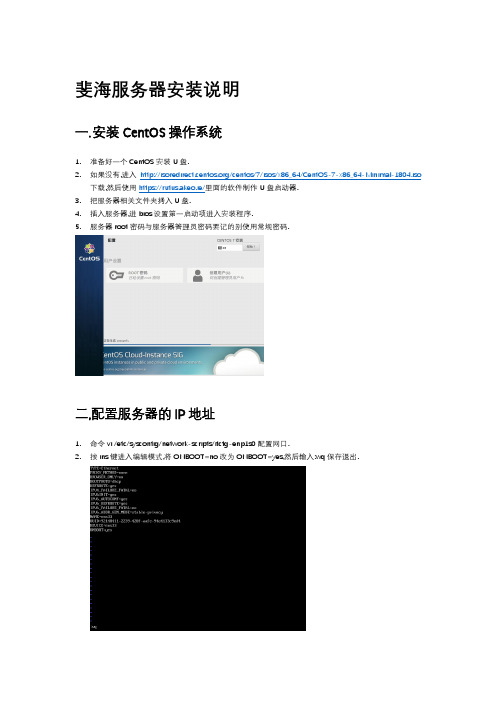
18.在指定区域打开端口(记得重启防火墙)firewall-cmd --zone=public --add-port=80/tcp(永久生效再加上 --permanent)
说明:–zone 作用域
15.设置默认接口区域 firewall-cmd --set-default-zone=public(立即生效,无需重启)
16.更新防火墙规则 firewall-cmd --reload或firewall-cmd --complete-reload(两者的区别就是第一个无需断开连接,就是firewalld特性之一动态添加规则,第二个需要断开连接,类似重启服务)
–add-port=8080/tcp 添加端口,格式为:端口/通讯协议
–permanent #永久生效,没有此参数重启后失效
3.配置端口的命令格式如下
端口3306 tcp
firewall-cmd --zone=public --add-port=3306/tcp --permanent
范围端口 10002/10005 udp
FHSC和pureftpd数据库的导入依上而行.
4.赋予程序可执行权限
chmod +x/root/wks/Freiheit/nginx/nginx-1.10.3/build/sbin/nginx
chmod +x/home/fh/exe/bms
6.程序开机自启
编辑启动程序vi /etc/rc.local,在下面加入
11.拒绝所有包 firewall-cmd --panic-on
12.取消拒绝状态 firewall-cmd --panic-off
Sophos Endpoint Security and Control 9.7 快速说明书

Sophos Endpoint Security and Control 9.7快速安装指南文档日期:2011 年 4 月目录1 关于本指南 (3)2 安装什么? (3)3 哪些主要步骤? (3)4 检查系统要求 (4)5 做好安装准备 (5)6 下载安装程序 (5)7 安装 Enterprise Console (5)8 下载安全软件 (6)9 安装 NAC Manager (6)10 创建计算机组 (7)11 设置安全策略 (7)12 查找计算机 (8)13 保护计算机 (8)14 检查网络的健康状况 (10)15 排疑解难 (11)16 就通常的任务获得帮助 (11)17 技术支持 (12)18 法律声明 (12)2快速安装指南1关于本指南本指南将告诉您怎样使用 Sophos 安全软件保护您的网络。
如果您是首次安装 Sophos 软件,请阅读本指南。
如果您在进行升级,请转到/support/upgrades/中的Endpoint Security and Control Upgrade Center。
注:如果您具有大型的网络,您可能会考虑Sophos Endpoint Security and Control 高级安装指南中说明的各种安装选项。
2安装什么?您将安装两个管理工具:■Sophos Enterprise Console.它使您能够在计算机上安装和管理安全软件。
■Sophos NAC Manager.它使您能够使用“网络访问控制”,防止未经授权的计算机,或者,没有遵照您的安全标准的计算机,访问您的网络。
安装NAC Manager是可选项。
注:您将使用不同的安装程序,分别安装这两种工具。
注:您可以在同一台服务器上同时安装这两种工具。
不过,如果您拥有超过1,000 的计算机,那么,您应该将这两种工具安装到不同的服务器上。
安装的过程是相同的。
3哪些主要步骤?您要进行这些主要步骤:■检查系统要求。