velocity中文手册
velocity入门使用教程
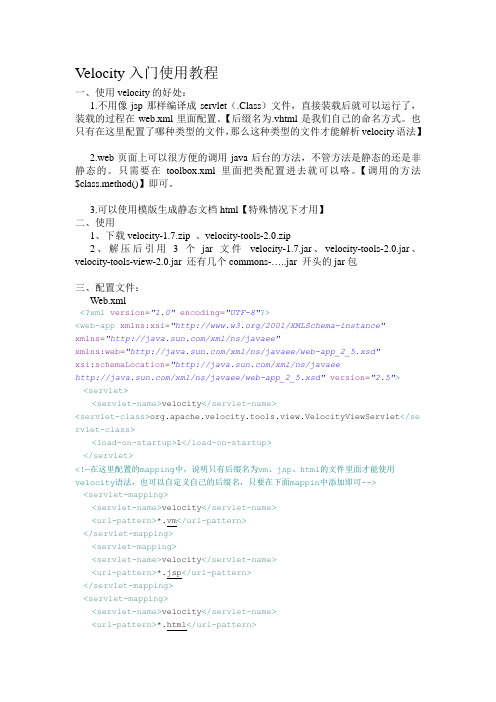
V elocity入门使用教程一、使用velocity的好处:1.不用像jsp那样编译成servlet(.Class)文件,直接装载后就可以运行了,装载的过程在web.xml里面配置。
【后缀名为.vhtml是我们自己的命名方式。
也只有在这里配置了哪种类型的文件,那么这种类型的文件才能解析velocity语法】2.web页面上可以很方便的调用java后台的方法,不管方法是静态的还是非静态的。
只需要在toolbox.xml里面把类配置进去就可以咯。
【调用的方法$class.method()】即可。
3.可以使用模版生成静态文档html【特殊情况下才用】二、使用1、下载velocity-1.7.zip 、velocity-tools-2.0.zip2、解压后引用3个jar文件velocity-1.7.jar、velocity-tools-2.0.jar、velocity-tools-view-2.0.jar 还有几个commons-…..jar 开头的jar包三、配置文件:Web.xml<?xml version="1.0"encoding="UTF-8"?><web-app xmlns:xsi="/2001/XMLSchema-instance"xmlns="/xml/ns/javaee"xmlns:web="/xml/ns/javaee/web-app_2_5.xsd"xsi:schemaLocation="/xml/ns/javaee/xml/ns/javaee/web-app_2_5.xsd"version="2.5"> <servlet><servlet-name>velocity</servlet-name><servlet-class>org.apache.velocity.tools.view.VelocityViewServlet</se rvlet-class><load-on-startup>1</load-on-startup></servlet><!—在这里配置的mapping中,说明只有后缀名为vm、jsp、html的文件里面才能使用velocity语法,也可以自定义自己的后缀名,只要在下面mappin中添加即可--> <servlet-mapping><servlet-name>velocity</servlet-name><url-pattern>*.vm</url-pattern></servlet-mapping><servlet-mapping><servlet-name>velocity</servlet-name><url-pattern>*.jsp</url-pattern></servlet-mapping><servlet-mapping><servlet-name>velocity</servlet-name><url-pattern>*.html</url-pattern></servlet-mapping></web-app>Toolbox.xml 【这个文件和web.xml放在一起,不要改名字,否则不会自动加载】<?xml version="1.0"encoding="UTF-8"?><tools><data type="string"key="version"value="2.0"/><!—在这里配置类,在项目启动的时候就自动把类实例化好了,在页面就可以用了,例子:下面 ${test.Method()}--><toolbox scope="request"><!-- currentProject util start --><tool key="test"class="com.gzrj.services.Test"></tool>...<!-- currentProject util end --><!—下面的这些配置都是velocity的配置,可以不用管,也不能更改 --><!-- velocity util start --><tool class="org.apache.velocity.tools.view.CookieTool"/><tool class="org.apache.velocity.tools.view.ImportTool"/><tool class="org.apache.velocity.tools.view.IncludeTool"/><tool class="org.apache.velocity.tools.view.LinkTool"/><tool class="org.apache.velocity.tools.view.PagerTool"/><tool class="org.apache.velocity.tools.view.ParameterTool"/><tool class="org.apache.velocity.tools.view.ViewContextTool"/><tool class="org.apache.velocity.tools.generic.ContextTool"/><tool class="org.apache.velocity.tools.generic.LoopTool"/><tool class="org.apache.velocity.tools.generic.RenderTool"/><!-- velocity util end --></toolbox><toolbox scope="session"createSession="false"><tool class="org.apache.velocity.tools.view.BrowserTool"/> </toolbox><toolbox scope="application"><tool class="org.apache.velocity.tools.generic.AlternatorTool"/> <tool class="org.apache.velocity.tools.generic.ClassTool"/><toolclass="parisonDateTool"/> <tool class="org.apache.velocity.tools.generic.ConversionTool"/> <tool class="org.apache.velocity.tools.generic.DisplayTool"/><tool class="org.apache.velocity.tools.generic.EscapeTool"/><tool class="org.apache.velocity.tools.generic.FieldTool"/><tool class="org.apache.velocity.tools.generic.MathTool"/><tool class="org.apache.velocity.tools.generic.NumberTool"/><tool class="org.apache.velocity.tools.generic.ResourceTool"/><tool class="org.apache.velocity.tools.generic.SortTool"/><tool class="org.apache.velocity.tools.generic.XmlTool"/><tool class="org.apache.velocity.tools.generic.ListTool"/> </toolbox></tools>四、页面使用(html)<!DOCTYPE html PUBLIC"-//W3C//DTD HTML 4.01 Transitional//EN""/TR/html4/loose.dtd"><html><head><meta http-equiv="Content-Type"content="text/html; charset=UTF-8"><title>添加 -- 修改 -- 界面</title></head><body><br><form name="form1"id="form1"action="tree/tree!add.action"method="post"><!-- 两个隐藏表单传值 --><input type="hidden"name="updateBeforeId"id="updateBeforeId" value=$!request.produKey><input type="hidden"name="treeid"id="treeid"value=$!request.id> <table border=0><tr><td>序号:</td><td><input type="text"name="treeproduKey"id="treeproduKey" maxlength="3"onkeydown="keySel(event);"value=$!{request.produKey_3}><lable id="idname"></lable><fontcolor="red"size="2px">*序列号请输入三位数字</font></td></tr><tr><td>名字:</td><td><input type="text"name="treename"id="treename" maxlength="50"onkeydown="keySel(event);"value=$!><font color="red"size="2px">*‘输入1-50个字母、数字或者汉字’</font></td> </tr><tr><td>所属类别:</td><td><select name="selectP_id"id="selectP_id"onkeydown="keySel(event);"size="1"style="width:120px;"><option value="">根数据</option>#foreach($list in $!request.listTree)<!-- 当传过来的值id与数据库样的时候,就selected="selected -->#if($!list.id==$request.produKey_id)<option value="$!list.id"selected="selected">$!</option>#else<option value="$!list.id">$!</option> #end#end</select></td></tr><tr><td> </td></tr><tr align="center"><td colspan=2>#if(!$)<a class="easyui-linkbutton"plain="false"iconCls="icon-save"href="#this"onclick="checkForm();">确认添加</a> #else<a class="easyui-linkbutton"plain="false"iconCls="icon-save"href="#this"onclick="checkForm();">确认更新</a> #end</td></tr></table></form></body></html>。
Velocity教程

Velocity教程⼀、基本语法1、"#"⽤来标识Velocity的脚本语句,包括#set、#if 、#else、#end、#foreach、#end、#iinclude、#parse、#macro等;如:#if($info.imgs)<img src="$info.imgs" border=0>#else<img src="noPhoto.jpg">#end2、"$"⽤来标识⼀个对象(或理解为变量);如如:$i、$msg、$TagUtil.options(...)等。
3、"{}"⽤来明确标识Velocity变量;⽐如在页⾯中,页⾯中有⼀个$someonename,此时,Velocity将把someonename作为变量名,若我们程序是想在someone这个变量的后⾯紧接着显⽰name字符,则上⾯的标签应该改成${someone}name。
4、"!"⽤来强制把不存在的变量显⽰为空⽩。
如当页⾯中包含$msg,如果msg对象有值,将显⽰msg的值,如果不存在msg对象同,则在页⾯中将显⽰$msg字符。
这是我们不希望的,为了把不存在的变量或变量值为null的对象显⽰为空⽩,则只需要在变量名前加⼀个“!”号即可。
如:$!msg⼆、在EasyJWeb中的最佳实践 理论上你可以在EasyjWeb模板使⽤所有Velocity的脚本及功能,但我们不推荐你在界⾯模板中使⽤过多过复杂的脚本表达⽅式,在万不得已的情况下,不要在界⾯模板中加⼊任何复杂的逻辑,更不要在界⾯模板中加⼊变量声明、逻辑运算符等等。
在EasyJWeb中,我们提供了五条基本的模板脚本语句,基本上就能满⾜所有应⽤模板的要求。
这四条模板语句很简单,可以直接由界⾯设计⼈员来添加。
在当前很多EasyJWeb的应⽤实践中,我们看到,所有界⾯模板中归纳起来只有下⾯四种简单模板脚本语句即可实现:1、$!obj 直接返回对象结果。
Velocity快速入门教程
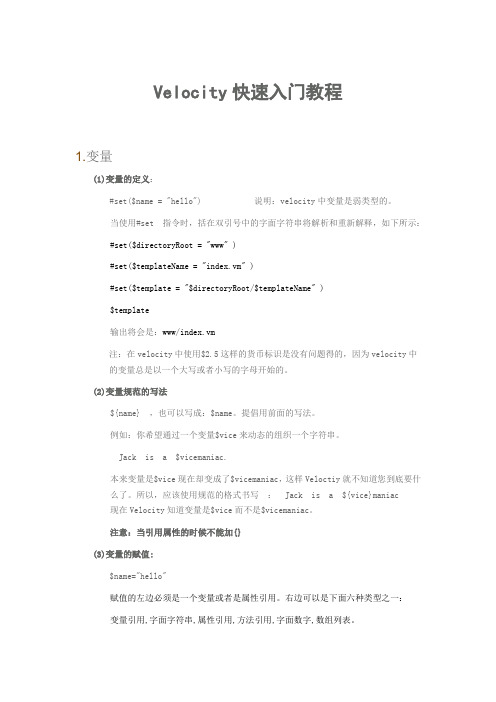
Velocity快速入门教程1.变量(1)变量的定义:#set($name = "hello") 说明:velocity中变量是弱类型的。
当使用#set 指令时,括在双引号中的字面字符串将解析和重新解释,如下所示:#set($directoryRoot = "www" )#set($templateName = "index.vm" )#set($template = "$directoryRoot/$templateName" )$template输出将会是:www/index.vm注:在velocity中使用$2.5这样的货币标识是没有问题得的,因为velocity中的变量总是以一个大写或者小写的字母开始的。
(2)变量规范的写法${name} ,也可以写成:$name。
提倡用前面的写法。
例如:你希望通过一个变量$vice来动态的组织一个字符串。
Jack is a $vicemaniac.本来变量是$vice现在却变成了$vicemaniac,这样Veloctiy就不知道您到底要什么了。
所以,应该使用规范的格式书写: Jack is a ${vice}maniac现在Velocity知道变量是$vice而不是$vicemaniac。
注意:当引用属性的时候不能加{}(3)变量的赋值:$name="hello"赋值的左边必须是一个变量或者是属性引用。
右边可以是下面六种类型之一:变量引用,字面字符串,属性引用,方法引用,字面数字,数组列表。
下面的例子演示了上述的每种类型:#set( $monkey = $bill ) ## variable reference#set( $monkey.Friend = "monica" ) ## string#set( $monkey.Blame = $whitehouse.Leak ) ## property reference#set( $monkey.Plan = $spindoctor.weave($web) ) ## method reference#set( $monkey.Number = 123 ) ##number#set( $monkey.Say = ["Not", $my, "fault"] ) ## ArrayList注意:①如果上述例子中的右值是null, 则左值不会被赋值,也就是说会保留以前的值。
Velocity配置文件详解

Velocit y配置文件详解在veloci ty的发布方包中有一个v e locit y.propert ies(位于 org.apache.velocit y.runtime.default s package下,文件定义了ve locity的配置信息o r g.apache.velocit y.runtime.Runtime Consta nts中定义了key值)#模板编码:input.encodin g=ISO-8859-1//模板输入编码output.encodin g=ISO-8859-1 //模板输出编码#foreach配置directi ve.foreach.counte= velocit yCount //计数器名称directi ve.foreach.counter.initial.value = 1 //计数器初始值directi ve.foreach.maxloop s = -1 //最大循环次数,-1为默认不限制directive.foreach.iterato = velocit yHasNe x //迭代器名称#set配置directi ve.set.null.allowed = false //是否可设置空值#include配置directi ve.include.output.errorms g.start= <!-- include error : //错误信息提示开始字符串directi ve.include.output.errorms g.end = see error log --> //错误信息提示结束字符串#parse配置directi ve.parse.max.depth = 10 //解析深度#模板加载器配置resourc e.loader= file //模板加载器类型,默认为文件,可定义多个file.resourc e.loader.descrip tion= Velocit y File Resourc e Loader//加载器描述file.resourc e.loader.class =Velocit y.Runtime.Resourc e.Loader.FileRes ourceLoader//加载器类名称file.resourc e.loader.path = . //模板路径file.resourc e.loader.cache = false //是否启用模板缓存file.resourc e.loader.modific ationC heckIn terval = 2 //检查模板更改时间间隔宏配置velocim acro.library//指定宏定义文件的位置velocim acro.permiss ions.allow.inline= true //是否可以行内定义velocim acro.permiss ions.allow.inline.to.replace.global= false //是否可以用行内定义代替全局定义velocim acro.permiss ions.allow.inline.local.scope = false //行内定义是否只用于局部velocim acro.context.localsc ope= false //宏上下文是否只用于局部velocim acro.max.depth = 20 //解析深度velocim acro.argumen ts.strict= false //宏参数是否启用严格模式#资源管理器配置resourc e.manager.class= Velocit y.Runtime.Resourc e.Resourc eManag erImpl//管理器类名称resourc e.manager.cache.class = Velocit y.Runtime.Resourc e.Resourc eCache Impl //缓存器类名称#解析器池配置parser.pool.class= Velocit y.Runtime.ParserP oolImp l //解析池类名称parser.pool.size = 40 //初始大小#evaluat e配置directi ve.evaluat e.context.class= Velocit y.Velocit yConte xt //上下问类名称#可插入intr ospect or配置runtime.introsp ector.uberspe ct = Velocit y.Util.Introsp ection.Uberspe ctImpl //默认intro specto r类名称#日志配置runtime.log = velocit y.log用以指定 Velocit y 运行时日志文件的路劲和日志文件名,如不是全限定的绝对路径,系统会认为想对于当前目录.runtime.log.logsyst em这个参数没有默认值,它可指定一个实现了org.apache.velocit y.runtime.log.LogSyst em.接口的自定义日志处理对象给Velocit y。
Velocity 模板使用指南》中文版
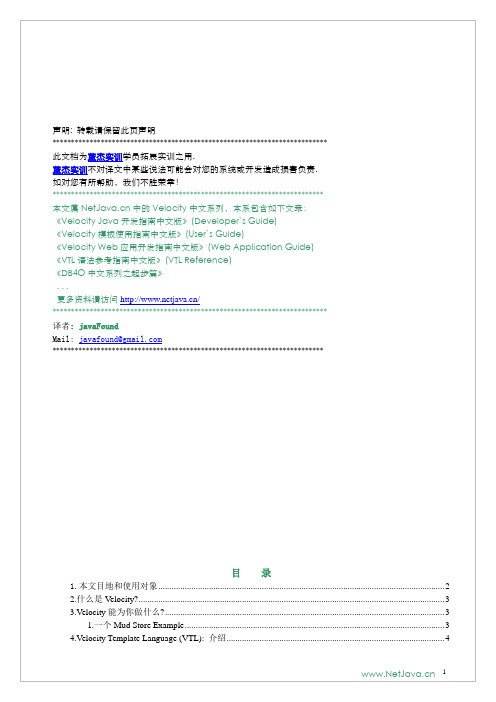
2.Escaping Valid VTL References(封装有效的引用)如下示,如果没有#set( $email = "foo" )这一行且java代码中Context对象中没有放放email对象,将直接输出$email.#set( $email = "foo" )$email如果email己定义了 (比如它的值是foo),而这里你却想输出$email. 这样一个字符串,就需要使用转义字符”\”.## The following line defines $email in this template:#set( $email = "foo" )$email\$email\\$email\\\$email上面的模板在web页面上的输出将是:foo$email\foo\$email但如果email并没有定义,我们这样写:.$email\$email\\$email\\\$email输出就原封不动了:$email\$email\\$email\\\$email注意:当己定义变量和未定义变量一起输出时,会输出字面意思,如下便,$moon是未定义的:#set( $foo = "gibbous" )$moon = $foo输出到web页面中将是$moon = gibbou11.Case Substitution(可选的格式)至此,你对velocity的refenerce己比较熟悉了, 你可以在你的模板中开始应用这些功能. 但你还可以知道的是Velocity references从java语法中汲取了一些优点以便模板设计者更容易使用VTL.比如:$foo$foo.getBar()## 等同于$foo.Bar$data.setUser("jon")##等同于#set( $er = "jon" )$data.getRequest().getServerName()##等同于$data.Request.ServerName## is the same as${data.Request.ServerName}这里示例了你可选的一些引用方式. VTL汲取了java语法和java bean的一些简洁语法以解析java代码中Context中的对象和这些对象的命令及属性---这样,一个java对象的所有功能都可以展示到视图中了.Velocity也借见了java Bean的规范(Bean specifications defined by Sun Microsystems), 是大小写敏感的; 但Velocity会尽可能的帮你修正错误. 当命令getFoo()通过指令 $bar.foo在模板中引用时,Velocity的搜索规则我们在前面己讲了,你还记得是什么吗?.注意:模板中引用的必须是通过java Bean中的getter/setter 实现的,而直接的java对象的数据域是不能直接引用的,如$ 会解析到 class Foo's getName() 的实例方法,但不会解析到Foos类的public Name 这个实例变量.12.Directives(指令符号)模板设计者使用“引用“生成动态内容, 指令(directives)–简单的说就是设计者在模板中操作java 对象—让视图设计者全面控制输出内容的格式.指令总是以 #开头后面紧跟具体的指令符. 就像引用一样(指令的一种),可以将指令理解为”表示这里是一个什么东东).如下例生成一个出错提示:#if($a==1)true enough#elseno way!#end这个例子中应使用括号将else分开.#if($a==1)true enough#{else}no way!#end1.#set指令#set用来给一个引用赋值.值可以被赋给变量引用或属性引用, 但要将它们放入括号中,如下示:#set( $primate = "monkey" )#set( $customer.Behavior = $primate )“左操作数被赋值“是引用操作的一个规则.=号右侧可能是以下类型之一:∙Variable reference变量引用∙String literal字符串∙Property reference 属性引用∙Method reference 命令引用∙Number literal 数字∙ArrayList 数组∙Map 映射下面是对上述类型设置的示例:#set( $monkey = $bill ) ## variable reference#set( $monkey.Friend = "monica" ) ## string literal#set( $monkey.Blame = $whitehouse.Leak ) ## property reference#set( $monkey.Plan = $spindoctor.weave($web) ) ## method reference#set( $monkey.Number = 123 ) ##number literal#set( $monkey.Say = ["Not", $my, "fault"] ) ## ArrayList#set( $monkey.Map = {"banana" : "good", "roast beef" : "bad"}) ## Map注意: 在ArrayList类型引用的例子中,其原素定义在数组 [..]中, 因此,你可以使表$monkey.Say.get(0)访问第一个元素.类似的,引用Map 的例子中, 原素定义在 { } 中,其键和值间以:隔成一对,使用$monkey.Map.get("bannana") 在上例中将返回 'good', ( $monkey.Map.banana也会有同样效果).下面是一般的计算表达式:#set( $value = $foo + 1 )#set( $value = $bar - 1 )#set( $value = $foo * $bar )#set( $value = $foo / $bar )但注意:如果右边的操作数是一个属性或命令的引用而返回null,那么赋值将不会成功,且在随后的VTL 中也不能再取出使用. 如下例:#set( $result = $query.criteria("name") )The result of the first query is $result#set( $result = $query.criteria("address") )The result of the second query is $result如果$query.criteria("name")返回的是字符串 "bill", 但$query.criteria("address")返回null, 上面的TVL输出结果将是:The result of the first query is billThe result of the second query is bill这对与初学者的理解有些麻烦,比如在#foreach loops中,你使用#set给一个属性或命令赋值时,如下例示:#set( $criteria = ["name", "address"] )#foreach( $criterion in $criteria )#set( $result = $query.criteria($criterion) )#if( $result )Query was successful#end#end在上例中,就不能依赖if( $result )来决定查询是否成功. $result一但被#set 为null (context会同样), 它将不能被赋其它值 (不能从 context中取出).一个解决办法是,每次都将$result设为false. 如果$query.criteria()调用成功,就可以检测到. #set( $criteria = ["name", "address"] )#foreach( $criterion in $criteria )#set( $result = false )#set( $result = $query.criteria($criterion) )#if( $result )Query was successful#end#end注意:#set不需要使用#end来声明结尾.2.Literals (语义解析)使用#set指令时,变量如果用“”引起会被解析,如:#set( $directoryRoot = "www" )#set( $templateName = "index.vm" )#set( $template = "$directoryRoot/$templateName" )$template输出的将是:www/index.vm但当用单引号引起来时,就不会被解析::#set( $foo = "bar" )$foo#set( $blargh = '$foo' )$blargh输出后会是:bar$foo默认情况下,不会解析单引号中的变量,当然,这可以通过改变Velocity的配置参数来改变:velocity.properties such that stringliterals.interpolate=false.另外, 指令#literal元素可以用来输出字面意思,如下示.#literal()#foreach ($woogie in $boogie)nothing will happen to $woogie#end#end会输出::#foreach ($woogie in $boogie)nothing will happen to $woogie#end3.Conditionals(条件判断)1.If / ElseIf / Else#if指令用来根据条件在页面中输出内容, 如下简单的例子:#if( $foo )<strong>Velocity!</strong>#end根据变量$foo计算后是否为true决定输出, 这会有两种情况: (i) $foo的是值是一个boolean (true/false)型并有一个true value, 或(ii) 它是一个非null值. 要记者,Velocity context 中只能包含Objects, 因此当我们讲'boolean'时, 它就是一个Boolean (the class).在#if和#end的内容是否会输出,由$foo是否为true决定. 这里,如果$foo is true, 输出将是: "Velocity!". 如果$foo为null或false,将不会有任何输出.#elseif或#else可以#if和组合使用. 如果第一个表达式为true,将会不计算以后的流程,如下例假设t $foo是15 and $bar产6.#if( $foo < 10 )<strong>Go North</strong>#elseif( $foo == 10 )<strong>Go East</strong>#elseif( $bar == 6 )<strong>Go South</strong>#else<strong>Go West</strong>#end输出将会是Go South.2.Relational and Logical Operators(关系和逻辑运算)Velocity使用==来做比较,如下例.#set ($foo = "deoxyribonucleic acid")#set ($bar = "ribonucleic acid")#if ($foo == $bar)In this case it's clear they aren't equivalent. So...#elseThey are not equivalent and this will be the output.#end注意:==计算与java中的==计算有些不同:不能用来测试对象是否相等(指向同一块内存). Velocity 中是否相等仅直接的用来比较numbers, strings的值, or objects的toString()结果是否相等. 如果是不同的对象,会调用它们的toString()命令结果来比较.Velocity也使用AND, OR and NOT 执行逻辑运算.详细说明请参看《VTL参考中文版》,如下是一些简单示例:## logical AND#if( $foo && $bar )<strong> This AND that</strong>#end仅当$foo$bar和都为true时,#if()才会输出中间内容.OR 运算例子## logical OR#if( $foo || $bar )<strong>This OR That</strong>#end$foo或$bar只要有一个为true就可以输出。
Rocktron Velocity V10 电子吉他放大器用户手册说明书

V10ELECTRIC GUITAR AMPLIFIERUser’s ManualMay be covered by one or more of the following: U.S. Patents #4538297, 4647876, 4696044, 4745309, 4881047, 4893099,5124657, 5263091, 5268527, 5319713, 5333201, 5402498 and 5493617.Other patents pending. Foreign patents pending.V elocity is a registered trademark of GHS Corporation Battle Creek MI, USAR Rocktron -A Division of GHS Corporation 2813 Wilber AvenueBattle Creek MI 49015USARocktron Phone:1-(269)-968-3351Email:*****************www Check us out on the web at:Copyright © 2006 GHS CorporationAll Rights Reserved.Power OutputSpeakersEQ Headphone Output Channels Dimensions W eight Power Requirements Fuse10 Watts 1 x 6.5” Custom V oiced V elocity Speaker by Rocktron BassTrebleOne 1/4” jackDISTORTION Switch256mm(W) x 152mm(D) x 304mm(H)10” x 6” x 12”9.9lbs (4.5KG)100 V olts AC 50/60Hz or 117 V olts AC, 60Hzor 220/240 V olts AC, 50/60Hz, as specified on chassis100-120V - use F500mA220-240V - use F300mA V10 Specifications2006-0001Rev. 8/01/06PrecautionsNOTE: IT IS VERY IMPORTANT THAT YOU READ THIS SECTION TO PROVIDEYEARS OF TROUBLE FREE USE. THIS UNIT REQUIRES CAREFUL HANDLING.•All warnings on this equipment and in the operating instructions should beadhered to and all operating instructions should be followed.•Do not use this equipment near water. Care should be taken so thatobjects do not fall and liquids are not spilled into the unit through anyopenings.•The power cord should be unplugged from the outlet when left unused fora long period of time.•Do not block any ventilation openings (if applicable). Install in accordancewith the manufacturer’s instructions.•Do not install near any heat sources such as radiators, heat registers, stovesor other apparatus (including amplifiers) that produce heat.•Only used attachments/accessories specified by the manufacturer.•Do not use this product with any case, stand tripod, bracket or table that isnot specified by the manufacturer. Insure that the case, stand, tripod,bracket etc. is properly adjusted and setup (follow all instructions). Extracare and caution should be taken to avoid tip over and injury.•Unplug this apparatus during lightning storms or when unused during longperiods of time.Refer all service to qualified service personnel. Servicing is required when the apparatus has been damaged in any way, such as power supply or plug is damaged, liquid has been spilled or objects have fallen into the apparatus or if the apparatus has been exposed to rain or moisture, does not operate normally or has been dropped.DO NOT A TTEMPT TO SERVICE THIS EQUIPMENT. THIS EQUIPMENTSHOULD BE SERVICED BY QUALIFIED PERSONNEL ONLY. DO NOT MAKEANY INTERNAL ADJUSTMENTS OR ADDITIONS TO THIS EQUIPMENT A TANY TIME. DO NOT TAMPER WITH INTERNAL ELECTRONICCOMPONENTS AT ANY TIME. FAILURE TO FOLLOW THESE INSTRUCTIONSMAY VOID THE WARRANTY OF THIS EQUIPMENT, AS WELL AS CAUSINGSHOCK HAZARD.OPERA TING TEMPERA TUREDo not expose this unit to excessive heat. This unit is designed to operate between 32° Fand 104° F (0° C and 40° C). This unit may not function properly under extremetemperatures.INPUT jackConnect the output of your guitar to the 1/4” input jack with a shielded guitar cable.DISTORTION ON/OFF ButtonThis button allows you to turn the DISTORTION “ON” or “OFF”. When the button is pressed in, the DISTORTION is “ON”. When the button is out, the DISTORTION is “OFF.”GAIN controlThis knob determines the amount of GAIN (or distortion) added to the signal when the distortion is “ON.”Turning the knob clockwise will add more GAIN to the signal. Turning the knob counter-clockwise will decrease the amount of GAIN added to the signal.VOLUME controlThis knob determines the overall VOLUME (or level) of the amplifier. Turning the knob clockwise will increase the VOLUME. Turning the knob counter-clockwise will decrease the VOLUME.BASS controlThis knob controls the overall bass of both the DISTORTION and CLEAN channels. The BASS control boosts or cuts the amount of low frequency, or bass sound in the signal.FRONT PANEL DESCRIPTIONS 12345HEADPHONE jackPlugging your headphones into this jack disconnects the sound going to the speaker and allows you to practice in private.POWER switchTurns the amp ON and OFF. When the LED is lit, the amp is on.TREBLE controlThis knob controls the overall TREBLE of both the CLEAN and DISTORTION channels. The TREBLE control boosts or cuts the amount of high frequencies present in the signal.678POWER CORDPlug the amplifier into any standard wall outlet. Please be sure to check your local wiring and voltage to make sure your amplifier is the proper voltage for your area of the world. Please follow all the precaution guidelines found in the front of this manual.BACK SIDE (not shown)DISTORTIONEQUALIZATION。
velocity2.0 入门 变量 方法

1. 什么是velocity2.0?velocity2.0是一个模板引擎,用于在Web开发中,特别是在Java Web开发中,用于生成HTML、XML等静态文件。
velocity2.0可以将模板文件中的变量替换为具体的数值,也可以执行一些简单的逻辑操作,比如条件判断、循环等。
它的主要作用就是将模板和数据整合在一起,生成最终的文件输出。
2. velocity2.0的入门指南想要学习和使用velocity2.0,首先需要了解它的基本语法和用法。
下面是velocity2.0入门的一些基本概念和内容。
3. 变量在velocity2.0中,变量用来表示一些数值、字符串或者对象,在模板中可以通过变量名来引用这些值。
变量的命名规则和作用域和Java中的情况很类似,这些都是需要在学习velocity2.0时需要注意的地方。
4. 变量定义与赋值在velocity2.0模板中,可以通过#set指令来定义和赋值一个变量,比如:```#set($name = "velocity2.0")```这样就定义了一个名为name的变量,并赋值为"velocity2.0"。
5. 变量的引用定义了变量之后,就可以在模板中引用这个变量了。
比如:```Wee to $name!```这样就会在生成的文件中,将$name替换为具体的数值,也就是"velocity2.0"。
6. 变量的作用域velocity2.0中的变量和作用域和Java中的类似,有全局变量和局部变量之分。
全局变量是在整个模板中都可以访问的,而局部变量只在某个指令块中可以访问。
7. 方法除了变量之外,方法也是velocity2.0中比较重要的概念。
在模板中,可以通过方法来执行一些逻辑操作,比如字符串的拼接、条件判断、循环等。
8. 方法的定义与调用在velocity2.0模板中,可以通过#macro指令来定义一个方法,然后通过#call指令来调用这个方法。
Velocit手册-中文版
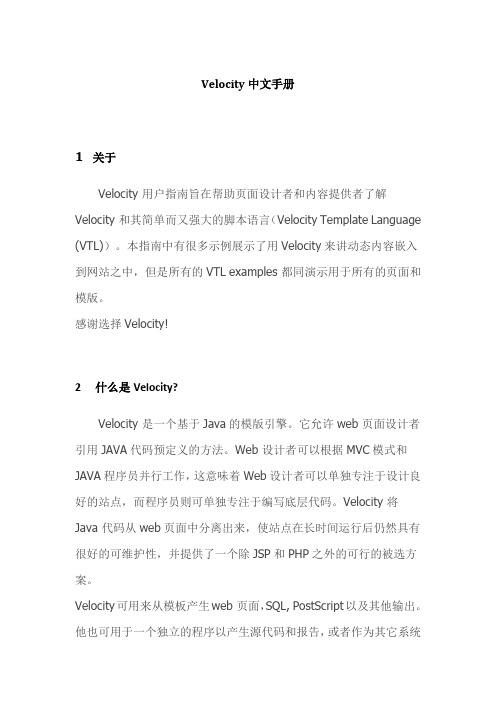
Velocity中文手册1关于Velocity 用户指南旨在帮助页面设计者和内容提供者了解Velocity 和其简单而又强大的脚本语言(Velocity Template Language (VTL))。
本指南中有很多示例展示了用Velocity来讲动态内容嵌入到网站之中,但是所有的VTL examples 都同演示用于所有的页面和模版。
感谢选择Velocity!2什么是Velocity?Velocity 是一个基于Java的模版引擎。
它允许web 页面设计者引用JAVA代码预定义的方法。
Web 设计者可以根据MVC模式和JAVA程序员并行工作,这意味着Web设计者可以单独专注于设计良好的站点,而程序员则可单独专注于编写底层代码。
Velocity 将Java 代码从web页面中分离出来,使站点在长时间运行后仍然具有很好的可维护性,并提供了一个除JSP和PHP之外的可行的被选方案。
Velocity可用来从模板产生web 页面,SQL, PostScript以及其他输出。
他也可用于一个独立的程序以产生源代码和报告,或者作为其它系统的一个集成组件。
这个项目完成后,Velocity将为Turbine web 应用程序框架提供模板服务。
Velocity+Turbine 方案提供的模板服务将允许web 应用按真正的mvc模式进行开发。
3 Velocity 可以做什么?Mud Store 示例假设你是一个专门销售泥浆(MUD)的在线商店的页面设计者。
我们称他为"The Online Mud Store"。
生意很好。
客户订购各种各样的类型和数量的泥浆。
他们使用他们的用户名和密码登陆到商店中来,就可以浏览他们的订货和购买其他东西。
现在,赤土陶泥正在促销,这是一种很常用的泥巴。
一少部分顾客很有规律的购买一种亮红土Bright Red Mud,这也是促销产品,但是不太常用,因此被移到页面的边缘。
所有顾客的信息都在数据库中被跟踪,因此有一天问题出现了:为什么不使用Velocity来定位目标客户,这些客户对某种类型的产品特别感兴趣?Velocity 使针对访问者个性的WEB页面客户化(个性化)非常容易。
DURATRAX VELOCITY 15 说明书

The High-Speed Needlethe factory at 2-1/2 turns out from the fully closed position of the carb. Once the engine is broken-in, the high-speed needle would typically run from 2 to 2-1/2 turns out from closed, depending on the weather, humidity and altitude above sea level. To richen turn the needle coun-terclockwise, to lean turn the needle clockwise.The Low-Speed NeedleThe “low-speed” needle is the screw in the carb body, opposite the throt-tle arm (see picture on previous page). It controls the fuel to air mixture at low throttle settings. There is a simple way of adjusting the low-speed nee-dle correctly called the “pinch test.” With the engine at idle, pinch the fuel line and listen to how the engine speeds up or slows down. If the engine increases its speed for about 2 or 3 seconds and then loses RPM, the needle is set correctly. If the engine loses RPM quickly, it is set too lean and the low-speed needle needs to be opened (counterclockwise)to richen the mixture. Pinch again to check the mixture. If the engine takes longer than 4 seconds to slow down, lean (clockwise)the low-speed nee-dle and then pinch again to check the mixture.The Throttle Stop ScrewOn the front of the carburetor, there is a black screw (see picture on previ-ous page). This is called the throttle stop screw. This increases or decreas-es the idle RPM without changing the fuel-to air-mixture. You should see an openning of approximately 1.5mm (between 1/32” and 1/16”) between the carb body and the carb barrel when the throttle is pushed closed.Before running, please, read this manual thoroughly to familiarize your-self with this engine.There are several simple steps to starting the engine:1.Install a glow plug if one is not in your engine. This threads into thetop of the cylinder head.2.Fill the tank almost to the top. Leave a little air at the top of the tank.3.Prime the engine by turning the flywheel on the engine. Watch thefuel go through the line and when it gets to the carburetor, turn the flywheel one more full revolution.4.Open the high speed needle valve exactly 2-1/2 turns out (coun-terclockwise)from fully closed. Be careful not to overtighten the high speed needle. When you feel some resistance, stop turning the needle. The high-speed needle is sticking up from the car-buretor inside the brass housing. All of the carburetor settings are adjusted with a flat bladed screwdriver. If you have previously run the vehicle, keep the same needle valve setting that you used on your last run.5.Start the engine by pulling the recoil - Use short, quick pulls. DONOT pull the recoil starter’s string to the end. You only need 10 inch-es of pull to start the engine.If the engine does not start after several pulls, sometimes it is helpful to start the engine at around half throttle. Have a friend pull back on the throttle some while you start the engine. This may be an indicator that the low speed needle setting needs to be adjusted. When the engine starts, immediately return the throttle to idle. If this is not done the engine can over-rev and cause engine damage. If the engine is diffi-cult to turn over with the recoil starter, especially if it is brand new, loosen the glow plug a half turn before starting the engine. This allows some compression to escape, but the engine will still start. Make sure you tighten the glow plug after the engine starts.If the recoil starter is still difficult to pull, the engine is flooded – there is too much fuel inside the engine. Remove the glow plug and air cleaner, then turn the engine upside down and pull the recoil 5 or 6 times. This will clear the engine of fuel, and you will notice the recoil pulls easier. Replace the glow plug and repeat the starting procedure.FuelsUse fuels that are specially formulated for car and truck engines. DuraTrax Red Alert fuel is specially formulated for R/C engines like the Velocity .15.How To Stop Your EngineYou may have been wondering how to stop the engine. All you have to do is pinch the fuel line that runs to the carburetor and from the bottom of the fuel tank. Pinching this will restrict the fuel flow and the engine will quit within a few seconds. You can also touch the flywheel with the tip of your shoe through the hole in the bottom of the chassis.To insure long life and good performance from your Velocity .15 engine, you MUST break-in the engine. The break-in period is critical for long life of the internal parts of the engine. This should be done over the first 5 or 6 tanks of fuel.Some Things To Remember During Break-In:1.Run with the body off. This will keep the engine cooler.2.Keep the air cleaner on at ALL times.3.Run on a smooth, hard surface. An empty parking lot is perfect.e the same fuel that you will use for normal running.5.Resist the urge to accelerate and decelerate the vehicle quickly.6.Break-in puts stress on the glow plug and you can burn it out dur-ing break-in. Make sure you have an extra plug or two on hand.7.Do NOT overheat the engine. You can check the head temperatureby using one of the temperature gauges that are available.The First TankYour first tank of fuel should be running the engine at a very rich high-speed needle valve setting. This allows the fuel to carry as much oil as possible into the engine to lubricate the internal parts during the break-in.1.Open the needle valve 2-1/2 turns from fully closed (counterclockwise).This is factory set already, but check it to make sure. When closing the high-speed needle, close the needle until you feel some resistance.DO NOT overtighten or you will damage the engine.2.Start the engine.3.Once the engine is started, open the high-speed needle valvearound 1/8 turn at a time, finding the setting where the engine just barely runs. This may take a few times adjusting the needle, run-ning the vehicle away from you and back, then adjusting the nee-dle. The engine will perform sluggishly and stall from time to time - that is normal.4.Run the vehicle back and forth at medium speeds, slowly acceler-ating and decelerating the vehicle, until the tank is almost out of fuel. Do not allow the tank to run out of fuel. This leans out the engine and can cause overheating.5.Stop the engine and allow the engine to cool before the secondtank. This normally takes around 10 minutes (See How To Stop Your Engine).Tanks 2-6Turn in the needle valve (clockwise) around 1/12 turn from the previous setting. Run the vehicle back and forth. You should notice that the engine will perform better during each run. Stop the vehicle periodical-ly to check for overheating. If it is too hot, stop the engine. Wait for it to cool, then open up the needle valve 1/4 turn and restart. After the 6th tank, you should be near to the peak performance of the engine.BREAKING-IN THE ENGINERUNNING THE ENGINE1/32" TO 1/16" GAP403938424344484746451415751125114121011963334353683191816133232172021222324252728302931264150 3749Ten Ways To Ensure A Long Life From Your Engine:1.Keep your engine clean. Dirt will act as insulation on an engine. Itwill not be able to shed heat as easily. Use a good air filter to keep dirt out of your engine and clean it often.2.Do not over-lean your engine.3.Do not run your engine with little or no load. Don’t throttle up the engineto full throttle when the wheels are not in contact with the ground.4.Do not overheat the engine. This goes along with keeping it cleanand not over-leaning the engine.5.Do not use a fuel with a low oil content. Make sure you use a fuelfrom a reputable manufacturer, such as DuraTrax Red Alert.6.Avoid using old fuels in the engine. Always run all of the fuel out of theengine. After running for the day, use an after-run oil and work it into the engine by turning the flywheel or pulling the engine recoil slowly.7.Do not use a fuel with a nitromethane (often called nitro) contentover 20%.8.Do not scratch the piston or cylinder sleeve. Avoid jamming some-thing into the exhaust port when removing or re-installing the clutch or flywheel. Use a special tool called a crankshaft locking tool (not included), which is installed in the glow plug hole.9.Do not use silicone sealer on the engine joints. Silicone sealercontains acetic acid, which is corrosive if it gets inside your engine.10.Do not allow any water inside the engine. This sounds easy, buttemperature changes can cause condensation inside the engine.This is a good reason to use an after-run oil. Store your engine inside the house, not in a garage or shed where there will be tem-perature extremes.If you are having problems with your engine consult the engine troubleshooting on the back page. The following are some poten-tial problems.Glow PlugThe glow plug is an item that will wear out and need replacement from time to time. It is a good idea to remove the glow plug before your first run, heat it and see how well it glows. You should see a bright orange glow from the filament. If a coil or two will not glow or the plug will not glow at all, replace the plug. If the engine quits when you remove the glow starter, the plug might need to be changed, although this may be because you are running too rich and need to screw in your high-speed needle some. Look at the glow plug when you are running the engine. If you see some bubbles coming from around the plug, replace the glow plug (copper) gasket, or both the plug and gasket. The only real way to test a glow plug is to replace it. Make sure you have a spare plug or two on hand when you run the engine.FuelFuel can go bad. The main ingredient in model fuel is methanol, which is basically an alcohol. Alcohols can absorb water out of the air, so keep your fuel jug capped at all times. Store your fuel out of the sunlight and in a cool place. Bad fuel is one of the most difficult problems to diagnose in engines. If you have tried everything you can think of to remedy an engine that is not running correctly, try using some fresh fuel.Fuel line is susceptible to pinhole leaks. You cannot see the hole in the fuel line, but if you see air bubbles in the line going to the carburetor, replace the fuel line. Another symptom of a leak in the fuel line is a surging engine. The properly tuned engine will surge when the air bub-bles hit the carb. It is basically leaning out the mixture.To keep dirt out of the engine, use an inline fuel filter on the fuel line running from the fuel tank to the carburetor. Dirt can get caught in the needle seat and cause an inconsistent running engine. If you suspect that some dirt has lodged itself in the carb, remove the needles and clean the carb with denatured alcohol or fuel. It can help to use com-pressed air to blow out the fuel passages as well. Dirt can get into your carburetor and engine through the air filter. Ensure that your air clean-er has a good seal to the top of the carb. Periodically wash the air cleaner foam element and re-oil the filter. Any air cleaner that has a torn element or a bad seal should be replaced immediately.OverheatingOne of the worst things you can do to your engine is overheat it. The oils that lubricate the engine are carried in the fuel. If your engine is set too lean, there will not be enough oil in the engine to lubricate the internal parts. This will cause premature wear in the engine and cause damage.ENGINE MAINTENANCEStock #Description...........................Includes DTXG0352Bearing Front.............................7x1pc DTXG0362Bearing Rear..............................8x1pc DTXG0380Carburetor Barrel.....................38x1pc DTXG0401Carburetor Boot / Dust Cover..39x1pc DTXG0411Carburetor Body.......................37x1pc DTXG0415Carburetor Barrel Spring..........42x1pc DTXG0460Carb Retainer & Nut......34,35,36x1pc DTXG0468Carburetor O-Ring ................51x2pcs DTXG0472Connecting Rod.........................2x1pc DTXG0496Coverplate for Recoil...............17x1pc DTXG0502Coverplate Gasket...................13x1pc DTXG0511Coverplate Screws.................32x4pcs DTXG0522Crankcase..................................1x1pc DTXG0535Crankshaft..................................3x1pc DTXG0553Cylinder Piston Set.................4,5x1pc DTXG0557Fuel Inlet Nozzle......................48x1pc DTXG0562Drive Washer...........................14x1pc DTXG0566Drive Washer Collet.................15x1pc DTXG0572Head Button...............................9x1pc DTXG0586Heatsink Head Black.................6x1pc DTXG0592Heatsink Head Gasket.............12x1pc DTXG0602Head Screws..........................33x4pcs DTXG0604Idle Needle...............................49x1pc DTXG0607Idle Needle O-Ring................50x2pcs DTXG0617Needle Socket..........................47x1pc DTXG0622Needle Valve............................45x1pc DTXG0630Needle O-Ring.........................46x1pc DTXG0635One-Way Bearing...............20,21x1pc DTXG0642Piston Pin.........................................10x1pc DTXG0655Piston Pin Retainers..............11x2pcs DTXG0752Recoil Starter......22,23,24,25,26,27,2829,30,31x1pc, 32x3pcs DTXG0762Start Shaft................................16x1pc DTXG0776Start Shaft Pin.........................19x1pc DTXG0782Start Shaft Spring....................18x1pc DTXG0802Throttle Arm........................40,41x1pc DTXG0811Throttle Stop Screw............43,44x1pc Optional:DTXG0442Carburetor Slide Valve........Not Shown DTXG0497Coverplate Standard...........Not Shown DTXG0587Heatsink Head Purple.........Not ShownExploded View and Parts ListPrinted in USAEntire Contents Copyright © 2000DTXZ2603 for DTXG0260。
Velocity用户手册---中文版
Velocity⽤户⼿册---中⽂版Velocity是什么?Velocity是⼀个基于java的模板引擎(template engine)。
它允许任何⼈仅仅简单的使⽤模板语⾔(template language)来引⽤由java代码定义的对象。
当Velocity应⽤于web开发时,界⾯设计⼈员可以和java程序开发⼈员同步开发⼀个遵循MVC架构的web站点,也就是说,页⾯设计⼈员可以只关注页⾯的显⽰效果,⽽由java程序开发⼈员关注业务逻辑编码。
Velocity将java代码从web页⾯中分离出来,这样为web站点的长期维护提供了便利,同时也为我们在JSP和PHP之外⼜提供了⼀种可选的⽅案。
Velocity的能⼒远不⽌web站点开发这个领域,例如,它可以从模板(template)产⽣SQL和PostScript、XML,它也可以被当作⼀个独⽴⼯具来产⽣源代码和报告,或者作为其他系统的集成组件使⽤。
Velocity也可以为Turbine web开发架构提供模板服务(template service)。
Velocity+Turbine提供⼀个模板服务的⽅式允许⼀个web应⽤以⼀个真正的MVC模型进⾏开发。
Velocity能为我们作什么?The Mud Store Example假设你是⼀家专门出售Mud的在线商店的页⾯设计⼈员,让我们暂且称它为“在线MUD商店”。
你们的业务很旺,客户下了各种类型和数量的mud订单。
他们都是通过输⼊⽤户名和密码后才登陆到你的⽹站,登陆后就允许他们查看订单并购买更多的mud。
现在,⼀种⾮常流⾏的mud正在打折销售。
另外有⼀些客户规律性的购买另外⼀种也在打折但是不是很流⾏的Bright Red Mud,由于购买的⼈并不多所以它被安置在页⾯的边缘。
所有⽤户的信息都是被跟踪并存放于数据库中的,所以某天有⼀个问题可能会冒出来:为什么不使⽤velocity来使⽤户更好的浏览他们感兴趣的商品呢?Velocity使得web页⾯的客户化⼯作⾮常容易。
《Velocity Web应用开发指南中文版》
《V elocity1.4使用指南中文版》中文版来源声明:转载请保留此页声明**************************************************************************此文档为蓝杰实训学员拓展实训之用.蓝杰实训不对译文中某些说法可能会对您的系统或开发造成损害负责.如对您有所帮助,我们不胜荣幸!*************************************************************************本文属中的Velocity中文系列,本系包含如下文章:《Velocity Java开发指南中文版》(Developer`s Guide)《Velocity模板使用指南中文版》(User`s Guide)《Velocity Web应用开发指南中文版》(Web Application Guide)《VTL语法参考指南中文版》(VTL Reference)《DB4O中文系列之起步篇》...更多资料请访问/下载.**************************************************************************译者:javaFoundMail:javafound@@*************************************************************************目录1.使用Velocity构建Web应用 (3)e a Framework (3)3.Web应用用例 (3)4.不要改变己输出对象的状态! (4)5.HTML/XML字符转义 (4)6.应用安全性 (5)7.日志文件 (5)8.布署指南 (5)1.使用Velocity构建Web应用Velocity常见的用途是生成web页面,通常用来替换JSP技术.使用它生成页面有以下优势:∙简洁–一般的web美工不需要懂程序语言的就可以设计动态业面.∙Web系统容易维护–MVC推荐的做法是在页面中不要存在其它的脚本语言出现..∙容易访问数据模型的命令和属性–页面设计者通过引用简单的就可访问context中的java数据对象.∙一致性–Velocity可用做其它的文本模板生成任务,如如发送email.本文讲解了将Velocity应用与web应用的一些基本方法.e a FrameworkVelocity的主要目标是通过模板生成格式文档.因此,Velocity自身不提供任何Web相关的功能.当你需要开发Web应用时,需要一个框架来接收HTTP请求和,处理用户认证,执行业务逻辑调用,最后生成应答内容返回给客户端。
velocity中文手册
Velocity用户指南什么是Velocity?Velocity是基于Java的模板引擎。
它允许Web页面开发者引用Java代码中定义的方法。
Web设计者可以和Java程序开发者并行开发遵循MVC模式的Web 站点。
这意味着,Web设计者可以将精力放在好的Web站点设计上,而Java 程序开发者可以将精力放在编写代码上。
Velocity将Java代码从Web页面中分离,使Web站点更具长期可维护性,并提供了一种替代JSP或PHP的方案。
VTL(Velocity Template Language)介绍VTL提供一种简单、容易和干静的方法将动态内容合并到Web页面。
VTL使用引用(references)将动态内容插入到Web页面中。
变量是一种引用,可以指向Java代码中的定义内容,或者由Web页面中的VTL语句来获得值。
下面是一个可以插入到HTML文档的VTL语句的例子:#set( $a = "Velocity" )VTL语句以#开头,并包含指令(set)。
变量以$开头,用引号引起。
引号可以是单引号,也可以是双引号。
前者引用具体的String值;后者可以包含Velocity 引用,例如”hello, $name”,$name会用其当前的值替换。
上面的例子是将值Velocity赋值给变量a。
当变量被赋值后,就可以在HTML文档的任何地方引用,下面是Hello Velocity World!的例子:<html><body>#set( $foo = "Velocity" )Hello $foo World!</body><html>注释VTL支持单行注释(以##开始)和多行注释(包括在#*和*#之间),下面是一个例子:This text is visible. ## This text is not visible.This text is visible.This text is visible. #* This text, as part of a multi-line comment,is not visible. This text is not visible; it is also part of themulti-line comment. This text still not visible. *# This text is outsidethe comment, so it is visible.## This text is not visible.引用VTL有3种类型的引用:变量、属性和方法。
PETREL操作手册文字版(中文)
备注:
单击菜单栏中File (选择 Import File) 或单击工具栏中Import File 按钮也可 以载入数据.
4. 弹出输入数据对话框,定义文件名,类 别,单位.
1.3 属性,深度/时间,厚度域的色标
为了达到数据的最佳显示,定义颜色模板很重要. 对于同类数据对象Petrel拥有多种模 板描述色标的参数设置.例如:属性、深度/时间、厚度.
1 载入数据
PETREL 允许用户载入各种格式的数据,例如Irap Classic, Irap RMS, CPS-3, Earthvision, Stratamodel, VIP, LAS, Eclipse, Zmap+ 和 Charisma, 也可以载入 SEG-Y 格式的数据. 检查输入数据的质量对于载入数据很重要, PETREL 拥有强大的可视化工具,同时对 于载入的对象生成一个统计报告表.
单击petrel资源管理器中velocitymodels文件夹用户可以打开一个菜单加入一个新的速度模只有处于击活状态的速度模型参与时深转换的处理
目录
1 载入数据 1.1 添加新文件夹 1.2 载入数据 1.3 属性、深度/时间和厚度的色标 1.4 质量控制 地震解释 2.1 断层解释 2.2 层位追踪 井相关 3.1 2D面板下的井相关 3.2 3D窗口下的井相关 创建/编辑井分层 4.1 创建井分层 定义模型 建立断层模型 6.1 使用 Key Pillars定义模型 6.2 编辑 Key Pillars Pillar Gridding 7.1 Pillar Gridding的处理步骤 7.2 网格构架的质量控制 创建层面网格 8.1 创建层面网格 时深转换 9.1 时深转换的处理步骤 9.2 使用井分层进行时深转换 划分地层 10.1 划分地层 10.2 截面的可视化和质量控制 10.3 输出 细分地层 11.1 细分地层 编辑3D网格 12.1 更新3D网格 12.2 3D网格的手动编辑 创建油气水接触关系 13.1 创建油气水接触关系 13.2 接触关系的可视化
KB Velocity O Curve Setting 5.3 产品说明说明书
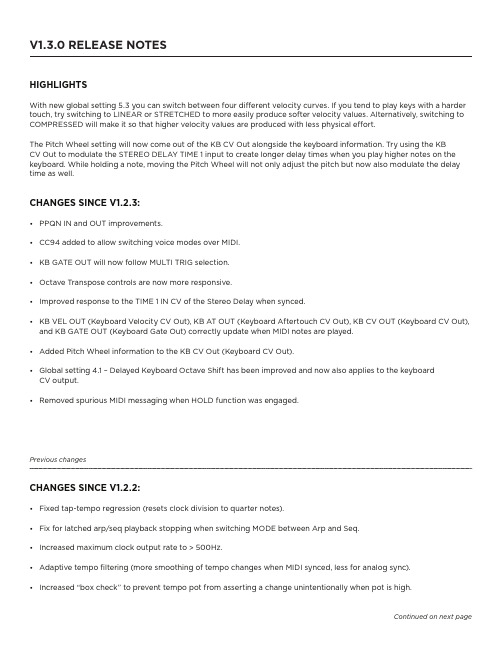
HIGHLIGHTSWith new global setting 5.3 you can switch between four different velocity curves. If you tend to play keys with a harder touch, try switching to LINEAR or STRETCHED to more easily produce softer velocity values. Alternatively, switching to COMPRESSED will make it so that higher velocity values are produced with less physical effort.The Pitch Wheel setting will now come out of the KB CV Out alongside the keyboard information. Try using the KBCV Out to modulate the STEREO DELAY TIME 1 input to create longer delay times when you play higher notes on the keyboard. While holding a note, moving the Pitch Wheel will not only adjust the pitch but now also modulate the delay time as well.CHANGES SINCE V1.2.3:• PPQN IN and OUT improvements.• CC94 added to allow switching voice modes over MIDI.• KB GATE OUT will now follow MULTI TRIG selection.• Octave Transpose controls are now more responsive.• Improved response to the TIME 1 IN CV of the Stereo Delay when synced.• KB VEL OUT (Keyboard Velocity CV Out), KB AT OUT (Keyboard Aftertouch CV Out), KB CV OUT (Keyboard CV Out), and KB GATE OUT (Keyboard Gate Out) correctly update when MIDI notes are played.• Added Pitch Wheel information to the KB CV Out (Keyboard CV Out).• Global setting 4.1 – Delayed Keyboard Octave Shift has been improved and now also applies to the keyboard CV output.• Removed spurious MIDI messaging when HOLD function was engaged.Previous changesCHANGES SINCE V1.2.2:• Fixed tap-tempo regression (resets clock division to quarter notes).• Fix for latched arp/seq playback stopping when switching MODE between Arp and Seq.• Increased maximum clock output rate to > 500Hz.• Adaptive tempo filtering (more smoothing of tempo changes when MIDI synced, less for analog sync).• Increased “box check” to prevent tempo pot from asserting a change unintentionally when pot is high.Continued on next pageCHANGES SINCE V1.2.0:• Added clock-input jitter reduction:• Fixes missed/dropped Clock Out pulses when synced to USB MIDI clock• Fixes pitch warble in analog delay when delay is synced to USB MIDI clock• Arp/Seq switches automatically from MIDI Sync to Internal Clock when MIDI clock is stopped.• Delay Spacing works correctly when SYNC is on.• Turning off SUSTAIN/HOLD doesn’t end notes that should stay on.• Increased hardware timeout between gate re-triggers (from 2ms to 4ms) to prevent outlying instances of stuck envelopes in Multi Trig mode.• Fixed Delay Tap Tempo.CHANGES SINCE V1.1.0:• Synchronization and Timing Engine update - Analog Clock in/out and MIDI Clock all remain tightly in phase now, eliminating the possibility of drift between these clocks which was present in earlier firmware.• New function when step recording: hold SHIFT + press the TIE button to duplicate the current step. This function copies the note(s) from the current step to the next step and ties them together, advancing the sequence by one step for each SHIFT + TIE press. This makes it easy to program longer notes and chords into your sequences.• New Global setting (5.1) “Arp/Seq CV Out Mirrors KB CV”: If ON, then the Arp/Seq CV OUT, GATE OUT, and VEL OUT jacks on the front panel will output the same voltages as the rear-panel KB CV OUT, KB GATE OUT, and KB VEL OUT jacks, whenever the Arp/Sequencer is not running.• New Behavior: HOLD button acts like a Sustain Pedal (KB Hold) when Arp/Seq is not running.• The default setting for CLOCK INPUT PPQN and CLOCK OUTPUT PPQN was changed from expecting/outputting a clock every 8th note, to expecting/outputting a clock every 16th note (changed from 2 PPQN to 4 PPQN).• Arp/Sequencer Gate Length can be adjusted using MIDI CC 106. Value 64 = 50% gate length (default).• Matriarch no longer outputs unexpected streams of MIDI CC/NRPN data.• PPQN In/Out settings now match documentation in manual.• External Analog Clock overrides MIDI Sync.• Arp/Seq PLAY button does not output MIDI CC 73 (can still respond to it if necessary).• Improves compatibility with other Grandmother/Matriarchs.• Changed MIDI Clock Output default setting to “Off”.• Fix for stuck envelopes (was due to retriggering faster than a certain minimum, easy to do in multi-trig mode).• Can now edit global settings via MIDI SysEx messages (documented below).NEW GLOBAL SETTINGS AND FUNCTIONS:5.3 MIDI Velocity CurvesGLOBAL SETTINGSMost Matriarch front-panel controls relate to creating sound. Below the surface, there is another level of parameters known as the Global Settings, which determine how the instrument operates, and howit can connect and interact with other electronic instruments and audio equipment.To access Matriarch’s Global Settings, simultaneously press and hold the HOLD [SHIFT] buttonlocated in the Left-Hand Controller and the SYNC ENABLE button located in Oscillator 1 until theSYNC ENABLE button begins to blink. This indicates that Matriarch is in the Global Settings edit mode. Now you can use the keyboard commands listed below to make any needed changes to the Global Settings. The SYNC ENABLE button will blink a specific number of times to indicate which Global Setting is currently selected. When you have finished making any changes, simply press the SYNC ENABLE button to exit the Global Settings edit mode.Once you are in the Global Settings edit mode, you can freely select different groups and parameters using the black keys, and can switch the value of the selected parameters by using the white keys, until you press the SYNC ENABLE button to exit. Double-tapping on a white key will both update the setting and exit the Global Settings edit mode simultaneously.NOTE: Global Settings are retained even when the power has been turned off.HERE’S HOW IT WORKS:Global Settings are organized in groups of ten. An individual parameter in the chosen group is selected using one of the lower 10 black keys, starting with C#0. The white keys, starting with C0, are used to set the value of the chosen parameter. The first 10 parameters are in the default group, and no group selection is required. Additional groups are selected using one of the upper black keys, starting with C#2. To access these additional parameters, hold down the Group Select key while pressing the individual Parameter Select key.KNOWN OUTSTANDING ISSUES AS OF V1.3.0:• Global: Delay Sync CV Bend - Can be stepped/quantized when it should be smooth and continuous.• Global: Keyed Timing Reset - Does not work while HOLD is active.• Global: Sequence Keyed Restart - Seems to have no effect.• Global: Sequence Random Repeat - Seems to have no effect.• Global: Load Default Settings - After performing this command, global mode acts like A#3 is constantly being held down. Globals don’t work again until power cycle.• Send Program Change - Seems to have no effect.• Paraphonic Mixer Gate Length - Mixer gate can stay high longer than keys are pressed.• ARP sends Sustain CC while Hold is active - HOLD should send sustain CC when Arp/Seq is inactive.。
Velocity基本语法及实现客户端和服务器端模板
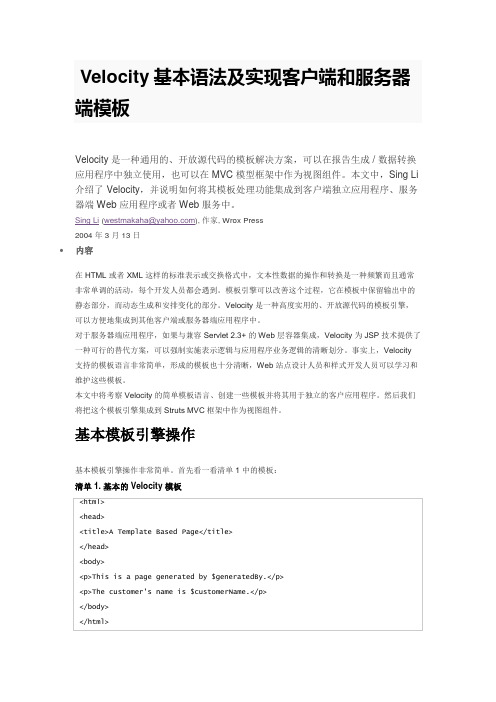
Velocity基本语法及实现客户端和服务器端模板Velocity 是一种通用的、开放源代码的模板解决方案,可以在报告生成 / 数据转换应用程序中独立使用,也可以在 MVC 模型框架中作为视图组件。
本文中,Sing Li 介绍了 Velocity,并说明如何将其模板处理功能集成到客户端独立应用程序、服务器端 Web 应用程序或者 Web 服务中。
Sing Li (westmakaha@), 作家, Wrox Press2004 年 3 月 13 日内容其他有趣的 VTL 细节单行注释或者行尾注释从##开始,多行注释则放在#*和*#之间。
在处理字符串数据时,可以使用双引号或单引号分隔。
但是使用双引号允许在分隔的字符串内部对Velocity 引用、指示符甚至 Velocimacros 求值。
回页首Velocity 上下文您可以把 Velocity 中的上下文看作是导入 Java 对象,以便在 Velocity 模板内部访问的一种方法。
这种导入必须在 Java 编码中明确地完成。
和 JSP 代码或者 JavaScript 不同,不存在“自然的”或“原生方式”使 Velocity 访问任何 Java 对象。
只有明确导入的 Java 对象才能在 Velocity 模板中使用。
通过创建org.apache.velocity.context.Context类的实例可以获得 Velocity 上下文。
然后可以使用上下文的put( key, value) 方法,把将要导入供模板使用的对象附加到上下文中。
key 是一个字符串名,将在模板中作为可用的引用出现。
在产品环境中,图形或java -classpath ..\classes;%VEL_HOME%\velocity-dep-1.4-rc1.jarcom.ibm.dvworks.velocity.VelocityParser %1 %2 %3注意,必须同时在compile.bat和process.bat中把环境变量VEL_HOME设置成安装 Velocity 的目录。
Velocity Intel CPU 水晶块用户手册说明书
This product is intended for installation only by expert users. Pleaseconsult with a qualified technician for installation. Improper installation mayresult in damage to your equipment. EK Water Blocks assumes no liabilitywhatsoever, expressed or implied, for the use of these products, nor theirinstallation. The following instructions are subject to change withoutnotice. Please visit our website at for updates. Beforeinstallation of this product, please read important notice, disclosure, andwarranty conditions that are printed on the back of the box.Before you start using this product, please follow these basic guidelines:Please carefully read the manual before beginning the installationprocess.Please remove your graphics card from the computer to assure thesafest mounting process and prevent any possible damage to yourGPU and/or graphics card circuit board (PCB).The EK Fittings require only a small amount of force to screwthem firmly in place since the liquid seal is ensured by the rubberO-ring gaskets.The use of corrosion inhibiting coolants is always recommendedfor liquid cooling systems, and mandatory for nickel platedwater blocks!Do not use pure distilled water! For best results EK rrecommendsthe use of EK-CryoFuel coolants.Make sure to thoroughly bleed air out of your water block, or you willnot reach optimal performance.TABLE OF CONTENTGENERAL INFORMATION ON WATER BLOCK COMPATIBILITY 4 BOX CONTENTS 5 WATER BLOCK DIMENSIONS 6 TECHNICAL SPECIFICATIONS AND WATER BLOCK PARTS 7SUPPORT AND SERVICE 18 SOCIAL MEDIA 18GENERAL INFORMATION ON WATER BLOCK COMPATIBILITYThis CPU liquid cooling unit is pre-assembled for use with modern Inteldesktop socket type motherboards. By default (out of the box) this waterblock supports the following CPU sockets:- Intel LGA-1150/1151/1155/1156- Intel LGA-1200- Intel LGA-2011(-3)- Intel LGA-2066Washer (5 pcs)Spring (4 pcs)Standoff - LGA 115x / AMD (4 pcs)BOX CONTENTSStandoff - 20xx (4 pcs) EK-Velocity universal CPU water block with the Intel bracket (1 pc)Allen Key 2.5 mm (1 pc)Thumb Nut (4 pcs)EK-Loop Intel CPU Backplate M4 (1 pc)Additional Jet Plate – 0.8 mm (1 pc)Thermal grease (1 pc)Universal Mounting Mechanism – You may not need every screw from this package. EAN: 3831109813065WATER BLOCK DIMENSIONSTECHNICAL SPECIFICATIONS AND WATER BLOCK PARTSTechnical Specification:- Dimensions (L x H x W): 91 x 91 x 22 mm - D-RGB cable length: 500 mm - D-RGB LED count: 20- D-RGB connector standard 3-pin (+5V, Data, Blocked, Ground)- Dimensions (L x H x W): 91 x 91 x 22 mm- D-RGB cable length: 500 mm- D-RGB LED count: 1- D-RGB connector standard 3-pin (+5V, Data, Blocked, Ground)REPLACING THE JET PLATE PROCEDURESTEP 1Please reference the table below to determine the optimal insert andjet plate needed for your type of socket.J1d= 1 mm J2d= 0.8 mmSTEP 2Unscrew the four M4 screws in counter-clock-wise direction from the bottom of the water block using the enclosed 2.5 mm Allen key to release the assembly, which consists of the water block top and jet plate. Upon replacing the jet plate, please reassemble the water block as shown in STEP 1 and STEP 2. Pay special attention to the insert orientation relative to the copper base and the water block top.Screw the four screws back in firmly, but not forcefully.INSTALLING THE WATER BLOCKBACKPLATESTEP 1 – NEW BACKPLATEInstall the Intel backplate for LGA-115x/1200 socket to the back of your motherboard. Align the holes on the motherboard with the holes on the backplate.STEP 2 – NEW BACKPLATEInstall four (4) M3 thumb screws onto your motherboard. It is mandatory to put 0.7mm plastic washer underneath each of the M3 thumb screws. Tighten the screws to the metal backplate until you reach the end of the thread. Using tools (such as pliers) is not recommended.BACKPLATESTEP 1 – OLD BACKPLATEIf already installed, please remove the motherboard from your computer and place it on an even surface with front facing down. STEP 2 – OLD BACKPLATEPreparing backplate rubber gasketThe enclosed rubber gasket is an essential part of the backplate and mounting system and must be used every time you install this water block on your motherboards.CONNECTING THE RGB LED STRIP (Optional)STEP 4 – OLD BACKPLATEInstall four (4) M3 thumb screws onto your motherboard. It is mandatory to put 0.7mm plastic washer underneath each of the M3 thumb screws. Tighten the screws to the metal backplate until you reach the end of the thread. Using tools (such as pliers) is not recommended.SUPPORT AND SERVICEIn case you need assistance or wish to order spare parts or a new mounting mechanism, please contact:https:///customer-support/For spare parts orders, refer to the page with “TECH NICAL SPECIFICATIONS AND WATER BLOCK PARTS” where you can find the EAN number of each part you might need.Include the EAN number with quantity in your request. Mounting Mechanism EAN can be found under “BOX CONTENTS”Thermal pads are readily available in the EK shop SOCIAL MEDIAEKWaterBlocks@EKWaterBlocksekwaterblocksEKWBofficialekwaterblocks。
BUNN BXB Velocity Brew Coffee Maker 用户手册说明书
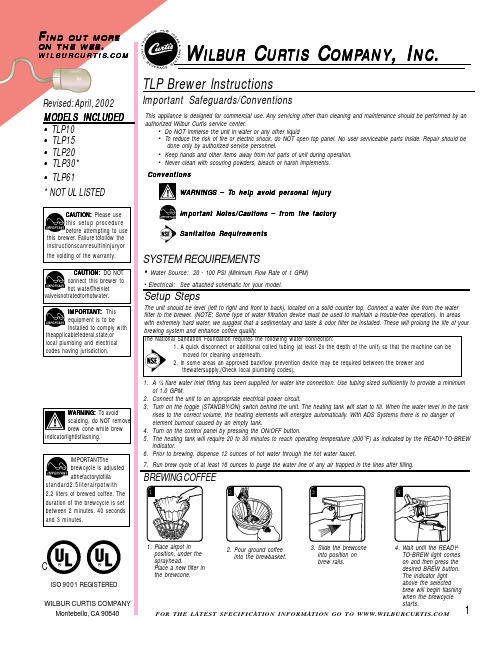
standard 2.2 liters of brewed coffee. The duration of the brewcycle is set between 2 minutes, 40 seconds Water Source:• Electrical: Setup StepsThe unit should be level (left to right and front to back), located on a solid counter top. Connect a water line from the waterfilter to the brewer. (NOTE: Some type of water filtration device must be used to maintain a trouble-free operation). In areas with extremely hard water, we suggest that a sedimentary and taste & odor filter be installed. These will prolong the life of your brewing system and enhance coffee quality.The National Sanitation Foundation requires the following water connection:1. A quick disconnect or additional coiled tubing (at least 2x the depth of the unit) so that the machine can be Revised: April, 2002MODELS INCLUDED W I L ISO 9001 REGISTERED this brewer. .instructions the voiding of the warranty.SYSTEM REQUIREMENTSTLP Brewer InstructionsImportant Safeguards/ConventionsWILBUR CURTIS COMPANY Montebello, CA 906401. A ¼ flare water inlet fitting has been supplied for water line connection. Use tubing sized sufficiently to provide a minimum of 1.0 GPM,2.Connect the unit to an appropriate electrical power circuit.3.Turn on the toggle (STANDBY/ON) switch behind the unit. The heating tank will start to fill. When the water level in the tank rises to the correct volume, the heating elements will energize automatically. With ADS Systems there is no danger of Place airpot in position, under the sprayhead.Place a new filter in the brewcone.2.Pour ground coffee into the brewbasket.3.Slide the brewcone into position on brew rails.4.Wait until the READY-TO-BREW light comes on and then press the desired BREW button.The indicator light above the selected brew will begin flashing when the brewcycle starts.indicator valve i s n ot the a pplicable local plumbing and electrical codes having jurisdiction.This appliance is designed for commercial use. Any servicing other than cleaning and maintenance should be performed by an authorized Wilbur Curtis service center.• Do NOT immerse the unit in water or any other liquid• To reduce the risk of fire or electric shock, do NOT open top panel. No user serviceable parts inside. Repair should be 1234FOR THE LATEST SPECIFICATION INFORMATION GO TO STEPS TOPROGRAMMINGYour Curtis ADS System is Factory Pre-Set for Optimum Performance. Generally, There Will Not be a Need to Change Programming.ON/OFF Button (Yellow)CHANGING THE DELTA FEATURE!! By pressing and holdingChanging the ADS System ProgramYour ADS System features a dynamic memory. In the event of a power loss, it will remember ALL program settings.. Brew temperature will be indicated by READY-TO-BREW light blinking.! Press for two seconds, then RELEASE.!will start blinking. Each blink equals 2º F, starting at 170º (max. temp. 204º F or 18 blinks).!.!will start QUICK flashing. Each QUICK flash equals 2º F. After reaching 204º, temperature starts over at 170º.! T CONFIRM/RESET BREW TEMPERATURE - Factory Preset to 200ºWARNING: Steps involve workingwith hot water. Scalding may occur. Take care against spilling.The Half Brew button is always half of the brewtime of the setting of the Full Brew button. You cannot program the Half Brew.Change the brew volume of your ADS System by following these steps.Before changing the brew volume, wait until unit reaches brew temperature (Ready to Brew light comes on), insert the brewcone into place on the brewer, then place a measuring container centered beneath the brewcone.Brew Volume - Factory Pre-set Full Brew to 2.2 Liters!!!CHANGE BREW VOLUME(When programming the brewer for volume, it is important to realize that after you program the unit, it must reach full brew temperature before it will allow you to brew.)BREW CYCLE COUNTERTO ACCESS BREW CYCLE COUNTERENTER THE PROGRAMMING MODE #2:!will now start a pattern of LONG and SHORT blinks.This pattern identifies the number of brew cycles. SHORT blinks indicate the brew number from one [1] to nine [9]. LONG blinks separate the 1’s, 10’s, 1,000’s and 10,000’s.DELTA 1 (this is factory setting) allows you to brew within 5 degrees from set temperature. This provides for consistent brew temperature and consistent water density. If Delta 1 is used, run half brew first,discard water. Program to ½" below collar of airpot (one small finger width).DELTA 2 allows you to brew within 10 degrees from set temperature. If Delta 2 is used, run half brew first and discard water. Program to ¾" below collar of airpot (between one and two small finger widths).DELTA 3 will allow you to brew at any temperature. Back to back brewing is only possible in this mode (120V). If Delta 3 is used, run half brew first and discard water. Program to 1” below collar of airpot (two smallfinger widths). The brew cone must be empty without a filter. This will ensure proper operation at all brew rates.During back to back brew cycles the water temperature in the tank will start to drop, as these brew cycles increase the water gets cooler. With cooler water in the tank the density changes and the flow rate will increase. Typically an increased flow rate may translate into a maximum increase of 4 ounces in the airpot.LOW TEMPERATURE BREW LOCKOUT (Delta) - Factory Preset to Delta 3** Suggested Parts ListCONE, UNIVERSAL BREW 7 1/8 BLK PLASTIC BREWCONE W/BASKET, S/S STD 7 1/8MEMBRANE, CONTROL PANEL CURTIS SENSOR, HEATING TANKSPRAYHEAD ASSY, ADVANCED FLOW ORANGE FITTING, SPRAYHEAD ASSY RESTRICTOR, ELBOW PP REDINLET VALVE REPAIR (FOR WC-826, WC-825)CONTROL BOARD, 120V TLP (Models 10, 20, 15, 61)CONTROL BOARD, 220V TLP (Model 30)PUMP, WATER CENTRIFUGAL 120V 60 Hz (Models 10, 20, 15, 61)PUMP, WATER CENTRIFUGAL 220V 60 Hz (Model 30)VALVE, LIQUID DISPENSING LEFT 120V 12W (Models 10, 20, 15, 61)VALVE, LIQUID DISPENSING LEFT 220VAC 12W (MODEL 30)COMPOUND, SILICONE 5 OZ TUBELEG, SCREW BUMPER 3/8” - 16 STUDSWITCH, TOGGLE SPST 25A 250VAC RESISTIVE (Models 10, 20)SWITCH, TOGGLE DPST 25A 125/250 VAC RESISTIVE (Models 15, 30, 61)VALVE INLET 1.15 GPM 120V 10W (Models 10, 20, 15, 61)25WC-8591CAPACITOR, X28A24PARTS DIAGRAMS14425ELECTRICAL SCHEMATICFOR THE LATEST SPECIFICATION INFORMATION GO TO 45/28/02 . 14.8 . edr 3368 Rev NCPrinted in U.S.A. 4/02 F-3206-S Rev NCWARRANTYWe hereby certify that the products manufactured by the Wilbur Curtis Company, Inc., are, to thebest of our knowledge, free from all defects and faulty workmanship.The following warranties and conditions are applicable:• 90 Days for Labor and 1 90 Days for Labor and 1 Y Y ear P ear Parts from Da arts from Da arts from Date of Purchase from F te of Purchase from F te of Purchase from Factor actor actory:y:y: This warranty covers all electrical parts, fittings and tubing.• 40 Months or 40, 000 Pounds of Coffee on a set of Grinding Burrs. (ADS Grinders)• 2 • 2 YY ears from Da ears from Date of Purchase:te of Purchase:te of Purchase: This warranty covers electronic control boards and leaking or pitting of a stainless steel body of a Brewer or Urn.• 90 Days from Date of Purchase: 90 Days from Date of Purchase: On replacement parts that have been installed on out of warranty equipmentAll in-warranty service calls must have prior authorization from the manufacturer. For an RMA (Return Merchandise Authorization) number, call the Technical Service Department at 1-800-995-0417. The Wilbur Curtis Company will allow up to 100 miles, round trip, per in-warranty service call.CONDITIONS & EXCEPTIONSThe warranty covers original equipment at time of purchase only. The Wilbur Curtis Company, Inc., assumes no responsibility for substitute replacement parts installed on Curtis equipment that have not been purchased from the Wilbur Curtis Company. Inc The Wilbur Curtis Company will not accept any responsibility if the following conditions are not met. The warranty does not cover and is void under these circumstances:1) Improper operation of equipment. The equipment must be used for its designed and intended purpose and function.2) Improper installation of equipment. This equipment must be installed by a professional, certified technician and must comply with all local electrical, mechanical and plumbing codes.3) Wilbur Curtis Company will not be responsible for the operation of equipment at other than the stated voltages on the serial plate.4) Abuse or neglect (including failure to periodically clean or remove lime accumulations). Manufacturer is not responsible for variation in equipment operation due to excessive lime or local water conditions.5) Replacement of items subject to normal use and wear. This shall include, but is not limited to, light bulbs, shear disks, “0” rings, gaskets, canister assemblies. whipper chambers and plates, mixing bowls, agitation assemblies and whipper propellers.6) Any faults resulting from inadequate water supply. This includes, but is not limited to, excessive or low water pressure, and inadequate or fluctuating water flow rate.7) All repairs and/or replacements are subject to our decision that the workmanship or parts were faulty and the defects showed up under normal use.8) All labor shall be performed during regular working hours. Overtime charges are the responsibility of the owner.9) Charges incurred by delays, waiting time, or operating restrictions that hinder the service technician’s ability to perform service is the responsibility of the owner of the equipment.This includes institutional and correctional facilities.10) All claims under this warranty must be submitted to the Wilbur Curtis Company Technical Service Department before return of the unit to the factory.11) All equipment returned to us must be repackaged properly in the original carton. No units will be accepted if they are damaged in transit due to improper packaging.12) Damaged in transit.13) The resetting of safety thermostats and circuit breakers, programming and temperature adjustments are the responsibility of the equipment owner.NO UNITS OR PARTS WILL BE ACCEPTED WITHOUT A RETURN MERCHANDISE AUTHORIZATION (RMA). RMA NUMBER MUST BE MARKED ON THE CARTON OR SHIPPING LABEL.All in-warranty service calls must be performed by an authorized service center, where service is available. Call the factory for location near you.WILBUR CURTIS CO., INC.6913 Acco St., Montebello, CA 90640-5403 USA Phone: 800/421-6150 Fax: 323-837-2410TechnicalServicePhone:800/995-0417(M-F5:30A-4:00PPST)E-Mail:**************************** Web Site: 。
Velocity用户手册
Velocity用户手册-摘抄Velocity的能力远不止web站点开发这个领域,例如,它可以从模板(template)产生SQL和PostScript、XML,它也可以被当作一个独立工具来产生源代码和报告,或者作为其他系统的集成组件使用。
Velocity也可以为Turbine web开发架构提供模板服务(template service)。
Velocity+Turbine提供一个模板服务的方式允许一个web应用以一个真正的MVC模型进行开发。
Velocity能为我们作什么?The Mud Store Example假设你是一家专门出售Mud的在线商店的页面设计人员,让我们暂且称它为“在线MUD商店”。
你们的业务很旺,客户下了各种类型和数量的mud订单。
他们都是通过输入用户名和密码后才登陆到你的网站,登陆后就允许他们查看订单并购买更多的mud。
现在,一种非常流行的mud正在打折销售。
另外有一些客户规律性的购买另外一种也在打折但是不是很流行的Bright Red Mud,由于购买的人并不多所以它被安置在页面的边缘。
所有用户的信息都是被跟踪并存放于数据库中的,所以某天有一个问题可能会冒出来:为什么不使用 velocity来使用户更好的浏览他们感兴趣的商品呢?Velocity使得web页面的客户化工作非常容易。
作为一个web site的设计人员,你希望每个用户登陆时都拥有自己的页面。
你会见了一些公司内的软件工程师,你发现他们每个人都同意客户应该拥有具有个性化的信息。
那让我们把软件工程师应该作的事情发在一边,看一看你应该作些什么吧。
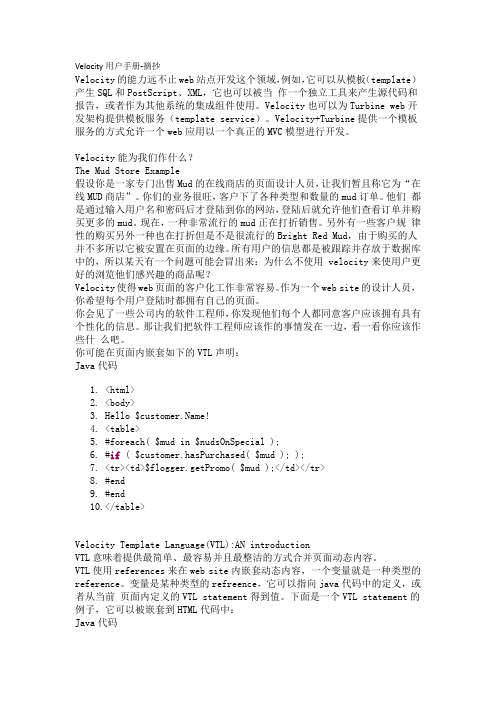
你可能在页面内嵌套如下的VTL声明:Java代码1.<html>2.<body>3.Hello $!4.<table>5.#foreach( $mud in $nudsOnSpecial );6.#if ( $customer.hasPurchased( $mud ); );7.<tr><td>$flogger.getPromo( $mud );</td></tr>8.#end9.#end10.</table>Velocity Template Language(VTL):AN introductionVTL意味着提供最简单、最容易并且最整洁的方式合并页面动态内容。
velocity
Velocity是一种模板语言,它的作用、好处等可以找到很多资料,下面我们分二次来进行简单实践,第一部份是hello world 。
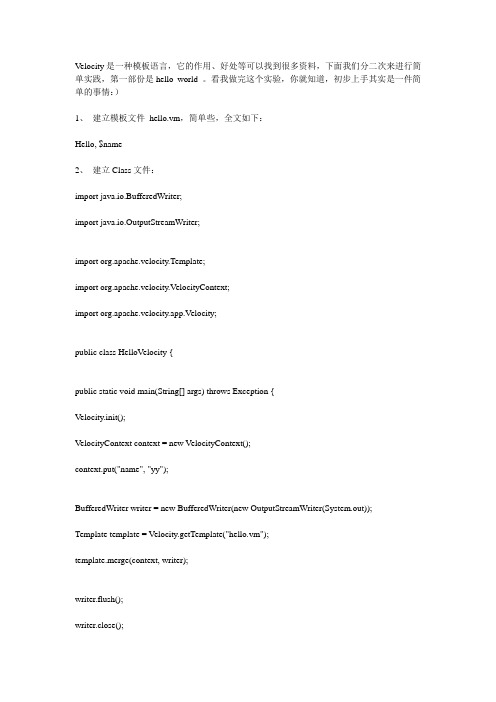
看我做完这个实验,你就知道,初步上手其实是一件简单的事情:)1、建立模板文件hello.vm,简单些,全文如下:Hello, $name2、建立Class文件:import java.io.BufferedWriter;import java.io.OutputStreamWriter;import org.apache.velocity.Template;import org.apache.velocity.VelocityContext;import org.apache.velocity.app.Velocity;public class HelloVelocity {public static void main(String[] args) throws Exception {Velocity.init();VelocityContext context = new VelocityContext();context.put("name", "yy");BufferedWriter writer = new BufferedWriter(new OutputStreamWriter(System.out));Template template = Velocity.getTemplate("hello.vm");template.merge(context, writer);writer.flush();writer.close();}}让Class文件运行起来,注意把vm文件放在工作目录下,看看,输出是不是hello,yy J过程是这样的:初始化–获取context –context 输出对像给值–获取模板文件–写模板文件–关闭资源到这里半懂不懂的吧,没关系,我们毕竟让它跑起来了,接着来第二次实验。
- 1、下载文档前请自行甄别文档内容的完整性,平台不提供额外的编辑、内容补充、找答案等附加服务。
- 2、"仅部分预览"的文档,不可在线预览部分如存在完整性等问题,可反馈申请退款(可完整预览的文档不适用该条件!)。
- 3、如文档侵犯您的权益,请联系客服反馈,我们会尽快为您处理(人工客服工作时间:9:00-18:30)。
Velocity用户指南什么是Velocity?Velocity是基于Java的模板引擎。
它允许Web页面开发者引用Java代码中定义的方法。
Web设计者可以和Java程序开发者并行开发遵循MVC模式的Web 站点。
这意味着,Web设计者可以将精力放在好的Web站点设计上,而Java 程序开发者可以将精力放在编写代码上。
Velocity将Java代码从Web页面中分离,使Web站点更具长期可维护性,并提供了一种替代JSP或PHP的方案。
VTL(Velocity Template Language)介绍VTL提供一种简单、容易和干静的方法将动态内容合并到Web页面。
VTL使用引用(references)将动态内容插入到Web页面中。
变量是一种引用,可以指向Java代码中的定义内容,或者由Web页面中的VTL语句来获得值。
下面是一个可以插入到HTML文档的VTL语句的例子:#set( $a = "Velocity" )VTL语句以#开头,并包含指令(set)。
变量以$开头,用引号引起。
引号可以是单引号,也可以是双引号。
前者引用具体的String值;后者可以包含Velocity 引用,例如”hello, $name”,$name会用其当前的值替换。
上面的例子是将值Velocity赋值给变量a。
当变量被赋值后,就可以在HTML文档的任何地方引用,下面是Hello Velocity World!的例子:<html><body>#set( $foo = "Velocity" )Hello $foo World!</body><html>注释VTL支持单行注释(以##开始)和多行注释(包括在#*和*#之间),下面是一个例子:This text is visible. ## This text is not visible.This text is visible.This text is visible. #* This text, as part of a multi-line comment,is not visible. This text is not visible; it is also part of themulti-line comment. This text still not visible. *# This text is outsidethe comment, so it is visible.## This text is not visible.引用VTL有3种类型的引用:变量、属性和方法。
作为一个设计者,必须和Java工程师在VTL引用的名称(标识符)上一致,以便在模板中使用它们。
引用是作为String对象处理的。
(1)变量变量的格式:$VTL标识符VTL标识符以字母开始,由字母、数字、横划线(-)或下划线(_)组成。
变量或者从模板中的set指令获得值(如前面的例子),或者Java代码(同名变量)中获得值。
Velocity只处理已定义的变量引用,对于没有定义的变量引用,Velocity 原样返回。
例如下面的例子:#set( $foo = "gibbous" )$moon = $foo输出结果是:$moon = gibbous(2)属性属性的格式:$VTL标识符. VTL标识符下面是属性引用的例子:$customer.Address$purchase.Total拿第一例子来说,有两种意思:●返回Hashtable对象customer中键值为Address的值●$customer.getAddress()方法引用的缩写(JavaBean属性的getter方法)至于是哪种情况,Velocity会做决定,返回合适的值。
(3)方法方法的格式:$VTL标识符(参数列表)下面是方法引用的例子:$customer.getAddress()$purchase.getTotal()$page.setTitle( "My Home Page" )$person.setAttributes( ["Strange", "Weird", "Excited"] )前面两个例子可以缩写成属性引用(如属性引用的例子)。
属性引用和方法引用的主要区别是方法引用可以指定参数列表。
(4)正式引用符号:{}正式引用符号在使用变量引用含糊的地方进行区分。
看下面的例子:#set( $vice = "klepto" )Jack is a $vicemaniac.输出结果是:Jack is a $vicemaniac.($vicemaniac没有定义,原样输出)#set( $vice = "klepto" )Jack is a ${vice}maniac.输出结果是:Jack is a kleptomaniac.(使用正式引用符号将$vice和其它文本区分开)(5)Quit引用符号:!看下面的例子:<input type="text" name="email" value="$email"/>初始时,$email没有值,所以文本框中会显示值$email,而更希望是空白。
下面是使用Quit引用符号的例子:<input type="text" name="email" value="$!email"/>当$email没有值时,Velocity会用空串替代$email。
(6)特殊字符转义对于$、#等特殊字符要正常显示,可以使用\进行转义,\\转义为\。
下面是一个例子:#set( $email = "foo" )$email\$email\\$email\\\$email输出结果是:foo$email\foo\$email指令(Directives)引用允许模板设计者为Web站点生成动态内容,而指令使巧妙处理Java代码的脚本元素容易使用。
(1)#set格式:#set( LHS = RHS )●LHS可以是变量引用或属性引用●RHS可以是引用、字符串、数字、ArrayList或Map下面的例子展示了上面的每种RHS类型:#set( $monkey = $bill ) ## variable reference#set( $monkey.Friend = "monica" ) ## string literal#set( $monkey.Blame = $whitehouse.Leak ) ## property reference#set( $monkey.Plan = $spindoctor.weave($web) ) ## method reference #set( $monkey.Number = 123 ) ##number literal#set( $monkey.Say = ["Not", $my, "fault"] ) ## ArrayList#set( $monkey.Map = {"banana" : "good", "roast beef" : "bad"}) ## Map 对于ArrayList和Map,可以使用对应的Java方法访问其中的元素值:$monkey.Say.get(0)$monkey.Map.get("bannana")$monkey.Map.banana ## same as above●RHS可以是简单的算术表达式#set( $value = $foo + 1 ) ## Addition#set( $value = $bar - 1 ) ## Subtraction#set( $value = $foo * $bar ) ## Multiplication#set( $value = $foo / $bar ) ## Division#set( $value = $foo % $bar ) ## Remainder算术表达式只支持整型。
/的结果为整数;如果非整型数值,返回null●如果RHS的结果为null,是不会赋值给LHS的看下面的例子:#set( $criteria = ["name", "address"] )#foreach( $criterion in $criteria )#set( $result = $query.criteria($criterion) )#if( $result )Query was successful#end#end上面使用$result检查是否执行成功是有问题的。
如果第一次执行成功,$result不为null,则后面的执行不管是否成功,检查条件总是成立。
改进的方法是在每次执行前初始化为false:#set( $criteria = ["name", "address"] )#foreach( $criterion in $criteria )#set( $result = false )#set( $result = $query.criteria($criterion) )#if( $result )Query was successful#end#end●String文字可以使用双引号或单引号括起。
两者的主要区别是双引号中的引用会替换成相应的值,而单引号中的引用原样输出#set( $directoryRoot = "www" )#set( $templateName = "index.vm" )#set( $template = "$directoryRoot/$templateName" )$template输出结果是:www/index.vm如果使用单引号:#set( $template = '$directoryRoot/$templateName’ )输出结果是:$directoryRoot/$templateName●使用双引号可以实现字符串的串联,如下面的例子:#set( $size = "Big" )#set( $name = "Ben" )#set($clock = "${size}Tall$name" )The clock is $clock.(2)#if / #elseif / #else#if指令在条件成立时,显示#if和#end之间的内容,否则显示#else和#end之间的内容。
