LZMA SDK(软件开发工具包)
黑马程序员android开发笔记及源码
01、什么是3G02、android系统简介03、android背景介绍04、android的framewor简介05、两种虚拟机的比较06、sdk的下载以及简介07、创建android模拟器08、ddms简介09、platform-tools的简介及常见adb指令10、android项目的目录结构11、android下apk安装的过程12、常见的adb指令介绍13、创建模拟器遇到的常见错误14、电话拨号器15、点击事件的四种写法16、短信发送器17、相对布局&单位介绍18、现形布局&布局的组合19、表格布局&绝对布局20、帧布局21、测试相关概念22、android下junit测试框架配置23、logcat简介24、保存文件到手机内存25、android下文件访问的权限26、保存文件到SD卡中27、分析setting源代码获取SD卡大小28、_sharePreference入门29、xml文件的序列化30、采用pull解析xml文件31、采用断电调试的方法观察pull解析的的流程32、android下创建一个sqllite数据库33、sql语句实现数据库的增删改查34、系统api实现数据库的增删改查&Sqlite3工具的使用35、数据库的事物36、listView入门37、采用layoutInflater打气筒创建一个view对象38、采用数据适配器ArryAdapter39、常用数据适配器simpleAdapter40、数据适配器总结41、内容提供者简介42、内容提供者的实现43、短信的备份44、插入一条记录到系统短信应用45、内容观察者46、获取系统的联系人信息47、保存联系人到系统通讯录48、读取联系人的一个小细节49、网络图片查看器50、anr产生的原理&如何避免51、android消息机制入门52、网络html查看器53、字符乱码问题的处理54、采用get方式提交数据到服务器55、采用post方式提交数据到服务器56、提交数据到服务器中文乱码问题的处理57、采用httpclient提交数据到服务器58、异步http框架简介&实现原理59、异步http框架提交数据到服务器60、上传文件到服务器61、smartimageview&常见开源代码62、多线程下载的原理63、多线程断点下载的原理64、多线程java代码移植到android65、多线程下载文本页面的更新66、显示意图激活另一个activity67、隐式意图激活另一个activity68、隐式意图的配置69、隐式意图和显示意图的使用场景70、在不同activity之间数据传递71、activity的声明周期72、activity的启动模式73、activity横竖屏切换的声明周期74、开启新的activity获取他的返回值75、请求码和结果码的作用76、利用广播实现ip拨号77、短信窃听器78、自定义广播时间&发送自定义广播&广播接受者优先级79、采用服务执行长期后台操作80、采用服务窃听电话&服务的声明周期81、android进程优先级&为什么使用服务82、绑定方式开启服务&调用服务的方法83、服务的声明周期(混合开启84、采用aidl绑定远程服务85、代码注册广播接受者&利用广播调用服务的办法86、加载大图片到内存87、获取图片exif信息88、从gallery获取图片89、图片画画板90、扒开美女衣服91、图片的缩放92、图片的旋转93、图片的平移&镜面&倒影效果94、图片的合成95、图片的颜色处理96、多媒体播放api简介97、人脸识别98、mediaplayer的生命周期99、soundpoo简介100、sufaceview的生命周期101、播放在线视频102、视频播放器进度的处理103、调用系统照相机拍照和录像104、采用camera拍照105、常见对话框106、notification入门107、菜单108、android下的样式109、android下的主题110、代码编写ui111、html创建ui112、帧动画113、代码创建创建的tween动画114、xml文件定义动画115、传感器简介116、117、杀死进程118、apk的安装119、应用程序的反编译120、动态创建fragment121、用fragment创建一个选项卡122、fragment的向下兼容性123、fragment的生命周期124、fragment之间的通讯125、应用程序国际化04、android的framewor简介Wap:wait and playWireless Makeup Language(WML)精简的html语言Applications:android自带的基本上层应用Aplication framework:应用程序框架Librarics:Linux lernel:05、两种虚拟机的比较编译后文件格式:jvm:.java->.class->.jardalvik vm:.java->.dex->.odex基于的架构:jvm:基于栈的架构dalvik vm:基于寄存器的架构Cpu直接访问寄存器因此dalvik虚拟机的效率比jvm高06、sdk的下载以及简介->获取sdk工具包(sdk:standard develope kits)->ADT(android develop tools,实际上是eclipse的插件)SDK具体内容Android->SDK Plateform:开发时使用到的jar包->Samples for sdk:->ARM EABI V7a System Image:模拟器运行时的镜像->Intel n86 Aton System:模拟器运行时的镜像->MIPS System Image:模拟器运行时的镜像->google APIs:google提供的jar包,可以直接使用google提供的一些API ->source for android SDK:SDK全部的源代码Extrals:->tools:开发的工具->support library:实现高版本的android向下的兼容->google Admed Ads SDK:gongle提供的广告插件->Analyties App Irackiong SDK:应用的用户分析->cloud message:云消息->gongle play service:收费服务->google USB Driver:真实的设备驱动开发时:基于4.0,兼容2.2、2.3.307、创建android模拟器avd:android virture developerVGA:480*640(电视的标准分辨率)QVGA:240*320(四分之一)HVGA:320*480(一半)WVGA:480*800(width)FWVGA:480*854(更宽)08、ddms简介ddms:模拟器不支持中文,因此发送中文会显示不出来09、platform-tools的简介及常见adb指令Android调试桥:内部实现就是socket让两个系统之间实现数据交互->reset adb:模拟器找不到时候可以重启->adb device:列出所有的连接的设备->adb kill-server:杀死adb调试桥->adb start-server 启动adb调试桥dx.bat:将.class文件打包10、android项目的目录结构一:SDK的目录结构->Samples->Api demo:根据API demo(模拟器上面可以看见)的效果可以在sample中看见相应的代码->Source:jar包所有的sdk源代码都在这个文件夹里->SystemImage:系统镜像->temp:下载更新临时存储的文件夹,一般是空的->tools:emulater.ext 不同版本的模拟器二:New Android Application->theme:留给以后作为扩展,现在并没有太大的作用->target SDK:一般选择高版本,因为高版本对下兼容->mark project as a library:一般不选择,意思是将这个项目提供一个jar包供别人使用三:文件夹目录.setting:设置目录assets:资产目录,存放一些文件,这些文件会被原封不动打包到应用程序的apk中bin:gen:自动生成的目录->builderConfig.java:生成的配置信息->R.java:Android 4.1.2->android.jar开发环境,jar包可以在properties中修改,jar包就是SDK011、Android下apk的安装过程一、Android安装过程分析:->setContentView:甚至view的对象,把里面的xml文件加载到->在project中选择build automaticly会自动把文件生成字节码文件,.class $代表的class文件生成的是内部类->dex.bat文件会把.class文件生成.dex文件->apk压缩文件解压内部内容->META-INF:应用程序的签名eclipse的调试签名文件->res:资源文件->classes.dex:class文件->resources.arsc:资源ID映射->android软件安装的过程:->拷贝xxx.apk带/data/app/xxx-1.apk->在/data/data目录下创建一个文件夹,文件夹名称当前应用程序的报名012、常见adb指令前提:->设备连接上电脑而且驱动安装正常,如果安装不正常的话,会有黄色的问号显示;->设备上打开USB调试;指令:->adb device(如果启动发现这个程序没有安装会自动安装)->adb kill-server->adb start-server->adb uninstall <包名>->adb -s emulator-5554 install c:\\users\\administrator\\hello.apk如果有多个设备的话,如果不指定安装的是哪个设备程序会报错->adb push haha.prop /sdcard/haha.txt 将文件移到(360管家,豌豆荚之类的软件他们也是用的adb指令,倘若电脑上装这些软件的话,会因为两个adb指令抢端口号而挂掉)(adb版本之间兼容不是很好,经常报错可以考虑下版本的问题)->adb shell:远程连接到了android的linux终端ls:显示文件夹ps:显示正在运行的程序ping:网络连通性013、创建模拟器遇到的常见错误->路径最好不要有中文:->应用安装不上,或者安装模拟器的时候开启一个新的模拟器:可能是模拟器的资源被占用,模拟器在运行的时候其实占用着硬盘上面的一个文件,这个文件位于工作空间.android/avd/iphone.avd 里面会有镜像文件,当一个模拟器开启起来了,就给你创建一个文件夹.knock的文件夹,代表着这个模拟器被锁定了,如果把模拟器关掉,就没有程序占据这几个镜像资源了,那么这几个程序就会被自动删除。
加壳与脱壳应用及实现

加壳与脱壳的应用与实现一、加壳 (2)1.什么是壳 (2)2.加壳原因 (2)3.壳的加载过程 (3)4.压缩引擎 (5)5.常见的加壳工具 (6)a.常用压缩壳介绍 (6)b.加密保护壳介绍 (7)二、脱壳 (10)1.侦壳 (10)2.脱壳 (13)a.查找程序的真正入口点(OEP) (13)b.抓取内存映像文件 (15)c.输入表重建 (15)附:视频“加壳与脱壳(软件)”和“手动脱壳” (17)加壳与脱壳一、加壳1.什么是壳在一些计算机软件里也有一段专门负责保护软件不被非法修改或反编译的程序。
它们一般都是先于程序运行,拿到控制权,然后完成它们保护软件的任务。
由于这段程序和自然界的壳在功能上有很多相同的地方,基于命名的规则,就把这样的程序称为“壳”了。
图1.12.加壳原因就把这样的程序称为“壳”了。
作者编好软件后,编译成exe可执行文件。
1)有一些版权信息需要保护起来,不想让别人随便改动,如作者的姓名,即为了保护软件不被破解,通常都是采用加壳来进行保护。
2)需要把程序搞的小一点,从而方便使用。
于是,需要用到一些软件,它们能将exe可执行文件压缩。
3)在黑客界给木马等软件加壳脱壳以躲避杀毒软件。
实现上述功能,这些软件称为加壳软件。
3.壳的加载过程1)获取壳自己所需要使用的API地址如果用PE编辑工具查看加壳后的文件,会发现未加壳的文件和加壳后的文件的输入表不一样,加壳后的输入表一般所引入的DLL和API函数很少,甚至只有Kernel32.dll以及GetProcAddress这个API 函数。
壳实际上还需要其他的API函数来完成它的工作,为了隐藏这些API,它一般只在壳的代码中用显式链接方式动态加载这些API函数2)解密原程序的各个区块(Section)的数据壳出于保护原程序代码和数据的目的,一般都会加密原程序文件的各个区块。
在程序执行时外壳将会对这些区块数据解密,以让程序能正常运行。
壳一般按区块加密的,那么在解密时也按区块解密,并且把解密的区块数据按照区块的定义放在合适的内存位置。
sdk安装教程

sdk安装教程SDK(Software Development Kit)是指软件开发工具包,为了方便开发者进行软件开发,提供了一系列的工具、文档、示例代码等内容。
下面是一个关于SDK安装的简单教程。
首先,下载SDK安装包。
一般来说,SDK安装包可以在开发者官网或相关开发平台上进行下载,根据你的开发环境选择相应的SDK版本和操作系统。
下载完成后,双击安装包进行安装。
根据安装包的实际情况可能会有所不同,但大致步骤是类似的。
1. 打开安装包,可能会出现欢迎界面,点击“下一步”继续。
2. 阅读并接受许可协议,点击“下一步”继续。
3. 选择安装目录,可以使用默认目录或自定义目录,点击“下一步”继续。
4. 根据需要选择额外的组件,例如开发工具、示例代码等,点击“下一步”继续。
5. 选择开始菜单文件夹或桌面快捷方式,点击“下一步”继续。
6. 确认安装选项,点击“安装”开始安装过程。
安装过程可能需要一些时间,请耐心等待。
安装完成后,打开相应的开发工具,开始使用SDK进行软件开发。
可以参考SDK提供的文档、示例代码等资源,了解如何使用相关的API和功能。
在使用SDK过程中,可能还需要进行一些配置。
例如,添加SDK路径到开发工具的环境变量中,以方便编译和调试。
另外,需要注意的是,SDK的安装和使用可能需要一定的系统配置要求。
比如,某些SDK可能只支持特定的操作系统版本、硬件要求或开发语言。
在安装之前,建议查阅官方的系统要求和开发文档,确保所用的开发环境符合要求。
总结一下,安装SDK可以通过下载安装包,并按照安装向导完成相应的操作。
安装完成后,开发者可以使用SDK提供的工具和资源进行软件开发。
为了更好地使用SDK,建议阅读官方文档并按照要求进行系统配置。
希望以上内容对你理解SDK的安装过程有所帮助。
如有疑问,请随时再次咨询。
Android_JuheApiSDK使用文档(Eclipse)

Android_JuheApiSDK使⽤⽂档(Eclipse)聚合数据SDK使⽤说明⽂档(Eclipse)V 2.6时间:2015/04/23⽬录1 版本说明 (3)2 APP集成聚合数据SDK (3)2.1 聚合数据SDK说明 (3)2.2 集成聚合数据SDK的⽅法 (3)2.3 初始化聚合数据SDK (4)2.4 查找调⽤接⼝的参数值 (5)2.5 编写代码调⽤具体的数据接⼝: (6)2.6 返回数据实例 (7)3 聚合数据后台使⽤⽅法: (9)3.1 ⽤户的注册与登录 (9)3.2 开发者申请应⽤的openid (10)3.3 开发者的appkey (10)3.4 开发者应⽤的概况 (11)3.5 认证管理 (12)3.6 套餐管理 (13)3.7 数据管理 (14)3.8 数据统计 (15)1版本说明2APP集成聚合数据SDK2.1聚合数据SDK说明JuheApisSDK是⼀个⼯具,内部集成了聚合数据平台除电商类所有接⼝。
包括⽣活常⽤,位置信息服务,⾦融基⾦,影视娱乐,全⽹数据,其他数据留个⼤类,再此⼤类之下⼜分⼩类,每个⼩类下⼜包含数⽬不等的实现具体功能的接⼝。
2.2集成聚合数据SDK的⽅法将juhe_sdk_v_X_X.jar以及armeabi⽂件夹(内包含libJuheSDK_v_X_X.so)添加到⼯程中libs⽂件夹下,Android⼯程会⾃动将libs⽂件夹下的jar导⼊ .在AndroidManifest.xml中,加⼊所需权限:添加所申请的openid.如图1-2所⽰:图1-2:添加聚合数据SDK以及依赖的包2.3初始化聚合数据SDK在调⽤接⼝之前需要初始化聚合数据SDK,只需要初始化⼀次即可。
需要在Application中调⽤初始化⽅法.2.4查找调⽤接⼝的参数值在聚合数据API官⽹上/doc/79253acf69eae009581becb7.html /docs查看接⼝,并得到调⽤接⼝必须的字段:API, APIID,以及需要设置的参数调⽤对应接⼝和请求⽅式。
Android SDK开发包国内下载地址

Android SDK开发包国内下载地址不知道是因为最近kaihui还是怎么的,打开android sdk官方网站特别的慢,想下载最新版本的platform几乎变成不可能完成的任务,不知道为什么Google不像Apache那样在各国设立镜像站。
为了预防今后再出现这样的情况,这次干脆把android开发所需要的各种包总结一下,顺便提供本地下载链接,省得以后找起来麻烦。
通过分析SDK Manager里要用到的repository文件,我下载了目前google提供的各类安卓开发包并上传到了网盘。
由于网盘有CDN支持,即使不用迅雷,下载速度依然很快。
如果你从官网下载很慢,不妨试试这些国内链接。
更新2015/3/11:完善了sysimg部分,增加了Level 21的x86平台sysimg链接。
更新2015/1/5:增加了android 5.0的sample下载。
更新2014/12/19:增加了Support包下载,更新了doc资源版本和下载链接;更新了Andr oid Studio版本到1.0.1,更新了SDK Tools到r24。
更新2014/12/2:更新了SDK Tools的版本,从22.6到23.0.2;增加了Android Studio下载。
更新2014/10/23:增加了部分Android-L资源下载。
更新2014/10/23:感谢CodeDream分享的另一个国内下载网址,内容比较全(没有adt-b undle)速度较快,推荐。
更新2014/8/15:更新了level14-17的samples包;增加了level18-20的samples包;增加了level20版本的源码包;增加了level18-20的platform包。
更新2014/8/7:增加了level18和level19的源码包,并更新了其他版本源码包的链接。
更新2014/7/1: 百度和微云的大部分链接都失效了,重新更新了adt-bundle和sdk的下载链接,部分文件版本有升级。
windows下C++环境的配置
windows下C++环境的配置⽅法⼀——VS: 使⽤windows开发神器visio studio。
这种⽅法⽐较简单,直接下载⼀个最新的vs安装就⾏。
不单单是C++,C、C#、VB等都可以开发。
⽅法⼆——只安装C++编译器: 最常⽤的免费可⽤的编译器是 GNU 的 C/C++ 编译器,为了在 Windows 上安装 GCC,您需要安装 MinGW。
1.⾸先去MinGW主页下载最新版本的MinGW:。
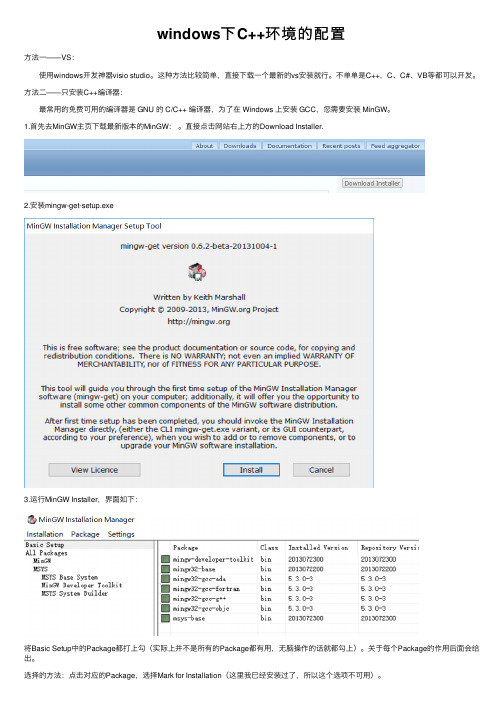
直接点击⽹站右上⽅的Download Installer.2.安装mingw-get-setup.exe3.运⾏MinGW Installer,界⾯如下:将Basic Setup中的Package都打上勾(实际上并不是所有的Package都有⽤,⽆脑操作的话就都勾上)。
关于每个Package的作⽤后⾯会给出。
选择的⽅法:点击对应的Package,选择Mark for Installation(这⾥我已经安装过了,所以这个选项不可⽤)。
4.点击Installation->Apply Changes.如下图所⽰(我已经安装过了,所以选项不可⽤)。
5.安装完之后将MinGW\bin配置到系统环境变量中。
此电脑(计算机)右键-> ⾼级系统设置->环境变量->系统变量->path(双击)。
如下图(我安装到E盘\software2⽬录下了)6.⽤cmd命令提⽰符输⼊: gcc -v。
如果出现如下信息说明安装正确。
ps:各个Package的作⽤:MinGW---- MinGW Base System-------- MinGW Compiler Suit------------ mingw32-binutils 必选,⽤于编译⽣成的 .o ⽂件的链接、汇编、⽣成静态库等。
------------ mingw32-gcc 必选,核⼼的 C 编译器。
------------ mingw32-gcc-ada 可选,Ada 编译器。
丝芯实验室 Flex SDK 软件开发套件说明书

Proprietary Flex SDK 3.4.0.0 GAGecko SDK Suite 4.1June 8, 2022 ArrayThe Proprietary Flex SDK is a complete software development suite for proprietary wire-less applications.Per its namesake, Flex offers two implementation options.The first uses Silicon Labs RAIL (Radio Abstraction Interface Layer), an intuitive and eas-ily-customizable radio interface layer designed to support both proprietary and standards-based wireless protocols.The second uses Silicon Labs Connect, an IEEE 802.15.4-based networking stack de-signed for customizable broad-based proprietary wireless networking solutions that re-quire low power consumption and operates in either the sub-GHz or 2.4 GHz frequencybands. The solution is targeted towards simple network topologies.The Flex SDK is supplied with extensive documentation and sample applications. All ex-amples are provided in source code within the Flex SDK sample applications.These release notes cover SDK version(s):3.4.0.0 GA released June 8, 2022Compatibility and Use NoticesFor information aboutsecurity updates and notices, see the Security chapter of the Gecko Platform Release notes installed with this SDK or on the TECH DOCS tab on https:///developers/flex-sdk-connect-networking-stack. Silicon Labs also strongly recommends that you subscribe to Security Advisories for up-to-date information. For instructions, or if you are new to the Silicon Labs Flex SDK, see Using This Release.Compatible Compilers:IAR Embedded Workbench for ARM (IAR-EWARM) version 9.20.4•Using wine to build with the IarBuild.exe command line utility or IAR Embedded Workbench GUI on macOS or Linux could result in incorrect files being used due to collisions in wine’s hashing algorithm for generating short file names.•Customers on macOS or Linux are advised not to build with IAR outside of Simplicity Studio. Customers who do should carefully verify that the correct files are being used.GCC (The GNU Compiler Collection) version 10.3-2021.10, provided with Simplicity Studio.Contents Contents1Connect Applications (1)1.1New Items (1)1.2Improvements (1)1.3Fixed Issues (1)1.4Known Issues in the Current Release (1)1.5Deprecated Items (1)1.6Removed Items (1)2Connect Stack (2)2.1New Items (2)2.2Improvements (2)2.3Fixed Issues (2)2.4Known Issues in the Current Release (2)2.5Deprecated Items (2)2.6Removed Items (2)3RAIL Applications (3)3.1New Items (3)3.2Improvements (3)3.3Fixed Issues (3)3.4Known Issues in the Current Release (3)3.5Deprecated Items (3)3.6Removed Items (3)4RAIL Library (4)4.1New Items (4)4.2Improvements (4)4.3Fixed Issues (4)4.4Known Issues in the Current Release (5)4.5Deprecated Items (5)4.6Removed Items (5)5Using This Release (6)5.1Installation and Use (6)5.2Security Information (6)5.3Support (7)Connect Applications 1 Connect Applications1.1 New ItemsAdded in release 3.4.0.0•PSA Crypto API usage•Major update of Connect - SoC ECDH Key Exchange1.2 ImprovementsNone1.3 Fixed IssuesNone1.4 Known Issues in the Current ReleaseIssues in bold were added since the previous release. If you have missed a release, recent release notes are available on the TECH DOCS tab on https:///developers/flex-sdk-connect-networking-stack.652925 EFR32XG21 is not supported for “Flex (Connect) - SoC LightExample DMP” and “Flex (Connect) - SoC Switch Example”1.5 Deprecated ItemsNone1.6 Removed ItemsNoneConnect Stack 2 Connect Stack2.1 New ItemsAdded in release 3.4.0.0•All of the crypto operations are now made through ARM PSA Crypo API, enabling the storage of the network security key in the Secure Vault.•Added a new API emberSetPsaSecurityKey() that indicates which PSA Crypto key handler has to be used by the stack. It is the application’s responsibility to create the key. The old emberSetSecurityKey()no longer designates the key used by the network. It can be used to erase an old key from its previous location in NVM.•Added a new API emberRemovePsaSecurityKey()that cancels the effects of emberSetPsaSecurityKey(). It does not erase the key. It is the application’s responsibility to destroy the key.2.2 ImprovementsNone2.3 Fixed IssuesFixed in release 3.4.0.0833232 Fixed an error the was causing Connect Application Framework IPC to write to the address 0.2.4 Known Issues in the Current ReleaseIssues in bold were added since the previous release. If you have missed a release, recent release notes are available on the TECH DOCS tab on https:///developers/gecko-software-development-kit.When running the RAIL Multiprotocol Library (used forexample when running DMP Connect+BLE), IR Calibrationis not performed because of a known issue in the RAILMultiprotocol Library. As result, there is an RX sensitivityloss in the order of 3 or 4 dBm.501561 In the Legacy HAL component,the PA configuration is hard-coded regardless of the user or board settings. Until this is changed to properly pull from the configuration header, the file ember-phy.c in the user's project will need to be modified by hand to reflect the desired PA mode, voltage, and ramp time.711804 Connecting multiple devices simultaneously may fail with a timeout error.2.5 Deprecated ItemsNone2.6 Removed ItemsNoneRAIL Applications 3 RAIL Applications3.1 New ItemsAdded in release 3.4.0.0•EFR32xG24 support•FGM230S support•RAIL Bluetooth DMP - SoC Range Test BLE and IEEE802.15.4 demos for some XGM210 boards3.2 ImprovementsNone3.3 Fixed IssuesNone3.4 Known Issues in the Current ReleaseNone3.5 Deprecated ItemsNone3.6 Removed ItemsNone4 RAIL Library4.1 New ItemsAdded in release 3.4.0.0•The RAIL channel of a received packet is now available in the packet's RAIL_RxPacketDetails_t::channel field. This can be of value when scanning or hopping across multiple channels while letting packets accumulate in the receive FIFO for later processing.•Added the RAIL_ConfigPaAutoEntry API to allow for easier configuration of PA auto mode operation in RAIL.•Added the RAIL_SetRssiDetectThreshold API to allow the user to detect when the RSSI is at or above a configurable threshold.Once configured, the RAIL_EVENT_DETECT_RSSI_THRESHOLD event can be used to detect when this happens.•Added support for the MGM240L022RNF module.•Added support for the FGM230SA27HGN and FGM230SBHGN modules.•Added the RAIL_GetChannelAlt API. This function returns the channel the radio is currently using. If using DMP and run on the inactive protocol it returns the channel that will be used when next switching to that protocol. When using channel hopping, mode switch, and other features that change channels dynamically this may be different than what is returned by RAIL_GetChannel, as this function will track what channel the radio is actually on at that moment and not what it started on.4.2 ImprovementsChanged in release 3.4.0.0•The "RAIL Utility, PTI" component will now validate that the correct set of pins are in use for the desired PTI mode.•RAIL will now error if attempting to start a CSMA or LBT transmit while a scheduled RX is still in progress or vice versa.•Added PA curves for BGM240P and MGM240P modules.•Restricted the SL_RAIL_UTIL_PA_RAMP_TIME_US to 10us on some EFR32 modules to match the certification conditions.4.3 Fixed IssuesFixed in release 3.4.0.0376658 Fixed an issue with the Bluetooth LE coded PHY on EFR32xG21 where a packet received with a corrupt coding indicator would result in an invalid start-of-packet timestamp.759793 Fixed an issue with Bluetooth LE long-range reception on EFR32xG21 that corrupted packet data and tripped RAIL_ASSERT_FAILED_UNEXPECTED_STATE_RX_FIFO.772769 Fixed an issue when running IR Calibration on the EFR32xG23 using RAIL_CalibrateIrAlt where we could compute an invalid IRCAL value for certain PHYs and chips.777427 Fixed support for using the signal identifier CCA modes simultaneously with a user-enabled signal identifier trigger event.819644 Fixed an issue with frame-type decoding PHYs running at more than 500 kbps on EFR32xG22 and later.825083 Fixed an issue on EFR32xG23 and EFR32xG24 where PTI could merge multiple receive packets into the same transaction when interrupt latency is significant.829499 Fixed an issue where RAIL_GetRadioStateDetail would not report the correct state information when frame detection was disabled or during an LBT operation.830214 Ensure that the RAIL_RadioConfigChangedCallback_t is called for all RAIL handles in a dynamic multiprotocol application where multiple handles use the same underlying PHY configuration.835299 Fixed an issue with dynamic handling of whitening and FCS in FSK when onlyRAIL_IEEE802154_E_OPTION_GB868 was enabled.844600 Fixed an issue of not being able to receive packets during a RAIL_ScheduleRx configured with a zero relative start time when Power Manager sleep is enabled and configured with an EM2 or lower energy requirement.4.4 Known Issues in the Current ReleaseIssues in bold were added since the previous release.Using direct mode (or IQ) functionality on EFR32xG23requires a specifically set radio configuration that is notyet supported by the radio configurator. For theserequirements, reach out to technical support who couldprovide that configuration based on your specification 641705 Infinite receive operations where the frame's fixed lengthis set to 0 are not working correctly on the EFR32xG23series chips.732659 On EFR32xG23:•Wi-SUN FSK mode 1a exhibits a PER floor with fre-quency offsets around ± 8 to 10 KHz• Wi-SUN FSK mode 1b exhibits a PER floor with fre-quency offsets around ± 18 to 20 KHz819544 Rx duty cycle mode does not work reliably on theEFR32xG24 platform.818707 BLE CTE timings are sometimes slightly off when usingthe EFR32xG24 with a 38.4MHz crystal.4.5 Deprecated ItemsNone4.6 Removed ItemsNone5 Using This ReleaseThis release contains the following•Radio Abstraction Interface Layer (RAIL) stack library•Connect Stack Library•RAIL and Connect Sample Applications•RAIL and Connect Components and Application FrameworkThis SDK depends on Gecko Platform. The Gecko Platform code provides functionality that supports protocol plugins and APIs in the form of drivers and other lower layer features that interact directly with Silicon Labs chips and modules. Gecko Platform components include EMLIB, EMDRV, RAIL Library, NVM3, and mbedTLS. Gecko Platform release notes are available through Simplicity Studio’s Documentation tab.For more information about the Flex SDK v3.x see UG103.13: RAIL Fundamentals and UG103.12: Silicon Labs Connect Fundamentals. If you are a first time user, see QSG168: Proprietary Flex SDK v3.x Quick Start Guide.5.1 Installation and UseThe Proprietary Flex SDK is provided as part of the Gecko SDK (GSDK), the suite of Silicon Labs SDKs. To quickly get started with the GSDK, install Simplicity Studio 5, which will set up your development environment and walk you through GSDK installation. Simplicity Studio 5 includes everything needed for IoT product development with Silicon Labs devices, including a resource and project launcher, software configuration tools, full IDE with GNU toolchain, and analysis tools. Installation instructions are provided in the online Simplicity Studio 5 User’s Guide.Alternatively, Gecko SDK may be installed manually by downloading or cloning the latest from GitHub. See https:///Sili-conLabs/gecko_sdk for more information.Simplicity Studio installs the GSDK by default in:•(Windows): C:\Users\<NAME>\SimplicityStudio\SDKs\gecko_sdk•(MacOS): /Users/<NAME>/SimplicityStudio/SDKs/gecko_sdkDocumentation specific to the SDK version is installed with the SDK. Additional information can often be found in the knowledge base articles (KBAs). API references and other information about this and earlier releases is available on https:///.5.2 Security InformationSecure Vault IntegrationWhen deployed to Secure Vault High devices, sensitive keys are protected using the Secure Vault Key Management functionality. The following table shows the protected keys and their storage protection characteristics.Thread Master Key Exportable Must be exportable to form the TLVsPSKc Exportable Must be exportable to form the TLVsKey Encryption Key Exportable Must be exportable to form the TLVsMLE Key Non-ExportableTemporary MLE Key Non-ExportableMAC Previous Key Non-ExportableMAC Current Key Non-ExportableMAC Next Key Non-ExportableWrapped keys that are marked as “Non-Exportable” can be used but cannot be viewed or shared at runtime.Wrapped keys that are marked as “Exportable” can be used or shared at runtime but remain encrypted while stored in flash.For more information on Secure Vault Key Management functionality, see AN1271: Secure Key Storage.Security AdvisoriesTo subscribe to Security Advisories, log in to the Silicon Labs customer portal, then select Account Home. Click HOME to go to the portal home page and then click the Manage Notifications tile. Make sure that ‘Software/Security Advisory Notices & Product Change Notices (PCNs)’ is checked, and that you are subscribed at minimum for your platform and protocol. Click Save to save any changes.5.3 SupportDevelopment Kit customers are eligible for training and technical support. Use the Silicon Labs Flex web page to obtain information about all Silicon Labs Thread products and services, and to sign up for product support.You can contact Silicon Laboratories support at /support.Silicon Laboratories Inc.400 West Cesar Chavez Austin, TX 78701USAIoT Portfolio/IoTSW/HW/simplicityQuality /qualitySupport & Community/communityDisclaimerSilicon Labs intends to provide customers with the latest, accurate, and in-depth documentation of all peripherals and modules available for system and software imple-menters using or intending to use the Silicon Labs products. Characterization data, available modules and peripherals, memory sizes and memory addresses refer to each specific device, and “Typical” parameters provided can and do vary in different applications. Application examples described herein are for illustrative purposes only. Silicon Labs reserves the right to make changes without further notice to the product information, specifications, and descriptions herein, and does not give warranties as to the accuracy or completeness of the included information. Without prior notification, Silicon Labs may update product firmware during the manufacturing process for security or reliability reasons. Such changes will not alter the specifications or the performance of the product. Silicon Labs shall have no liability for the consequences of use of the infor -mation supplied in this document. This document does not imply or expressly grant any license to design or fabricate any integrated circuits. The products are not designed or authorized to be used within any FDA Class III devices, applications for which FDA premarket approval is required or Life Support Systems without the specific written consent of Silicon Labs. A “Life Support System” is any product or system intended to support or sustain life and/or health, which, if it fails, can be reasonably expected to result in significant personal injury or death. Silicon Labs products are not designed or authorized for military applications. Silicon Labs products shall under no circumstances be used in weapons of mass destruction including (but not limited to) nuclear, biological or chemical weapons, or missiles capable of delivering such weapons. Silicon Labs disclaims all express and implied warranties and shall not be responsible or liable for any injuries or damages related to use of a Silicon Labs product in such unauthorized applications. Note: This content may contain offensive terminology that is now obsolete. Silicon Labs is replacing these terms with inclusive language wherever possible. For more information, visit /about-us/inclusive-lexicon-projectTrademark InformationSilicon Laboratories Inc.®, Silicon Laboratories ®, Silicon Labs ®, SiLabs ® and the Silicon Labs logo ®, Bluegiga ®, Bluegiga Logo ®, EFM ®, EFM32®, EFR, Ember ®, Energy Micro, Energy Micro logo and combinations thereof, “the world’s most energy friendly microcontrollers”, Redpine Signals ®, WiSeConnect , n-Link, ThreadArch ®, EZLink ®, EZRadio ®, EZRadioPRO ®, Gecko ®, Gecko OS, Gecko OS Studio, Precision32®, Simplicity Studio ®, Telegesis, the Telegesis Logo ®, USBXpress ® , Zentri, the Zentri logo and Zentri DMS, Z-Wave ®, and others are trademarks or registered trademarks of Silicon Labs. ARM, CORTEX, Cortex-M3 and THUMB are trademarks or registered trademarks of ARM Holdings. Keil is a registered trademark of ARM Limited. Wi-Fi is a registered trademark of the Wi-Fi Alliance. All other products or brand names mentioned herein are trademarks of their respective holders.。
lzma——精选推荐
lzmaLzma的全称是Lempel-Ziv-Markov chain Algorithm,和bzip2/gzip⼀样,是⼀款压缩/解压软件.它⽐bzip更加快速与⾼效。
就我们所知, gzip压缩⽐率低于bzip2 (还有lzma). 此⽂将介绍如何使⽤lzma, ⼀个有着更⾼压缩率和压缩速度的软件。
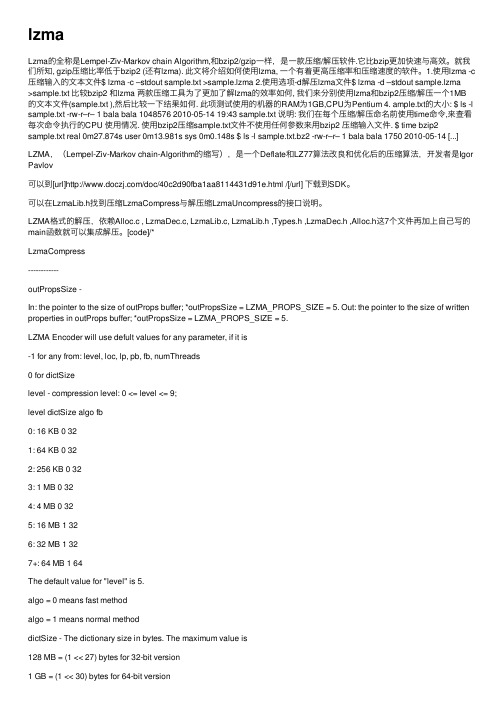
1.使⽤lzma -c 压缩输⼊的⽂本⽂件$ lzma -c –stdout sample.txt >sample.lzma 2.使⽤选项-d解压lzma⽂件$ lzma -d –stdout sample.lzma>sample.txt ⽐较bzip2 和lzma 两款压缩⼯具为了更加了解lzma的效率如何, 我们来分别使⽤lzma和bzip2压缩/解压⼀个1MB 的⽂本⽂件(sample.txt ),然后⽐较⼀下结果如何. 此项测试使⽤的机器的RAM为1GB,CPU为Pentium 4. ample.txt的⼤⼩: $ ls -l sample.txt -rw-r–r– 1 bala bala 1048576 2010-05-14 19:43 sample.txt 说明: 我们在每个压缩/解压命名前使⽤time命令,来查看每次命令执⾏的CPU 使⽤情况. 使⽤bzip2压缩sample.txt⽂件不使⽤任何参数来⽤bzip2 压缩输⼊⽂件. $ time bzip2 sample.txt real 0m27.874s user 0m13.981s sys 0m0.148s $ ls -l sample.txt.bz2 -rw-r–r– 1 bala bala 1750 2010-05-14 [...]LZMA,(Lempel-Ziv-Markov chain-Algorithm的缩写),是⼀个Deflate和LZ77算法改良和优化后的压缩算法,开发者是Igor Pavlov可以到[url]/doc/40c2d90fba1aa8114431d91e.html /[/url] 下载到SDK。
bundletool用法 -回复
bundletool用法-回复标题:深入理解与使用Bundletool:一款强大的Android应用打包工具Bundletool是一款由Google推出的开源工具,主要用于处理Android 应用的AAB(Android App Bundle)和APK(Android Package)文件。
本文将详细解析Bundletool的用法,帮助开发者更好地理解和使用这款强大的工具。
一、Bundletool简介Bundletool是Google为了解决Android应用打包、优化和签名等问题而推出的一款命令行工具。
它支持从AAB文件生成多个针对不同设备配置的APK,以及对APK进行签名、优化、拆分等操作。
通过使用Bundletool,开发者可以更高效地管理和发布Android应用。
二、安装Bundletool首先,我们需要下载并安装Bundletool。
Bundletool提供了JAR文件和Python脚本两种形式,开发者可以根据自己的需求选择合适的版本。
1. JAR文件安装:下载最新版本的Bundletool JAR文件(例如:bundletool-all-1.9.0.jar)。
打开命令行终端,进入Bundletool JAR文件所在的目录,然后运行以下命令来检查Bundletool是否安装成功:java -jar bundletool-all-1.9.0.jar version如果输出了Bundletool的版本信息,说明安装成功。
2. Python脚本安装:首先确保已经安装了Python环境。
下载最新版本的Bundletool Python脚本(例如:bundletool.py)。
在命令行终端中,进入Bundletool Python脚本所在的目录,然后运行以下命令来检查Bundletool是否安装成功:python bundletool.py version如果输出了Bundletool的版本信息,说明安装成功。
AndroidSDK目录具体结构及Android源码的具体结构

AndroidSDK⽬录具体结构及Android源码的具体结构Android SDK⽬录具体结构1. add-ons:这⾥⾯保存着附加库,⽐如Google Maps,当然你如果安装了OphoneSDK,这⾥也会有⼀些类库在⾥⾯。
2. docs:这⾥⾯是Android SDK API参考⽂档,所有的API都可以在这⾥查到。
3. market_licensing:作为AndroidMarket版权保护组件,⼀般发布付费应⽤到电⼦市场可以⽤它来反盗版。
4. platforms:是每个平台的SDK真正的⽂件,⾥⾯会根据API Level划分的SDK版本,这⾥就以Android 2.2来说,进⼊后有⼀个android-8的⽂件夹,android-8进⼊后是Android 2.2 SDK的主要⽂件,其中ant为ant编译脚本,data保存着⼀些系统资源,images是模拟器映像⽂件,skins则是Android模拟器的⽪肤,templates是⼯程创建的默认模板,android.jar则是该版本的主要framework⽂件,tools⽬录⾥⾯包含了重要的编译⼯具,⽐如aapt、aidl、逆向调试⼯具dexdump和编译脚本dx。
5. platform-tools:保存着⼀些通⽤⼯具,⽐如adb、和aapt、aidl、dx等⽂件,这⾥和platforms⽬录中tools⽂件夹有些重复,主要是从android 2.3开始这些⼯具被划分为通⽤了。
6. samples:是Android SDK⾃带的默认⽰例⼯程,⾥⾯的apidemos强烈推荐初学者运⾏学习,对于SQLite数据库操作可以查看NotePad这个例⼦,对于游戏开发Snake、LunarLander都是不错的例⼦,对于Android主题开发Home则是android m5时代的主题设计原理。
7. tools:作为SDK根⽬录下的tools⽂件夹,这⾥包含了重要的⼯具,⽐如ddms⽤于启动Android调试⼯具,⽐如logcat、屏=幕截图和⽂件管理器,⽽draw9patch则是绘制android平台的可缩放png图⽚的⼯具,sqlite3可以在PC上操作SQLite数据库,⽽monkeyrunner则是⼀个不错的压⼒测试应⽤,模拟⽤户随机按键,mksdcard则是模拟器SD映像的创建⼯具,emulator是android模拟器主程序,不过从android1.5开始,需要输⼊合适的参数才能启动模拟器,traceview作为android平台上重要的调试⼯具。
Android SDK 2.2 开发环境安装

5. 回到 Available Software 界面,你应该看到 "Developer Tools" 。选取 checkbox 。点击 Next,接受 license agreement, 然后点击 Finish。
6. 重起 Eclipse.
[配置 ADT]
配置 Eclipse 里的 ADT,使其指向 Android SDK 。
Create Activity: HelloAndroid
点击 Finish.
2). 编写代码:打印 Hello Android
package com.android.helloandroid;
import android.app.Activity;
import android.os.Bundle;
1. 选取 Eclipse Window > Preferences...
2. 选择 Android
3. 点击 Browse... 定位 Android SDK 目录。
4. 点击 Apply, 然后 OK.
(本节内容参考:/sdk/eclipse-adt.html)
super.onCreate(savedInstanceState);
TextView tv = new TextView(this);
tv.setText("Hello, Android");
setContentView(tv);
}
}
3)运行
ADT 使运行非常简单:
Android SDK 1.5 Revision 3 (Jul 2009) API Level: 3 Requires SDK Tools r6 or higher. Cupcake
NVIDIA DOCA SDK 开发者指南.pdf_1701842647.0832493说明书
OverviewTable of ContentsChapter 1. Introduction (1)Chapter 2. Installation (2)Chapter 3. API (3)Chapter 4. Samples (4)Chapter 5. Applications (5)Chapter 6. Tools (6)Chapter 7. Services (7)Chapter 1.IntroductionThe NVIDIA DOCA™ SDK enables developers to rapidly create applications and services on top of NVIDIA® BlueField® data processing units (DPUs), leveraging industry-standard APIs. With DOCA, developers can deliver breakthrough networking, security, and storage performance by harnessing the power of NVIDIA's DPUs.This guide walks you through DOCA's developer zone portal which contains all the information about the DOCA toolkit from NVIDIA, providing everything you need to develop DPU-accelerated applications.Chapter 2.InstallationDOCA contains a runtime and development environment for both the host and as part of a BlueField image for the DPU. The full installation instructions for both can be found in the NVIDIA DOCA Installation Guide for Linux.Whether DOCA has been installed on the host or on the DPU, one can find the different DOCA components under the /opt/mellanox/doca directory. These include the traditional SDK-related components (libraries, header files, etc.) as well as the DOCA samples, applications, tools and more, as described in this document.Chapter 3.APIThe DOCA SDK is built around the different DOCA libraries designed to leverage the capabilities of the DPUs. Under the Programming Guides section, one can find a detailed description of each DOCA library, its goals, and API. These guides document DOCA's API, aiming to help developers wishing to develop DOCA-based programs.The API References section holds the Doxygen-generated documentation of DOCA's official API. See NVIDIA DOCA Libraries API Reference Manual.Please note that, as explained in the NVIDIA DOCA gRPC Infrastructure User Guide, some of DOCA's libraries also support a gRPC-based API. More information about these extended programming interfaces can be found in detail in the programming guides of the respective libraries.Chapter 4.SamplesSamples are simple code snippets for achieving basic DOCA-based tasks using DOCA's libraries. It is recommended to review the samples while going over the programming guide of the DOCA library of interest and learning about its API. The samples are designed to show an example implementation of a single feature of a given DOCA library. As such, the samples of a given library should be treated as a direct extension of the programming guide of that library, aiming to provide code snippets to accompany developers wishing to familiarize themselves with the DOCA API.For more information about DOCA samples, refer to NVIDIA DOCA Samples Overview.For a higher-level reference of full DOCA-based programs that make use of multiple DOCA libraries, refer to Applications.Chapter 5.ApplicationsApplications are a higher-level reference code than the samples and demonstrate how a full DOCA-based program can be built. In addition to the supplied source code and compilation definitions, the applications are also shipped in their compiled binary form. This is to allow users an out-of-the-box interaction with DOCA-based programs without the hassle of a developer-oriented compilation process.Many DOCA applications combine the functionality of more than one DOCA library and offer an example implementation for common scenarios of interest to users such as application recognition according to incoming/outgoing traffic, scanning files using the hardware RegEx acceleration, and much more.For more information about DOCA applications, refer to NVIDIA DOCA Applications Overview.Chapter 6.ToolsSome of the DOCA libraries are shipped alongside helper tools for both runtime and development. These tools are often an extension to the library's own API and bridge the gap between the library's expected input format and the input available to the users.An example for one such DOCA tool is the doca_dpi_compiler, responsible for converting Suricata-based rules to their matching .cdo definition files which are then used by the DOCA DPI library.For more information about DOCA tools, refer to NVIDIA DOCA Tools Overview.Chapter 7.ServicesDOCA services are containerized DOCA-based programs that provide an end-to-end solution for a given use case. DOCA services are accessible as part of NVIDIA's container catalog (NGC) from which they can be easily deployed directly to the DPU.For more information about container-based deployment to the DPU, refer to the NVIDIA DOCA Container Deployment Guide.For more information about DOCA services, refer to the NVIDIA DOCA Services Overview.NoticeThis document is provided for information purposes only and shall not be regarded as a warranty of a certain functionality, condition, or quality of a product. NVIDIA Corporation nor any of its direct or indirect subsidiaries and affiliates (collectively: “NVIDIA”) make no representations or warranties, expressed or implied, as to the accuracy or completeness of the information contained in this document and assume no responsibility for any errors contained herein. NVIDIA shall have no liability for the consequences or use of such information or for any infringement of patents or other rights of third parties that may result from its use. This document is not a commitment to develop, release, or deliver any Material (defined below), code, or functionality.NVIDIA reserves the right to make corrections, modifications, enhancements, improvements, and any other changes to this document, at any time without notice. Customer should obtain the latest relevant information before placing orders and should verify that such information is current and complete.NVIDIA products are sold subject to the NVIDIA standard terms and conditions of sale supplied at the time of order acknowledgement, unless otherwise agreed in an individual sales agreement signed by authorized representatives of NVIDIA and customer (“Terms of Sale”). NVIDIA hereby expressly objects to applying any customer general terms and conditions with regards to the purchase of the NVIDIA product referenced in this document. No contractual obligations are formed either directly or indirectly by this document.NVIDIA products are not designed, authorized, or warranted to be suitable for use in medical, military, aircraft, space, or life support equipment, nor in applications where failure or malfunction of the NVIDIA product can reasonably be expected to result in personal injury, death, or property or environmental damage. NVIDIA accepts no liability for inclusion and/or use of NVIDIA products in such equipment or applications and therefore such inclusion and/or use is at customer’s own risk. NVIDIA makes no representation or warranty that products based on this document will be suitable for any specified use. Testing of all parameters of each product is not necessarily performed by NVIDIA. It is customer’s sole responsibility to evaluate and determine the applicability of any information contained in this document, ensure the product is suitable and fit for the application planned by customer, and perform the necessary testing for the application in order to avoid a default of the application or the product. Weaknesses in customer’s product designs may affect the quality and reliability of the NVIDIA product and may result in additional or different conditions and/or requirements beyond those contained in this document. NVIDIA accepts no liability related to any default, damage, costs, or problem which may be based on or attributable to: (i) the use of the NVIDIA product in any manner that is contrary to this document or (ii) customer product designs.No license, either expressed or implied, is granted under any NVIDIA patent right, copyright, or other NVIDIA intellectual property right under this document. Information published by NVIDIA regarding third-party products or services does not constitute a license from NVIDIA to use such products or services or a warranty or endorsement thereof. Use of such information may require a license from a third party under the patents or other intellectual property rights of the third party, or a license from NVIDIA under the patents or other intellectual property rights of NVIDIA.Reproduction of information in this document is permissible only if approved in advance by NVIDIA in writing, reproduced without alteration and in full compliance with all applicable export laws and regulations, and accompanied by all associated conditions, limitations, and notices.THIS DOCUMENT AND ALL NVIDIA DESIGN SPECIFICATIONS, REFERENCE BOARDS, FILES, DRAWINGS, DIAGNOSTICS, LISTS, AND OTHER DOCUMENTS (TOGETHER AND SEPARATELY, “MATERIALS”) ARE BEING PROVIDED “AS IS.” NVIDIA MAKES NO WARRANTIES, EXPRESSED, IMPLIED, STATUTORY, OR OTHERWISE WITH RESPECT TO THE MATERIALS, AND EXPRESSLY DISCLAIMS ALL IMPLIED WARRANTIES OF NONINFRINGEMENT, MERCHANTABILITY, AND FITNESS FOR A PARTICULAR PURPOSE. TO THE EXTENT NOT PROHIBITED BY LAW, IN NO EVENT WILL NVIDIA BE LIABLE FOR ANY DAMAGES, INCLUDING WITHOUT LIMITATION ANY DIRECT, INDIRECT, SPECIAL, INCIDENTAL, PUNITIVE, OR CONSEQUENTIAL DAMAGES, HOWEVER CAUSED AND REGARDLESS OF THE THEORY OF LIABILITY, ARISING OUT OF ANY USE OF THIS DOCUMENT, EVEN IF NVIDIA HAS BEEN ADVISED OF THE POSSIBILITY OF SUCH DAMAGES. Notwithstanding any damages that customer might incur for any reason whatsoever, NVIDIA’s aggregate and cumulative liability towards customer for the products described herein shall be limited in accordance with the Terms of Sale for the product.TrademarksNVIDIA, the NVIDIA logo, and Mellanox are trademarks and/or registered trademarks of Mellanox Technologies Ltd. and/or NVIDIA Corporation in the U.S. and in other countries. The registered trademark Linux® is used pursuant to a sublicense from the Linux Foundation, the exclusive licensee of Linus Torvalds, owner of the mark on a world¬wide basis. Other company and product names may be trademarks of the respective companies with which they are associated.Copyright© 2022 NVIDIA Corporation & affiliates. All rights reserved.NVIDIA Corporation | 2788 San Tomas Expressway, Santa Clara, CA 95051。
安装sdk教程

安装sdk教程安装软件开发工具包(Software Development Kit,简称SDK)是进行软件开发的基础步骤,它包含了开发所需的各种组件和工具。
不同的SDK适用于不同的开发环境和编程语言,比如Android SDK用于Android应用开发,iOS SDK用于iOS应用开发等。
下面是一个关于如何安装SDK的简要教程:第一步,确定需要安装的SDK版本。
在进行开发之前,先确定需要使用的SDK版本。
一般来说,官方网站会提供最新版本的SDK下载,也可以通过搜索引擎查找其他版本的SDK。
第二步,下载SDK安装包。
在官方网站或其他可信的下载站点上找到对应的SDK版本,并下载安装包。
下载完成后,可以将安装包放置在一个便于找到的位置,比如在桌面或专门创建一个文件夹。
第三步,运行安装程序。
找到SDK安装包所在的位置,双击运行安装程序。
根据安装程序的指引和选项,将SDK安装在合适的目录下。
一般来说,安装程序会默认选择一个目录,但也可以选择自定义目录。
第四步,接受安装许可协议。
在安装过程中,会弹出一个许可协议的窗口。
仔细阅读许可协议的内容,并选择接受许可协议。
只有接受许可协议,才能继续进行安装。
第五步,配置环境变量(可选)。
有些SDK需要配置环境变量,以便在命令行界面中能够直接调用相关的命令和工具。
如果安装程序没有自动配置环境变量,可以手动配置。
具体的配置方法可以在SDK的官方文档或用户手册中找到。
第六步,完成安装。
安装程序会自动将SDK的文件和组件复制到指定的目录下,并进行相关的设置。
等待安装程序完成,同时可以选择创建桌面快捷方式或开始菜单项,以便更方便地访问SDK。
第七步,验证安装。
安装完成后,可以进行安装的验证。
打开命令行界面,输入相关的命令或查看SDK的文档,看是否能够正常调用相关的工具和函数。
需要注意的是,不同的SDK安装步骤可能会有所不同,具体的步骤和操作可根据官方文档或用户手册进行参考。
在安装过程中,如果遇到问题或错误,可以通过搜索引擎查找解决方法,或咨询官方技术支持。
sdk开发案例

sdk开发案例SDK(Software Development Kit,软件开发工具包)开发案例主要包括以下几个方面:1. 微信SDK开发:微信SDK提供了一套完善的开发工具和API,使得开发人员可以构建具有微信功能的应用。
例如,开发微信小程序、微信公众号、微信企业号等,实现聊天机器人、朋友圈、微信支付等功能。
2. Android SDK开发:Android SDK是一套用于开发Android手机应用程序的工具和API。
开发者可以使用Android SDK构建各种应用程序,如手机游戏、社交应用、工具应用等。
例如,开发一个天气应用,实现实时天气查询、预警等功能。
3. iOS SDK开发:iOS SDK是苹果公司提供的一套用于开发iOS设备(如iPhone、iPad等)应用程序的工具和API。
开发者可以使用iOS SDK 构建各种应用程序,如手机游戏、社交应用、工具应用等。
例如,开发一个音乐播放器应用,实现音乐播放、歌词显示、歌曲推荐等功能。
4. Node.js SDK开发:Node.js是一个基于JavaScript的服务器端编程框架。
使用Node.js SDK,开发者可以构建高性能、可扩展的服务器和应用程序。
例如,开发一个在线购物网站,实现商品展示、购物车、订单处理等功能。
5. 手游SDK开发:手游SDK主要用于解决游戏中的登录、支付、数据统计等问题。
例如,开发一个手机游戏,实现用户注册、登录、购买道具、游戏排行榜等功能。
6. 音频SDK开发:音频SDK提供了一组用于处理音频数据的API,开发者可以利用这些API构建音乐制作、语音识别、音频处理等应用。
例如,开发一个音频处理工具,实现音频剪辑、混音、均衡等功能。
7. 视频SDK开发:视频SDK提供了一组用于处理视频数据的API,开发者可以利用这些API构建视频播放、剪辑、特效处理等应用。
例如,开发一个视频编辑软件,实现视频剪辑、字幕添加、特效应用等功能。
7zip源码研究(一)

7zip源码研究(一)1开篇缘由2012年6月4日,上证指数大跌64.89,巧合。
在离开VC++开发一线N年后,因故需重捡武装。
下载安装了Visual Studio 2010旗舰版。
回想当年告别VC++时,尚是VC6…考虑要重温杀伐旧梦,需有一套合适的代码磨刀。
一搜,开源的7zip进入视野。
一并搜了7zip源码资料,中文的实话说未见什么实质性的东西。
故开篇写这个笔记,记录自己摸索的相关情况,对以后也是借鉴。
2源码下载7zip的官网:/download.html。
当前最新版本9.22b。
官网上9.20是正式版,9.22是beta版。
既然是磨刀,beta也无所谓。
9.22b的源代码包7z922.tar.bz2;另有一个7zip的SDK开发包源码lzma922.tar.bz2,也一并下了。
同时把9.22b安装版也下来安装了,以便验证编译结果和发布版差异。
3编译起步经尝试,带.dsw项目文档的各源码目录,均可打开并编译成功。
只是对每个打开的项目文件需注意修改若干参数(菜单“项目”->“属性”)。
自然,对于熟练的VC++程序员,这些环境参数调整是常识;但对于久疏战阵的本人,还是有必要记录一下相关调整。
相关参数之所以要调整,原因无非是源码发布方在自己的开发环境中有自己的调试安排,文件放置路径等多少与我们希望的有所差异。
另外,发布方用的编译开发环境与我现在要用VS2010显然也未必相同,故调整比较自然。
需调整的参数包括:1.配置属性->常规,“输出目录”、“中间目录”,建议都改成“.\Debug\”;2.查看“链接器->常规”,“输出文件”建议保留文件名,但目录同样改为“.\Debug\”;3.配置属性->常规,“目标文件名”建议改成与“链接器->常规”中“输出文件”相同;4.清单工具->输入和输出,“嵌入清单”改成“否”。
当“是”时,因原代码编译环境较低,在VC2010中编译链接时会出“fatal error LNK1123”。
7z的lzma sdk的用法

7z的lzma sdk的用法The 7z LZMA SDK is a powerful tool that allows developers to integrate LZMA compression and decompression functionality into their applications. It provides a comprehensive set of APIs that make it easy to work with LZMA-compressed files, providing users with high compression ratios and fast decompression times.7z的LZMA SDK是一种强大的工具,允许开发人员将LZMA压缩和解压功能集成到他们的应用程序中。
它提供了一套全面的API,使与LZMA压缩文件的工作变得容易,为用户提供高压缩比和快速解压缩时间。
One of the key benefits of using the 7z LZMA SDK is its ability to achieve high compression ratios, making it an ideal choice for applications that require efficient data storage. By leveraging the LZMA algorithm, developers can drastically reduce the size of their files without compromising on data quality.使用7z的LZMA SDK的一个关键优势是其能够实现高压缩比,这使它成为需要高效数据存储的应用程序的理想选择。
通过利用LZMA算法,开发人员可以大幅减小文件的大小,而不会影响数据质量。
- 1、下载文档前请自行甄别文档内容的完整性,平台不提供额外的编辑、内容补充、找答案等附加服务。
- 2、"仅部分预览"的文档,不可在线预览部分如存在完整性等问题,可反馈申请退款(可完整预览的文档不适用该条件!)。
- 3、如文档侵犯您的权益,请联系客服反馈,我们会尽快为您处理(人工客服工作时间:9:00-18:30)。
LZMA SDK (软件开发工具包)
LZMA 软件开发工具包(以下简称 SDK )给开发客户提供文档、源代码以及几个使用 LZMA 压缩算法制作的应用程序的例子。
链接
大小 日期 版本 描述 下载
1 MB 2019-02-21 19.00 LZMA SDK C 、C++、C#、Java 包含 Windows 二进制文件 下载
1 MB 2018-01-28 18.01 下载
1 MB 2016-10-04 16.04 下载1
2 KB 2015-06-14 LZMA 规范(草案)
注意:如果您使用 LZMA SDK 中的 XZ 代码,建议您从 15.05 beta 中升级到最新的 XZ 代码,新版本的 XZ 代码修复了一些 bug 。
工具包更新:
•
19.00:加强 7z 压缩档案的加密强度。
•
18.06:部分 LZMA/LZMA2 代码的速度优化。
•
18.05:部分 LZMA/LZMA2 代码的速度优化。
•
18.01:对 LZMA2/xz 多线程压缩代码进行部分改动。
修复已知错误。
•
9.35:修复已知错误,SDK 中新增 AES 源代码以及 SFX 模块。
•
9.20:新增用于安装包的精简版 SFX 自释放模块。
•
9.11:支持 PPMd 。
•
9.04:增加对 LZMA2 以及 XZ 的支持。
•
4.62:修正小错误。
LZMA SDK 隶属于 公有领域 •
4.58:速度优化,为 LZMA 压缩提供了新的 ANSI-C 代码。
•
4.57:速度优化,修正了一些小错误。
• 4.49:完善 .7z ANSI-C 解码器。
增加 C++ 的 .7z 压缩档案处理代码。
LZMA 是 7-Zip 程序中 7z 格式 的默认压缩算法。
LZMA 能提供给用户极高的压缩比及较快的压缩速度,它非常适合与应用程序集成。
LZMA SDK 包括:
•
LZMA 编码器及解码器的 C++ 源代码 •
.7z 压缩与解压缩 C++ 源代码(精简版) •
兼容 ANSI-C 的 LZMA / LZMA2 / XZ 压缩及解压缩源代码 •
兼容 ANSI-C 的 7z 解压缩及相关例子的源代码 •
LZMA 压缩及解压缩的 C# 源代码 • LZMA 压缩及解压缩的 Java 源代码
•lzma.exe用于 .lzma 的压缩及解压缩
•7zr.exe用于7z 压缩包(7z.exe 的精简版)
•SFX 模块可以用来创建自释放压缩包以及应用程序安装包
ANSI-C LZMA解压缩代码是从原始的C++ 源代码转换到C。
并简化和优化了代码的大小。
但它依然和7-Zip的LZMA完全兼容。
LZMA的主要特征:
•压缩速度:在双核处理器上可以达到2 MB/秒。
•解压缩速度:
o在英特尔酷睿2 或AMD 速龙64 上可以达到20-30 MB/秒。
o在100 MHz ARM、MIPS、PowerPC 或其它精简指令集处理器上能达到1-2MB/秒。
•较小的解压缩内存需求:8-32 KB(依赖于字典大小)
•较小的解压缩代码:2-8 KB
LZMA解码器仅使用整数运算,可以在任何主流的32 位处理器(或在一定条件下的16 或处理器)下运行。
