AUDIX 人声话筒
Audix M55 声学麦克风安装指南说明书
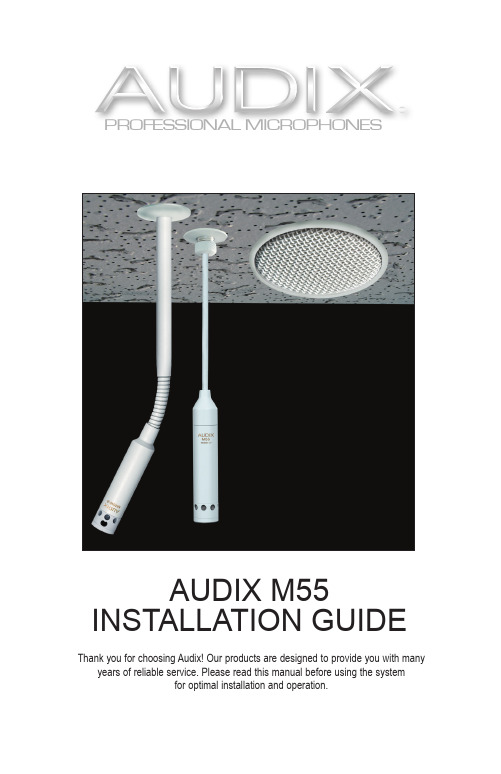
PROFESSIONAL MICROPHONESAUDIX M55 INSTALLATION GUIDEThank you for choosing Audix! Our products are designed to provide you with many years of reliable service. Please read this manual before using the systemfor optimal installation and operation.M55CEILING TILE WITH 5/8″ HOLEADJUSTMENT NUT TIGHTENS BY HANDJBM55 PLENUM RATED BOX MALE & FEMALE PHOENIX CONNECTORSBRASS STRAIN RELIEF FOR OUTER CABLESLOTTED MOUNTING NUT• DRILL 5/8 INCH HOLE IN THE CEILING TILE.• OPEN JMB55 BOX LID AND PLACE BOX ON TOP OF 5/8 INCH HOLE IN THE CEILING TILE. (SEE #1)• INSERT M55 THREADED CEILING MOUNT THROUGH CEILING TILE AND INTO THE JBM55 BOX • SECURELY TIGHTEN THE KNURLED NUT. (SEE #2)• INSERT PLENUM WIRE (BELDEN 9451P OR 82761 OR EQUIVALENT THROUGH STRAIN RELIEF (SEE #3) AND TERMINATE TO MATING PHOENIX CONNECTOR. (SEE #4 AND #5)• TIGHTEN STRAIN RELIEF AND CLOSE LID OF JMB55 BOX. (SEE #5)• LOOSEN M55 KNURLED NUT, ADJUST CABLE TO APPROXIMATE DESIRED LENGTH, AND TIGHTEN NUT. (SEE #6)• TIGHTEN THE PLENUM CABLE STRAIN RELIEF NUT AND ARRANGE EXCESS M55 WIRE IN BOX AND CLOSE LID.(SEE #7)•FINE ADJUSTMENTS TO MICROPHONE HEIGHT CAN BE MADE EASILY FROM BELOW CEILING BY LOOSENING THE M55 KNURLED NUT, LENGTHENING/SHORTENING WIRE AND RETIGHTENING KNURLED NUT. (SEE #8)BOTTOM VIEW OF JUNCTION BOXINSTALLATION AND WIRING INSTRUCTIONS FOR AUDIX M55CEILING MICROPHONESOpen lid of JBM55 box and place on top of ceiling tile drilled hole.Wiring:1 = Ground 2 = Blue (+)3 = Yellow (-)Insert ceiling mount through ceil-ing tile hole, and into JBM55 box then tighten the knurled nut.Connect Phoenix terminals.Loosen M55 knurled nut (above), adjust cable to approximate desired length, and tighten nut.Insert plenum wire through strain relief nut, then connect to the Phoenix terminal.Recommended cable:Belden 9451P - .124” O.D. or Belden 82761 - .116” O.D.Tighten the strain relief nut. Arrange excess wire in box and close lid.For final adjustment, loosen knurled nut, adjust cable length, and tighten nut.For further information contact Audix at 503.682.693333212114256378SEISMIC RESTRAINT INSTRUCTIONSCABLECABLE STAY BARRELCABLE RELEASEPINCABLE RELEASEPINPLENUM RATED BOXPLENUM RATEDCABLEWrap the cable through fastening point (beam,eyebolt). Next, slip the cable through the top of cable stay barrel pulling excess cable until taut.To loosen or disassemble cable, depress the cable release pin and pull cable to desired length.gg ggggg gggLITJB405570 ver. 2.0 8/14。
E 945 超级卡尔迪奥领先阶段麦克风说明说明书
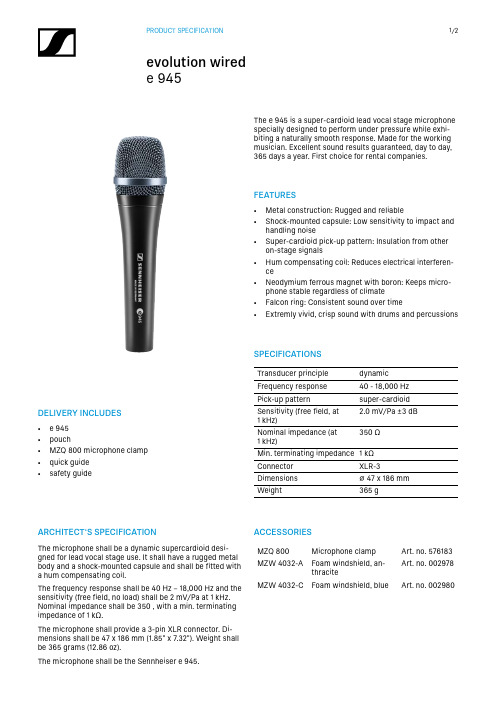
The e 945 is a super-cardioid lead vocal stage microphone specially designed to perform under pressure while exhi-biting a naturally smooth response. Made for the working musician. Excellent sound results guaranteed, day to day, 365 days a year. First choice for rental companies.FEATURES• Metal construction: Rugged and reliable• Shock-mounted capsule: Low sensitivity to impact and handling noise• Super-cardioid pick-up pattern: Insulation from other on-stage signals• Hum compensating coil: Reduces electrical interferen-ce• Neodymium ferrous magnet with boron: Keeps micro-phone stable regardless of climate• Falcon ring: Consistent sound over time• Extremly vivid, crisp sound with drums and percussionsDELIVERY INCLUDES• e 945• pouch• MZQ 800 microphone clamp • quick guide• safety guide SPECIFICATIONSTransducer principle dynamicFrequency response40 - 18,000 HzPick-up pattern super-cardioid Sensitivity (free field, at1 k Hz)2.0 mV/Pa ±3 dBNominal impedance (at1 k Hz)350 ΩMin. terminating impedance 1 kΩConnector XLR-3Dimensions⌀ 47 x 186 mmWeight365 g ACCESSORIESMZQ 800Microphone clamp Art. no. 576183 MZW 4032-A Foam windshield, an-thraciteArt. no. 002978 MZW 4032-C Foam windshield, blue Art. no. 002980ARCHITECT‘S SPECIFICATIONThe microphone shall be a dynamic supercardioid desi-gned for lead vocal stage use. It shall have a rugged metal body and a shock-mounted capsule and shall be fitted with a hum compensating coil.The frequency response shall be 40 Hz – 18,000 Hz and the sensitivity (free field, no load) shall be 2 mV/Pa at 1 kHz. Nominal impedance shall be 350 , with a min. terminating impedance of 1 kΩ.The microphone shall provide a 3-pin XLR connector. Di-mensions shall be 47 x 186 mm (1.85" x 7.32"). Weight shall be 365 grams (12.86 oz).The microphone shall be the Sennheiser e 945.Sennheiser electronic GmbH & Co. KG · Am Labor 1 · 30900 Wedemark · Germany · DIMENSIONSPOLAR PATTERNFREQUENCY RESPONSEXLR 330°0°180°150°120°60°90°0510152025dB30°0°180°150°120°60°90°125 Hz 250 Hz 500 Hz 1,000 Hz 2,000 Hz 4,000 Hz8,000 Hz 16,000 Hz-40-50-60-70-80-90501002005001,0002,0005,00010,00020,000H zdBV 0°, 1 m。
Audix DCLIP 高端乐器话筒夹 使用说明书

DCLIP 高端乐器话筒夹特性•耐用尼龙材料•金属指旋螺丝可将话筒夹牢固锁在位置上•适用于各种主流话筒•耐用铜质螺纹503.682.6933 Fax: 503.682.7114Audix Corporation 9400 SW Barber St. Wilsonville, OR 97070ver 2.0 05-16深圳 0755-********成都 028-********西安 029-******** 上海 4831166**************规格参数如有变更,恕不另行通知。
概观DCLIP话筒夹系统使用方便且坚固耐用,可连接到话筒支架或任何数量的带有3/8"或5/8"螺纹的支架(包括话筒臂支架、三脚架、 Audix DVICE、Audix DCLAMP、其他鼓话筒夹)上。
DCLIP配有螺纹适配器,可与欧版3/8"话筒支架配合使用。
DCLIP经过优化,可与Audix D系列乐器话筒一起使用,适用于任何外径为19mm-23mm的话筒。
使用指南将话筒放入话筒夹的最佳方法是将话筒从夹子的顶部向下卡入到位(如右下角图片所示)。
请勿尝试将话筒滑入夹子的末端,因为夹子只有顶部有开口。
这种卡扣式设计可以非常紧密地夹住话筒,使其在任何位置都能牢固固定。
通过金属指旋螺丝,话筒在夹子上可以进行180°旋转。
指旋螺丝可以牢固锁定到位,不必过度拧紧。
如需松开指旋螺丝,只需逆时针转动即可(无需超过1/4圈)。
请注意,如果松开超过2整圈,螺丝和螺栓会分开。
适用于Audix D系列乐器话筒(图为Audix D2话筒)适用于枪式指向话筒(图为 Audix UEM81S )适用于Overhead铅笔电容话筒(图为 AudixADX51 )使用指南:将话筒头朝上卡入到位。
根据话筒的大小,可能需要相当大的压力才能将话筒卡入到位。
请不要担心,话筒夹弹性强,不会断裂。
话筒术语(国外英文资料)

话筒术语(国外英文资料)一、基础术语1. Microphone(话筒):一个设备,用于将声音转换成电信号,以便录制或传输。
2. Dynamic Microphone(动圈话筒):一种常见的话筒类型,使用线圈和磁铁来检测声音振动。
3. Condenser Microphone(电容话筒):另一种常见的话筒类型,使用电容变化来检测声音振动。
4. Ribbon Microphone(铝带话筒):一种较为罕见的话筒类型,使用轻薄的铝带来检测声音振动。
5. Shotgun Microphone(枪式话筒):一种长条形的话筒,用于捕捉特定方向的声音。
6. Lavalier Microphone(领夹话筒):一种小型的话筒,可以夹在衣服上,用于录音或演讲。
7. Headset Microphone(头戴话筒):一种戴在头上的话筒,用于电话会议或直播。
8. Boundary Microphone(边界话筒):一种放置在平面上的话筒,用于捕捉房间内的声音。
9. Omnidirectional(全向):一种话筒拾音模式,可以捕捉来自各个方向的声音。
10. Unidirectional(单向):一种话筒拾音模式,主要捕捉来自一个方向的声音。
11. Cardioid(心形):一种单向拾音模式,主要捕捉来自前方方向的声音。
12. Supercardioid(超心形):一种更窄的心形拾音模式,进一步减少了侧面和背面的声音拾取。
13. Hypercardioid(超心形):一种最窄的心形拾音模式,进一步减少了侧面和背面的声音拾取。
14. Polar Pattern(极性图):描述话筒拾音模式的一种图形表示。
15. Frequency Response(频率响应):话筒在不同频率下的灵敏度。
16. Sensitivity(灵敏度):话筒将声音转换为电信号的效率。
17. Impedance(阻抗):话筒和放大器之间的匹配度。
18. Phantom Power(幻象电源):一种为电容话筒提供电源的方法。
Adobe_Audition的人声精细处理
第一章音质主观评价音质的主观评价是反映声音系统中音调、音色、音量的综合听觉效果,声音系统即音源的声音经过拾取进入电声处理单元,最终从扬声器单元反映出来。
当然也包括人声。
在此我借用该理论用作人声精细处理的基础。
音质的主观评价需要掌握很多知识,比如各种声音的物理特性(对声音进行客观测量的结果)、心理声学知识、声音的动态范围、声音的频响特性、声压级、失真、延时混响、噪音等等。
令人相当的望而生畏,在此,列举出19种常用而又有代表性的评价用语,来简单的诠释音质的主观评价理论。
1、声音丰满所表现为声音的频带宽,动态范围大,中低频能量大,混响比例合适,音域宽广。
2、声音干瘪是丰满的反义词,表现为混响时间短,特别是缺少中高频混响声,听起来声音干涩,费力。
3、声音柔和声音的低频和中频能量充足,声音厚实松弛合适,混响声适合或稍大,中频和高频特性均匀,有一定的响度,听起来音色丰满、柔和不费力(即很多人推崇的电子管的“胆味”)4、声音尖是柔和的反义词,表现为声音频率特性不均匀,缺少低音,中频和高频分量过多,尤其在3400HZ和6800HZ两个频段成分过高,听觉上感到刺耳。
5、声音粗低频能量密度较大,中高频相对较少,音色粗狂,有力度,但是明亮度和混响度较差6、声音软声音失真小,混响适量,阻尼好,低频段展宽,声音松弛,软度合适的声音就是上述3的柔和。
但是过软的声音就缺少力度,中音不突出,声音不亮,清晰度差。
7、声音硬低音缺少,中高频偏多,特别是高频谐波衰减过快,低频混响短,瞬态相应差。
8、声音厚声音厚实,有力,低音丰满,高音合适,有适当的亮度,低频和中低频能量较强,直达声和混响声比例合适,给人一种厚实的感觉。
9、声音薄音色单薄,没有力度,混响少,平均声音能量较小,缺少中频和中低频。
10、声音圆润声音的频带较宽,音质纯真,失真极小,声压级合适,有一定的力度和亮度,低音不混,中音不硬,高音不毛,瞬态相应好,混响度合适。
丰满、明亮、清晰、自然。
Audix Fusion Series FP7 鼓麦包说明书

FP7OVERVIEWAudix revolutionized drum and percussion miking by designing instrument specific microphones. With the introduction of the Fusion Series, Audix created two attractively priced packages for today’s up and coming professionals.The FP7 Drum Pack contains a combination of f2, f5 and f6 dynamic microphones with the addition of two f9 condensers. The f5 is tuned for snare drum and can be used as well for bongos, timbales, guitar cabinets and acoustic instruments; the f2 is ideally suited for rack and floor toms, congas, djembe, bongos, timbales, brass and woodwind instruments. The f6, with its extended bass response, is designed for kick drum, bass cabinets, cajon and other low frequency instruments. The f9 condenser mics will capture the cymbal from overhead and also the hi-hat.Built to withstand the rigors of live stage applications, the Fusion Series mics are excellent for rehearsal, school, House of Worship and a wide variety of home recording applications.SUPPLIED ACCESSORIESDCLIP - Heavy duty mic clip (6) MC1 - Nylon mic clip (1)DFLEX - Dual pivot rim mounted clip with extra wide butterfly jaws (4) WSF9 - WSF9 Windscreens (2)OPTIONAL ACCESSORIESDVICE - Flexible mini-gooseneck with spring loaded rim mount clamp DCLAMP - Flexible mini-gooseneck with drum tension lug mountCBL20 - 20’ premium XLR-XLR balanced mic cable. Quad conductor, twisted pair with braided shield for maximum conductivity. 6 mm PVC jacketed.CBLDR25 - 25’ premium right angle XLR-XLR balanced mic cable. Quad conductor, twisted pair with braided shield for maximum conductivity. 6 mm PVC jacketed. SMT25 - Low profile shock mount system with nylon cable and thumbscrew for positioning. Designed for use with pencil condensers (f9). STANDKD - Short pedestal stand with telescoping boom armPROFESSIONAL DRUM AND PERCUSSION MIC PACKAGEINCLUDESPACKAGED SET OF 7 DRUM MICS Aluminum Road Case 3 x f2 Rack and Floor Tom Mics 1 x f5 Snare Mic 1 x f6 Kick Drum Mic2 X f9 Overhead MicsDCLIP DFLEX DVICE WSF9 DCLAMP CBL20 CBLDR25 STANDKD SMT25MC1USER TIPSThe f2, f6 and f9 microphones are supplied with the DCLIP , a heavy duty nylon stand adapter with snap-to-fit design; the f5 is supplied with the MC1 mic clip. Each clip comes with a 3/8” thread adapter which is mainly used with European mic stands.The following are some ideas as to how the microphones in the packs interact with each other.Kick drum: The f6 is the kick drum mic. A great accessory to help position the f6 is the STANDKD, which is specifically designed for that application. To position the f6, a good starting point is to place the mic inside the front hole of the kick drum, pointing toward the beater. (Tip: be sure that the grill is completely inside the hole). For more attack, move the mic closer toward the head, making sure not to position the mic right in front of the beater.Snare and toms: The f2 (snare) and f5 (toms) are designed to be close miked. A good starting point is two inches above the rim with the mic pointing toward the center of the head. For more “rim” sound, pull the mic back closer to the rim. For more resonance and depth of field, pull the mic further away from the head. The trick is to find the right balance between resonance and controlling bleed from the other drums.ALL SPECIFICATIONS SUBJECT TO CHANGE WITHOUT NOTICE.503.682.6933 Fax: 503.682.7114Audix Corporation 9400 SW Barber St. Wilsonville, OR 97070ver 3.0 01-17PRODUCT REGISTRATION: Please register your product online at /docs_12/about/product_registration.shtml .SERVICE AND WARRANTY: These microphones are under warranty for a period of 3 years to be free of defects in material and workmanship. In the event of a product failure due to materials or workmanship, Audix will repair or replace said product at no charge with proof of purchase. Audix does not pay or reimburse shipping costs for warranty repairs or returns. The warranty excludes any causes other than manufacturing defects, such as normal wear, abuse, environmental damage, shipping damage or failure to use or maintain the product per the supplied instructions. No Implied Warranties: All implied warranties, including but not limited to implied warranties of merchantability and fitness for a particular purpose are hereby excluded. The liability of Audix, if any, for damages relating to allegedly defective products shall be limited to the actual price paid by Dealer for such products and shall in no event include incidental or consequential damages of any kind. Should your microphones fail in any way, please contact the Audix Service department at 503.682.6933. A Return Authorization is required before returning any product. OTHER THAN THIS WARRANTY, AUDIX MAKES NO WARRANTIES, EXPRESS OR IMPLIED, WITH RESPECT TO THE PRODUCTS, THE USE OF THE PRODUCTS, THE PERFORMANCE OF THE PRODUCTS. AUDIX SHALL NOT BE LIABLE FOR SPECIAL INCIDENTAL, CONSEQUENTIAL, INDIRECT OR SIMILAR DAMAGES ARISING FROM OR BASED ON THE SALE, USE, STORAGE OR DISPOSAL OF THE PRODUCTS, AUDIX’S SERVICE WORK, BREACH OF WARRANTY, BREACH OF CONTRACT. NEGLIGENCE, OR ANY OTHER THEORY OF LIABILITY, EVEN IF AUDIX HAS BEEN ADVISED OF THE POSSIBILITY OF SUCH DAMAGES.SPECIFICATIONSF P 7The FP7 package includes two f9 condensers for overhead miking. With the addition of the overhead mics, you have the opportunity to create more depth of field and more presence within the mix. There is a choice of using both f9’s for overheads, or one for high hat and one for overhead.Overheads: There are several options when placing two mics overhead. The most common concept is to keep the snare as the focal point and move the mics into various left and right positions equal distance from the snare; 4 feet is a good starting point. For best results, keep the mics in a vertical position, keeping in mind that you are not necessarily just miking the cymbals but the whole kit. You will need to find a balance between the overhead mics and the drum mics, some of which will be dictated by the venue and the PA system.One for high-hat, one for overhead: The f9 for high hat should be placed 2-3 inches above the top cymbal and toward the outside edge. The overhead mic can be placed above the cymbals, generally above the rack toms. In the case where there are more cymbals on one side of the kit than the other, the mic can favor the side with the most cymbals.For more tips on miking your kit, please refer to the Audix DVD on “How to Mic your Drums” or visit the .f2f9f5f6。
迪美克 e 906 微音电子麦克风说明书

e 906Instruction manualDelivery includes Delivery includes• e 906• microphone clamp MZQ 100• pouch• quick guide• safety guideProduct overview1. Sound inlet basket2. 3-position slide switch for adjusting the presence filter3. XLR-3 connector4. FrontInstallationInstallationAttaching the microphoneScrew the microphone clamp to a stand.Place the microphone with its back end into the microphone clamp.Orient the microphone together with the microphone clamp.Connect the XLR-3 socket of the microphone cable (optional accessories) to the XLR-3 socket of the microphone.OperationPositioning the microphone an a guitar ampThe front of the microphone must face the guitar amplifier.It is vital to observe the following notes:Position Resulting sound CommentaryA many treblesaggressive soundmicrophone directed towards the dome of theloudspeakerB less trebles, more lowermids, smoother soundbalanced, natural soundgood starting position:microphone directed towards the middle betweendome and edge of the loudspeakerIf necessary, turn the microphone by approx. 30°towards the edge.C less trebles, more lowermids, smoother soundmicrophone directed towards the edge of theloudspeakerPositioning the microphone on a drumThe front of the microphone must face the drum.It is vital to observe the following notes:Position Resulting sound CommentaryD more fundamental tonelittle overtonesposition on the drum:• 3–5 cm above the batter head• directed towards the center of the batter headThe fundamental tone to overtones ratio can beadjusted via the angle. The most balanced results areobtained at an angle of 30–60°.E less fundamental tonemany overtonesPositioning the monitor loudspeakersTo prevent feedback and crosstalk, postion your monitor loudspeakers in the angle area of the highest cancellation of the microphone (approx. 120°).Adapting the sound characteristicsThe e 906 features a switchable presence filter which allows to adapt the microphone to the diffe-rent sound requirements and styles (see frequency response).Use a pointed tool such as a small screwdriver to move the 3-position slide switch to the desiredposition.Position Setting Suitabilityboosted presence range e.g. for aggressive metal rhythm guitarsnormal presence range e.g. for classic rockattenuated presence range e.g. for warm and smooth jazz and blues soundsThe mid frequency of the presence filter is 4.2 kHz.Cleaning and maintaining the e 906Cleaning and maintaining the e 906CAUTIONLIQUIDS CAN DAMAGE THE ELECTRONICS OF THE PRODUCT!Liquids entering the housing of the product can cause a short-circuit and damage the electronics.Keep all liquids away from the product.Do not use any solvents or cleansing agents.Disconnect the products from the power supply system and remove rechargeable batteries and batteries before you begin cleaning.Clean all products only with a soft, dry cloth.SpecificationsTransducer principle dynamicFrequency response40 - 18,000 H zPick-up pattern super-cardioidSensitivity (free field, no load)2,2 mV/PaNominal impedance (at 1 kHz)350 ΩMin. terminating impedance1 kΩConnector XLR-3Dimensions55 x 34 x 134 mmWeight140 gSpecificationsPolar pattern125 Hz 250 Hz 500 Hz 1,000 Hz 2,000 Hz 4,000 Hz8,000 Hz 16,000 Hz30°0°180°150°120°60°90°0510152025dB30°0°180°150°120°60°90°Frequency response-40-50-60-70-80-90501002005001,0002,0005,00010,00020,000H zdBV (0°, 1 m)Connector assignmentUNBALANCEDBALANCEDOverview of applicationsOverview of applicationsPrimary applicationSecondary application。
Audix DP5A 5个鼓麦包说明书

DP5ALIVE SOUND OR RECORDINGThe DP5A drum pack contains the fi ve microphones required to mic a standard rock kit: kick, snare, rack toms and fl oor tom. Perfect for stage or studio, this selection of dynamic mics features exclusive Audix VLM TM capsule technology offering accurate sound reproduction in very high SPL applications. Mic clips, mounts and rugged aluminum carrying case are included.Professional set of 5 drum mics for stage or studioMics work in tandem to replicate each drum accurately and independently Easy to set up and positionCLOSE MIKINGThe D6 for kick drum and the i5 for snare are considered must haves for every drummer. The kick and snare are considered the core of any drum kit and the foundation for every groove. Close miking insures that they will be captured in the mix. If either the kick or the snare is unable to be heard, there is simply no groove. The D2 and D4 are also industry standards for toms and fl oor toms. Being high SPL dynamic microphones, the i5, D2, D4 and D6 excel at “close miking”. These four microphones, in conjunction with this miking technique, are guaranteed to capture the attack and percussion sound of each drum. Also, by having the mic close to the source of the sound, it helps to isolate and control the sound of each drum. The DP5A allows for total control of your drum sound on stage or in the studio.SUPPLIED ACCESSORIESDVICE - Spring loaded rim mount clamp MC1 - Nylon mic clipDCLIP - Heavy duty mic clip provided with D & SCX SeriesOPTIONAL ACCESSORIESDFLEX - All purpose percussion clamp DCLAMP - Tension rod mic clampSTANDKD - Adjustable kick drum mic stand with telescopic boom CBL20 - 20’ XLR-XLR mic cableCBLDR25 - 25’ right angle XLR-XLR mic cableProfessional Drum and Percussion Mic PackageDP5AINCLUDESPACKAGED SET OF 5 DRUM MICS Aluminum Road Case 1 x i5 Snare Mic 2 x D2 Rack Tom Mics 1 x D4 Floor Tom Mic 1 x D6 Kick Mic 4 x DVICE Rim Mounts 1 x MC1 Mic Clip1 x DCLIP Mic ClipDVICE DCLAMP DCLIP CBL20MC1STANDKD DFLEX CBLDR25ALL SPECIFICATIONS SUBJECT TO CHANGE WITHOUT NOTICE.503.682.6933 Fax: 503.682.7114Audix Corporation 9400 SW Barber St. Wilsonville, OR 97070ver 3.0 09-15PRODUCT REGISTRATION: Please register your product online at /docs_12/about/product_registration.shtml .SERVICE AND WARRANTY: These microphones are under warranty for a period of 5 years to be free of defects in material and workmanship. In the event of a product failure due to materials or workmanship, Audix will repair or replace said product at no charge with proof of purchase. Audix does not pay or reimburse shipping costs for warranty repairs or returns. The warranty excludes any causes other than manufacturing defects, such as normal wear, abuse, environmental damage, shipping damage or failure to use or maintain the product per the supplied instructions. No Implied Warranties: All implied warranties, including but not limited to implied warranties of merchantability and fi tness for a particular purpose are hereby excluded. The liability of Audix, if any, for damages relating to allegedly defective products shall be limited to the actual price paid by Dealer for such products and shall in no event include incidental or consequential damages of any kind. Should your microphone fail in any way, please contact the Audix Service department at 503.682.6933. A Return Authorization is required before returning any product. OTHER THAN THIS WARRANTY, AUDIX MAKES NO WARRANTIES, EXPRESS OR IMPLIED, WITH RESPECT TO THE PRODUCTS, THE USE OF THE PRODUCTS, THE PERFORMANCE OF THE PRODUCTS. AUDIX SHALL NOT BE LIABLE FOR SPECIAL INCIDENTAL, CONSEQUENTIAL, INDIRECT OR SIMILAR DAMAGES ARISING FROM OR BASED ON THE SALE, USE, STORAGE OR DISPOSAL OF THE PRODUCTS, AUDIX’S SERVICE WORK, BREACH OF WARRANTY, BREACH OF CONTRACT. NEGLIGENCE, OR ANY OTHER THEORY OF LIABILITY, EVEN IF AUDIX HAS BEEN ADVISED OF THE POSSIBILITY OF SUCH DAMAGES.SPECIFICATIONSD P 5Ai5D2D4D6Transducer Dynamic VLM Type B Dynamic VLM Type B Frequency Response 50 Hz - 16 kHz 68 Hz - 18 kHz Polar Pattern Cardioid Hypercardioid Output Impedance 150 ohms 280 ohms Sensitivity 1.5 mV / Pa @ 1k 1.2 mV / Pa @ 1k Maximum SPL ≥140 dB ≥144 dB Off -axis rejection ≥23 dB ≥30 dB Power Requirements NoneNoneMaterials / Finish Zinc Alloy / BlackFinish Black Hard Coat Weight 250 g / 8.8 oz 250 g / 8.8 oz Length141.5 mm / 5.6 in100 mm / 3.9 inDynamic VLM Type D Dynamic VLM Type B 40 Hz - 18 kHz 30 Hz - 15 kHz Hypercardioid Cardioid 280 ohms 280 ohms 1.4 mV / Pa @ 1k 0.8 mV / Pa @ 1k ≥144 dB ≥144 dB >20 dB >20 dB NoneNoneBlack Hard Coat Machined Aluminum / Black Finish 128 g / 4.5 oz 254 g / 8.9 oz 100 mm / 3.9 in117 mm / 4.6 inUSER TIPSD6 - Kick Drum: To position the D6, a good starting point is a few inches inside the port of the front head with the mic pointing off -center and not directly at the beater. For more attack, move the mic closer towards the beater. For more bass, pull the mic farther away from the beater. The STANDKD is a great accessory to help achieve the perfect position for the D6. i5 - Snare: A good starting point is two inches above the rim with the mic pointing towards the center of the head. For more “rim” sound, pull the mic back closer to the rim. For more resonance and depth of fi eld, pull the mic further away from the head. The trick is to fi nd the right balance between resonance and attack while still controlling bleed from the other drums.D2 / D4 - Floor Toms: Place the mic about two inches above the head and point the mic across the head towards the center of the drum. This is the best position to capture the fundamental resonance and decay of the drum with minimal ring.Note that the DCLAMP or DFLEX mounts are available in order to attach the mics to hand percussion instruments or non-conventional rims.。
Audix Performance Series 演讲系列说明书

AUDIX PERFORMANCE SERIES SCAN. SYNC. PLAY!503.682.6933©2016 Audix Corporation All RightsReserved.Audix and the Audix Logo aretrademarks of Audix Corporation.January 2016 PreliminaryWhether you are a vocalist, musician, performer or presenter, the Audix Performance Series is designed to take the mystery out of wireless with a professional-grade system that is simple, reliable and versatile.Going from set up to performance is as easy as:SCANSYNCPLAY!RECEIVERSAvailable in single and dual rack mountable models, the receivers for the Audix Performance Series feature a contemporary design, rugged construction and intuitive menus .Single Channel R41 R61Dual Channel (R42 and R62) | Dual channel systemhoused within a durable rack mount receiver. Operates with one set of antennas and one power supply.. 32 MHz Extended spectrum receiver . Microprocessor-controlledantenna diversity. 8 compatible system operation . 106 pre-coordinated frequencies for quick, easy and reliable set up . 300’ (91 Meters) operating range . Metal rack mountable chassis . RF and AF indicators. High contrast LCD display. One-touch auto scan searches for clear channel . One-touch sync links transmitter to receiver via infrared beam. Choice of balanced XLR or ¼” outputs. Soft keys control output levels, squelch, pilot, lockout . Wide selection of handheld, instrument, headset and lavalier options. 64 MHz Wide spectrum tuning receiver. True diversity, dual receiver modules . 16 compatible system operation . 207 pre-coordinated frequenciesfor quick, easy and reliable set up . 2560 tunable frequencies. 300’ (91 Meters) operating range . Metal rack mountable chassis . RF and AF indicators. High contrast LCD display. One-touch auto scan searches for clear channel . One-touch sync links transmitter to receiver via infrared beam. Choice of balanced XLR or ¼” outputs. Soft keys control output levels, squelch, pilot, lockout . Wide selection of handheld, instrument, headset and lavalier optionsFour dual systems may be used with one ADS48 antenna distribution system.R41R61TRANSMITTERSAudix Performance Series transmitters consist of both handheld and bodypack designs.Handheld H60 | The H60 features an elegantlydesigned slim line body that is compact, well-balanced and comfortable to hold.SYSTEMSBelow are some of the system options available. Systems include receiver, antennas, power supply, bodypack or handheld transmitter and microphone.. 64 MHz Wide spectrum transmitter(works with all Performance Series receivers). Durable metal housing. May be used with dynamic (OM Series) andcondenser microphones (VX5). AF and RF gain control. Modular and interchangeable capsule assemblies . High contrast LCD display with group, channeland battery indicator. Soft mute switch. 10 Hour Run Time - AA batteries. 64 MHz Wide spectrum transmitter(works with all Performance Series receivers). Precision metal housing . Lightweight, slim design . Modular antenna design. May be used with lavalier, head worn andinstrument mics as well as electric guitar and bass. AF and RF gain control. High contrast LCD display with group, channeland battery indicator . Soft mute switch. 10 Hour Run Time - AA batteriesBodypack B60 | The Audix Performance Seriesbody pack system is very contemporary in design, rugged,comfortable to wear and easy to use.1.HANDHELDOM2 | OM5 | VX54. INSTRUMENTGuitar | Sax | Flute5. COMBOGuitar and Vocal | Lavalier and Vocal2. LAVALIERL5 | ADX103. HEADWORNHT2 | HT5 | HT7SPECIFICATIONSH60B60RF Power Output 10 mW, 40 mW 10 mW, 40 mW Frequency Bandwidth 64 MHz64 MHzGain Controls 0 dB, -6 dB, -12 dB 0 db, -6 dB, -12 dB Input Connector n/a 3 pin mini-XLR Battery (not included) 2 AA 1.5 V 2 AA 1.5 V Current Consumption 110 mA typical110 mA typicalBattery Life Approximately 10 hours(depending on battery type and usage)Approximately 10 hours(depending on battery type and usage)Input Impedance n/aMic: 10k Ohm, Line: 1M OhmMax Sound Pressure Level >140 dB (depending on capsule)approx. 128 db to140 dB (depending on mic)Dimensions 2.1” diameter body, 10.43” (L), 53 mm diameter body, 265 mm (L)67 mm (W) x 90 mm (L) x 17 mm (D)2.6" (W) x 3.5" (L) x .67" (D)Net Weight11.0 oz / 312 g (without battery)3.0 oz / 85 g (without battery)Specifications subject to change without notice.R41R61Frequency Range 522 MHz – 554 MHz / 554 MHz - 586 MHz 522 MHz – 586 MHz Bandwidth 32 MHz64 MHzCompatible Systems 8 compatible system operation 16 compatible system operation Switchable Frequencies 106 preset frequencies 207 preset frequenciesManual Mode n/a2560 frequencies (spaced 25 KHz apart)Frequency Response 45 Hz – 18 kHz 45 Hz – 18 kHz Signal to Noise Ratio >105 dB >105 dB Compander System 2:12:1Pilot Tone 32 kHz32 kHzReceiving System Single tuner, antenna diversityDual tuner, true diversitySignal-to-Noise Ratio 105 dB at 30 kHz deviation (IEC-weighted)112 dB at 30 kHz deviation (IEC-weighted)Total Harmonic Distortion ≤.7% (10 kHz deviation at 1 kHz)≤.4% (10 kHz deviation at 1 kHz)Sensitivity5 dBμV (S/N 60 dB at 25 kHz deviation, IEC-weighted) 5 dBμV (S/N 60 dB at 25 kHz deviation, IEC-weighted) Intermediate Frequency 110.6 MHz, 10.7 MHz110.6 MHz, 10.7 MHzAudio Output (AF=0)1/4" 1100 mV (at 1 kHz,)10 kHz deviation, 10 k ohm load Balanced: 2200 mV (at 1 kHz,) 10 kHz deviation, 600 ohm load 1/4" 1100 mV (at 1 kHz,)10kHz deviation, 10k ohm load Balanced: 2200mV (at 1 kHz,) 10kHz deviation, 600 ohm load Output Connectors 1/4", XLR1/4", XLRNominal / Peak Deviation Balanced: -12 to +9 dBuLine: -24 to +4 dBu (adjustable in 3 dB-steps)Balanced: -12 to +9dBuLine: -24 to +4dBu (adjustable in 6 dB-steps)Adjacent Channel Rejection >65 dB >65 dB Intermodulation Spacing >65 dB >65 dB Image Rejection >70 dB >70 dB Range 300', (91 M)300', (91 M)Power Supply 100 - 240V / 50 - 60 Hz, 12V DC, 1A100 - 240V / 50 - 60 Hz, 12V DC, 1ADimensions 205 mm (W) x 206 mm (D) x 44 mm (H)406 mm (W) x 209 mm (D) x 44 mm (H) (R42)205 mm (W) x 206 mm (D) x 44 mm (H)406 mm (W) x 209 mm (D) x 44 mm (H) (R62)Net Weight1.92 lbs. / 870 g4.75 lbs. / 2.1 kg (R42)2.43 lbs. / 1.1 kg4.75 lbs. / 2.1 kg (R62)。
如何用Audition进行人声处理 让你的声音更有磁性-au调人声
之南宫帮珍创作人声音源的频谱分布比力特殊, 就其发音方式而言, 他有三个部份:一个是由声带震动所发生的乐音, 此部份的发音最为灵活, 分歧音高、分歧发音方式所发生的频谱变动也很年夜;二是鼻腔的形状较为稳定, 因而其共鸣所发生的谐音频谱分布变动不年夜;三是口腔气流在齿缝间的摩擦声, 这种齿音与声带震动所发生的乐音基本无关. 频率均衡可以年夜致的将这三部份频谱分离出来.用语调节鼻音的频率段在500Hz, 以下均衡的中点频率一般在80~150Hz, 均衡带宽为4个倍频程.例如, 可以将100Hz 定为频率均衡的中点, 均衡曲线应从100~400Hz平缓的过渡, 均衡增益的调节范围可以为+10Db~ -6dB.这里应提醒年夜家的是:进行此项调整的监听音箱不得使用低频发音很弱的小箱子, 以防止鼻音被无意过分加重. 人声乐音的频谱随音调的变动也很年夜, 所以调节乐音的均衡曲线应非常平缓, 均衡的中点频率可在1000~3400Hz, 均衡带宽为六个倍频程.此一频段控制着歌唱发音的明亮感, 向上调节可温和地提升人声的亮度.然而如需降低人声的明亮度, 情况就会更复杂一些.一般音感过分明亮的人声年夜多都是2500Hz附近的频谱较强, 这里我们可用均衡带宽为1/2倍频程, 均衡增益为-4dB左右的均衡处置, 在2500Hz附近寻找一个效果最好的频点即可. 人声齿音的频谱分布在4kHz以上.由于此频段亦包括部份乐音频谱, 所以建议调节齿音的频段应为6~16KHz, 均衡带宽为3个倍频程, 均衡中点频率一般在10~12KHz, 均衡增益最年夜向上可调至+10Db;如需向下降低人声齿音的响度, 则应使用均衡带宽为1/2倍频程, 均衡中点频率为6800Hz的均衡处置, 其均衡增益最低可向下降至-10Db. 由以上分析可以看出, 对人声进行频率均衡处置时, 为突出某一音感而进行的频段提升, 都尽量使用曲线平缓的宽频带均衡.这是为了使人声鼻音、乐音、齿音三部份的频谱分布均匀连贯, 以使其发音自然、顺畅.从理论上讲, 应使人声在发任何音时, 其响度都坚持恒定. 为了在不破坏人生自然感的基础上对其进行特定效果的处置可以使用1/5倍频程的均衡处置, 具体有以下几种情形:(1)音感狭窄, 缺乏厚度, 可在800Hz处使用1/5倍频程的衰减处置, 衰减的最年夜值可以在-3dB. (2)卷舌齿音的音感尖啸, "嘘"音缺乏清澈感, 可在2500Hz处使用1/5倍频程的衰减处置, 衰减的最年夜值可以在-6Db. 对音源的均衡处置, 最好是使用能显示均衡曲线的均衡器.一般数字调音台均衡器上的均衡增益调节钮用"G"来标识, 均衡频率调节钮用"F"来标识, 均衡带宽调节钮用"F"或"Q"来标识. 延时反馈延时反馈是效果处置傍边应用最为广泛, 但也是最为复杂的方式.其中, 混响、合唱、镶边、回声等效果, 其基本处置方式都是延时反馈. 1、混响混响效果主要是用于增加音源的融合感.自然音源的延时声阵列非常密集、复杂, 所以模拟混响效果的法式也复杂多变.罕见参数有以下几种:混响时间:能逼真的模拟自然混响的数码混响器上都有一套复杂的法式, 其上虽然有很多技术参数可调, 然而对这些技术参数的调整都不会比原有的效果更为自然, 尤其是混响时间. 高频滚降:此项参数用于模拟自然混响傍边, 空气对高频的吸收效应, 以发生较为自然的混响效果.一般高频混降的可调范围为0.1~1.0.此值较高时, 混响效果也较接近自然混响;此值较低时, 混响效果则较清澈. 扩散度:此项参数可调整混响声阵密度的增长速度, 其可调范围为0~10, 其值较高时, 混响效果比力丰厚、温暖;其值较低时, 混响效果则较空旷、冷僻. 预延时:自然混响声阵的建立城市延迟一段时间, 预延时即为模拟次效应而设置. 声阵密度:此项参数可调整声阵的密度, 其值较高时, 混响效果较为温暖, 但有明显的声染色;其值较低时, 混响效果较深邃, 切声染色也较弱. 频率调制:这是一项技术性的参数, 因为电子混响的声阵密度比自然混响稀疏, 为了使混响的声音比力平滑、连贯, 需要对混响声阵列的延时时间进行调制.此项技术可以有效的消除延时声阵列的段裂声, 可以增加混响声的柔和感. 调治深度:指上述调频电路的调治深度. 混响类型:分歧房间的自然混响声阵列分歧也较年夜, 而这种分歧也不是一两项参数就能暗示的.在数码混响器傍边, 分歧的自然混响需要分歧的法式.其可选项一般有小厅(S-Hall)、年夜厅(L-Hall)、房间(Room)、随机(Random)、反混响(Reverse)、钢板(Plate)、弹簧(Sprirg)等.其中小厅、年夜厅房间混响属自然混响效果;钢板、弹簧混响则可以模拟早期机械式混响的处置效果. 房间尺寸:这是为了配合自然混响效果而设置的, 很容易理解. 房间活跃度:活跃度, 就是一个房间的混响强度, 他与房间墙面吸声特性有关, 此项参数即用于调节此特性. 早期反射声与混响声的平衡:混响的早期反射声与其处置效果特性关系密切, 而混响声阵的音感则不那么变动多端, 所以数码混响器的这两部份的生成是分开的, 本参数就是用于调整早期反射声与混响声阵之间响度平衡. 早期反射声与混响声的延时时间:即早期反射声与混响声阵之间的延时时间控制.此时间较长, 混响效果的前段就较清澈;此时间较短, 早期反射声与混响声就会重叠在一起, 混响效果的前段就较浑浊. 除以上可调参数之外, 混响效果还有一些其他附属参数, 例如低通滤波、高通滤波、直达/混响声的响度平衡控制等. 2、延时延时就是将音源延迟一段时间后, 再欲播放的效果处置.依其延迟时间的分歧, 可分别发生合唱、镶边、回音等效果. 当延迟时间在3~35ms之间时人耳感觉不到滞后音的存在, 而且他与原音源叠加后, 会因其相位干涉而发生"梳状滤波"效应, 这就是镶边效果.如果延迟时间在50ms以上时, 其延迟音就清晰可辨, 此时的处置效果才是回音.回音处置一般都是用于发生简单的混响效果. 延时、合唱、镶边、回音等效果的可调参数都差未几.具体有以下几项:*延时时间(Dly), 即主延时电路的延时时间调整. *反馈增益(FB Gain), 即延时反馈的增益控制. *反馈高频比(Hi Ratio), 即反馈回路上的高频衰减控制. *调制频率(Freq), 指主延时的调频周期. *调制深度(Depth), 指上述调频电路的调制深度. *高频增益(HF), 指高频均衡控制. *预延时(Ini Dly), 指主延时电路预延时时间调整. *均衡频率(EQ F), 这里的频率均衡用于音色调整, 此为均衡的中点频率选择. 由于延时发生的效果都比力复杂多变, 如果不是效果处置专家, 建议使用设备提供的预置参数, 因为这些预置参数给出的处置效果一般都比力好. 3、声激励对音源信号进行浅度的限幅处置, 音响便会发生一种类似"饱和"的音感效果从而使其发音在不提高其实际响度的基础上有响度增年夜的效果. 一些数码效果器上也配有非线性饱和效果, 他就是对信号的振幅处置, 模拟年夜电瓶信号在三极管上的饱和所引起的非线性, 从而发生出"发硬"的音感效果. 由于限幅失真所引起的主要是发生额外的高次谐波成份, 因而新设计的激励器, 为了使其处置效果柔和一些, 都是通过在音源中家置高次载波成份来模拟限幅失真, 营造不那么"嘶哑"的声激励效果. 另外, 通过一个用于加强高次谐波的高通滤波器对原信号进行处置, 然后再叠加在经延时的原信号上, 可以营造出音头清澈的声效果.显然、这种处置方式可以发生出不那么喧闹的激励处置. 激励处置类似于音响设备的过载失真, 因而对音源的过量激励, 会发生令人不悦的喧闹感.由于早期音响设备的保真度都不高, 人们已经习惯了那种稍显喧闹的音响, 而对音感清洁的高保真度音响, 反而不太习惯, 感觉其发音过分柔弱.在人声音源傍边, 除一少部份经过专门训练的人之外, 年夜部份的发言都缺乏劲度, 因而这里的激励处置是十分需要的. 对人声的激励处置有下面几种情形:(1)对人声乐音的激励处置, 其频谱分布以2500Hz为中点.此种激励的效果比力自然舒适、对增加音源突出感的作用也比力明显. (2)对人声鼻音的激励处置, 其频谱分布以500Hz为中点.此种激励可以有效地增年夜人声的劲度感. (3)对人声800Hz附近进行激励, 可以增加音源的喧嚣感, 固然此处置方式的使用应十分谨慎, 最好是只用于摇滚乐的演唱. (4)对人声3500-6800Hz范围内的频谱, 不宜使用激励处置, 因为它容易使音源发生令人不悦的喧闹声响. (5)对人声的齿音一般应防止使用激励处置, 因为此频段的失真很容易被人发觉.固然如果是使用激励效果比力柔和的数字式激励器, 也可以对齿音做轻微的激励处置, 以用于加重齿音的清析感.其处置的频谱应在7200Hz以上. 歌唱发音的激励处置通常要守旧一些.在实际的调音傍边, 激励处置的音感效果有可能随长时间的听音而逐渐弱化, 所以在调节激励效果时, 时间不要超越10分钟. 对人声音源的激励处置, 最好是使用数码效果处置器.它通常有以下几项调整参量: 1.输入增益(Gmn), 用于调节输入电平, 注意此处切勿使设备发生过载. 2.调谐频率(Tuning), 根据需要处置的频段, 选择一个合适的频率. 3.驱动电平(Drive), 用于调整激励的深度.驱动电平较年夜时, 效果比力喧闹;驱动电平较小时, 效果则比力温和. 4.混合比率(Mix), 即原信号与效果信号的响度比. 效果处置的整体规划对人声音源的精细处置, 需要使用1台全数字式调音台, 至少3台数字式效果器和一台数字式激励器, 其连接方式如附图所示. 首先在调音台上, 使用通道均衡控制单位对人声进行音色调整, 以使其音感得以改善, 这里给出几个经常使用的例子. (1)8OOHz附近的频段可使人发生某种厌烦感, 因而是可在此频段予以最年夜为15dB的衰减, 频带宽度为1/5倍频程, 用于改善人声发音的总印象;(2)68O0Hz附近的频段可使人声发生尖啸、难听的感觉, 可在此频段予以最年夜为10dB 的衰减, 频带宽度为l/5倍频程, 用以减弱齿音的尖啸感;(3)对发音过亮、有炸耳棍子的感觉者, 可在3400Hz 处予以最年夜为8dB的衰减, 频带宽度为1/3倍频程;(4)对鼻音过重者, 可在500Hz以下频段适当衰减, 衰减带宽为3倍频程;(5)齿音的超高频段由于受人耳灵敏度的影响, 需对12KHz处提升6dB(频带宽度为2倍频程), 其响度才华与人声的乐音平衡. 以上均衡处置较适用于现场扩音, 如果是多轨录音或节目转发, 则应将增益的调节量减半. 均衡调好之后, 再调节激励器.先将激励器的驱动电平和混频电平调至最年夜状态, 频率调谐放在2500Hz, 此时如果其发音已显喧闹, 或音色过硬, 可将驱动电平调低, 应注意这种调整有变动的是音源的硬度.如果驱动电平调在较高的位置, 而只将混频电平调低, 则高硬度声响的音响坚持不变, 但它会被未经激励处置的原声略微掩盖.此一现象在激励深度很强时比力明显, 其中前一种发音给人的听感就是原声, 后一种则可发生出两层声音, 它具有增加人声条理感的效果. 一般1台激励器只能处置一个频段, 而且很多单一功能激励器的连接都要求不能并联, 只能串连.如需对音源的多个频段加激励, 这里建议在附图所示的设备连接傍边, 混响器应选用含有激励处置的多重效果器(如YAMAHA SPX990), 此时就可以用激励器处置500Hz、800Hz和7200Hz频段, 用混响器上的激励功能处置2500Hz频段. 再次提醒年夜家的是, 激励处置的调整时间不能太长, 以免人耳疲劳后, 无法准确识别激励的水平是否合适. 最后就是调整混响效果.这里的混响效果包括两个方面, 一个是基础润饰, 另一个是强染色. 混响处置的基础润饰, 主要是为了增加音源的融和性, 但又不能让人听出有房间残响.此处的混响处置的强染色效果, 主要是用于为音源生成余音缭绕渲染性.其处置方式有以下3种情形:(1)生成空间感.使用厅堂或房间混响效果.模拟余音明显的自然混响效果, 是混响处置简单而又有效的方式, 对此效果通道上3500Hz附近的频段稍作提升, 可以发生穿透感良好的高亮度声响.固然, 也有一个缺点, 即处置的效果比力浑浊, 有时带有一种"闷罐"声响. (2)生成回音.长延时时间的延时反馈处置, 可以模拟山谷回音效果;处置的延时时间一般都与演唱歌曲的节奏合拍.为使其效果更具有遥远感, 可对其1600Hz以下和3800Hz以上的频段适量衰减.模拟山谷回音效果, 很大都码效果处置器上都有现成的法式可供使用. (3)生成融和的声布景.余音缭绕的混响效果对人声音源的美化作用非常有效, 几乎所有的人声演唱都要使用混响.在不招致其发音变浑, 或引起"闷罐"声的前提下, 我们认为混响效果越强越好, 但实际经常是混响效果还很弱时, 其发音已经变浑, 并引起明显的"闷罐"声. 为了在不招致其发音变浑, 或引起"闷罐"声的前提下, 生成融和的声布景.下面推荐如下效果处置方式, 即延时一混响串连处置方式.此种处置的延时时间一般为200-600ms, 反馈增益40%-60%, 混响使用年夜厅混响效果, 混响时间为2-8s.串连处置后的混响效果要求平滑、连贯.如果处置后的声响音头毕露, 则可作如下调整, 一是缩短延时时间, 二是增加混响的响度, 三是增年夜混响的时间. 混响处置的强染色效果, 一般都应在基础润饰的前提下进行, 这样强染色处置就可以弱一些.。
创新Audigy ZS SB 声卡使用和调试简介
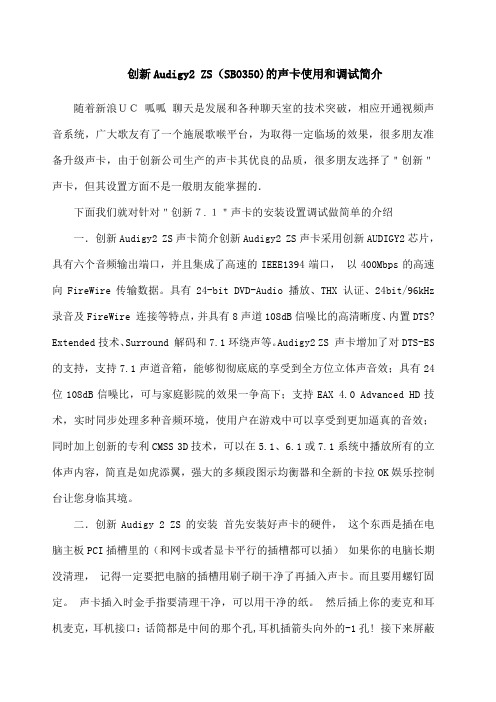
创新Audigy2 ZS(SB0350)的声卡使用和调试简介随着新浪UC呱呱聊天是发展和各种聊天室的技术突破,相应开通视频声音系统,广大歌友有了一个施展歌喉平台,为取得一定临场的效果,很多朋友准备升级声卡,由于创新公司生产的声卡其优良的品质,很多朋友选择了"创新"声卡,但其设置方面不是一般朋友能掌握的.下面我们就对针对"创新7.1"声卡的安装设置调试做简单的介绍一.创新Audigy2 ZS声卡简介创新Audigy2 ZS声卡采用创新AUDIGY2芯片,具有六个音频输出端口,并且集成了高速的IEEE1394端口,以400Mbps的高速向FireWire传输数据。
具有24-bit DVD-Audio 播放、THX 认证、24bit/96kHz 录音及FireWire 连接等特点,并具有8声道108dB信噪比的高清晰度、内置DTS? Extended技术、Surround 解码和7.1环绕声等。
Audigy2 ZS 声卡增加了对DTS-ES 的支持,支持7.1声道音箱,能够彻彻底底的享受到全方位立体声音效;具有24位108dB信噪比,可与家庭影院的效果一争高下;支持EAX 4.0 Advanced HD技术,实时同步处理多种音频环境,使用户在游戏中可以享受到更加逼真的音效;同时加上创新的专利CMSS 3D技术,可以在5.1、6.1或7.1系统中播放所有的立体声内容,简直是如虎添翼,强大的多频段图示均衡器和全新的卡拉OK娱乐控制台让您身临其境。
二.创新Audigy 2 ZS的安装首先安装好声卡的硬件,这个东西是插在电脑主板PCI插槽里的(和网卡或者显卡平行的插槽都可以插)如果你的电脑长期没清理,记得一定要把电脑的插槽用刷子刷干净了再插入声卡。
而且要用螺钉固定。
声卡插入时金手指要清理干净,可以用干净的纸。
然后插上你的麦克和耳机麦克,耳机接口:话筒都是中间的那个孔,耳机插箭头向外的-1孔! 接下来屏蔽原先的声卡的具体方法:到系统里屏蔽声卡(我就习惯到系统屏蔽以前的声卡) 步骤: “我的电脑”——单击右键————管理——设备管理器——点开<声音.视频和游戏控制器>一栏前的+------找出原先的声卡(一般是AC‘97,还有就是High Definition Audio)把创新Audigy 2 ZS附带的光盘驱动装入光驱(为了驱动和随带的软件能成功安装,之前要退出杀毒软件,防火墙、、、),自动运行出现如下界面。
Audix HT5 专业头戴型电容麦克风说明书

HT5OVERVIEWThe HT5 is a professional pre-polarized headworn condenser microphone designed for stage, presentation and broadcast applications. T he HT5 is known for its excellent sonic characteristics, intelligibility, low profi le, high sensitivity and comfort. Designed primarily for use with Audix wireless systems, the HT5 may also be used as a wired mic. Simply order the APS910 or APS911 phantom power adapter for use with a standard mic cable.Characterized with a uniformly controlled omni-directional polar pattern, the HT5 is designed to capture vocals from a comfortable distance of 2”-3” off axis. With a wide frequency range of 20 Hz - 20 kHz, the HT5 will handle high sound pressure levels of ≥140 dB without distortion.The HT5 is easy to position, lightweight and manufactured with high standards and tight tolerances. Roadworthy construction includes a rubber coated steel alloy frame, a high performance 5 mm capsule, black or beige fi nish, and a 3’ high quality cable terminating in a mini 3-pin XLRf connector.MODEL VARIATIONSHT5 - Black headset mic only with a 3’ cable terminating with 3-pin mini XLR for use with Audix wireless systems HT5BG - Same as HT5 in beigeHT54PIN - Same as HT5 with 4-pin mini-XLR HT5BG4PIN - Same as HT54PIN in BeigeSUPPLIED ACCESSORIES3’ integrated mic cable with mini 3-pin XLRf connectorWindscreen - external foam windscreen for reducing wind, sibilance and pop noise MCL5 - lapel clip/cable holderOPTIONAL ACCESSORIESAPS910 - 48 V phantom power adapter for use with electret condenser microphones.APS911 - Optional phantom power adapter for use with electret condenser microphones. Runs on AA batteries when phantom power is not available. Features on/off switch and bass roll-off fi LIPBE - Collar clip beige CCLIPBL - Collar clip blackCondenser Headworn MicrophoneHT5FEATURES·Hands free, headworn presentation microphone ·Optimized for clear, accurate speech ·Lightweight and low profile ·Available in black and beige · 3 year warrantyAPPLICATIONS·Speech ·Presentation ·Vocal solos ·Videography·Broadcast ·Violin, fluteMCL 5APS910APS911HiLoFREQUENCY RESPONSEPOLAR PATTERNSARCHITECT AND ENGINEER SPECIFICATIONSThe microphone shall be a back plate pre-polarized condenser with an omni-directional polar pattern. The microphone shall operate on 5-52 Volts biased from a wireless bodypack or phantom power and the nominal output impedance shall be equal to 2000 ohms at 1 kHz. The microphone shall have a sensitivity of 12 mV / Pa at 1 kHz. The microphone shall have a maximum SPL level of 140 dB with a THD of 0.5%. The headset shall be made of flexible steel alloy with steel coiled gooseneck supporting the microphone element.OPERATION AND MAINTENANCEThe HT5 microphone is designed for use with the Audix wireless bodypack. The HT5 may be used with other brands of wireless bodypacks, however, the connector and wiring will most likely have to be modified in order to match the specs of the system being used.Using the HT5 as a wired mic: The HT5 can be used as a wired microphone with the addition of either the APS910 or APS911 phantom power adapter. The HT5 will not operate without phantom power voltage (minimum of 5 volts) which is available on most professional mic preamps and mixing devices. It phantom power is not available on your equipment, you may use the APS911 in the “battery powered” mode. Avoid plugging or unplugging the microphone from a PA system unless the channel is muted or the volume of the system is turned down. Failure to do so may result in a loud “popping” noise which could seriously damage the speakers in the PA system.The HT5 is manufactured to exacting specs with roadworthy construction. However, t he c apsule i s h ighly s ensitive a nd s hould b e h andled w ith c are. A void extreme temperatures and be sure to store your microphone in the pouch provided when not in use. Moisture of any kind can adversely affect the sound and performance of your microphone.USER TIPSThe HT5 is designed so that the headband is worn around the back of the head with the curved ear pieces resting lightly around both ears. If the user has long hair, the back of the headset will be completely hidden. The dual ear system keeps the headset stable once it is in the desired position. The microphone is at the very end of the flexible boom and should be positioned on the user’s left side of the cheek just off the corner of the mouth. T he flexible steel cage can be adjusted to fit your head comfortably by either opening or closing the cage. For optimum sound and performance, DO NOT place the microphone directly in front of the mouth or in the airflow path of the nose.Further miking techniques may be found at .ALL SPECIFICATIONS SUBJECT TO CHANGE WITHOUT NOTICE.503.682.6933 Fax: 503.682.7114Audix Corporation 9400 SW Barber St. Wilsonville, OR 97070ver 4.2PRODUCT REGISTRATION: Please register your product online at /docs_12/about/product_registration.shtml .SERVICE AND WARRANTY: This microphone is under warranty for a period of 3 years to be free of defects in material and workmanship. In the event of a product failure due to materials or workmanship, Audix will repair or replace said product at no charge with proof of purchase. Audix does not pay or reimburse shipping costs for warranty repairs or returns. T he warranty excludes any causes other than manufacturing defects, such as normal wear, abuse, environmental damage, shipping damage or failure to use or maintain the product per the supplied instructions. No Implied W arranties: All implied warranties, including but not limited to implied warranties of merchantability and fitness for a particular purpose are hereby excluded. T he liability of Audix, if any, for damages relating to allegedly defective products shall be limited to the actual price paid by Dealer for such products and shall in no event include incidental or consequential damages of any kind. Should your microphone fail in any way, please contact the Audix Service department at 503.682.6933. A Return Authorization is required before returning any product. OTHER T HAN THIS WARRANTY, AUDIX MAKES NO WARRANTIES, EXPRESS OR IMPLIED, WITH RESPECT TO THE PRODUCTS, THE USE OF THE PRODUCTS, THE PERFORMANCE OF THE PRODUCTS. AUDIX SHALL NOT BE LIABLE FOR SPECIAL INCIDENTAL, CONSEQUENTIAL, INDIRECT OR SIMILAR DAMAGES ARISING FROM OR BASED ON T HE SALE, USE, STORAGE OR DISPOSAL OF T HE PRODUCTS, AUDIX’S SERVICE W ORK, BREACH OF W ARRANTY, BREACH OF CONTRACT. NEGLIGENCE, OR ANY OTHER T HEORY OF LIABILITY, EVEN IF AUDIX HAS BEEN ADVISED OF T HE POSSIBILITY OF SUCH DAMAGES.SPECIFICATIONS H T5。
Audix f6 音频动态麦克风说明书
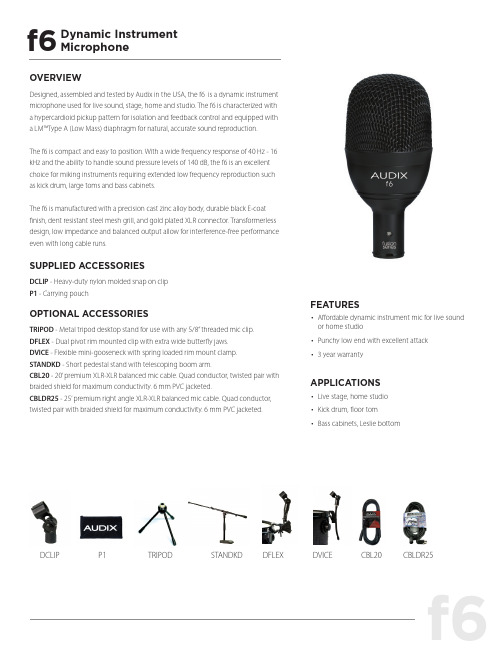
f6OVERVIEWDesigned, assembled and tested by Audix in the USA, the f6 is a dynamic instrumentmicrophone used for live sound, stage, home and studio. The f6 is characterized witha hypercardioid pickup pattern for isolation and feedback control and equipped witha LM™Type A (Low Mass) diaphragm for natural, accurate sound reproduction.The f6 is compact and easy to position. With a wide frequency response of 40 Hz - 16kHz and the ability to handle sound pressure levels of 140 dB, the f6 is an excellentchoice for miking instruments requiring extended low frequency reproduction suchas kick drum, large toms and bass cabinets.The f6 is manufactured with a precision cast zinc alloy body, durable black E-coatfinish, dent resistant steel mesh grill, and gold plated XLR connector. Transformerlessdesign, low impedance and balanced output allow for interference-free performanceeven with long cable runs.SUPPLIED ACCESSORIESDCLIP - Heavy-duty nylon molded snap on clipP1 - Carrying pouchOPTIONAL ACCESSORIESTRIPOD - Metal tripod desktop stand for use with any 5/8” threaded mic clip.DFLEX - Dual pivot rim mounted clip with extra wide butterfly jaws.DVICE - Flexible mini-gooseneck with spring loaded rim mount clamp.STANDKD - Short pedestal stand with telescoping boom arm.CBL20 - 20’ premium XLR-XLR balanced mic cable. Quad conductor, twisted pair withbraided shield for maximum conductivity. 6 mm PVC jacketed.CBLDR25 - 25’ premium right angle XLR-XLR balanced mic cable. Quad conductor,twisted pair with braided shield for maximum conductivity. 6 mm PVC jacketed. Dynamic Instrument MicrophoneFEATURES • Affordable dynamic instrument mic for live sound or home studio • Punchy low end with excellent attack • 3 year warranty APPLICATIONS • Live stage, home studio • Kick drum, floor tom• Bass cabinets, Leslie bottomDCLIP P1 TRIPOD STANDKD DFLEX DVICE CBL20 CBLDR25FREQUENCY RESPONSE POLAR PATTERNS ARCHITECT AND ENGINEER SPECIFICATIONS The microphone shall be of the dynamic type operating on the moving coil principle and the capsule shall be L M Type A. The polar pattern of the microphone shall be hypercardioid. The nominal output impedance shall be 580 ohms at 1 kHz. The microphone shall have a sensitivity of 1.2 mV / Pa at 1 kHz and shall handle a sound pressure level of ≥140 dB. The microphone body shall be cast of zinc alloy metal and the grill cap shall be steel wire mesh. The overall dimensions shall be 21 mm in diameter at the base, 58 mm in diameter at the widest point and 121 mm in length.OPERATION AND MAINTENANCE The f6 is a low impedance microphone and should be plugged into a “mic level” of your console, mixer, or recording device. Please note that your microphone does not require phantom power and will not be affected in any way by phantom power should it be running simultaneously while the microphone is in operation. Avoid plugging or unplugging the microphone from the PA system unless the channel is muted or the volume of the system turned down. Failure to do so may result in a loud “popping” noise which could seriously damage thespeakers in the PA system. The f6 is manufactured to exacting specs with roadworthy construction.However, the capsule is highly sensitive and should be handled with care. Avoidextreme temperatures and be sure to store your microphone in the pouchprovided when not in use. Moisture of any kind can adversely effect the soundand performance of your microphone.USER TIPSThe f6 is designed with low output in order to compensate for instruments havingvery high sound pressure levels.Kick drums: For kick drums, as a general rule, start with the mic positioned cen-tered inside the middle of the drum pointed towards the beater. For more attack,and less bass boom, move the mic closer to the beater. For less attack and morebass, move the mic further away from the beater. For kick drums without holein front head, place the f6 a few inches from the head for a large dynamic sound.Toms: For toms, position the mic 2 inches from the head and point towards thecenter of the drum.Bass cabinets: For bass cabinets, position the mic 90 degrees to the grill clothand 1-2 inches inside the edge of the speaker.Further miking techniques may be found at .ALL SPECIFICATIONS SUBJECT TO CHANGE WITHOUT 503.682.6933 Fax: 503.682.7114Audix Corporation 9400 SW Barber St. Wilsonville, OR 97070ver 3.0 05-16PRODUCT REGISTRATION: Please register your product online at /docs_12/about/product_registration.shtml .SERVICE AND WARRANTY: This microphone is under warranty for a period of 3 years to be free of defects in material and workmanship. In the event of a product failure due to materials or workmanship, Audix will repair or replace said product at no charge with proof of purchase. Audix does not pay or reimburse shipping costs for warranty repairs or returns. The warranty excludes any causes other than manufacturing defects, such as normal wear, abuse, environmental damage, shipping damage or failure to use or maintain the product per the supplied instructions. No Implied Warranties: All implied warranties, including but not limited to implied warranties of merchantability and fitness for a particular purpose are hereby excluded. The liability of Audix, if any, for damages relating to allegedly defective products shall be limited to the actual price paid by Dealer for such products and shall in no event include incidental or consequential damages of any kind. Should your microphone fail in any way, please contact the Audix Service department at 503.682.6933. A Return Authorization is required before returning any product. OTHER THAN THIS WARRANTY, AUDIX MAKES NO WARRANTIES, EXPRESS OR IMPLIED, WITH RESPECT TO THE PRODUCTS, THE USE OF THE PRODUCTS, THE PERFORMANCE OF THE PRODUCTS. AUDIX SHALL NOT BE LIABLE FOR SPECIAL INCIDENTAL, CONSEQUENTIAL, INDIRECT OR SIMILAR DAMAGES ARISING FROM OR BASED ON THE SALE, USE, STORAGE OR DISPOSAL OF THE PRODUCTS, AUDIX’S SERVICE WORK, BREACH OF WARRANTY, BREACH OF CONTRACT. NEGLIGENCE, OR ANY OTHER THEORY OF LIABILITY, EVEN IF AUDIX HAS BEEN ADVISED OF THE POSSIBILITY OF SUCH DAMAGES. DIMENSIONS (mm)SPECIFICATIONS f6HiLo。
AUDIX 人声话筒
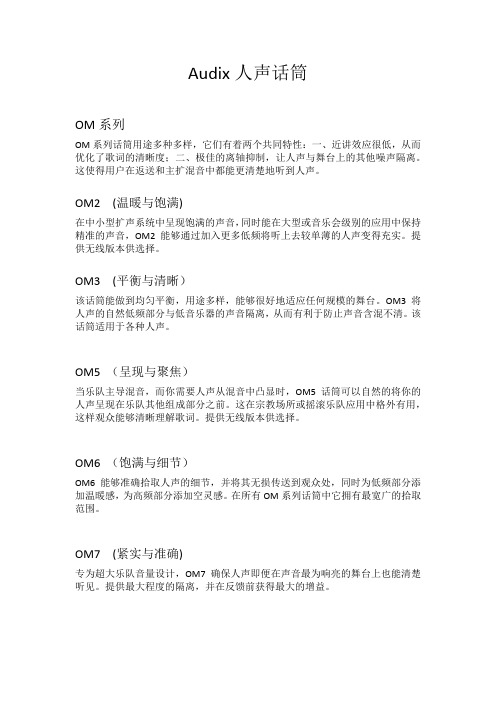
Audix人声话筒OM系列OM系列话筒用途多种多样,它们有着两个共同特性:一、近讲效应很低,从而优化了歌词的清晰度;二、极佳的离轴抑制,让人声与舞台上的其他噪声隔离。
这使得用户在返送和主扩混音中都能更清楚地听到人声。
OM2 (温暖与饱满)在中小型扩声系统中呈现饱满的声音,同时能在大型或音乐会级别的应用中保持精准的声音,OM2能够通过加入更多低频将听上去较单薄的人声变得充实。
提供无线版本供选择。
OM3 (平衡与清晰)该话筒能做到均匀平衡,用途多样,能够很好地适应任何规模的舞台。
OM3将人声的自然低频部分与低音乐器的声音隔离,从而有利于防止声音含混不清。
该话筒适用于各种人声。
OM5 (呈现与聚焦)当乐队主导混音,而你需要人声从混音中凸显时,OM5话筒可以自然的将你的人声呈现在乐队其他组成部分之前。
这在宗教场所或摇滚乐队应用中格外有用,这样观众能够清晰理解歌词。
提供无线版本供选择。
OM6 (饱满与细节)OM6能够准确拾取人声的细节,并将其无损传送到观众处,同时为低频部分添加温暖感,为高频部分添加空灵感。
在所有OM系列话筒中它拥有最宽广的拾取范围。
OM7 (紧实与准确)专为超大乐队音量设计,OM7确保人声即便在声音最为响亮的舞台上也能清楚听见。
提供最大程度的隔离,并在反馈前获得最大的增益。
OM11 (平衡与清晰)作为经典OM1(已停产)的复刻,OM11设计用于声音极有力度的歌手,为其呈现自然的人声投射与宽广的人声范围。
其牢固的合金构造为话筒寿命提供了保证。
VX系列VX5与VX10是两款非常独特的电容话筒,除了适用于录音室以外,还能将录音室品质的声音在现场舞台演出中呈现出来。
VX5VX5在一般的电容话筒无法发挥优势的环境中仍能呈现电容话筒的丰富细节和清晰度。
它能抗反馈,具备10dB PAD衰减,并可以处理极高的舞台音量。
VX5有着更宽广的拾音模式,使其适用于想要摆弄话筒的歌手。
VX10VX10是在现场系统中能够提供录音室级别音质的终极人声电容话筒。
空间系列马斯克专业udio大腔电容麦克风用户手册说明书
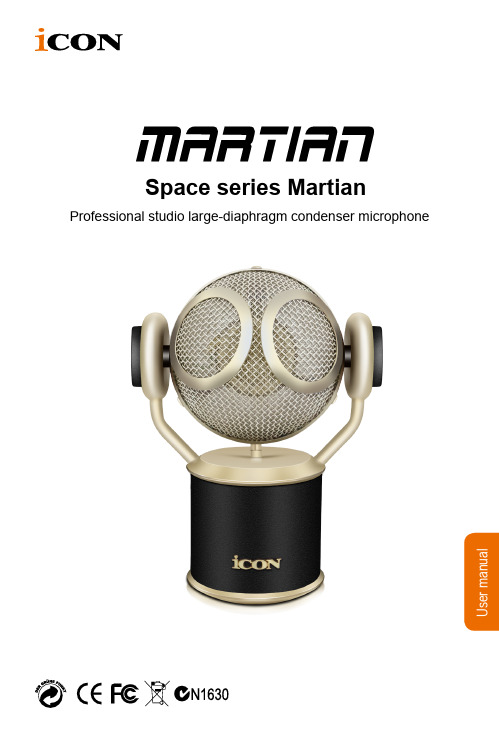
UsermanualSpace series MartianProfessional studio large-diaphragm condenser microphoneImportant Safety Instructions1. Read this manual thoroughly before using this unit.2. Keep this manual for future reference.3. Take notice of and comply with all warnings included in the user's manual or indicated on theappliance.4. Follow all instructions included in this manual.5. Do not expose this unit to rain or moisture. Avoid having water or other liquids spilled on thisunit.6. When cleaning the cabinet or other parts of this appliance, use only a dry or slightly damp soft cloth.7. Do not block any ventilation openings or interfere with the proper ventilation of this unit. Installin accordance with the manufacturer's instructions.8. Do not use or store near any heat sources such as radiators, heat registers, stoves, or other heat-producing appliances.9. Do not interfere with the safety purpose of the polarized or grounding-type plug. A polarized plughas two blades with one wider than the other. A grounding-type plug has two blades and a third grounding prong. These are designated for your safety. If the provided plug does not fit into your outlet, consult an electrician.10. Protect the power cord from being walked on or otherwise damaged by items placed on oragainst them. Particular attention should be given to the plugs, receptacles, and the point where the cord exits the appliance.11. To avoid the risk of electrical shock, do not touch any exposed wiring while the unit is inoperation.12. Only use attachments/accessories specified by the manufacturer.13. Unplug this unit and all connected electrical equipment during lightning storms or when leftunused a long period of time.14. Refer all servicing to qualified service personnel. Servicing is required when the appliance hasbeen damaged in any way or fails to operate normally.WARNING: To reduce the risk of fire or electric shock, do not expose this unit to rain or moistureContentsIntroduction (4)What's in the package? (4)Register your ICON ProAudio product to your personal account (5)Features (6)Operating the Martian (7)Specifications (9)Services (10)IntroductionThank you for purchasing the ICON ProAudio pace series Martian professionalstudio large-diaphragm condenser microphone. We sincerely trust this productwill provide years of satisfactory service, but if anything is not to your completesatisfaction, we will endeavor to make things right.In these pages, you'll find a detailed description of the features of the Martian, step-by-step instructions for its setup and use, and full specifications.Please register the product on our website at the below link www.iconproaudio.com/registration:Please follow the step by step procedures starting from input the device’s serialnumber to your personal information etc. By registering your product online, you will entitle to several different services and after-sales supporting at our ACS help center by visiting our website at . Also, all the registered products under your account will be listed on your personal product page where you could get update information such as firmware/driver upgrade, software bundle and user manual download etc for your device.With proper care,your Martian will operate without any trouble for many years.What's in the package?●Space series Martian professional studio large-diaphragm condenser microphone●This User Manual●Suspension Shock mount●Carry case4Register your ICON ProAudio product to your personal account1. Check serial number of your devicePlease go to http:// /registration or scan the QR codebelow.Input your device’s serial number and the other information on the screen. Click “Submit”.A message will pop up showing your device information such as model nameand its serial number - Click “Register this device to my account” or if you seeany other message, please contact our after-sales service team2. Log in to your personal account page for existing user orsign up for new userExisting user: Please log into your personal user page by inputing youruser name and password.New user: Please click “Sign Up” and fill in all the information.3. Download all useful materialsAll your registered devices under your account will show on the page. Eachproduct will be listed along with all its available files such as drivers, firmware,user manual in different languages and bundled software etc. for download.Please make sure you have download the necessary files such as driver beforeyou begin device installation.5Features●Build in Latvia with quality construction●Unique design with sound quality and performance as well as stylish in mind●Super warm and classic sonic character make it a perfect mic voice andinstrument applications●Professional hand-build large-diaphragm capsule for full, open-sound andunsurpassed audio quality●Ideal as main and support microphone for most differing recording situations●Cardioid pickup pattern for outstanding sound source separation and feedbackrejection●Pressure-gradient transducer with shock-mounted capsule●External 36-52 Volt phantom power operation●Heavy-duty suspension mount included●Prefect for vocals and acoustic instruments●Special designed aluminum case well protect the microphone with stylish●Durable metal pop-filter included●Ultra-rugged construction with metal die-cast body●High-quality components and exceptionally rugged construction ensure long life 6Operating the Martian1. Powering the MartianThe "Martian" is a large diaphragm condenser microphone and therefore needs to be operated by connecting a phantom power supply. Phantom power isstandard on most quality mixers, outboard MIC-pres and hard disk recorders. Ifnecessary an external phantom power supply can also be used. The "Martian"receives the phantom power directly from a MIC cable when connected to amixer or other microphone input that includes a phantom supply. The power isactually sent OUT of the microphone INPUT, riding silently along with the audiosignal. Most mixers have a switch to engage the phantom power so be sure tocheck that the phantom power is on.2. Setting up the signal levelWhen connecting the "Martian" to a mixer or recorder input, be sure that theinput is of microphone level. Also, be sure that the phantom power is engagedas explained at the previous section “Powering the Martian”. Most mixers andrecorders of reasonable quality will offer a microphone input with MIC trim (usually called Trim or Gain) control. The purpose of the MIC trim control is to optimizethe amount of good signal to any noise associated with the mixers electronics.A good MIC pre with trim also will have a Peak or Clip LED. To set a good levelon the MIC, set the "Martian" up in front of the desired sound source and slowly raise the MIC trim control until you see the Peak LED light up. Then, turn themix trim control down until the LED does not light any more. On most mixers,the ideal setting is that the trim control is turned up as much as possible without lighting the Peak LED.3. Microphone PlacementIn order to maximize the sound quality, you must pay careful attention tothe placement of your "Martian" and how it is positioned for the instrumentor vocalist that you are miking. All microphones, especially unidirectional orcardioid microphones, exhibit a phenomenon know as the “proximity effect”.Very simply put, proximity effect is a resulting change in the frequency response of a microphone based on the position of the MIC capsule relative to the soundsource. Specifically, when you point a cardioid MIC directly at the sound source (on-axis) you will get the best frequency response, however, when you startpointing the microphone slightly away (off-axis) you will notice the low frequency dropping off and the microphone will start to sound thinner.For most vocal applications you'll want to position the microphone directly infront of the artist. The same may be true for miking instruments. However, youcan make some pretty amazing equalization adjustments by slightly changingthe angle of the capsule to the sound source. This can be a very usefultechnique in capturing the optimum sound of drum set, acoustic guitar, piano or other instruments in a live room or sound stage. Experimentation and experience are the best teachers in getting good sounds, so plug in!78P-Poping is that annoying pop that you can get when the microphone diaphragm gets a blast of air from a vocalist pronouncing words with the letter "P" included. using an external pop filter. 5. Mounting the "Martian"Mount your "Martian" into the provided suspension mount as the diagrams illustrated below.Then install the metal pop filter as illustrated below.SpecificationsTransducer type .......................................................................electrostatic Operating principle ..................................................................presure gradientThe diaphragms active diameter .............................................26 mmFrequency range .....................................................................20 Hz to 20 kHzPolar pattern ............................................................................unidirectional,cardioid Sensitivity at 1 kHz into 1000 Ω load.......................................33 mV/PaOutput impedance ...................................................................50 ΩRated load impedance.............................................................1000 ΩSuggested load impedance .....................................................> 250 ΩMaximum SPL for 0,5% THD at 1000 Ω load ..........................134 dBS/N Ratio DIN/IEC 651 A-weighten .........................................83.2 dB-AEquivalent noise level DIN/IEC A-weighten...........................10.5 dB-A microphone preamplifier ..........................................................123.5 dBPhantom powering voltage on pin 2&3 of XLR ........................+48V (+/-4V)) Current consumption ............................................................< 3mAOutput connector .....................................................................3-pin XLR male Dimension................................................................................118mmX78mmX149mm Weight .....................................................................................0.77kgPad ..........................................................................................noHPF .........................................................................................n9ServicesIf your Martian needs servicing, follow these instructions.Check our online Help Center at /hc/en-us, for information, knowledge, and downloads such as:1. FAQ2. Download3. Learn More4. ForumVery often you will find solutions on these pages. If you don’t find a solution, create a support ticket at our online Help Center at the link below, and our technical support team will assist you as soon as we can.Navigate to /hc/en-us and then sign in to submit a ticket.As soon as you have submitted an inquiry ticket, our support team will assist you to resolve the problem with your ICON ProAudio device as soon as possible.To send defective products for service:1. Ensure the problem is not related to operation error or external system devices.2. Keep this owner's manual. We don't need it to repair the unit.3. Pack the unit in its original packaging including end card and box. This is veryimportant. If you have lost the packaging, please make sure you have packedthe unit properly. ICON is not responsible for any damage that occurs due tonon-factory packing.4. Ship to the ICON tech support center or the local return authorization. See ourservice centers and distributor service points at the link below:If you are located in USS end the product to:North AmericaMixware, LLC – U.S. Distributor 11070 Fleetwood Street – Unit F. Sun Valley, CA 91352; USA Tel.: (818) 578 4030Contact: /help If you are located in EuropeSend the product to:Sound Service GmbHEuropean HeadquarterMoriz-Seeler-Straße 3D-12489 Berlin Telephone: +49 (0)30 707 130-0 Fax: +49 (0)30 707 130-189E-Mail:*********************If you are located in Hong Kong Send the product to:ASIA OFFICE:Unit F, 15/F., Fu Cheung Centre, No. 5-7 Wong Chuk Yueng Street, Fotan,Sha Tin, N.T., Hong Kong. Tel: (852) 2398 2286Fax: (852) 2789 3947Email: @icon-global. com5. For additional update information please visit our website at:1011www.twi tter .com/iconp roaudio www.youtu /icon proaudiowww.insta gr /iconp roaudio www.fa ce /iconp roaudio Twi tter Insta gr am Fa ce book Youtub eWe bsite iconp r /dashboa r d/DashboardSuppo r t suppo r t.iconp r www.iconp r 中国地区用户微信号iCON-PRO 微信公众号B 站iCON Pro Audio。
Audix D6动圈底鼓话筒
Audix D6动圈底鼓话筒
概览
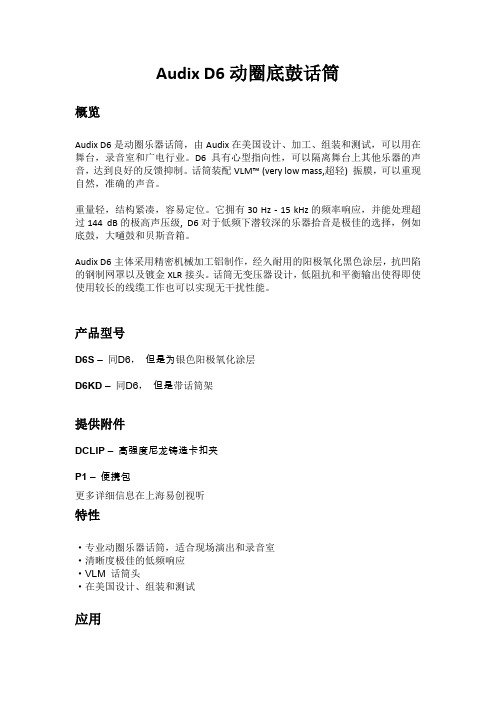
Audix D6是动圈乐器话筒,由Audix在美国设计、加工、组装和测试,可以用在舞台,录音室和广电行业。
D6具有心型指向性,可以隔离舞台上其他乐器的声音,达到良好的反馈抑制。
话筒装配VLM™ (very low mass,超轻) 振膜,可以重现自然,准确的声音。
重量轻,结构紧凑,容易定位。
它拥有30 Hz - 15 kHz的频率响应,并能处理超过144 dB的极高声压级, D6对于低频下潜较深的乐器拾音是极佳的选择,例如底鼓,大嗵鼓和贝斯音箱。
Audix D6主体采用精密机械加工铝制作,经久耐用的阳极氧化黑色涂层,抗凹陷的钢制网罩以及镀金XLR接头。
话筒无变压器设计,低阻抗和平衡输出使得即使使用较长的线缆工作也可以实现无干扰性能。
产品型号
D6S –同D6,但是为银色阳极氧化涂层
D6KD –同D6,但是带话筒架
提供附件
DCLIP –高强度尼龙铸造卡扣夹
P1 –便携包
更多详细信息在上海易创视听
特性
·专业动圈乐器话筒,适合现场演出和录音室
·清晰度极佳的低频响应
·VLM 话筒头
·在美国设计、组装和测试
应用
·现场演出,录音·底鼓
·地嗵鼓
·贝斯音箱
·风琴音箱的低音音箱。
AUDIX乐器话筒
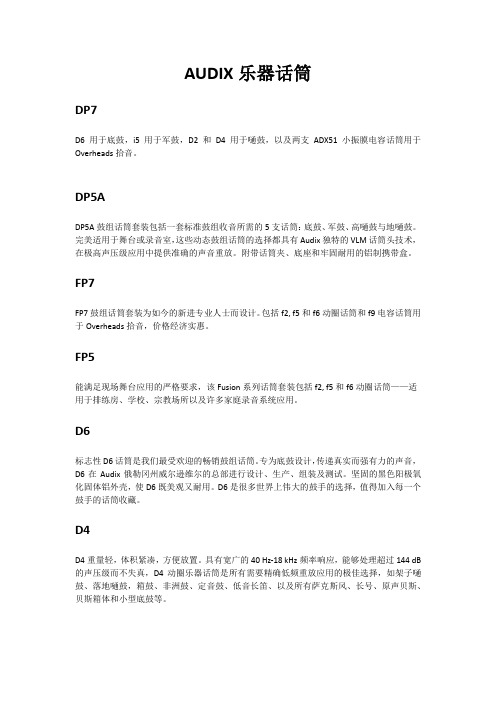
AUDIX乐器话筒DP7D6用于底鼓,i5用于军鼓,D2和D4用于嗵鼓,以及两支ADX51小振膜电容话筒用于Overheads拾音。
DP5ADP5A鼓组话筒套装包括一套标准鼓组收音所需的5支话筒:底鼓、军鼓、高嗵鼓与地嗵鼓。
完美适用于舞台或录音室,这些动态鼓组话筒的选择都具有Audix独特的VLM话筒头技术,在极高声压级应用中提供准确的声音重放。
附带话筒夹、底座和牢固耐用的铝制携带盒。
FP7FP7鼓组话筒套装为如今的新进专业人士而设计。
包括f2, f5和f6动圈话筒和f9电容话筒用于Overheads拾音,价格经济实惠。
FP5能满足现场舞台应用的严格要求,该Fusion系列话筒套装包括f2, f5和f6动圈话筒——适用于排练房、学校、宗教场所以及许多家庭录音系统应用。
D6标志性D6话筒是我们最受欢迎的畅销鼓组话筒。
专为底鼓设计,传递真实而强有力的声音,D6在Audix俄勒冈州威尔逊维尔的总部进行设计、生产、组装及测试。
坚固的黑色阳极氧化固体铝外壳,使D6既美观又耐用。
D6是很多世界上伟大的鼓手的选择,值得加入每一个鼓手的话筒收藏。
D4D4重量轻,体积紧凑,方便放置。
具有宽广的40 Hz-18 kHz频率响应,能够处理超过144 dB 的声压级而不失真,D4动圈乐器话筒是所有需要精确低频重放应用的极佳选择,如架子嗵鼓、落地嗵鼓,箱鼓、非洲鼓、定音鼓、低音长笛、以及所有萨克斯风、长号、原声贝斯、贝斯箱体和小型底鼓等。
D2D2对于有冲击特性的乐器如架子鼓、康加鼓、萨克斯风、吉他音箱和铜管乐器来说是收音的理想选择。
无变压器设计,低阻抗及平衡输出,确保D2超心型乐器话筒在无干扰的情况下改造,用来重现自然且准确的声音。
MICROD & MICROD TRIO用于鼓组和打击乐器的小型电容夹式话筒,其装在一个铝环中,通过一个橡胶悬挂防震系统隔离。
MicroD利用专利的Dvice鼓框安装系统使其能轻松固定在标准的鼓框上。
Audix i5 音响设备说明书
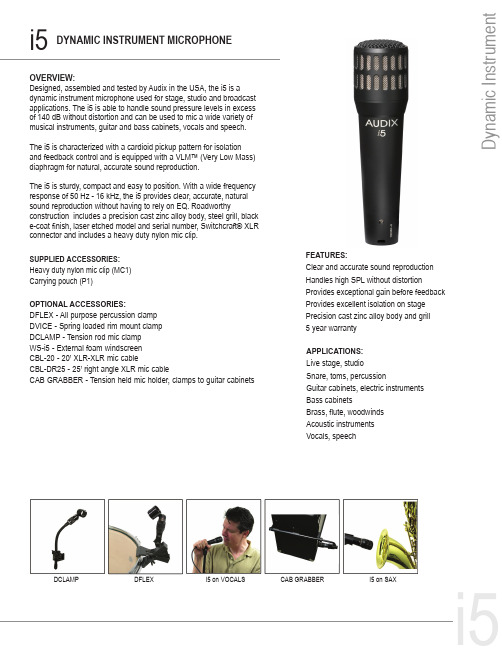
i5OVERVIEW:Designed, assembled and tested by Audix in the USA, the i5 is a dynamic instrument microphone used for stage, studio and broadcast applications. The i5 is able to handle sound pressure levels in excess of 140 dB without distortion and can be used to mic a wide variety of musical instruments, guitar and bass cabinets, vocals and speech.The i5 is characterized with a cardioid pickup pattern for isolation and feedback control and is equipped with a VLM™ (Very Low Mass) diaphragm for natural, accurate sound reproduction.The i5 is sturdy, compact and easy to position. With a wide frequency response of 50 Hz - 16 kHz, the i5 provides clear, accurate, natural sound reproduction without having to rely on EQ. Roadworthyconstruction includes a precision cast zinc alloy body, steel grill, black e-coat finish, laser etched model and serial number, Switchcraft® XLR connector and includes a heavy duty nylon mic clip.APPLICATIONS:Live stage, studioSnare, toms, percussionGuitar cabinets, electric instruments Bass cabinetsBrass, flute, woodwinds Acoustic instruments Vocals, speechDYNAMIC INSTRUMENT MICROPHONESUPPLIED ACCESSORIES:Heavy duty nylon mic clip (MC1)Carrying pouch (P1)OPTIONAL ACCESSORIES:DFLEX - All purpose percussion clamp DVICE - Spring loaded rim mount clamp DCLAMP - Tension rod mic clamp WS-i5 - External foam windscreen CBL-20 - 20’ XLR-XLR mic cableCBL-DR25 - 25’ right angle XLR mic cableCAB GRABBER - Tension held mic holder, clamps to guitar cabinetsDCLAMP DFLEX i5 on VOCALS CAB GRABBER i5 on SAXFEATURES:Clear and accurate sound reproduction Handles high SPL without distortionProvides exceptional gain before feedback Provides excellent isolation on stage Precision cast zinc alloy body and grill 5 year warrantyARCHITECTS AND ENGINEERS SPECIFICATIONS:The microphone shall be of the dynamic type operating on the moving coil principle and the polar pattern of the microphone shall be cardioid. The capsule shall be VLM Type B. The nominal out-put impedance shall be equal to 150 ohms at 1 kHz. The microphone shall have a sensitivity of 1.5 mV / Pa at 1 kHz and a sound pressure level ≥140 dB. The microphone body and grill shall be of die cast zinc alloy. The overall dimensions shall be 23 mm in diameter at the base, 37.5 mm at the top, and 141.5 mm in length. The microphone shall be the Audix i5. Call: 503-682-6933 Fax: 503-682-7114Audix Corporation 9400 SW Barber Street, Wilsonville, OR 97070Black E-coat Weight 183 g / 6.5 ounces Length 141.5 mm / 5.6 inchesOPERATION:The i5 is a low impedance microphone and should be plugged into a “mic level” input on your console, mixer, or recording device. Please note that your microphone does not require phantom power and will not be effected in any way by phantom power should it be running simultaneously when the microphone is in operation. Avoid plugging or unplugging the microphone from the PA system unless the channel is muted or the volume of the system turned down. Failure to do so may result in a loud “popping” noise which could seriously damage the speakers in the PA system.FREQUENCY / POLARS:To register your microphone, please visit SERVICE AND WARRANTY:This microphone is under warranty for a period of 5 years from any and all manufacturing defects. Should your microphone fail in any way, please con-tact the Audix Service department at 503-682-6933. A Return Authorization number is required before returning any products .CARE AND MAINTENANCE:The i5 is manufactured to exacting specs with roadworthy construction. However, the capsule is highly sensitive and should be handled with care. Avoid extreme temperatures and be sure to store your microphone in the pouch provided when not in use. Moisture of any kind can adversely affect the sound and performance of your microphone.***All specifications subject to change without notice.USER TIPS:The i5 has a tight (cardioid) pick-up pattern in order to help eliminate sound from other instruments on stage from “bleeding” into the microphone. For this reason, it the i5 is exceptionally effective for drums and percussion in be able to capture the sound of each component of the kit.Snare: Start with the i5 about 2 inches above the head and aimed towards the center of the drum. For more “rim” effect, the i5 can be aimed less towards the center and more towards the rim. It is not uncommon for engineers to place the mic practically right on the drum head to achieve a very tight, cracking sensation.Toms, congas: Similar to snare. For tighter sound and more attack place, the mic closer to the head. For more decay and overtones pull the mic further away from the head.Guitar cabs: The i5 can be placed within 1-2 inches of the grill cover at a 90 degree angle pointing directly into the speaker. If the mic is placed closer to the edge of the speaker, you will minimize the higher frequencies and get a warmer, fatter tone. To capture more highs, move the mic closer towards the center of the speaker, but avoid the middle of the speaker.Horns: Place the mic within 1-3 inches of the bell, especially when on a stage with drums, bass, guitar, etc. For jazz, classical, and music where the stage volume is lower, the mic can be placed further away for a richer, fuller, sound.Allow a distance of 2-3 feet between microphones to avoid phase cancellation issues. *Further miking techniques may be found on our website at DIMENSIONS (mm):。
Audix tm1测试话筒

Audix TM1测试与测量话筒
概览
TM1是6mm预驻极体电容话筒,用于测试和测量应用。
TM1凭借精确的线性响应、一致性,易用性和高性价比而闻名。
具有性能高度一致的全指向模式,TM1 设计用于为房间分析软件、实时分析仪和其他声音控制设备进行声学测量拥有平坦的20 Hz-25 kHz 频率范围,TM1 是音响工程师、音响公司和录音爱好者的优秀工具。
TM1 需要18 –52 V 幻象电源工作,工艺精湛的4 级黄铜外壳,镀镍表面,Switchcraft ® 或Audix XLR ,O 形减震环与承重搭扣用于装配话筒夹。
提供附件
DCLIP - 承重装配话筒夹
P1 –携带用包
可选附件
CBL20 - 20’XLR-XLR 四导体话筒线缆
SMT19 -防震架夹子
SMT25 - 防震架系统
TM1CA4231 - 校准适配器
TRIPOD - 三脚话筒支架
WSTM1 - 带螺纹防风罩
特性
· 6mm 预极化电容话筒头
·高声压级响应
·工艺精湛的黄铜外壳
·低噪声电子元件
·可替换的电子元件和话筒头
·三年保修
应用
·测试与测量
·实时分析仪
·房间分析软件
·房间环境声拾取
更多信息在上海易创视听。
Audix Nile V监听箱

Audix Nile V监听箱原音【期刊名称】《中国电子商情:基础电子》【年(卷),期】1999(000)002【摘要】在专业领域里广泛使用的监听扬声器,由于音色准确、质量可靠,同样受到发烧友的宠爱,成为民用发烧器材。
最明显的例子要数英国BBC的小型近场监听扬声器LS3/5A和大名鼎鼎的ATCSCM20了。
虽然听音响是很主观的一种个人欣赏行为,每人都有自己不同的欣赏口味和习惯,喜欢不同音色风格的扬声器,但是大多数人还是认同扬声器的声音必须准确、真实。
而监听扬声器,特别是在录音室里被录音师用作监听录音制作的音箱,更是具备了发烧家用音箱所欠缺的那种真实和敏锐的鉴别参考能力。
Audix Nile V是笔者近期碰到的优质监听音箱,其紧凑的结构,细小的体积,再加上杰出的表现,完全有资格成为挑剔的发烧友家中的新宠。
说起Audix,一般音响爱好者也许对它认识不多,但它在专业音响圈内却甚有名气,大部分录音师都知其大名。
在美国,它在录音制作室里的使用率相当高,由于体积不大,特别适合流动录音及其他需要监听的场合使用。
这家设在美国俄勒冈州的专业音响公司其实只有10多年历史,现时监听扬声【总页数】2页(P43-44)【作者】原音【作者单位】【正文语种】中文【中图分类】F416.6【相关文献】1.为还原真实而生——惠威X4监听箱完全解析 [J],2.JBL 4312D监听书架箱 [J], 吴蒙3.监听器的独特之美 JBL监听箱及4348的试听心得 [J], 张国梁4.KEFL S50小型监听箱广州品鉴会 [J], 无5.Klipsch R-15PM有源监听箱 [J],因版权原因,仅展示原文概要,查看原文内容请购买。
- 1、下载文档前请自行甄别文档内容的完整性,平台不提供额外的编辑、内容补充、找答案等附加服务。
- 2、"仅部分预览"的文档,不可在线预览部分如存在完整性等问题,可反馈申请退款(可完整预览的文档不适用该条件!)。
- 3、如文档侵犯您的权益,请联系客服反馈,我们会尽快为您处理(人工客服工作时间:9:00-18:30)。
ADUXI人声话筒
OM系列
OM系列话筒用途多种多样,它们有着两个共同特性:一、近讲效应很低,从而优化了歌词的清晰度;二、极佳的离轴抑制,让人声与舞台上的其他噪声隔离。
这使得用户在返送和主扩混音中都能更清楚地听到人声。
OM2 (温暖与饱满)
在中小型扩声系统中呈现饱满的声音,同时能在大型或音乐会级别的应用中保持精准的声音,OM2能够通过加入更多低频将听上去较单薄的人声变得充实。
提供无线版本供选择。
OM3 (平衡与清晰)
该话筒能做到均匀平衡,用途多样,能够很好地适应任何规模的舞台。
OM3将人声的自然低频部分与低音乐器的声音隔离,从而有利于防止声音含混不清。
该话筒适用于各种人声。
OM5 (呈现与聚焦)
当乐队主导混音,而你需要人声从混音中凸显时,OM5话筒可以自然的将你的人声呈现在乐队其他组成部分之前。
这在宗教场所或摇滚乐队应用中格外有用,这样观众能够清晰理解歌词。
提供无线版本供选择。
OM6 (饱满与细节)
OM6能够准确拾取人声的细节,并将其无损传送到观众处,同时为低频部分添加温暖感,为高频部分添加空灵感。
在所有OM系列话筒中它拥有最宽广的拾取范围。
OM7 (紧实与准确)
专为超大乐队音量设计,OM7确保人声即便在声音最为响亮的舞台上也能清楚听见。
提供最大程度的隔离,并在反馈前获得最大的增益。
OM11 (平衡与清晰)
作为经典OM1(已停产)的复刻,OM11设计用于声音极有力度的歌手,为其呈现自然的人声投射与宽广的人声范围。
其牢固的合金构造为话筒寿命提供了保证。
VX系列
VX5与VX10是两款非常独特的电容话筒,除了适用于录音室以外,还能将录音室品质的声音在现场舞台演出中呈现出来。
VX5
VX5在一般的电容话筒无法发挥优势的环境中仍能呈现电容话筒的丰富细节和清晰度。
它能抗反馈,具备10dB PAD衰减,并可以处理极高的舞台音量。
VX5有着更宽广的拾音模式,使其适用于想要摆弄话筒的歌手。
VX10
VX10是在现场系统中能够提供录音室级别音质的终极人声电容话筒。
