电动干油泵使用说明书
电动抽油泵说明

电动抽油泵说明电动抽油泵概述:SB抽油泵是我公司引进西德优质样机开发研制而成,各项技术指标均能达到样机水平,并在样机基础上开发了不同的使用场合不同抽吸液体的系列派生产品,该系列泵为轻便型管式轴流泵,具有效率高,使用、维修方便等特点。
SB型油泵广泛用于化工、石油化工、精细化工、染料化工、环保、水处理、医药、食品等部门抽吸不同液体。
如在易燃易爆场合使用,可选用我公司生产的防爆型电动抽液泵。
(SB-3型、SB-4型)使用油泵时应按CB38361-2《爆炸环境用防爆电气设备》有关规定并正确使用防爆插头插座。
抽油泵可以直接插入物料桶(最大适用于符合GB/325-1991标准的钢桶)中抽取桶中液体。
可输送各种油料、带腐蚀性化学药水、其他液体。
根据所输送的液体性质,电动抽油泵泵体沾湿部分材料可选用铝合金、不锈钢,316不锈钢等组成。
驱动电机配备单相标准电机,防爆电机,高转速电机等多种选择。
根据材质,电机不同,型号可分为:SB-1,SB-2,SB-3,SB-3-1,SB-4,SB-5,SB-6,SB-7,SB-8系列铝合金,不锈钢或防爆型。
我们备有详细资料,欢迎索取。
该系列泵可按防爆区域和非防爆区域选用,凡在防爆区域使用配置防爆型电机,这类电机分三种机组型号,当使用条件含各种易燃易爆混合时,应选用最高组级。
该系列泵可输送酸、碱、盐、油品、饮料等介质,广泛用于化工、石油化工、精细化工、染料化工、环保、水处理、医药、食品等部门。
同时适用于中小型油田、油库、炼油厂、加油站、农机站、企事业单位、车队、车辆船舶等输送汽油、煤油、柴油、轻质燃油的理想工具 .电动抽油泵性能参数:产品型号流量流量扬程转速功率进口出口材质重量m3/h L/min m r/min Kw mm mm泵管KgSB-17.81307.510000 1.15025不锈钢8 SB-1-1 6.61107100000.885025不锈钢7.5 SB-1-27.81307.510000 1.15025不锈钢8 SB-1-3 6.61107.5100000.885025不锈钢7.8 SB-27.81307.510000 1.15025铝合金 5.5 SB-2-1 6.61107.5100000.885025铝合金 5.3 SB-3915010120000.885025不锈钢9 SB-3-1915010120000.885025不锈钢9.5 SB-4915010120000.885025铝合金7.5 SB-66100780000.554125不锈钢 5.7 SB-76100780000.554125不锈钢 5.5SB-86100780000.554125铝合金 3.8电动抽油泵使用与维护1、全新或长期搁置不用的电动抽油泵使用与维护,开箱后用500伏兆欧表测量所有带电零件与可能触及的金属零件之间绝缘电阻,在接近工作温度时应不低于7兆欧。
电动油泵说明书

一、产品型号、名称二、技术性能ZB4-500D型电动油泵技术性能三、构造简介本油泵为高压电动油泵,由泵体、组合控制阀、车体管路、液压控制回路等五部分组成。
1、泵体该泵系采用自吸式轴向柱塞泵。
电动油泵带动轴旋转,轴在旋转过程中,通过设置于该轴上的推力轴承逐次将柱塞压入油缸,而吸油弹簧靠其弹力时刻使柱塞贴紧在推力轴承端盖上,轴和弹簧的交替作用使柱塞在油缸中往复运动,在进、排两单向球阀同步配合下,便在出油嘴得到连续均匀的出油。
该泵共有6个油缸,圆周等分排列又交错分成两条排油路,每一排油路均由三个相间120°角的油缸组成。
两条排油路单独出油,各不相扰。
本泵头系阀式配流,斜盘式轴向柱塞泵,设有5XΦ10柱塞副,公称流量为2L/min,最高压力为50MPa。
泵头结构示意图如图1。
图1 泵头构造示意图2、控制阀整组控制阀是在原ZB4-500型电动油泵控制阀基础上增加比例溢流阀PMVP4-44/24及球式电磁换向阀VZP1D22-G24而成。
工作时把与P 口(在阀块上打有钢印)连接的原ZB4-500电动油泵一侧控制阀关闭,另一侧控制阀开启,系统的压力由比例溢流阀调定,压力的高低变化与控制电流的变化有关。
千斤顶的伸缩缸通过电磁换向阀的切换来实现。
3、控制回路4、油箱小车车体采用薄板焊接结构,油在下部,主泵直接浸入油中。
泵、阀和电动油泵与翻板系固定联接,高压管采用Φ9x2.5紫铜管及Φ6高压胶管,低压管采用Φ11x0.5透明塑料管和Φ6高压胶管。
油箱采用钢板焊接,容量约为42L。
小车安装固定轮及万向轮,转向灵活,运输轻便。
5、电器开关采用磁力开关,以减少负载时的启动电流。
四、使用与保养(一)灌油本油泵采用优质矿物油,油内不含水、酸及其他杂质混合物,粘度约为2~3,根据环境温度实际情况一般可采用液压油L-HM32(冬用)或L-HM46(夏用)灌油前需经过滤,并应把油箱、泵体管路等处清洗干净,否则泥沙铁屑等脏物带入将可能发生不正常的磨损和刮伤,甚至造成事故。
干泵 DS2610B 操作说明书
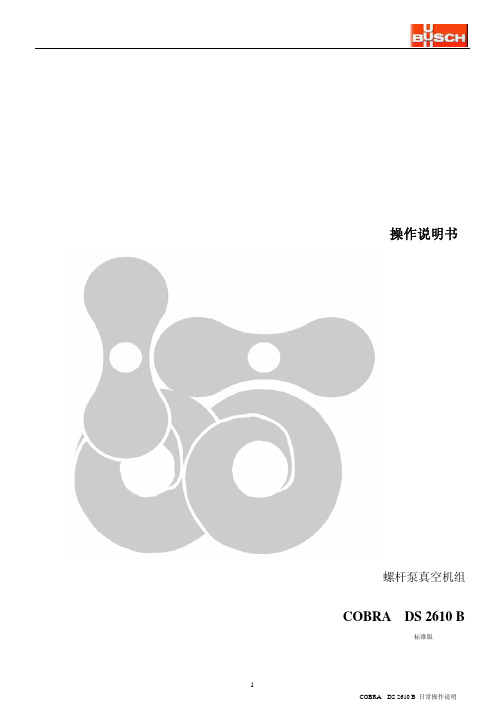
操作说明书螺杆泵真空机组COBRA DS 2610 B标准版a.进气口b.排气口c.润滑油注入口(DP)d.润滑油液位观察窗(DP)e.润滑油释放口(DP)f.冷却水连接口g.冷却水调节阀h.冷却水流量计i.氮气连接口j.氮气调节阀k.氮气稀释调节阀l.氮气稀释调节阀m.氮气流量计n.冷却液膨胀容器o.安全阀p.冷却液注入塞q.冷却液吹扫口r.冷却液释放口s.温度调节控制阀t.氮气系统电磁阀u.润滑油注入口(MB)v.润滑油液位观察窗(MB) w.润滑油释放口(MB)螺杆泵---DP罗茨泵---MBa. 进气口b. 排气口c. 润滑油注入口(DP )d. 润滑油液位观察窗(DP )e. 润滑油释放口(DP )f. 冷却水连接口g. 冷却水调节阀h. 冷却水流量计i. 氮气连接口j. 氮气调节阀k. 氮气稀释调节阀l. 氮气稀释调节阀m. 氮气流量计n. 冷却液膨胀容器o. 安全阀p. 冷却液注入塞 q. 冷却液吹扫口 r. 冷却液释放口 s. 温度调节控制阀 t. 氮气系统电磁阀u. 润滑油注入口(MB ) v. 润滑油液位观察窗(MB) w.润滑油释放口(MB )1. 开始2. 停止3. 电源指示灯4. DS 运行5. 吹扫指示灯6. 警告指示灯7. 报警指示灯8. 蜂鸣器9. 消音键 10. 程序操作键一、开机前的准备工作1、首先检查泵的润滑油的液位;1.1、检查罗茨泵的润滑油液位,确保在液位在油位视窗1/2以上,2/3以下。
1.2、打开机盖板,检查螺杆泵DP600的润滑油液位,确保在液位在油位视窗1/2以上,2/3以下。
2、检查冷却水系统阀门是否开启(真空机组外管道系统)?若没有开启,请开启冷却水阀门。
冷却水压力应为2~5bar。
3、检查氮气供给阀门是否开启(真空机组外管道系统)?若没有开启,请开启阀门。
氮气压力应不小于2 bar。
4、检查电源是否接好?电源为380V 50Hz。
5、检查真空机组进气口是否连接好?6、检查真空机组连接的排气管道的截止阀是否打开?真空机组运行前必须打开。
MP系列电动泵说明书

100FEMPa时 , 请 检 查 工 作 压 力 为100FEMPa, 否 则 会 损 坏 所 连 接 设 备); 7.7.2 系统需要调压时,请停泵泄压,使千斤顶回缩,系统无压力;
6
7.7.3 调整: 请拧松溢流阀(压力调节阀)的锁紧螺母,逆时针调出溢流阀,再顺时针微量调进溢流阀,
开启泵站,观察压力表;指针未达到要求压力时,停泵泄压,重复上述步骤,直至调到所需压力, 锁紧螺母,完成调压过程; 7.7.4 锁紧螺母必须拧紧,否则泵站工作中的震动会造成溢流阀的松动,系统压力输出会不准确。
雷恩液压机具
FEMP系 列
液压电动泵
德国液压
WRMP2051
欢 迎 来 到 WREN 液 压 工 具 世 界
JB-70型电动、手摇二用计量加油泵操作与使用

【JB-70型电动、手摇二用计量加油泵】操作与使用:1、操作程序(1)接通电源,旋转防爆电机旋钮至“开一位置。
(2)板紧出油枪捏手即可出油,此时流量计同时开始计数。
(3)松开出油手柄柄即停出油,此时计数值即为所加油量(或前后二次读数差即为所加油量)(4)停止工作时,应先将防爆电机旋钮旋至“断一位置,然后切断电源开关,绕好橡套电缆等。
2、使用注意点(1)经长途运输或长期拥置不用的加油机,在使用前必须用.50岁邑欧表测量电机时间地的绝缘电阻,其值不应低于10兆欧。
(2)整机工作前应检查电机转向是否正确(面对三角带轮应是顺时针方向转动)’。
(3)油枪关闭电机仍驱动叶片泵吸油的持续时间一般不应超过一分钟。
.(4)为维持正常出油效率及压力,可利用叶片泵上溢流阀的调节螺钉进行油路的压力调节。
(5)将流量计上计数器一侧铜帽向里推进, (指1级)2级流量计,每次指示完毕可逆时针方向旋转手轮,将大小指针拨回零位。
计数盘指针即自动回零,如要连续计数,则不再揿铜帽。
(6)控制出油枪捏手板紧程度,能粗略调节出油量。
(7)本机的橡套电缆,,在使用中应避免与地面及其物体磨损,严禁脚踏轮辗,在使用中应经常检查橡套完好情况。
(8)进、出油管,出油枪,电缆不用时应绕在规定位置,不能随地拖动,进油管插入油池 (或油桶)前应擦洗干净。
(9)橡套电缆联接电源前,应认清接地线和相线(用万用表测定),接地线应与电机机壳,地面可靠联接。
(10)不得用极易产生和职聚大量静电的尼龙管塑料管代替本机的专用进出口油管进行加油。
(11)不得用普通电缆代替本机专用橡套电缆及随便拆装联接。
(12)操作人员严禁穿着化纤类服装进行加油作业,并应遵守石油和化工行业有关安全操作规(13)严禁操作人员自行加大额定流量,以免静电职聚速度加快,造成不安全危险。
怎样选择水泵?建议从五个方面加以考虑,既液体输送量、扬程、液体性质、管路布置以及操作运转条件等。
1、流量是选泵的重要性能数据之一,它直接关系到整个装置的的生产能力和输送能力。
电动润滑泵用户手册
电动润滑泵Electric Grease PumpDPR—P系列Series DPR—P(根据JB/T8810.1-1998)用户手册Owners ManualXXXXX公司概述:DPR-P系列电动润滑泵(根据JB/T8810.1-1998)适用于润滑频率高、配管长度长、润滑点密集、公称压力为40Mpa以下的单、双线干油、稀油集中润滑系统中,作为供送润滑剂的输送装置。
该系列电动润滑泵是一种由减速电机驱动压油泵元件,排出润滑剂的单出口电动润滑泵。
有三种排量,四种容积贮油器各四种形式电机减速器组成十种规格的电动润滑泵,选择范围广,根据不同需要可方便地组成投资最低的集中润滑系统。
还可配备移动小车、胶管、油枪和电缆组成移动式电动润滑泵装置,专用于润滑频率低、润滑点少、给油量大、不便于采用集中润滑的单机设备,进行移动给油润滑。
部分优点:1.可以向多达1000个润滑点供送润滑脂。
2.投资较低。
3.适应各种系统的要求。
4.系统可以很方便的进行扩展。
5.结构紧凑、坚固,是其可用于各种复杂的环境中。
6.泵由于有完善的活塞部件,工作是否可靠。
7.可根据使用情况方便地调整泵的工作压力。
8.结构简单,维护费用低。
9.内部使用优质合金钢材料,使用寿命长。
XXXX公司XXXX 公司技术参数:适用于介质为针入度不低于220(25℃,150g )1/10mm 的润滑脂(NLGI0#~3#)和粘度等级大于N68的润滑油。
型号说明:电动润滑泵 顺序号压力参数代号(40Mpa )(注:老标准为M ) 给油量值(ml/min )使用介质(Z :润滑脂,Y :润滑油)外形尺寸:XXXX公司动作说明:泵的工作原理如下:减速电机固定于带泵元件的连接法兰上,通过驱动偏心轴带动滑叉作直线往复运动,并带动螺旋压油板和刮油板作顺时针方向的旋转(使用润滑油无此机构),经搅动变软的润滑脂均匀地被压到泵元件的吸油口周围。
泵体内有两组活塞,每组由一个工作活塞1和一个控制活塞2及推杆3组成。
电动燃油泵使用说明

整体式电动燃油泵总成使用说明书( 第一版 )5000模块化系列产品无储油杯简化系列产品5000系列油泵1500系列油泵金属支架油泵总成2 结构特征• 德尔福5000系列电动燃油泵总成德尔福公司研究发展的5000系列电动燃油泵总成已经过众多汽车生产主机厂家多种车型、多年道路实际使用考核。
该设计拥有世界上最先进、功能最全面的结构和满足当今世界最严格之排放法规要求的全部功能。
概括如下:• 适用于燃油箱装配接口到燃油箱底部深度大于180毫米的燃油箱• 模块化标准结构设计,装配高度可根据客户要求调整;应用灵活机动• 带储油杯设计结构,随时保证燃油泵接触液体燃油• 采用弹性装配结构(弹簧预紧),保证燃油泵紧密接触燃油箱底部• 德尔福标准化电器接口总成设计;电器连接接触可靠、密封性良好• 圆柱形断面“O”型圈镶入式密封结构设计、密封性能良好• 燃油箱接口仅采用简单冲压和点焊工艺制造;生产工艺简便,成本低• 与燃油箱接口设计结构装配工艺简便、快捷,劳动生产效率高• 燃油压力调节器集成选装结构;适用于无回油发动机管理系统• 供、回油管路接口可选择国际标准快速接头,也可选用橡胶管接头设计• 燃油量(油位传感器)采用贵金属材料,应用靠寿命长;选装结构设计• 车辆侧翻防止燃油泄漏控制阀选装结构设计• 结构设计考虑到降噪措施,油泵工作运行噪音低• 德尔福1500系列电动燃油泵总成• 适用于燃油箱装配接口到燃油箱底部深度小于180毫米的燃油箱• 模块化标准结构设计,装配高度可根据客户要求调整;应用灵活机动• 卧式燃油泵设计结构,适用于平坦结构燃油箱• 采用弹性装配结构(弹簧预紧),保证燃油泵紧密接触燃油箱底部• 德尔福标准化电器接口总成设计;电器连接接触可靠、密封性良好• 圆柱形断面“O”型圈镶入式密封结构设计、密封性能良好• 燃油箱接口仅采用简单冲压和点焊工艺制造;生产工艺简便,成本低• 与燃油箱接口设计结构装配工艺简便、快捷,劳动生产效率高• 供、回油管路接口可选择国际标准快速接头,也可选用橡胶管接头设计• 燃油量(油位传感器)采用贵金属材料,应用靠寿命长;选装结构设计• 车辆侧翻防止燃油泄漏控制阀选装结构设计• 德尔福金属支架电动燃油泵总成• 模块化标准结构件设计,根据客户燃油箱实际结构要求进行设计• 平板耐油橡胶垫、螺钉压紧密封方式• 燃油量(油位传感器)选装结构设计• 可采用普通镀锌防锈或镀锌后钝化处理防锈• 电动燃油泵总成德尔福公司发展的GEN IV电动燃油泵总成机构主要包括涡轮、转子线圈总成、马蹄形永磁材料定子元件、前后端盖、碳刷、限压阀和单向阀等部件组成。
DRB系列电动润滑泵使用说明书(分享借鉴)

DRB系列电动润滑泵使用说明1、简介DRB系列电动润滑泵是一种齿轮泵,具有结构合理,性能优良,功能齐全、适用范围广等特点,油罐容积2升、4升、6升、8升四种不同规格可供选择,该泵配有液位开关,根据不同需求还可配置压力开关、卸压阀、控制程序等。
可与主设备上的PLC程控系统相连,实现对油罐内油液的液位,系统压力进行监控及润滑周期的设定。
DRB系列电动润滑泵可与定量分配器组成容积式润滑系统,对各润滑点进行定量注油润滑;也可与计量件组成反比例式润滑系统,对各润滑点进行按比例注油润滑;或与递进式分配器组成递进式润滑系统,对润滑点依序按量进行润滑。
DRB系列电动润滑泵可广泛用于机床、塑料机械、纺织机械、轻工机械、印刷机械、自动扶梯和输送机械等各种设备的各种润滑系统。
二、产品特点1、润滑泵可配置单相或三相电机,电机电压可根据客户需要进行配置。
2、电机、液位开关或压力开关(选配)可与泵上的程控器相联,也可与用户的主设备上PLC系统相联,从而实现润滑周期的自动控制。
3、电动润滑泵用于容积式润滑系统时,需选用配卸荷规格的润滑泵,运行时间为泵运行时间的出油量大于或等于系统内各润滑点之和,再加5~10秒,停机时间可根据要求设定。
4、电动润滑泵用于比例式或递进式润滑系统时,可根据润滑周期要求设定开、停机时间。
5、电动润滑泵配有液位开关,油位到下限时开关动作,输出信号。
开关可分为常开、常闭两种,泵的出厂状态为常开。
如需常闭,在订货时注明。
6、电动润滑泵可根据需要选配卸荷阀,泵停机后,卸荷阀动作,使系统主油路压力下降,此时定量分配器完成卸压式分配器加油(加压式分配器贮油)的过程。
通常管路长、管径小、油品粘度大会使卸压时间相对延长,一般3-6秒。
7、DBR2-G160系列电机内置热保护器,可有效地保护电机。
在使用定量注油器(PDI)时,运行时间由压力开关控制,停机时间可由程控系统设定控制。
4、在使用计量件(MU)时,开、停机时间均可由程控系统设定控制。
汽缸简易电动泵产品说明书
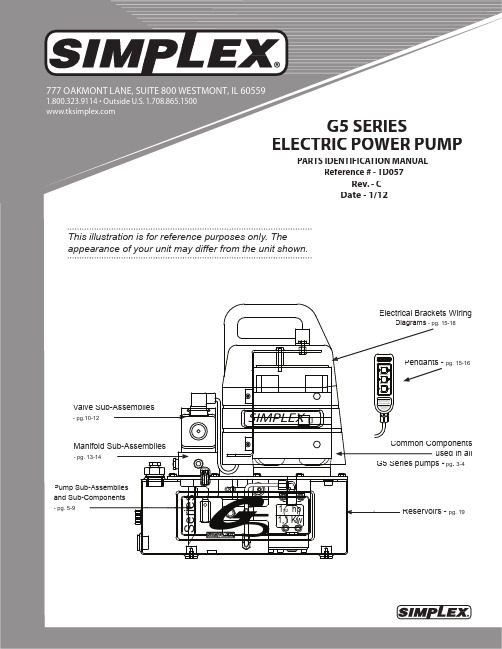
G5 SERIESELECTRIC POWER PUMPPARTS IDENTIFICATION MANUALReference # - TD057Rev. - CDate - 1/12Electrical Brackets WiringDiagrams - pg. 15-18Common Componentsused in allG5 Series pumps - pg . 3-4Reservoirs - pg. 19This illustration is for reference purposes only. The appearance of your unit may differ from the unit shown.Pendants - pg. 15-16Valve Sub-Assemblies- pg.10-12Manifold Sub-Assemblies- pg. 13-14Pump Sub-Assemblies and Sub-Components- pg. 5-91,1 Kw1 hp 1/2S e r i e sG 5SIMPLEXHow to Identify Partsfor Your Model.G5 Series Electric Power PumpSample Model #:Description:MODEL NUMBER & DATE CODE LOCATIONMODEL DECAL PLACEMENTMODEL MATRIXSTAMPING LOCATIONNOTE: This illustration is for reference only. The appearance of your unit may di er from unit shown.TORQUE TOG5 Series Electric Power PumpPump AssemblyPART # 46335SS (PUMP ASM G5)SECTION A-ATORQUE TO 90 IN*LBS.TORQUE TO 75 IN*LBS.TORQUE TOPump AssemblyPART # 46335SS (PUMP ASM G5)G5 Series Electric Power PumpPump Sub AssemblyG5 Series Electric Power Pump(46388SS) PUMP SUB ASM. (DUMP PUMPS)SECTION A-ADETAIL "D"TORQUE TO TORQUE TOPump Sub AssemblyG5 Series Electric Power Pump(46388SS) PUMP SUB ASM. (DUMP PUMPS)G5 Series Electric Power PumpPump Sub AssemblyPART# 43766SS (UNLOADING PISTON ASM. )PART# 46336SS (PISTON BLK ASM. )PART #45820SS (ECCENTRIC SHAFT ASM.)G5 Series ElectricPower PumpValve Assembly PART#43540SS (DUMP ASM)SECTION A-AAPART#43567SS (2 WAY DUMP ASM)(69094SS) 2 WAY MANUALValve Sub AssemblyG5 Series Electric Power Pump(69691SS) 3 WAY MANUAL(69101SS) 4 WAY MANUAL RELIEF REPLACEMENT KIT( ++ = COMPONENTS) -- PART #55057(46285SS) 4 WAY SOLENOID VALVE(69100SS) 4 WAY STANDARDRELIEF REPLACEMENT KIT (* = COMPONENTS) -- PART # 55057RELIEF REPLACEMENT KIT (* = COMPONENTS) -- PART # 55057Manifold Sub AssembliesG5 Series ElectricPower PumpRELIEF REPLACEMENT KIT (++ = COMPONENTS) -- PART # 55057PACKING KIT 3 & 4 WAY LOCK VALVE (* = COMPONENTS) -- PART #54492(46486SS) BRACKET SUB ASM. 115V .15 IN*LBS(46487SS) BRACKET SUB ASM. 230V .15 IN*LBSSOLENOID CONTROLWIRING DIAGRAM 115V.SOLENOID CONTROLWIRING DIAGRAM 230V.MANUAL MOTOR CONTROL WIRING DIAGRAM 115V.MANUAL MOTOR CONTROL WIRING DIAGRAM 230V.SWITCH TO BE IN 110/120V POSITIONReservoirsG5 Series Electric Power Pump(45996P) 1.5 GALLON RESERVIOR NOTE: ALL RESERVOIRS ARE POWDER COATED BLACKNOTE: THIS ILLUSTRATION IS FOR REFERENCE ONLY.THE APPEARANCE OF YOUR UNIT MAY DIFFER FROM UNIT SHOWN.(46046P) 5.0 GALLON RESERVIOR (46048P) 10 GALLON RESERVIOR (DS1256025) 20 GALLON RESERVIOR(46213P) 2.5 GALLON RESERVIOR。
油泵操作规程(最新版)
油泵操作规程(最新版)The safety operation procedure is a very detailed operation description of the work content in the form of work flow, and each action is described in words.( 安全管理 )单位:______________________姓名:______________________日期:______________________编号:AQ-SN-0435油泵操作规程(最新版)一、齿轮油泵的润滑是靠本身排送的液体进行的,(电动机的润滑脂更换,视使用情况而定)。
所以排送的液体必须清洁,若夹带有细小沙尘或金属粉末,对本泵的使用寿命有严重的影响,使用时注意此点。
必要时在吸入管端装置金属滤油网,防止杂质吸入。
滤油网以60-100目/时为宜,滤油网的有效过滤面积应大于吸油管截面积的两倍。
二、泵的安装高度,应保证不超过泵所允许的吸上高度,安装管路应有管架、油泵不允许承受管路负荷。
三、建议在吸、排油管路上分别安装真空表和压力表,以便监视泵的工作状态。
四、油泵未开动前的准备:1、在油泵未开动之前应对泵各部进行仔细检查。
A、检查油泵的各螺母及底座上各螺栓是否紧固。
B、检查油泵内的主动齿轮和被动齿轮的转动是否灵活。
2、把吸油接管和排油接管的阀门打开。
3、检查电动机的电源是否接对。
油泵旋向是否与指示箭头方向相同,即面向轴承,顺钟向旋转。
五、油泵工作时的维护:1、注意油泵压力表和真空表的读数应符合技术规范。
2、注意轴封的工作状态,倘若漏油,对填料密封结构的泵应将其压紧盖均匀拧紧,但不能过紧,以免发热和密封圈的迅速磨损,漏油时应及时更换油封。
3、定时检查油泵各部位发热情况。
4、当发现油泵有不正常的噪音或发热过高等故障时,应立即停止油泵工作,排除故障。
5.经常保持油泵工作场地清洁。
干油润滑系统使用说明

宁波北仑DQ4200/4200.42堆取料机干油集中润滑系统技术说明目录1系统技术参数及工作原理………………STI 2 2典型双线系统工作原理……………………STI 4 3FYK分油块…………………………………STI 6 4DRB泵………………………………………STI 8 5SSP双线分配器………………………………STI 16 6YCK-M5压差开关……………………………STI 191.系统技术参数及工作原理宁波北仑DQ4200/4200.42堆取料机干油集中电动润滑系统润滑点部位包括:大车集中润滑系统和回转集中润滑系统.其余润滑系统均采用分油块润滑系统.大车集中润滑系统原理图回转集中润滑系统原理图电动双线集中润滑系统:整个系统由电动干油润滑泵、双线分配器、连接管路和接头等组成。
2.典型双线系统工作原理润滑泵开始工作后,泵不断地从贮油桶中吸入油脂,从出油口压出油脂。
泵排出的压力油脂经液动换向阀进入主管1,送至各分配器。
此时,主管2通过XYDF型液动换向阀与回油管相连,处于卸荷状态。
主管1中的油脂进入各分配器的上部进油口(图A所示),利用上部进油口处的压力油推动分配器中的所有活向下运动,并将活塞下腔的油经分配器的下出油口2,定量地送入各润滑点。
当所有分配器的下出油口一次送油结束后(即所有分配器中的供油活塞下行到活塞行程的末端停止运动后),主管1中的压力将迅速上升,当压力达图A到额定压力后,换向阀换向。
换向阀换向后,润滑泵输出的压力油进入主管2,同时主管1卸荷,各分配器的下进油口进油(图B所示),分配器中的活塞向上运动,将活塞上腔的油经分配器的上出油口1,定量地送入各润滑点。
当所有分配器的上出油口一次送油结束后,主管2的压力上升,当压力达到额定压力后,换向阀换向。
这样系统就完成了一次循环,每个润滑点均得到了一次定量的润滑图B油脂。
分油块示意图3.FYK型分油块用途及特点分油块有结构紧凑、体积小、安装补脂方便的特点。
HD40电动泵说明书

一、性能及用途1、性能HD-40电动型实验台由油泵、控制阀、油箱、电动机、仪表及电气控制等组成的一种独立的、完整的液压动力装置。
具有体积小、重量轻、结构简单、操作灵活方便、可快速移动、输出压力高等特点。
油泵为超高压高径向柱塞泵,噪音小、容积效率高;控制阀设有液控单向阀,可停机保压,在额定压力下,停机5分钟,压力降≤3Mp a。
2、用途本实验台可作为液压缸或专用机具的压力测试使用,也可在配备液压缸的情况下实现起重、拉伸、挤压、弯曲、剪切、拆卸、压装等工作要求;可以在其他机械设备中作液压动力元件;也可作为中高压系统液压元件、高压容器、高压胶管等的试压泵。
3、操作台按钮的功能电源指示(接通电源灯会亮起)压力报警(回油滤油器回油不畅报警)开机指示(电机启动提示)关机(关闭实验台电源)开机(开启实验台电源)温报警(油温报警)油位报警(不显示)前进(液压缸顶升)中位(电磁阀中位回油)后退(液压缸后退)压力调节旋钮二、技术参数:1、电动机:功率:3KW2、额定压力:35Mpa3、流量:3L/min4、油箱容量:50L5、电磁阀带液压锁,可停机保压。
带压力调节。
系统加装风冷却器及回油过滤器,装置为封闭式结构,外置操控台并且可移动6、压力表位于正面易见处,换向开关、压力可调节开关、电源开关位于外置操控台易操作处,进出油口位于操控台一侧。
7、压力表等级1.6;8、外形尺寸(约)650x500x950(长x宽x高)9、液压泵输出/回油A、B口为G1/2内螺纹;10、外观喷漆颜色为宝石蓝锤纹漆;三、结构及工作原理:1、油泵部分油泵为超高压R系列径向柱塞泵。
,压力最高可达50Mpa2、控制阀部分控制阀包括溢流阀(溢流阀安装在控制面板的右下方。
调定压力为35M p a,可根据工作需要在0-35M p a进行调整。
)、三位四通电磁换向阀(中位机能为H型,换向阀不通电状态下,油泵卸载)、液控单向阀(为单向液控单向阀A口保压B口不保压)及压力表。
3A6850H电动泵产品说明书
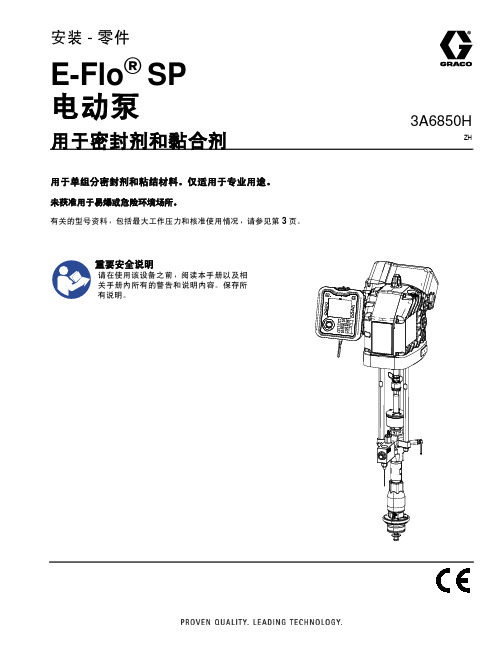
3A6850HZH安装 - 零件E-Flo ®SP 电动泵用于密封剂和黏合剂用于单组分密封剂和粘结材料。
仅适用于专业用途。
未获准用于易爆或危险环境场所。
有关的型号资料,包括最大工作压力和核准使用情况,请参见第 3 页。
重要安全说明请在使用该设备之前,阅读本手册以及相关手册内所有的警告和说明内容。
保存所有说明。
相关手册23A6850H目录相关手册 . . . . . . . . . . . . . . . . . . . . . . . . . . . . . . . . . . 2型号 . . . . . . . . . . . . . . . . . . . . . . . . . . . . . . . . . . . . . . 3系统压力 . . . . . . . . . . . . . . . . . . . . . . . . . . . . . . . 4警告 . . . . . . . . . . . . . . . . . . . . . . . . . . . . . . . . . . . . . . 5部件辨认 . . . . . . . . . . . . . . . . . . . . . . . . . . . . . . . . . . 7带 100 cc Check-Mate CS 下缸体的电动泵 . . . . 7高级显示模块 (ADM) . . . . . . . . . . . . . . . . . . . . . . 8安装 . . . . . . . . . . . . . . . . . . . . . . . . . . . . . . . . . . . . . . 9定位和安装 . . . . . . . . . . . . . . . . . . . . . . . . . . . . . 9接地 . . . . . . . . . . . . . . . . . . . . . . . . . . . . . . . . . . . 9电源要求 . . . . . . . . . . . . . . . . . . . . . . . . . . . . . . . 9连接电源 . . . . . . . . . . . . . . . . . . . . . . . . . . . . . . 10连接独立变压器 . . . . . . . . . . . . . . . . . . . . . . . . . 11在设备使用之前安装开口机油盖 . . . . . . . . . . . . 12流体软管的连接 . . . . . . . . . . . . . . . . . . . . . . . . . 12连接多个泵 . . . . . . . . . . . . . . . . . . . . . . . . . . . . 13设置 . . . . . . . . . . . . . . . . . . . . . . . . . . . . . . . . . . . . . 14湿杯 . . . . . . . . . . . . . . . . . . . . . . . . . . . . . . . . . . 14冲洗泵 . . . . . . . . . . . . . . . . . . . . . . . . . . . . . . . . 14泄压步骤 . . . . . . . . . . . . . . . . . . . . . . . . . . . . . . . . . 16关闭并维护泵 . . . . . . . . . . . . . . . . . . . . . . . . . . . . . . 16驱动器维护 . . . . . . . . . . . . . . . . . . . . . . . . . . . . . . . . 17零配件 . . . . . . . . . . . . . . . . . . . . . . . . . . . . . . . . . . .18带 Check-Mate 下缸体的电动泵 . . . . . . . . . . . .18带 Dura-Flo 下缸体的电动泵 . . . . . . . . . . . . . . .22单向阀 . . . . . . . . . . . . . . . . . . . . . . . . . . . . . . . .25套件及附件 . . . . . . . . . . . . . . . . . . . . . . . . . . . . . . . .28高级显示模块配件包 25E439 . . . . . . . . . . . . . .28通信网关模块 (CGM) 配件包 . . . . . . . . . . . . . . .29入口压力传感器配件包,24Y245 . . . . . . . . . . .30泵架式机架,253692 . . . . . . . . . . . . . . . . . . . .31壁式安装支架,255143 . . . . . . . . . . . . . . . . . .31地板安装适配器,223952 . . . . . . . . . . . . . . . . .32CAN 电缆 . . . . . . . . . . . . . . . . . . . . . . . . . . . . . .32灯塔配件包,255468 . . . . . . . . . . . . . . . . . . . .32I/O 电缆,122029 . . . . . . . . . . . . . . . . . . . . . . .32尺寸 . . . . . . . . . . . . . . . . . . . . . . . . . . . . . . . . . . . . .33E-Flo SP 泵尺寸 . . . . . . . . . . . . . . . . . . . . . . . .33泵机架安装孔图表 . . . . . . . . . . . . . . . . . . . . . . .34地板支脚安装孔图表 . . . . . . . . . . . . . . . . . . . . .35电动驱动器安装孔位置图 . . . . . . . . . . . . . . . . . .35变压器安装孔图表 . . . . . . . . . . . . . . . . . . . . . . .36泵性能 . . . . . . . . . . . . . . . . . . . . . . . . . . . . . . . . . . .37E-Flo SP 性能图表 . . . . . . . . . . . . . . . . . . . . . . .38技术规格 . . . . . . . . . . . . . . . . . . . . . . . . . . . . . . . . . .43美国加州第 65 号提案 . . . . . . . . . . . . . . . . . . . . . . .44Graco 标准保修 . . . . . . . . . . . . . . . . . . . . . . . . . . . .46相关手册这些手册可以从 网站获取。
jb-70型电动、手摇二用计量加油泵操作与使用

【JB-70型电动、手摇二用计量加油泵】操作与使用:1、操作程序(1)接通电源,旋转防爆电机旋钮至“开一位置。
(2)板紧出油枪捏手即可出油,此时流量计同时开始计数。
(3)松开出油手柄柄即停出油,此时计数值即为所加油量(或前后二次读数差即为所加油量)(4)停止工作时,应先将防爆电机旋钮旋至“断一位置,然后切断电源开关,绕好橡套电缆等。
2、使用注意点(1)经长途运输或长期拥置不用的加油机,在使用前必须用.50岁邑欧表测量电机时间地的绝缘电阻,其值不应低于10兆欧。
(2)整机工作前应检查电机转向是否正确(面对三角带轮应是顺时针方向转动)’。
(3)油枪关闭电机仍驱动叶片泵吸油的持续时间一般不应超过一分钟。
.(4)为维持正常出油效率及压力,可利用叶片泵上溢流阀的调节螺钉进行油路的压力调节。
(5)将流量计上计数器一侧铜帽向里推进, (指1级)2级流量计,每次指示完毕可逆时针方向旋转手轮,将大小指针拨回零位。
计数盘指针即自动回零,如要连续计数,则不再揿铜帽。
(6)控制出油枪捏手板紧程度,能粗略调节出油量。
(7)本机的橡套电缆,,在使用中应避免与地面及其物体磨损,严禁脚踏轮辗,在使用中应经常检查橡套完好情况。
(8)进、出油管,出油枪,电缆不用时应绕在规定位置,不能随地拖动,进油管插入油池 (或油桶)前应擦洗干净。
(9)橡套电缆联接电源前,应认清接地线和相线(用万用表测定),接地线应与电机机壳,地面可靠联接。
(10)不得用极易产生和职聚大量静电的尼龙管塑料管代替本机的专用进出口油管进行加油。
(11)不得用普通电缆代替本机专用橡套电缆及随便拆装联接。
(12)操作人员严禁穿着化纤类服装进行加油作业,并应遵守石油和化工行业有关安全操作规(13)严禁操作人员自行加大额定流量,以免静电职聚速度加快,造成不安全危险。
怎样选择水泵?建议从五个方面加以考虑,既液体输送量、扬程、液体性质、管路布置以及操作运转条件等。
1、流量是选泵的重要性能数据之一,它直接关系到整个装置的的生产能力和输送能力。
EZ-8 12V 电动手动泵说明书
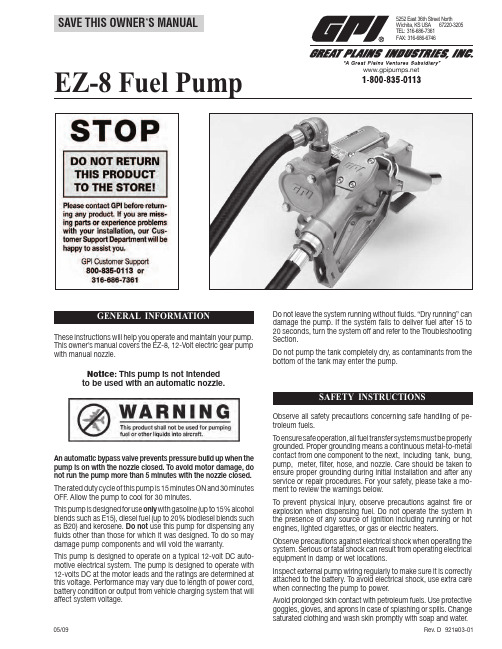
Rev. D 921803-0105/09GENERAL INFORMATIONThese instructions will help you operate and maintain your pump. This owner’s manual covers the EZ-8, 12-Volt electric gear pump with manual nozzle.Do not leave the system running without fluids. “Dry running” can damage the pump. If the system fails to deliver fuel after 15 to 20 seconds, turn the system off and refer to the Troubleshooting Section.Do not pump the tank completely dry, as contaminants from the bottom of the tank may enter the pump.Observe all safety precautions concerning safe handling of pe-troleum fuels.To ensure safe operation, all fuel transfer systems must be properly grounded. Proper grounding means a continuous metal-to-metal contact from one component to the next, including tank, bung, pump, meter, filter, hose, and nozzle. Care should be taken to ensure proper grounding during initial installation and after any service or repair procedures. For your safety, please take a mo-ment to review the warnings below.To prevent physical injury, observe precautions against fire or explosion when dispensing fuel. Do not operate the system in the presence of any source of ignition including running or hot engines, lighted cigarettes, or gas or electric heaters.Observe precautions against electrical shock when operating the system. Serious or fatal shock can result from operating electrical equipment in damp or wet locations.Inspect external pump wiring regularly to make sure it is correctly attached to the battery. To avoid electrical shock, use extra care when connecting the pump to power.Avoid prolonged skin contact with petroleum fuels. Use protective goggles, gloves, and aprons in case of splashing or spills. Change saturated clothing and wash skin promptly with soap and water.Notice : This pump is not intended to be used with an automatic nozzle.An automatic bypass valve prevents pressure build up when the pump is on with the nozzle closed. To avoid motor damage, do not run the pump more than 5 minutes with the nozzle closed.The rated duty cycle of this pump is 15 minutes ON and 30 minutes OFF . Allow the pump to cool for 30 minutes.This pump is designed for use only with gasoline (up to 15% alcohol blends such as E15), diesel fuel (up to 20% biodiesel blends such as B20) and kerosene. Do not use this pump for dispensing any fluids other than those for which it was designed. To do so may damage pump components and will void the warranty.This pump is designed to operate on a typical 12-volt DC auto-motive electrical system. The pump is designed to operate with 12-volts DC at the motor leads and the ratings are determined at this voltage. Performance may vary due to length of power cord, battery condition or output from vehicle charging system that will affect system voltage.Observe precautions against electrical shock when servicing the pump. Always disconnect power before repairing or servicing. Never apply electrical power to the system when any of the coverplates are removed.If using solvent to clean pump components or tank, observe the sol-vent manufacturer’s recommendations for safe use and disposal.This pump is designed to self-prime with dry gears.Make sure all threaded fuel connections are wrapped with three to four turns of Teflon ® tape or a pipe thread sealant approved for use with petroleum fuels.Clean and bond the suction pipe top and bottom as necessary. Thread the suction pipe into the inlet fitting and tighten snugly. Trim the suction pipe as necessary to leave approximately 1/2 in. (1.2 cm) clearance from the bottom of the tank. Clean the tank interior of all dirt and debris. Insert the suction pipe into the tank opening. Tighten the pump into the tank opening until snug. Do not cross thread.Make sure the tank is vented. A vent cap rated at 3 psi or less is recommended.Install Electrical ConnectionsA grounding connection is provided. It is identified as a green colored binding head screw in the electrical cavity. Connect these pumps only to a 12-volt DC power source. Do not attempt connec-tion to a 24-volt DC, 115-volt AC or 230-volt AC power source.For installation in unclassified areas, the supplied power cord, fuse and strain relief grip may be used.NOTE: These components have not been evaluated as part ofthe UL Listed Equipment and are not intended for use in a Hazardous (Classified) Location.To install the power cord, remove the electrical coverplate. If necessary, trim the power cord to the desired length. Strip 3 to 4 inches (7.5 to 10 cm) of outer insulation from the power cord end. Then strip 1/2 in. (1.3 cm) of insulation from the power cord wires. Slide the strain relief grip onto the power cord so that the threaded end of the strain relief grip faces the stripped power cord wires. Insert the power cord through the 1/2 inch NPT connection on the back of the pump. Using wire nuts, connect black wire to black and red wire to red in the pump’s electrical cavity. Position the wires inside the electrical cavity and tighten the strain relief grip securely. Make sure surfaces are clean. Install the coverplateand tighten securely.Install Hose and NozzleAfter sealing threads, tighten the hose into the pump outlet and the nozzle on the hose. The nozzle can be placed in the nozzle holder only when the pump is off.ALWAYS FOLLOW SAFETY PRECAUTIONS WHEN OPERAT-ING THIS EQUIPMENT. REVIEW THE SAFETY INSTRUCTIONS. Before each use, repair leaks around seals or connections. Make sure hoses are in good condition and connections are tight. Make sure the work area is dry. MAKE SURE THE PUMP IS PROPERLY GROUNDED. Repair any corroded or damaged wiring before use. Ensure the tank contains enough fuel. Make sure the fuel is not contaminated with debris. Tighten loose tank lids regularly.To Dispense FuelTurn on the pump by removing the nozzle from the holder and push-ing up the switch lever. Insert the nozzle into the receiving tank and squeeze the handle to start fuel flow. When done, release the nozzle handle, turn the pump off, and return the nozzle to its holder.This pump is designed to be self-priming. If fuel is not delivered within 15 to 20 seconds, turn the pump off and refer to priming information in the Troubleshooting Section.An automatic bypass valve prevents pressure build up when the pump is on with the nozzle closed. To avoid pump damage, do not run the pump more than 5 minutes with the nozzle closed.After running the pump for a maximum of 15 minutes, allow it to cool for 30 minutes.Auxiliary Temperature-Limiting DeviceThe motor is provided with an internal auxiliary temperature-limiting device. Excessive motor heat can trip the device. It resets automatically after the motor has cooled.This pump is designed for minimum maintenance. Motor bear-ings are sealed and require no lubrication. Inspect the pump and components regularly for fuel leaks and make sure the hose and power cord are in good condition. Keep the pump exterior clean to help identify leaks.Do not use this pump for water, chemicals or herbicides. Dispens-ing any fluid other than that listed in this manual will damage the pump. Use of the pump with unauthorized fluids will void the warranty.If pump is to be installed in a Hazardous (Classified) location, it must be installed by a licensed electrician and conform to Carefully route the power cord to the battery, protecting the power cord from hot surfaces, sharp edges or anything that A 20-amp fuse is provided to protect the motor and power cord. Install fuse in the red wire of the power cord adjacent to the battery. Connect the red wire of the fuse to the positive (ungrounded) side of the battery. Connect black wire to the negative (grounded) side of the battery.WARNINGALWAYS DISCONNECT POWER BEFORE REPAIRING OR SER-VICING THE PUMP. NEVER APPLY POWER TO THE SYSTEM WHEN ANY COVERPLATE IS REMOVED.A. MOTOR DOES NOT RUN1. Auxiliary temperature-limiting device tripped. Turn pumpswitch off. Allow motor to cool. Device resets automatically. Try again.2. Switch defective. Remove electrical coverplate and inspectswitch. Replace if necessary.3. Motor burned out. Inspect and replace as necessary.4. Switch or electrical connection faulty. Inspect for defec-tive wiring or switch, or improper electrical connections. Replace as necessary.5. Fuse blown. Inspect fuse in fuse holder. If blown, replace.B. MOTOR RUNS BUT DOES NOT PUMP FLUID1. Suction pipe clogged, damaged, or missing. Remove pumpfrom tank. Inspect suction pipe. Clean or replace, as necessary. 2. Gear coverplate or O-ring damaged. Remove and inspectthe coverplate and O-ring. Replace as necessary.3. Strainer clogged or defective. Inspect and clean asrequired.4. Bypass poppet O-ring worn, missing or dirty. Inspectthe O-ring. Replace as necessary.5. Bypass poppet binding or damaged. Remove the bypasspoppet, spring, and O-ring. Clean cavity. Inspect and replace as necessary.6. System air leak. Tighten all pump fittings and connections.Inspect suction pipe for leaks or damage.7. Poor connections or low voltage. Make sure electricalconnections are secure. Also check battery voltage. 8. Fuel level low. Fill tank.9. Motor running backwards due to incorrect polarity.Connect red wire to positive (+) ungrounded side of battery.C. LOW FLOWRATE1. Poor connections or low voltage. Make sure electricalconnections are secure. Also check battery voltage. 2. Strainer partially clogged. Inspect and clean as required. 3. Suction pipe clogged or damaged. Remove pump fromtank. Inspect suction pipe. Clean or replace. 4. Fuel tank empty. Fill tank.5. System air leak. Tighten all pump fittings and connec-tions. Inspect suction pipe for leaks or damage. Replace as necessary.6. Suction pipe too close to tank bottom. Suction pipe musthave at least 1/2 in. (1.2 cm) clearance from bottom of tank.D. MOTOR STALLS WHEN OPERATING IN BYPASS MODE 1. Gears locked. Remove gear coverplate and inspect gearsand drive key. Make sure gears turn freely with the key removed. Replace, if worn.2. Wiring defective. Use instructions in the Installation Sec-tion to ensure proper electrical connections.3. Bypass poppet binding or damaged. Remove the bypasspoppet, spring, and O-ring. Clean cavity. Inspect compo-nents and replace as necessary.4. Motor defective. Inspect and replace as necessary.E. SWITCH FAILS TO OPERATE MOTOR1. Motor burned out. Inspect and replace as necessary.2. Switch or electrical connections faulty. Inspect for blownfuse, defective wiring or switch, or improper electrical con-nections. Replace as necessary.F. RAPID OVERHEATING OF MOTOR1. Duty cycle too long. Pump operation should not exceedthe standard duty cycle of 15 minutes on and 30 minutes off. Allow the pump to cool for 30 minutes.In order to preserve the UL Listing for the motor, do not attempt to service the motor. For products serviced outside the factory, the UL nameplate must be defaced to indicate that the equipment may no longer meet the requirements for UL Listing. This does not apply to products serviced outside the factory under the UL program for Rebuilt Motors for Use in Hazardous Locations.For warranty consideration, parts, or other service information, please contact your local distributor or the GPI Customer Service Department in Wichita, Kansas, during normal business hours at:1-800-835-0113To obtain prompt, efficient service, always be prepared with the model number of your pump, the serial number or manufacturing date code of your pump, and part descriptions and numbers.For warranty work, always be prepared with your original sales slip or other evidence of purchase date.Please contact GPI before returning any parts. GPI can inform you of special requirements you will need to follow.CAUTION: Do not return the pump or parts without authority fromthe Customer Service Department. Due to strict government regulations, GPI cannot accept parts unless they have been drained and cleaned.Applications:The EZ-8 Fuel Pump is designed to safely transfer low viscosity petroleum fuels such as gasoline (up to 15% alcohol blends such as E15), diesel fuel (up to 20% biodiesel blends such as B20) and kerosene. The pump is designed for permanent mounting on vented storage tanks.Pump Housing:Lightweight, corrosion-resistant, cast aluminum body.Performance:Pump Rate: Up to 8 GPM (30 LPM) Duty Cycle: 15 min. ON, 30 min. OFFSuction Lift: Manual nozzle: Up to 5.5 ft. (1.7 m)Operating Temperature:-20°F to +125°F (-29°C to +52°C)Operating Pressure: 15 PSI Electrical Specifications: Input: 12-volt DC Current Draw: 11 ampMotor: 2100 RPM, UL Listed to UL and Canadian Standards 1/10 HP (75 watts)Mechanical Connections:Bung: 2 in. NPT Inlet: 3/4 in. NPT Outlet: 3/4 in. NPT Accessories:5/8 in. x 10 ft. (3.0m) Buna-N Electrically Conductive discharge hose.Standard 3/4 in. manual unleaded nozzle Cord: 15 ft. (4.6 m) of 14/2 gauge Fuse: 20 amp Strain Relief GripShipping Weight:16.0 lbs. (7.5 kg) with manual nozzle2. Strainer clogged. Inspect and clean as required.3. Suction pipe clogged or damaged. Remove pump from tank. Inspect suction pipe. Clean or replace as necessary.4. Fuel level low. Fill tank.5. Running too long in bypass mode. Limit bypass operation to 5 minutes.GPI and the electric gear pump are registered trademarks of Great Plains Industries, Inc. U.S. Design Patent D543,217© 2009 GREAT PLAINS INDUSTRIES, INC., Wichita, KS Printed in U.S.A. 05/09Great Plains Industries, Inc. 5252 E. 36th Street North, Wichita, KS USA 67220-3205, hereby provides a limited warranty against defects in material and workmanship on all products manufactured by Great Plains Industries, Inc. This product includes a 2 year warranty from date of purchase as evidenced by the original sales receipt. A 30 month warranty from product date of manufacture will apply in cases where the original sales receipt is not available. Reference product labeling for the warranty expiration date based on 30 months from date of manufacture. Manufacturer’s sole obligation under the foregoing warranties will be limited to either, at Manufacturer’s option, replacing or repairing defective Goods (subject to limitations hereinafter provided) or refunding the purchase price for such Goods theretofore paid by the Buyer, and Buyer’s exclusive remedy for breach of any such warranties will be enforcement of such obligations of Manufacturer. The warranty shall extend to the purchaser of this product and to any person to whom such product is transferred during the warranty period.This warranty shall not apply if:A. the product has been altered or modified outside the warrantor’s duly appointed representative;B.the product has been subjected to neglect, misuse, abuse or damage or has been installed or operated other than in accordance with the manufacturer’s operating instructions.To make a claim against this warranty, contact the GPI Customer Service Department at 316-686-7361 or 800-835-0113. Or by mail at:Great Plains Industries, Inc.5252 E. 36th St. North Wichita, KS, USA 67220-3205GPI will step you through a product troubleshooting process to determine appropriate corrective actions.GREAT PLAINS INDUSTRIES, INC., EXCLUDES LIABILITY UNDER THIS WARRANTY FOR DIRECT, INDIRECT, INCIDENTAL AND CONSEQUENTIAL DAMAGES INCURRED IN THE USE OR LOSS OF USE OF THE PRODUCT WARRANTED HEREUNDER.The company herewith expressly disclaims any warranty of merchantability or fitness for any particular purpose other than for which it was designed.This warranty gives you specific rights and you may also have other rights which vary from U.S. state to U.S. state.Note: In compliance with MAGNUSON MOSS CONSUMER WARRANTY ACT – Part 702 (governs the resale availability of the warranty terms).Limited Warranty PolicyELECTRIC MOTOR FOR HAZARDOUS LOCATIONS。
E2-30、 40电动泵指导手册

指导手册指导手册E2E2--30 30 电动泵电动泵电动泵• 107071型 (欧盟型号)• 107074 型(美国型号) • 107075型 (日本型号)E2E2--40 0 电动泵电动泵电动泵• 107093 型(欧盟型号)• 107094型 (美国型号) • 107095型 (日本型号)Note: Read and follow all instructions and safety precautions before using this equipmentProduct Description107071 – E2-30 Electric Pump107093 – E2-40 Electric PumpThis equipment is designed for use with Solvent based and Waterborne materials. Suitable for use in Zone 1 and 2, Protection Level: II 2 G XManufacturer: - Finishing BrandsJustus-von-Liebig-Straße31,63128 Dietzenbach. DEEU Declaration of ConformityWe: Finishing Brands declare that the above product conforms with the Provisions of Machinery Directive 98/37/EC, the Provisions of Pressure Equipment Directive 97/23/EC and the ATEX Directive 94/9/EC by complying with the following statutory documents and harmonized standards: -Machinery Safety Standards BS EN ISO 12100 Part 1 and 2Pressure Equipment Regulations 1999 (SI 1999/2001)Explosion Prevention Potentially Explosive Atmospheres BS EN 1127-1Non-electrical Equipment for Potentially Explosive Atmospheres BS EN 13463-1 2001 Constructional Safety for Potentially Explosive Atmospheres BS EN 13463-5 2003 Providing all conditions of safe use stated within the product manuals have been complied with and that the final equipment into which this product is installed has been re-assessed as required, in accordance with essential health and safety requirements of the above standards, directives and statutory instruments and also installed in accordance with any applicable local codes of practice.PM Green (General Manager)4th April 2007引索 引节章 节1.1 概述 (4)1.2 工作原理..........................5-6 1.3 规格. (7)1.4 尺寸与安装详图 (8)2.1 重要安全信息························9-113.1 安装--概述 (11)3.2 安装-电气/接地·······················12-133.3 安装--机械 (14)4.1 操作····························14-155.1 零件清单--主泵组件·····················16-17 5.2 零件清单--机械传动组件···················18-215.3 零件清单--流体部分组件···················22-236.1 维护--组装程序.......................24-32 6.2 维护--概述.........................33-34 6.3 维护-电机/齿轮箱. (35)6.4 维护--故障查找 (36)6.5 维护--测试/润滑/排放 (37)7.1 备件清单 (38)8.1 附件 (39)概述-1.1E2-30、40电动泵泵使用标准的防爆变频交流异步4极电机驱动流体部分,以输送油漆、溶剂及其它适当的材料。
