freebsd ssh配置
FreeBSD配置笔记 让普通用户可以使用bash
FreeBSD配置笔记(2006-10-15 05:34:55)分类:电脑应用让普通用户可以使用bashFreebsd默认安装之后用户的shell是sh,平时都已经习惯了使用bash。
通过下面的步骤可以配置用户来使用bash作为shell。
1. 安装bash。
cd /usr/ports/shells/bash; make install clean这样安装完之后,bash会被安装在/usr/local/bin/目录下面。
2. 在/bin目录下面做一个符号连接。
ln -f /usr/local/bin/bash /bin3. 修改 /etc/shells文件,将bash增加进去,这样在添加用户的时候就可以指定使用bash 作为shell了。
否则的话,会警告pwd_mkdb: warning, unknown root shell4. 如果已经添加过的用户,可以使用chsh命令来修改默认的shell.---------------------------------------------freebsd命令速记大全第一步我如何离线?(exit)我如何停止电脑?(shutdown -h now)我如何重新激活计算机? (shutdown -r now)我如何在单使用者模式下停止系统? (shutdown now)我如何切换终端机? (ALT-F*)文件我如何阅读 manual page? (man)使用者管理 (1)我该如何增加一个使用者? (adduser)我如何移除使用者? (rmuser)我如何改变我的密码? (passwd)"su" 指令我如何 "su" 至 root 帐号? (su)我如何 "su" 至其它使用者的帐号? (su username)四处观察我在哪? (pwd)我如何观察目录下有什么? (ls)我如何看到以点开始的隐藏档? (ls -a)我如何看到更多的讯息 (存取许可,拥有者,群组,大小,日期)? (ls -l) 我如何看出那些档是什么? (ls -F)这些是什么档: ".." 与 "."? (ls -aF)四处移动我该如何改变工作目录? (cd)如何回到上一层目录? (cd ..)我如何回到自己的工作目录? (cd, cd ~/)屏幕控制我如何卷回 (在终端机中,非 X)? (The Scroll Lock Key)我该如何清除屏幕? (clear)文章我如何不使用文书编辑器就可以观看小的档案? (more)最普遍的文书编辑器是? (vi)"vi" 看起来有点难,我可以从 "ee" 开始吗? (ee)"visual" 编辑器学习 "vi" 最有效的方法为何? (vilearn)"vi" 是如何工作的? (man vi)什么是储存指命? (:w)什么是离开指令? (:q)什么是可以储存与离开的命令? (:wq)如何离开而不使用储存指令? (:q!)我如何移动? (h, j, k, and l)Esc 键有什么用途? (The Esc Key)我如何加入新的文字? (a and i)我如何建立新的一行? (o and O)我如何删除文字? (x and dd)我如何拷贝文章内容? (yy and p)我如何替代文章? ®我如何使用数个指令? (nCommand)我如何搜寻文章? (/text)我如何起动 "vi" 于只读模式? (view)使用者管理 (2)我如何新增使用者至群组? (vi /etc/group)计算机信息我如何能观看开机记录文件? (dmesg)有什么方法可以让我慢慢地观看开机记录文件吗? (dmesg |more)谁显示谁在系统上? (who)他们正在做什么?? (w)"w" 可以显示出所有的处理吗? (w)何时我如何显示或设定日期时间? (date)我如何显示月历? (cal)有什么方法可以让我慢慢地观看月历吗? (cal | more) Communications(通讯)我如何显示 (或不显示) 其它使用者送来的讯息? (mesg y, mesg n) 我如何传送讯息到其使用者的屏幕? (write)我如何送讯息到每一个人的屏幕? (wall)我如何与他人交谈 (chat)? (talk)档案管理我如何建立一个空档案? (touch)我如何删除档案? (rm)我如何建立一个目录? (mkdir)我如何移除一个空的目录? (rmdir)我如何移除一个目录包括里面所有的东西 (包括子目录)? (rm -r) 我如何移除以 "-" 起头的档案? (rm -- -filename)我如何拷贝档案? (cp)我如何拷贝整个目录包括它所有的内容? (cp -R)我该如何搬移档案与目录? (mv)我如何改变档案/目录名称? (mv)我如何执行 rm、cp 与 mv 时,须要我的许可? (-i)我如何执行 rm、cp 与 mv 时,不须要我的确认? (-f)档案连结我如何连结一个档案或目录? (ln -s)我如何 hard link 一个档案? (ln)档案拥有权/存取许可我如何观察谁是档案拥有者? (ls -l)我如何观察档案/目录的存取许可? (ls -l)我如何改变档案/目录的使用者拥有人? (chown)我如何改变档案/目录的群组拥有人?s group owner? (chgrp)我如何改变档案/目录的使用者与群组拥有人? (chown user:group) 我如何改变存取许可? (chmod)如果我拥有这个目录,我可否修改不是我的档案? (yes)软盘机装置我如何挂上我的软盘? (mount)我如何挂上 MS-DOS 格式的软盘机? (mount -t msdos)我如何卸下我的软盘? (umount)应用程序我如何起动应用程序? (./)我如何由文件名称来起动应用程序? (PATH)我如何在背景起动应用程序? (&)我如何知道我的 PATH 是? (echo $PATH)所有的应用程序在那? (The FreeBSD Ports Collection)我如何安装一个 port? (make install clean)那里有编辑好的二进制文件? (The FreeBSD Packages Collection) 我如何移除应用程序? (pkg_delete)使用者环境使用者的 profile 档案在那? (vi ~/.profile)我如何改变我的 shell? (chsh)处理管理我如何列出处理? (ps)我如何列找到处理? (ps -waux | grep "name of the process") 我如何砍掉处理? (kill)磁盘管理我如何检查可用的磁盘空间? (df)我如何检查每个目录下用了多少磁盘空间? (du)工具哪里有计算器? (bc)附加:一些小技巧bsd的daemon在哪里?# ls /usr/share/examples/BSD_daemonFreeBSD.pfa beastie.eps eps.patchREADME beastie.fig poster.sh如何把上面的daemon化为gif或者png?# pkg_add -r transfig# fig2dev -L gif -g '#f0f0f0' -t '#f0f0f0' beastie.fig beastie.gif # fig2dev -L png beastie.fig beastie.pngUnix家谱在哪里?more /usr/share/misc/bsd-family-tree超级经典如何在我的脚本加上交互式对话框?# ls /usr/share/examples/dialog# sh /usr/share/examples/dialog/yesno如何更新离线文档?#file of CVS supfiledoc-all tag=.# pkg_add -r docproj-nojadetex# echo "Updating docs"# cd /usr/doc# cp Makefile.orig Makefile# make install > /dev/null有图形版的rc.conf吗?# cd /usr/ports/sysutils/thefish# make install clean[ ] CONSOLE Disable X11 support[x] GTK Use GTK+ for the X11 interface[ ] QT Use Qt for the X11 interface如何重新知道port安装时候,我在菜单的选择?---------------------------------------------FreeBSD带有许多简单而功能强大的命令FreeBSD带有许多简单而功能强大的命令以使你的计算机工作更容易。
freebad 8.0 配置ip配置ssh

Freebsd 8.2 下配置ip地址和ssh服务
1、#sysinstall 我们在命令行下输入sysinstall 进入如下界面。
2、我们选择“configure”回车,如下图。
我们按键“pgDn”进入下一个界面,我们选择,“Networking”回车。
3.我们选择“Interfaces”对端口进行设置。
4、我们选择网卡,回车
5、现在我们对网卡进行设置。
1、现在会提示我们是否要尝试配置IPv6.我们选择“NO”
2、你希望通过DHCP服务器来配置吗?我们选择“No”
6.接下来我们开始配置ip地址
配置完成后,我们选择“OK”后,会出现如下界面
我们选择“yes”后会出现之前界面
7、我们现在只需按“Esc”键两下就会退到命令行下,对计算机进行重启
现在IP地址已经设置完了,接下来我们来配置ssh
1、我们依然输入sysinstall 通过界面来设置
2、我们选择“configure”回车。
3、我选择“Networking”
进入后,我们选择“ssh”回车
我们按Esc键至退到命令行界面下。
我们现在对ssh服务进行编辑。
ssh服务的文件位于/etc/ssh/sshd_config
PasswordAuthentication yes # 设置是否使用口令验证。
PermitEmptyPasswords no #不允许空密码登录
PermitRootLogin yes #允许root登录
重新启动sshd服务器 /etc/rc.d/sshd restart
谢谢大家的支持!
邮箱:lengchao@
QQ群:167371551。
美国高防服务器在FreeBSD 10.2如何安装和配置OpenNTPd

在FreeBSD 10.2如何安装和配置OpenNTPdNTP,网络时间协议,是一种标准化协议提供的方式来同步时间对各种操作系统。
OpenNTPd 是一个自由和易于使用实施网络时间协议(NTP)的,最初是作为的一部分OpenBSD的项目。
它提供了从远程NTP服务器同步本地时钟的能力,并且也可以作为服务器本身。
本教程将告诉你如何在FreeBSD上安装OpenNTPd先决条件FreeBSD的液滴需要远程访问SSH密钥。
有关设置SSH密钥帮助,请阅读如何在FreeBSD服务器上配置SSH密钥的验证。
要了解更多关于登录到您的FreeBSD滴和基础管理第1步- 安装OpenNTPd安装OpenNTPd之前,更新所使用的存储库的信息pkg:sudo pkg update然后安装OpenNTPd包:sudo pkg install openntpd默认OpenNTPd配置使用作为其默认时间服务器和被配置为仅作为客户机的工作。
本教程的其余部分将展示如何更改时间服务器使用,以及如何OpenNTPd配置为时间服务器。
第2步- 更改时间服务器(可选)接下来的几个步骤将编辑/usr/local/etc/ntpd.conf,默认的配置文件。
使用ee,vi或你喜欢的文本编辑器编辑配置文件。
sudo ee /usr/local/etc/ntpd.conf通常会在服务器返回的IP地址或接近你的国家。
对于大多数用户来说,第3步- 更改约束自定义客户端安装还可以添加支持的限制,以便ntpd可以查询Date:通过TLS从信任的HTTPS服务器头。
该ntpd.conf(5)手册页说:“随着时间的推移下降的信息约束附近的范围之外收到的NTP包将被丢弃,这样NTP服务器将被标记为无效。
”这防止对一些MITM攻击,同时保持时钟精度。
约束加入/usr/local/etc/ntpd.conf。
请务必使用一个或多个可靠的,知名的HTTPS站点。
您可以通过删除第一个注释文件中提供的示例# $OpenBSD: ntpd.conf,v 1.2 2015/02/10 06:40:08 reyk Exp $# sample ntpd configuration file, see ntpd.conf(5)# Addresses to listen on (ntpd does not listen by default)#listen on *# sync to a single server第4步- 配置OpenNTPd作为一个时间服务器本节将展示如何改变OpenNTPd的默认行为,并把FreeBSD系统能够服务时间超过IPv4和IPv6的NTP服务器为服务器配置的最终结果应该是这样的,跟your_server_ip你的服务器的IPv4或IPv6地址取代。
rssh的用法

rssh的用法
rssh是一个基于SSH的简单反向Shell。
它的基本功能是通过SSH打开与远程计算机的连接,然后侦听远程计算机上的端口,并在与该端口建立连接后,在本地启动命令并向其复制数据。
RSSH只允许执行特定的命令,如scp、sftp、cvs、rsync和rdist,并且其他一切操作都是禁止的。
其配置文件通常位于/etc/rssh.conf (在FreeBSD中为/usr/local/etc/rssh.conf),而rssh可执行文件的默认位置为/usr/bin/rssh(在FreeBSD中为
/usr/local/bin/rssh)。
安装rssh的方法通常是通过克隆Git仓库,然后使用cargo构建。
RSSH是一个集密码管理、远程登录、远程执行命令于一体的工具,其软件架构封装了sshpass源码,是一个单可执行文件,运行时不依赖任何库。
FreeBSD常用命令大全

FreeBSD常用命令大全1.禁止ping/etc/rc.d/rc.localecho 1 > /proc/sys/net/ipv4/icmp_echo_ignore_all2.对用户和口令文件进行权限控制chmod 600 /etc/passwdchmod 600 /etc/shadowchmod 600 /etc/groupchmod 600 /etc/gshadow3.给下面文件加上不可更改属性chattr +i /etc/passwdchattr +i /etc/shadowchattr +i /etc/groupchattr +i /etc/gshadow4.对vsftp进行访问控制vi hosts.denyvsftpd: all --先禁止所有vsftp的请求vi hosts.allowvsftpd: 192.168.2.1 --再允许内网的vsftd请求5.关闭无用端口,只开启常规端口(21、22、80、443)service portmap stopchkconfig --level 35 portmap off --关闭111端口netstat -nap |grep 32768killall rpc.statd --关闭32768端口netstat -nap |grep 631killall cupsd --关闭631端口service sendmail stopchkconfig --level 12345 sendmail off --关闭25端口6.apache安全设置(先备份httpd.conf配置文件)vi /etc/httpd/httpd.confServerSignature OffServerTokens Prod ---隐藏Apache的版本号及其它敏感信息<Directory>Options -ExecCGI -FollowSymLinks -Indexes --关闭CGI执行程序、includes、目录浏览</Directory>将UserDir public_html改为UserDir disabled#ScriptAlias /cgi-bin "/usr/local/apache/cgi-bin/"注释掉manual7.vi /etc/profileHISTFILESIZE=30HISTSIZE=30 --这表示每个用户的“.bash_history”文件只可以保存30条旧命令tmout=600 --用户将在10分钟无操作后自动注销vi /etc/skel/.bash_logoutrm -f $HOME/.bash_history --当用户每次注销时,“.bash_history”文件都会被删除。
FreeBSDshell设置-电脑资料

FreeBSDshell设置-电脑资料下寻找该用户个人的资源文件:sh使用.profile文件,csh使用.login 和.cshrc文件。
这些资源文件均使用相应的shell语言,/etc/profile 和个人目录下的.profile使用sh风格的控制语言,/etc/cshrc和个人目录下的.login、.cshrc使用csh 风格的控制语言。
系统管理员可以改动这些资源文件,为用户提供一个最方便的使用环境。
当然,系统管理员没有必要直接去修改个人主目录下的资源文件,这些文件应该由用户自己管理,但是系统管理员可以在生成帐号时为用户产生缺省的资源文件,以减轻用户设置资源文件的麻烦。
adduser命令缺省使用/usr/share/skel下的文件为用户提供各种资源文件的缺省设置,这个目录下除了可以放入shell的资源文件之外,还可以放入其他应用程序的资源文件。
由于这些资源文件都是以点开头的隐藏文件,为了表示清楚,在skel目录下使用了一种转换方式,如使用dot.profile 作为.profile的模板。
# ls /usr/share/skeldot.cshrc dot.mail_aliases dot.rhostsdot.login dot.mailrc dot.shrcdot.login_conf dot.profile在/usr/share/skel中为用户设置的缺省配置文件,在用户生成之后,就不会对用户产生影响了。
因此对系统登录文件进行修改更有效和直接。
对于sh风格的用户,可以更改/etc/profile文件,对csh应更改 /etc/csh.cshrc文件。
在这些文件中可以改动shell使用的环境变量,这样来改变shell的行为方式,或者执行一系列自动操作,完成一些用户登录时需要自动执行的任务。
常用的环境变量:电脑资料可以将用户的shell设置为特殊的应用程序,来达到对特殊用户进行限制的目的。
FreeBSD8.2配置ssh并用root远程登录方法详细操作

FreeBSD8.2配置ssh并用root远程登录方法详细操作前言:最近下载了最新版的FreeBSD,在虚拟机上安装。
安装后第一步骤当然就是开启ssh 服务,用终端登录上去了。
开始吧。
内容:=================================================开启sshd服务:1.#vi /etc/inetd.confssh stream tcp nowait root /usr/sbin/sshd sshd -i -4ssh stream tcp6 nowait root /usr/sbin/sshd sshd -i -6//默认前面都注释了,去掉#2.让root能够远程登录:FreeBSD默认禁止root远程登录的,学习用无关紧要,直接放行:#vi /etc/ssh/sshd_config找到:#PermitRootLogin no改成:PermitRootLogin yes 注意去掉注释。
3.重启sshd#/etc/rc.d/sshd restart三个步骤完毕就OK了,在win下开启个惯用的连接程序登录吧。
进阶:====================================================虚拟机上安装学习用的,我一般是不会太关注安全设置。
但学习还是有必要的:方法1:不允许root远程登录,用普通账户登录后su切换得到root权限。
方法2:改变配置文件查找:#vi /etc/ssh/sshd_config#PasswordAuthentication no#PermitEmptyPasswords no修改成:PermitEmptyPasswords no #这是不允许空密码登录PasswordAuthentication yes #这是开启密码认证模式查找:#Port 22改成:Port xxxx #改掉默认端口,但你自己要记住。
查找:#ListenAddress 0.0.0.0修改成:ListenAddress IP重启sshd:#/etc/rc.d/sshd restart这样就差不多了,希望大家多多研究并把成果分享出来。
FreeBSD-6.2-Release系统安装手册

FreeBSD-6.2-Release系统安装手册龙旗科技(上海)有限公司版权所有历史版本记录目录环境说明................................................................................................................ 错误!未定义书签。
安装前的准备........................................................................................................ 错误!未定义书签。
开始安装................................................................................................................ 错误!未定义书签。
通过菜单方式选择安装条目并对硬盘进行必要配置 ........................................ 错误!未定义书签。
对硬盘进行分区.. (5)安装组件的选择 (5)安装媒介的选择 (6)安装后的配置 (6)系统初期网络设置 (6)FreeBSD-6.2-Release系统安装手册环境说明鉴于线上环境和大部分情况,这里将以6.2作为系统版本和DELL-1950服务器、2个300G SCSI 10K转速的硬盘作为硬件环境。
安装前的准备首先raid 1。
并把光驱的启动优先权设为最高。
开始安装将安装光盘放入光驱,如果正常启动,在屏幕上会看到如下信息:/kernel text=0x14c395 data=0x180d8+0x22ec4 syms=[0x4+0x1e3c0+0x4+0x210f8] Uncompressing kernel...doneBooting the kernelCopyright (c) 1982, 1986, 1989, 1991, 1993The Regents of the University of California.All rights reserved.接着会看到安装选择信息:Kernel Configuration MenuSkip kernel configuration and continue with installationStart kernel configuration in full-screen visual modeStart kernel configuration in CLI mod选择第一个按回车,在载入内核后,进入sysinstall的菜单安装界面。
SSHd配置sftp服务器

S S H d配置s f t p服务器 Company Document number:WTUT-WT88Y-W8BBGB-BWYTT-19998使用FREESSHD配置SFTP服务器说明背景:最近在公司做的项目需要传输文件,要求是文件加密传输,这里需要用加密证书来认证后才能访问服务器,因为使用服务器是Windows 2008 R2 ,所以折腾后选择FREESSHD作为SFTP服务端。
首先去下载 SFTP服务端,你可以去官网下载也可以去我百度云下载,下载完成直接后安装在你准备好的SFTP服务器(如果你想测试安装在本地机器也可)。
下载后,安装过程前五个步骤默认下一步即可,点击Install执行一段时间后,它会询问你是否生成私有密钥(这里的密钥其实就是RSA或DSA非对称加密算法文件),请点击‘是’生成用于服务器验证密钥(如果你点击‘否’,安装成后,打开软件配置,进入Server status选项卡SSH server is not running 点击这里开启服务会报错:Keys not loaded or generated.,这时就是需要你手动切换到SSH选项卡,生成RSA或DSA算法文件才行,算法文件是用于处理公有密钥的,其中原理请详细了解这两种算法),接着询问你是否将FREESSHD以服务形式运行,同上点击‘是’(如果你点‘否’就不会把服务端在windows服务里面运行,每次开机都要启动软件)。
安装成功后以管理员运行软件FREESSHD,将看到友好的提示。
安装成功后需要配置,关键也在配置,请仔细阅读,避免陷入我走过的坑。
Server status 选项卡是telnet 和SFTP两个服务端的开关,等把所有配置配好后,最后一步才把开关开启来,开启后有两个绿色的钩。
Telnet 选项卡如果不使用telnetcommand shell 必须是CMD命令程序的路径,默认是C:\Windows\system32\,其他选项默认即可。
freessh手册

freessh手册`freessh` 通常是指基于自由软件构建的 SSH 服务器和客户端,其源代码可以在自由许可证下获得和使用。
这里有一些关于 `freessh` 的基本信息和如何使用它的手册。
1. 简介SSH(安全外壳协议)是一种安全协议,用于在网络上建立加密的连接。
使用 SSH,你可以安全地远程登录到其他计算机或执行命令。
`freessh` 是一个基于 FreeSSH 的项目,它提供了一个完整的 SSH 服务器和客户端实现。
2. 安装 freessh安装 `freessh` 的具体步骤取决于你使用的操作系统。
一般来说,你可以从项目的官方网站或源代码仓库下载并编译它。
3. 配置 freessh 服务器配置 `freessh` 服务器需要编辑其配置文件。
配置文件通常位于`/etc/freesshd/`。
在这个文件中,你可以设置服务器的主机名、端口号、用户和权限等。
4. 使用 freessh 客户端一旦你已经安装并配置好了 `freessh` 服务器,你就可以使用 `freessh` 客户端来远程登录到服务器。
在命令行中,你可以使用以下命令:```bashfreessh -l username servername```其中 `username` 是你的用户名,`servername` 是服务器的地址。
5. 安全性和最佳实践使用 SSH 时,安全性非常重要。
你应该确保你的密码和密钥是安全的,并定期更新和审核你的系统以防止任何潜在的安全风险。
此外,为了提高安全性,你应该限制对 SSH 服务器的访问,并使用防火墙来保护你的服务器。
以上是关于 `freessh` 的基本手册。
如果你需要更详细的信息或遇到任何问题,建议查阅 `freessh` 的官方文档或寻求社区支持。
FreeBSD11系列1:FreeBSD11.0 的安装
FreeBSD11 安装(FreeBSD11.0 amd64)一、硬件最低配置安装 FreeBSD 所需的最低配置,随版本及硬件架构而有所不同。
● 1.FreeBSD/i386FreeBSD/i386 需要 486 或更快的处理器,最小 64 MB 的内存,以及至少 1.1 GB 的硬盘空间。
● 2.FreeBSD/amd64FreeBSD/amd64 支持两种处理器。
第一种是 AMD64 处理器,包括AMD Athlon™64、AMD Athlon™64-FX、AMD Opteron™ 以及更高级别的处理器。
第二种是采用了Intel®EM64 架构的处理器。
这类处理器包括Intel®Core™ 2 Duo、Quad 和 Extreme 家族,还包括Intel®Xeon™ 3000、 5000 和 7000 系列,以及Intel®Core™ i3、 i5 和 i7。
对于使用了 nVidia nForce3 Pro-150 的机器,必须在 BIOS 设置中禁用 IO APIC,如果没有这样的选项就只能转而禁用 ACPI。
因为 Pro-150 芯片组存在 bug,而目前还没有能够规避此问题的方法。
● 3.FreeBSD/powerpc Apple®Macintosh®支持所有内建 USB 的 New World Apple®Macintosh® 系统,同时也为配置多 CPU 的机器提供 SMP 支持。
注意 32 位的内核只能使用内存的前 2 GB,而 PowerMac G3 蓝白机上的FireWire® 也不被支持。
● 4.FreeBSD/sparc64FreeBSD/sparc64 需要独占一块磁盘。
目前还不支持与其他操作系统共享同一块磁盘。
二、获取安装镜像FreeBSD 9.0-RELEASE 及更高版本的镜像文件可以在ftp:///pub/FreeBSD/releases/arch/arch/ISO-IMAGES/version/FreeBSD -version-RELEASE-arch-memstick.img 中的ISO-IMAGES/目录中找到,其中,arch是指要安装的架构,而version则是指要安装的版本号。
FreeBSD的一些命令及FAMP配置安装
FreeBSD的一些命令及AMP配置安装关机命令#halt -p和shutdown -p now重启命令#shutdown -r now挂载和卸载光盘命令#mount /cdrom#unmount /cdrom#cd /cdrom查找文件命令#find /etc -name "*conf*"查看机器情况# uname –rna通过ports安装程序安装上传下载文件插件lrzsz#cd /usr/ports/comms/lrzsz#make clean install clean && rehash要下载就输入lsz ,上传就输入lrz,出现对话框挂载U盘#cd /mnt#mkdir usb#moun -t msdosfd /dev/da0s1 /mnt/usb用ports安装gmake有些程序在安装的时候需要用gmake来编译源码# cd /usr/ports/devel/gmake/# make all然后系统就开始自动下载从gnu官方站点上下载最新的gmake源码:然后系统就开始自动编译然后再重启系统:xinsoftbsd# reboot重启以后,FreeBSD就支持gmake了。
pkg安装gmake挂载第二张光盘,找到gmake-3.81_2.tbz#pkg_add gmake-3.81_2.tbz安装freetype2出错#./configure出现GNU make(> = 3.79.1) or makepp (> = 1.19) is required to build FreeType2.原因:make或gmake版本过低解决办法:#vi configure把GNUMAKE=make改成GNUMAKE=gmake再通过pkg安装gmake在php中编译#./configure --prefix=/usr/local/apache2/bin/apxs --with-mysql=/usr/local/mysql --with-xml --with-png --with-jpeg-dir=/usr/local/jpeg6 --with-zlib --with-freetype-dir --with-gd --with-curl --enable-track-vars --disable-debug --enable-url-includes --enable-sockets --enable-force-cgi-redirect--enable-magic-quotes --enable-ftp --enable-gd-native-ttf --with-ttf --with-gdbm --with-gettext--with-iconv --enable-mbstring=all --enable-memory-limit出现configure: error: DBA: Could not find necessary header file(s).是因为没安装gdbm,在第二张盘里有gdbm-1.8.3_3.tbz#pkg_add gdbm-1.8.3_3.tbz即可通过编译安装完php后启动apache出现httpd: Could not reliably determine the server's fully qualified domain name, using 127.0.0.1 for ServerName解决办法:# vi /usr/local/apache2/conf/httpd.conf添加这么一行:ServerName 127.0.0.1:80AMP配置安装1、下载首先从网上下载以下版本的压缩包 (1) mysql-5.0.41.tar.gz(2) httpd-2.2.8.tar.gz(3) php-5.1.4.tar.gz(4) libxml2-2.6.19.tar.gz(5) zlib-1.2.3.tar.gz(6) libpng-1.2.34.tar.gz(7) jpegsrc.v6b.tar.gz(8) gd-2.0.33.tar.gz(9) freetype-2.1.10.tar.gz(10) curl-7.15.0.tar.(11) gzlibxslt-1.1.15.tar.gz(12) mediawiki-1.9.3cn.zip2、开始安装Mysql-5.0.41.tar.gz#tar –xvf mysql-5.0.41.tar.gz#cd mysql-5.0.41#./configure --prefix=usr/local/mysql# make#make install为mysql加入访问的组与用户#pw group add mysql#pw user add mysql –g mysql#cp support-files/f /etc/f #cd /usr/local/mysql# chown -R mysql .#chgrp -R mysql .# bin/mysql_install_db --user=mysql# chown -R root .#chown -R mysql var#bin/mysqld_safe --user=mysql &#/usr/local/bin/mysqladmin -u root password '123456'#mysql -u root –p设置开机自动运行#vi /usr/local/etc/rc.d/mysql_start.sh添加#! /bin/sh/usr/local/mysql/bin/mysql_safe &编辑完成后保存并将属性更改为可执行#chmod +x mysql_start.sh3. Apache2的安装(httpd-2.2.8.tar.gz)#./configure --prefix=/usr/local/apache2 --enable-shared=max --enable-module=rewrite --enable-so#make#make install建立自动运行执行文件#vi /usr/local/etc/rc.d/apache_start.sh添加#! /bin/sh/usr/local/apache2/bin/httpd –k start保存后修改为可执行#chmod +x /usr/local/etc/rc.d/apache_start.sh4. 为PHP的安装做好准备而安装的各种包安装xml2-2.6.19.tar.gz#tar –xvf xml2-2.6.19.tar.gz#cd xml2-2.6.19#./configure#make#make install安装zlib-1.2.3.tar.gz#tar –xvf zlib-1.2.3.tar.gz#cd zlib-1.2.3#./configure#make#make install安装libpng-1.2.34.tar.gz#tar –xvf libpng-1.2.34.tar.gz#cd png-1.2.8#./configure --prefix=/usr/local/libpng2#make#make install安装jpegsrc.v6b.tar.gz#mkdir –p /usr/local/jpeg6#mkdir –p /usr/local/jpeg6/bin#mkdir –p /usr/local/jpeg6/lib#mkdir –p /usr/local/jpeg6/include#mkdir –p /usr/local/jpeg6/man#mkdir –p /usr/local/jpeg6/man1#mkdir –p /usr/local/jpeg6/man/man1#./configure--prefix=/usr/local/jpeg6--enable-shared--enable-static#make#make install安装freetype-2.1.10.tar.gz这个软件采用gmake来安装,因此首先将configure文件中的make修改为gmake #./configure#gmake#gmake install安装curl-7.15.0.tar#./configure#make#make install安装gzlibxslt-1.1.15.tar.gz#./configure#make#make install5.开始安装PHP5源代码:php-5.1.4.tar.gz#tar-zxvf php-5.1.4.tar.gz#cd php-5.1.4#./configure –prefix=/usr/local/php –with-apxs2=/usr/local/apache2/bin/apxs –with-xml –with-mysql=/usr/local/mysql –with-zlib –with-jpeg-dir=/usr/local/jpeg6 --with-png-dir=/usr/local/libpng2 –with-config-file-path=/usr/local/lib –disable-debug –enable-safe-mode –enable-trans-sid –enable-memory-limit –enable-short-tags –disable-posix –enable-exif –enable-ftp --enable-sockets#make#make install#cp /usr/src/php-5.1.4/php.ini-dist /usr/local/lib/php.ini把php加到apache里去代码:#vi /usr/local/apache2/conf/httpd.conf添加LoadModule php5_module modules/libphp5.soAddType application/x-httpd-php .phpAddType application/x-httpd-php-source .phps然后放个test.php文件上去测试看看成功vi /usr/local/apache2/htdocs/test.phpPHP代码:<?phpinfo();>启动一下apache服务#/usr/local/apache2/bin/apachectl start在浏览器中输入http://127.0.0.1/phpinfo.php这应该会出现一些php的测试信息6.安装MediaWiki 1_9_3上传到/usr/local/apache2/htdocs/目录下#cd /usr/local/apache2/htdocs#chmod a+w config #这样保证Wiki的setup程序可以有执行权利点击set up the wiki然后开始安装前的一些检测信息填入你的一些相关信息后,执行,如果成功会出现类似画面。
free BSD 安全配置手册

FreeBSD安全配置手册v1.0 目录第一部份:目的第二部份:内容一、必选配置选项1、取消控制台信任设置2、配置telnetd服务器3、配置ftpd服务器4、对inetd超级服务器里的其它服务做审核5、检查/etc/rc.conf及/etc/default/rc.conf文件二、推荐配置选项1、使用ssh替代telnet及ftp2、使用ipfilter进行加固3、加入hosts.allow及hosts.deny4、安全日志记录5、设置安全级别6、限制用户所能使用的资源7、保证suid,sgid可执行程序的安全三、参考配置选项1、控制能su成root的用户2、删除不必要的预置用户和组3、改变系统的核心变量达到对外屏闭服务器没有使用的端口4、关闭对广播类型的响应5、对udp包的校验和计算6、设置取消ctrl-alt-del组合键重启系统四、参考FreeBSD技巧1、更改shell并在配置文件中做设置2、更改telnet banner3、更改ftp banner五、参考安全工具1、tripwire2、john3、nmap第三部份:目前本系统的补丁情况一、FreeBSD补丁方法1、下载并检查完整性2、patch源文件3、编译安装4、攻击测试二、FreeBSD补丁下载地点三、FreeBSD官方安全邮件列表第四部份:系统应用程序可能存在的安全问题第五部份:施工注意事项一、配置1、对极其重要,不能中止服务的主机2、对可以暂时停止服务进行配置工作的主机二、审核1、如何发现入侵2、紧急处理需知3、如何进行审核目的尽管BSD系列的操作系统发行版比大多数的系统就安全性而言都相对强健,但默认安装仍然存在许多脆弱点,同时它仍然有许多可以进一步加强的安全特性,因此本篇配置文档旨在让对unix操作系统有一定了解的人员能够通过阅读文档对照操作,将一台FreeBSD的服务器配置成安全脆弱性最小化的主机。
本文档有一配套文档FreeBSD security checklist v1.0。
panabit安装配置
Freebsd系统安装1.1 Vmware workstion 6。
5 下安装freebsd6。
2 1。
1。
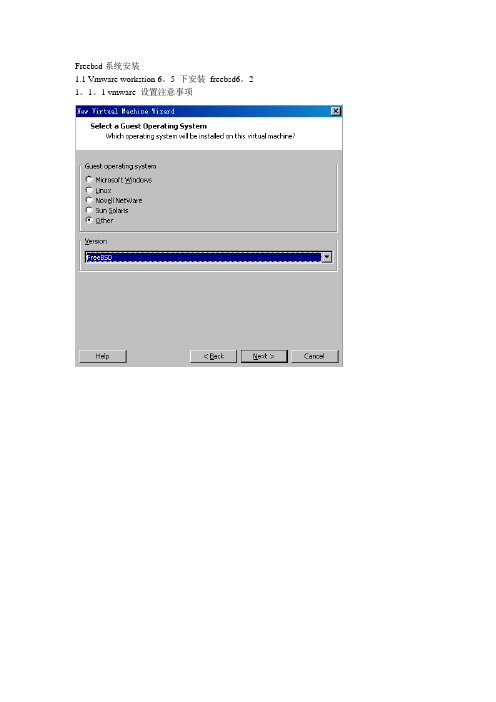
1 vmware 设置注意事项三块网卡全为“桥接模式":1。
1.2 freebsd安装按“q"退出分区设置按“a”键按”s”键盘,按“q”退出按”a’,然后按"q"退出多核CPU,把SMP选上选”NO”配置IP。
Vmware有三块网卡,假定把em0设置为管理接口, em1,em2 数据接口2。
1 Panabit安装设置2.1.1进入系统开启ssh服务Login: root密码为空设置root密码编辑ssh服务配置文件修改PermitRootLogin no 为PermitRootLogin yes ,使root用户能登录。
启动ssh服务在windows xp 使用ssh工具连接freebsd2.2.1 sftp 上传panabit安装包上传安装包并安装bashliu#ls。
cshrc 。
login Panabit0903。
tar.tar 。
k5login 。
profilebashliu#time tar xf Panabit0903.tar。
tar0。
044u 0。
429s 0:01。
14 40。
3%71+486k 5+403io 2pf+0wbashliu# cd Panabit0903bashliu#lsadmin etc ipeupgrade rdfbin ipeinstall kernelbashliu# 。
/ipeinstallWelcome installing panabit!Please input the directory to install panabit [/usr/panabit]:Please input the directory to store log [/usr/panalog]:Please input the directory to store configuration [/usr/panaetc]:The last time to verify your choice:(1)The directory that you want to install is "/usr/panabit"(2)The directory that the log to be stor ed is "/usr/panalog”(3)The directory that the configuration to be stored is "/usr/panaetc”Above are right(y/n[y])?yCreating directory "/usr/panabit" 。
freebsd 编译openssh
FreeBSD操作系统是一种广泛使用的开源UNIX-like操作系统。
它以其稳定性、可靠性和安全性而闻名,适用于各种用途,包括服务器、桌面和嵌入式系统。
OpenSSH是用于加密通信的工具套件,它通过安全的通信通道传输数据,为网络连接提供了加密。
编译OpenSSH是在FreeBSD系统上安装和配置OpenSSH的过程。
这篇文章将介绍该过程,并提供一些有用的技巧和建议,以便读者能够顺利地在FreeBSD系统上编译OpenSSH。
1. 确保系统更新在编译OpenSSH之前,首先需要确保系统已经更新至最新的版本。
可以使用以下命令来更新FreeBSD系统:```freebsd-update fetchfreebsd-update install```这将下载最新的补丁,并将其安装到系统中,以确保系统的安全性和稳定性。
2. 下载OpenSSH源代码接下来,需要从OpenSSH冠方全球信息站上下载最新的OpenSSH源代码。
可以使用以下命令来下载OpenSSH源代码:```fetch xxx```其中openssh-X.Xp1.tar.gz是最新的OpenSSH源代码的压缩包名称,X.Xp1是版本号。
请确保要下载的是最新版本的OpenSSH源代码。
3. 解压源代码下载完成后,需要将压缩包解压缩。
可以使用以下命令来解压OpenSSH源代码:```tar xf openssh-X.Xp1.tar.gz```解压完成后,将会得到一个名为openssh-X.Xp1的文件夹,其中包含了OpenSSH的源代码和相关文件。
4. 配置和编译OpenSSH在解压源代码后,需要进入OpenSSH的源代码目录,并进行配置和编译。
可以使用以下命令来完成这一步骤:```cd openssh-X.Xp1./configuremakemake install```这些命令将会根据系统的配置和需求,对OpenSSH进行配置和编译。
make install命令将会安装OpenSSH到系统中,以便可以在系统中正常运行。
FreeBSD配置防火墙开启SSH服务的方法是什么
FreeBSD配置防火墙开启SSH服务的方法是什么防火墙主要由服务访问规则、验证工具、包过滤和应用网关4个部分组成,防火墙就是一个位于计算机和它所连接的网络之间的软件或硬件。
这篇文章主要介绍下如何下freebsd下配置防火墙开启SSH 服务的方法,需要的朋友可以参考下方法步骤1、配置FreeBSD 防火墙ee /etc/rc.conf #编辑,在最后添加firewall_enable="yes" #开启防火墙net.inet.ip.fw.verbose=1 #启用防火墙日志功能net.inet.ip.fw.verbose_limit=5 #启用防火墙日志功能natd_enable="YES" # 开启防火墙NAT功能natd_interface="rl0"natd_flags="-dynamic -m"firewall_script="/etc/ipfw.rules" #自定义防火墙规则路径按esc,回车,再按a保存配置2、添加防火墙规则ee /etc/ipfw.rules #编辑防火墙规则,添加以下代码#!/bin/sh################ Start of IPFW rules file ####################### Flush out the list before we begin.ipfw -q -f flush# Set rules command prefixcmd="ipfw -q add"skip="skipto 800"pif="rl0" # public interface name of NIC# facing the public Internet################################################################## No restrictions on Inside LAN Interface for private network # Change xl0 to your LAN NIC interface name############################################# ####################$cmd 005 allow all from any to any via xl0############################################# ##################### No restrictions on Loopback Interface############################################# ####################$cmd 010 allow all from any to any via lo0############################################# ##################### check if packet is inbound and nat address if it is############################################# ####################$cmd 014 divert natd ip from any to any in via $pif############################################# ##################### Allow the packet through if it has previous been added to the# the "dynamic" rules table by a allow keep-state statement.############################################# ####################$cmd 015 check-state############################################# ##################### Interface facing Public Internet (Outbound Section)# Check session start requests originating from behind the# firewall on the private network or from this gateway server # destined for the public Internet.############################################# ##################### Allow out access to my ISP's Domain name server.# x.x.x.x must be the IP address of your ISP's DNS# Dup these lines if your ISP has more than one DNS server # Get the IP addresses from /etc/resolv.conf file$cmd 020 $skip tcp from any to x.x.x.x 53 out via $pif setup keep-state# Allow out access to my ISP's DHCP server for cable/DSL configurations.$cmd 030 $skip udp from any to x.x.x.x 67 out via $pif keep-state# Allow out non-secure standard www function$cmd 040 $skip tcp from any to any 80 out via $pif setup keep-state# Allow out secure www function https over TLS SSL$cmd 050 $skip tcp from any to any 443 out via $pif setup keep-state# Allow out send & get email function$cmd 060 $skip tcp from any to any 25 out via $pif setup keep-state$cmd 061 $skip tcp from any to any 110 out via $pif setup keep-state# Allow out FreeBSD (make install & CVSUP) functions# Basically give user root "GOD" privileges.$cmd 070 $skip tcp from me to any out via $pif setup keep-state uid root# Allow out ping$cmd 080 $skip icmp from any to any out via $pif keep-state # Allow out Time$cmd 090 $skip tcp from any to any 37 out via $pif setup keep-state# Allow out nntp news (i.e. news groups)$cmd 100 $skip tcp from any to any 119 out via $pif setup keep-state# Allow out secure FTP, Telnet, and SCP# This function is using SSH (secure shell)$cmd 110 $skip tcp from any to any 22 out via $pif setup keep-state# Allow out whois$cmd 120 $skip tcp from any to any 43 out via $pif setup keep-state# Allow ntp time server$cmd 130 $skip udp from any to any 123 out via $pif keep-state############################################# ##################### Interface facing Public Internet (Inbound Section)# Check packets originating from the public Internet# destined for this gateway server or the private network.############################################# ##################### Deny all inbound traffic from non-routable reserved address spaces#$cmd 300 deny all from 192.168.0.0/16 to any in via $pif #RFC 1918 private IP$cmd 301 deny all from 172.16.0.0/12 to any in via $pif #RFC 1918 private IP$cmd 302 deny all from 10.0.0.0/8 to any in via $pif #RFC 1918 private IP$cmd 303 deny all from 127.0.0.0/8 to any in via $pif #loopback$cmd 304 deny all from 0.0.0.0/8 to any in via $pif #loopback $cmd 305 deny all from 169.254.0.0/16 to any in via $pif #DHCP auto-config$cmd 306 deny all from 192.0.2.0/24 to any in via $pif #reserved for docs$cmd 307 deny all from 204.152.64.0/23 to any in via $pif #Sun cluster$cmd 308 deny all from 224.0.0.0/3 to any in via $pif #Class D & E multicast# Deny ident$cmd 315 deny tcp from any to any 113 in via $pif# Deny all Netbios service. 137=name, 138=datagram, 139=session# Netbios is MS/Windows sharing services.# Block MS/Windows hosts2 name server requests 81$cmd 320 deny tcp from any to any 137 in via $pif$cmd 321 deny tcp from any to any 138 in via $pif$cmd 322 deny tcp from any to any 139 in via $pif$cmd 323 deny tcp from any to any 81 in via $pif# Deny any late arriving packets$cmd 330 deny all from any to any frag in via $pif# Deny ACK packets that did not match the dynamic rule table$cmd 332 deny tcp from any to any established in via $pif # Allow traffic in from ISP's DHCP server. This rule must contain# the IP address of your ISP's DHCP server as it's the only# authorized source to send this packet type.# Only necessary for cable or DSL configurations.# This rule is not needed for 'user ppp' type connection to # the public Internet. This is the same IP address you captured# and used in the outbound section.$cmd 360 allow udp from x.x.x.x to any 68 in via $pif keep-state# Allow in standard www function because I have Apache server$cmd 370 allow tcp from any to me 80 in via $pif setup limit src-addr 2# Allow in secure FTP, Telnet, and SCP from public Internet $cmd 380 allow tcp from any to me 22 in via $pif setup limit src-addr 2# Allow in non-secure Telnet session from public Internet# labeled non-secure because ID & PW are passed over public# Internet as clear text.# Delete this sample group if you do not have telnet server enabled.$cmd 390 allow tcp from any to me 23 in via $pif setup limit src-addr 2# Reject & Log all unauthorized incoming connections from the public Internet$cmd 400 deny log all from any to any in via $pif# Reject & Log all unauthorized out going connections to the public Internet$cmd 450 deny log all from any to any out via $pif# This is skipto location for outbound stateful rules$cmd 800 divert natd ip from any to any out via $pif$cmd 801 allow ip from any to any# Everything else is denied by default# deny and log all packets that fell through to see what they are$cmd 999 deny log all from any to any################ End of IPFW rules file ###############################备注:参数说明:#$cmd 300 deny all from 192.168.0.0/16 to any in via $pif #RFC 1918 private IP我的IP地址是192.168.21.173,是属于192.168.0.0/16 IP段,所以这里要注释掉这一行,允许连接外网,否则主机无法联网。
FreeBSD安装配置FTP

• Ls_recurse_enable=no Async_abor_enable=yes one_process_model=yes Listen_address=10.2.2.2 (将虚拟服务绑定到某端口) Guest_enable=yes (虚拟用户可以登陆) Guest_username=所设的用户名 (将虚拟用户映射 为本地用户) User_config_dir=/任意指定的路径/为用户策略自己 所建的文件夹 (指定不同虚拟用户配置文件的路径) Deny_email_enable=yes (是否允许禁止匿名用户 使用某些邮件地址) Banned_email_file=//任意指定的路径/xx/ Pasv_enable=yes ( 服务器端用被动模式) User_config_dir=/任意指定的路径//任意文件目录 (指定虚拟用户存放配置文件的路径)
FreeBSD安装配置FTP
安装FTP服务
• 1、安装 通过ports安装。 # cd /usr/ports/ftp/vsftp # make install
• 2、配置 (1)编辑/usr/local/etc/vsftpd.conf # ee /usr/local/etc/vsftpd.conf Anonymous_enable=NO (禁止匿名登陆) Local_enable=YES (允许本地用户登陆) Local_umask=022 (FTP上本地的文件权限755,默认是077) Connect_form_port_20=yes (启用FTP数据端口的数据连接) Xferlog_enable=yes (激活上传和下传的日志) Xferlog_std_format=yes (使用标准的日志格式) Idle_session_timeout=120(秒) (用户会话空闲后2分钟) Data_connection_timeout=300(秒) (将数据连接空闲5分钟断) Ascii_upload_enable=YES (起用ASCII方式上传) Ascii_download_enable=YES帮带(起用ASCII方式下载) Ftpd_banner=Welcome to blah FTP service. (FTP服务器登陆欢 迎信息) Chroot_list_enable=YES (开启锁定用户目录) Chroot_list_file=/任意路径/vsftpd.chroot_list (要锁定目录的用户 保存文件,格式为每个用户一行) 注:如果想把本地的任何用户都锁定在自己的目录中的话,把上 面两行注释掉,再增加这一样 Chroot_local_user=YES 保存退出
FreeBSD Rsync的配置

FreeBSD下配置Rsync一、文档概述 (2)二、什么是rsync (2)三、安装配置 (3)3.1软件安装 (3)3.2服务器配置 (3)3.3服务器启动 (6)3.4客户机配置 (7)3.5客户机启动 (8)四、rsync语法详解 (8)五、FAQ (10)一、文档概述本文介绍FreeBSD环境下如何安装配置RSYNC软件。
二、什么是rsyncrsync,remote synchronize顾名思意就知道它是一款实现远程同步功能的软件,它在同步文件的同时,可以保持原来文件的权限、时间、软硬链接等附加信息。
rsync是用“rsync 算法”提供了一个客户机和远程文件服务器的文件同步的快速方法,而且可以通过ssh方式来传输文件,这样其保密性也非常好,另外它还是免费的软件。
rsync 包括如下的一些特性:能更新整个目录和树和文件系统;有选择性的保持符号链链、硬链接、文件属于、权限、设备以及时间等;对于安装来说,无任何特殊权限要求;对于多个文件来说,内部流水线减少文件等待的延时;能用rsh、ssh 或直接端口做为传输入端口;支持匿名rsync 同步文件,是理想的镜像工具;三、安装配置架设rsync 服务器比较简单,写一个配置文件rsyncd.conf 。
文件的书写也是有规则的,我们可以参照 上的文档来做。
当然我们首先要安装好rsync这个软件才行;3.1 软件安装rsync软件的获取/ftp/rsync/src-previews/rsync-patches-3.0.9pre1.tar.gz官方网站:/3.2服务器配置使用命令FreeBSD#tar –xvf rsync-patches-3.0.9pre1.tar.gz #解压FreeBSD#cd rsync-3.0.9pre1FreeBSD#./configure #编译,默认路径,./configure –prefix=/*/*可以自定义FreeBSD#make #在用源码包编译安装之前,您得安装gcc等编译开具才行FreeBSD#make installrsync的主要有以下三个配置文件rsyncd.conf(主配置文件)、rsyncd.secrets(密码文件)、rsyncd.motd(rysnc服务器信息)服务器配置文件(/etc/rsyncd.conf),该文件默认不存在,请创建它。
- 1、下载文档前请自行甄别文档内容的完整性,平台不提供额外的编辑、内容补充、找答案等附加服务。
- 2、"仅部分预览"的文档,不可在线预览部分如存在完整性等问题,可反馈申请退款(可完整预览的文档不适用该条件!)。
- 3、如文档侵犯您的权益,请联系客服反馈,我们会尽快为您处理(人工客服工作时间:9:00-18:30)。
#UseDNS no
#PidFile /var/run/sshd.pid
#MaxStartups 10
# no default banner path
#Banner /some/path
# override default of no subsystems
# The strategy used for options in the default sshd_config shipped with
# OpenSSH is to specify options with their default value where
# possible, but leave them commented. Uncommented options change a
Subsystem sftp /usr/libexec/sftp-server
IgnoreRhosts yes
IgnoreUserKnownHosts yes
PrintMotd yes
StrictModes no
RSAAuthentication yes
PermitRootLogin yes #允许root登录
3.改成/etc/ssh/ssh_config中指定的公钥文件名,在FreeBSD中执行:
mv /home/xxx/.ssh/id_dsa.pub /home/xxx/.ssh/authorized_keys
方法2(由SecureCRT生成密钥对):
1. 设置好用户名后,在SecureCRT设置登录方式中选择PublicKey的Properites -> Use session public key setting -> Use identify file ->Create Identify File ->DSA->生成 Identity 与Identity.pub
#Port 22
#Protocol 2
#AddressFamily any
#ListenAddress 10.1.10.196
#ListenAddress ::
# HostKey for protocol version 1
#HostKey /etc/ssh/ssh_host_key
# This is the sshd server system-wide configuration file. See
# sshd_config(5) for more information.
# This sshd was compiled with PATH=/usr/bin:/bin:/usr/sbin:/sbin
# be allowed through the ChallengeResponseAuthentication mechanism.
# Depending on your PAM configuration, this may bypass the setting of
# PasswordAuthentication, PermitEmptyPasswords, and
/etc/ssh/ssh_known_hosts
#RhostsRSAAuthentication no
# similar for protocol version 2
#HostbasedAuthentication no
# Change to yes if you don't trust ~/.ssh/known_hosts for
# $OpenBSD: sshd_config,v 1.72 2005/07/25 11:59:40 markus Exp $
# $FreeBSD: src/crypto/openssh/sshd_config,v 1.42.2.1 2005/09/11
16:50:35 des Exp $
# "PermitRootLogin without-password". If you just want the PAM account
and
# session checks to run without PAM authentication, then enable this
but set
#StrictModes yes
#MaxAuthTries 6
#RSAAuthentication yes
#PubkeyAuthentication yes
#AuthorizedKey .ssh/authorized_keys
# For this to work you will also need host keys in
# RhostsRSAAuthentication and HostbasedAuthentication
#IgnoreUserKnownHosts no
# Don't read the user's ~/.rhosts and ~/.shosts files
#IgnoreRhosts yes
/etc/rc.d/sshd restart
二、首先vi编辑/etc/inetd.conf,去掉ssh前的#,保存退出
编辑/etc/rc.conf
最后加入:sshd_enable="yes"即可
激活sshd服务:
techo#/etc/rc.d/sshd start
用下面命令检查服务是否启动,在22端口应该有监听。
# Change to yes to enable built-in password authentication.
PasswordAuthentication yes
#PermitEmptyPasswords no
# Change to no to disable PAM authentication
# default value.
# Note that some of FreeBSD's defaults differ from OpenBSD's, and
# FreeBSD has a few additional options.
#VersionAddendum FreeBSD-20050903
#ServerKeyBits 768
# Logging
# obsoletes QuietMode and FascistLogging
#SyslogFacility AUTH
#LogLevel INFO
# Authentication:
#LoginGraceTime 2m
#PermitRootLogin no
#PrintMotd yes
#PrintLastLog yes
#TCPKeepAlive yes
#UseLogin no
#UsePrivilegeSeparation yes
#PermitUserEnvironment no
#Compression delayed
#ClientAliveInterval 0
# HostKeys for protocol version 2
#HostKey /etc/ssh/ssh_host_dsa_key
# Lifetime and size of ephemeral version 1 server key
#KeyRegenerationInterval 1h
PermitEmptyPasswords no #不允许空密码登录
PasswordAuthentication yes # 设置是否使用口令验证。
##############################################
记得修改完配置文件后,重新启动sshd服务器(/etc/rc.d/sshd restart)即可
#netstat -an ## check port number 22
最后
vi /etc/ssh/sshd_config,
下面是详细配置文件:(/etc/ssh/sshd_config)
####################################################
2.把Identity.pub上传到FreeBSD的/home/xxx/.ssh
3.在FreeBSD中执行:
ssh-keygen -X -f Identity.pub > authorized_keys
取消sshd密码认证方式:
vi /etc/ssh/sshd_config
PasswordAuthentication no
# GSSAPI options
#GSSAPIAuthentication no
#GSSAPICleanupCredentials yes
# Set this to 'no' to disable PAM authentication, account processing,
# and session processing. If this is enabled, PAM authentication will
#ChallengeResponseAuthentication yes
# Kerberos options
#KerberosAuthentication no
#KerberosOrLocalPasswd yes
