GP日常维护手册-常用命令
GP系列操作指南
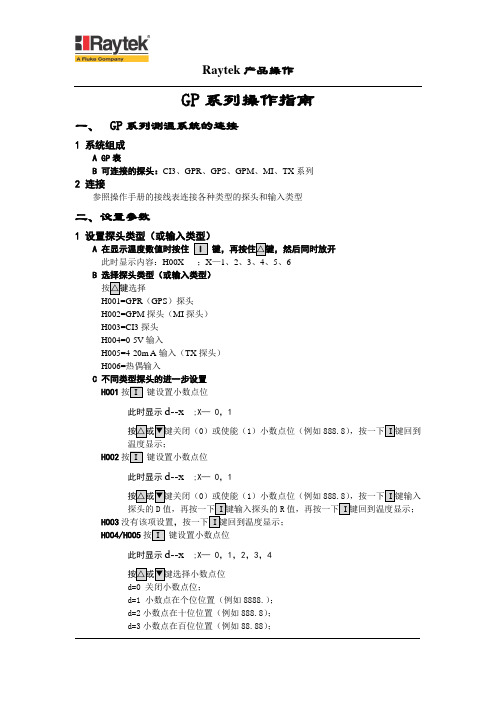
GP系列操作指南一、GP系列测温系统的连接1 系统组成A GP表B 可连接的探头:CI3、GPR、GPS、GPM、MI、TX系列2 连接参照操作手册的接线表连接各种类型的探头和输入类型二、设置参数1A 在显示温度数值时按住 I 键,再按住△键,然后同时放开此时显示内容:H00X ;X—1、2、3、4、5、6B 选择探头类型(或输入类型)按△键选择H001=GPR(GPS)探头H002=GPM探头(MI探头)H003=CI3探头H004=0-5V输入H005=4-20m A输入(TX探头)H006=热偶输入C 不同类型探头的进一步设置H001按I 键设置小数点位此时显示d--x ;X— 0,1按△或▼键关闭(0)或使能(1)小数点位(例如888.8),按一下I键回到温度显示;H002按I 键设置小数点位此时显示d--x ;X— 0,1按△或▼键关闭(0)或使能(1)小数点位(例如888.8),按一下I键输入探头的D值,再按一下I键输入探头的R值,再按一下I键回到温度显示;H003没有该项设置,按一下I键回到温度显示;H004/H005按I 键设置小数点位此时显示d--x ;X— 0,1,2,3,4按△或▼键选择小数点位d=0 关闭小数点位;d=1 小数点在个位位置(例如8888.);d=2小数点在十位位置(例如888.8);d=3小数点在百位位置(例如88.88);d=4小数点在千位位置(例如8.888);另外:对H004按一下I键,设置0V输入时对应的温度值,再按一下I键,设置5V输入时对应的温度值,再按一下I键回到温度显示;对H005按一下I键,设置4mA输入时对应的温度值,再按一下I键,设置20mA输入时对应的温度值,再按一下I键回到温度显示;H006按I 键设置小数点位此时显示d--x ;X— 0,1按△或▼键关闭(0)或使能(1)小数点位(例如888.8),按一下I键设置热偶的输入类型此时显示TC-x ;X— 1,2,3,4,5,6,7按△或▼键选择TC=1 J型热偶;TC=2 K型热偶;TC=3 E型热偶;TC=4 N型热偶;TC=5 R型热偶;TC=6 S型热偶;TC=7 T型热偶;按一下I键回到温度显示;2 设置发射率按I 键到显示EX.XX ; X.XX:0.10-1.09按△或▼键输入发射率值,按I键到其它参数设置项或回到温度显示;3 1和2A 使能或关闭报警功能按I 键到显示S1-X 或S2-X ; X— 0,1按△或▼键关闭(0)或使能(1)报警功能;B 输入报警温度值按一下I键,按△或▼键输入温度值;C 设置温度触发方式和输出方式按一下I 键到显示b--X ; X— 0,1,2,3再按△或▼键选择b=0 温度低于设定值时输出高电平,平时输出低电平;b=1温度高于设定值时输出高电平,平时输出低电平;b=2温度低于设定值时输出低电平,平时输出高电平;b=3温度高于设定值时输出低电平,平时输出高电平;注:面板指示灯“O”、“N”、“L”显示当前的温度状态(高于、正常或低于设定的温度点);D 设置死区温度值按一下I 键到显示d00X ; X≥1按△或▼键输入相应数值;4 设置4-20mAA按I 键直到显示“Lo”,再按I 键到4mA对应的温度值,按△或▼键输入需要的温度数值;B 设置20mA模拟输出对应的温度值按I 键直到显示“Hi”,再按I 键到20mA对应的温度值,按△或▼键输入需要的温度数值;设定完毕后,按I 键直到温度显示模式;5 设置温度单位A按I 键直到显示“C 1”,按△或▼键击活“1”或撤消“0”℃温度单位;B 设置℉温度单位按I 键直到显示“F 1”,按△或▼键击活“1”或撤消“0”℉温度单位;设定完毕后,按I 键直到温度显示模式;6 设置峰值保持/谷值保持/平均值时间A 设置峰值保持按住▼键,再按 I 键,然后同时放开,显示“PH”;再按 I 键显示当前的峰值保持时间(秒);按△和▼键输入要设定的时间值;注:000值时关闭峰值保持。
GP46系列压力计与切换仪安装与维护手册说明书
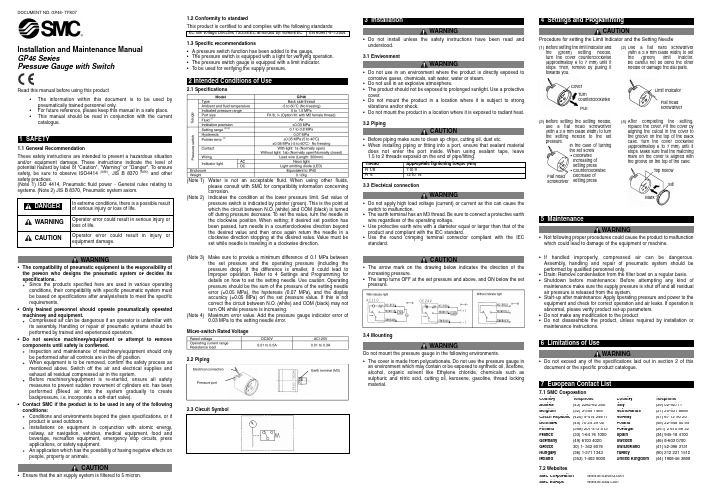
Installation and Maintenance ManualGP46 SeriesPressure Gauge with SwitchRead this manual before using this product•The information within this document is to be used bypneumatically trained personnel only.•For future reference, please keep this manual in a safe place.•This manual should be read in conjunction with the currentcatalogue.1SAFETY1.1 General RecommendationThese safety instructions are intended to prevent a hazardous situationand/or equipment damage.These instructions indicate the level ofpotential hazard by label of "Caution", "Warning" or "Danger".To ensuresafety, be sure to observe ISO4414 (Note1), JIS B 8370 (Note2)and othersafety practices.(Note 1) ISO 4414, Pneumatic fluid power - General rules relating tosystems.(Note 2) JIS B 8370, Pneumatic system axiom.DOCUMENT NO.GP46- TFK07WARNING•The compatibility of pneumatic equipment is the responsibility ofthe person who designs the pneumatic system or decides itsspecifications.Since the products specified here are used in various operatingconditions, their compatibility with specific pneumatic system mustbe based on specifications after analysis/tests to meet the specificrequirements.•Only trained personnel should operate pneumatically operatedmachinery and equipment.Compressed air can be dangerous if an operator is unfamiliar withits assembly.Handling or repair of pneumatic systems should beperformed by trained and experienced operators.•Do not service machinery/equipment or attempt to removecomponents until safety is confirmed.Inspection and maintenance of machinery/equipment should onlybe performed after all controls are in the off position.When equipment is to be removed, confirm the safety process asmentioned above.Switch off the air and electrical supplies andexhaust all residual compressed air in the system.Before machinery/equipment is re-started, ensure all safetymeasures to prevent sudden movement of cylinders etc.has beenperformed (Bleed air into the system gradually to createbackpressure, i.e.incorporate a soft-start valve).•Contact SMC if the product is to be used in any of the followingconditions:Conditions and environments beyond the given specifications, or ifproduct is used outdoors.Installations on equipment in conjunction with atomic energy,railway, air navigation, vehicles, medical equipment, food andbeverage, recreation equipment, emergency stop circuits, pressapplications, or safety equipment.An application which has the possibility of having negative effects onpeople, property or animals.CAUTION•Ensure that the air supply system is filtered to 5 micron.1.2 Conformity to standardThis product is certified to and complies with the following standards:1.3 Specific recommendations• A pressure switch function has been added to the gauge.•The pressure switch is equipped with a light for verifying operation.•The pressure switch gauge is equipped with a limit indicator.•T o be used for verifying the supply pressure.2 Intended Conditions of Use2.1 Specifications(Note 1)Water is not an acceptable fluid.When using other fluids,please consult with SMC for compatibility information concerningcorrosion.(Note 2)Indicates the condition at the lower pressure limit.Set value ofpressure switch is indicated by pointer (green).This is the point atwhich the circuit between N.O.(white) and COM (black) is turnedoff during pressure decrease.To set the value, turn the needle inthe clockwise position.When setting;if desired set position hasbeen passed, turn needle in a counterclockwise direction beyondthe desired value and then once again return the needle in aclockwise direction stopping at the desired value.Value must beset while needle is traveling in a clockwise direction.(Note 3)Make sure to provide a minimum difference of 0.1 MPa betweenthe set pressure and the operating pressure (including thepressure drop).If the difference is smaller, it could lead toimproper operation.Refer to 4 Settings and Programming fordetails on how to set the setting e caution:Operatingpressure should be the sum of the pressure of the setting needleerror (±0.05 MPa), the hysteresis (0.07 MPa), and the displayaccuracy (±0.05 MPa) on the set pressure value.If this is notcorrect the circuit between N.O.(white) and COM (black) may notturn ON while pressure is increasing.(Note 4)Maximum error value:Add the pressure gauge indicator error of0.03 MPa to the setting needle error.Micro-switch Rated Voltage2.2 Piping2.3 Circuit Symbol3 InstallationWARNING•Do not install unless the safety instructions have been read andunderstood.3.1 EnvironmentWARNING•Do not use in an environment where the product is directly exposed tocorrosive gases, chemicals, salt water, water or steam.•Do not use in an explosive atmosphere.•The product should not be exposed to prolonged e a protectivecover.•Do not mount the product in a location where it is subject to strongvibrations and/or shock.•Do not mount the product in a location where it is exposed to radiant heat.3.2 PipingCAUTION•Before piping make sure to clean up chips, cutting oil, dust etc.•When installing piping or fitting into a port, ensure that sealant materialdoes not enter the port inside.When using sealant tape, leave1.5 to 2 threads exposed on the end of pipe/fitting.3.3 Electrical connectionWARNING•Do not apply high load voltage (current) or current as this can cause theswitch to malfunction.•The earth terminal has an M3 thread.Be sure to connect a protective earthwire regardless of the operating voltage.•Use protective earth wire with a diameter equal or larger than that of theproduct and compliant with the IEC standard.•Use the round crimping terminal connector compliant with the IECstandard.CAUTION•The arrow mark on the drawing below indicates the direction of theincreasing pressure.•The lamp turns OFF at the set pressure and above, and ON below the setpressure.3.4 MountingWARNINGDo not mount the pressure gauge in the following environments.•The cover is made from polycarbonate.Do not use the pressure gauge inan environment which may contain or be exposed to synthetic oil, acetone,alcohol, organic solvent like Ethylene chloride, chemicals such assulphuric and nitric acid, cutting oil, kerosene, gasoline, thread lockingmaterial.•If handled improperly, compressed air can be dangerous.Assembly, handling and repair of pneumatic system should beperformed by qualified personnel only.•Drain:Remove condensation from the filter bowl on a regular basis.•Shutdown before maintenance:Before attempting any kind ofmaintenance make sure the supply pressure is shut off and all residualair pressure is released from the system.•Start-up after maintenance:Apply operating pressure and power to theequipment and check for correct operation and air leaks.If operation isabnormal, please verify product set-up parameters.•Do not make any modification to the product•Do not disassemble the product, unless required by installation ormaintenance instructions.6 Limitations of UseWARNING•Do not exceed any of the specifications laid out in section 2 of thisdocument or the specific product catalogue.7 European Contact List7.1 SMC Corporation7.2 Websites4 Settings and ProgrammingCAUTIONProcedure for setting the Limit Indicator and the Setting Needle5 MaintenanceWARNING•Not following proper procedures could cause the product to malfunctionwhich could lead to damage of the equipment or machine.In extreme conditions, there is a possible resultof serious injury or loss of life.WARNING Operator error could result in serious injury orloss of life.CAUTION Operator error could result in injury orequipment damage.DANGEREC low voltage Directive 73/23/EEC amended by:93/68/EEC EN 60947-5-1:2004Thread Appropriate tightening torque (Nm)R 1/87 to 9R ¼12 to 14Country Telephone Country TelephoneAustria(43) 2262-62 280Italy(39) 02-92711Belgium(32) 3-355 1464Netherlands(31) 20-531 8888Czech Republic(420) 5-414 24611Norway(47) 67 12 90 20Denmark(45) 70 25 29 00Poland(48) 22-548 50 85Finland(358) 207-513 513Portugal(351) 2 610 89 22France(33) 1-64 76 1000Spain(34) 945-18 4100Germany(49) 6103 4020Sweden(46) 8-603 0700Greece30) 1- 342 6076Switzerland(41) 52-396 3131Hungary(36) 1-371 1343Turkey(90) 212 221 1512Ireland(353) 1-403 9000United Kingdom(44) 1908-56 3888SMC Corporation SMC Europe (1)Before setting the limit indicator andthe (green) setting needle,turn the cover counterclockwise(approximately 6 to 7 mm) until itstops.Then, remove by pulling ittowards you.(3)Before setting the setting needle,use a flat head screwdriver(with a 2.9 mm blade width) to turnthe setting needle to the setpressure.(2)Use a flat hard screwdriver(with a 2.9 mm blade width) to setthe (green) limit indictor.Be careful not be bend the otherneedle or damage the dial plate.(4)After completing the setting,replace the cover.Fit the cover byaligning the cutout in the cover tothe groove on the top of the blackcase.Turn the cover clockwise(approximately 6 to 7 mm) until itstops.Make sure that the matchingmark on the cover is aligned withthe groove on the top of the case.CoverTurncounterclockwisePullIn the case of turningthe set screw•ClockwiseIncreasing ofsetting press•CounterclockwiseDecrease ofsetting pressFlat headscrewdriverLimit IndicatorFlat headscrewdriverTop hollowSlitMark。
GP用户手册 (硬体)

192W×120H
211.2W×158.4H
闪烁/反转显示
有两种亮度, 在触摸屏上调整
有四种亮度, 在触摸屏上调整
--
8 级可调
日﹑韩﹑中﹑台湾﹑ 英文﹑ ASCⅡ码等
80 个字符/行,50 行
80 个字符/行, 60 行
80 个字符/行,25 行
80 个字符/行, 30 行
40 个字符/行,25 行
GP577R 0~40℃
–10~60℃
20~85%(无凝露)
30~85%(无凝露)
10~25Hz(X,Y,Z 方向各 30 分钟 2G)
电压噪声:1200Vp-p (DC24V 型为 1000Vp-p)
脉冲宽度:1 微秒
保持时间(上升/下降):1ns
无腐蚀性气体
接地电阻小于 100Ω
适合 IP65F (GP37W-LG11 为 IP64F)
80 个字符/行,50 行 80 个字符/行, 60 行
80 个字符/行,25 行 80 个字符/行, 30 行
40 个字符/行,25 行 40 个字符/行, 30 行
高和宽可扩大 2,4,8 倍
GP675-TC** TFT 彩色 LCD 64 色 CCFL 寿命=
25000 小时 800×600 点 246W×184.5H
在上面的产品型号表中,只是列出了在中国国内常用的型号。
PDF 文件使用 "pdfFactory Pro" 试用版本创建
厦门亚得机电科技有限公司(李清流)
GP 用户手册
1.1 一般规格
1. 电气规格
型号
GP675-TC11
输入电压 功耗
AC85-132V, 50/60Hz 低于 50VA
PGP维护指导

PGP维护指导一、软件备份在调试期间应注意每天对画面和数据库组态进行备份;调试结束正常运行期间应将168后的画面和数据库组态进行备份,每次对画面或数据库有较大修改之前及之后都应做备份。
1、License备份在PGP安装完成导入License后将会在“D:\PGP\sources\licenses目录下生成“PGP.sla”文件,将每台服务器的该文件拷贝出来做备份,这样下次重新安装PGP时只需将该文件拷贝到相应文件夹中而不需要再重新导入License。
2、数据库备份PGP的所有的数据库都存放在“D:\PGP\config”目录下面的每个子文件夹中,其中SYMPHONY系统较为常用且需要组态的数据库文件及其说明如下表所示,每次备份应将整个目录拷贝出来。
3、画面备份PGP所有的画面都存放在“D:\PGP\display”目录下,其中“D:\PGP\display\work”目录下存放离线的可编辑画面及符号,“D:\PGP\display\bin”目录下存放在线的系统显示画面,离线画面分别以“.UCBD,.UCBG,.UCBP,.UCBV”为后缀,在线画面分别以“.DIAG,.G,.PAGE,.VAR”为后缀,两者互相对应,可以通过修改后缀名将在线画面转换成可编辑的离线画面。
备份画面时应将所有的离线画面、符号以及所有的在线画面、符合和面板都备份出来。
4、注册表备份如下图所示,可以将PGP的注册表文件导出做备份,下次重新安装PGP后若计算机名一样可以直接将注册表项导入以保证和之前的设置一样。
图 2. 导出PGP的注册表二、标签库组态在PGP所有的数据库中最重要的也是最复杂的就是TAG标签库,对于出厂发到现场的PGP标签库都会按照标准的设置做好,对于现场做通讯时需要添加一些标签时除了按照模板添加点还应当注意其中的一些字段的设置。
1、常用字段说明:下表列出了一些常用的字段的说明,添加标签时可以按照说明对字段进行一些修改。
Ubuntu常用维护命令
Ubuntu常用命令一、常用命令1、系统更新sudo apt update:更新包索引。
sudo apt upgrade:升级所有可升级的包。
sudo apt dist-upgrade:在必要时可以更改已安装包的版本。
sudo apt full-upgrade:类似于dist-upgrade,但会尝试更多升级。
2、包管理sudo apt install package_name:安装一个新包。
sudo apt remove package_name:移除一个包,但保留配置文件。
sudo apt purge package_name:移除一个包及其配置文件。
sudo apt autoremove:自动移除不再需要的包。
dpkg -l | grep package_name:列出与特定包相关的所有包。
3、磁盘和文件系统管理df -h:显示磁盘空间使用情况。
du -sh directory_name:显示目录的磁盘使用情况。
sudo fdisk -l:列出所有磁盘分区。
sudo fsck /dev/sdX:检查文件系统。
sudo mkfs.ext4 /dev/sdX:创建新的文件系统。
4、用户和组管理sudo adduser username:添加新用户。
sudo usermod -aG groupname username:将用户添加到组。
sudo deluser username:删除用户。
sudo groupadd groupname:创建新组。
sudo groupdel groupname:删除组。
5、服务管理sudo systemctl start service_name:启动服务。
sudo systemctl stop service_name:停止服务。
sudo systemctl restart service_name:重启服务。
sudo systemctl status service_name:查看服务状态。
GP日常维护手册-常用命令
Greenp lum 日常维护手册1.数据库启动:g pstar t常用可选参数:-a : 直接启动,不提示终端用户输入ye s确认-m:只启动mas ter 实例,主要在故障处理时使用2.数据库停止:g pstop:常用可选参数:-a:直接停止,不提示终端用户输入确认-m:只停止mas t er 实例,与gpsta rt –m 对应使用-M fast:停止数据库,中断所有数据库连接,回滚正在运行的事务-u:不停止数据库,只加载pg_hba.conf 和postgresql.conf中运行时参数,当改动参数配置时候使用。
-f:强制停止数据库-r:重启数据库3.查看实例配置和状态select * from gp_con figur ation orderby 1 ;select * from gp_con figur ation_hist ory orderby 1 ;主要字段说明:Conten t:该字段相等的两个实例,是一对P(primar y instan ce)和M(mirrorInstan ce)Isprim ary:实例是否作为p rimary instan ce 运行V alid:实例是否有效,如处于fal se 状态,则说明该实例已经dow n 掉。
Port:实例运行的端口Datadi r:实例对应的数据目录注 4.0后,实例配置的数据表:gp_seg ment_confi gurat ion 、pg_fil espac e_ent ry、gp_fau lt_st rateg y;其它常用的系统表:pg_cla ss,pg_att ribute,pg_database,pg_tab l es……可以用tab来匹配表名;4.gpstat e :显示Gree n plum数据库运行状态,详细配置等信息常用可选参数:-c:primary instan ce 和mirror instan ce 的对应关系-m:只列出mir ror 实例的状态和配置信息-f:显示stan dby master的详细信息-s:查看详细状态,如在同步,可显示数据同步完成百分比--versio n,查看数据库v ersio n(也可使用pg_cont roldata查看数据库版本和p ostg r esql版本)该命令默认列出数据库运行状态汇总信息,常用于日常巡检。
gp简易维护
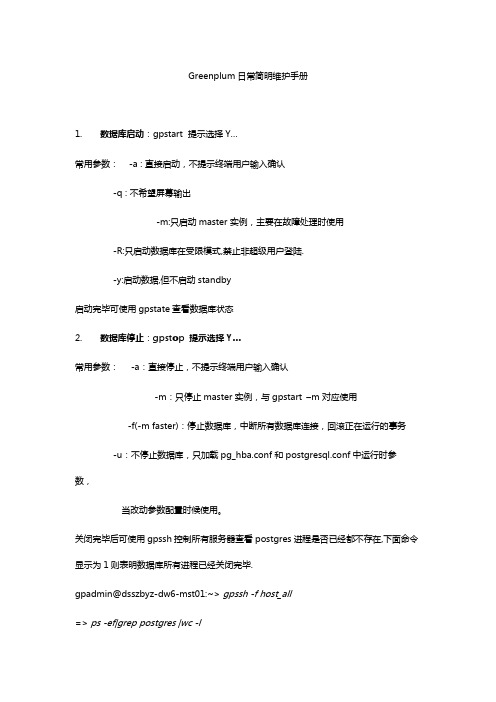
Greenplum 日常简明维护手册1. 数据库启动:gpstart 提示选择Y…常用参数: -a : 直接启动,不提示终端用户输入确认-q : 不希望屏幕输出-m:只启动master 实例,主要在故障处理时使用-R:只启动数据库在受限模式,禁止非超级用户登陆.-y:启动数据,但不启动standby启动完毕可使用gpstate查看数据库状态2. 数据库停止:gpstop 提示选择Y…常用参数:-a:直接停止,不提示终端用户输入确认-m:只停止master 实例,与gpstart –m 对应使用-f(-m faster):停止数据库,中断所有数据库连接,回滚正在运行的事务-u:不停止数据库,只加载pg_hba.conf 和postgresql.conf中运行时参数,当改动参数配置时候使用。
关闭完毕后可使用gpssh控制所有服务器查看postgres进程是否已经都不存在,下面命令显示为1则表明数据库所有进程已经关闭完毕.gpadmin@dsszbyz-dw6-mst01:~> gpssh -f host_all=> ps -ef|grep postgres |wc -l[ sdw1] 1[sdw2] 1[ mdw] 1[ sdw3] 1[ smdw] 1[ sdw4] 1[ ftp1] 1=>exit3. 登陆数据库:psql登录数据库方式:psql –d 数据库名–u 用户名可以先使用psql -d template1登陆默认实例,然后使用select * from pg_database;查看已经安装的数据库名,然后登陆相应数据库。
退出psql 使用\q.使用应用模式访问单个数据实例():PGOPTIONS='-c gp_session_role=utility' psql template1 -p 54324. 查看实例配置和状态:gpstate常用参数:-c:显示primary instance和mirror instance的对应关系-m:显示mirror的状态-f:显示standby的状态(是否配置,是否同步)-e:显示错误节点的详细信息。
GPG常用命令总结
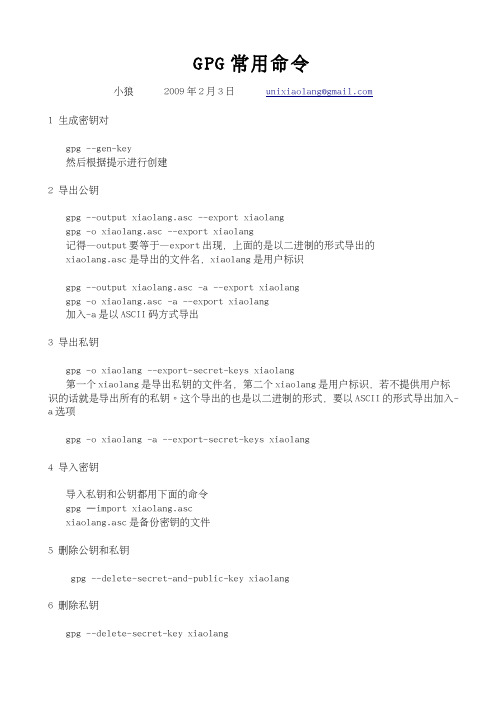
GPG常用命令小狼 2009年2月3日 unixiaolang@1 生成密钥对gpg --gen-key然后根据提示进行创建2 导出公钥gpg --output xiaolang.asc --export xiaolanggpg -o xiaolang.asc --export xiaolang记得—output要等于—export出现,上面的是以二进制的形式导出的xiaolang.asc是导出的文件名,xiaolang是用户标识gpg --output xiaolang.asc -a --export xiaolanggpg -o xiaolang.asc -a --export xiaolang加入-a是以ASCII码方式导出3 导出私钥gpg -o xiaolang --export-secret-keys xiaolang第一个xiaolang是导出私钥的文件名,第二个xiaolang是用户标识,若不提供用户标识的话就是导出所有的私钥。
这个导出的也是以二进制的形式,要以ASCII的形式导出加入-a选项gpg -o xiaolang -a --export-secret-keys xiaolang4 导入密钥导入私钥和公钥都用下面的命令gpg –import xiaolang.ascxiaolang.asc是备份密钥的文件5 删除公钥和私钥gpg --delete-secret-and-public-key xiaolang6 删除私钥gpg --delete-secret-key xiaolang7 删除公钥gpg --delete-key xiaolang9 显示所有公钥gpg --list-public-keysgpg -k10 显示所有私钥gpg --list-secret-keysgpg -K11 编辑证书gpg --edit-key xiaolangxiaolang是用户标识然后根据提示进行编辑,要帮助输入help1)list:列出密钥和用户标识2)addkey:添加一个子密钥3)delkey:删除选中的子密钥4)key N:选中第N个子密钥(基于1),若是0的话清除所有5)fpr:显示密钥指纹6)uid N:选中第N个用户(基于1),若是0的话清除所有7)adduid:添加一个用户标识8)deluid: 删除选中的用户标识9)passwd: 修改私钥的密码10)trust: 修改此密钥的信任度11)enable:启用此密钥12)disable:禁用此密钥13)lsign 为所选用户标识添加本地签名lsign -u other //使用other用户的私钥对所选的用户标识进行签名//此签名可导出,不加-u选项的话使用默认用户进行签名14)tsign 为所选用户标识添加信任签名tsign -u other //同上,只不过此签名被标记为不可导出,一般用于本地环境 //信任这个用户15)check 检测选中用户的签名16)delsig 删除选中的用户的签名17)expire 修改私钥的失效时间18)save 保存修改12 检测公钥环中公钥的签名信息gpg --check-sig13 查看公钥指纹信息:gpg --fingerprint xiaolang14 加密文件gpg -e -r xiaolang ttt.txt使用xiaolang的公钥对ttt.txt文件进行加密,生成二进制的加密文件(在源文件目录下,扩展名为.pgp)gpg -o ttt.asc -ea -r xiaolang ttt.txt使用xiaolang的公钥对ttt.txt文件进行加密,以ASCII的方式输入结果,保存的文件为ttt.asc15 解密文件gpg -o ttt -d ttt.pgp对ttt.pgp文件进行解密,解密后的文件保存为ttt16 打包方式进行签名与验证gpg -s ttt.txt 使用默认的用户对ttt.txt进行打包方式的签名gpg -u xiaolang -s ttt.txt 使用指定的用户(xiaolang)对ttt.txt进行签名gpg -u xiaolang -o ttt.sig -s ttt.txtgpg --verify ttt.gpg 仅仅验证签名gpg -o ttt -d ttt.gpg 解包并验证签名,记得一定要加上-o这个选项17 分离方式进行签名与验证gpg -sb ttt.txtgpg -u xiaolang -sb ttt.txtgpg -u xiaolang -o ttt.sig -sb ttt.txtgpg --verify ttt.gpggpg --verify ttt.gpg ttt //若文件已经被改名的话,将要验证的源文件加在//最后面,比如这里的ttt18 签名并加密gpg -es -r xiaolang -u other -o ttt.gpg ttt.txt使用xiaolang的公钥进行加密,使用other的私钥进行签名,生成的二进制文件是ttt.gpggpg -esa -r xiaolang -u other -o ttt.asc ttt.txt同上面一样,只不过输入的结果是以ASCII编码的这个不能使用gpg --verify 进行验证,必须在解密的时候才可以看到签名信息gpg -o t -d ttt.asc19 修改默认的私钥gpg --defalut-key 用户标识。
GP简明使用手册
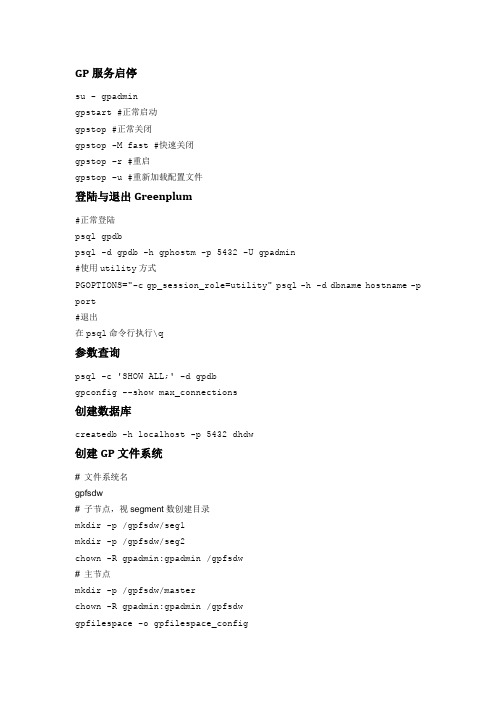
GP服务启停su - gpadmingpstart #正常启动gpstop #正常关闭gpstop -M fast #快速关闭gpstop –r #重启gpstop –u #重新加载配置文件登陆与退出Greenplum#正常登陆psql gpdbpsql -d gpdb -h gphostm -p 5432 -U gpadmin#使用utility方式PGOPTIONS="-c gp_session_role=utility" psql -h -d dbname hostname -p port#退出在psql命令行执行\q参数查询psql -c 'SHOW ALL;' -d gpdbgpconfig --show max_connections创建数据库createdb -h localhost -p 5432 dhdw创建GP文件系统# 文件系统名gpfsdw# 子节点,视segment数创建目录mkdir -p /gpfsdw/seg1mkdir -p /gpfsdw/seg2chown -R gpadmin:gpadmin /gpfsdw# 主节点mkdir -p /gpfsdw/masterchown -R gpadmin:gpadmin /gpfsdwgpfilespace -o gpfilespace_configgpfilespace -c gpfilespace_config创建GP表空间psql gpdbcreate tablespace TBS_DW_DATA filespace gpfsdw;SET default_tablespace = TBS_DW_DATA;删除GP数据库gpdeletesystem -d /gpmaster/gpseg-1 -f查看segment配置select * from gp_segment_configuration;文件系统select * from pg_filespace_entry;磁盘、数据库空间SELECT * FROM gp_toolkit.gp_disk_free ORDER BY dfsegment;SELECT * FROM gp_toolkit.gp_size_of_database ORDER BY sodddatname;日志SELECT * FROM gp_toolkit.__gp_log_master_ext;SELECT * FROM gp_toolkit.__gp_log_segment_ext;表描述/d+ <tablename>表分析VACUUM ANALYZE tablename;表数据分布SELECT gp_segment_id, count(*) FROM <table_name> GROUP BYgp_segment_id;表占用空间SELECT relname as name, sotdsize/1024/1024 as size_MB, sotdtoastsize as toast, sotdadditionalsize as otherFROM gp_toolkit.gp_size_of_table_disk as sotd, pg_classWHERE sotd.sotdoid = pg_class.oid ORDER BY relname;索引占用空间SELECT soisize/1024/1024 as size_MB, relname as indexnameFROM pg_class, gp_toolkit.gp_size_of_indexWHERE pg_class.oid = gp_size_of_index.soioidAND pg_class.relkind='i';OBJECT的操作统计SELECT schemaname as schema, objname as table, usename as role, actionname as action, subtype as type, statime as timeFROM pg_stat_operationsWHERE objname = '<name>';锁SELECT locktype, database, c.relname, l.relation, l.transactionid, l.transaction, l.pid, l.mode, l.granted, a.current_queryFROM pg_locks l, pg_class c, pg_stat_activity aWHERE l.relation=c.oidAND l.pid=a.procpidORDER BY c.relname;队列SELECT * FROM pg_resqueue_status;加载(LOAD)数据到Greenplum数据库gpfdist外部表# 启动服务gpfdist -d /share/txt -p 8081 –l /share/txt/gpfdist.log &# 创建外部表,分隔符为’/t’drop EXTERNAL TABLE TD_APP_LOG_BUYER;CREATE EXTERNAL TABLE TD_APP_LOG_BUYER (IP text,ACCESSTIME text,REQMETHOD text,URL text,STATUSCODE int,REF text,name text,VID text)LOCATION ('gpfdist://gphostm:8081/xxx.txt')FORMAT 'TEXT' (DELIMITER E'/t'FILL MISSING FIELDS) SEGMENT REJECT LIMIT 1 percent;# 创建普通表create table test select * from TD_APP_LOG_BUYER;# 索引# CREATE INDEX idx_test ON test USING bitmap (ip);# 查询数据select ip , count(*) from test group by ip order by count(*); gpload# 创建控制文件# 加载数据gpload -f my_load.ymlcopyCOPY country FROM '/data/gpdb/country_data'WITH DELIMITER '|' LOG ERRORS INTO err_countrySEGMENT REJECT LIMIT 10 ROWS;从Greenplum数据库卸载(UNLOAD)数据gpfdist外部表# 创建可写外部表CREATE WRITABLE EXTERNAL TABLE unload_expenses( LIKE expenses )LOCATION ('gpfdist://etlhost-1:8081/expenses1.out','gpfdist://etlhost-2:8081/expenses2.out')FORMAT 'TEXT' (DELIMITER ',')DISTRIBUTED BY (exp_id);# 写权限GRANT INSERT ON writable_ext_table TO <name>;# 写数据INSERT INTO writable_ext_table SELECT * FROM regular_table;copyCOPY (SELECT * FROM country WHERE country_name LIKE 'A%') TO'/home/gpadmin/a_list_countries.out';执行sql文件psql gpdbname –f yoursqlfile.sql或者psql登陆后执行\i yoursqlfile.sql如何杀掉greenplum、postgresql的会话进程在linux命令行执行kill -s SIGTERM <procid>杀掉该会话的进程用函数杀sql对于查询SQLselect pg_cancel_backend(procpid);其他SQLselect pg_terminate_backend(procpid);调整Greenplum的SQL查询计划在oracle中使用hint可以调整SQL的执行计划,在postgresql可以使用如下的方法进行调整使用set<option> to off/on;调整查询计划,参数如下:enable_seqscan是否走全表扫描enable_hashjoin是否允许走hash连接enable_nestloop是否允许走nestloop连接enable_mergejoin是否允许走合并连接enable_tidscan是否允许走tid扫描(类似oracle中的按rowid访问)enable_bitmapscan是否允许走bitmap扫描enable_hashagg是否允许走hash聚集(也就是做group by时)enable_indexscan是否允许走索引enable_sort是否允许走排序constraint_exclusion是否允许走分区Greenplum参数配置优化# 查询参数psql -c'SHOW ALL;' -d gpdbgpconfig--show max_connections# 修改参数配置命令gpconfig-c <parameter name> -v <parameter value>比如:gpconfig-c log_statement -v DDL# 使参数生效gpstop –r# 修改默认搜索路径# 默认dbtestALTERDATABASE dhgp SET search_path TO dbtest;# 设置work_mem 64MBALTERDATABASE dhgp SET work_mem TO 65536;另一种写法:SETwork_mem TO '64MB'# 设置maintenance_work_mem 128MBALTER DATABASEdhgp SET maintenance_work_mem TO 131072; # 设置max_work_mem 4GALTERDATABASE dhgp SET max_work_mem TO 4194304;# 设置statement_memALTERDATABASE dhgp SET statement_mem TO '256MB';# 12G,需要配合修改/etc/sysctl.conf kernel.shmmaxALTERDATABASE dhgp SET effective_cache_size TO 1572864;# 在各个节点的postgres.conf文件中配置,master和每个segment的可以使用的cpu 个数Master:gp_resqueue_priority_cpucores_per_segment 8Segment:2# checkpoint_segments32-256(512MB-4GB)查看数据库表清单(包括临时表)PG_TABLES主表与分区表pg_partitions字段清单i nformation_schema.columns视图 pg_views字典schema : information_schema。
GP3000 系列可编程人机界面 维护 故障排除手册说明书

㓈 / 䱰 䰸前言前言感谢您购买Pro-face的GP3000系列可编程人机界面(以下简称为“GP”)和新一代画面和逻辑编程软件“GP-Pro EX”V2.20简体中文版。
在使用这些产品之前,请认真阅读本手册,并妥善保管以备将来参考。
注意(1)这些产品中包括的所有程序和手册的版权均为Digital Electronics Corporation所有。
Digital Electronics Corporation根据“软件操作许可条款”文档(GP-Pro EX的CD-ROM)中的描述,向用户授予这些产品的使用许可。
任何违反上述条款的行为均为日本及国外法规所禁止。
(2)本手册的内容已经过全面审查。
如果您发现任何错误或疏漏,请与我们联系。
(3)对因使用这些产品而造成的损坏或第三方索赔Digital Electronics Corporation不承担任何责任。
(4)本手册中的描述与这些产品的实际功能之间可能存在差异。
有关这些产品的最新信息将在数据文件(如Readme.txt文件等)和其他文档中另行提供。
在使用产品之前,请参考这些资料及本手册。
(5)尽管这些产品包含和显示的信息可能涉及Digital Electronics Corporation或第三方的无形产权或知识产权,但Digital Electronics Corporation不向任何用户和/或其他第三方担保或授权上述产权的使用。
(6)本手册中的规格仅适用于海外产品。
因此,本手册中的产品与其对应的日本产品的规格之间可能存在一定的差异。
Digital Electronics Corporation不承担与第三方知识产权有关的任何责任,也不承担与使用这些产品所包含或显示信息有关的任何责任。
© 2008 Digital Electronics Corporation版权所有,保留所有权利。
Digital Electronics Corporation,2008年6月 有关商标和商标名称权利的信息,请参阅“商标权利”。
GP用户手册 (硬体)

GP 用户手册
警告:
为了安全、正确地使用该装置,请遵守下列准则。 * 因为存在触电的危险,因此在连接电源线到 GP 上时,确保电源线没有接通电
源。 * 由于 GP 内部装有高电压部件,当拆解该装置时,可能会引起触电,不要拆解
GP。 * 不要使用超过电压范围的电源。使用超过指定电压范围的电源,可能会损坏 GP。 * 在有可燃性气体的环境中不要使用 GP,否则可能引起爆炸。 * GP 使用一个锂电池用来支持内部时钟数据。如果错误的更换电池,可能引起
PDF 文件使用 "pdfFactory Pro" 试用版本创建
厦门亚得机电科技有限公司(李清流)
GP 用户手册
GP 系列触摸屏工业图形显示器用户手册
目
录
第一章 技术条件
1.1 一般规格 ---------------------------------------------------- 4 1.2 功能特点 ---------------------------------------------------- 5
显示尺寸
显示材料
GP70 系列
GP77 系列
5 英寸
黑白液晶
GP270-LG11-24V
彩色 STN 液晶
GP270-SC11-24V
6 英寸
黑白液晶
GP37W-LG11-24V
蓝色液晶
GP37W2-BG11-24V
黑白液晶
GP370-LG11-24V GP377-LG41-24V
彩色 STN 液晶
在上面的产品型号表中,只是列出了在中国国内常用的型号。
PDF 文件使用 "pdfFactory Pro" 试用版本创建
GP88S维修手册(原版)
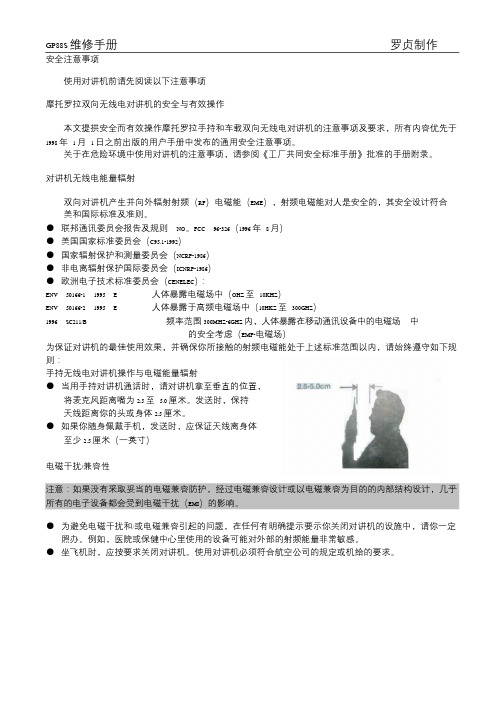
GP88S 维修手册罗贞制作安全注意事项使用对讲机前请先阅读以下注意事项摩托罗拉双向无线电对讲机的安全与有效操作本文提拱安全而有效操作摩托罗拉手持和车载双向无线电对讲机的注意事项及要求,所有内容优先于1998 年1 月1 日之前出版的用户手册中发布的通用安全注意事项。
关于在危险环境中使用对讲机的注意事项,请参阅《工厂共同安全标准手册》批准的手册附录。
对讲机无线电能量辐射双向对讲机产生并向外辐射射频(RF)电磁能(EME),射频电磁能对人是安全的,其安全设计符合美和国际标准及准则。
●联邦通讯委员会报告及规则NO。
FCC 96-326(1996 年8 月)●美国国家标准委员会(C95.1-1992)●国家辐射保护和测量委员会(NCRP-1986)●非电离辐射保护国际委员会(ICNRP-1986)●欧洲电子技术标准委员会(CENELEC):ENV 50166-1 1995 E 人体暴露电磁场中(OHZ 至10KHZ)ENV 50166-2 1995 E 人体暴露于高频电磁场中(10HKZ 至300GHZ)1996 SC211/B 频率范围300MHZ-6GHZ 内,人体暴露在移动通讯设备中的电磁场中的安全考虑(EMF-电磁场)为保证对讲机的最佳使用效果,并确保你所接触的射频电磁能处于上述标准范围以内,请始终遵守如下规则:手持无线电对讲机操作与电磁能量辐射●当用手持对讲机通话时,请对讲机拿至垂直的位置,将麦克风距离嘴为2.5 至 5.0 厘米。
发送时,保持天线距离你的头或身体2.5 厘米。
●如果你随身佩戴手机,发送时,应保证天线离身体至少2.5 厘米(一英寸)电磁干扰/兼容性注意:如果没有采取妥当的电磁兼容防护,经过电磁兼容设计或以电磁兼容为目的的内部结构设计,几乎所有的电子设备都会受到电磁干扰(EMI)的影响。
●为避免电磁干扰和/或电磁兼容引起的问题,在任何有明确提示要示你关闭对讲机的设施中,请你一定照办。
GBase 8A MPP Cluster 产品培训-日常维护

18
E: 独占锁
gcadmin查看集群锁
• 查看集群锁
• gcadmin showlock
19
检查内存使用率
• 使用top(LINUX), nmon(/opt/gnode/server/bin/目录下)等 工具进行监控
/opt/gnode/server/bin/nmon
16
gcadmin切换集群模式
• 集群模式
集群模式分为: normal :正常,能执行所有SQL操作 readonly:只读,只能执行查询SQL,用于数据备份操作。 recovery:恢复,不能进行任何SQL操作,用于数据恢复操作。
• 举例:
备份之前设置集群模式为readonly。 gcadmin switchmode readonly 备份结束之后,将集群模式设置为normal gcadmin switchmode normal
• 检查进程是否正常命令
ps –ef |grep 进程名
• 如果有进程不存在,需重新启动该节点gcware服务
service gcware restart (service gcware restart 会启动所有模组进程,需使用root帐号启动服务)
9
模组进程close状态故障排除
• 查看模组进程状态命令:
• 数据会自动恢复。
15 15
集群命令行gcadmin管理工具
• 命令行工具gcadmin可以为管理员提供管理集群的操作,包括:添加 SafeGroup、查看集群状态、切换集群状态、查询集群表锁等常用功能。
• 主要功能:
gcadmin --help 列出所有命令 gcadmin addsg --nodes <ip1[,[ip2]]> --names <name1[,[name2]] 增加组
GP-5830用户手册
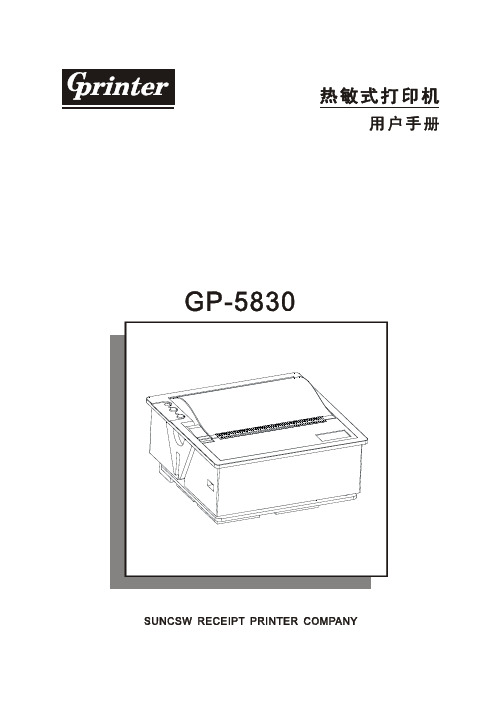
热敏打印纸。 (7)当拔插连接线时,请确认打印机电源处于关闭状态。 (8)请妥善保管本手册,以备使用参考。
THERMAL PRINTER
2
1. 概述 1.1 主要特点
● 打印质量高 ● 低噪音、高速打印 ● 小巧轻便,造型美观 ● 易装纸结构,结构合理,使用维护简便 ● 通讯接口可选并行端口或串行端口 ● 内置数据缓冲器(打印时可以接收打印数据) ● 字符横向纵向均可以 1-8 倍放大打印,可调整字符间隔和行间距打印 ● 支持下载图形打印和各种曲线打印 ● 支持条形码打印 ● 功耗小,运行成本低(无需色带、墨盒) ● 兼容 ESC/POS 打印指令集
GP常用功能介绍

GP常用功能介绍GP常用功能介绍 (1)1. 前言 (3)1.1 目标 (3)1.2 参考文档 (3)2. 安全域介绍 (3)2.1 安全域分类 (3)2.1.1 安全域密钥分散 (4)2.1.2 用户信息结构 (4)2.2 安全域密钥说明 (4)2.3 安全域密钥分散 (5)3. SCP02的外部认证 (6)3.1 外部认证的APDU命令 (6)3.1.1 INITIALIZE UPDATE命令 (6)3.1.2 会话密钥分散 (7)3.1.3 EXTERNAL AUTHENTICA TE命令 (7)3.2 计算APDU的MAC (9)4. 卡内容管理 (9)4.1 卡内容装载和安装 (9)4.1.1 卡内容的装载 (10)4.1.2 卡内容的安装 (10)4.2 卡内容移除 (12)4.2.1 应用的移除 (13)4.2.2 可执行装载文件的移除 (14)4.2.3 可执行装载文件和相关应用的移除 (14)4.3 内容的移交(context Extradition) (14)5. APDU命令参考 (15)5.1 CLASS字节编码 (15)5.2 一般性的错误情形 (16)5.3 INSTALL命令 (16)5.3.1 命令消息 (16)5.3.2 命令消息中发送的数据字段 (17)5.3.3 响应消息 (21)5.4 LOAD命令 (21)5.4.1 命令消息 (21)5.4.2 响应消息 (22)1.前言1.1目标本文档主要介绍GlobalPlatform上安全域,应用常用操作内容,以方便使用都快速掌握必要信息。
1.2参考文档GlobalPlatform卡片规范2.22.安全域介绍卡片管理器作为GlobalPlatform架构中的首要组件起到了GlobalPlatform卡片中心管理者的作用,特定的密钥和安全管理应用被称作安全域,负责确保发卡方和其他安全域提供者之间的密钥的完全隔离。
安全域负责提供各类安全服务,包括密钥管理、加密解密、针对其提供者(发卡方、应用提供方、授权管理者)的应用进行数字签名的生成与验证。
GP日常维护手册-常用命令
Greenplum 日常维护手册1.数据库启动:gpstart常用可选参数:-a : 直接启动,不提示终端用户输入yes确认-m:只启动master 实例,主要在故障处理时使用2.数据库停止:gpstop:常用可选参数:-a:直接停止,不提示终端用户输入确认-m:只停止master 实例,与gpstart –m 对应使用-M fast:停止数据库,中断所有数据库连接,回滚正在运行的事务-u:不停止数据库,只加载pg_hba.conf 和postgresql.conf中运行时参数,当改动参数配置时候使用。
-f:强制停止数据库-r:重启数据库3.查看实例配置和状态select * from gp_configuration order by 1 ;select * from gp_configuration_history order by 1 ; 主要字段说明:Content:该字段相等的两个实例,是一对P(primary instance)和M(mirror Instance)Isprimary:实例是否作为primary instance 运行Valid:实例是否有效,如处于false 状态,则说明该实例已经down 掉。
Port:实例运行的端口Datadir:实例对应的数据目录注 4.0后,实例配置的数据表:gp_segment_configuration 、pg_filespace_entry、gp_fault_strategy;其它常用的系统表:pg_class,pg_attribute,pg_database,pg_tables……可以用tab来匹配表名;4.gpstate :显示Greenplum数据库运行状态,详细配置等信息常用可选参数:-c:primary instance 和mirror instance 的对应关系-m:只列出mirror 实例的状态和配置信息-f:显示standby master 的详细信息-s:查看详细状态,如在同步,可显示数据同步完成百分比--version,查看数据库version(也可使用pg_controldata查看数据库版本和postgresql版本)该命令默认列出数据库运行状态汇总信息,常用于日常巡检。
- 1、下载文档前请自行甄别文档内容的完整性,平台不提供额外的编辑、内容补充、找答案等附加服务。
- 2、"仅部分预览"的文档,不可在线预览部分如存在完整性等问题,可反馈申请退款(可完整预览的文档不适用该条件!)。
- 3、如文档侵犯您的权益,请联系客服反馈,我们会尽快为您处理(人工客服工作时间:9:00-18:30)。
Greenplum 日常维护手册1.数据库启动:gpstart常用可选参数:-a : 直接启动,不提示终端用户输入yes确认-m:只启动master 实例,主要在故障处理时使用2.数据库停止:gpstop:常用可选参数:-a:直接停止,不提示终端用户输入确认-m:只停止master 实例,与gpstart –m 对应使用-M fast:停止数据库,中断所有数据库连接,回滚正在运行的事务-u:不停止数据库,只加载pg_hba.conf 和postgresql.conf中运行时参数,当改动参数配置时候使用。
-f:强制停止数据库-r:重启数据库3.查看实例配置和状态select * from gp_configuration order by 1 ;select * from gp_configuration_history order by 1 ;主要字段说明:Content:该字段相等的两个实例,是一对P(primary instance)和M(mirror Instance)Isprimary:实例是否作为primary instance 运行Valid:实例是否有效,如处于false 状态,则说明该实例已经down 掉。
Port:实例运行的端口Datadir:实例对应的数据目录注 4.0后,实例配置的数据表:gp_segment_configuration 、pg_filespace_entry、gp_fault_strategy;其它常用的系统表:pg_class,pg_attribute,pg_database,pg_tables……可以用tab来匹配表名;4.gpstate :显示Greenplum数据库运行状态,详细配置等信息常用可选参数:-c:primary instance 和mirror instance 的对应关系-m:只列出mirror 实例的状态和配置信息-f:显示standby master 的详细信息-s:查看详细状态,如在同步,可显示数据同步完成百分比--version,查看数据库version(也可使用pg_controldata查看数据库版本和postgresql版本)该命令默认列出数据库运行状态汇总信息,常用于日常巡检。
5.查看用户会话和提交的查询等信息select * from pg_stat_activity该表能查看到当前数据库连接的IP 地址,用户名,提交的查询等。
另外也可以在master 主机上查看进程,对每个客户端连接,master 都会创建一个进程。
ps -ef |grep -i postgres |grep -i conpg_backend_pid();pg_cancel_backend(integer)6.查看数据库、表占用空间select pg_size_pretty(pg_relation_size('schema.tablename'));(与pg_tables子查询查看所有表的占用空间)select pg_size_pretty(pg_database_size('zctt'));必须在数据库所对应的存储系统里,至少保留30%的自由空间,日常巡检,要检查存储空间的剩余容量。
7.收集统计信息,回收空间定期使用Vacuum analyze tablename 回收垃圾和收集统计信息,尤其在大数据量删除,导入以后,非常重要、需要定期对数据字典做vacuum和reindex ,如pg_class,pg_attribute等系统表。
可以gp_toolkit.gp_bloat_diag看膨胀很大的表;8.查看数据分布情况两种方式:●Select gp_segment_id,count(*) from tablename group by 1 ;●在命令运行:gpskew -t public.ate -a postgres如数据分布不均匀,将发挥不了并行计算的优势,严重影响性能。
9.登录每一个实例数据库的方法PGOPTIONS='-c gp_session_role=utility' psql dbname –p xxxx可以通过这个命令登录实例,一般用于检测单个实例是否运行正常,还有就是用于在集群发生不一致时(只有在非常特殊的情况下才有可能发生,如表不一致等),进行表维护10.实例恢复:gprecoverseg通过gpstate 或gp_configuration 发现有实例down 掉以后,使用该命令进行回复。
gprecoverseg -F强制恢复11.查看锁信息:注:在Greenplum里(截至到4.0版本),INSERT 和COPY都是行级锁,UPDATE/DELETE都是表级锁;SELECT locktype, database, c.relname, l.relation,l.transactionid, l.transaction, l.pid, l.mode, l.granted,a.current_queryFROM pg_locks l, pg_class c, pg_stat_activity aWHERE l.relation=c.oid AND l.pid=a.procpid ORDER BY c.relname;主要字段说明:relname: 表名locktype、mode 标识了锁的类型注:也可以通过pgadminIII的工具->服务器状态查看当前运行的SQL及锁等待情况。
发生Deadlock时,系统自动让其中一个SQL失败,并提示deadlock信息。
12.explain:在提交大的查询之前,使用explain分析执行计划、发现潜在优化机会,避免将系统资源熬尽。
explain analyze sql,将执行一次SQL,并行将过程中的具体cost和运行情况记录下来也可以用pgadminIII进行explain的图形化显示,进而来优化执行路径,如表关联策略等。
注:可以在Master的postgresql.conf中修改log_min_duration_statement=5000s,SQL运行耗时超过这个值得都在pg_log纪录SQL的实际耗时,用来监控耗时的SQL。
13.数据库并行备份gp_dump:常用参数:-s: 只导出对象定义(表结构,函数等)-n: 只导出某个schemagp_dump 默认在master 的data 目录上产生这些文件:gp_catalog_1_<dbid>_<timestamp> :关于数据库系统配置的备份文件gp_cdatabase_1_<dbid>_<timestamp>:数据库创建语句的备份文件gp_dump_1_<dbid>_<timestamp>:数据库对象ddl语句gp_dump_status_1_<dbid>_<timestamp>:备份操作的日志在每个segment instance 上的data目录上产生的文件:gp_dump_0_<dbid>_<timestamp>:用户数据备份文件gp_dump_status_0_<dbid>_<timestamp>:备份日志gpcorndump:可以用于备份数据库配置文件和全局数据(如角色、资源队列等)Example:gpcrondump -x mydatabase –u /xxx/ -c -g –G –a –q >>$DATE.log-g 备份postgresql.conf、pg_hba.conf、pg_ident.conf-G 备份全局对象-u 备份到的目录(如果没有-u,则数据备份到每个数据目录里面)gpcrondump的文件可以用gp_restore恢复gp_restore --gp-c --gp-d=/data/backup/db_dumps/20110423/ --gp-k=20110423103328 -d gpadmin也可以用gpdbresotre恢复:(需要数据在一个Host上)gpdbrestoree -R master=/data/backup/db_dumps/2011042314.数据库恢复gp_restore必选参数:--gp-k=key :key 为gp_dump 导出来的文件的后缀时间戳-d dbname :将备份文件恢复到dbname15.串行备份pg_dump/pg_dumpall一般用于环境迁移和DDL、FUNCTION等备份;如:pg_dump -s -n public demodb –f demodb.sql ,将只备份demodb数据库中的public 下的所有DDL和FUNCTION,-s表示不备份数据;恢复时,使用psql -d demodb –f demodb.sql16.数据库僵尸进程处理首先使用kill -15 去停止进程,kill -15 不响应,再用kill -11;一般情况下,不要用kill -9,否则可能导致数据库宕机且状态不一致,严重的导致数据库不能重新启动,可能需要用pg_resetxlog去重置日志,有可能导致数据丢失;17.参数更改通过gpconfig配置Master和所有Segment的postgresql.conf中参数。
EXAMPLESgpconfig -c work_mem -v 120MB –masteronly修改master上的work_mem =120MBgpconfig -c max_connections -v 100 -m 10修改Master上max_connections=10,Segment上修改成100gpconfig -r default_statistics_target注释参数,使用缺省参数gpconfig –l列出所有的参数gpconfig -s max_connections显示某个参数最大连接数:show max_connections;最大事务数:show max_prepared_transactions;18.Greenplum其它常用命令gpssh -f all_hosts—通过SSH同时访问多个节点,并可同时执行shellgpcheckperf --检查网络和硬盘性能checkos -f all_hosts –检查OS内核和参数如:检查Disk性能:gpcheckperf -d /data/gpdb_p1 -d /data/gpdb_p2 -d /data/gpdb_p3 -d /data/gpdb_p4 -d /data/gpdb_p5 -d /data/gpdb_p6 -d /data/gpdb_p7 -d /data/gpdb_p8 -S 64GB -r ds -D -v -f hosts-setup检查网络性能:gpcheckperf -d /data/gpdb_p1 -r N -f hosts-net0gpcheckperf -d /data/gpdb_p1 -r N -f hosts-net1gpcheckperf -d /data/gpdb_p1 -r N -f hosts-net2gpcheckperf -d /data/gpdb_p1 -r N -f hosts-net3gpssh –h sdw1 –v –e ‘mkdir /data/test’gpssh –h sdw1 –v –e ‘mkdir /data/test’gpssh -h sdw1 -v -e 'mkdir /data/test'19 copy导出、导入数据文件:COPY public.ods_data_msg TO '/zte/gpdata/ocs_data_msg.txt' delimiter'|';COPY public.ods_data_msg from '/zte/gpdata/ocs_data_msg.txt' WITH delimiter'|';20 进程监控:select * from pg_stat_activity where waiting ='t' ORDER BY current_query;select * from pg_stat_activity where waiting ='t' ORDER BY sess_id;select * from pg_stat_activity where waiting ='f' ORDER BY current_query;select * from pg_stat_activity where waiting ='f' ORDER BY sess_id;21 添加默认分区ALTER TABLE INF.EVENT_TGPS_201307 ADD default PARTITION PDEFAULT ;22 杀进程登录数据库后先使用select pg_cancel_backend(客户端进程ID);如果无法杀掉则使用select pg_terminate_backend(客户端进程ID);23.导出对象pg_dump -h 136.6.160.196 -p 5432 -U dsj -n dsj -s -T dsj.hot_contents_user_20130710 -T dsj.tbd_bwt_evt_pd_lo_evt_20130709 --gp-syntax cqdsj > db.sqlpg_dump -h 136.6.160.196 -p 5432 -U gpadmin -n public -s --gp-syntax xdcx > xdcx_public.sql pg_dump -h 136.6.160.196 -p 5432 -U gpadmin -n inf -s --gp-syntax xdcx > xdcx_inf.sqlpg_dump -h 136.6.160.196 -p 5432 -U gpadmin -n mid -s --gp-syntax xdcx > xdcx_mid.sqlpg_dump -h 136.6.160.196 -p 5432 -U inf -n public -s --gp-syntax xdcx > xdcx_public.sql24.表的字段:SELECT * FROM PG_ATTRIBUTE WHERE ATTRELID IN(SELECT RELFILENODE FROM PG_CLASS WHERE UPPER(RELNAME)=UPPER('DS_EVT_CALL_AREA_201312'))and attstattarget='-1' order by attnum;25.新建登陆用户CREATE ROLE cqcis LOGINENCRYPTED PASSWORD 'md5265eb7390afca3acc1f251fe55e63c00'NOSUPERUSER INHERIT NOCREATEDB NOCREATEROLE RESOURCE QUEUE pg_default;GRANT USAGE ON SCHEMA inf TO cqcis;GRANT USAGE ON SCHEMA mid TO cqcis;GRANT USAGE ON SCHEMA public TO cqcis;26.模式管理(命令行)查询当前可以直接访问的模式:SHOW search_path;当前可以直接访问的模式:1、SET search_path TO temp,cqdmkt,public;---session级2、alter database cqdmkt_new SET search_path TO temp,cqdmkt,public;---database级---第一个模式为默认模式,即在新建表或者函数式,不加模式名的情况,都默认到第一个模式下。
