NEC_Expresscluster X3.0产品维护手册(md镜像磁盘恢复)
NEC-V-NODE运维操作手册

VNODE操作手册SpectralWaveV-NodeSTM-16SDH光传输设备系统描述武汉NEC武汉日电光通信工业有限公司(一)产品概述:1.1系统研制背景1.2设备特性V-Node系统采用先进的技术和设计思想,继承了NEC在SDH领域的技术积淀,结合网络业务的多样化和网络结构的变化赋予SDH设备新的技术内涵:V-Node系统是一种集各种功能于一体的MSTP设备。
1.2.1宽带业务传送能力∙强大的交叉连接能力1.2.4完善的定时同步处理能力系统可以选择多种定时源:外时钟、S-N业务接口、内部时钟作为设备定时基准。
定时系统可以工作在三种工作模式:同步锁定模式、保持模式和自由振荡模式。
系统支持同步优先级倒换和基于SSM算法的自动倒换,在复杂的传送网中,基于SSM算法的自动倒换可以优化网络的定时同步分配,降低同步规划的难度,避免定时环路,保证网络同步处于最佳状态。
1.2.5完善的网络管理能力SpectralWaveV-Node系列产品均采用INC-100MS综合网络管理系统,SpectralWaveV-Node采用NEC设计思想,提供网元层、网元管理层和网络管理层的管理,具备系统、性能、配置、故障和安全等完善的管理功能,具有友好的人机界面,操作简单。
SpectralWaveV-Node系统提供可靠的备份功能,一个子网可以接入多个网管系统,不仅实现分段、分区域的管理,还大大增强了网管系统的可靠性。
2.设计依据与执行标准GB/T16814-1997 同步数字体系(SDH)光缆线路系统测试方法YD/T767-1995 同步数字系列设备和系统的光接口技术要求YD/T877-1996 同步数字体系(SDH)复用节点和系统的电接口技术要求YD/T900-1997 SDH设备技术要求-时钟YD/T1022-1999 同步数字体系(SDH)设备功能要求YDN099-1998 光同步传送网技术体制(暂行规定)YD/T1238-2002 基于SDH的多业务传送节点技术要求IEEE802.17-2003 弹性分组环访问模式和物理层规范IEEE802.1d(1998)介质访问控制(MAC)桥协议的光学接口系列数字接口的物理/电特性用于1544、6312、2048、8448和44736kbit/s速率系列ITU-TQ.822(1994)Q3接口的一级、二级和三级描述-性能管理ITU-TX.721(1992)信息技术-开放系统互连-管理信息的结构:管理信息定义ITU-TX.733(1992)信息技术-开放系统互连-系统管理:告警报告功能ITU-TX.738(1993)信息技术-开放系统互连-系统管理:摘要功能ITU-TX.739(1993)信息技术-开放系统互连-系统管理:测量客体和属性ITU-TX.826(1999)基群或基群以上速率的国际恒定比特率数字通道的误码性能参数和指标ITU-TX.86(2001)基于LAPS的以太网邮电部《光同步传输网技术体制》国家标准《同步数字体系(SDH)光缆线路系统进网要求》系统结构及各板配置位置如图V-Node设备的机盘分布图典型配置:命令或点击4点击设置按钮下发网元校时命令。
AIX下修复磁盘丢失的另一种方法经验分享
AIX下修复磁盘丢失的另一种方法经验分享AIX下修复磁盘丢失的另一种方法一、故障的起因与现象:用作开发测试的一个P690分区连接EMC盘阵,分配了12块磁盘,分别为hdiskpower23-30和hdiskpower41-44。
其中hdiskpower23出现故障,导致在主机端不可见,该磁盘状态一直是missing。
在磁盘hdiskpower23-26上存放了20几个条带化的逻辑卷,用作数据库的裸设备文件。
后来故障修复,重新认到磁盘,但是磁盘数据丢失了。
重新认到的hdiskpower23磁盘,完全是一块未初始化过的新磁盘。
就当前的情况看,要完整地恢复数据已不可能了。
但是这台测试机上面目前没有测试任务,并且还有数据库数据备份。
所以让它恢复正常的状态还是没问题的。
目前应该有两种方修恢复它:1、删除所有受损的LV,把MISSING 状态的磁盘从卷组中除去,将hdiskpower23重新加入卷组,重建LV 并恢复备份。
这应该是标准的做法。
2、依据已知的数据结构和其他磁盘现存的PVID、LVM、VGSA、VGDA、LVCB信息和ODM 信息,在新磁盘上重建原来磁盘的控制与状态信息,使其状态恢复正常,再恢复数据。
此种方法需要对卷管理要有深入地理解,并且知晓底层数据结构,因为操作风险大,所以此方法只限于学习与研究,且勿在生产环境操作下面,我就试着用第二种方法修复丢失的磁盘。
二、数据搜集Lpar8gd:/tmp/haha>lsvg -p data2vg0516-304 lsvg: Unable to find device id0035068ac341c091in the DeviceConfiguration Database.data2vg:PV ID PV STATE TOTAL PPs FREE PPs FREE DISTRIBUTION0035068ac341c091missing 272 0 00..00..00..00..00 hdiskpower24 active 272 0 00..00..00..00..00 hdiskpower25 active 272 0 00..00..00..00..00 hdiskpower26 active 272 0 00..00..00..00..00 hdiskpower27 active 272 0 00..00..00..00..00 hdiskpower28 active 272 1 00..00..00..00..01 hdiskpower29 active 272 1 00..00..00..00..01 hdiskpower30 active 272 1 00..00..00..00..01 hdiskpower41 active 272 0 00..00..00..00..00 hdiskpower42 active 272 0 00..00..00..00..00 hdiskpower43 active 272 0 00..00..00..00..00 hdiskpower44 active 272 0 00..00..00..00..00 Lpar8gd:/tmp/haha>Lpar8gd:/tmp/haha>lsvg -l data2vgdata2vg:LV NAME TYPE LPs PPs PVs LV STATE MOUNT POINT srootdbs jfs 8 8 4 closed/syncd N/Asplog jfs 8 8 4 closed/syncd N/Asllog1 jfs 64 64 4 closed/syncd N/Asllog2 jfs 64 64 4 closed/syncd N/Aschunk01 jfs 64 64 4 closed/syncd N/Aschunk02 jfs 64 64 4 closed/syncd N/Aschunk03 jfs 64 64 4 closed/syncd N/Aschunk04 jfs 64 64 4 closed/syncd N/Aschunk05 jfs 64 64 4 closed/syncd N/Aschunk06 jfs 64 64 4 closed/syncd N/Aschunk07 jfs 64 64 4 closed/syncd N/Aschunk08 jfs 64 64 4 closed/syncd N/Aschunk09 jfs 64 64 4 closed/syncd N/Astmpdbs1 jfs 16 16 4 closed/syncd N/Astmpdbs2 jfs 16 16 4 closed/syncd N/Astmpdbs3 jfs 16 16 4 closed/syncd N/Alv01 jfs2log 1 1 1 closed/syncd N/Adevp2 jfs2 1084 1084 4 closed/syncd /devp2schunk10 jfs 64 64 4 closed/syncd N/Aschunk11 jfs 64 64 4 closed/syncd N/Aschunk12 jfs 64 64 4 closed/syncd N/Aschunk13 jfs 64 64 4 closed/syncd N/Aschunk14 jfs 64 64 4 closed/syncd N/Aschunk15 raw 64 64 4 closed/syncd N/Aschunk16 raw 64 64 4 closed/syncd N/Aschunk17 raw 64 64 4 closed/syncd N/Aschunk18 raw 64 64 4 closed/syncd N/Aschunk19 raw 64 64 4 closed/syncd N/Aschunk20 raw 64 64 4 closed/syncd N/A上面标识为jfs类型的卷原来都应该是raw类型的。
MHDD修复硬盘技术方法及图解
mhdd硬盘检测操作流程1、要运行mhdd,首先我们要有一张带有mhdd程序的启动盘,然后从系统盘启动到dos系统,之后输入“mhdd”命令,回车,运行mhdd主程序。
2、mhdd主程序运行之后,系统会定位在mhdd程序根目录下(图1),这时我们可以按“F1”进入“mhdd帮助菜单”(图2)图2帮助菜单里列举了mhdd所有的命令,输入所需的命令,按回车就可以执行相应的操作3、在这一步我们一般通过按shift+F3,进入选择磁盘页面,选择我们要检测的磁盘(图3)图34、输入要扫描磁盘前面的数字编码,按回车,返回mhdd跟目录,然后输入“scan”回车(或按F4)打开磁盘扫描设置页面,(图4)设置扫描磁盘的参数。
图4SCAN(热键F4):盘面扫描,可以用特定模式来修复坏扇区,其中:[Star LBA]:设定开始扫描的LBA值。
[End LBA]:设定结束扫描的LBA值。
[Remap: On/Off](重新映像):是否修复坏扇区。
[Timeout(sec)]:设定超时值,从1到200,默认值为30。
[Spindown after scan]:扫描结束后关闭硬盘马达,这样即可使SCAN 扫描结束后,硬盘能够自动切断供电,但主机还是加电的(属于无人职守功能)。
[Loop the test/repair]:循环检测和修复,主要用于反复地修复顽固型坏道。
[Erase Delays](删除等待):此项主要用于修复坏道,而且修复效果要比REMAP更为理想,尤其对IBM硬盘的坏道最为奏效,但要注意被修复的地方的数据是要被破坏的(因为Erase Delays的每个删除单位是255个扇区)。
Erase Delays的时间默认为250毫秒,数值可设置范围从10到10000。
要想设置默认时间,可以打开/CFG目录下的MHDD.CFG文件,修改相应项目即可更改Erase Delays数值。
此数值主要用来设定MHDD确定坏道的读取时间值(即读取某扇区块时如果读取时间达到或超过该数值,就认为该块为坏道,并开始试图修复),一般情况下,不必更改此数值,否则会影响坏道的界定和修复效果。
NEC EXPRESSCLUSTER X 5.1 产品说明书
Version 5.1 New EnhancementNovember 2023NECTechnology Service and Software Department (EXPRESSCLUSTER)EXPRESSCLUSTER RoadmapProviding various platforms with high availability in accordance with the timesEnhancement Points of EXPRESSCLUSTER X 5.1Enhancements for the cloud ⚫Added forced-stop resources for Azure.⚫Mail Report function supports SMTPS and STARTTLS.⚫Facilitated the configuration and operation processes in the cloud environment.Security enhancements⚫Added the function to display operation logs of the Cluster WebUI.⚫Added the function to configure the log storage period.⚫Added the function to configure a floating IP resource as a source IP address.⚫Supported OpenSSL 3.0.Newly supported platforms & applications ⚫SUSE Linux Enterprise Server 15 SP4⚫Ubuntu Server22.04.1 LTS, Ubuntu Server20.04.5 LTS⚫SQL Server2022,PostgreSQL 15.1, MariaDB 8.0.31,MariaDB 10.10⚫ReFSEnhancements for the CloudAdded forced-stop resources for Azure.Mail Report function supports SMTPS and STARTTLS.Facilitated the configuration and operation processes in the cloud environment.Added Forced-stop Resources for AzureThe forced-stop function that prevents both-system activation due to a hang-up has been enhanced: GUI configuration now allows using the function to forcedly stop a failed node before failover.This can be configured from GUI withoutscripting.Availability SetResource GroupVMBlob storageFault Domain 0Fault Domain 1MirroringVMBlob storageForcedly stop a failed node before theoperation startup![Cluster WebUI] ->[Cluster Properties]-> [Fencing]tab-> [Forced Stop] FailureOperationOperation◆Mail Report function is now available for SMTPS/STARTTLS-required email delivery services such as “Email Delivery”, email delivery service on OCI.Mail Report function is now supported on Oracle Cloud Infrastructure (OCI).Oracle Cloud InfrastructureAvailability DomainEmail DeliverySSL(TLS)Internet!System AdministratorFailure*This enhanced function is available in the on-premises environment as well.Mail Report function supports SMTPS and STARTTLSOther Facilitation Improvements in Configuration and Operation on the Cloud Environment◆For configuration◼Environment variables for using AWS-related functions (such as AWS virtual IP resources) now can be configured from the Cluster WebUI. This allows the configuration without going through a proxy to be set on the Cluster WebUI, for example, only when EXPRESSCLUSTER uses AWS-related functions.◼Added the function for specifying a command line option, to the AWS CLI being executed with the AWS-related function. This allows specifying the end point for executing the AWS CLI.◼Installing Python is not needed anymore in the configuration using only the AWS virtual IPresource and the AWS virtual IP monitor resource.◼Installing the VMware vSphere CLI is not needed anymore to use the forced-stop function in the vSphere environment.◆For operation*This enhanced function is available in the on-premises environment as well.◼Added the option not to execute the OS restart, to the backup/restore commands(clpbackup/clprestore). This now allows some procedures to be performed without the OS restart.Security EnhancementsAdded the function to display operation logs of the Cluster WebUI.Added the function to configure the log storage period.Added the function to configure a floating IP resource as a source IP address. Supported OpenSSL 3.0.Added the Function to Display Operation Logs of the Cluster WebUIAdded the tab to display the history of operations performed on the Cluster WebUI: It is now possible to check traces of incorrect or invalid operations.At [2:07:20 am, May 17, 2023], by the user [clpuser2], from the IP address [10.20.10.200], the group [failover] was requested to move to the server [server22].At [2:08:28 am, May 17, 2023], by the user [clpuser1], from the IP address [10.20.10.200], the properties of the group [failover] were viewed.When, by whom, from where, what operation was performed now can be checked on the Cluster WebUI!Added the Function to Configure the Log Storage PeriodItems to configure for the log storage period have been added to the Cluster WebUI: It is now easy to address the requirements for the log storage.Examples of guidelines for the log storage period◆PCI Data Security Standard v4.0 (*1)◼10.5.1 Retain audit log history for at least 12 months , with at least the most recent three months immediately available for analysis.◆Convention on Cybercrime (ETS No. 185) (*2)◼oblige that person to preserve and maintain the integrity of that computer data for a period as long as necessary, up to a maximum of ninety days◆NIST SP 800-92 (Guide to Computer Security Log Management) (*3)◼Table 4-1. Examples of Logging Configuration SettingsLogs can be compressed, stored to the logstorage directory at the specified time such as the one with low server load, and kept for the desired storage period.(*1) https:///document_library/(*2) https://www.coe.int/en/web/conventions/full-list?module=treaty-detail&treatynum=185(*3)https:///nistpubs/legacy/sp/nistspecialpublication800-92.pdf[Cluster WebUI] ->[Cluster Properties]-> [Extension] tab-> [Settings of log storage period]Added the Function to Configure a Floating IP Address as a Source IP Address Items to configure a floating IP address as a source IP address have been added to the Cluster WebUI: The number of ports to be opened in the firewall now can be minimized as needed.◆Before◆The source IP is not fixed. (Actual IP or floating IP)◼If the firewall restricts the source IP address, all the IP addressesneed to be opened.◼If a failover occurs, the source IP address changes, and then theserver communicating with the cluster server behaves in anunexpected way.◆After ◆The source IP is fixed to the floating IP.◼If the firewall restricts the source IP address, only the floating IP address needs to be opened.◼Even if a failover occurs, the source IP address remains unchanged. This allows the server communicating with the cluster server to behave without being aware of the failover.Actual IPs of servers Source IP:10.0.0.10 ?10.0.0.20 ?10.0.0.30 ?Source IP:10.0.0.1010.0.0.2010.0.0.3010.0.0.1010.0.0.2010.0.0.3010.0.0.10Floating IP [Cluster WebUI] -> Properties of Floating IP resource -> [Detail] tab *This function is available also for applications where the clients are aware of the source IPs.Other Security Enhancements◆Supported OpenSSL 3.0◼HTTPS access to the Cluster WebUI◼HTTPS monitoring function by HTTP monitor resource◼FTPS monitoring function by FTP monitor resource◼Mail report function (Communication with the mail server by using SMTPS/STARTTLS)◆Disabled TLS 1.1◼HTTPS access to the Cluster WebUINewly Supported Platforms and ApplicationsNewly Supported Platforms and Applications◆OS◼RedHatEnterprise Linux9.2,9.0,8.8◼MIRACLE LINUX9.2,9.0,8.8◼Oracle Linux9.2,9.0,8.8◼SUSE Linux Enterprise Server 15 SP5/SP4◼Ubuntu Server22.04.1 LTS◼Ubuntu Server20.04.5 LTS◼AlmaLinux OS9.2,9.0,8.8◆Data base◼SQL Server 2022◼PostgreSQL 15.1◼MariaDB 8.0.31◼MariaDB 10.10◆File system◼ReFS◆Java execution environment◼Java17◆Java application◼WebSAM SVF PDF Enterprise 10.1◼WebSAM RDE SUITE 10.1◼WebSAM SVF Connect SUITE Standard 10.1Thank YouAn Integrated High Availability and Disaster Recovery Solution For more product information & request for trial license, visit >>https:///expresscluster/For more information, feel free to contact us -https:///en/global/prod/expresscluster/en/contact.html。
PNS3.0旗舰版用户手册

虚拟桌面快速交付系统软件 V3.0
QuickDesktop 虚拟桌面快速交付系统软件 V3.0 旗舰版使用手册
苏州江波软件技术有限公司
-1-
QuickDesktop
虚拟桌面快速交付系统软件 V3.0
目录
第一章 1.1 1.2 第二章 第三章 3.1 3.2 3.3 第四章 4.1 4.2 4.3 4.4 第五章 5.1 5.2 5.3 5.4 第六章 6.1 6.2 6.3 6.4 第七章 7.1 7.2 7.3 7.4 7.5 7.6 7.7 7.8 第八章 8.1 8.2 8.3 8.4 8.5 产品简介 .......................................................................................................................................................... 4 产品概述 ................................................................................................................................................... 4 产品安装环境 ........................................................................................................................................... 4 QUICKDESKTOP 的安装流程说明 ..........................
ExpressCluster 虚拟化通用解决方案建议书

3.2.1 第四章 4.1 4.2
4.2.1 4.2.2 4.2.3 4.2.4 4.2.5 4.2.6 4.2.7 4.2.8 4.2.9 第五章 5.1 5.2 5.3 5.4 5.5
NEC EXPRESSCLUSTERM+1(N)解决方案建议书
5.6 5.7 5.8 第六章
失效切换资源 .......................................................................................................... 20 监视组资源 .............................................................................................................. 21 保护的应用和服务 .................................................................................................. 22 NEC 高可用软件 EXPRESSCLUSTER 解决方案的关键特性 ............................... 25
传统双机热备可以解决单个或双业务单点故障问题,但是随着 it 不断发展,企业应用 业务也不断增多, 如果对每个应用业务都采用传统双机热备方式解决高可用问题, 必然增加 服务器成本投入,既不利于资源整合及管理,也为后期的运维增加难度和成本。
3.2 结合虚拟化高可用方案建议
结合虚拟化高可用结构是 M+1 结构的虚拟化扩展。 虚拟化结构对使用单台服务器的性能 安装虚拟化平台,把各个业务安装在虚拟化平台 OS,实现业务之间 OS 环境隔离,从而更好 地适合业务之间运行的稳定性及兼容性。 Expresscluster 虚拟化平台支持主流平台, VMWARE/HYPER-V/Xenserver/KVM 等。 与 M+1 及 M+N 的区别在于, 虚拟化高可用结构综合了 M+1 的低成本和 M+N 的业务运行环 境隔离等优点。适合于多业务运行环境不兼容且综合运行资源不大的业务。
EMC日常维护手册
E M C日常维护手册(v20131108)版本说明目录目录版本说明 ......................................................................................................................................... 错误!未指定书签。
1硬件部分 ...................................................................................................................................... 错误!未指定书签。
1.1ClariionCX系列产品硬件介绍........................................................................................... 错误!未指定书签。
1.2如何用Navisphere看存储的状态 ................................................................................... 错误!未指定书签。
1.3客户发现Clariion出现问题,应如何报修? ................................................................. 错误!未指定书签。
1.4EMCClariionCX系列开关机注意事项及详细步骤 ........................................................... 错误!未指定书签。
1.5Clariion主动性售后支持及call-home的介绍 ................................................................. 错误!未指定书签。
NEC EXPRESSCLUSTER X 软件说明书

Milestone Certified Solution EXPRESSCLUSTER XDate certified: 19-11-2018Table of ContentsAbout NEC (3)About Milestone Systems (3)Executive Summary (4)Certified Products (4)Test Setup (4)Performance Results / Features Tested Described (5)Conclusion (6)Resources (7)About NECNEC Corporation is headquartered in Tokyo, JAPAN was established in the year 1899. Presently NEC employees more than 100,000 people and has 303 consolidated subsidiaries across the globe (as of Mar, 31, 2018). Visit for more information.NEC’s EXPRESSCLUSTER X is a “Business Continuity / Disaster Recovery” solution which is designed to maximize uptime for any critical system. EXPRESSCLUSTER X solutions can minimize the damage organizations experience from system outages, whether they are planned or unplanned. EXPRESSCLUSTER X solutions are cost effective and easy to deploy. EXPRESSCLUSTER X is a scalable High Availability (HA) clustering solution across LAN and WAN environments. It can gracefully scale to meet the needs of both small businesses and large enterprises at the same time. It protects critical systems that run industry-standard applications, operating systems and virtualization platforms.It offers Advantages as it is•Reliable•Flexible•Monitoring CapabilitiesVisit https:///en/global/prod/expresscluster/ for more information.About Milestone SystemsMilestone Systems is a global leader in providing open platform IP video surveillance software. Milestone has provided easy-to-use, powerful video management software in more than 200,000 installations, worldwide.Milestone XProtect® provides open architecture products that are compatible with more IP cameras, encoders, and digital video recorders than any other manufacturer. Because Milestone provides an open platform, you can integrate today’s best business solutions and expand what’s possible with future innovations. Visit for more.GENERAL DISCLAIMER:All information, to include but not limited to, documentation, configuration calculations, installation and trouble-shooting advice, consultancy and support services which may be provided within this document is delivered 'as is' without warranty of any kind. Unless otherwise agreed in writing between you and Milestone Systems A/S or its Affiliates, you, as the recipient, agree to assume the entire risk as to the results and performance achieved or not achieved by reliance on such information. Milestone Systems A/S and its Affiliates shall, to the extent allowed by law, assume no li ability for the Recipient’s reliance on such information and disclaims all warranties, whether express or implied, including but not limited to, the implied warranties of merchantability, fitness for a particular purpose, title and non-infringement, or any warranty arising out of any proposal, specification or sample with respect to the document. Furthermore, Milestone Systems A/S and its Affiliates shall not be liable for loss of data, loss of production, loss of profit, loss of use, loss of contracts or for any other consequential, economic or indirect loss whatsoever in respect of delivery, use or disposition from the content of this document.Executive SummaryNEC EXPRESSCLUSTER X is an integrated software solution that can cater to the High availability / Disaster Recovery needs of an organization. It has the capabilities of monitoring and detecting failures on Operating System, Network, Hardware and Application and based on the user settings can failover the application / database workload to standby server.It can not only perform the failover of the application / database but has inbuilt capabilities to protect data by means of replication (Synchronous / Asynchronous) over LAN / WAN. EXPRESSCLUSTER X is hardware agonistic and can be deployed in Physical as well as Virtual or Hybrid environment. NEC EXPRESSCLUSTER X is cloud ready and can failover from / to On-premises servers to / from cloud deployment. Certified Products• NEC EXPRESSCLUSTER X 3.3• Milestone XProtect Corporate 2018 R2Test SetupTwo server with Windows 2012 standard operating system has been installed on the test machines. Both the servers have been installed with Milestone xProtect Corporate 2018 R2 and NECEXPRESSCLUSTER X.Asynchronous / Synchronous Data MirroringAutomatic / Manual FailoverServer 1HeartbeatSAP B1, MSSQL Server &FTPServer 2Data partitionData partitionMilestone xProtect Corporate 2018 R2LAN / WAN ConnectivityMilestone xProtect Corporate 2018 R2Configuration to cluster Milestone xProtect using NEC EXPRESSCLUSTER X had to be performed on the systems. Therefore, all the required service of the Application and its database were configured as per EXPRESSCLUSTER X requirement considering no impact of functioning of the application and its database.Performance Results / Features Tested DescribedS. No.Test Case Expected Result Observed Result Status1Groups creation Create failover group withresources like mirror disk,services resources, NetworkresourcesFailover groupcreated2Power off activeserverApplication should failoverto secondary serverApplication startsat secondary serverCompleted3Database servicesstopped on primaryserver using toolDatabase services shouldfailover to secondary serverDatabase Servicesstarted on itssecondary server Completed4Database servicesstopped on secondaryserver using toolDatabase services shouldfailover to primary serverDatabase Servicesstarted on itsprimary server Completed5 Application servicesstopped on primaryserver using toolApplication services shouldfailover to secondary serverApplication Servicesstarted on itssecondary server Completed6 Application servicesstopped on secondaryserver using toolApplication services shouldfailover to primary serverApplication Servicesstarted on itsprimary server Completed7Run cluster onprimary server, addsome data on its datapartition and thenmove the clusterservice to secondaryserviceData should be visible orreplicate on data partition ofsecondary serverData is visible andhas been replicatedon data partition ofsecondary serverCompleted8Add some data ondata partition ofsecondary server andthen move the clusterto Primary serverData should be visible orreplicate on data partition ofprimary serverData is visible andhas been replicatedon data partition ofprimary serverCompleted9Manual failback fromsecondary to primaryserverFailback to primary server Seamless failbackto primary serverCompletedS. No.Test Case Expected Result Observed Result Status10Failover time < 4 Minutes Successful failoverwithin 4 Minutes Completed11Failback time < 4 Minutes Successful failoverwithin 4 Minutes Completed12For any reasonprimary goes downFailover takes place tosecondary serverSeamless failoverrecordedCompleted13After diagnosticprimary return toclusterFailback is done manually Seamless failbackrecordedCompleted14EXPRESSCLUSTER XUI accessibility usingfloating IPEXPRESSCLUSTER X UIshould open using Floating IPEXPRESSCLUSTER XUI opensseamlessly inbrowserCompletedConclusionThe cluster configuration got applied successfully from the EXPRESSCLUSTER X web console and the entire cluster came online successfully. Starting the services on manual and automatic failover was successfully executed without any errors or warnings. The clustering of Milestone xProtect Corporate 2018 R2 started seamlessly from secondary server on failover and also started successfully on primary server on failback. The data was also protected by continuous replication and no data loss was reported on failover and failback.ResourcesVirtual Machines: 02OS: Windows 2012 R2 StandardApplication: Milestone xProtect Corporate 2018 R2 Clustering Solution: NEC EXPRESSCLUSTER X https:///en/global/prod/expresscluster/。
硬盘修复工具MHDD使用说明
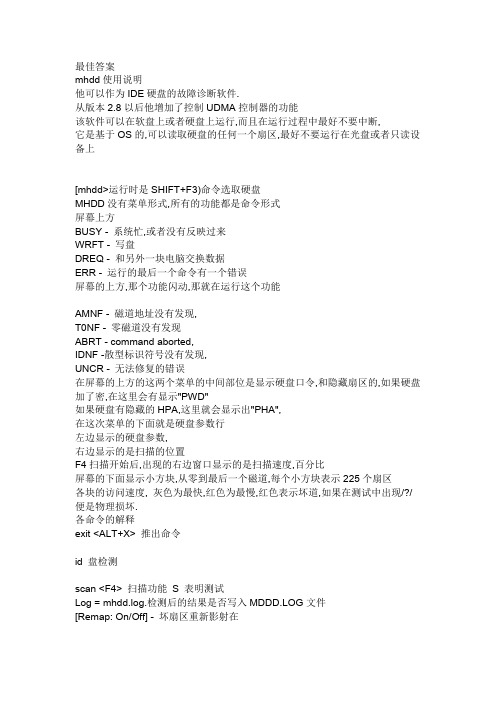
最佳答案mhdd使用说明他可以作为IDE硬盘的故障诊断软件.从版本2.8以后他增加了控制UDMA控制器的功能该软件可以在软盘上或者硬盘上运行,而且在运行过程中最好不要中断,它是基于OS的,可以读取硬盘的任何一个扇区,最好不要运行在光盘或者只读设备上[mhdd>运行时是SHIFT+F3)命令选取硬盘MHDD没有菜单形式,所有的功能都是命令形式屏幕上方BUSY - 系统忙,或者没有反映过来WRFT - 写盘DREQ - 和另外一块电脑交换数据ERR - 运行的最后一个命令有一个错误屏幕的上方,那个功能闪动,那就在运行这个功能AMNF - 磁道地址没有发现,T0NF - 零磁道没有发现ABRT - command aborted,IDNF -散型标识符号没有发现,UNCR - 无法修复的错误在屏幕的上方的这两个菜单的中间部位是显示硬盘口令,和隐藏扇区的,如果硬盘加了密,在这里会有显示"PWD"如果硬盘有隐藏的HPA,这里就会显示出"PHA",在这次菜单的下面就是硬盘参数行左边显示的硬盘参数,右边显示的是扫描的位置F4扫描开始后,出现的右边窗口显示的是扫描速度,百分比屏幕的下面显示小方块,从零到最后一个磁道,每个小方块表示225个扇区各块的访问速度, 灰色为最快,红色为最慢,红色表示坏道,如果在测试中出现/?/便是物理损坏.各命令的解释exit <ALT+X> 推出命令id 盘检测scan <F4> 扫描功能S 表明测试Log = mhdd.log.检测后的结果是否写入MDDD.LOG文件[Remap: On/Off] - 坏扇区重新影射在版本2.8时候,扫描坏道就会出现“R”表示该磁道已经不是很稳定,或者已经损坏,。
将Erase WAITS打开对对IBM硬盘上的坏块检测很方便的。
该命令是破坏数据的,所以小心使用。
aerase 高级擦除,速度很慢hpa (更改大小,当然,要硬盘支持这种技术,1999年以后的硬盘都支持)rhpa 恢复原盘的大小cls 清屏pwd 设置密码unlock 解锁dispwd 去掉密码,前提是要用unlock后,而且你还要知道密码rpm Rotate-per-minute测试ff 把镜像文件复制到磁盘上nhpa 显示全部的硬盘空间aam 降低硬盘的运行中的声音,磁盘性能也同时降低,P最大(性能最高),M最小(性能最低);tof 创建镜像文件init 磁盘复位fdisk 在磁盘上分区smart smartport <SHIFT+F3> 选择硬盘.stop <SHIFT+F4> 停止测试i <F2> 重新安排硬盘检测cx 可以检验昆腾CX和LCT系列硬盘5247芯片的稳定性erase 快速擦除ibme 显示IBM硬盘的tlists表fujlst 显示富士通硬盘的tlists表以下等命令的说明在正式版本的说明书中才有的,谁要是有的话,贴出来,在请高人翻译我个人估计是对西数,昆腾,富士通等硬盘的操作WDWRWDFMTOLDWDWCPWDFMTWDFMTSAWDMWDWMWDRCPQUQURMQUWMQUMAPQURCPQUWCPQUSPINUPQUSPINDOWNQURESTARTQUCRCQUWCPRAMQUDEFLQUSAFMTQUERDEFLFUJRMFUJWMFUJAFMTFUJFMTFUJRFFUJWF经过比较,HP与hddreg差不多,对非物理坏道有一点修复作用,对有绿块、红块的扇区没用,对真正物理坏道没用。
ECE-3-产品介绍技术篇
共享磁盘型
运行 业务 运行
业务数据存储在 共享磁盘上
FO发生时待机服 务器去访问共享 磁盘
业务
待机
待机
Copyright© 2004-2007 by NEC-AS Software Laboratories Co.,Ltd.
数据镜像型
运行 业务 运行
业务数据实时镜像化
FO发生时使用镜像数据
业务 待机
集群生成
Copyright© 2004-2007 by NEC-AS Software Laboratories Co.,Ltd.
追加Server
Copyright© 2004-2007 by NEC-AS Software Laboratories Co.,Ltd.
网络设置
Copyright© 2004-2007 by NEC-AS Software Laboratories Co.,Ltd.
软件构成
Linux
ExpressCluster 本体
Web Manager
(Server)
Linux
ExpressCluster 本体
Web Manager (Server)
Windows or Linux
JRE
Trekking Tool
JRE
Trekking Tool
Web Manager (browser)
集群构成信息的作成
Windows
c:\program files\nec\clptrek\clptrek.html
Linux
/opt/nec/clptrek/clptrek.html
集群构成信息FD
Trekking Tool
EXPRESSCLUSTER X3.0 中文手册 Windows版 开始指南
Single Point of Failure的排除 ................................................................................................................24
共享磁盘 .......................................................................................................................................................25
46最新信息的确认46集群系统的设计46集群系统的构建46开始操作集群系统后的故障对策46第篇发布备忘录最新信息47iiexpresscluster第3章expresscluster的运行环境49硬件运行环境50所需规格50expressclusterserver的运行环境50支持os50所需内存容量和磁盘容量51监视可选软件已经确认完毕的应用程序信息52虚拟机资源的运行环境54builder的运行环境55运行确认完毕的os浏览器55java执行环境55所需内存容量磁盘容量55支持的expresscluster版本55webmanager的运行环境56运行确认完毕的os浏览器56java执行环境56所需内存容量磁盘容量56统合webmanager的运行环境57运行确认完毕的os浏览器57java执行环境57所需内存容量磁盘容量57第4章最新版本信息59expresscluster和手册的对应一览表60最新版本60功能强化信息61第5章注意限制事项62研究系统配置时63关于builderwebmanager的运行os63关于镜像磁盘共享型镜像磁盘的需求63关于共享磁盘的需求64niclinkupdown监视资源64关于镜像磁盘共享型镜像磁盘的write性能64关于非同步镜像的历史文件64关于多个非同步镜像间的数据一致性65关于multiboot65安装expresscluster前65关于文件系统65通信端口号66时钟同步的设置67关于共享磁盘67关于镜像磁盘用的分区67关于共享型镜像磁盘用的分区68vos启动时间的调整68网络的确认68关于与esmproautomaticrunningcontroller结合使用69关于ipmiutil70关于在servercore的安装70创建expresscluster的配置信息时71组资源非激活异常时的最终运行71延迟警告比例71关于磁盘监视资源和共享型镜像磁盘tur监视资源的监视方法tur71关于webmanager的画面更新间隔71关于心跳资源的设置72关于能用于脚本注释等的2字节系字符编码72操作expresscluster后72恢复运行中的操作限制72关于命令篇中没有记载的可执行文件或脚本文件73集群关机集群关机重启73特定服务器的关机重启73从网络分区状态的恢复73关于webmanager74关于builder74关于expressclusterdiskagent
NEC公司EXPRESSCLUSTER解决方案

NEC公司EXPRESSCLUSTER解决方案恒领公司概况重庆正大恒领信息技术有限公司是正大软件集团旗下专业从事服务外包(BPO)的企业,其充分依托正大软件与众多知名跨国公司良好的合作关系以及正大软件学院、正大创新学院丰富的人才资源为国内外企业提供专业优质的信息服务外包业务。
正大恒领信息还致力于为政府部门提供全面数字化解决方案,提高政府部门的服务水平和管理效率。
为制造业、物流行业以及医疗卫生系统提供行业解决方案。
目前,已完成重庆市高新区“数字化城市管理”监控指挥平台、Call—Center等多个项目,获得相关政府部门及领导的一致好评。
2007年正大恒领成为北京富士通系统工程有限公司战略合作伙伴。
代理了日本富士通ERP、物流产品;代理NEC服务器双机备容及数据安全产品;代理了美国QUOV ADX医疗中间件产品。
我们致力于帮助国际知名IT跨国企业在中国市场的成功。
正大恒领同时还是中国医疗信息化市场优质解决方案供应商,正大恒领拥有国内300家医院客户资源,我们在HIS、PACS 、RIS、LIS、GMIP、医院财务与成本核算、综合性医疗资源管理平台等方面为卫生信息化做出了卓越的贡献。
正大恒领,做中国一流的服务外包供应商。
NEC公司EXPRESSCLUSTER产品登记证书:产品体系:产品荣誉:2005年 ‘计算机世界优秀高可用实践奖’产品关键特性:EXPRESSCLUSTER 以下几方面的关键技术,为用户的关键业务系统提供强大的高可用性、高可靠性和灵活的扩展性。
● 支持多平台EXPRESSCLUSTER 支持目前国内几乎所有主流的Windows 和Linux 操作系统平台,如Windows NT/20002003,RedHat ,Turbolinux,MIRACLELINUX,Novell SUSE LINUX,RedFlag 等。
● 支持IA-64和EM64T 等64位架构的服务器和操作系统平台● 灵活的系统扩展性支持服务器节点扩展,可灵活适应用户业务的需求,最多可扩展到32个节点; ● 自动监测EXPRESSCLUSTER 可自动检测和恢复服务器和应用程序的故障,不仅可以监视服务器故障,还可以监视IP 地址、磁盘设备、用户应用程序等等各种资源的故障。
NEC_ExpressclusterX3.0产品维护手册(md镜像磁盘恢复)

NEC_Expresscluster X3.0产品维护手册文档声明:本文档针对Windows平台下NEC ExpressCluster集群软件运行过程中故障的快速定位和快速处理方法。
此文档截止目前适用于“Windows2003、Windows2008”操作系统平台下的“NEC ExpressCluster X3.0和X3.1版本”。
有关其他版本及相关手册可登陆“”论坛。
文档中"ExpressCluster"简称"EC"。
1.管理界面介绍通过浏览器输入服务器任意IP地址加29003端口进入EC管理界面(下图为EC_X3.0_Win 的管理配置界面),界面主要分为【菜单栏】、【树形结构】、【信息栏】和【日志栏】,通过菜单栏中的按钮可以更改有关参数、控制集群的启动停止等。
a)三种管理模式:操作模式:对集群执行启动、停止、转移等操作设定模式:对集群的配置进行修改查看参照模式:与操作模式看到相同的内容,但无法执行启动停止等操作注:本文档内容主要涉及到操作模式下的相关操作b)树形结构图树形结构图中主要显示集群的资源、服务器和资源监视。
Server:所有集群内的服务器基本信息,展开各台服务器可以看出集群的心跳状态Group:所有的资源组,资源组内包含各类资源(用于执行集群内应用的启动停止)。
浮动IP地址、应用服务和磁盘等统称为集群资源,而将这些资源放到同一组内即可实现一个应用的双机热切换。
资源在组内一般会设定依赖关系(即启动顺序)Monitor:各项资源的监视,用于监视资源组内的相关资源,通过对监视器的调整可以改变故障切换的时间信息栏:点击左侧树形结构任意内容会在右侧信息栏中显示相关项目的详细信息注:本手册主要针对浮动IP、镜像磁盘、应用服务这三类资源为维护对象c)日志栏EC管理界面中,日志栏会实时显示EC的相关信息。
日志存在服务器中,每次打开浏览器都能显示所有日志内容。
NEC-ExperssCluster集群软件部署手册

- 1 - Dayang Product Center SI ab 第- 1 - 页总109 页Dayang SI Lab ReleaseNEC ExperssCluster集群软件部署手册Dayang Technology Development Inc北京中科大洋科技发展有限公司- 2 - Dayang Product Center SI ab 第- 2 - 页总109 页NEC ExperssCluster集群软件部署手册- 3 - Dayang Product Center SI ab 第- 3 - 页总109 页报告文档信息:- 4 - Dayang Product Center SI ab 第- 4 - 页总109 页目录目录................................................................................................................................................................... - 5 - 前言................................................................................................................................................................... - 6 - Experss Cluster集群软件功能特点......................................................................................................... - 6 - 1.创建集群的基本要求及前期准备.............................................................................................................. - 12 -系统拓扑图............................................................................................................................................. - 12 - IP规划 .................................................................................................................................................... - 13 - 软硬件要求............................................................................................................................................. - 13 - 2.建立群集...................................................................................................................................................... - 13 -安装Experss Cluster集群软件(两台机器都做).............................................................................. - 13 - 配置Experss Cluster集群软件(一台即可)...................................................................................... - 22 - 4.验证安装.................................................................................................................................................... - 107 - 4.其它说明.................................................................................................................................................... - 109 -- 5 - Dayang Product Center SI ab 第- 5 - 页总109 页前言EXPRESSCLUSTER是一款专业的高可用集群软件产品,它可提供Windows和Linux平台上完整的高可用性解决方案。
ImageX备份还原工具
ImageX备份还原工具一、映像创建、映像压缩、映像文件拆分以及应用映像本文的所有操作都需要在Windows PE下进行。
虽然这可能没有在DOS环境下方便,不过用Windows PE取代DOS已经是一个必然的趋势,同时,Windows PE环境也使imagex的适用范围更广。
我们都知道,传统的基于磁盘扇区的映像工具一般只能在Windows操作系统之外运行,因此都使用了专用的恢复环境,例如软件开发商提供的特别版本的DOS。
但这就存在一个问题,主要是关于存储子系统的。
现在我们使用的存储子系统规格越来越多,除了传统的IDE,常见的还有SCSI、SATA,以及各种级别的RAID 等,如何让映像工具支持这些不常用的存储子系统成了一个最大的问题。
以使用DOS作为恢复环境的映像工具为例,假如该工具没有自带用于RAID系统的DOS驱动程序,那么就无法使用它对RAID系统创建和恢复映像。
但imagex解决了这一问题,它的恢复环境是Windows PE,这可以看作是一个省略了图形界面的Windows内核,因此任何磁盘子系统,只要提供了Windows下的驱动程序,就可以用于Windows PE。
使用过程中大家可能会注重到,用Windows PE光盘引导计算机,进入Windows PE 环境之前,屏幕上首先会显示“Press F6 to Install…”的字样,这和我们直接用光盘安装Windows操作系统时的选项类似。
如果您使用了一些比较不常用的存储子系统,例如SCSI或者RAID,就需要在这个界面上按下F6,然后提供所需的驱动程序,这样引导后Windows PE才可以识别出您的硬盘。
下文中,实验所用系统的设置如下:C盘安装操作系统,D盘是光驱,E盘用于保存创建的映像文件。
不过当我们用Windows PE光盘引导计算机后情况有所变化,C盘依然是系统盘,但光驱成了X盘,Windows下的E盘成了Windows PE环境下的D盘。
NEC EXPRESSCLUSTER X云平台介绍说明书

December 2020 NEC Corporation, Cloud Platform Division, (EXPRESSCLUSTER)
Why is EXPRESSCLUSTER Chosen for Cloud System?
▌Set a backup site on a remote location to reduce the risk of business interruption along with a disaster.
▌Protect both application and data, taking them over to the backup site.
Failover
Active
Site A
Mirroring
Standby
Site B
5
© NEC Corporation 2020
Advantage 3. Supporting SLA(*)
▌Cloud service feature must offer a very high service level (e.g. 99.99% for availability)
8
© NEC Corporation 2020
3 Values of Using EXPRESSCLUSTER on Cloud
▌There are few HA cluster software that can support public cloud. EXPRESSCLUSTER officially supports the operation on the Cloud. It is possible to create HA cluster configuration without shared disk because data can be shared by the data mirroring function.
NEC EXPRESSCLUSTER X for Windows 快速启动指南iSCSI目标服务器版

EXPRESSCLUSTER X for Windows Quick Start Guide for iSCSI Target ServerVersion 1July, 2016DisclaimerThe contents of this document are subject to change without notice. NEC Corporation assumes no responsibility for technical or editorial mistakes in or omissions from this document. T o obtain the benefits of the product, it is the customer’s responsibility to install and use the product in accordance with this document. The copyright for the contents of this document belongs to NEC Corporation. Copying, altering, or translating this document, in full or in part, without the permission of NEC Corporation, is prohibited.Trademark InformationInformation in this document is subject to change without notice. No part of this document may be reproduced or transmitted in any form or by any means, electronic or mechanical, for any purpose, without the express written permission of NEC Corporation.Microsoft® and Windows® are registered trademarks of Microsoft Corporation.Other system names, company names, and product names are trademarks and registered trademarks of their respective companies.Contents1About This Guide (4)1.1Using This Guide (4)1.2Revision History (4)1.3Evaluation Environment (4)1.4For More Information (4)2Overview (6)3System Requirements and Planning (7)3.1System Requirements (7)3.2System Planning (7)4EXPRESSCLUSTER X Installation (9)4.1Install EXPRESSCLUSTER X on the Primary Server (9)4.2Install EXPRESSCLUSTER X on the Secondary Server (10)4.3Restart the Primary and Secondary Servers (10)4.4Confirm Connectivity between Servers (10)5Base Cluster Setup (11)5.1Start WebManager (11)5.2Create a Cluster (11)5.3Set Up the Network Configuration (11)5.4Create a Failover Group (12)5.5Create Resources for Base Cluster (12)5.6Upload the Cluster Configuration and Start Cluster (13)6iSCSI Target Server Installation (15)6.1Install iSCSI Target Server on the Primary Server (15)6.2Install iSCSI Target Server on the Secondary Server (16)7iSCSI Target Server Cluster Setup (18)7.1Add the First Set of Scripts (18)7.2Add the Second Set of Scripts (19)7.3Change Dependency of Resources (19)7.4Upload the Cluster Configuration (20)8iSCSI Initiator Setup (21)9Appendix (22)9.1Test Cluster and Verify Functionality (22)9.2Example System Planning Worksheet (22)1 About This Guide1.1 Using This GuideThis guide provides a hands-on “Quick Start” set of instructions to createActive/Standby cluster system for iSCSI T arget Server withEXPRESSCLUSTER X for Windows. The guide assumes users haveMicrosoft Windows system administration knowledge and skills withexperience in installation and configuration of Microsoft Windows operatingsystems, networks, and iSCSI T arget Server.1.2 Revision History1.3 Evaluation EnvironmentThis iSCSI T arget Server clustering method has been evaluated with thefollowing OS and software.●Windows Server 2012 R2●EXPRESSCLUSTER X 3.3 for Windows1.4 For More InformationWe have the following guides for instant support.●Getting Started Guide– This guide explains general cluster conceptsand overview of EXPRESSCLUSTER X functionality.●Installation and Configuration Guide– This guide explainsEXPRESSCLUSTER X installation and configuration procedures indetail.●Reference Guide– This is a reference of commands that can be put inEXPRESSCLUSTER X scripts and maintenance commands that can beexecuted from the server command prompt.The guides listed above can also be found at/en/global/prod/expresscluster/en/support/manuals.html2 OverviewThe general procedure to deploy EXPRESSCLUSTER X on two servers (referred to as Primary and Secondary), each with an iSCSI virtual disk which is mirrored between the servers, consists of the following major steps:1. Perform system planning to determine requirements and specify configurationsettings prior to the start of actual system installation and configuration.2. Prepare the Secondary server, including OS installation and configuration.3. Set up a Data Partition and Cluster Partition on both servers according toinstructions in the EXPRESSCLUSTER X Installation and ConfigurationGuide.4. Install and configure EXPRESSCLUSTER X on the Primary and Secondaryserver.5. Create and configure the EXPRESSCLUSTER X failover group to enablecontinuous protection and automatic recovery of the iSCSI virtual disk.6. Upload the configuration file and start the cluster to complete deployment.3 System Requirements and Planning3.1 System RequirementsBoth Windows Server 2012 R2 servers in the cluster require the installationof the iSCSI T arget Server service. It can be installed using the Add Rolesand Features Wizard in Server Manager, under the File and StorageServices section.3.2 System PlanningFill out the tables of the worksheet below to use for reference in theconfiguration sections of this guide. See also 9.2Example SystemPlanning Worksheet for an example worksheet.Machine #1: Primary Server (with iSCSI T arget Server)Machine #2: Secondary Server (with iSCSI Target Server)Machine #3: T est Client Machine (with iSCSI Initiator)Floating IP (FIP) Address:Virtual Computer Name (vcom):iSCSI Target Name:1MDC (Mirror Disk Connect) is network for data mirroring.4 EXPRESSCLUSTER X Installation4.1 Install EXPRESSCLUSTER X on the Primary Server1. Insert the EXPRESSCLUSTER X CD-ROM into a CD-ROM drive on theserver.2. In the pop-up window, click NEC EXPRESSCLUSTER for Windows.3. Click on NEC EXPRESSCLUSTER X 3.x for Windows.4. In the Welcome window, click Next.5. In the Choose Destination Location window, click Next.6. In the next window, click Install.7. In the Port Number window, if necessary, modify the default portnumbers. Click Next.8. In the Filter Settings of Shared Disk window, click Next.9. Click Yes in the Confirmation window to skip shared disk filtering.10. In the License Manager window, click Register.11. In the License Registration window, click Register with LicenseInformation.12. In the Product Selection window, select the OS and Product/Trialtypes. For Product Name, click EXPRESSCLUSTER X 3.x forWindows. Click Next.13. In the License Unit Selection window, depending on the type of license,enter the number of CPU or Node Units. Click Next.14. In the License Key Entry window, enter the Serial No. and LicenseKey. Click Next.15. In the License Registration Confirmation window, confirm theinformation entered is correct. Click Next.16. Click OK. If the license registration fails, start again from step 10.17. Repeat steps 10 – 16 again for the EXPRESSCLUSTER X Replicator3.x for Windows product license. Select EXPRESSCLUSTER XReplicator 3.x for Windows as the Product Name in step 12.18. When the licenses have been successfully registered, click Finish.19. On the InstallShield Wizard Complete window, click the No, I willrestart my computer later option button, and then click Finish.20. In the next window, click Exit. Click Exit. (Two times total).4.2 Install EXPRESSCLUSTER X on the SecondaryServerPerform all of the step s in Section 4.1 on the Secondary Server.4.3 Restart the Primary and Secondary ServersFirst restart the Primary Server, and then restart the Secondary Server.4.4 Confirm Connectivity between ServersPing the servers in the cluster to verify that there are no issues inconnectivity. Also be sure that the ports used by EXPRESSCLUSTER are able to communicate through the Windows Firewall.5 Base Cluster Setup5.1 Start WebManagerVerify that Java Runtime Environment (JRE) is installed on a machine to beused for cluster management. See the installation requirements section ofthe EXPRESSCLUSTER X Getting Started Guide for a compatible version.For this guide, use the Primary Server for cluster management. Install JREif necessary. Then start by accessing port 29003 of the Primary Serverfrom the web browser of the cluster management machine, using thePrimary Server’s IP address. Example: http://10.0.0.2:29003. When thesecurity warning window displays, select the Always trust content fromthis publisher check box. Click Run.5.2 Create a ClusterFor all of the steps in the cluster creation project, refer to Table 1 for the IPaddresses and server names.1. When the cluster manager is opened for the first time, there is a pop-upwindow with two options. Click Start cluster generation wizard.2. In the confirmation window, click Start Cluster Generation Wizard forstandard edition.3. In the new window, type a Cluster Name (Example: iscsi_cluster), andclick Next.4. In the next window, to add another server to the cluster, click Add.5. Type the Server Name or the IP Address of Secondary Server, andthen click OK.6. Both servers are now on the list. If the Primary Server is not in the top(Master Server) position, then move it up. Click Next.5.3 Set Up the Network Configuration1. EXPRESSCLUSTER X automatically detects the IP addresses of theservers. The primary network (Interconnect) is for heartbeat andmirroring the data; set the MDC on this row as mdc1. The secondary(Public) network is for heartbeat only. Click Next.2. In the NP Resolution window, click Next.5.4 Create a Failover Group1. T o add a group, in the Cluster Generation Wizard, in the Group section,click Add.2. In the next window, select failover for group Type. Name the group(Example: iscsi_failover), click Next, and then click Next. (Two timestotal).3. Select the default options for the Group Attribute Settings, and thenclick Next.5.5 Create Resources for Base Cluster1. In the Group Resource section of the Cluster Generation Wizard, toadd a resource, click Add.2. T o add a floating IP address resource, from the Type drop down menu,select floating ip resource, and then click Next.3. Verify the Follow the default dependency box is selected, and thenclick Next.4. Verify the default options are correct, and then click Next.5. Enter the floating IP address in the IP Address field and click Finish.6. Add a virtual computer name resource by clicking Add.7. From the Type drop down menu, select virtual computer nameresource, and then click Next.8. Uncheck the Follow the default dependency box.9. Select the recently created floating ip resource in the right pane andclick Add. Click Next.10. Verify the default options are correct, and then click Next.11. Enter the Virtual Computer Name chosen earlier (Example: vcom).12. From the drop down menu under Target FIP Resource Name, selectthe floating IP address. Click Finish.13. Add a mirror disk resource by clicking Add.14. Click Get License Info to retrieve the active license for replication. (Notethat there is no visible indication that it was successful).15. T o add a mirror disk resource, from the Type drop down menu, selectmirror disk resource, and then click Next.16. Verify the Follow the default dependency box is selected, and thenclick Next.17. Verify the default options are correct, and then click Next.18. Select the Primary Server name and click Add.19. Click Connect to populate the server partitions.20. Select the drive letter of the data partition for mirroring (Example: X) inthe Data Partition box, and the drive letter of the cluster partition(Example: W) in the Cluster Partition box. Click OK.Note:Specify different partitions for data partition and cluster partition. If thesame partition is specified, data on the mirror disk may be corrupted.21. Repeat steps 18 – 20 for the Secondary Server.22. Click Finish.23. Click Finish, and then click Next.24. Click Finish.25. Click Yes to enable recovery action when an error occurs in a monitorresource.5.6 Upload the Cluster Configuration and Start Cluster1. In the Cluster Manager window, click the File menu and then Apply theConfiguration File. Click OK. Click OK. (Two times total).2. After the upload is complete, change from Config Mode to OperationMode.3. Restart Cluster Manager. Click the Service menu, and then clickRestart Manager. Click OK.4. Click the Service menu, and then click Start Cluster. Click OK.5. When the cluster tree displays after a few seconds, in the left pane of theCluster Manager window, expand the %failover group% section, rightclick %mirror disk%, and click Details to monitor the disksynchronization progress. Mirror disk copy starts automatically,replicating data from the Primary Server to the Secondary Server.Note:This step may take a while depending on the size of the data on themirror disk partition.6. After the copy completes, in the Mirror Disk Helper window, clickClose.7. In the Cluster Manager window, all icons in the tree view should now begreen. Refer to the figure below:8. Move the %failover group% to the Secondary Server to verify that allgroup resources and monitor resources can be activated on Secondary Server. After verification, move the %failover group% back to thePrimary Server.Note:These tests do not affect server functionality. It verifies that the mirror disks on each server in the cluster are functioning properly. The mirror disk is now controlled by EXPRESSCLUSTER X and is only accessible from the active server.6 iSCSI Target Server Installation6.1 Install iSCSI Target Server on the Primary ServerDo the following steps to install iSCSI T arget Server.1. Open a PowerShell window with Administrative rights.2. If iSCSI T arget Server role has not been installed, enter the followingcommand.3. Create a directory on the mirror disk for the iSCSI virtual disk (Example:X:¥iSCSIVirtualDisks).4. Run the following command to create a virtual disk.Example:5. Run the following command to create an iSCSI T arget.Example:6. Run the following command to change iSCSI T arget IQN.Example:7. Run the following command to assign the VHDX to the T arget.Example:8. Run the following command to stop Microsoft iSCSI Software Targetservice (wintarget).6.2 Install iSCSI Target Server on the Secondary ServerDo the following steps to install iSCSI T arget Server.1. Move the %failover_group% to the Secondary Server.2. Open a PowerShell window with Administrative rights on theSecondary Server.3. If iSCSI T arget has not been installed, enter the following command.4. Run the following command to import iSCSI virtual disk (VHDX).Example:5. Run the following command to create an iSCSI T arget (using the samename on Primary Server).Example:6. Run the following command to change iSCSI T arget IQN.Example:7. Run the following command to assign the VHDX to the T arget.Example:8. Run the following command to stop Microsoft iSCSI Software Targetservice (wintarget).7 iSCSI Target Server Cluster Setup7.1 Add the First Set of Scripts1. Download the script files for iSCSI T arget Server clustering from theEXPRESSCLUSTER web site./en/global/prod/expresscluster/en/support/Setup.html2. Unzip sample_scripts_iSCSIT arget.zip and check if there are followingfolders and files.script-wintarget1Control-Wintarget.ps1start.batstop.batscript-wintarget2Control-Wintarget.ps1start.batstop.bat3. Start the EXPRESSCLUSTER X Cluster Manager.4. In the Cluster Manager window, change to Config Mode.5. Right-click on the %failover group%, and then click Add Resource.6. From the Type drop down menu, select script resource. As theresource Name, enter script-wintarget1. Click Next.7. Uncheck the Follow the default dependency box, and then click Next.8. Verify the default options are correct, and then click Next.9. Select start.bat in the left pane and click the Replace button.10. Navigate to the scripts that were downloaded, open thescript-wintarget1 folder, select the new start.bat file, and click Open.11. Click Yes to replace.12. Select stop.bat in the left pane and click the Replace button.13. Navigate to the scripts that were downloaded, open thescript-wintarget1 folder, select the new stop.bat file, and click Open.14. Click Yes to replace.15. Click Add button.16. Navigate to the scripts that were downloaded, open thescript-wintarget1 folder, select the Control-Wintarget.ps1 file, andclick Open.17. Click OK to add.18. Click the Tuning button.19. Enter 0 for Normal Return Value for the start and stop sections. ClickOK.20. Click Finish.7.2 Add the Second Set of Scripts1. Right-click on the %failover group%, and then click Add Resource.2. From the Type drop down menu, select script resource. As theresource Name, enter script-wintarget2. Click Next.3. Uncheck the Follow the default dependency box.4. Select the %mirror disk% resource in the right pane and click Add.Click Next.5. Verify the default options are correct, and then click Next.6. Select start.bat in the left pane and click the Replace button.7. Navigate to the scripts that were downloaded, open thescript-wintarget2 folder, select the new start.bat file, and click Open.8. Click Yes to replace.9. Select stop.bat in the left pane and click the Replace button.10. Navigate to the scripts that were downloaded, open thescript-wintarget2 folder, select the new stop.bat file, and click Open.11. Click Yes to replace.12. Click Add button.13. Navigate to the scripts that were downloaded, open thescript-wintarget2 folder, select the Control-Wintarget.ps1 file, andclick Open.14. Click OK to add.15. Click the Tuning button.16. Enter 0 for Normal Return Value for the start and stop sections. ClickOK.17. Click Finish.7.3 Change Dependency of Resources1. Click on the %failover_group% in the left pane.2. Select the Resources tab in the right pane.3. Right-click on the %mirror_disk% resource and select Properties.Select the Dependency tab and uncheck Follow the defaultdependency. Select script-wintarget1 in the right pane, and click Add.Click OK.4. Right-click on the %fip% resource and select Properties. Select theDependency tab and uncheck Follow the default dependency. Selectscript-wintarget2 in the right pane, and click Add. Click OK.5. Click the Entire Dependency tab in the right pane and check the7.4 Upload the Cluster Configuration1. In the Cluster Manager window, click the File menu, and then Apply theConfiguration File. Click OK on confirmation message popup. If theupload ends successfully, click OK.2. After the upload is complete, change to the Operation Mode.3. Right-click on the %failover_group% and select Start. Select thePrimary Server to start the group on and click OK.8 iSCSI Initiator SetupThis chapter shows iSCSI Initiator setup example with Windows OS (ex.Windows Server 2012 R2, Windows 7).1. Logon the client machine.2. Open Control Panel.3. Click iSCSI Initiator.4. Enter the floating IP address (ex. 10.0.0.4) for Target on T argets tab and clickQuick Connect.5. Check if the iSCSI T arget IQN shows on Discovered targets and Status isConnected.6. Open Disk Management (diskmgmt.msc) and initialize disk.7. Format disk and check if it is available to create folders and files.Note:This iSCSI T arget clustering method is NOT suitable as a shared disk forWindows Server Failover Cluster (WSFC). Because it is needed to recover iSCSI Initiator connection manually on WSFC environment after failover.Note:When Linux iSCSI Initiator is used, it is recommended to increase the disktimeout. If it takes longer than disk timeout to complete failover/failback, thedevice that provided by iSCSI T arget will be remounted with read-only mode and it is needed to dismount and mount the device manually to clear read-only mode.9 Appendix9.1 Test Cluster and Verify Functionality9.1.1 Move the Failover Group1. Using Cluster Manager, move the %failover_group% from thePrimary Server to the Secondary Server. Verify that the iSCSIInitiator on the client maintains its connection to the iSCSI T arget,which is now on the Secondary Server, and that the iSCSI virtualdisk can be accessed by the client.2. Move the %failover_group% back to the Primary Server. Verifythat the iSCSI Initiator on the client maintains its connection to theiSCSI T arget, which is now back on the Primary Server, and thatthe iSCSI virtual disk can be accessed by the client.9.1.2 Failover on Server Shutdown1. Shutdown the Primary Server manually or through ClusterManager. This will initiate an automatic failover to the SecondaryServer. The iSCSI Initiator on the client should maintain itsconnection to the iSCSI T arget which is now on the SecondaryServer. The iSCSI virtual disk should still be accessible by theclient.2. Return the Primary Server to the cluster by turning its power backon. Move the %failover_group% back to the Primary Server.9.2 Example System Planning WorksheetMachine #1: Primary ServerMachine #2: Secondary ServerMachine #3: T est Client MachineFloating IP (FIP) Address: 10.0.0.4 Virtual Computer Name (vcom): vcom iSCSI Target Name: Target1。
MHDD 硬盘扫描、修复详解(亲自使用心得)

MHDD 硬盘扫描、修复详解(亲自使用心得)MHDD 硬盘扫描、修复详解一、MHDD简介及使用注意事项1、MHDD是俄罗斯Maysoft公司出品的专业硬盘工具软件,具有很多其他硬盘工具软件所无法比拟的强大功能,它分为版和收费的完整版,介绍的是版的详细用法。
这是一个G表级的软件,他将扫描到的坏道屏蔽到磁盘的G表中。
于它扫描硬盘的速度非常快,已成为许多人检测硬盘的首选软件。
2、MHDD的特点:MHDD无论以CHS还是以LBA模式,都可以访问到128G 的超大容量硬盘,即使你用的是286电脑,它不依赖主板BIOS,无需BIOS支持,也无需任何中断支持。
支持热插拔,热插拔的顺序要记清楚:插的时候,先插数据线,再插电源线。
拔的时候,先拔电源线,再拔数据线。
但不熟练最好不要热插拔,以免不小心烧了硬盘。
3、MHDD最好在纯DOS /环境下运行。
4、MHDD可以不依赖于主板BIOS直接访问IDE口,但要注意不要使用原装Intel品牌主板。
5、不要在要检测、修复的硬盘中运行MHDD。
6、MHDD在运行时需要记录数据,因此不能在被写保护了的存储设备中运行。
7、检测不到硬盘,换新数据线或接口。
最好把要检测、修复的硬盘接在主板最前的接口,有些主板不插在前面的接口或设置成从盘,MHDD将发现不到硬盘。
SATA硬盘接在主板最前的接口SATA0或有的为SATA1。
8、用U盘启动的,有的可能会无法进入MHDD,可以更改一下制作U盘的文件系统格式,一般大多数启动盘制作软件默认将U盘制作为FAT32,若遇无法进入MHDD,可以重新将U盘制作成NTFS 文件系统就可以了。
9、请先备份需修复硬盘的数据到其它硬盘,硬盘修复可能破坏原有数据。
造成你重大损失。
10、如果坏道较多或硬盘读写数据较慢,建议先低格硬盘后,再运行MHDD 软件。
11、有一种情况就是用MHDD测试时开始可能全盘都没有坏道或者刚开始测试没有坏道,可随着硬盘工作的时间越来越长,坏道开始出现并不断增多,坏道位置并没有规律,这是于硬盘的硬件部分有不稳定的地方导致的,这种情况在硬件问题没有解决前是不能维修坏道的。
操作和维护手册

Sun StorEdge™ 3000 系列安装、操作和维护手册Sun StorEdge 3120 SCSI Array Sun Microsystems, Inc.文件号码 817-6624-112005 年 7 月,修订版 A请将有关本文档的意见和建议提交至:/hwdocs/feedback版权所有 © 2004-2005 Dot Hill Systems Corporation, 6305 El Camino Real, Carlsbad, California 92009, USA. 保留所有权利。
对于本文档中介绍的产品,Sun Microsystems, Inc. 和 Dot Hill Systems Corporation 对其所涉及的技术拥有相关的知识产权。
需特别指出的是(但不局限于此),这些知识产权可能包含在 /patents 中列出的一项或多项美国专利,以及在美国和其他国家/地区申请的一项或多项其他专利或待批专利。
本文档及其相关产品的使用、复制、分发和反编译均受许可证限制。
未经 Sun 及其许可方(如果有)的事先书面许可,不得以任何形式、任何手段复制本产品或文档的任何部分。
第三方软件,包括字体技术,均已从 Sun 供应商处获得版权和使用许可。
本产品的某些部分可能是从 Berkeley BSD 系统衍生出来的,并获得了加利福尼亚大学的许可。
UNIX 是 X/Open Company, Ltd. 在美国和其他国家/地区独家许可的注册商标。
Sun、Sun Microsystems、Sun 徽标、Sun StorEdge、AnswerBook2、 和 Solaris 是 Sun Microsystems, Inc. 在美国和其他国家/地区的商标或注册商标。
美国政府权利-商业用途。
政府用户应遵循 Sun Microsystems, Inc. 的标准许可协议,以及 FAR(Federal Acquisition Regulations,即“联邦政府采购法规”)的适用条款及其补充条款。
- 1、下载文档前请自行甄别文档内容的完整性,平台不提供额外的编辑、内容补充、找答案等附加服务。
- 2、"仅部分预览"的文档,不可在线预览部分如存在完整性等问题,可反馈申请退款(可完整预览的文档不适用该条件!)。
- 3、如文档侵犯您的权益,请联系客服反馈,我们会尽快为您处理(人工客服工作时间:9:00-18:30)。
NEC_Expresscluster X3.0产品维护手册
文档声明:
本文档针对Windows平台下NEC ExpressCluster集群软件运行过程中故障的快速定位和快速处理方法。
此文档截止目前适用于“Windows2003、Windows2008”操作系统平台下的“NEC ExpressCluster X3.0和X3.1版本”。
有关其他版本及相关手册可登陆“/”论坛。
文档中"ExpressCluster"简称"EC"。
对于本文档中的内容有任何意见或建议可随时发送邮件至******************.cn
1.管理界面介绍
通过浏览器输入服务器任意IP地址加29003端口进入EC管理界面(下图为EC_X3.0_Win 的管理配置界面),界面主要分为【菜单栏】、【树形结构】、【信息栏】和【日志栏】,通过菜单栏中的按钮可以更改有关参数、控制集群的启动停止等。
a)三种管理模式:
操作模式:对集群执行启动、停止、转移等操作
设定模式:对集群的配置进行修改查看
参照模式:与操作模式看到相同的内容,但无法执行启动停止等操作
注:本文档内容主要涉及到操作模式下的相关操作
b)树形结构图
树形结构图中主要显示集群的资源、服务器和资源监视。
Server:所有集群内的服务器基本信息,展开各台服务器可以看出集群的心跳状态Group:所有的资源组,资源组内包含各类资源(用于执行集群内应用的启动停止)。
浮动IP 地址、应用服务和磁盘等统称为集群资源,而将这些资源放到同一组内即可实现一个应用的双机热切换。
资源在组内一般会设定依赖关系(即启动顺序)
Monitor:各项资源的监视,用于监视资源组内的相关资源,通过对监视器的调整可以改变故障切换的时间
信息栏:点击左侧树形结构任意内容会在右侧信息栏中显示相关项目的详细信息
注:本手册主要针对浮动IP、镜像磁盘、应用服务这三类资源为维护对象
c)日志栏
EC管理界面中,日志栏会实时显示EC的相关信息。
日志存在服务器中,每次打开浏览器都能显示所有日志内容。
日志主要分为三个级别:
信息:记录对EC的操作信息以及内部信息
警告:此信息出现可能存在单点故障,集群不处于最佳状态,此时需要查看集群树状结
构以确保集群工作正常,一般在警告状态下至少还有一台服务器可以工作错误:出现此类信息表示集群内有某项资源或位置发生错误,出现此类错误需要立即查看故障点以给出相应解决办法
2.资源故障分析
在集群的资源中可能会出现各个资源故障,本手册将会针对Md资源在各种故障情况下的恢复方法进行详细阐述。
对于浮动IP资源和服务资源进行简单地表述解决方法和常见问题。
a)浮动IP资源
浮动IP资源主要和网卡有关,在浮动IP资源出现故障或警告的情况下,首先要查看集群的网卡状态以及心跳是否都工作正常。
当确定网卡和心跳都工作正常时确定局域网内是否有IP地址与之冲突。
在这些初步判断无法定夺时需要结合EC日志和Windows系统日志内容来确定故障的原因,并制定出对应解决方案(详细内容可参考官方“ExpressCluster® X 3.0 for Windows参考指南”)
b)Md资源
在不正常关机或断电等情况下对Md资源的正确操作非常重要,操作不慎就会丢失数据。
以下主要针对各种情况下Md可能会出现的状态以及对应的解决办法。
➢mdw1出现黄色警告
此状态一般会在首次做完集群配置和服务器重启后出现,如果仅出现mdw1警告,其他资源一切正常时表示两台服务器的数据不完全一样,可能正在从最新数据同步到非最新数据服务器,也可能是根本无法从主机镜像到备机。
区别这两种情况可以点击mdw1在右侧信息栏就可以看出,如果一台服务器警告,一台正常则一般表示正在同步,若一台出现异常,一般则表示无法实现镜像。
此时还可以右键Md资源显示Md的详细信息
在Md的详细信息栏中将会看到以下内容则表示正在从服务器“Win0302”往“Win0301”上同步数据,通过文本框内的信息可以看出当前的状态。
此时不需要进行任何操作,只需等待其完成即可,在此期间不可以执行重启服务器和断开网络等操作。
➢Md资源启动失败
在机房出现断电导致主备机同时断电后主备机不同时启动(大于五分钟)时可能会出现Md资源无法启动,其他认为等因素也可能导致此故障发生。
出现以上情况时需要手动指定最新数据源才可恢复集群,由于磁盘被锁定无法人为判断最新数据时可以采取以下方法(操作之前最好保证客户端无法连接到服务器):
解锁磁盘查看并比较两台服务器数据
打开Md资源详细信息,会显示如下状态:
点击图标以更改其状态至以下状态
并点击按钮,则Win0301的磁盘将被解锁
同样在另一台机器执行相同操作,结果将显示如下:
此时可以查看各个服务器的磁盘内容,可以进行大小和日期的对比来判断新数据,比较完成后还需要在Md的详细信息中还原到初始状态,即:
关闭认为数据较旧的那台服务器,将显示如下状态:
点击win0302的磁盘图标,到最新数据
关闭详细信息后停止资源组,并重新启动资源组
在win0302上启动后应当首先确定数据是否为最新数据,当确认为最新数据(用客户端访问查询最新数据)时,可以选择让另一台机器启动。
如果当前需要客户端立即访问数据库,建议可以先不启动另一台机器,直接单机服务,可以选择下班后开启另一台机器。
这样做的目的是可以防止在业务运行期间执行数据同步占用一定的服务器资源。
若确定为另一台机器为新数据,则应当关闭服务器开启另一台服务器,执行以上的操作步骤。
c)服务资源
当应用程序服务资源启动出现错误时可能会出现如下状态
首先停止启动失败的服务资源
当资源停止后需要手动去启动服务资源,在手动启动服务过程中根据出现的错误描述来判断问题出现的原因,并有针对性的解决应用程序服务本身的故障。
服务启动故障需要根据具体的应用情况来甄别问题的原因。
总结:除了以上发生故障时的排查外还需要不定期的查看EC日志,以确保服务器一直处于健康稳定的状态。
Md资源可能会因为各种误操作导致两边数据不同步,而不同步的结果都需要人为进行干预,在碰到任何问题之前先打开EC管理器查看状态。
根据状态显示的结果进行分析后再执行下一步操作,需谨慎处理md资源。
遇到紧急问题需要及时在菜单栏的工具菜单下选择日志收集,将收集到的压缩文件发到“******************.cn”邮箱并予以说明现场的详细情况。
