MOCS 工具操作手册汇编
汇编语言编程软件使用指南

汇编语言编程和调试工具一、汇编语言编程工具学习汇编语言的目的就是要用汇编语言编程来解决实际问题,下面介绍二种常用的汇编语言编程环境:宏汇编MASM 6.11和Turbo Assember 5.0。
1.1、宏汇编MASM系统在宏汇编MASM系统中,程序员可用二种方法来处理源程序:命令行和集成环境。
1.1.1 命令行命令1、编写源程序可用计算机系统中各种能编辑文本文件的编辑器来编辑汇编源程序。
常用的编辑器有:EDIT、Q、Word、记事本、写字板、WPS等。
源文件的后缀为:.ASM。
2、汇编程序当源程序编写好后,可用MASM命令来汇编该源程序。
如果源程序没有语法错误,那么,将生成目标文件(.OBJ文件),为最终生成可执行文件作准备,但如果源程序有错误,汇编程序将显示出错误位置和原因,也可用列表文件(.LST文件)来查看出错位置和原因。
下面给出一些使用该命令的实例情况。
例1.1:查看MASM命令的功能…>masm /?(*)……/Zi Generate symbolic information for CodeView/Zd Generate line-number information其中:选项/Zi和/Zd是经常被引用的二个选项,因为它们与符号跟踪有关。
例1.2:用MASM命令汇编源程序…>masm test……Invoking: ML.EXE /I. /Zm /c test.asm……Assembling: test.asm如果MASM命令显示了类似如上的处理结果,那么,表示源文件TEST.ASM已成功汇编,并已生成了其目标文件TEST.OBJ。
(*)用户输入的命令用“下划线”来表示,系统显示的内容没有“下划线”。
以下与此相同。
例1.3:用MASM命令汇编源程序…>masm test……Invoking: ML.EXE /I. /Zm /c test.asm……Assembling: test.asmtest.asm(10): error A2070: invalid instruction operands如果MASM命令显示了类似如上的处理结果,那么,表示源文件有错,没有生成其目标文件。
MoCA测评工具操作指南及评分标准

MoCA测评工具操作指南及评分标准操作指南
1. 确保评估环境安静舒适,避免干扰或干涉。
2. 先介绍评估目的和过程给被评估者,并解答其可能有的问题。
3. 在评估过程中需维持良好的交流和沟通,耐心与被评估者进
行对话。
4. 按照评估工具的要求,依次进行测试操作。
5. 将被评估者的回答记录在相应的表格中。
评分标准
1. 注意被评估者的回答是否正确、完整和连贯。
2. 根据评估工具的规定,对每个测试项目进行评分。
一般来说,评分是根据回答的正确与否以及回答的精确程度进行的。
3. 评分时要注意被评估者是否能理解问题的含义,以及能否给
出正确答案。
4. 在评分时要对照评估工具的参考标准,判断被评估者的回答
在哪个范围内,从而确定得分。
注意事项
1. 在操作评估工具时,要尽量减少可能的干扰和干涉。
2. 对于某些测试项目,可能需要根据被评估者的具体情况进行调整,以确保评估结果的准确性。
3. 在评估过程中,要保持专业和客观,不对被评估者提供帮助或提示。
4. 评估结果应仅基于被评估者的表现,而不应受其他因素的影响。
以上为MoCA测评工具操作指南及评分标准,希望能对您在使用该工具时有所帮助。
如有任何问题,请随时与我们联系。
【必读】MagicSOPC实验箱使用说明V1.20

【必读】MagicSOPC实验箱使⽤说明V1.20⽬录第1章MagicSOPC实验开发平台使⽤说明 (2)1.1MagicSOPC操作指南 (2)1.1.1DDS函数信号发⽣器使⽤说明 (2)1.1.2注意事项 (2)1.2MagicSOPC演⽰程序操作指南 (3)1.2.1通过PC上位机软件操作 (3)1.2.2通过或触摸屏或矩阵键盘操作 (5)1.2.3红外遥控器操作 (6)1.2.4触摸屏校正 (6)第2章MagicSOPC实验开发平台实验指导勘误 (7)2.1SOPC嵌⼊式系统实验教程(⼆) (7)2.1.1实验“4.12 操作及逻辑分析仪使⽤实验” (7)2.1.2实验“3.1 SOPC快速⼊门” (7)2.2EDA实验与实践教程(⼆) (7)2.3现在DSP设计与实践教程(⼆) (7)第1章MagicSOPC实验开发平台使⽤说明本章简单介绍了使⽤MagicSOPC实验开发平台的⼀些注意事项和使⽤说明。
因此请读者务必认真仔细阅读本章的内容。
1.1 MagicSOPC操作指南本节将对MagicSOPC创新教学实验开发平台的操作进⾏简单说明,并列出⼀些使⽤注意事项。
1.1.1DDS函数信号发⽣器使⽤说明MagicSOPC实验开发平台上带的DDS函数信号发⽣器可产⽣正弦波、⽅波、三⾓波等信号,通过板上“↑”、“→”、“ESC”和“Enter”四个按键可对输出信号的频率及信号类型进⾏更改。
各按键的功能如所表 1.1列。
表 1.1 DDS函数信号发⽣器按键功能简介函数信号发⽣器上数码管⽤于显⽰频率,右边有五个LED发光⼆极管,⽤于指⽰当前信号的输出状态(如输出是正弦波还是⽅波、三⾓波)及信号输出频率的单位(如Hz,KHz)。
在正常情况下按“↑”和“→”键可对输出的信号频率进⾏递增/递减操作,步进为100,单位⽰频率指⽰LED⽽定;按“ESC”可进⾏波形的切换;按“Enter”键可进⼊精调模式。
在精调模式中,能看到其中有⼀个数码管或LED在闪烁,表⽰当前的操作位,可通过按“↑”键对其修改;按“→”键可实现右移操作,直到频率值输出完毕,最后可按“Enter”键确定并退出精调模式,实现频率及波形状态的设置;如不想更改当前设置,可按“ESC”键取消设置并退出精调模式。
SIMOCODE ES 编程和操作手册 V15.1 更新 5说明书

SIMOCODE pro Readme V15.1 Update 5 Programming and Operating Manual06/2022Legal informationWarning notice systemThis manual contains notices you have to observe in order to ensure your personal safety, as well as to prevent damageto property. The notices referring to your personal safety are highlighted in the manual by a safety alert symbol, noticesreferring only to property damage have no safety alert symbol. These notices shown below are graded according tothe degree of danger.DANGERindicates that death or severe personal injuryWARNINGindicates that death or severe personal injury may result if proper precautions are not taken.CAUTIONindicates that minor personal injury can result if proper precautions are not taken.NOTICEindicates that property damage can result if proper precautions are not taken.If more than one degree of danger is present, the warning notice representing the highest degree of danger will beused. A notice warning of injury to persons with a safety alert symbol may also include a warning relating to propertydamage.Qualified PersonnelThe product/system described in this documentation may be operated only bypersonnel qualified for the specific task in accordance with the relevant documentation, in particular its warning notices and safety instructions.Qualified personnel are those who, based on their training and experience, are capable of identifying risks andavoiding potential hazards when working with these products/systems.Proper use of Siemens productsNote the following:WARNINGSiemens products may only be used for the applications described in the catalog and in the relevant technicaldocumentation. If products and components from other manufacturers are used, these must be recommended orapproved by Siemens. Proper transport, storage, installation, assembly, commissioning, operation and maintenanceare required to ensure that the products operate safely and without any problems. The permissible ambientconditions must be complied with. The information in the relevant documentation must be observed. TrademarksAll names identified by ® are registered trademarks of Siemens AG. The remaining trademarks in this publication maybe trademarks whose use by third parties for their own purposes could violate the rights of the owner. Disclaimer of LiabilityWe have reviewed the contents of this publication to ensure consistency with the hardware and software described.Since variance cannot be precluded entirely, we cannot guarantee full consistency. However, the information in thispublication is reviewed regularly and any necessary corrections are included in subsequent editions.Siemens AGSmart InfrastructureElectrical ProductsPostfach 10 09 5393009 RegensburgGERMANYⓅ 07/2022 Subject to changeCopyright © Siemens AG 2020.All rights reservedTable of contents1Security information (5)2Information on data protection (7)3Validity (9)4Improvements in SIMOCODE ES (11)4.1Improvements and changes in SIMOCODE ES V15.1 Update 5 (11)Readme V15.1 Update 5Programming and Operating Manual, 06/20223Table of contentsReadme V15.1 Update 5 4Programming and Operating Manual, 06/2022Security information1Siemens provides products and solutions with industrial security functions that support thesecure operation of plants, systems, machines and networks.In order to protect plants, systems, machines and networks against cyber threats, it is necessaryto implement – and continuously maintain – a holistic, state-of-the-art industrial securityconcept. Siemens’ products and solutions constitute one element of such a concept.Customers are responsible for preventing unauthorized access to their plants, systems,machines and networks. Such systems, machines and components should only be connected toan enterprise network or the internet if and to the extent such a connection is necessary and onlywhen appropriate security measures (e.g. firewalls and/or network segmentation) are in place.For additional information on industrial security measures that may be implemented, pleasevisithttps:///industrialsecurity.Siemens’ products and solutions undergo continuous development to make them more secure.Siemens strongly recommends that product updates are applied as soon as they are availableand that the latest product versions are used. Use of product versions that are no longersupported, and failure to apply the latest updates may increase customer’s exposure to cyberthreats.To stay informed about product updates, subscribe to the Siemens Industrial Security RSS Feedunderhttps:///cert.Readme V15.1 Update 5Programming and Operating Manual, 06/20225Security informationReadme V15.1 Update 5 6Programming and Operating Manual, 06/2022Information on data protection2Siemens observes standard data protection principles, in particular the principle of privacy bydesign.For SIMOCODE ES this means:SIMOCODE ES does not process or store any personal data, only technical function data (e.g.time stamps). If you link this data with other data (e.g. shift schedules) or store personal data onthe same storage medium (e.g. hard disk), and thus establish a link to a person or persons, thenyou are responsible for ensuring compliance with the relevant data protection regulations.Readme V15.1 Update 5Programming and Operating Manual, 06/20227Information on data protectionReadme V15.1 Update 5 8Programming and Operating Manual, 06/2022Validity3This update is valid for the following products:•SIMOCODE ES V15.1 Basic•SIMOCODE ES V15.1 Standard•SIMOCODE ES V15.1 PremiumReadme V15.1 Update 5Programming and Operating Manual, 06/20229ValidityReadme V15.1 Update 5 10Programming and Operating Manual, 06/2022Improvements in SIMOCODE ES4 4.1Improvements and changes in SIMOCODE ES V15.1 Update 5•Compiling when using SIMOCODE pro S devices with a baud rate setting of 45.45 kbps now works without errors.•Improvement of the designation of acyclic signals in the parameterization of Ethernet IP devices.•Attribute modifications for the SIMOCODE openness interface.•This update installs the latest version of the TIA Automation License Manager for SIMOCODE ES V15.1.Readme V15.1 Update 5Programming and Operating Manual, 06/202211Improvements in SIMOCODE ES4.1 Improvements and changes in SIMOCODE ES V15.1 Update 5Readme V15.1 Update 5 12Programming and Operating Manual, 06/2022。
小型机工具操作手册
小型机工具操作手册发布:浙江省火电建设公司热机工程公司目录1目的2适用范围3引用文件4职责5小型机工具操作方法5.1角向磨光机5.2电磨5.3手枪电钻5.4磁座钻5.5电动扳手5.1.1.3使用时应仔细检查角磨,如发现有下列情况之一,立即停止使用角磨,并进行调整或到仓库维修、更换。
a) 机体或电线破损;b) 砂轮片有裂纹或破损,外径被磨损到小于2/3时;c) 角磨声音异常或振动、摇摆幅度过大;d) 碳刷被磨损过大,转动不稳定时。
5.1.1.4 操作时,应按规范穿戴工作服、安全帽、防护眼镜(面具)等,避免穿戴宽松、散袖的工作服,不得伸手越过转动的角磨取工具及打磨或切割,且必须有足够的照明。
5.1.1.5 严禁在无砂轮防护罩的情况下进行打磨或切割,严禁用切割片进行打磨工作。
5.1.1.6必须使用有效转速与角磨机最高转速相同的砂轮片。
5.1.1.7 使用完毕或突遇停电及无意地拔出插头时,应立即把开关换至“关”的位置, 并切断电源。
5.1.1.8 在磨削加工之后不要马上用手摸工件,以防烫伤。
注意:对角磨进行调整或更换附件、备件之前,必须将角磨的电源切断!5.1.2.1使用规定的电压:电源电压不超过角磨铭牌上额定电压的10%。
5.122使用前检查:先检查角磨机体、电线及漏电保安器是否完好,再使角磨空转1 分钟,检查角磨的震动幅度是否过大,转动部份是否灵活,有无异常的杂音,换向火花是否正常,砂轮片有无裂纹等。
5.1.2.3固定工件:打磨或切割的工件必须固定牢固。
5.1.2.4 保持正确的姿势:操作时双手紧握机身,集中注意力,保持适当的正确姿势,身体要保持平衡,不得用力推、压角磨,应使它轻轻地和研磨面接触;打磨时,砂轮片与工件打磨面应保持15° ~30°角,只利用砂轮片的圆周表面;切割时,切割片必须垂直工件,且不得摇晃,角磨推动的方向与跑向相反。
5.1.2.5正确装卸砂轮片(如右图):当砂轮片外径小于2/3时,必须更换砂轮片。
南方监测系统SMOS用户使用手册

目录1引言 (1)1.1编写目的 (1)1.2背景 (1)1.3定义 (1)1.4参考资料 (1)2用途 (2)2.1功能 (2)2.1.1GPS模块(外部位移) (2)2.1.2系统日志模块 (2)2.1.3预警模块 (2)2.1.4水位模块 (2)2.1.5气象模块 (2)2.1.6倾斜感应模块 (2)2.1.7干滩模块 (2)2.2性能 (3)2.2.1精度 (3)2.2.2时间特性 (3)2.2.3灵活性 (3)2.3安全保密 (3)2.4运行环境 (3)3软件使用 (3)3.1运行软件 (3)3.2添加设备前的工作 (4)3.2.1注册狗 (4)3.2.2修改狗配置 (5)3.2.3设置解算文件的路径 (6)3.3添加设备 (7)3.3.1添加GPS (7)3.3.2添加物位计(库水位) (9)3.3.3添加雨量计(雨量) (11)3.3.4添加渗压计(单点)(倾斜感应-浸润线/孔隙水压力) (12)3.3.5添加测斜仪(单点)(倾斜感应-深部位移) (14)3.3.6添加测干滩的物位计(干滩) (18)3.4查看信息 (20)3.4.1GPS模块 (20)3.4.2日志模块 (24)3.4.3预警模块 (25)3.4.4水位模块 (25)3.4.5气象模块 (26)3.4.6倾斜感应模块 (26)3.4.7干滩模块 (27)3.5预警管理 (28)3.5.1预警单位及设定值说明 (28)3.5.2预警值设置 (28)3.5.3联系人管理 (30)3.6配置工具 (31)3.7曲线和报表 (33)3.7.1表面位移(GPS) (34)3.7.2孔隙水压力 (36)3.7.3库水位 (38)3.7.4深部位移(组) (38)3.7.5深部位移(单个) (38)3.7.6雨量 (38)3.7.7干滩 (38)3.7.8自动报表设置 (38)3.8其他 (39)3.8.1切换到地图模式 (39)3.8.2切换列表模式背景 (41)3.8.3查看系统信息 (41)3.8.4用户手册 (42)4常见问题及解答 (43)1引言1.1编写目的本文档在一定程度上对SMOS的运行软件进行了说明,能明确得指导各用户正确得使用南方监测系统。
ControlLogix數位I O模組 使用手冊说明书

熱電中插拔 . . . . . . . . . . . . . . . . . . . . . . . . . . . . . . . . . . . . . . . . . . . . . . 37 模組故障報告 . . . . . . . . . . . . . . . . . . . . . . . . . . . . . . . . . . . . . . . . . . . 37 可設定的軟體 . . . . . . . . . . . . . . . . . . . . . . . . . . . . . . . . . . . . . . . . . . . 38 電子鍵控 . . . . . . . . . . . . . . . . . . . . . . . . . . . . . . . . . . . . . . . . . . . . . . . . 38 模組禁止 . . . . . . . . . . . . . . . . . . . . . . . . . . . . . . . . . . . . . . . . . . . . . . . . 39 使用系統時鐘為輸入加上時間戳記及排程輸出. . . . . . . . . 40 生產者/消費者通訊 . . . . . . . . . . . . . . . . . . . . . . . . . . . . . . . . . . . . . 43 狀態指示燈資訊 . . . . . . . . . . . . . . . . . . . . . . . . . . . . . . . . . . . . . . . . . 43
2014-01 MOSAIC Suite 用户快速入门手册V1.2
MOX 中国自动化有限公司
MOSAIC Suite 用户快速入门手册
3.1 示意图组配置对话框介绍 ............................................................................... 49 3.2 示意图分组窗口 ............................................................................................... 49 3.3 指定示意图到对应的组窗口 ........................................................................... 50 4. 示意图编辑器..................................................................................................... 52 4.1 示意图编辑器介绍 ........................................................................................... 52 4.2 绘图范围 ........................................................................................................... 53 4.3 图层的管理 ....................................................................................................... 53 4.4 绘图操作 ........................................................................................................... 55 4.5 工具栏介绍 ....................................................................................................... 57 4.6 基本图形介绍 ................................................................................................... 59 5. 图形关联属性..................................................................................................... 63 5.1 增加基本的属性 ............................................................................................... 63 5.2 动作属性 ........................................................................................................... 71 5.3 事件属性 ........................................................................................................... 76 5.4 属性优先权 ....................................................................................................... 78 6. 单元库编辑器..................................................................................................... 78 7. 单元库关联属性................................................................................................. 80 7.1 添加属性 ........................................................................................................... 80 7.2 单元实体 ........................................................................................................... 81 7.3 配置动态属性 ................................................................................................... 82 第五章 报警系统............................................................................................................. 84 1. 报警系统设置..................................................................................................... 84 2. 添加报警信息表................................................................................................. 84 3. 为设备属性添加属性条件................................................................................. 85 4. 报警查看............................................................................................................. 87 5. 事件查看............................................................................................................. 89 第六章 历史趋势............................................................................................................. 90 1. 定义信号点的历史配置..................................................................................... 90 2. 配置趋势组......................................................................................................... 91 3. 趋势查看............................................................................................................. 93 附:联系方式.......................................................................................................................... 95
SPMXCA200 Smart ESC Programmer 使用说明书

Age Recommendation: Not for children under 14 years. This is not a toy.2ENWARNING: Read the ENTIRE instruction manual to become familiarwith the features of the product before operating. Failure to operate the product correctly can result in damage to the product, personal property and cause serious injury.This is a sophisticated hobby product. It must be operated with caution and common sense and requires some basic mechanical ability. Failure to operate this product in a safe and responsible manner could result in injury or damage to the product or other property. This product is not intended for use by children without direct adult supervision. Do not attempt disassembly, use with incompatible components or alter product in any way withoutthe approval of Horizon Hobby, LLC. This manual contains instructions for safety, operation and maintenance. It is essential to read and follow all the instructions and warnings in the manual, prior to assembly, setup or use, in order to operate correctly and avoid damage or serious injury.3Table of ContentsIn the Box (5)Specifications (5)Functions (5)Features (6)Operating the SMART ESC Programmer (7)Limited Warranty (8)Warranty and Service Contact Information (12)FCC Information (13)IC Information (14)Compliance Information for the European Union (15)45EN SpecificationsIn the Box• Smart ESC Programmer• Instructions• USB Cable•ESC Cable The SPMXCA200 Smart Avian TM & Firma TM ESC programmer allows quick and easy parameter changes and updates to Spektrum Smart speed controls. • Review, adjust and save Smart ESC parameters.• Connect (via USB) to a PC to update Smart ESC firmware and adjust parameters on the Spektrum SmartLink application (see for more information about SmartLink).• Check a LiPo battery’s voltage.FunctionsFeaturesACFA IPS DisplayB Interface ButtonsC USB Port -to connect to a PCD ESC Port -to connect to aSMART ESCEBattery Port -to providepower when the ESC does nothave a built-in BECFBattery Checker Port -con-nect a Li-Po Battery to receivebattery and cell voltages67ENThe SPMXCA200 Smart Avian & Firma ESC programmer is simple to use:1. Connect the Smart ESC’s programming cable to the SPMXCA200 ESC Port.2. Connect a battery to the Smart ESC, then power ON the Smart ESC. The Programmer Box will turn ON and display the firmware version on the screen.3. Press the Select button to connect to the Smart ESC. The Programmer box will read the Smart ESC firmware, connect to the Smart ESC, and display the first programmable setting for the Smart ESC.4. Press the Select , Edit , Reset and Save commands to make changes to theSmart ESC parameters.Operating the SMART ESC ProgrammerLimited WarrantyWhat this Warranty Covers – Horizon Hobby, LLC, (Horizon) warrants to the original purchaser that the product purchased (the “Product”) will be free from defects in materials and workmanship for a period of 1 year from the date of purchase.What is Not Covered – This warranty is not transferable and does not cover (i) cosmetic damage, (ii) damage due to acts of God, accident, misuse, abuse, negligence, commercial use, or due to improper use, installation, operation or maintenance, (iii) modification of or to any part of the Product, (iv) attempted ser-vice by anyone other than a Horizon Hobby authorized service center, (v) Product not purchased from an authorized Horizon dealer, or (vi) Product not compliant with applicable technical regulations or (vii) use that violates any applicable laws, rules, or regulations.OTHER THAN THE EXPRESS WARRANTY ABOVE, HORIZON MAKES NO OTHER WARRANTY OR REPRESENTATION, AND HEREBY DISCLAIMS ANY AND ALL IMPLIED WARRANTIES, INCLUDING, WITHOUT LIMITATION, THE IMPLIED WAR-RANTIES OF NON-INFRINGEMENT, MERCHANTABILITY AND FITNESS FOR A PARTICULAR PURPOSE. THE PURCHASER ACKNOWLEDGES THAT THEY ALONE HAVE DETERMINED THAT THE PRODUCT WILL SUITABLY MEET THE REQUIRE-MENTS OF THE PURCHASER’S INTENDED USE.Purchaser’s Remedy – Horizon’s sole obligation and purchaser’s sole and exclusive remedy shall be that Horizon will, at its option, either (i) service, or (ii) replace, any Product determined by Horizon to be defective. Horizon reserves the right to inspect any and all Product(s) involved in a warranty claim. Service or replacement decisions8are at the sole discretion of Horizon. Proof of purchase is required for all warranty claims. SERVICE OR REPLACEMENT AS PROVIDED UNDER THIS WARRANTY IS THE PURCHASER’S SOLE AND EXCLUSIVE REMEDY.Limitation of Liability – HORIZON SHALL NOT BE LIABLE FOR SPECIAL, INDIRECT, INCIDENTAL OR CONSEQUENTIAL DAMAGES, LOSS OF PROFITS OR PRODUCTION OR COMMERCIAL LOSS IN ANY WAY, REGARDLESS OF WHETHER SUCH CLAIMIS BASED IN CONTRACT, WARRANTY, TORT, NEGLIGENCE, STRICT LIABILITY OR ANY OTHER THEORY OF LIABILITY, EVEN IF HORIZON HAS BEEN ADVISED OF THE POSSIBILITY OF SUCH DAMAGES. Further, in no event shall the liability of Horizon exceed the individual price of the Product on which liability is asserted. As Horizon has no control over use, setup, final assembly, modification or misuse, no liability shall be assumed nor accepted for any resulting damage or injury. By the act of use, setup or assembly, the user accepts all resulting liability. If you as the purchaser or user are not prepared to accept the liability associated with the use of the Product, purchaser is advised to return the Product immediately in new and unused condi-tion to the place of purchase.Law – These terms are governed by Illinois law (without regard to conflict of law principals). This warranty gives you specific legal rights, and you may also have other rights which vary from state to state. Horizon reserves the right to change or modify this warranty at any time without notice.WARRANTY SERVICESQuestions, Assistance, and Services – Your local hobby store and/or place of purchase cannot provide warranty support or service. Once assembly, setup or use of the Product has been started, you must contact your local distributor9or Horizon directly. This will enable Horizon to better answer your questions and service you in the event that you may need any assistance. For questions or assistance, please visit our website at , submit a Product Support Inquiry, or call the toll free telephone number referenced in the Warranty and Service Contact Information section to speak with a Product Support representative.Inspection or Services – If this Product needs to be inspected or serviced and is compliant in the country you live and use the Product in, please use the Horizon Online Service Request submission process found on our website or call Horizon to obtain a Return Merchandise Authorization (RMA) number. Pack the Product securely using a shipping carton. Please note that original boxes may be included, but are not designed to withstand the rigors of shipping without additional protection. Ship via a carrier that provides tracking and insurance for lost or damaged parcels, as Horizon is not responsible for merchandise until it arrives and is accepted at our facility. An Online Service Request is available at /content/service-center_render-service-center.If you do not have internet access, please contact Horizon Product Support to obtain a RMA number along with instructions for submitting your product for service. When calling Horizon, you will be asked to provide your complete name, street address, email address and phone number where you can be reached during business hours. When sending product into Horizon, please include your RMA number, a list of the included items, and a brief summary of the problem.A copy of your original sales receipt must be included for warranty consider-ation. Be sure your name, address, and RMA number are clearly written on the outside of the shipping carton.10NOTICE: Do not ship Li-Po batteries to Horizon. If you have any issue with aLi-Po battery, please contact the appropriate Horizon Product Support office. Warranty Requirements – For Warranty consideration, you must include your original sales receipt verifying the proof-of-purchase date. Provided warranty conditions have been met, your Product will be serviced or replaced free of charge. Service or replacement decisions are at the sole discretion of Horizon. Non-Warranty Service – Should your service not be covered by warranty, service will be completed and payment will be required without notificationor estimate of the expense unless the expense exceeds 50% of the retail purchase cost. By submitting the item for service you are agreeing to payment of the service without notification. Service estimates are available upon request. You must include this request with your item submitted for service. Non-war-ranty service estimates will be billed a minimum of ½ hour of labor. In addition you will be billed for return freight. Horizon accepts money orders and cashier’s checks, as well as Visa, MasterCard, American Express, and Discover cards. By submitting any item to Horizon for service, you are agreeing to Horizon’s Terms and Conditions found on our website /content/ service-center_render-service-center.ATTENTION: Horizon service is limited to Product compliant in the country of use and ownership. If received, a non-compliant Product will not be serviced. Further, the sender will be responsible for arranging return shipment of the un-serviced Product, through a carrier of the sender’s choice and at the sender’s expense. Horizon will hold non-compliant Product for a period of 60 days from notification, after which it will be discarded. 10/1511Warranty and Service Contact Information12ENFCC Information13Supplier’s Declaration of Conformity Spektrum SMART ESC Programmer - SPMXCA200This device complies with part 15 of the FCC Rules. Operation is subject to the following two conditions: (1) This device may not cause harmful interference, and (2) this device must accept any interference received, including interference that may cause undesired operation.CAUTION: Changes or modifications not expressly approved by the party responsible for compliance could void the user’s authority to operate the equipment.NOTE: This equipment has been tested and found to comply with the limits for a Class B digital device, pursuant to part 15 of the FCC Rules. These limits are designed to provide reasonable protection against harmful interference in a residential installation. This equipment generates, uses and can radiate radio frequency energy and, if not installed and used in accordance with the instruc-tions, may cause harmful interference to radio communications. However, there is no guarantee that interference will not occur in a particular installation. If this equipment does cause harmful interference to radio or television reception, which can be determined by turning the equipment off and on, the user is encouraged to try to correct the interference by one or more of the following measures:14IC InformationCAN ICES-3 (B)/NMB-3(B)This device complies with Industry Canada licence-exempt RSS standard(s). Operation is subject to the following two conditions:(1) this device may not cause interference, and (2) this device must accept any interference, including interference that may cause undesired operation of the device.• Reorient or relocate the receiving antenna.• Increase the separation between the equipment and receiver.• Connect the equipment into an outlet on a circuit different from that to which the receiver is connected.• Consult the dealer or an experienced radio/TV technician for help.Horizon Hobby, LLC 2904 Research Rd., Champaign, IL 61822Compliance Information for the European Unionrelevant provisions of the EMC Directive.A copy of the EU Declaration of Conformity is available online at:/content/support-render-compliance. Instructions for disposal of WEEE by users in the European UnionThis product must not be disposed of with other waste. Instead, it is the user’s responsibility to dispose of their waste equipment by handing itover to a designated collections point for the recycling of waste electrical and electronic equipment. The separate collection and recycling of your waste equipment at the time of disposal will help to conserve natural resources and ensure that it is recycled in a manner that protects human health and the environment. For more information about where you can drop off your waste equipment for recycling, please contact your local city office, your household waste disposal service or where you purchased the product.15EN62383。
OMS-50编程使用手册

注意事项z本手册是根据有关数控系统的通常情况编写的。
由于数控机床的生产厂家可能在机床中使用不同的代码或指令,为避免程序运行时可能出现的问题,测量软件必须由合格的专业人员安装,安装人员还应视机床的具体情况决定是否需对软件做适当的调整。
不同的数控系统所使用的测量软件及手册不同。
z在手册的编写过程中,本公司已尽量做到其内容及使用的术语正确,但本公司不对此做任何承诺。
此外本公司保留对手册内容进行适当修改而不事先通知客户的权利。
z手册中使用的示例仅起示范的作用,操作要在进行测量编程时根据机床具体要求进行,不能照抄照搬。
安全注意事项本手册所介绍的测量程序用于控制机床的测量移动,其功能的实现要依赖机床的数控系统。
测量程序所使用的语言是在数控系统所提供的平台上开发的,因此它并不直接控制机床,而是通过数控系统对机床进行控制。
为保障操作者及测头的安全,请务必注意下列事项:1、保证机床的安全防护门在正确的位置并工作正常。
2、确保使用测头时机床的手动绝对开关(MANUAL ABSOLUTE)处于接通(ON)状态。
3、确认测量程序所使用的代码与机床的规定代码一致。
4、确保机床的移动不会导致测头与机床及夹具发生碰撞,更不会危及操作者的人身安全。
5、测头的操作者要熟悉数控系统的编程语言并能熟练操作机床。
6、机床操作者应了解测头硬件状态的判断和故障诊断方法,要求先阅读相关的硬件手册。
目录第一章前言测量软件简介 (5)关于测头的标定 (6)关于刀具补偿 (7)第二章使用测头前要做的几件事2.1用户可设定数据 (8)2.1.1 后退系数#505 (8)2.1.2 设定半径或直径编程 (8)2.2标定测头 (9)2.2.1 X向标定 (10)2.2.2 Z向标定 (14)第三章测量程序的使用 (18)3.1 保护移动程序 (19)3.2 X向单边测量 (21)3.3 Z向单边测量 (24)附录:报警信息及处理方法 (27)第一章前言测量软件简介标准型测量软件由若干个子模块组成,包括以下内容:程序号功能O9010 保护移动子程序O9011 径向(X向)单边测量O9012 轴向(Z向)测量O9018 径向(X向)单边标定O9019 轴向(Z向)标定O9621 ,O9622 , O9623 ,O9624为下级子程序,用户不能直接调用。
MASTERBOOK

4
按产品的要求,来选择产 品的放臵视图。如:三视 图
2
在左上图通过滚动条进行产品形状 的选择。(基本形状的选择)
5
将零件配臵在 CAD中。
12
B2-4.导出通用格式数据,应用在其他软件中
如果没有使用AutoCAD、Pro/E、UG这些设计软件,也可以使 用Mold EX-Press导出IGES、STEP、SAT、DWG和DXF来对 应各种3D、2D设计软件。
20
C1-7. 通过输入零件代码轻松找到零件(高级检索2)
对于已知MISUMI编号的产品,如需导出零件3D图形,只需在 检索栏中输入零件代码,即可快速的找到零件。但是不能将参 数同时输入。
3
但是只能输入产品型号 例:SWM。
返回
1
打开高级检索。 4
1
1、点击“工具”-“加载 应用程序”,(或直接输入 命令APPLOAD)出现以下界 面
4
4、点击“添加”,在“启动 组列表”列表中出现 MsmControler.arx,如图所 示;
2 2、点击“启动组”里面的 “内容”按钮,出现“启动 组列表”界面; 5、然后点击“关闭”即完成添加 。
6
A5. 安装软件后,AutoCAD运行变慢 返回
2
在左上图通过滚动条进行产品形状 的选择。(基本形状的选择)
部品数量: 12
15
C1-2. . 选用C-value高性价比产品(按照品牌检索)
客户更想使用性价比较高的产品,也会提出这样的期望,我们 接受了客户的要求,于2011年4月开始, MISUMI开发了一款低 于现存品近一半的新品, 称为C-VALUE品牌的产品进行销售, 还请选购。
3
对于「C-VALUE」完全不了解的话, 点击“C-VALUE?”按钮,有专门的 说明PDF资料进行解释。
Mac Tools 移动工具箱说明书

9ASSEMBLY INSTRUCTIONSFIG. 1Mount the push handle (#9) to the same side of the cart as the locking casters, using the four bolts provided.Read and understand all instructions. Failure to follow all instructions listed below, may result in electric shock, fire, explosion and/or serious personal injury. It is the responsibility of the owner to make sure all personnel read this manual prior to using the tool. It is also the responsibility of the tool owner to keep this manual intact and in a convenient location for all to see and read. If the manual or product labels are lost or not legible, contact Mac Tools for replacements. If the operator is not fluent in English, the product and safety instructions shall be read and discussed with the operator in the operator's native language by the purchaser/owner or his designee, making sure that the operator comprehends its contents.MB327UCFD/BK/BL/LG/ORDeluxe 32" 7 Drawer CartFig 1.TROUBLESHOOTING MB327UCFD/BK/BL/LG/OR Deluxe 32" 7 Drawer CartPARTS LIST AND PARTS DRAWING I tem No.Part No. No. Req'd Description1 RS327RCP 1 Cord Rubber Protector2 RS327PSK 1 Power Strip Kit3 MB327LIDR 1 Lid - RedMB327LIDBK 1 Lid - BlackMB327LIDBL 1 Lid - BlueMB327LIDLG 1 Lid - Lime GreenMB327LIDOR 1 Lid - Orange4 RS327LMR 1 Lock Mechanism - RedRS327LMBK 1 Lock Mechanism - BlackRS327LMBL 1 Lock Mechanism - BlueRS327LMLG 1 Lock Mechanism - Lime GreenRS327LMOR 1 Lock Mechanism - Orange5 RS327TML 1 PVC Top Mat6 RS327GPC 2 Gas Piston - ChromeRS327GPBK 2 Gas Piston - Black7 RS190UCPBT 3 Pry Bar Holder8 ** 1 PVC Liner for Top Compartment9 RS327PHKS 1 Push Handle w/Hardware - SilverRS327PHKBK 1 Push Handle w/Hardware - Black10 1 Cart Frame11 RSSWLCSBK 2 5"x2" Swivel Locking Caster - BlackRSSWLCS 2 5"x2" Swivel Locking Caster - Chrome Plated12 * 16 Spacer (8.5x1.5)13 * 16 Spring Spacer (8.5x1.5)14 * 16 Hex Screw (M8x16)15 RS403UCLB 1 Safety Bumper (4pc Set)16 RS32718RBS 8 Roller Bearing Slides (18") (pair)17 RSSWCSBK 2 5"x2" Swivel Non-Locking Caster - BlackRSSWCS 2 5"x2" Swivel Non-Locking Caster - Chrome Plated 18 MB3277DR 1 7" Drawer - RedMB3277DBK 1 7" Drawer - BlackMB3277DBL 1 7" Drawer - BlueMB3277DLG 1 7" Drawer - Lime GreenMB3277DOR 1 7" Drawer - Orange19 MB3274DR 4 4" Drawer - RedMB3274DBK 4 4" Drawer - BlackMB3274DBL 4 4" Drawer - BlueMB3274DLG 4 4" Drawer - Lime GreenMB3274DOR 4 4" Drawer - Orange20 RS327ADPBK 7 Alum Drawer Pull - BlackRS327ADPS 7 Alum Drawer Pull - Silver21 ** 7 PVC Drawer Liners22 MB3273DR 2 3" Drawer - RedMB3273DBK 2 3" Drawer - BlackMB3273DBL 2 3" Drawer - BlueMB3273DLG 2 3" Drawer - Lime GreenMB3273DOR 2 3" Drawer - Orange23 RS327LKBK 1 Lock with Keys- BlackRS327LKS 1 Lock with Keys - Silver Only item number's identified by part number are available separately.Also Available:RSMB327UCFDPLK Product Label Kit* RS89UCCB Caster Hardware Kit Chrome (16 each hex bolts M8x16,spring washers, flat washers)RS89UCCBBK Caster Hardware Kit Black (16 each hex bolts M8x16,spring washers, flat washers)** RS3278LK 8pc PVC Liner Kit (incl #8 & #21Problem: Drawers appear not to fit, do not slide in accurately and bump the cart sides.Solution: The roller bearing slides must be fully engaged into the mounting slots on all drawers. They potentially could fall out of position in shipment or during assembly. Remove the drawer that is out of position. The drawer is removed by the two clips on the roller bearing slides. Simply push the roller bearing slide back down into position.Insert the drawer back onto the roller bearing slides.。
MOC流程

只供内部使用MOC信令流程1. 文档控制1)2)3)文档发行范围目录1引言 (5)1.1 编写目的 (5)1.2 预期读者和阅读建议 (5)1.3 文档约定 (5)1.4 参考资料 (5)1.5 缩写术语 (5)2MOC Signaling flow (6)2.1 MOC SIGNALING FLOW (6)2.2 M ESSAGE CONTENTS (9)2.2.1 RRC Connection Request (9)2.2.2 Radio Link Setup Request (9)2.2.3 Radio Link Setup Response (13)2.2.4 RRC Connection Setup (14)2.2.5 RRC Connection Setup Complete (20)2.2.6 Initial Direct Transfer(CM Service Request) (21)2.2.7 CM Service Request (22)2.2.8 CM Service Accept (24)2.2.9 Downlink Direct Transfer(CM Service Accept) (25)2.2.10 Uplink Direct Transfer(Setup) (25)2.2.11 Setup (26)2.2.12 Call proceeding (28)2.2.13 RAB Assignment Req (29)2.2.14 Downlink Direct Transfer(Call proceeding) (31)2.2.15 RL Reconf Prepare (32)2.2.16 RL Reconf Ready (38)2.2.17 RL Reconf Commit (39)2.2.18 Radio Bearer Setup (40)2.2.19 Radio Bearer Setup Complete (46)2.2.20 RAB Assignment Res (46)2.2.21 Alerting (47)2.2.22 Downlink Direct Transfer( Alerting ) (48)2.2.23 Connect (49)2.2.24 Downlink Direct Transfer( Connect ) (50)2.2.25 Uplink Direct Transfer( Connect Ack ) (50)2.2.26 Connect Ack (51)3Release ( by Network ) signaling flow (52)3.1 R ELEASE ( BY N ETWORK ) SIGNALING FLOW (52)3.2 M ESSAGE C ONTENTS (53)3.2.1 Direct Transfer( Disconnect ) (53)3.2.2 Downlink Direct Transfer( Disconnect ) (54)3.2.3 Uplink Direct Transfer( Release ) (54)3.2.4 Direct Transfer( Release ) (55)3.2.5 Direct Transfer( Release Complete ) (56)3.2.6 InitiatingMessage( Iu-Release Req ) (57)3.2.7 SuccesfulOutcome( Iu-Release Res ) (57)3.2.8 Released (58)3.2.9 Release Complete (59)3.2.10 Downlink Direct Transfer( Release Complete) (59)3.2.11 RRC Connection Release (59)3.2.12 RRC Connection Release Complete (60)3.2.13 InitiatingMessage( Radio Link Del Req ) (60)3.2.14 SuccesfulOutcome ( Radio Link Del Res ) (61)4Release ( by UE ) signaling flow (62)4.1 R ELEASE ( BY UE) SIGNALING FLOW (62)4.2 M ESSAGE C ONTENTS (63)4.2.1 Uplink Direct Transfer ( Disconnect ) (63)4.2.2 Direct Transfer ( Disconnect ) (63)4.2.3 Direct Transfer ( Release ) (64)4.2.4 Downlink Direct Transfer ( Release ) (65)4.2.5 Uplink Direct Transfer ( Release Complete ) (66)4.2.6 Direct Transfer ( Release Complete ) (66)4.2.7 InitiatingMessage ( Iu-release Req ) (67)4.2.8 SuccesfulOutcome ( Iu-release Res ) (68)4.2.9 RRC Connection Release (68)4.2.10 Released (69)4.2.11 Release Complete (69)4.2.12 RRC Connection Release Complete (70)4.2.13 InitiatingMessage ( Radio RL Del Req ) (70)4.2.14 SuccesfulOutcome ( Radio RL Del Res ) (71)大唐移动通信设备有限公司文档名称文档编号1 引言引言提出了对本文档的纵览,帮助读者理解该文档的编写目的,适用的读者,参考资料,术语解释等等。
摩卡业务服务管理快速开始手册 V7.3.2

Mocha BSM Quick Start V7.3.2 摩卡业务服务管理快速开始手册 V7.3.2编号 (Doc No.):MOP-BSM-Start日期 (Date):2009.08目录第一章、手册导读 (1)第二章、安装和使用 (1)2.1前提 (1)2.2安装 (2)2.3注册L ICENSE (3)2.4启动服务 (3)2.5登录系统 (3)2.6注册系统组件 (4)第三章、发现网络拓扑 (7)第四章、发现资源 (11)第五章、查看资源 (11)5.1查看资源详细信息 (12)5.2查看资源事件 (14)53查看资源报警 (16)第六章、设置资源监控 (17)6.1资源如何被监控 (17)6.2修改资源的监控设置 (17)第七章、报表报告 (20)7.1创建报表 (21)7.2订阅报表 (21)7.3定制综合报告 (21)第八章、业务服务 (22)8.1创建服务 (22)8.2查看服务 (24)第九章、用户和权限 (28)9.1标准版用户和权限 (28)9.2企业版用户和权限 (30)第一章、手册导读本手册将引导用户快速安装并开始使用Mocha BSM。
手册中只涉及了必要的部分,关于更多功能的详细介绍请参见《摩卡业务服务管理安装手册.pdf》、《摩卡业务服务管理系统管理员手册.pdf》。
产品简介Mocha BSM是一款强大的网络监控软件。
可监控的范围包括:网络拓扑、网络设备(交换机、路由器、防火墙、无线AP等)、存储设备、服务器(Windows/Unix)、应用(Database、J2EE Server、Web Server、Mail Server、中间件等)、标准服务(DNS、FTP、NTP、Telnet、URL等)。
您想要做什么?安装并使用Mocha BSM ( 详见第二章)发现网络拓扑( 详见第三章)发现资源( 详见第四章)查看资源 ( 详见第五章)修改资源监控设置( 详见第六章)创建报表和报告 ( 详见第七章)监控业务服务( 详见第八章)设置用户权限( 详见第九章)第二章、安装和使用Mocha BSM分为标准版和企业版。
Magics使用说明书
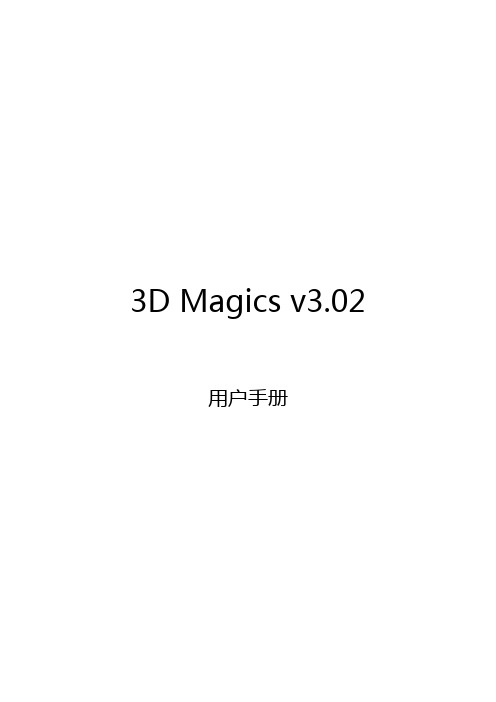
4.4.1 零件概况及自动排列 ........................................................................................................................... 27 4.4.2 移动、旋转 ............................................................................................................................................ 27 4.4.3 指定顶面/底面 ...................................................................................................................................... 28
2
1 配置环境
4.1 配置规格表
输入接口格式 INTERFACE OF INPUT
标准接口格式
STL 文件(*.stl)
支持接口格式
STEP 文件(*.stp/step) IGES 文件(*.igs/iges)
3dmagicsv302用户手册目录1配置环境341配置规格表342显视优化42安装和注册63模块说明74使用说明841菜单8411文件8412工作台15413帮助1542模式栏17421加载模型项目17422卸载模型17423模型基础信息18424修复模型19425生成支撑21426卸载项目模型2343工具栏24431模型运动控制24432视图缩放分栏24433视图选择分栏25434平台移动工具分栏25435测量工具分栏2644信息栏27441零件概况及自动排列27442移动旋转27443指定顶面底面2845支撑参数详解29451公共29452基础支撑31453支架支撑32454点支撑33455辅助支撑3421配置环境41配置规格表输入接口格式interfaceofinput标准接口格式stl文件
磨石排版系统使用说明
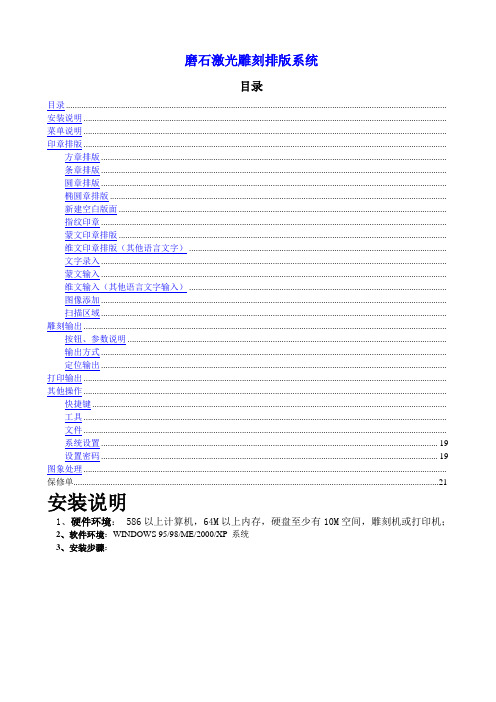
目录1
安装说明2
菜单说明3
印章排版4
方章排版4
条章排版5
圆章排版6
椭圆章排版7
新建空白版面8
指纹印章8
蒙文印章排版8
维文印章排版(其他语言文字)9
文字录入10
蒙文输入12
维文输入(其他语言文字输入)12
图像添加13
扫描区域13
雕刻输出14
按钮、参数说明14
输出方式15
定位输出16
打印输出17
其他操作18
存坐标:将当前位置存放在位子库中;
提取坐标:从坐标库中提取已存的坐标,作为当前位置;
返回:返回到排版界面,并不影响雕刻输出;
阳模、阴模:印章的两种样式,选择需要的模式,默认为阳模;
正字、反字:输出后为正字或反字,默认为反字;
雕刻速度:激光头移动的速度1..999;
扫描间隔:相同情况下,间隔越大雕刻时间越短,但雕刻精度越差;
指纹印章
在印章的五角星上,添加指纹,印章带有个人识别信息;
制作方法:
1、用扫描仪以单色方式将指纹扫描进计算机中,并以单色位图存放于BMP文件;
2、编排印章;
3、添加五角星,如已有可跳过此步;
4、添加指纹图像;
5、选择菜单—图像—微调工具,将添加的图像移动到五星上;
6、选择图像的“附加图像”一项;
7、调节图像的大小、位置,使其符合条件。
类型:它将影响输出时扫描区域的类型;
扫描区域:默认比版面大2毫米。
按钮、参数说明
雕刻输出:定位后转换数据,输出到雕刻机;
重新输出:再次输出上一次雕刻的数据;
停止雕刻:当雕刻正在进行时可用,因为雕刻机有缓存,所以这里只是停止向雕刻机输出数据,但雕刻机并不立即停止雕刻;
- 1、下载文档前请自行甄别文档内容的完整性,平台不提供额外的编辑、内容补充、找答案等附加服务。
- 2、"仅部分预览"的文档,不可在线预览部分如存在完整性等问题,可反馈申请退款(可完整预览的文档不适用该条件!)。
- 3、如文档侵犯您的权益,请联系客服反馈,我们会尽快为您处理(人工客服工作时间:9:00-18:30)。
MOCS工具操作手册国民油井钻井/修井事业部是世界上最大的井下工具和设备独立供应商。
我们拥有专业的技术来优化BHA选择和性能,支持全球超过80个国家,150多个地区。
我们拥有完整的井下钻柱组合解决方案及相关工具,主要包括:• 钻头• 钻井马达• 井眼扩大器• 钻井工具及相关产品• 取芯服务• 打捞工具• 修井及完井工具• 车间服务设备• 先进的钻井方案我们以提供高性能和高可靠度产品为荣。
我们的目标是始终领先客户的需求,提高客户的经济效益,成为客户策略不可或缺的一部分。
前言国民油井多次开关循环堵漏短节(MOCS)允许钻井液在工具处向环空或通过BHA向钻头流动间无限次转换。
这种投球激活的工具被证明可以为许多条件下的应用带来附加价值的一款工具。
技术规格过流面积和球尺寸可根据需要进行更换。
-1- 当钻井液密度等于8.3磅/加仑-2- 工具内没有投球-3- 流向环空,而不会流向MOCS工具下的BHA-4- 流过钻头-5- 一种高温度密封装置可将耐温提高至450°F-6- 可使用1.44”球-7- 可使用2.25”球-8- 可使用2.38”球-9- 当钻井液密度等于8.3磅/加仑可夹持部位和操作说明大钳/链钳可夹持区域见下图。
只允许在工具的上部和下部接头处施加扭矩。
不能对MOCS工具内部连接处施加额外的扭矩。
禁止卸开工具内部连接扣。
在现场对这些内部连接进行卸扣可能会引起人身伤害。
定义MOCS工具通过一次投球来激活;未投球前工具是不能进行转换的。
MOCS工具两种转换位置为:•旁通模式– MOCS将钻柱内所有流体传递至环空。
没有流体流向钻头。
•非旁通模式– MOCS工具将所有流体向下传递至钻头。
装配和布置MOCS在钻柱中的位置取决于BHA和应用要求。
施工前,需要客户提交一份“施工前调查表”。
NOV将这些数据输入到MOCS Hydraulics软件进行计算。
软件得出的报告会给出MOCS工具在旁通和非旁通模式下立管压力的差别,这样NOV就可以根据实际应用情况进行优选,以达到最佳效果。
注意:MOCS工具以上所有工具的内径必须大于投球至少1/8”,以保证球能顺利到达MOCS工具。
如果还有其他需要投球的工具存在,在投球前必须进行确认。
地面测试在MOCS工具入井前,NOV推荐在地面进行快速测试,以保证工具工作正常:1. 将MOCS工具连接到钻柱上,并上好扣2. 在将MOCS下放过转盘面之前,调整工具外孔方向,并下放至转盘面以下1英尺,钻台上任何人不能与工具外孔在一条线上。
3. 开泵,排量提升至正常钻进时排量,确保MOCS工具下钻前没有流体从外孔流出。
如果在测试期间在外孔处发现有泄漏,那该工具就不适合入井,选用备用的MOCS工具入井。
返回发现有泄漏的工具进行检查。
工具激活排量激活排量定义为使MOCS工具发生转换的最小排量。
为了使MOCS工具转换至旁通和非旁通模式,需要排量达到或超过该排量值。
为保持MOCS目前所处的位置,必须保持该排量。
激活排量受泥浆比重影响。
下表显示的是不同尺寸MOCS工具的激活排量。
注意:该表没有考虑泥浆泵的效率,所以实际应用中要比推荐值增加10%。
剪切销钉根据MOCS水力计算软件得出的参数报告,可以根据情况在MOCS工具内安装一个剪切销钉。
对于大排量的情况,剪切销钉可防止在球没到位前MOCS提前激活。
剪切销钉在近激活排量时剪切(假设已经投球)。
所有带销钉的MOCS工具在被激活后,必须返回NOV车间进行检修。
对于排量和立管压力都比较有限的情况,可以不安装剪切销钉,以保证工具能进行转换。
标准结构MOCS工具激活程序步骤1:非激活模式当MOCS工具入井后,在未投球前,其处于非激活模式。
在投球前,正常钻进,没有特殊考虑;MOCS此时的作用类似于钻铤。
MOCS工具外径上的旁通孔关闭,流体直接流至钻头。
当需要激活工具时,在投球前,提升泵排量至激活排量,记录立管压力。
步骤2:转换至旁通模式当第一次需要转换至旁通位置时,按如下步骤来激活MOCS工具:1. 将球通过钻柱投入;2. 泵送球至MOCS工具上。
当球下行至中途时,降低排量至低于200gpm,以保证球座不会发生损坏。
3. 当球成功坐到位后,立管压力会明显增加75psi或更高。
为了能将MOCS工具转换至旁通位置,提高泵排量等于或高于激活排量。
当发现立管压力明显下降,就说明成功转换至旁通模式(一定要观测到该立管压力变化)。
立管压力的下降,是因为旁通位置是MOCS工具流动面积最大的时刻。
步骤3:转换至非旁通模式当MOCS工具处于旁通模式,需要转换至非旁通模式,停泵至少60秒。
这会使MOCS工具进入重置位置。
重置位置定义:MOCS工具在旁通和非旁通位置之间转换时的中间位置。
当停泵或者排量非常低(低于100gpm)时,就进入重置位置。
、60秒钟后,提高泵排量至激活排量或更高。
会发现立管压力上升,证明MOCS工具进入非旁通模式。
旁通和非旁通模式之间立管压力的差值应该跟MOCS水力学计算软件得出的值相近。
如果要继续钻进,必须先将MOCS工具转换至非旁通模式。
如果BHA的压降很小,而钻头的过流面积很大,那么旁通和非旁通之间的压差就很小,很难确定。
在这种情况下,NOV将在MOCS工具上安装一个喷嘴,以保证在地面能够观测到一个至少250psi的立管压力信号。
因此,在工具入井前的检查表是非常重要的。
MOCS工具结构MOCS工具有不同的转换结构,不同的转换结构在旁通和非旁通之间转换时的转换顺序不同。
1:1 -- 1旁通/1非旁通结构这是标准的转换结构,本文中描述的就是这种结构。
每次停泵就会发生旁通/非旁通的转换。
•旁通开泵•重置位置停泵•非旁通开泵•重置位置停泵•重复上述步骤3:1 – 3旁通/1非旁通结构每次非旁通位置都经历3次旁通位置。
•旁通开泵•重置位置停泵•旁通开泵•重置位置停泵•旁通开泵•重置位置停泵•非旁通开泵•重置位置停泵•重复上述步骤2:2 – 2旁通/2非旁通结构这种结构是在转换至下一种模式前,当前模式都要连续经历2次。
•旁通开泵•重置位置停泵•旁通开泵•重置位置停泵•非旁通开泵•重置位置停泵•非旁通开泵•重置位置停泵•重复上述步骤如果MOCS工具位于内径小于球外径+1/8”的钻柱以下时,必须在地面度MOCS工具进行激活。
注意:每次接单根的时候,都要将MOCS工具转换至非旁通模式;当球已坐至MOCS工具上,停泵或将泵排量降至低于75gpm。
如果想继续钻进,必须将MOCS工具转换至非旁通模式。
操作注意事项转换时注意记录立管压力当MOCS处于旁通和非旁通状态时,记录立管压力SPP很重要,因为这将直接反映工具处于何种状态:•当立管压力SPP下降,说明MOCS处于旁通模式•当立管压力SPP上升,说明MOCS处于非旁通模式钻进时接单根钻进时,MOCS必须处于非旁通位置,以保证泥浆全部流过钻头。
如果钻井和循环过程中必须停泵接单根,需执行如下程序:1. 停泵。
MOCS处于重置模式下。
2. 接单根3. 开泵,以等于或高于激活排量循环至少60秒。
这将会使MOCS转换至旁通模式,这将不能用于正常钻进。
记录此时的立管压力。
4. 停泵至少60秒。
5. MOCS进入重置模式。
6. 开泵,提高排量等于或高于激活排量。
这将使MOCS转换至非旁通模式。
此时记录的立管压力SPP应高于此前记录的立管压力,说明MOCS进入非旁通模式,恢复到正常钻进状态。
旁通模式的最小排量为了使MOCS进入旁通位置,排量应达到或超过激活排量。
进入旁通模式以后,可以适当降低排量(如下述所示)也会保持在旁通位置。
如果不能保证最小排量达到如下要求,MOCS将会转换回RESET位置。
如下的信息可以用作是MOCS防止进入RESET模式的检测方法:•如果是泵入泥浆,排量仅可以降低至激活排量的90%•如果是泵入堵漏材料,由于其相对较高的密度,排量可以降低至激活排量的80%恢复至非激活模式如果需要重新恢复井筒的内径,必须使用电缆打捞磁铁将球取出。
该磁铁具有一个¾”的抽油杆公扣接头。
取出球后,MOCS的环空阀孔保持在关闭状态。
该磁铁与MOCS工具(包括2个球)一同发送至井场。
注意:磁铁上的发货标牌在入井前必须取掉。
地面取球当MOCS出井后,按照如下程序来取出球。
如果MOCS工具垂直放置:•连接打捞磁铁至磁铁提升杆•将连接好的磁铁通过MOCS工具母扣端放入,捞住球。
•将磁铁和球提出MOCS工具。
如果MOCS工具必须放平:•将MOCS放平,注意MOCS工具母扣端不能正对人•用一根杆子,从MOCS工具底部将球捅出。
注意:在取球的时候人身体的任何部位都不要暴露在母扣端。
MOCS工具起出后再次入井如果下述内容没有发生的话,MOCS工具可以继续入。
如果发生以下内容,MOCS工具必须返回NOV车间进行检修:•通过MOCS泵入堵漏材料•MOCS工具上安装了剪切销钉,且投球激活了工具•如果MOCS工具出井后,放置了超过了3天如果MOCS工具没有经历如上述情况,其可以再次入井,直至达到工具的使用寿命(见下表)注意:如果不按照这些手册进行操作,可能会引起工具故障或者当大排量循环时导致MOCS工具发生钻井液漏失的情况。
温度和转速对MOCS工具使用寿命的影响下图显示的是基于井下温度和钻柱转速的钻井液循环通过MOCS的最大使用寿命。
如果钻井方案超过了图中情况(例如:175RPM,300小时),就不推荐在这种环境下下入MOCS工具。
堵漏材料程序重要提示:当泵入堵漏材料时,MOCS工具不能处于非旁通模式下。
因为这将会使MOCS以下的工具暴露在堵漏材料中,将会给BHA和/或钻头带来高的损坏风险。
必须保证80%或更高的液流从旁通流出,否则会弄脏BHA。
推荐采用如下的步骤,以确保堵漏材料远离MOCS以下的BHA工具(见如下图示)1. 按照循环堵漏材料的排量进行正常的钻井液循环,记录立管压力。
2. 激活MOCS工具,转换至旁通位置。
3. 当MOCS确认是旁通模式后,同时开启阀B/关闭阀A(见下图)。
如果同时操作不允许的话,保持两个阀都开启,然后关闭阀A。
4. 此时可以泵入堵漏材料进入环空了。
5. 如果不再需要泵入堵漏材料了,继续泵入干净的钻井液,直到堵漏材料被完全替出钻柱为止(或进行一个循环周的循环)。
6. 继续泵入常规钻井液,关闭阀A;然后关闭阀B(见下图)。
如果在泵入堵漏材料的过程中发生意外的停泵(或者是排量低于激活排量的80%),按如下步骤操作:1. 如果泵还没有完全停,停掉泵。
2. 关闭阀B,同时开启阀A。
这将防止更多的堵漏材料进入钻柱3. 重新开泵,达到激活排量。
这将使MOCS工具转换至非旁通模式。
4. 停泵至少60秒,然后再开泵至激活排量。
这将转换MOCS工具恢复至旁通模式。
5. 当确认MOCS工具进入旁通模式后(立管压力明显降低),关闭阀A,同时开启阀B,以允许堵漏材料继续进入管柱。
