Supplier Info Shortcut 2011 Camshaft
PICS2011年发布的最新SMF模板

PHARMACEUTICAL INSPECTION CONVENTIONPHARMACEUTICAL INSPECTION COOPERATIONSCHEME药品检查协定和药品检查合作计划组织PE 00841 Annex1 January 2011PE 0084附件一2011年1月1日EXPLANATORY NOTES FOR PHARMACEUTICAL MANUFACTURERS ON THE PREPARATION OF A SITE MASTERFILE制药工厂现场主文件编写说明Editor/编著: PIC/S Secretariatemail/邮箱: info@web site/网站: TABLE OF CONTENTS目录1 Document History/文件历史 (2)2 Introduction/简介 (2)3 Purpose/目的 (2)4 Scope/范围 (3)5 Content of Site Master File/现场主文件内容 (3)6 Revision History/修订历史 (3)1 DOCUMENT HISTORY 文件历史2 INTRODUCTION 简介2.1 T he Site Master File is prepared by the pharmaceutical manufacturer and should contain specific information about the quality management policies and activities of the site, the production and/or quality control of pharmaceutical manufacturing operations carried out at the named site and any closely integrated operations at adjacent and nearby buildings. If only part of a pharmaceutical operation is carried out on the site, a Site Master File need only describe those operations, e.g. analysis, packaging, etc.现场主文件是由制药厂家编写,并包含以下信息:质量管理方针及现场活动、在对在指定现场进行生产或/和对在指定现场的制药生产操作进行的质量控制以及在临近及附近建筑内进行的一体化操作。
惠普彩色激光打印机 Pro M454 和惠普彩色激光多功能一体机 Pro M479 维修手册说明书
Table -1 Revision history Revision number 1
Revision date 6/2019
Revision notes HP LaserJet Pro M454 HP LaserJet Pro MFP M479 Repair manual initial release
Additional service and support for HP internal personnel HP internal personnel, go to one of the following Web-based Interactive Search Engine (WISE) sites: Americas (AMS) – https:///wise/home/ams-enWISE - English – https:///wise/home/ams-esWISE - Spanish – https:///wise/home/ams-ptWISE - Portuguese – https:///wise/home/ams-frWISE - French Asia Pacific / Japan (APJ) ○ https:///wise/home/apj-enWISE - English ○ https:///wise/home/apj-jaWISE - Japanese ○ https:///wise/home/apj-koWISE - Korean ○ https:///wise/home/apj-zh-HansWISE - Chinese (simplified)
Find information about the following topics ● Service manuals ● Service advisories ● Up-to-date control panel message (CPMD) troubleshooting ● Install and configure ● Printer specifications ● Solutions for printer issues and emerging issues ● Remove and replace part instructions and videos ● Warranty and regulatory information
SolidCAM_2011_Whats_new_Presentation(学习资料)

Tool path editor
• Tool path editing to remove any unneeded moves
Toolbox - Slot strategies
• Simple slot • Closed slot • Spine slot • Spiral open slot • Spiral open slot wide • Spire closed slot wide
Toolbox - Spiral strategies
Toolbox cycles
• New Toolbox operation • Slot strategies • Spiral strategies • General strategies
Toolbox operation
• Slot strategies • Spiral strategies • General strategies
Mill-Turn Stock definition
• Single dialog box for the stock model definition
• Extended functionality for the stock model definition:
• Cylinder • Box • Extruded boundary • Revolved boundary • 3D Model • STL
• GUI improvements • Modify geometry • Thread standards • Number of starts
开发技转作业流程SOP

全套手剪确认
1.收到大中小试穿结果. 2.级放分段表发出. 3. 会后 24H 内,客人及内部 报告发出.
斩刀试做
10天
斩刀试做确认
会后 24H 内,客人及内部报告 需发出 会后4H时内发出:是否有材 料加工方式变更的MAIL。
前导试做
7天
前导试做确认
会后24H内,客人/内部报告需 发出
说明书/流程挂板发出
开发作业流程
R1试版 (发单时CC技转一份)
试版会议(开发主导)
R1生产并出货
开发主导
42天
R1 Sample Review
R2试版 (发单时CC技转一份)
试版会议(开发主导)
R2生产并出货
开发将R2 LIST发给技转。 技转提供初步流程给IE计算 产能
100天
开发主导
R2 Sample Review
2天
技转新订单审查
开发发出销样 LIST给技转, 对 于试做型体 :1: 需将技转试做 的需面料与销样一并调回 .2: 提供销样确认鞋给技转. 技转发出需试做型 体LIST给开发
25天
接销样订单
销样生产&基本码试作同步进行
开发发单(试做型体需多发2.5 双并CC技转) M’S9#/W’S7# / K’S 3.5 Y’S13# / I’S 7# / C’S 2#/ UNISEX 5#
M’S:9#/11#/13#, W’S:7#/9#/11# K’S: 3.5#/5#.I’S: 5#/7#/9#. Y’S/J’S:11#/13#/2#, C’S1#/2#/3#. UNISEX:3.5#/5#/9#/11#/13#
7天
大中小(含试穿鞋)确认
全套手剪试做
CabinetVisionFeatureComparsion2011

/
Page 5 of 20
模組說明 Render Textures 塗彩+材質 Drawings 繪圖功能 Architectural Door Hinging 建築門鉸鏈 Elevation Cross Sections 立面圖混合剖面圖 Straight and Angled Walls 直線和角度牆面 Peninsula Walls 半島式牆面 Windows 窗 Doors 門 Wall Dimension Adjustments 調整牆尺寸 Modify Window and Door Size 調整窗和門的尺寸 Change Wall Texture 更改門材質 Automatic Wall Angle Calculator 自動計算門角度 Preview Assemblies Prior to Placement 配置圖中預視優先零組件功能 Create and Edit Floors 建立/編輯 樓板 Cathedral & Vaulted Walls 圓拱形大教堂牆面 Auto-Fill Cabinets 自動充滿產生櫥櫃 Curved Walls 弧形牆面 Custom Catalog Assemblies 組裝使用者之型錄 Stock Pricing Catalogs 庫存定價之型錄 Change Name 更名 Full Sizing Control 全部尺寸控制 Change Door Hinging 更改門鉸鏈 Modify Assembly Price 修改組裝價格 Modify Part Size & Position 修改板件零組件尺寸及位置 Modify Assembly Interior and Exterior Finish 修改內/外部組裝後完成品 Mutliple Toe Kick Types 多樣踢腳板樣式 Full Section Control 完全層板控制 Partition Location 隔層板位置 Add, Delete & Move Roll Outs 增加、刪除及搬移內置式小抽屜 Add, Delete & Move Shelves 增加、刪除及搬移層板架 Change Drawer Dimensions 更改抽屜尺寸 Change no. of Drws in Bank 更改抽屜圖庫的編號 Change Door & Drw Overlays 更改櫥櫃門板及抽屜外罩 Define Door & Drw Per Opening 定義櫥櫃門板及抽屜打開方式 Change Face Frame Joints 更改面板框架接頭 Full Positional Control 完全以空間位置控制 Full Rotational Control 完全以旋轉控制 Copy & Paste Assemblies 複製及貼上配件 Place Assemblies 擺設配件
LucidShape CAA Base Module商业说明说明书

PRODUCT FEATURESBase Module Key CapabilitiesFlexible Modeling FeaturesIn the LucidShape CAA Base Module, you can use geometry generated in theLucidShape CAA Design Module, geometry directly created through CATIAfunctionality, or imported geometry. You can then insert light sources andsensors, assign, create, and edit materials and media using a materials/medialibrary, and define simulation settings and analysis preferences. The BaseModule is a prerequisite for all other LucidShape CAA modules.LucidShape CAA functionality is accessible in a variety of ways. Thefunctionality is included in a specific LucidShape workbench, but can also bedirectly accessed through LucidShape CAA toolbars and menus from otherworkbenches such as the Generative Shape Design, Part Design, and Assemblyor Product workbenches. You can easily customize the software to bestsupport your individual workflows and speed the modeling process.LucidShape CAA includes:• Sources: point, plane, cylinder, and ray file• Sensors: candela, luminance camera, ray file, ray history, surface sensorsupporting both lux and lumen sensor materials• Materials/media: compatible with LucidShape actor materials andorganized in a library• Simulation:–Forward simulations–NURBS simulation (mesh free), tessellated simulation (CPU), tessellatedsimulation on GPU–CATIA Design Tables (forward simulation) so you can construct andsimulate design variations quickly. Streamlines the creation of multipledesign forms for a product line•Ability to import measured bi-directional scattering distribution functionLucidShape CAA V5 Based provides the industry’s only complete workflow solution for automotive lighting, design, and visualization within the CATIA V5 environment. Designers who are familiar with CATIA can easily leverage LucidShape’s powerful features to produce, with a minimal learning curve, automotive lighting products that meet performance, styling, visual branding, and regulatory requirements.With LucidShape CAA V5 Based, you also benefit from seamless communication between multi-domain teams with access to a large ecosystem of tools on the CATIA platform.(BSDF) data for precise surface scatter modelingEasy Design Navigation and ManagementModel navigation and management are highly efficient with the LucidShape CAA Specification Tree structure, which keeps all automotive lighting components organized and accessible from a single location — supporting work on individual parts or highly complex assemblies. This infrastructure enables users to quickly understand even the most complex models.Rapid Design VerificationThe software can rapidly and accurately ray trace part-level models or product-level assemblies using tessellated or NURBS simulation methods for comprehensive CATIA-based optical simulations. You can run a simulation on one part while you continue to work on another part in the same project.The software also supports multi-core processing and GPU ray tracing (for tessellated mode only) to further accelerate simulations.Extensive Suite of Analysis ToolsLucidShape CAA V5 Based delivers a wide spectrum of UV data analysis tools, as well as bird’s eye and driver’s views. A large set of test point standardsare included to ensure that your system meets both industry regulations and company specifications. Analysis tools include:• Test tables (ECE, SAE, JIS, user defined)• Special views (bird’s eye view, driver’s view)• A variety of UV data operations (scale, shift, rotate, etc.)• Planar Lux Sensor for quantitative analysis of near-field illuminance• Luminance Camera Sensor to produce high-accuracy luminance images to help you quickly check the appearance of an automotive signal lighting lamp from multiple viewing directions• Ray History Sensor Capability for both Candela Sensor and LuminanceCamera Sensor to provide valuable tools for troubleshooting photometric and appearance issues• Surface Sensor for analyzing illuminance, irradiance, and flux on curved surfaces. You can trace random rays through the system and display theirray paths. This functionality can help you:–V erify light source placement and materials or media setup–Check light source image magnification and/or rotation for specificpoints on the optical surfaces during design work–Check the light spread of optics for interference with other lamp orhousing components–Analyze stray light and glare–Troubleshoot optical systemsExample Model LibraryLucidShape CAA V5 Based provides an extensive collection of example models that enable you to jumpstart model creation and analysis tasks.Design Module Key CapabilitiesPowerful Design ToolsGeometry creation tools that give you the freedom to focus on overall design objectives rather than the implementation details of complex optics have always made LucidShape software unique.The LucidShape CAA V5 Based Design Module provides exceptional, versatile design features from LucidShape integrated into the CATIA environment. The fundamental principle behind most of this functionality is the design-by-function concept, which enables users to create functional geometry based on lighting criteria such as spread angles or target light distributions. This feature set enables optical engineers to focus on creating the beam patterns required (and their superposition) to meet an overall light distribution, rather than on creating the freeform surfaces needed to accomplish them.Combined with CATIA’s extensive CAD modeling capabilities, these features enable users to accomplish their optical design work more efficiently, without repetitive and error prone export/import steps. Your optical model can remainfully parametric and feature based at all times, which enables you to simply update your model for subsequent design iterations.LucidShape CAA design features can also be combined with CATIA features. As a result, the actual trimmed optics are available for simulation from the very beginning of the design. This provides a significant efficiency advantage over working with untrimmed or approximated geometry and having to perform repetitive, time-consuming CAD export/import operations andphotometric validations.Visualize Module Key CapabilitiesStunning, Physics-Based VisualizationPhotorealistic visualization is used in the creative process to evaluate the aesthetics of a lighting design and in the engineering process to evaluate optical feasibility based on uniformity, brightness, and manufacturability. The LucidShape CAA Visualize Module is a CATIA-integrated photorealisticrendering capability that generates stunning, physics-based images of automotive lighting products.Features like the Environment Light Source and the Human Eye Vision Image tool augment the realism in a scene and enable you to virtually evaluate how the human eye will perceive a headlight, tail light, or signal light:• The Environment Light Source allows you to integrate photographicenvironments into a simulation, creating a photorealisticimpression of a scene.• The Human Eye Vision Image (HEVI) tool is a tone mapper that modifies luminance data so that it appears as a human would see the real scene. The LucidShape CAA Visualize Module also supports backward simulations and a luminance camera for fast, accurate analysis of your system’slit appearance.Light Guide Design Module Key CapabilitiesOptimized Light Guide DesignsThe Light Guide Design Module enables you to create and optimize light guidesystems for spatial uniformity and for angular centroid pointing direction. UsingCATIA geometry, the Light Guide Designer can make light guides, add pyramidalprism extractors, add sensors, sources, and other items needed for designinglight guide systems. This tool uses a CATIA spline curve (or a datum curve)to define the light guide path curve, and it uses special techniques to quicklyoptimize the uniformity along the length of the light guide.Adding fillets to a light guide design can be a tedious task, given the typicallylarge number of prisms to consider. The Light Guide Designer includes anautomatic filleting capability to automate this task. You can create and optimizelight guides with fillets that conform to manufacturing constraints, allowing youto achieve better as-built performance.Complete Access to Expert SupportAs a LucidShape CAA customer, you can rely on prompt access to our team of technical support experts, who understand automotive lighting design and engineering. In addition, you have 24/7 access to a customer-dedicated website that contains resources to help you become more productive – including videos, documentation, and example files and models.For More InformationFor more information, please contact Synopsys’ Optical Solutions Group at (626) 795-9101, visit /optical-solutions/ lucidshape/caa-v5-based.html, or send an e-mail to *******************.。
中兴5G网管_RANCLI指令帮助文档
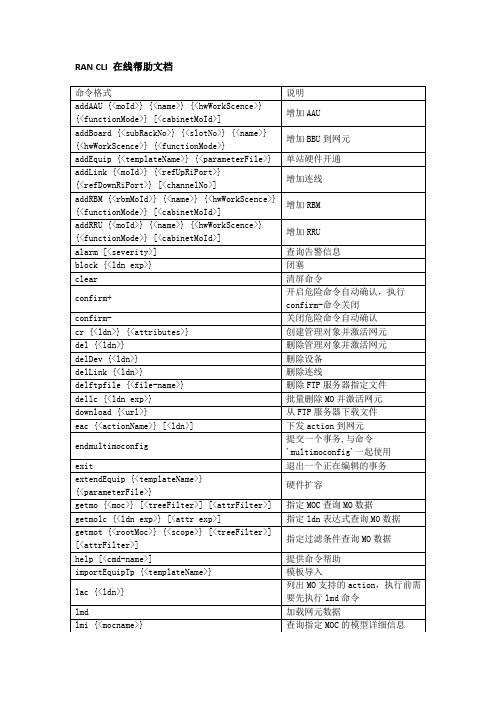
RAN CLI 在线帮助文档1、增加AAU命令格式addAAU {<moId>} {<name>} {<hwWorkScence>} {<functionMode>} [<cabinetMoId>]命令举例addAAU AAU_1 'ZXRAN A9601 S350' 8192 2147483649使用说明增加AAU命令功能增加AAU命令参数参数名称注释参数类型取值范围是否必填参数描述moId AAU对象标识字符型必填参数AAU对象标识name AAU名称字符型必填参数AAU名称hwWorkScence 设备场景整型必填参数设备场景functionMode 功能模式整型必填参数功能模式cabinetMoId 机柜对象标识整型可选参数机柜对象标识2、增加BBU到网元命令格式addBoard {<subRackNo>} {<slotNo>} {<name>} {<hwWorkScence>}{<functionMode>}命令举例addBoard 1 1 VSWc1 0 0使用说明增加BBU命令功能增加BBU到网元命令参数参数名称注释参数类型取值范围是否必填参数描述subRackNo 机框编号整型必填参数机框编号slotNo 槽位编号整型必填参数槽位编号name 单板名称字符型必填参数单板名称hwWorkScence 设备场景整型必填参数设备场景functionMode 设备功能模式整型必填参数设备功能模式3、单站硬件开通命令格式addEquip {<templateName>} {<parameterFile>}命令举例addEquip equipment_V9200_and_AAU_S1_template parameter.json使用说明1,拖拽一个json文件,格式为命令参数的parameterFile的描述;2,输入命令硬件开通命令功能单站硬件开通命令参数参数名称注释参数类型取值范围是否必填参数描述templateName 模板名称字符型必填参数模板名称parameterFile 模板参数字符型必填参数模板参数4、增加连线命令格式addLink {<moId>} {<refUpRiPort>} {<refDownRiPort>} [<channelNo>] 命令举例addLink cable-1 Equipment=1,ReplaceableUnit=VBP_1_4,RiPort=OF1 Equipment=1,ReplaceableUnit=VBP_1_4,RiPort=OPT1 使用说明 增加连线 命令功能 增加连线 命令参数参数名称 注释 参数类型 取值范围 是否必填参数 描述moId 连线标识 字符型 必填参数 连线标识 refUpRiPort上级无线接口ldn字符型 必填参数 上级无线接口ldn refDownRiPort下级无线接口ldn 字符型 必填参数 下级无线接口ldnchannelNoAAU 通道编号字符型可选参数AAU 通道编号5、 增加RBM命令格式addRBM {<rbmMoId>} {<name>} {<hwWorkScence>} {<functionMode>} [<cabinetMoId>] 命令举例addRBM RBM_1 ‘RBBM1’ 0 0 使用说明 增加RBM 命令功能 增加RBM 命令参数 参数名称 注释 参数类型 取值范围 是否必填参数 描述 rbmMoId RBM 对象标识 字符型 必填参数 RBM 对象标识 nameRBM 名称字符型 必填参数 RBM 名称 hwWorkScence 设备场景 整型 必填参数 设备场景 functionMode 功能模式整型必填参数 功能模式 cabinetMoId 机柜对象标识 整型可选参数机柜对象标识6、 增加RRU命令格式addRRU {<moId>} {<name>} {<hwWorkScence>} {<functionMode>} [<cabinetMoId>] 命令举例addRRU RRU_1 'ZXRAN A9601 S350' 8192 2147483649使用说明增加RRU命令功能增加RRU命令参数参数名称注释参数类型取值范围是否必填参数描述moId RRU对象标识字符型必填参数RRU对象标识name RRU名称字符型必填参数RRU名称hwWorkScence 设备场景字符型必填参数设备场景functionMode 功能模式整型必填参数功能模式cabinetMoId 机柜对象标识整型可选参数机柜对象标识7、查询告警信息命令格式alarm [<severity>]命令举例alarm critical使用说明告警命令功能查询告警信息命令参数参数名称注释参数类型取值范围是否必填参数描述severity 告警级别字符型可选参数告警级别8、闭塞命令格式block {<ldn exp>}命令举例block Sctp使用说明闭塞命令功能闭塞命令参数参数名称注释参数类型取值范围是否必填参数描述ldn exp ldn 字符型必填参数ldn9、清屏命令命令格式clear命令举例clear 使用说明 清屏命令 命令功能 清屏命令10、开启危险命令自动确认,执行confirm -命令关闭命令格式 confirm+ 命令举例 confirm+ 使用说明开启危险命令自动确认,执行confirm-命令关闭 命令功能开启危险命令自动确认,执行confirm-命令关闭11、关闭危险命令自动确认命令格式 confirm- 命令举例 confirm- 使用说明关闭危险命令自动确认 命令功能关闭危险命令自动确认12、创建管理对象并激活网元命令格式cr {<ldn>} {<attributes>} 命令举例cr Equipment=1,SubRack=1 moId=1,subRackNo=1,subRackType=21,refCabin et="Equipment=1,Cabinet=1" 使用说明创建管理对象并激活网元 命令功能创建管理对象并激活网元 命令参数参数名称 注释 参数类型 取值范围 是否必填参数 描述ldn管理对象的ldn 字符型必填参数 管理对象的ldn attributes 管理对象的属性值 字符型必填参数管理对象的属性值13、删除管理对象并激活网元del {<ldn>}命令举例del TransportNetwork=1,Sctp=1使用说明删除管理对象并激活网元命令功能删除管理对象并激活网元命令参数参数名称注释参数类型取值范围是否必填参数描述ldn 管理对象的ldn 字符型必填参数管理对象的ldn14、删除设备命令格式delDev {<ldn>}命令举例delDev Equipment=1,SubRack=1,ReplaceableUnit=VBP_1_4使用说明删除设备命令功能删除设备命令参数参数名称注释参数类型取值范围是否必填参数描述ldn 单板的ldn 字符型必填参数单板的ldn15、删除连线命令格式delftpfile {<file-name>}命令举例delftpfile dvupdate.json使用说明删除FTP服务器指定文件命令功能删除FTP服务器指定文件命令参数参数名称注释参数类型取值范围是否必填参数描述file-name 文件名称字符型必填参数文件名称16、删除FTP服务器指定文件命令格式dellc {<ldn exp>}命令举例dellc TransportNetwork=1,Sctp批量删除MO并激活网元命令功能批量删除MO并激活网元命令参数参数名称注释参数类型取值范围是否必填参数描述ldn exp MO的ldn表达式字符型必填参数MO的ldn表达式17、批量删除MO并激活网元命令格式delLink {<ldn>}命令举例delLink Equipment=1,RiCable=1使用说明删除连线命令功能删除连线命令参数参数名称注释参数类型取值范围是否必填参数描述ldn 当前RiCable的ldn字符型必填参数当前RiCable的ldn18、从FTP服务器下载文件命令格式download {<url>}命令举例download sftp://rancli@fe80::682c:daff:feed:610d:21/dv/dvupdate.json 使用说明从FTP服务器下载文件命令功能从FTP服务器下载文件命令参数参数名称注释参数类型取值范围是否必填参数描述url url 字符型必填参数url19、下发action到网元命令格式eac {<actionName>} [<ldn>]命令举例eac resetBoard Equipment=1,ReplaceableUnit=AAU-1使用说明执行action下发action到网元命令参数参数名称注释参数类型取值范围是否必填参数描述actionName action名称字符型必填参数action名称ldn ldn 字符型可选参数ldn下一级指令(1)、activateEmergency命令格式eac activateEmergency [--operate <operate>]命令举例eac activateEmergency --operate EXIT使用说明激活/去激活License紧急状态命令功能激活/去激活License紧急状态命令注意事项无命令参数参数名称注释参数类型取值范围是否必填参数描述operate 激活或去激活紧急状态字符型可选参数激活或去激活紧急状态(2)、activatePackage命令格式eac activatePackage {<ldn>}命令举例eac activatePackage SystemFunctions=1,SwM=1,SwPackage=1 使用说明激活软件包命令功能激活软件包命令注意事项无命令参数参数名称注释参数类型取值范围是否必填参数描述ldn ldn 字符型0..65535 必填参数ldn(3)、autodown命令格式eac autodown {<ldn>} {--url <url>}eac autodown SystemFunctions=1,SwM=1,SwPackage=1 --urlsftp://**************.92.242:80/swr/SW_PLAT_V2.17.00.03B13_11272104.p kg使用说明自下载软件包命令功能自下载软件包命令注意事项无命令参数参数名称注释参数类型取值范围是否必填参数描述ldn ldn 字符型0..65535 必填参数ldnurl 软件包所在路径URL字符型0..256 必填参数软件包所在路径URL(4)、bbuRruLinkTest命令格式eac bbuRruLinkTest {<ldn>}命令举例eac bbuRruLinkTest Equipment=1,RiCable=1使用说明BBU RRU链路测试命令功能BBU RRU链路测试命令注意事项无命令参数参数名称注释参数类型取值范围是否必填参数描述ldn ldn 字符型0..65535 必填参数ldn(5)、calibrateAnt命令格式eac calibrateAnt {<ldn>} [--acType <acType>]命令举例eac calibrateAnt GNBDUFunction=1,NRCellDU=1 --acType 1 使用说明天线校准命令功能天线校准命令注意事项无参数名称注释参数类型取值范围是否必填参数描述ldn ldn 字符型0..65535 必填参数ldn acType 校准类型字符型可选参数校准类型(6)、cancelVerify命令格式eac cancelVerify命令举例eac cancelVerify使用说明取消校验命令功能取消校验操作命令注意事项无(7)、CFSBoardTest命令格式eac CFSBoardTest {<ldn>}命令举例eac CFSBoardTest Equipment=1,ReplaceableUnit=1使用说明CFS单板测试命令功能CFS单板测试,支持CFS单板命令注意事项无命令参数参数名称注释参数类型取值范围是否必填参数描述ldn ldn 字符型0..65535 必填参数ldn(8)、checkBbuRruLink命令格式eac checkBbuRruLink {<ldn>}命令举例eac checkBbuRruLink Equipment=1,RiCable=1使用说明检查BBU和RRU间的链路命令功能检查BBU和RRU间的链路命令注意事项无参数名称注释参数类型取值范围是否必填参数描述ldn ldn 字符型0..65535 必填参数ldn(9)、checkBoardHealth命令格式eac checkBoardHealth {<ldn>}命令举例eac checkBoardHealth Equipment=1,ReplaceableUnit=1使用说明单板自检命令功能单板自检,自检过程中硬件可能会短暂不工作。
CMpartlist

No Part No Part Name Remark1KXFE00F3A00CPU board /N610087118AB N610087118AA(SCV1ER)/N61 0012075AA2N610009178AA memory boaed N610030275AA/ELV1ED+ELV3 EA3KXFE0009A00VISION BOARD SCV4EA4KXFE0008A00VISION BOARD SCV4EA(2张二手)5KXFK00APA00CONTROL UNIT FOE MOTOR3401P3/3401P26KXFY001LA00RING I/O BOARD KXFE000FA00(NFV2CD)7N610001129AA CM602/VISION BOARD PRV4EA8KXFE000SA00CM602/LED LAMP CONTRONL PE1AC/N610017723AC9N610012675AA SSR CARD PNF0AF10KXFE0005A00ONE BOARD MICROCOMPUTER MC16/H3 N610090171AA 11KXFE0004A00PC BOARD W/COMPONENT MC15/H812N610012673AA FEEDER CART BOARD FEEDER台车板卡13KXFE0001A00ONE BOARD MICROCOMPUTER MC14CA15N1F8RC7B MSF VISION BOARD16N1F8RC8C MSF VISION BOARD17N1F8RC5B MSR/HT VISION BOARD18N209PENT-174MSR/HT CPU BOARD二手19KXF0DWW9A00CONVERY MOTOR传送马达20KXF0DGEAA00R MOTOR 3W N510042740AA/DT40121KXF0E1LXA00R MOTOR 50W CM402(TS4602N1520E500)22N510008188AA R MOTOR 50W CM602角度马达(型号:TS4602N1521E500)23KXF0DGFAA00Z MOTOR 25W N510042739AA/DT40124KXF0CWQAA00Z motor 20w N510042738AA/N510030834A B25N510002508AA Z MOTOR 15w N510042737AA/N510030833A A26N510027476AA Z MOTOR 6W CM60227N510028646AA CABLE28KXF0DHSAA00MOTOR TS4502N2227E50029KXF0CWLAA00Y MOTOR HC-RFS103-S130KXF0DQXAA00PRESSURE SENSOR vs1-3, N510025620AA31N610026749AA PRESSURE SENSOR VS1-4, KXF0DWVWA00, N610040037AA32N610027221AA PRESSURE SENSOR VS5-8/N610040037AA33N610017022AD PRESSURE SENSOR VS1-634N610017023AC PRESSURE SENSOR VS7-1235N510015534AA SHAFT DT40136N510015533AA SHAFT CM40237N510028739AA SHAFT CM602/N510054811AA38N510002505AA SHAFT CM402CM402/602 Sparepart list39 1.08073E+11SHAFT MSF40KXFX036HA00PCB CAMERA一套新一套旧41N610001944AB CAMERA UNIT CM602原件相机42KXF0DLKAA01VALVE VK332-5HS-M5 43KXF0DLLAA01VALVE VK332V-5HS-M5 44KXF0DR4AA00VALVE VQZ1421-5MO-M545KXF0DR6AA00VALVE N510029538AA/VQZ1321-5MO-C6(切刀电磁阀)46KXF0DX8NA00VALVE CM402/10-VQ110U-5MO-X4647KXF0A1RAA00VALVE VQZ115R-5MO-M5-PR(真空破坏电磁阀)48KXF0A3RAA00NOZZLE CHANGE VQZ1220-5MO-C4 49KXF09X2AA00VALVE VQZ1121-5MO-C4 50KXF05PLAA00GREASE吸嘴杆保养白油51KXFW1KS5A008MM FEEDER支全新,52KXFW1KS6A0012/16MM FEEDER支新,53KXFW1KS7A0024/32MM FEEDER12支二手54KXFW1KS8A0044/56MM FEEDER1支新,4支二手55KXFX03DGA00Nozlle:11056KXFX037NA00Nozlle:115A57KXFX0384A00Nozlle:12058KXFX0385A00Nozlle:13059KXFX0386A00Nozlle:14060KXFX05V2A00Nozlle:206A61KXFX037SA00Nozlle:100162KXFX037TA00Nozlle:100263KXFX037UA00Nozlle:100364KXFX037VA00Nozlle:100465KXFX037WA00Nozlle:100567N610017371AC Nozlle:110S68N610017372AC Nozlle:115AS69N610017373AC Nozlle:120S70N610017375AC Nozlle:130S71KXFX0386A00Nozlle:140S72N610017370AC Nozlle:205S73N610040786AA Nozlle:225CS74N610040787AA Nozlle:226CS75N610040788AA Nozlle:230CS76N610043815AA Nozlle:235CS77N610040853AA Nozlle:240CS78N610040783AA Nozlle:226C79N610040784AA Nozlle:230C80N610043814AA Nozlle:235C81N610062681AA Nozlle:240C82N610038265AA Nozlle:203ZS83N610030510AC Nozlle:206AS84KXFX0387A00Nozlle:450 85KXFX03NGA00Nozlle:460 86Nozlle:124887KXF0DXTSA00AIR CYLINDER88KXF0DG9AA00FEEDER MOTOR(4.5w)89N510048142AA FEEDER MOTOR(9.6w)进料马达90N510043555AA FEEDER MOTOR(1.7w)N510046420AA(2.4w) 91N610009394AA CM301/DT401 FILTER金属过滤器92N610071334AA CM602/CM212/CM402 FILTER N210048234AA93N610009409AA HOLDER402HOLDER滤网94N610071723AA HOLDER402HOLDER滤芯95KXFB00L1A02CLAMP ARM DT401 HOLDER抓子96KXFB00S6A03CLAMP ARM CM402 HOLDER 抓子 新料号:010DC11127097N510030308AA T-BELT CM402角度皮带98N510021327AA T-BELT CM602角度皮带99N510021326AA T-BELT CM602角度皮带100KXF0DKCAA008。
FastCAM小数控版全自动共边套料软件

FastCAM小数控版全自动共边套料软件软件名称:软件版本:FastCAM小数控版全自动共边套料软件(有效切割范围:6000mmx1800mm)FastCAM小数控专家版适用范围:使用目的:适用于小蜜蜂或小便携切割机,小台式或小龙门数控切割机,包括火焰、等离子、水刀等数控切割机,有效切割范围:6000x1800。
自带绘图软件,完成零件制图,对DXF/DWG等零件进行清除压缩等优化处理,零件自动和手动套料,整板自动编程及切割轨迹校验工作。
通过自动套料和高效切割功能提高钢材利用率和切割生产效率,降低生产成本。
小蜜蜂和小便携切割机,配套FastCAM小数控专家版,主要适用于二大类用户,第一类是个体和中小企业,购买经济实惠的小数控切割机,易于搬运和户外使用,先学习数控切割知识,以后再购买大型切割机。
第二类是使用小便携切割机替代仿形切割机,用来切割各种余料和不规则材料,和大型龙门切割机配套使软件简介:FastCAM小数控版全自动共边套料软件,在原有FastCAM全自动编程套料软件基础上进行了产品升级和功能更新,增加了数控切割中最重要的全自动共边套料功能、桥接连割功能,以及更新了任意修改引弧线位置、任意指定切割顺序、切割代码和切割路径同步跟踪功能等等,注重高效切割和节省耗材。
FastCAM套料软件的四大模块包括:FastCAM绘图模块,FastNEST套料模块,FastPATH编程模块和FastPLOT校验模块,主要功能涵盖了CAD 画图、DXF/DWG优化处理、交互式套料、自动编程,以及切割模拟校验和成本计算,新版软件重点在FastPATH自动编程和FastNEST全自动套料模块中增加了全自动共边套料借边切割、桥接切割和连套料方式,更新了任意修改引弧线的位置和切割顺序,以有效提高数控切割效率,节省钢材,节省耗材,特别是割嘴、电极、以及切割用气体的消耗。
FastCAM小数控版全自动共边套料软件,适用于各种类型的小蜜蜂和小便携式的火焰等离子数控切割机,支持ESSI和EIA代码格式,支持FLCNC交大数控、Start、Adtech等国内和国外的多种数控系统。
IndraMotion MTX micro商品说明书
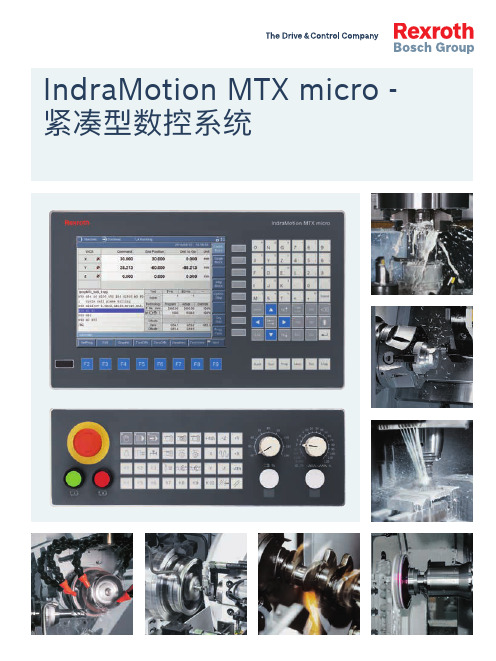
经久耐用的 22mm 开关用于急停,当前操作模式Graphical assistance for every ▲Drilling ▲Milling ▲Contouring ▲Engraving▲Turning 加工循环范例车削加工钻铣轮廓加工雕刻10图形轮廓编辑器IndraMotion MTX micro 轮廓编辑器极大简化了对从简单到复杂轮廓定义的编程。
编辑器引导用户一步步输入轮廓元素。
每一个元素都带有直观的参数输入框。
向导式显示至下一轮廓元素的选项和过渡。
参数的变化及时显示在轮廓图形上。
最后轮廓会以 DIN G 代码的形式保存在 NC 程序中。
功能f轮廓元素:水平 & 垂直线, 角线和正向 & 反向弧线f轮廓元素的数量不受限制f轮廓可定义在子程序中或直接在 NC 程序中f同一 NC 程序中允许多轮廓定义f轮廓输入时有效性检查f在 NC 程序中轮廓以 DIN G 代码写入f可在轮廓编辑结束后再次修改轮廓或手动调整高效 CNC 编程符合 DIN66025 的 NC 编程通用的 NC 编程 - 通过 DIN 编程描述运动顺序及其限制条件(几何形状,运动限制,动态性,偏置等)。
标准的编程用于指定机床的运动和特殊的机床功能。
高级语法的 NC 编程针对更有效的 NC 编程是在符合 DIN 66025 标准 G 代码编程的基础上扩展了功能。
高级语法增强了NC程序的可读性。
例如:scale (全称)或 SCL(缩写)用于放大或缩小已编程的轮廓。
CPL 语言编程(Customer Programming Language)源自 BASIC 高级语言编程,简单易学。
CPL 可以用于变量编程,数学运算,程序结构控制例如通过 REPEAT, WHILE, FOR, IF, CASE, GOTO 和访问系统状态。
通过使用 CPL 您可以:f通过例如循环或类似的程序结构缩短程序量f条件判定的程序f通用子程序用户加工循环使用 DIN 和 CPL 编程创建单独的加工循环。
FastCAM套料操作流程
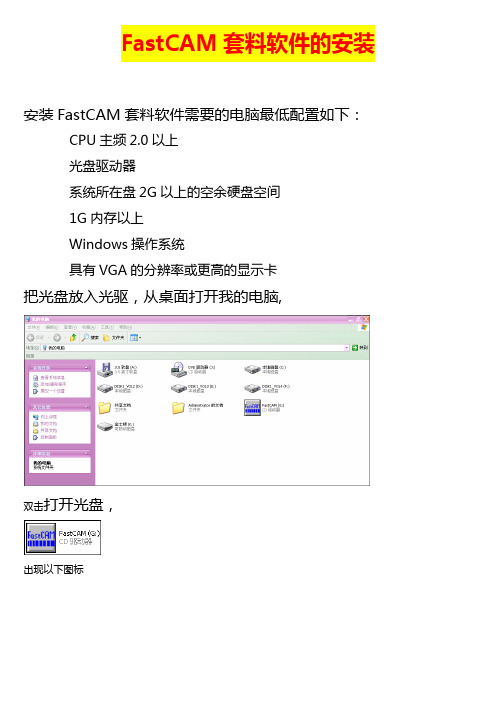
FastCAM套料软件的安装安装FastCAM套料软件需要的电脑最低配置如下:CPU主频2.0以上光盘驱动器系统所在盘2G以上的空余硬盘空间1G内存以上Windows操作系统具有VGA的分辨率或更高的显示卡把光盘放入光驱,从桌面打开我的电脑,双击打开光盘,出现以下图标点击将出现下面界面点击上面界面上的“简体中文”将出现下面界面点击上面界面上的“安装FastCAM”稍等将出现下面界面点击上面界面上的“Next”将出现下面界面点击上面界面上的“”后再点击“Next”将出现下面界面根据切割机控制厂家,在上面界面中选择相应的切割机控制器选项。
金属结构厂使用的设备应该选择“FastCNC”,然后在点击“Next”将出现下面界面点击上面界面中的“Install”将开始安装,稍等将出现下面界面点击上面界面中的“Finish”安装完成。
此时会出现如下提醒界面:如果后面出现错误提示,不用担心,那是因为还没有插加密狗:程序不完整产生的错误。
插上加密狗后再点击,稍等几分钟就安装完成了!退出点击左上角“HOME”然后按“ESC"即可提示:⑴安装演示文件请根据实际是否需要选择是否安装。
⑵安装路径只能在C盘,即:默认选项⑶下方的“FastCAM培训资料"可作为自学使用FastCAM套料软件的使用我们在FastCAM套料软件的长期使用中,认为以下介绍的方法为使用中最容易接受、最快速上手并能保证切割质量和板材利用率的使用方法。
其它方法请在以后的使用中参考FastCAM套料软件的说明书。
每次使用FastCAM套料软件前,请将加密狗插到电脑的USB接口上,等电脑上显示USB设备可用后。
在桌面打开文件名为“FastCAM”文件夹.如安装完桌面没有文件名为“FastCAM”文件夹,刷新桌面一次就会有了。
用AutoCAD画制1:1的图纸。
图中只画出需要切割的线条,其它如标注,画图时使用的一些辅助线等,请在图画好后及时删除。
AFIRMToolkitOct08 - Chinese

《供应商的RSL 工具文件》目录2008年10月1日1. 序言a. “限用物质”的定义b. 受到限制的原因c. RSL 的目的及其对供应商的重要性2. 限用物质清单(RSL )3. 限用物质的危害a. 部分限用物质的基本信息4. 供应商环节的培训5. RSL 检测6. RSL 执行7. 向供应商提供每个品牌的RSL 网页链接清单8. 附件a. 术语表b. 工厂管理计划c. PPT – RSL 管理计划模型d.检测方案模型e. 避免RSL 问题的最佳方法f. AFIRM 常见问题解答注:本文件旨在为服饰及鞋类供应商提供协助其执行限用物质清单(RSL)要求所需的全面意见和基本信息。
读者不应依赖本文件去解决特定问题。
本文件不对本文信息的完整或用途做任何明确或暗示的保证。
此外,国际服饰及鞋类限用物质清单管理工作小组(AFIRM)不对任何因使用或依据本文件内容而导致的任何情况负责。
《服饰及鞋类供应商的RSL工具文件》2008年10月1日1. 序言国际服饰及鞋类限用物质清单管理工作小组(AFIRM)以制定本《RSL工具文件》为其使命的一部分,目的是要“减少服饰及鞋类供应链中有害物质的使用和影响。
”本文件为RSL计划的执行提供了全面意见。
RSL 计划的执行是一个高度个体化的过程,受到许多因素的影响,包括生产的产品及其销售地。
其实许多品牌也有自己的RSL执行方针,并鼓励供应商在可用的情况下采用。
AFIRM对美国服饰及鞋类协会(AAFA)在限用物质清单及其执行指南上作出的贡献表示感谢,正是这些信息构成了本文件的基础。
“限用物质”的定义限用物质是指在某一特定制造过程中,其使用受到法律或各品牌的禁止或限制的化学品和其他物质。
通常情况下,限用物质不能存在成品中,或其浓度须在限制范围内。
限用物质可能在一个或多个行业,或者在某些特定的产品或材料中被禁止或限制使用。
其他可能相关的术语见附件A。
受到限制的原因这些物质受到限制的原因有许多。
打印机复印机清零方法及维修代码解决方案

兄弟打印机清零大全一、兄弟 4040CN、4050 彩打硒鼓清零方法兄弟 4040CN 彩色激光打印机更换硒鼓后清零方法如下:当打印机出现“Drum End Soon”等字母提示时,就提醒您要更换硒鼓了。
当您更换新的硒鼓单元时,您需要通过以下步骤重置硒鼓计数器:1、打开打印机电源开关。
2、按下“+” 或“-” 键,选择 M +achine Info. ( 机器信息)。
3、按下“OK” 执行下一级菜单,然后按下“+” 或“-” 键,选择“Reset Parts Life” ( 重置零件寿命)。
4、按下“OK”,然后按下“+” 键,选择“Drum Unit” ( 硒鼓单元)。
5、按两次“OK”。
二、兄弟 3040cn 清零方法1、同时按下 secure print 和 cancel 四秒钟2、根据提示自动更换粉,然后按下两次OK,就大功造成了,是不是很简单呀。
三、兄弟 7420,2820 加粉后清零打开前盖,按选项,再按星号键,然后是零零四、ALL 系列(HL2040、HL2070N),AL 系列(HL5240、HL5250DN)清零方法1、确保已将打印机电源打开并且硒鼓指示灯闪烁,打开打印机前盖。
2、按住 GO 按钮约四秒钟,直到所有的指示灯亮起。
四个指示灯都亮起后,松开GO 按钮。
五、ALL-FB/ALL-SF(MFC7420/7220/DCP7010/7025/FAX2820) 清零方法1、请确保前盖打开,然后按控制面板上的 Option(选项)键2.取出硒鼓单元3.按“GO”运行按钮4.将硒鼓单元装入打印机5.按“GO”运行按钮6.关闭前盖九、FC7420 清零方法1.打开前盖2.按”选项”键3.依次按*、0、04.关闭前盖十、DCP7010/7025 清零方法1.打开前盖2.依次按“选项”、“启动”3.若使用标准墨粉(中国地区都使用标准墨粉)按▲或▼键数次使 LCD 显示“11”4.按“设定”键,LCD 上出现“ACCEPTED”(已接受)5.关闭前盖十一、FAX2820/MFC7220 清零方法1.打开前盖2.按“选项”键3.依次按*、0、04.关闭前盖十二、MFC8220/MFC8440 清零方法1.打开前盖2.按“清除/返回”键3.依次按*、0、04.关闭前盖注意:更换新墨粉盒时(请勿断电),请务必在缺粉指示灯亮时打开前盖。
ProSystem fx Engagement到Workpapers CS数据转换信息Kit说明书

Information Kit for Conversions from ProSystem fx Engagement to Workpapers CSThis document provides information about the data converted from ProSystem fx® Engagement to Workpapers CS™.ContentsWhat to expect from the data conversion (2)Conversion considerations and recommendations (2)Installing the conversion program (2)Converting the client data before import into Workpapers CS (2)Data transferred during conversion (4)Chart of Accounts and balances (4)Grouping schedules (5)Transactions (5)Engagement-related data transferred during conversion (6)Engagement information (6)Folder information (7)Workpaper information (7)ProSystem fx Engagement Excel and Word demographic formulas (7)ProSystem fx Engagement Excel and Word link formulas (8)Conversion notes and exceptions (8)Items not converted (8)Data Conversion Report (9)Getting help (9)Help & How-To Center (9)Product support (9)What to expect from the data conversionThe overall objective of the data conversion from ProSystem fx Engagement is to provide accurate, comprehensive Workpapers CS data to help you move forward with Workpapers CS.Important!Due to differences between applications, some data must be modified during the conversion process and some data cannot be converted. Additions and/or modifications may be required to exactly duplicate engagement and workpaper information in Workpapers CS after the conversion.Conversion considerations and recommendationsPlease review the following before beginning the conversion process.▪We recommend that you convert a smaller, easy-to-process client first. This will help you become familiar with the conversion options in Workpapers CS.▪Some data items from ProSystem fx Engagement are not converted because there is no exact equivalent in Workpapers CS.Installing the conversion programClick this link to download a ZIP file and install the ProSystem fx Engagement to Workpapers CS conversion utility.Converting the client data before import into Workpapers CS Important! When you convert large or complex sets of engagement files for a ProSystem fx Engagement client, you should allow a significant amount of time for the conversion and import. Please wait for the process to be completed before converting another client.After installing the ProSystem fx Engagement to Workpaper CS conversion program, use the following steps to create the converted data files for import into Workpaper CS.The conversion process does not modify existing client data in ProSystem fx Engagement. However, we strongly recommend that you create a backup of the original client before you process any clients.1. Verify that the ProSystem fx Engagement binder has been synchronized with the Local File Roomand that any instances of this binder or workpapers are closed on your workstation.2. To start the conversion program, right-click the CS Data Conversions icon on your desktop andchoose Run as Administrator. If you did not install the shortcut, click Start on the Windows taskbar and then choose All Programs > CS Professional Suite > CS Data Conversions.3. In the Select competitor field, select ProSystem fx from the drop-down list.4. In the Select the export location for the converted files field, click the Browse button to browse to thelocation where the import files should be placed until imported into WorkpaperCS.5. Click Start conversion.6. If prompted to close all open sessions of Word® and Excel®, close those sessions.7. If prompted to select your user, select the login for the Local File Room for which you want to convertdata. This dialog will open only if multiple logins exist on the workstation.8. In the Processing Type dialog, click either Single or Multiple. Single converts just one client at a timeand allows for greater customization. Multiple allows for multiple clients, but the application makes more assumptions about the clients during the conversion.9. In the Select a Client dialog or Select client(s) dialog, select the client(s) you want to convert, andclick Continue.Note: This dialog lists all available clients for conversion from ProSystem fx Engagement. Yourselection of Single or Multiple in step 8 determines whether you can select one or multiple clients. 10. In the Engagement selection dialog, which lists all of the binders / engagements for the selectedclient(s), select an engagement type for each binder you want to convert, and then click Continue. 11. If you selected a single conversion, an optional Trial Balance selection dialog may open if multipleTrial Balances existed in ProSystem fx Engagement. Workpapers CS supports only one Trial Balance per engagement. Select the desired Trial Balance.If you selected multiple conversions, the last accessed Trial Balance will be used.12. Click Continue.13. In the Account classification selection dialog, select the ProSystem fx Engagement group thatcontains the account classification you want to use in Workpaper CS.Note: If you click Skip, the program will not convert any Account Classifications for the Trial Balance Accounts.14. In the Tax group selection dialog, select the set of tax codes to convert for your Trial Balance.If you selected multiple conversions, the last tax year will be used.15. Click Continue to begin the data conversion process, and then follow the prompts that appear on thescreen.16. At the prompt indicating the conversion process is complete, click OK to begin importing theconverted data into Workpapers CS.17. In Accounting CS, choose File > Import > ProSystem fx Engagement to open the ProSystem fxEngagement conversion wizard.18. Source Data: Select the location where your ProSystem fx Engagement export files are stored andclick Next.19. Source Data - Clients: Mark the checkbox next to the ProSystem fx Engagement client—or multipleclients—that you want to convert, and then click Next.20. Staff: Select the Accounting CS Workpapers staff member—or multiple staff members—to map to foreach corresponding ProSystem fx Engagement staff in the list.Note:If the appropriate staff member is not available from the drop-down list in the Accounting CS Staff column, exit the wizard and add that staff member in the Setup > Firm Information > Staffscreen, and then restart the conversion process.21. Click Finish to complete the conversion.Data transferred during conversionThe following tables detail the ProSystem fx Engagement data that converts to Workpapers CS.Chart of Accounts and balancesProSystem fx Engagement menu navigation andfield name Workpapers CS menunavigation and field nameComments and additionalinformationTrial Balance > Chart ofAccountsActions > Enter Trial BalanceAccount # Account numberDescription DescriptionReport ReportBudget BudgetProposed PotentialUNADJ Unadjusted Unadjusted balance is convertedonly for the current period.ADJ Adjusted Prior-year and prior-periodbalances only.FTAX Tax Prior-year and prior-periodbalances only.OBAL1 Other Prior-year and prior-periodbalances only.Trial Balance > AccountGroupings > Tax CodeAccount GroupingTax Code Tax Code Tax codes and tax codeassignments for clients with ayear end of 2012 or later.menu navigation andfield namenavigation and field name informationTrial Balance > AccountGroupings > Group AccountGrouping > AdvancedAccClass RatioClass Classification codeClassification subcodeIn ProSystem fx Engagement,classification and ratios are seton a group-by-group basis.During the conversion process,you will be asked from whichgroup we should pullclassification and ratios.Grouping schedulesProSystem fx Engagement menu navigation andfield name Workpapers CS menunavigation and field nameComments and additionalinformationTrial Balance > AccountGroupings > Group AccountGroupingEnter Trial Balance > Account Groupings Account group name GroupingCode CodeCode Description Code DescriptionSubcode SubcodeSubcode Description Subcode DescriptionTransactionsProSystem fx Engagement menu navigation andfield name Workpapers CS menunavigation and field nameComments and additionalinformationTrial Balance > Journal EntrySummaryActions > Enter Transactions JE# ReferenceDescription DescriptionAdditional Distributions (Account, Amount, Description) Distributions (Account, Account Description, Amount)menu navigation andfield namenavigation and field name information Reversing journal entry Auto-reverse next periodType:Adjusting Journal Entries Reclassifying Journal Entries Federal Tax Journal Entries Other Journal Entries1 Proposed Journal Entry Type:AdjustingReclassifyingTaxOtherPotentialJournal entries are posted to thespecific engagement for whichthe entries were intended.Engagement-related data transferred during conversionThe following information is provided to identify ProSystem fx Engagement items that are automatically converted to Workpapers CS items.Engagement informationProSystem fx Engagement menu navigation andfield name Workpapers CS menunavigation and field nameComments and additionalinformationBinder Properties Engagement PropertiesName Engagement binder name If you convert multiple binders fora single client, the binders musthave a unique name.Type Type You must select the newWorkpapers CS type during theconversion.Entity In the ProSystem fx Engagementconversion, Entity is determinedby the selection on the TaxGroup selection screen. Thisdata is mapped to the Client >Accounting information tab. Period sequence Period FrequencyBinder Index View Binder TreeEngagement tree structure Engagement tree structureFolder informationProSystem fx Engagement menu navigation andfield name Workpapers CS menunavigation and field nameComments and additionalinformationTab Properties Engagement tree structureIndex # Folder name Index # and Name are combinedto comprise the Workpapers CSfolder name.Name Folder nameWorkpaper informationProSystem fx Engagement menu navigation andfield name Workpapers CS menunavigation and field nameComments and additionalinformationWorkpaper Properties Workpaper PropertiesName NameIndex # ReferenceSign Off: Preparers Preparer You can rename Preparer,Reviewer, and Reviewer 2names in Workpapers CS, ifdesired.Sign Off: 1st Reviewers Reviewer You can rename Preparer,Reviewer, and Reviewer 2names in Workpapers CS, ifdesired.Sign Off: 2nd Reviewers This will depend on staff mappingand whether signoffs are set upin Workpapers CS beforehand. Sign Off Initials Sign Off Initials Initials and date will display underthe signed off heading inWorkpapers CS.ProSystem fx Engagement Excel and Word demographic formulasThe following table lists the applicable ProSystem fx Engagement formulas and the equivalent formula variables in Workpapers CS.ProSystem fx EngagementName FunctionsWorkpapers CS VariablesBinder Name Engagement NameBinder Due Date Completion DateBinder Type Engagement TypeProSystem fx EngagementWorkpapers CS VariablesName FunctionsBinder Report Release Date Report Release DateWorkpaper Name Workpaper NameWorkpaper Index Workpaper ReferenceCurrent Period End Current Period DateProSystem fx Engagement Excel and Word link formulasExcel® and Word® link formulas do not convert.Conversion notes and exceptionsThis section details conversion notes and exceptions.▪Engagement tree structure: The order and appearance of the engagement tree structure in Workpapers CS after the conversion may differ from the ProSystem fx Engagement binder. Please note all items are converted to the correct folder locations within the engagement. To providemaximum flexibility, Workpapers CS does not automatically sort folders and workpapers.▪Excel and Word workpaper add-ins, macros, and links: Excel workpapers are modified during the conversion process for removal of add-ins, macros, and/or links.▪Manual workpapers: Manual workpapers are converted as text documents.▪Tax Codes: If UltraTax CS® Tax Codes are desired during the conversion, a translation of ProSystem fx Engagement Tax Codes to UltraTax CS is available. Only one Tax Code Group will convert.▪Workpaper references: Workpapers CS requires that workpapers have reference values.Workpapers without an index value are assigned a reference value during the conversion. You may rename the workpaper reference, if desired. If a duplicate reference exists in a folder, the duplicate references will be renamed.▪Finalized Binders: Finalized binders will be converted as Active unfinalized binders. We recommend that you convert only active / unfinalized binders.Items not convertedThis section details items not converted.▪Workpapers not in a standard binder folder: This includes workpapers within the Unfiled Workpapers, Conflicts, Incompatible Workpapers, Published Workpapers, and Trash folders. To convert these workpapers, you must move the workpapers into a standard binder folder before the conversion process.▪Trial Balance: Consolidated trial balances.▪Firm information▪Client Information▪Engagement and workpaper password information▪Engagement and workpaper history▪Workpaper notes and templates▪Staff▪M3 Tax CodesData Conversion ReportThe data conversion from ProSystem fx Engagement to Workpapers CS creates a report for each engagement converted. The Data Conversion report lists certain modifications made during the conversion process, such as truncations, abbreviations, and so on. Most items in the report are informational and do not require immediate attention.To access the report, locate and open YYYYYY.html, where YYYYYY is the binder name. The report is placed in the user’s Documents folder.Getting helpHelp & How-To CenterFor answers to questions on using Workpapers CS, access the Help & How-To Center by clicking the Help link on the toolbar. For more information, including sample searches, see Finding answers in the Help & How-To Center.Product supportFrom the Support Contact Information page on our website, you can complete a form to send a question to our Support team. For additional product support, visit the Support section of our website. You can also access our Support website from Workpapers CS by choosing Help > Additional Resources > General Support Information.。
操作手册补充说明 Lift Tools Expo Installer 原始说明的翻译说明书

Lift Tools™ Expo Installer原始说明的翻译First EditionFourth PrintingPart No. 1286259CSGT操作手册补充说明 第一版 • 第四次印刷简介2 Lift Tools ™ Expo Installer零件号 1286259CSGTManufacturer: Terex Global GmbH Bleicheplatz 2 Schaffhausen, 8200 SwitzerlandEU Authorized representative : Genie Industries B.V. Boekerman 54751 XK OUD GASTEL The NetherlandsUK Authorized representative : Genie UK Limited The Maltings Wharf Road Grantham NG31 6BH UK请与我们联系:网址:电子邮件:*********************要点操作机器前,应阅读、理解并遵守这些安全规则和操作说明。
只有训练有素且经过授权的人员方允许操作该机器。
应将此手册当作机器的一部分并始终与机器放在一起。
如有任何问题,请联系我们。
认可的型号Z-45/25 S-65 Z-45/25J S-60HC Z-45/25 RT Z-60/34 Z-45/25J RT Z-60/37DC Z-51/30 Z-60/37FE Z-45 XCZ-62/40 Z-45 DC / Z-45 FE S-40 XC S-40 S-45 XC S-45 S-60 XC S-60 S-65 XC S-60X切勿在任何非指定型号的Genie 臂杆产品上安装LTEI 系统。
© 2018 Terex Corporation 版权所有 第一版: 第四次印刷, 8 月 2021 年Genie 是 Terex South Dakota, Inc. 在美国和许多其他国家/地区的注册商标。
ISO 6722-1-2011

ISO 6722-1
Fourth edition 2011-10-15
Road vehicles — 60 V and 600 V singlecore cables — Part 1: Dimensions, test methods and requirements for copper conductor cables
ii
© ISO 2011 – All rights reserved
ISO 6722-1:2011(E)
Contents
Page
Foreword ............................................................................................................................................................ iv 1 2 3 4 4.1 4.2 4.3 4.4 4.5 4.6 4.7 4.8 5 5.1 5.2 5.3 5.4 5.5 5.6 5.7 5.8 5.9 5.10 5.11 5.12 5.13 5.14 5.15 5.16 5.17 5.18 5.19 5.20 5.21 5.22 Scope ...................................................................................................................................................... 1 Normative references .............................
林肯电力Linc Feed 22M、24M和24M PRO电缆馈线产品说明书
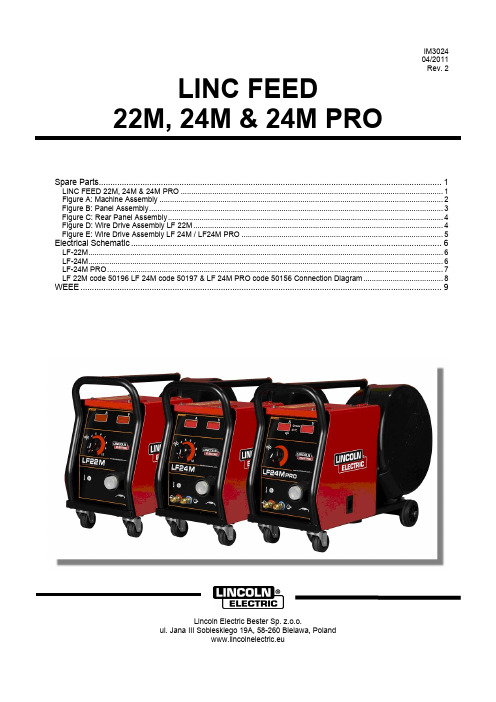
IM302404/2011Rev. 2LINC FEED22M, 24M & 24M PROSpare Parts (1)LINC FEED 22M, 24M & 24M PRO (1)Figure A: Machine Assembly (2)Figure B: Panel Assembly (3)Figure C: Rear Panel Assembly (4)Figure D: Wire Drive Assembly LF 22M (4)Figure E: Wire Drive Assembly LF 24M / LF24M PRO (5)Electrical Schematic (6)LF-22M (6)LF-24M (6)LF-24M PRO (7)LF 22M code 50196 LF 24M code 50197 & LF 24M PRO code 50156 Connection Diagram (8)WEEE (9)Lincoln Electric Bester Sp. z.o.o.ul. Jana III Sobieskiego 19A, 58-260 Bielawa, Polandwww.lincolnelectric.euSpare PartsSP50156/50196/50197 Rev. 207/03LINC FEED 22M, 24M & 24M PROASSEMBLY PAGE NAMEM a c h i n e A s s e m b l yP a n e l A s s e m b l y R e a r P a n e l A s s e m b l y W i r e D r i v e A s s e m b l y L F 22M W i r e D r i v e A s s e m b l y L F 24M / L F 24M P R O CODE NO.:K NO.:FIGURE NO.:A B C D E 50196K14064-1LINC FEED 22M 1111-50197K14065-1W LINC FEED 24M222-150156K14066-1WLINC FEED 24M PRO333-1Figure AFigure A: Machine AssemblyItem Description Part Number QTY12345 1KNOB FI389ET10491R1X X X2LAMP0917-421-024R1X X X3QUICK COUPLING0744-000-152R2•X X4EURO SOCKET R-8040-140-3R1•X XEURO SOCKET R-8040-042-3R1X••5EURO SLEEVE1361-599-708R1X X X6FRONT PANEL R-3019-154-1/08R1••XFRONT PANEL R-3019-154-3/08R1•X•FRONT PANEL R-3019-154-2/08R1X••LABEL (22M)R-0010-247-1R1X••7LABEL (24M)R-0010-248-1R1•X•LABEL (24M PRO)R-0010-249-1R1••X8WASHER0744-200-041R1X X X9PC BOARD PD50918-432-073R1••XPOTENTIOMETR1158-113-304R1X X•10CASTER1029-660-003R2X X X11ROTARY BRACKET1361-598-180R1X X X12BOLT0654-610-004R1X X X13LABEL2719-107-732R1X X X14SIDE PANEL R-1019-224-1R1X X X15WHEEL PG801029-660-081R2X X X16RACK R-3019-156-1/08R1X X X17REEL HUB STANDARD0744-000-192R1X X X FASTENING CUP B11035-11X X X18SPOOL COVER0749-901-003R1X X X19COVER R-3019-162-1/02R1X X X20WARNING LABEL2719-107-728R1X X X21BRIDGE RECTIFIER1156-112-044R1••X22SOLENOID GAS SWITCH0972-423-002R1X X•22SOLENOID GAS SWITCH0972-423-038R1••X23PC BOARD G4560C-3731-399-3R1••XPC BOARD US-69-6Y024-6R1X••PC BOARD US-69 2Y024-2R1•X•24SIDE PANEL R-1019-225-1R1X X X PC BOARD US67C-3731-400-2R1••x25PC BOARD WAV10918-432-006R1•X•26CONTACT RAIL R-1010-038-1R1•X XCONTACT RAIL R-1010-008-1R1X••27SHUNT0941-712-026R1X X X28CONTACT RAIL R-1010-036-1R1•X XCONTACT RAIL R-1010-041-1R1X••29LABEL R-0010-341-1R1••XFigure BFigure B: Panel AssemblyItem Description Part Number QTY 12345KNOB FI259ET13639-3R 2X ••KNOB FI259ET13639-3R 3•X •1KNOB FI259ET13639-3R 5••X LABEL R-0010-278-1R 1X ••LABEL R-0010-277-1R 1•X •2LABEL R-0010-252-1R 1••X DIVIDER R-1019-209-1/08R 1X ••DIVIDER R-1019-208-1/08R 1•X •3DIVIDERR-1019-181-1/08R 1••X POTENTIOMETR 1158-113-304R 2X ••4POTENTIOMETR 1158-113-304R 3•X X 5SWITCH 2FA53-731158-650-021R 1X X X 6SWITCH 6FC53-731158-650-022R 1X X X 7SWITCH PRS D-4542-012-2R 2••X 8FUSE SOCKET 1158-632-032R 1X X •9CAP 1158-632-033R 1X X •10FUSE1158-660-084R1XX•Figure CFigure C: Rear Panel AssemblyItem Description Part Number QTY12345 1QUICK CONNECT COUPLING0744-000-149R1X X X2SOCKET X111158-641-129R1X X X3SOCKET X5D-2985-002-1R1X X X4QUICK CONNECT COUPLING0744-000-152R2 X X5LABEL R-0010-354-1R1X X XFigure DFigure D: Wire Drive Assembly LF 22MItem Description Part Number QTY12345 1WIRE FEEDER COMPLETE0744-000-166R1X2FEED PLATE0646-231-123R1X3PRESSURE ARM COMPLETE0646-231-096R1X4FIXING ARM COMPL.0646-231-097R1X5ADAPTER COPL.0744-000-194R1X6INLET GUIDE COMPLETE0744-000-193R1X7SPRING PRESSURE ARM0646-231-125R1X8AXIS PRESSURE ARM0646-231-120R1X9FIXING CAP0744-000-195R1X10METAL COVER0646-231-127R1X11 D.C. MOTOR1111-722-045R1X12FERRITE TUBE1158-290-036R1X13WIRE GUIDE TUBE D-1829-066-4R1X14WOODRUFF KEY0646-231-102R1XFigure EFigure E: Wire Drive Assembly LF 24M / LF24M PROItem Description Part Number OLD Part Number QTY12345 WIRE FEEDER COMPL.0744-000-241R1X1FEED PLATE0646-233-002R S51997-11X2FIXING ARM COMPL.0646-233-015R2X3INLET GUIDE0646-233-025R T511251X4AXIS PRESSURE ARM0646-233-003R S51997-22X5SPRING PRESSURE ARM0646-233-013R S51997-122X6PRESSURE ARM COMPL.L0646-233-007R S51997-51X7INTERMEDIATE GUIDE0646-233-023R T511261X8AXIS DRIVE ROLL0646-233-020R S51997-192X9GEAR WHEEL ROLL0646-231-090R S51889-22X10GEAR WHEEL MOTOR0646-233-028R S518881X11FIXING CAP0646-233-022R S51997-202X12METAL COVER0646-233-027R S51997-231X13PRESSURE ARM COMPL.R0646-233-005R S51997-41X14MOTOR -28V1111-722-047R L120731X15WOODRUFF KEY0646-231-102R1XElectrical Schematic LF-22MLF-24MLF-24M PROLF 22M code 50196 LF 24M code 50197 & LF 24M PRO code 50156 Connection DiagramWEEERecycleSTRef.F eA lC uB r a s sB o a r d sP l a s t i c sL i q u i d C r i s t a lE x t e r n a l E l e c t r i c C a b l e sC a p a c i t o r sFront Panel Assembly 1X Rack Assembly2X Right Side Access Panel 3X Left Side Panel4X Top Panel Assembly 5XBrake6X Colorless Lamp 7XXConductor Rail 8XCover9XEuro Connector Assembly 10XX Gas Heater Socket 11XKnob12,13,14XP.C.Board Assembly OP-1915XX P.C.Board Assembly 16, 17XX Potentiometers 18X X Rectifier Bridge 19XReinforced Hoses 20, 21X XRotary Bracket 22XShunt23X Solenoid Valve 24XXSpool Cover 25XSwitches26, 27, 28X X Terminal Blocks 29X X X Welding Socket 30XX Wheels31, 32XX。
FASTCAM使用手册
FastCAM®自动编程套料软件FastCAM®技术手册适用于Windows 98/2000/NT/XP/VISTA操作系统发思特软件(上海)有限公司版权所有本手册中所有内容受著作权相关法律保护,未得到发思特软件(上海)有限公司书面许可,不得以任何形式或手段(电子的或机械的)对本手册内容进行复制、印刷、翻译、发行,违者必究.本手册之内容如有变动,恕不另行通知。
© 2001—2008 发思特软件(上海)有限公司,保留所有权利。
2008年9月第一版 2008年9月第1次印刷FastCUT, FastCAM, FastFRAME, FastSHAPES, FastNEST, FastTRACK, FastAIR, FastCOPY 和FastLOC Dongle是Fagan Microprocessor Systems Pty Ltd公司的注册商标。
Microsoft Windows、Windows NT、是Microsoft Corporation的注册商标.本手册中涉及的其他产品商标为相应公司拥有。
®软件 (5)安装/卸载F AST CAMF AST CAM®简介 (14)关于本手册 (17)FASTCAM 快速使用指南 (19)1.用户界面 (19)2.绘制零件图 (23)3.使用F AST PATH自动生成切割代码(NC) (25)4.校验切割代码(NC) (28)5.操作流程图 (31)FASTNEST快速使用指南 (32)1.F AST NEST介绍 (32)2.用户界面 (33)3.套料步骤 (34)4.F AST NEST套料流程图 (42)第一章软件初步 (44)1—1开始 (44)1—2“加密狗” (44)1-3运行F AST CAM绘图程序 (45)1-4绘制零件 (45)1—5使用鼠标 (46)1-6屏幕坐标系 (49)1—7绝对坐标编程 (51)1-8增量式编程 (55)1—9输入点 (62)1-10线菜单 (67)1-11弧菜单 (68)1—12存盘与读入文件 (70)1-13显示菜单 (73)1—14删除菜单 (73)1—15修剪菜单 (74)1-16生成编程路径 (74)1—17套料理论及其应用 (75)FASTNEST 新增功能 (89)DWG套料 (89)配对共边切割功能 (89)退回移动 (91)废料切割 (92)鼠标滚轮缩放 (93)旋转板材 (93)重叠检查 (94)全自动任意共边切割 (94)桥接 (95)第二章FASTCAM (97)2—1文件菜单 (97)2—2线菜单 (103)2-3弧菜单 (106)2—4点菜单 (109)2-5标准件菜单 (111)2-6删除菜单 (115)2-7块菜单 (118)2-8显示菜单 (124)2—9工具菜单 (130)2-10文字 (133)2-11CAD层 (134)2-12校验 (136)2—13修剪 (137)2-14编程路径 (138)2-15控制点 (138)2-16坡口 (139)2—17NC编程路径 (140)2-18语言 (145)第三章 FASTPATH 手册 (148)3-1F AST PATH简介概念 (148)3-2F AST PATH简介单切割过程快速设置 (148)3—3F AST PATH选择菜单 (151)3—4设置切割过程 (155)3-5内边界引入引出线 (157)3—6外边界引入线 (159)3—7切割顺序 (161)3—8排料选项 (162)3—9特定设置 (164)3—10垫缝/补偿 (165)3—11坡口 (168)3-12雕刻/桥接 (169)4-1文件切割表 (170)4—2套料文件 (176)4—3自动套料 (182)4—4手动套料 (184)4—5显示 (188)4-6输出 (194)4—7实用工具 (196)4—8语言 (203)第五章FASTPLOT (204)5-1NC文件 (204)5—2NC工具 (206)5—3NC系统 (208)第六章FASTCAM文件结构 (209)文件类型: (209)控制器与“CONTROL.CON"文件 (213)M代码示例: (216)G代码示例: (217)"SETUP。
fastcam常见问题解答

fastcam常见问题解答FastCAM系列软件-问题解答库1、使用自动套料功能是否对板材的利用可以达到最佳?解答:自动套料是根据一定的数学优化算法对零件的计算排列,不可能适合所有情况,因此,一般而言,自动套料不可能通过一次运算就达到最优的结果,人的脑力也不是一次就得到最优的结果。
但是,自动套料可以提高效率,可以在短时间内给出较好的结果。
FastCAM 软件的优异功能是用自动套料和手动套料的交互,即达到计算机的自动套料与人的脑力的互动,先自动套料,当看到某个零件位置排列不合适时,马上按暂停键,或鼠标右键暂停,然后移动零件到合适位置,接着按继续自动套料。
这样可以结合自动套料的快速和人工套料的经验和智慧,使套料既快又好。
2、如何保存余料并在余料中进行再套料?解答:FastNEST 可以选用给定尺寸的矩形板套料,也可以用不规则的余料板进行套料。
其好处是可以充分利用剩余板料,节省板材解答:可能是您所使用的FastCAM软件是标准版软件,不是专家版软件,或者是设置了手动排料的缘故。
解决方法:在FastNEST 的界面中,打开“排料”菜单,检查是否在“设置手动排料”选项前面有打钩。
若有,则去掉该钩,三个按钮就会变成有效,就可以使用自动手工交互套料功能。
若无法去掉前面的钩,则软件为标准版,请联系FastCAM公司进行软件升级,把标准版软件升级为专家版软件。
4、能否指定或改变一批零件的排料顺序?解答:可以指定零件的排料顺序,在FastNEST套料软件中,在文件切割表->增加零件,或者快捷按钮增加零件时,在排料零件数据中修改各个零件的优先级,这是零件在排料中的重要程度,范围是0-9,重要性依次递增,0表示不需要排料,9表示必需首先考虑。
针对不同的零件设定不同的优先级,就可以指定零件的排料顺序了。
5、能否指定或改变零件的切割顺序?解答:能指定或修改零件的切割顺序,通过对零件切割顺序的优化,NC程序被优化,可以有效提高切割效率,防止热切割变形。
- 1、下载文档前请自行甄别文档内容的完整性,平台不提供额外的编辑、内容补充、找答案等附加服务。
- 2、"仅部分预览"的文档,不可在线预览部分如存在完整性等问题,可反馈申请退款(可完整预览的文档不适用该条件!)。
- 3、如文档侵犯您的权益,请联系客服反馈,我们会尽快为您处理(人工客服工作时间:9:00-18:30)。
Note :Here above is an example , please remove it with your own information
Key process, key technolgy,key material information are welcome to listed No
Private 私有10000EURO 1000pcs TS16949ISO14000
Yes 注意:上面所填均为示例,请删除后填写贵公司的信息:关键工艺,关键技术,关键材
Company Name 公司名称Ownership 所有制Total Sales Revenue 总销售收入Annual sales in pieces 年销售量ABCDEFG
钢杆成品
吗?还是其
他?
Shanghai Process type 工艺类型Steel bar+machin
ed? Or what
can you sell Steel bar without full machined 是否销售钢杆半成品?Plant Location 厂区位置Key machine/material /process/technolog y 关键设备/材料/工艺/技术
Process inhouse or not 是否为内部工艺
3~5 L 5~8 L 9~13 L >13 L
3~5 L 5~8 L 9~13 L >13 L
No Yes, 7L,
for
Engine type:ZX CVVB 7l 适用的
发动机
类型No Yes 16L Type:ZXCVBN Note:上面要求填写的百分比是贵公司占你的供应商年采购额的百分比
Main Customers and y
Weichai 潍柴3%Yuchai 玉柴
1% (note: the % represents your share in
your customer's annual buy)(注;%代表
你的份额占客户每年购买量)
and your market share in below customers and engine type ap
7%0%FAW W
Dongfeng东风Cummins康明斯
3~5 L5~8 L9~13 L>13 L3~5 L5~8 L9~13 L>13 L3~5 L
pe application下列客户和发动机类型申请表中的主要客户和市场份额AW Wuxi Diesel大众锡柴FAW Dalian Deutz大连大众道依茨
CNHTC中国重型汽车集
5~8 L9~13 L>13 L3~5 L5~8 L9~13 L>13 L3~5 L5~8 L
9~13 L >13 L 3~5 L 5~8 L 9~13 L >13 L
A B C
户和市场份额
Main Competitors
中国重型汽车集团Others 其他
What other
products you
have in your
company
D
Camshaft,valves。