美国胜利 SunLite E1中文手册(旧键盘)
喜利得电动工具产品手册
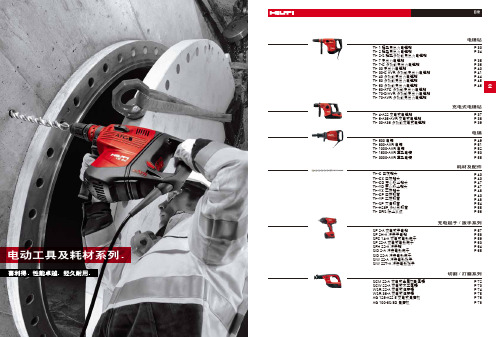
压丝
龙丝
攻
合旋
锚旋
螺
板入
栓入
钉
安混
螺
装凝
栓
锚土
紧
栓上
固
于开
压
压孔
薄
合
合器
钢
板
板用
板
页 码
/
(mm) (mm) (mm) (mm) () ()
(KG) (V)
10.8 1.1/1.2
2.6 35 ø6 ø8 ø4.8x19 - - ø20 ø40 -
14.4 1.5 21.6 2.5 21.6 2.6 10.8 1.1 21.6 1.5 21.6 1.5 21.6 3.0
品名
TE 2 套装(机具+耗材)
品号
3457956
①
TE-C夹头、4 m长电源线、侧把手、深度尺、润滑油、使用说明,耐冲击塑料工具箱及配套耗材
TE 2-S 套装(机具+耗材)
3457957
TE-C夹头、4 m长电源线、侧把手、深度尺、润滑油、使用说明,耐冲击塑料工具箱及配套耗材
②
TE 2-S 精确定位,易碎材质钻孔
率大
推
单
重
荐
凿破材质
次
量
凿
工
锤 击 力
公 斤
破 比 例
作 方
尾
向
柄
花岗岩/
页 码
钢筋混凝土 石头/实心砖 空心砖/瓦
100%
1100 W
5.6
49
7.5 J
100%
1850W 21J
10.6
51
100%
1750 W
26 J
12.5
52
伦茨中文手册资料

– Firmware version 01.51.01 (固件版本01.51.01)
▪ 2x Motor MCS06C41 with resolver and tooth wheel(2个 伺服电机带旋变和齿型轮)
– left Z = 72 and 32 (左 Z=72,32) – right Z = 60 and 20 (右Z=60,20)
9400 Servo Drives
Target
First without engineer Engineer with single drive, basics of TA Structured project, further TA FB editor Multi axis applications Online alternatives
Welcome!
Practical introduction: 实用简介
L-force 9400 Servo Drives L-force | Engineer
19 January 2007
Trainer: Torsten Heß, Markus Toeberg, Markus Warnecke, Stefan Witte
9400 Servo Drives
Target
First without engineer
Engineer with single drive, basics of TA Structured project, further TA FB editor Multi axis applications Online alternatives
RFR Controller enable (Reglerfreigabe)控制器使能 DI1 Deactivation of quick stop 快停取消 DI2 Start 启动 AI1[%] Speed setpoint 速度设定
美国SunSet SDH SDH分析仪中文操作手册V1.2

SDH测试仪操作手册美国胜利通讯设备公司MAN-12980-US001-Rev C00美国胜利通讯设备公司SunSet SDH16J快速操作手册安全须知Charpter1 仪表简介1.0 前面板外观1.1 按键说明1.1.1 白色标识1.1.2 黑色标识1.1.3 橙色标识1.2 LED 指示灯1.2.1 通用LED 指示灯1.2.2 各个速率的LED 指示灯1.3 接口面板Chapter 2 菜单1.0 设置1.1 测试配置1.1.12.5G 设置1.1.2 622M 设置1.1.3 155M 设置1.1.4 139M 设置1.1.5 2M 设置1.2 发送测试码样1.2.1 定制测试码样2.0 结果2.1 测试结果2.2 支路扫描2.3 观测测试结果3.0 SDH 特性3.1 开销监测3.2 发送RSOH/MSOH 字节3.2.1 发送K1, K2 字节3.2.2 发送S1 字节3.3 POH 监测3.4 发送通道开销字节3.4.1 编辑C2 HP 标签字节3.4.2 编辑C2 LP 信号标签3.4.3 发送K3 字节3.4.4 发送V5 字节3.4.5 发送K4 字节3.5 踪迹生成3.5.1 J0 段踪迹生成3.5.2 J1 HP 踪迹生成1SunSet SDH16J快速操作手册美国胜利通讯设备公司2 3.5.3 J1 LP 踪迹生成3.5.4 J2 通道踪迹生成3.5.5 预期通道踪迹数据3.6 指针3.6.1 指针监测3.6.2 指针调整3.6.3 G.783 指针测试序列3.7 APS 定时3.8 DCC BERT3.9 公务线测试4.0 告警错误4.1 出错注入4.2 告警生成5.0 系统设置5.1 测试参数5.2 通用指标设置5.3 清除内存5.4 版本/选件5.5 系统文件Chapter 3 应用1.0 验证新线路2.0 监测2.1 监测在线业务环路2.2 监测开销字节3.0 点-到-点设备验证3.1 端-到-端测试3.2 端-到-环路测试3.3 复用设备测试3.4 SDH ADM 测试Chapter 4 参考缩略语目录附录1.抖动漂移功能手册美国胜利通讯设备公司SunSet SDH16J快速操作手册欢迎使用SunSet SDH重要的安全须知警告:本产品为一类激光产品应避免光发射机对眼睛的直接照射当不使用时应关闭光发射机以确保安全性可插拔的软件卡槽:只有在电源关闭的情形下才能插入或取出软件卡盒否则会对卡盒造成损坏SDH:15V DC, 1.8A适配器AC 100V-240VAC, 50/60Hz.只能用本公司的专用充电器,电池包:只能用本公司的专用电池。
Victor Smart-Kill 用户指南说明书

SMART-KILL ™USER GUIDE Electronic Traps A t t i c T r a pR O D E N T C A U G H T•A smart phone, tablet or similar connected mobile device.•Broadband internet connection. Do NOT use a phone/tablet hot spot.•A strong Wi-Fi signal where trap will be placed.•Password for your home network.•A Victor ® Smart-Kill™ trap.•A set of brand new batteries (4"AA" for the mouse trap, 4 "C" for the rat trap).You Will Need:Getting Started:Download the free Victor ® Pest App from the Apple App Store ® or Android Google Play ™ store. Check that the unit is turned “OFF” by making sure the power button is not pressed down. Insert batteries into the battery compartment and launch the Victor ® Pest App .Connect your trap by following the instructions on screen. Step by step instructions are also in this guide.Once the power button and Wi-Fibutton have been pressed during the initial setup, users will have 5 minutes to successfully nish. Once 5 minutes have passed, the user should power the trap off and start over if setup was not successful.123Trouble Shooting:•Once a rodent is caught, a noti cation is sent to your connected device if it is connected to the Victor ® Pest App .•A noti cation is sent to yourmobile device when the battery life of the trap is low. Replace batteries when you receive this noti cation.• You can share your experience through social media within the App.• The trap will still operate without being connected to Wi-Fi. However,you will not receive noti cations upon catching a rodent and will need to regularly check the trap.•For general maintenance, you can visit /electronics.STOP! If you have questions or problems with your purchase do not return it to the retail store. Please contact us directly for immediate assistance at 1-855-5-VICTOR.Did You Know?You may need to check your Wi-Fi signal strength. Do this by making sure your mobile device is connected to your Wi-Fi network. Hold your mobile device in the place where your Victor ® Smart-Kill ™ trap will be stationed and check the Wi-Fi signal strength.If you see:Indications that the trap did not successfully connect to Wi-Fi during setup:•A network/server error has occurred if the blue Wi-Fi light and the red Victor ® “V” light stay ON for 5 seconds. Power the trap off and start over.Smart-Kill ™ trap.• Buy a Wi-Fi range extenderWi-Fi signal is strong. Y ou’re all set!Wi-Fi signal is weak. Y our Victor ® Smart-Kill ™ trap will likely connect to your Wi-Fi network, but connection may be intermittent.•Where should I place my trap?Traps can be placed anywhere indoors. Place trap against a wall where rodent activity is frequently seen.•Where is my trap/QR code?The QR code is located on the bottom of the mouse trap and the back of the rat trap.• What kind of bait should I use?The best baits are high in fat and protein, such as peanut butter or hazelnut spread.Frequently AskedQuestions•A password error has occurred if the blue Wi-Fi light and the red Victor ® “V” light blink for 5seconds. Re-enter password. Note that passwords are case sensitive.Frequently AskedQuestions•How much bait do I need?The trap has a bait cup that shows you exactly how much bait to use. Do not over ll the bait cup. Do not place bait on the metal plates. Doing so may interfere with the electrical functionality and your trap may not work unless you completely clean the bait off.•How do I dispose of a caught mouse?Press the power button to turn the unit “OFF.”Open the kill chamber door and properly discard rodent. Clean and bait trap after each use for most effective results. Press the power button to turn the unit back on. The trap will automatically reconnect to Wi-Fi. Opening and closing the kill chamber door willre-arm the mouse trap if it has not been powered “OFF”.•How do I dispose of a caught rat? Press the power button to turn the unit “OFF.” Properly discard rodent. Clean and bait trap after each use for most effective results. Press power button to turn the unit back on. The trap will automatically reconnect to Wi-Fi.1.Press Power Button Press the power button to turn the trap on. The Victor ® “V” will blink green 3 times.2.Press and Hold Wi-Fi Button for 5Seconds The Wi-Fi button will blink blue 10times while the trap is connecting.21Important Note: Some screens,instructions and settings may differ slightly depending on what device you are using.3.Scan Trap CodeCenter the trap’s code in the window on the screen. The trap code is theQR code located on the bottom ofthe mouse trap and the back of therat trap. See FAQ page for images of QR code locations.If you have trouble successfullyscanning the code, try changing thedistance between the trap andmobile device. Alternatively you can enter the 15 digit alphanumeric code manually by pressing the “ENTERCODE MANUALLY” text found on the bottom of the screen. Enter thes erial number found next to the QRcode on your trap.334.Connect Mobile Device to TrapGo to Wi-Fi settings on your device by pressing the red “GO TOSETTINGS” button. Select the trap, which is VICTOR followed by 15alphanumeric digits.(Ex: VICTOR-WM170818BE00004).Press “CONNECT”, then press theb ack button.445. Connect Trap to Wi-FiSelect the Wi-Fi network toconnect the trap to.Enter the network password forthe Wi-Fi network, then press the red “CONNECT” button. It maytake up to 1 minute to connect.556. Connected.A noti cation appears when thetrap successfully connects. Press the red “NEXT” button andcontinue to step number 8.567. Unable to ConnectIf your trap did NOT successfully connect, go to the Settings menu of your mobile device, then select the Wi-Fi option.Select more options (often can be found by pressing the options button in the top right corner) then select “Saved Networks.”777. Unable to Connect (Continued)Find the trap name(Ex: VICTOR-WM170818BE00004)and select it.Select “FORGET.”Power trap off, then repeatsteps 1 through 7. If the trapstill does not connect, visit theTrouble Shooting section orcall 1-855-5-VICTOR forimmediate assistance.778. Name Your TrapAfter successful connection,name the trap and pressthe red “NEXT” button.9. Bait and Place TrapSwipe through the threeinstruction screens on baitingand placing the trap, thenpress the red “DONE button.Visit the Frequently AskedQuestions section for moreinformation on baiting andplacing the trap.10.Monitor TrapStay up to date on trapactivity from anywhere viayour mobile device.89211. Press Power Button Press the power button to turn the trap on. The Victor ® “V” will blink green 3 times.2. Press and Hold Wi-Fi Button for 5 Seconds The Wi-Fi button will blink blue 10 times while the trap is connecting.Important Note: Some screens,instructions and settings may differ slightly depending on what device you are using.3. Scan Trap CodeCenter the trap’s code in thew indow on the screen.The trap code is the QR code located on the bottom of the mouse trap and the back of the rat trap. See FAQ page for images of QR code locations.If you have trouble successfully scanning the code, try changing thed istance between the trap andm obile device. Alternatively you can enter the 15 digit alphanumeric code m anually by pressing the “ENTERC ODE MANUALLY” text found onthe bottom of the screen. Enter thes erial number found next to the QR code on your trap.334. Connect Mobile Device to TrapGo to Wi-Fi settings on your device by pressing the red “GO TOSETTINGS” button.Select the trap, which is VICTORfollowed by 15 alphanumeric digits.(Ex: VICTOR-WM170818BE00004).Press the back button on thedevice’s top menu bar to return to the Victor®Pest App.3445. Connect Trap to Wi-FiPress the red “NEXT” button to go to Wi-Fi settings.Choose the Wi-Fi network youwould like your trap to connect to.35355. Connect Trap to Wi-Fi (Continued)Enter the network password forthe Wi-Fi network, then press the red “SUBMIT” button.356. Reconnect Mobile Deviceto Wi-FiGo to the Wi-Fi settings on yourdevice by pressing the red “GO TO SETTINGS” button.Choose a Wi-Fi network.Most devices will automaticallyre-connect to the most recentlyselected Wi-Fi network. If it doesnot, select it. Then press the back button on the phone’s top menu bar to return to the Victor® Pest App.3666. Reconnect Mobile Deviceto Wi-Fi (Continued)Press the red “NEXT” button.It may take up to 1 minute to connect.36367. Connected.A noti cation appears when the trap successfully connects. Press the red “NEXT” button and continue to step number 9.8. Connection ErrorIf your trap did NOT successfully connect, visit the Trouble Shooting section of this manual or click“CONNECTION HELP” on screen.37389. Name Your TrapAfter successful connection,name the trap and press the red “NEXT” button.10. Bait and Place TrapSwipe through the threeinstruction screens on baitingand placing the trap, then press the red “DONE” button. Visit the Frequently Asked Questionssection for more information on baiting and placing the trap.11. Monitor TrapStay up to date on trap activityfrom anywhere via your mobile device.39310SMART-KILL™/smart-kill。
DOSE1操作规程说明书

DOSE1操作规程说明书(根据英文版用户手册第五章翻译,其中提到的图请参考原英文手册中相应的图号。
)目录目录 (2)1、准备工作 (3)2、基本操作方法 (3)3、选择探测器 (5)4、选择校正参数功能 (7)5、选择极化电压 (12)6、本底测量 (15)7、手动起/停测量 (18)8、自动计时器测量 (20)1、准备工作包括模体的设置、探测器的连接、静电计的连接等等。
1.1模体的设置:根据测量的要求,选择适当的模体:固体模体(用于日常的绝对剂量检验工作)、或用于绝对剂量测量的小水箱(用于严格的绝对剂量测量)。
将模体正确地摆置在加速器的照射也内,按照绝对剂量测量规范的要求,设置参考条件。
注意保证电离室周围有足够的物质存在,以提供必要的散射条件。
1.2探测器的连接:按照所测射线的线质,选择适当的探测器。
一般采用指形电离室(“Farmer”型电离室)测量X( )-射线和高能电子线。
而对于10MeV以下的电子线适宜选用平行板型电离室。
并将电离室与延长电缆相连接(该延长电缆最好是剂量仪刻度时使用的同一延长电缆),但现在不要将延长电缆与静电计相连接。
注意:更换探测器的步骤是——先在静电计中设置选择连接的探测器,然后再将探测器与静电计相连接。
这样的步骤可以避免由于极化电压设置的不正确而造成电离室的损坏(因为在选择电离室时,极化电压会被自动关闭。
)1.3静电计的准备:将静电计摆置在治疗室外的适当位置,打开电源开关,并触动等待(Stand By)触摸按钮。
等待片刻,显示屏上会出现“System Ready”的信息框。
DOSE1的基本显示窗口如图5-01所示。
现在,你需要选择测量所需要的探测器(有时当前系统却省的探测器恰恰是你想用的,你就不必再从新选择了)。
然后,根据需要,选择适当的校正算法,并打开高压。
2、基本操作方法下面介绍部分按键、按钮的使用方法:∙软件控制按键:这些触摸按键位于显示屏的下方,它们的具体功能根据显示屏的模式和窗口的状态而定。
SunSet_E20_快速操作手册
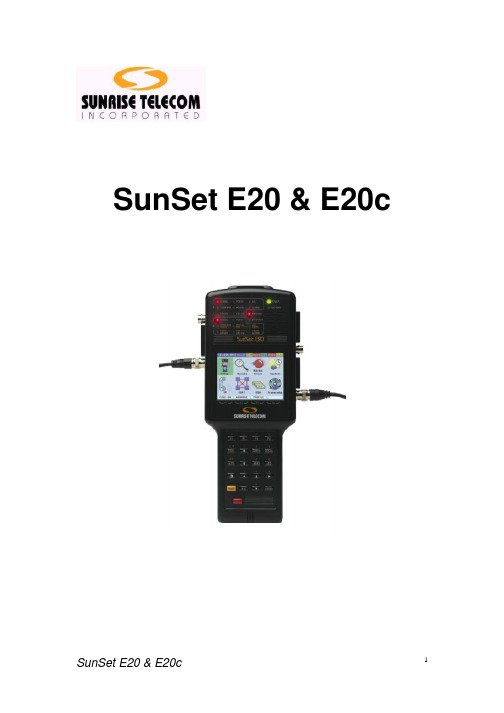
快速操作指南
美国胜利电讯公司北京办事处
SunSet E20 & E20c 快速操作手册
美国胜利电讯公司北京办事处 1
Chapter 1 初始化设置 Initial Setup
1.0 开箱检查 Unpacking the SunSet 2.0 电池包检查 Replacing the Battery Pack
SunSet E20 & E20c 快速操作手册
美国胜利电讯公司北京办事处 11
1.0 菜单简介 Introduction
菜单树简介 E20 MAIN MENU TEST CONFIGURATION
E1SINGL E1DUAL E1-MUX MUXTEST DATACOM TEST PATTERN MEASUREMENT RESULT Line 1, Line 2 Summary Line 1, Line 2 Frequency Line 1, Line 2 G.821 Line 1, Line 2 ALM/SIG Line 1, Line 2 M.2100/550 Line 1, Line 2 G.826 OTHER MEASUREMENTS VIEW RECEIVED DATA VIEW FAS WORDS VIEW MFAS WORDS PULSE MASK ANALYSIS X.50 ANALYSIS (N/A E1-MUX mode)
ERROR INJECTION中进行设置
AUTO AUTO 键有两个功能key has two functions: 1) 按 AUTO 键可使仪表自动和接收的线路码型 2) 按 AUTO 键可以重新启动测试
帧结构
测试图案进行同步
玻妞新版说明书

说明书改版形式:图文结合,上图下文,形象说明框架:1,安全注意事项2,产品组成1)包装内容:主机、适配器、安全绳、遥控器、清洁环、清洁布2)技术参数3)部件名称:产品每个按键部位介绍3,产品使用步骤:1)使用前检查:2)安装清洁布3)连接适配器与DC延长线4)连接安全绳5)喷清洁液6)产品工作:连接电源、打开电源开关,吸附、开始工作7)产品暂停8)结束工作4,维护保养:清洁布保养,机器主机5,灯效及提示音6,故障排除1.安全注意事项使用本产品前请仔细阅读此说明书。
请保存好说明书。
1.产品不能由8岁以下的儿童、身体或者精神上有障碍的人使用。
若需要使用,请在监护人的监督指导下进行。
请不要让儿童靠近处于工作状态的产品,或将产品作为玩具玩耍。
2.仅当室外温度在0度以上40度以下、无大风、无雨,空气干燥的情况下方可在室外使用此产品。
产品工作温度:0℃~40℃(32℉~104℉)。
产品储藏温度:-10℃~50℃(14℉~122℉)。
3.第一次使用前务必充电5小时左右,保证内置锂电池充满电(绿灯亮)后使用。
4.本产品在工作时,请始终保持产品处于通电状态。
产品内置锂电池仅用于维持产品在突然断电情况下、在限定时间内保持吸附在玻璃上不跌落,不作为正常工作供电。
5.使用前请检查安全绳是否破损,绳結是否松脱。
使用时系好安全绳,并将安全绳绑住屋內的固定物,以免发生危险。
6.本产品在使用过程中,请确保有人在旁看护,必要时可以为产品提供帮助。
7.请勿在无框玻璃,有弧度玻璃、破损缝隙及凹凸不平玻璃上使用本产品,以避免玻璃破碎、产品跌落等风险。
8.严禁在大面积潮湿或油性玻璃上使用,以避免产品打滑造成跌落的风险。
产品使用存放需远离热源或易燃物。
9.请勿将本产品放在水中或其他液体中,请勿直接对机器喷水,造成电击危险;禁止用潮湿的手触碰插头或产品。
10.高层户外使用本产品时,建议在楼下地面设置危险警示区,禁止人员靠近。
11.产品使用时需确保产品完全吸附在玻璃上方可放手,清洁完毕时先拿下机器再关闭电源。
VICTOR 101 EN英文说明书-EN

VICTOR 101 Instruction Manual for PortableOscilloscopeTable of ContentsI. Overview (3)II. Open-case Inspection (3)III. Safety Precautions (3)IV. Technical Characteristics (4)V. Appearance Description (7)VI. Operation Instruction (7)VII. Charging Battery (17)VIII. SD Card Storage (16)IX. Troubleshooting (17)WarningThe warnings and safety requirements stated in this manual must be strictly observed to ensure safety. Please read the operating instructions carefully before using this instrument.I.OverviewVICTOR 101 Portable Oscilloscope is a 32-bit compatible digital storage oscilloscope based on ARM Cortex™-M3, equipped with 320*240 color display, SD card, USB port and features charging function. VICTOR 101 is compact, easy-to-use and convenient. It is suitable for experiment, home appliance service and general electronic engineering purposes.II.Open-case Inspection1.VICTOR101 Portable Oscilloscope 1 unit2.Charger 1 PcB cable (5P MINI) 1 Pc4.20MHz probe 1 pair5.Instruction manual 1 copy6.Product qualification certificate 1 copy III.Safety PrecautionsPlease read the following rules. Not following these rules may lead to danger or break the law. Please thoroughly read the user’s manual for more informationon safety issues.1. Please read this instruction manual carefully before using this portable oscilloscope.2. Do not use the portable oscilloscope and measuring wire with damaged surface.3. Do not measure signals above DC100V to avoid damage to the instrument.4.The instrument shall not be stored at high temperature; direct sunlight shall be avoided so as not to affect the service life of LCD.5. When battery voltage is low and the symbol "" occurs, recharge the battery immediately.IV.Technical Characteristics-Ultra-portable and light-weight- 2.8” 320*240 color display-Micro SD card for waveform storage-200kHz bandwidth-1Msps sampling rate-Adjustable measurement symbols-Multiple triggering modes -Built-in test signal-USB rechargeable battery -Open source programV.appearanceVI.operating instructionFigure 4Green curve on the screen is the waveform of current signal; purple curve is the non real-time waveform from Micro SD card for reference; the two horizontal dotted lines in white are “voltage measurement cursor 1”and “voltage measurement cursor 2”, respectively; horizontal dotted line in yellow is the mark of triggering voltage; horizontal dotted line in purple is the baseline of vertical offset; the two vertical dotted line in white are “time measurement cursor 1”and “time measurement cursor 2”, respectively. Thicker horizontalyellow solid line under the bottom of the screen and thewhite column on the top indicate the position of current window relative to the entire data buffer.Press keys to select, modify and adjust corresponding items and parameters.1.Start lock key “”.2.Up selection key “”.3.Left selection key “”.4.Right selection key “”.5.Down selection key “”.6.Menu selection key “”.7.Power switch key “”.8.Signal input port.9.SD card slot.D port.11.Synchronization mode selection.With the cursor blinking, press and keys to select various synchronization triggering modes. Four synchronization modes, “AUTO”, “NORM”, “SING”and “NONE”are available. “AUTO”is automatic synchronization scanning mode, where if the input signal is not enough to trigger, signal waveform is still displayed. “NORM” is normal scanning mode, where if the input signal is not enough to trigger, signal waveform is not displayed. “SING”is single scanning mode, where if the signal is triggered/scanned/sampled and displayed once, it enters pause mode and you needto press to restart. “NONE”is random sampling display mode. “SCAN”is a mode normally used for endured scanning and is suitable for observing the change of low frequency signals.1.Selection of vertical sensitivity.With the cursor blinking, press and keys to select various vertical sensitivities. There are 19 ranges of vertical sensitivity available from 10mV/Div to 100V/Div. However, when using sensitivities above 20V/Div, probe input with 10:1 attenuation must beused at the same time. If the new range does not coincide with the one saved with the purple reference waveform, the reference waveform will be cleared automatically.2.Selection of horizontal sensitivity.With the cursor blinking, press and keys to select various horizontal sensitivities. There are 22 ranges of vertical sensitivity available from 1uS/Div to 10S/Div. If the new range does not coincide with the one saved with the purple reference waveform, the reference waveform will be cleared automatically.3.Adjustment of vertical offset.With the cursor blinking, press and keys toadjust the vertical position of waveform. Press key to select “Display” or “Hide” purple offset baseline. 4.Selection of calculation items.There are three items that can be measured/calculated automatically, “FREQN” for signalfrequency, “CYCLE” for signal cycle and “DUTY” forsignal duty. With the cursor blinking, press and keys to select desired calculation item, and the instrument will update and display measured value in real-time. Press key to enter “STOP” mode to obtain stable measurement value.5.Indication of power supply mode.Two power supply modes can be used, battery or external USB. In case USB power is used, the battery will be charged at the same time. In case the battery is used, remaining power of the battery will be shown. 6.Selection of triggering sensitivity.With the cursor blinking, press and keys to adjust the sensitivity of triggering and obtain intuitive result from the change in the shape of triggering level line on the screen.7.Selection of triggering polarity.With the cursor blinking, press and keys to toggle between triggering by rising edge and fallingedge.8.Selection of input probe attenuation.With the cursor blinking, press and keys to toggle between 1:1 and 10:1 input probes.9.Save the displayed waveform.With the cursor blinking, “Save Filexxx”will appear in the middle of the project column below thescreen. Press and keys to select desired file name. Range of “xxx” shall be 0-255. Select file name and press Down key to save the waveform currently displayed on screen into Micro SD card.10.Read displayed waveform.With the cursor blinking, “Load Filexxx”will appear in the middle of the project column below thescreen. Press and keys to select desired file name. Range of “xxx” shall be 0-255. Select file name and press Down key to display the waveform file saved in Micro SD card onto screen.11.Setting of reference output frequency.With the cursor blinking, press and keys according to screen prompt to select the frequency of output square wave.12.Adjustment of time measurement cursor T2.With the cursor blinking, press and keys to adjust T2 time measurement cursor. Vertical dotted line in white on the right side of the screen will move to left/right, and the value of ΔT=T1-T2 will be shown in the project column below the screen.13.Adjustment of time measurement cursor T1.With the cursor blinking, press and keys to adjust T1 time measurement cursor. Vertical dotted line in white on the left side of the screen will move to left/right, and the value of ΔT=T1-T2 will be shown in the project column below the screen.14.Adjustment of horizontal offset.With the cursor blinking, press and keys to move the displayed waveform horizontally.15.Indication of working status.Press key to display “RUN”and “HOLD”in the lower right project column of the screen.16.Time difference measurement.17.Adjustment of voltage measurement cursor V2.With the cursor blinking, press and keys to adjust V2 time measurement cursor. Horizontal dotted line in white on the bottom of the screen will move up/down, and the value of V1-V2=V will be shown in the project column below the screen.18.Adjustment of voltage measurement cursor V2.With the cursor blinking, press and keys to adjust V1 time measurement cursor. Horizontal dotted line in white on the top of the screen will move up/down, and the value of V1-V2=V will be shown in the project column below the screen.19.Setting of triggering level.With the cursor blinking, press and keys to set level. Horizontal dotted line in yellow on the top of the screen will move up/down, and the value of Vt=Vwill be shown in the left project column below the screen.20.Test terminal of built-in signal.Square wave of 10Hz-1MHz with amplification around 3.7V can be measured.VII.Charging BatteryWhen battery voltage symbol" occurs or the display is dark, recharge the battery immediately. The instrument may be either turned on or off when charging the battery.VIII.SD Card StorageWhen SD card is used for storage, insert the SD card into the slot as shown in Figure 5. SD card of up to 2G is supported.Figure 5IX.TroubleshootingIf your instrument does not work properly, the following methods can help you quickly resolve general problems. If the faults are still not removed, please contact the service center or distributor.This manual is subject to change without notice.The contents of this manual are considered correct. If you find some errors and omissions therein, please contact the manufacturer.We are not responsible for any accident and hazard due to user's faulty operation.The functions described in this manual cannot be taken as the reason for using this product for special purposes.。
foretell键盘说明书

主控键盘(SYSTEM KEYBOARD)使用说明书(中文版第一版)注意事项:1.安装场所远离高温的热源和环境,避免阳光直接照射。
为确保本机的正常散热,应避开通风不良的场所。
为了防止电击和失火,请勿将本机放置于易燃、易爆的场所。
小心轻放本机避免强烈碰撞、振动等,避免安装在会剧烈震动的场所。
避免在过冷、过热的场所间相互搬动本机,以免机器内部产生结露,影响机器的使用寿命。
2.避免电击和失火切记勿用湿手触摸电源开关和本机。
勿将液体溅落在本机上,以免造成机器内部短路或失火。
勿将其它设备直接放置于本机上部。
安装过程中进行接线或改线时,都应将电源断开,预防触电。
重要提示:为了避免损坏,请勿自动拆开机壳,必须委托有资格有专业维修人员在指定的维修单位进行维修。
清洁装置时,请勿使用强力清洗剂,当有灰尘时用干布擦拭装置。
不得在电源电压过高和过低的场合下使用该本机。
务请通读本使用说明书,以便您掌握如何正确使用本机。
当您读本说明书后,请把它妥善保存好,以备日后参考。
如果需要维修,请在当地与经本公司授权的维修站联系。
环境防护:本机符合国家电磁辐射标准,对人体无电磁辐射伤害。
申明:产品的发行和销售由原始购买者在许可协议条款下使用;未经允许,任何单位和个人不得将该产品全部或部分复制、再生或翻译成其它机器可读形式的电子媒介;本手册若有任何修改恕不另行通知;因软件版本升级而造成的与本手册不符,以软件为准。
目录设备概述 (3)第一部分控制矩阵切换系统 (4)1.1 键盘通电 (4)1.2 键盘操作加锁 (4)1.3 键盘操作解锁 (4)1.4 键盘密码设置 (4)1.5 选择监视器 (5)1.6 选择摄像机 (5)1.7 控制解码器 (5)1.8 控制智能高速球 (6)1.9 操作辅助功能 (7)1.10系统自由切换 (8)1.11系统程序切换 (9)1.12系统同步切换 (10)1.13系统群组切换 (10)1.14报警联动 (10)1.15防区警点 (11)1.16警点状态 (11)1.17声音开关 (11)第二部分控制数字录像机、画面处理器 (11)2.1 进入数字录像机、画面处理器模式 (11)2.2 退出数字录像机、画面处理器模式 (11)2.3 选择数字录像机、画面处理器 (11)2.4 控制数字录像机、画面处理器 (12)第三部分设置连接 (12)3.1 键盘工作模式 (12)3.2键盘与矩阵主机连接示意图 (14)3.3键盘解码器连接示意图 (15)3.4键盘与小型系统连接示意图 (16)3.5键盘与智能高速球连接示意图 (16)设备概述:系统控制键盘是与矩阵切换系统配套使用的一种操作键盘。
SonicWall 1RK28-0A6 -SuperMassive 9200 使用说明书
SonicWall™ SuperMassive™ 9200/9400/9600入门指南规格型号:1RK28-0A6 –SuperMassive 92001RK28-0A7 –SuperMassive 94001RK28-0A8 –SuperMassive 9600版权所有 © 2017 SonicWall Inc. 保留所有权利。
SonicWall 是 SonicWall Inc. 和/或其附属公司在美国和/或其他国家/地区的商标或注册商标。
所有其他商标和注册商标均为其各自所有者的财产。
本文档中的信息与 SonicWall Inc. 和/或其附属公司的产品一起提供。
本文档不授予任何知识产权的许可(明示或暗示,通过禁言或其他形式)。
此类许可与 SonicWall 产品的销售无关。
除了本产品的许可协议中规定的条款与条件,SonicWall 和/或其附属公司不承担有关其产品的任何责任和任何明确、暗示或法定的担保,包括但不限于暗示的适销性、适用于某一特定用途或不侵权的担保。
在任何情况下,即使已告知 SonicWall 和/或其附属公司发生此类损害的可能性,SonicWall 和/或其附属公司都不对由于停止使用或无法使用本文档而产生的任何直接的、间接的、继发的、惩罚性的、特殊的或偶然的损害(包括但不限于利润损失,业务中断或信息丢失的损失)承担任何责任。
SonicWall 和/或其附属公司对本文档内容的准确性或完整性不作任何陈述或保证,并保留随时更改规格和产品说明的权利,恕不另行通知。
SonicWall Inc. 和/或其附属公司不作任何承诺更新本文档中包含的信息。
如需获取更多信息,请访问 https:///cn-zh/legal/。
SuperMassive 9200/9400/9600 入门指南更新日期 - 2017 年 4 月232-003813-00 修订版 A图例警告:“警告”图标用来提示可能造成财产损失或人员伤亡的情况。
单手MALTRON键盘说明书

Introduction From Lillian Malt (1 of 2)Dear Maltron User,Congratulations on your choice of the single handed MALTRON keyboard!It has been designed for users with special needs. Those who have only one hand which can be used for keying. This may be because one hand is not usable at all, or because it has to be used for something other than keying. Whatever the reason, you will find that this keyboard is easy to learn and that it will make it possible for you to achieve a good speed with accuracy. The reasons for ease of learning and speed of keying may be of interest to you. Because of its ergonomic shape, your fingers will very quickly learn to feel when they are on the 'home' row, that is the row on which they should rest. This row is the Space key for the thumb, and A T E H for the other fingers. Why not put your fingers on those keys now? Carefully ensure all your fingers are on the these keys, thumb on the Space, index finger on the A etc.. Then they will also very quickly feel when they are not on those keys. The shape of the keyboard tells them. Try moving your fingers about. Could you feel that they were away from the 'home' row? Relax your hand.The most commonly used letters are right on that home row, and the letters of the alphabet have been so placed that finger movements to and from the home row are the easiest that could be arranged. That makes keying easy and fast and helps with learning where each key is located. The exercises in the manual have also been especially designed to imprint the letter positions. Do them carefully. Follow the instructions exactly. The phrases and sentences have not been designed for ease of keying. They use the letters which are introduced for each unit frequently. That way you will learn to use all the letters of the alphabet equally easily.The keys in each column are allocated to a finger. The thumb, index finger and little finger all have more than one column. See the keyboard figure above. The verticle lines in this layout are better for your hand but they are new! Keeping your fingers in their columns will take concentration at first. The normal flat qwerty keyboard has keys that are slightly skewed to the side as your finger goes from one row to the one above or below.(You can use the Tab, Shift Tab and Control Tab and Return key to get to the Next link below -but beware! -the way the Tab key works depends on which windows and side panels and toolbars are open. The Shift key with the Tab key moves your keyboard cursor in the opposite direction, the Control key with the Tab key moves your keyboard cursor around the different 'forms' or 'panels'. Now we know why the mouse is popular!)Note:You may print any of the training pages for offline practise. If you look near the top right-hand corner of any page, you will see three little symbols: Just click the centre (print) icon and your usual print dialogue box will open allowing you to print the page.Next page。
胜家6199 6180 6160缝纫机 使用说明书
小心 - 移动部位,为了减少伤害,在维修前关闭电源;在操作前合上机盖。
2
请妥善保存本使用说明书
本产品仅限家用 脚踏控制器 本产品使用 YC-485 EC 或 JF-1000 电器。 本产品符合欧共体指令 2004/108/EC 涵盖电磁兼容性。
SINGER is a registered trademark of The Singer Company Limited or its affiliates. ©2010 The Singer Company Limited or its affiliates. All rights reserved.
4. “Jangan pakai mesin jahit ini jika kabel atau stekernya rusak, jika mesin jahit ini tidak bekerja sebagaimana mestinya, jika mesin jahit ini pernah jatuh atau rusak, atau jatuh ke air. Kembalikan mesin jahit ke dealer resmi atau service center terdekat untuk diperiksa, diperbaiki, atau disetel kelistrikan atau mekaniknya.”
6. “Jangan operasikan mesin jahit jika ada lubang udara yang tersumbat. Bersihkan lubang ventilasi mesin jahit dan pedal dari timbunan kain tiras, debu, dan kain lepasan.”
VICTOR胜利E数字万用表说明书
VICTOR胜利E数字万⽤表说明书⽬录1、概述 (1)2、开箱检查 (2)3、安全注意事项 (3)4、安全符号说明 (5)5、仪表⾯板说明 (6)6、按键功能说明 (7)7、其它功能 (8)8、特性 (9)9、通讯连接 (27)10、仪表保养 (28)11、故障排除 (29)⼀、概述VICTOR 86E是带USB电脑接⼝,可⾃动转换量程的4 1/2位数字仪表,是⼀种性能稳定、⽤电池驱动的⾼可靠性数字多⽤表。
仪表采⽤ 42mm字⾼LCD 显⽰器,读数清晰;具有数据保持和⾃动关机功能,更加⽅便使⽤。
此仪表可⽤来测量直流电压和交流电压、直流电流和交流电流、电阻、电容、温度、⼆极管、通断测试、频率及占空⽐等参数。
整机以⼤规模集成电路的双积分A/D转换为核⼼,具有⾃动和⼿动选择功能,是⼀款性能优越的⼯具仪表,是实验室、⼯⼚、⽆线电爱好者及家庭的理想⼯具。
1/29⼆、开箱检查打开包装箱,仔细检查以下配件是否缺少或损坏,如有缺少或损坏请⽴即与经销商联系。
86E数字多⽤表⼀台⽪盒⼀个表笔⼀付鳄鱼夹⼀套温度探头(K型热电偶)⼀个PC接⼝电缆⼀根软件光盘⼀张9V电池⼀节产品博览⼀份2/293/29三、安全注意事项该仪表在设计上符合IEC1010条款(国际电⼯委员会颁布的安全标准)。
使⽤污染等级II 的安全要求进⾏设计和⽣产。
在使⽤之前,请先认真阅读说明书。
警告:为避免危险和使⽤者的安全,在使⽤仪表之前请仔细阅读本使⽤⼿册,并严格遵守安全警告信息和操作说明来使⽤本仪表。
1.在测量30V 以上电压,测量10mA 以上电流,测量带电感负载的交流电⼒线;测量电⼒波动期间的交流电⼒线时, 谨防电击。
2.测量前,检查测量功能开关是否置于正确的档位,要检查表笔是否可靠接触,是否正确连接、是否绝缘良好等,以避免电击。
3.仪表只有和所配备的表笔⼀起使⽤才符合安全标准要求。
如表笔线破损时,必须更换上同样型号或者相同电⽓规格的表笔线。
4.不要使⽤其它未经确认或未认可的保险管来更换仪表内部的保险管。
Victor Professional Edge Series 气体控制器说明书

•and More Edge Series Outfits •User Friendly •Advanced Design •Outstanding Flow PerformanceNEW Edge™ Series Products: OUTFITS and REGULATORSInnovative NEW Edge™Series RegulatorsU.S. Customer Care: 800-426-1888 / FAX 800-535-0557The Vict Safety AccessoriesVictor ® has been the leader in gas equipment since our humble beginnings. We were founded on the principle of offering the safest, most reliable and highestquality gas equipment in the business. With the Victor Professional Edge Series regulators, Victor has breathed new life into gas control technology, giving you more value for your purchase.It's easy to use . The Edge Series regulators have gauges with enhanced graphics, color-coded knobsfor quick gas identification, and offer better hand/body positioning while adjusting delivery pressure. Theadvanced design makes them the smallest, lightest, most compact industrial regulators available on the market.Unsurpassed safety – The Edge Series regulators pass the most stringent testing: ASTM G-175 promoted ignition test, all CGA E-4 compliance testing, Heated Oxygen Impact Test, and meet or exceed all requirements of UL 252.Outstanding flow performance – Outperforming the competition, the Victor Professional Edge Series regulators offer a more consistent delivery over a wide range of cylinder pressures.Fabric Reinforced Neoprene DiaphragmInternal Vent SystemZinc-Aluminum Alloy –Twice the Yield Strength of BrassOutlet Points Back – Away From the UserSafety Relief ValveInlet FilterBuilt-In Gauge GuardModel Number is Metal StampedOnto Regulator BodyThe Check ValvePREvENTS THE REvERSE FlOW OF GASES.• H elp prevent gases from traveling back into the fuel supply or Oxygen system, creating a mixed gas condition • Available in torch and regulator models • Will not stop a flashback alone • Single and pair packsThe Flashback ArrestorPREvENTS FlASHbACk.• Designed to prevent flashback from torch to hose • For use with most oxy-fuel welding & cutting torches • Greater flow than competitive models • Built-in reverse flow check valves• Available in torch and regulator modelsGas FlowOutlet Sideseals tight against seat in event of reverse flownormal flow, moving diskassembly forward and allowing gas flowconnection to torch or regulator sintered filter acts as a flame blockNut and swivel Gas-tight Brass housingCheck-valve assemblyGas FlowOutlet SideAll NEWEdge Series Outfits Come with the Edge Series Regulatorstor ® Compact balanced attachments:For welding, cutting or heating. Each torch handle is designed for optimal balance and feel with its own nozzles and attachments. With proper balance of length and weight, operator fatigue is minimized.Model 315FC with W NozzleModel 100FC with MFA-1 NozzleAcetylene Red Propylene Orange Natural Gas Blue Propane Bluevictor ® Professional and CutSkill ® Tips:Available in a variety of types and sizes for any of your applications. Color-coded packaging for appropriate gases (victor exclusive). Our tips will meet all of your cutting requirements, guaranteed.Cutting TipsNozzlesTube With-In-A-Tubedesigned for greater handle strengthbrass Headfor strength and durability“built-In” Flashback Arrestorsno need for accessory flash arrestorsDie-Forged brass bodythreaded for easier servicePatent # 5407348Stainless Steel leverfor extra durabilitySpiral MixerForgedJourneyman®This heavy duty outfit cuts up to 3/4" (19.1mm) or 8" (203.2mm) with optional tips. It welds up to 1/2" (12.7mm) or 3" (76.2mm)A 2460 Cutting AttachmentWelding Nozzles, Sizes: 1, 3, 5FA Heating Nozzle, Size: 8This heavy duty outfit cuts up to3/4" (19.1mm) or 8" (203.2mm) with optional tips. It welds up to 3" (76.2mm) with optional nozzles.FA Heating Nozzle, Size: 6This medium duty outfit cuts up to 1/2" (12.7mm) or 6" (152.4mm) with optional tips. It welds up to1/4" (6.4mm) or 1.25" (31.8mm) -1 Welding Nozzle, Size: 0Journeyman II This heavy duty outfit cuts up to3/4" (19.1mm) or 8" (203.2mm) with optional tips. It welds up to1/8" (3.2mm) or 3" (76.2mm)A 2460 Cutting AttachmentContender AFThis heavy duty outfit is capable of cutting up to 8" (203.2mm) with theSelectThis heavy duty outfit is capable of cutting up to 8" (203.2mm) with theYellow .............................Air Red ........................Acetylene Green ........................Oxygen Black .......................Inert Gas Grey ................Carbon DioxideOrange ...........................LPGEdge SS 340 (SCFH)580Argon ESS3-FG-5800781-5120EdgeSS340 (SCFH)320Carbon DioxideESS3-FG-3200781-5119Model Numbering ExplanationForm No. 65-1002 (02/01/11 ) © 2011 Thermadyne Industries, Inc. Printed in U.S.A.W O R L D H E A D Q UA R T E R S : 16052 S w i n g l e y R i d g e R o a d , S u i t e 300 • S t. L o u i s , M i s s o u r i 63017 U.S.A.A Global Cutting & Welding Market Leader ™U.S. Customer Care: 800-426-1888 / FAX 800-535-0557 • Canada Customer Care: 905-827-4515 / FAX 800-588-1714International Customer Care: 940-381-1212 / FAX 940-483-8178 • ESS4 & ESS3 RegulatorsESS3。
优利德使用说明

工具操作手册目录一、UT311测振仪 (3)仪器简介 (3)工作原理 (3)仪表结构 (3)符号 (4)使用方法 (4)测量范围 (4)保养维护 (5)二、UT71E数字万用表 (5)仪器简介 (5)安全使用准则 (5)外形结构 (5)旋钮开关及按键功能 (6)测量操作说明 (6)按键功能定义 (9)保养与维修 (11)三、UT233数字钳形功率计 (12)仪器简介 (12)仪器结构图 (12)LCD显示.................................................... . (14)按键功能 (14)测量 (14)电池更换 (19)四、UT372非接触式转速计............................... (19)仪器简介 (19)仪器结构图 (19)LCD显示................................... (20)按键功能及设置 (20)测量操作说明 (21)五、UT320S数字式测温仪................................ (22)仪器简介 (22)仪器结构图 (22)LCD显示.................................. ......................... .. (22)按键功能 (23)仪表设置 (24)仪表使用 (25)六、UT342覆层测厚仪............ .. (25)仪器简介 (25)LCD显示 (25)基本测量 (26)七、UT332数字式温湿度表 (26)仪器简介 (26)仪器外观 (26)仪表设置 (26)仪表使用 (27)保养维护 (28)八、UT360风速仪 (28)仪器简介 (28)仪表外观 (28)LCD显示 (29)按键说明 (29)仪表使用 (30)保养维护 (31)九、UT352声级计 (31)仪器简介 (31)仪器外观 (31)按键功能及设置 (31)外观 (32)十、UT202数字钳式万用表 (32)仪器简介 (32)操作说明 (32)保养维护 (33)一、UT311测振仪1.仪器简介UT311型测振仪是由加速度和数字测量显示电路构成的一体式手持测振仪表。
victory密码柜说明书

victory密码柜说明书摘要:一、引言二、密码柜简介1.产品背景2.产品特点三、密码柜使用方法1.开启密码柜2.设置密码3.关闭密码柜四、密码柜注意事项1.密码保护2.避免撞击3.防止潮湿五、密码柜维护与清洁1.清洁方法2.维护建议六、结束语正文:【引言】随着人们生活水平的提高,对于个人财产安全和隐私保护的需求也日益增强。
在此背景下,victory 密码柜应运而生,为用户提供了安全、便捷的存储空间。
本文将详细介绍victory 密码柜的使用方法和注意事项。
【密码柜简介】【产品背景】victory 密码柜是一款具有高安全性、操作简便的储物产品,适用于家庭、办公室等场景。
它采用先进的密码锁技术,为用户提供了一个私密、安全的存储空间。
【产品特点】1.高安全性:采用密码锁设计,防止他人随意开启;2.大容量:提供多种尺寸和款式供用户选择,满足不同存储需求;3.操作简便:一键开启/关闭,方便用户快速使用;4.美观大方:简约时尚的设计,适合各种场合使用。
【密码柜使用方法】【开启密码柜】1.确保密码柜水平放置,避免倾斜;2.使用钥匙或内部旋钮将柜门打开;3.按住密码键盘上的“#”键,同时输入正确密码。
【设置密码】1.在密码柜门关闭状态下,按住“#”键;2.输入原密码,若没有设置过密码,请输入初始密码“0000”;3.输入新密码,再次确认新密码;4.松开“#”键,密码设置成功。
【关闭密码柜】1.确认密码柜内物品已经取出;2.按下密码键盘上的“#”键;3.输入正确密码;4.柜门自动关闭。
【密码柜注意事项】【密码保护】1.请勿将密码告知他人,确保个人隐私安全;2.若忘记密码,请携带有效身份证件及购买凭证,联系售后服务进行密码重置。
【避免撞击】1.请勿将密码柜放置在容易受到撞击的地方;2.避免在密码柜上放置重物,以免损坏密码锁。
【防止潮湿】1.请将密码柜放置在干燥、通风的环境中;2.防止水分渗透,以免影响密码柜的正常使用。
Victory V100 电子吉他头产品说明书

VICTORY V100 User Guide• Do not use this amplifier near water or any other liquid• Do not block an y openings• Do not attempt to clean the amplifier with any fluids: use only a dry clothDo not attempt to modify or service this product yourselfRemoving covers could mean you are exposed to dangerous voltages that may result in severe injury or deathRefer all servicing to qualified service personnel• Damage Requiring Service: Unplug this product from the wall outlet and refer servicing to qualified service personnel under the following conditions:(a) When the power-supply cord or plug is damaged;(b) If liquid has been spilled, or objects have fallen into the product;(c) If the product has been exposed to rain or water;(d) If the product does not operate normally by following the operating instructions. Adjust only those controls that are covered by the operating instructions. Improper adjustment of other controls may result in damage and will often require extensive work by a qualified technician to restore the product to its normal operation;(e) If the product has been dropped or damaged in any way;(f) When the product exhibits a distinct change in performance - this indicates a need for service. Replacement Parts: When replacement parts are required, be sure the service technician uses replacement parts specified by the manufacturer or have the same characteristics as the original part. Unauthorized substitutions may result in fire, electric shock, or other hazards.InputPlug your guitar in here!Channel switchThe V100 has two channels that you can switch between using this front-panel toggle, or a remote footswitch plugged into the Channel/Boost footswitch socket.Clean channelThe clean channel is indicated by a green LED channel indicator next to the gain control.Clean GainThis adjusts the input sensitivity. Use low settings for maximum clean headroom and higher settings when you want to introduce more natural valve overdrive to your tone.Balancing your input gain level with your master volume level is crucial in delivering the tone and feel that works best for you.Clean TrebleControls the high frequency content of your sound in the clean channel and is also a powerful tone shaper when it comes to overdrive character.Clean MiddleControls the midrange frequencies in your sound in the clean channel. Run the middle control higher to help cut through a band mix, or generally fatten and ‘widen’ your sound. Run it lower for a lighter, less -your-face’ kind of sound.Clean BassControls the low frequency content of your sound in the clean channel. Higher levels of bass can be goodControls the low frequency content of your sound in the overdrive channel. It’s well worth experimenting with getting your preferred settings of bass and resonance together: they both affect low-end response in different ways.Overdrive MiddleControls the midrange frequencies in your sound in the overdrive channel. Mid frequencies are a crucial, defining factor with overdriven tones so spend some time getting to understand how this control interacts with the bass and treble pots for your optimum EQ balance.Overdrive TrebleControls the high frequency content of your sound in the clean channel and is also a powerful tone shaper when it comes to overdrive character.Overdrive VolumeEach channel has its own volume control, as well as the extra dual master volumes. Use this one to balance the volume level of the overdrive channel to taste when switching between channels and modes.Overdrive ReverbThe V100 features independent reverb controls for each channel. Adjust to taste for the overdrive channel. The reverb is also footswitchable on/off.Master control section – these 4 controls are not channel dependent.Master 1 & 2switch to ON. To extend valve life, the amplifier can be switched to ‘Standby’ when not being played. REAR PANELVoltage selectorSelects the correct mains voltage for your territory. Please refer to a qualified technician before even thinking about moving this switch. If you do find yourself in foreign climes where the mains voltage is different to home, (and the water tastes funny), it will be necessary to switch this selector. The mains fuse must always be changed at the same time. Failure to do this will result in either the mains fuse blowing as soon as the amp is turned on or the amp running with a fuse that is of too higher value to provide adequate safety protection. Generally, the fuse value will double if the mains voltage is halved, (i.e. if it’s a 2A f use in the UK @ 230V, it will needs to be a 4A fuse for the USA @ 115V).Always use the correct rating and type of fuse. Victory amplifiers exclusively use UL-approved 20x5mm ‘T’ or ‘Timed’ fuses. If you have difficulty acquiring the correct fuses, please contact Victory using ************************.uk.Mains inlet, (IEC Socket)Please only use the correct mains cord for your territory!PLEASE NOTE: The lightning flash with arrowhead symbol, within an equilateral triangle, is intended to alert the user to the presence of uninsulated ‘dangerous voltage’ within the product’s enclosure that may be of sufficient magnitude to constitute a risk of electric shock. Terminals labelled as “Speaker Outputs” must be connected to a speaker cabinet of the designated load rating using an un-shielded two conductor cable for speaker use at all times during operation. Never use a guitar cable to connect the amplifier to a speaker as thi s presents the amplifier with a ‘capacitive load’. This can cause instability or oscillation which may seriously damage valves and/or the expensive output transformer.The output transformer in the V100 has 3 separate secondary windings; a 4 Ohm, an 8 Ohm and a 16 Ohm. This makes it easy to connect many different combinations of speakers. There are five speaker output jacks: 2 x 4 ohms, (wired in parallel), 2 x 8 ohms, (wired in parallel) and 1 x 16 ohms.So here are all the possible combinations:For a single 4 Ohm cabinet, use either of the 4 Ohm sockets.For a single 8 Ohm cabinet, use either of the 8 Ohm sockets.For a single 16 Ohm cabinet, use the 16 Ohm socket.For a pair of 8 Ohm cabinets, use both of the 4 Ohm socketsFor a pair of 16 Ohm cabinets, use both of the 8 Ohm sockets.OUTPUT VALVE FUSES and LED’sThe two panel mounted fuse holders protect each pair of output valves as labelled.will switch over when the Channel is switched. With Auto Assign ‘ON’, LOOP 1 is for Channel 1 and LOOP 2 is for Channel 2.This is so you can have a different bank of effects for each channel.However, if Auto Assign is switched ‘OFF’ then use the dual footswitch provided to change from FX loop 1 to FX loop 2. Please note, in the Auto Assign OFF mode, one of the FX loops will always be on & all the footswitch is able to do is toggle between Loop 1 & 2. To create a situation where you can turn off the FX loop, we suggest only using FX in loop 1 & leaving FX loop 2 empty. This way, by toggling between FX loop 1 & 2 you essentially are switching FX loop 1 on & off.External switching jacks, (Footswitch sockets)Effect Loop 1/2:Connect a 2 way latching footswitch here to select Loops 1 and 2Channel / Boost:Connect 2 way latching footswitch here to change Channels and engage/disengage the overdrive channel Boost function.Master Volume / Reverb: Connect a 2 way latching footswitch here to select between Master 1 and Master 2, and also turn the Reverb on and off.Amplifier Dimensions:SIZE (mm): 660(w) x 260(h) x 260(d) Unboxed 760(w) x 360(h) x 360(d) BoxedWeight: 25,7Kgs Unboxed 27.7Kgs BoxedWarrantyAll Victory products come with a 5 year limited warranty. This covers any defects in manufacturing or faulty components. Valves and speakers are warrantied for 90 days from the purchase date but replacement parts will be at our discretion. Please contact your local dealer if you have any issues with your Victory product.A note from Team VictoryWe’ve built your Victory Amplifier as a professional, no-compromise musical instrument, with a great deal of pride and an absolute commitment to tone. We encourage you to learn to get to know it by experimenting with all the controls, in order to discover its vast array of tonal combinations.Thank you for making your tones with us: we wish you many years of achieving inspiring sounds to push your playing ever onwards.。
美国标准电吉他 Telecaster 2012年左撇型(0113222XXX)产品说明书

101264563578911121313141516181917202122201819212324292628272530313234333520213637403839414038394142AMERICAN STANDARD TELECASTER® 2012 LH (0113222XXX)PARTS LAYOUTREF#DESCRIPTION PARTNUMBER 1BODY AM STD TELE LH UPG 3TS0093566500 1BODY AM STD TELE LH UPG BLK0093567506 1BODY AM STD TELE LH UPG BLZ0093567555 2NECK ASSY AM STD TELE LH UPG MN0075404000 3KEY GTR DUAL PIN MNT LH 0073119000 4KEY GTR 2 PIN MTG SHORT LH0073120000 5WASHER KEY 0053106049 6BUSHING KEY0058820049 7STRING GUIDE TREE AM STD 0994911000 8SCREW SMAB 3 X 3/8 RHP ZA CHROME 0021405049 9NECK PLATE SPAG LOGO TILT CHROME 0991445100 10SCREW SMA 8 X 1-3/4 OHPH ZA 0021424049 11SCREW ST 1/4-20 X 3/8 OP NI HEX0031571000 12PICKGUARD TELE AM STD LH P/B/P0056201000 13SCREW SMAB 4 X 1/2 OHP ZA CHROME0994923000 14CONTROL PLATE TELE 0992058000 15SWITCH 3 WAY LEVER W/MTL0992041000 16KNOB SWITCH VINT TELE 0994936000 17SCREW MA-6-32 X 5/8 RH ZA0994925000 18KNOB KNURLED CHROME 0991366000 19SCREW ST 8-32 X 3/16 SL0994922000 20HEX NUT 3/8-32 X 3/32 TK NI0016352049 21WASHER LOCK INTL 3/8 X .6870016436049 22CONTROL 250K 10% 0099083100 23CONTROL 250K SOLID SHFT NO LOAD 0990833000 24CAP MPF RDL .022µF 250V 10%0024832049 25BRIDGE ASSY AM SERIES TELE LH W/PICKUP 20120093272000 25A BRIDGE PLATE AM SERIES TELE LH CHROME0075107000 25B BRIDGE SECTION ASSY NI AM SERIES TELE SHORT0075123103 25C BRIDGE SECTION ASSY NI AM SERIES TELE TALL0075123104 25D SPRING INTONATION ADJ 6COIL NI0056138000*=NOT PICTURED IN DIAGRAMREF#DESCRIPTION PARTNUMBER 25E SPRING INTONATION ADJ 7COIL NI0056139000 25F SCREW M4-40 X 3/4 RHP NI 0076245000 26PICKUP BROADCASTER BRIDGE 0068050000 27SCREW 6-32 X 3/4 RHP ZA0048631049 *28TUBING LATEX CUT .375 X 1/8 ID X 1/4 OD 0036878000 29SCREW SMA 8 X 1 OHP ZA CHROME0021373049 30SCREW SMA 3 X 1/2 OHP 0027956049 31SCREW SMA 8 X 3/8 PHP BLK0015116049 32PICKUP ASSY TWISTED TELE 0058128000 33SCREW M4-40 X 7/8 RHP ZA0059319000 *34TUBING SIL RUB CUT RED .6250068156000 35JACK PHONE OPEN CIRCT 11 0021956049 36FERRULE JACK STD TELE CHROME0021452000 37RETAINER JACK NI PLT TELE0010355069 38STRAP BUTTON CHROME0063267049 39SCREW WOOD 6 X 1 OHP NI0016188049 40WASHER FELT BLACK0994929000 41WASHERS FELT WHITE0994930000 42FERRULE STRING RETAINER CHROME0994917000 *CASE GUITAR 0996101506 *WRENCH 1/8 X 1-1/4 X 2-3/4 HEX0023811049 *WRENCH .050 HEX KEY SHORT ARM0018531049 *WRENCH ALLEN 3/160038467049 *WRENCH HEX KEY 1/16 SHORT ARM 0021109049 *WRENCH 3/32 HEX KEY SHORT ARM 0018622000*=NOT PICTURED IN DIAGRAM.022u F BRIDGE PICKUPNECK PICKUPTONECAPACITOR .022µFVOLUME CONTROL3 WAY SWITCHBLACK & WHITE WIRES TO OUPUT JACKTO BOTTOM OF CONTROL CAVITYTO BOTTOM OF PICKUP CAVITYWIRING ASSEMBLY3 WAY SWITCH POSITION3 WAY SWITCHPOSITIONNECK PICKUPBRIDGE PICKUP321PICKUP IS ONOF 3 WAY SWITCHINDICATES POSITION 1PICKUP IS OFFMASTER VOLUMEMASTER TONE3 WAY SWITCH NECK PICKUPBRIDGE PICKUPSWITCH AND CONTROL FUNCTION。
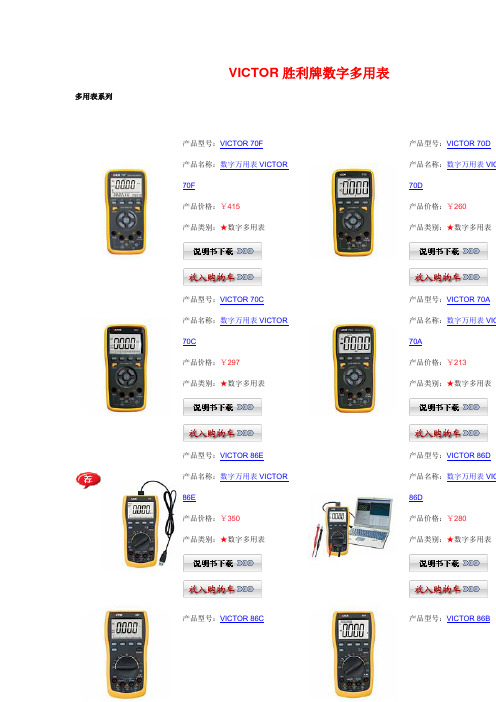
VICTOR胜利牌数字多用表
VICTOR胜利牌数字多用表多用表系列产品型号:VICTOR 70F产品名称:数字万用表VICTOR70F产品价格:¥415产品类别:★数字多用表产品型号:VICTOR 70D产品名称:数字万用表VIC70D产品价格:¥260产品类别:★数字多用表产品型号:VICTOR 70C产品名称:数字万用表VICTOR70C产品价格:¥297产品类别:★数字多用表产品型号:VICTOR 70A产品名称:数字万用表VIC70A产品价格:¥213产品类别:★数字多用表产品型号:VICTOR 86E产品名称:数字万用表VICTOR86E产品价格:¥350产品类别:★数字多用表产品型号:VICTOR 86D产品名称:数字万用表VIC86D产品价格:¥280产品类别:★数字多用表产品型号:VICTOR 86C产品型号:VICTOR 86B产品名称:数字万用表VICTOR 86C产品价格:¥261产品类别:★数字多用表产品名称:数字万用表VIC 86B产品价格:¥243产品类别:★数字多用表多用表系列产品型号:VC890D产品名称:数字万用表VC890D产品价格:¥126产品类别:★数字多用表产品型号:VC980+产品名称:数字万用表VC产品价格:¥455产品类别:★数字多用表产品型号:VC9808+产品名称:数字万用表VC9808+产品价格:¥325产品类别:★数字多用表产品型号:VC9807A+产品名称:数字万用表VC9807A+产品价格:¥288产品类别:★数字多用表产品型号:VC9806+产品名称:数字万用表VC9806+产品价格:¥325产品类别:★数字多用表产品型号:VC9805A+产品名称:数字万用表VC9805A+产品价格:¥270产品类别:★数字多用表产品型号:VC9804A+产品名称:数字万用表VC9804A+产品价格:¥225产品类别:★数字多用表产品型号:VC9802A+产品名称:数字万用表VC9802A+产品价格:¥207产品类别:★数字多用表共8页第2页8条/页共59 条记录首页上一页下一页尾页跳到多用表系列产品型号:VICTOR 6056C产品名称:钳形表VICTOR6056C产品价格:¥325产品类别:★钳形多用表产品型号:VICTOR 6056产品名称:钳形表VICTO6056A产品价格:¥396产品类别:★钳形多用表产品型号:VICTOR 98A产品名称:智能型数字万用表VICTOR 98A产品价格:¥990产品类别:★智能型多用表产品型号:VICTOR 187产品名称:记录型真有效值万用表VICTOR 187产品价格:¥产品类别:★智能型多用表产品型号:VICTOR 189产品名称:记录型真有效值数字万用表VICTOR 189产品价格:¥产品类别:★智能型多用表产品型号:VICTOR 8145产品名称:台式万用表VIC8145B产品价格:¥产品类别:★台式多用表产品型号:vc8045-II产品名称:台式万用表vc8045-II产品价格:¥603产品型号:VICTOR 6013产品名称:数字电感电容电VICTOR 6013C产品类别:★台式多用表产品价格:¥216产品类别:★数字电感电容表共8页第7页8条/页共59 条记录首页上一页下一页尾页跳到产品型号:VICTOR 70F 操作方式:自动量程产品名称:数字万用表VICTOR 70F 显示位数:3 3/4位产品分类:★数字多用表体积大小:手持式价格:¥415特殊功能:详细介绍:|一|般|特|征|产品型号:VICTOR 70C 操作方式:自动量程产品名称:数字万用表VICTOR 70C 显示位数:3 3/4位产品分类:★数字多用表体积大小:手持式价格:¥297特殊功能:电脑接口详细介绍:特点:1、新型防振套,流线形设计,手感舒适;2、大屏幕显示字迹清楚,使用按键触发型全自动操做方式设计;3、金属屏蔽板,防磁,抗干扰能力强;4、全保护功能,防高压打火电路设计。
Victor EX-01音响 说明书

谢谢阁下的购买热情,我们建议您在连接和接通电源之前,请先抽点时间仔细通读一遍本使用说明,将使您能从新购置的音响设备获得最佳的性能和视听享受。
请妥善保管本说明书及其它包装材料,以备将来搬运时使用。
致顾客前言1请小心开箱,注意将全部附件放在一个地方,以防止遗失。
请检查任何搬运损坏的可能性,如果您的装置有损坏或不能操作,请立即通知当地销售商如果装置直接运到您处,请您尽快与装运公司联系只有收货人(接收装置的个人或公。
司)才有权利就搬运损坏问题向承运者提出赔偿。
我们建议您保存好原装纸箱和包装材料,以便将来搬运时使用。
开箱目录前言 (1)目录 (1)主要部件 (2)重要安全说明 (2)面后板功能说明 (3)遥控器功能说明 (4)与电视机的连接 (5)与杜比数码音响的连接 (6)系统连接...........................................................................................................7基本操作说明.............................................................................................8-14选单设定....................................................................................................15-17收音功能说明 (18)技术规格 (19)故障排除指南 (19)多句2主要部件重要安全说明。
:,!,为确保安全操作,在使用此装置之前,请通读安全操作说明。
为万全之计,请遵守写於此处和装置上的有关操作和使用的所有警言,这些安全和操作说明要妥善保管以备后用注意为了防止火及触电危险切勿使本机淋雨或受潮请在通风环境下使用以便利於散热。
- 1、下载文档前请自行甄别文档内容的完整性,平台不提供额外的编辑、内容补充、找答案等附加服务。
- 2、"仅部分预览"的文档,不可在线预览部分如存在完整性等问题,可反馈申请退款(可完整预览的文档不适用该条件!)。
- 3、如文档侵犯您的权益,请联系客服反馈,我们会尽快为您处理(人工客服工作时间:9:00-18:30)。
:h
SunLite E1
9
H)J\\ J\\ SunLiteE1*+E,
+y®}7 7¯567¹ºE -< 1) ./0&1¤
SUNRISETELECOM
I N C O R P O R A T E D
SunLite E1
User’s Manual Version 1.02 SS265-CN
SIGNAL CODE AIS
PCM-30 SYNCH RAI
PCM-31 BIT TX
CRC-4 ERROR RUN
RT STA
AU
ST O P
1
SunLite E1
2
SUNRISETELECOM
I N C O R P O R A T E D
SunLite E1
User’s Manual Version 1.02
Sunrise Telecom…A Step Ahead
SunLite E1 3
SunLite E1
4
SunLite E1
©KL
¤ E
SET UP $: 20 22 24 24 BC MODE E1DNx64K FRAME UNFRAME, PCM-30DPCM30CDPCM31DPCM-31C INPUT TERMDHI-Z, MONITOR TxCLK INTERNAL (EFG H%BCFDE±XXXX)DRECEIVED DEXTERNAL 2e9, 2e11, 2e15, 2e23, 1111, 0000, 1010, RICAR3, USER1..3, LIVE, LOOP ON, OFF, SELF-LOOP TEST MEASUREMENTS SIGNAL LEVEL FREQUENCY MEASUREMENTS CODE ERR, CE RATE, FAS ERR, FE RATE CRC-4 ERR, CRC RATE E-bit ERR, E-bit RATE LOSS, LOFS, SYLS, AIS, FAS RAI MFAS RAI, G.821I6$) G.826I4$)DM.2100/550
TO
SCRO LL
+
RE LT SU S
SET UP
PRBS CAS
Sa BIT TX ERR INJ OTHER S
S
HISTO
RY
POWE R
MAN-10100-001 Rev. A
Sunrise Telecom…A Step Ahead
SunLite E1
22 Great Oaks Blvd. San Jose, CA 95119 Tel 1-408-363-8000 Fax: 1-408-363-8313
SunLite E1
5
56789:; <=>?@ABCDEFGGHIJK LM7NOPQRSABCDTEUV@ GWXYBZ[\][^[_`a7bcABCDdefghS<HJij JHiHHjHJiE
!
klmn opqrstJHuvutds^wZZtxJdyz{|}~+kl 17E6 6 dK7mn@y}~E =rHE HJ ¡¢sE ¢q£¤¥:; ¢q£¤¥:; ¦§¨d*©¢q£¤¥ª =«¬¨®?¯°±@E¤¥+²&³´ /µ7¦¶E¤¥·>¸¹ºE
©2.048Mbit/s, AMIKHDB3!r53:hE • Rx<y75ΩmnoÄBNC SunliteÍ E1 :h7qØE
!
SunLite E1
13
Cs • :Ñ<tuytvR9ÀKDw:ÑE • xØ<
©RJ11xØd
©xÊêO UKl$%&'E 8s • n<tuytvRyz{|ðµñLCD 7nE } •5 VDC<SunLite PQ(y²Eãå4
11
<o&ydFÊñNêOdãåP² RESULTñdFÛêO´ñEProfileñdF êO´¸Qá¶E:;®ñdFêOR ®SåE <o&ydFò³ñE TX<o&ydFÛøTU¤VK¥LdK UmW|E <o&ydFÛXY7¤VK¥LE
ERR INJ<o&ydFÛ
23?45d!"&á¶6E 2) 70Ü8/9À:;®9À¨ 53;< 53=>¯´¸5?d@AB70E 3) 70ÜC/D:;®D¨ 53;< 53=>¯´¸5?d@AB70E 4) 5Eo&STOPFGlE
SunLite E1
10
704A
T AR ST
Speaker To insert the batteries: 1. Press the + end of the battery against the spring. 2. Hold pressure as you press the battery in, until the – end snaps into place.
©/ B lE POWER<o&ydFÛy®}¤VK¥LE
SunLite E1
12
1.3 & SunLite E1>7fË7h~E i
Tx
REF CLK
Rx
³4 SunLite E1i < oprAjikli7dy47= rHE<HJ\¡¢sE • Tx: y75ΩmnoÄBNC E1:hpSunlite øa7qØE • REF CLK<BNC!r53Ey²(
+
-
_ +
-
+
! WARNING
Microphone
DIP Switches
³5 c
SunLite E1
15
2.0 & PÛ7
¯ÙE AIS</µ:hÔ47
©91 HHH:MM:SS<À5< <2 LT<q LVL< PMP<1 RAI<q/µ-<7qüøù ¥E UI<¦,?EÚ ø
©þÿ(ø:hE HISTORY<o&ydZ[äóô7\]
LEDE
<o&LOCK/UNLOCK^_/ê¤
` dF^_´d®}Ûøa
`bc:d Ùá ¶Ûº&deEo&y*`d F´Û&ê¤dy®}Ûøa*`bc :E OTHERS<o&ydFOTHERÙÚd y¨dP>?á¶fË!"E <o&yENTERWgdFÉÊ
³2 LED GqA
ö<ÍE1 õö<ÍE1 £sCjvi £sCjvid jvid£sCjvH ö<Í´M7 õö<MdúÍ
SunLite E1
8
CRC-4 ö<Í´M7ssjI õö<MssjIdúÍ q] õö<Íþÿ ERROR õö<ÍgÿÂÂÿÂssjIÂr \\Kþÿ A ö<»Ê® TX ö<»ø óô ö<?m|ø <ø SYNC ö<Í7®ÿÄL( õö<ºL( qG õö<»Í
CAS <o&ydF.Iñ4Ü&JK/0E <o&ydFøÙÚ7mgÿñ ´¸H7Ü&mgÿE <o&ydøÙÚ7mgÿñ ´¸H7mLMgÿE Sa
Sa 4-8
SunLite E1
ON C&R 1006
1 2 3 4 5 6
SunLite E1
6
1.0
SunLite E1
SIG NAL CODE
SUNRISE TELECOM
PCM-30 SYNCH RAI PCM-31 BIT TX CRC-4 ERRO R RUN
LCD
LED
1.0
1.1 1.3 1.4 LED 1.2
4 6 7 8 10 13 15 16 17 20 65 67 75 82 85
2.0 3.0 4.0 !" 5.0 # $%&'() 6.0 * + 7.0 , -./0 12 34
©´5,En 2.048Mbit/sS .488µsE S<2 VF<:; :h
SunLite E1
16
3.0 SunLiteE1
©/BE&hðµ ¯¥¸7 SE@ ENTERWgR¸H
©EãåP do&
©?z
PRBS %&'( )*'( ), ./ 23/)*
AIS
T AR ST
AU TO
ST OP
SCROLL
+
S LT SU RE
!"#$
SET UP
PRBS
CAS
Sa BITS
TX
!+#$ CAS Sa01 456 78 9:;< (= >? @A
ERR INJ
©T dFSunLite>?p
©ü17Rkl Eãå
TdFSunLite Êkl5dNiMH&TE
SunLite E1
14
1.4 SunLite7¨ >?py®}7XÊ~ 1E!³5¥c7E \ < <=>?@ABCDEFGGHIJKLM7NO PQRSy}~´@7ABCDTEUV@ GWXYBZ[\][^[_`a7bcABCDdefghS<HJij JHiHHjHJiE
