AXISM1054网络摄像机安装指引-AxisCommunications
AXIS网络视频监控系统解决方案

I/O端口口 对讲功能 图像接口口协议 功耗 特殊功能
30帧
越线、遗留物、人人数统计。。。
支支持
64GB(128GB)
94º 有
有
支支持
通用用支支持ONVIF
MAX 2.2W
走走廊格式
HDMI输出
主动防篡改
30帧 无无 支支持 64GB 75º 有 有 支支持 私有协议 MAX 5W —————
彩色模式 黑白模式
高效的红外补光适用于任何黑暗环境
> AXIS M3024-LVE 通过红外IR可以工作在完全 黑暗的环境下
高效、长寿的 850 nm IR LED灯 根据不同的应用环境,最大补光距离可达10米
AXIS M3024-LVE 内置IR
AXIS M3025-VE
AXIS M3026-VE
!!
室外防暴
针对于室外应用的型号: AXIS M30-E
> 适中的价格 > I/O报警接口 > 室外防护能力
30帧 无无 支支持 64GB 70º 有 无无 支支持 私有协议 MAX 6W —————
AXIS M10 摄像机系列– 适用于任何应用环境
• 世界一一流产室内品标准型质号 量品质
• 无无与伦比比的图像质量 SVGA
HDTV 720p / 1MP
AXIS M1013
!!
室内监控
HDTV 720p / 1MP AXIS M3204
普通型
AXIS M3203-V
AXIS M3204-V
防暴型
网络摄像机安装手册

网络摄像机安装手册V4.0.1杭州海康威视数字技术股份有限公司技术热线:400-700-5998非常感谢您购买我公司的产品,如果您有什么疑问或需要请随时联系我们。
本手册适用于以下型号的的网络摄像机:枪型Ⅰ:DS-2CD852MF-E、DS-2CD862MF-E枪型Ⅱ:DS-2CD886BF-E、DS-2CD886MF-E、DS-2CD877BF、DS-2CD876BF、DS-2CD876MF枪型Ⅲ:DS-2CD883F-E(W)、DS-2CD855F-E、DS-2CD854F-E(W)、DS-2CD854FWD-E(W)、DS-2CD853F-E(W)、DS-2CD864FWD-E(W)、DS-2CD864F-E(W)、DS-2CD863PF(NF)-E(W)、iDS-2CD893PF(NF)-E (W)、DS-2CD893PF(NF)-E (W)、DS-2CD893PFWD(NFWD)-E(W)、DS-2CD833F-E(W)半球型Ⅰ:DS-2CD752MF-E半球型Ⅱ:DS-2CD752MF-FB(H)、DS-2CD752MF-IFB(H)、DS-2CD762MF-FB(H)、DS-2CD762MF-IFB(H)半球型Ⅲ:DS-2CD783F-E(I)、DS-2CD764FWD-E(I)、DS-2CD764F-E(I)、DS-2CD755F-E(I)、DS-2CD754F-E(I)、DS-2CD754FWD-E(I)、DS-2CD753F-E(I)、DS-2CD763PF(NF)-E(I)、DS-2CD793PF(NF)-E(I)、DS-2CD793PFWD(NFWD)-E(I) 、DS-2CD733F-E(I)(Z)半球型IV:DS-2CD7233F-E(I)Z(H)(S)、DS-2CD7253F-E(I)Z(H)(S)、DS-2CD7254F-E(I)Z(H)(S)、DS-2CD7255F-E(I)Z(H)(S)、DS-2CD7263PF(NF)-EZ(H)(S)、DS-2CD7264FWD-EZ(H)(S)、DS-2CD7293PF(NF)-E(I)Z(H)(S)、DS-2CD7293PFWD(NFWD)-E(I)Z(H)(S) 筒型:DS-2CD8283F-E(I)(S)、DS-2CD8264FWD-E(I)(Z)(S)、DS-2CD8264F-E(I)(Z)(S)、DS-2CD8254F-E(I)(S)、DS-2CD8255F-E(I)(S)、DS-2CD8253F-E(I)(Z)(S)、DS-2CD8233F-E(I)(Z)(S)卡片型Ⅰ:DS-2CD8153F-E (I) (W)、DS-2CD8133F-E (I) (W)卡片型Ⅱ:DS-2CD8433F-E(I)、DS-2CD8464F-E(I)迷你半球型:DS-2CD7164-E、DS-2CD7153-E、DS-2CD7133-E本手册可能包含技术上不准确的地方、或与产品功能及操作不相符的地方、或印刷错误。
麦迪逊网络摄像头快速安装指南说明书
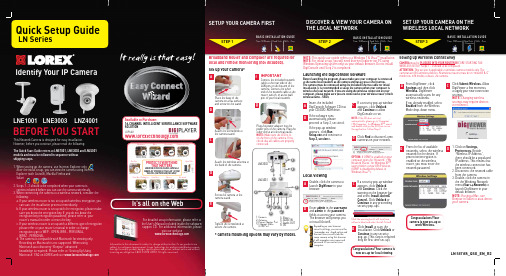
SETUP YOUR CAMERA FIRSTSTEP 1SET UP YOUR CAMERA ON THE WIRELESS LOCAL NETWORKSTEP 3DISCOVER & VIEW YOUR CAMERA ON THE LOCAL NETWORKSTEP 2LN SeriesQuick Setup GuideIt really is that easy!After the initial setup, you can view the camera using Internet Time: 10 MinutesHand ToolsSkills - EasyBASIC INSTALLATION GUIDEBroadband Router and Computer are required for local and remote monitoring (not included).Screw the camera to the5. reset6. Audio IN7. Audio OUT8. I/O1. Camera2. Antenna3. Power Adaptor Port4. Ethernet Cable (lAN) Port2143535421678lNE3003lNZ4001Time: 10 MinutesHand Tools - ComputerSkills - Easy BASIC INSTALLATION GUIDENOTE: This quick start guide refers to a Windows 7 & Vista™ installation. NOTE: For initial setup, you will need Internet Explorer (on PC using Windows Operating system only) as your default browser Congratulations! Your camera is now set-up for local viewingasame camera using this browser it will renumber user name and password till you restart your computer.D i d y o u only for first time set-up).Setting up Wireless ConnectivityCAMERA must be PLUGGED INTO YOUR ROUTER B Time: 10 MinutesHand Tools - ComputerSkills - Easy BASIC INSTALLATION GUIDEFor detailed setup information, please refer to the User’s Manual included inside the software/It’s all on the WebWarehouseOffi ceDay CareConvenience StoreRestaurantHome Offi ceDrive Way / Parking Lot Front DoorNurseryBackyardLN Series_QSG_EN_R2The iPhone, iPod Touch and iPad are capable of remotely viewingthe lN series cameras. To do this you will need to download an App onto your device.• iPhone, iPod Touch Users must download the Lorex Live 2 App from the App store.• iPad users must download the Lorex iMobile App from the Appstore.LOREX EASY CONNECT INTERNET REMOTE VIEWING - BASICSTEP 4AREMOTE VIEWING INSTALLATION GUIDETime: 20 MinutesSkills - Easy Hardware - PCCongratulations! Now that you have a Yoics account set up you can log in to to remotely view your cameras from anywhere in the worldusing Internet Explorer web browser (Windows operating system only).ON YOUR PCSTEP 4BLOREX EASY CONNECT INTERNET REMOTE MONITORING ADVANCED (AUTO PORT FORWARD WIZARD)CONTINUEDCongratulations! You have completed 4B successfully. Your camera is now set-up for remote viewing on any PC. You can now log into your lorex account from anywhere inthe world with your DDNS Url address.CONTINUEDStep 4B-1).3. For URL REQUEST enter a unique Url name (e.g. tomsmith ). NOTE: Url name should not be more than 15 characters.Complete New Account Information:12387Create Account:Create AccountConfigure DDNS in DigiviewerSTEP 4B STEP 4B 6Open your web browser (Internet Explorer by default) and enter in the address bar .DDNS (Dynamic Domain Name System) Set-up:LOREX EASY CONNECT INTERNET REMOTE MONITORING ADVANCED LOREX EASY CONNECT INTERNET REMOTE MONITORING ADVANCEDOPTIONALDDNSDDNS9An automated REGISTRATION CONFIRMATION EMAIL will be sent to your email. Print and Save this confirmation. You will Registration Email:User ID: tomsmithPassword: (your password)ON YOUR PCON YOUR PCON YOUR PC & IP CAMERA1. Open DigiViewer:• Open directly in your web browser using your device’s IP address (refer to Step 4B-1).)OR• From DigiConsole , from the Find menu, right-click the device and select Open Device in Browser 2. Enter the IP Camera’s user name (admin) and password (admin) to login to the device.3. From the DigiViewer main window, click Settings and then click Remote Access.4. Under Dynamic DNS, select Enable Lorex Dynamic DNS Service.5. Enter the domain name(e.g. tomsmith ), you only need to enter tomsmith in the text field and your user name from the DDNS confirmation email. DigiViewer will automatically update with your newly entered DDNS information. 6. Click the Submit Remote button to complete the setup.7. Click System Log and scroll down to check if your DDNS Setup was successful.8. Click Surveillance to return to the main window to ensure the changes have been implemented.Registering with YoicsRouter port forwarding is not required2NOTE: There is no “www” in front of the address. The camera must be connected to your local network router for Yoics toautomatically detect the system.1. From DigiViewer, click Settings and then click Remote Access.2. Under Yoics Instant Networking, click Register this Camera. The lorex remote Viewing page opens 3. Enter your personal information in the necessary fields and create an account.Registering your Camera3 1. A pop-up window opens andinforms you that your camera has been detected. Click CONTINUE in the registration screen to enable Yoics Easy Connect.2. You can rename your camera (e.g. myoffice). Click REGISTER NOW. After the registration your IPcamera will appear on the left side bar under My Stuff/Cameras NOTE: This service is provided free of charge. You do not have to click the Upgrade Now button to use the remote Viewer service.Connect to your IP Camera4 1. Double click your IP Camera to view live camera images. Double click on the camera’s name to view the feed.Your IP camera is designed to work with Yoics easy-connect remote Using YoicsManual.1NOTE: If you have not already registered for free lorex DDNS Service, click Register with DDNS Service at the bottom of the remote access window to go to the lorex DDNS website.10Step 3: Update the Router Settings1. Click the Update Router button. The program Step 4: Test your Connection1. Click the Test Your Connection button. Your system’s default browser opens and connects to your lorex device.2. Enter the IP Camera’s user name (admin) and password (admin) to login to the device.NOTE: Ensure that Internet Explorer is your system’s default internet browser.Manual Port Forward:5If you were unable to port-forward your routerautomatically using the wizard, you will need to do so manually.All routers are different. To port forward your router, please refer to your router’s user manual.An example of a port forwarding screen is shown for illustration purposes.Ports: 80 (Web Port), 554 (Video Port (RTSP)805541212554SystemSystem 80REMOTE VIEWING USING iPHONE ™, iPOD TOUCH ™ & iPAD ™1. iPhone/iPod Touch users: Must have OS version 3.1.2 or greater .2. iPad users: Must run OS version3.2 or greater.System Requirements:Downloading the App:You must download the application from the Apple App Store.NOTE: You must create an App Store account before you can download content. A valid credit card is required to create an account, however the download of the above Apps is free of charge.• launch the App Store application from your device.• iPod, iPod Touch users: Search for Lorex Live 2• iPad users: Search for Lorex iMobile.Auto Port Forward Wizard2The lorex Auto Port Forwarding Wizard is a software that automates router port forwarding.You must have the following before you configure the software:1. Your router’s model and version numbers 2. Your router’s user name and password 3. Your lorex device’s IP address4. Your lorex device’s port numbers that require port forwardingStep 1: Populate the Router Database4The Auto Port Forwarding Wizardautomatically populates a list of current routers, and detects the number of connected routers.1. Click the Next button after the software detects your router configuration.Step 2: Enter your Router Settings1. Under the router drop-down list, select the model of your router OR click the Search button to enter the name of your router model.2. Under Router IP , click the Detect Router IP button . The router’s IP populates in the blank field.3. Under Username and Password , enter the router’s username and password.4. Under IP , enter the IP address of your lorex device (refer to Step 4B-1).5. Under Port , enter the port number(s) that require forwarding (Web Port: 80, Video Port (rTSP): 554)6. Click Next to continue.80NOTE: Click the Auto Detect button if you have a linksys or Netgear router (works with most models).NOTE: Ensure you select the proper model and firmware number of the router.5541. From the DigiConsole main viewing window, click on LOREX EASY CONNECT WIZARD and follow the instructions on the website to register, download and launch the Wizard.Installation3For detailed setup information, please refer to the User Manual included inside the software CD.Enter the IP Camera’s user name (admin) and password (admin) to login to the device.1Locate your IP & MAC Addresses:1. run DigiConsole from the included Ports (by default): 80 (Web Port), 554 (Video Port (RTSP)Step 4B-1LN Series_QSG_EN_R2。
AXIS摄像机基本调试说明书

Q1604摄像机基本和功能调试1.设置分辨率2.设置压缩比3.设置GOV值4.设置固定码流:即CBR值5.设置色彩四项:色彩度、亮度、清晰度、对比度6.宽动态开启/关闭7.白平衡设置8.曝光、快门、增益设置9.日夜转换模式10.自动聚焦11.添加用户12.截图设置13.启动录像按钮14.恢复出厂值设置15.查看访问此台摄像机的用户16.阻止某些用户访问此台摄像机17.屏幕字符叠加:例如码流、日期18.区域遮挡19.开启组播功能20.SD卡存储21.建立模板,以供第三方调取合适的视频流22.摄像机的升级23.开启并修改ONVIF参数23.1建立用户:此用户名和密码就是与第三方平台集成23.2然后开启onvif23.2.123.2.223.2.323.2.423.2.523.3修改onvif参数值23.3.123.3.223.3.223.3.323.3.4再次:24.移动侦测设置25.ACAP上传:例如上传给定时间宽动态开启关闭、自动聚焦、电子快门值等首先:请将inittap文件和paramsettings.sh文件放置在C:\Users\Administrator 目录下然后:运行DOS命令:开始---运行ftp 192.168.0.90cd /etcasciiput paramsettings.shput inittabquote site chmod 777 paramsettings.shquote site chmod 777 inittabQuit上传timeshell.eap文件到摄像机Applications并Start再次进入最后。
AXISP3905–RE网络摄像机安装指引-AxisCommunications

商标声明 AXIS COMMUNICATIONS、AXIS、ETRAX、 ARTPEC 和 VAPIX 是 Axis AB 在全球各个国家 的商标和注册商标。所有其他公司名称和产品 是其各自公司的商标或注册商标。 Apple、Boa、Apache、Bonjour、Ethernet、 Internet Explorer、Linux、Microsoft、 Mozilla、Real、SMPTE、QuickTime、UNIX、 Windows、Windows Vista 和 WWW 均为各自 持有者的注册商标。Java 和所有基于 Java 的商标和标识均为 Oracle 公司和/或其下属 公司的商标或注册商标。UPnPTM 是 UPnPTM Implementers 公司的认证标志。 SD、SDHC 和 SDXC 是 SD-3C, LLC 在美国和 /或其他国家和地区的商标或注册商标。另外, miniSD、microSD、miniSDHC、microSDHC、 microSDXC 是 SD-3C,LLC 在美国和/或其它 国家/地区的商标或注册商标。
AXIS P3905–RE 网络摄像机 安装指南
法律考虑事项 视频监控可能会受法律管制,各个国家/地区 的法律会有所不同。如将本产品用于监控目 的,需要先检查是否符合你所在区域内的法 律规定。 本产品包括一个(1)H.264解码器许可。要购 买更多许可,请与您的经销商联系。
责任 本文档在制作时已力求审慎。如发现任何不准 确或遗漏的内容,请及时告知您当地的安讯士 办事处。安讯士网络通信有限公司不承诺对任 何技术或印刷错误承担责任,并保留对产品及 手册进行变更的权利,恕不另行通知。安讯士 网络通信有限公司不对本文档中包含的材料做 出任何形式的担保,包括但不限于为特定目的 而对适销性和适用性做出的暗示担保。安讯 士网络通信有限公司对于与该材料的提供、 执行或使用相关的偶然或间接损坏不承担任 何责任,也不负责。该产品仅可按其使用意 图使用。
axis m1045-lw 网络摄像机用户手册说明书

AXIS M1045-LW Network Camera 用户手册目录产品概述 (3)开始 (4)将摄像机连接到无线网络 (4)在网络上查找设备 (4)访问设备 (5)网页概览 (5)其他设置 (8)调整图像 (8)查看并录制视频 (9)设置事件规则 (10)高级无线设置 (11)了解更多 (13)码流传输和存储 (13)应用程序 (14)故障排查 (16)重置为出厂默认设置 (16)检查当前固件 (16)升级固件 (16)技术问题、线索和解决方案 (17)性能考虑 (18)规格 (20)LED指示灯 (20)SD卡插槽 (20)按钮 (20)连接器 (20)产品概述产品概述1对焦锁环2对焦环3红外LED4LED状态指示灯5控制按钮6WLAN配对按钮7网络连接器8SD卡插槽9电源连接器开始开始将摄像机连接到无线网络1.按下并快速地释放摄像机上的WLAN配对按钮。
2.在120秒内按下无线访问点上的WLAN配对按钮,然后按下摄像机上的按钮。
3.确保LED指示灯呈稳定绿色亮起10秒,这意味着摄像机已连接。
4.转到设置>系统>无线,然后关闭WLAN配对按钮以防止未经授权的WLAN配对。
如果无线访问点不支持按下按钮配置,您必须手动配置无线网络,请参见手动配置无线网络4。
手动配置无线网络1.使用网络线缆将摄像机连接至网络。
2.请确保接入点已启动并正在运行。
3.登录产品网页,参见在网络上查找设备4。
4.转到设置>系统>无线。
5.在列表中,选择无线网络或转到添加其他网络并使用SSID手动添加。
6.输入访问点的密码。
7.单击保存。
8.从摄像机断开网络电缆。
9.确保LED指示灯呈稳定绿色亮起10秒,这意味着摄像机已连接。
如果使用与WPA2-PSK以外的其他安全方法设置网络,请参见高级无线设置11。
在网络上查找设备若要在网络中查找Axis设备并为它们分配Windows®中的IP地址,请使用AXIS IP Utility或AXIS设备管理器。
无线网络摄像机的安装方法与设置教程
无线网络摄像机的安装方法与设置教程无线网络摄像机的安装方法与设置教程无线网络摄像机是通过无线网络传输视频信号的网络摄像机,与普通网络摄像机的区别在于视频信号的传输方式。
以下是小编精心整理的无线网络摄像机的安装方法与设置教程,欢迎大家借鉴与参考,希望对大家有所帮助。
无线网络摄像机的安装方法与设置教程 1经常能够在百度上面看到有人问有关于无线网络摄像机安装方法及设置教程。
其实只要掌握了要领还是很容易就可以安装好。
无线网络摄像机在安防方面既能充当家庭安保,也可以帮助您随时注意家中所发生的一切,不管是在什么时候发生的。
摄像机只要能连接无线WIFE,可以看到摄像头拍摄的任何地方的图像。
如果是无线网络摄像头,就更加灵活,它可以放在可以连接到网络的地方。
那么选择带有线还是无线的摄像头呢?无线相对有线连接更具灵活性,当然有线连接更易于设置。
但我们在实际生活中,在进行无线连接设置的过程中,您会首先建立临时的有线连接。
这是为了防止在设置无线连接时遇到问题可以返回至有线连接的设置。
现在的无线摄像机越来越受到年轻用户的追捧,我们可以考虑使用802.11g或802.11n联网技术,而不要选择旧版的802.11a或技术。
我们假定您已经完成支持有线和无线连接的网络设置。
现在,您只需一个网络摄像头和一条在设置过程中可连接至路由器的网线。
家用网络摄像机的价格在300到千元左右。
在此安装也要特别注意以下几点:网络摄像头特性与无线协议兼容(即,802.11g或802.11n)支持您使用的无线安全性(如果有,WEP或WPA)内置的Web服务器(无需电脑即可连接至互联网)支持音频和内置的麦克风可放置在桌面上或安装在墙上。
收集网络信息除设备外,在设置过程中,您需要从路由器的管理界面了解有关无线网络的信息:网络名称或服务集标识符(SSID)网络使用的安全类型,如WEP(有线等同协议)或WPA(WiFi保护性接入)对于WEP网络,需采用密钥(长度为64位或128位)对于WPA网络,需采用加密算法(TKIP或AES)共享的加密密钥或口令。
网络摄像机安装图解
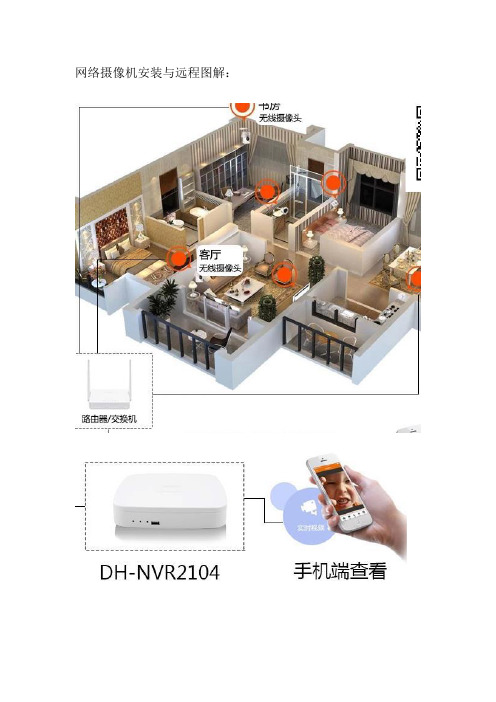
网络摄像机安装与远程图解:
支持1080P高清预览;
采用嵌入式硬件和嵌入式Linux系统;
可接驳第三方(SAMSUNG、Panasonic、SONY、Bosch、Arecont、AXIS、Honeywell、LG、Vivotek、SANYO、景阳)等50多个品牌IPC;
支持标准ONVIF、PSIA协议;
支持VGA、HDMI同步输出;
支持VGA、HDMI最大分辨率达1920×1080;
支持高清预览,所有通道解主码流;
支持智能行为分析扩展;
采用Dahua云台控制协议时,可以通过鼠标实现三维智能定位功能;
支持预览图像与回放图像的电子放大;
支持按事件查询、回放、备份录像文件,支持图片本地回放与查询;
支持录像回放时智能搜索功能;
支持数字水印;
支持一键开启录像功能;
支持即时回放,在预览画面下回放指定通道的录像;
支持重要录像文件锁定功能;
支持大华DDNS域名解析系统;
支持网络检测(网络流量监控、网络抓包、网络通畅)功能;
最大支持8路D1或4路720P同步回放;
支持盘组管理、录像定向存储;
支持1个SATA接口;
支持IPv4、IPv6、HTTP、UPnP、SNMP、NTP、SADP、SMTP、PPPoE、DDNS、FTP、ONVIF。
AXISM11网络摄像机系列AXISM1124网络-AxisCommunications

法规信息 欧洲
本产品符合适用的 CE 标记指令和协 调标准:
• 电子兼容性 (EMC) 指令 2004/108/EC。
参见 电磁兼容性 (EMC) 在第 2 页。
• 低压 (LVD) 指令 2006/95/EC。参见安全
在第 3 页。
• 有害物质限用 (RoHS) 指令 2011/65/EU。
参见处置和回收 在第 3 页。 可通过 Axis Communications AB 获得一份一 致性声明原件。参见联系信息 在第 3 页。
设备改造 必须严格按照用户文档中给出的说明安装和使 用本设备。本设备不含用户可维修的部件。未 经授权的设备更改或改造将使所有适用的法 律认证和认可无效。
商标声明 AXIS COMMUNICATIONS、AXIS、ETRAX、 ARTPEC 和 VAPIX 是 Axis AB 在全球各个国家 的商标和注册商标。所有其他公司名称和产品 是其各自公司的商标或注册商标。 Apple、Boa、Apache、Bonjour、Ethernet、 Internet Explorer、Linux、Microsoft、 Mozilla、Real、SMPTE、QuickTime、UNIX、 Windows、Windows Vista 和 WWW 均为各自 持有者的注册商标。Java 和所有基于 Java 的商标和标识均为 Oracle 公司和/或其下属 公司的商标或注册商标。UPnPTM 是 UPnPTM Implementers 公司的认证标志。 SD、SDHC 和 SDXC 是 SD-3C, LLC 在美国和 /或其他国家和地区的商标或注册商标。另外, miniSD、microSD、miLC 在美国和/或其它 国家/地区的商标或注册商标。
知识产权 Axis AB 持有本文档所述产品中包含的技术的 知识产权。 特别是(但不仅限于) 这些知识产权 可能包含/patent.htm中所 列的一项或多项专利,以及一项或多项美国及 其他国家/地区的其它专利或待定的专利申请。 本产品包含许可的第三方软件。 查看产品用户 界面中的“关于”菜单项,了解更多信息。 根据苹果公开源代码许可 2.0 中的条款,本产 品包含有 Apple Computer, Inc. 的源代码版权 (请参见/apsl)。 如需源代码请访 问:https:///bonjour/
网络摄像机安装说明书.pdf_1694203535.9877102
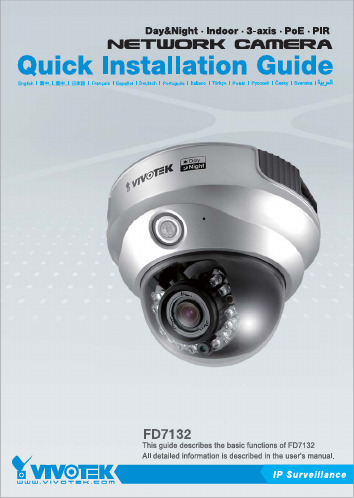
E n g l i s hPower off the Network Camera assoon as it is found smoking or smeltunusual.Contact your distributor when such caseshappen.Keep the Network Camera away from the water. If the Network Camera is wet, power off immediately.Do not place the Network Cameraaround the heat sources, such astelevision or oven.Refer to your user's manual for the operating temperature.Keep the Network Camera away fromdirect sunlight.Do not place the Network Camera in high humid environments.Contact your distributor when such cases happen.Do not place the Network Camera on unsteady surfaces.Do not touch the Network Camera when it's lightening.Do not disassemble the NetworkCamera.Do not drop the Network Camera.Do not insert any object into theNetwork Camera, such as needles.E n g l i s hSoftware CDWarranty cardScrewdriver Alignment sticker Quick installation guide Power adapterMicrophone inExternal/Internal microphoneswitchDrill holesDome coverPhysical Description2E n g l i s hFirst, use the supplied screwdriver to detach the dome cover from the camera base. Then, follow the steps below to install the camera; either to a ceiling or to a wall.Hardware Installation3General Connection (without PoE)1. If you have external devices such as sensors and alarms, make connections from gen-eral I/O terminal block.2. Connect the camera to a switch via a Ethernet cable.3. Connect the supplied power cable from the camera to a power outlet.2Ethernet switchNetwork Deployment4E n g l i s h Power over Ethernet (PoE)PoE switchnon-PoE switchWhen using a non-PoE switchUse a PoE power injector (optional) to connect between the camera and a non-PoE switch.When using a PoE-enabled switchThe camera is PoE-compliant, allowing transmission of power and data via single Ether-net cable. See the following illustration to connect the camera to a PoE-enabled switch via Ethernet cable.MAC:0002D107258A 1. Install the "Installation Wizard 2" under the Software Utility directory from software CD.2. The program will conduct analyses on your network environment. After your network is analyzed, please click on the "Next" button to continue the program.3. The program will search the VIVOTEK Video Receivers, Video Servers or Network Cam-eras on the same LAN.4. After searching, the main installer window will pop up. Click on the MAC that matches the one labeled on the bottom of your device to connect the Internet Explorer to the Network Camera.0002D107258AAssigning IP Address5E n g l i s hFor further setup, please refer to user's manual on the software CD.Ready to Use61. Access to the Network Camera from the Internet.2. Retrieve live video through web browsers or recording software.3. It is suggusted to select Fix Iris in the Audio and Video page (Choose Configuration > Advanced mode > Audio and video) to set up the iris at the maximum value; then fol-low the instructions on the next page to adjust the zoom factor and focus range. Uponcompletion, uncheck this item to enable auto iris.Based on the live image retrieved from the camera, adjust the camera lens by doing the following:To adjust the viewing angle1. Loosen the pan screw and then turn the lens module left and right. Upon completion, tighten the pan screw.2. Loosen the tilt screws on both side of the camera and then turn the lens module up and down. Upon completion, tighten the tilt screws.3. Loosen the image adjustment screw and then turn the lens to adjust the image orientation. Upon completion, tighten the image adjustment screw.To adjust the zoom factor and focus range1. Loosen the zoom controller and then adjust zoom factor by moving the controller left and Adjusting the Lens7E n g l i s hAttach the dome cover to camera. Secure the two dome screws with a screwdriver.Finally, make sure all parts of the camera are securely installed.Completion8P/N: 625006600G Ver.1.01 Copyright 2008 VIVOTEK INC. All right reserved.。
威视讯达网络摄像机客户端安装操作指导手册

IPCamView安装操作指导手册主编:编委:主审:编辑:北京昌泰视佳数码科技有限公司IPCamView安装操作指导手册资料版本V1.1出版状态正式产品版本v5.5.16.0日期2012年08月BOM 编号北京昌泰视佳数码科技有限公司2012年版权所有,保留一切权利在没有得到本公司书面许可时,任何单位和个人不得擅自摘抄、复制本书(软件等)的部分或全部,不得以任何形式(包括资料和出版物)进行传播。
版权所有,侵权必究。
内容如有改动,恕不另行通知。
Copyright © 2012 by Beijing Chang Tai Shi Jia Digital Technology Co., Ltd..All rights reserved.The information in this document is subject to change without notice. No part of this document may in any form or by any means (electronic,mechanical,micro-copying,photocopying,recording or otherwise) be reproduced,stored in a retrieval system or transmitted without prior written permission from Beijing Chang Tai Shi Jia Digital Technology Co., Ltd目录前言 (5)本书读者 (5)如何阅读本书 (5)第〇章硬件安装 (6)第一章软件安装 (7)1.1安装准备 (7)1.2软件安装 (7)第二章软件操作 (11)2.1软件主界面简介 (11)2.2软件基本操作 (13)2.3主界面画面和信息 (15)2.4远程实时 (17)2.5远程回放 (21)2.6本地回放 (23)2.7摄像机属性和服务器属性 (24)2.8摄像机远程升级 (26)2.9录像下载 (27)2.10AVI转换 (29)2.11系统设置 (30)2.11.1 本地配置 (30)2.11.2 登录配置 (32)2.11.3 下载管理 (32)2.11.4 用户配置 (33)2.11.5 录像管理 (34)2.11.6 快捷键管理 (35)2.11.7 电子地图 (36)2.12其他功能 (38)2.12.1 云台控制及预置点、巡航设置 (38)2.12.2 画质、色彩设置 (40)2.12.3音频及画面播放控制功能 (41)2.12.4 锁定解锁 (41)前言本手册主要描述如何安装和操作IPCamView软件,从而完成对IPCamView的配置、实现监控系统的录像和回放功能。
《高清网络摄像机快速安装指南》

《高清网络摄像机快速安装指南》感谢您使用我公司生产的高清网络摄像机系列产品,为了能让您正确的完成网络摄像机的安装使用,请您务必仔细阅读本指南进行相关操作。
如未能正确安装,请与您的供应商联系或直接致电我公司,谢谢~一、 IE浏览安装使用方法将高清网络摄像机通电并与您进行监控的计算机通过RJ45网络接口正确连接,或将高清网络摄像机接入到与您计算机同样的局域网络,然后在监控计算机打开光盘内容,找到IP搜索工具中的网络摄像机搜索程序IPNCSearch,双击运行,打开窗口如下图如示:点击窗口中的“搜索”按钮,网络摄像机列表中将会出现所有在线的网络像机,并显示相关的网络参数。
网络像机出厂IP地址为192.168.1.253,网关为192.168.1.254,选中摄像机列表前的选择方框,然后点击“修改IP”,出现网络参数修改界面后,将网络摄像机的网关设成与您计算机同一个网段和不同的IP地址,然后点击“修改”按钮,稍等10秒钟左右,网络摄像机将完成IP修改动作,重新点击搜索按钮,将显示成功修改IP后的网络摄像机列表,选择您所需要监控的网络摄像机,再点击“播放按钮”,将会出现网络摄像机的登陆界面。
首次进行IE登陆需要安装控件程序,请在登陆界面中点击OCX下载控件,并运行安装,安装控件后输入默认用户名admin及密码9999,点击登陆即可打开视频监控画面。
二、集中管理监控使用方法安装光盘内的集中管理软件程序IPCamClient,安装完成后将在桌面生成“网络视频监控软件客户端”快捷方式,双击运行,在登陆界面中选择默认用户名admin并输入密码12345即可打开客户端界面。
(在此步聚之前必需已将网络摄像机IP地址修改成与计算机同在一个网段、不同的IP,修改方法请参照以上IE浏览的使用方法),点击客户端左下角的视频源管理按钮,出现管理界面,点击“搜索”键,出现摄像机列表后,选择要添加的网络摄像机,然后按“添加”键。
返回软件主界面,单击右下角的即可打开视频画面(或在添加摄像机的列表中直接拖动摄像机到画面窗口)。
AXISM10系列安装指引-AxisCommunications

安装步骤
1. 根据下面的列表检查包装内容。 2. 第 4 页上的硬件概览。 3. 安装硬件 (第 8 页)。 4. 分配 IP 地址 (第 10 页)。 5. 设置密码 (第 13 页)。 6. 配置无线连接 (第 15 页)。
(仅 AXIS M1011-W/M1031-W)
包装内容
重要提示! 使用本产品时必保。 Axis Communications AB 对于 与该材料的提供、执行或使用相关的偶然
损坏或间接损坏不承担任何责任,亦不对此 负责。
AXIS M10 系列
第3页
中文
AXIS M10 系列安装指南
本指南可帮助您在网络上安装 AXIS M10 系列网络摄像机。有关 更多信息,请参见可在 CD 上或 /techsup 上获得的 用户手册。
责任
准备本文档时已进行谨慎处理。请将出现的 任何不准确的内容或遗漏的内容告知您当 地的 Axis 办事处。Axis Communications AB 不负责任何技术错误或印刷错误,并且保留 对产品和文档进行更改的权利,恕不事先通 知。 Axis Communications AB 不对本文档中 包含的材料做出任何形式的担保,包括但不
安全性 符合 EN 60950-1 (IEC 60950-1) 和信息技术 设备的安全性。
设备改造
必须严格按照用户文档中给出的说明安装 和使用本设备。本设备不含用户可维修的部 件。未经授权的设备更改或改造将使所有适 用的法规认证和认可无效。
RoHS
本产品既符合欧洲 RoHS 指令 2002/95/EC 又符合中国 RoHS 法 规 ACPEIP。
M1054)
弹性夹
用于架式安装
CD
AXIS Network Video Product CD,包括产品文档、
AXIS M1104网络摄像头详细信息说明书
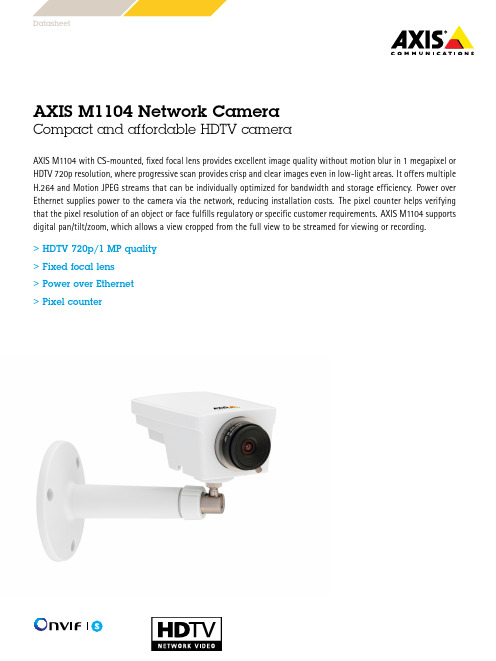
DatasheetAXIS M1104Network CameraCompact and affordable HDTV cameraAXIS M1104with CS-mounted,fixed focal lens provides excellent image quality without motion blur in1megapixel or HDTV720p resolution,where progressive scan provides crisp and clear images even in low-light areas.It offers multiple H.264and Motion JPEG streams that can be individually optimized for bandwidth and storage efficiency.Power over Ethernet supplies power to the camera via the network,reducing installation costs.The pixel counter helps verifying that the pixel resolution of an object or face fulfills regulatory or specific customer requirements.AXIS M1104supports digital pan/tilt/zoom,which allows a view cropped from the full view to be streamed for viewing or recording.>HDTV720p/1MP quality>Fixed focal lens>Power over Ethernet>Pixel counterAXIS M1104Network Camera CameraImage sensor Progressive scan RGB CMOS1/4"Lens 2.8mm,F2.0Horizontal angle of view:80°Minimumillumination1.0-100000lux,F2.0Shutter time1/8000s to1/6sVideoVideocompressionH.264Baseline Profile(MPEG-4Part10/AVC),Motion JPEGResolutions1280x800a to160x90Frame rate30fps in all resolutionsVideo streaming Multiple,individually configurable streams in H.264andMotion JPEGControllable frame rate and bandwidth,VBR/CBR H.264Pan/Tilt/Zoom Digital PTZImage settings Compression,Color,Brightness,Sharpness,Contrast,Whitebalance,Backlight compensation,Mirroring of images,Rotation-including Corridor Format,Text and image overlay,Privacy maskRotation:0°,90°,180°,270°NetworkSecurity Password protection,IP address filtering,HTTPS b encryption,IEEE802.1X b network access control,Digest authentication,Useraccess logSupported protocols IPv4/v6,HTTP,HTTPS b,SSL/TLS b,QoS Layer3DiffServ,FTP, CIFS/SMB,SMTP,Bonjour,UPnP TM,SNMP v1/v2c/v3(MIB-II), DNS,DynDNS,NTP,RTSP,RTP,TCP,UDP,IGMP,RTCP,ICMP,DHCP, ARP,SOCKS,SSHSystem integrationApplication Programming Interface Open API for software integration,including VAPIX®and AXIS Camera Application Platform,specifications at AXIS Video Hosting System(AVHS)with One-Click Connection ONVIF Profile S,specification at Analytics Video motion detection,Active tampering alarmSupport for AXIS Camera Application Platform enablinginstallation of AXIS Video Motion Detection3,AXIS Cross LineDetection,AXIS Digital Autotracking and third-party applications,see /acapEvent triggers Analytics,Edge storage events,External input,Time scheduled Event actions File upload via FTP,HTTP and network shareEmail Notification via email,HTTP and TCP Pre-and post-alarmvideo bufferingExternal output activation,Video recording to edge storage,Goto PTZ preset,Guard tourData streaming Event dataBuilt-ininstallation aidsPixel counterGeneralCasing Color:White NCS S1002-BAluminum and plasticMemory128MB RAM,128MB FlashPower Power over Ethernet IEEE802.3af Class1Connectors RJ4510BASE-T/100BASE-TX PoEEdge storage Support for recording to dedicated network-attached storage(NAS)For NAS recommendations see Operatingconditions-20°C to50°C(-4°F to122°F)Humidity20–80%RH(non-condensing)Approvals EN55022Class B,EN61000-6-1,EN61000-6-2,EN61000-3-2, EN61000-3-3,EN55024,FCC Part15Subpart B Class B,ICES-003Class B,VCCI Class B,C-tick AS/NZS CISPR22Class B,KCC KN22Class B,KN24,IEC/EN/UL60950-1Weight170g(0.37lb)IncludedaccessoriesInstallation Guide,Windows decoder1-user licenseStandOptionalaccessoriesAxis Mounts,Axis Housings&Cabinet,Axis Midspans,AxisIlluminators,LensesFor more accessories,see VideomanagementsoftwareAXIS Camera Companion,AXIS Camera Station,Videomanagement software from Axis’Application DevelopmentPartners available on /techsup/software Languages German,French,Spanish,Italian,Russian,Simplified Chinese,Japanese,Korean,PortugueseWarranty Axis1-year warranty and AXIS Extended Warranty option,see/warrantya.1440x900(1.3MP)scaled resolution available via VAPIX®b.This product includes software developed by the OpenSSL Project for use in the OpenSSL Toolkit(/),and cryptographic software written by Eric Young(*****************).More information is available at ©2014-2015Axis Communications AB.AXIS COMMUNICATIONS,AXIS,ETRAX,ARTPEC and VAPIX are registered trademarks or trademark applications of Axis AB in various jurisdictions.All other company names and products are trademarks or registered trademarks of their respective companies.We reserve the right to introduce modifications without notice.1 4 8 0 5 9 5 / E N / M 1 . 1 / 0 6 2 0 1 5。
- 1、下载文档前请自行甄别文档内容的完整性,平台不提供额外的编辑、内容补充、找答案等附加服务。
- 2、"仅部分预览"的文档,不可在线预览部分如存在完整性等问题,可反馈申请退款(可完整预览的文档不适用该条件!)。
- 3、如文档侵犯您的权益,请联系客服反馈,我们会尽快为您处理(人工客服工作时间:9:00-18:30)。
该产品符合 EN 55024 办公和商用环境抗干 扰要求。 澳大利亚/新西兰 该数字设备 符合 AS/NZS CISPR 22 B 类限制 的射频辐射要求。产品应当使用正确接地的屏 蔽网线 (STP) 进行连接。
安全
该产品符合 IEC/EN 60950-1信息技术设备安 全标准。如果连接线在室外布置,本产品必须 通过屏蔽网线(STP)或其它方法正确接地。 本产品使用的电源应该满足 IEC/EN/UL 60950-1的安全极低电压 (SELV) 及有限电源 (LPS) 的要求。
AXIS M1054 网络摄像机 安装指南
法律考虑事项 视频和音频监控可能会受法律管制,各个国 家/地区的法律会有所不同。如将本产品用于 监控目的,需要先检查是否符合你所在区域 内的法律规定。 本产品包括一个(1)H.264解码器许可和一个 (1)AAC 解码器许可。要购买更多许可,请 与您的经销商联系。
• 重新定向或重新定位接收天线。 • 增加设备与接收器的间隔距离。 • 将设备连接到不与接收器相连的回路的
插座上。
• 请咨询经销商或有经验的收音机/电视机
技术人员。 产品应当使用正确接地的屏蔽网线 (STP) 进 行连接。 加拿大 本数字设备符合 CAN ICES-3 (B 类)要 求。本产品必须连接一个正确接地的屏蔽网线 (STP)。 Cet appareil numérique est conforme à la norme CAN NMB-3 (classe B).Le produit doit être connecté à l'aide d'un câble réseau blindé (STP) qui est correctement mis à la terre. 欧洲 该数字设备符合 EN 55022 B 类限制的射频 辐射要求。产品应当使用正确接地的屏蔽网 线 (STP) 进行连接。 该产品符合 EN 61000-6-1 住宅、商用和轻工 业环境的抗扰度要求。 该产品符合 EN 61000-6-2 工业环境的抗扰 度要求。
法规信息 欧洲
本产品符合适用的 CE 标记指令和协 调标准:
• 电子兼容性 (EMC) 指令 2004/108/EC。
参见 电磁兼容性 (EMC) 在第 2 页。
• 低压 (LVD) 指令 2006/95/EC。参见安全
在第 3 页。
• 有害物质限用 (RoHS) 指令 2011/65/EU。
参见处置和回收 在第 3 页。 可通过 Axis Communications AB 获得一份一 致性声明原件。参见联系信息 在第 3 页。
电磁兼容性 (EMC)
该设备经过专门设计和测试,符合以下适用 标准:
• 在根据说明安装并用于设计环境中时符
合射频辐射标准。
• 在根据说明安装并用于设计环境中ห้องสมุดไป่ตู้符合
抗电气和电磁现象标准。 美国 本设备已使用屏蔽线缆(STP)进行了测试, 证明其符合 FCC 规定第 15 条针对 B 类数字设 备的限制。这些限制旨在针对该设备在住宅环 境中使用时的有害干扰提供合理防护。该设备 可以生成、利用并发射射频能量,如果不按有 关指导来进行安装和使用该设备,则可能会对 无线电通信造成有害干扰。但是,不能保证将 来不会在特定安装中出现干扰。如果该设备确 实对收音机或电视接收造成有害干扰(可通过 关闭和打开设备进行确定),建议用户尝试通 过以下一个或多个方法来排除干扰:
处置和回收
产品达到使命寿命后,请根据当地法律和法规 对其进行处置。有关离您最近的指定回收点的 信息,请联系负责垃圾处理的当地机构。根据 当地法律,处置废物不当可能会受到处罚。 欧洲
设备改造 必须严格按照用户文档中给出的说明安装和使 用本设备。本设备不含用户可维修的部件。未 经授权的设备更改或改造将使所有适用的法 律认证和认可无效。
商标声明 AXIS COMMUNICATIONS、AXIS、ETRAX、 ARTPEC 和 VAPIX 是 Axis AB 在全球各个国家 的商标和注册商标。所有其他公司名称和产品 是其各自公司的商标或注册商标。 Apple、Boa、Apache、Bonjour、Ethernet、 Internet Explorer、Linux、Microsoft、 Mozilla、Real、SMPTE、QuickTime、UNIX、 Windows、Windows Vista 和 WWW 均为各自 持有者的注册商标。Java 和所有基于 Java 的商标和标识均为 Oracle 公司和/或其下属 公司的商标或注册商标。UPnPTM 是 UPnPTM Implementers 公司的认证标志。
知识产权 Axis AB 持有本文档所述产品中包含的技术的 知识产权。 特别是(但不仅限于) 这些知识产权 可能包含/patent.htm中所 列的一项或多项专利,以及一项或多项美国及 其他国家/地区的其它专利或待定的专利申请。 本产品包含许可的第三方软件。 查看产品用户 界面中的“关于”菜单项,了解更多信息。 根据苹果公开源代码许可 2.0 中的条款,本产 品包含有 Apple Computer, Inc. 的源代码版权 (请参见/apsl)。 如需源代码请访 问:https:///bonjour/
责任 本文档在制作时已力求审慎。如发现任何不准 确的内容或遗漏,请及时告知您当地的安讯士 办事处。Axis Communications AB 不承诺对任 何技术或印刷错误承担责任,并保留对产品及 手册进行变更的权利,恕不另行通知。Axis Communications AB 不对本文档中包含的材料 做出任何形式的担保,包括但不限于为特定目 的而对适销性和适用性做出的暗示担保。Axis Communications AB 对于与该材料的提供、 执行或使用相关的偶然或间接损坏不承担任 何责任,也不负责。该产品仅可按其使用意 图使用。
