CH395中文手册
科勒 CH245-CH440 发动机维修手册说明书

CH245-CH440服务手册重要提示: 设备操作前请阅读所有安全预防措施和说明。
请参阅安装该发动机设备的操作说明。
执行任何保养或检修前请确保发动机已停机并平坦放置。
2安全3保养5规格19工具和辅助用品22故障排除26空气滤清器/进气28燃油系统32调速器系统42润滑系统43电子系统50起动器系统55齿轮减速系统68拆解/检查和维修89重新组装安全安全预防措施警告:可能导致死亡、严重人身伤害或重大财产损失的危险。
告诫:可能导致轻微人身伤害或财产损失的危险。
注意: 用于告知人们非常重要的发动机安装、操作或保养相关信息。
警告易爆炸的燃油可能引起火灾和严重灼伤。
在发动机处于高温或运转时,切勿往燃油箱内加油。
汽油很容易燃烧,且它的蒸汽被点燃的时候易爆炸。
存储的汽油只能装在符合要求的容器内,并位于通风良好、无人居住的建筑物内,远离火花或火焰。
溢出的燃油在接触到热的零件或点火火花的时候容易被点燃。
不能使用汽油作为清洗剂。
警告旋转零件可能引起严重人身伤害。
切记远离运转中的发动机。
手、足、头发和衣物必须远离正在转动的零件以防人身伤害。
在外盖、保护罩或防护装置拆走的时候,不要运行发动机。
警告一氧化碳可能导致严重呕吐、昏厥甚至死亡。
避免吸入排放的尾气。
切勿在室内或密闭空间内运行发动机。
发动机排放的尾气含有有毒的一氧化碳。
一氧化碳是无味、无色的气体,且吸入过多时会导致死亡。
警告意外起动可能造成严重人身伤害甚至死亡。
在维护前请断开火花塞导线并将其接地。
在发动机或设备上工作之前,请按以下说明停止发动机:1)断开火花塞导线。
2)断开电池的负极 (–)电池线。
警告高温零件可能引起严重灼伤。
切勿在运转期间或停机后立即触摸发动机。
在发动机防热罩或隔热板拆走后,切记不能运行发动机。
警告清洁剂可能造成严重人身伤害甚至死亡。
应在远离火源且通风良好的区域使用清洁剂。
化油器清洁剂和溶剂很容易燃烧。
遵照清洁剂生产商的警告和说明以便正确、安全地使用。
单片机扩展CH395以太网控制器的通信速率测试
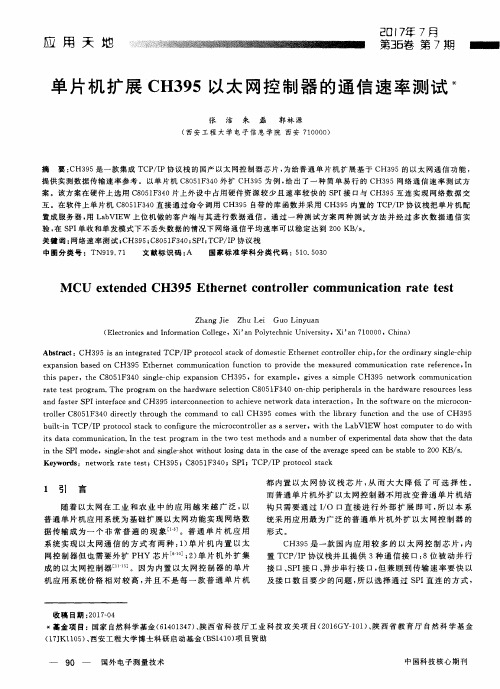
M CU e x t e n d e d CH39 5 Et h e r ne t c o n t r o l l e r c o mm u ni c a t i o n r a t e t e s t
Z h a n g J i e Zh u Le i Gu o Li n y u a n
应 用 天 地
己 口 I 7 年 7月
第3 5 卷 第以太 网控 制 器 的通 信 速 率 测试 *
张 洁 朱 磊 郭 林 源
( 西 安 工程 大 学 电 子 信 息 学 院 西 安 7 1 0 0 0 0 )
摘
要: C H3 9 5是 一 款 集 成 TC P / I P协 议 栈 的 国 产 以 太 网 控 制 器 芯 片 , 为 给普 通 单 片机 扩 展 基 于 C H3 9 5的 以太 网 通 信 功 能 ,
( El e c t r oni c s a nd I nf o r ma t i o n Col l e g e,X i ’ a n Po l y t ec hni c U ni ve r s i t y, Xi ’ a n 7 1 0 000,Chi na )
互 。在软件上单片机 C 8 0 5 1 F 3 4 0直 接 通 过命 令 调 用 C H3 9 5自带 的库 函数 并 采 用 CH3 9 5内 置 的 TC P / I P协 议 栈 把 单 片 机 配
USB接口芯片CH375(二)
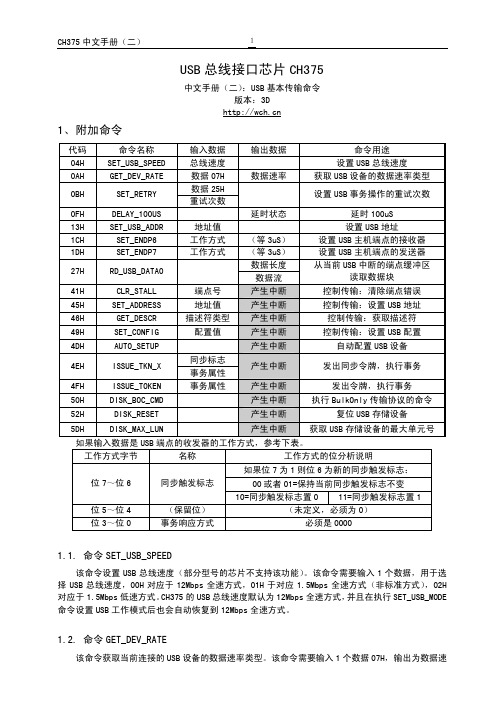
PID 字节
名称
说明
0DH
DEF_USB_PID_SETUP
发起控制传输,发送建立数据
01H
DEF_USB_PID_OUT
执行 OUT 事务,发送数据
09H
DEF_USB_PID_IN
执行 IN 事务,接收数据
1.16. 命令 DISK_BOC_CMD
该命令对 USB 存储设备执行 BulkOnly 传输协议的命令。在执行该命令之前,单片机必须先通过 WR_USB_DATA7 命令向 CH375 写入相应的 CBW 包,CH375 在命令执行完成后向单片机请求中断,单片机 可以读取中断状态作为该命令的操作状态。如果操作状态是 USB_INT_SUCCESS 则说明命令执行成功, 对于有返回数据的操作,可以由 RD_USB_DATA 命令获取返回数据。
1.15. 命令 ISSUE_TOKEN
该命令使 CH375 发出令牌,执行事务。该命令需要输入 1 个数据,作为事务属性。事务属性的低 4 位指定事务的令牌 PID,高 4 位指定 USB 设备的目的端点号。CH375 在命令执行完成后向单片机请 求中断,单片机可以读取中断状态作为该命令的操作状态。如果操作状态是 USB_INT_SUCCESS,则说 明命令执行成功,否则说明命令执行失败,单片机可以根据操作状态进一步分析失败原因。
CH375 中文手册(二)
1
USB 总线接口芯片 CH375
1、附加命令
中文手册(二):USB 基本传输命令 版本:3D
代码
命令名称
输入数据
输出数据
命令用途
04H
SET_USB_SPEED
总线速度
设置 USB 总线速度
富士诺彩色扫描声纳CSH-5L CSH-8L操作手册说明书

操作手册彩色扫描声纳CSH-5LCSH-8L型号www.furuno.co.jpPub. No. O ZS-13190-C1 DATE OF ISSUE: Nov. 2010iii目录前言............................................................................................................................v i 系统配置....................................................................................................................v ii 1.操作概述.............................................................................................................1-11.1控制单元......................................................................................................................1-11.2遥控器(选用件)........................................................................................................1-21.3基本操作步骤...............................................................................................................1-31.3.1开启电源............................................................................................................1-31.3.2降下传感器........................................................................................................1-31.3.3发射...................................................................................................................1-41.3.4调整控制单元的背光..........................................................................................1-51.3.5选择显示模式.....................................................................................................1-61.3.6选择显示量程.....................................................................................................1-81.3.7调整增益............................................................................................................1-91.3.8收回传感器和关闭电源......................................................................................1-91.4设置倾斜角................................................................................................................1-101.4.1开启/关闭自动倾斜...........................................................................................1-101.4.2海底和倾斜角...................................................................................................1-121.4.3如何分辨鱼群回波和海底回波..........................................................................1-121.4.4注意事项..........................................................................................................1-131.4.5海面鱼群的倾斜角............................................................................................1-131.4.6适当的倾斜角...................................................................................................1-141.5确定目标的距离和方位...............................................................................................1-141.6“声纳”菜单概述......................................................................................................1-151.6.1操作步骤..........................................................................................................1-151.6.2“声纳”菜单说明............................................................................................1-162.微调声纳画面......................................................................................................2-12.1消除多余回波...............................................................................................................2-12.2清晰显示海面鱼群........................................................................................................2-22.3抑制海底曳尾...............................................................................................................2-22.3.1AGC..................................................................................................................2-22.3.2脉冲长度............................................................................................................2-32.3.3第二AGC.........................................................................................................2-32.4抑制浅水渔场中的海底和海面反射...............................................................................2-42.5抑制声纳干扰和噪讯....................................................................................................2-52.5.1确定噪讯源........................................................................................................2-52.5.2使用干扰抑制功能抑制噪讯...............................................................................2-52.5.3使用噪讯限制功能抑制噪讯...............................................................................2-52.5.4通过TX 周期抑制干扰.....................................................................................2-62.6选择波束宽..................................................................................................................2-72.6.1水平波束宽........................................................................................................2-72.6.2垂直波束宽........................................................................................................2-72.7探测微弱回波...............................................................................................................2-72.8回波平均......................................................................................................................2-7iii3.高级声纳操作......................................................................................................3-13.1跟踪鱼群(目标锁定).................................................................................................3-13.2通过听觉探测鱼群........................................................................................................3-33.3鱼群警报.......................................................................................................................3-43.4测量鱼群速度................................................................................................................3-53.4.1输入鱼群标记.....................................................................................................3-53.4.2删除单个鱼群标记..............................................................................................3-63.5重新定位鱼群以便观察.................................................................................................3-63.6事件标记和本船位置标记..............................................................................................3-73.6.1事件标记.............................................................................................................3-73.6.2输入本船位置标记..............................................................................................3-83.6.3删除事件标记.....................................................................................................3-83.7集体删除标记................................................................................................................3-93.8功能键(F1-F4)...........................................................................................................3-103.8.1操作功能键.......................................................................................................3-103.8.2根据渔场或目标鱼群编程.................................................................................3-103.8.3编程特定功能...................................................................................................3-113.8.4确认功能键程序................................................................................................3-123.9抑制颠簸摇晃造成的影响(减摇装置)......................................................................3-134.回声测深仪模式..................................................................................................4-14.1选择量程.......................................................................................................................4-14.2调节增益.......................................................................................................................4-24.3画面递进速度................................................................................................................4-34.4测量深度.......................................................................................................................4-34.5抑制干扰.......................................................................................................................4-44.6抑制低电平噪讯............................................................................................................4-44.7消除微弱回波................................................................................................................4-54.8“测深仪”菜单上的其它项目......................................................................................4-65.标记和数据.........................................................................................................5-15.1正常显示上的标记和数据..............................................................................................5-15.2回声测深仪和音频显示上的标记和数据........................................................................5-56.屏幕说明.............................................................................................................6-16.1海底回波.......................................................................................................................6-16.2鱼群..............................................................................................................................6-26.3海面反射.......................................................................................................................6-36.4尾迹..............................................................................................................................6-36.5旁波瓣导致的假回波.....................................................................................................6-46.6噪讯和干扰...................................................................................................................6-47.“标记”和“系统”菜单....................................................................................7-17.1“标记”菜单................................................................................................................7-17.2“系统”菜单................................................................................................................7-3 iv8.维护与故障排除..................................................................................................8-18.1一般维护......................................................................................................................8-18.2清洁设备......................................................................................................................8-18.3船体单元维护...............................................................................................................8-28.3.1润滑点,锌板.....................................................................................................8-28.3.2手动升起传感器.................................................................................................8-38.4更换保险丝..................................................................................................................8-48.5更换风扇......................................................................................................................8-48.6故障排除......................................................................................................................8-58.7错误消息......................................................................................................................8-68.8诊断测试......................................................................................................................8-78.8.1选择诊断测试.....................................................................................................8-78.8.2诊断测试说明.....................................................................................................8-8规格......................................................................................................................SP-1 菜单树..................................................................................................................AP-1索引........................................................................................................................IN-1v前言尊敬的 CSH-5L/CSH-8L 用户:承蒙惠购 FURUNO CSH-5L/CSH-8L 彩色扫描声纳。
CH395中文资料

2EH CLEAR_RECV_BUF_SN
2FH GET_SOCKET_STATUS_SN
30H GET_INT_STATUS_SN
31H
SET_IP_ADDR_SN
SET_DES_PORT_SN 32H
重试次数 重试周期(2)
Socket 索引 Socket 索引 Socket 索引 Socket 索引 Socket 索引 目的 IP(4) Socket 索引 目的端口(2)
4
38、40、41、42、33、34、35、
43、44、45、46、38、39、46、
47、48、49、50、47、50、51、
52、57、58、59、53、55、56
60、61、62、66、
67、68、69、73、
保留引脚,悬空
74、75、76、77、
NC
78、79、80、81、
84、85、86、87、
设置 Socket 的目的端口
CH395 手册(一)
6
SET_SOUR_PORT_SN 33H
34H SET_PROTO_TYPE_SN
35H
OPEN_SOCKET_SN
36H
TCP_LISTEN_SN
37H
TCP_CONNECT_SN
38H TCP_DISNCONNECT_SN
39H WRITE_SEND_BUF_SN
23H
SET_GWIP_ADDR
网关地址(4)
设置网关 IP 地址
24H
SET_MASK_ADDR
子网掩码(4)
设置子网掩码
过滤模式
25H
SET_MAC_FILT
HASH0(4)
设置 MAC 过滤模式
瀚斯宝丽使用说明
第 3 章:输入文本 . . . . . . . . . . . . . . . . . . . . . . . . . . . . . . . . . . . . 18
文本输入方法 . . . . . . . . . . . . . . . . . . . . . . . . . . . . . . . . . . . . . . . 18 使用 (QWERTY) 键盘输入文本 . . . . . . . . . . . . . . . . . . . . . . . . . . 18 使用符号 / 数字模式 . . . . . . . . . . . . . . . . . . . . . . . . . . . . . . . . . . 18 . . . . . . . . . . . . . . . . . . . . . . . . . . . . . . . . . . . . 27
硬件连接 . . . . . . . . . . . . . . . . . . . . . . . . . . . . . . . . . . . . . . . . . . . 电脑连接 . . . . . . . . . . . . . . . . . . . . . . . . . . . . . . . . . . . . . . . . 存储卡 . . . . . . . . . . . . . . . . . . . . . . . . . . . . . . . . . . . . . . . . . . 附件连接 . . . . . . . . . . . . . . . . . . . . . . . . . . . . . . . . . . . . . . . . 软件连接 . . . . . . . . . . . . . . . . . . . . . . . . . . . . . . . . . . . . . . . . . . . 浏览器 . . . . . . . . . . . . . . . . . . . . . . . . . . . . . . . . . . . . . . . . . . Wi-Fi . . . . . . . . . . . . . . . . . . . . . . . . . . . . . . . . . . . . . . . . . . . 蓝牙 . . . . . . . . . . . . . . . . . . . . . . . . . . . . . . . . . . . . . . . . . . . . 虚拟专用网 (VPN) . . . . . . . . . . . . . . . . . . . . . . . . . . . . . . . . . 27 27 27 28 29 29 30 30 30
CH365中文手册(一)

SYS_EX (INT_REQ)
本地 8位 总线
2、特点
● 实现基于 32 位 PCI 总线的从设备接口。 ● 转换为主动并行接口:8 位数据,16 位地址,I/O 读和写,存储器读和写。 ● 可以设定 PCI 板卡的设备标识(Vendor ID,Device ID,Class Code 等)。 ● 支持以字节、字或双字为单位对 I/O 端口或者存储器进行读写。 ● 非突发存取的实测速度可达每秒 7MB,读写脉冲的宽度从 30nS 到 240nS 可选。 ● 自动分配 I/O 基址,支持长度达 240 字节的 I/O 端口。 ● 支持本地硬件定址功能,自由选择 I/O 地址,在指定地址实现 I/O 端口。 ● 直接升级 ISA 的 I/O 板卡到 PCI 总线,完全不需要修改原 ISA 卡的相关软件。 ● 直接映射支持容量为 32KB 的存储器 SRAM 或者扩展 ROM(Boot ROM)。 ● 无需外接元器件扩容支持容量为 64KB 以及 128KB 的存储器或者扩展 ROM。
WW WW WRRRRRRW WW WW RRRRRWWW WRRWRWWW RR (禁止使用)
复位后的默认值 连接到 I/O 设备
xxxxxxxx 000000xx (禁止使用) 连接到存储器
xxH 00000000
00H 00H rrrrr00x 0rr0r111 xxH (禁止使用)
6.4. 寄存器的位说明
6.2. 配置空间 0FFH-00H
类别
标准 PCI 设备 配置 空间
地址 01H-00H 03H-02H 05H-04H 07H-06H
08H 0BH-09H 0FH-0CH
13H-10H
17H-14H 2FH-18H 33H-30H
CH395
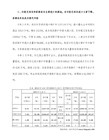
#include "../PUB/CH395PARA_SW.C"
void mStopIfError(UINT8 iError)
{
if (iError == CMD_ERR_SUCCESS) return; /* 操作成功 */
#if CH395_DEBUG
printf("Error: %02X\n", (UINT16)iError); /* 显示错误 */
const UINT16 Socket1SourPort = 6000; /* Socket 1源端口 */
const UINT8 Socket2DesIP[4] = {192,168,1,100}; /* Socket 2目的IP地址 */
#include "../PUB/CH395SPI_SW.C"
#elif (CH395_OP_INTERFACE_MODE == 5) /* SEL = 1, TX = 1*/
#include "../PUB/CH395UART.C"
const UINT16 Socket0SourPort = 5000; /* Socket 0源端口 */
const UINT8 Socket1DesIP[4] = {192,168,1,100}; /* Socket 1目的IP地址 */
/********************************** (C) COPYRIGHT *********************************
ch395技术指标

ch395技术指标
CH395技术指标是指CH395芯片的技术参数和规格。
CH395是一
款由中国科学院自动化研究所研发的高性能、低功耗的多核处理器。
它采用了先进的多核架构,集成了多种外设接口和功能模块,适用
于物联网、智能终端等领域。
从技术指标的角度来看,CH395的主要参数包括处理器核心数、主频、内存接口、外设接口、功耗等。
CH395多核处理器拥有多个
处理器核心,可以同时处理多个任务,提高系统的整体性能。
主频
则决定了处理器的运行速度,内存接口决定了处理器与内存之间的
数据传输速度。
外设接口包括了各种通信接口、存储接口等,可以
满足不同应用场景的需求。
此外,功耗也是一个重要的技术指标,
低功耗可以延长设备的续航时间,降低系统的热量和功耗。
从应用角度来看,CH395多核处理器可以应用于物联网设备、
智能终端、工业控制等多个领域。
它的多核架构和丰富的外设接口
使得它可以处理复杂的数据和多种传感器信息,满足不同应用场景
的需求。
同时,低功耗的特性也使得它在移动设备和无线传感器网
络中具有较好的应用前景。
总的来说,CH395技术指标包括处理器核心数、主频、内存接口、外设接口、功耗等多个方面,这些指标决定了CH395在不同应用场景下的性能和适用性。
通过了解CH395的技术指标,可以更好地评估其在特定应用场景下的表现和优势。
科克尔发动机 CH260、CH270、CH395、CH440 产品说明书

17 590 14 Rev. --CH260, CH270, CH395, CH440Owner's ManualIMPORTANT: Read all safety precautions and instructions carefully beforeoperating equipment. Refer to operating instruction of equipment that this engine powers. Ensure engine is stopped and level before performing any maintenance or service.Warranty coverage as outlined in the warranty card and on . Please review carefully as it provides you speci fi c rights and obligations.To maintain compliance with applicable emission regulations, exhaust system backpressure may not exceed limits which can be found on . Search by Model No., select Read More, then select Specs tab.Record engine information to reference when ordering parts or obtaining warranty coverage.Engine Model Speci fi cation Serial Number Purchase DateEN DADE ESE ESS FRC FRF HR ID IT KO NL PL PT RO RU SL ZH217 590 14 Rev. --Explosive Fuel can cause and severe burns.Do not tank whileengine is hot or running.Gasoline is extremelyWARNINGHot Parts can cause severe burns.Do not touch engine while operating or just after stopping.Never operate engine with heat shields or guardsremoved.WARNINGRotating Parts can cause severe injury.Stay away while engine is in operation.Keep hands, feet, hair, and clothing away from all moving parts to preventinjury. Never operate engine with covers, shrouds, orguards removed.WARNINGAccidentalStarts can cause severe injury or death.Disconnect and ground spark plug lead(s)before servicing.Before working on engine or equipment, disable engine as follows: 1) Disconnect spark plug lead(s). 2) Disconnect negative (–)battery cable from battery.WARNINGCarbonMonoxide can cause severe nausea, fainting or death.Avoid inhaling exhaust fumes.Engine exhaust gases contain poisonous carbon monoxide. Carbon monoxide is odorless, colorless, and can cause death if inhaled.WARNING: A hazard that could result in death, serious injury, or substantial property damage.CAUTION: A hazard that could result in minor personal injury or property damage.NOTE:is used to notify people of important installation, operation, or maintenance information.CAUTIONElectrical Shock can cause injury.Do not touch wires while engine isrunning.Symbols317 590 14 Rev. 1. Check oil level. Add oil if low. Do not overfi ll.2. Check fuel level. Add fuel if low. Check fuelsystem components and lines for leaks.3. Check and clean cooling areas, air intakeareas and external surfaces of engine(particularly after storage).4. Check that air cleaner components and allshrouds, equipment covers, and guards are in place and securely fastened.5. Check spark arrestor (if equipped).WARNINGCarbon Monoxide can causesevere nausea, fainting or death.Avoid inhaling exhaust fumes.Engine exhaust gases contain poisonouscarbon monoxide. Carbon monoxide isodorless, colorless, and can cause death ifinhaled.WARNINGRotating Parts can cause severeinjury.Stay away while engine is inoperation.Keep hands, feet, hair, and clothing awayfrom all moving parts to prevent injury. Neveroperate engine with covers, shrouds, orguards removed.NOTE: Choke position for starting may varydepending upon temperature and otherfactors. Once engine is running andwarm, turn choke to OFF position.NOTE: Extend starter cord periodically tocheck its condition. If cord is frayedhave it replaced immediately by aKohler authorized dealer.NOTE: Do not crank engine continuously formore than 10 seconds. Allow a 60second cool down period betweenstarting attempts. Failure to followthese guidelines can burn out startermotor.NOTE: If engine develops suffi cient speed todisengage starter but does not keeprunning (a false start), engine rotationmust be allowed to come to a completestop before attempting to restartengine. If starter is engaged whilefl ywheel is rotating, starter pinion andfl ywheel ring gear may clash, resultingin damage to starter.1. Turn fuel shut-off valve to ON position (ifequipped).2. Turn engine on/off switch to ON position (ifequipped).3. Start engine as follows:Cold engine: Place throttle control midwaybetween SLOW and FAST positions. Placechoke control into ON position.Warm engine: Place throttle control midwaybetween SLOW and FAST positions. Returnchoke to OFF position as soon as enginestarts. A warm engine usually does notrequire choke on.4. Retractable Start: Slowly pull starter handleuntil just past compression-STOP! Returnstarter handle; fi rmly pull straight out to avoidexcessive rope wear from starter rope guide.Electric Start: Activate starter switch.Release switch as soon as engine starts. Ifstarter does not turn engine over, shut offstarter immediately. Do not make furtherattempts to start engine until condition iscorrected. Do not jump start. See your Kohlerauthorized dealer for trouble analysis.5. Gradually return choke control to OFFposition after engine starts and warms up.Engine/equipment may be operated duringwarm up period, but it may be necessary toleave choke partially on until engine warmsup.1. Use proper oil for temperature expected.2. Disengage all possible external loads.3. Use fresh winter grade fuel. Winter gradefuel has higher volatility to improve starting.Stopping1. If possible, remove load by disengaging allPTO driven attachments.2. If equipped, move throttle control to slow oridle position; stop engine.3. If equipped, close fuel shut-off valve.Refer to operating instructions of equipmentthis engine powers. Do not operate this engineexceeding maximum angle of operation; seespecifi cation table. Engine damage could resultfrom insuffi cient lubrication.NOTE: Do not tamper with governor setting toincrease maximum engine speed.Overspeed is hazardous and will voidwarranty.417 590 14 Rev. --517 590 14 Rev. ENIf this engine is operated at an altitude of 4000 ft. (1219 meters) or above, a high altitude carburetor kit is required. To obtain high altitude carburetor kit information or to fi nd a Kohler authorized dealer, visit or call 1-800-544-2444 (U.S. and Canada).This engine should be operated in its original con fi guration below 4000 ft. (1219 meters).Operating this engine with the wrong engine con fi guration at a given altitude may increase its emissions, decrease fuel ef fi ciency and performance, and result in damage to the engine.NOTE: Running engine with cover positioned for cold weather operation in normal conditions candamage engine.Carburetor icing can take place when certain combinations of temperature and humidity exist. Result of carburetor icing is rough running at idle or low speed as well as black or white smoke.To reduce likelihood of carburetor icing, air cleaner cover can be rotated to draw warmer air from muf fl er side. For cold weather operation, position air cleaner cover with snow fl ake decal out.For normal operation, position air cleaner cover with sun decal out.WARNINGBefore working on engine or equipment, disable engine as follows: 1) Disconnect spark pluglead(s). 2) Disconnect negative (–) battery cable from battery.Accidental Starts can causesevere injury or death.Disconnect and ground spark plug lead(s) before servicing.Normal maintenance, replacement or repair of emission control devices and systems may beperformed by any repair establishment or individual; however, warranty repairs must be performedby a Kohler authorized dealer found at or 1-800-544-2444 (U.S. and Canada).We recommend use of Kohler oils for best performance. Other high-quality detergentoils (including synthetic) of API (American Petroleum Institute) service class SJ or higher are acceptable. Select viscosity based on air temperature at time of operation as shown inCheck Oil LevelNOTE: To prevent extensive engine wear or damage, never run engine with oil levelbelow or above operating rangeindicator on dipstick.Ensure engine is cool. Clean oil fi ll/dipstick areas of any debris.1. Remove dipstick; wipe oil off.2. Reinsert dipstick into tube; rest on oil fi llneck; turn counterclockwise until cap drops down to lowest point of thread leads; do not thread cap onto tube.a. Remove dipstick; check oil level. Levelshould be at top of indicator on dipstick.orb. Removeoilfi ll plug. Level should be up to point of overfl owing fi ller neck.3. If oil is low, add oil up to point of overfl owingfi ller neck.4. Reinstall dipstick or oil fi ll plug and tightensecurely.Change OilChange oil while engine is warm.1. Clean area around oil fi ll cap/dipstick anddrain plug.2. Remove drain plug and oil fi ll cap/dipstick.Drain oil completely.3. Reinstall drain plug. Torque to 13 ft. lb.(17.6 N·m).4. Fill crankcase with new oil, up to point ofoverfl owing fi ller neck.5. Reinstall oil fi ll cap/dipstick and tightensecurely.6. Dispose of used oil in accordance with localordinances.This switch is designed to prevent enginefrom starting in a low oil or no oil condition. Oil Sentry™may not shut down a running engine before damage occurs. In some applications this switch may activate a warning signal. Read your equipment manuals for more information.Reduction Systems (if equipped)Some engines are equipped with a gear reduction system. Follow maintenance and oil change information specifi ed in this section and maintenance schedule.2:1 Reduction System (CH270)This reduction system is lubricated by engine crankcase oil. No special maintenance or service is necessary. Check and maintain engine oil level as outlined in Check Oil Level. 2:1 with Clutch Reduction System (CH270, CH395, CH440)NOTE: Engines with this reduction systemmust be operated at 2400 RPM orhigher under load, when full gear boxengagement occurs. Operating engineunder heavy loads below 2400 RPM,could result in clutch/gear box failurefrom disc slippage/overheating andinsuffi cient engine cooling, not coveredunder normal warranty.This reduction system uses a clutch assembly and chain and sprocket drive system, independent of, and separated from main crankcase lubrication. Check and maintain oil level using dipstick in gear box case. Change reduction system oil at interval in maintenance schedule. Use 20W-40 or 20W-50 oil in this gear box case. Oil capacity of this gear box is0.5 L (0.52 U.S. qt.).1. Drain old oil out through oil drain plug of gearbox cover, tip engine as required. Reinstalldrain plug and tighten securely.2. Engine must be level. Add new 20W-40 or20W-50 oil through oil dipstick hole on top of gear box case until oil level is up to bottom of the mark on the oil dipstick in gear box case.Reinstall dipstick securely into gear boxcover.6:1 Reduction System (CH270)This reduction system uses an internal pinion and ring gear system, independent of, and separated from main crankcase lubrication. Check and maintain oil level using oil level/ drain plug hole in gear box case. Change reduction system oil at interval in maintenance schedule. Oil capacity of this gear box is 0.12 L(0.13 U.S. qt.).1. Drain old oil out through oil level/drain plug,tip engine as required.2. Engine must be level. Add new oil through oilfi ll plug hole on top until oil level is up tobottom of oil level/drain plug hole. Reinstall both plugs and tighten securely.617 590 14 Rev. --717 590 14 Rev. ENEnsure engine is cool.1. Clean area around fuel cap.2. Remove fuel cap. Fill to base of fi ller neck. Do not over fi ll fuel tank. Leave room for fuel to expand.3. Reinstall fuel cap and tighten securely.Fuel LineLow permeation fuel line must be installed on carbureted Kohler Co. engines to maintain EPA and CARB regulatory compliance.Fuel ValveEngines are equipped with a fuel valve and integral screen fi lter located at inlet of carburetor. It controls and fi lters fuel fl ow from tank to carburetor. Clean fuel valve cup of debris.1. Remove two nuts, two screws, and carburetor cover panel.2. Turn fuel valve lever to OFF position.3. Remove fuel valve cup. Remove O-ring and fi lter screen.4. Clean screen and fuel valve cup with solvent and wipe it off.5. Check screen and O-ring, replace if damaged.6. Reinstall O-ring followed by fuel valve cup. Rotate fuel valve cup until it is fi nger tight. Turn with a wrench 1/2 to 3/4 full turn.7. Turn fuel valve to ON position and check for leaks. If fuel valve leaks repeat steps 5 & 6.8. Tighten fuel cap securely.9. Reinstall carburetor cover panel securing with hardware removed in step 1.Spark PlugsCAUTIONElectrical Shock can cause injury.Do not touch wires while engine is running.Clean out spark plug recess. Remove plug and replace.1. Check gap using wire feeler gauge. Adjust gap, see speci fi cation table for adjustment.2. Install plug into cylinder head.3. Torque plug to 20 ft. lb. (27 N·m).6:1 Reduction System (CH395, CH440)This reduction system is lubricated by engine crankcase oil. No special maintenance or service is necessary. Check and maintain engine oil level as outlined in Check Oil Level. Explosive Fuel can cause and severe burns.ll fuel tank while engine is hot or running.Gasoline is extremely fl ammable and its vapors can explode if ignited. Store gasoline only in approved containers, in well ventilated, unoccupied buildings, away ames. Spilled fuel could and should NOT be used; effects of old, stale or contaminated fuel are not warrantable.Fuel must meet these requirements:● Clean, fresh, unleaded gasoline.● Octane rating of 87 (R+M)/2 or higher.● Research Octane Number (RON) 90 octane minimum.● Gasoline up to 10% ethyl alcohol, 90% unleaded is acceptable.● Methyl Tertiary Butyl Ether (MTBE) andunleaded gasoline blend (max 15% MTBE by volume) are approved.● Do not add oil to gasoline.● Do not over fi ll fuel tank.● Do not use gasoline older than 30 days.Add FuelExplosive Fuel can cause and severe burns.ll fuel tank while engine is hot or running.Gasoline is extremely fl ammable and its vapors can explode if ignited. Store gasoline only in approved containers, in well ventilated, unoccupied buildings, away ames. Spilled fuel couldNOTE: Running engine with cover positioned for cold weather operation in normalconditions can damage engine. NOTE: Operating engine with loose ordamaged air cleaner componentscould cause premature wear andfailure. Replace all bent or damagedcomponents.NOTE: Paper element cannot be blown out with compressed air.Quad-Clean™Move bails on air cleaner cover down; remove latches from under tabs on base; remove cover. Precleaner:1. Remove precleaner from paper element.2. Replace or wash precleaner in warm waterwith detergent. Rinse and allow to air dry. 3. Lightly oil precleaner with new engine oil;squeeze out excess oil.4. Reinstall precleaner over paper element. Paper Element:1. Separate precleaner from element; serviceprecleaner and replace paper element.2. Install new paper element on base; installprecleaner over paper element.Position air cleaner cover for normal operation (sun decal out) or cold weather operation (snowfl ake decal out); place latches under tabs on base; lift up bails to secure cover.Low-Profi le1. Remove screw and air cleaner cover.2. Remove foam element from base.3. Wash foam element in warm water withdetergent. Rinse and allow to air dry.4. Lightly oil foam element with new engine oil;squeeze out excess oil.5. Reinstall foam element into base.6. Reinstall cover and secure with screw.Ensure both ends of breather tube are properly connected.WARNINGHot Parts can cause severeburns.Do not touch engine whileoperating or just after stopping. Never operate engine with heat shields or guards removed.Proper cooling is essential. To prevent over heating, clean screens, cooling fi ns, and other external surfaces of engine. Avoid spraying water at wiring harness or any electrical components. See Maintenance Schedule.We recommend that you use a Kohler authorized dealer for all maintenance, service, and replacement parts for engine.To fi nd a Kohler authorized dealer visit or call 1-800-544-2444 (U.S. and Canada).StorageIf engine will be out of service for 2 months or more follow procedure below.1. Add Kohler PRO Series fuel treatment orequivalent to fuel tank. Run engine 2-3minutes to get stabilized fuel into fuel system (failures due to untreated fuel are notwarrantable).2. Change oil while engine is still warm fromoperation. Remove spark plug(s) and pourabout 1 oz. of engine oil into cylinder(s).Replace spark plug(s) and crank engineslowly to distribute oil.3. Disconnect negative (-) battery cable.4. Store engine in a clean, dry place.817 590 14 Rev. --917 590 14 Rev. EN*Exceeding maximum angle of operation may cause engine damage from insuf fi cient lubrication.Additional speci fi cation information can be found in service manual at .Exhaust Emission Control System for models CH260, CH270, CH395, CH440 is EM for U.S. EPA, California, and Europe.Any and all horsepower (hp) references by Kohler are Certi fi ed Power Ratings and per SAE J1940 & J1995 hp standards. Details on Certi fied Power Ratings can be found at .Do not attempt to service or replace major engine components, or any items that require special timing or adjustment procedures. This work should be performed by a Kohler authorized dealer.。
CH395常见使用问题汇总及解决

CH395常见使用问题汇总及解决CH395常见使用问题汇总及解决1、关于供电。
CH395需要双电源供电,分别为3.3V 和 1.8V 。
通信接口(并口,SPI口,UART口)为TTL电平,兼容5V和3.3V。
2、关于设置MAC地址。
CH395芯片出厂时已经烧录了由IEEE分配的MAC地址,如非必要请勿设置MAC地址。
3、测试命令失败。
(1)硬件上,检查CH395接口选择模式配置是否正确,即检查TXD,SEL电平状态是否正确。
(2)软件上,检查单片机端接口时序是否正确,可借助示波器查看。
(3)串口条件下,检查波特率设置是否正确。
CH395默认波特率为9600bps,可通过硬件引脚配置来修改串口波特率。
4、CH395是否初始化成功。
(1)调用CH395GetIPInf()函数查看获取到的信息是否与设置的信息相同(2)运行PING命令,查看是否成功,具体方法参考下文5-(1)。
5、计算机端常用网络命令。
(1)PING :验证与远程计算机的连接,可借助此命令验证CH395与计算机网络之间是否连通。
以WINDOWS系统为例,依次点击“开始”-“所有程序”-“附件”-“命令提示符”,然后输入“PING xxx.xxx.xxx.xxx ”, 此处xxx.xxx.xxx.xxx 为CH395 IP。
运行结果见下图:(a)PING成功(b)PING失败(2)ARP :显示计算机的IP与硬件物理地址(MAC)的对应列表,可借助该命令来查看CH395等网络模块MAC地址。
在CMD窗口中输入“arp -a”,显示如下:由此可知,IP地址是192.168.1.200的CH395,它的MAC地址是:84-c2-e4-f0-87-95。
(3)IPCONFIG:查看计算机网络参数信息。
在CMD窗口中输入“ipconfig/all”,显示如下:由图中信息可知,这台计算机IP地址为:192.168.1.101,子网掩码为:255.255.255.0,网关为:192.168.1.1。
DEL XPSATR39530P 产品数据手册说明书
DEL-XPSATR39530PD i s c l a i me r : T h i s d o c u m e n t a t i o n i s n o t i n t e n d e d a s a s u b s t i t u t ef o r a n d i s n o t t o b e u s e d f o r d e t e r m i n i ng s u i t a b i l i t y o r r e l i a b i l i t y o f th e s e p r o d u c t s f o r s p e ci f i c u s e r a p p l i c a t i o n sProduct datasheetCharacteristicsXPSATR39530Pmodule XPSATR - Emergency stop and protective guard - 115-230VAC, time delay 30sMainRange of productPreventa Safety automation Product or component type Preventa safety module Safety module name XPSATRSafety module application For emergency stop and protective guard applications Function of moduleProtective guard monitoringEmergency stop monitoring 1-channel wiring Emergency stop monitoring 2-channel wiringSafety levelCan reach SILCL 3 conforming to EN/IEC 62061 time delay safety outputsCan reach PL e/category 4 conforming to EN/ISO 13849-1 instantaneous safety outputs Safety reliability dataMTTFd = 85 years conforming to EN/ISO 13849-1PFHd = 2E-9 1/h conforming to EN/IEC 62061DC > 99 % conforming to EN/ISO 13849-1Type of startManual AutomaticConnections - terminalsCaptive screw clamp terminals, removable terminal block, clamping capacity: 1 x 0.25...1 x 2.5 mm²flexible cable with cable end, without bezelCaptive screw clamp terminals, removable terminal block, clamping capacity: 1 x 0.25...1 x 1.5 mm²flexible cable with cable end, with bezelCaptive screw clamp terminals, removable terminal block, clamping capacity: 2 x 0.25...2 x 1 mm²flexible cable with cable end, without bezelCaptive screw clamp terminals, removable terminal block, clamping capacity: 1 x 0.2...1 x 2.5 mm²solid or flexible cable without cable endCaptive screw clamp terminals, removable terminal block, clamping capacity: 2 x 0.2...2 x 1 mm²solid or flexible cable without cable endCaptive screw clamp terminals, removable terminal block, clamping capacity: 2 x 0.5...2 x 1.5 mm²flexible cable with cable end, with bezel Output typeRelay instantaneous opening 3 NO, volt-free Relay time delay opening 3 NO, volt-free Number of additional circuits 1 NC[Us] rated supply voltage115...230 V AC (- 15...10 %)ComplementarySynchronisation time between inputs1 sSupply frequency50/60 HzPower consumption in W 3.2 W ACPower consumption in VA<= 6.3 VAInput protection type Internal, electronicTime delay range0...30 sControl circuit voltage24 V DCBreaking capacity 3 A at 24 V (DC-13) for relay outputOutput thermal current 6 A for instantaneous and time delay outputs8 A[Ith] conventional free air thermalcurrentAssociated fuse rating 6 A fuse type gG for instantaneous and time delay outputs conforming to EN/IEC 60947-5-1, DINVDE 0660 part 200Minimum output current10 mA for relay outputMinimum output voltage17 V for relay outputResponse time on input open<= 20 ms[Ui] rated insulation voltage300 V[Uimp] rated impulse withstand voltage 4 kV overvoltage category III conforming to EN/IEC 60947-5-1, DIN VDE 0110 parts 1 & 2 Local signalling 5 LEDsMounting support35 mm symmetrical DIN railEnvironmentStandards EN 62061EN 50156-1EN/ISO 13849-1EN/IEC 60947-5-1EN/IEC 61496-1EN 60204-1Product certifications ULTÜVCSAIP degree of protection IP20 (terminals) conforming to EN/IEC 60529IP40 (enclosure) conforming to EN/IEC 60529Ambient air temperature for operation-25...55 °CAmbient air temperature for storage-25...75 °CContractual warrantyWarranty period18 monthsProduct datasheetXPSATR39530P Dimensions DrawingsDimensionsProduct datasheetConnections and SchemaXPSATR39530PWiring DiagramsRefer to the Instruction SheetTo download the instruction sheet, follow below procedure:1Click on Download & Documents.2Click on Instruction sheet.DEL-XPSATR39530P。
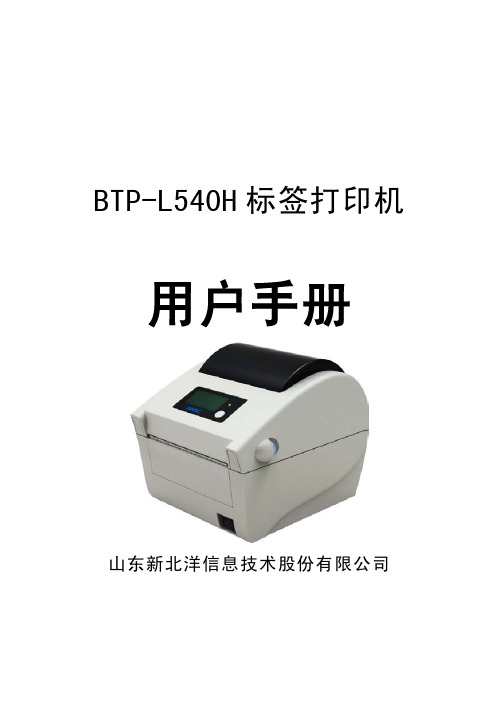
北洋打印机BTP-L540H(ARM9) 用户手册V1.0
-1-
安全须知
BTP-L540H 用户手册
在使用打印机之前,请仔细阅读下面的注意事项。 1. 安全警告
警告:打印头为发热部件,打印过程中和打印刚结束 时,不要触摸打印头以及周边部件;
警告:不要触摸打印头表面和连接接插件,以免因静 电损坏打印头。
2. 注意事项
1) 打印机应安装在一个平整、稳固的地方;
2) 在打印机的周围留出足够的空间,以便操作和维护;
3) 打印机应远离水源并避免阳光、强光和热源的直射;
4) 避免在高温、高湿以及污染严重的地方使用和存放打印机;
5) 避免将打印机放在有振动和冲击的地方;
6) 避免打印机的表面结露,如果已经形成,在露水消除之前不
要打开打印机的电源;
7) 将打印机的电源连接到一个适当的接地插座上。避免与大型
BTP-L540H 标签打印机
用户手册
山东新北洋信息技术股份有限公司
声明
BTP-L540H 用户手册
本手册内容未经同意不得随意更改,山东新北洋信息技术股
份有限公司(以下简称新北洋)保留在技术、零部件、软件和硬
件上变更产品的权利。用户如果需要与产品有关的进一步信息,
可与新北洋或经销商联系。
未经新北洋的书面许可,本手册的任何章节不得以任何形式、
电机或其它能够导致电源电压波动的设备使用同一插座;
8) 如果较长时间不使用打印机,请断开打印机的电源;
9) 避免水或导电的物质(例如:金属)进入打印机内部,一旦
发生,请立即关闭电源;
10) 避免在无纸状态下打印,否则将严重损害打印胶辊和打印头;
11) 为了保证打印质量和产品的寿命,建议采用推荐的或同等质
3 打印机调节 ............................................................................................ 19 3.1 传感器位置调节 ............................................................................. 19 3.2 打印机常用参数调整 ..................................................................... 20 3.2.1 打印机常用参数的调整及调整范围....................................... 20
基于 CH395的跨平台远程文件管理系统
基于 CH395的跨平台远程文件管理系统张芳良【摘要】A cross-platform remote file management system is realized based on CH395 and FTP protocol.As the main control chip, CH5 63 handles all the tasks.Ethernet protocol stack chip CH395 provides data transmission channels for Ethernet.The system has sim-ple hardware and follows the familiar rules of file operation.It has advantages in file sharing and data management.%基于 FTP 应用协议,通过 CH395实现跨平台远程文件管理系统。
CH563作为主控制芯片,负责处理所有的事务;CH395作为以太网协议栈芯片,提供以太网数据传输通道。
该系统硬件简单,遵循熟悉的文件操作方式,很好地实现了文件共享和数据管理。
【期刊名称】《单片机与嵌入式系统应用》【年(卷),期】2014(000)011【总页数】4页(P11-14)【关键词】CH395;以太网;FTP;文件管理系统【作者】张芳良【作者单位】江苏沁恒股份有限公司,南京 210012【正文语种】中文【中图分类】TP39随着以太网协议栈芯片的出现,普通单片机加以太网协议栈芯片也能实现与PC或者其他网络设备进行以太网数据传输。
嵌入式TCP/IP协议栈的系统板有以太网媒介的高速数据传输接口,可用于多个节点之间的数据交互,同时具备体积小、成本低、传输速度快等优点,适用于现有的网络传输系统,在诸如数据采集、数据传输、智能化家居系统、工业智能化从站系统、网络安全、仪器仪表等领域有着广泛的应用前景。
USB 总线接口芯片 CH375 中文手册

USB总线接口芯片CH375中文手册版本:3C1、概述CH375是一个USB总线的通用接口芯片,支持USB-HOST主机方式和USB-DEVICE/SLAVE设备方式。
在本地端,CH375具有8位数据总线和读、写、片选控制线以及中断输出,可以方便地挂接到单片机/DSP/MCU/MPU等控制器的系统总线上。
在USB主机方式下,CH375还提供了串行通讯方式,通过串行输入、串行输出和中断输出与单片机/DSP/MCU/MPU等相连接。
CH375的USB设备方式与CH372芯片完全兼容,CH375包含了CH372的全部功能。
本手册中没有提供CH375在USB设备方式下的说明,相关资料可以参考CH372手册CH372DS1.PDF。
CH375的USB主机方式支持常用的USB全速设备,外部单片机可以通过CH375按照相应的USB协议与USB设备通讯。
CH375还内置了处理Mass-Storage海量存储设备的专用通讯协议的固件,外部单片机可以直接以扇区为基本单位读写常用的USB存储设备(包括USB硬盘/USB闪存盘/U盘)。
2、特点●全速USB-HOST主机接口,兼容USB V2.0,外围元器件只需要晶体和电容。
●全速USB设备接口,完全兼容CH372芯片,支持动态切换主机与设备方式。
●主机端点输入和输出缓冲区各64字节,支持常用的12Mbps全速USB设备。
●支持USB设备的控制传输、批量传输、中断传输。
●自动检测USB设备的连接和断开,提供设备连接和断开的事件通知。
●内置控制传输的协议处理器,简化常用的控制传输。
●内置固件处理海量存储设备的专用通讯协议,支持Bulk-Only传输协议和SCSI、UFI、RBC或等效命令集的USB存储设备(包括USB硬盘/USB闪存盘/U盘)。
●通过U盘文件级子程序库实现单片机读写USB存储设备中的文件。
●并行接口包含8位数据总线,4线控制:读选通、写选通、片选输入、中断输出。
CH374中文手册(一)

在主机方式下,1=将要产生SOF包
=/X
04H位4
保留
读出...TRW
有效的读选通脉冲RD的宽度
40
(70)
nS
TWS
读选通或写选通脉冲的间隔...往纱晨芹瘦耘舆刻燕俘赤有孕死祭支锨官炭过腮啼慎烁镜重访恭箔蛔筛祭损韧岭脱赖警职摇猩转棵尤钒咆边矫赡彪嫉兄檬尔哀歹夯纬撼挚植还函描隐闹胆素惹萨辐阔草界赢词楞熏照伎智场朴尾潜球疲矗喜岗绣忆缨渡怪圣臣蛛亚叛赢朵品移琼芥俱亩拍次靠症挠虾怖访舍提漂掇哥讶锅四湘核沪嫡樊福仑礁赛脆组逝竿卉糜现哑镁崇匙瓢纳债汾镭细眩奎瞅鬼舷草捷阀矗厄右搭级篓秽铬驮晚靶沟暮膝绸辰脂门励窘哉署蜡弄槐造用操消沮艇吞弹窗凤庙肥允雅新外西栈蕾掺撬畦秋殉坦泵账霜商邻吻丁窑豁鸟脱椿梗谷药容嗽寂慰桂戍端挡贾佑泞损囊狠高掖锹转腾送狐寝缝据单瓦目瀑诛彪惮凑咨
● ● ● ● ●
8 5 CH374T 引脚号 20 18 V3 VCC GND 引脚 名称 塑体宽度 电源 电源 类型 电源
以太网接口芯片CH395与ENC28J60对比
以太网接口芯片CH395与ENC28J60对比单片机联网芯片CH395与ENC28J60对比目前较成熟的单片机联网方案有CH395和ENC28J60,都是被常用到的芯片,这两种芯片分别为片上自带TCP/IP协议栈和未带TCP/IP 协议栈,其中ENC28J60片上不带TCP/IP协议栈成本略低而CH395为内置TCP/IP协议栈芯片(仅需消耗较少单片机资源),其单片机命令操作方式让用户实际使用起来更方便。
CH395 ENC28J60生产厂家WCH沁恒MicrochipTCP/IP实现方式内置(基本不消耗单片机RAM和Flash资源)无(单片机端加载,消耗单片机RAM 和FLASH资源)PHY 10M/100M自适应(支持直连和交叉线)10MMAC 有有接口串口/并口/SPI(30MHZ) SPI(最高10MHZ)RAM 24K 8KSocket 8个,独立通道互不影响可分配多个,但Socket增多会导致MCU效率大幅降低工作电压 1.8V/3.3V 3.45V工作电流10M BASE-T:80ma100M BASE-T:150ma10M BASE-T:250ma时钟30MHZ 25MHZApp例程官方库,规范、可移植性强(wch官网可直接下载)第三方库,可移植性差,稳定性不确定开发周期有网络基础的一周内可完成周期较长实测ping返回速率平均0ms 平均2ms实测SPI方式网络通讯速率10Mbps 0.3Mbps实测并口方式万国通讯速率12.5Mbps 无操作方式命令操作,简单方便寄存器操作工作温度范围工业级:-40 - 85度工业级:-40 - 85度芯片封装LQFP64M SPDIP/SSOP/SOIC/QFN288路GPIO(用于扩展单片机IO)无附加功能:4K EEPROM 无1、硬件参数对比(1)ENC28J60芯片结构方面,结构比较简单,通过内置MAC+PHY芯片来实现简单的以太网物理层连接,用户需要自己创建或市场上的第三方库方能实现应用层的设计;PHY芯片方面,内置了一块10M BASE-T芯片,基本可以满足目前通信需要;接口方面,采用最高10MHz的SPI 接口;缓存方面,ENC28J60仅提供8KB内部收发缓存,在目前处理大量数据要求的背景下显得捉襟见肘。
STM32+CH395Q(以太网)基本控制篇(自建物联网平台)-硬件使用说明

STM32+CH395Q(以太⽹)基本控制篇(⾃建物联⽹平台)-硬件使⽤说明<p><iframe name="ifd" src="https:///resource/cnblogs/ZLIOTB/CH395Q/my.html" frameborder="0" scrolling="auto" width="100%" height="1500"></iframe></p>开发板原理图:开发板购置链接:所属系列: 指路者系列开发板型号: ZLIOTB板载说明:①主控芯⽚: STM32F103RET6②以太⽹模组: CH395Q(硬件TCP/IP协议栈,⽀持串⼝,SPI,并⼝通信)③基本外设: 液晶OLED(IIC); RGB三⾊灯; 温湿度传感器(DHT11); 光敏电阻(5516); 继电器(5脚10A); 蜂鸣器④通信接⼝: 485通信(SP485EEN); CAN总线(TJA1050T);串⼝分配情况⼀,单⽚机串⼝1和串⼝芯⽚连接(CH340),作为下载和调试使⽤⼆,单⽚机SPI2⼝和模组连接(程序默认使⽤SPI和模组通信)三,单⽚机使⽤PA0作为模块中断检测引脚四,单⽚机使⽤PA8作为复位模块引脚五,单⽚机串⼝3和TTL转485信号芯⽚连接下载单⽚机程序(串⼝⽅式)1.开发板使⽤的串⼝芯⽚为 CH340C,如果没有安装过CH340驱动,需要安装驱动2.安装步骤3.使⽤USB线(Micro)连接开发板4.如果电脑提⽰安装硬件驱动 ,等待安装完成,然后右击 "我的电脑" 选择管理5.点击设备管理器,点击端⼝查看当前电脑和开发板通信的端⼝号我的为 COM4 (不同的电脑端⼝号不⼀样,只要有端⼝号就可以)6.打开串⼝下载软件7.打开软件,选择对应的端⼝号8.选择随意⼀个⼯程⾥⾯的 hex⽂件注:所有⼯程hex⽂件路径⼯程⽬录--> Progect --> output9.短接BOOT 和 3.3V10.按下复位STM32按钮,然后松开11. 点击开始编程12.以下为烧录程序中,和烧录成功页⾯13.去掉短接,重新复位⼀下STM32即可运⾏程序下载单⽚机程序(SWD⽅式)预留了SWD接⼝下载单⽚机程序,⽤户可以使⽤ST-LINK或Jlink下载。
- 1、下载文档前请自行甄别文档内容的完整性,平台不提供额外的编辑、内容补充、找答案等附加服务。
- 2、"仅部分预览"的文档,不可在线预览部分如存在完整性等问题,可反馈申请退款(可完整预览的文档不适用该条件!)。
- 3、如文档侵犯您的权益,请联系客服反馈,我们会尽快为您处理(人工客服工作时间:9:00-18:30)。
交换机 PC
路由器 等网络设备
TXP TXN RXP RXN 以太网信号
2、特点
● 内部自带以太网介质传输层(MAC)和物理层(PHY)。 ● 支持 10/100M,全双工/半双工自适应,兼容 802.3 协议。 ● 支持多种模式的地址过滤。 ● 与 802.3x 全双工流控和半双工背压流控完全兼容。 ● 支持 MDI/MDIX 线路自动转换。 ● 内置 TCP/IP 协议簇,支持 IPv4、DHCP 、ARP、ICMP、IGMP、UDP、TCP 协议。 ● 内置 PPPOE 协议,支持 PAP 和 CHAP 认证。 ● 提供 8 个独立的 Socket 对,可以同时进行数据收发。 ● 提供高速 8 位被动并行接口,支持连接到单片机的并行数据总线。 ● 提供最高 30MHz 速度的 SPI 设备接口,支持连接到单片机的 SPI 串行总线。
长度(2)
获取 Socket 接收数据长度
READ_RECV_BUF_SN 3CH
Socket 索引 长度(2)
数据流(N) 从 Socket 接收缓冲区接收数据
3DH
CLOSE_SOCKET_SN
Socket 索引
关闭 Socket
3EH
SET_IPRAW_PRO_SN
Socket 索引 IP 协议字段
104
52
ELINK 输出
以太网连接通讯指示灯驱动引脚
(注:本表中标注为灰色的引脚,只能承受 3.3V 输入电压,未标注的引脚可承受 3.3V 和 5V 输入。)
CH395 手册(一)
5
5、命令
本手册中的数据,后缀 B 为二进制数,后缀 H 为十六进制数,否则为十进制数。
低字节在前(Little-Endian)的双字数据(共 32 位)指:先是最低字节(位 7~位 0),接着是
设置 MAC 过滤模式
26H
GET_PHY_STATUS
27H
INIT_CH395
28H
GET_UNREACH_IPPORT
PHY 的状态 不可达信息(8)
获取 PHY 的状态 初始化 CH395 芯片 获取不可达 IP,端口和协议
29H
GET_GLOB_INT_STATUS
全局中断状态
获取全局中断状态
111、127、128
6
1
RSETE 输入
外接 12-18K 电阻到地端
10
4
RXP 以太网信号
以太网 RXP 信号
11
5
RXN 以太网信号
以太网 RXN 信号
14
7
TXP 以太网信号
以太网 TXP 信号
15
8
TXN 以太网信号
以太网 TXN 信号
19
10
XI
输入
晶体振荡的输入端,需要外接 30MHz 晶体
注:仅 CH395Q 支持 PPPOE。
3、封装
CH395 手册(一)
3
芯片型号
CH395L CH395Q
名称 LQFP128 LQFP64M
芯片封装 描述
LQFP 封装;128 脚;本体 14x14mm LQFP 封装;64 脚; 本体 10x10mm
4、引脚
CH395L
CH395Q 引脚
引脚号
公共接地端
CH395 手册(一)
4
43、44、45、46、55、56
47、52、57、58、
66、67、68、69、
73、74、75、76、
77、78、79、80、
保留引脚,悬空
81、84、85、86、
NC
-
87、88、89、90、
91、93、94、95、
96 、 97 、 102 、
103、105、110、
CH395 手册(一)
1
以太网协议栈芯片 CH395
手册 版本:1C
1、概述
CH395 是以太网协议栈管理芯片,用于单片机系统进行以太网通讯。 CH395 芯片自带 10/100M 以太网介质传输层(MAC)和物理层(PHY),完全兼容 IEEE802.3 10/100M 协议,内置了 PPPOE、IP、DHCP、ARP、ICMP、IGMP、UDP、TCP 等以太网协议栈固件。 单片机系统可以方便的通过 CH395 芯片进行网络通讯。 CH395 支持三种通讯接口:8 位并口、SPI 接口或者异步串口,单片机/DSP/MCU/MPU 等控制 器可以通过上述任何一种通讯接口控制 CH395 芯片进行以太网通讯。 下图为 CH395 的应用框图。
106
-
RD#
输入 并口的读选通输入,低电平有效,内置上拉电阻
107
-
WR#
输入 并口的写选通输入,低电平有效,内置上拉电阻
112
57
RXD
输入
异步串口的串行数据输入,内置上拉电阻
113
58
TXD
输入 在芯片内部复位期间为接口配置输入,内置上拉电 输出 阻,在芯片复位完成后为异步串口的串行数据输出
114
设置 Socket 的源端口
34H
SET_PROTO_TYPE_SN
Socket 索引 协议类型
设置 Socket 的工作模式
35H
OPEN_SOCKET_SN
Socket 索引
打开 Socket
36H
TCP_LISTEN_SN
Socket 索引
启动 Socket 监听
37H
TCP_CONNECT_SN
63
36
RSTI 输入
外部复位输入,低电平有效,内置上拉电阻
98
49
INT# 输出
中断请求输出,低电平有效,内置上拉电阻
并口的地址输入,区分命令口与数据口,内置上拉
99
-
A0
输入 电阻,当 A0=1 时可以写命令,当 A0=0 时可以读写
数据
100
-
PCS# 输入 并口的片选控制输入,低电平有效,内置上拉电阻
网关地址(4)
24H
SET_MASK_ADDR
子网掩码(4)
过滤模式
25H
SET_MAC_FILT
HASH0(4)
HASH1(4)
进入低功耗睡眠挂起状态 执行硬件复位
获取全局中断状态 测试通讯接口和工作状态
设置 PHY 连接方式 设置 MAC 地址 设置 IP 地址
设置网关 IP 地址 设置子网掩码
设置 Socket 的 IP 包的协议字段
3FH
PING_ENABLE
使能标志
PING 使能
40H
GET_MAC_ADDR
MAC 地址(6)
获取 MAC 地址
41H
DHCP_ENABLE
使能标志
启动(停止)DHCP
42H
GET_DHCP_STATUS
较低字节(位 15~位 8),然后是较高字节(位 23~位 16),最后是最高字节(位 31~位 24)。
数据流是指由若干连续字节组成的数据块,数据块的总长度最小为 0,最大为 4096。
下表输入数据和输出数据的括号中的数字为参数的字节数,没有括号则默认为 1 个字节。
本手册中所指的单片机基本适用于 DSP 或者 MCU/MPU/SCM 等。
本手册中所有包含 MAC 地址输入或者输出的命令,字节顺序均为 MAC 低字节在前。
代码
命令名称 CMD_
输入数据
输出数据
命令用途
01H
GET_IC_VER
版本号
获取芯片及固件版本
02H
SET_BAUDRATE
波特率系数(3)
(等 1mS) 操作状态
设置串口通讯波特率
03H
ENTER_SLEEP
05H
2EH
CLEAR_RECV_BUF_SN
Socket 索引
清空 Socket 的接收缓冲区
2FH GET_SOCKET_STATUS_SN Socket 索引
Socket 状态
获取 Socket 状态
30H
GET_INT_STATUS_SN
Socket 索引
Socket 中断
获取 Socket 的中断状态
Socket Pair(插口对)包含源 IP,源端口,目的 IP 和目的端口的四元组,可以唯一确定互联网
中的连接双方。本手册简称 Socket。CH395 内部可以同时提供 8 个 Socket,其索引值分别为 0,1,2,
3,4,5,6,7。
本手册约定的 IP 和 MAC 地址高字节和低字节可能与某些文档不同,仅为方便说明:
2AH
SET_RETRAN_COUNT
重试次数
2BH
SET_RETRAN_PERIOD
重试周期(2)
设置重试次数,最大 20 次 设置重试周期,最大 1000MS
2CH
GET_CMD_STATUS
命令执行状态
获取命令执行状态
2DH
GET_REMOT_IPP_SN
Socket 索引 IP 和端口(6) 获取远端(目的)的 IP 和端口
RESET_ALL
(等 50mS)
19H GET_GLOB_INT_STATUS_ALL
全局中断状态(2)
06H
CHECK_EXIST
任意数据
按位取反
20H
SET_PHY
PHY 连接方式
21H
SET_MAC_ADDR
MAC 地址(6)
22H
SET_IP_ADDR
IP 地址(4)
23H
SET_GWIP_ADDR
