AH-BASIC Ⅱ中文说明书
TA2中文操作手册

调试说明一. 安装注意事项1.1探杆安装探杆的插入深度务必超过管道中心线25mm,见下图.1.2 接线1.2.1电气端接线步骤:a. 打开接线盒外盖(见下图)b. 将电源线通过电气接口引入接线盒;c. 将正确电源接到TB1 端子(要确认该仪表的使用电源) ;1.) 如电源为120VAC,火线接到L1 端子,零线火线接到L2/N 端子,2.) 如电源为240VAC,一根线接到L1 端子,另一根线接到L2/N 端子,3.) 如电源为24DC,正端接到+端子,负端接到- 端子d. 将4~20mA 信号线接到TB2 端子,将正端接到A+,负端接到A- 端e. 盖好接线盒2.一体化探头端接线步骤:a. 确认电源断开;b. 将PC 板端外盖打开,参考操作手册页31 图8;c. 拧松显示板的固定螺丝,拔出显示板;d. 用1/4” 内六角扳手松开探头和变送器连接出的两个内六角固定螺 丝。
此时可以取出逻辑板和电源板;3.分体式探头端接线步骤:a. 确认电源断开;b. 将PC 板端外盖打开,c. 拧松显示板的固定螺丝,拔出显示板;d. 用1/4” 内六角扳手松开探头和变送器连接出的两个内六角固定螺 丝。
此时可以取出逻辑板和电源板;e. 探头的引出的五根线将连接到探头接线盒内分体PC 板上。
看下表 五个接线端子序号 探头引出线颜色1 白色2 兰色3 黑色4 棕色5 桔黄色线 端子 探头白色 1 温度探头兰色 2 流量探头黑色 3 接地棕色 4 加热接地橙色 5 加热f. 探头接线盒内分体PC 板上八个接线端子将与变送器内TB3 板上8 个 接线端子连接,按各电路板上端子号如下接线:分体式探头内端子序号 TB3 板上接线端子号线 远传端子 TB3接线端绿/白 线1 1白/绿 线2 2兰/白 线3 3白/兰 线4 4棕/白 线5 5白/棕 线6 6橙/白 线7 7白/橙 线7 7屏蔽线 线8 84.简单参数设置由于TA2流量计已经按照客户技术规格书的要求,在出厂前进行标定后再发往客户处.如需改变原有的量程,或者用于其它安装位置必须返厂重新进行标定.TA2的操作界面是菜单式,分为主菜单和子菜单,其中主菜单大致分为以下几个窗口,通过”上”或”下”箭头切换.第一次通电后,需要等待3~5分钟,等仪表初始化后,液晶屏显示瞬时流量时,就可以修改相关参数.如需进入子菜单请按”回车”键4.1 System Config 参数设置主要可以修改流量单位;质量流量单位;温度单位;密度单位;管径单位;面积单位;其中”flow area”是自动计算的流通面积,不需要修改.4.2 I/O Config 参数修改要修改其中的参数,需要输入密码”200”.在这个子菜单内可以修改4mA,20mA对应的值.电流输出按照”体积流量”或”质量流量”输出.4.3 Adv Config(高级设置) 默认修改密码为”200”.高级设置菜单里面可能用的参数为”install Factors”.具体公式为:A+Bv+Cv~2=实际流量 A.B.C为修正系数,v为表头显示的流量 一般把公式简化为 Bv=实际流量 所以, A.C默认为0.通过修改B就可以使得表头的读数接近实际流量值.4.4 Diagnostics(诊断菜单) 默认修改密码为”200”. 该菜单用于诊断表头和探头是否工作在正常状态.4.5 Factory Config(工厂配置参数) 默认修改密码:2005 HART 通讯菜单6.检查TA2的流量特性是否在工作范围之内目的:当TA2热式质量流量计使用一段时间后,用户总会怀疑自己的流量计还准不准,由于以前需要特殊的设备来标定,才能确定精度是否满足要求.现在可以把流量计放在办公室内,进行相关测试,从而知道流量计是否在正常工作范围内.TA2测量热传感器,并且在标定的时候热传感器和质量流量建立一定的关系.检查TA2的标定情况的一种方法是检查探头的热传感器特性是否还在控制范围内.接下来的步骤是在没有流量和模拟高流量两种情况下,检查热传感器.需要的设备:热水盆或桶(容量大约为1升),水温在20~25度之间..热水盆必须非常牢固的固定,没有任何振动.步骤:先把探头原始的热传感器特性记录下来,以便将来检查它的特性.1.没有流量的情况:a.TA2通电.用干净的纸把TA2的探头缠绕包好并确认稳定.从TA2菜单中选择Diagnostics/Signal Values,记录它的读数(mW).b.这是反应零点流量信号(Zero Flow Signal),要记录下来.2.高流量的情况:a.从TA2菜单中选择Factory Config/Ctrl Parameters/Set Point.记录下看到的值.改变这个Set Point到15℃(需要输入密码”2200”).液晶板可能显示”Initializing”(初始化),这不会影响标定程序.在室温的情况下(15℃~26℃),把缠绕的纸移开,垂直的把探杆伸入热水盆中,并确保探头完全浸没在水中.这个热水盆必须保持相当的稳定没有任何振动或晃动.为最可能的降低对探头热流的对流影响,探杆保持垂直的位置是非常关键的.如果是整体式的探头,也必须完全浸没在水中,或者把管道的末端堵住,确保所有的水充满管道.每次进行标定的时候,必须注意探头上的箭头流向标志.b.从菜单中选择Diagnostics/Delta Temp,等到液晶板上Delta Temp的读数已经稳定(在正负0.3℃范围内波动).这表明了热传感器和参考传感器的温度之差.把数据记录下来.c.关键:数据记录完成后,从菜单中返回到Factory Config/Ctrl Parameters/SetPoint窗口,把Set point 改回到原来的数值(这个值在出厂的校验报告中也记录下来).检验步骤重复步骤记录Zero Flow Signal 和Delta Temp的数值.1.比较Zero Flow Signal新的数值和原来的值,两者之差应该在5mW.2.Delta Temp新的数值和初始值,两者之差应该在0.125℃.3.如果以上两个比较都在范围之内,说明探头的测量特性没有改变.4.如果以上两个比较超出规定范围之内,则需要a.清洗探头和探杆,并重新进行标定.b.检查探针有无变形.联系工厂,需要送回工厂重新进行标定.7 故障排除7.1 报错信息由于TA2具备自诊断功能,所以如有异常情况,可以在液晶屏上看到相关信息.信息 功能Usr Passwd Req’d 用户密码输入错误Prb Passwd Req’d 密码输入错误Err New Pwd Failed 此信息说明新密码输入第二次与第一次不一样No Probe Signals或者显示”Probe Hdwr Fault” 没有探杆信号,检查探杆的接线端子是否松动,再到”Diagnostics”菜单查看Probe的状态,如有异常,需要返厂维修.Initializing TA2 正在初始化 Module cal Req’d 需要重新标定 Prb Params Reset 重新输入探头校验数据Usr Params Reset 根据流量面积重新组态仪表和4~20mA 设定7.2 检查端口电阻值:a. 一体式在逻辑电路板上有J6 端口,断开电源,拔出J6,可以看到7 个引脚,其 编号为1,3,5,7,9,11,13。
浩博兄姐铅电极安全指南说明书

SDS # 412HBC8676801S afety Latest Revision: June 2015 D ata Page 1 of 8 S heet Hobart Brothers Co. 1. PRODUCT AND COMPANY IDENTIFICATION:PRODUCT NAME: Electrodes, Nickel 55 (H500631-RDP, H500644-RDP)SUPPLIER: Hobart Brothers Co.2200 Corporate DriveTroy, OH 45373 U.S.A.Phone: 937-332-4000E-mail:**********************Website: EMERGENCY TELEPHONE NUMBER: 1-800-424-9300 (Chemtrec CCN11662)____________________________________________________________________________________2. HAZARD IDENTIFICATION:Emergency Overview: This product is normally not considered hazardous as shipped. Avoid eye contact or inhalation of dust from the product. When this product is used in a welding process, the most important hazards are welding fumes, heat, radiation and electric shock.Classification of the Substance/MixtureCLP/GHS Classification (1272/2008):Skin Irritation, Category 2Skin Sensitization, Category 1Eye Irritation, Category 2Carcinogenicity, Category 2Specific Target Organ Toxicity (Repeated Exposure), Category 1EU Classification (67/548/EEC):Toxic (T), Harmful (Xn), Irritant (Xi), Carcinogen Category 3, R48/23, R40, R36/38, R43Hazardous Classification per 29CFR 1910.1200 (Rev. July 1, 2012):Skin Irritation, Category 2Skin Sensitization, Category 1Eye Irritation, Category 2Carcinogenicity, Category 2Specific Target Organ Toxicity (Repeated Exposure), Category 1Labelling:Symbols:Signal Word: DangerHazard Statements:H315 –Causes skin irritation.H317 –May cause an allergic skin reaction.H319 –Causes serious eye irritation.H351–Suspected of causing cancer.H372–C ause damage to respiratory system, eyes, brain and nervous system through prolonged or repeated exposure. Precautionary Statements:P201 –Obtain special instructions before use.P202 –Do not handle until all safety precautions have been read and understood.P260 –Do not breathe dust/fume/gas/mist/vapours/spray.S heet Hobart Brothers Co. P264 –Wash skin and hair thoroughly after handling.P270 –Do not eat, drink or smoke when using this product.P272 –Contaminated work clothing should not be allowed out of the workplace.P280 –Wear protective gloves/eye protection/face protection.P281 –Use personal protective equipment as required.P302+P352 –IF ON SKIN: Wash with plenty of soap and water.P305+P351+P338 –IF IN EYES: Rinse cautiously with water for several minutes. Remove contact lenses, if present and easy to do. Continue rinsing.P308+P313 –IF exposed or concerned: Get medical advice/attention.P314 –Get medical advice/attention if you feel unwell.P333+P313 –IF skin irritation or rash occurs: Get medical advice/attention.P337+P313 –IF eye irritation persists: Get medical advice/attention.P362 –Take off contaminated clothing and wash before reuse.P405 –Store locked up.P501 –Dispose of contents/container in accordance with local/regional/national/international regulations.___________________________________________________________________________________R36/37/38Irrit.. 2(H319) EyeIrrit.. 2(H335) STOTSE 3Irrit.. 2(H319) EyeIrrit.. 2(H335) STOTSE 3R36/37/38(H315) SkinIrrit.. 2(H319) EyeIrrit.. 2(H335) STOTSE 3(H315) SkinIrrit.. 2(H319) EyeIrrit.. 2(H335) STOTSE 3(H319) EyeIrrit.. 2(H335) STOTSE 3(H319) EyeIrrit.. 2(H335) STOTSE 3Not Hazardous Not Hazardous Not Hazardous Not Hazardous(H373) STOTRE 2(H373) STOTRE 2( H302) AcuteTox. 4( H302) AcuteTox. 4(H317) SkinSens. 1(H351) Carc.2(H372) STOTRE 1(H317) SkinSens. 1(H351) Carc.2(H372) STOTRE 1Not Hazardous Not HazardousS heet Hobart Brothers Co.Corr. 1B (H335) STOT SE 3 Corr. 1B (H335) STOT SE 3Important This section covers the materials of which the products manufactured. The fumes and gases produced during normal use of this product are covered in section 10. The term “Hazardous” in “Hazardous Material” should be interpreted as a term required and defined in OSHA Hazard Communication Standard 29CFR 1910-1200 and it does not necessarily imply the existence of hazard. The chemicals or compounds reportable by Section 313 of SARA are marked by the symbol #.___________________________________________________________________________________4. FIRST AID MEASURES:Inhalation: Remove to fresh air immediately or administer oxygen. Get medical attention immediately.Skin: Flush skin with large amounts of water. If irritation develops and persists, get medical attention.Eye: Flush eyes with water for at least 15 minutes. Get medical attention.Ingestion: Obtain medical attention immediately if ingested.Electric Shock: Disconnect and turn off the power. Use a nonconductive material to pull victim away from contact with live parts or wires. Immediately contact a physician.___________________________________________________________________________________5. FIRE-FIGHTING MEASURES:Suitable Extinguishing Media: Use water spray, alcohol-resistant foam, dry chemical or carbon dioxide. Welding arcs and sparks can ignite combustible and flammable materials. Use the extinguishing media recommended for the burning material and fire situation.Unsuitable Extinguishing Media:Do not use water on molten metal. Large fires may be flooded with water from a distance.Specific Hazards Arising From Chemical: Keep away from heat/spark/open flames/hot surfaces –No smoking. Hydrogen fluoride, Calcium oxide, Iron oxides, Carbon oxides, Strontium oxides, Manganese/manganese oxides, Barium oxide, Nickel/nickel oxides, Aluminum oxide, Sodium oxides, Silicon oxidesProtective Equipment: Fire fighters should wear complete protective clothing including self-contained breathing apparatus.___________________________________________________________________________________6. ACCIDENTAL RELEASE MEASURES:Personal Precautions: Refer to section 8.Environment Precautions: Refer to section 13.Cleaning Measures: Solid objects may be picked up and placed into a container. Liquids or pastes should be scooped up and placed into a container. Wear proper protective equipment while handling these materials. Do not discard as refuse.___________________________________________________________________________________7. HANDLING AND STORAGE:Precautions for Safe Handling: Handle with care to avoid stings or cuts. Wear gloves when handling welding consumables. Avoid exposure to dust. Do not ingest. Some individuals can develop an allergic reaction to certain materials. Retain all warning and identity labels.Conditions for Safe Storage: Store in dry place in closed packages. Keep separate from chemical substances like acids and strong bases, which could cause chemical reactions. Ground/Bond container and receiving equipment.___________________________________________________________________________________8. EXPOSURE CONTROLS/ PERSONAL PROTECTION:Engineering Controls:Avoid exposure to welding fumes, radiation, spatter, electric shock, heated materials and dust. Ensure sufficient ventilation, local exhaust, or both, to keep welding fumes and gases from breathing zone and general area. Keep work place and protective clothing clean and dry. Train welders to avoid contact with live electrical parts and insulate conductive parts. Check condition of protective clothing and equipment on a regular basis.Exposure limits: Use industrial hygiene equipment to ensure that exposure does not exceed applicable national exposure limits. The limits defined under section 3 can be used as guidance. Unless noted, all values are for 8 hour time weighted average. For information about welding fume analysis refer to section 10.Biological limits: No available dataPersonal protection:S heet Hobart Brothers Co. Respiratory protection: Use an air purifying dust respirator when welding or brazing in a confined space, or when local exhaust or ventilation is not sufficient to keep exposure values within safe limits.Hands protection: Wear appropriate gloves to prevent skin contact.EN 12477: Protection gloves for weldersType B gloves are recommended when high dexterity is required as for TIG welding, while type A gloves are recommended for other welding processes. The contact temp (ºC) is 100 and the threshold time (seconds) >15. Eyes protection:Welder’s helmet or face shield with colour absorbing lenses. Shield and filter to provide protection from harmful UV radiation, infra red and molten metal approved to standard EN379. Filter shade to be a minimum of shade 9.Skin protection: Heat-resistant protective clothing. Wear safety boots, apron, arm and shoulder protection. Keep protective clothing clean and dry. Clothing should be selected to suit the level, duration and purpose of the welding activity.S heet Hobart Brothers Co.9. PHYSICAL AND CHEMICAL PROPERTIES:Appearance:Solid.Color: Black 1144/ BlackOdour:OdourlessOdour Threshold: Not AvailablepH Value: Not AvailableMelting Point/Melting Range: >2300° F, >1300° CFreezing Point: Not AvailableBoiling Point/Boiling Range: Not AvailableFlash point: Not AvailableEvaporation Rate: Not AvailableSelf-in flammability:Not AvailableExplosion limits: Not AvailableVapour pressure: Not AvailableVapour density: Not AvailableDensity at 20ºC: Not AvailableRelative density: 6-9 g/cm3Solubility:Insoluble in water.Partition coefficient: Not AvailableAuto-ignition temperature: Not AvailableDecomposition temperature: Not AvailableOther Information:No available data.___________________________________________________________________________________10. STABILITY AND REACTIVITY:Chemical Stability: This product is stable under normal conditions.Hazardous Reactions: Contact with chemical substances like acids or strong bases cause generation of gas. Conditions to Avoid: Not applicable.Incompatible Materials: Reacts with acid.Hazardous Decomposition Products: When this product is used in a welding process, hazardous decomposition product would include those from volatilization, reaction or oxidation of the material listed in section 3 and those from the base metal and coating. The amount of fumes generated from this product varies with welding parameters and dimensions.Refer to applicable national exposure limits for fume compounds, including those exposure limits for fume compounds found in section 3. Reasonably expected gaseous products would include carbon oxides, nitrogen oxides and ozone. Air contaminants around the welding area can be affected by the welding process and influence the composition and quality of fumes and gases produced.S heet Hobart Brothers Co. ___________________________________________________________________________________11. TOXICOLOGICAL INFORMATION:Signs and Symptoms of Overexposure: Inhalation of welding fumes and gases can be dangerous to your health. Classification of welding fumes is difficult because of varying base materials, coatings, air contaminants and processes. The Internal Agency for Research on Cancer has classified welding fumes as possible carcinogenic to humans (Group 2B).Acute Effects: Overexposure to welding fumes may result in symptoms like metal fume fever, dizziness, nausea, dryness or irritation of the nose, throat or eyes. May cause sensitisation by skin contactChronic Effects:Overexposure to welding fumes may affect pulmonary function. Overexposure to manganese and manganese compounds above safe exposure limits can cause irreversible damage to the central nervous system, including the brain, symptoms of which may include slurred speech, lethargy, tremor, muscular weakness, psychological disturbances and spastic gait. Prolonged inhalation of nickel (Classified 2B by IARC and R by NTP) above safe exposure limits may cause cancer. Long term inhalation exposure to iron (oxide fume or dust) can cause siderosis.___________________________________________________________________________________12. ECOLOGICAL INFORMATION:Toxicity: Welding rods contain metals which are considered to be very toxic towards aquatic organisms. Finely divided welding rods are therefore considered harmful to aquatic organisms.Persistence and Degradability: The welding rods consist of elements that can not degrade any further in the environment.S heet Hobart Brothers Co. Bio accumulative Potential: Welding rods contain heavy metals which bio accumulates in the food chain. The following figures are the bio concentration factor (BCF) for the substances on their own.BCF:Manganese, BCF: 59052Nickel, BCF: 16Iron, BCF: 140000Mobility in Soil: Welding rods are not soluble in water or soil. Particles formed by working welding rods can be transported in the air.Other Adverse Effects: In massive form, welding rods present no hazards to the aquatic environment.Welding materials could degrade into components originating from the materials used in the welding process. Avoid exposure to conditions that could lead to accumulation in soils or groundwater. Harmful to aquatic organisms, may cause long-term adverse effects in the aquatic environment.___________________________________________________________________________________13. DISPOSAL CONSIDERATIONS:Product:For product elimination, consult recycling companies or appropriate local authority.USA RCRA: This product is not considered hazardous waste if discarded.Residue from welding consumables and processes could degrade and accumulate in soils and groundwater.Package:May be disposed in approved landfills provided local regulations are observed.___________________________________________________________________________________14. TRANSPORT INFORMATION:UN-number: Welding rods are not classified as dangerous goods for transport and has no UN number.UN proper shipping name: Welding rods are not classified as dangerous goods for transport and has no UN proper shipping name.Transport hazard class: Welding rods are not classified as dangerous goods for transport.Packing group: There are not any special precautions with which a user should or must comply or be aware of in connection with transport or conveyance either within or outside premises.Environmental hazards: Welding rods are not environmentally hazardous according to the criteria of the UN Model Regulations (as reflected in the IMDG Code, ADR, RID and AND) and/or a marine pollutant to the IMDG Code.Special precautions for users: There are not any special precautions which a user should or must comply or be aware of in connection with transport or conveyance either within or outside premises of the welding rod.Transport in Bulk According to Annex III MARPOL 73/78 and the IBC Code: Welding rods in massive form do not subject under MARPOL 73/78 and the IBC Code. Not applicable – product is transported only in packaged form.__________________________________________________________________________________15. REGULATORY INFORMATION:Safety, health and environment regulations/legislation specific for the substance or mixture: Read and understand the manufacturer’s instructions, your employer’s safety practices and the health and safety instructions on the label. Observe a ny federal and local regulations. Take precautions when welding and protect yourself and others.Warning: Welding fumes and gases are hazardous to your health and may damage lungs and other organs. Use adequate ventilation.Electric shock can kill. Arc rays and sparks can injure eyes and burn skin. Wear correct hand, head, eye and body protection.Chemical safety assessment: NoUSA: Under the OSHA Hazard Communication Standard, this product is considered hazardous. This product contains or produces a chemical known to the state of California to cause cancer and birth defects (or other reproductive harm). (California Health & Safety Code § 25249.5 et seq.) United States EPA Toxic Substance Control Act: All constituents of this product are on the TSCA inventory list or are excluded from listing.EPCRA/SARA Title III Toxic ChemicalsThe following metallic components are listed as SARA 313 “Toxic Chemicals” and potential subject to annual SARA reporting. See Section 3 for weight percentage.S heet Hobart Brothers Co.16. OTHER INFORMATION:The information in this document is believed to be correct as of the date issued. However, no warranty is expressed to be implied regarding the accuracy or completeness of this information. This information and product are furnished on the condition that the person receiving them shall make his own determinations as to the suitability of the product for his particular purpose and on the condition that he assumes the risk of his use thereof.This Material Safety Data Sheet complies with the EC directives 91/155/EEC and 93/112/EEC, including modifications 2001/58/EC.Complies with OSHA Communication Standard 29 CFR 1910.1200 and Superfund Amendments and Reauthorization Act (SARA) of 1986 Public Law 99-499Hazard Statements:H302 –Harmful if swallowed.H314– Causes severe skin burns and eye damage.H315 –Causes skin irritation.H317– May cause an allergic skin reaction.H319– Causes serious eye irritation.H335 –May cause respiratory irritation.H351– Suspected of causing lung cancer.H372– Causes damage to organs through prolonged or repeated exposure.H373– May cause damage to organs through prolonged or repeated exposure.R-Phrases:R22 –Harmful if swallowed.R34 –Causes burns.R36/37 –Irritating to eyes and respiratory system.R36/37/38 –Irritating to eyes, respiratory system and skin.R37 –Irritating to respiratory system.R40 –Limited evidence of a carcinogenic effect.R43 –May cause sensitization by skin contact.R48 –Danger of serious damage to health by prolonged.R48/23 –Toxic: danger of serious damage to health by prolonged exposure through inhalation and if swallowed.S-Phrases:S22 –Do not breathe dust.S24/25 –Avoid contact with skin and eyes.S26 –In case of contact with eyes, rinse immediately with plenty of water and seek medical advice.S28 –After contact with skin, wash immediately with plenty of water.S36/37/39 –Wear suitable protective clothing, gloves and eye/face protection.S43 –In case of fire, use fire-fighting equipment on basis class D.End of the document.。
TH9520 磁性元器件综合分析系统使用说明书

使用说明书OPERATION MANUALTH9520集成化磁性元器件综合分析系统TH9520 MAGNETIC COMPONENTEST ANALYZER***********目录第1章概述................................................................................................................................. 1-11.1引言................................................................................................................................. 1-11.2使用条件 ......................................................................................................................... 1-21.2.1 电源 .............................................................. 1-21.2.2 环境温度与湿度...................................................... 1-21.2.3 预热................................................................ 1-21.2.4 几点注意问题........................................................ 1-21.3体积与重量...................................................................................................................... 1-31.4安全要求 ......................................................................................................................... 1-31.4.1 绝缘电阻............................................................ 1-31.4.2 绝缘强度............................................................ 1-31.4.3 泄漏电流............................................................ 1-41.5电磁兼容 ......................................................................................................................... 1-41.5.1 电源瞬态敏感度按GB6833.4的要求。
拜安捷2 血糖仪 说明书
血糖仪使用说明书132b a血糖检测步骤简单….1把血糖仪后盖打开,安装试碟,然后把血糖仪后盖盖紧。
2拉出 (a ) 再推进 (b ) 血糖仪手柄,推出一条试纸。
3滴加血样。
所需血样少、血糖检测快速、可储存较多检测结果拜耳客户服务电话:400-810-0701产品介绍介绍1血糖仪一览2显示屏图案说明4检测所需物品6日常使用说明血糖试碟安装步骤7血糖检测步骤 10血糖检测结果加上删除标记的步骤 17检测结果说明 18非指尖部位检测 19核对液检测步骤 20核对液检测结果标记步骤 22其他使用说明浏览储存的检测结果 24检测结果平均值 25删除所有储存的检测结果 26设定模式 27时间设定 27日期设定 28音量设定 30时间显示模式设定 31日期显示模式设定 32如何将检测结果传输至电脑 33血糖仪的清洁方法 34电池更换步骤 35技术资料产品规格 38性能评估 39常见问题和解决途径解决问题的第一步 40显示屏错误代码说明 41客户服务 46替换信息 47质量保证 48预期用途:拜安捷血糖监测系统包括血糖仪和血糖试碟,可让糖尿病患者自己进行血糖检测,或让专业医疗保健人员使用。
拜安捷血糖监测系统专测毛细血管全血中的葡萄糖,所得结果已自动校准为毛细血管血浆的血糖值。
检验方法:拜安捷血糖仪主要是测量葡萄糖和试纸电极上的试剂产生反应所生成的电流强度。
血糖试纸靠虹吸作用将血样吸收,血样中的血糖则和试纸试剂中的葡萄糖氧化酶和铁氰化钾产生反应,形成电流。
电流强度和血样中的血糖浓度成正比,血糖值会在5秒钟后显示在血糖仪的显示屏上。
注意:在本说明书中,拜安捷血糖检测试碟(葡萄糖氧化酶法)简称为血糖试碟;拜安轻可调式采血器简称为采血器。
拜耳客户服务电话:400-810-0701产品介绍介绍:感谢您选择使用拜安捷血糖监测系统!拜安捷血糖监测系统可帮助您控制糖尿病。
我们知道糖尿病患者需要一个简单易用的血糖仪来定时检查血糖。
fisa ii用户手册说明书

What you will learn from this chapter .................................. 1 About the package ................................................................ 1 System requirements............................................................. 1 Installing and starting FiSAT II............................................. 2 The graphic user interface..................................................... 4
FiSAT II was developed mainly for the analysis of lengthfrequency data, but also enables related analyses, of size-atage, catch-at-age, selection and others.
This User's Guide is an update of the previous version (Gayanilo, Sparre and Pauly, 1996). In addition to the printed document, a compact disk is provided with the software.
The errors and bugs in the software detected during the workshop, as well as those that were discovered during the later testing phase were corrected by Pedro de Barros, Professor at the University of Algarve.
Bayas2_手册中文版

Digilent的Basys2板参考手册引言该Basys2板是一种电路设计和实施平台,任何人都可以使用它获得建立真正的数字电路的经验。
围绕着赛灵思Spartan - 3E现场可编程门阵列和ATMEL的AT90USB2的USB控制器,Basys2板提供完整的、随时可用的硬件适合电路实现从基本逻辑器件到复杂的控制器。
拥有一系列板上的I / O设备和所有需要支持的FPGA电路,这样的设计可以创造无数无需任何其他元件的设计。
4个标准的扩展连接器允许设计使用面包板、用户设计的电路或Pmods扩展Basys2板板,(Pmods是价格便宜的模拟和数字I / O模块,能提供一个A/ D&D / A转换,电机驱动器,传感器投入﹡10万门的赛灵思Spartan-3E FPGA和许多其他功能)。
6针连接器上的信号﹡Atmel AT90USB2全速USB2端口提供电源和编程/数据传输接口免受ESD损害和短路损害,从而确保了﹡赛灵思平台的Flash ROM来存储FPGA配置在任何环境中的使用寿命更长。
该Basys2﹡8个LED,4位7段显示器,4个按键,8滑动开关的PS / 2端口板适用于所有赛灵思ISE工具的版本,包括和8位VGA端口免费版在内。
配有一条可以同时提供电源和﹡用户可设置的时钟(25/50/100MHz),加上短路块可以选择实现下载的USB下载线,所以不需要任何其第二种时钟他电源供应器或编程电缆。
﹡4个6针头扩展连接器该Basys2板可以通过USB2.0端口提供﹡所有I / O信号都有ESD和短路的保护。
电源和板载编程。
Digilent的免费使用的基于图1 Basys2板的结构图和功能模块PC端的Adept的软件会自动检测到Basys2板,同时提供了一个FPGA和板载的Flash ROM的编程接口,并允许用户传输数据(更多内容详见或/)。
该Basys2板设计的与免费的赛灵思ISE WebPACK的CAD软件相配套。
Ashcroft ATE-2 Handheld Calibrator 用户手册说明书

All specifications are subject to change without notice. All sales subject to standard terms and conditions. ©2022 Ashcroft Inc., ate-2_calibrator_ds_RevE_05-13-22 **************1.800.328.82581 of 9ATE-2 Handheld CalibratorFEATURESMonitor up to 3 parameters at once: pressure,temperature, voltage or current Built in data logging up to 16,000 recordsSD memory card slot for additional data log storage USB Communications interfaceIP65/NEMA 4X for all weather functionalityInterchangeable pressure module to measure from 0.25 in. H 2O up to 10,000 psiORDERING CODE P/N:Description Version ATE 2ST Ashcroft base unit Standard ATE 2ISAshcroft base unitIntrinsically safeATE-2Hand Held CalibratorNote: Loop power supply is not included with Intrinsically Safe UnitsF M Intrinsic SafetyCL 1, Div 1, Gr A, B, C, D CSA Intrinsic Safety CL 1, Div 1, Gr A, B, C, DATEX Ex ia ii c T4 Ga –20°C<Ta<50°C Power Requirements :(4) AA Batteries or via USB power supply or USB universal AC adapter 100-240 Vac, 2813module bays, banana jack inputs for DC voltage or current monitoringPressure Modules :Pressure ranges from 0.25 in. H 2O up to 10,000 psiAccuracy from ±0.025% to ±0.1% of span Hot Swap capable.LCD Display: 2.5˝ (W) x 1.5˝ (H) displays 3 simultaneousmeasurements, back light, flip screen capabilityElectrical Connection :4mm banana jacks – 1 set of test leads included Loop Power Supply:24 Vdc-35 mA maximum (non I.S. only)Available Engineering Units:psi, in. H 2O, in. Hg, ft SW, bar, mbar, kPa, MPa,mm Hg, cm H 2O, mm H 2O, kg/cm 2, user programmableOperating Temp. Range:-4 °F to 120 °F (-20 °C to 49 °C)Storage Temperature :-4 °F to 158 °F (-20 °C to 70 °C)Update Rate:100 ms – 1 module installed200 ms – 2 modules installed300 ms – 2 modules installed and external inputResolution:±0.001% span; 99,999 counts Electrical Measurements :0-20 mA or 0-30 Vdc Accuracy :Input Volts Accuracy 0/10 Vdc ±0.025% fs 10/30 Vdc ±0.10% fs 0-20 mA ±0.03% fsWarm-Up Time: 5 minutes for rated accuracy Programmable Filtering (Damping):Levels 1 through 16Temperature Effect Electrical Measurement: ±0.001% of span per °F over compensated range from reference temperature of 70 °F (±3 °F)Serial Interface:USB (Micro-B connector type)Field Calibration:Base Unit and pressure modules may be field-calibrated via keypad commandsData Logging:•Internal storage for up to 64 data logs and up to 16,000 records; transferable to SD card •Manual/automatic data logging capability • Programmable data intervals (0.1 sec. to 24 hrs.)All specifications are subject to change without notice. All sales subject to standard terms and conditions. ©2022 Ashcroft Inc., ate-2_calibrator_ds_RevE_05-13-22 **************1.800.328.82582 of 9ATE-2 Handheld CalibratorAM2-1Pressure ModuleAM2-2Pressure ModuleSTANDARD FUNCTIONSm D ata logging allows the user to savepressure, temperature and or electronic values displayed on the LCD to internal memory. Internal memory can hold up to 64 data log files and a total of up to 16,000 individual records. Manual logging is initiated with a single key press. Automatic data logging can be programmed to collect data at timed intervals between 0.1 second and 24 hours.m S D Memory Card Slot gives the ATE-2 additional data storage capability limited only by the capacity of the SD card installed. Data logs stored on the SD card are saved in .csv format which can be read by most spread-sheet programs. Data can easily be transferred from the ATE-2 to a PC.m L oop Power Supply is a standard feature on non-I.S. units and allows the user to conveniently power the device under test with 24 Vdc up to 35 mAm P ercent Error Function can be usedwhen calibrating pressure transduc-ers. Calculations are performed by the ATE-2 eliminating potential for human errors. This function enables the user to program the full scale range and electri-cal output of the transducer under test, and will display the actual pressure and electrical output readings as well as a percentage value comparing the actual output to the theoretical output.m S witch Test Function allows the operator to calibrate and document the pressure switch function. The onboard display will show pressure switch trip point, reset point and will calculate switch deadband. All calculations are performed by the ATE-2 eliminating potential for human errors m D ual Mode Function allows the operator to add or subtract themeasured pressure values from twoinstalled Quick-Select™ pressure mod-ules. This allows for measurement of “high-line” or elevated static differen-tial pressures. This feature also offers the ability to add barometric pressure from an absolute pressure module tothe measured pressure from a gauge pressure module, giving the user theability to measure a variety of absolutepressures without using designated modules.ATE-2Hand Held Calibratorm L eak Detect the HHC provides theability to detect and quantify leaks interms of pressure decay over time. In the pressure decay over time mode the HHC will monitor the desired pres-sure vessel for the programmed time interval and, at the end of the monitor-ing time period, display the measured change in pressure.All specifications are subject to change without notice. All sales subject to standard terms and conditions.©2022 Ashcroft Inc., ate-2_calibrator_ds_RevE_**************1.800.328.82583 of 9FEATURESL ow pressure modules ranges from 0.25 in. H2O(IWC) to 200 in. H2O (IWC), accuracy ±0.1% to±0.06% of span, variable capacitance sensor, for usewith clean dry gas mediaM edium/high pressure modules 5 to 10,000 psi,accuracy ±0.1% to ±0.025% of span, 316 SS isolatedsensor, for use with media compatible with 316 SSG auge, absolute, differential and compoundranges availableTemperature compensated 20°F to 120°FAM2-1Pressure ModuleAM2-2Pressure ModuleHM2-1, HM2-2 Pressure ModulesPRODUCT SPECIFICATIONS:AM2-1 Low Pressure Modules:Pressure Types:Differential and compoundAvailable Ranges:Refer to range tableAvailable Accuracies:±0.06% of span (0/1-0/200 in. H20)±0.07% of span (0/0.25-0/0.5 in. H20)±0.1% of spanCompensatedTemperature Range:20 °F to 120 °F (–7 °C to 49 °C)Temperature Effect:±0.004% of span per °F over compensated rangefrom reference temperature range of 70 °F (±3degrees)Repeatability:±0.01% of span (range 0/1 in. H20 or higher)±0.02% of span (range below 1.0 in. H20)Sensitivity:±0.002% of span (typical)Under / OverpressureCapability:–15 to 50 psiMaximum Static (line)Pressure:100 psiProcess Connection:1⁄8 NPT Female (STD.)Media Compatibility:Clean, dry, non-conductive, non-corrosive gasAgency Approvals:FCC (CFR47), UL61010-1, Not RoHS compliantPRODUCT SPECIFICATIONS:AM2-2 Medium High Pressure Modules:Pressure Types:Gauge, absolute, compound and vacuumAvailable Ranges:Refer to range tableAvailable Accuracies:±0.025%, ±0.05% or ±0.1% of span (10,000 psionly offered in psig and ±0.1% accuracy)CompensatedTemperature Range:20 °F to 120 °F (–7 °C to 49 °C)Temperature Effect:S tandard: ±0.004% of span per °F overcompensated range from reference temperaturerange of 70 °F (±3 degrees)Optional: Enhanced Accuracy Option. No additionalerror due to ambient temperature from20 °F to 120 °FSensitivity:±0.002% of span (typical), ±0.001 of span (max)Repeatability:±0.01% of spanOverpressureCompatibility:200% for ranges to ≤ 1,000 psi150% for ranges > 1,000 psiProcess Connection:1⁄8 NPT Female (STD.) Optional pressure connec-tions, 1⁄8 NPT Female NPT with flush out port,welded VCR fitting with standard finish (5,000 psimax)Media Compatibility:A ny medium compatible with 316 SS isolation;10,000 psi range only available with 17-4 PH /316 Stainless steelOptional:Clean to ASME B40-100 Level IV,(Not marked for oxygen service)Agency Approvals:CE, FCC (CFR47), UL61010-1All specifications are subject to change without notice. All sales subject to standard terms and conditions. ©2022 Ashcroft Inc., ate-2_calibrator_ds_RevE_05-13-22 **************1.800.328.82584 of 98Bold type indicates “C” accuracy is ±0.07% of full span Consult factory for additional ranges and units of measure Ranges available per unit of measureAll specifications are subject to change without notice. All sales subject to standard terms and conditions. ©2022 Ashcroft Inc., ate-2_calibrator_ds_RevE_05-13-22 **************1.800.328.82585 of 9All specifications are subject to change without notice. All sales subject to standard terms and conditions. ©2022 Ashcroft Inc., ate-2_calibrator_ds_RevE_05-13-22 **************1.800.328.82586 of 9FEATURES M easures temperature with most RTD probes S upports 2, 3 & 4 - wire RTDs D isplays measurement for Farenheit, Celsius, Kelvin Rankine and ohmsEasy configurability to meet applicationPRODUCT SPECIFICATIONS:Following specification is based on use of 4 wire RTD probe; accuracy does not include contribution from RTTA4F type RTD connectorAM2-RT1, AM2-RT2 RTD Temperature Moduleselectrical connector for compatibility with AM2-RT1 interface modules. TheyAll specifications are subject to change without notice. All sales subject to standard terms and conditions.©2022 Ashcroft Inc., ate-2_calibrator_ds_RevE_**************1.800.328.82587 of 9FEATURESA llows ATE-2 to measure temperature with athermocoupleP re-programmed to accept 8 most commonthermocouple typesD isplays measurement for Farenheit, Celsius, KelvinRankine and millivoltsR eference junctions: automatic internal or manualexternalPRODUCT SPECIFICATIONS:AM2-TC1 THERMOCOUPLE TEMPERATURE MODULEUnit of Measure (selectable):°C, °F, °K, °R and millivoltsReference Junction (selectable):Automatic Mode: The AM2-TC1 module incorporates an internal resistor/ thermistor based reference junction, which may be selected for use in the temperature readout mode.Manual Mode:An external reference junction may be used in place of the internal junction. External reference junctions may be applied in the temperature or direct millivolt readout modes.Resolution Reading in Temperature Units (selectable):1, .1 or .01 degrees. “Auto” mode selection that allows the ATE-2 to automatically configure the readout to the highest significant resolution (resolution closest to the tolerance) for the thermocouple type selected. Resolution Reading in Millivolts:.001 millivoltsThermocouple Connection (to interface module):Requires a “miniature thermocouple connector” (Omega type SMP), specifically matched to the thermocouple type to be used. These connectors may be purchased as an accessory under the following part numbers: (see how to order thermocouple connector table)SYSTEM ACCURACY (READING IN TEMPERATURE UNITS):Includes the base unit and AM2-TC1 interface module. (Does not include inaccuracy of the thermocouple device. Consult thermocouple manufacturer or ANSI MC96.1 for thermocouple accuracy specifications. Typical inaccuracies range from ±1 to ±2.2°C.)Conversion Factors to convert °C specifications to other units of measure: To convert from C to F; F = (1.8 x C) + 32To convert from C to K: K = C + 273.15To convert from C to R; R = (1.8 x C) + 427.6Additional thermocouple information on the following page.All specifications are subject to change without notice. All sales subject to standard terms and conditions. ©2022 Ashcroft Inc., ate-2_calibrator_ds_RevE_05-13-22 **************1.800.328.82588 of 9AMBIENT TEMPERATURE EFFECT:To calculate, multiply degrees deviation from 25 °C times the value listed in the far right column of the listed table. Only applied when using the internal reference junction, within the ambient window of 0-50 °C.TO CALCULATE TOTAL SYSTEM/MEASUREMENT ACCURACY:Accuracy = System Accuracy @ 25 °C + System Ambient Temperature Effect + Inaccuracy of Thermocouple DeviceSYSTEM ACCURACY (BASED ON DIRECT MILLIVOLT READING FROM THERMOCOUPLE):Includes the base unit and AM2-TC1 interface module. (Does not include inaccuracy due to the thermocouple device. Reference junction not applicableto direct millivolt readings.)All specifications are subject to change without notice. All sales subject to standard terms and conditions. ©2022 Ashcroft Inc., ate-2_calibrator_ds_RevE_05-13-22 **************1.800.328.82589 of 9OPTIONSCarrying, Transport and Protective Cases:Contoured: Protective Instrument Case with Shoulder Strap. P/N 864D079-01Heavy Duty, Watertight Instrument Carrying / Transport Case. P/N ATE2-CASEDIMENSIONS Base UnitCarrying Case。
TOBTAK AHA全系列UPS中文说明书 A2
工业级UPS(1kVA~40kVA)设备运行维护手册中航太克(厦门)电力技术股份有限公司制造目录第1章简介 (1)1.1前言 (1)1.2产品特点 (1)1.3安全指示 (1)第2章外型结构与功能说明 (2)2.1操作面板说明 (2)2.2外观说明 (3)2.2.1 1KV A~3KV A 直立式外观图 (3)2.2.2 1KV A~3KV A 机架式外观图 (4)2.2.3 4KV A~6KV A 直立式外观图 (5)2.2.4 4KV A~6KV A 机架式外观图 (5)2.2.5 8KV A~15KV A 直立式外观图 (6)2.2.6 8KV A~15KV A 机架式外观图 (6)2.2.7 20KV A~40KV A 直立式外观图 (7)第3章安装说明 (9)3.1开箱检查 (9)3.2搬运或移动 (9)3.3摆置 (9)第4章安装方法 (11)4.1端子连接 (11)4.1.1 1KV A~3KV A (11)4.1.2 4KV A~6KV A (12)4.1.3 8KV A~15KV A (13)4.1.4 20KV A~40KV A (14)4.2输入与输出 (14)第5章操作程序 (17)5.1开机操作程序 (17)5.1.1 第一次开机前准备工作 (17)5.1.2 第一次开机操作程序 (17)5.2维修旁路断路器(SW6)的操作 (21)5.3故障机的退出系统与并入系统时的操作 (22)第6章系统运行模式 (23)6.1UPS系统架构图 (23)6.2系统运行模式 (23)6.2.1 正常运行模式 (23)6.2.2 直流供电模式 (23)6.2.3 旁路供电模式 (24)6.2.4 维修旁路模式 (24)6.3串联备份系统 (25)6.4并联冗余系统 (26)第7章状况处理 (27)7.1符号代表意义 (27)7.2UPS运行状况显示及不正常时的处理方式 (27)第8章 UPS的维护与保养 (32)8.1注意事项 (32)8.2维护与保养 (32)第9章通讯说明 (33)9.1通讯接口 (33)9.2干接点外观及功能说明 (34)第10章主要技术规格 (35)10.11KV A~3KV A技术规格 (35)10.24KV A~6KV A技术规格 (36)10.38KV A~15KV A技术规格 (37)10.420KV A~40KV A技术规格 (38)第11章并机系统 (39)11.1并机安装 (39)11.2并机接线示意图 (39)11.2.1 1KV A~3KV A (39)11.2.2 4KV A~6KV A (40)11.2.3 8KV A~15KV A (42)11.2.4 20KV A~40KV A (45)第12章 MODBUSRTU-A VICTECH通讯协议 (46)12.1概述 (46)12.2参考文献 (46)12.3帧结构 (46)12.4命令解释 (46)12.4.1 01功能码 (46)12.4.2 03功能码 (47)12.5模拟量地址定义 (48)12.6开关量地址定义 (50)制造商保留对技术及产品规格进行修改的权力,恕不另行通知。
安柏精密仪器有限公司AT527系列电池测试仪用户手册说明书

用户手册User’s GuideRev.A9固件说明:适用于主程序Rev.C1.02及以上的版本AT527系列电池测试仪安柏精密仪器有限公司电话:0512-********©2005-2018 Applent InstrumentsLtd..产品咨询联系电话:0512-63976842 AT527系列用户手册安全须知当你发现有以下不正常情形发生,请立即终止操作并断开电源线。
立刻与安柏科技销售部联系维修。
否则将会引起火灾或对操作者有潜在的触电危险。
●仪器操作异常。
●操作中仪器产生反常噪音、异味、烟或闪光。
●操作过程中,仪器产生高温或电击。
●电源线、电源开关或电源插座损坏。
●杂质或液体流入仪器。
安全信息为避免可能的电击和人身安全,请遵循以下指南进行操作。
免责声明用户在开始使用仪器前请仔细阅读以下安全信息,对于用户由于未遵守下列条款而造成的人身安全和财产损失,安柏科技将不承担任何责任。
仪器接地为防止电击危险,请连接好电源地线。
不可在爆炸性气体环境使用仪器不可在易燃易爆气体、蒸汽或多灰尘的环境下使用仪器。
在此类环境使用任何电子设备,都是对人身安全的冒险。
不可打开仪器外壳非专业维护人员不可打开仪器外壳,以试图维修仪器。
仪器在关机后一段时间内仍存在未释放干净的电荷,这可能对人身造成电击危险。
不要使用已经损坏的仪器如果仪器已经损害,其危险将不可预知。
请断开电源线,不可再使用,也不要试图自行维修。
不要使用工作异常的仪器如果仪器工作不正常,其危险不可预知,请断开电源线,不可再使用,也不要试图自行维修。
不要超出本说明书指定的方式使用仪器超出范围,仪器所提供的保护措施将失效。
产品咨询联系电话:0512-63976843安装和设置向导有限担保和责任范围常州安柏精密仪器有限公司(以下简称Applent )保证您购买的每一台AT527在质量和计量上都是完全合格的。
此项保证不包括保险丝以及因疏忽、误用、污染、意外或非正常状况使用造成的损坏。
阿海珐P521电流差动使用说明书
电流差动保护装置使用说明书Jan 2005上海AREVA电力自动化有限公司499号1/B楼邮编201315电话:+86 (0) 21 5812 8822传真:+86 (0) 21 5812 8833目录1.装置简介 (4)1.1概述 (4)1.2用户界面 (5)1.2.1液晶显示和键盘 (5)1.2.1.1LCD显示 (5)1.2.1.2键盘 (5)1.2.2LED (6)1.2.3上、下盖板区域 (6)2.菜单 (7)2.1缺省显示 (7)2.2菜单内容 (7)2.3菜单操作举例 (8)2.3.1进入菜单 (8)2.3.2菜单操作举例 - 电流差动保护菜单操作 (8)2.4密码 (10)2.4.1密码保护 (10)2.4.2密码的键入 (10)2.4.3密码的修改 (10)2.5报警显示 (10)2.5.1电力系统报警 (10)2.5.2保护装置硬/软件报警 (13)3.调试大纲 (15)3.1调试前提 (15)3.2调试所需的设备 (15)3.2.1所需最基本设备 (15)3.2.2可选设备 (15)3.3产品检验 (16)3.3.1保护装置未通电时的检验 (16)3.3.1.1外观检查 (16)3.3.1.2绝缘 (16)3.3.1.3Watchdog(看门狗) 接点 (16)3.3.2辅助电源 (16)3.3.3保护装置带电测试 (17)3.3.3.1日期与时间 (17)3.3.3.2发光二极管(LED) (17)3.3.3.3光隔输入 (17)3.3.3.4输出继电器 (17)3.3.3.5后部通讯端口 (18)3.3.3.6差动保护通信 (18)3.3.3.7电流输入 (18)3.4整定值检验 (18)3.4.1采用实际应用的定值 (19)3.4.2演示保护装置的正确动作 (19)3.4.2.1电流差动制动动作特性 (19)3.4.2.2电流差动动作时间 (20)3.4.2.3后备过流保护 (20)3.4.3检查应用的整定值 (22)3.5点对点测试 (22)3.6带负荷试验 (22)3.6.1确认电流互感器接线 (22)3.6.2测量电容性充电电流 (23)3.6.3检查差动电流 (23)3.6.4检查电流互感器电流的一致性 (23)3.7最终检查 (23)1. 装置简介1.1 概述MiCOM P521是全数字式继电保护装置,其设计目标是用于实现电力保护和控制功能。
H-CELL 2.0 安装指南说明书
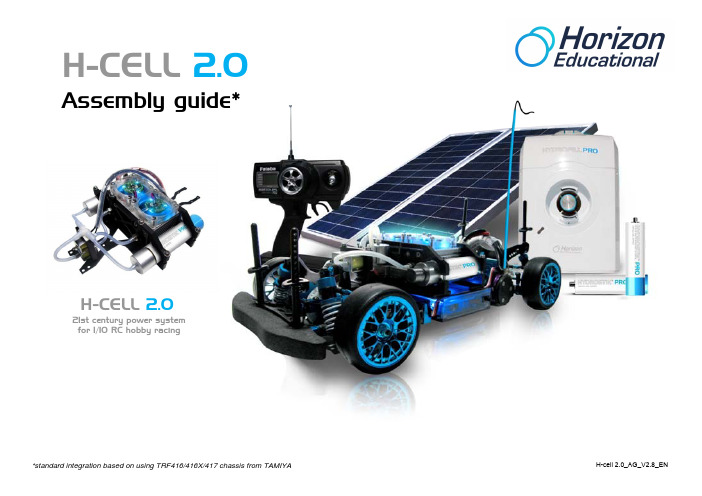
*Although we recommend TRF416/416X/417 from TAMIYA and our aluminum support plate is designed around this model, the H-cell 2.0 kit could be adapted to various RC vehicles and boats with some additional engineering.
A. Purchase all the necessary parts (see Recommended RC Vehicle Part list)
B. Follow the TRF416/416X/417 chassis assembly manual, but adjust with the following steps:
*See recommended parts list (Horizon recommends the TAMIYA TBLE-01 speed controller for this assembly)
(O)
(K) (K)
(K)
Page 8 of 44
STEP 4: Use black double-sided tape to attach the speed controller* (O) to the chassis (N).
Paste speed controller On/Off switch onto outer side of speed controller (O)
(O)
Page 10 of 44
STEP 6: Insert the red plug and grey plug from speed controller (O) into socket “B” of signal received (Q) and black plug from the servo motor (P) into socket “1”.
惠斯勒 2 型号商品说明书

Serie 2, Forno da incasso, 60 x 60 cm, Acciaio inoxHBF010ER0CAccessori integrati1 x Griglia combinata, 1 x Leccarda universale smaltata Accessori specialiHEZ438201 :HEZ317000 Teglia per pizzaHEZ327000 Pietra per pane e pizzaHEZ333001 Coperchio per leccarda extra profonda HEZ438301 :HEZ625071 Teglia per grigliare adatta a pirolisiHEZ915003 Pirofila in vetro con coperchio 5,4 l. HEZ431002 Accessorio forno Un forno da incasso con funzione ventilata 3D: così ottenete cotture perfette cucinando su tre livelli diversi in contemporanea.Dati tecniciDa incasso / a libera installazione: .....................................Da incasso Sistema di pulizia: ..........................................................................No Dimensioni del vano per l'installazione: 575-597 x 560-568 x 550 mm Dimensioni del prodotto: ....................................595 x 594 x 548 mm Dimensioni del prodotto imballato: ....................670 x 680 x 660 mm Materiale del cruscotto: ...................................................acciaio inox Materiale porta: ..........................................................................vetro Peso netto: ..............................................................................32.5 kg Volume utile: .................................................................................66 l Metodo di cottura: ...........Aria calda dolce, aria calda, riscaldamento superiore/infer., aria calda intensiva, riscaldamento inferiore, grill ventilato, Grill a superficie grande var.Regolazione della temperatura: ..........................................Meccanico Numero di luci interne: (1)Codice EAN: (4242005046874)Number of cavities (2010/30/EC): (1)Classe di efficienza energetica: .........................................................A Energy consumption per cycle conventional (2010/30/EC): ........0.98 kWh/cycleEnergy consumption per cycle forced air convection (2010/30/EC):0.79 kWh/cycleIndice di efficienza energetica (2010/30/CE): ..........................95.2 % Potenza: ..................................................................................3300 W Corrente: .....................................................................................16 A Tensione: ...................................................................................400 V Frequenza: ...........................................................................50; 60 Hz Tipo di spina: ....................................................................senza spina Accessori inclusi: .......1 x Griglia combinata, 1 x Leccarda universale smaltataSerie 2, Forno da incasso, 60 x 60cm, Acciaio inoxHBF010ER0CUn forno da incasso con funzione ventilata 3D: così ottenete cotture perfette cucinando su tre livelli diversi in contemporanea.Tipo di forno e modi di riscaldamento- Volume interno: 66 l- Riscaldamento rapido- Impostazione della temperatura 50 °C - 275 °CSupporto per accessori / Sistema d`estrazione:- Guide telescopiche1-livelliDesign- Illuminazione interna alogenaPuliziaAccessorio:Ambiente e SicurezzaInformazioni tecniche- Dimensioni nicchia (AxLxP): 575 mm - 597 mm x 560 mm - 568 mm x 550 mm- Dimensioni apparecchi (AxLxP): 595 mm x 594 mm x 548 mm- Potenza max. assorb. (elettr.): 3.3 kWSerie 2, Forno da incasso, 60 x 60cm, Acciaio inox HBF010ER0C。
安贝尔XH12(A)矿用本安型显示器使用说明书

使用本产品前,请仔细阅读使用说明书!XH12(A)矿用本安型显示器使用说明书(版本号:V 1.0)GB 3836.1-2010 《爆炸性环境第1部份:设备通用要求》GB 3836.4-2010 《爆炸性环境第4部份:由本质安全型“i”保护的设备》MT 209-1990 《煤矿通信、检测、控制用电工电子产品通用技术要求》(可靠性和抗干扰性除外)MT 210-1990 《煤矿通信、检测、控制用电工电子产品基本试验方法》(可靠性和抗干扰性除外)Q/ABE 001.01.01 2021 《XH12(A)矿用本安型显示器》深圳市安贝尔科技有限公司出版日期:2013年12月本说明书的使用对象:本说明书是为具有煤矿电气、控制知识的人员,负责煤矿电气设备的选型人员,以及现场的操作管理人员而编写的。
安全全警告:注意:安装、使用产品前,请阅读使用说明书。
警告:·严禁带电开盖!·维修时不得改变本安电路和与本安电路有关的元、器件的电气参数、规格、型号。
·本产品不得随意与其它未经联检的设备连接。
·不得任意改变本安线路及其关联设备的各元件参数。
·所有关联设备应进行防爆关联审查和检验,取得防爆关联审查检验合格证明后方可接入。
注意:·本产品请务必在本说明书中要求的规格、性能范围及环境下使用。
·本说明书编录了使用本产品的必须信息,使用前请仔细阅读本说明书并充分理解。
看完后请妥善保管,以便随时查阅。
注意:·请不要随意拆开本产品进行修理和改造。
对于客户擅自改造、使用造成的后果,无法进行保证。
注意:·本说明书未经许可不得进行部分或全部的复印、复制、转载。
·产品改进时,本说明书中的一些变更之处,恕不另行通知。
·本说明书与所涉及到的产品,难免存在有一定程度的差错,如果发现有什么错误请及时与封底记载的地址及电话联系,谢谢!1概述XH12(A)矿用本安型显示器是专为对可靠性和安全性要求较高的煤矿等工业应用而设计;XH12(A)矿用本安型显示器(以下简称显示器),可以对视频信号接收及观看以及对煤矿的监视。
柯尼卡美能达bizhub c550中文说明书
中文簡易說明書 Bizhub C550如需詳細內容,請參閱隨機之操作手冊 [User Manual]Konica MinoltaC451/C550**如已選用共用用戶認證功能,請跟以下步驟進入使用版面彩色複印前: 1.按【User Name List 列表】選擇用戶名稱,按【OK 確定】2.按【Password 密碼】輸入密碼,按【OK 確定】,3.按【Access 】。
黑白複印:如影印機被鎖,請先按 [Public User Access 共同的使用者部門]複印後: (鎖機)請按【Access 】鍵2次1. Touch Panel 輕觸版面2. Main Power 總電源3. Power 電源4. Mode Memory 模式記憶5. Utility/Counter 公用設定/錶數6. Reset 還原7. Interrupt 插隊8. Stop 停止9. Proof Copy 版本複印Start 影印鍵10.11. Panel 版面12. “C” Clear 清除13. Keypad 數字鍵Help 輔助說明14.15. Enlarge Display 版面放大16. Accessibility 版面顯示設定17. Power Save 省電18. Access 密碼鍵19. Brightness 版面光度調教20. User Box 用戶信箱21. Fax / Scan 傳真/掃描22. Copy 影印Basic 基本設定 (I)-- Color Mode顏色本機設定為自動色彩,即自動探測原稿是彩色文件或黑色文件按 Color,選擇以下不同色彩設定1. Auto Color自動彩色– 自動探測原稿是彩色文件或黑白文件2. Full Color全彩– 列印彩色文件3. Black黑色– 列印黑白文件4. 2 Color兩色-- 如原稿圖案或文字分為黑色和彩色,可把原稿彩色的部份轉變為選擇的其中一種顏色,而黑色的部份則不變5. Single Color單色 – 可把文件的影像轉變為選擇的其中一種顏色Basic基本設定 (II)-- Paper 紙張更改手送紙紙張尺寸1 按 Basic基本的設定 中,按Paper紙張2 選擇手送紙盤3 按Change Tray Settings紙盤變更設定4 選擇紙張類型5 輸入適合的尺寸a 按 Standard Size尺寸設定,選擇標準尺寸b 按 Custom Size自定尺寸輸入長度X和寬度Y,例如90mm輸入0900(如要儲存尺寸,按Store儲存, 再選擇儲存位置Memory1 -5 )6 按OKBasic 基本設定 (III)-- 倍率 Zoom可放大或縮小原稿影像按 ZOOM 倍率可選擇以下設定1選擇一般定的變焦比率a 按預設的縮小 / 放大比率 例如︰A3 A4 設定數字為 0.707b 按 - + 加減號增加或減少變焦數字2 按 XY Zoom 軸微調倍率直接輸入變焦數字,按OK 確定如要把變焦數字儲存, 直接輸入變焦數字後,可按 Set Zoom 微調倍率,然後選擇要儲存的位置,按OK分頁/分類 Sort/Group1. 按Finishing 分頁機2. 可按Sort 分頁或Group 群組3. 如沒有其他設定,按Start 影印鍵位移功能 Offset1. 按Finishing 分頁機2. 在Offset位移功能項目中按Yes 是3. 如沒有其他設定,按Start 影印鍵(必需加裝配件才有以下功能)訂裝Staple1. 按Finishing分頁機2. 在Staple項目中按Corner或2 position3. 按position Setting設定訂裝位置4. 如沒有其他設定,按Start影印鍵打孔Punch1. 按Finishing分頁機2. 在Staple項目中按2 Hole或4 Hole3. 按position Setting設定打孔位置4. 如沒有其他設定,按Start影印鍵摺疊/書本訂裝 Fold/Bind1. 按Finishing分頁機2. 在Fold/Bind項目中按Yes啟動功能3. 按Half-Fold Center Staple & Fold或Tri-Fold4.如沒有其他設定,按Start影印鍵Basic基本設定(IV)--Duplex/Combine雙面/組合選擇Combine組合按2 in 12合1兩張原稿縮為一張或按4 in 1/ 8 in 14合1/8合1四張/八張原稿縮為一張選擇Original > Copy 原稿 > 影本a.單面原稿印雙面副本1-sided > 2-sided 單面 > 雙面b.雙面原稿印單面副本2-sided >1-sided 雙面 > 單面c.雙面原稿印雙面副本2-sided >2-sided 雙面 > 雙面Originals Setting原稿設定1. 按Mixed Original混合原稿啓動探測功能, 如放在自動送紙器的原稿有不同大小的混合2. 按Z-Folded Original Z摺疊原稿啓動摺紙功能(必需加裝配件才有此功能)3. 按Binding Direction原稿空白邊設定原稿內容的方向4. 按Original Direction原稿設定方向設定預留的訂裝位置5. 按Original Size原稿尺寸設定原稿大小,預設是自動探測原稿大小Quality/Density 品質濃淡度1. 可在Original Type原稿類型選擇適當的原稿類型2. 按Density濃淡度調校整份文件的深淺度3. 按Background Removal底色調整調校原稿背景的深淺度4. 按Text Enhancement文字增強調校原稿文字的深淺度5.選擇Glossy光澤面開動光面效果Application應用功能- OHP投影片插頁1. 按Application應用功能2. 按Sheet /Cover /Chapter Insert 插頁 / 封面 / 插入章節3. 按OHP Interleave OHP白紙插頁4. 選擇分隔紙的紙盤5. 把投射膠片放在手送紙盤6. 按OK7. 按Start影印鍵- Cover Mode封面1. 按Application應用功能2. 按Sheet /Cover /Chapter Insert插頁 / 封面 / 插入章節3. 按Cover Mode封面4. 選擇前封面有沒有影像或後封面有沒有影像5. 及哪一個紙盤放置前封面紙或後封面紙6. 按Ok7. 按Start- Insert Sheet頁面插入1. 按Application應用功能2. 按Sheet /Cover /Chapter Insert插頁 / 封面 / 插入章節3. 按Insert Sheet 頁面4. 按Copy複印或Blank空白選擇插入的頁數有沒有影像5. 輸入需插入的頁號和選擇插紙的紙盤6. 按Ok7. 按Start- Insert Image 插入影像1. 按Application應用功能2. 按Sheet /Cover /Chapter Insert插頁 / 封面 / 插入章節3. 按Insert Image畫像插入4. 輸入插入影像的頁號5. 按OK6. 按Start影印鍵7. 最後,按Finish再按Start- Chapter章節(只適用於雙面時)1. 按Application應用功能2. 按Sheet /Cover /Chapter Insert插頁 / 封面 / 插入章節3. 按Chapter章節4. 輸入插入影像的頁號5. 按Ok按Start影印鍵- Edit Color 色彩編輯1. 按Application應用功能2. 按Edit Color色彩編輯3. 按Neg. Pos. Reverse黑白反像4. 按Mirror Image鏡面畫像5. 按Background Color 底色色彩設定背景顏色- Book Copy 書本複印2. 按Book Copy / Repeat頁連寫/重覆3. 按Book Copy書本掃瞄4. 再按Separation,同時可選擇要不要Front Cover/Back Cover前封面或後封面5. 把書打開放在鏡面左上角,按Start6. 直至掃描整本書後,按Finish7. 再按Start- Image Adjustment畫像調整1. 按Application應用功能2. 按 Image Adjust畫像調整3. 可選擇Full Size全尺寸 / Center Zoom中間倍率或Centering僅有中間如按Centering僅有中間,選擇直接置中4. 按 Start- Image Repeat 畫像重複1. 按Application應用功能2. 按Book Copy / Repeat 頁連寫/重覆3. 按Image Repeat 畫像重複4. 選擇With Margin / Without Margin有空白邊/沒有空白邊5. 按Set Range範圍設定6. 按Custom Size自訂尺寸,按X輸入長度和按Y 輸入寬度7. 按OK8. 按Start- Poster Mode海報模式1. 按Application應用功能2. 按Book Copy / Repeat頁連寫/重覆3. 按Poster Mode海報模式4. 按Zoom倍率﹐選擇要放大的倍數5. 按OK6. 按Start- Booklet Original 原稿小冊子必須加裝配件才有此功能1. 按Application應用功能2. 按Book Copy/Repeat頁連寫/重覆3. 按Booklet Original書本掃瞄4. 按OK5. 如下圖般把原稿放在鏡面或自動送紙器6. 按Start- Page Margin 白邊1. 按Application應用功能2. 按Page Margin頁邊的空白邊3. 選擇要加裝釘線的位置Top頂端Left 左側或Right右側4. 於Adjust Value調整值畫像移位中輸入寬度5. 按OK6. 按Start- Frame Erase 消框1. 按Application應用功能2. 按 Frame Erase消框3. 選擇要刪除影像的位置及寬度4. 按 OK5. 按 Start- Booklet 小冊子1. 按Application應用功能2. 按Booklet小冊子3. 可選擇左邊裝訂或右邊裝訂Left Binding /Right Binding 4. 按Start- Date / Time日期時間1. 按Application應用功能2. 按 Stamp/Composition3. 按Date / Time日期/時間4. 按 Print Position 可選擇把日期打印在不同位置5. 按OK6. 按Start- Page # 頁碼1. 按Application應用功能2. 按 Stamp/Composition3. 按Page Number4. 在Starting Page Number中可輸入開始號碼5. 按 Print Position 可選擇把日期打印在不同位置6. 按OK7. 按Start- Copy Protect1. 按Application應用功能2. 按 Stamp/Composition3. 按Copy Protect 複印防護4. 按Preset Stamp預設戳記選擇水印,或按Date/Time選擇日期時間或可按Detail Setting 細節設定選擇顏色深淺等詳細資料5. 按OK停止正在等候的工作1. 按 Job Details 作業細節2. 按 Print 列印 畫面中的 Current Jobs 現有的作業3. 選擇正在等候的工作4. 按 Delete 刪除5. 按 Yes 是 確定清除工作的命令Address Book 地址簿 E-mail 傳送電郵/ Fax 傳真1. 按Utility/Counter2. 按1. One Touch/User Box Registration 目的地/信箱的登記3. 按1. Create One Touch Destination 地址簿4. 按1.Address Book 快速撥號目的地5. 按E-mail 電子送信/ Fax 傳真傳送6. 按New 新的7. 按Name 名稱,輸入名稱,按 OK8. 按Address 輸入電郵地址/傳真地址,按 OK 9. 按Index 索引,選擇要放在哪個索引中 10. 按 OK1.3.4.5.6.7.Group Registration1. 按Utility/Counter2. 按1. One Touch/User Box Registration目的地/信箱的登記3. 按1. Create One Touch Destination地址簿4. 按1.Group 群組5. 按New 新的6. 按Name名稱,輸入名稱,按OK7. 按Select Group目的地選擇分組類型(如類型是傳真,請選fax)8. 按OK 直至回到控制版面Scan To Email / Send Fax 掃瞄到電郵或傳送傳真1. 按Fax/Scan2. 按Address Book從登記目的地3. 選擇一按鍵的索引及名稱4. 按Scan Settings 掃描設定A. Original Type原稿型態(如原稿內容是鉛筆或較淺色文字,可選擇Dot Matrix點矩陣原稿)B. Simplex/Duplex單面/雙面設定原稿是單或雙面C. Resolution解晰度設定解像度D. File Type檔案類型設定掃瞄後的檔案類型式(不適用於Fax)E. Density濃淡度設定深淺度F.設定掃瞄色彩5. 可按檢查細節/登記查看或更改以下設定A. Destination Settings檢查位址/登記已選取的目的地B. Check Scan Settings檢查掃瞄設定C. Check Original Settings檢查原稿設定D. Check E-mail Setting電郵設定(例如Email的主題和內容)6. 最後,按Start注︰- 掃瞄或傳真時,可把原稿放在自動送紙器(FACE UP)或鏡面(FACE DOWN)- Compact PDF只適用於全彩模式Full Color- TIFF檔只適用黑白模式Black- 檔案類型設定不適用於Fax- Check E-mail Setting只適用於掃瞄到電郵Scan to EmailRemove Jammed Paper清除塞紙如出紙位置出現塞紙情況, 請參考以下步驟*版面顯示塞紙位1. 打開出紙位置之綠色鍵後, 拉出紙張2. 如雙面器塞紙, 請打開雙面器後拉出紙張3. 如手送紙盤或紙盤上紙位, 請參考以下步驟更換碳粉*當某碳粉接近不足時,版面會顯示右邊的提示,此時大約可印多1000張*版面會顯示需要更換之碳粉顏色- Toner Cartridge (Y) = 黃色碳粉- Toner Cartridge (M) = 紅色碳粉- Toner Cartridge (C) = 藍色碳粉- Toner Cartridge (K) = 黑色碳粉如版面顯示碳粉不足,請依照以下步驟更換碳粉: 1234Display the Job History List檢查傳送記錄1. 按Job Details 作業細節2. 按Send 傳送3. 按Job History 作業日誌4. 按Comm. List 通信清單5. 選擇要列印的報告A. Activity Report 動態式報表B. TX Report 傳送報表C. RX Report接收報表6. 按Start1235請每月報讀總咪錶數,完成列印後,傳真至 2565 21281. 按Utility / Counter2. 按Meter Count 計數器3. 按Check Details細節檢查4. 按Print List列印5. 選擇紙盤按Start大量文件列印時可使用 [機密列印 Secure Print] 縮短文件處理之時間於電腦輸出機密列印程序先從“檔案File "選擇“列印Print "後, 點選“內容Preferences "---1. 點選工具列之【紙張Setup 】2. 在輸出方式Output Method (圖1) 選擇【機密列印Secure Print 】3. 輸入機密列印Secure Print ID & 密碼Password (圖2)4. 按 [確定OK]5. 完成所有設定按 【確定OK 】於影印機列印文件程序1. 按【Box 】2. 按 [Use Document] (圖3)3. 按【系統BOX System User Box 】(圖4)4. 按【保密接收檔案箱Secure Print User Box 】(圖4)5. 輸入 [帳號Access ] (即機密列印Secure Print ID) 之後按【確定OK 】(圖5)6. 輸入 [密碼Password] 之後按【確定OK 】(圖5)7. 選擇所需文件之後按【列印Print 】(圖6)8. 按【Start 】列印文件(圖1)(圖2)(圖3)(圖4)(圖5)(圖6)部門熱線新號碼市務科銷售熱線查詢產品及銷售詳情電話: 2565 2111電郵 : ****************************.com.hk服務科維修熱線多功能產品之維修服務電話 :2565 2176 傳真 :2856 1024服務科產品之技術支援熱線軟件及網絡支援電話 :2565 2178 服務科客戶服務熱線保養合約查詢新客戶之產品培訓脹單查詢報錶電話系統報錶(此服務只適用於黒白影印機,及必須於合約生效日期前報讀。
19032中文说明书

1. 1.1 1.2
2.
3.
4. 4.1 4.2 4.3 4.4 4.5
4.5.1 4.5.2 4.5.3
4.6
4.6.1 4.6.2
4.7
4.7.1 4.7.2
4.8
4.8.1 4.8.2 4.8.3
4.9 4.10 4.11 4.12 4.13
5. 5.1 5.2
5.2.1 5.2.2 5.2.3 5.2.4 5.2.5
使用操作說明 ................................................................................................. 4-1 前面板功能說明 ............................................................................................. 4-1 後面板功能說明 ............................................................................................. 4-5 操作前的注意事項及程序 ............................................................................. 4-7 系統參數(SYSTEM)設定 .........................................................................4-7 測試參數及測試前置參數的記憶體管理 ..................................................... 4-8
安培克 APW7302B 2A 24V 340kHz 同步降压转换器 数据手册说明书

ANPEC reserves the right to make changes to improve reliability or manufacturability without notice, and advise customers to obtain the latest version of relevant information to verify before placing orders.FeaturesGeneral Description•Wide Input Voltage from 4.5V to 24V •2A Continuous Output Current•Adjustable Output Voltage from 0.92V to 20V •Intergrated N-MOSFET•Fixed 340kHz Switching Frequency •PFM/PWM mode Operation •Stable with Low ESR Capacitors •Power-On-Reset Detection •Programmable Soft-Start •Over-Temperature Protection •Over-Voltage Protection•Current-Limit Protection with Frequency Foldback •Enable/Shutdown Function •Small SOP-8P Package•Lead Free and Green Devices Available(RoHS Compliant)Applications•LCD Monitor/TV •Set-Top Box• DSL, Switch HUB• Notebook ComputerAPW7302B is a 2A synchronous buck converter with inte-grated power MOSFETs. The APW7302B design with a current-mode control scheme, can convert wide input voltage of 4.5V to 24V to the output voltage adjustable from 0.92V to 20V to provide excellent output voltage regulation.The APW7302B is equipped with an automatic PFM/PWM mode operation. At light load, the IC operates in the PFM mode to reduce the switching losses. At heavy load, the IC works in PWM.The APW7302B is also equipped with Power-on-reset,soft- start, and whole protections (over-temperature, and current-limit) into a single package.This device, available SOP-8P, provides a very compact system solution external components and PCB area.Simplified Application CircuitPin ConfigurationBS VIN LX GNDSS EN COMP FBAPW7302BSOP-8P(Top View)Exposed PadThe pin 4 must be connected to the pin 9 (Exposed Pad)V INNote: ANPEC lead-free products contain molding compounds/die attach materials and 100% matte tin plate termination finish; which are fully compliant with RoHS. ANPEC lead-free products meet or exceed the lead-free requirements of IPC/JEDEC J -STD-020D for MSL classification at lead-free peak reflow temperature. ANPEC defines “Green” to mean lead-free (RoHS compliant) and halogen free (Br or Cl does not exceed 900ppm by weight in homogeneous material and total of Br and Cl does not exceed 1500ppm by weight).(Note 1)stress ratings only and functional operation of the device at these or any other conditions beyond those indicated under "recom-mended operating conditions" is not implied. Exposure to absolute maximum rating conditions for extended periods may affect device reliabilityThermal CharacteristicsNote 2: θJA is measured with the component mounted on a high effective thermal conductivity test board in free air.Recommended Operating Conditions (Note 3)Recommended Operating Conditions (Cont.) (Note 3)Note 3: Refer to the typical application circuit.Electrical CharacteristicsUnless otherwise specified, these specifications apply over V IN =12V, V OUT = 3.3V, V EN =3V and T A =25o C.Electrical Characteristics (Cont.)Note 4: Guarantee by design.Unless otherwise specified, these specifications apply over V IN =12V, V OUT = 3.3V, V EN =3V and T A =25o C.Typical Operating CharacteristicsR e f e r e n c e V o l t a g e , V R E F (V )Reference Voltage vs. JunctionTemperatureJunction Temperature, T J (o C)0.90.9050.910.9150.920.9250.930.9350.94-50-25255075100125150Oscillator Frequency vs. JunctionTemperatureJunction Temperature, T J (¢X C)300310320330340350360-50-250255075100125150O s c i l l a t o r F r e q u e n c yV I N I n p u t C u r r e n t , I V I N (m A )VIN Supply Voltage , V IN (V)11.21.41.61.8204812162024VIN Input Current vs. Supply VoltageRefer to the “Typical Application Circuit” The test conditions are V IN =12V, V OUT =3.3V, L1=10µH, C2=22µF, T A = 25o C unless otherwise specified.E f f i c i e n c y (%)Output Current vs. Efficiency2030405060100100.0110Output Current (A)0.110.001708090Operating WaveformsPower OffCH1: V IN , 5V/Div, DC CH2: V OUT , 2V/Div, DC TIME: 5ms/DivCH3: I L1, 2A/Div, DC V INV OUTI L1I OUT =2ATIME: 50µs/DivLoad Transient ResponseCH1: V OUT , 200mV/Div, offset=3.3V CH2: I L1, 1A/Div, DC I OUT =0.5A-2A-0.5A,rise/fall time=10µsI OUTV OUTRefer to the “Typical Application Circuit” The test conditions are V IN =12V, V OUT =3.3V, L1=10µH, C2=22µF, T A = 25o C unless otherwise specified.Power OnCH1: V IN , 5V/Div, DC CH2: V OUT , 2V/Div, DC TIME: 5ms/DivCH3: I L1, 2A/Div, DC I OUT =5AV INV OUTI L1I OUT =2A Load Transient ResponseCH1: V OUT , 200mV/Div, offset=3.3V CH2: I L1, 1A/Div, DC TIME: 50µs/DivI OUTV OUTI OUT =0A -2A -0A ,rise /fall time =10µsSwitching WaveformCH1: V LX , 5V/Div, DC CH2: I L1, 2A/Div, DC TIME: 1µs/DivI OUT =2AV LXShort CircuitCH1: V OUT , 1V/Div, DC CH2: I L1, 2A/Div, DC TIME: 1s/DivV OUT is shorted to GND by a short wireV OUTI L1Operating Waveforms (Cont.)Refer to the “Typical Application Circuit” The test conditions are V IN =12V, V OUT =3.3V, L1=10µH, C2=22µF, T A = 25o C unless otherwise specified.CH1: V OUT , 1V/Div, DC TIME: 50ms/DivCH2: I L1, 2A/Div, DCV OUTI L1I OUT =0~4AOver CurrentSwitching WaveformI LCH1: V LX , 5V/Div, DC TIME: 10µs/DivV LXCH2: I L , 0.5A/Div, DC I OUT =100mALine Transient ResponseV OUTCH1: V IN , 5V/Div, DCTIME: 50µs/DivCH2: V OUT , 50mV/Div, offset=3.3V V IN =12 to 20V, rise/fall time=10µsV INV OUT Operating Waveforms (Cont.)Refer to the “Typical Application Circuit” The test conditions are V IN =12V, V OUT =3.3V, L1=10µH, C2=22µF, T A = 25o C unless otherwise specified.Block DiagramLXVINBSTypical Application CircuitV INRecommended Feedback Compensation ValueFunction DescriptionMain Control LoopThe APW7302B is a constant frequency current modeswitching regulator. During normal operation, the inter-nal N-channel power MOSFET is turned on each cycle when the oscillator sets an internal RS latch and would be turned off when an internal current comparator (ICMP) resets the latch. The peak inductor current at which ICMP resets the RS latch is controlled by the voltage on the COMP pin, which is the output of the error amplifier (EAMP). An external resistive divider connected between VOUT and ground allows the EAMP to receive an output feedback voltage VFBat FB pin. When the load currentincreases, it causes a slight decrease in VFBrelative to the 0.92V reference, which in turn causes the COMP volt-age to increase until the average inductor current matches the new load current.VIN Power-On-Reset (POR) and EN Under-voltage LockoutThe APW7302B keep monitoring the voltage on VIN pin to prevent wrong logic operations which may occur when VIN voltage is not high enough for the internal control circuitry to operate. The VIN POR has a rising threshold of 4.1V (typical) with 0.5V of hysteresis.An external under-voltage lockout (UVLO) is sensed at the EN pin. The EN UVLO has a rising threshold of 2.5V with 0.2V of hysteresis. The EN pin should be connected a resistor divider from VIN to EN.After the VIN and EN voltages exceed their respective voltage thresholds, the IC starts a start-up process and then ramps up the output voltage to the setting of output voltage.Over-Temperature Protection (OTP)The over-temperature circuit limits the junction tempera-ture of the APW7302B. When the junction temperatureexceeds TJ= +160o C, a thermal sensor turns off the power MOSFET, allowing the devices to cool. The thermal sen-sor allows the converter to start a start-up process and regulate the output voltage again after the junction tem-perature cools by 50o C.The OTP is designed with a 50o C hysteresis to lower the average TJduring continuous thermal overload conditions, increasing lifetime of the lC.Current-Limit ProtectionThe APW7302B monitors the output current, flowing through the N-Channel power MOSFET, and limits the IC from damages during overload, short-circuit and over-voltage conditions.Frequency FoldbackThe foldback frequency is controlled by the FB voltage. When the FB pin voltage is under 0.6V, the frequency of the oscillator will be reduced to 110kHz. This lower fre-quency allows the inductor current to safely discharge, thereby preventing current runaway. The oscillator’s fre-quency will switch to its designed rate when the feedback voltage on FB rises above the rising frequency foldback threshold (0.6V, typical) again.Over-Voltage ProtectionThe over-voltage function monitors the output voltage by FB pin. When the FB voltage increase over 120% of the reference voltage, the over-voltage protection compara-tor will force the low-side MOSFET gate driver high. This action actively pulls down the output voltage. As soon as the output voltage is within regulation, the OVP compara-tor is disengaged. The chip will restore its normal operation.Enable / ShutdownDriving EN to ground places the APW7302B in shutdown. When in shutdown, the internal power MOSFET turns off, all internal circuitry shuts down.Application InformationSetting Output VoltageInductor Capacitor Selectionwhere D is the duty cycle of the power MOSFET .For a through hole design, several electrolytic capacitors may be needed. For surface mount designs, solid tanta-lum capacitors can be used, but caution must be exer-cised with regard to the capacitor surge current rating.)A ()D 1(D I I OUT RMS ⋅−×=)V (ESR I V OUT ⋅×∆=∆OUTOSC COUT C F 8IV ××∆=∆The regulated output voltage is determined by:Use small ceramic capacitors for high frequency decoupling and bulk capacitors to supply the surge cur-rent needed each time the N-channel power MOSFET (Q1) turns on. Place the small ceramic capacitors physi-cally close to the VIN and between the VIN and GND.The important parameters for the bulk input capacitor are the voltage rating and the RMS current rating. For reliable operation, select the bulk capacitor with voltage and current ratings above the maximum input voltage and largest RMS current required by the circuit. The capacitor voltage rating should be at least 1.25 times greater than the maximum input voltage and a voltage rating of 1.5times is a conservative guideline. The RMS current (IRMS)of the bulk input capacitor is calculated as the following equation:An output capacitor is required to filter the output and sup-ply the load transient current. The filtering requirements are the function of the switching frequency and the ripple current (DI). The output ripple is the sum of the voltages,having phase shift, across the ESR and the ideal output capacitor. The peak-to-peak voltage of the ESR is calcu-ated as the following equations:)V ()R R 1(92.0VOUT 21⋅+×=To prevent stray pickup, please locate resistors R1 and R2 close to APW7302B.ESRI V LF )D 1(V I V V D ESR OSC OUT INOUT ×∆=−=∆=××The peak- to-peak voltage of the ideal output capacitor iscalculated as the following equations:For the applications using bulk capacitors, the ∆V COUT is much smaller than the V ESR and can be ignored. Therefore,the AC peak-to-peak output voltage(∆V OUT ) is shown below:Output Capacitor SelectionFor the applications using bulk capacitors, the V ESR is much smaller than the ∆V COUT and can be ignored.Therefore, the AC peak-to-peak output voltage(∆V OUT ) is to ∆V COUT .Figure 1. Converter WaveformsI OUTVLXI LI Q1I COUTI OUTV OUT (1) (2) (3) (4) (5)INV OUTApplication Information(Cont.)Output Capacitor Selection (Cont.)The load transient requirements are the function of the slew rate (di/dt) and the magnitude of the transient load urrent. These requirements are generally met with a mix of capacitors and careful layout. High frequency ca-pacitors initially supply the transient and slow the current load rate seen by the bulk capacitors. The bulk filter ca-pacitor values are generally determined by the ESR (Effective Series Resistance) and voltage rating require-ments rather than actual capacitance requirements.High frequency decoupling capacitors should be placed as close to the power pins of the load as physically possible. Be careful not to add inductance in the circuit board wiring that could cancel the usefulness of these low inductance components. An aluminum electrolytic capacitor’s ESR value is related to the case size with lower ESR available in larger case sizes. However, the Equiva-lent Series Inductance (ESL) of these capacitors increases with case size and can reduce the usefulness of the ca-pacitor to high slew-rate transient loading.The operating frequency and inductor selection are inter-related in that higher operating frequencies permit the use of a smaller inductor for the same amount of inductorripple current. However, this is at the expense of efficiency due to an increase in MOSFET gate charge losses. The equation (2) shows that the inductance value has a direct effect on ripple current.Accepting larger values of ripple current allows the use of low inductances, but results in higher output voltage ripple and greater core losses. A reasonable starting point for setting ripple current is ∆I< 0.4 x I OUT (max). Please be no-ticed that the maximum ripple current occurs at the maxi-mum input voltage. The minimum inductance of the in-uctor is calculated by using the following equation:Inductor Value Calculationwhere (6)IN(MAX)IN V V = 1.2V · L · 340000)V -(V · V IN OUT IN OUT ≤(H)V · 408000)V -(V · V L INOUT IN OUT ≥Application Information (Cont.)Thermal ConsiderationLayout ConsiderationIn high power switching regulator, a correct layout is important to ensure proper operation of the regulator. In general, interconnecting impedance should be minimized by using short, wide printed circuit traces. Signal and power grounds are to be kept separating and finally combined using the ground plane construction or single point grounding. Figure 3 illustrates the layout, with bold lines indicating high current paths. Components along the bold lines should be placed close together. Below is a checklist for your layout:1. Begin the layout by placing the power components first.Orient the power circuitry to achieve a clean power flow path. If possible, make all the connections on one side of the PCB with wide, copper filled areas.2. In Figure 3, the loops with same color bold lines con-duct high slew rate current. These interconnecting im-pedances should be minimized by using wide and short printed circuit traces.3. Keep the sensitive small signal nodes (FB, COMP)away from switching nodes (LX or others) on the PCB and it should be placed near the IC as close as possible.Therefore, place the feedback divider and the feedback compensation network close to the IC to avoid switching noise. Connect the ground of feedback divider directly to the GND pin of the IC using a dedicated ground trace.The APW7302B maximum power dissipation depends on the thermal resistance and temperature difference between the die junction and ambient air. The power dis-sipation P D across the device is:P D = (T J - T A ) / θJAwhere (T J -T A ) is the temperature difference between the junction and ambient air. θJA is the thermal resistance between Junction and ambient air.For normal operation, do not exceed the maximum junc-tion temperature rating of T J = 125o C. The calculated power dissipation should less than:P D = (125-25)/50= 2(W)4. Place the decoupling ceramic capacitor C1 near the VIN as close as possible. Use a wide power ground plane to connect the C1, C2, and Schottky diode to provide a low impedance path between the components for large and high slew rate current.Figure 2. Current Path DiagramFigure 3. Recommended Layout DiagramSensitive node (FB, COMP) should be away from switching node(LX) and it should be placed nearthe thermal pad to thedissipation11.52255075100125Ambient Temperature, T A (o C)M a x i m u m P o w e r D i s s i p a t i o n , P D (W )V OUTVPackage InformationSOP-8PoSEE VIEW AVIEW AGAUGE PLANE SEATING PLANENote : 1. Followed from JEDEC MS-012 BA.2. Dimension "D" does not include mold flash, protrusions or gate burrs. Mold flash, protrusion or gate burrs shall not exceed 6 mil per side .3. Dimension "E" does not include inter-lead flash or protrusions. Inter-lead flash and protrusions shall not exceed 10 mil per side.0.0200.0100.0200.0500.0060.063MAX.0.40L 00o C E e h E10.25D c b 0.170.310.0161.278o C0o C8o C 0.501.27 BSC0.510.250.050 BSC0.0100.0120.007MILLIMETERS MIN.S Y M B O L A1A2A 0.001.25SOP-8PMAX.0.151.60MIN.0.0000.049INCHESD1 2.500.0982.000.079E2 3.503.000.1380.1184.805.000.1890.1973.80 4.000.1500.1575.806.200.2280.244(mm)Carrier Tape & Reel DimensionsSECTION B-BSECTION A-ATaping Direction InformationSOP-8PUSER DIRECTION OF FEEDClassification ProfileClassification Reflow ProfilesTable 1. SnPb Eutectic Process – Classification Temperatures (Tc)Table 2. Pb-free Process – Classification Temperatures (Tc)Reliability Test ProgramCustomer ServiceAnpec Electronics Corp.Head Office :No.6, Dusing 1st Road, SBIP,Hsin-Chu, Taiwan, R.O.C.Tel : 886-3-5642000Fax : 886-3-5642050Taipei Branch :2F, No. 11, Lane 218, Sec 2 Jhongsing Rd.,Sindian City, Taipei County 23146, TaiwanTel : 886-2-2910-3838Fax : 886-2-2917-3838。
AHT21 产品手册说明书

AHT21产品手册•完全标定•数字输出,I2C接口•优异的长期稳定性•采用SMD封装适于回流焊•响应迅速、抗干扰能力强产品综述AHT21,新一代温湿度传感器在尺寸与智能方面建立了新的标准:它嵌入了适于回流焊的双列扁平无引脚SMD封装,底面3x3mm,高度0.8mm。
传感器输出经过标定的数字信号,标准I2C格式。
AHT21配有一个全新设计的ASIC专用芯片、一个经过改进的MEMS半导体电容式湿度传感元件和一个标准的片上温度传感元件,其性能已经大大提升甚至超出了前一代传感器的可靠性水平,新一代温湿度传感器,经过改进使其在恶劣环境下的性能更稳定。
每一个传感器都经过校准和测试,在产品表面印有产品批号。
由于对传感器做了改良和微型化改进,因此它的性价比更高,并且最终所有设备都将得益于尖端的节能运行模式。
应用范围广泛应用于消费电子、医疗、汽车、工业、气象等领域,例如:暖通空调、除湿器和冰箱等家电产品,测试和检测设备及其他相关温湿度检测控制产品。
图1:AHT21传感器封装图(单位:mm公差:±0.1mm)传感器性能相对湿度参数条件最小典型最大单位分辨率典型-0.024-%RH 精度误差1典型-±2-%RH 最大见图2-%RH 重复性--±0.1-%RH 迟滞--±1-%RH 非线性--<0.1-%RH 响应时间2τ63%-<8-s 工作范围extended 30-100%RH 长时间漂移4正常-<1-%RH/yr表1湿度特性表图225℃时相对湿度的典型误差和最大误差电气特性参数条件最小典型最大单位供电电压典型 2.2 3.3 5.5V 供电电流,IDD 5休眠--250nA 测量-980-µA 功耗5休眠--0.8µW 测量- 3.2-mW通讯两线数字接口,标准I 2C协议表2电气特性1此精度为出厂检验时,传感器在25℃供电电压为3.3V条件下的测试精度。
IR-AH中文讲明书
Unit
C
·用↑键在摄氏温度显示℃,华氏温度显示°F。
·按 ENT 登陆。
·按 ON/OFF 切断电源。
下次启动时,显示存储的温度单位。
备注
出厂时设定摄氏温度。
6
5.测定
5.1.测定顺序
·按 ON/OFF 接入电源。 ·用距离调整环将测量距离调妥。 ·从观察口观察内部显示器来回旋转视度调整标度盘。以自己眼睛能最清楚的看清瞄准标记
光侧。(IR-AHS,IR-AHU 的场合)
● 有关光路 请留意,不要将水滴、灰尘、烟、水蒸气等进入测定对象与仪表对 物面之间。
● 使指示偏高的干扰 请注意,在被侧物与本仪表对物面上不要有直射目光,白炽灯光, 火炎等热辐射照射。
● 周围温度急骤变化 IR-AHT 使用热电元件检出元件,当周围温度急骤变化,到指示稳定 要化费时间。故当携入温差大的场所时,请放置一小时后,再进行 测量。
5.2.连续测量
固定本仪表,也可在同一场所长时间进行有效的连续测量。 要进行连续测量,边按 MEASURE,边按 ON/OFF 投入电源。 按 MEASURE,开始测量。 从开始连续测量,到再度按 MEASURE 键之间进行连续测量。
参考
连续测量电池消耗很大。建议使用零购的组件 AC 电源转换器 (IR-VHR)进行测量。
标识
⑴
AL
⑵
AH
⑶
Mess
⑷
Set
⑸
Mem
⑹
M
⑺
I
⑻
F
⑼
Error
⑽
⑾
℃
⑿
°F
左侧面
功能 下限温度报警时灯亮 上限温度报警时灯亮 温度测定状态灯亮 参数设定时,系统设定时亮 存储关联设定/显示时亮 存储功能有效时亮 间隔存储方式设定时亮 温度数据保存用存储器满时亮 检出表内温度异常时亮 电池耗尽时亮 用摄氏显示时亮 用华氏显示时亮
电熔焊机AH-2型使用说明书资料

AH-Ⅱ电熔焊接机使用说明书背光液晶显示,视觉开阔。
可预置焊接时间,监控焊接过程!错误信息报警、界面显示错误内容提示!整机轻便,操作者可背在肩上焊接操作!目录1. 前言 (2)2. 概述 (2)3. 外观示意及部件 (3)4. 基本参数 (4)5. 管件焊接时间选择............................................ (4)6. 功能和特点 (5)7. 焊接的使用操作 (5)8. 特别注意事项 (6)1.前言:使用AH-Ⅱ电熔焊机之前,请您详细阅读使用说明书,熟知其使用方法和注意事项以使焊机正确操作。
在使用AH-Ⅱ电熔焊机之前,您还应了解电熔管件的熔接参数及管件能量供给方式。
本机可用于本公司生产的排水用电熔管件,当需要焊接其它公司生产的电熔管件时,应获得本公司技术部门的确认,以免影响焊接的可靠性。
警告:在使用AH-Ⅱ电熔焊机时,电源接地线要可靠接地。
2.概述:AH-Ⅱ电熔焊机体积小、重量轻、携带方便,操作者可背在肩上进行焊接操作。
AH-Ⅱ电熔焊机采用单片机系统作为主控制器,控制输出精确,背光液晶可显示多种语言界面及监控焊接全部过程,自动按预置的时间进行熔接,显示环境温度,自动的检测管件错误及焊接操作错误并报警、界面显示错误内容提示。
AH-Ⅱ电熔焊机具有焊接时间参数记忆功能,焊接下一次相同规格的管件时无需再次预置焊接时间参数,焊接输出过程蜂鸣器报警提示。
AH-Ⅱ电熔焊机使用操作简单,只需按不同厂商提供的管件熔接时间参数,手动预置焊接时间即可,发生操作错误,可以按复位键纠正错误,返回到前一操作状态,重新进行下一步骤操作。
AH-Ⅱ电熔焊接机使用说明书3.外观示意及部件:保险丝座电源开关液晶显示控制按键输出线插槽电源线插槽输出头电源插头3.1主机面板:液晶显示器——界面语言显示。
预置键()——按此键移动设定时间的数字光标。
数字键( )——按此键滚动增加设定时间数字。
确认键( )——按此键开始焊接。
AH-BASIC Ⅱ中文说明书
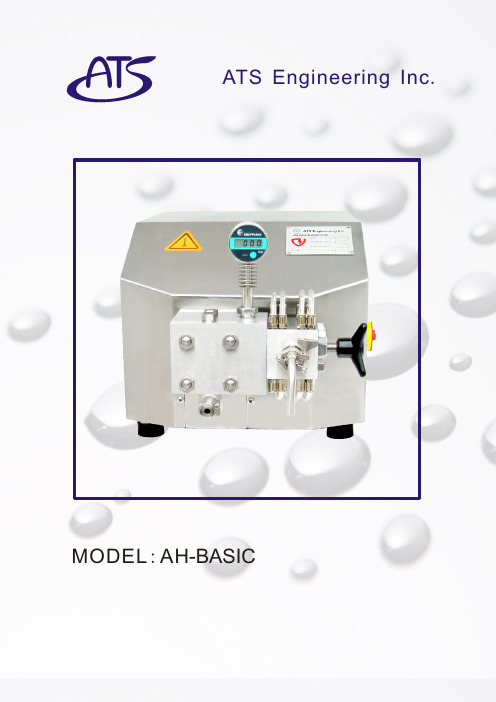
ATS Engineering Inc.MODEL:AH-BASIC 注意事项1. 任何物料在进入均质机进行均质之前,必须经过60—100目的滤网过滤,避免颗粒的杂质(如铁屑、玻璃碎片等)进入均质机,磨损机器的进料阀座和均质阀。
2. 均质机禁止在无物料的情况下长时间运行。
3. 均质机严禁在两级均质阀手柄旋紧的情况下开机,突然的过载负荷严重损害马达。
4. AH-B ASICⅡ均质机为实验型设备,机器设计为短时间的实验使用。
5. 均质机使用固体陶瓷柱塞,与柱塞接触的物料温差变化不得超过70℃,否则可能造成柱塞断裂。
物料的温度增加或降低的幅度不得大于每分钟5℃(特别在机器灭菌操作时)。
1 均质原理1.1 何为均质均质是由柱塞泵和均质阀共同作用使物料在均质阀区发生细化和均匀混合的过程。
1.2 均质原理物料通过柱塞泵吸入并加压,在柱塞作用下进入压力大小可调节的阀组中,经过特定宽度的限流缝隙(工作区)后,瞬间失压的物料以极高的流速(1000至1500米/秒)喷出,碰撞在阀组件之一的碰撞环上,产生了三种效应:空穴效应被柱塞压缩的物料内积聚了极高的能量,通过限流缝隙时瞬间失压,造成高能释放引起空穴爆炸,致使物料强烈粉碎细化。
撞击效应物料通过限流缝隙时以上述极高的速度撞击到特制的碰撞环上,造成物料粉碎。
剪切效应高速物料通过阀腔通道和限流缝隙时会产生强烈的剪切。
1.3 柱塞泵工作图1.4 均质阀工作原理图1.5 两级均质阀工作原理图2 设备结构介绍2.1压力块1— 高精度数显压力表 6—出料管 2— 进料阀塞子 7—出料阀塞子 3— 大料杯 8—一级均质阀组 4— 进料弯管 9—在位冷却PVC管 5— 进料块 10—压力块2.2 陶瓷柱塞1—固体陶瓷柱塞 2—锁紧螺母 3—涨紧圈 4—间隔圈—柱塞密封2.3 进料阀压力块采用高等级双相合金不锈钢制造,确保在高的操作压力下的良好的抵抗应力疲劳,容易拆卸和安装的设计。
压力块内部的管路体积为12ML,配备特制的进料器后,确保最少50ML的批量即可进行循环操作。
- 1、下载文档前请自行甄别文档内容的完整性,平台不提供额外的编辑、内容补充、找答案等附加服务。
- 2、"仅部分预览"的文档,不可在线预览部分如存在完整性等问题,可反馈申请退款(可完整预览的文档不适用该条件!)。
- 3、如文档侵犯您的权益,请联系客服反馈,我们会尽快为您处理(人工客服工作时间:9:00-18:30)。
ATS Engineering Inc.MODEL:AH-BASIC 注意事项1. 任何物料在进入均质机进行均质之前,必须经过60—100目的滤网过滤,避免颗粒的杂质(如铁屑、玻璃碎片等)进入均质机,磨损机器的进料阀座和均质阀。
2. 均质机禁止在无物料的情况下长时间运行。
3. 均质机严禁在两级均质阀手柄旋紧的情况下开机,突然的过载负荷严重损害马达。
4. AH-B ASICⅡ均质机为实验型设备,机器设计为短时间的实验使用。
5. 均质机使用固体陶瓷柱塞,与柱塞接触的物料温差变化不得超过70℃,否则可能造成柱塞断裂。
物料的温度增加或降低的幅度不得大于每分钟5℃(特别在机器灭菌操作时)。
1 均质原理1.1 何为均质均质是由柱塞泵和均质阀共同作用使物料在均质阀区发生细化和均匀混合的过程。
1.2 均质原理物料通过柱塞泵吸入并加压,在柱塞作用下进入压力大小可调节的阀组中,经过特定宽度的限流缝隙(工作区)后,瞬间失压的物料以极高的流速(1000至1500米/秒)喷出,碰撞在阀组件之一的碰撞环上,产生了三种效应:空穴效应被柱塞压缩的物料内积聚了极高的能量,通过限流缝隙时瞬间失压,造成高能释放引起空穴爆炸,致使物料强烈粉碎细化。
撞击效应物料通过限流缝隙时以上述极高的速度撞击到特制的碰撞环上,造成物料粉碎。
剪切效应高速物料通过阀腔通道和限流缝隙时会产生强烈的剪切。
1.3 柱塞泵工作图1.4 均质阀工作原理图1.5 两级均质阀工作原理图2 设备结构介绍2.1压力块1— 高精度数显压力表 6—出料管 2— 进料阀塞子 7—出料阀塞子 3— 大料杯 8—一级均质阀组 4— 进料弯管 9—在位冷却PVC管 5— 进料块 10—压力块2.2 陶瓷柱塞1—固体陶瓷柱塞 2—锁紧螺母 3—涨紧圈 4—间隔圈—柱塞密封2.3 进料阀压力块采用高等级双相合金不锈钢制造,确保在高的操作压力下的良好的抵抗应力疲劳,容易拆卸和安装的设计。
压力块内部的管路体积为12ML,配备特制的进料器后,确保最少50ML的批量即可进行循环操作。
压力块上安装有:一只固体陶瓷柱塞,有极高的硬度和光滑的表面,极高的耐磨作用和自润滑作用。
特殊材质的柱塞密封,不需使用水润滑即可使用。
球型单向进料阀和出料阀,在进料阀处安装有可拆卸的进料阀座,进料阀座采用高硬度的STELLITE合金制造。
一只高精度数显压力表,采用卫生型设计,压力表内安装有电池提供压力表电源。
设备采用不锈钢料斗作为标准的进料方式,采用1/2”的快速夹钳和进料法兰连接。
Rupture均质阀组作为标准配置。
2.4 均质阀组1— 阀体3— 阀体内O型圈4— 阀体外O型圈5— 顶杆O型圈6— 顶杆7— 手轮标准的均质阀组是一套均质阀安装在不锈钢阀体内,通过转动手轮,推动顶杆进行均质压力调节。
2.5 均质阀Rupture ValveAH-BASICⅡ均质机提供一套R型(破碎)均质阀:由一只撞击头, 一只不锈钢的碰撞环和一只碳化钨的阀座组成。
阀座采用双面设计,两面均可使用,使用延长一倍。
R型均质阀通常用于生物行业,如:细胞破壁、藻类破碎等2.6 机器技术参数型号:AH-BASICⅡ流量:20L/H均质阀最高压力:1000 bar机器冲程数:140次/Min最大产品粘度:2000 cP最高产品温度:90 ℃最高蒸汽温度:121℃3 设备操作3.1 开机前的检查A T S 高压均质机设计成可达到很高的压力,因此,好的操作习惯可以预防和避免人员伤害和设备本身伤害。
为了正确和安全地使用设备,要求操作人员对设备进行定期的必需的检查,确保设备是在理想的状态下运转并预防可能发生的问题。
1.保证机器的进料管的清洁,需要均质的料液要确保不含杂质。
注意:要确保待均质或破碎的料液中无金属颗粒;在料液中Array有金属颗粒存在,会严重损伤进料阀和均质阀,造成机器无法使用。
2.确认法兰,各种连接和压力块上的螺栓完全锁紧。
3.将电源线接上插头,接通主电源。
4.检查马达的转动方向。
确保风扇转动与箭头指示方向一致。
注意:如果马达转动方向与箭头指示方向不同时,调整电源插头上的接线。
5.检查阀组装配正确,阀组垫圈完好无损,重新装配阀组。
6.确定两级均质阀的手轮完全松开,但需注意不可过松。
7.按下压力表上的开关,确认压力表显示的数值为零。
8.定期检查密封圈和柱塞密封确保无泄漏。
3.2 设备开机2. 排出进料弯管中的空气3. 转动开关至“1”,设备即可开始运行。
出料均匀连续,无异常的噪音。
4. 在压力表显示为零时,方可进行关机操作。
注意:如果开机30秒后,出料口无料液排出,说明压力块内有气堵现象。
应该关闭设备,打开进料阀,把料液引入压力块,然后重新安装进料阀,再进行开机操作。
压力为零1. 往进料斗中加入清水3.3 压力调节排放压力:排放均质阀压力:缓慢逆时针转动手轮,压力缓慢地稳定地降低至零。
停止转动手轮。
注意:手轮转动到压力为零即可停止。
不可转动到过松的位置。
3.4 操作步骤:1. 料斗中加入清水,开机。
2. 调节均质压力到所需工作压力。
3. 当清水流到料斗底部时,往料斗中加入物料。
4. 在机器均质过程中,操作人员要随时关注料斗中的存料量,及时补料、循环或准备降压停机。
5. 完成均质后,排放设备内部的物料,在料斗中的物料将尽时加入清水。
6. 调节压力为零,根据需要进行清洗。
7. 将开关转动到“0”位置,关机。
3.5 清洗1. 在料液将尽时,立即向料斗里进清水进行清洗,防止料液在机器内部形成料膜或残留。
最好使用60℃的热水清洗。
2. 在清洗时可以加压力至200bar,清洗机器。
3. 该设备可以使用以下清洁剂:NaOH类:最大浓度 3% 最高温度 90℃HNO3类:最大浓度 0.5% 最高温度 70℃H3PO4类:最大浓度 3% 最高温度 85℃热水:最高温度 95℃蒸汽:最高温度 130℃注意:该设备不得使用含氯和碘的洗洁剂3.6 灭菌操作AH-BASICⅡ均质机设计成可以通纯蒸汽进灭菌操作,纯蒸汽最高温度121℃,最长灭菌时间30MIN。
最高压力3.8bar。
1. 打开硅胶管的快速夹钳,取下进料斗。
2. 蒸汽发生器的连接管和进料法兰使用快速夹钳连接,接口尺寸1/2”,连接管最好采用不锈钢管外壁包覆保温层。
3. 通入纯蒸汽进行灭菌。
灭菌时间最长不得超过30MIN。
在灭菌过程中,严禁开机运行,以免损伤柱塞和柱塞密封。
4. 灭菌结束后,让设备自然冷却。
注意:在冷却过程中,严禁往压力块内通冷却水进行冷却,过大得温差会造成柱塞的断裂。
5. 在压力块完全冷却后,断开进料法兰的连接,接上灭菌的进料斗和硅胶管。
4 维护4.1 进料/出料阀的拆卸和装配拆卸1. 使用套筒取下固定螺栓1和2。
2. 使用提取器取出固定器3和4。
3. 使用镊子取出弹簧和陶瓷球5和6。
装配1. 使用镊子放入陶瓷球5和6,5放在出料阀开口上,6放在进料阀座上,检查确保陶瓷球处于正中间的位置。
2. 把弹簧固定在固定器3和4上,确保垂直提起弹簧不会落下,将固定器使用提取器压入出料/进料阀孔,确保压到底部后使用套筒拧紧固定螺栓1和2。
4.2 压力表的拆卸和装配拆卸松开固定螺栓,取出压力表1。
取出压力表的时候要小心,不能拔压力表的表头,要握住压力表体拔出。
装配1. 把辅助垫圈2先装在压力表下方,然后安装O型圈3。
2. 把装好垫圈的压力表1装入压力表孔内,锁紧固定螺栓。
4.3 均质阀组的拆卸和装配拆卸和检查1. 松开阀体螺栓,取出整个阀体。
2. 用手指按压阀座,同时顺时针旋转手轮,顶出阀组(阀座、撞击头、碰撞环)和顶杆7。
3. 检查均质阀座,撞击头,碰撞环表面的磨损情况。
4. 检查顶杆密封O型圈6,阀体内密封O型圈3,阀体外密封O型圈4,阀体密封复合垫圈2的磨损情况。
装配1. 在安装各部件前,各种O型圈使用食品级的润滑脂润滑。
2. 将手轮8顺时针旋入阀体5。
3. 将顶杆7从均质阀安装端放入阀体5,使用专用顶出器将顶杆7顶入位置。
4. 先将撞击头放入阀体内,然后放入碰撞环,最后放入阀座。
用手把阀座压入阀体内,此时可逆时针旋转手轮8几圈,让顶杆7后退,留出空间压入阀座。
阀座的平面和阀体平面同一水平即可。
5. 装上密封复合垫圈2,用水润湿后再贴在阀座的表面。
6. 检查均质阀安装孔内已无垫圈,然后装入均质阀体,紧固螺栓。
使用前注意事项:安装好均质阀后,顺时针旋转手轮至拧不动,然后逆时针松开手轮即可。
此项操作可减少顶杆上的O型圈6在开机操作压力增加时的快速摩擦,延长使用寿命。
4.4 压力块的拆卸和安装拆卸1. 使用24#扳手取下固定螺栓1。
2. 抱住压力块2轻轻往外拔出,取下压力块2。
压力块重量20KG,注意小心轻放。
3. 依次取下中心导向环4和支撑块6,避免碰到柱塞。
4. 检查陶瓷柱塞有无松动。
柱塞密封的更换柱塞密封装于压力块的后面,从外面看,最外面安装的是灰色的PE辅助垫片,内安装的是UHMW-PE材质的密封件。
1. 使用专用的密封件拔出器插入磨损的柱塞密封内,使用倒角把密封圈构住并拔出。
2. 注意:柱塞密封只在磨损泄漏的情况下才更换。
全新的柱塞密封请勿要使用拔出器取出,会损坏该密封。
3. 安装柱塞密封,橡胶外径朝内压入压力块腔孔至表面齐平。
注意:装好后检查,从外面观察,只能看到黄色的内径。
4. 安装灰白色的辅助垫片。
压力块的安装1. 安装支撑块6,有排气孔的一面朝下,装在四根螺栓上。
2. 把中心导向环4套入柱塞,装入支撑块内。
3. 陶瓷柱塞和柱塞密封用水润湿,起润滑作用。
4. 把压力块2轻轻推入,注意对准柱塞和密封接口,把压力块2推至和支撑块6接触即可。
注意:如果推的时候阻力太大,很难装入,此时严禁使用大力强行推动压力块,否则会把柱塞从固定处折断。
处理方法:1、取出压力块,检查柱塞密封是否安装正确。
2、柱塞密封件的内径和陶瓷柱塞不匹配,更换柱塞密封。
5. 锁紧固定螺栓1,锁紧方式:先锁紧对角线的两只螺栓,再锁紧另一对角线的两只螺栓,确保压力块安装平衡。
5 常见故障及解决方法故障现象故障原因解决措施马达不运转没有电源供应检查电源连接,电源的电压和主开关马达在运转,但出料口无物料流出压力块内有空气堵塞不进料柱塞断裂打开进料阀,排除空气(参见3.2)更换柱塞无均质压力进料阀座磨损压力表损坏检查并更换进料阀座检查或更换压力表不稳定的压力压力表损坏物料中有团块物料中有空气检查或更换压力表重新预处理,物料分散均匀物料脱气处理加压后流量减少或不出料进料阀或阀座磨损泄漏检查并更换磨损件物料从手轮和阀体的螺纹间泄漏手轮旋出太多顶杆上的密封圈磨损阀体复合垫圈破裂将手轮顺时针旋入检查并更换密封圈检查并更换复合垫圈物料从支撑块下方的排气孔泄漏柱塞密封磨损更换柱塞密封压力表无显示压力表失效或没电更换压力表或电池。
