Open Flash Chart2
NEO-STB-0003 Neo-Flash 150 RGB用户手册说明书
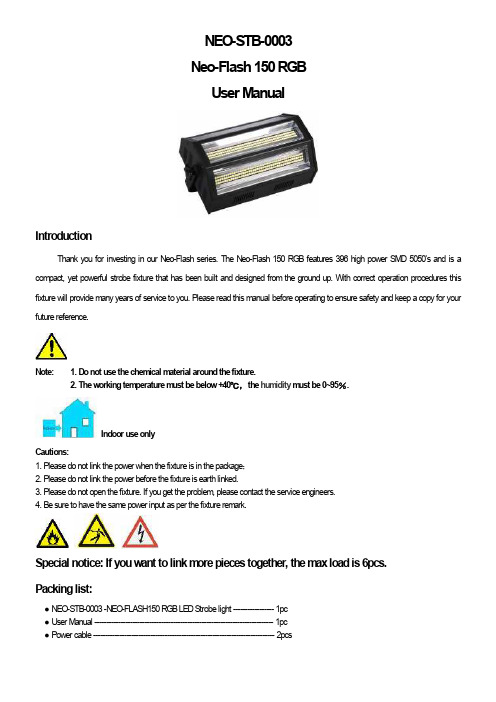
NEO-STB-0003Neo-Flash 150 RGBUser ManualIntroductionThank you for investing in our Neo-Flash series. The Neo-Flash 150 RGB features 396 high power SMD 5050’s and is a compact, yet powerful strobe fixture that has been built and designed from the ground up. With correct operation procedures this fixture will provide many years of service to you. Please read this manual before operating to ensure safety and keep a copy for your future reference.Note: 1. Do not use the chemical material around the fixture.2. The working temperature must be below +40℃,the humidity must be 0~95%.Indoor use onlyCautions:1. Please do not link the power when the fixture is in the package;2. Please do not link the power before the fixture is earth linked.3. Please do not open the fixture. If you get the problem, please contact the service engineers.4. Be sure to have the same power input as per the fixture remark.Special notice: If you want to link more pieces together, the max load is 6pcs.Packing list:● NEO-STB-0003-NEO-FLASH150 RGB LED Strobe light-----------------1pc● User Manual---------------------------------------------------------------------------1pc● Power cable----------------------------------------------------------------------------2pcsTechnical Specifications:1.Voltage:90-264VAC 50Hz/60Hz2.Fuse:220V 2A/250V or120V 5A/125V3.Peak Power:145W4.Light Source:396x5050 RGB LED5.Working Mode:DMX、Auto、Sound、Master/Slave6.DMX Channels:13CHs7.Dimension:L365xW209xH210mm8.Weight:5.5 KGOperation Manual1、Panel description:1.Power Input2.Power Output3.MIC4.DIP SWITCH5.3P DMX Input6.5P DMX Input7.3P DMX Output8.5P DMX Output9、FUSE10.SAFETYCABLE2、As per the above photo,switch1is“ON”,and the rest are at“OFF”.Set switch1”~“switch10”as“#1”~“#10”,When the switch is “ON”, we read it as“1”,when the switch is“OFF”, we read it as“0”. When the“ON”or“OFF”are no use, we read it as“X”(When you switch the switch which is read it as X, there is no function.). If there is no remark, you can also read it as“0”。
ofc帮助资料
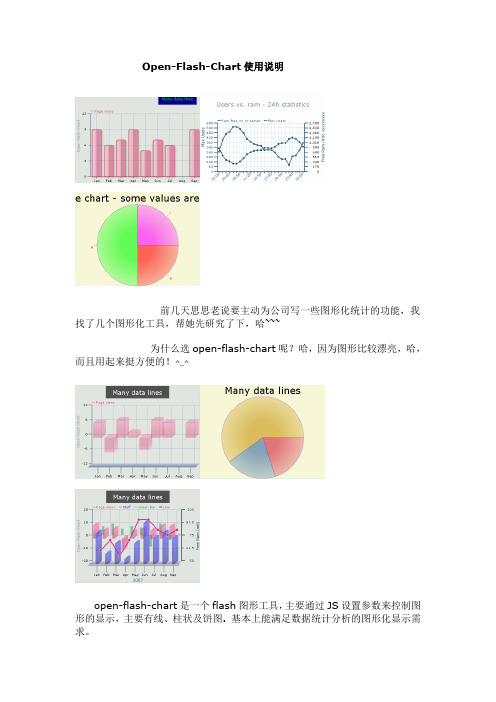
Open-Flash-Chart使用说明前几天思思老说要主动为公司写一些图形化统计的功能,我找了几个图形化工具,帮她先研究了下,哈~~~为什么选open-flash-chart呢?哈,因为图形比较漂亮,哈,而且用起来挺方便的!^_^open-flash-chart是一个flash图形工具,主要通过JS设置参数来控制图形的显示,主要有线、柱状及饼图. 基本上能满足数据统计分析的图形化显示需求。
优点:使用方便,一般浏览器都能支持使用,提供回调功能支持更高级的处理。
目录下JS是与swf交互的核心脚本,不过有些地方好像写得不大好,有些语法不遵从W3C标准,呵~~一点见解:个人觉得用ajax请求数据,然后在前台控制图形的显示比较好。
比起在后台直接生成HTML代码返回直接打印的好,怎么说网络传输量可以减少些,而且用前者还可能做成类似单例的加载方式。
所以个有觉得没必要用PHP 或JAVA等其它语言从后台返回的HTML的方式(虽然OPEN-FLASH-CHART 已经有支持的类),个人还是喜欢在前台用JS的方式来控制图形,哈哈~~~百变不离其宗!下面是我整理的一些文档,可以参考,应该是比较齐的了:===============================2010.11.17=================================JOFC2 - Java API for Open Flash Chart Version-22010-09-11 00:26最近在用Open Flash Chart做报表,在网上查了很多关于Open Flash Chart2的资料,可惜的是中文资料很少。
现在自己开始开发基于Struts 1的Open Flash Chart开发,准备在我的空间里把JOFC2中针对的各个图表的用法写出来,给大家做个借鉴首先下载JOFC2的jar包,可以在/p/jofc2/下载到,另外还有一个开发人员针对jofc2自己的扩展可以在/job/JOFC2/下载到,以下代码我用到的包是前者。
OpenFlashChart
line.DotSize =5;
chart.AddElement(line);
chart.AddElement(bar);
Response.Clear();
Response.CacheControl ="no-cache";
Response.Write(chart.ToPrettyString());
"9.0.0",//flash播放器版本
"expressInstall.swf",
{"data-file":"datafile/test.aspx"}//數據文件路徑---这里是你要显示的数据(后面详讲)
);
</script>
PS:Default后台没代码
然后新建个文件夹“datafile”,在改夹下新建Web页“test.aspx”.
test.aspx后台代码为:
C# code
protectedvoidPage_Load(objectsender, EventArgs e)
{
OpenFlashChart.OpenFlashChart chart =newOpenFlashChart.OpenFlashChart();
Random random =newRandom();
这个例子实现的效果是—&g做法:先引入OpenFlashChart.dll,将open-flash-chart.swf,swfobject.js加入专案.
Default页面前台代码:
C# code
<title>OpenFlashChart</title>
mt developer2 使用手册
mt developer2 使用手册MT Developer 2是一款功能强大的集成开发环境(IDE),适用于各种编程语言和开发任务。
以下是MT Developer 2的使用手册,以便您更好地了解和使用这款工具。
一、简介MT Developer 2是一款功能强大的集成开发环境(IDE),适用于各种编程语言和开发任务。
它提供了丰富的代码编辑、调试、测试和部署工具,使开发人员能够更高效地编写、调试和发布软件应用程序。
二、界面布局MT Developer 2的界面布局非常直观,主要由菜单栏、工具栏、编辑器、输出窗口和状态栏等部分组成。
编辑器是主要的工作区域,用于编写和编辑代码。
输出窗口显示编译和运行结果以及错误和警告信息。
状态栏显示当前编辑器的状态和信息。
三、基本操作1.新建项目:点击菜单栏中的“文件”选项,选择“新建”->“项目”,然后选择要创建的项目类型和配置。
2.打开项目:点击菜单栏中的“文件”选项,选择“打开”->“项目”,然后选择要打开的项目文件。
3.保存项目:点击菜单栏中的“文件”选项,选择“保存”或“另存为”,将项目文件保存到磁盘上。
4.编译项目:点击菜单栏中的“构建”选项,选择“编译项目”,将源代码编译成可执行文件或库文件。
5.运行项目:点击菜单栏中的“运行”选项,选择“开始调试”或“运行”,执行编译后的程序。
6.调试项目:点击菜单栏中的“调试”选项,使用调试工具对程序进行单步执行、断点设置和变量查看等操作。
7.测试项目:点击菜单栏中的“测试”选项,使用测试框架对程序进行单元测试、集成测试和性能测试等操作。
8.部署项目:点击菜单栏中的“部署”选项,将编译后的程序打包并部署到目标环境中。
四、高级功能1.代码自动完成:MT Developer 2提供了代码自动完成功能,可以根据输入的字符自动补全代码,提高编写效率。
2.代码提示:当光标放在变量、函数或类上时,MT Developer 2会显示有关该元素的信息和用法提示。
Abilix Chart 使用手册说明书
Abilix Chart使用手册前言 (1)第1章安装与第一次使用 (2)1.1安装过程 (2)1.2菜单栏与工具栏 (2)1.2.1工具栏 (2)1.2.2快捷按键 (3)1.3连接 (4)1.3.1获取机器人热点 (4)1.3.2连接热点 (5)1.3.3连接机器人 (5)1.4程序下载 (5)第2章程序编辑界面 (6)2.1流程图界面介绍 (6)2.2流程图各模块名称、功能 (7)2.2.1电机模块库 (7)2.2.2扬声器模块库 (13)2.2.3LED灯模块库 (14)2.2.4传感器模块库 (14)2.2.5控制语句模块库 (16)2.2.6运算模块库 (18)2.2.7变量模块库 (19)2.3编写流程图 (23)2.3.1如何删除一个模块 (25)2.3.2如何编写程序 (25)2.3.3如何使用子程序 (28)2.3.4如何使用变量 (30)2.4程序实例 (31)2.4.1实例2-1环境采集方法 (31)2.4.2实例2-2小车巡线程序 (31)2.4.3实例2-3判断循环 (32)前言Abilix Chart软件用于流程图式图形化编程,电脑版软件可以运行在Windows7及以上版本操作系统上,为了确保您编写的程序下载到机器人控制器中,您的电脑需配备wifi 功能。
本书适用于软件版本1.2.12.0,之前的软件版本操作与功能模块可能有略微差别,但使用操作方式一样。
书中介绍了电脑版Abilix Chart软件的使用方法,提供了一些简单示例能帮助您更好地学习,以提升产品套件的使用效率。
在您拿到我们产品后,请先浏览一遍该书。
祝您使用愉快!第1章安装与第一次使用Abilix Chart中文全称为能力风暴流程图编程软件,支持标准流程图式图形化编程。
具有初学者上手快,高级用户用其开发复杂算法空间广等特点。
1.1安装过程您可以访问能力风暴官网,在“技术服务/资料下载”中下载安装包,下载后解压文件,然后请以管理员权限运行安装程序,根据提示完成安装。
mt developer2编程实例

mt developer2编程实例MT Developer2编程实例MT Developer2是一款功能强大的编程工具,它为开发人员提供了丰富的功能和工具,帮助他们更高效地进行编程工作。
在本文中,我们将介绍一些MT Developer2的编程实例,展示它的各种用途和功能。
MT Developer2可以用于编写PLC程序。
PLC(可编程逻辑控制器)是工业自动化领域中常用的控制设备,它通过编写程序来控制机器和设备的运行。
MT Developer2提供了一个直观的编程界面,使开发人员可以轻松地创建、编辑和调试PLC程序。
通过MT Developer2,开发人员可以使用各种编程语言,如LD(梯形图)、FBD(功能块图)和ST(结构化文本),来编写PLC程序。
MT Developer2还支持使用C++、C#等编程语言进行高级编程。
开发人员可以通过MT Developer2创建和管理C++、C#项目,并使用丰富的工具和功能进行开发。
MT Developer2提供了强大的代码编辑器,语法高亮显示、自动完成和代码调试等功能,大大提高了开发效率。
此外,MT Developer2还集成了版本控制工具,方便开发人员进行代码管理和团队协作。
除了PLC编程和高级编程,MT Developer2还可以用于编写人机界面(HMI)应用程序。
HMI应用程序是通过触摸屏、按钮等交互设备与机器和设备进行交互的界面。
MT Developer2提供了一个直观的图形化界面编辑器,开发人员可以轻松地创建和设计HMI界面。
MT Developer2还支持丰富的控件库和动画效果,使开发人员可以创建出美观、易用的HMI界面。
MT Developer2还支持与其他系统和设备进行通信。
开发人员可以使用MT Developer2创建和管理通信协议,以实现与其他系统和设备的数据交换。
MT Developer2支持多种通信方式,如串口通信、以太网通信和无线通信等,满足不同应用场景的需求。
flashas2.0基本脚本命令
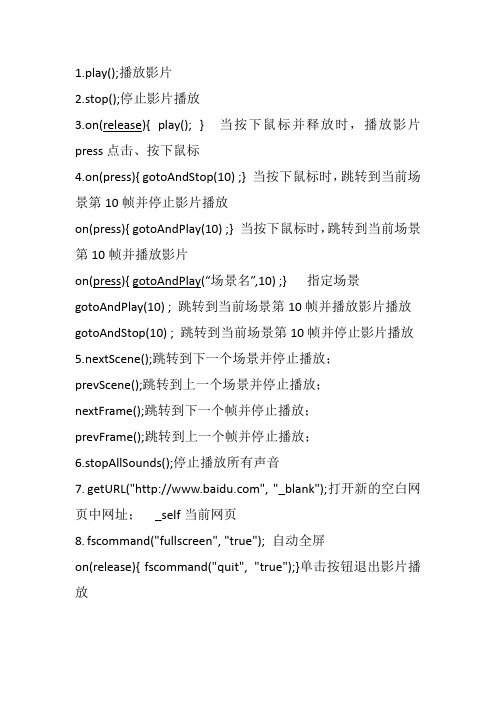
1.play();播放影片2.stop();停止影片播放3.on(release){ play(); } 当按下鼠标并释放时,播放影片press点击、按下鼠标4.on(press){ gotoAndStop(10) ;} 当按下鼠标时,跳转到当前场景第10帧并停止影片播放on(press){ gotoAndPlay(10) ;} 当按下鼠标时,跳转到当前场景第10帧并播放影片on(press){ gotoAndPlay(“场景名”,10) ;} 指定场景gotoAndPlay(10) ; 跳转到当前场景第10帧并播放影片播放gotoAndStop(10) ; 跳转到当前场景第10帧并停止影片播放5.nextScene();跳转到下一个场景并停止播放;prevScene();跳转到上一个场景并停止播放;nextFrame();跳转到下一个帧并停止播放;prevFrame();跳转到上一个帧并停止播放;6.stopAllSounds();停止播放所有声音7.getURL("", "_blank");打开新的空白网页中网址;_self当前网页8.fscommand("fullscreen", "true"); 自动全屏on(release){fscommand("quit", "true");}单击按钮退出影片播放Ctrl+Enter测试影片;F9打开动作面板;F8打开转换元件对话框;F7插入空白关键帧F6插入关键帧;F5插入普通帧;元件类型:图形元件、按钮元件、影片剪辑元件文本框类型:静态文本、动态文本、输入文本按钮包括4帧:弹起、鼠标经过、按下、点击。
Integrated Data Viewer和OpenFlashChart在公共气象服务系统中的应用

但是 ,用户较难从服务产 品的网站窗 V中 ,随时随地发 1
查询某一 时间尺度上的某一时间段 的气象要素情况 。比
1 4
信息系统工程 I 0 1 . 1. 2 2 70
S S P AC I E 系统 实践 Y R TC
>
如某2 小时降水情况 ,某个月气温变化情况和某年气压 4
及 时地 了解需要 了解的气象信息 ,这将对 于今后 的公共
气象服务工作有着显著 的意义。
二 、系统 简介
本 系统是 基 于B S 构 ,J E 框 架 的W E GI 系 \架 2E B S
统 ,用户能使用I 等浏览器访 问本 系统 ,无需安装任何 E 插件 。用户使用方便 ,能及时分析前一小时的各气象要 素G S ,也能查询历史上某一时 间,某一空 间和某一 I图
变化情况等等 。
醺疆} Bl 重癀 i l删 云_ 。 。目 。R
区域 ,西南 区域和中南 区域 );第 三级—— 省 ( 上去六
个 区域的所有所辖省 );第 四级——地级市 ( 四川省所
辖下的所有二十一个地级市 )。
蟊 盈 椭 8 ≈ ^ # 馘 0
・ t 国日 ¨ {
人教版高中英语必修五unit3-Life-in-the-future-(1)

S: I think the problems of pollution and shortage of resources will still be there, and will even get worse.
S: I don’t think so. Now scientists all over the world are trying their best to develop new resources that human beings can make use of, such as solar energy. In my opinion, the problems can be solved one by one.
T: We all know that as our society develops, we have got much benefit. But at the same time, we have to face lots of problems. Can you find out what kind of problems human beings are facing
Give the Ss 1 or 2 minutes to think and they can discuss with their partners. Then check the answers.
After the Ss read the paragraphs, ask them the following questions.
Flash as2.0代码大全(最全合集)
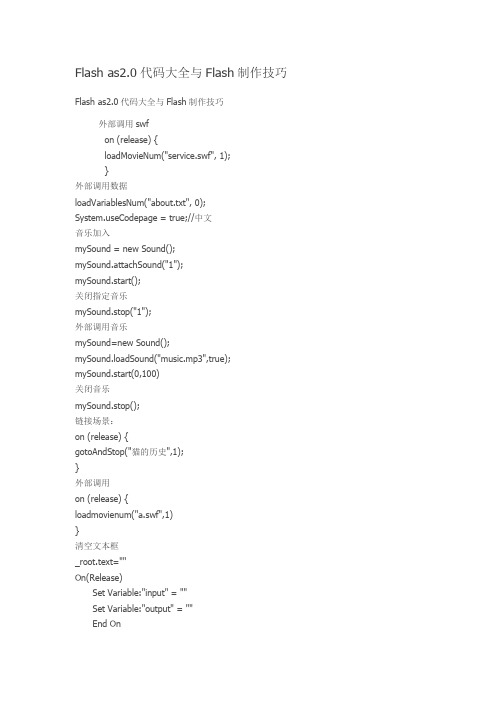
Flash as2.0代码大全与Flash制作技巧Flash as2.0代码大全与Flash制作技巧外部调用swfon (release) {loadMovieNum("service.swf", 1);}外部调用数据loadVariablesNum("about.txt", 0);eCodepage = true;//中文音乐加入mySound = new Sound();mySound.attachSound("1");mySound.start();关闭指定音乐mySound.stop("1");外部调用音乐mySound=new Sound();mySound.loadSound("music.mp3",true); mySound.start(0,100)关闭音乐mySound.stop();链接场景:on (release) {gotoAndStop("猫的历史",1);}外部调用on (release) {loadmovienum("a.swf",1)}清空文本框_root.text=""On(Release)Set Variable:"input" = ""Set Variable:"output" = ""End On轻松实现Flash的全屏播放许多人都看过这样的效果:把光盘放入光驱后,光盘自动运行,接着便是一段Flash制作的开场动画,动画是全屏播放的,且右键点击无效,动画播放结束后,出现“关闭”按钮,单击该按钮后,全屏动画关闭。
其实上面提到的全屏播放以及取消右键菜单等效果都是靠Fscommand指令在发挥作用。
Fscommand指令主要是用来控制Flash影片播放器的,但也可以用来打开其它的应用程序。
Open Flash Chart图表的JSON格式基本属性详解

数据文件必须是JSON格式.JSON对象的基本格式:{}把所有对象都编写在{}里面.让它看起来像下面JSON 数据格式:{"title":{"text": "Many data lines","style": "{font-size: 20px; color:#0000ff; font-family: Verdana; text-align: center;}"}}Title(可选)所有属性参数都可选的.text:string , 标题style:string , CSS样式例子:{"title":{"text": " data line","style": "{font-size:20px; color:#000000; font-family:Verdana; text-align:center;}"}}Y_Legend(可选)所有属性参数都是可选.text:string, Y轴标题style:string, CSS样式例子:{"y_legend":{"text":" Chart","style":"{color:#736AEF; font-size:12px;}"}}X Axis(可选)这个对象的属性是可选的,如果没有指定属性将使用默认的X轴属性.所有可选属性:stroke: number, X轴线的宽度tick-height: number, X轴刻度线高度值colour: string, 线的颜色offset: boolean, 柱状图表中X轴的偏移最小值是0grid-color:string, 表格线颜色3d: boolean, 设置3Dsteps: 取决于tick-height属性labels: array of strings, 每个X点的标签例子:{"x_axis":{"stroke": 1,"tick-height": 10,"colour": "#d000d0","grid-colour": "#00ff00","labels": ["January,"February","March","April","May","June","July","Aug ust","Spetember"]}}Y Axis(可选)应该属性和X Axis差不多(因为官方没给出,不知道是不是编漏了)min:integer, Y轴最小值max: integer, Y轴最大值tick-length:number, Y轴刻度线长度例子:{"y_axis":{"stroke": 4,"tick-length": 3,"colour": "#d000d0","grid-colour":"#00ff00","offset": 0,"max": 20}}Elements 元素元素的属性是一个数组的通用对象这些通用对象图表类型为(line,bar,scatter等等){"elements":[{"type": "bar","alpha": 0.5,"colour": "#9933CC","text": "Page views","font-size": 10,"values" : [9,6,7,9,5,7,6,9,7]},{"type": "bar","alpha": 0.5,"colour": "#CC9933","text": "Page views 2","font-size": 10,"values" : [9,6,7,9,5,7,6,9,7]}]}Elements.bar柱状图表必须包含在元素数组type: string 必须是’bar’alpha: number, 0(透明)和1(不透明)之间的值colour:string, CSS颜色text:string, 图例说明文本font-size: number, 设置图例文本字体大小values: array of number, 柱子的高底例子:{"elements":[{"type": "bar","alpha": 0.5,"colour": "#9933CC","text": "Page views","font-size": 10,"values" : [9,6,7,9,5,7,6,9,7]}]}Elements.pie圆饼图表,必须包含在元素数据组里type:string, 必须是’pie’start-angle: number, 第一个切片角度colours:array of string, CSS颜色alpha:number, 0(透明)和1(不透明)之间的值stroke: number, 切片外边线宽animate: boolean, 切片图表动画values:array of objects, 每个切片值或者切片对象与值例子:{"elements":[{"type": "pie","start-angle": 180,"colours": ["#d01f3c","#356aa0","#C79810","#73880A","#D15600","#6BBA70"], "alpha": 0.6,"stroke": 2,"animate": 1,"values" : [0,2,{"value":0,"text":"zero"},2,6]}]}Elements.hbar横状图表values:array of objects 每个值含有"right"和"left"可选值例子:{"elements":[{"type": "hbar","colour": "#9933CC","text": "Page views","font-size": 10,"values" : [{"right":10},{"right":15},{"left":13,"right":17}]}]}Elements.line_dot线形图表values:array of number 一个数组集合例子:{"elements":[{"type": "line_dot","colour": "#736AFF","text": "Avg. wave height (cm)","font-size": 10,"width": 2,"dot-size": 4,"values" : [1.5,1.69,1.88,2.06,2.21,2.34,null,2.35,2.23,2.08]}]}Elements.line*注意:这是一个简单定义3种不同线形类型的图表(不明白的属性,请向上温习一下)例子:{"title":{"text":"Many data lines","style":"{font-size: 30px;}"},"y_legend":{"text":"Open Flash Chart","style":"{font-size: 12px; color:#736AFF;}" },"elements":[{"type": "line","colour": "#9933CC","text": "Page views","width": 2,"font-size": 10,"dot-size": 6,"values" : [15,18,19,14,17,18,15,18,17] },{"type": "line_dot","colour": "#CC3399","width": 2,"text": "Downloads","font-size": 10,"dot-size": 5,"values" : [10,12,14,9,12,13,10,13,12] },{"type": "line_hollow","colour": "#80a033","width": 2,"text": "Bounces","font-size": 10,"dot-size": 6,"values" : [5,7,9,7,4,6,1,2,5]}],"y_axis":{"max": 20},"x_axis":{"steps": 2,"labels": ["January","February","March","April","May","June","July","August","September"]}}例子:这是一个简单的横状图表的JSON对象内容(不明白的属性请向上温习){"title":{"text":"HBar Map X values","style":"{font-size: 20px; font-family: Verdana; text-align: center;}"},"elements":[{"type": "hbar","colour": "#9933CC","text": "Page views","font-size": 10,"values" : [{"right":10},{"right":15},{"left":13,"right":17}]}],"x_axis":{"min": 0,"max": 20,"offset": 0,"labels": ["a","b","c","d","e","f","g","h","i","j","k","l","m","n","o","p","q","r","s","t","u","v"] },"y_axis":{"stroke": 14,"tick-length": 30,"colour": "#d09090","grid-colour": "#00ff00","offset": 1,"labels": ["","",""]}}。
PLC-5可编程控制器闪存工具用户指南说明书

User ManualPLC-5 Programmable ControllerFlash Tool(Catalog Number 1785-L11B, -L20B, -L20C, -L20C15,-L20E, -L26B, -L30B, -L40B, -L40C, -L40C15, -L40E, -L40L,-L46B, -L46C15, -L60B, -L60C, -L60C15, -L60L, -L80B,-L80C, -L80C15, -L80E, -L86B)Use This Manual e this manual if you are responsible for performing a flashfirmware upgrade to a flash-based PLC-5® processor.This Manual Describes...This manual describes how to use the PLC-5 programmablecontroller flash tool to upgrade these products:•series E and later Enhanced PLC-5 processors•series E and later Ethernet® PLC-5 processors•series C and later ControlNet™ PLC-5 processorsThis manual also describes what to do if the flash upgrade does notcomplete successfully.The following publications contain additional information aboutAllen-Bradley PLC-5 processor products. To obtain copies, contactyour local Allen-Bradley office or distributor.For more information about:Read this publication:Publication number:Enhanced PLC-5 processors Enhanced and Ethernet PLC-5 ProgrammableControllers User Manual 1785-6.5.12Ethernet PLC-5 processorsControlNet 1.0 or 1.25 PLC-5 processors ControlNet PLC-5 Programmable ControllersUser Manual1785-6.5.14ControlNet 1.5 PLC-5 processors ControlNet PLC-5 Programmable ControllersPhase 1.5 User Manual1785-6.5.22For A-B Internal Use Only Publication 1785-6.2 March 19982Publication 1785-6.2 March 1998For A-B Internal Use OnlyBefore You Begin...Gathering What You Need Gather the following items before you begin using the flash upgrade.(Items marked with an asterisk (*) are included in the flash tool package you ordered.)•flash firmware upgrade tool disk*•PLC-5 processor whose firmware you want to update (with chassis and power supply)•personal computer with PLC-5 programming software installed •shielded serial cable (1784-CP10 or 1784-CP11)•this manual*•firmware revision label*•plug PROM(s) (if you require a plug PROM firmware update)*Running the Software You will copy the flash files to your hard ing the Flash ToolTo successfully use the flash tool, you need to complete seven steps:1.Prepare the PLC-5 processor.2.Install the flash tool.3.Perform the firmware upgrade.4.Apply the firmware revision label.5.Update the communication plug firmware, if necessary.6.Reconnect the PLC-5 processor.7.Uninstall the flash tool.!ATTENTION:You must install and run the PLC-5 flash tool on a computer booted up in DOS 6.22 or later. Do not use a DOS window running under Windows 95 or Windows NT .!ATTENTION:Pay strict attention to the flash tool procedure. Failure to follow this procedure exactly may result in an inoperable processor.3For A-B Internal Use Only Publication 1785-6.2 March 1998Step 1 - Preparing the PLC-5 Processor1.Save processor memory to your hard disk or to an EEPROM using yourPLC-5 programming software.2.Remove the processor battery cover and disconnect the battery. This resetsthe serial port to its default configuration so that the PLC-5 processor and theflash tool can communicate.3.Turn off processor power.4.Disconnect all cables (serial, DH+™, ControlNet, Ethernet, etc.) fromthe processor.5.Disconnect the coprocessor or PLC-5 Ethernet Interface module, if oneis connected.6.Turn the processor keyswitch to Program mode.7.Turn on processor power.8.Attach the shielded serial cable (1784-CP10 or 1784-CP11) betweenchannel 0 on the PLC-5 processor and the serial port on the computer.!ATTENTION:You must save the processor memoryto your hard disk or to an EEPROM. If you do not, thePLC-5 user memory will be lost because the flash procedure erases processor memory.4Publication 1785-6.2 March 1998For A-B Internal Use OnlyStep 2 - Installing the Flash Tool1.Boot the computer in DOS 6.22 or later. Do not use a DOS window running under Windows 95 or Windows NT . Verify that there is a DOS prompt on the screen.2.Create the following directory on the programming terminal’s hard drive by typing:md c:\flash3.Place the flash firmware upgrade tool diskette in the a: drive of the programming terminal. Copy the files from this diskette to the programming terminal hard drive by typing:4.On the programming terminal, change to the following directory containing the firmware files by typing:cd c:\flashStep 3 - Performing the Flash Upgrade Follow these steps to upgrade the processor firmware.1.Enter this command:The flash upgrade catalog number selection screen e the arrow keys to move the cursor to the catalog number of the flash upgrade you want to download to the processor and!ATTENTION:Make sure you install this application on the hard drive. Do not attempt to run it from the floppy disk; it will not work.!ATTENTION:Do not interrupt the flash download process by disturbing the processor or computer. Failure to do so may result in an inoperable processor.5For A-B Internal Use Only Publication 1785-6.2 March 19983.Select the appropriate script file by moving the cursor to the file name andLwwx_yz.ini4.On your computer, select the communication port (COM1 or COM2) by5.Make sure you have established a connection. This could take about 60seconds.Where:Represents:ww 11, 20, 26, 30, 40, 46, 60, 80, or 86depending on what flash upgrade you aretrying to download to the processor.x the type of flash upgrade to download:• B (for Enhanced)•L (for Extended-local I/O)• C (for ControlNet 1.0 or 1.25)• E (for Ethernet)•C15 (for ControlNet 1.5)y the series of the flash upgrade to download(see the disk label)z the revision of the flash upgrade to download(see the disk label)If you:The screen displays:established a connection information about the target processorThe processor’s PROC LED flashesred/green.did not establish a connection an error messageSee the following table.6Publication 1785-6.2 March 1998For A-B Internal Use OnlyIf you received an error:When the flash download begins:•the processor’s COMM LED blinks green •the processor’s PROC LED blinks red/green • a percent complete status (0 - 100) appears in the middle of the screen that indicates how much of the flash update is complete 6.Wait for the flash update to complete. The upgrade should take about 5 minutes to complete.When the download is complete the status bar will be at 100% and the screen will display this message: Processors Flash Update Completed. Press Any Key to Continue.If you received this error:Do this:Processor not connected. a.Make sure the keyswitch is in Program mode.b.Make sure the processor power is on.c.Check the serial cable.d.Verify the COM port being used by the computer.e.Return to item 3, step 3 on page 5 and repeat this section.Target processor does not match script file. a.Check the name of the script file.b.Make sure you are connected to the correct type and series of processor.c.Return to item 3, step 3 on page 5 and repeat this section.Firmware series stated in script file does not match PLC. a.Make sure you are connected to the correct type and series of processor.b.Return to item 3, step 3 on page 5 and repeat this section.No script files found. a.Make sure you copied all files from the firmware upgrade diskette to the c:\flash hard drive directory as described in item 2, step 2 on page 4.b.Make sure you selected the catalog number of the flash upgrade you want to download to the processor on the flash upgrade catalog number selection screen. Do not select the catalog number of the processor you currently have.c.Return to item 3, step 3 on page 5 and repeat this section.7For A-B Internal Use Only Publication 1785-6.2 March 19987.When the flash update is complete, cycle power to the processor.8.Disconnect the serial cable that you used to perform the flash upgrade.Step 4 - Applying the Firmware Revision LabelImportant: It is important to apply this label to your processor to ensure youreceive the correct version back if you send it in for repair.1.Turn off power to the processor.2.Remove the processor from the chassis.3.Apply the new firmware revision label in the space indicated by dotted lineson the product identification label. The following figure shows where toplace the label on a series E PLC-5 processors and on older PLC-5 processors.If the processor powers up with the:Do this:PROC LED solid red and CH1A DH+ LEDblinking green (normally)continue with the item 8, step 3 that follows this table.PROC LED flashing red/green(flash mode)Return to item 3, step 3 on page 5 and repeat this section.If you have repeated this item more than 3 times, send the processor toAllen-Bradley repair services.PROC LED solid red and CH1A DH+LED off8Publication 1785-6.2 March 1998For A-B Internal Use OnlyStep 5 - Updating the Communication Plug Firmware If you received communication plug PROM(s) with your order, you need to update your PROM(s) to complete the flash upgrade.1.Make sure you have already removed the battery cover and disconnected the battery and disconnected any cables attached to the processor.!ATTENTION:Printed circuit board components can be damaged during routine handling and installation. Follow these precautions to reduce static electricity discharges before you upgrade the processor firmware.•Handle the printed circuit board by the case or carrier without touching the pins or the edge connector.•Use a static-free workstation.•Connect the static-free workstation to ground through a minimum 200K ohm resistance.•Wear a grounded, conductive wrist strap with a minimum 200K ohm resistance.•Ground all tools before you begin to upgrade the firmware.•Control the relative humidity of the installation area. Ideal conditions are 40-60% relative humidity.9For A-B Internal Use Only Publication 1785-6.2 March 19982.Do one of the following:3.Remove the PROM, observing the orientation of the PROM notch. Replacethe plug PROM, checking to see that the PROM notch is correctly oriented.4.Reassemble and power up the processor.Step 6 - Reconnecting the PLC-5 Processor1.Reconnect the battery, any cables, and coprocessor or PLC-5 EthernetInterface module.2.Reload your program and make certain that it runs properly.(If you have any questions, call technical support at 440-646-6800.)If you have a:Do this:PLC-5/11, or -5/20 type processor a.Remove the four screws that hold the right sideplastic cover.b.Remove the cover.c.Remove the two large screws and washers located in the middle of the exposed circuit board.d.Separate the two processor boards by pulling theexposed circuit board at the backplane edge connectoraway from the metal cover as you would open a book.Notice the direction in which the battery cable is wrappedaround the nearby standoff.e.Disconnect the wires leading from the battery to thestake pins on the exposed circuit board.f.Disconnect the wires leading from the keyswitch to thestake pins on the exposed circuit board.See the figure at the left for the location of thecommunication plug PROM.Series D and earlier PLC-5/40C, -5/60C, or -5/80C processor Remove the phillips head screw near the channel 1B LED and gently remove the channel 1 communication plug. Beaware that the memory grounding clip may move or drop offfrom the cover mounting tab.41024。
flashas2简易教程第1篇

flashas2简易教程第1篇上一篇教程出来以后,很多网友留言,问我为什么不直接讲as3,而是很过时的唠叨as2,这里首先澄清一下,as3 是一个好东西,本博客并非要视as3为无物,在一个3.0的时代推崇2.0,而是2.0简易教程这个系列,将主要以2.0 为主。
关于3.0的应用,我们也会在其它的一些系列或者相关的文章中提到。
至于本教程面对的对象,其实我在第0篇的唠叨里已经说得很清楚了,就是针对那些已经使用过Flash很多年,对fl ash产生了深厚的感情,甚至就是吃flash这碗饭的同志们,随着flash越来越向技术平台转型,很多人可能觉得跟不上,觉得掉队了,甚至对自己flash的能力产生了怀疑,所以,这系列其实就是想说,flash as并没有那么难,障碍在自己的心里。
只要你愿意去做,你会发现你完全跟得上flash大潮的发展。
所以,简单点说,这个教程不是面对程序员的,恰恰就是面对设计师和动画师的。
这个回答可能很多人不喜欢,并且要问我,为何在一个程序员云集的博客发给设计师的东西。
我要说首先互联网是开放的,其次,像博客园这样执著于专业领域的网站实在不多。
好的,废话结束,下面开始讲课。
用过flash的人都知道,flash中,有一个很重要的概念:影片剪辑(一般,我们简称为mc),它几乎是flash一切动画的基础。
Flash 这东西,一言以蔽之,就是如何让很多影片剪辑在界面里按你想象的运动起来。
滑动、变大、变小、旋转、显示、消失……就是这些最基础的运动,构成了flash,甚至是说任何图形界面的软件的最基本的交互和展现形式。
在关键祯时代,我们用关键祯来进行这些最基本的事情,在as时代,我们用as来做,如此而已。
在早期的flash版本里边,我们都知道,按钮司交互,影片剪辑管运动,所以,以前大家做一个flash,思路很简单,我需要一个东西有交互行为,说白了就是我点点点,他动动动,就直接做个按钮,放到库里,再拖到场景里用;我需要一个东西动起来,直接建一个影片建立,放到场景里,再拖到场景里用。
新通用大学英语综合教程2(第2册)U4

Part 4 Parking Lot Safety
3. In a parking lot, while a driver darts forward to be the first to claim a spot, __. a. he may lose his key c. he may hit the others’ car b. he forgets his own car d. he gets the idea
a. stop sign b. a car c. a piano
6. After the accident, my vehicle smells like _______.
a. onions b. bananas c. fish
7. The _______ is the only car part that still looks good.
8 “When I got out to look at the damage, a piano fell on the van.” _____
Exercise B
B. Complete each statement with the correct answer.
1. Paul was driving a ______ when he had an accident. a. sedan b. van c. bus
F □ □ □ □ □
5. According to the speaker, you should never use your cell phone while driving.
Part 4 Parking Lot Safety
Choose the best answer according to what you hear from the passage.
openrct2 用法

openrct2 用法
OpenRCT2是一个重新实施过山车大亨2(RCT2)的开源软件,具有许多新功能和改进。
以下是OpenRCT2的一些用法:
创建和管理公园:在OpenRCT2中,您可以创建自己的公园,并管理公园的各种方面,如地形、设施、门票价格等。
建造过山车和设施:OpenRCT2提供了许多工具和选项,让您能够建造自己的过山车和设施,并根据需要进行自定义。
管理公园财务:OpenRCT2允许您跟踪公园的财务状况,包括收入、支出和利润。
您可以使用这些信息来制定更好的商业决策。
调整游戏设置:OpenRCT2提供了许多游戏设置选项,让您能够根据自己的喜好来调整游戏的行为和难度。
与其他玩家互动:OpenRCT2支持多人游戏,您可以在游戏中与其他玩家互动,分享公园和设施设计,以及一起建设和管理公园。
总的来说,OpenRCT2是一个功能强大的游戏,您可以使用它来建造和管理自己的虚拟公园。
请注意,游戏中的一些功能需要您具备一定的游戏技巧和知识才能完全掌握。
15款经典图表软件推荐

15款经典图表软件推荐在这篇文章中,我将列出图表,图形和数据可视化的最佳软件,从创建基本的2D图表到产生复杂的数据集的数据可视化,这些PHP,Javascript、Flash的图表,对于任何一个严谨的开发者都是必须一览的。
1.Fusion ChartsFusionCharts v3帮助创建Web或企业应用的动画/交互的图表。
企业级图表组件支持PCs, Macs, iPads, iPhones,以及大量其他的手机设备。
2.MaanibXML/SWF图表是个简单、强大的工具,支持XML数据创建吸引人的图表。
XML提供灵活的数据生成,而Flash提供最好的图像质量。
3.JP GraphJpGraph是面向对象的PHP图形创建库。
该库完全PHP所写,可用作任何PHP脚本。
4.Open Flash ChartOpen Flash Chart,是个开源软件,用来生成Flash的图表的组件。
5. Free PHP Graph/ChartFusionCharts是完全免费和开源的Flash图表组件。
可创建动画、交互的图表web 应用、桌面应用等。
FusionCharts支持PHP,,JSP, ColdFusion,Python,RoR,简单的HTML页面,甚至是PowerPoint演示。
6. J poweredPHP图形脚本可非常简单的嵌入动态生成图形和图表到PHP应用或HTML页面中。
该图形软件使用简便,可几分钟内制作专业水准的实时图形。
7.jQuery Visualize PluginjQuery Visualize Plugin是一个根据HTML表格的内容生成图表的jQuery插件。
8.HighchartsHighcharts是纯粹的JavaScript写的图表库,提供简单的方式添加交互图表到站点或web应用,支持各种图表类型。
9.FlotFlot for jQuery是一个纯Javascript绘图库。
浅析Open Flash Chart的使用

‘ 1
£ u 0 《鼍 0 嚣
电脑编程技巧与维护
0 0
∞
曲
Un ar e Ch t
jvsr t l t(7) , v s i : et(9) ,v sf t l t aaci :e j ac p a r j ac p:e pa r a r tl a i ar (5),v sr tlr jvsr t l t( jv sr t j aci : et( ), aci :e ), aci : a pa 7 a pa r 6 a p ae , jvsf t l ( , l t( ), ac p: e )& r 9 a i ar 9 t
p i i a d ce r y t e u a e o p n F a h C a ,ma y tp s o h rs c n b e e ae i e ln h r i h r,b r l t n la .B h s g f O e ls h r c t n y e fc a t a e g n r td l i e c a ,p e c a t a k t c a , a a h r, r a c a t it g ae h rsa d S n I a s a e s t n n t e a p cs o n ie f n oo , a k h r r d rc a t a e h r, n e r td c a n O o . t l c n b et g o h s e t f o ts , o tc lr b c — t t o i f z g o n n S sy ewh c o l ep u e h o e p e t f y h w t e d t. r u d a d CS tl i h c u d h l s rc o s ln y o st s o h aa wa o Ke r s C a e h oo y: e p l ai n y wo d : h r t c n lg W b a p i t t c o
check flash用法

check flash用法Flash 是一种广泛使用的多媒体技术,它可以在网页中播放音频、视频和动画。
本文将介绍如何检查 Flash 的使用方法,以保证你正确地使用该技术。
首先,在使用 Flash 之前,我们需要确认浏览器是否支持 Flash。
大多数现代浏览器都默认禁用了 Flash,因此我们需要在浏览器设置中启用它。
在 Chrome 浏览器中,你可以在设置菜单中找到“Flash”的选项,并确保其开启。
其他浏览器也会有类似的选项。
一旦你确定 Flash 已启用,下一步是检查你的电脑是否安装了最新版本的 Flash Player。
Flash Player 是播放 Flash 内容所必需的插件。
你可以访问 Adobe 官方网站,从那里下载最新版本的 Flash Player,并按照指示进行安装。
在网页开发中,我们通常使用 HTML 代码嵌入 Flash 内容。
要使用 Flash,你需要创建一个包含 Flash 文件的 HTML 文件。
在 HTML 中,你可以使用`<embed>` 或者 `<object>` 元素来嵌入 Flash 文件。
确保在 HTML 文件中提供正确的文件路径和参数,以确保 Flash 文件能够正确加载和播放。
另外,为了提供更好的用户体验,我们可以检查 Flash 的兼容性。
尽管 Flash是一种流行的技术,但在移动设备上的支持并不广泛。
为了确保你的网页在移动设备上正常运行,你可以使用现代的 HTML5 和 CSS3 技术来替代 Flash。
并且,很多浏览器都开始逐步淘汰对 Flash 的支持,因此考虑到这一点,我们可以选择使用其他替代技术。
在开发网页时,我们还需要注意 Flash 的安全性。
由于 Flash 存在许多安全漏洞,黑客有可能利用它进行攻击。
因此,及时更新 Flash Player 是至关重要的。
确保你在安装 Flash Player 后定期检查并下载最新版本,以确保你的系统不会受到已知的安全漏洞的威胁。
- 1、下载文档前请自行甄别文档内容的完整性,平台不提供额外的编辑、内容补充、找答案等附加服务。
- 2、"仅部分预览"的文档,不可在线预览部分如存在完整性等问题,可反馈申请退款(可完整预览的文档不适用该条件!)。
- 3、如文档侵犯您的权益,请联系客服反馈,我们会尽快为您处理(人工客服工作时间:9:00-18:30)。
Open Flash Chart简介Open flash chart 简称OFC,是一个开源的flash报表组件。
我们不仅可以免费使用,而且还可以修改源代码,来达到我们想要的效果。
客户端在得到数据以后,在Flash Player中渲染出报表图。
目前通用的OFC版本为2 Lug Wyrm Charmer,使用actionscript3.0编写,Adobe Flex编译。
open-flash-chart.swf解析传递给它的json文件并按json文件的内容创建对应的图表。
传入的Json文件会指定图表的类型,颜色,线条类型等信息。
该json 文件可以是服务器上通过动态脚本生成的,也可以是本地文件。
为了方便在不同环境下生成需要的json文件,作者提供了相应的开发包。
在发行包目录下我们可以找到python,dot net ,php,和perl等的开发包。
用Open flash chart创建图表的过程很简单——按照规格生成json,然后传递给open-flash-chart生成图表。
官网网址:/open-flash-chart/1、动手实践1.1、获取OFC在OFC官方网站首页的下方可以找到跳转到下载页面的超链接。
也可以直接使用下面的地址跳转到下载页面。
/projects/openflashchart/files/open-flash-chart/在下载页面我们可以看到从1.9.1~2 Lug Wyrm Charmer等任意版本。
最后一版的更新时间是2009-07-27,这已经是很久远的事了,所以建议你选择最高版本。
解压下载后的文件我们可以看到如下目录结构。
这里需要重点关注如图划红线的文件夹。
其他文件夹是针对特殊语言的帮助类,需要那个可以自己研究一下。
Data-files文件夹里面存放着大量的例子,遗憾的是例子本身无法执行,例子中的js代码还是1.x版本时编写的,并不能运行在2中,因为依赖的第三方js组件也升级了。
但是这个文件夹的实例数据还是很值得研究一下的。
Js文件夹中保存着OFC依赖的第三方JS组件swfobject,关于这个组件的用途会在后面提到,如果有兴趣请查阅更多相关资料了解。
Open-flash-chart文件夹保存着OFC的源代码文件。
Open-flash-chart.swf文件是编译后的文件,也就是我们实际使用时需要引入到工程目录中的文件。
1.2、swfobjectswfobject是一个开源js组件,主要为在html中嵌入flash提供支持。
一个最大的好处是把flash嵌入IE的时候,不会出现“单击激活此控件”的提示。
Open flash chart 1.x版本采用swfobject1.5作为flash引入方式。
到了open flash chart 2版本时,swfobject也已经升级到了2.x版本,并且swfobject2.x与之前版本的设计完全不同。
所以在使用时需要注意这点区别。
直接在open flash chart 官网下载到的版本2压缩文件中的例子代码中却是用的swfobject1.x的写法,而文件包中包含的swfobject是2.1版本的,所以无法正常运行。
1.3、一个极简的柱状图首先创建一个WEB工程,将swfobject.js和open-flash-chart.swf两个文件复制到工程的根目录,这里以JA V A为例,工程目录如下图:编辑index.jsp文件,代码如下:<%@ page language="java" import="java.util.*" pageEncoding="UTF-8"%> <!DOCTYPE HTML PUBLIC "-//W3C//DTD HTML 4.01 Transitional//EN"><html><head><meta http-equiv="Content-Type" content="text/html;charset=utf-8"><title>柱状图</title></head><body><h1>柱状图</h1><div id="bar"><p>如果你看到这段文字,说明你的浏览器不支持flash或者你的程序有问题!</p> </div><script type="text/javascript" src="swfobject.js"></script><script type="text/javascript">swfobject.embedSWF("open-flash-chart.swf","bar","500px","500px","9.0.0","expressInstall.swf",{ "data-file": "bar.js" });</script></body></html>代码比较简单,重点是,引入swfobject.js文件。
调用swfobject.js中定义的静态方法embedSWF加载open-flash-chart.swf文件并设置参数。
EmbedSWF的参数意义依次是:1,flash文件地址,2,2,flash文件加载到区域的外层标签ID,3,flash区域的宽度,4,flash区域的高度,5,比对浏览器flash播放器最低版本是否低于设定版本。
6,指定的flash文件用于播放器升级。
7,open-flash-chart绘制报表需要的数据。
接下来在工程根目录下创建bar.js文件,并录入如下数据:数据的意义会在后面讲解,请先收起你的好奇心。
OK,将工程部署到服务器上访问index.jsp页面,一幅很专业的图标就呈现在你的面前啦。
是不是很容易呢!2、OFC数据结构通过上一章的例子我们知道,Open flash chart要求传入的是一个json对象,因此json 文件的最外围必须是{}其他内容都定义在该对象内。
在根对象的下面定义了以下对象/属性:这些属性会在后面详细讲解。
在这里首先需要了解以下OFC展现时的图标结构与一级属性的对应关系。
下图是将一幅图标分隔成了若干区域,每一个区域的设置通过一个一级属性来完成。
下面我们通过改善之前完成的柱状图来学习这些属性。
注意:所有属性中涉及到的字符串采用“””双引号,不能使用单引号。
2.1、elementselements对象是一个chart对象数组,是一级对象中唯一必需的元素,这一点从柱状图例子可以看出。
有人会对elements对象时一个chart对象数组不理解,我们可以通过一个小例子帮助理解。
首先在之前的bar.js中的elements数组中增加一个数组元素,内容如下:重新访问index.jsp页面,图表变成了柱状图与线图组合而成的复合图表。
由此我们可以理解,elements对象时一个chart对象数组的意义了吧。
复合图接下来给出elements数组中每个chart对象的可选属性。
继续扩展之前的例子,在例子中实验alpha,colour,text,font-size,on-click,tip等属性。
改造后的图标如下图所示,注意数据中的#val#是一个预定义,代表鼠标停留位置所代表的实际值。
请仔细与之前的效果对比,体会这些属性的作用。
在线图设置中,我们注意到tip和on-click两个属性的设置并没有起到作用,这是为什么呢? Values属性的内部属性设置留在后面讲解。
2.2、title图表的标题,位于chart的正上方,内部属性说明如下:在之前的数据文件中与elements同级添加属性title的定义如下:柱状图最上方出现了我们定义的标题。
2.3、y_legend/y2_legendY_legend属性定义Y轴的左标题,y2_legend属性定义Y轴的右标题。
这个两个属性对中文支持有BUG,英文则没有问题。
具体BUG的表现请通过例子自己体会,将下面的数据添加到柱状图例子中,与title同级。
这里可以清晰的看到左边的标题正确显示出来了,右边的中文标题则没有显示出来,这是一个BUG,至今没有被修复。
2.4、x_legendx轴的下标题,显示于chart的底部在柱状图例子数据的基础上添加下属数据,数据与title同级,查看效果。
图略,通过图可以知道x_legend没有y轴标题的中文BUG。
2.5、y_axis/ y_axis_righty轴的轴线定义,分为左轴线和右轴线。
属性如下先来体验一下stroke, tick-length, colour, grid-visible, grid-colour, offset, max, min, steps等属性,labels稍等片刻。
老规矩,填充bar.js文件,增加如下内容。
"grid-visible":true,"grid-colour":"#ff0000","offset":false,"max":100,"min":0,"steps":20},"y_axis_right":{"stroke":2,"tick-length":2,"colour":"#ff0000","grid-visible":true,"grid-colour":"#00ff00","offset":false,"max":80,"min":0,"steps":20},查看柱状图的变化请自己修改上面数据的值,不断体会每个属性的意义。
接下来专门研究下labels,这个属性是一个数组,数组内可以包括两种值,一种是字符串,另一种是{}对象。
继续改写bar.js,为y_axis何y_axis_right分别增加一段labels的定义。
