数字媒体播放器
基于IPV6的IPTV流媒体播放器的研究与实现的开题报告

基于IPV6的IPTV流媒体播放器的研究与实现的开题报告1.研究背景:随着网络技术的飞速发展,网络带宽的增加,高清视频的传输变得越来越普遍,并且网络视频的用户数量也不断增长。
在此背景下,IPTV (Internet Protocol Television)应运而生,它是一种基于IP协议的数字电视传送方式,具有节目多样性、互动性强、覆盖面广等特点,已经成为数字电视的发展方向之一。
然而,目前IPTV流媒体播放器面临的问题包括:1)IPTV流媒体服务商之间的兼容性问题;2)目前IPTV流媒体服务商使用的协议和分发方式不同,导致播放器的适配性差;3)传输网络的延时、失真、丢包率等问题。
因此,在IPV6网络环境下,研究并实现一种基于IPV6的IPTV流媒体播放器,具有实用性和应用价值。
2.研究目标:本研究主要为了解决现有IPTV流媒体播放器的不足,基于IPV6网络环境,研究并实现一款具有以下特点的IPTV流媒体播放器:(1)支持IPV6网络,提供更加稳定、高效的传输服务;(2)支持多种协议和分发方式,提高播放器的适配性;(3)通过优化传输过程,降低因网络传输引起的延时和播放卡顿;(4)实现用户自定义节目订阅和收藏功能。
3.研究方法:本研究采用实证研究方法,通过对现有IPTV流媒体播放器的分析和对IPV6网络环境的研究,确定自己研究的方向和目标,并进行如下研究步骤:(1)设计基于IPV6的IPTV流媒体播放体系结构与通信协议;(2)开发基于IPV6的IPTV流媒体播放器原型系统,实现基础的功能;(3)通过测试和优化,进一步提高播放器的性能和用户体验;(4)针对用户需求,加入自定义节目订阅和收藏功能;(5)对系统进行测试和评估,验证技术和性能指标。
4.研究意义:本研究结果可为推动数字电视发展,提高IPTV服务质量,提供有力的支撑。
同时,实现一款基于IPV6的IPTV流媒体播放器,对于IPV6网络环境下数字媒体传输的研究具有重要的意义。
数字音乐播放器使用手册

数字音乐播放器使用手册欢迎使用数字音乐播放器!本手册将为您提供详细的操作指南,以帮助您充分利用该播放器的功能和特性。
请按照以下步骤进行操作,以确保您能够顺利地使用该播放器。
1. 连接和充电将数字音乐播放器使用随附的USB线缆与计算机相连,以便传输音乐文件和充电。
确保电脑已经安装了相应的驱动程序,以便与播放器进行连接。
2. 文件传输打开计算机上的音乐文件夹,选择您想要添加到播放器的音乐文件。
将这些文件直接拖放到数字音乐播放器的指定文件夹中。
等待文件传输完成后,您可以断开与计算机的连接。
3. 音乐播放打开数字音乐播放器的电源,然后通过菜单界面选择您想要播放的音乐。
通过使用播放、暂停、上一曲、下一曲按钮进行音乐的控制。
您还可以调整音量大小,并通过耳机或扬声器来收听音乐。
4. 设置功能通过菜单界面,您可以访问播放器的各种设置功能。
这些功能包括音效调节、平衡设置、睡眠定时器、屏幕亮度等。
根据个人喜好和需求,您可以对这些设置进行调整,并保存您的设置。
5. 播放列表您可以创建自己的播放列表,以便更方便地组织和播放音乐。
通过菜单界面选择“创建播放列表”,然后按照提示在列表中添加您喜爱的音乐曲目。
保存播放列表后,您可以随时在菜单中选择并播放它们。
6. FM收音机该播放器还具有FM收音机功能。
通过菜单界面进入FM收音机模式,然后按下搜索按钮,播放器将搜索并保存可用的收音机频道。
您可以使用上一频道和下一频道按钮切换频道,并通过调整音量来进行调谐。
7. 时钟和闹钟设置播放器还具备时钟和闹钟功能。
通过菜单界面进入时钟设置,您可以调整时间和日期,并设置闹钟时间。
在闹钟设置完成后,播放器会在指定的时间发出提醒音。
8. 电池续航请确保及时充电以确保播放器的正常使用。
使用USB线缆连接计算机或电源适配器进行充电。
播放器通常具有较长的续航时间,但具体续航时间因使用情况而异。
9. 故障排除如果您遇到任何问题或故障,可以查阅播放器附带的用户手册,或联系售后服务获得帮助和支持。
数字音频播放器的工作原理
数字音频播放器的工作原理数字音频播放器,又称为MP3播放器,已成为现代生活中不可或缺的一部分。
这种便携式设备能够存储和播放数百甚至数千首音频文件,为我们带来了无尽的音乐享受。
本文将详细介绍数字音频播放器的工作原理,从硬件到软件将一一讨论。
一、硬件组成数字音频播放器的硬件组成主要包括处理器、存储器、音频解码器、音频输出和用户界面。
1. 处理器处理器是数字音频播放器的核心,负责控制整个设备的操作。
它负责解析用户输入、读取音频文件、进行音频解码和输出等功能。
常见的处理器包括ARM芯片和其他微处理器。
2. 存储器存储器用于保存音频文件和播放器的操作系统。
目前的数字音频播放器通常采用固态存储器,如闪存、SD卡或Micro SD卡。
这种存储器具有读取速度快、体积小、可靠性高的优点。
3. 音频解码器音频解码器负责将压缩的音频文件解码为电子信号,并将其转化为模拟音频信号以便输出。
常见的音频解码器有MP3解码器、AAC解码器等。
这些解码器能够还原压缩文件中所包含的音频信息,使其能够被音频输出设备播放。
4. 音频输出音频输出将解码的音频信号转化为声音。
目前常见的音频输出设备包括耳机接口、蓝牙耳机和扬声器等。
用户可以通过插入耳机或连接蓝牙耳机来享受音频播放器提供的音乐。
5. 用户界面用户界面为用户提供操作播放器的方式,通常包括按钮、触摸屏和显示屏。
用户可以通过操作界面来选择音频文件、调整音量、设置播放模式等功能。
二、软件控制除了硬件组成之外,数字音频播放器还采用了各种软件来控制其功能。
1. 操作系统数字音频播放器通常搭载一种操作系统。
这种操作系统具有简洁、稳定的特点,专注于音频播放器的运行和管理。
一些常见的音频播放器操作系统包括Rockbox、iPod OS等。
2. 文件管理数字音频播放器需要能够管理存储在存储器中的音频文件。
为了实现这一功能,播放器一般配备了文件管理系统,使用户可以方便地浏览和查找音频文件。
3. 音频格式支持不同的数字音频播放器可能支持不同的音频格式。
诺瓦科技LED多媒体播放器TB2-4G规格书
新科多媒体数码播放器使用说明
新科多媒体数码播放器使用说明一、产品简介新科多媒体数码播放器是一款功能强大、操作简便的数码设备。
它具备多种功能,包括音乐播放、视频播放、照片查看等,适用于家庭、办公室和旅行等场合。
本文将详细介绍该播放器的使用方法。
二、播放器的基本操作1. 开机和关机使用播放器前,首先需要将其开机。
按下电源按钮,播放器将进入待机状态,显示屏上会出现欢迎界面。
长按电源按钮即可关机,关闭播放器。
2. 主界面介绍播放器主界面分为几个部分,包括顶部菜单栏、左侧导航栏和中央内容显示区域。
顶部菜单栏提供了各种功能选项,包括音乐、视频、照片等。
左侧导航栏用于切换不同的媒体类型,例如按下音乐按钮后,左侧导航栏会显示音乐分类,包括歌手、专辑、播放列表等。
中央内容显示区域会展示对应媒体类型的内容。
3. 媒体文件的导入播放器支持通过 USB 数据线将媒体文件从电脑导入到播放器中。
连接电脑和播放器后,打开电脑上的文件管理器,在播放器中会显示一个可移动设备的图标,双击打开后即可进行文件的导入和管理。
4. 音乐播放在主界面中点击音乐按钮,进入音乐播放界面。
通过左侧导航栏可以选择不同的音乐分类。
在选择某一首歌曲后,点击播放按钮即可开始播放。
播放过程中可以使用上一曲、下一曲、暂停/播放等按钮进行控制。
也可以创建播放列表,将喜欢的歌曲添加到列表中,方便随时播放。
5. 视频播放在主界面中点击视频按钮,进入视频播放界面。
通过左侧导航栏可以选择不同的视频分类。
选择某个视频后,点击播放按钮即可开始播放。
播放过程中可以通过拖动进度条调整进度,也可以暂停/播放。
6. 照片查看在主界面中点击照片按钮,进入照片查看界面。
通过左侧导航栏可以选择不同的照片分类。
选择某张照片后,即可在中央内容显示区域中显示该照片。
可以通过左右箭头按钮切换照片,也可以进行放大、缩小等操作。
三、高级功能介绍1. 多媒体文件格式支持新科多媒体数码播放器支持多种媒体文件格式,包括MP3、WAV、AVI、MP4、JPEG 等。
诺瓦科技LED多媒体播放器TB4规格书
Taurus系列多媒体播放器TB4规格书文档版本:V1.3.2文档编号:NS120000358版权所有© 西安诺瓦电子科技有限公司2018。
保留一切权利。
非经本公司书面许可,任何单位和个人不得擅自摘抄、复制本文档内容的部分或全部,并不得以任何形式传播。
商标声明是诺瓦科技的注册商标。
声明欢迎您选用西安诺瓦电子科技有限公司(以下简称诺瓦科技)的产品,如果本文档为您了解和使用产品带来帮助和便利,我们深感欣慰。
我们在编写文档时力求精确可靠,随时可能对内容进行修改或变更,恕不另行通知。
如果您在使用中遇到任何问题,或者有好的建议,请按照文档提供的联系方式联系我们。
对您在使用中遇到的问题,我们会尽力给予支持,对您提出的建议,我们衷心感谢并会尽快评估采纳。
i 目录目录目录 ........................................................................................................................................ ............. ii1 概述 ........................................................................................................................................ . (1)1.1 产品简介 (1)1.2 应用场景 (2)2 产品特点 ........................................................................................................................................ .. 32.1 支持多屏播放同步机制 (3)2.2 处理性能强大 (3)2.3 全方位控制方案 (3)2.4 支持同步异步双模式 (4)2.5 支持 WiFi AP 连接 (4)3 硬件结构 ........................................................................................................................................ .. 63.1 外观图 (6)3.1.1 前面板 (6)3.1.2 后面板 (7)3.2 尺寸图 (8)4 软件结构 ........................................................................................................................................ .. 94.1 系统软件 (9)4.2 相关配置软件 (9)5 产品规格 ........................................................................................................................................ 106 音视频解码规格. (11)6.1 图片 (11)6.1.1 解码器 (11)6.1.2 编码器 (11)6.2 音频 (12)6.2.1 解码器 (12)6.2.2 编码器 (12)6.3 视频 (13)6.3.1 解码器 (13)6.3.2 编码器 (14) ii1 概述板载亮度传感器接口,支持自动和定时的智能亮度调节。
DVD的工作原理
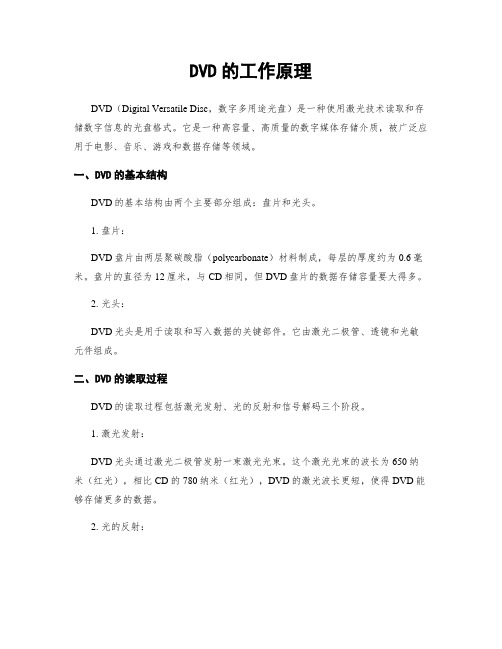
DVD的工作原理DVD(Digital Versatile Disc,数字多用途光盘)是一种使用激光技术读取和存储数字信息的光盘格式。
它是一种高容量、高质量的数字媒体存储介质,被广泛应用于电影、音乐、游戏和数据存储等领域。
一、DVD的基本结构DVD的基本结构由两个主要部分组成:盘片和光头。
1. 盘片:DVD盘片由两层聚碳酸脂(polycarbonate)材料制成,每层的厚度约为0.6毫米。
盘片的直径为12厘米,与CD相同,但DVD盘片的数据存储容量要大得多。
2. 光头:DVD光头是用于读取和写入数据的关键部件。
它由激光二极管、透镜和光敏元件组成。
二、DVD的读取过程DVD的读取过程包括激光发射、光的反射和信号解码三个阶段。
1. 激光发射:DVD光头通过激光二极管发射一束激光光束。
这个激光光束的波长为650纳米(红光),相比CD的780纳米(红光),DVD的激光波长更短,使得DVD能够存储更多的数据。
2. 光的反射:激光光束照射到DVD盘片上,光束会在盘片的表面反射。
DVD盘片的表面被涂覆上一层反射膜,这层膜通常由铝制成。
当光束照射到盘片上时,部分光会被反射回光头。
3. 信号解码:光头接收到反射回来的光信号后,通过透镜将光聚焦到光敏元件上。
光敏元件将光信号转换成电信号,然后电信号经过解码和处理,最终转化为数字数据。
三、DVD的数据存储方式DVD的数据存储方式采用了螺旋状的数据轨道和蓝宝石材料制成的光学层。
1. 数据轨道:DVD的数据轨道采用了与CD相似的螺旋状布局,但DVD的数据密度更高。
这意味着DVD能够在相同的物理尺寸上存储更多的数据。
2. 光学层:DVD的光学层由蓝宝石材料制成,这种材料能够反射和折射光束。
蓝宝石材料的折射率比CD使用的聚碳酸脂材料高,这使得DVD能够使用更短波长的激光,从而实现更高的数据存储密度。
四、DVD的存储容量DVD的存储容量因不同的格式而有所不同。
以下是几种常见的DVD格式及其存储容量:1. DVD-5:DVD-5是最常见的DVD格式之一,单面单层,容量为4.7GB。
最值得入手的5款HiFi入门数字音乐播放器

最值得入手的5款HiFi入门数字音乐播放器音源随着历史的发展,包括LP(黑胶)、CD、数码文件等多种介质,其中数码文件的播放最方便。
但用电脑播放无损音频文件(比如FLAC、WAV、DSD)等,容易收到电脑本身内部器件的干扰,所以后期慢慢出现脱离电脑的专门机器来播放音频文件,简称数字播放器。
仙籁B2网络数字音乐播放器¥2980英文品牌Silent Angel,中文品牌仙籁。
一些新玩家可能会对仙籁这个品牌感到陌生,但在发烧圈中已经颇有名气,国产仙籁以高质量音源为水准,在音响行业里不容小觑。
今天讲的仙籁B2也是用户反馈音质优秀、体验感极佳的一款播放器。
仙籁B2的适用性广,功能强大,支持WiFi和蓝牙,在家庭音响系统或者优雅高档的商铺买了有源音箱的用户,都可以选仙籁B2作为音源。
B2是通过自主研发的软件VitOS Lite操控,支持多台手机同时连接,支持DLNA、Airplay2、Qplay推送。
以提高用户体验研发的播放器自带优质音乐资源丰富,你可以轻松听QQ音乐、网易云、酷我音乐、酷狗音乐等国内音乐平台。
AAP也内置了非常多热门的国外无损音乐服务平台,如Tidal,Qobuz,Spotify和亚马逊音乐等,这些国外的音乐服务平台也是非常多的中文歌曲资源。
闲暇放松时还可以听书,听小说,听新闻,听笑话,亲子教育想听什么都有,可以让生活质量直线上升。
背后接口丰富,有RCA、USB、AES、I2S和同轴。
音质佳,高低频比较稳,乐器分离度高,清晰立体,人声温暖,听古典音乐或者流行风格都很合适。
BLUESOUND NODE 2i¥3980Node 2i的做工质量不算太好,外壳用的是塑料,但功能上完全没有廉价感,可以支持aptX蓝牙和WiFi无线传输。
需要注意的是APP-BluOS网上普遍反馈体验不好。
背后接口比较传统,有同轴、光纤、RCA、网线输出,A型USB可用于接入U盘或硬盘播放器,通过BluOS读取里面的数字音乐文件。
DLNA

worked Infrastructure Devices (NID) 联网支持设备。 (1)Mobile Network Connectivity Function (M-NCF)。移动网 络连接功能设备。提供各种设备接入移动网络的物理介质。 DLNA的希望是全部实现无线化。 (2)Interoperability Unit (MIU)媒体交互设备。提供媒体格式 的转换以支持各种设备需要。
DMS: Digital Media Server(数字媒体服务器) DMP: Digital Media Player (数字媒体播放器) DMR: Digital Media Render(数字媒体渲染器) DMA: Digital Media Adapter(数字媒体适配器) DMC: Digital Media Controller(数字媒体控制器) DMPr:Digital Media Printer(数字媒体打印机) M-DMC: Mobile Digital Media Controller(移动数字媒体控制器) M-DMU: Mobile Digital Media Uploader(移动数字媒体上传器) M-DMD: Mobile Digital Media Downloader(移动数字媒体下载器) +UP+ : Upload Controller (上传控制器) +DN+ :Download Controller (下载控制器) +PU+ : Push Controller (推送控制器) +PR1+ :Printer Controller + Image Content Source (打印控制 器) +PR2+ : Printer Controller (Print Images stored in other devices)
小学信息技术四年级上册第9课《媒体播放器》教案

小学信息技术四年级上册第9课《媒体播放器》教案(一)年级:四年级上册学科:信息技术版本:冀教版【教材分析】本课内容主要围绕媒体播放器展开,包括媒体播放器的种类、功能以及常见媒体播放器的使用方法。
教材还介绍了不同的媒体文件格式及其用途,旨在帮助学生提高媒体素养,增强对媒体信息的辨别能力。
教学目标本课旨在通过介绍媒体播放器的种类和功能,让学生掌握常见媒体播放器的使用方法,并学会识别不同的媒体文件格式及其用途。
同时,通过实际操作和案例分析,培养学生的媒体素养、合作与交流能力,以及创新精神。
教学重点与难点教学重点:媒体播放器的种类和功能。
常见媒体播放器的使用方法。
教学难点:识别不同的媒体文件格式及其用途。
在不同场景下选择合适的媒体播放器。
学情分析四年级的学生已经具备了一定的信息技术基础,能够初步掌握计算机的基本操作。
然而,对于媒体播放器的使用,他们可能还缺乏一定的经验和技巧。
因此,本课的教学重点应放在让学生掌握媒体播放器的使用方法和识别不同的媒体文件格式上。
教学准备多媒体计算机教室。
投影仪及屏幕。
常见的媒体文件(如MP3、MP4、AVI、RMVB等格式)。
几种常见的媒体播放器软件(如QQ音乐播放器、暴风影音、VLC Media Player等)。
教学过程一、导入新课教师首先展示几种常见的媒体文件,如音乐、视频、图片等,然后提问学生:“你们平时是如何播放这些媒体文件的呢?”引导学生思考并回答。
接着,教师介绍媒体播放器的种类和功能,让学生初步了解媒体播放器的概念。
二、讲授新课1. 媒体播放器的功能教师详细讲解媒体播放器的功能,包括播放音频、视频、图片等媒体文件,支持多种媒体格式,具有播放控制、音量调节、字幕显示等功能。
2. 常见媒体播放器的使用方法QQ音乐播放器:教师演示QQ音乐播放器的安装和使用方法,包括搜索歌曲、播放歌曲、下载歌曲等。
暴风影音:教师简要介绍暴风影音的特点,并演示其基本使用方法。
同时,教师可以展示Windows Media Player等其他常见媒体播放器的使用方法,让学生了解不同播放器的特点和适用场景。
诺瓦科技LED多媒体播放器TB2-4G规格书
2 产品特点 .......................................................................................................................................... 3
2.1 处理性能强大 ............................................................................................................................................... 3 2.2 全方位控制方案 ........................................................................................................................................... 3 2.3 支持同步异步双模式 .................................................................................................................................... 4 2.4 支持 WiFi AP 连接 ....................................................................................................................................... 4 2.5 支持 4G 模块................................................................................................................................................ 5
四年级信息技术上册媒体播放器1教案冀教版

2.作业评价:
(1)作业批改:教师将对学生的课后作业进行认真批改,了解学生对媒体播放器知识的理解和应用情况。对于作业中出现的问题,教师将及时进行解答和指导。
(2)作业点评:在课堂上,教师将选取部分学生的作业进行点评,以展示优秀作业的特点,并针对存在的问题提出改进建议。
(3)鼓励与反馈:教师将对学生的努力和进步给予肯定和鼓励,同时对学生的不足之处提出改进意见,以促进学生的持续发展。
课堂
1.课堂评价:
(1)提问:在课堂上,教师将通过提问的方式了解学生的学习情况。针对媒体播放器的基本概念、组成部分、功能和操作等方面,教师将设计不同难度的问题,以检查学生对知识的掌握程度。
(2)观察:教师将密切观察学生在实践环节的操作情况,了解他们对媒体播放器的熟悉程度以及操作技能的掌握情况。
(3)测试:在课程结束前,教师将安排一次小测试,以评估学生对媒体播放器知识的掌握情况。测试题包括选择题、填空题和简答题等,以全面考查学生的学习效果。
教学反思与总结
今天,我上了一节关于媒体播放器的课,总体来说,课堂气氛活跃,学生参与度高。在教学过程中,我采用了讲授法、实践法和互动式教学法相结合的方式,通过具体的案例分析,让学生深入了解媒体播放器的特性和重要性。同时,我也安排了小组讨论和课堂展示环节,锻炼了学生的合作能力和表达能力。
数字广告牌媒体播放器所有者手册说明书

TABLE OF CONTENTSLicenses (4)Replacing Flash Memory Battery (4)NC1000Specifications (5)General Specifications (5)Multi I/O Port (5)Operational Specifications (5)Included in the Box (6)Basic Components (6)Optional Items (6)Connections (7)Back Panel (7)Installation (8)In/Out Cable Connection (10)Connecting a Monitor with D-sub Cable (10)Connecting a Monitor with an HDMI Cable (13)Connecting/Disconnecting HDMI Audio Device in Windows (15)Connection to Multiple Monitors (16)NC2000Specifications (17)General Specifications (17)Multi I/O port (17)Operational Specifications (17)Included in the Box (18)Basic Components (18)Connections (19)Back Panel (19)Installation (20)2NC1100/NA1000/NA1100Specifications (21)General Specifications (21)Multi I/O Port (21)Operational Specifications (21)Included in the Box (22)Basic Components (22)Optional Items (22)Connections (23)Back Panel (23)Installation (24)In/Out Cable Connection (26)Connecting a Monitor with D-sub Cable (26)Connecting a Monitor with an HDMI Cable (29)Connecting/Disconnecting HDMI Audio Device in Windows (31)Connecting a Monitor with DP Cable (32)Connection to Multiple Monitors (35)NC2100/NA2000/NA2100Specifications (36)General Specifications (36)Multi I/O Port (36)Operational Specifications (36)Included in the Box (37)Basic Components (37)Connections (38)Back Panel (38)Installation (39)AppendixLimitations of Microsoft Windows Embedded Standard (40)Frequently Asked Questions (FAQs) (40)3LicensesSupported licenses may differ by model. For more information of the licenses,visit .HDMI, the HDMI logo and High-Definition MultimediaInterface are trademarks or registered trademarks of HDMILicensing LLC.Replacing Flash Memory BatteryThe flash memory battery helps maintain the system (BIOS) settings when the computer is powered off.The flash memory battery is a consumable part.Attention● W hen you change the flash memory battery, it is recommended that you seek assistance from the LGElectronics Service Center.● Using a non-standard battery may cause a malfunction.● If a malfunction is caused by trying to replace a part on your own, servicing will be charged.● I f the product is not connected to the AC power for an extended period of time, the flash memory batterymay be discharged. In this case, servicing will be charged.● W hen the battery is discharged, the message below will appear on the boot screen. In this case, youshould replace the battery.=> ERROR0271: Check data and time settingsWARNING0251: System CMOS checksum bad - Default configuration usedPress <F1> to resume, <F2> to Setup45Dimensions 250 mm (W) x 220 mm (H) x 45 mm (D) (only Set)Weight 1.43 kg (only Set)CPU Intel ATOM Processor 330 1.6 GHz(Dual Core), FSB 533 MHzChip Set Nvidia MCP7A-I ONMain Memory DDR3 1066 SODIMM type 1 GB, 2 GBSecondary Storage Device SATA SSD 8 GB, 16 GB, 32 GBO/S Windows Embedded StandardGeneral Specifications Resolution Maximum Resolution 1920 x 1080 @ 60 HzRecommended Resolution 1920 x 1080 @ 60 HzPower Rated Voltage 100-240 V~ 50/60 Hz 1.2 AOperating Condition Sync (H/V)Video LEDNormal Mode On/On Active OnDeep Sleep Mode(Set = Off)Off/Off Off OffOperating Conditions Operating Conditions Temperature 5 ℃ to 40 ℃Humidity 10 % to 80 %Storage Conditions Temperature -20 ℃ to 60 ℃Humidity 5 % to 95 %Operational SpecificationsMulti I/O PortSerial Port One external RS-232 Serial portUSB Port Hi-Speed USB 2.0 port 480 Mbps rate (x5)LAN Port Realtek RTL8103E 10/100 Mbps Ethernet controller (NC1000-**A*/**B*)Realtek RTL8111E Gigabit Ethernet controller (NC1000-**P*/**Q*)VGA / HDMI Nvidia MCP7A-ION integrated Graphic chipset4-in-1 Card Secure Digital (SD) / MultiMedia Card (MMC/MMC4.0) /Memory Stick (MS/MS-Pro) / xD Memory CardPCI Express Card Slot SupportedLINE OUT SupportedSPDIF (Digital Audio Out)5.1 Channel Supported (depending on source signal)Attention● P roduct specifications may change without prior notice to improveperformance.NC1000Specifications6Basic ComponentsOptional ItemsM3, L12 x 4 (for attachment of Box Guide on the monitor)Included in the BoxThe NC1000 with the following components. Please check that these components have been included prior to installation.The following items are supported by the NC1000, but are not provided with the product.Please purchase optional items as needed.● HDMI cable, D-sub cable, LINE-OUT cable, fiber optic cable, LAN cable, mouse, keyboard.NC1000Power Cable Handle x 2User Manual / Cards RS-232C Cable M3, L8 x 8 (for attachment of handle)Box GuideRail x 2● These illustrations may differ from your product and are subject to change.Attention7Back PanelNumber Connection DescriptionPower Cable In For the power cable.Power Switch Provides power to the NC1000.RS-232C Out For the RS-232C cable.USB Wireless Modem In For a USB-type wireless modem.USB In For USB-type devices, including memory, hard disk, CD-ROM, key-board, and mouse.HDMI Out For an HDMI-compatible monitor.LAN Connector For a LAN cable.4 IN 1 Multi-Card Slot Accommodates memory cards for storing video or reading images.Supported cards include Secure Digital (SD), MultiMedia (MMC/MMC4.0), Memory Stick (MS/MS-Pro), and xD Memory Cards.D-sub Out For the monitor's RGB video in.OPTICAL Out For an optical cable for digital audio transfer.NC1000 Power Button Turns NC1000 on.LINE-OUT Connector For a LINE-OUT cable for analog audio transfer.PCI MINI EXPRESS Card Slot Provided for PCI Mini Express Cards.A B C D E F G H I J K L M A B C D EEE F G H I J K L M ConnectionsAttention● Turn on the power switch (B) and then turn on the power button (K) to power on NC1000.2Use screws to secure the handle.3Place the rail in the slots on the side of the product.Warning● Be careful of sharp edges on the rail and the handle.Attach the Box Guide to the rail slots, and press it upward.In/Out Cable ConnectionIn order to watch video on a monitor, you need to use a D-sub cable or an HDMI cable to connect the NC1000 to a monitor.Attention● D-sub, HDMI, LINE-OUT, OPTICAL, and LAN cables are not included with the NC1000. If the cables werenot provided with your monitor, you may need to purchase them separately.● A fter cabling is complete, assign the SET ID of the monitor to be connected to NC1000.● To configure the SET ID, please refer to the owner’s manual for your monitor.NoteWhen using the SuperSign Manager software:● T he monitor SET ID is a unique number used to identify the monitor. You can choose a number from 1 to25. The SET ID allows the SuperSign Manager software to identify the monitor.● In order to directly connect the monitor to NC1000, its SET ID must be set to 1.● T o use SuperSign Manager, the monitor that will be connected to NC1000 must support the LG RS232Cprotocol. A monitor supporting the LG RS232C protocol can control the monitor functions, such as bright-ness and sound, using SuperSign Manager.Connecting a Monitor with D-sub CableAttention● A D-sub cable connection does not include an audio signal. For audio, you need to connect a LINE-OUTor OPTICAL cable.Note● D-sub cables are also known as RGB cables.1Connect the appropriate power cables to a monitor and NC1000 respectively.10Connecting a Monitor with an HDMI CableHDMI connections allow digital video and audio signals to be transferred with one cable.HDMI cable connections do not require an additional audio in cable.Attention● The monitor to connect with NC1000 should have the HDMI in for the HDMI connection.● T o use the HDMI device, you need to activate the HDMI device in Microsoft Windows Embedded Standard, the operating system of the NC1000. To connect and disconnect the HDMI audio device, see the Connecting/ Disconnecting HDMI Audio Device in Windows section of this document.1Connect the appropriate power cables to a monitor and NC1000 respectively.2Connect NC1000 to a monitor with an HDMI cable.13Click the button in the lower left of the screen.Start > Control Panel > Sounds and Audio Devices > Audio.Click the button in the lower left of the screen.Start > Control Panel > Sounds and Audio Devices > Audio.Connection to Multiple MonitorsEach NC1000 can accommodate up to 25 monitors for video playback. (SET ID: 1 to 25)You can set the tile mode by connecting multiple monitors.1Connect the NC1000's D-sub OUT to the D-sub IN of the first monitor, which has SET ID = 1.2Connect other monitors with D-sub cables as shown below (IN/OUT separated).3Connect the NC1000's RS-232C OUT to the RS-232C IN of the first monitor, which has SET ID = 1.4Connect other monitors with RS-232C cables as shown below (IN/OUT separated).Attention● You may want to purchase additional RS-232C cables to use several monitors together.● You cannot use multiple monitors with the HDMI cable.1617SpecificationsNC2000Dimensions 99.8 mm (W) x 183.3 mm (H) x 28.4 mm (D) (only Set)Weight 0.215 kg (only Set)CPU Intel ATOM Processor 330 1.6 GHz(Dual Core), FSB 533 MHz Chip Set Nvidia MCP7A-I ONMain Memory DDR3 1066 SODIMM type 1 GB, 2 GB Secondary Storage Device SATA SSD 8 GB, 16 GB, 32 GB O/SWindows Embedded StandardGeneral SpecificationsMulti I/O portSerial Port N/AUSB Port Hi-Speed USB 2.0 port 480 Mbps rate (x3)LAN Port Realtek RTL8103E 10/100 Mbps Ethernet controller (NC2000-**A*/**B*)Realtek RTL8111E Gigabit Ethernet controller (NC2000-**P*/**Q*)VGA / HDMI Nvidia MCP7A-ION integrated Graphic chipset 4-in-1 CardN/A PCI Express Card Slot Supported LINE OUT N/A SPDIF(Digital Audio Out)N/AAttention● P roduct specifications may change without prior notice to improve performance.Resolution Maximum Resolution 1920 x 1080 @ 60 Hz Recommended Resolution 1920 x 1080 @ 60 Hz PowerRated Voltage12 V 3.5 AOperating ConditionSync (H/V)Video LED Normal Mode On/On Active On Deep Sleep Mode (Set = Off)Off/OffOff Off Operating ConditionsOperating Conditions Temperature 5 ℃ to 40 ℃Humidity 10 % to 80 %Storage ConditionsTemperature-20 ℃ to 60 ℃Humidity5 % to 95 %Operational SpecificationsAttention19Back PanelConnectionsABCCD Number Connection DescriptionHDMI OutFor an HDMI-compatible N Connector For a LAN cable.USB InFor USB-type devices, including memory, hard disk, CD-ROM, key-board, and mouse.PCI MINI EXPRESS Card SlotProvided for PCI Mini Express Cards.A B C DAttach the Box Guide to the rail slots, and press it upward.NoteIf card does not become fully inserted into the insertion direction. Hit by hand carefully to make fully connected.Use screws to secure the player and the Box Guide as shown below.21Dimensions 250 mm (W) x 220 mm (H) x 45 mm (D) (only Set)Weight SSD 1.590 kg (only Set)HDD 1860 g (only Set)CPUNC1100Intel Celeron Processor P4500 (2M Cache, 1.86 GHz)NA1000Intel Core™ i7-620M Processor (4M Cache, 2.66 GHz)NA1100Intel Core™ i5-520M Processor (3M Cache, 2.40 GHz)Chip Set Mobile Intel QM57 Express Chipset Main Memory DDR3 1066 SODIMM type 1 GB, 2 GB Secondary Storage Device SATA SSD 8 GB, 16 GB, 32 GB, 64 GB SATA SSD 320 GBO/SMicrosoft Windows Embedded Standard Microsoft Windows Embedded Standard 7 E Microsoft Windows Embedded Standard 7 PGeneral SpecificationsResolution Maximum Resolution 1920 x 1080 @ 60 Hz Recommended Resolution 1920 x 1080 @ 60 Hz PowerRated Voltage100-240 V~ 50/60 Hz 1.5 AOperating ConditionSync (H/V)Video LED Normal Mode On/On Active On Deep Sleep Mode (Set = Off)Off/OffOff Off Operating ConditionsOperating Conditions Temperature 5 ℃ to 40 ℃Humidity 10 % to 80 %Storage ConditionsTemperature-20 ℃ to 60 ℃Humidity5 % to 95 %Operational SpecificationsMulti I/O PortSerial Port One external RS-232 Serial port USB Port Hi-Speed USB 2.0 port 480 Mbps rate (x4)LAN Port Intel 82577 Gigabit Ethernet PHY VGA / HDMI / DP Intel HD Graphics Controller4-in-1 CardSecure Digital (SD) / MultiMedia Card (MMC/MMC4.0) /Memory Stick (MS/MS-Pro) / xD Memory Card PCI Express Card Slot Supported LINE OUT Supported MIC INSupportedAttention● P roduct specifications may change without prior notice to improve performance.NC1100/NA1000/NA1100Specifications22Basic ComponentsOptional ItemsM3, L12 x 4(for attachment of Box Guide on the monitor)Included in the BoxThe NC1100/NA1000/NA1100 with the following components. Please check that these components have been included prior to installation.The following items are supported by the NC1100/NA1000/NA1100, but are not provided with the product.Please purchase optional items as needed.● HDMI cable, D-sub cable, DP cable, LINE-OUT cable, MIC-IN cable, LAN cable, mouse, keyboard.NC1100/NA1000/NA1100Power Cable Handle x 2User Manual / Cards RS-232C Cable M3, L8 x 8(for attachment of handle)Box GuideRail x 2Attention● These illustrations may differ from your product and are subject to change.23Back PanelNumber ConnectionDescriptionPower Cable In For the power cable.RS-232C Out For the RS-232C cable.Power Button Turns the power on for NC1100/NA1000/NA1100's.LINE-OUT Connector For a LINE-OUT cable for analog audio B In For USB-type devices, including memory, hard disk, CD-ROM, key-board, and mouse.HDMI Out For an HDMI-compatible N Connector For a LAN cable.4 IN 1 Multi-Card Slot Accommodates memory cards for storing video or reading images. Supported cards include Secure Digital (SD), MultiMedia (MMC/MMC4.0), Memory Stick (MS/MS-Pro), and xD Memory Cards.D-sub Out For the monitor's RGB video in.DP Output Port Connects the cable to the DP-supporting monitor.MIC-InConnects the Mic-In cable to transfer analog audio input.PCI MINI EXPRESS Card SlotProvided for PCI Mini Express Cards.ConnectionsA B C D E F G H I J K LPWMIC INABCDEE FGHIJ KLUse screws to secure the handle.Place the rail in the slots on the side of the product.Warning● Be careful of sharp edges on the rail and the handle.261Connect the appropriate power cables to a monitor and NC1100/NA1000/NA1100 respectively.Connecting a Monitor with D-sub CableIn/Out Cable ConnectionTo view images on the monitor, you need to connect NC1100/NA1000/NA1100 to the monitor via a D-SUB, HDMI or DP cable.Attention● D -SUB, HDMI, DP, LINE-OUT, MIC-IN and LAN cables are not included in the basic components. If the cables were not provided with your monitor, you may need to purchase them separately.● A fter cabling is complete, assign the SET ID of the monitor to be connected to NA1000/NC1100/NA1100.● To configure the SET ID, please refer to the owner’s manual for your monitor.AttentionAudio is not available when only the D-SUB cable is connected to the monitor. A LINE-OUT cable must be connected for audio output to function.D-sub cables are also known as RGB cables.When using the SuperSign Manager software:● T he monitor SET ID is a unique number used to identify the monitor. You can choose a number from 1 to 25. The SET ID allows the SuperSign Manager software to identify the monitor.● In order to directly connect the monitor to NC1100/NA1000/NA1100, its SET ID must be set to 1.● T o use SuperSign Manager, the monitor that will be connected to NC1100/NA1000/NA1100 must sup-port the LG RS232C protocol. A monitor supporting the LG RS232C protocol can control the monitor functions, such as brightness and sound, using SuperSign Manager.NoteNoteMIC INPWMIC INPW272Connect the D-sub port of NC1100/NA1000/NA1100 and RGB-IN port of the monitor with a D-sub cable.3Connect NC1100/NA1000/NA1100 (OUT) to the monitor (IN) with an RS-232C cable.MIC INPWMIC INPWMIC INPWMIC INPW MIC INPW MIC INPW MIC INPWMIC INPWMIC INPWMIC INPW285Connect a LAN cable to the NC1100/NA1000/NA1100.4Connect the NC1100/NA1000/NA1100 to the monitor with a LINE-OUT cable.MIC INPWMIC INPWMIC INPWMIC INMIC INPWMIC INPWMIC INPWMIC INPWMIC INPWMIC INPWMIC INPW292Connect NC1100/NA1000/NA1100 to a monitor with an HDMI cable.1Connect the appropriate power cables to a monitor and NC1100/NA1000/NA1100 respectively.Connecting a Monitor with an HDMI Cable● The monitor to connect with NC1100/NA1000/NA1100 should have the HDMI in for the HDMI connection.● T o use the HDMI device, you need to activate the HDMI device in Microsoft Windows Embedded Standard, the operating system of the NC1100/NA1000/NA1100. To connect and disconnect the HDMI audio device, see the Connecting/Disconnecting HDMI Audio Device in Windows section of this document.HDMI connections allow digital video and audio signals to be transferred with one cable.HDMI cable connections do not require an additional audio in cable.AttentionMIC INPWMIC INPWPWMIC INPWMIC INPWMIC INPWMIC INPWMIC INPWMIC INPWMIC INPWMIC IN304Connect a LAN cable to NC1100/NA1000/NA1100.3Connect NC1100/NA1000/NA1100 (OUT) to the monitor (IN) with an RS-232C cable.MIC INPWMIC INPWMIC INPWMIC INPWMIC INPWMIC INPWMIC INPWMIC INPWMIC INPWClick the button in the lower left of the screen.Start > Control Panel > Sounds and Audio Devices > Audio.Click the button in the lower left of the screen.Start > Control Panel > Sounds and Audio Devices > Audio.32Connecting a Monitor with DP CableAttentionTo enable DP connection, the monitor that will be connected to NC1100/NA1000/NA1100 must support the DP input port.1Connect the appropriate power cables to a monitor and NC1100/NA1000/NA1100 respectively.2Connect NC1100/NA1000/NA1100 to the monitor via a DP cable.MIC INPWPWMIC INPWPWMIC INPWMIC IN PWMIC INPWMIC INPWMIC IN333Connect NC1100/NA1000/NA1100 (OUT) to the monitor (IN) with an RS-232C cable.4Connect the NC1100/NA1000/NA1100 to the monitor with a LINE-OUT cable.MIC INPWMIC INPWMIC INPWMIC INMIC INPWMIC INPWMIC INPWMIC INPWMIC INPWMIC INPW345Connect a LAN cable to NC1100/NA1000/NA1100.Attention● N C1100/NA1000/NA1100prioritizes video output in the following order: RGB → DP → HDMI. If you connect multiple cables simultaneously and turn the product on, video output is prioritized accordingly.● W hen the product is turned on after cable connection or the operating system is completely booted, DP and HDMI video output start operating.● T he product does not support a dual mode where DP can be switched either to HDMI or DVI.It is only for DP output.● T he display port (DP) of the NC1100, NA1000 and NA1100 does not support digital audio output. It is recommended to use it with a line-out cable for analog audio output.353Connect the NC1100/NA1000/NA1100's RS-232C OUT to the RS-232C IN of the first monitor, which has SET ID = 1.4Connect other monitors with RS-232C cables as shown below (IN/OUT separated).1Connect the NC1100/NA1000/NA1100's D-sub OUT to the D-sub IN of the first monitor, which has SET ID = 1.2Connect other monitors with D-sub cables as shown below (IN/OUT separated).Connection to Multiple MonitorsEach NC1100/NA1000/NA1100 can accommodate up to 25 monitors for video playback. (SET ID: 1 to 25)Attention● You may want to purchase additional RS-232C cables to use several monitors together.● You cannot use multiple monitors with the HDMI cable.NC1100/NA1000/NA1100NC1100/NA1000/NA110036Dimensions 99 mm (W) x 179 mm (H) x 28.5 mm (D) (only Set)Weight0.288 kg (only Set)CPU(NC2100)CPU(NA2000)CPU(NA2100)Intel® Celeron® Processor P4500 (2M Cache, 1.86 GHz)Intel® Core™ i7-620M Processor (4M Cache, 2.66 GHz)Intel® Core™ i5-520M Processor (3M Cache, 2.40 GHz)Chip Set Mobile Intel® QM57 Express Chipset Main Memory DDR3 1066 SODIMM type 1 GB, 2 GB Secondary Storage Device SATA SSD 8 GB, 16 GB, 32 GB, 64 GBO/SWindows Embedded StandardGeneral SpecificationsMulti I/O PortSerial Port N/AUSB Port Hi-Speed USB 2.0 port 480 Mbps rate (x2)LAN Port Intel ® 82577 Gigabit Ethernet PHY VGA / HDMI / DP Intel ® HD Graphics Controller 4-in-1 CardN/A PCI Express Card Slot Supported LINE OUT N/A MIC INN/AAttention● P roduct specifications may change without prior notice to improve performance.NC2100/NA2000/NA2100SpecificationsResolution Maximum Resolution 1920 x 1080 @ 60 Hz Recommended Resolution 1920 x 1080 @ 60 Hz PowerRated Voltage12 V 4.5 AOperating ConditionSync (H/V)Video LED Normal Mode On/On Active On Deep Sleep Mode (Set = Off)Off/OffOff Off Operating ConditionsOperating Conditions Temperature 5 ℃ to 40 ℃Humidity 10 % to 80 %Storage ConditionsTemperature-20 ℃ to 60 ℃Humidity5 % to 95 %Operational SpecificationsIncluded in the BoxBasic ComponentsThe NC2100/NA2000/NA2100 consists of the following components. Please check that these componentshave been included prior to installation.NC2100/NA2000/NA2100User Manual / Cards screw x 2AttentionThese illustrations may differ from your product and are subject to change.AttentionThe NC2100/NA2000/NA2100 model is compatible with the following models.Applicable models: 32VS10, 42VS10, 47VS10AttentionWithout prior notice, applicable models for NC2100/NA2000/NA2100 are subject to change to improvethe performance of the product.3738Back PanelNumber Connection DescriptionUSB In For USB-type devices, including memory, hard disk, CD-ROM, key-board, and mouse.HDMI OutFor an HDMI-compatible N ConnectorFor a LAN cable.PCI MINI EXPRESS Card SlotProvided for PCI Mini Express Cards.ConnectionsABCDA B C DAttach the Box Guide to the rail slots, and press it upward.Notef card does not become fully inserted into the insertion direction. Hit by hand carefully to make fully connected.Use screws to secure the player and the Box Guide as shown below.40Limitations of Microsoft Windows Embedded StandardFrequently Asked Questions (FAQs)The following are potential errors that may occur due to internal limitations of Microsoft Windows Embedded Standard, which is the OS of SuperSign Player.● If you press Alt + Enter on the DOS window, text other than English may be shown corrupted.● If you use Save As function in the Print window, the menu window name will be displayed in English.● W hen you move to sub-menu items such as Control Panel, some of the items, such as hyper terminal, country and language setting, will be written in English.QuestionAnswerWhere can I download the driver file?● Y ou can obtain the file from the SuperSign Support website ().The Express Card does not work. What should I do?● F or NC1000/NC2000, insert the Express Card with the top side facing upward. (See Figure 1)● F or NC1100/NA1000/NA1100/NC2100/NA2000/NA2100, insert the Ex -press Card with the bottom side facing upward. (See Figure 2)Where can I get a vaccine pro-gram?This media player comes packaged with the Windows program only. Please pur-chase a vaccine program separately for use.< Figure 1 >< Figure 2 >AppendixMake sure to read the Important Precautions before using the product.Keep the User’s Guide(CD) in an accessible place for furture reference.The model and serial number of the SET is located on the back and one side of the SET. Record it below should you ever need service.WARNING - This is a class A product. In a domestic environment this product may cause radio interference in which case the user may be required to take adequate measures.MODEL SERIAL T emporary noise is normal when powering ON or OFF this device.。
JVC KD-X50BT Bluetooth 无线技术数字媒体播放器收音机说明书

JVC’s digital media receiver features advanced integration with smartphones, and connections with USB, AUX, or Bluetooth ®.The included Bluetooth ® adapter can be plugged to one of the dual USB inputs. 1A USB connection for smartphones features Drive Change Mode for BlackBerry ® and Application Mode for iPod/iPhone. With Smart Remote for Android, you can use your Android device as a remote for audio playback. Control for Pandora Radio is available on the headunit via Bluetooth ® for Android/BlackBerry ®, and USB for iPhone. You can customize the keys and display from over 30,000 colors with SeparatedVariable-Color. The unit also has 3-band parametric iEQ, and is Steering Wheel Remote ready. Ride on with the cool digital media receiver in the latest disk-less style. Key BenefitsD igital M edia R eceiverFront AUXAUDIO20W x 4RMSMOS-FET 50W x 4Recommended Features2-Way Control for iPod/iPhoneiPod Headunit2 ConnectionsforiPod/iPhone (Front+Rear+Subwoofer)3 Pre-OutputFull Digital Full Speed Charging1.0ASupport SeparatedVariable-ColorDrive Change ModeiPod/iPhone USB G3Bluetooth ®Wireless Technology Phone Book Access ProfileAudio Streaming & ControlDual USB Ports1ARadio Broadcast Data System2 Phones Full-Time ConnectionRadio ReadySAT Application Mode foriPod/iPhoneMP3/WMA WAVEQ Repeat Forward UpPlaySerial Port Profile4NTK-0884-194Pandora via Bluetooth ® (for Android/BlackBerry ®)Download the Pandora app on to your Android/BlackBerry ® and make Bluetooth ® connection to the headunit. The Serial Port Profile (SPP) lets you control as well as listen toPandora Radio on the headunit.4Steering Wheel Remote ReadyWith an optional adapter, you can control an advanced JVC headunit from the steering wheel remote control that comesfactory standard with your car.iPodUSBRearConnectionsAndroid*Mass Storage Audio Streaming AVRCPiPhoneApplication Mode Audio Streaming AVRCP* Compatibility depends on modelUSB MemoryUSB Cable HDD*Front* USB playback not supported for NTFS formatted devices. When partitions are created, only the first partition can be read.4Dual 1A USB for iPod/iPhone and SmartphonesConnect your iPod/iPhone or other smartphones to the unit’s 1A USB port, full-speed transfer. Your device’s batterywill be charged during connection. With dual USB, you can use both front and rear ports to connect a USB Bluetooth ® adapter and another device, or even twoplayers/smartphones at the same time. The audio files in your USB device can be easily accessed by PC-like folder structure.1A Support4Apps Control for iPod ModeSong information display and certain control features areavailable on the headunit for some apps, when the app is launched during iPod Mode.iPod Mode4Drive Change Mode for BlackBerry ®Listen to music from either internal (built-in memory) or external (SD) sources on a compatible BlackBerry ®, via USB connection. Some Android devices are also compatible.* Phone stays charged while connected* Switch between external and internal memory from receiver’s controls * Play/Pause/Skip tracks from receiver or wireless remote controlSelectableUSB4Bluetooth ® Compatible FunctionsIn addition to hands-free calling, voice recognition dialing, audio streaming/control, and remote control features with your smartphone, you can transfer up to 400 contact numbers to the headunit. With PBAP compatible cell phones, you can access your phone book without transferring to the headunit. Two phones can remain connected continuously. The features are also available forsmartphones.included included4Application Mode for iPod/iPhoneYou can enjoy updated features of the JVC Auto Drive Router app for Drive Data andHere I am, as well as play the sound from other apps including Pandora, with high current power supply.JVC-original iPod/iPhone AppsAuto Drive RouterDon’t miss the details! Go to the feature page for JVC original app contentCD *Not compatible with NTFS format.。
数字音频播放器使用说明书
数字音频播放器使用说明书一、产品概述数字音频播放器是一款便携式设备,旨在让用户能够随时随地欣赏高质量的音频内容。
本产品采用先进的数字音频技术和人性化设计,具备丰富的功能和操作简便性,为用户提供极致的音乐体验。
二、产品外观和配件1. 外观描述:数字音频播放器外观小巧轻便,采用精心打造的铝合金材料,具有良好的手感和耐用性。
正面配备显示屏和触控按钮,背面备有音频输出接口和USB接口。
2. 配件清单:产品包装内应包含数字音频播放器主体、耳机、USB 数据线、使用说明书。
三、基本操作1. 开机与关机:按住电源键3秒启动播放器,再按一次电源键即可关机。
2. 音乐播放:长按模式选择键进入音乐播放界面,通过上下键选择音频文件,按确认键开始播放,音量加减键可调节音量大小。
3. 暂停与继续播放:在音乐播放状态下,按确认键可暂停播放,再按一次确认键即可继续播放。
4. 上一曲与下一曲:在音乐播放状态下,按上一曲键可切换到上一首音乐文件,按下一曲键可切换到下一首音乐文件。
5. 音乐列表:按菜单键进入音乐列表界面,通过上下键选择不同的音频文件,在确认键的作用下进入选定的音频文件。
四、高级功能1. FM收音功能:按菜单键进入功能列表,选择FM收音选项,通过上下键调整频率,确认键可搜索和保存收音台。
2. 录音功能:按菜单键进入功能列表,选择录音选项,按确认键开始录音,再按一次确认键停止录音,并自动保存录音文件。
3. 文件管理:按菜单键进入功能列表,选择文件管理选项,通过上下键选择不同的文件夹,确认键可打开选定的文件夹并进行操作。
4. 设置选项:按菜单键进入功能列表,选择设置选项,通过上下键选择不同的设置项,按确认键进入设置菜单并进行个性化设置。
五、充电与存储1. 充电方式:使用附带的USB数据线连接播放器和电脑,可实现充电功能。
2. 存储容量:播放器支持外置存储卡,最大扩展容量为32GB,用户可以根据需求自行选择合适的存储容量。
Pioneer KMM-DAB307 1DIN 数字媒体播放器 DAB+ 收音机说明书

KMM-DAB3071DIN Digital Media Receiver with DAB+ radio.Replacement for KMM-DAB403▼Display / Cosmetic features:Full detachable front panel.1 line, 13 Digits x 13 Segments x Liquid Crystal Display.Vertical aligment display for high contrast & wide viewing angle.White LED display illumination.Red LED key illumination.Display & Key brightness control (1 - 31 steps).Manual & timer set dimmer control (On/Off) for key & display.Menu language: English (default) / French / Russian / Spanish.Tag language: English / French / Greek / Russian / Spanish.Demonstration mode.Dual Accent key (Audio settings / Preset EQ).12H/24H clock display.▼Audio features:MOS-FET 4 x 50W max output power.1 RCA pre-out (2,5V), Rear/Subwoofer switchable.Front side mini-Jack AUX input, dust cover protected.Audio Control/ Digital Sound Processor (DSP):▪ Subwoofer setup & control.▪ Manual EQ: 13 Band: 62,5Hz~16kHz with level & Q factor control.▪ Preset EQ: Natural/Rock/Pops/Easy/Top40/Jazz/Powerfull/User.▪ Bass Boost & Loudness control.▪ Fader & Balance control.▪ Source Volume offset.▪ Sound effect: Sound Reconstruction, Space Enhancer, Realizer,Stage EQ, Drive EQ.▪ Speaker size control.▪ 3-way X’over.▪ Digital Time aligment (DTA) settings: Position/Distance/Gain/Reset.▪ Car type: Off/Compact/Full Size Car/Wagon/Minivan/SUV/Minivan long.▼Tuner features:6 Mix presets (Regardless the selected band: DAB / FM / MW / LW).Seek Mode: Auto1/Auto2/Manual (FM & DAB).TI, Traffic Information (FM & DAB).Tuner preset memory w/o backup power.PTY search, ASW select, PTY Watch, Related service (FM & DAB).FM / AM (MW/LW) tuner:▪ Radio Data System (RDS) with Radio Text Plus.▪ 18FM / 6AM presets.▪ Local Seek, Auto memory, Regional, AF set.Digital Audio Broadcasting (DAB) Tuner.▪ DAB aerial optional.▪ DAB+ & DMB audio support.▪ Intelligent seek & ensemble seek, Soft link, AF set.▪ Service list by alphabet order.▼USB port features:Front, Illuminated, USB 2.0 input, dust cover protected.1,5A Quick battery charge (BC1.2 compatible).FAT 12/16/32 file system.Audio codec: MP3 / WMA / WAV / FLAC.Mass storage class:▪ Tag information display / Time code display.▪ Play / Pauze / Reverse / Fast-forward / Select Track / File .▪ Random play (Folder), Repeat play (Folder / File).Drive change.Last position memory / Resume play.▼General features:Firmware update by USB.Mitsumi to ISO connector DC cord.Steering remote control wire for 3rd party interfaces.Mute control wire.Power control wire / Antenna control wire.Less then 1mA dark current in Power Off mode.13Digit 1Line LCD Front USB(1,5A)& AUX input1 RCA Preout2,5VRed Key & White Display Illumination.MP3 • WMAWAV • FLACShort Body•Mecha Less13-Band EQ •DSP • DTA• X’overWiredSteering WheelRemote ReadyRemovableFaceplate (Aerial optional)2020-2021KMM-DAB307。
数字音频播放器的数字信号转换原理

数字音频播放器的数字信号转换原理数字音频播放器是一种便携式设备,可将数字音频信息转换为模拟信号,然后通过耳机或扬声器播放出来。
它采用的核心技术是数字信号转换,本文将详细介绍数字音频播放器的数字信号转换原理。
一、数字音频的产生数字音频是通过模拟音频信号经过采样、量化和编码等过程转换而来的。
采样是指将模拟音频信号在时间轴上等间隔地离散采集,而量化则是将采样得到的模拟信号幅度近似离散化为一系列数字值。
最后,编码将离散的模拟信号幅度映射为一系列数字编码,以便存储和传输。
二、数字信号转换原理数字音频播放器中的数字信号转换分为两个阶段:数字到模拟(D/A)转换和模拟输出。
1. 数字到模拟转换(D/A转换)数字到模拟转换是将数字音频数据还原为模拟音频信号的过程。
在数字音频播放器中,该过程通常由数字音频芯片(Digital-to-Analog Converter,简称DAC)来实现。
DAC将以数字形式存在的音频数据解码并转换为模拟信号。
首先,DAC接收到存储在数字音频播放器中的音频文件。
然后,DAC芯片按照一定的算法将数字值转换为模拟电压。
这个算法通常称为数字插值和重构滤波器。
数字插值是指根据采样率的不同,利用附加信息来计算处于采样点之间的信号值。
重构滤波器则是对插值结果进行平滑处理,以消除采样产生的高频噪音,使输出的模拟信号更接近原始模拟信号。
2. 模拟输出经过D/A转换的数字信号已经转换为模拟信号,但仍然是低电平的电压信号。
为了使模拟信号能够通过耳机或扬声器播放出来,需要通过放大器来提高信号的电平。
放大器接收D/A转换后的模拟信号,并将其放大到足够的电压水平。
放大器还可以根据用户的需求来调整音量大小和音质平衡等参数。
经过放大器放大和处理后,模拟信号被送入耳机或扬声器,最终以声音的形式输出。
三、数字信号转换的优势数字音频播放器采用数字信号转换的方式有以下优势:1. 噪音抗干扰能力强:数字信号具有很好的抗干扰能力,可以有效抵抗传输、存储和处理过程中引入的噪音和失真。
字节alphaplayer详解-概述说明以及解释
字节alphaplayer详解-概述说明以及解释1.引言1.1 概述概述部分的内容主要是对字节alphaplayer进行简要介绍和概括。
可以从以下几个方面进行描述:字节alphaplayer是一款基于字节跳动公司开发的音频播放器应用。
它是一款功能强大、操作简便、用户友好的音频播放器,可在各类设备上流畅运行。
它具有多项出色的特点,能够满足用户对音乐播放的多种需求。
首先,字节alphaplayer提供了丰富多样的音乐资源。
用户可以通过该应用访问到全球范围内的音乐库,包括各种音乐流派、语种和时期的歌曲。
用户可以根据自己的喜好和心情选择不同类型的音乐进行收听,满足不同场景下的音乐需求。
其次,字节alphaplayer具有智能推荐功能。
该应用能够根据用户的听歌记录和收藏喜好,自动为用户推荐符合其喜好的音乐曲目。
这种个性化推荐的方式能够提高用户的音乐发现体验,帮助用户发现与自己口味相符的新歌,丰富音乐库的浏览与收听。
此外,字节alphaplayer还支持自定义播放列表。
用户可以根据自己的喜好和需要,自行创建或编辑播放列表,并进行批量收藏和管理。
这种个性化的操作方式使得用户能够更好地组织和管理自己的音乐资源,方便随时收听和切换不同的音乐风格。
最后,字节alphaplayer还提供了多种音效调节和音乐播放控制功能。
用户可以根据自己的需求,调整音乐的音量、音色等参数,获得更好的音乐效果。
同时,字节alphaplayer还支持音频的快进、快退、暂停等基本操作,方便用户对音乐进行灵活控制。
综上所述,字节alphaplayer是一款功能全面、操作简便的音频播放器应用。
它通过丰富的音乐资源、智能的推荐功能、个性化的播放列表和音效调节,提供了良好的音乐收听体验。
在未来,字节alphaplayer有着巨大的发展空间,将进一步满足用户对音乐播放的需求,并持续提供优质的音乐服务。
1.2 文章结构文章结构部分的内容:文章的结构分为引言、正文和结论三个部分。
JBL MP350 Classic 数字媒体播放器用户手册说明书
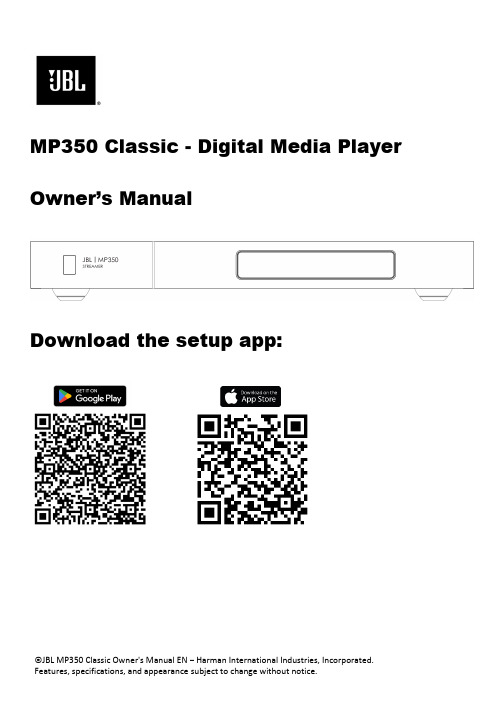
©JBL MP350 Classic Owner's Manual EN – Harman International Industries, Incorporated.MP350 Classic - Digital Media Player Owner’s ManualDownload the setup app:IMPORTANT SAFETY INSTRUCTIONS1. Read these instructions.2. Keep these instructions.3. Heed all warnings.4. Follow all instructions.5. Clean only with a dry cloth.6. Do not block any ventilation openings. Install this apparatus in accordance with the manufacturer’s instructions.7. Do not install this apparatus near any heat sources such as radiators, heat registers, stoves or other apparatus that produce heat.8.Do not defeat the safety purpose of the polarized or grounding-type plug. A polarized plug has two blades with one wider than the other. A grounding-type plug has two blades and a third grounding prong. The wide blade or the third prong is provided for your safety. If the provided plug does not fit into your outlet, consult an electrician for replacement of the obsolete outlet. 9. Protect the power cord from being walked on orpinched, particularly at plugs, convenience receptacles and the point where they exit from the apparatus. 10.Use only attachments/accessories specified by the manufacturer.11.Use only with the cart, stand, tripod, bracket, or tablespecified by the manufacturer or sold with the apparatus. When a cart is used, use caution when moving thecart/apparatus combination to avoid injury from tip-over.12. Unplug this apparatus during lightning storms or when unused for long periods of time.13.Refer all servicing to qualified service personnel. Servicing is required when the apparatus has been damaged in any way, such as when the power-supply cord or plug is damaged, liquid has been spilled or objects have fallen into the apparatus, or theapparatus has been exposed to rain or moisture, does not operate normally or has been dropped.14. To disconnect this apparatus from the AC mains completely, disconnect the power-supply cord plug from the AC receptacle.15. The mains plug of the power-supply cord shall remain readily operable.16.This apparatus is intended to be used only with the power supply and/or charging cable provided by the manufacturer.The following instructions may not apply to waterproof devices. Refer to your device user manual or quick start guide for more waterproof instruction if any.• Do not use this apparatus near water.• Do not expose this apparatus to dripping or splashing, and ensure that no objects filled with liquids,such as vases, are placed on the apparatus. WARNING: TO REDUCE THE RISK OF FIRE OR ELECTRIC SHOCK, DO NOT EXPOSE THIS APPARATUS TO RAIN OR MOISTURE.RISK OF ELECTRIC SHOCK. DO NOT OPEN.THIS SYMBOL ON THE PRODUCT MEANS THERE IS UNINSULATED, DANGEROUSVOLTAGE WITHIN THE PRODUCTENCLOSURE THAT MAY PRESENT A RISK OF ELECTRICAL SHOCK.THIS SYMBOL ON THE PRODUCT MEANS THERE ARE IMPORTANT OPERATING AND MAINTENANCE INSTRUCTIONS IN THIS GUIDE.Visit the product page at and download the Safety Sheet for a full list of safety instructions.Class II ProductThis equipment is a Class II or double insulated electrical appliance. It has been designed in such a way that it does not require a safety connection to electrical earth (“ground” in the U.S.).Table of ContentsIMPORTANT SAFETY INSTRUCTIONS (2)Class II Product (2)Table of Contents (3)Package Contents (4)Placing The Unit (4)Front Panel (5)Rear Panel (5)Remote Control (6)Connecting the Streamer (7)Network Connection (7)Wired Connections: (7)Wi-Fi Connections: (7)Analog Audio Connection (8)Digital Audio Connection (9)Operation (10)Power (10)Auto Standby (10)Playback (10)USB (10)Menu (11)Menu Tree (11)Supported File Formats (11)Troubleshooting (12)Specifications (12)Trademarks and Licenses (13)Thank you for choosing JBLFor over 75 years, JBL has been creating best in class audio equipment for concerts, studios, theaters, and homes around the world. JBL is the trusted choice of leading recording artists and sound engineers.The JBL MP350 is designed to provide you with upgradable audio streaming for decades to come, all with exceptional musicality so you get the most enjoyment from your music.This handbook is a guide to installing and using the MP350 and includes information on its more advanced features.In the unlikely event of any fault, or you require technical assistance, please contact our dedicated support teams by email using ************************, or by telephone using +44 (0) 1707 668012 or +1 888 691 4171. Or, if you simply require further information about JBL products, our network of dealers will be happy to help you. Further information can also be found on the JBL website at .Package Contents▪JBL MP350 Classic streaming music player▪IR remote▪2x AAA batteries for the remote control▪Region specific power cords▪Quick start guide▪Safety and compliance documentPlacing The Unit▪Place the streamer on a level, firm surface, avoiding direct sunlight and sources of heat or damp. ▪Do not place the MP350 on top of an amplifier or other source of heat.▪Make sure the remote-control receiver to the left of the front panel display is unobstructed, otherwise this will impair the use of the remote-control.▪Do not place your record deck on top of this unit. Record decks are very sensitive to the noise generated by mains power supplies which will be heard as a background ‘hum’ if the record deck is too close.▪The normal function of the unit may be disturbed by strong electromagnetic interference. If this occurs, simply reset the unit with the switch on the rear panel, or move the unit to another location.Front PanelRear PanelRemote ControlNote: Incorrect use of batteries can have hazardous results. Do not mix old and new batteries together. Do not use non-identical batteries together. Although they may look similar, different batteries may have different voltages. Ensure the batteries are inserted in the correct direction.Remove batteries from equipment that is not going to be used for a month or more. When disposing of used batteries, please comply with governmental or local regulations that apply in your country or area.Toggle Standby OperationMenu NavigationCenter button to selectVolume Control (for MP350 or SA550)Mute On or Off (for MP350 or SA550)Display BrightnessTransport Keys (Play/Pause, Skip back/forward)Menu buttonMusic info buttonConnecting the StreamerNetwork Connection Wired Connections:Wi-Fi Connections:To make a Wi-Fi connection, download the JBL Premium Audio app to your smartphone or tablet. Links are on the front page of this manual.Power on the JBL MP350 streamer and open the app to discover it after the MP350 is Ready . Select it and follow the prompts to connect it to your Wi-Fi network.Alternatively, you can connect the JBL MP350 to your Wi-Fi network using Apple Airplay speaker setup in the Wi-Fi settings of your Apple device, or the Google Home app in both Android and Apple devices.Step 2, using analog interconnect cables, connect the right (R), red terminal of the analog output on the streamer to the right (R), usually red terminal of an analog input on your amplifier.Step 3, connect the left (L), white terminal of the analog output on the streamer to the left (L), usually white terminal of an analog input on your amplifier.Top Tips▪After making connections: switch the amplifier on with no input and reduce the volume to minimum.Select the input that corresponds to your connection, and then slowly increase the volume to asuitable listening level to avoid loud sounds or product damage in the event of incorrect connection. ▪If you are unsure as to how your system should be connected, please contact your JBL dealer who will be happy to help you.Step 2, using a digital coax interconnect cable, connect the digital coaxial output on the streamer to a digital coaxial input on your amplifier.Alternatively, using an optical Toslink interconnect cable, connect the digital optical output to a digital optical input on your amplifier.Note 1: Digital outputs are disabled by default. To use a Digital output, changethe Output Type in the settings menu. To use the menu, see Page 11Note 2: Variable output is not available when Digital output is enabled. WhenDigital output is selected, Output Volume will default to Fixed.Top Tips▪Digital audio connections are recommended when using the MP350 with the JBL SA550 amplifier. ▪After making connections: switch the amplifier on with no input and reduce the volume to minimum.Select the input that corresponds to your connection, and then slowly increase the volume to asuitable listening level to avoid loud sounds or product damage in the event of incorrect connection. ▪If you are unsure as to how your system should be connected, please contact your JBL dealer who will be happy to help you.OperationPowerThe power switch on the rear panel switches the amplifier on or off. When you have finished making connections, switch the amplifier on.Auto StandbyThe MP350 is designed to enter standby automatically after 20 minutes with no audio playing, and no user interaction. This is to meet international power consumption regulations. This can be turned off in the menu. To use the menu, see page 11.PlaybackThe JBL MP350 can be connected to, and play music from the following apps and services:▪Spotify Connect▪Tidal Connect▪Apple Airplay 2▪Chromecast (requires acceptance of Google terms in the JBL Premium App or additional setup steps in the Google Home app)▪Roon (requires additional setup in Roon app)From the JBL Premium Audio app, you can access setup favorites and access other services including but not limited to:▪Internet Radio▪Podcasts▪Connected USB media▪Local network storage (UPnP)USBInsert the USB storage device into the USB socket on the rear panel. Do not use a USB extension cable. The JBL MP350 can play music files stored on a USB flash drive. Music files contained within the USB storage can be browsed using the JBL Premium Audio app.Please refer to Supported File Formats on page 11.MenuTo access the setting menu, press the MENU button on the remote control. To navigate the menu use the navigation buttons on the remote control. Menu TreeOutput Type Selects which output to use, Analog or Digital with full or partial MQA decoding (where MQA encoded content is being played). Default is Analog.Output Volume Selects whether the audio output volume is fixed or variable. Default is Variable.Display Select Display Brightness. Default is Full.Auto Standby When enabled, the streamer will enter standby after 20 minutes with no user interaction or playback. Default is On.DAC Filter Select a digital filter for the analog outputs. Default is Slow. System Reset Press Select/OK to initiate a reset of all settings to default.USB Update Press Select/OK to initiate a software update from a USB stick present in the USB socket on the rear panel.NET Version Displays the current software version in operation on the NETWORK device. Host Version Displays the current software version in operation on the HOST device.IP Address Displays the current IP address of the MP350 on your network.MAC Address Displays the MAC address of the MP350.UNIT ID Displays the NETWORK ID of the MP350 as identified to other devices on the network.Supported File FormatsAAC 16 or 24 bit 44.1, 48, 88.2 or 96 kHzAIFF 16 or 24 bit 44.1, 48, 88.2, 96, 176.4 or 192 kHz ALAC 16 or 24 bit 44.1, 48, 88.2, 96, 176.4 or 192 kHz FLAC 16 or 24 bit 44.1, 48, 88.2, 96, 176.4 or 192 kHzMP3 16 bit 44.1 or 48 kHzOGG 16 bit 44.1 or 48 kHzWAV 16 or 24 bit 44.1, 48, 88.2, 96, 176.4 or 192 kHz WMA 16 bit 44.1 or 48 kHzTroubleshooting No sound Is the streamer correctly plugged in and switched on?Is the streamer correctly connected to the amplifier, with the correct input selected?Is the amplifier muted?Is the correct output mode selected (Analog or Digital)? (See menu on page 11)The streamer does not respond to the remote controlAre there fresh batteries in the remote control?Are you pointing the remote control towards the amplifier window without obstruction?The front panel display is blank Is the streamer correctly plugged in and switched on?Is the streamer in standby?Is the display dimmed to “Off”?Press the button on the remote control. Cannot control the volume Is Fixed volume enabled? (See menu on page 11)Is Digital output selected? (See menu on page 11)Cannot discover the streamer in an app Is the streamer correctly plugged in and switched on?Does the streamer have a network connection, wired by Ethernet or Wi-Fi?For Wi-Fi connections, has setup been completed using the JBL Premium Audio app?Is your smartphone or tablet connected to the same local network?Specifications USBUSB 2.0 High Speed (480Mbps) Ethernet10/100Mbps Wi-Fi802.11b/g/n Digital to Analog ConverterTI PCM1796 Signal/Noise Ratio (Awtd)115dB Harmonic Distortion (1kHz)< 0.007% Frequency response10 Hz – 20 kHz ± 0.5dB Output level (fixed)2.2V rms Output Impedence47Ω unbalanced Jitter RMS< 20 psec Mains voltage110–240V, 50–60Hz Maximum power consumption12W Dimensions in mm (including feet, control knob andconnectors)448 W x 58 H x 285 D Weight (net)4.5kg Weight (gross) 7.0kgTrademarks and LicensesApple®, AirPlay® and the AirPlay Logo™, iPod®, iPhone® and iPad® are trademarks of Apple Inc.,registered in the U.S. and other countries. App Store is a service mark of Apple Inc.To use AirPlay with the JBL MP350, the latest version of iOS, iPadOS, or macOS is recommended.The Spotify software is subject to third party licenses that can be found here:https:///legal/third-party-licenses/The Wi-Fi CERTIFIED™ logo is a registered trademark of Wi-Fi Alliance®.Google, Google Play, Chromecast, and other related marks are trademarks of Google LLC. The GoogleAssistant requires an internet connection and is not available in certain countries and languages. Availabilityand react of certain features and services are device, service, and network-dependent and may not beavailable in all areas. Controlling certain devices in your home requires compatible smart devices.Subscriptions for services and applications may be required and additional terms, conditions and/or chargesmay apply.MQA and the Sound Wave Device are registered trademarks of MQA Limited. © 2016MQA (Master Quality Authenticated).MQA is an award-winning British technology that delivers the sound of the original master recording. Themaster MQA file is fully authenticated and is small enough to stream or download.Visit for more information.The JBL MP350 includes MQA technology, which enables you to play back MQA audio files and streams,delivering the sound of the original master recording.MQA or MQA Studio indicates that the product is decoding and playing an MQA stream or file and denotesprovenance to ensure that the sound is identical to that of the source material.MQA Studio indicates it is playing an MQA Studio file, which has either been approved in the studio by theartist/producer or has been verified by the copyright owner.MP3 MPEG Layer-3 audio decoding technology licensed from Fraunhofer IIS and Thomson multimedia.FLAC FLAC Decoder Copyright © 2000, 2001, 2002, 2003, 2004, 2005, 2006, 2007, 2008 Josh Coalson Redistribution and use in source and binary forms, with or without modification, are permitted provided that the following conditions are met:•Redistributions of source code must retain the above copyright notice, this list of conditions and the following disclaimer.•Redistributions in binary form must reproduce the above copyright notice, this list of conditions and the following disclaimer in the documentation and/or other materials provided with the distribution.•Neither the name of the Foundation nor the names of its contributors may be used to endorse or promote products derived from this software without specific prior written permission. THIS SOFTWARE IS PROVIDED BY THE COPYRIGHT HOLDERS AND CONTRIBUTORS ‘AS IS’ AND ANY EXPRESS OR IMPLIED WARRANTIES, INCLUDING, BUT NOT LIMITED TO, THE IMPLIED WARRANTIES OF MERCHANTABILITY AND FITNESS FOR A PARTICULAR PURPOSE ARE DISCLAIMED. IN NO EVENT SHALL THE FOUNDATION OR CONTRIBUTORS BE LIABLE FOR ANY DIRECT, INDIRECT, INCIDENTAL, SPECIAL, EXEMPLARY, OR CONSEQUENTIAL DAMAGES (INCLUDING, BUT NOT LIMITED TO, PROCUREMENT OF SUBSTITUTE GOODS OR SERVICES; LOSS OF USE, DATA, OR PROFITS; OR BUSINESS INTERRUPTION) HOWEVER CAUSED AND ON ANY THEORY OF LIABILITY, WHETHER IN CONTRACT, STRICT LIABILITY, OR TORT (INCLUDING NEGLIGENCE OR OTHERWISE) ARISING IN ANY WAY OUT OF THE USE OF THIS SOFTWARE, EVEN IF ADVISED OF THE POSSIBILITY OF SUCH DAMAGE.HARMAN International, Incorporated8500 Balboa Boulevard, Northridge, CA 91329 USADanzigerkade 16G 1013 AP Amsterdam, NetherlandsGround Floor, Westside 2, London Road, Apsley, Hemel Hempstead,Hertfordshire, HP3 9TD, United Kingdom© 2023 HARMAN International Industries, Incorporated. All rights reserved. JBL is a trademarks of HARMAN International Industries, Incorporated, registered in the United States and/or other countries.Features, specifications, and appearance are subject to change without notice.。
- 1、下载文档前请自行甄别文档内容的完整性,平台不提供额外的编辑、内容补充、找答案等附加服务。
- 2、"仅部分预览"的文档,不可在线预览部分如存在完整性等问题,可反馈申请退款(可完整预览的文档不适用该条件!)。
- 3、如文档侵犯您的权益,请联系客服反馈,我们会尽快为您处理(人工客服工作时间:9:00-18:30)。
MP3, WMA, WMA Pro, AAC, MPEG1/2 Layer 1/2, ADPCM, OGG Vorbis, Dolby Digital AC3, Dolby Digital Plus, RACOOK, FLAC
Support HTML&CSS, Javascript, Adobe Flash Player, ACTS Media Player, ACTS Ticker, ACTS Image Slide Show, MPEG,AVI,WMV,MP 3,MP4,RTM,RTP,MM S,WMA
Main Products:
• • • Cisco Digital Media Player 4400G Cisco Digital Media Player 4310G Cisco Digital Media Player 4305G
Digital Signage’s Common Applications: •Public information •Internal information •Menu information •Advertising •Brand building(In-Store) •Influencing customer behavior •Enhancing customer experience
The global digital signage market is estimated to generate $3.95 billion in 2011 and $13.2 billion by 2016; at a CAGR of 27.29% from 2011 to 2016.
-----From the report “Global Digital Signage Market and its Applications (2011-2016)”
Interactive Services
The Cisco Interactive Services Solution combines:
Healthcare
• • • • • Preventative health care Product advertising Guidance systems Queue management Local news and entertainment
Leisure
• • • • • Opening hours Ticketing Way finding Promotions Activity schedules
Digital Signs Enterprise Content Delivery System Interactive Solution
•Digital media player •Content management servers •Displays and software •Network infrastructure
ACTS
AMPWEB4
UCView
SignEdg e 10 Intel Atom D525 (1.8GHz, DualCore) 4G ViewMe dia 100 Intel® Intel i3 (3.1GHz)
Memory Operating system
2/4G Window s 7e
1GB DDR3 Android 4.0
Cisco
DMP440 0G Processor DMP4 310G DMP4 305G
Digital Signage-DMP Products Data Sheets
HP Digital Signage Signage China Dynasign
rp5800 Intel Core™ i3-2120 , i52400 Media DROIDZX 1.6Ghz Dual ARM® Cortex™A9 mediaB OX-100 Inte™ core2 2.7GDua l Core mediaBO X-200 Intel™ i3 Dual Core 3.1G mediaBO X-300 Intel™ i5 Quad Core 2.8G SC-8018 SC400 N93-2G Intel Mobil Duo Core 2Ghz CPU AMPDUO ARM based Multimedia processor 712Mhz
Dynasign N93-2G AMPDUO
ACTS AMPWEB4
UCView SignEdg e 10 ViewMe dia 100
Video Formats & Codecs
MPEG1, MPEG2, MPEG4 Part 2 Aspect ratio: 4:3 and 16:9 For 4400G&4310G& : Also Windows Media 9 and VC1—VoD only
2 HD(up to 1080p at 16:9)
1 Normal 480p/30 fps
16 supports USB hub HD 720p about 30fps
2 Up to 1920x1280 , both 16:9 and 4:3
1 16:9 and 4:3
6 1080p
4 720p, 1080p
Digital Signage-DMP
Digital Signage-DMP Display Applications
Corporate
• • • • • Visitors welcoming messages Live news Internal communication Presence/absence information Menus in canteens
4GB Flash
160G SATA HDD
8G(128G) Ethernet 10/100 Mbps ,Wifi 802.11b/g, 3G
160GB 10/10 0, HTTP, DHCP,
160G wireless 802.11b/ g/n
320G 10/100 Base-T & 802.11 b/g/n
160G wireless 802.11b/ g/n
60G
60G S.S.
Ethernet copper 10/100B10/100Base-T & 802.11 b, g, n
10/100/1000Base-T Wi-Fi 802.11 b/g/n
USB Ports HD
DMP
Digital Signage Interactive Services Central Management Software
Digital Signage Overview
Digital Signage’s components: Major Players: • • • • • • • • • • • Cisco Systems (U.S.) NEC Display Solutions, Ltd (Tokyo) AU Optronics (Taiwan) Winmate(Taiwan) Scala (U.S.) Navori (Switzerland) Adflow Network (Canada) Nanonation Technology (U.S.) Omnivex Corporation (Canada) UCView(U.S.) Samsung Electronics Co. Ltd (South Korea) Cisco DMS Solution Overview
VOB, AVI, WMV
Sound Formats & Codecs
Audio MPEG1 Layers 1 and 2, MP3, MPEG4 AAC Low Complexity, AC-3
For 4400G&4310G: Also HE-AAC v1
Realtek ALC261 codec
Audio integrated intel high definition 5.1 audio
Digital Media Player 4310 is the industry's first network-aware DMP. It integrates Cisco medianet architecture technology and is capable of automatically configuring to a digital signage network at setup.
2 1080p
4 1080p
Cisco DMP440 0G DMP4 310G DMP4 305G
HP rp5800 Media DROIDZX
Digital Signage mediaB OX-100 mediaBO X-200 mediaBO X-300
Signage China SC-8018 SC400
2GB Windows7e
2GB
4G RISC or Embedded based platform
2G Windows 7e Embedded Linux
2/4G Window /Linux
Linux
Storage Network
4G 802.11 B/G &10/100 BASE-T
32G
2G
250 GB 802.11 b/g/n wireless , Integrat ed Intel 82579L M GbE 7
Retail
• • • In-store advertising Branding Interactive
Government
• • • • Employee/public communication Room scheduling Evacuation procedures Greeting systems