HYP-3系列消化炉说明书

合集下载

沛欧红外消化炉XMTP段程序控制仪表使用说明

沛欧红外消化炉XMTP段程序控制仪表使用说明

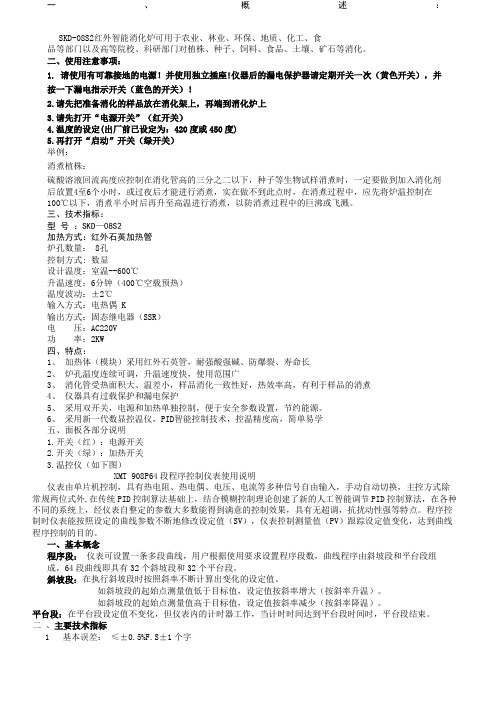
沛欧红外消化炉X M T P 段程序控制仪表使用说明 The final edition was revised on December 14th, 2020.一、概述:SKD-08S2红外智能消化炉可用于农业、林业、环保、地质、化工、食品等部门以及高等院校、科研部门对植株、种子、饲料、食品、土壤、矿石等消化。

二、使用注意事项:1. 请使用有可靠接地的电源!并使用独立插座!仪器后的漏电保护器请定期开关一次(黄色开关),并按一下漏电指示开关(蓝色的开关)!2.请先把准备消化的样品放在消化架上,再端到消化炉上3.请先打开“电源开关”(红开关)4.温度的设定(出厂前已设定为:420度或450度)5.再打开“启动”开关(绿开关)举例:消煮植株:硫酸溶液回流高度应控制在消化管高的三分之二以下,种子等生物试样消煮时,一定要做到加入消化剂后放置4至6个小时,或过夜后才能进行消煮,实在做不到此点时,在消煮过程中,应先将炉温控制在100℃以下,消煮半小时后再升至高温进行消煮,以防消煮过程中的巨沸或飞溅。

三、技术指标:型号:SKD—08S2加热方式:红外石英加热管炉孔数量: 8孔控制方式: 数显设计温度:室温--600℃升温速度:6分钟(400℃空载预热)温度波动:±2℃输入方式:电热偶 K输出方式:固态继电器(SSR)电压:AC220V功率:2KW四、特点:1、加热体(模块)采用红外石英管,耐强酸强碱、防爆裂、寿命长2、炉孔温度连续可调,升温速度快,使用范围广3、消化管受热面积大、温差小,样品消化一致性好,热效率高,有利于样品的消煮4、仪器具有过载保护和漏电保护5、采用双开关,电源和加热单独控制,便于安全参数设置,节约能源。

6、采用新一代数显控温仪,PID智能控制技术,控温精度高,简单易学五、面板各部分说明1.开关(红):电源开关2.开关(绿):加热开关3.温控仪(如下图)XMT 908P64段程序控制仪表使用说明仪表由单片机控制,具有热电阻、热电偶、电压、电流等多种信号自由输入,手动自动切换,主控方式除常规两位式外,在传统PID控制算法基础上,结合模糊控制理论创建了新的人工智能调节PID控制算法,在各种不同的系统上,经仪表自整定的参数大多数能得到满意的控制效果,具有无超调,抗扰动性强等特点。

HyPM HD 30集成手册中文版

HyPM HD 30集成手册中文版

30 KW 氢燃料电池发电模块HyPM® HD 30集成操作手册第4版此产品受6,436,563, 6,866,061, 6,878,477, 7,018,732, 7,077,187, 7,148,654美国专利及其它申请中的专利保护。

30 kW氢燃料电池发电系统HyPM® HD 30集成操作手册第4版保留所有版权。

未经Hydrogenics公司书面授权,手册的任何一部分均不得以任何方式或任何手段(电子的、机械的)复制或传播。

2013年8月印制修订历史担保和责任1 概述2 安全3 产品概述HyPM® HD 30属于长寿命/移动电源系列。

经过设计、优化,它可以应用在多种移动领域。

除了HyPM燃料电池电堆以外,产品还包含了燃料、氧化剂及水的管理,以及气体净化处理辅助部件,集成了软件控制及电源调节。

HyPM结构最显著的特点如下:✓随负荷变化,相应快速✓无限制启动次数,不会对电堆产生负面影响✓内置先进的诊断✓燃料利用率高✓液体冷却,能够有效的带走系统或沟槽内的热量,以应用在其它地方✓低压操作✓安静3.1 技术规格表3-1FCPM技术规格1.大约是底座外围尺寸,不包括空气供应系统和水泵。

2.冷藏处理后产品质量在湿基准基础上有上下1 kg浮动。

产品质量不包含空气供应系统和水泵。

3.产品尺寸以最外围为基准,不包含接插件和法拉。

4.禁止用户超功率使用。

最大输出电流禁止使发电系统超过额定功率。

模块额定功率是在最初工程测试验收时确定的,工况条件为环境温度为21℃,海拔高度为200 m,燃料和氧化剂温度均为21℃。

FCPM须按照说明书规定运行。

否则,会影响电堆性能包括电堆耐久性,毁坏电堆。

5.输出电流由用户决定,但禁止超过由CAN总线输出的“允许消耗电流”。

FCPM禁止在低于15 A下运行5min。

6.平均最高效率在模块出厂验收测试得到,约有±3 %的误差。

工况条件为环境温度为21℃,海拔高度为200 m,燃料和氧化剂温度均为21℃,操作电流约(以氢气低热值为准,25℃,101.3 kPa)。

沛欧红外消化炉XMTP段程序控制仪表使用说明

沛欧红外消化炉XMTP段程序控制仪表使用说明

一、概述:SKD-08S2红外智能消化炉可用于农业、林业、环保、地质、化工、食品等部门以及高等院校、科研部门对植株、种子、饲料、食品、土壤、矿石等消化。

二、使用注意事项:1. 请使用有可靠接地的电源!并使用独立插座!仪器后的漏电保护器请定期开关一次(黄色开关),并按一下漏电指示开关(蓝色的开关)!2.请先把准备消化的样品放在消化架上,再端到消化炉上3.请先打开“电源开关”(红开关)4.温度的设定(出厂前已设定为:420度或450度)5.再打开“启动”开关(绿开关)举例:消煮植株:硫酸溶液回流高度应控制在消化管高的三分之二以下,种子等生物试样消煮时,一定要做到加入消化剂后放置4至6个小时,或过夜后才能进行消煮,实在做不到此点时,在消煮过程中,应先将炉温控制在100℃以下,消煮半小时后再升至高温进行消煮,以防消煮过程中的巨沸或飞溅。

三、技术指标:型号:SKD—08S2加热方式:红外石英加热管炉孔数量: 8孔控制方式: 数显设计温度:室温--600℃升温速度:6分钟(400℃空载预热)温度波动:±2℃输入方式:电热偶 K输出方式:固态继电器(SSR)电压:AC220V功率:2KW四、特点:1、加热体(模块)采用红外石英管,耐强酸强碱、防爆裂、寿命长2、炉孔温度连续可调,升温速度快,使用范围广3、消化管受热面积大、温差小,样品消化一致性好,热效率高,有利于样品的消煮4、仪器具有过载保护和漏电保护5、采用双开关,电源和加热单独控制,便于安全参数设置,节约能源。

6、采用新一代数显控温仪,PID智能控制技术,控温精度高,简单易学五、面板各部分说明1.开关(红):电源开关2.开关(绿):加热开关3.温控仪(如下图)XMT 908P64段程序控制仪表使用说明仪表由单片机控制,具有热电阻、热电偶、电压、电流等多种信号自由输入,手动自动切换,主控方式除常规两位式外,在传统PID控制算法基础上,结合模糊控制理论创建了新的人工智能调节PID控制算法,在各种不同的系统上,经仪表自整定的参数大多数能得到满意的控制效果,具有无超调,抗扰动性强等特点。

不同温度对大豆糖蜜发酵法生产酒渣碱的影响研究

不同温度对大豆糖蜜发酵法生产酒渣碱的影响研究

不同温度对大豆糖蜜发酵法生产酒渣碱的影响研究摘要:酒渣碱为一种强荧光黄色的化合物,具有淡苦味,是一种吲哚生物碱衍生物。

酒渣碱具有抗HIV-1活性、抗癌活性、抗肿瘤活性、抗神经炎症活性等多种生理活性。

本文以大豆糖蜜为原料,优化了米曲霉液体发酵生产酒渣碱的工艺条件。

研究结果表明米曲霉在30℃发酵45d,发酵液中酒渣碱的浓度可达到0.45μg/ml。

关键词:酒渣碱米曲霉发酵酒渣碱1936年第一次从日本米酒中发现,后来多次被科学家从当归、牛肝菌、酱油、高等植物和真菌中分离得到,并证明该化合物具有抗HIV-1活性,抗肿瘤活性。

姚磊等人发现酒渣碱对金黄色葡萄球菌具有较强的抑制作用;赵雪娇等从当归中分离纯化出酒渣碱;王洪平等从头花蓼中分离出酒渣碱;董泽军等人发现酒渣碱具有抗 HIV-1的活性,但是对C8166细胞的毒性比较弱,CC50为87.86μg/mL,对 HIV-1 诱导 C8166 细胞形成合胞体抑制的EC50为7.27μg/mL,治疗指数为 12.09;李冬梅等从真菌 Alternaria tenuissima SY-P-07 也分离出了此化合物。

有鉴于此,本文以大豆加工副产物大豆糖蜜为原料,探讨米曲霉发酵法生产酒渣碱的工艺方法。

1实验材料与方法1.1实验材料米曲霉曲精 (Aspergillus oryzae)沪酿3.042,石家庄市鼎鑫酿造食品科学研究所;原料为大豆糖蜜、食盐,均为市购。

酒渣碱(纯度98%)购于麦克林公司。

1.2 仪器与设备高效液相色谱仪,美国Waters公司;HYP-308消化炉、KDN-103F型微量凯氏定氮仪,上海纤检仪器有限公司;电子分析天平,梅特勒-托利多国际股份有限公司;pH-3E pH计,上海雷磁仪器厂;THZ-82恒温振荡器,常州国华电器有限公司;TG20-WS离心机,长沙湘智离心机仪器有限公司;Milli Q超纯水仪,默克密理博Merck Millipore公司。

定磷法测定保健食品中核酸的含量-最新年文档

定磷法测定保健食品中核酸的含量-最新年文档

定磷法测定保健食品中核酸的含量【】 To use the determinenate phosphorus content method for the determination of nucleic acid in health food. The sample was digested, coloured with phosphorus agent, and determined by UV spectrophotometry. And then content of nucleic acid was caculated. The calibration curves of phosphorus was in good linearity over 2.5~15μg (R =0.999 9). The average recovery was 99.4%, and RSD was 1.0%. The method is simple, accurate with good reproducibility. It can be used to control the quality of nucleic acid health food.【s】 determinenate phosphorus content method; nucleic acid health food; nucleic acid health food合鑫胶囊(含有核酸和多种维生素等物质),具有增强免疫力的保健功能。

核酸作为生命和遗传基因的物质基础,在本产品中作为功效成分具有增强免疫力的作用。

本研究使用定磷法[1][2]测定该保健食品中的核酸含量,该方法简捷准确,为核酸类保健食品的质量控制方法提供了很好的科学参考。

1 仪器与试药UV-2450紫外分光光度计(日本岛津);HM-200电子分析天平(日本AND公司);AG135电子分析天平(METTLER TOLEDO);HYP-308消化炉(河南省泰斯特仪器XX公司);DZKW电热恒温水浴锅(北京永光明医疗仪器厂)。

HYP-3系列消化炉说明书

HYP-3系列消化炉说明书

目录一、概述二、工作原理三、技术指标四、安装使用五、控温仪操作说明六、消化炉示意图七、消化炉接线图八、故障及处理方法九、消化建议十、注意事项十一、随机附件版本号:20121126一、概述上海纤检仪器有限公司生产的“华烨”牌定氮仪,是依据经典凯氏定氮法设计的样品消化装置和自动测氮蒸馏装置,该仪器安装、操作简单;使用安全、可靠、省时、省力;自动化程度高,适用于植物养份、水、沉淀物测试、粮油、食品、饲料、氮肥,医药、制糖、乳制品、化工、煤炭、橡胶等行业的分析、教学和研究,也可以作为提取其他元素的仪器,是实验室操作人员的理想工具。

HYP-3系列消化炉有两种导热方式,一种为陶瓷炉芯,一种为铝锭。

陶瓷炉芯的有4孔8孔两种,可单排分组使用,省电节能。

本产品特点:炉内温度连续可调,控温精度高,控温稳定。

铝锭一体加热,温差小,样品消化均匀。

控制面板与炉体散热隔离,杜绝炉体高温辐射对控制系统的影响。

过热保护:铝锭超温自动切断加热电源并报警。

限温保护:可设置温度上限,若实际温度超过上限温度,仪器会自动报警并切断加热电源,防止控温系统失灵后温度不断上升而报废样品。

2.5寸蓝屏显示:同时显示实际温度与保温时间,并倒计时,到时后自动停止加热并报警。

一定范围内可调节升温速度,适用范围更广。

毒气罩排气,可不用将仪器置于通风橱中使用。

完善的周边附件配置,方便使用者称样,摆放等工作。

“华烨”品牌的产品还有脂肪测定仪、粗纤维测定仪、黄曲霉毒素测定仪;详细内容请访问公司主站二、工作原理蛋白质是含氮的有机化合物。

样品与硫酸和催化剂一同加热消化,使氮分解,分解的氮与硫酸结合生成硫酸铵,然后碱化蒸馏使氨游离,用硼酸吸收,再用已知摩尔浓度盐酸的标准溶液滴定,根据酸的消耗量计算氮的含量,再乘以换算系数,即为蛋白质含量。

注解:消化过程的目的是要打破样品中的氮的有机结合, 并使所有类型的氮都转换成铵离子。

硫酸是最佳选择,但是当单独使用硫酸时,消化速度很慢。

消化器使用操作手册

消化器使用操作手册

这三个特性是紧密相关的,也就是说,生石灰晶体颗粒越小,生石灰的比表面积越大,
孔隙率越高。而这些特性的实现很大程度上取决于煅烧温度和生石灰在烧窑内的停留时间。
锻烧温度越高,生石灰在窑里的停留时间越长,生石灰的消化反应速度将越慢。
氧化钙转化为氢氧化钙是液态反应。
C
2+ a

OH
+
离子在溶液中形成过饱和时,氢氧化
第 1 页,共 26 页
消化器控制系统使用说明书
设 1 mol 的 CaO 完全消化所需用于转移热量的蒸汽为 X mol,根据热量平衡:
(X+1)×Q3+X×Q4+Q2=Q1 X=1.12 (mol)
由上可推出,在不考虑散热损失和生石灰纯度的情况下,每消化 1kg 的氧化钙理论上
须要加入(1+1.12)×18/56=0.71kg 的水,产生 0.36kg 的蒸汽来移出消化反应产生的热量。
钙以结晶形式析出。
用轻烧方式生成的生石灰,由于有很大的比表面积和高孔隙率,反应时溶液浓度能很
快增加,很快达到过饱和状态。结晶析出过程中,强过饱和状态必然会带来单晶体快速生
成。
第 2 页,共 26 页
消化器控制系统使用说明书
相反,如果消化生石灰为过烧的生石灰,溶液浓度增加缓慢,过饱和结晶析出速度也 将双倍降低,粗颗粒晶体生成速度增加,就只能得到粗颗粒消石灰。
检查皮带秤的传感器是否积灰或卡住,皮带秤内有否积料等。
第 4 页,共 26 页
消化器控制系统使用说明书
检查称量系统的安装和接线是否正确。检查称量系统量程是否设置如下: DH04L12 量程: 0~8T/H (吨/小时) DH10L12 量程: 0~15T/H (吨/小时)

HYP-304四孔智能消化炉和四孔智能消化炉价格

HYP-304四孔智能消化炉和四孔智能消化炉价格
搜索联系
KDN-08C消化炉
标题:KDN-08C消化炉
产品特点ProductCharacteristics KDN-04、08、12、16、20消化炉是专为需批量进行样品蛋白质沉淀消化的用户而设计的,可同时进行4(8、12、16、20)个样品的加热消化。本装置使用方便、消化效率高,是用户理想的消化装置。本装置采用井式消化炉加热,增加了消化管的受热面积且受均匀性较好,加热效率高。在消化时加入硒片作为催化剂。则可大大缩短消化时间。在消化过程中逸出的SO2等有害气体,可通过消化管上的排污管经抽气三通排入下水道。技术指标Specifications工作电压:交流220V,50Hz消化时间:小于1小时含氮量0.05%-90%的样品均可进行消化型号Modl消化数量功率体积KDN-04 4孔1200 650×220×150mm KDN-08 ...
厂家:南北炉
标题:KXL-1010控温消煮炉
KXL-1010型控温消煮炉是凯氏法定氮的辅助设备,主要用于被测样品中有机氮转化为无机氮的高温消煮处理。加热炉采用碳化硅远红外加热板加热,具有升温快的特点;双温度控制器显示,使温度监控更为直观、方便。技术指标:1、控温范围:300℃—450℃。2、消煮样品量:16/批(φ40mm管)仪器使用条件:1、供电:交流220V/50HZ。2、耗电功率:2千瓦。...
HYP-304四孔智能消化炉和四孔智能消化炉价格
HYP-304四孔智能消化炉
标题:HYP-304四孔智能消化炉
主要特点:炉内温度连续可调,控温精度高,控温稳定。陶瓷炉芯加热,样品消化完全。控制面板与炉体散热隔离,减少炉体高温辐射对控制系统的影响。限温保护:更多保护仪器与样品。2.5寸蓝屏显示:同时显示实际温度与保温时间,并倒计时,到时后自动停止加热并报警。程序控制:曲线升温与直线升温两种方式,仪器将自动按顺序完成。更适于牛奶等易产生泡沫的样品。毒气罩排气,可不用将仪器置于通风橱中使用。完善的周边附件配置,方便使用者称样,摆放等工作。技术参数:(★表示本公司产品特点)1.测定范围:0.1mg~240mg氮;2.测定数量:4个/批.;3.消化管容量:300ml;4.控温范围:室温~600℃;5.控温精度:±1℃;6.平均升温速度:30℃/min;7.★控温方...

高温变性豆粕酶改性过程中蛋白质结构的变化

高温变性豆粕酶改性过程中蛋白质结构的变化

高温变性豆粕酶改性过程中蛋白质结构的变化任为聪;程建军;张智宇;赵伟华;江连洲【摘要】The effects of enzymatic modification ( EM ) treatment on structural characteristics of highly denatured defatted commercial soy flakes (HDDSF) were investigated in order to analyze the relationship between its solubility and structure. Protein solubility, surface hydrophobicity ( Ho), surface sulfhydryl ( SSH ) content, free sulfhydryl (FSH) content, total sulfhydryl (TSH) content and disulfide bond ( - S - S - ) content were evaluated. Protein subunits profiles for the hydrolysate were altered by the EM treatment and major changes were observed for the hydrolysate. With DH increasing, the solubility of HDDSF was increased significantly. The SSH content, FSH content and the TSH content were showed different changes, above all the - S - S - content of HDDSF was significantly increased after EM treatment at DH1% , but was gradually decreased with further increase in DH. Analysis showed that the soluble aggregates were formed during EM treatment. Covalent interactions ( i. e. disulfide bonds) was involved in the formation of soluble aggregates. The formation of soluble aggregates significantly improved the solubility of HDDSF,and the soluble aggregates were hydrolyzed by Alaclase thereafter.%研究了高温变性豆粕(HDDSF)酶改性过程中蛋白质的结构变化,分析了高温变性豆粕蛋白质溶解性提高与结构的关系.在不同水解度(DH)下,检测酶改性处理前后的可溶性蛋白质的的表面巯基(SSH)、自由巯基(FSH)、总巯基(TSH)、二硫键(-S-S-)和表面疏水性(Ho),通过SDS-PAGE图谱分析蛋白亚基变化.随着DH的提高,高温变性豆粕蛋白质溶解性增加,自由巯基和表面疏水性下降,总巯基和二硫键先上升后下降.经酶改性后蛋白质溶解性明显提高,酶解促使高温变性豆粕的不溶性蛋白质生成了以二硫键为主要化学键连接的可溶性聚合物,在酶继续作用下,生成的聚合物被最终酶解.【期刊名称】《食品与发酵工业》【年(卷),期】2011(037)004【总页数】6页(P42-47)【关键词】高温变性豆粕;酶改性;二硫键;表面疏水性【作者】任为聪;程建军;张智宇;赵伟华;江连洲【作者单位】东北农业大学食品学院,黑龙江,哈尔滨,150030;东北农业大学食品学院,黑龙江,哈尔滨,150030;东北农业大学食品学院,黑龙江,哈尔滨,150030;东北农业大学食品学院,黑龙江,哈尔滨,150030;东北农业大学食品学院,黑龙江,哈尔滨,150030;国家大豆工程技术研究中心,黑龙江,哈尔滨,150030【正文语种】中文高温变性豆粕是大豆炼油后的副产物,炼油工艺中高温脱溶步骤会造成蛋白质的热变性,导致溶解性较差。

氧气烹饪设备用户指南与维护说明书

氧气烹饪设备用户指南与维护说明书

Page 1INSTALLATION INSTRUCTIONSAND OWNER’S MANUALINSTALLER:Leave this manual with the appliance.CONSUMER:Retain this manual for future reference.NOTICE: Ceramic fiber logs may differ in appearance from those shown in this manual.Page 237708-1-061737708-1-0617Page 3LOG PLACEMENTThe positioning of logs is critical to safe and clean operation of this fireplace. Sooting and other problems may result if the logs are not properly and firmly positioned in the fireplace. BEFORE BEGINNING THE INSTALLATION:1. Remove barrier screen and glass door on fireplace usinginstructions from the fireplace manual.2. Remove the burner cover. Using a screwdriver push up pins6, 7 and 8 for both model applications. See Figures 2 and 3.3. Place burner cover into fireplace.4. Place logs in position as shown in Figure 1 and the followingpages. DO NOT force holes into the logs. Install using theholes located in each log.NOTICE:Log Index Letter (G) only used on LS42. See Figure 1.EMBER AND COAL PLACEMENTAfter placing logs into position, place dime-sized pieces of glowing embers over the burner surface. A single layer is sufficient; do not over-apply. See Figure 4.PIN LOCATIONS FOR THE LS3236FFFigure 2PIN LOCATIONS FOR THE LS42FFFigure 3GLOWING EMBERS (place in shaded area only)Figure 4COAL PLACEMENT (place in shaded area only)Figure 5NOTICE: For step by step instructions with images for model LS3236FF (See Pages 5-12). For step by step instructions with images for model LS42FF (See Pages 13-21).12345786ABCGEFDFigure 1 - LS(3236,42)FF1234578637708-1-0617 Page 4STEP 1.Push up pins 6, 7 and 8 as shown in Figure 2. Replace burner cover inside fireplace.Top ViewFront View37708-1-0617Page 5STEP 2.Place (Log Index Letter B) onto pins 1 and 2 on the burner. See image below.Top ViewFront ViewPage 637708-1-0617STEP 3.Place (Log Index Letter F) onto pins 6 and 8 on the burner. See image below.Top ViewFront View37708-1-0617Page 7STEP 4.Place (Log Index Letter C) onto pin 3 and pin on log B. See image below.Top ViewFront ViewPage 837708-1-0617STEP 5.Place (Log Index Letter D) onto pin on log C and to left side of pilot. See image below.Top ViewFront View37708-1-0617Page 9STEP 6.Place (Log Index Letter A) onto pins 4 and 5 on the log support bracket. See image below.Top ViewFront ViewPage 1037708-1-0617STEP 7.Place (Log Index Letter E) onto pin 9 and the pin on log A. See image below.Top ViewSTEP 8.This completes the placement of the logs. Place Glowing Embers in locations indicated in Figure 4 along the circular ports. Use dime-shaped size embers. Place ember sticks and coal in area shown in Figure 5. Replace glass door and barrier screen as indicated in fireplace manual.Top ViewSTEP 1.Push up pins 6, 7 and 8 as shown in Figure 3. Replace burner cover inside fireplace.Top ViewSTEP 2.Place (Log Index Letter B) onto pins 1 and 2 on the burner. See image below.Top ViewSTEP 3.Place (Log Index Letter F) onto pin 6 on the burner. See image below.Top ViewSTEP 4.Place (Log Index Letter C) onto pin 3 and pin on log B. See image below.Top ViewSTEP 5.Place (Log Index Letter D) onto pin on log C and to left side of pilot. See image below.Top ViewSTEP 6.Place (Log Index Letter G) onto pin 7 and on to the side of log D. See image below.Top ViewSTEP 7.Place (Log Index Letter A) onto pins 4 and 5 on the log support bracket. See image below.Top ViewSTEP 8.Place (Log Index Letter E) onto pin 8 and the pin on log A. See image below.Top ViewTop ViewFront ViewSTEP 9. This completes the placement of the logs. Place Glowing Embers in locations indicated in Figure 4 along thecircular ports. Use dime-shaped size embers. Place ember sticks and coal in area shown in Figure 5. Replaceglass door and barrier screen as indicated in fireplace manual.To Order Parts Under Warranty, please contact your local Empire dealer. See the dealer locator at . To provide warranty service, your dealer will need your name and address, purchase date and serial number, and the nature of the problem with the unit.To Order Parts After the Warranty Period, please contact your dealer or one of the Master Parts Distributors listed below. This list changes from time to time. For the current list, please click on the Master Parts button at .Please note: Master Parts Distributors are independent businesses that stock the most commonly ordered Original Equipment repair parts for Heaters, Grills, and Fireplaces manufactured by Empire Comfort Systems Inc. Parts Not Under WarrantyParts can be ordered through your Service Person, Dealer, or a Master Parts Distributor. See this page for the Master Parts Distribu-tors list. For best results, the service person or dealer should order parts through the distributor. Parts can be shipped directly to the service person/dealer .Warranty PartsWarranty parts will need a proof of purchase and can be ordered by your Service Person or Dealer. Proof of purchase is required for warranty parts.All parts listed in the Parts List have a Part Number. When ordering parts, first obtain the Model Number and Serial Number from the name plate on your equipment. Then determine the Part Number (not the Index Number) and the Description of each part from the fol-lowing illustration and part list. Be sure to give all this information . . .Appliance Model NumberPart Description Appliance Serial NumberPart Number Type of Gas (Propane or Natural)Do not order bolts, screws, washers or nuts. They are standard hardware items and can be purchased at any local hardware store. Shipments contingent upon strikes, fires and all causes beyond our control.Dey Distributing 1401 Willow Lake BoulevardVadnais Heights, MN 55101Phone: 651-490-9191Toll Free: 800-397-1339Website: Parts: Heater, Hearth and Grills F. W. Webb Company 200 Locust Street Hartford, CT 06114Phone: 860-722-2433Toll Free: 800-243-9360Fax: 860-293-0479Toll Free Fax: 800-274-2004Websites: & Parts: Heater, Hearth and GrillsEast Coast Energy Products 10 East Route 36West Long Branch, NJ 07764Phone: 732-870-8809Toll Free: 800-755-8809Fax: 732-870-8811Website: Parts: Heater, Hearth and GrillsEmpire Comfort Systems Inc.Belleville, ILIf you have a general questionabout our products, please e-mail**************************.If you have a service or repairquestion, please contact your dealer.。

Vulcan-Hart VSX3, VSX4, VSX5 电子反流蒸汽煮食器操作手册说明书

Vulcan-Hart VSX3, VSX4, VSX5 电子反流蒸汽煮食器操作手册说明书

Installation, Operation, and Care ofMODELS VSX3, VSX4, VSX5ELECTRIC COUNTER CONVECTION STEAMERSKEEP THIS MANUALGENERALThe VSX 3, 4, and 5 Steamers are single compartment electric pressureless steam cookers with an internal electric steam generator that maintains water temperature at approximately 205°F. VSX3 is rated 7.5kw as standard; 10kw is optional. VSX4 is rated 10kw. VSX5 is rated 15kw.At high altitude locations a lower temperature is required to achieve atmospheric steaming. Contact your Vulcan-authorized service office to have the thermostat adjusted if the steamer will be operated at high altitudes.INSTALLATIONUNPACKINGImmediately after unpacking the steamer, check for possible shipping damage. If the steamer is found to be damaged, save the packaging material and contact the carrier within 15 days of delivery.Prior to installation, verify that the electrical service agrees with the specifications on the machine data plate which is located on the left side panel.LOCATIONAllow space for plumbing and electrical connections. Minimum clearances are 2" on the sides and 6" on the back for proper air circulation. Allow adequate access for operating and servicing the steamer (36" at the front of the steamer and 15" above the steamer).LEVELING FEET (Standard) OR 4"ADJUSTABLE LEGS (Optional)Thread the four 2" leveling feet shipped in a bag inside the steamer cabinet into the threaded holes on the bottom corners of the steamer. Or, thread the four optional 4" adjustable legs into the threaded holes on the bottom corners of the steamer.LEVELINGUsing a spirit level or pan of water in the bottom of the steamer, adjust the leveling feet or the feet on the adjustable legs to level the steamer front-to-back and side-to-side. After the drain is connected, check for level by pouring water onto the floor of the compartment. All water should drain through the opening at the back of the compartment cavity.1.Place steamer in the desired location on theleveled counter top and mark four corners.Remove the steamer and drill 1/2" holes asindicated in Fig. 1.2.Apply a bead of RTV or other equivalent sealantaround the bottom perimeter edge of the steamer.If anchoring the steamer, this bottom seal isnecessary to meet NSF requirements.3.Set steamer on counter and bolt down securelywith 3/8 - 16 bolts (not supplied).STACKING KITFollow instructions in the stacking kit when installingstacked convection steamers.Fig. 1ELECTRICAL CONNECTIONWARNING: ELECTRICAL AND GROUNDING CONNECTIONS MUST COMPLY WITH APPLICABLE PORTIONS OF THE NATIONAL ELECTRICAL CODE AND/OR OTHER LOCAL ELECTRICAL CODES. WARNING:DISCONNECT ELECTRICAL POWER SUPPLY AND PLACE A TAG AT THE DISCONNECT SWITCH INDICATING THAT YOU ARE WORKING ON THE CIRCUIT.PLUMBING CONNECTIONSWARNING: PLUMBING CONNECTIONS MUST COMPLY WITH APPLICABLE SANITARY, SAFETY AND PLUMBING CODES.Connect the water supply line to the 3/8" NPT (internal thread) copper tube inlet. The 3/8" water line supplies water to both the generator tank and the cooling system where steam is condensed before entering the drain line. Install the line strainer provided. A manual shutoff valve must be provided convenient to the steamer.DRAIN CONNECTIONSThe drain connection (Fig. 2) must be 1" IPS down, preferably with one elbow only, maximum length of 6 feet, and piped to an open gap type drain. CAUTION: In order to avoid any back pressure in the steamer, do not connect solidly to any drain connection.PL-50880GAP DRAINBY CUSTOMER DRAIN VENTFig. 2WATER QUALITYThe water supply connected to this steamer should contain no more than 2.0 grains of hardness per gallon with pH from 6.5 to 8.0. This degree of hardness and pH can easily be obtained with the use of a properly maintained water softener.Water supplies vary from one location to another. A local water treatment specialist should be consulted before installing any steam generating equipment.Untreated water contains scale producing minerals which can precipitate onto the surfaces in the boiler. Due to the temperatures in the boiler, the minerals can bake onto the surfaces and components. This can result in early component failure and reduced product life.Mineral scale on components causes several problems:1.The surfaces of the heating devices become coated with scale, reducing the heat transferefficiency. This can produce hot spots on the heating elements and result in premature failure.2.The water level probes become coated with scale. Scale will bridge across the probe insulator fromthe metal extension which senses the water level in the boiler shell. Once this scale becomes wet, the water level control is unable to maintain the proper water level in the boiler. This situation may cause an electric heating element to fail if the element is not adequately covered by water. Strainers and filters will NOT remove minerals from the water.Refer to REMOVAL OF LIME SCALE DEPOSITS, page 12.VENT HOODSome local codes may require the steamer to be located under an exhaust hood. Information on the construction and installation of ventilating hoods may be obtained from Vapor Removal from Cooking Equipment, NFPA standard No. 96 (latest edition).TESTING PROCEDUREWARNING:THE STEAMER AND ITS PARTS ARE HOT. USE CARE WHEN OPERATING, CLEANING OR SERVICING THE STEAMER. THE COOKING COMPARTMENT CONTAINS LIVE STEAM. STAY CLEAR WHILE OPENING THE DOOR.Once the steamer is installed and all mechanical connections have been made, thoroughly test the steamer before operation.1.Check that proper water, drain, and electrical connections have been made.2.Open water valve. Turn main power switch ON. After approximately 15 minutes, the READY lightshould come on, indicating that the water temperature is 205°F.3.When the READY light comes on, turn the dial timer to 5 minutes. With door open, observe thatno steam is entering the compartment and the COOKING light is not lit.4.Close compartment door. The COOK ING light is lit and steam should be heard entering thecompartment.5.Check drain line to ensure that water from the cold water condenser is flowing through the drainline.6.Open compartment door and observe that steam supply to the chamber is cut off. The READY lightshould come on; the COOKING light goes off.7.Close compartment door and let cooking cycle finish. When timer returns to 0, a buzzer will soundsignalling the end of the cooking cycle. To silence the buzzer, turn the dial timer to OFF.8.To turn the steamer off, turn the main power switch OFF — the steam generator will drain. Leavethe door open to allow the inside to dry out.OPERATIONWARNING: THE STEAMER AND ITS PARTS ARE HOT. USE CARE WHEN OPERATING, CLEANING OR SERVICING THE STEAMER. THE COOKING COMPARTMENT CONTAINS LIVE STEAM. STAY CLEAR WHEN OPENING DOOR.CONTROLSMain Power switchON The boiler will automatically fill and begin heating to the preset temperature.OFF The boiler will drain.DELIME Closes the drain valve while CLR liquid is being poured into the generatorduring the Delime procedure.Ready light Indicates the temperature has reached 205°F and that the steamer is readyto begin cooking.Cooking light Indicates that a cooking cycle is in progress.Timer Set the cooking time (0 to 60 minutes) — steam cooking will begin when thedoor is closed. The cooking cycle will be interrupted if the door is openduring the cooking cycle; resume cooking by closing the door.When done, a buzzer sounds and steam stops being supplied to the cookingchamber. Turn the timer OFF to stop the buzzer.Delime Generator light Indicates that lime scale deposits have accumulated in the steam generatorand that a DELIME procedure should be performed at the next convenientopportunity. See Maintenance, page 12.PREHEATTurn the main power switch ON. When the READY light comes on, set the timer to 1 minute to preheat the compartment. This should be done when the steamer is first used for the day or whenever the chamber is cold. The door should be closed during the preheat cycle. COOKING light is lit.When the buzzer sounds, turn the timer to OFF. The steamer is now ready to cook.COOKAfter the preheat cycle, the READY light should be ON.Place pans of food in the cooking chamber. Close the door. Set the timer. Steam flows into the compartment and the COOKING light is lit. Opening the door will interrupt cooking; resume by closing the door.At the end of the cooking cycle, the COOKING light goes off, the buzzer sounds and steam stops being supplied to the cooking chamber. To stop the buzzer, turn the timer to OFF.SHUTDOWNTurn the main power switch OFF — the boiler will automatically blow down. Leave the compartment door open to allow the inside to dry out.For an extended shutdown, turn the main power switch OFF; turn power and water supply OFF.COOKING HINTSThe steamer efficiently cooks vegetables or other foods for immediate serving. Steam cooking should be carefully time controlled. Keep hot food holding-time to a minimum to produce the most appetizing results. Prepare small batches, cook only enough to start serving, then cook additional amounts to meet demand.PreparationPrepare vegetables, fruits, meats, seafood and poultry normally by cleaning, separating, cutting, removing stems, etc. Cook root vegetables in a perforated pan. Other vegetables may be cooked in a perforated pan unless juices are being saved. Liquids can be collected in a solid 12" x 20" pan placed under a perforated pan.Perforated pans are used for frankfurters, wieners and similar items when juices do not need to be preserved. Solid pans are good for cooking puddings, rice, and hot breakfast cereals. Vegetables and fruits are cooked in solid pans in their own juice. Meats and poultry are cooked in solid pans to preserve their juice or retain broth.Canned foods can be heated in their opened cans (cans placed in 12" x 20" solid pans) or the contents may be poured into solid pans. DO NOT place unopened cans in the steamer.Frozen Food ItemsSeparate frozen foods into smaller pieces to allow more efficient cooking.Use a pan cover for precooked frozen dishes that cannot be cooked in the covered containers in which they are packed if they require more than 15 minutes of cooking time. When a cover is used, approximately one-third additional cooking time is necessary.Cooking time for frozen foods depends on the amount of defrosting required. If time permits, allow frozen foods to partially thaw overnight in a refrigerator. This will reduce their cooking time. Acceptable Pan SizesThe steamer accommodates combinations of 12 x 20" pans, solid or perforated.Model Number of Pans AccommodatedDepth of Pan1" 2.5"4"6"VSX3 VSX4 VSX56810345223122DRAINING THE BOILERDrain the boiler after each day's use to flush out minerals and minimize scale build-up. The boiler drains automatically for approximately 4 – 6 minutes after the main power switch is turned OFF.CLEANINGAt the end of each day, or between cooking cycles if necessary . . .Turn main power switch OFF.Remove pans and racks from compartment and wash in sink.Wash compartment interior with clean water. Never use steel wool or abrasive scouring pads as they will scratch and ruin the general surface appearance of the steamer.Use warm soapy water with a cloth or sponge to clean the door gasket, rinse with warm clear water, and wipe with a dry cloth.Wipe surfaces which touch the door gasket with a cloth or sponge and warm soapy water, rinse with warm clear water and wipe with a dry cloth. CAUTION: Do not allow the door gasket to come in contact with food oils, petroleum solvents, or lubricants.Keep the cooking compartment drain working freely. After cooking grease producing foods, operate the steamer with the compartment empty for 30 minutes at the end of the day, or pour 1/2 gallon of warm soapy water down the drain, followed by 1/2 gallon of warm clear water.Use a clean damp cloth to wipe down the exterior of your steamer.Leave the door slightly open when the steamer is not in use to allow the inside to dry out. Weekly, or more often if necessary . . .Clean exterior with a damp cloth and polish with a soft dry cloth.Use a non-abrasive cleaner to remove discolorations.COOKING GUIDELINESThe steamer steam cooks vegetables, frankfurters, eggs in their shells, and certain other meats or food items at atmospheric pressure.These cooking guidelines are suggestions only. You should experiment with your food products to determine the cooking times that will give you the best results. Variables which affect cooking time include size, weight, thickness of foods, temperature, density, previous condition of the foods (fresh, pre-blanched or frozen) and degree of doneness desired.COOK IN SOLID PANSPRODUCT TIME (minutes)WEIGHT PER PANEggs, Scrambled10 – 128 Doz.Rice, Long Grain25 2 Lb.(Cover with 4 cups water per pound.)Pasta (Place perforated pan insidesolid pan, cover pasta with cold water)Spaghetti, Regular/Vermicelli12 – 15Macaroni, Shells/Elbows15 – 18Noodles, 1/2" wide12 – 15Lasagna Noodles15 – 18Frozen Casseroles, Lasagna35Full PanMeat Loaf, 3 – 5 pound each4015 Lb.BeefGround Chuck20 – 2510 Lb.Sliced as Purchased35 – 4010 Lb.Shrimp, Frozen, 10 per pound5 4 Lb.BeansBaked910 Lb. Can Refried910 Lb. CanCanned Vegetables610 Lb. CanPrunes, Dried12 – 15COOK IN PERFORATED PANSPRODUCT TIME (minutes)WEIGHT PER PAN SEAFOODClamsFrozen10 – 12 3 Doz. Fresh, Cherrystone 5 – 6 3 Doz.King Crab, FrozenClaws421/2 Lb.Legs 4 –641/2 Lb.Lobster Tail, Frozen610 Lb.Lobster, Live, 10 – 12"5 4 Per PanSalmon Fillets, Frozen, 8 ounce each571/2 Lb.Scallops, Fresh4 3 Lb.Scrod Fillets, Fresh 3 – 5 4 Lb.EggsHard Cooked15 4 Doz.Soft Cooked9 – 10 4 Doz.Soft Yoke for Caesar Salad 6 – 8 4 Doz.Chicken — Breasts, Legs, Thighs2015 Lb.Turkey, FrozenBreasts (2)90 6 – 7 Lb. Each Cut Lengthwise5520 – 25 Lb.Corned Beef40 – 75 6 – 8 Lb.Hot Dogs or Wieners380 – 100 Count VEGETABLESAsparagus SpearsFrozen10 – 12 3 Doz. Fresh5 5 Lb.BeansGreen, 2" Cut, Frozen / Fresh6 5 Lb. Lima, Frozen8 5 Lb.Baby Lima, Frozen5 5 Lb.Brussel Sprouts, Frozen6 5 Lb.COOK IN PERFORATED PANSPRODUCT TIME (minutes)WEIGHT PER PAN VEGETABLES, (Cont'd.)BroccoliSpears, Frozen8 4 Lb. Spears, Fresh6 5 Lb. Flowerettes, Frozen6 5 Lb.Cabbage, Fresh, 1/6 Cut8 5 Lb.CarrotsBaby Whole, Frozen87 Lb. Crinkle Cut, Frozen7–8 4 Lb. Sliced, Fresh119 Lb .Cauliflower, FlowerettesFrozen6 4 Lb.Fresh7–8 5 Lb.Celery, 1" Diagonal Cut7 5 Lb.CornYellow Whole Kernal, Frozen5 5 Lb. Cobbettes, Frozen827 Ears16–1880 EarsCorn-On-Cob, Fresh10–1218 Ears16–1854 EarsPeas, Green6 5 Lb.Potatoes, Whole Russet5540 Lb.SpinachChopped, Frozen17 6 Lb. Defrosted5 6 Lb.Fresh Cut3 2 Lb.Squash, Acorn Halves2510 HalvesZucchini, Slices810 Lb.Frozen Mixed Vegetables6–7 5 Lb.FRUITFruit, Blanch for Peeling,Grapefruit, Oranges3Pineapple, Whole for Cutting4MAINTENANCEWARNING: THE STEAMER AND ITS PARTS ARE HOT. USE CARE WHEN OPERATING, CLEANING OR SERVICING THE STEAMER. THE COOKING COMPARTMENT CONTAINS LIVE STEAM. STAY CLEAR WHEN OPENING DOOR.REMOVAL OF LIME SCALE DEPOSITSThe steamer should be delimed at a convenient time after the DELIME GENERATOR light comes on. Use the CLR TREATMENT K IT available from your Vulcan-authorized service office. Follow the instructions in the Kit to delime the steam generator.COLD WATER CONDENSERThe steamer is equipped with a cold water condenser in the rear of the cooking chamber which helps to condense the steam prior to discharge into the drain. The steamer freely vents itself by the negative pressure created by the condensate water drainage. This negative pressure prevents steam leakage around the door gasket and helps draw the steam through the cooking compartment. Steam leakage at the door may indicate a plugged or improperly installed drain.SERVICEContact your local Vulcan-authorized service office for any repairs or adjustments needed on this equipment.。

浙江托普仪器有限公司 D型石墨消化炉使用说明书

浙江托普仪器有限公司 D型石墨消化炉使用说明书

D 型石墨消化炉使用说明书浙江托普仪器有限公司ZHEJIANG TOP INSTRUMENT Co.,Ltd.本公司已通过ISO9001:2008质量管理体系认证公司简介浙江托普仪器有限公司坐落于美丽的西子湖畔,国家重点旅游城市——杭州市,是一家集科、工、贸为一体的综合型高新技术企业。

公司主营业务是研发、生产和销售应用于土壤、气象、种子、植物生理、环境、粮油食品等农业生态和食品领域检测仪器仪表,以先进的检测、信息化软件技术和丰富细致的具体产品以及系统集成为核心,为农业、林业、气象、水利、环境、农产品检测等相关领域提供综合解决方案。

多年来公司研发生产了百余种农业专用仪器和相关系统集成方案,产品销往全国各地并远销欧洲、东南亚,非洲等地。

在农业、林业、气象、水利、环境、农产品检测等领域得到了广泛的应用和普遍的好评!在国内已形成系列产品最齐全、专业化程度最高、系统软件集成最丰富,并具有多项自主知识产权的农业专用仪器研发、生产基地。

公司时刻关注着国内外相关行业内的先进技术,已拥有大量完全自主知识产权的技术和产品。

公司已率先通过ISO9001:2008质量管理体系认证,并始终坚持以“质量第一、诚信至上、服务为本”的经营理念,除了为客户提供优质的产品外,还提供更多的增值服务,根据客户需求,为客户提供全程方案咨询、产品选型、专业采购、行业动态等各种优质完善的服务。

在网络的建设和应用上,公司也一直走在行业前列。

在继中国种子检验仪器网(/)和中国粮油仪器网(/)后,于2003年建立中国农业仪器网(/),为农业工作者建立了网上信息获取和交流的平台。

业精于专,方显卓越!我们将进一步集中企业和高校科研优势,以更先进的产品,更过硬的质量,更优惠的价格,更全面的服务来赢得您长久的青睐!与时俱进,开拓创新,浙江托普仪器有限公司必将为中国农业仪器行业作出更大的贡献!公司24公司售后服务专线:400-672-1817为提高蛋白质含量测定的检测速度,其关键首先要加速样品消化煮解时间。

R Stainless Steel食物干烧器操作指南说明书

R Stainless Steel食物干烧器操作指南说明书

Stainless Steel Food Dehydrator Operating ManualD-5#32700 #32701#327021500 Clinton St. Bldg. 123, Buffalo, NY 14206Tel: (716) 824-5814 • Fax: (716) 824-6465D-10 #32704#32705#32706D-5 and D-10 Dehydrator Operating ManualTable of Contents Page Introduction 1Dehydration 2Important Safeguards 2Preparation of Food (Pre-Treatment) 2Operating Instructions 3Food Drying Guides 4Food Storage 7Reconstitution 7Cleaning 7Reviewing the Dehydrating Process 8Warranty 8D-5 Parts List 9D-10 Parts List 10IntroductionDrying food for presearvation dates back to the ancient Egyptians. TheSpaniards were the first explorers known to use dehydration to prepare food for their ex-peditions. The method was used extensively in the days of the Lewis and Clark expedition as they charted the expanse of the Louisiana Land Purchase. Buffalo, elk and deer were plentiful, but their success relied heavily upon the proper use of this preserving method.The D-5 and D-10 Dehydrators were designed and constructed to help you get the best results possible. The shell is made of durable stainless steel so it can be easily cleaned and maintained. When used properly, it will not rust or crack. All electrical components used are UL listed for safety and reliability. The information in this manual is intended to help you get the best results from this equipment. Please read this booklet carefully and call the manu-facturer if you have any questions.DehydrationThere are no exact rules that apply to food dehydration because your results can be af-fected by room temperature, relative humidity and moisture levels in the food that you are drying. To become proficient, it will be necessary to experiment with your drying techniques. If you use too much heat, food may harden on the outside while still being moist inside. However, with too little heat, your drying times will be very long. With a little practice you will be creating tasty, ready to eat snacks in no time.Important Safeguards1. Read ALL of these instructions thoroughly before using your dehydrator.2. Save these instructions for future reference.3. Never leave your dehydrator unattended.4. Close supervision is required if the unit will be used around children.5. Only for use indoors in a clean, dry location, free of flammable objects.6. This unit gets hot. Do not touch surfaces while operating.7. Continuous operation above 155° F is not recommended as surfaces willbecome very hot.8. This unit may scratch household surfaces.9. Do not use if the cord or controls have been damaged in any way. Contactthe manufacturer before attempting to make any repairs.10. Do not use sharp utensils inside the unit.11. Turn off unit before plugging into or unplugging from an electrical outlet.12. Unplug the unit when not in use.13. Allow unit to cool before cleaning.14. Clean with a damp cloth and mild detergent.15. Never immerse unit or cord in water or other liquids.16. Never plug unit into a damaged electrical outlet.17. Do not allow the cord to contact the edge of a counter, table or hot surface.18. The use of attachments or accessories is not recommended by themanufacturer and will void the warranty.19. Do not attempt to move this unit while it is operating.Preparation of Foods (Pre-Treatment)For best results, select the freshest foods available to dehydrate. Note thatimmature fruits and vegetables do not have as much color and flavor as do those that are fully matured. Foods should be dehydrated as soon after purchase as possible. Foods high in sugar such as apples, pears, peaches and bananas are prone to darkening as a result of oxidation of the sugars. Below are somepre-treatments that will help reduce this effect.Lemon and pineapple juice are natural antioxidants. Place the sliced produce in the juice for a few minutes. Remove, drain and place on the dehydrator shelf. For extra flavor, try sprinkling on cinnamon, Jello powders or other sweeteners.Preparation of Foods (Pre-Treatment), cont’dAscorbic acid mix, a form of vitamin C which is available at most health food stores, comes in either tablet or powder form. Use about 2-3 tablespoons of powder or ground tablets per quart of water. Stir to completely dissolve powder. Place fruit into the solution for 2-3 minutes. Remove, drain and place on the dehydrator shelf.Sodium Bisulfite can be purchased at your local pharmacy. If you or anyone who will be eating the food has any known chemical allergies, you should check with yourphysician before using this chemical. Be certain to ask for food grade (safe) product only. Mix 1 teaspoon of sodium bisulfite in 1 quart of water. Dip the sliced fruit in the solution for a few minutes. Remove, drain and place on the dehydrator shelf.Blanching is used primarily to prepare fruits and vegetables for dehydrating that have skins that will toughen during drying. This process helps lock in the color and flavor as well as soften the skin of grapes, cherries, prunes and plums. There are two blanching methods: water and steam.Water blanching - Fill a large pan about half full of water. Bring water to a boil.Use tongs to place food directly into the water, cover the pan and blanch forabout 3 minutes. Remove, drain and place on the dehydrator shelf.Steam blanching - Using a steamer pot such as one used in Chinese cooking,put 2-3 inches of water in the pan and bring to a boil. Place food into the steamerbasket, place in pan and cover. Steam food for about 5 minutes. Remove andplace on the dehydrator shelf.Operating InstructionsFor the safest results, read all of the instructions first.1. Examine the carton and the unit for any damage that may have occurred duringshipping. Contact the manufacturer and the carrier to report any damage.2. Fill out and return the product warranty card. The card must be on file for yourwarranty to take effect.3. Make sure the power switch is turned off. Place the unit on a clean, dry surface away from children and pets. Plug into an undamaged electrical outlet. Warning: Do not use an extension cord with your dehydrator.4. Turn on the unit. The unit will begin to heat up. You may hear the heating elementcycle on and off depending on the temperature you have selected.5. Lift the door up 2-3” and heat the unit at 90° F for 45 minutes to remove any moisture.6. If the unit stops for any reason, turn off, unplug and then repeat Steps 3 and 4. If the unit does not operate normally, turn off, unplug and call the manufacturer.7. Follow your recipe to prepare the food that you wish to dehydrate. Place the prepared food evenly on the shelves provided. We recommend using cooking spray on theshelves to prevent sticking. Do not overlap the food.8. Using oven mitts, remove the front panel by sliding it straight up. Set it aside on a heat resistant surface.Operating Instructions, cont’d9. Carefully place shelves onto the rails inside the unit and slowly slide them in. Forcing the shelves in may damage the heating assembly.10. Slide the cover into place.11. To monitor the internal temperature of the unit, slide the optional thermometer into the hole on the front panel. THIS THERMOMETER MUST BE REMOVED BEFOREYOU CAN OPEN THE FRONT PANEL. FAILURE TO REMOVE IT WILL DAMAGETHE SHELVES AND THE THERMOMETER.12. Set the temperature by turning the knob on top of the unit. Monitor the internaltemperature and adjust as needed.13. Monitor the unit to ensure that the proper temperature is maintained. If the internaltemperature exceeds 155° F, it may damage the unit. If the temperature of the unitreaches 155° F, turn off and allow it to cool.14. If drying is uneven, use oven mitts to rotate the shelves 180°.15. For very moist foods, such as tomatoes, it may be necessary to prop open the front cover 1 1/2 to 2” with a small block of wood for the first 2 hours of operation. This will increase the air flow and help drive excess moisture out of the unit.16. Note: Moisture may collect on the bottom of the unit during operation and can bewiped out with a paper towel. Avoid touching the walls and shelves with your barehands as a burn may result.Food Drying GuidesThe following charts are guidelines for the preparation of various fruits, vegetables and meats. Drying times will vary depending on the room temperature, relative humidity and moisture levels in the food that you are drying. If the moisture level is low, the drying time will be on the low end of the range. However, if the moisture level is high, the drying time will be on the high end of the range.Keep in mind that drying times are also affected by the amount of food placed on the shelves. Over loading the shelves will slow the drying time and may produce poorer results. When dehydrating foods, it is important to check on the dryness of the product. If the prod-uct is not thoroughly dried, mold may form during storage (see Food Storage). To test for dryness, remove a piece of food from the dehydrator and allow to cool to room tempera-ture. Bend and tear the piece to check for internal moisture.Vegetables at 125° FFood Preparation Test Time Asparagus Wash and cut into 1” pieces Crunchy4-6 hoursBeans, Green orWaxed Wash, remove ends and cut into1” pieces or French styleCrunchy9-12 hoursBeets Remove 1/2” of the top, scrubthoroughly, steam blanch untiltender. Peel and cut into 1/4” thickslices.Pliable9-12 hoursBroccoli Wash and trim. Cut stems into 1/4”pieces. Dry florets whole.Crunchy10-14 hours Cabbage Wash and trim. Cut into 1/8” strips.Crunchy8-11 hours Carrots Wash and trim tops. Peel orscrape if desired. Cut into 1/8”thick slices.Pliable7-11 hoursCelery Wash, separate leaves and stalks.Cut stalks into 1/4” strips.Crunchy3-10 hoursCorn Shuck corn and trim silk. Steamuntil milk is set. Cut kernels fromcob and spread on plastic screen.Stir several times during drying.Crunchy7-10 hoursCucumber Wash and trim. Cut into 1/8” slices.Pliable4-8 hours Eggplant Wash and peel. Cut into 1/4”slices.Pliable4-8 hours Mushroom Wash and cut into 3/8” slices.Pliable4-7 hoursParsnips Scrub thoroughly, steam blanchuntil tender. Peel if desired andcut into 3/8” thick slices.Pliable/Tough7-11 hoursPeppers Wash and remove stems, seedsand white section. Pat dry. Cutinto 1/4” thick strips or rings.Pliable4-8 hoursPotatoes Use new potatoes. Wash, peel ifdesired. Steam blanch 4-6minutes. Cut french style, 1/4”slices, 1/8” thick circles or grate.Crunchy/Pliable7-13 hoursSummer Squash Wash and peel. Cut into 1/4”slices.Pliable10-14 hoursTomatoes Wash and remove stems. Sliceinto 1/4” circles. For cherrytomatoes, slice in half, dry skinside down.Pliable5-9 hoursZucchini Wash, peel if desired. Cut into 1/4”slices or chips.Crunchy7-11 hoursFruits at 135° FFood Preparation Test TimeApples Wash, core and peel if desired.Cut into 1/4” slices. Dust withcinnamon if desired.Pliable7-15 hoursApricots Wash, halve and remove pit. Sliceif desired and dry skin side down.Pliable21-29 hoursBananas Wash, peel and slice into 1/8”slices.Pliable7-10 hoursFigs Wash, cut out blemishes, quarter.Dry skin side down.Pliable22-30 hours Kiwi Wash, peel and slice in 1/4” slices.Crisp8-15 hours Nectarines Wash, halve and remove pit. Sliceif desired and dry skin side down.Pliable8-17 hoursPeaches Wash, halve and remove pit. Sliceif desired and dry skin side down.Pliable8-16 hoursPears Wash, core and peel if desired.Cut into 1/4” slices or quarter.Pliable8-16 hoursPineapple Peel, remove fibrous eyes,remove core. Cut into 1/4” slices orwedges.Pliable11-18 hoursRhubarb Wash, cut into 1” lengths.Pliable6-10 hours Strawberries Wash, cut out caps, slice 1/4” thick.Crisp7-15 hoursWatermelon Cut off rind, cut into wedges andremove seeds.Pliable andSticky8-10 hoursJerky at 145-150° FFood Preparation Test TimeJerky Use lean meat and remove asmuch fat as possible. Fat turnsrancid with time. Cut uniform 1/4”thick or less slices. Do not overlapslices on the shelves.Pliable3-4 hoursMeattemperatureshould reach145-150° FFood StorageDried foods should be allowed to condition before being placed into a storage container. Generally, let stand about 1 week in a dry, well ventilated and protected area. The conditioning time allows for further drying and removes most of the remaining moisture in the food. Dried foods can be placed into clean, dry, insect resistant containers, preferably glass jars. Heavy gauge plastic freezer bags can also be used. Eliminate as much air as possible before sealing the bag.When properly used, vacuum sealers provide ideal storage. The less air present, the less potential for the formation of molds. Stored foods should be checked monthly for insects and mold. If mold is present, you can scrape it off, place the food on a cookie sheet and heat in the oven at 175° for 15 - 25 minutes. Re-pack into a clean, air tight container.ReconstitutionDried foods do not need to be reconstituted for consumption. Many people prefer to eat them in their dried state. If you want to reconstitute your food, here are some basic guidelines. Soak food in unsalted water for 3 - 7 minutes and then prepare as usual. If you are boiling them, use the same water they soaked in to preserve nutrients.If you plan to soak foods for more than 1 hour, they should be placed in the refrigerator to prevent bacterial growth. One cup of dried vegetables will reconstitute to about 2 cups. One cup of dried fruit will reconstitute to about 1 1/2 cups. Reconstitution times will vary depending on the thickness of the food and the water temperature used. Warm water will speed reconstitution but may result in some flavor loss.CleaningTo clean the unit, remove the shelves and wash separately. Wipe off both the exterior and interior surfaces of the unit with a damp cloth and mild detergent. Do not use scouring pads or abrasive cleaners as this may mar the finish.NEVER IMMERSE THE UNIT OR POWER CORD IN WATER OR OTHER LIQUIDSReviewing the Dehydrating ProcessTo obtain the best results:1. Use high quality food: the better the food the better the results2. Wash food, use clean utensils and keep work area clean.3. Pre-treat foods to prevent discoloration.4. Do not overlap food on shelves.5. Drying times will vary depending on food thickness, moisture in the food, relativehumidity and temperature of the room.6. Cool food before testing for dryness.7. Rotate trays 180° if you notice uneven drying.8. Let food condition in a clean, dry, ventilated area for a week before placing them in air tight containers.9. Reconstitute as needed.10. And last but not least, ENJOY!Warranty InformationThe Sausage Maker, Inc., through its Distributors, warrants each new product sold by it to the initial user to be free of defects in material and workmanship for a period of one year from the date of sale of the equipment. With respect to the sale of parts, such warranty period shall be three (3) months from the date of sale.The Sausage Maker, Inc. will provide a new part or repaired part, at its election, in place of any part which is found upon inspection to be defective in material and workmanship during the period described above. Purchaser must present proof of purchase and purchase date at the time of exercising this warranty.This warranty does not apply to failures occurring as a result of abuse, misuse, negligent repairs, corrosion, erosion and normal wear and tear, alterations or modifications made to the product without express written consent of The Sausage Maker, Inc. or failure to follow the recommended operating practices and maintenance procedures as provided in the products operating and maintenance publications. The warranty provided herein does not apply to equipment sold hereunder but manufactured by others as they are warranted by their respective manufacturers directly to the user.This warranty is in lieu of all other warranties (except of title) expressed or implied and there are no warranties of merchantability or of fitness for a particular purposeD-5 Parts ListPart Name Part # Box P32700-01 Heater Box P32700-02 Door P32700-03 Thermostat/Knob P32700-04 Rubber Feet P32700-05 Toggle Switch P32700-06 Heating Element P32700-07 Thermal Fuse (Thermodisc) P32700-08 Motor P32700-09 Fan Blade P32700-10 Power Cord P32700-11 Screen Guard P32700-12 Bottom Bracket P32700-13 Top Bracket P32700-14 Door Handle with Screw P32700-15 Male/Female Insulator P32700-16 Grooved Insulator P32700-17 Complete Back Panel Assembly - D5 32500-BPA Shelving:Chrome Shelf (3/4” holes) 32731 Stainless Steel Shelf (3/8” holes) 32733 Non-Stick Shelf (3/8” holes) 32732 Plastic Drying Screen (1/4” holes) 32737 Non Stick Drying Sheets 32735D-10 Parts ListPart Name Part # Box P32704-01 Heating Panel P32704-02 Door P32704-03 Shelving Unit P32704-04 Latch P32704-05 Timer P32704-06 Terminal Block P32704-07 Thermostat P32704-08 Pilot Light P32704-09 Toggle Switch P32704-10 Thermal Fuse (Thermodisc) P32704-11 Power Cord P32704-12 Heating Element P32704-13 Motor P32704-14 Fan Blade P32704-15 Screen Guard P32704-16 Legs P32704-17 Door Handle with Screw P32704-18 Male/Female Insulator P32704-19 Grooved Insulator P32704-20 Complete Back Panel Assembly 32213 Shelving:Chrome Shelf (3/4” holes) 32731 Stainless Steel Shelf (3/8” holes) 32733 Non-Stick Shelves (3/8” holes) 32732 Plastic Drying Screen (1/4” holes) 32734 Non Stick Drying Sheets 3273510The Sausage Maker, Inc.1500 Clinton St. Bldg. 123, Buffalo, NY 14206 Tel: (716) 824-5814 • Fax: (716) 824-6465 。

沼气炉产品手册说明书

沼气炉产品手册说明书

PM/ IS 8749/ 1/ May 2020PRODUCT MANUAL FORBIOGAS STOVEACCORDING TO IS 8749: 2002This Product Manual shall be used as reference material by all Regional/Branch Offices & licensees to ensure coherence of practice and transparency in operation of certification under Scheme-I of Bureau of Indian Standards (Conformity Assessment) Regulations, 2018 for various products. The document may also be used by prospective applicants desirous of obtaining BIS certification licence/certificate.BUREAU OF INDIAN STANDARDSManak Bhawan, 9, Bahadur Shah Zafar Marg,New Delhi 110 0021PM/ IS 8749/ 1/ May 2020ANNEX AList of Test EquipmentMajor test equipment required to test as per the Indian Standard2PM/ IS 8749/ 1/ May 2020ANNEX BScheme of Inspection and Testing1. LABORATORY– A laboratory shall be maintained which shall be suitably equipped and staffed, where different tests given in the specification shall be carried out in accordance withthe methods given in the specification.1.1 The manufacturer shall prepare a calibration plan for the test equipment.2. TEST RECORDS – The manufacturer shall maintain test records for the tests carried outto establish conformity.3. LABELLING AND MARKING– As per the requirements of IS 8749:2002.3.1Each stove shall also be accompanied by an instruction sheet, card or leaflet as per Clause 27 of IS 8749:2002.4. CONTROL UNIT - Gas stoves having same design and material of burners, total gas consumption in 1/h at STP and rating of individual burners in 1/h at STP, manufactured in aday shall constitute a control unit.5. LEVELS OF CONTROL – The tests as indicated in column 1 of Table 1 and the levels of control in column 3 of Table 1, shall be carried out on the whole production of the factory which is covered by this plan and appropriate records maintained in accordance with paragraph 2 above.5.1 All the production which conforms to the Indian Standard and covered by the licence shouldbe marked with Standard Mark.6. REJECTIONS –Disposal of non-conforming product shall be done in such a way so as to ensure that there is no violation of provisions of BIS Act, 2016.3TABLE 1456Note-1: Sub-contracting is permitted to a laboratory recognized by the Bureau or Government laboratories empanelled by the Bureau.Note-2: Levels of control given in column 3 are only recommendatory in nature. The manufacturer may define the control unit/batch/lot and submit his own levels of control in column 3 with proper justification for approval by BO Head.7PM/ IS 8749/ 1/ May 2020ANNEX CScope of Licence8。

Festo MOFH-3-1 2 电压式3 2式阀门说明书

Festo MOFH-3-1 2 电压式3 2式阀门说明书
08/11/2023 – Reservado el derecho de modificación – Festo Serta monoestable eléctrico 52 mm 3.700 l/min 0,15 ... 0,8 MPa 1,5 ... 8 bar asiento de plato muelle mecánico c UL us - Recognized (OL) IP65 14 mm 69 mm Estrangulable blando indistinto con enclavamiento prepilotado no reversible Superposición negativa 0,3 90 ms 18 ms 2.200 µs 3.700 µs Consultar bobina; pedir por separado Aire comprimido según ISO 8573-1:2010 [7:4:4] Opción de funcionamiento con lubricación (necesaria en otro modo de funcionamiento) 1 - riesgo de corrosión bajo VDMA24364-B1/B2-L -20 ... 60 °C -10 ... 60 °C -5 ... 40 °C 1.100 g a través de bobina F, pedir por separado Sobre regleta de bornes con taladro pasante a elegir: M5 G1/2 G1/2 G1/2 G1/2 G1/2 Conforme con RoHS NBR Fundición inyectada de aluminio

HYP-304308314320系列消化炉使用说明

HYP-304308314320系列消化炉使用说明

目录一、概述 ....................................................................................................... - 1 -二、工作原理 ............................................................................................... - 2 -三、技术指标 ............................................................................................... - 2 -四、安装使用 ............................................................................................... - 3 -五、操作说明 ............................................................................................... - 5 -1. 面板介绍:...................................................................................... - 5 -2. 按键介绍:...................................................................................... - 6 -3. 操作举例:...................................................................................... - 7 -4. 自整定:.......................................................................................... - 9 -5. 菜单列表.......................................................................................... - 9 -六、HYP-3系列消化炉示意图 .................................................................. - 10 -七、HYP-3系列消化炉接线图 .................................................................. - 11 -八、故障及处理方法 ................................................................................. - 15 -九、样品消化建议 ..................................................................................... - 15 -十、注意事项 ............................................................................................. - 18 - 十一、随机附件 ......................................................................................... - 18 -一、概述上海纤检仪器有限公司生产的“华烨”牌定氮仪,是依据经典凯氏定氮法设计的样品消化装置和自动测氮蒸馏装置,该仪器安装、操作简单;使用安全、可靠、省时、省力;自动化程度高,适用于植物养份、水、沉淀物测试、粮油、食品、饲料、氮肥,医药、制糖、乳制品、化工、煤炭、橡胶等行业的分析、教学和研究,也可以作为提取其他元素的仪器,是实验室操作人员的理想工具。

消化炉说明书

消化炉说明书
玻璃破碎引起的伤害危险!处理玻璃原件时,要坚持专业团体的规则!
使用处理酸碱物质时,必须小心!腐蚀性的灼伤和伤害!
来自有毒气体的危害! 在凯氏消化过程中, 硫酸的蒸汽(和其他有毒气体)被释放,他们可能会危害你的健康和损害仪器和实验室设备 使用萃取系统时,一直进行消化操作可能会导致有毒或腐蚀性气体的进化。把消化炉和萃取系统安置在通风初中。
不要在潮湿和有引发爆炸危险的地方使用消化炉! 最大空气湿度 = 80 % 最高温度= 40 °C
© 11 / 2009
–3–
FoodALYT SBS 凯氏消化炉
目录
全通知.......................................................................................................................................................................................................... 3 货物提供...................................................................................................................................................................................................... 5
完整性和缺失损害.................................................................................................................................................................................5 部件清单................................................................................................................................................................................................ 5 正确使用...................................................................................................................................................................................................... 5 FoodALYT SBS 凯氏消化炉概述........................................................................................................................................................... 6 组装.............................................................................................................................................................................................................. 8 处理.............................................................................................................................................................................................................. 9 安置样品支架.........................................................................................................................................................................................9 把样品插入加热模块............................................................................................................................................................................. 9 从加热模块上移走样品.......................................................................................................................................................................10 安置尾气收集器..............................................................................................................................................................ቤተ መጻሕፍቲ ባይዱ................... 10 样品支架的前盖.................................................................................................................................................................................. 10 移走和重新安装前盖...........................................................................................................................................................................10 接通电源.................................................................................................................................................................................................... 11 使用FoodALYT SBS凯氏消化炉........................................................................................................................................................... 11 操作仪器............................................................................................................................................................................................. 11 开始菜单............................................................................................................................................................................................. 12 按需求设定 FoodALYT SBS 消化炉..................................................................................................................................................... 12 第一页: 语言和时间............................................................................................................................................................................ 13
  1. 1、下载文档前请自行甄别文档内容的完整性,平台不提供额外的编辑、内容补充、找答案等附加服务。
  2. 2、"仅部分预览"的文档,不可在线预览部分如存在完整性等问题,可反馈申请退款(可完整预览的文档不适用该条件!)。
  3. 3、如文档侵犯您的权益,请联系客服反馈,我们会尽快为您处理(人工客服工作时间:9:00-18:30)。
HYP-3系列消化炉有两种导热方式,一种为陶瓷炉芯,一种为铝锭。陶瓷炉芯的有4孔8孔两种,可单排分组使用,省电节能。
本产品特点:
炉内温度连续可调,控温精度高,控温稳定。
铝锭一体加热,温差小,样品消化均匀。
控制面板与炉体散热隔离,杜绝炉体高温辐射对控制系统的影响。
过热保护:铝锭超温自动切断加热电源并报警。
限温保护:可设置温度上限,若实际温度超过上限温度,仪器会自动报警并切断加热电源,防止控温系统失灵后温度不断上升而报废样品。
2.5寸蓝屏显示:同时显示实际温度与保温时间,并倒计时,到时后自动停止加热并报警。
一定范围内可调节升温速度,适用范围更广。
毒气罩排气,可不用将仪器置于通风橱中使用。
完善的周边附件配置,方便使用者称样,摆放等工作。
2.更换铝锭
加热不停
可控硅坏
更换可控硅
数字乱跳
热电偶坏
更换热电偶
整体不加热
1.保险丝烧断
2.控温仪坏
更换保险丝
更换控温仪
毒气罩小白管有液体流出
1.自来水抽气压力不足
2.吸气泵坏
1.加大自来水压力
2.更换吸气泵
3.或者减慢升温速度
毒气罩缝隙中有废气冒出
毒气罩内排气管破损
更换排气管
消化时间长或消化不彻底
b. 检查电源开关在关闭状态,接通电源,再打开电源开关,按需要设定预置温度(见本书“控温仪操作”),按运行键即开始加热。
4.2 消化操作(根据说明书配合本公司主站视频教程,更容易理解)
a. 称取0.3~1g试样、液体2~5ml准确至0.0002g,干净无损失地转入清洗干净的消化管中、加入加速剂(5~16g)再加入浓硫酸(8~25ml).
三、技术指标
1.测定范围: 0.1mg~240mg氮;
2.速 度:45min/批;
3.控温范围:室温~500℃;
4.控温精度:±1℃;
5.平均升温速度:30℃/min;
6.★控温方式:程序控制,曲线升温与直线升温两种方式;
7.★废气密封材料:聚四氟乙烯;
8.隔热方式:分体风道隔热;
9.导热方式:铝合金一体;陶瓷炉芯;
5. 菜单列表
字符
名称
设定范围
说明
出厂设定值
一级菜单
C-01
设置阶段温度
0-500℃
设置所需温度
e-01
设定阶段保温时间
0-999分钟
设定保温时间
二级菜单
AL1
上限温度
0-50℃
20
此温度为限定加热最高温度。到此温度报警,并停止加热。低于此温度后自动恢复。此数值是叠加数值。比如设置为5,设置温度是100,那么上限温度为105。
一、概 述
二、工作原理
三、技术指标
四、安装使用
五、控温仪操作说明
六、消化炉示意图
七、消化炉接线图
八、故障及处理方法
九、消化建议
十、注意事项
十一、随机附件
版本号:20121126
一、概述
上海纤检仪器有限公司生产的“华烨”牌定氮仪,是依据经典凯氏定氮法设计的样品消化装置和自动测氮蒸馏装置,该仪器安装、操作简单;使用安全、可靠、省时、省力;自动化程度高,适用于植物养份、水、沉淀物测试、粮油、食品、饲料、氮肥,医药、制糖、乳制品、化工、煤炭、橡胶等行业的分析、教学和研究,也可以作为提取其他元素的仪器,是实验室操作人员的理想工具。
13按 键开始运行程序;
14全部运行结束后,仪器将自动停止并报警。(按任意键停止报警)。
4. 自整定(出厂前已调试好,若更换控温仪后,需重新自整定):
1).先在阶段1和2都设好需整定的温度(一般为420℃),将阶段3-6的时间均设为0,按 键开始运行。
2).在运行界面安住“+”键不放直到“嘀”一声即开始自整定,此时出现 ,自整定标志,待该标志消失后自整定结束。
b. 将装有试样的消化管(6)放在消化炉支架(5)上,套上毒气罩,压下毒气罩(8)锁住二面拉钩。
c. 把支架连同装有试样的消化管一起移到电热炉上保持消化管在电炉中心,先设定低温(如200℃)保温一段时间后再提高到420℃保持消化管中液体连续沸腾,沸酸在瓶颈部下冷凝回流。待溶液消煮至无微小碳粒、呈兰绿色时,再继续消煮一段时间。(由于样品的不同,消化时无固定温度时间,客户根据样品需要,可自行设置,也可联系厂家进行咨询)
AL2
无作用
SC
修正温差
0-100℃
修正温度差值
0
P
比例带
不得修改项
|
积分时间
不得修改项
d
阶段
不得修改项
HL
斜率
不得修改项
OUt
输出功率限制
0-100
设置输出功率百分比
100
LCy
权限锁
不得修改项
2
六、HYP-3系列消化炉示意图
七、HYP-3系列消化炉接线图
铝锭消化炉接线图
HYP-308接线图
当使用单排时,关闭扁开关即可(在仪器控制面板侧面)。
V′—试样分解液蒸馏用体积(ml)
C —酸标准溶液的mol/L浓度
K —氮换算成粗蛋白质的系数6.25
W —试样重量(g)
0.0140—氮的毫克当量数
4.6.2平行测定的结果用算术平均值表示,保留小数后二位。
五、控温仪操作说明
1. 面板介绍:
2. 按键介绍:
1)SET:设置键
按一次设定温度,30秒内按第二次设定保温时间。
肥料
这类样品的制备可以使用盘式磨和旋风磨。它们中的一些有吸湿性,所以要注意控制它们的水分含量。注意消化过程,依据不同的目的可以使用不同的技术。
油料种子
对大多数油料样品的分析中的主要问题是怎样得到一个均匀的有代表性的样品。在样品制备中,油份可能从样品中分离出来,以及在粉碎磨中会有油的残渣残留。使用刀式磨可以得到均匀的样品。
2.5 硫酸铜(CuSO4·5H2O)分析纯(GB/T665)10g;硫酸钾(K2SO4)(HG3—920)分析纯150g,分别研磨至粉状,仔细混匀过40目筛,放入瓶中备用(加速剂)。
2.6 浓硫酸(H2SO4)化学纯(GB/T625)(含量98%、无氮)。
3 样品制备:
3.1 选取有代表性的样品,挑拣干净,按四分法缩减取样,粉碎至40目筛通过,装于密封容器中。(取样不少于200g)。
250ml
HYP-340
40个
3000W
150ml
四、安装使用
1. 仪器和用具:
1.1 分析天平:感量0.0001g
1.2 实验室用粉碎机或研钵
1.3 酸式滴定管:25ml或10ml
1.4 锥形瓶:容积250ml
1.5 分样筛:孔径0.45mm(40目)
2. 试剂:
2.1 盐酸(HCI):分析纯(GB/T622)0.05mol/L标准液,(4.2ml盐酸,注入1000ml蒸馏水)碳酸钠法标定盐酸。
重量
标配消化管容量
HYP-304
4个
1200W
432*209*450mm
15kg
300ml
HYP-308
8个
2560W
432*370*450mm
19kg
300ml
HYP-314
14个
2000W
430*360*160mm
25kg
250ml
HYP-320
20个
2000W
405*435*475mm
27kg
九、样品消化建议
(内容仅供参考各行业依照官方要求为准)
农业
饲料
标准凯氏分析过程测试。对于干饲料,可以使用盘式磨或旋风磨直接制备。对于罐装的宠物饲料,高的水分含量不宜使用平常的磨制备样品。此时,刀式磨是最好的选择。为了得到可靠和重复性好的结果,控制每一个样品的水分是极其重要的。
土壤
标准凯氏分析过程测试。为了得到可靠和重复性好的结果,控制每一个样品的水分是极其重要的。样品不能烘干,否则氨可能会被蒸发。高有机物含量的样品在消化的开始可能产生泡沫。升温要慢。
10.★安全功能:限温保护,铝锭过温保护;
11.★显示:2.5寸液晶屏,同时显示实际温度与保温时间,并倒计时,到时后自动停止加热并报警;
12.电 源:220(V)±10% 50~60HZ;
13. 使用环境:室温<35℃
功率、测定数量、尺寸、重量、消化管容量等指标如下:
规格
每批测定数量
额定功率
外型尺寸
4.6 测定结果计算:
4.6.1测定计算公式:
A.微量法:
粗蛋白质%=
(V2-V1)×C×0.0140×K
×100
W×V′÷V
B.全量法:
粗蛋白质%=
(V2-V1)×C×0.0140×K
×100
W
式中:V2—滴定试样时消耗酸标准溶液的体积(ml)
V1—滴定空白时消耗酸标准溶液的体积(ml)
V —试样分解液总体积(ml)
d.消化结束后,戴上手套,将毒气罩及消化炉支架连同消化管一同移回消化炉支架托座(17)上,冷却至室温。注意,在冷却过程中,毒气罩必须保持吸气状态(切忌放入水中冷却)防止废气溢出。
4.3 蒸馏(详见蒸馏装置说明书)
4.4 吸收氨后的吸收液,用标定后的盐酸溶液进行滴定,溶液由兰绿色变为灰紫色为终点。
4.5 空白测定:用0.1g糖代替样品或不加样品作空白测定。
5再按一次SET键;
6利用 键和“+ -”键将数值调到22;
7再按SET键;
8利用 键和“+ -”键将数值调到100;
9再按SET键;
10利用 键和“+ -”键将数值调到60;
11按上述方法可设置6个阶段。如不满六个阶段,需将后几个不用的阶段的时间都设置为“0”;
相关文档
最新文档