诺瓦科技LED视频切换台N6用户手册
K16二合一视频控制器用户手册说明书

K16二合一视频控制器用户手册西安诺瓦星云科技股份有限公司更新记录西安诺瓦星云目录更新记录 (II)1 概述 (1)2 外观 (2)前面板 (2)后面板 (3)3 应用场景 (5)4 主界面 (6)5 菜单操作 (9)屏体亮度 (9)智能配屏 (9)5.2.1 快捷点屏 (9)5.2.2 载入箱体配置文件 (10)5.2.3 固化至接收卡 (12)5.2.4 高级点屏 (12)5.2.5 更多设置 (13)窗口属性 (14)5.3.2 主窗口及PIP 属性 (14)5.3.3 背景设置 (15)输入设置 (16)5.4.1 选择输入源 (16)5.4.2 设置输入源分辨率 (16)5.4.3 DVI 拼接 (18)画面控制 (19)场景设置 (20)拼接带载 (21)高级设置 (21)5.8.1 热备份设置 (21)5.8.2 同步设置 (21)5.8.3 FN 键设置 (22)5.8.4 高级功能 (22)5.8.4.1 HDR 设置 (22)5.8.4.2 光口工作模式 (23)5.8.4.3 3D 设置 (25)5.8.4.4 自检 (25)5.8.5 输出帧频 (25)5.8.6 返回主界面时长 (25)5.8.7 恢复出厂设置 .................................................................................................................................................................. 26 西安诺瓦星云科技股份有限公司5.8.8 关于我们 (26)工厂复位 (26)通讯设置 (26)5.10.1 通讯模式 (26)5.10.2 网络设置 (26)设备工作模式 (27)6 产品规格 (29)西安诺瓦星云科技股份有限公司1 概述K16是诺瓦科技最新推出的一款All-in-One产品,集视频处理、视频控制以及LED屏体配置等功能于一体,具备多种类的视频信号接收能力、超高清全4K×2K@60Hz的图像处理能力和发送能力。
LED地砖屏视频处理器诺瓦科技V900详细使用说明书
LED视频控制器V900详细使用说明书Rev 1.1.2 NS160000077 西安诺瓦电子科技有限公司声明尊敬的用户:欢迎您成为诺瓦产品的使用者,如果本手册为您了解和使用产品带来帮助和便利,我们深感欣慰,我们在编写手册时力求精确可靠,诺瓦会在未通知的情况下随时对手册的内容进行修改和变更,如果您在使用中遇到任何使用问题,或者您有好的建议,请按照手册提供的联系方式联系我们。
对您在使用中遇到的问题,我们会尽力给予支持,对您提出的建议,我们衷心感谢并尽快评估采纳。
版权本手册版权归西安诺瓦科技所有,任何个人或单位未经书面许可,不得以任何形式对文本内容作复制、摘录。
商标是诺瓦科技的注册商标。
www.novastar.tech目录1安全声明 ..............................................................................................................................................32概述 (4)3接口/按钮 ............................................................................................................................................53.1前面板 (5)3.2后面板 (6)4操作动作说明 (7)5操作说明 ..............................................................................................................................................75.1第一步硬件连接 (7)5.2第二步输入设置 (8)5.3第三步快捷点屏 (9)5.4第四步亮度调节 (11)5.5第五步输出设置 (11)5.6画面控制 (14)5.7声音设置 (15)5.8高级设置 (15)5.8.1双画面 (16)5.8.2拼接带载 (17)5.8.3载入箱体配置文件 (18)5.8.4固化至接收卡 (21)5.8.5双主控热备份 (21)5.9高级属性 (21)www.novastar.tech5.10工厂复位 (22)5.11预设模板 (22)5.12自定义按键 (22)5.13硬件版本 (22)6 常见问题 (23)1安全声明为避免可能的危险,请按规定使用此设备。
诺瓦科技LED控制卡MCTRL4K用户手册

MCTRL4KIndependent ControllerUser ManualCopyright © 2018 Xi’an NovaStar Tech Co., Ltd. All Rights Reserved.No part of this document may be copied,reproduced, extracted or transmitted in any form or by any means without the prior written consent of Xi’an NovaStar Tech Co., Ltd.MCTRL4K Independent ControllerUser Manual Change HistoryMCTRL4K Independent ControllerUser Manual ContentsChange HistoryTrademarkis a trademark of Xi’an Nov aStar Tech Co., Ltd. StatementYou are welcome to use the product of Xi’an NovaStar Tech Co., Ltd. (hereinafter referred to as NovaStar). This document is intended to help you understand and use the product. For accuracy and reliability, NovaStar may mak e improvements and/or changes to this document at any time and without notice. Any problem in use or any good suggestion, please contact us through ways provided in the document. We will do our utmost to solve the problems and adopt the suggestions after e v aluation as soon as possible.ContentsChange History (ii)1Safety (1)1.1 Storage and TransportSafety (1)1.2 Installation and UseSafety (1)2Overview (3)3Hardware Structure (5)3.1 Appearance .................................................................................................................................................. 53.2Dimensions ...................................................................................................................................... (7)4Home Screen (8)5Web Control (10)5.1 EnvironmentConfiguration (10)5.2 UserInterface ............................................................................................................................................106Menu Operations (12)6.1 BrightnessAdjustment (12)6.2 InputSettings .............................................................................................................................................126.2.1 Input ModeSettings ............................................................................................................................ (12)6.2.2 Input ResolutionSettings ........................................................................................................................136.2.3 Ultra-High ResolutionSettings (13)6.3 ScreenSettings .........................................................................................................................................146.3.1 QuickConfiguration .................................................................................................................... (14)6.3.2 AdvancedConfiguration .................................................................................................................... (15)6.3.3 ImageOffset ................................................................................................................................ (15)6.4 DisplayControl ..........................................................................................................................................156.5 AdvancedSettings (16)6.5.1 MappingFunction ........................................................................................................................... (16)6.5.2 Loading CabinetFiles (16)6.5.3 AlarmThreshold ......................................................................................................................... (17)6.5.4 Saving toHardware .......................................................................................................................... (17)6.5.5 Redundancy ..................................................................................................................... (17)6.5.6 FactoryReset ................................................................................................................................ (17)6.5.7 HDR ................................................................................................................................. (17)6.5.8 HardwareVersion ............................................................................................................................. (18)MCTRL4K Independent ControllerUser Manual Contents6.6 CommunicationSettings (18)6.7 Language ......................................................................................................................................... (18)7Specifications ............................................... .. (19)1 Safety● 1Safety This chapter illustrates safety of the MCTRL4K independent controller to ensure the product’s storage, transport, installation and use sa f ety. Safety instructions are applicable to all personnel who contact or use the product. First of all, pay attention to following points. ●Read through the instructions. ●Retain all instructions. ● Comply with all instructions. 1.1 Storage and Transport Safety● Pay attention to dust and water prevention. ● Avoid long-term direct sunlight. ● Do not place the product at a position near fire and heat. ●Do not place the product in an area containing explosive materials. ●Do not place the product in a strong electromagnetic environment. ●Place the product at a stable position to prevent damage or personal injury caused by dropping. ● Save the packing box and materials which will come in handy if you ever have tostore and ship the product. For maximum protection during storage and shipping, repack the product as it was originally packed at the factory. 1.2 Installation and Use Safety Only trained professionals may install the product. ●Plugging and unplugging operations are prohibited when the power is on. ●Ensure safe grounding of the product. ● Beware of electric shock hazards.XI'ANNOVASTARTECHCO.,LTD.● Always wear a wrist band and insulating gloves.● Do not place the product in an area having frequent or strong shake.●Perform dust removing regularly.1 Safety ●Contact NovaStar for maintenance at any time, rather than have the product disassembled and maintained by non-professionals without authorization. ● Replace faulty parts only with the spare parts supplied by NovaStar.2 Overview XI'ANNOVASTARTECHCO.,LTD.MCTRL4K Independent ControllerUser Manual2 Overview2Overview The MCTRL4K is a 4K×2K independent controller developed by NovaStar. With up to 3840×2160@60 H z loading capacity of a single unit, it can support any custom resolution within this range as required, thus meeting the on-site configuration requirements of super-long or super-large LED displays. In multi-card mode, the MCTRL4K can be used as two independent controllers, making the images of two input sources perfectly displayed on the screen. What's more, the MCTRL4K supports HDR function and can work with A8s/A10s to greatly enhance the image quality of the screen, presenting more vivid and clearer images. The MCTRL4K is mainly applied to concert control centers, live events, security monitoring, Olympic Games and various sports centers. XI'ANNOVASTARTECHCO.,LTD.MCTRL4K Independent ControllerUser ManualNote: The device must be powered off before connection. To control multiple MCTRL4K units (10 units at most), please cascade them according to the figure below.XI'ANNOVASTARTECHCO.,LTD.MCTRL4K Independent ControllerUser Manual3 Hardware StructureOn the home screen, pressing the knob enters the main menu.On the main menu, rotating the knob selects a menu item or adjusts theparameter, and pressing the knob confirms the selection or enters the submenu. ●Holding down the knob and BACK button simultaneously for 5 seconds locks or unlocks all the buttons.Rear Panel3Hardware Structure3.1 AppearanceFront PanelInstruction on knob operations:● ●TECHCO.,LTD.USB port isbeing connected to the upper computer 3.2 Dimensio nsUnit: mmXI'ANNOVASTARTECHCO.,LTD.e Screen/// 4Home ScreenAfter the MCTRL4K is powered on, the home screen is shown in the figure below.●A: Access status of signal sources− Blue: Signal available −Gray: Signal unavailableThe interval between plugging and unplugging the DP connector should begreater than 5 seconds. Otherwise, the DP source cannot be detected. ● B: Current input source and its resolution and frame rateWhen the dual-link DVI is selected as input, the information of the two DVI sources will be displayed alternately.● C: Width, height and frame rate of the LED display that is currently configured ●D: Status areaThe meaning of each status icon is introduced in the following table.XI'ANNOVASTARTECHCO.,LTD.4 Home Screen●E: Connection status of Ethernet ports − Blue: The connection works and the port serves as the master. − Gray: The port is not connected or the connection does not work. − Mark on the top corner of the icon: The connection works and the port is inredundancy status.●F: Connection status of optical fiber ports− Blue: The connection works and the port serves as the master. − Gray: The port is not connected or the connection does not work.−Mark on the top-left corner of the icon: The connection works and the port is in redundancy status.XI'ANNOVASTARTECHCO.,LTD./5 Web Control5Web ControlThe MCTRL4K supports Web control functions, so the screen configurations can beeasily and quickly performed on a PC or mobile device.Note: For LED screen configuration via Web, Google browser is recommended.5.1 Environment ConfigurationStep 1 Connect the MCTRL4K to a PC (or a mobile device) with Ethernet cable. Step 2 Obtain the IP address of the MCTRL4K.Step 3 On the PC (or mobile device), search for the above IP address and enter the IPaddress.Note: The MCTRL4K and PC (or mobile device) must be in the same LAN.XI'ANNOVASTARTECHCO.,LTD.5.2 User InterfaceThe user interface of Web control is shown in the following figure.5 WebControl● A: Hardware connection statuses and loading capacities of the input, output and other connectors on the MCTRL4K. For details, see chapter 4 Home Screen .●B: Operations can be done in this area. For details, see chapter 6 Menu Operations .Click the menu bar on the left of area B to select the option to be adjusted. The corresponding operations can be done on the right. XI'ANNOVASTARTECHCO.,LTD.User Manual6 Menu OperationsMenu Operations6Menu Operations6.1 Brightness AdjustmentOn the main menu, press the knob to select the B rightness item and rotate the knobto adjust the brightness value.6.2 Input Settings6.2.1 Input Mode SettingsSupported input video sources include A uto , D P , H DMI , D VI×2 , D VI1 and D VI2 . Note: When the input source is set toA uto , the controller will automatically detect the input source according to the following priority: DP > HDMI > DVI The MCTRL4K supports two input modes: mosaic and multi-card.XI'ANNOVASTARTECHCO.,LTD.User Manual6● In mosaic mode, the DVI×2 is the input source.●In multi-card mode, the DVI1 or DVI2 is the input source.−The MCTRL4K serves as two independent controllers and the loadingcapacity of each is up to 3840×2160@30Hz. The images of both DVI 1 and DVI 2 input sources can be displayed on LED display simultaneously, but they cannot be set at the same time.−The DVI 1 corresponds to Ethernet ports 1–8, while DVI 2 corresponds toEthernet ports 9–16.6.2.2 Input Resolution SettingsThe input resolution can be set to a preset resolution or can be customized.The input resolution can be set through either of the following ways. Method 1: PresetSelect a proper resolution from the preset standard resolutions.Method 2: CustomRotate the knob to set a custom width (increasing by even numbers), custom height and custom refresh rate. Then select A pply and press the knob to apply the settings.Note: The supported custom resolution is up to 4092×2160@60Hz.6.2.3 Ultra-High Resolution SettingsWhen the input source is DP/HDMI, and the width or height of the output image is greater than 4095 pixels, the resolution must be customized only through the NVIDIA graphics card.Recommended graphics cards: NVIDIA GeForce GTX 970, NVIDIA GeForce GTX 1060 , and NVIDIA GeForce GTX 750 TiNote: The custom resolution is up to 7680×1080@60Hz or 1080×6000@60Hz.ProceduresStep 1 Right-click on PC desktop.Step 2 Choose NVIDIA Control Panel to enter its window. Step 3 On the left panel, choose Display > C hange resolution . Step 4 On the right, choose NOVA MCTRL4K .Step 5 Click Customize under 2 . Apply the following settings .XI'ANNOVASTARTECHCO.,LTD.User Manual6 Menu OperationsNOVASTARTECHCO.,LTD.Step 6 In the displayed Customize dialog box, click Create Custom Resolution .Step 7 In the displayed dialog box, set the parameters.−Set the timing standard to Manual .Menu Operations−Use the MCTRL4K Ultra-High Resolution Settings Generator (Rev 1.0) tocalculate the parameters, including active pixels, front porch (pixels), sync width (pixels), polarity, total pixels and refresh rate. Then, enter the parameter values manually. Note that the pixel clock must not be greater than 595.0 MHz.Step 8 Click Test .Step 9 In the displayed dialog box indicating the test is successful, click Yes to save thecustom resolution.6.3 Screen Settings6.3.1 Quick ConfigurationLoad the cabinet configuration files and save them to the receiving card.Step 1 On the main menu, select Screen Settings and press the knob to enter the submenu. Step 2 Choose Quick Config and press the knob to enter the submenu.Step 3 Set Cabinet Row QTY and Cabinet Col QTY (quantities of cabinet rows and columnsto be loaded). Step 4 Set Port 1 Cabinet QTY (number of cabinets loaded by Ethernet port 1). The device has restrictions on loading capacity of the Ethernet ports. For details, Note a). Step 5 Set Data Flow of the screen. For details, see Note c), d), and e).User Manual 66.3.2 Advanced ConfigurationStep 1 Choose Advanced Config and press the knob to enter its submenu. Step 2 On the warning screen, click Yes to enter the advanced configuration screen. Step 3 Select Enable and set the parameters of targeted Ethernet ports. 6.3.3 Image OffsetSet S tart X and S tart Y (the horizontal and vertical offsets of the overall displayloaded by the device).6.4Display ControlNormal : The LED screen displays the content of current input source normally. Freeze : The content of current input source is frozen.Black Out : The screen goes blacks and does not display the content.Test Pattern : A total of 8 test patterns are provided, such as pure colors and line patterns.XI'ANNOVASTARTECHCO.,LTD.6.5 Advanced SettingsStep 2 Import the cabinet configuration files to the MCTRL4K.6.5.1 Mapping FunctionWhen M apping Function is enabled, each of the cabinets will display the cabinetnumber and Ethernet port number it belongs to.6.5.2 Loading Cabinet FilesStart NovaLCT on PC and import the saved cabinet configuration files.Step 1 Save cabinet configuration files.After configuring the receiving cards, click S ave to File to save the cabinetconfiguration files (.rcfgx) to local PC.XI'ANNOVASTARTECHCO.,LTD.●The HDR function supports only HDR video sources.●The HDR function supports only the HDMI input connector.Note: After entering theI mport the Configuration File of Controller Cabinet window, NovaLCT will automatically read the configuration files already existed in the MCTRL4K. Users can change the names and orders of these files or delete them.Step 3 Load the cabinet configuration files.6.5.3 Alarm ThresholdSet the ranges of temperature and voltage values.6.5.4 Saving to HardwareSave all the configurations related to the receiving cards to the receiving cards and those data will not be lost even after the device is powered off.6.5.5 RedundancySet the current device as the primary or backup device.Factory Reset6.5.6Reset the current device to factory settings.6.5.7 HDRThe MCTRL4K supports HDR function and can work with A8s/A10s to greatlyenhance the image quality of the screen, presenting more vivid and clearer images.Step 1 Choose Advanced Settings > H DR to enter the HDR settings screen.Step 2 Press the knob on the HDR item and select Enable to enable the HDR function. Step 3 Set Screen Peak Luma and A mbient Light.Step 4 (Optional) Choose Rest to reset the HDR settings to factory settings.Note:XI'ANNOVASTARTECHCO.,LTD.The HDR and ClearView functions cannot be used at the same time. To set the function, choose Settings > Adjust screen effect on NovaLCT . In the displayed window, choose to enable the HDR or ClearView function.6.5.8 Hardware VersionView the hardware version of current device.Note: To upgrade the hardware version, send the upgrade file to the MCTRL4K via NovaLCT .6.6 Communication SettingsSet the communication mode and network parameters.Two communication modes are provided: U SB Preferred and L AN Preferred . When the USB and Ethernet ports are connected at the same time, the system willuse the communication mode set by the user.The IPv4 can be configured automatically or manually.Note: When setting the network manually, the IP address of current device cannot conflict with IP addresses of other devices.6.7 LanguageChange the UI language of the MCTRL4K unit.XI'ANNOVASTARTECHCO.,LTD.7 Specifications7SpecificationsCO.,LTD.XI'AN。
诺瓦科技LED显示屏视频控制器V700用户手册

产品用户手册视频控制器V700Rev1.0.0 NS160000034西安诺瓦电子科技有限公司声明尊敬的用户:欢迎您成为诺瓦产品的使用者,如果本手册为您了解和使用产品带来帮助和便利,我们深感欣慰,我们在编写手册时力求精确可靠,诺瓦会在未通知的情况下随时对手册的内容进行修改和变更,如果您在使用中遇到任何使用问题,或者您有好的建议,请按照手册提供的联系方式联系我们。
对您在使用中遇到的问题,我们会尽力给予支持,对您提出的建议,我们衷心感谢并尽快评估采纳。
版权本手册版权归西安诺瓦科技所有,任何个人或单位未经书面许可,不得以任何形式对文本内容作复制、摘录。
商标是诺瓦科技的注册商标。
西安诺瓦电子科技有限公司目录1 安全声明 ..............................................................................................................................................2 2 附件清单 .............................................................................................................................................. 23 概述 ...................................................................................................................................................... 2 4外观说明 .............................................................................................................................................. 3 4.1 前面板 ....................................................................................................................................... 3 4.2 后面板 (4)5 信号连接 .............................................................................................................................................. 46 操作动作说明 ....................................................................................................................................... 57 主界面 .................................................................................................................................................. 5 8菜单操作 .............................................................................................................................................. 6 8.1 第一步 输入设置 ...................................................................................................................... 6 8.2 第二步 快捷点屏 ...................................................................................................................... 7 8.3 第三步 亮度调节 ...................................................................................................................... 8 8.4 第四步 输出设置 ...................................................................................................................... 8 8.5 画面控制 ................................................................................................................................. 10 8.6 声音设置 .................................................................................................................................. 11 8.7高级设置 .................................................................................................................................. 11 8.7.1 双画面 .......................................................................................................................... 12 8.7.2 载入箱体配置文件........................................................................................................ 13 8.7.3 固化至接收卡 ............................................................................................................... 15 8.7.4 双主控热备份 ............................................................................................................... 15 8.7.5 高级属性 ...................................................................................................................... 15 8.7.6 工厂复位 ...................................................................................................................... 16 8.7.7 硬件版本 . (16)8.8固件升级 (16)9 常见问题 ............................................................................................................................................ 19 10 技术规格 . (20)11 安装尺寸 (20)西安诺瓦电子科技有限公司1 安全声明为避免可能的危险,请按规定使用此设备。
诺瓦科技LED显示屏视频处理器J6用户手册
J6 User ManualStatementDear users,You are welcome to use the J6, a multi-screen splicing processor of Xi'an NovaStarTech Co., Ltd. (hereinafter referred to as NovaStar).This document is intended to help you understand and use the product. For accuracyand reliability, NovaStar may make improvements and/or changes to this document atany time and without notice. Any problem in use or any good suggestion, pleasecontact us through ways provided in the document. We will do our utmost to solve theproblems and adopt the suggestions after evaluation as soon as possible.User ManualMulti-Screen Splicing Processor J6Rev1.0.1NS160110162Copyright ©2018NovaStarAll rights reserved. No part of this document may be copied, reproduced, extracted ortransmitted in any form or by any means without the prior written consent of Xi’anNovaStar Tech Co., Ltd.Trademarksis a trademark of NovaStar.Contents1 Overview (2)1.1 System Architecture .......................................................................................................................................21.2 Software Installation ......................................................................................................................................22 Appearance (3)2.1 Front Panel ....................................................................................................................................................32.2 Rear Panel .....................................................................................................................................................43 Signal Connection (6)4 Menu Operations (7)4.1 Output Settings ..............................................................................................................................................94.2 Window Settings ............................................................................................................................................94.3 Preset Recall ...............................................................................................................................................104.4 Input Settings ...............................................................................................................................................104.5 Display Control .............................................................................................................................................114.6 Advanced Settings ........................................................................................................................................114.7 Communication Settings ..............................................................................................................................124.8 Language Settings .......................................................................................................................................125 System Mode (13)5.1 Switcher .......................................................................................................................................................135.2 Splicer ..........................................................................................................................................................156 Electrical Parameters (17)7 Installation Dimensions (19)8 Troubleshooting (20)Safety NoticeTo avoid potential hazards, please use this product according to regulations. In theevent of breakdowns, non-professionals are not allowed to disassemble it formaintenance without permission. Please contact the after-sales department ofNovaStar timely.Vertical synchronization: The accuracy level of synchronization.Cascade: Connect multiple J6 units in specific order so as to output images with largerresolution.Note: Terms explained here are only for the chapters below. We will be sorry if theseterms cannot help you.1OverviewDeveloped by NovaStar, J6 is a high-performance multi-screen splicing processor featuring powerful image processing. Multiple video inputs can be overlapped anddisplayed on a display system composed by 4 screens after each of the input is scaled. J6 supports a wide range of inputs which can be spliced into a bigger picture. Based on a powerful FPGA processing platform, J6 supports quick seamless switch between input sources and supports transition effects such as fade, etc., allow you to experience more flexible screen layouts.In addition, J6 can work with V-Can, a new smart management software, to enable more screen splicing effects and better satisfy your needs.1.1 System ArchitectureSoftware Installation1.2 Just like the installation of other common software, install V-Can following the setupwizard.视频源输入 J6控制器显示屏3Signal ConnectionPlease refer to the interface introduction in previous chapter to connect hardware devices (Please turn the power off before connecting signals).J6- S plicerComputerGenlock SourceComputerComputerCameraLED DisplayJ6-SwitcherComputerCameraGenlockSourceComputerComputerCameraMonitorLED DisplayMonitor4Menu Operations After startup, the home screen on the LCD panel is shown as below://Figure 4-1 J6 menu tree4.1 Output SettingsAs shown in the figure below, set the mosaic mode of output images in the “O utput Settings ” menu. Set the resolution of output images i n “Output R esolution ”. Preset resolution and custom resolution are optional. Set the W idth and H eight of current screen in the “ D VI Output ” menu.4.2 Window SettingsThis processor is capable of displaying 6 windows at most and the input source, size, position, priority, input crop,border parameters, etc. of each window are settable. Priority: allows to set the display priority of current window.Input Crop: allows to turn on “Input Crop” a nd display cropped content on LED screen. Border Settings: allows to add or delete borders and set border width and height as well as border color.4.3Preset RecallSwitch presets. Apply the preset parameters directly. 16 presets in total are availablefor users to set and use.Preset RecallJ6 supports 16 user presets. After the preset data is configured, uses can directly usethe configured presets by their names.●Rotate the knob to select a preset you want to load and press the knob to load it.●When you enter the P reset Recall menu, the indicators of number buttons on thefront panel will turn on. You can press the number button to quickly load thecorresponding preset. If the preset No. is a double-digit value, press the twonumbers quickly within 2 seconds. For example, to load P reset 15, press 1and 5quickly within 2 seconds.Preset TemplatesJ6 provides 6 preset templates. Users can use the templates to quickly openwindows to fill the whole screen loaded by J6.Provided preset templates are 1×1, 1×2, 2×1, 1×3, 2×2 and 1×4.4.4Input SettingsInput resolution of signal sources, including DVI, HDMI and DP, can be set. Presetresolutions and custom resolutions are available for users.Preset resolutions include 800×600, 1024×768, 1280×720, 1280×768, 1280×800,1280×1024, 1366×768, 1440×900, 1600×1200, 1680×1050, 1920×1080, 1920×1200,2048×640, 2048×1152, 2048×1536, 2304×1152, 2560×816, 2560×960, 2560×1600and 3840×1080.Preset refresh rates include 50 Hz, 60 Hz, 75 Hz and 120 Hz.Custom resolution includes custom width, custom height and custom refresh rate.● Select “Apply ” and confirm the selection after the settings are done, and then the settings will take effect.●The total number of pixels is not greater than 2.1 million. The width of custom resolution cannot be greater than 3840 and height not greater than 1080.Output modes include: “SingleLink” and “DualLink”.Note:4.5 Display ControlAs shown in the figure below, “OSD” can be turned on/off , and “ T ransition Effect ”( i ncluding fade and cut), “ S witching Time ” , display state and image quality can be set in the “Display Control” menu. Input Color Settings: Select an input source to be adjusted to adjust its brightness, contrast, saturation, hue or reset to defaults.Tip: ● OSD function description: You can turn on/off OSD. Control software is requiredfor adding and setting detailed contents.●Transition effect description: Switching time setting can change the transition time of an effect.MVR Selection4.6 Users can scale up a specific input source, the PVW or PGM to view on the previewmonitor.On the MVR selection menu, rotate the knob to select an input source, the PVW or PGM and press the knob to display the selected target on the monitor in full screen. When you press the knob again, the current scaled display will exit.4.7 Advanced SettingsSystem modes include: “S p licer ” and “S w itcher ”.In synchronous mode, any one of the input sources can serve as synchronous source. Following synchronous sources are selectable: GenLock and any one of the input sources.4.8Communication SettingsCommunication modes include: “USB preferred” and “LAN preferred”.“N etwork”:allows to set IPv4 Config (manual and auto), IP address, and subnet maskor to reset to default network parameters.Tip:●This processor supports two control modes: USB and Ethernet cable. Pleaseselect according to actual needs.●IP and subnet mask can be edited only when network mode is set to “M anual”.4.9Language SettingsJ6 currently s upports “Chinese” and “English”only. Users can switch languages asrequired.“PVW” area is for editing. Different signal sources can be selected. Windows can be added and window parameters can be edited. Six windows can be added at most. Splicing area supports up to 1×2 layout (Splicing mode can be chosen withoutlimitation). Windows can be overlapped. The overlapped area displays the content of the window with higher priority. After the content is edited, result can be previewed on the monitor and can be adjusted.The display parameters set before can be saved as preset, which is convenient for using next time.5System ModeSystem modes include “Splicer” and “Switcher”.I n these two modes, J6 can work with the software V-Can.5.1 SwitcherStep 1: Refer to the hardware connection diagram t o connect hardware devices. Step 2: Start V-Can, connect devices and adjust their parameters. Set system mode to “Switcher”.Step 3: Add windows in editing area and set window parameters. Then output the edited content to LED screen.As shown in the figure below, content in “PGM” area is being displayed on the LED screen. After the content to be output is edited i n the “PVW” area , click the “TAKE” button in the top right corner of the page and then t he content in “PVW” area will bemapped to “PGM” area. LED screen will disp lay the edited content. Xi’anTechCo.,Ltd.5.2 SplicerStep 1: Refer to the hardware connection diagram to connect hardware devices. Step 2: Start V-Can, connect devices and adjust their parameters. Set system mode to“ S plicer ”. Step 3: Add windows in editing area and set window parameters. Then the edited content is displayed on LED screen in real-time.Splicing area supports up to 2×2 layout. (Splicing mode can be chosen without limitation).Different signal sources can be chosen. Windows (six at most) can be added. Window parameters can be edited. Windows can be overlapped. The overlapped area displays the content of the window with higher priority.The display parameters set before can be saved as preset, which is convenient for using next time.7 Installation DimensionsUnit: mm。
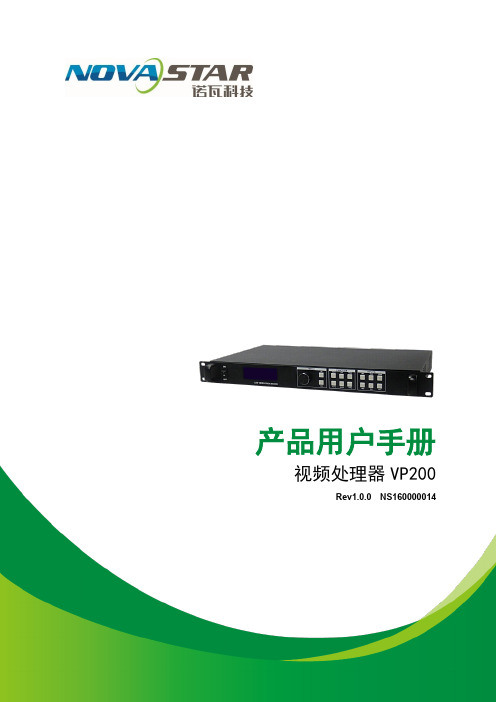
诺瓦科技LED视频控制器VP200用户手册
版权
本手册版权归西安诺瓦科技所有,任何个人或单位未经书面许可,不得以任何形式对文本内容作复
制、摘录。
西安诺瓦电子科技有限公司 商标
是诺瓦科技的注册商标。
1
目录
视频处理器 VP200 用户手册
1 安全声明 .......................................................................................................................................... 3 2 附件.................................................................................................................................................. 3 3 型号说明 .......................................................................................................................................... 3 4 概 述................................................................................................................................................ 4 5 功能简介 .......................................................................................................................................... 4
LED地砖屏显示屏视频处理器诺瓦科技NovaPro HD用户使用教程

Rev1.4.1 NS160100032StatementWelcome to use the product from Xi ’an NovaStar Tech Co., Ltd. (hereinafter referred to as “NovaStar ”). It is our great pleasure to offer this manual to help you understand and use the product. We strive for precision and reliability during the compilation of this manual, and the content of this manual are subject to change without notice. If you have any problem in use or you have any suggestion, pleaseFCC CautionAny Changes or modifications not expressly approved by the party responsible for compliance could void the user's authority to operate the equipment.This device complies with part 15 of the FCC Rules. Operation is subject to the following two conditions: (1)This device may not cause harmful interference, and (2) this device must accept any interference received,including interference that may cause undesired operation.Note: This equipment has been tested and found to comply with the limits for a Class B digital device, pursuant to part 15 of the FCC Rules. These limits are designed to provide reasonable protection against harmful interference in a residential installation. This equipment generates, uses and can radiate radio frequency energy and, if not installed and used in accordance with the instructions, may cause harmful interference to radio communications. However, there is no guarantee that interference will not occur in a particular installation. If this equipment does cause harmful interference to radio or television reception, which can be determined by turning the equipment off and on, the user is encouraged to try to correct the interference by one or more of the following measures: —Reorient or relocate the receiving antenna.—Increase the separation between the equipment and receiver.—Connect the equipment into an outlet on a circuit different from that to which the receiver is connected. —Consult the dealer or an experienced radio/TV technician for help.feel free to contact us according to the contact information provided in this manual. We will do our utmost to satisfy your needs. We would like to express our sincere thanks to your suggestions and make assessment for adoption as soon as possible.CopyrightAll the intellectual property rights involved in this document are reserved to NovaStar.Unauthorized duplication is a violation of applicable laws. Trademarkis the registered trademark of NovaStar.This equipment complies with FCC radiation exposure limits set forth for an uncontrolledenvironment .This equipment should be installed and operated with minimum distance 20cm betweenthe radiator & your body.This transmitter must not be co-located or operating in conjunction with any other antenna or transmitter Contents1SafetyStatement .............................................................................................................................12Overview ........................................................................................................................................ (2)3Appearance ................................................................................................................................... (3)3.1F ront Panel (3)3.2R ear Panel (5)4SignalConnection ..........................................................................................................................75Description of Operation Modes (8)6MachineOperation (9)6.1D escription of operation action (9)6.2M ain Interface (10)6.3S tep 1: Input Settings (11)6.4S tep 2: Screen Settings (12)6.5S tep 3: Brightness Control (15)6.6S tep 4: Output Settings (15)6.7D isplay Control (18)6.8A dvanced Settings (20)6.8.1Picture in Picture(PIP) (20)6.8.2AdvancedConfiguration (22)6.8.3Montage ............................................................................................................... (24)6.8.4Load CabinetFile (25)www.novastar.tech -1-6.8.5Alarm Threshold Settings ...................................................................................286.8.6Advanced Property ...............................................................................................286.8.7Save parameters to hardware ...........................................................................296.8.8Redundancy .............................................................................................................296.8.9DMX512 Channel Settings .................................................................................306.8.10Factory Reset (31)6.8.11Hardware version ..................................................................................................316.9C ommunication Settings (32)6.10Language Settings (32)7Web Interface Operation (33)7.1N etwork Establishment (33)7.2O perating Motion Description (33)7.3M y Device (35)8LCT Client Operation (36)9Firmware Upgrade (37)10Troubleshooting and Precautions (40)11Technical Specifications (42)12Installation Dimensions (45)-2- 1Safety StatementTo avoid potential hazards, please use this equipment according to the regulations. In case of damages, non-professionals are not allowed to disassemble it for maintenance without permission. Please contact the after-sales department of the company.2OverviewXi ’anNovaStarTechCo.,Ltd.NovaPro HD is a professional LED display controller. Besides the function of display control, it also features in powerful front-end processing. It has integrated various professional interfaces. With excellent image quality and free image control, NovaProHD has greatly satisfied the requirements of display industry. Product features:1) NovaPro HD has complete input interfaces including CVBS, VGA, SDI, DVI, HDMIand DP . These interfaces support input resolution up to 1080p@60Hz, highest pixel clock up to 165 MHz and output bandwidth up to 4 GBit.2) NovaPro HD has adopted 12 Bit digital processing internally. With advanceddeinterlacing motion self-adaptive processing technology adopted, images are clear and fine. Each input can be fully configured with contrast, saturation, hue,color temperature. It allows for switching between point-to-point display and point-bypoint scaling of input image according to display resolution.3) NovaPro HD doesn ’t need computer software for system configuration. Systemconfiguration can be completed only through one knob and one button. All operations can be done only by several steps. That's what we called “TouchTrack ”.4) NovaPro HD supports multiple units splicing.5) NovaPro HD has integrated DMX512 and GenLock input and loop interfaces.Professional control and synchronization have been provided. With the design of dual power redundancy backup, the system is stable and reliable. Optical fiberoutput has guaranteed the stability of long-distance data transmission.6) In addition to the operations of the controller and LCT client, y ou can alsoconfigure the system with browsers on your PC or PAD, namely, Web interface operation which is able to preview and assist with system settings in real time③: Option buttons of six input sources and below is corresponding indicator lights. Short press a button to set it as the input source of main screen while long pressto set as the source of PIP . Result of the operation can be viewed on operationscreen during setting.④:Operation screen (Please see details in the subsequent Chapter: Main Interface).⑤:Knob : Enter by pressing the knob and select or adjust by turning the knob. ⑥:ESC: Exit current operation or option.and confirm current working status of the system.Xi ’an3.2Rear Panel4Signal ConnectionSignal ConnectionConnect the required hardware devices referring to the interface descriptions in previous chapters.Note: Please turn OFF POWER before signal connection.Fig. 4-1 Signal ConnectionMultiple Units Connection Sketchoperating modes for users to choose in different occasions.Mode 1: Machine operation. All operations can be completed by a knob and a button on NovaPro HD without PC.Mode 2: Web operation. Suitable for the situation when NovaPro HD and control computer are in the same LAN. Open up a browser on control computer and enter the IP of NovaPro HD to log in control page.Mode 3: NovaLCT client operation. Connect NovaPro HD to control computer and allconfigurations can be completed on NovaLCT-Mars client. Then send to NovaPro HD. Note : Interlace operation of machine, LCT and Web is not allowed.【ESC 】: Return key, exit from current menu or operation. Please refer to the following chapter for detailed operation steps.Machine Operation Video Source Connection Fig. 4-2 Oversized Video Source Loading Scheme (4K)Cascade Control Signal Connection ...Option buttons of six input sources: Short press a button to set it as the input source of main screen while long press to set as the source of PIP.Lock: simultaneously press the knob and ESC button for more than three seconds to lock the controller.Unlocking: simultaneously press the knob and ESC button for more than three seconds to unlock the controller.6.2Main InterfaceAfter starting the controller, the main interface of LCD display is as follows:LED Output, Currently it is Port2 output.STATE:Status bar, meanings of each icon are described as below:It denotes that the controller is in primary control mode.First row:p roduct model, local IP/ device name (custom)OUTPUT:6.3 Step 1: Input SettingsSet the resolution of input source signal. Resolution can be directly set and changed through NovaPro HD for digital input modes: DVI, HDMI and DP . For other input modes, resolution can only be changed on input devices. Input resolution can be set through two ways: I : Preset ResolutionChoose a suitable resolution from the standard resolutions preset in the controller. Ifthere is no suitable resolution, please go to II: Custom ResolutionXi ’an6.4 Step 2: Screen SettingsPreconditions of screen settings:1) Each Ethernet port must load the same number of cabinets (If the number ofcabinets is not integer multiples of the Ethernet ports, the remaining cabinets will be loaded by the last Ethernet port);2) Regular screen, regular cabinets, each cabinet with the same size. Operating steps of screen settings:Step 1 Turn on the power of LED display. If the cabinets display normally, go to stepStep 4 Set Port1 Cabinet QTY. The device has some limitations on the cabinet quantity of network interfaces. For details, see precautions for screen setting a). The controller has certain limitations to the quantity of cabinet loaded by an Ethernet port. Please see details in Notes a) of Screen Settings. Step 5 Set data flow of the screen and please see the Notes c), d), e) of screen settings.2 . If the cabinets display abnormally, it is required to loadthe cabinet file first and save it to receiving card. Please see detailed operations in Advanced Settings . Step 2 E nter into the submenu of "Screen Settings" submenu. The options are shown in the following figure:Step 3 S et Cabinet Row QTY and Cabinet Column QTY according to the actualsituation of the screen. Xi ’anNovaStarTechCo., Ltd.NovaPro HD User's ManualLtd.6.5 Step 3: Brightness ControlReturn to main menu interface. Press the knob and select the corresponding value. At this time, the knob can be turned to adjust brightness value.III: Custom ScalingOperation: Enable Scaling and disable Auto Fit To Screen to customize scaling.E ffects of scaling disabledII: Output image is adjusted to the size of display screen, namely it is self-adaptive to the size of display screen.Operation: Enable scaling and auto fit to screen.Xi ’anNovaStarTechCo.,Ltd.size of LED display. After window is set, images can only be displayed within therange of the window and be self-adapted to the size of the window.Operating steps of custom scaling:a)Input Capture setting, i.e., to capture the part of the image from one start position of the input image and display it on the LED screen. It is needed to set horizontal width(≤horizontal resolution of input source) and vertical height(≤vertical resolution of input source) as well as start X(horizontal start) and start Y(vertical start).b) Output Window setting, size of the window is smaller than or equal to the Xi ’anNovaStarTechCo.,Ltd.After setting according to the above two steps, the captured content will be only NormalFreeze : same as the function of FRZ button.Black Out : same as the function of BLK button. Test PatternChannel EffectThe software supports three effects: cut, fade and pop-up. Select Off to if off to switch off Channel Effect.Picture quality adjustment Set contrast, saturation, hue, sharpness, color temperature, red brightness, green brightness, blue brightness and Gamma a s required . Save these parameters to hardware after adjusting to satisfaction NovaStarTechCo.,Ltd.displayed on the set area of the LED display, as shown below:Custom Scaling Effect6.7 Display ControlXi ’anNovaStarTechCo.,Ltd.6.8.1 Picture in Picture (PIP)To switch on or off PIP and set the input source of main screen as well as the size,position and transparency of PIP and PIP crop settings.Transparency: Transparency of PIP PIP Crop Settings:Image cropped from the set starting position will be displayed on PIP and its size is the set horizontal width and vertical height.Please enable this function before setting horizontal width, vertical height, start X and start Y.Advanced Config defaults to “Disabled ”. After the function is enabled, the rows and columns of the cabinets loaded by each port, offset, and data flow can be set respectively. PIP: Switching on/off PIP is the same as the function of PIP button on front panel and synchronous with it.Main source/PIP source: Input source switching of main screen and PIP is the same as the function of input source switching button on front panel.NovaStarTechCo.,Ltd.6. Advanced SettingsSeveral options of major functionare included in advanced settings, as shown in the figure below, including PIP , Advanced Configuration, Montage, etc. Operationof each function will be detailed for users in the following chapter.Xi ’anNovaStarTechCo.,Ltd.2)Ethernet Port Settings -16--17-Port Settings are completed, select "Apply " and press the knob to apply current settings. If you want to quit the settings, select “Return ”.Montage Example: the total number of pixels of the LED display is 4000×1000, which has exceeded the load of a single Pro HD unit. Montage can be applied and two ProHD units can be used for montage. See detailed parameter settings and the connections in the chart and figure below.6.8. MontageFor oversized LED display, two or more NovaPro HD units are needed for montage. In this case, the loading area of each NovaPro HD unit needs to be set respectively. Enable Montage first and set total width and height of the LED display. Then set the size and starting position of loading area of the NovaPro HD unit.Total sizes of loading area of all NovaPro HD units are the total sizes of LED display.Xi ’anNovaStarTechCo.,Ltd.as w-18-Connect NovaPro HD to PC and run NovaLCT-Mars on PC. Import cabinet configuration file saved before into the controller. 1) Save cabinet configuration fileAfter receiving card is configured, click Save File to save cabinet configuration file (.rcfg) to local file on PC.2) Import cabinet configuration file into NovaPro HD. Operating steps are shown in the figure below:Total Width(H) 4000 Total Height(V)1000 Load Area Width2000 Load Area Height 1000 Load Area X 0 Load Area YLtd.TechCo.,Ltd.Montage Connections (referring to the Chapter: Signal Connection)Note : If montage is to be enabled, please ensure Output Settings is in the third case: Custom Scaling, namely, set Scaling as enable while Custom Scaling as disable.6.8.4 Load Cabinet FileXi ’anNovaStarTech -19-3) Load Cabinet File6.8.5 Alarm Threshold SettingsIncluding following functions: VGA Auto Adj: sampling parameters of VGA input signal are automatically adjusted so that VGA image is clear and complete. Select this menu and then press the knob once to perform VGA automatic adjustment once.ADC Calibration: Images will be color cast or darker etc. when analog signal is accessed into processors without ADCcalibration. NovaPro HD is able to automatically perform ADC calibration based on input analog signal (including CVBS6.8.8 RedundancySet this controller as primary control or backup. “Primary ” or “Backup ” will bedisplayed on the main interface.and VGA) to solve above problems. Select this menu and then press the knob onceto perform ADC calibration once.DNR Settings: Ii s available when image input port is not VGA and there are five modes of noise reduction: "Off", "Auto", "Low", "Medium" and "High". 6.8. Save parameters to hardwareSave all the configurations of NovaPro HD to hardware and the data will not be lostafter power off.NovaStarTechCo., Ltd. Set the threshold values of temperature and voltage. When temperature or voltage NovaPro HD exceeds the threshold value, temperature or voltage on the home page of the screen will turn red and blink. 6.8. Advanced PropertyXi ’anNovaStarTechCo., Ltd.-20-4 Color temperature5 Red component brightness6 Green component brightness7 Blue component brightness8Gamma9 UndefinedUndefined Ltd.Definitions of channel properties are shown in the table below: anNovaStarNovaPro HD User's Manual-21-Xi ’an6.8.10 Factory ResetRestore NovaPro HD to factory settings.6.8.11 Hardware versionView hardware version of NovaPro HD.6.9 Communication SettingsSet communication mode and network parameters of NovaPro HD.There are two communication modes, one is USB Preferred and the other is LAN Preferred. If both USB and LAN port are connected to control computer and LAN Preferred is selected, system will use LAN to control. If only USB port is connected, the1 Web Interface Operation1.2 Operating Motion DescriptionThe Web interface of Pro HD is shown as the picture below. Compared with controller operation, the operation with Web interface is more intuitional and clearer.setting will be unavailable and system will use USB to control. Network modes include “ M anually ” and “ A u tomatically ”. It is obtained through DHCP while in “ Automatically ” mode. 6.10 Language SettingsXi ’anNovaStarTechCo.,Ltd.-22-Access Web control interface of Pro HD through browser. Main operating steps,functions and corresponding parameter configuration requirements are the same asmotion description and features of Web interface operations . Please refer to therelevant chapters of controller operation for specific parameter configurations andconfiguration requirements.7. Network Establishment1) Connect Pro HD to the same LAN and network segment as the control computer.2)Turn on the power of Pro HD and set communication settings on the referring to 7. Communication Setting. Local IP c an be obtained automatically or manually if you know the IP address.3)Open up the browser on control computer. Enter the local IP of Pro HD and Xi ’anNovaStarTechCo.,Ltd.-23- the operation of the controller. This chapter only covers network establishment,open up the web configuration interface.enter “Advanced Settings ” → “PIP ” sub menu interface settings, as shown in the figure below.Three display control buttons: the indicator lights default to blue and turn greenCo.,Ltd. Toolbar : The toolbar will be highlighted when you move the mouse over it. By clicking the toolbar, you can get into the configuration pages of sub menus. Thefunctions are the same as the menus in the bottom left of the page.Menu bar: click the mouse and enter the parameter configuration interface in the NovaStarTechCo.,Ltd.-24-Operation interface of LCT client is shown as the figure below:on. Choose whether to upgrade or not according to prompt.2) Upgrading firmware by LCT clientConnect Pro HD to PC and run NovaLCT-Mars on PC. Log in advanced user and the password is “admin ”. Then click “admin ” on you keyboard after logging in and the program loading page will pop up.Program path: Select the hardware program to be upgrade currently.Sending card: Check to update all the programs of sending card. FPGA of receiving card: Check to update FPGA program of receiving card. Update: Change hardware program into hardware device.Refresh all: Check this option and click Refresh to refresh and display the program versions of all sending card and receiving card of current serial port.Set refresh: Click “Refresh ” to set refresh and display the version information of one receiving card. ProblemSolutionCo.,Xi ’anNovaStarTechCo.,Ltd.Xi ’an NovaStarTechCo.,Ltd.9 Firmware UpgradeThere are two ways to upgrade the firmware of Pro HD: upgrade by U disk and LCT client.1) Upgrading firmware by U disk Firmware upgrade by U disk must meet two conditions:a The format of the U-disk must be FAT12/16/32 。
诺瓦科技LED控制台C1使用手册
网址:
i
目录
1 简介 .................................................................................................................................................. 1
2.2 前面 板 ..................................................................................................................................................... .... 3
2 硬件介绍 .......................................................................................................................................... 2
2.1 外 观 ..................................................................................................................................................... ........ 2
- 1、下载文档前请自行甄别文档内容的完整性,平台不提供额外的编辑、内容补充、找答案等附加服务。
- 2、"仅部分预览"的文档,不可在线预览部分如存在完整性等问题,可反馈申请退款(可完整预览的文档不适用该条件!)。
- 3、如文档侵犯您的权益,请联系客服反馈,我们会尽快为您处理(人工客服工作时间:9:00-18:30)。
4.6 高级设置 ............................................................................................................................................. 14
5.2 拼接器模式 ......................................................................................................................................... 18
版权 本文档版权归诺瓦科技所有,未经本公司书面许可,任何单位或个人பைடு நூலகம்得以任何形式对文本内容
进行复制、摘录等,违者必究。
商标
是诺瓦科技的注册商标。
西安诺瓦电子科技有限公司
www.novastar.tech
i
目录
多画面拼接处理器 N6 用户手册
安全声明 .................................................................................................................................................................... 1
4.7 通讯设置 ............................................................................................................................................. 14
www.novastar.tech
ii
多画面拼接处理器 N6 用户手册 7 安装尺寸 ......................................................................................................................................................... 21 8 常见问题 ......................................................................................................................................................... 22
1 概述.....................................................................................................................................................................4
预监:分为输入预监和切换台模式下的预监,
OSD:on screen display,屏幕叠加显示。预先加载的图片或文字可叠加在屏幕上显示,可放置在 屏幕的任意区域。
Genlock:同步锁定,可以使一套系统或多套系统与同一视频源实现同步。 场级同步:即同步的精度,一般有像素级同步、帧级同步和场级同步,场级同步为所有同步锁定后的 同步误差不超过一场。 级联:多台设备按照一定的顺序连接起来,可以实现更大面积的图像输出。 注意:此处术语解释仅针对下文内容,若未能帮助到您,请见谅。
公司 2.2 后面板.....................................................................................................................................................6 限 信号连接 ............................................................................................................................................................ 8 有 菜单操作 ......................................................................................................................................................... 10 科技 4.1 屏体配置 ............................................................................................................................................. 12 子 4.2 窗口布局 ............................................................................................................................................. 12 瓦电 4.3 场景切换 ............................................................................................................................................. 13 诺 4.4 输入设置 ............................................................................................................................................. 13 西安 4.5 画面控制 ............................................................................................................................................. 13
1.2 软件安装 ................................................................................................................................................ 4
西安诺瓦电子科技有限公司 禁止液体、金属碎片浸入机器内部,以免引起安全事故。
www.novastar.tech
1
更新历史
多画面拼接处理器 N6 用户手册
更新日期 2017/4/18
版本号 V1.0.0
更新说明 初始版本
备注
西安诺瓦电子科技有限公司
www.novastar.tech
2
术语
多画面拼接处理器 N6 用户手册
2 外观说明 ............................................................................................................................................................ 5
4.8 语言设置 ............................................................................................................................................. 15
西安诺瓦电子科技有限公司
www.novastar.tech
iii
安全声明
多画面拼接处理器 N6 用户手册
为避免可能的危险,请按规定使用此设备。如出现损坏,非专业人士请勿擅自打开维修,请及时与本 公司售后联系。
高压危险:本产品的工作电压为 100~240V AC。 接地:本产品通过电源的地线与大地相连,请确保接地导体的良好接地。 电磁干扰:设备应远离磁铁、马达及变压器。 防潮:请将设备置于干燥、干净的环境中。如有液体浸入,请立即拔掉电源插头。 远离易燃易爆危险物品。
6 电气参数 ......................................................................................................................................................... 20
西安诺瓦电多子画科面技有拼限接公用处司户理器手N册6
Rev1.0.1 NS160110161
多画面拼接处理器 N6 用户手册
声明 欢迎您选用西安诺瓦电子科技有限公司(以下简称诺瓦科技)的产品,如果本文档为您了解和使
用产品带来帮助和便利,我们深感欣慰。我们在编写文档时力求精确可靠,随时可能对内容进行修改 或变更,恕不另行通知。如果您在使用中遇到任何问题,或者有好的建议,请按照文档提供的联系方 式联系我们。对您在使用中遇到的问题,我们会尽力给予支持,对您提出的建议,我们衷心感谢并会 尽快评估采纳。
3 4
2.1 前面板.....................................................................................................................................................5