2009_3560交换机自学命令
交换机配置命令大全
交换机配置命令大全交换机是网络中非常重要的设备,它可以实现局域网内计算机之间的数据传输和通信。
在进行交换机的配置时,我们需要掌握一些基本的配置命令,以确保交换机能够正常运行并满足网络的需求。
下面将介绍一些常用的交换机配置命令,希望对大家有所帮助。
1. 设置交换机的主机名。
在配置交换机之前,我们首先需要设置交换机的主机名,以便在网络中进行识别和管理。
我们可以通过以下命令来设置交换机的主机名:```。
Switch(config)#hostname S1。
```。
这条命令将交换机的主机名设置为S1,您也可以根据实际情况进行修改。
2. 配置交换机的管理IP地址。
为了实现对交换机的远程管理,我们需要为交换机配置一个IP地址。
我们可以通过以下命令来配置交换机的管理IP地址:```。
Switch(config)#interface vlan 1。
Switch(config-if)#ip address 192.168.1.1 255.255.255.0。
Switch(config-if)#no shutdown。
```。
这条命令将VLAN 1接口的IP地址设置为192.168.1.1,子网掩码为255.255.255.0,并启用该接口。
3. 配置交换机端口。
在实际网络中,我们需要对交换机的端口进行配置,以满足不同设备的连接需求。
以下是一些常用的端口配置命令:```。
Switch(config)#interface fastethernet 0/1。
Switch(config-if)#switchport mode access。
Switch(config-if)#switchport access vlan 10。
```。
这条命令将FastEthernet 0/1端口设置为接入模式,并将该端口划分到VLAN 10中。
4. 配置交换机的VLAN。
VLAN是虚拟局域网的缩写,它可以将一个物理局域网划分成多个逻辑上的局域网。
交换机配置命令
交换机配置命令在网络设备中,交换机是起到连接多台计算机并实现数据交换的重要设备。
通过合理的配置命令,可以对交换机进行管理和优化,从而更好地满足网络的需求。
下面将介绍一些常用的交换机配置命令,并对其作出详细解释和应用。
1. 基本配置命令。
在进行交换机配置时,首先需要进行一些基本的配置,包括设置主机名、密码、时钟等。
以下是一些常用的基本配置命令:设置主机名。
```。
Switch(config)#hostname S1。
```。
设置特权模式密码。
```。
Switch(config)#enable password cisco。
```。
设置虚拟终端密码。
```。
Switch(config)#line vty 0 4。
Switch(config-line)#password cisco。
Switch(config-line)#login。
设置时钟。
```。
Switch(config)#clock set 14:30:00 25 Dec 2022。
```。
这些基本配置命令可以帮助管理员对交换机进行基本的管理和保护,确保网络的安全和稳定。
2. VLAN配置命令。
VLAN(Virtual Local Area Network)是将局域网划分成多个虚拟局域网的技术,可以提高网络的灵活性和安全性。
以下是一些常用的VLAN配置命令:创建VLAN。
```。
Switch(config)#vlan 10。
Switch(config-vlan)#name Sales。
```。
配置端口的VLAN。
```。
Switch(config)#interface fastethernet 0/1。
Switch(config-if)#switchport mode access。
Switch(config-if)#switchport access vlan 10。
配置VLAN间的路由。
```。
Switch(config)#interface vlan 10。
思科3560G交换机常用配置

思科3560G交换机常用配置一.配置telnet登陆账号和密码用串口线连上交换机Switch(config)#usernaSwitch(config)#username admin pasSwitch(config)#username admin password 123Switch(config)#line vty 0 4Switch(config-line)#login localSwitch(config-line)#end%SYS-5-CONFIG_I: Configured from console by consoleSwitch#wr二.配特权密码Switch#conf tEnter configuration commands, one per line. End with CNTL/Z.Switch(config)#enable password 456三.划分vlanSwitch(config)#vlan 10Switch(config-vlan)#int vlan 10Switch(config-if)#%LINK-5-CHANGED: Interface Vlan10, changed state to upSwitch(config-if)#ip add 192.168.10.1 255.255.255.0四.配dhcpSwitch(config)#ip dhcp pool vlan10Switch(dhcp-config)#network 192.168.10.0 255.255.255.0Switch(dhcp-config)#default-router 192.168.10.1Switch(dhcp-config)#dns-server 192.168.1.1Switch(dhcp-config)#五.划分端口Switch(config)#int range fastEthernet 0/1-5 进入1-5端口Switch(config-if-range)#switchport mode access 并把接口方式改为accessSwitch(config-if-range)#switchport access vlan 10把1-5端口划vlan 10Switch(config-if-range)#no sh六. 配静态路由Switch(config)#ip route 0.0.0.0 0.0.0.0 192.168.10.2 192.168.10.2是一跳地址七. 配置完一定要保存Switch#wrBuilding configuration...[OK]。
思科3560 配置命令

switch> 命令行模式;config#特权模式一、配置交换机vlan模式;有两种方式第一种:config#vlan ID 这里的ID是需要你个人给要划分的vlan起的编号config-if#name 名字switch#show vlan brief 查看vlan 用来检验是否配置成功第二种:switch#vlan database 交换机的vlan配置状态switch(vlan)#vlan ID name 名字配置vlan 并且分配相应的名字二、3560上开启路由功能配置switch(config)#ip routingswitch(config)#ip route ipaddress net-hop 配置路由(静态)switch(config)#ip default-gateway ipaddress 配置网关三、开启聚合链路配置#conf tSW(config)#interface range f1/1 - 2SW(config-if)#channel-group 1 mode desirable/onSW(config-if)#swithportSW(config-if)#switchport mode trunkSW(config-if)#switchport trunk encap dot1q四、启动telnet管理模式switch(config)#line vty 0 4switch(config-line)#password 密码switch(config-line)#login五、开启cisco日志功能switch(config)#logging onswitch(config)#logging trap 信息switch(config)#logging host 你的IP地址switch(config)#logging facility 你选着的信息配置3550作为dhcp服务器六、配置cisco启动dhcp功能配置地址池switch(config)ip dhcp pool 名字switch(config-pool)network maskswitch(config-pool)dns-serverswitch(config-pool)default-router 网关设置dhcp保留不分配的地址switch(config)ip dhcp excluded-address 地址地址第一步;从起交换机第二步;配置1)按下MODE键后给3560加电。
交换机的命令

交换机的命令一、交换机基本配置1、使用交换机的命令行管理界面①切换交换机的模式:用户模式、特权模式、全局配置模式、端口模式②命令帮助:?③命令简写:可识别该命令的前几个字母④命令自动补齐:按TAB键,在可识别的情况下自动补齐⑤命令的快捷键:ctrl+z返回到特权模式,ctrl+c终止当前操作2、交换机的全局配置①进入全局配置模式switch#configure terminalswitch(config)#②配置交换机的设备名称switch(config)#hostname s123s123(config)#③配置交换机的每日提示信息s123(config)#banner motd & !&为终止符,有效字符为22个字节3、交换机端口的基本配置①进入端口配置模式switch#configure terminalswitch(config)#interface fastethernet 0/3switch(config-if)#②配置端口速率(100、10、auto)switch(config-if)#speed 10③配置双工模式(full、half、auto)switch(config-if)#duplex half④开启端口⑤查看端口配置信息switch#show interface fastethernet 0/3 AdminStatus:up 交换机端口开启OperStatus:up 交换机端口连接设备正常AdminDuplex:half 双工模式AdminSpeed:10 端口速度4、查看交换机的系统和配置信息①进入特权模式switch>enableswitch#②查看交换机的版本信息switch#show version③查看交换机的MAC地址表switch#show mac-address-table④查看交换机当前生效的配置信息switch#show running-config二、虚拟局域网VLAN--交换机端口隔离1、配置前测试连通性①给每台PC配置IP地址等信息②用ping命令测试可以连通2、创建VLAN①进入交换机全局配置模式switch#configure terminalswitch(config)#②建立VLANswitch(config)#vlan 10switch(config-vlan)#name test10 switch(config-vlan)#exitswitch(config)#vlan 20switch(config-vlan)#exit③查看已配置的VLAN信息3、将接口分配到VLAN①进入端口配置模式switch#configure terminalswitch(config)#interface fastethernet 0/1 switch(config-if)#②端口加入VLANswitch(config-if)#switchport access vlan 10 switch(config-if)#exitswitch(config)#interface fastethernet 0/3 switch(config-if)#switchport access vlan 20 switch(config-if)#exit4、配置后测试连通性加入不同vlan的端口所连接的PC间逻辑上不再连通三、跨交换机实现VLANSwitch(config)#vlan 10Switch(config-vlan)#exitSwitch(config)#interface fastEthernet 0/3 Switch(config-if)#switchport access vlan 10Switch(config)#interface fastEthernet 0/1 Switch(config-if)#switchport mode trunk四、交换机的冗余链接--不能形成环路链路聚合Switch(config)#interface aggregateport 1 Switch(config-if)#switchport mode trunk Switch(config-if)#exitSwitch(config)#interface range fastethernet 0/1-2Switch(config-if-range)#port-group 1生成树步骤1:交换机A上的配置Switch(config)#hostname SASA(config)#VLAN 10SA(config-if)#name salesSA(config-if)#exitSA(config)#interface fastethernet 0/3SA(config-if)#switchport access vlan 10SA(config-if)#exitSA(config)#interface range fastethernet 0/1 - 2SA(config-if-range)#switchport mode trunk步骤2: 交换机B上的配置Switch(config)#hostname SBSB(config)#VLAN 10SB(config-if)#name salesSB(config-if)#exitSB(config)#interface fastethernet 0/3SB(config-if)#switchport access vlan 10SB(config-if)#exitSB(config)#interface range fastethernet 0/1 - 2SB(config-if-range)#switchport mode trunk步骤3: 配置快速生成树协议SA(config)#spanning-tree !开启生成树协议SA(config)#spanning-tree mode rstp !指定生成树协议的类型为RSTPSB(config)#spanning-tree !开启生成树协议SB(config)#spanning-tree mode rstp !指定生成树协议的类型为RSTP步骤4: 设置交换机的优先级,指定交换机A为根交换机SA(config)#spanning-tree priority 4096五、利用三层交换机实现不同VLAN间的通信步骤1: 在交换机A(三层交换机)上创建VLAN 10,并将0/1端口划分到VLAN 10中在交换机A(三层交换机)上创建VLAN 20,并将0/2端口划分到VLAN 20中步骤2: 把交换机A与交换机B相连端口(设为0/24端口)定义为tag vlan模式步骤3: 在交换机B上创建VLAN 10,并将0/1端口划分到VLAN 10中步骤4: 把交换机B与交换机A相连端口(设为0/24端口)定义为tag vlan模式步骤5: 设置三层交换机VLAN间通信。
交换机路由器命令大全(结合配置实例)
交换机路由器命令大全(结合配置实例)交换机路由器命令大全(结合配置实例)交换机和路由器是计算机网络中常用的网络设备,用于实现数据包的转发和路由选择。
在实际应用中,我们需要使用命令来配置交换机和路由器的各项参数。
本文将给出交换机和路由器常用命令的大全,并结合实际配置示例进行说明。
一、交换机命令1. 查看交换机基本信息查看交换机型号、固件版本、序列号等基本信息:show version2. 配置交换机端口设置交换机接口的速率、全双工模式等参数:interface interface_namespeed speed_valueduplex {full | half}3. 查看交换机端口状态查看交换机端口的连接状态、速率、工作模式等信息:show interfaces status4. 配置交换机VLAN创建VLAN和端口关联,实现VLAN的隔离和管理:vlan vlan_idname vlan_nameinterface interface_name5. 查看交换机MAC表显示交换机学习到的MAC地址和对应的端口:show mac-address-table6. 配置交换机链路聚合将多个物理端口绑定为一个逻辑端口,提高带宽和冗余性:interface port-channel channel_numberdescription description_textswitchport mode trunk/access7. 交换机Spanning Tree配置配置交换机的Spanning Tree协议参数,避免网络环路:spanning-tree vlan vlan_idpriority priority_value二、路由器命令1. 查看路由表显示路由器的路由表,包括直连路由、静态路由和动态路由表项:show ip route2. 配置静态路由手动配置路由器的静态路由表,指定目的网络和下一跳信息:ip route destination_network subnet_mask next_hop_ip3. 配置路由器接口配置路由器的接口参数,包括IP地址、子网掩码、描述等:interface interface_nameip address ip_address subnet_maskdescription description_text4. 配置路由器OSPF协议配置路由器之间的OSPF动态路由协议,实现网络的动态路由选择:router ospf process_idnetwork network_address wildcard_mask area area_number5. 配置路由器ACL配置路由器的访问控制列表,用于控制数据包的流量:access-list access_list_number permit/deny source destination6. 配置路由器NAT配置路由器的网络地址转换功能,实现内网与外网的互通:interface interface_nameip nat inside/outside三、配置实例1. 配置交换机端口接口GigabitEthernet0/1配置为100Mbps全双工模式:interface GigabitEthernet0/1speed 100duplex full2. 配置交换机VLAN创建VLAN10,将接口GigabitEthernet0/1划分到VLAN10:vlan 10name VLAN10interface GigabitEthernet0/13. 配置路由器接口将接口GigabitEthernet0/0配置为192.168.1.1/24的IP地址:interface GigabitEthernet0/0ip address 192.168.1.1 255.255.255.0description LAN interface4. 配置静态路由配置路由器的静态路由表,将目的网络192.168.2.0/24指向下一跳192.168.1.2:ip route 192.168.2.0 255.255.255.0 192.168.1.25. 配置路由器ACL设置访问控制列表,允许源IP地址为192.168.1.0/24的流量通过:access-list 1 permit 192.168.1.0 0.0.0.2556. 配置路由器NAT设置路由器的NAT,将内部接口GigabitEthernet0/1地址转换为公网地址:interface GigabitEthernet0/1ip nat inside以上是交换机和路由器常用命令的大全以及配置实例。
3560G配置命令大全

3560G配置命令大全1.在基于IOS的交换机上设置主机名/系统名:witch(config)#hotnamehotname在基于CLI的交换机上设置主机名/系统名:witch(enable)etytemnamename-tring2.在基于IOS的交换机上设置登录口令:witch(config)#enablepawordlevel1paword在基于CLI的交换机上设置登录口令:witch(enable)etpawordwitch(enable)etenalbepa3.在基于IOS的交换机上设置远程访问:witch(config)#interfacevlan1witch(config-if)#ipaddreip-addrenetmakwitch(config-if)#ipdefault-gatewayip-addre在基于CLI的交换机上设置远程访问: witch(enable)etinterfacec0ip-addrenetmakbroadcat-addrewitch(enable)etinterfacec0vlanwitch(enable)etiproutedefaultg ateway4.在基于IOS的交换机上启用和浏览CDP信息:witch(config-if)#cdpenablewitch(config-if)#nocdpenable为了查看Cico邻接设备的CDP通告信息:witch#howcdpinterface[typemodle/port]witch#howcdpneighbor[typemodule/port][detail]在基于CLI的交换机上启用和浏览CDP信息:witch(enable)etcdp{enable|diable}module/port为了查看Cico邻接设备的CDP通告信息:witch(enable)howcdpneighbor[module/port][vlan|duple某|capabilitie|detail]5.基于IOS的交换机的端口描述:witch(config-if)#decriptiondecription-tring基于CLI的交换机的端口描述:witch(enable)etportnamemodule/numberdecription-tring6.在基于IOS的交换机上设置端口速度:witch(config-if)#peed{10|100|auto}在基于CLI的交换机上设置端口速度: witch(enable)etportpeedmoudle/number{10|100|auto}witch(enabl e)etportpeedmoudle/number{4|16|auto}7.在基于IOS的交换机上设置以太网的链路模式:witch(config-if)#duple某{auto|full|half}在基于CLI的交换机上设置以太网的链路模式:witch(enable)etportduple某module/number{full|half}8.在基于IOS的交换机上配置静态VLAN:witch#vlandatabaewitch(vlan)#vlanvlan-numnamevlawitch(vlan)#e某itwitch#configureteriminalwitch(config)#interfaceinterfacemodule/numberwitch(config-if)#witchportmodeaccewitch(config-if)#witchportaccevlanvlan-numwitch(config-if)#end在基于CLI的交换机上配置静态VLAN:witch(enable)etvlanvlan-num[namename]witch(enable)etvlanvlan-nummod-num/port-lit9.在基于IOS的交换机上配置VLAN中继线:witch(config)#interfaceinterfacemod/portwitch(config-if)#witchportmodetrunkwitch(config-if)#witchporttrunkencapulation{il|dotlq}witch(config-if)#witchporttrunkallowedvlanremovevlan-litwitch(config-if)#witchporttrunkallowedvlanaddvlan-lit在基于CLI的交换机上配置VLAN中继线:witch(enable)ettrunkmodule/port[on|off|deirable|auto|nonegotiate]Vlan-range[il|dotlq|dotl0|lane|negotiate]10.在基于IOS的交换机上配置VTP管理域:witch#vlandatabaewitch(vlan)#vtpdomaindomain-name在基于CLI的交换机上配置VTP 管理域:witch(enable)etvtp[domaindomain-name]11.在基于IOS的交换机上配置VTP模式:witch#vlandatabaewitch(vlan)#vtpdomaindomain-namewitch(vlan)#vtp{ever|cilent|tranparent}witch(vlan)#vtppaword paword在基于CLI的交换机上配置VTP模式:witch(enable) etvtp[domaindomain-name][mode{ever|cilent|tranparent}][pawordpaword]12.在基于IOS的交换机上配置VTP版本:witch#vlandatabaewitch(vlan)#vtpv2-mode在基于CLI的交换机上配置VTP版本:witch(enable)etvtpv2enable13.在基于IOS的交换机上启动VTP剪裁:witch#vlandatabaewitch(vlan)#vtppruning在基于CLI的交换机上启动VTP剪裁:witch(enable)etvtppruningenable14.在基于IOS的交换机上配置以太信道:witch(config-if)#portgroupgroup-number[ditribution{ource|detination}]在基于CLI的交换机上配置以太信道:witch(enable)etportchannelmoudle/port-rangemode{on|off|deirable|auto}15.在基于IOS的交换机上调整根路径成本:witch(config-if)#panning-tree[vlanvlan-lit]cotcot在基于CLI 的交换机上调整根路径成本:witch(enable)etpantreeportcotmoudle/portcotwitch(enable)etpa ntreeportvlancotmoudle/port[cotcot][vlan-lit]16.在基于IOS的交换机上调整端口ID:witch(config-if)#panning-tree[vlanvlan-lit]port-priorityport-priority在基于CLI的交换机上调整端口ID:witch(enable)etpantreeportpri{mldule/port}prioritywitch(enab le)etpantreeportvlanpri{module/port}priority[vlan]17.在基于IOS的交换机上修改STP时钟:`witch(config)#panning-tree[vlanvlan-lit]ma某-ageecond在基于CLI的交换机上修改STP时钟:witch(enable)etpantreehellointerval[vlan]witch(enable)etpant reefwddelaydelay[vlan]witch(enable)etpantreema某ageagingtiame[vlan]18.在基于IOS的交换机端口上启用或禁用PortFat 特征:witch(config-if)#panning-treeportfat在基于CLI的交换机端口上启用或禁用PortFat特征:witch(enable) etpantreeportfat{module/port}{enable|diable}19.在基于IOS的交换机端口上启用或禁用UplinkFat特征:witch(config)#panning-treeuplinkfat[ma某-update-ratepkt-per-econd]在基于CLI的交换机端口上启用或禁用UplinkFat特征:witch(enable)etpantreeuplinkfat{enable|diable}[rateupdate-rate][all-protocoloff|on]20.为了将交换机配置成一个集群的命令交换机,首先要给管理接口分配一个IP地址,然后使用下列命令:witch(config)#cluterenablecluter-name21.为了从一条中继链路上删除VLAN,可使用下列命令:witch(enable)cleartrunkmodule/portvlan-range22.用howvtpdomain显示管理域的VTP参数.23.用howvtptatitic显示管理域的VTP参数.24.在Catalyt交换机上定义TrBRF的命令如下: witch(enable)etvlanvlan-name[namename]typetrbrfbridgebridge-num[tp{ieee|ibm}]25.在Catalyt交换机上定义TrCRF的命令如下:witch(enable)etvlanvlan-num[namename]typetrcrf{ringhe某-ring-num|decringdecimal-ring-num}parentvlan-num26.在创建好TrBRFVLAN之后,就可以给它分配交换机端口.对于以太网交换,可以采用如下命令给VLAN分配端口:witch(enable)etvlanvlan-nummod-num/port-num27.命令howpantree显示一个交换机端口的STP状态.28.配置一个ELAN的LES和BUS,可以使用下列命令:ATM(config)#interfaceatmnumber.ubintmultiointATM(config-ubif)#laneerber-buethernetelan-name29.配置LECS:ATM(config)#lanedatabaedatabae-nameATM(lane-config-databade)#nameelan1-nameerver-atm-addrele1-nap-addreATM(lane-config-databade)#nameelan2-nameerver-atm-addrele2-nap-addreATM(lane-config-databade)#name…30.创建完数据库后,必须在主接口上启动LECS.命令如下:ATM(config)#interfaceatmnumberATM(config-if)#laneconfigdatabaedatabae-nameATM(config-if)#laneconfigauto-config-atm-addre31.将每个LEC配置到一个不同的ATM子接口上.命令如下:ATM(config)#interfaceatmnumber.ubintmultipointATM(config)#lan eclientethernetvlan-numelan-num32.用howlaneerver显示LES的状态.33.用howlanebu显示bu的状态.34.用howlanedatabae显示LECS数据库可内容.35.用howlaneclient显示LEC的状态.36.用howmodule显示已安装的模块列表.37.用物理接口建立与VLAN的连接:router#configureterminal router(config)#interfacemediamodule/portrouter(config-if)#decriptiondecription-tringrouter(config-if)#ipaddreip-addrubnet-makrouter(config-if)#nohutdown38.用中继链路来建立与VLAN的连接:router(config)#interfacemodule/port.ubinterfacerouter(config -ig)#encapulation[il|dotlq]vlan-numberrouter(config-if)#ipaddreip-addreubnet-mak39.用LANE来建立与VLAN的连接: router(config)#interfaceatmmodule/portrouter(config-if)#noipaddrerouter(config-if)#atmpvc105qaalrouter(config-if)#atmpvc2016ilnirouter(config-if)#interfaceatmmodule/port.ubinterfacemultipointrouter(config-if)#ipaddreip-addreubnet-makrouter(config-if)#laneclientethernetelan-numrouter(config-if)#interfaceatmmodule/port.ubinterfacemultipointrouter(config-if)#ipaddreip-addreubnet-namerouter(config-if)#laneclientethernetelan-namerouter(config-if)#…40.为了在路由处理器上进行动态路由配置,可以用下列IOS命令来进行:router(config)#iproutingrouter(config)#routerip-routing-protocolrouter(config-router)#networkip-network-numberrouter(config-router)#networkip-network-number41.配置默认路由:witch(enable)etiproutedefaultgateway59.访问时间和保持时间参数是可配置的:60.配置HSRP跟踪:router(config-if)#tandygroup-numbertracktype-numberinterface-priority42.为一个路由处理器分配VLANID,可在接口模式下使用下列命令:61.要显示HSRP路由器的状态:router(config)#interfaceinterfacenumberrouter(config-if)#mlrpvlan-idvlan-id-num43.在路由处理器启用MLSP:router(config)#mlrpip44.为了把一个外置的路由处理器接口和交换机安置在同一个VTP域中:router(config)#interfaceinterfacenumberrouter(config-if)#mlrpvtp-domaindomain-name45.查看指定的VTP域的信息: router#howmlrpvtp-domainvtpdomainname46.要确定RSM或路由器上的管理接口,可以在接口模式下输入下列命令:router(config-if)#mlrpmanagement-interface47.要检验MLS-RP的配置情况:router#howmlrp48.检验特定接口上的MLS配置:router#howmlrpinterfaceinterfacenumber49.为了在MLS-SE上设置流掩码而又不想在任一个路由处理器接口上设置访问列表:etmlflow[detination|detination-ource|full]50.为使MLS和输入访问列表可以兼容,可以在全局模式下使用下列命令:router(config)#mlrpipinput-acl51.当某个交换机的第3层交换失效时,可在交换机的特权模式下输入下列命令:witch(enable)etmlenable54.确定那些MLS-RP和MLS-SE参与了MLS,可先显示交换机引用列表中的内容再确定:witch(enable)howmlinclude55.显示MLS高速缓存记录:witch(enable)howmlentry56.用命令howinarp显示ARP高速缓存区的内容。
交换机路由器常用命令
交换机路由器常用命令交换机和路由器是网络中非常重要的设备,熟练掌握它们的常用命令对于网络管理和故障排除至关重要。
下面为您介绍一些交换机和路由器常用的命令。
一、交换机常用命令1、`enable` 命令这个命令用于进入特权模式。
在特权模式下,可以执行更多高级的配置和管理操作。
2、`configure terminal` 命令输入此命令后,可以进入全局配置模式,对交换机的整体参数进行设置。
3、`interface` 命令通过`interface` 加上接口类型和编号,例如`interface ethernet0/1` ,可以进入特定接口的配置模式,对该接口的参数进行详细配置。
4、`vlan` 命令`vlan` 相关的命令用于创建、删除和配置 VLAN(虚拟局域网)。
比如`vlan 10` 创建 VLAN 10 ,`name VLAN10` 为 VLAN 10 命名。
5、`show vlan` 命令用于查看交换机上已创建的VLAN 信息,包括VLAN 编号、名称、端口成员等。
6、`show interfaces` 命令此命令可以查看交换机各个接口的状态、速率、双工模式等详细信息。
7、`port trunk allowpass vlan` 命令在配置 trunk 链路时,使用该命令允许特定的 VLAN 通过 trunk 链路。
8、`spanningtree` 命令用于配置生成树协议,防止网络环路。
例如`spanningtree moderstp` 可以设置生成树的模式为快速生成树。
二、路由器常用命令1、`enable` 命令同样用于进入特权模式。
2、`configure terminal` 命令进入全局配置模式。
3、`interface` 命令例如`interface fastethernet 0/0` ,进入特定的接口配置模式。
4、`ip address` 命令为接口配置 IP 地址,如`ip address 19216811 2552552550` 。
cisco 3560 基本命令

1.show查看指令,输入show ?查看帮助aaa Show AAA valuesaccess-lists List access listsaccounting Accounting data for active sessions adjacency Adjacent nodesaliases Display alias commandsarchive Archive functionsarp ARP tableauto Show Automation Templateauto Show Automation Templateboot show boot attributesbuffers Buffer pool statisticscable-diagnostics Show Cable Diagnostics Resultscca CCA informationcdp CDP informationcef CEF address family independent status class-map Show QoS Class Mapclock Display the system clockcluster Cluster informationcns CNS agentsconfiguration Configuration detailscontrollers Interface controller statusdampening Display dampening informationdata-corruption Show data errorsdebugging State of each debugging optionderived-config Derived operating configurationdhcp Dynamic Host Configuration Protocol status diagnostic Show command for diagnosticdot1q-tunnel Display dot1q tunnel portsdot1x Dot1x informationdtp DTP informationeap Shows EAP registration/session information env Environmental facilitieseou EAPoUDPerrdisable Error disableetherchannel EtherChannel informationexception exception informationsfallback Display Fallback configurationfile Show filesystem informationflash: display information about flash: file system flowcontrol show flow control informationhistory Display the session command historyhosts IP domain-name, lookup style, nameservers, and host table html HTML helper commandsidb List of Interface Descriptor Blocksidentity Identity profiles and policiesidprom show IDPROMs for interfacesinterfaces Interface status and configuration接口状态和配置inventory Show the physical inventoryip IP informationipc Interprocess communications commandsipv6 IPv6 informationkey Key informationkron Kron Subsysteml2protocol-tunnel Display L2PT status and configurationslacp Port channel informationline TTY line informationlink Show Linklocation Display the system locationlogging Show the contents of logging bufferslogin Display Secure Login Configurations and Statemac MAC configurationmac-address-table MAC forwarding tablememory Memory statisticsmls mls global commandsmonitor Monitoring different system eventsmvr Show mvr global parametersntp Network time protocolpagp Port channel informationparser Show parser commandsplatform platform specific show commandspm Show Port Manager commandspolicy-manager Policy Managerpolicy-map Show QoS Policy Mapport-security Show secure port informationpost Show the results of the system POSTpower Switch Powerprivilege Show current privilege levelprocesses Active process statisticsprotocols Active network routing protocolsqueue Show queue contentsqueueing Show queueing configurationradius Shows radius informationregion Region Manager Statusregistry Function registry informationreload Scheduled reload informationresource Resource group statisticsrhosts Remote-host+user equivalencesrmon rmon statisticsroute-map route-map informationrtr Service Assurance Agent (SAA)running-config Current operating configuration当前操作配置sdm Switch database managementsessions Information about Telnet connectionssetup Show express setup settingssnmp snmp statisticsspanning-tree Spanning tree topologystacks Process stack utilizationstandby Hot Standby Router Protocol (HSRP) information startup-config Contents of startup configuration启动配置的内容storm-control Show storm control configurationsubsys Show subsystem informationsystem Show the system configurationtable-map Show Table Maptacacs Shows tacacs+ server statisticstcp Status of TCP connectionstech-support Show system information for Tech-Support template Template informationterminal Display terminal configuration parameterstime-range Time rangetrack T racking informationudld UDLD informationusers Display information about terminal lines version System hardware and software status系统硬件和软件状态vlan VTP VLAN statusVTP VLAN状态vmps VMPS version informationvtp VTP informationxdr Show details about XDR2.interface1.配置一个端口configure terminal进入配置状态interface Gi0/14进入端口配置状态speed {10 | 100 | 1000 | auto | nonegotiate}设置端口速率。
cisco3560交换机所有配置命令

channel-group command 2-70
channel-protocol command 2-74
Cisco Network Assistant
See Network Assistant
Cisco Redundant Power System 2300
configuring 2-464
auto qos voip command 2-52
Auto Smartports macros and LLDP 2-347
B
BackboneFast, for STP 2-808
backup interfaces
configuring 2-882
displaying 2-593
boot helper command 2-62
boot helper-config file command 2-63
booting
Cisco IOS image 2-66
displaying environment variables 2-524
interrupting 2-61
manually 2-64
boot loader
accessing A-1
booting
Cisco IOS image A-3
helper image 2-62
directories
creating A-19
displaying a list of A-8
removing A-23
boot private-config-file command 2-65
boot system command 2-66
交换机基本命令

交换机基本状态:hostname> ;用户模式hostname# ;特权模式hostname(config)# ;全局配置模式hostname(config-if)# ;接口状态交换机口令设置:switch>enable ;进入特权模式switch#config terminal ;进入全局配置模式switch(config)#hostname ;设置交换机的主机名switch(config)#enable secret xxx ;设置特权加密口令switch(config)#enable password xxa ;设置特权非密口令switch(config)#line console 0 ;进入控制台口switch(config-line)#line vty 0 4 ;进入虚拟终端switch(config-line)#login ;允许登录switch(config-line)#password xx ;设置登录口令xxswitch#exit ;返回命令交换机VLAN设置:switch#vlan database ;进入VLAN设置switch(vlan)#vlan 2 ;建VLAN 2switch(vlan)#no vlan 2 ;删vlan 2switch(config)#int f0/1 ;进入端口1switch(config-if)#switchport access vlan 2 ;当前端口加入vlan 2 switch(config-if)#switchport mode trunk ;设置为干线switch(config-if)#switchport trunk allowed vlan 1,2 ;设置允许的vlan switch(config-if)#switchport trunk encap dot1q ;设置vlan 中继switch(config)#vtp domain ;设置发vtp域名switch(config)#vtp password ;设置发vtp密码switch(config)#vtp mode server ;设置发vtp模式switch(config)#vtp mode client ;设置发vtp模式交换机设置IP地址:switch(config)#interface vlan 1 ;进入vlan 1switch(config-if)#ip address ;设置IP地址switch(config)#ip default-gateway ;设置默认网关switch#dir Flash: ;查看闪存交换机显示命令:switch#write ;保存配置信息switch#show vtp ;查看vtp配置信息switch#show run ;查看当前配置信息switch#show vlan ;查看vlan配置信息switch#show interface ;查看端口信息switch#show int f0/0 ;查看指定端口信息保存命令:switch(config)#copy running-config startup-config⊙该文章转自[大赛人网站(技能大赛技术资源网)] 原文链接:/ruijie/16351911405.html。
3560交换机配置vlan

1.注意事项1.交换机启动需要大约4-5分钟;2.网线插入交换机接口从黄变为绿需要大约1-2分钟,即进入正常工作模式;3.建议使用XP系统进行操作,2003默认没有安装超级终端,需要使用安装光盘添加该工具才有;4.请严格按照以下步骤进行,背景灰色字体为交换机显示信息,蓝色字体为配置命令。
2.准备工作先保持交换机断电状态;使用调试串口线连接笔记本电脑的串口与交换机背面的CONSOLE接口;打开超级终端:开始-所有程序-附件-超级终端;配置超级终端:名称-cisco选择com1或com2(请依照实际情况进行选择)修改每秒位数为9600应用-确定-回车;3.初始配置给交换机通电;片刻后会看到交换机的启动信息,直到出现以下配置选项:Would you like to terminate autoinstall? [yes]: noWould you like to enter the initial configuration dialog? [yes/no]:noWould you like to terminate autoinstall? [yes]: no4.出现命令窗口Switch>5.备份出厂配置Switch>en 进入特权模式Switch#copy running-config sfbak-configDestination filename [sfbak-config]?回车片刻后会出现:1204 bytes copied in 0.529 secs (2276 bytes/sec)表示文件备份成功。
6.配置账号密码Switch#configure terminal 进入配置子模式Switch(config)#enable password cisco设置PASSWORD密码为cisco Switch(config)#enable secret cisco设置SECRET密码为ciscoSwitch(config)#exit片刻后会出现:00:11:26: %SYS-5-CONFIG_I: Configured from console by console表示将配置保存到了内存中,在后面的配置过程中会出现类似的信息,属于正常现象。
2009+ 思科3560交换机自学命令

作者:红盟过客CCIE理论RHCEQQ:369136929msn:ccieyc@籍贯:湖北宜昌。
有宜昌的朋友可以一起聊聊技术。
杭州杭州CCIE联盟群40576311时间:2008年七月地点:浙江杭州软件:Visio2007CorelDRAW12WPS2005说明:一般情况下三台路由器。
模拟器为原版的Dynamips i顺序:R1的F0/0接R2的F0/0,R2的F1/1接R3的F1/1。
在这里用lookback接口来模拟不同网段。
路由器都为最小配置cisco2501.IOS是12.0以上。
提醒一下:现在可以用Dynamips软件完全模拟所有的实验。
为了使实验更有价值,所写实验均在真实路由器上完成。
说明:设备为思科3560交换机。
版本为Version12.2(40)SE C3560-ADVIPSERVICESK9-M第一版前言这份实验笔记是自己很早以前在学习3560交换机写的笔记。
里面的一些配置很简单,但是很实用,在考ccie时,对3560交换机的要求是精通,在实际工作中更是要求对35交换达到非常精通的要求。
35是思科中端交换机的基础,如果35不能很好的掌握,那么后面的45,65,也就很难搞精通。
这些实验配置很简单,但是命令需要花大量时间在上面。
所有的命令在3560上测试通过。
适合3560等中型交换机。
说明一下自己对交换机的理解,工作中常常遇到的是4565交换机。
其实当上到45及以上的时候,交换机的作用与路由器就没有多大的区别,像45有自己的处理器,自己的板卡。
能在上面配置动态路由协议.在45上面除了不能配置isis以外,基本上能运行所有的路由协议。
当然了,其实只要把最底端的三层35学好,所以的命令都是通用的,只不过在65上面是比较复杂的是一些模块,只是65将所有的功能综合起来,所以显示的比较复杂。
对于交换机的命令,我想说的是,一定要精通,只要有设备,一定要反复的学习命令,只有这样,就算你没有做过工程,你也不会感觉到心虚。
cisco3560思科交换机常用配置教程与实例
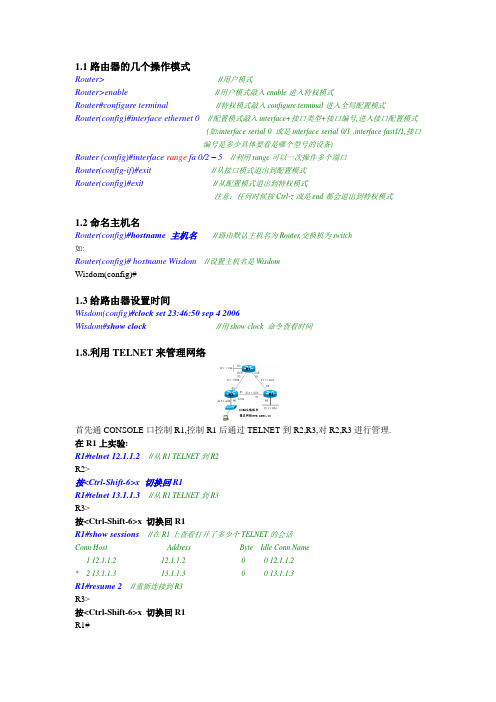
1.1路由器的几个操作模式Router>//用户模式Router>enable//用户模式敲入enable进入特权模式Router#configure terminal//特权模式敲入configure terminal进入全局配置模式Router(config)#interface ethernet 0//配置模式敲入interface+接口类型+接口编号,进入接口配置模式(如:interface serial 0 或是interface serial 0/1 ,interface fast1/1,接口编号是多少具体要看是哪个型号的设备)Router (config)#interface range fa 0/2 – 5//利用range可以一次操作多个端口Router(config-if)#exit //从接口模式退出到配置模式Router(config)#exit//从配置模式退出到特权模式注意:任何时候按Ctrl-z或是end都会退出到特权模式1.2命名主机名Router(config)#hostname 主机名//路由默认主机名为Router,交换机为switch如:Router(config)#hostname Wisdom//设置主机名是WisdomWisdom(config)#1.3给路由器设置时间Wisdom(config)#clock set 23:46:50 sep 4 2006Wisdom#show clock//用show clock 命令查看时间1.8.利用TELNET来管理网络首先通CONSOLE口控制R1,控制R1后通过TELNET到R2,R3,对R2,R3进行管理.在R1上实验:R1#telnet 12.1.1.2//从R1 TELNET到R2R2>按<Ctrl-Shift-6>x 切换回R1R1#telnet 13.1.1.3//从R1 TELNET到R3R3>按<Ctrl-Shift-6>x 切换回R1R1#show sessions//在R1上查看打开了多少个TELNET的会话Conn Host Address Byte Idle Conn Name1 12.1.1.2 12.1.1.2 0 0 12.1.1.2* 2 13.1.1.3 13.1.1.3 0 0 13.1.1.3R1#resume 2//重新连接到R3R3>按<Ctrl-Shift-6>x 切换回R1R1#R1#disconnect 1//从R1是主动断开到R2的连接(断开一个TELNET的会话)在R2上实验:R2#show users//在R2上查看有谁登录到路由器Line User Host(s) Idle Location* 0 con 0 idle 00:00:002 vty 0 idle 00:01:52 12.1.1.1R2#clear line 2//发现有人TELNET过来,把他清除R2#show usersLine User Host(s) Idle Location* 0 con 0 idle 00:00:00注意:Show session和show user的区别Disconnect 和Clear line的区别Ctrl+shift+6 x 和resume1.9 PING、TraceRoute、Debug、Sysloga.使用PING命令R1#ping 12.1.1.2如果ping的结果是!!!!!则表明网络正常.如果ping的结果是…..则表明网络不通.如果ping的结果是U.U.U则表明下一跳不可达.b.使用traceroute命令, 在网络层上追踪源到目的地址所经过的路由器.(或是数据包经过的路径)例:R2#traceroute 33.1.1.3Tracing the route to 33.1.1.31 12.1.1.1 4 msec 4 msec 4 msec2 13.1.1.34 msec 4 msec *//从以上可以看出从R2 到达33.1.1.3经过了12.1.1.1和13.1.1.3两个路由器例:………………………………………………………………………………………………………………….3.3使用串口管理交换机。
实习运维必须掌握H3C交换机简单操作命令
实习运维必须掌握H3C交换机简单操作命令实习运维练习,熟练操作手册一:进入核心设备cisco3560enable特权模式show run 查询config terminal 进入配置模式vlan 100 创建vlanname A#_15F_xxxx_8M Vlan命名interface vlan 100 进入vlandescription A#_15F_xxxx_8M 端口描述ip address 192.168.2.1 255.255.255.248 次vlan地址网关+子网exit 退出write 保存H3C配置交换机端口给用户使用以下为调节端口1 登录交换机2 sys 进入配置模式Dis cu 查询int e1/0/* (*为端口号)例如:interface e1/0/2 (进入交换机2个端口)port access vlan *(*为vlan号)例如:port access vlan 159port isolate (端口隔离)description +描述例如:description A#507line-rate inbound * (*为带宽数)例如:line-rate inbound 2048 (下载为2M带宽)line-rate outbound *例如:line-rate outbound 2048(上传为2M带宽)Shutdown 关闭端口Undo shutdown 端口开启Save 保存进入接入层设备华为3352system-veiw 进入配置模式vlan 100 透传VLan***(descriptiong A#_15F_XXXX_8M 本设备对vlan描述quit 退出interface ethernet 0/0/1 进入端口descriptiong A#_15F_XXXX_8M 端口描述port type-link access 端口工作模式port default vlan 100 给端口分配vlan qos lr inbound cir 8192 端口下载qos lr outbound cir 8192 端口上传quit 退出save 保存。
交换机和路由器常用命令大全

交换机和路由器常用命令大全交换机和路由器配置命令Cisco 交换机的命令行模式:1、用户模式Switch>2、特权模式Switch>enableSwitch#3、全局配置模式Switch#config terminalSwitch(config)#4、接口模式Switch(config)#interface fastethernet 0/1Switch(config-if)#Fastethernet表示百兆位以太网接口。
Ethernet表示十兆位以太网接口。
Gigabitethernet表示千兆位以太网接口。
Tengigabitethernet表示万兆位以太网接口。
如果从特权模式回到用户模式,需要输入disable命令,其他无论在那个模式,只要输入命令exit就能回到前一个模式,在全局模式或是接口模式,只要输入命令end都能回到特权模式,或者按下ctrl+z 组合键等效于命令end。
(命令行帮助机制:1、“?”。
2、Tab键。
)常用快捷组合键:Ctrl+A 光标移动到命令行的开始位置。
Ctrl+E 光标移动到命令行的结束位置。
一、常用命令介绍:1、hostname 用于配置主机名,可简写为host.Switch(config)#host sw1Sw1(config)#2、show version 显示系统IOS名称以及版本信息,可简写为sh ver.3、Show running-config 查看交换机当前配置信息,可简写为shrun.4、Show startup-config 显示已保存的配置信息,可简写为sh star.5、Copy running-config startup-config 保存当前配置信息,可简写为copy run star。
这个命令还等效于write(简写为wr)。
保存当前配置如下:Switch#wr 或者switch#copy run star6、erase nvram 删除已保存的配置信息,这命令等效于erasestartup-config.(擦除)。
- 1、下载文档前请自行甄别文档内容的完整性,平台不提供额外的编辑、内容补充、找答案等附加服务。
- 2、"仅部分预览"的文档,不可在线预览部分如存在完整性等问题,可反馈申请退款(可完整预览的文档不适用该条件!)。
- 3、如文档侵犯您的权益,请联系客服反馈,我们会尽快为您处理(人工客服工作时间:9:00-18:30)。
作者:红盟过客CCIE理论RHCEQQ:369136929msn:ccieyc@籍贯:湖北宜昌。
有宜昌的朋友可以一起聊聊技术。
杭州杭州CCIE联盟群40576311时间:2008年七月地点:浙江杭州软件:Visio2007CorelDRAW12WPS2005说明:一般情况下三台路由器。
模拟器为原版的Dynamips i顺序:R1的F0/0接R2的F0/0,R2的F1/1接R3的F1/1。
在这里用lookback接口来模拟不同网段。
路由器都为最小配置cisco2501.IOS是12.0以上。
提醒一下:现在可以用Dynamips软件完全模拟所有的实验。
为了使实验更有价值,所写实验均在真实路由器上完成。
说明:设备为思科3560交换机。
版本为Version12.2(40)SE C3560-ADVIPSERVICESK9-M第一版前言这份实验笔记是自己很早以前在学习3560交换机写的笔记。
里面的一些配置很简单,但是很实用,在考ccie时,对3560交换机的要求是精通,在实际工作中更是要求对35交换达到非常精通的要求。
35是思科中端交换机的基础,如果35不能很好的掌握,那么后面的45,65,也就很难搞精通。
这些实验配置很简单,但是命令需要花大量时间在上面。
所有的命令在3560上测试通过。
适合3560等中型交换机。
说明一下自己对交换机的理解,工作中常常遇到的是4565交换机。
其实当上到45及以上的时候,交换机的作用与路由器就没有多大的区别,像45有自己的处理器,自己的板卡。
能在上面配置动态路由协议.在45上面除了不能配置isis以外,基本上能运行所有的路由协议。
当然了,其实只要把最底端的三层35学好,所以的命令都是通用的,只不过在65上面是比较复杂的是一些模块,只是65将所有的功能综合起来,所以显示的比较复杂。
对于交换机的命令,我想说的是,一定要精通,只要有设备,一定要反复的学习命令,只有这样,就算你没有做过工程,你也不会感觉到心虚。
交换机常用的命令也不是很多了,所以把常用命令透彻理解应当不是很大的问题。
当交换机加电启动之后,它会自动实行POST程序来确认交换机运转正常.当交换机开始POST检测的时候,端口的LED变绿,而系统LED闪烁绿光,RPS LED熄灭;接下来最前两个端口LED熄灭.当POST检测完成后,端口LED恢复到它所显示的模式的状态,系统LED变绿.如果POST检测失败,那么系统LED和相关的端口变为暗黄.这份实验中如果有错误与不当之处,希望朋友指出。
当然,如果有朋友有兴趣加入一些交换的更高级的东东,大家可以联系,一起写一些交换的实验,让更多喜欢思科交换的朋友学习。
2008年于杭州已完工的作品《2009mpls vpn自学命令配置排错》第一版《20093560交换机自学命令与配置》第一版《2008vpn自学命令与配置》第一版《2008ospf命令与配置手册实验笔记》第二版《2008bgp命令与配置手册实验笔记》第二版《2009ISIS命令与配置手册实验笔记》第一版《2008三层交换与路由综合配置案例》《RHCE5.0实验手册》《华为3600交换机实验笔记》《BGP设计与实现笔记》《JUNIPER NETSCREEN防火墙基础实验》《杭州某中学断网解决办法》设置主机名Switch(config)#ho s3560设置密码s3560(config)#en pass ciscos3560(config)#en sec cisco配置用户名与密码s3560(config)#username cisco pass cisco设置交换机命令历史数量s3560#terminal history size20设置线路历史命令数量s3560(config)#line c0s3560(config-line)#history size20s3560(config-line)#end显示所有活动会话s3560#sh sessions设置当前会话的屏幕大小s3560#terminal length100s3560#terminal width100设置所有的会话屏幕大小s3560(config)#line c0s3560(config-line)#length100s3560(config-line)#width100s3560(config-line)#end设置超时时间为0s3560(config)#line c0s3560(config-line)#no exec-tis3560(config-line)#line vty04s3560(config-line)#no exec-ts3560(config-line)#end全局关闭查询命令s3560(config)#no ip domain-lo设置时间s3560#clock set13:57:1026february2008设置dns服务器地址s3560(config)#ip name-server192.168.1.1设置解析的主机名与地址s3560(config)#ip host r2192.168.1.2设置只充许192.168.1.0网段访问s3560(config)#access-list1per192.168.1.00.0.0.255 s3560(config)#line vty04s3560(config-line)#access-class1ins3560(config-line)#end只充许本主主机用户名与密码为cisco的主机访问http s3560(config)#int vlan1s3560(config-if)#ip add192.168.1.110255.255.255.0 s3560(config-if)#access-li2per192.168.1.00.0.0.255 s3560(config)#ip http sers3560(config)#ip http port3333s3560(config)#ip http access-cla2s3560(config)#ip http authen locals3560(config)#user cisco pass ciscos3560(config)#endSsh配置s3560(config)#user cisco pass ciscos3560(config)#line vty04s3560(config-line)#login locals3560(config-line)#transport input telnets3560(config-line)#end设置管理vlan地址s3560(config)#int vlan1s3560(config-if)#ip add192.168.1.110255.255.255.0设置默认网关s3560(config)#ip default-gateway192.168.1.1配置实例网关与管理地址。
s3560(config)#int vlan1s3560(config-if)#ip add192.168.1.2s3560(config-if)#ips3560(config)#ip name-sers3560(config)#no ip http sers3560(config)#end恢复交换机2900/3500xl29503550交换机密码1连接到交换机,并拔出电源2按住mode,然后接上电源,在led灯亮二秒后放开mode灯。
3在提示命令下键入命令flash_init4键入命令load-helper5dir flash:列示清单6用命令先保存配置rename将文件名改为7命令boot引导过程8对setup模式按n9按enter进到用户模式,使用enable10用命令copy flash:config.text system:running-config把配置文件复制到内存中11用config ter进到配置模式12设置密码重启。
实例s3560##Base ethernet MAC Address:00:1e:4a:0a:20:00Xmodem file system is available.The password-recovery mechanism is enabled.The system has been interrupted prior to initializing theflash filesystem.The following commands will initializethe flash filesystem,and finish loading the operatingsystem software:flash_initload_helperboots3560:s3560:flash_initInitializing Flash...s3560:flash_initInitializing Flash...flashfs[0]:6files,1directoriesflashfs[0]:0orphaned files,0orphaned directoriesflashfs[0]:Total bytes:32514048flashfs[0]:Bytes used:16745984flashfs[0]:Bytes available:15768064flashfs[0]:flashfs fsck took13seconds....done Initializing Flash.Boot Sector Filesystem(bs)installed,fsid:3Setting console baud rate to9600...s3560:load_helpers3560:bootLoading"flash:c3560-advipservicesk9-mz.122-40.SE.bin"...@@@删除所有的配置文件s3560#sh flash:Directory of flash:/2-rwx9860621Mar1199300:18:13+00:00c3560-advipservicesk9-mz.122-40.SE.bin3-rwx6875865Mar1199300:20:43+00:00c3560-ipbase-mz.122-35.SE5.bin4-rwx24Mar1199300:11:01+00:00private-config.text6-rwx1048Mar1199300:11:01+00:00multiple-fs7-rwx616Mar1199300:10:30+00:00vlan.dat8-rwx1422Mar1199300:11:01+00:00config.text32514048bytes total(15771136bytes free)s3560#del config.textDelete filename[config.text]?config.textDelete flash:config.text?[confirm]s3560#del vlan.datDelete filename[vlan.dat]?vlan.datDelete flash:vlan.dat?[confirm]s3560#relProceed with reload?[confirm]查看硬件结构s3560##sh hardware访问模块s3560###session slots3560##session mod模块断电s3560#(config)#no power enable module slot模块加电s3560#(config)#power enable module slot查看系统文件s3560##sh file systems查看mac地址s3560#sh lacp sys-id32768,001e.4a0a.2000显示acl的设置ra#sh mac access-group查看当前路径s3560#pwdflash:查看flash信息s3560#show file information flash:?flash:c3560-advipservicesk9-mz.122-40.SE.binflash:c3560-ipbase-mz.122-35.SE5.bin flash:config.textflash:multiple-fs flash:private-config.text flash:y将配置文件考贝到引导文件s3560#copy run startup-configDestination filename[startup-config]?Building configuration...[OK]从另外一个ios启动s3560#sh flashDirectory of flash:/2-rwx9860621Mar1199300:18:13+00:00c3560-advipservicesk9-mz.122-40.SE.bin3-rwx6875865Mar1199300:20:43+00:00c3560-ipbase-mz.122-35.SE5.bin4-rwx1313Mar1199300:25:51+00:00config.text5-rwx24Mar1199300:25:51+00:00private-config.text6-rwx3167Mar1199300:00:52+00:00y7-rwx1048Mar1199300:37:10+00:00multiple-fss3560(config)#boot system c3560-ipbase-mz.122-35.SE5.bins3560(config)#ends3560#rel查看系统启动文件s3560#sh bootBOOT path-list:c3560-ipbase-mz.122-35.SE5.binConfig file:flash:/config.textPrivate Config file:flash:/private-config.textEnable Break:noManual Boot:noHELPER path-list:Auto upgrade:yesAuto upgrade path:设置ntp系统时钟s3560(config)#ntp peer192.168.1.2ver3key2source f0/10preferntp peer ip address设置服务器地址ver设置ntp版本默认为3从1到3key标明验证密码source指定源地址prefer强制提供时钟同步设置接收客户端时间s3560(config)#ntp broadcastdelay3000启用ntp验证s3560(config)#ntp authenticate创建md5验证密码s3560(config)#ntp authentication-key2md5cisco将验证应用到ntps3560(config)#ntp trusted-key2cdp配置全局启用cdps3560(config)#cdp run设置cdp更新时间s3560(config)#cdp timer10设置cdp保持时间s3560(config)#cdp holdtime30设置cdp版本s3560(config)#cdp advertise-v2关闭cdp全局关闭cdps3560(config)#no cdp run接口关闭cdps3560(config)#int f0/1s3560(config-if)#no cdp run全局查看cdps3560#sh cdp neighbors接口查看cdps3560#sh cdp int f0/1FastEthernet0/1is down,line protocol is downEncapsulation ARPASending CDP packets every10secondsHoldtime is30seconds访问mspf与rsfc注意,在1槽里的msfc是152槽是16复位模块shutdown no shutdown可以用来复位端口实验设置两个验证,密码source1key来验证172.17.76.247,另外一个source2key来验证172.31.31.1s3560(config)#ntp authenticates3560(config)#ntp authentication-key1md5sourceAs3560(config)#ntp authentication-key2md5sourceBs3560(config)#ntp trusted-key1s3560(config)#ntp trusted-key2s3560(config)#ntp peer172.17.76.247key1s3560(config)#ntp peer172.31.31.1key2二层etherchanels3560(config)#int f0/1s3560(config-if)#channel-group1mode?active Enable LACP unconditionallyauto Enable PAgP only if a PAgP device is detected desirable Enable PAgP unconditionallyon Enable Etherchannel onlypassive Enable LACP only if a LACP device is detected on使用二层组但是不发送pagp分组desirable主动形成一个组,并发送pagp分组auto交换机被动形成一个组,默认配置active主动形成一个lacp组,并发lacp分组passive被动形成一个分组只有在接收到lacp分组时才形成non-silent要求在形成组之间先进行pagp的协商。
