abb组态教程7-ST编程语言
工业机器人离线编程(ABB)7-2-3 创建SC_输送链2 Smart组件

7-135 添加LogicGate与Source 的I-O Connec_输送链2Smart组件的I/O 链接I/O Connection
• 在”SC_输送链2”创建窗口,选择 “信号和连接”选项,在“I/O连接” 设置窗口下方,单击“添加I/O Connection”。
7-131 添加SC_输送链1与Source 的I-O Connection
二、实践操作
4、添加SC_输送链2Smart组件的I/O 链接I/O Connection
• 在”SC_输送链2”创建窗口,选择 “信号和连接”选项,在“I/O连接” 设置窗口下方,单击“添加I/O Connection”。
• 添加Source与Queue的I-O Connection,按照图7-131进行其 相关的设置,然后单击“确定”。
7-131 添加Source与Queue的IO Connection
二、实践操作
4、添加SC_输送链2Smart组件的I/O 链接I/O Connection
• 在”SC_输送链2”创建窗口,选择 “信号和连接”选项,在“I/O连接” 设置窗口下方,单击“添加I/O Connection”。
在搬运码垛工作站中,输送链的动态效果对整个工作站仿真起到关键的 作用。Smart组件功能就是在RobotStudio中实现动画效果的高效工具。本 工作站将创建拥有动态属性的Smart输送链和夹爪。
Smart输送链动态效果包含:输送链前端自动生成产品、产品随着输送 链向前运动、产品到达输送链末端后停止运动、产品被机器人取走后输送链 前端再次生成产品,然后依次循环。
7-127 将码垛_输送链2 放到SC_输送链2中
二、实践操作
2、添加SC_输送链2Smart组件的属 性连接
step7编程实例STEP7编程软件的使用方法

根据任务描述,可以将上述系统功能划分为两个子功能: 1 启停操作控制:负责将用户操作面板的输入信号逻辑转换为灌装线的启停信号。 2 灌装线控制:负责处理灌装定时和满瓶计数,为灌装线传送带电机和灌装漏斗提供控制信号,向数码管提供BCD码计数值。 第一个子功能由一个功能FC1实现,第二个子功能由一个功能快FB1实现,两条灌装线的定时时间分别保存在两个背景数据块DB1和DB2中。
STEP7的授权 授权是使用STEP7软件的“钥匙”,只有在硬盘上找到相应的授权,STEP7才可以正常使用,否则会提示用户安装授权。
图7-2 授权管理 器
STEP7的项目结构 在STEP7中,一个自动化系统的所有数据以项目(Project)的形式来进行组织和管理。一个项目包含了以下的三类数据。 1、硬件结构的组态数据及模块参数 2、通信网络的组态数据 3、可编程模块的程序 上述数据都以对象的形式存储,STEP7采用目录式的层次结构管理项目中的所有对象。对象从上到下有三个层次: 第一层:项目; 第二层:通讯子网、PLC站或S7程序; 第三层:第二层下面的具体对象,视第二层定。
数据块(DB)是用户定义的用于存取数据的存储区,可 以被打开或关闭。DB可以是属于某个FB的情景数据块,也 可以是通用的全局数据块,用于FB或FC。
S7 CPU还提供标准系统功能块(SFB、SFC),集成在S7 CPU中的功能程序库。用 户可以直接调用它们,由于它们是操作系统的一部分,因此不需将其作为用户程 序下载到PLC。
2 创建项目 在STEP7中建立一个名为example7-2的项目,通过插入菜单加入一个S7程序
STEP7一般操作提示

S7-300系统维修ABCS7-300系统是目前比较普遍采用的PLC系统之一,其使用比照AB、日本的PLC系统有较多的特殊性,这里针对其常用的概念及维修操作做出索引,希望对维修人员的日常维修有帮助。
一.基本硬件连接以下是主机架的基本硬件连接方式。
二.新建工程按如下方法新建一个工程。
1.使用菜单命令“文件/新建项目向导”,弹出向导窗口。
2.点击中间的“预览”按钮,下部窗口显示你的项目预览。
3.点“下一步”,在上部方框中选择CPU型号。
如CPU314。
4.点“下一步”,选择上部窗口中的OB1(循环组织块,即主程序,必须)及其它需要建立的OB块。
每个块后面有名称,并且可以通过“OB的有关帮助”按钮查询其作用。
5.在窗口中部选择语言:STL(指令表)、LAD(梯形图)、FDB(功能块)。
6.点“下一步”,定义“项目名称”。
7.点“完成”按钮,新工程被建立。
新建工程默认存储目录为:step7\s7proj。
下面就是要进行硬件组态及编辑程序了。
三.基本硬件组态硬件组态四.绝对地址地址有两种,绝对地址和符号地址。
绝对地址:是系统分配的唯一的物理地址,也是维修和接线时必须查询的用以定位接点位置的地址。
符号地址:是用户定义的,便于阅读的一个符号名称。
它要在符号表中予以说明才有效。
上图中给出的就是I/O点的绝对地址示意图。
除此之外,内部元件也有其绝对地址。
五.编程相关(一)基本程序结构1.常见块类型:OB:组织块,FC:功能,FB:功能块,DB:数据块,SFC:系统功能。
2.块的作用:OB1为主程序,FC、FB为子程序块,DB为数据块,DB1为掉电保持数据清单。
SFC为系统功能,在PLC内存自动驻留,无法修改。
3.组织块:除主循环程序OB1外,其它大多数也都有固定作用,如时间中断OB10-17、硬件中断OB40-47、循环中断OB30-37、循环时间故障OB80、电源故障OB81、I/O故障OB82-83、CPU故障OB84、机架丢失故障OB86、通讯故障OB87、程序错误OB121、暖重启OB100、热重启OB101、冷重启OB102等等。
ABB DCS详细图文组态教程
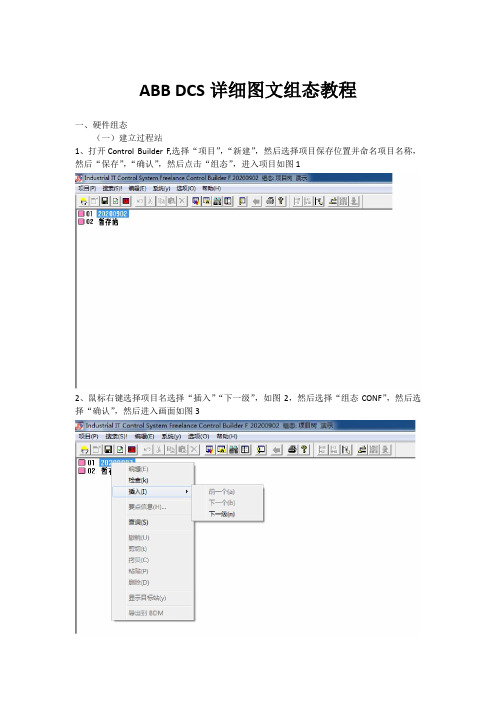
ABB DCS详细图文组态教程一、硬件组态(一)建立过程站1、打开Control Builder F,选择“项目”,“新建”,然后选择项目保存位置并命名项目名称,然后“保存”,“确认”,然后点击“组态”,进入项目如图12、鼠标右键选择项目名选择“插入”“下一级”,如图2,然后选择“组态CONF”,然后选择“确认”,然后进入画面如图33、鼠标右键选择项目名选择“插入”“下一级”,如图4,然后选择“过程站D-PS”如图5,然后选择“确认”;此时打开了“组态:过程站D-PS”对话框,然后点击“确认”如图6(命名最多4个字符,数字或字母,此例子中过程站命名为lim),建完后如图74、鼠标右键选择过程站名称(lim USRTask 任务列表)选择“插入”“下一级”,如图8,选择“任务TASK”,如图95、鼠标右键选择limUSERTask(任务),然后选择“插入”,“下一级”,然后选择“程序列表PL”如图11,然后确认;6、右键选择“limUSERTASK (PL)”,然后选择“插入”、选择“下一级”,然后选择“FBD 程序FBD”,如图12,然后选择确认后如图13;此时可以双击“limUSERTASK (FBD)”,进入,可以在页面内用功能块编程(二)建立操作员站1、选择过程站名称右键“lim(D-PS)”,(本例中过程站名称为lim(D-PS)),然后选择“插入”,选择“下一个”,如图21,然后选择“操作员站D-OS”如图222、右键选择llm(D-OS),然后选择“插入”,选择“下一级”,然后选择“图形显示FGR”,如图23,然后选择“确认”;此时可以双击llm(FGR)(操作员站名称,本例中操作员站名称为llm),进入,然后进行画面组态;(三)建立趋势网关站1、选择过程站名称右键“lim(D-PS)”,(本例中过程站名称为lim(D-PS)),然后选择“插入”,选择“下一个”,然后在“对象对话框”中选择“网关站D-GS”,如图31,然后在“组态:网关站D-GS”对话框中的“网关类型”中选择“TRN网关”,其余不变如图32(四)插入硬件1、点击页面上部菜单栏“硬件结构”,如图41,进入之后然后选择页面左部HWSYS(HWSYS),右键选择“插入”后如图42,之后选择“AC800F”控制器,如图43,之后鼠标点击“AC800F(AC800F1)”,之后在整个页面右部出现硬件组态的底板,现在我们开始按照已经安装好的硬件插入不同的模件,进行硬件组态。
STEP7使用方法

STEP7使用方法对于STEP7的使用方法,我将分为以下几个方面进行详细介绍:基本概念、编程语言、硬件配置和调试工具。
一、基本概念:二、编程语言:STEP7支持多种编程语言,包括梯形图、功能块图、指令表和结构化文本。
梯形图是一种图形化的编程语言,用于逻辑控制和循环控制。
功能块图是基于块的图形化编程语言,用于组织和管理程序模块。
指令表是一种文本化的编程语言,用于编写低级控制指令。
结构化文本是一种高级编程语言,类似于传统的编程语言,可以实现复杂的逻辑和算法。
三、硬件配置:使用STEP7之前,我们需要对硬件进行配置。
首先,我们需要选择适合应用需求的PLC型号和数量。
然后,我们需要选择适合的输入和输出模块,用于接收和输出信号。
接下来,我们需要通过网络或总线连接PLC和外部设备,如传感器、执行器和人机界面。
四、调试工具:在使用STEP7编写和测试PLC程序时,我们可以使用一些调试工具来帮助我们定位和解决问题。
首先,我们可以使用在线监视器来查看PLC的运行状态和信号值。
其次,我们可以使用断点和触发器来调试程序的执行过程。
还可以使用模拟器来模拟外部设备的输入和输出,以验证程序的正确性。
最后,我们可以使用追溯记录器来记录PLC的运行日志,以便后续分析和故障排除。
总结:通过以上对STEP7使用方法的介绍,我们可以了解到,STEP7是一款强大的PLC编程软件,它可以帮助我们开发和管理PLC应用程序。
在使用STEP7之前,我们需要掌握基本的概念,并了解不同的编程语言。
同时,我们还需要对硬件进行适当的配置,并使用调试工具来帮助我们定位和解决问题。
只有熟练掌握STEP7的使用方法,我们才能更好地应用它来实现工业过程和机器的控制。
ABB DCS 系统 培训课程 系列讲座 SFC Language
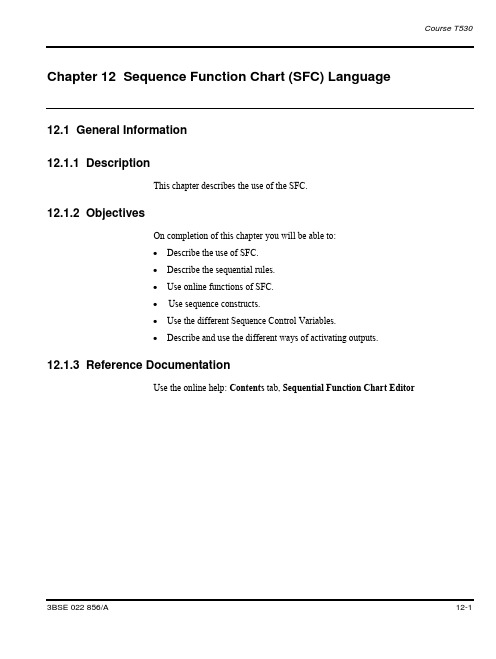
Chapter 12 Sequence Function Chart (SFC) Language 12.1 General Information12.1.1 DescriptionThis chapter describes the use of the SFC.12.1.2 ObjectivesOn completion of this chapter you will be able to:∙Describe the use of SFC.∙Describe the sequential rules.∙Use online functions of SFC.∙Use sequence constructs.∙Use the different Sequence Control Variables.∙Describe and use the different ways of activating outputs.12.1.3 Reference DocumentationUse the online help: Contents tab, Sequential Function Chart EditorChapter 12 Sequence Function Chart (SFC) Language12.2 Lesson 1 - SFC Language12.2.1 DescriptionThis lesson describes how to construct a basic sequence using SFC.12.2.2 ObjectivesOn completion of this lesson you will be able to:∙Describe the use of SFC.∙Describe the sequential rules.∙Use certain sequence constructs.∙Use online functions.12.2.3 GeneralThe Sequential Function Chart (SFC) programming language allows the user todescribe the sequential behavior of the control program graphically. This conceptenables all control actions for a process to be described in one compound sequencestructure even if it involves several parallel action chains. Furthermore, sequences canbe hierarchical, that is action chains can be grouped to give a clear high levelpresentation of the process control unit.A sequence is a unit with a complete sequence surrounded by an unconditional loop;the first step is reactivated when the sequence is finished. A sequence can be dividedinto separate types of structures. There are two types of structures, sequence selectionand simultaneous sequence. It is possible to structure the sequence view into severalhierarchical levels with the subsequence function.12.2.4 The SFC EditorThe SFC programming editor is divided into four panes, the declaration pane, codepane, structure pane, and the message pane. The declaration pane, the code pane (seealso below), the message pane, the toolbar and commands in the menu bar, concerningthe code are the same as in the other language program editors.Chapter 12 Sequence Function Chart (SFC) Language12.2.4.1 SFC ToolbarThere is a special toolbar in the Sequence Function Chart editor, with shortcuts tomany of the commands found in the menu bar (or in the pop-up menus). You can see abrief explanation of each button, if you hold the cursor over the button.12.2.4.2 Structure paneAll the graphical editing of the sequence structure are performed in the structure pane.You will be able to add, delete, move and modify steps, transitions, actions,simultaneous sequence, sequence selections, and jumps.The basic editing principles are to first select an item and then choose a menucommand, for example, if a transition is selected and then the Step, Transition menucommand is chosen, a step and a transition is added below the selected transition. Allmenu commands performs different actions depending on currently selected item.12.2.5 Sequential rulesThe sequence loop is always closed. The last transition is always connected to the first step. The execution continues from the last step to the first step when the last transition condition becomes true.12.2.6 Sequence constructs - BasicsThe basic elements in a sequence are steps and transitions. Each step can have three associated actions. Each transition has an associated boolean transition condition. A transition can be a jump that enables the execution order to be changed. The jump destination can be a step forward or backward in the sequence. An action is a codeblock. An action qualifier specifies how and when the action code shall be executed. Below is an example with sequence selection and simultaneous sequence.12.2.6.1 StepsA step is a basic element, which is activated by its precedingtransition. The step becomes active until its succeeding transition is true, and then next step is activated.Each step has a name, that can be changed, and each step can have up to three associated actions.12.2.6.1.1 Initial step/stepEach sequence has one initial step. The initial step becomes active at a cold start of the application(s) or when the sequence is reset by the SequenceName.Reset variable.12.2.6.2 ActionAn action is a code block, written in the Structured Text (ST). An action can have an action qualifier, specifying how and when the action code is to be executed. The names of the actions are automatically generated. The actions will be named stepname_action qualifier, for example, see figure below. If the step name is changed, the action names are automatically changed. There is no possibility to change the action names.Figure 12.1 An opened step with its actions.Chapter 12 Sequence Function Chart (SFC) LanguageThere are three different action qualifiers:∙The N action qualifier stands for Non-stored, and means that the action code isexecuted continuously, while the step is active.∙The P1 action qualifier stands for Pulse rising edge, and means that the actioncode is executed once, when the step becomes active.∙The P0 action qualifier stands for Pulse falling edge, and means that the actioncode is executed once, when the active step becomes inactive.For each step, there can be zero or one associated P1 action, zero or one associated Naction and zero or one associated P1 action.12.2.6.3 TransitionsThe transition from one step to the next, is controlled by transition conditions, whichare boolean expressions including process signals.12.2.6.3.1 Transition conditionIt is possible to rename a transition condition. When the next sequence step isactivated, its associated statements are executed and the previous ones are disabled. Atransition contains a condition. When the condition is true AND the preceding step isactive the following takes place:∙The preceding step(s) is deactivated.∙The succeeding step(s) is activated.The state of the sequence changes, when a transition condition becomes true. Thesequence evolution is controlled by Sequence Control Variables (for example,StepName.X and StepName.Reset).When a transition condition becomes true and the preceding step(s) is active (that is,the transition can fire), the actions are executed in the following order during that scan:∙The N action of the deactivated step that precedes the transition (its final scan)∙The P0 action of the deactivated step that precedes the transition∙The P1 action of the activated step that succeeds the transition∙The N action of the activated step that succeeds the transitionDuring scans when no transition condition becomes true, only N actions associated toactive steps will execute. A step is active when StepName.X is true12.2.7 Online functionsIn online mode, the code and the variable values are displayed in the program editor.Online commands in the menu bar and toolbar buttons concerning the code are thesame as in the other language program editors. There are functions only available inthe online mode. Some of them are:∙Disable Actions∙Show Actions∙Block Transitions∙Block All Transitions∙Reset∙Force Forward∙Force Backward∙Show All Actions∙Hide All ActionsUse the online help to read about the online functions.12.2.7.1 Toolbar in on lineThe following specific online mode toolbar buttons (each with its corresponding menucommand) exist:Chapter 12 Sequence Function Chart (SFC) Language12.3 Exercise 12.1 – Use the SFC LanguagePlease do exercise 12.112.4 Lesson 2 - SFC Constructs12.4.1 DescriptionThis lesson describes possible sequence constructs using SFC.12.4.2 ObjectivesOn completion of this lesson you will be able to:Describe and use different sequence constructs.12.4.3 Sequence constructs (cont.)12.4.3.1 Simultaneous SequencesThe simultaneous sequence structure allows simultaneous and independent executionof two or more branches of sequence actions. The transition cannot activate itssucceeding step unless the last step of both branches is active. When the transitioncondition that precedes the simultaneous sequence structure becomes true, all thebranches are started simultaneously, that is, the execution continues in every branch.The transition, that succeeds the simultaneous sequence structure, cannot fire until allthe branches have finished, that is, when the last step of each branch is active.12.4.3.2 Sequence SelectionTo choose one sequence branch among two or more, the sequence selection is used.When one of the first transition conditions become true, that branch is selected and theexecution continues in that branch. The execution can only continue in one of thebranches. The branch with the highest priority and a true transition condition will bechosen (graphically, the left to right branch order corresponds to the priority order,that is. The leftmost branch has the highest priority).12.4.3.3 Jumps and destinationsUnstructured links inside the sequence structures are necessary in some cases to dealwith extraordinary situations and when, for example, changing the process productionmode. A jump is a link from a named single transition to a named single step, locatedanywhere in the same sequence structure. It is allowed to have more than one jumpconnected to a step. A jump can be considered as a sequence selection. A jump is atransition where the execution is transferred from the preceding step to the jumpdestination step, when the transition condition becomes true.Chapter 12 Sequence Function Chart (SFC) Language12.4.4 Editing12.4.4.1 New BranchThe New Branch command inserts a new branch to the right of the current selection.12.4.4.2 Make SubsequenceFor documentation and overview reasons, it is sometimes convenient to graphicallystructure the sequence into smaller parts, subsequences, thus hiding details until theyare requested. The subsequence is usually put around a sequence part, which performsa set of logically related actions. The subsequence function is a way to structure thesequence using a graphic hierarchy. The sequence can be graphically structured intoany number of hierarchical levels.12.5 Exercise 12.2 – Sequence constructsPlease do exercise 12.212.6 Lesson 3 - SFC Language – Control Variables12.6.1 DescriptionThis lesson describes the use of control variables in SFC.12.6.2 ObjectivesOn completion of this lesson you will be able to:∙Describe and use the different Sequence Control Variables.∙Describe and use the different ways of activating outputs.12.6.3 Sequence Control VariablesThere are facilities to control a sequence and monitor the timing of sequence steps.When these functions are used, automatically generated variables are available for usein the code.12.6.3.1 Automatically generated variablesFor one sequence, the following variables are automatically generated when theprogram is compiled.∙SequenceName = The code block name of the sequence.∙StepName = The step name.* A Yes in the Menu Access column means that the variable can be enabled by amenu selection from the Tools menu in the online mode.Chapter 12 Sequence Function Chart (SFC) Language12.6.3.2 Step Timing VariablesThe following variables are only generated if the Step Elapsed Time command in theTools menu is enabled (a check mark in the check box before the command), beforethe program is compiled∙SequenceName = The code block name of the sequence.∙StepName = The step name.12.6.4 Different methods for activating outputsThere are two different ways of activating outputs from a step.12.6.4.1 In ActionsWhen a step is active is the code action of the step also activated. For example if thestatement Count := Count +1;is written in an action is the code executed while the stepis active.12.6.4.2 In a separate Code Block using StepName.XBy using the StepName.x (bool) variable is it possible to activate variables in othercode blocks. For example Start:= StartMotor.x; ( this statement is written in anothercode block than the SFC sequence).12.7 Exercise 12.3 – Sequence Control Variables and Activating outputsPlease do the exercise 12.3Chapter 12 Sequence Function Chart (SFC) LanguageThis page is intentionally left blankTA BLE OF CONTENTSChapter 12 Sequence Function Chart (SFC) Language (1)12.1 General Information (1)12.1.1 Description (1)12.1.2 Objectives (1)12.1.3 Reference Documentation (1)12.2 Lesson 1 - SFC Language (2)12.2.1 Description (2)12.2.2 Objectives (2)12.2.3 General (2)12.2.4 The SFC Editor (3)12.2.4.1 SFC Toolbar (4)12.2.4.2 Structure pane (4)12.2.5 Sequential rules (5)12.2.6 Sequence constructs - Basics (5)12.2.6.1 Steps (5)12.2.6.1.1 Initial step/step (5)12.2.6.2 Action (5)12.2.6.3 Transitions (6)12.2.6.3.1 Transition condition (6)12.2.7 Online functions (7)12.2.7.1 Toolbar in on line (7)12.3 Exercise 12.1 – Use the SFC Language (8)12.4 Lesson 2 - SFC Constructs (9)12.4.1 Description (9)12.4.2 Objectives (9)12.4.3 Sequence constructs (cont.) (9)12.4.3.1 Simultaneous Sequences (9)12.4.3.2 Sequence Selection (9)12.4.3.3 Jumps and destinations (9)12.4.4 Editing (10)12.4.4.1 New Branch (10)12.4.4.2 Make Subsequence (10)12.5 Exercise 12.2 – Sequence constructs (10)12.6 Lesson 3 - SFC Language – Control Variables (11)12.6.1 Description (11)12.6.2 Objectives (11)12.6.3 Sequence Control Variables (11)12.6.3.1 Automatically generated variables (11)12.6.3.2 Step Timing Variables (12)12.6.4 Different methods for activating outputs (12)12.6.4.1 In Actions (13)12.6.4.2 In a separate Code Block using StepName.X (13)12.7 Exercise 12.3 – Sequence Control Variables and Activating outputs (13)Chapter 12 Sequence Function Chart (SFC) LanguageThis page is intentionally left blank。
ABB机器人的程序编程
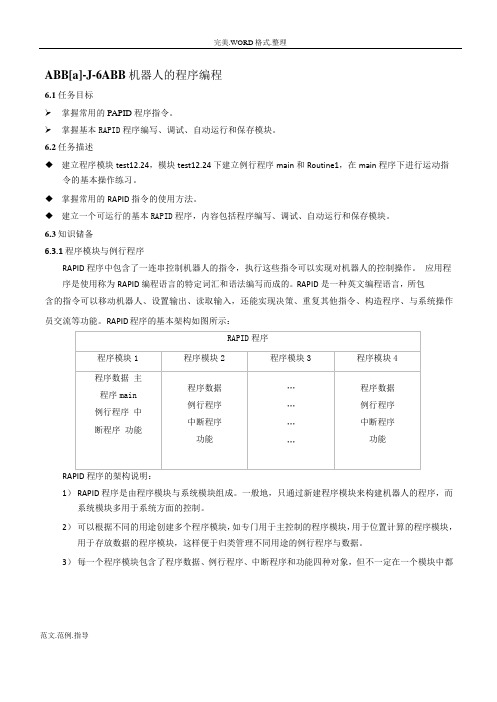
ABB[a]-J-6ABB 机器人的程序编程6.1 任务目标掌握常用的PAPID 程序指令。
掌握基本RAPID程序编写、调试、自动运行和保存模块。
6.2 任务描述◆建立程序模块test12.24,模块test12.24 下建立例行程序main 和Routine1,在main 程序下进行运动指令的基本操作练习。
◆掌握常用的RAPID 指令的使用方法。
◆建立一个可运行的基本RAPID程序,内容包括程序编写、调试、自动运行和保存模块。
6.3 知识储备6.3.1 程序模块与例行程序RAPID 程序中包含了一连串控制机器人的指令,执行这些指令可以实现对机器人的控制操作。
应用程序是使用称为RAPID 编程语言的特定词汇和语法编写而成的。
RAPID 是一种英文编程语言,所包含的指令可以移动机器人、设置输出、读取输入,还能实现决策、重复其他指令、构造程序、与系统操作员交流等功能。
RAPID 程序的基本架构如图所示:RAPID 程序的架构说明:1)RAPID 程序是由程序模块与系统模块组成。
一般地,只通过新建程序模块来构建机器人的程序,而系统模块多用于系统方面的控制。
2)可以根据不同的用途创建多个程序模块,如专门用于主控制的程序模块,用于位置计算的程序模块,用于存放数据的程序模块,这样便于归类管理不同用途的例行程序与数据。
3)每一个程序模块包含了程序数据、例行程序、中断程序和功能四种对象,但不一定在一个模块中都有这四种对象,程序模块之间的数据、例行程序、中断程序和功能是可以互相调用的。
4)在RAPID 程序中,只有一个主程序main,并且存在于任意一个程序模块中,并且是作为整个RAPID 程序执行的起点。
操作步骤:6.3.2 在示教器上进行指令编程的基本操作ABB 机器人的RAPID 编程提供了丰富的指令来完成各种简单与复杂的应用。
下面就从最常用的指令开始学习RAPID 编程,领略RAPID 丰富的指令集提供的编程便利性。
ABB机器人与西门子S7-200 SMART PLC进行PROFINET通讯

ABB机器人与西门子S7-200SMART PLC进行PROFINET通讯(ABB作为从站,PLC作为主站)硬件条件:1.ABB机器人必须有<888-2PROFINET Controller/Device>或<888-3PROFINET Device>选项.2.对应ABB机器人的GSDML文件,注意:此文件的版本需要与实际机器人的软件版本一致.GSDML文件获取方法:打开RobotStudio软件,进入<Add-Ins>,在窗口左侧<已安装的数据包>右击选择对应的RobotWare版本,选择<打开数据包文件夹>选项.进入<...\RobotPackages\RobotWare_RPK_6.11.1005\utility\service\GSDML>,其中<GSDML-V2.33-ABB-Robotics-Robot-Device-20180814.xml>就是所需的GSDML文件.PLC端设置:1.设置PLC的IP地址(同网段即可),如:<192.168.2.101>.2.安装ABB机器人的GSDML文件,安装步骤如图所示:3.组态PROFINET网络,点击<工具-PROFINET>4.设置PLC的角色为<控制器(主站)>,设置PLC的IP地址,其它默认.5.组态ABB机器人,设置<设备名(如:abb)>和<IP地址(如:192.168.2.102)>.6.组态ABB机器人的IO模块,128bytes表示有128*8个点.7.检查组态是否正确,点击生成.机器人端设置:1.进入示教器-控制面板-配置,主题选择<Communication>,进入<IP Setting>,选择<PROFINET Network>(机器人有PROFINET选项后会自动出现,无需人为添加),设置IP地址,如:192.18.2.102,设置子网掩码,如:255.255.255.0,选择通讯的网口,如:WAN口.注意:Label内容不要修改,完成重启.2.进入示教器-控制面板-配置,主题选择<I/O>,设置<PROFINET Station Name>为abb(与PLC组态时的设备名一致).3.进入示教器-控制面板-配置,主题选择<I/O>,选择<PROFINET Internal Device>,设置<PN_Internal_Device>,修改输入/输出与PLC组态时一致.4.添加信号,板卡选择<>,其它正常配置即可.5.PLC信号地址-ABB信号地址对应关系举例:PLC I128.0<->ABB0PLC I129.0<->ABB8PLC Ix.y<->ABB(x-128)*8+yPLC Q128.0<->ABB0PLC Q129.1<->ABB9PLC Qx.y<->ABB(x-128)*8+y。
ABB SYSTEM 800xA T530中文课程 07 - FBD Language
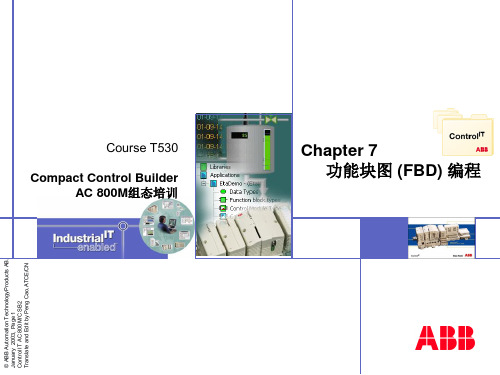
直接打开连接对话框
EN 复选框选择该功能块的使能参数有效
FBD 语言
EN 使能参数
EN 使能参数相当于ST语言中的IF语句。 EN 必须连接到一个布尔变量。 如果有EN使能参数,则必须连接。 当EN 输入为真时,函数或功能块才执行,否则,输出保持不变。. EN 可以在插入时打开或关闭,或在编辑属性时打开或关闭。
页面参考 右键点击函数或功能块连线的引脚 Go To Source Go to Sink
© ABB Automation Technology Products AB Page 21 Jan. 2003,
© ABB Automation TechnologyProducts AB. January 2003, Page 22 Control IT AC 800M/C SB2 Translate and Edit by Peng Cao,ATCE/CN
Search For:要搜索的文本。 Search In: 搜索的范围,缺省范围为开始搜 索时所在的POU。 Filter Result:搜索的过滤选项。 Rebuild: 重新编译搜索数据库。
© ABB Automation Technology Products AB Page 20 Jan. 2003,
© ABB Automation Technology Products AB Page 13 Jan. 2003,
必须确保这二个参数一个是输入参数,一个是输出参数。
FBD 语言
注释
函数和功能块注释 鼠标右键点击要编辑注释的函数或 功能块,选择Edit Comment… 命 令,在注释对话框中编辑注释。
获得POU程序的总貌。 选择,拷贝和粘贴函数和 功能块。 创建,修改和删除函数和 功能块。 编辑功能块实例名,编辑 元素。 修改分页和页注释. 查看分页和重编页码。 查看页脚文本。 程序导航。 修改FBD程序代码区中程 序的执行顺序。
ABB机器人实际应用中的指令说明

ABB机器人实际应用中的指令说明RAPID 程序指台与功能ABB 机器人提供了丰富的RAPID 程序指令,方便了大家对程序的编制,同时也为复杂应用的实现提供了可能。
以下就按照 RAPID 程序指令、功能的用途进行了一个分类,并对每个指令的功能作一个说明,如需对指令的使用与参数进行详细的了解,可以查看 ABB 机器人随机光盘说明书中的详细说明。
一、程序执行的控制1、程序的调用指令说明ProcCall 调用例行程序CallByVar 通过带变量的例行程序名称调用例行程序RETURN 返回原例行程序2、例行程序内的逻辑控制Compact IF 如果条件满足,就执行一条指令IF 当满足不同的条件时,执行对应的程序FOR 根据指定的次数,重复执行对应的程序WHILE 如果条件满足,重复执行对应的程序TEST 对一个变量进行判断,从而执行不同的程序GOTO 跳转到例行程序内标签的位置Label 跳转标签3、停止程序执行Stop 停止程序执行EXIT 停止程序执行并禁止在停止处再开始Break 临时停止程序的执行,用于手动调试ExitCycle 中止当前程序的运行并将程序指针PP复位到主程序的第一条指令,如果选择了程序连续运行模式,程序将从主程序的第一句重新执行。
二、变量指令变量指令主要用于以下的方面:l) 对数据进行赋值。
2) 等待指令。
3) 注释指令。
4) 程序模块控制指令1、赋值指令:= 对程序数据进行赋值2、等待指令WaitTime 等待一个指定的时间程序再往下执行WaitUntil 等待一个条件满足后程序继续往下执行WaitDI 等待一个输入信号状态为设定值WaitDO 等待一个输出信号状态为设定值3、程序注释comment 对程序进行注释4、程序模块加载Load 从机器人硬盘加载一个程序模块到运行内存UnLoad 从运行内存中卸载一个程序模块Start Load 在程序执行的过程中,加载一个程序模块到运行内存中Wait Load 当 Start Load 使用后,使用此指令将程序模块连接到任务中使用CancelLoad 取消加载程序模块CheckProgRef 检查程序引用Save 保存程序模块EraseModule 从运行内存删除程序模块5、变量功能TryInt 判断数据是否是有效的整数OpMode 读取当前机器人的操作模式RunMode 读取当前机器人程序的运行模式NonMotionMode 读取程序任务当前是否无运动的执行模式Dim 获取一个数组的维数Present 读取带参数例行程序的可选参数值IsPers 判断一个参数是不是可变量IsVar 判断一个参数是不是变量6、转换功能StrToByte 将字符串转换为指定格式的字节数据ByteT ostr 将字节数据转换成字符串三、运动设定1、速度设定MaxRobspeed 获取当前型号机器人可实现的最大TCP 速度VelSet 设定最大的速度与倍率SpeedRefresh 更新当前运动的速度倍率Accset 定义机器人的加速度WorldAccLim 设定大地坐标中工具与载荷的加速度PathAccLim 设定运动路径中 TCP 的加速度2、轴配置管理ConfJ 关节运动的轴配置控制ConfL 线性运动的轴配置控制3、奇异点的管理SingArea 设定机器人运动时,在奇异点的插补方式4、位置偏置功能PDispOn 激活位置偏置PDispSet 激活指定数值的位置偏置PDispOff 关闭位置偏置EOffsOn 激活外轴偏置EOffsSet 激活指定数值的外轴偏置EOffsOff 关闭外轴位置偏置DefDFrame 通过三个位置数据计算出位置的偏置DefFrame 通过六个位置数据计算出位置的偏置ORobT 从一个位置数据删除位置偏置DefAccFrame 从原始位代和替换位代定义一个框架5、软伺服功能SoftAct 激活一个或多个轴的软伺服功能关闭软伺服功能SoftDeact 关闭软伺服功能6、机器人参数调整功能TuneServo 伺服调整TuneReset 伺服调整复位PathResol 几何路径精度调整CirPathMode 在圆弧插补运动时,工具姿态的变换方式7、空间监控管理WZBoxDef 定义一个方形的监控空间WZCylDef 定义一个圆柱形的监控空间WZSphDef 定义一个球形的监控空间WZHomejointDef 定义一个关节轴坐标的监控空间WZLimjointDef 定义一个限定为不可进入的关节轴坐标监控空间WZLimsup 激活一个监控空间并限定为不可进入WZDOSet 激活一个监控空间并与一个输出信号关联WZEnable 激活一个临时的监控空间WZFree 关闭一个临时的监控空间注:这些功能需要选项“world zones”配合。
ABB-robotstudio使用详细步骤

搬运码垛工作站建模1、创建机器人系统2、创建动态输送链3、创建动态夹具4、工作站逻辑连接5、添加 IO(设置好需重启)6、示教目标点(同步到RAPID )7、RAPID 编程一、创建机器人系统1、创建空工作站2、导入 IRB 260 机器人模型二、创建动态输送链1、添加输送链并修改位置2、创建 600*400*200 的物料并修改位置3、添加一个 smart 组件4、添加 source 组件5、设置物料本地原点6、添加LINEMOVER 和 QUEUE 组件8、添加面传感器组件10、设置 SC_输送链的属性连接11、设置信号连接12、添加信号处理组件,用于检测传感器下降沿14、传感器与 SC 输送链的输出联系16、添加置位复位组件,对仿真开始结束信号进行保持17、18、进行仿真设定选择SC——输送链进行验证三、创建动态夹具1、先制作一个吸盘模型,然后设置成工具,并安装到机器人法拉盘2、添加SMART 组件3、添加ATTACHER 和DETACHER 组件5、添加一个线传感器组件7、设置吸盘工具不能被传感器检测9、设置属性连接11、添加信号处理取非和锁定组件13、添加一个示教物料四、工作站逻辑连接五、参考代码MODULE MainMoudlePERS tooldatatGrip:=[TRUE,[[0,0,200],[1,0,0,0]],[25,[0,0.00109327,116.889],[1,0,0,0],0,0,0]];!吸盘工具数据PERS loaddata LoadEmpty:=[0.01,[0,0,1],[1,0,0,0],0,0,0];PERS loaddata LoadFull:=[40,[0,0,50],[1,0,0,0],0,0,0];!有效载荷数据PERS robtarget pHome:=[[1620.00,-0.00,1331.59],[1.27986E-06,-0.707107,- 0.707107,1.27986E-06],[0,0,1,0],[9E+09,9E+09,9E+09,9E+09,9E+09,9E+09]];!基准点PERS robtarget pActualPos:=[[1620,-1.87531E-14,1331.59],[1.27986E-06,- 0.707107,-0.707107,1.27986E- 06],[0,0,1,0],[9E+09,9E+09,9E+09,9E+09,9E+09,9E+09]];!实际点PERS robtarget pPick1:=[[1488.007792464,376.826660408,476.964684195],[0,0.707106307,0.7071 07256,0],[0,0,1,0],[9E9,9E9,9E9,9E9,9E9,9E9]];!1 路拾取目标点PERS robtarget pPlace1:=[[- 292.446,1263.27,55.4492],[0,0.707107,0.707106,0],[1,0,2,0],[9E+09,9E+09,9E+09, 9E+09,9E+09,9E+09]];!1 路放置基准点PERS robtarget pBase1_0:=[[- 292.446294945,1263.272085268,55.449220723],[0,0.707107387,0.707106176,0],[1, 0,2,0],[9E9,9E9,9E9,9E9,9E9,9E9]];!1 路放置 0 度姿态PERS robtarget pBase1_90:=[[-391.976797324,1362.469634994,55.449159414],[0,1,-0.000030621,0],[1,0,3,0],[9E9,9E9,9E9,9E9,9E9,9E9]];!1 路放置 90 度姿态PERS robtarget pPick2:=[[1488.013130905,-358.406014736,476.965039287],[0,0.707106307,0.707107256,0],[-1,0,0,0],[9E9,9E9,9E9,9E9,9E9,9E9]];PERS robtarget pPlace2:=[[-317.378,-1857.99,55.449],[0,0.707108,0.707106,0],[-2,0,-1,0],[9E+09,9E+09,9E+09,9E+09,9E+09,9E+09]];PERS robtarget pBase2_0:=[[-317.378137718,-1857.993871961,55.448967354],[0,0.707107745,0.707105817,0],[-2,0,-1,0],[9E9,9E9,9E9,9E9,9E9,9E9]];PERS robtarget pBase2_90:=[[-407.525988074,-1755.902485322,55.449282402],[0,1,-0.000031217,0],[-2,0,0,0],[9E9,9E9,9E9,9E9,9E9,9E9]];PERS speeddata MinSpeed:=[1000,300,5000,1000];PERS speeddata MidSpeed:=[2500,400,5000,1000];PERS speeddata MaxSpeed:=[4000,500,5000,1000];!搬运速度定义PERS bool bPalletFull1:=FALSE;PERS bool bPalletFull2:=FALSE;!逻辑布尔量,拾取后为UE ,放置后为FALSEPERS num nCount1:=1;PERS num nCount2:=1;!输送链计数PROC Main()rInitAll;WHILE TRUE DOIF diBoxInPos1=1 AND diPalletInPos1=1 AND bPalletFull1=FALSE THENrPick1;rPlace1;ENDIFIF diBoxInPos2=1 AND diPalletInPos2=1 AND bPalletFull2=FALSE THENrPick2;rPlace2;ENDIFWaitTime 0.1;ENDWHILEENDPROCPROC rInitAll()Reset doGrip;pActualPos:=CRobT(\tool:=tGrip);pActualPos.trans.z:=pHome.trans.z;MoveL pActualPos,MinSpeed,fine,tGrip\WObj:=wobj0;MoveJ pHome,MidSpeed,fine,tGrip\WObj:=wobj0;bPalletFull1:=FALSE;nCount1:=1;bPalletFull2:=FALSE;nCount2:=1;ENDPROCPROC rPick1()MoveJ Offs(pPick1,0,0,400),MaxSpeed,z50,tGrip\WObj:=wobj0; MoveL pPick1,MinSpeed,fine,tGrip\WObj:=wobj0;Set doGrip;WaitTime 0.3;GripLoad LoadFull;MoveL Offs(pPick1,0,0,400),MinSpeed,z50,tGrip\WObj:=wobj0; ENDPROCPROC rPick2()MoveJ Offs(pPick2,0,0,400),MaxSpeed,z50,tGrip\WObj:=wobj0; MoveL pPick2,MinSpeed,fine,tGrip\WObj:=wobj0;Set doGrip;WaitTime 0.3;GripLoad LoadFull;MoveL Offs(pPick2,0,0,400),MinSpeed,z50,tGrip\WObj:=wobj0; ENDPROCPROC rPlace1()rPosition1;MoveJ Offs(pPlace1,0,0,400),MidSpeed,z50,tGrip\WObj:=wobj0; MoveL pPlace1,MinSpeed,fine,tGrip\WObj:=wobj0;Reset doGrip;WaitTime 0.3;GripLoad LoadEmpty;MoveL Offs(pPlace1,0,0,400),MidSpeed,z50,tGrip\WObj:=wobj0; MoveJ Offs(pPick1,0,0,400),MaxSpeed,z50,tGrip\WObj:=wobj0; nCount1:=nCount1+1;IF nCount1>20 THENbPalletFull1:=TRUE;ENDIFENDPROCPROC rPlace2()rPosition2;MoveJ Offs(pPlace2,0,0,400),MaxSpeed,z50,tGrip\WObj:=wobj0; MoveL pPlace2,MinSpeed,fine,tGrip\WObj:=wobj0;Reset doGrip;WaitTime 0.3;GripLoad LoadEmpty;MoveL Offs(pPlace2,0,0,400),MidSpeed,z50,tGrip\WObj:=wobj0; MoveJ Offs(pPick2,0,0,400),MaxSpeed,z50,tGrip\WObj:=wobj0; nCount2:=nCount2+1;IF nCount2>20 THENbPalletFull2:=TRUE;ENDIFENDPROCPROC rPosition1()TEST nCount1CASE 1:pPlace1:=Offs(pBase1_0,0,0,0);CASE 2:pPlace1:=Offs(pBase1_0,600+10,0,0);CASE 3:pPlace1:=Offs(pBase1_90,0,400+10,0);CASE 4:pPlace1:=Offs(pBase1_90,400+10,400+10,0);CASE 5:pPlace1:=Offs(pBase1_90,800+20,400+10,0);CASE 6:pPlace1:=Offs(pBase1_0,0,600+10,200);CASE 7:pPlace1:=Offs(pBase1_0,600+10,600+10,200);CASE 8:pPlace1:=Offs(pBase1_90,0,0,200);CASE 9:pPlace1:=Offs(pBase1_90,400+10,0,200);CASE 10:pPlace1:=Offs(pBase1_90,800+20,0,200);CASE 11:pPlace1:=Offs(pBase1_0,0,0,400);CASE 12:pPlace1:=Offs(pBase1_0,600+10,0,400);CASE 13:pPlace1:=Offs(pBase1_90,0,400+10,400);CASE 14:pPlace1:=Offs(pBase1_90,400+10,400+10,400);CASE 15:pPlace1:=Offs(pBase1_90,800+20,400+10,400); CASE 16:pPlace1:=Offs(pBase1_0,0,600+10,600);CASE 17:pPlace1:=Offs(pBase1_0,600+10,600+10,600);pPlace1:=Offs(pBase1_90,0,0,600);CASE19:pPlace1:=Offs(pBase1_90,400+10,0,600);CASE20:pPlace1:=Offs(pBase1_90,800+20,0,600);DEFAULT:TPErase;TPWrite"the Counter of line1is error,please check it!";Stop;ENDTESTENDPROCPROC rPosition2()TEST nCount2CASE1:pPlace2:=Offs(pBase2_0,0,0,0);CASE2:pPlace2:=Offs(pBase2_0,600+10,0,0);CASE3:pPlace2:=Offs(pBase2_90,0,400+10,0);CASE4:pPlace2:=Offs(pBase2_90,400+10,400+10,0);CASE5:pPlace2:=Offs(pBase2_90,800+20,400+10,0);CASE6:pPlace2:=Offs(pBase2_0,0,600+10,200);pPlace2:=Offs(pBase2_0,600+10,600+10,200); CASE8:pPlace2:=Offs(pBase2_90,0,0,200);CASE9:pPlace2:=Offs(pBase2_90,400+10,0,200);CASE10:pPlace2:=Offs(pBase2_90,800+20,0,200);CASE11:pPlace2:=Offs(pBase2_0,0,0,400);CASE12:pPlace2:=Offs(pBase2_0,600+10,0,400);CASE13:pPlace2:=Offs(pBase2_90,0,400+10,400);CASE14:pPlace2:=Offs(pBase2_90,400+10,400+10,400);CASE15:pPlace2:=Offs(pBase2_90,800+20,400+10,400);CASE16:pPlace2:=Offs(pBase2_0,0,600+10,600);CASE17:pPlace2:=Offs(pBase2_0,600+10,600+10,600);CASE18:pPlace2:=Offs(pBase2_90,0,0,600);CASE19:pPlace2:=Offs(pBase2_90,400+10,0,600);CASE20:pPlace2:=Offs(pBase2_90,800+20,0,600);DEFAULT:TPErase;TPWrite"the Counter of line1is error,please check it!";Stop;ENDTESTENDPROCPROC rModify()MoveJ pHome,MinSpeed,fine,tGrip\WObj:=wobj0;MoveJ pPick1,MinSpeed,fine,tGrip\WObj:=wobj0;MoveJ pBase1_0,MinSpeed,fine,tGrip\WObj:=wobj0;MoveJ pBase1_90,MinSpeed,fine,tGrip\WObj:=wobj0;MoveJ pPick2,MinSpeed,fine,tGrip\WObj:=wobj0;MoveJ pBase2_0,MinSpeed,fine,tGrip\WObj:=wobj0;MoveJ pBase2_90,MinSpeed,fine,tGrip\WObj:=wobj0;ENDPROCENDMODULE。
工业机器人离线编程(ABB)7-3 工作站轨迹编程

二、实践操作
5、示教目标点
• 为便于示教拾取位置pPallet_Pick1、 pPallet_Pick2,先复制码垛工件,然后 将其调整到输送链末端,再示教目标点。 pPallet_Pick1示教过程,如图7173~7-175所示。
7-173 调整码垛工件_1复制品 的位置
7-174 pPallet_Pick1目标点
二、实践操作
4、坐标系标定
• 此搬运码垛工作站需要标定码垛用工具Grip的工具数据。具体过程:在“基本” 功能选项卡,单击“其它”,选择“创建工具数据”,如图7-169所示。
7-169 创建工具坐标数据Grip
二、实践操作
4、坐标系标定
• 工具数据Grip的参数按照表7-1设置。
7-1 工具坐标Grip参数设置 Misc数据 名称 机器人握住工具 工具坐标框架 位置 X、Y、Z 旋转 rx、ry、rz(四元数) 0,0,135 1,0,0,0 存储类型 任务 模块名称 Grip Turea 重量 重心 x、y、z 惯性 加载数据 1 1,0,0 0,0,0 同步属性 PERS T_ROB1 MainMoudle
7-187 同步RAPID到工作站
7-188 同步RAPID到工作站后 生成的路径和目标点
三、总结
1、创建系统备份
2、工作站I/O配置 3、创建程序 4、坐标系标定 5、示教目标点
7-162 创建主程序Main()模块
二、实践操作
3、创建程序
• 创建初始化程序rInitAll() 程序模块,如图7-163所示。
7-163 创建初始化程序rInitAll()模块
二、实践操作
3、创建程序
• 创建码垛任务程序rPallet()程序模块,如图7-164所示。
abb组态教程7-ST编程语言
TOC
Overview Language elements Statements Processing
Summary
© Copyright ABB - 18 -
语句
基本概念
赋值 条件 循环 控制语句
调用
© Copyright ABB - 19 -
语句
赋值
variable := expression ;
© Copyright ABB - 11 -
语言元素
变量
每个变量需要独立声明 本地变量
仅能在本 ST 程序中使用.
通过 VAR ... END_VAR 声明
example:
VAR myVar1 : REAL; END_VAR
全局变量
可以在本ST 程序以外使用. 使用VAR_EXTERNAL ... END_VAR 声明
example :
My_C_CU(PV:= my_PV, OUT=> my_OUT);
None mandatory pins can also be supplied outside the Call statement
example :
My_C_CU.SP := my_SP;
(*Input*)
语言组成
标识符
类型
变量
常量 功能
功能块
数组 下列符号不能用做标识符
+-*/&=<>[].,():;‘@#$
© Copyright ABB - 8 -
工业机器人离线编程(ABB)7-2-1 创建SC_夹爪Smart组件
二、实践操作
4、添加SC_夹爪Smart组件的I/O链 接I/O Connection
• 在”SC_夹爪”创建窗口,选择“信 号和连接”选项,在“I/O连接”设 置窗口下方,单击“添加I/O Connection”。 • 添加LogicSRLatch与SC_夹爪的I-O Connection,按照图7-80进行其相 关的设置,然后单击“确定”。
7-74 添加SC_夹爪与LogicGate 的I-O Connection
二、实践操作
4、添加SC_夹爪Smart组件的I/O链 接I/O Connection
• 在”SC_夹爪”创建窗口,选择“信 号和连接”选项,在“I/O连接”设 置窗口下方,单击“添加I/O Connection”。 • 添加PoseMover[夹爪闭合]与 Attacher的I/O Connection,按照 图7-75进行其相关的设置,然后单 击“确定”。
7-80 添加LogicSRLatch与SC_夹爪的I-O Connection
二、实践操作
5、安装SC_夹爪Smart组件
• SC_夹爪Smart组件创建完成后还要安装到机器人IRB120上,安装过程如图781、7-82所示。
7-81 将SC_夹爪SMart组件安装到机器人上
7-82 SC_夹爪SMart组件安装完成
7-73 添加SC_夹爪与 PoseMover[夹爪闭合]的I-O Connection
二、实践操作
4、添加SC_夹爪Smart组件的I/O链 接I/O Connection
• 在”SC_夹爪”创建窗口,选择“信 号和连接”选项,在“I/O连接”设 置窗口下方,单击“添加I/O Connection”。 • 添加SC_夹爪与LogicGate的I/O Connection,按照图7-74进行其相 关的设置,然后单击“确定”。
- 1、下载文档前请自行甄别文档内容的完整性,平台不提供额外的编辑、内容补充、找答案等附加服务。
- 2、"仅部分预览"的文档,不可在线预览部分如存在完整性等问题,可反馈申请退款(可完整预览的文档不适用该条件!)。
- 3、如文档侵犯您的权益,请联系客服反馈,我们会尽快为您处理(人工客服工作时间:9:00-18:30)。
Range limited variables
Enumerated variables
myVar : INT (13 .. 33);
TYPE traffic_light : (red, yellow,green) ; END_TYPE
© Copyright ABB - 16 -
Arrays can only be used locally within ST programs
© Copyright ABB - 10 -
语言组成
类型
E.g. REAL, DINT, TIME, …
AC 800F标准类型
结构数据类型
结构类型内的元素可以独立使用 例如: variable_ponent_name
数组
相同类型的一系列数据 定义关键字: ARRAY 支持最大的维数为4 例如: variable_name[index1, index2,…,index4] 仅对ST 程序有效 !
Replace the value of the variable with the value of the expression
© Copyright ABB - 20 -
Statements
Selection - IF
IF expression THEN statement ;
ELSE statement ;
Freelance 800F Training IEC61131-3 ST
© ABB - Page 1
目录
基本概念 语言组成 语法 执行
总结
© Copyright ABB - 2 -
基本概念
Structured Text (ST) 符合 IEC 61131-3
SFC - Sequential Function Chart IL - Instruction List
I/O 变量
I/O 模件也必须声明 通过VAR_EXTERNAL ... END_VAR
example:
© Copyright ABB - 13 -
VAR_EXTERNAL DDI01_2_3 : DDI01; END_VAR
语言组成
指令
** -
Exponentiation Negation
Arrays cannot be passed over program boundaries
语言组成
扩展
符号常量
Can be declared locally within ST program units
New keyword CONST is introduced. This is not part of IEC 61131-3
功能
支持 AC 800F 标准功能 支持 IEC 61131-3 功能多输入单输出 输入通过参数表传入,输出通过赋值形式传出 example : maxval := MAX(val1, val2, val3);
CBF 支持的功能不必在ST程序内声明
© Copyright ABB - 15 -
© Copyright ABB - 11 -
语言元素
变量
每个变量需要独立声明 本地变量
仅能在本 ST 程序中使用.
通过 VAR ... END_VAR 声明
example:
VAR myVar1 : REAL; END_VAR
全局变量
可以在本ST 程序以外使用. 使用VAR_EXTERNAL ... END_VAR 声明
statement ;
END_FOR; Use this for iterations with a known number of repetitions.
© Copyright ABB - 23 -
Statements
Iteration While
WHILE expression DO statement ; END_WHILE;
ST
ST_FB
可以实现复杂算法; 支持数组实现变量查询检索;
© Copyright ABB - 4 -
基本概念
ST 程序结构
PROGRAM name (* declaration part *)
(* statements *)
;
END_PROGRAM
© Copyright ABB - 5 -
Language Elements
User Defined Function Blocks
UFB„s are the means to create subroutines Program code is written within the ST editor
Complement
Arithmetic Comparison Boolean operation
NOT
*, /, MOD +, <, >, <=, >=, =, <> &, AND XOR
© Copyright ABB - 14 -
OR
运算顺序从高到低,从左到右
元素组成
example :
My_C_CU(PV:= my_PV, OUT=> my_OUT);
None mandatory pins can also be supplied outside the Call statement
example :
My_C_CU.SP := my_SP;
(*Input*)
Call – Execution of Function Blocks
FB_name(IN := variable1, OUT => variable2);
Mandatory inputs and outputs have to be passed inside the Call statement
Use this for iterations with an unknown number of repetitions.
If the expression is fulfilled the statement isn‟t executed.
© Copyright ABB - 24 -
Statements
Iteration - Repeat
REPEAT statement ; UNTIL expression END_REPEAT;
Use this for iterations with an unknown number of repetitions.
If the expression is fulfilled the statement is executed once.
© Copyright ABB - 25 -
Statements
Control Statements
RETURN; EXIT;
Use this for specifically break off in loops and/or programs.
© Copyright ABB - 26 -
Statements
ST
属于一种类似C 或 PASCAL 的高级语言;
2 种方式集成到 Control Builder F 项目树接点;
for a ST program within a program list
for a ST user function block within the UFB pool
使用灵活文本编辑器进行程序编辑 通过
END_IF;
Use this for selections between few (two) alternatives
© Copyright ABB - 21 -
Statements
Selection - Case
CASE expression OF constant1 : statement ; (* single value *) constant2 .. constant3 : statement ; (* Interval *) constant4, constant5 : statement ; (* List *)
(*FB call*) My_C_CU (PV:= my_PV, OUT=> my_OUT);
© Copyright ABB - 27 -
my_CE := My_C_CU.CE;
(*Output*)
Each FB instance has to be instantiated
It can be used only once within the program
CONST max := 100; max2 := 2 * max; END_CONST
声明中不能使用变量与功能.
© Copyr
用于程序代码的注释
(* This is a comment *)
可以位于任意位置 允许嵌套
(* comment (* nested comment *) *)
LD - Ladder Diagram
FBD - Function Block Diagram ST - Structured Text
© Copyright ABB - 3 -
基本概念
ST 特点
