侏罗纪时代使用说明书
Rowenta PerfectCare Garment Steamer GC625 26 说明书

ProTouchMax 6 bar pump pressureUp to 90g steam boostNo descaling neededOptimalTEMP heated plateGC625/26Great results in just one stroke, no wet spotswith innovative Dual Heating TechnologyThanks to the innovative Dual Heating technology, the new PerfectCare garmentsteamer ensures powerful steam performance with no wet spots for great resultseffortlessly.Fast de-wrinkling for great resultsDual Heating TechnologyOptimalTEMP heated plate, guaranteed no burns*Powerful & continuous steamTriple precision tips on steam plate for challenging areasStable tilting board with quick dry coverUltimate convenienceMaintenance free engine, no descaling needed*Easy steam selection (3 settings+ ECO) on handleWheels for easy transportationReliableAutomatically switches to standby mode for peace of mindSteam refreshes garments and kills 99.9% of bacteria*PVC free hoseHighlightsDual Heating TechnologyThe innovative Dual Heating technology generates steam instantly at the base and reheats at the steamer head, for powerfulpenetrating steam, giving great results with no wet spotsOptimalTEMP heated steam plateSteamer plate is actively heated to provide better de-wrinkling results with no wet spots.With OptimalTEMP technology, it guarantees no burns on all ironable fabrics.Powerful & continuous steam90g powerful steam boost penetrates deep into garments while 35g/min of continuous steam enables effortless wrinkle removal, for great de-wrinkling results.Triple precision tipsThe triple precision tips on the steamer head enable you to reach the challenging areas,such as the collar, the shoulder, and the in-between buttons, giving you precise results.Tilting board &quick dry cover It can be tilted 30°, giving stable and comfortable support to make pleats and achieve crisp results. The shoulder shapeboard provides a better fit for garments. Board comes with a quick dry cover with enhanced steam permeability and breathability. It is durable with high heat resistance.Maintenance free engineSteamers need to be descaled regularly toensure steam performance. Our new innovative engine prevents scale from building up, for long lasting steam performance.Easy steam selection on handleBy pressing the steam selection button on the handle, you can easily change steam level for different fabrics - no need to bend down! Set your preferred steam level for optimal results on different fabrics. Use low steam for thinner fabrics and a more powerful setting for thicker fabrics and coats. Use ECO mode to save energy consumption.Wheels for easy transportationWheels enable user to tilt and drag the stand steamer from one place to another easily.Auto shut offThe steamer automatically switches to standby mode when the water tank is empty, so you have peace of mind even if you forget to switch it off.Kills 99.9% bacteria*Hot steam refreshes garments and kills up to 99.9% bacteria*. Less frequent washing and dry cleaning saves time and money, and helps clothes last longer.SpecificationsT echnologyFor all ironable fabricsNo burnsOptimalTEMP technology Fast crease removal Continuous steam: 35 g/min Power: 2200 WReady to use: 2 minSteam boost: up to 90 g Steam-on-demandVariable steam: 3 levels Vertical steamVoltage: 220-240 V Pressure Bar: Max 6 bar pump Easy to useWater tank capacity: 2000 ml Detachable water tank Power cord length: 1.8 m Precision steam tip Refill any time during useSelect steam level from handleSpecial water inlet: For extra hygieneTap water suitableAuto shut offSave on all fabrics: Even delicates like silkPVC Free HoseStorageIntegrated wheels: For easy transportationAccessories includedAdjustable poleGlove for extra protectionSize and weightBoard size (WxHxL): 41 x 74.5 x 5.1 cmCover size (WxHxL): 42.2 x 75.7 x 6.3 cmFoam layer thickness: Cover thickness : 6mm mmIroning surface: 56.4 cmPackaging dimensions (WxHxL): 46.5 x 51 x61.5 cmProduct dimensions (WxHxL): Basedimensions : 32 x 45.2 x 34 cmTotal weight with packaging: 11.5 kgWeight of board: 1.7 kgWeight of iron: 0.69 kgWeight of iron + base: 6.78 kgPole dimensions extended: Height fromground to shoulder tip of Hanger : 155 cmGuarantee2 year worldwide guaranteeGreen efficiencyEnergy saving modeProduct packaging: 100% recycableUser manual: 100% recycled paper* On all ironable fabrics* tested to IEC protocol with hard water for 500 hours tosimulate 5 years of usage.* tested by third party institute for bacteria typesEscherichia coli 8099, Staphylococcus aureus ATCC6538, Candida albicans ATCC 10231 with 1 minutesteaming time (Technical Standard For Disinfection2002-2.1.5)© 2020 Koninklijke Philips N.V.All Rights reserved.Specifications are subject to change without notice. Trademarks are the property of Koninklijke Philips N.V. or their respective owners.Issue date 2020‑09‑03 Version: 3.0.1EAN: 08 71010 39251 32 。
MHR300 Metal Hose Reel 说明书

2002 Suncast Corporation, Batavia, IL
0360822A
Assembly Instructions
Carefully remove all parts from the box and place on a smooth flat surface. 1.Remove the screw and washers from axle and insert axle (D) into axle brace on frame (A) of unit. Make sure the flat on the axle is oriented correctly with the flat in the axle hole.
This limited warranty applies only to the hose reel enclosed and does not apply to accessory parts.
THE MANUFACTURER'S LIABILITY HEREUNDER IS LIMITED SOLELYTO THE REPAIR OR REPLACEMENT OFTHE DEFECTIVE PRODUCT OR PART AND THE MANUFACTURER SHALL IN NO EVENT BE LIABLE FOR ANY INCIDENTAL OR CONSEQUENTIAL DAMAGES THAT MAY RESULT FROM ANY DEFECT IN MATERIAL OR WORKMANSHIP FROM THE BREACH OF ANY EXPRESS OR IMPLIED WARRANTY.
大班健康穿越侏罗纪教案
大班健康穿越侏罗纪教案一、教学内容本节课选自大班健康领域教材第四章“探索身体奥秘”,详细内容为“穿越侏罗纪”。
通过故事、游戏、讨论等形式,让幼儿了解侏罗纪时期恐龙的生活习性,以及如何保护自己在侏罗纪时代的生存。
二、教学目标1. 了解侏罗纪时期的环境特点,认识恐龙的生活习性。
2. 学习保护自己在侏罗纪时代生存的方法,培养安全意识。
3. 培养幼儿团队协作精神,提高问题解决能力。
三、教学难点与重点教学难点:如何让幼儿理解侏罗纪时期的环境特点,以及恐龙的生活习性。
教学重点:培养幼儿保护自己在侏罗纪时代生存的方法,增强安全意识。
四、教具与学具准备1. 教具:侏罗纪时期恐龙图片、PPT、情景剧道具。
2. 学具:画纸、画笔、剪刀、胶水。
五、教学过程1. 情景引入(5分钟)通过播放恐龙动画片,让幼儿了解侏罗纪时期的环境特点,引导幼儿关注恐龙的生活习性。
2. 例题讲解(10分钟)展示恐龙图片,讲解恐龙的生活习性,引导幼儿讨论如何保护自己在侏罗纪时代生存。
3. 随堂练习(10分钟)分组讨论,每组设计一个保护自己在侏罗纪时代生存的方法,并进行分享。
4. 实践活动(10分钟)组织幼儿进行情景剧表演,模拟在侏罗纪时代的生存挑战,培养团队协作精神。
六、板书设计1. 侏罗纪时期的环境特点2. 恐龙的生活习性3. 保护自己在侏罗纪时代生存的方法七、作业设计1. 作业题目:画出你心中的侏罗纪世界,并标注出保护自己的方法。
答案:幼儿作品,以创意为主,无固定答案。
八、课后反思及拓展延伸1. 反思:关注幼儿在活动中的参与程度,以及安全意识培养的效果。
2. 拓展延伸:组织幼儿参观博物馆,了解更多关于恐龙的知识,提高幼儿对自然科学的兴趣。
重点和难点解析1. 教学难点:如何让幼儿理解侏罗纪时期的环境特点,以及恐龙的生活习性。
2. 教学重点:培养幼儿保护自己在侏罗纪时代生存的方法,增强安全意识。
3. 实践活动:情景剧表演,模拟在侏罗纪时代的生存挑战。
幼儿园大班体育活动教案穿越侏罗纪

幼儿园大班体育活动教案穿越侏罗纪一、教学内容本节课选自幼儿园大班体育活动教材,第三章“奇幻时光之旅”,第二节“穿越侏罗纪”。
详细内容包括:了解侏罗纪时代的恐龙特点,进行穿越侏罗纪的情景模拟,通过团队协作完成各项体育任务。
二、教学目标1. 让学生了解侏罗纪时代恐龙的生活习性,培养对古生物的兴趣。
2. 培养学生团队合作意识,提高团队协作能力。
3. 通过体育活动,锻炼学生的体能,提高运动技能。
三、教学难点与重点教学难点:团队协作完成任务,侏罗纪恐龙特点的了解。
教学重点:穿越侏罗纪的情景模拟,体育活动的开展。
四、教具与学具准备1. 教具:恐龙模型,恐龙图片,任务卡,计时器。
2. 学具:运动服装,运动鞋,水壶。
五、教学过程1. 实践情景引入(5分钟)通过展示恐龙模型和图片,引导学生了解侏罗纪时代恐龙的特点。
宣布本节课的任务:穿越侏罗纪,完成各项体育任务。
2. 穿越侏罗纪(10分钟)学生分组,每组领取任务卡,按照任务卡上的要求,完成穿越侏罗纪的情景模拟。
3. 例题讲解(5分钟)教师示范并讲解如何进行团队协作,完成任务。
4. 随堂练习(10分钟)学生分组进行练习,教师巡回指导。
5. 团队竞赛(15分钟)各组进行团队竞赛,完成各项体育任务。
教师记录成绩,给予评价。
6. 体能训练(10分钟)学生进行体能训练,提高运动能力。
六、板书设计1. 侏罗纪时代恐龙特点2. 穿越侏罗纪任务卡3. 团队协作方法4. 体育活动成绩记录七、作业设计1. 作业题目:画出你最喜欢的侏罗纪恐龙,并简要介绍它的特点。
答案:学生自由发挥,画出自己喜欢的恐龙,介绍其特点。
2. 作业题目:与家长一起讨论,如何在生活中运用团队合作精神。
八、课后反思及拓展延伸重点和难点解析1. 教学难点:团队协作完成任务,侏罗纪恐龙特点的了解。
2. 实践情景引入:如何有效地通过恐龙模型和图片引发学生对侏罗纪时代的兴趣。
3. 例题讲解:如何具体示范和讲解团队协作的方法。
恐龙时代分为哪几个纪
恐龙时代分为哪几个纪
恐龙时代分为三叠纪、侏罗纪和白垩纪三个阶段
1、三叠纪:约距今2.5亿年至2亿年前,槽齿类爬行动物慢慢发展为最早的恐龙,到三叠纪晚期,恐龙已经是种类繁多的族群了,被称为“恐龙的黎明”。
三叠纪以一次灭绝事件结束,这次灭绝事件让许多槽齿目动物也都灭绝了,却为恐龙提供了巨大的发展机会。
2、侏罗纪:约公元前1亿9960万年(误差值为60万年)到1亿4550万年(误差值为400万年)。
侏罗纪前期,因为经历大灭绝,所以各种动植物都非常稀少(属于休养生息的阶段),但恐龙总目一枝独秀,伺机称霸陆地。
侏罗纪中晚期以后,恐龙统治地球1.5亿年。
3、白垩纪:开始于1.45亿年前,结束于6600万年前。
白垩纪恐龙种类达到鼎盛时期,最著名的是霸王龙,白垩纪末发生重大的灭绝事件在地表居统治地位的爬行动物大量消失,恐龙完全灭绝,哺乳动物度过了危机,并占领了由恐龙等爬行动物退出的生态环境,迅速进化发展为新的统治者。
WER2019赛季模块教育机器人赛 ——“侏罗纪时代”竞赛规则
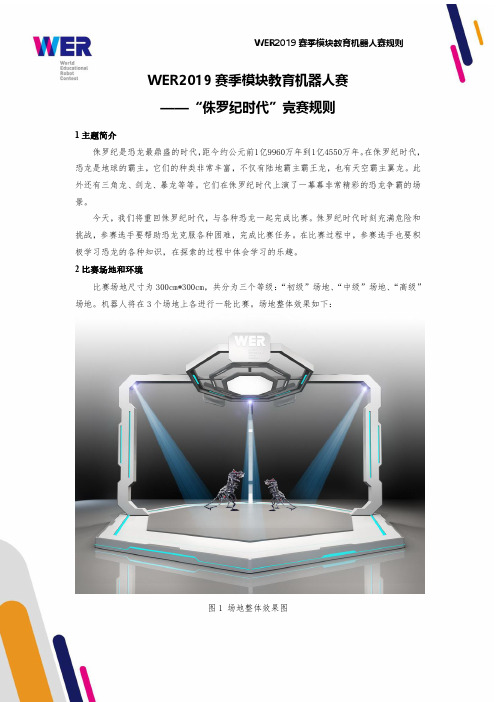
WER2019 赛季模块教育机器人赛规则
4.7 产品型号:竞赛仅限以下型号参赛:SB901。其他型号产品不可参赛。 5 比赛 5.1 参赛队 5.1.1 每支参赛队应由 2-3 名学生和 1-2 名教练员(教师或学生)组成。学生必须是 2020 年 6 月前在校的学生。 5.1.2 参赛队员应以积极的心态面对和自主地处理在比赛中遇到的所有问题,自尊、自重, 友善地对待和尊重队友、对手、志愿者、裁判员和所有为比赛付出辛劳的人,努力把自己培 养成为有健全人格和健康心理的人。 5.2 赛制 5.2.1 WER 能力挑战赛按小学、初中、高中各组别分别进行。 5.2.2 比赛共进行 3 轮,初级场地、中级场地和高级场地上各一轮,不分初赛、复赛。每轮 比赛进行前,均有 2 个小时调试时间。每轮比赛时间为 180 秒。 5.2.3 如果参赛队选择了现场任务,该场比赛时间不延长。 5.2.4 所有场次的比赛结束后,以每支参赛队各场得分之和作为该队的总成绩,按总成绩对 参赛队排名。 5.2.5 竞赛组委会有可能根据参赛报名和场馆的实际情况变更赛制。 5.3 比赛过程 5.3.1 搭建、编程与调试 a)搭建机器人与编程只能在准备区进行,测试程序可去竞赛场地。 b)参赛队的参赛选手经检录后方能进入准备区。裁判员有权对参赛队携带的器材进行检查, 所用器材必须符合大赛组委会相关规定与要求。参赛选手可以携带已搭建的机器人进入准备 区。参赛选手不得携带大赛组委会明令禁止使用的通信器材进场。所有参赛选手在准备区就 座后,裁判员把场地任务模型分布图和比赛须知发给各参赛队。 c)参赛队应自带便携式计算机、维修工具、替换器件、备用品等。参赛选手在准备区不得上 网和下载任何程序,不得使用照相机等设备拍摄比赛场地,不得以任何方式与指导教师或家 长联系。 d)赛前有 2 小时的准备时间,参赛队可根据现场环境修改机器人的结构和编写程序。 e)赛场采用日常照明,参赛选手可以标定传感器,但是大赛组委会不保证现场光照绝对不变。 随着比赛的进行,现场的照明情况可能发生变化,对这些变化和未知光线的实际影响,参赛 选手应自行适应或克服。 f)进入赛场后,参赛选手必须有秩序、有条理地调试机器人及准备,不得通过任何方式接受 指导教师的指导。不遵守秩序的参赛队可能受到警告或被取消参赛资格。准备时间结束前, 各参赛队应把机器人排列在准备区的指定位置,然后封场。
Halo Combat Evolved Anniversary 说明书

WARNING Before playing this game, read the Xbox 360® console instructions, Xbox 360 Kinect™ Sensor manual, and any other peripheral manuals for important safety and health information. Keep all manuals for future reference. For replacement console and accessory manuals, go to /support.
2
TEN YEARS OF HALO
It’s hard to imagine now, but in 2001, when Halo: Combat Evolved was released, the landscape of console games looked very different. There were first-person shooters, even sci-fi soldiers, but there was nothing like the iconic experience that Halo offered: pulse-pounding combat against convincing AI enemies, set in a fully realised universe with a rich, epic history and a cast of memorable characters.
NERF热火侏罗纪系列霸王龙发射器说明书
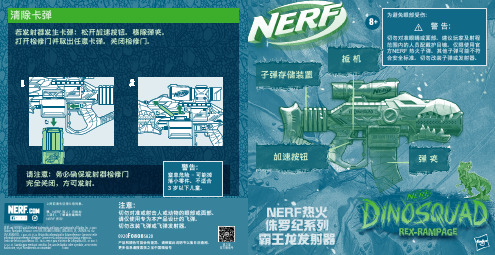
清除卡弹
警 告:
切勿对准眼睛或面部。
建议玩家及射程范围内的人员配戴护目镜。
仅限使用官方NERF 热火子弹。
其他子弹可能不符合安全标准。
切勿改装子弹或发射器。
为避免眼部受伤:
子弹存储装置
加速按钮
扳 机
弹 夹
8+
NERF热火 侏罗纪系列
3
x10
1.5V AA / LR6
x4
1
1
2
2 装弹与发射
存放发射器
子弹存储区
重新装载按住加速按钮,按动扳机即可发射。
为获得最佳性能,
切勿将子弹存放于弹夹中。
1
2 电池信息
4节 1.5V AA型号碱性电池(未随附)。
请使用碱性电池。
请使用十字螺丝刀安装/更换(不包含在本产品内)。
重要:电池信息 注意:
1. 为避免电池泄漏
a. 严格按照说明书操作,
按照说明书使用指定电池并正确安装;b. 非充电电池不能充电;
c. 充电电池只能在成人监护下充电;
d. 充电电池在充电前应从玩具中取出;
e. 不同类型的电池或新旧电池不能混用;
f. 电池应以正确的极性放入;
g. 用尽的电池应从玩具中取出;
h. 电源端子不得短路。
2. 如受电磁干扰,或引起电磁干扰,请移走产品, 必要时可重新设置产品。
(关闭开关再次打开,或者取出电池再次安装。
)3. 电池由成人安装。
恐龙时代

第二名:巨兽龙
体型:体长13至14米 食物:其他恐龙。 奔 跑 速 度 : 每小时4 5 至 5 0 千 米 / 。 攻击武器:穿刺型牙齿对敌人杀
伤力巨大。速度也快,基本没 有恐龙能赶上。 劣势:视力严重低下,智力不足。
第三名:棘背龙
体型:体长12至17米 食物:鱼、翼龙、其他恐龙。 奔跑速度: 每小时40至45千米。 攻击武器:可怕的利爪 劣势:防御低下。
击。
优势:它有带四根尖刺的尾巴, 用来防御和攻击。
第四名:山东龙
体 型 : 长14米 食物:植物
优势:尾巴形状粗重而扁平。 当它直立行走时,这根尾 巴可以平衡体重。
第五名:肿头龙
体型:长5米,头顶肿大。 食物:植物
优势:头顶比较厚,可以保护 脑部受伤。
恐龙的灭绝
1、气温下降,使恐龙无法生存。
恐龙的灭绝
恐龙的后代
大部分恐龙已经灭 绝,但是恐龙的后 代——鸟类存活下 来,并繁衍至今。
恐龙知识大比拼
头上长着三个角,后面一个大圆盘, 是那种恐龙?
恐龙知识大比拼
身体向蜥蜴,头大尾巴短,被称恐 龙之王,是那种恐龙?
恐龙知识大比拼 脖子长,尾巴短,是什么恐龙?
谢谢观赏
恐 龙 时 代
恐龙化石的发现
180年前被科学家发现的
下面我们来了解一下恐龙时代吧
恐龙时代分为三个阶段: 三叠纪、侏罗纪、白垩纪
ቤተ መጻሕፍቲ ባይዱ
三叠纪:
在这个时期,地球上出现了恐龙。
侏罗纪:
是恐龙时代最兴盛的时期,在这个时期恐龙成为地球 真正的霸主,占据了“陆海空”三大领域。
白垩纪:在这个时期恐龙逐渐灭局 恐龙逐渐灭绝
2、小型动物越来越多,最终吃光了恐龙蛋。
中生代(三叠纪、侏罗纪、白垩纪简介)
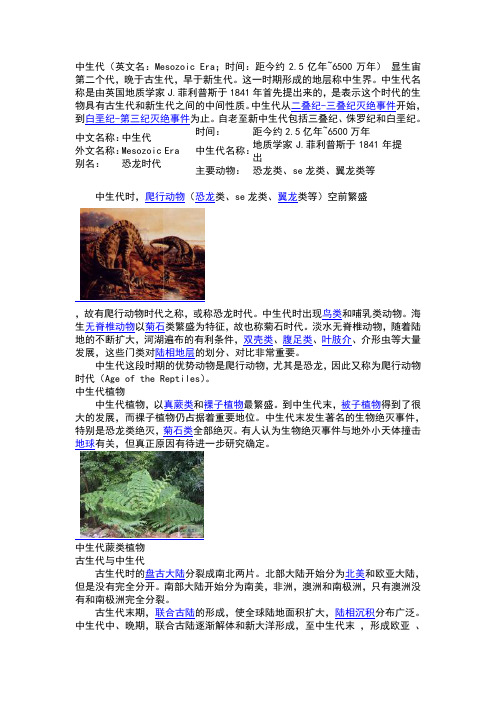
中生代(英文名:Mesozoic Era;时间:距今约2.5亿年~6500万年)显生宙第二个代,晚于古生代,早于新生代。
这一时期形成的地层称中生界。
中生代名称是由英国地质学家J.菲利普斯于1841年首先提出来的,是表示这个时代的生物具有古生代和新生代之间的中间性质。
中生代从二叠纪-三叠纪灭绝事件开始,到白垩纪-第三纪灭绝事件为止。
自老至新中生代包括三叠纪、侏罗纪和白垩纪。
中文名称:中生代外文名称:M esozoic Era 别名:恐龙时代时间:距今约2.5亿年~6500万年中生代名称:地质学家J.菲利普斯于1841年提出主要动物:恐龙类、se龙类、翼龙类等中生代时,爬行动物(恐龙类、se龙类、翼龙类等)空前繁盛,故有爬行动物时代之称,或称恐龙时代。
中生代时出现鸟类和哺乳类动物。
海生无脊椎动物以菊石类繁盛为特征,故也称菊石时代。
淡水无脊椎动物,随着陆地的不断扩大,河湖遍布的有利条件,双壳类、腹足类、叶肢介、介形虫等大量发展,这些门类对陆相地层的划分、对比非常重要。
中生代这段时期的优势动物是爬行动物,尤其是恐龙,因此又称为爬行动物时代(Age of the Reptiles)。
中生代植物中生代植物,以真蕨类和裸子植物最繁盛。
到中生代末,被子植物得到了很大的发展,而裸子植物仍占据着重要地位。
中生代末发生著名的生物绝灭事件,特别是恐龙类绝灭,菊石类全部绝灭。
有人认为生物绝灭事件与地外小天体撞击地球有关,但真正原因有待进一步研究确定。
中生代蕨类植物古生代与中生代古生代时的盘古大陆分裂成南北两片。
北部大陆开始分为北美和欧亚大陆,但是没有完全分开。
南部大陆开始分为南美,非洲,澳洲和南极洲,只有澳洲没有和南极洲完全分裂。
古生代末期,联合古陆的形成,使全球陆地面积扩大,陆相沉积分布广泛。
中生代中、晚期,联合古陆逐渐解体和新大洋形成,至中生代末,形成欧亚、北美、南美、非洲、澳大利亚、南极洲和印度等独立陆块。
并在其间相隔太平洋、大西洋、印度洋和北极海。
幼儿园大班体育活动教案穿越侏罗纪完整版

幼儿园大班体育活动教案穿越侏罗纪完整版一、教学内容本节课选自幼儿园大班体育活动教材第七章《穿越侏罗纪》。
主要内容包括:了解侏罗纪时代的特点;学习恐龙的基本知识;通过穿越侏罗纪的情景,进行一系列体育活动,锻炼孩子们的身体素质和团队协作能力。
二、教学目标1. 了解侏罗纪时代的基本特点,认识恐龙,培养孩子们的科普兴趣。
2. 通过体育活动,提高孩子们的身体协调性、灵活性,增强体质。
3. 培养孩子们的团队协作能力,提高人际交往能力。
三、教学难点与重点难点:恐龙知识的掌握,体育活动的技巧。
重点:侏罗纪时代的了解,身体协调性、灵活性的锻炼,团队协作能力的培养。
四、教具与学具准备1. 教具:恐龙模型,恐龙图片,侏罗纪背景板,口哨。
2. 学具:平衡木,障碍物,绳索,接力棒。
五、教学过程1. 导入:教师带领孩子们参观侏罗纪博物馆,观看恐龙模型和图片,让孩子们了解侏罗纪时代的特点。
2. 热身活动:孩子们模仿恐龙行走,进行简单的身体协调性练习。
3. 实践活动:(1)穿越侏罗纪:孩子们分组,通过平衡木、障碍物、绳索等,模拟穿越侏罗纪的情景。
(2)恐龙接力赛:孩子们分组进行接力比赛,每人手持接力棒,模仿恐龙奔跑。
六、板书设计1. 穿越侏罗纪2. 内容:侏罗纪时代特点:恐龙繁盛,植被丰富恐龙基本知识:种类、生活习性体育活动:穿越侏罗纪、恐龙接力赛七、作业设计1. 作业题目:画出你心中的恐龙。
答案:孩子们可以发挥想象,画出自己喜欢的恐龙形象。
2. 作业题目:与家长一起分享今天的学习内容,介绍侏罗纪时代和恐龙。
八、课后反思及拓展延伸1. 教师反思:关注每个孩子的参与度,确保他们在活动中得到充分的锻炼。
2. 拓展延伸:组织孩子们参观自然博物馆,深入了解恐龙和其他古生物。
鼓励孩子们阅读恐龙相关的科普书籍,提高科普素养。
重点和难点解析:1. 教学难点与重点的设定。
2. 实践活动的具体设计。
3. 作业设计的针对性与实践性。
4. 课后反思及拓展延伸的实际操作。
侏罗纪公园(恐龙知识)(课堂PPT)

剑龙为一种巨大的草食 性恐龙,是一种生存在侏罗 纪晚期的食草性动物,它的 背上有一排巨大的骨质板, 以及带有四根尖刺的危险尾 巴来防御掠食者的攻击,大 约9米长3米高4吨重。
19
角鼻龙
角鼻龙最大的特征就是鼻子 末段长有一个短角,双眼之间还 长有一对突起,角鼻龙就是因为 这个特征而得名的。角鼻龙的身 体结构比例匀称,强壮的后肢赋 予了它们极强的奔跑能力,短而 有力的前肢则是它们的捕食利器 。 与很多肉食性恐龙一样,角鼻龙 的大嘴中长满了短刃一般的牙齿 ,并拥有十分强大的咬合力。
6
恐龙生活的时代
恐龙生活在中生代,即距今2.4亿~6500万 年前的那段时期。中生代又被分成3个纪:三叠 纪(恐龙出现的时代)、侏罗纪、白垩纪。每 种恐龙都在地球上繁衍生息了数百万年,而每 时每刻又会有新的种类诞生。恐龙曾经统治地 球长达1.75亿年,是自地球形成以来最成功的 动物种类之一。
7
恐龙生活时间轴
来居陆地生物第一,同时也
是体型最为粗壮的食肉恐龙
26
鲨齿龙
鲨齿龙又名望齿龙,属于兽 脚亚目鲨齿龙科,生活于1亿年 到9300万年前的白垩纪中期到白 垩纪晚期,鲨齿龙是种巨大的肉 食性恐龙,也是目前发现最大的 兽脚亚目的食肉恐龙之一,
成年鲨齿龙估计可达12.5米,最 大甚至达到14.1米长,体重6吨 到11.45吨。主要特征包括:极 其锋利并类似鲨鱼的牙齿、大而 酷似骷髅眼睛的眶前孔、较为短 小的前肢、巨大而长的头颅骨、 比例上较窄的吻部、瘦的躯干、 比例上略微短的后肢。
异特龙
异特龙又称跃龙 或异龙,是兽脚亚目 恐龙的一属。异特龙 是种中型的二足、掠 食性恐龙,身长7-9米 ,最大9.7米,体重 1.5~2吨,最重3.6吨 。它们生存于晚侏罗 纪,约1亿5500万年~1 亿2000万年。
PreSonus Eris E5 BT 高清媒体和参考级扬声器操作手册说明书

Eris E5BTHochauflösender Medien-und Refe-renzlautsprecher Bedienungsanleitung1.1.1EinleitungVielen Dank,dass Sie sich für die hochauflösenden PreSonus®Medien-und Referenzlautsprecher ent-schieden haben.Die vielseitig einsetzbaren Eris Medien-und Referenzlautsprecher sind die idealeLösung für Gaming-Anwendungen,die Produktion von Audioinhalten oder die Wiedergabe Ihres Lieb-lingsalbums und bieten einen hochwertigen Studiosound mit einem gleichmäßigen und präzisen Fre-quenzgang.Wir bei PreSonus Audio Electronics bemühen uns um eine stetige Weiterentwicklung unserer Produkte und schätzen Ihre Anregungen daher sehr.Denn schließlich wissen Sie als Anwender am besten,was Sie von Ihrem Equipment erwarten.Vielen Dank für Ihr Vertrauen und viel Erfolg und Freude mit Ihren Eris Lautsprechern!Über dieses Handbuch:Bitte lesen Sie sich diese Bedienungsanleitung vollständig durch,um sich mit den Funktionen sowie den Anwendungs-und Anschlusshinweisen für Ihre Eris Medien-und Refe-renzlautsprecher vertraut zu machen,und schließen Sie sie bitte erst nach der Lektüre an Ihre anderen Audiogeräte an.Auf diese Weise können Sie Probleme bei der Installation und Inbetriebnahme ver-meiden.Im Verlauf dieser Anleitung stoßen Sie immer wieder auf Profi-Tipps,die Sie im Handumdrehen zu einem Experten für Eris machen und Ihnen dabei helfen,das Optimum aus Ihrer Anschaffung her-auszuholen.1.2ProduktregistrierungWir möchten unseren PreSonus-Kunden die bestmögliche Nutzererfahrung bieten.In unserem MyPreSonus-Portal haben registrierte Anwender Zugriff auf alle benötigten Ressourcen.In Ihrem MyPreSonus-Konto finden Sie alle Informationen zu Ihren registrierten Hard-und Software-Produkten sowie eine Bestellübersicht und können Kontakt mit unserem Support aufnehmen.öffnen Sie die Webseite und folgen Sie den Anweisungen auf dem Bildschirm.Alternativ können Sie sich unsere MyPreSonus-Appüber den Apple App Store oder Google Play her-unterladen.1.3LieferumfangFolgende Komponenten sind im Lieferumfang Ihrer Eris E5BT enthalten:(1Paar)PreSonus Eris E5BT Medien-und Referenzlautsprecher(1x aktiv,1x passiv)(1)1,5 m Kabel1x3,5 mm TRS-Klinke auf2x Cinch(1)1,5 m3,5 mm TRS-Stereo-Klinkenkabel(1)2 m Lautsprecherkabel ohne Stecker(1)Kurzanleitung(1)IEC-Netzkabel(8)Gummifüße2.Ihr Eris E5BT umfasst einen aktiven und einen passiven Lautsprecher.Die meisten Anschlüsse befin-den sich an der aktiven Box.Signal und Versorgungsspannung werden vom aktiven auf den passiven Lautsprecher gespeist.Der passive Monitor bietet lediglich die Klemmanschlüsse,an denen das Audio-signal und die Stromversorgung anliegen.2.1Rückseite2.2EingängeLine-Eingänge.Der aktive Lautsprecher bietet zwei Eingangspaare auf der Rückseite:je eine sym-metrische6,35 mm TRS-Klinkenbuchse für den linken/rechten Kanal sowie je eine unsymmetrische Cinch-Buchse für den linken/rechten Kanal.Diese Eingänge sind für den Anschluss von Audioquellen mit Line-Pegel ausgelegt und speisen das Signal auf die integrierten Endstufen der Monitore.Die unter-schiedlichen Anschlüsse sorgen für flexible Anschlussmöglichkeiten,sind jedoch nicht dazu gedacht, mehrere Quellen gleichzeitig an Ihre Lautsprecher anzuschließen.Auf der Vorderseite steht ein dritter Eingang als3,5 mm Stereo-Buchse zur Verfügung.Weitere Informationen finden Sie in Abschnitt 2.2.Profi-Tipp:Das Eingangssignal an den linken Eingängen(symmetrisch oder unsymmetrisch)wird andie Endstufe des aktiven Lautsprechers,das Eingangssignal an den rechten Eingängen an die End-stufe des passiven Lautsprechers ausgegeben.PreSonus empfiehlt,den aktiven Lautsprecher auf der linken Seite des Mischplatzes aufzustellen und den passiven auf der rechten Seite.Wenn Sie die Bedienelemente des Aktivmonitors lieber auf der rechten Seite haben möchten,vertauschen Sie ent-sprechend die Eingangsbelegung Ihrer Audioquelle,damit das korrekte Stereobild erhalten bleibt.2.3StromversorgungIEC Netzbuchse.Der Aktivlautsprecher bietet eine Buchse für ein herkömmliches IEC C7Netzkabel. Der Power-Schalter befindet sich auf der Vorderseite des Aktivlautsprechers.2.4Akustik-Tuning-FunktionenHigh.Verstärkt oder dämpft Frequenzen oberhalb von10 kHz um±6 dB.Profi-Tipp:Der High-Regler ist ein High-Shelf-EQ und dämpft oder verstärkt Frequenzen oberhalb von 10 kHz.Dieser EQ arbeitetähnlich wie der Höhenregler bei einer Stereoanlage oder einem Autoradio: Er hebt alle Frequenzenüber der vorgegebenen Einsatzfrequenz an oder senkt sie ab.Shelving-EQskönnen den Klangeindruck schnell und massiv verändern,da sie einen ganzen Frequenzbereich ver-stärken oder abschwächen.Low.Verstärkt oder dämpft die Frequenzen im Bereich um100 Hz um±6 dB.Profi-Tipp:Der Low-Regler ist ein Low-Shelf-EQ und dämpft oder verstärkt Frequenzen unterhalb von 100 Hz.Diese Funktion entspricht dem Tiefenregler einer Stereoanlage oder eines Autoradios:Er hebt alle Frequenzen unter der vorgegebenen Einsatzfrequenz an oder senkt sie ab.Shelving-EQs können den Klangeindruck schnell und massiv verändern,da sie einen ganzen Frequenzbereich verstärken oder abschwächen.2.5LautsprecheranschlüsseKlemmanschlüsse.Diese Anschlüsse dienen zur Stromversorgung und Signalübertragung auf den pas-siven Lautsprecher.Stellen Sie sicher,dass die positiven und negativen Anschlüsse Ihres aktiven Laut-sprechers jeweils mit den entsprechenden Anschlüssen am passiven Lautsprecher verbunden sind. (Verbinden Sie entsprechend die positiven und die negativen Anschlüsse miteinander.)Subwoofer Out Diese monophone6,35 mm TRS-Klinkenbuchse dient zum Anschluss eines Sub-woofers Ihrer Wahl.Wir empfehlen den Einsatz des Eris Sub8.2.6Bedienelemente am aktiven LautsprecherPower-Schalter.Hierbei handelt es sich um den Ein-/Ausschalter.Status-LED für Power/Bluetooth.Die LEDüber dem Lautstärkeregler zeigt den Ein-/Aus-Status an. Die Betriebszustände der Referenzmonitore werden wie folgt dargestellt:l Leuchtet blau.Der Eris Lautsprecher ist eingeschaltet.l Blinkt blau.Der Eris Lautsprecher befindet sich im Pairing-Modus.l Leuchtet weiß.Der Eris Lautsprecher ist mit einem Bluetooth-Gerät gekoppelt.Volume.Hier passen Sie den Pegel des Eingangssignals vor dem Verstärker an.Darüber hinaus steuert der Lautstärkeregler den Pegel des Kopfhörerverstärkers auf der Vorderseite.Aux In.Diese3,5 mm Klinkenbuchse ermöglicht den unkomplizierten Anschluss eines Media Players zu Vergleichszwecken.Profi-Tipp:Das Signal an diesem Eingang wird mit den Eingängen auf der Rückseite summiert.Kopfhörerausgang.Dieser Kopfhörerausgang wirdüber den Lautstärkeregler gesteuert.Beachten Sie,dass bei Anschluss eines Kopfhörers die Lautsprecher stummgeschaltet werden.3.3.1Grundlegende Einrichtung3.2AudioanschlüsseDie Power-/Bluetooth-LED und zeigtSobald Ihre Eris Lautsprecher gekoppelt sind,leuchtet die Power-/Bluetooth-LED weiß.Profi-Tipp:Um ein weiteres Gerät zu koppeln,wiederholen Sie diese Schritte.Ihre Eris Lautsprecher könnenzwei Bluetooth-Geräte speichern,allerdings kann jeweils nur das Audiosignal eines Gerätes wiedergegeben werden.Wenn Sie Ihre Eris Lautsprecher einschalten,wird automatisch die Verbindung zu Ihren gespeicherten Bluetooth-Geräten hergestellt,die sich in Reichweite befinden.4.2FehlerbehebungKein Strom.Stellen Sie zunächst sicher,dass Ihr Eris Aktivlautsprecher eingesteckt ist.Sofern Sie ihn an einem Spannungsstabilisator angeschlossen haben,stellen Sie sicher,dass dieser eingeschaltet ist und ordnungsgemäßfunktioniert.Keine Audiowiedergabe.Wenn Ihr Eris Lautsprecher offensichtlich eingeschaltet ist,jedoch kein Audio-signal wiedergegeben wird(das Licht ist an,aber es ist niemand zuhause),stellen Sie zuerst sicher, dass das Verbindungskabel zu Ihrer Audioquelle in Ordnung ist.Überprüfen Sie zudem,ob der Laut-stärkeregler eine ausreichende Verstärkung für das Audiosignal bietet.Sofern nur der passive Eris Laut-sprecher kein Audiosignal ausgibt,überprüfen Sie die Kabelverbindung und stellen Sie sicher,dass die abisolierten Enden der Lautsprecherkabel vollständig in den jeweiligen Klemmanschluss eingesteckt sind.Brummen.In der Regel entsteht Brummen durch Masseschleifen.Vergewissern Sie sich,dass alle Audiogeräte an derselben Stromquelle angeschlossen sind.Die Wiedergabe klingt dünn.Sofern die Lautsprecher dünn und schrill klingen,prüfen Sie den kor-rekten Anschluss Ihrer Lautsprecherkabel:Stellen Sie sicher,dass der positive(rote)und negative (schwarze)Anschluss Ihres aktiven Eris Lautsprechers jeweils mit dem entsprechenden Anschluss am passiven Eris Lautsprecher verbunden ist.5.Das streng geheime PreSonus-Rezept für…Hühner-und Andouille-GumboZutaten:l1Tasse Haushaltsmehll¾Tasse Pflanzenöll1große Zwiebel(gewürfelt)l1kleine Zwiebel(geviertelt)l6Selleriestangen(gewürfelt)l1große grüne Paprikaschote(gewürfelt)l3Knoblauchzehen(2kleingehackt,1ganze)l500g Andouille(Räucherwurst)l4Hühnerkeulenl4 l Wasserl4Lorbeerblätterl1TL Thymianl1TL…Old Bay“-Gewürzl1bis2Tassen tiefgefrorene Okra,in Scheibenl4EL frische gehackte Petersiliel6bis8Eier(optional)Zubereitung:l Geben Sie die Hühnerkeulen,das Wasser,die geviertelte Zwiebel,das…Old Bay“-Gewürz,die2 Lorbeerblätter und die ganze Knoblauchzehe in den Topf.Legen Sie den Deckel auf den Topf undbringen Sie das Ganze zum ssen Sie das Ganze dann so lange köcheln,bis sich das Hüh-nerfleisch von den Knochen löst.Lösen Sie das Fleisch von den Knochen und legen Sie es beiseite.Holen Sie die Zwiebel,den Lorbeer und den Knoblauch aus dem Sud.l Geben Sie1TLÖl in eine schwere Bratpfanne und bräunen Sie die Andouille-Räucherwurst darin, bis sie richtig durchgebraten ist.Legen Sie die Wurst beiseite.l Geben Sie das verbleibendeÖl in dieselbe Bratpfanne.Geben Sie das Mehl unter ständigem Rühren teelöffelweise in dasÖssen Sie die Mehlschwitze dunkelbraun werden(sie muss aussehen wiegeschmolzene schwarze Schokolade).DasÖl darf auf keinen Fall zu heißwerden,sonst brennt das Mehl an und Sie müssen noch einmal von vorn anfangen.l Wenn die Mehlschwitze dunkelbraun ist,geben Sie die gewürfelten Zwiebeln,den Sellerie,den Paprika und den fein gehackten Knoblauch ssen Sie diese Mischung so lange köcheln,bis das Gemüse gar ist.Legen Sie keinen Deckel auf den Topf/die Pfanne.l Geben Sie allmählich1 Liter Hühnerbrühe hinzu und lassen Sie die Mischung unter ständigem Rüh-ren aufkochen.l Geben Sie die Mehlschwitze-Mischung in einen Suppentopf und bringen Sie sie zum ssen Sie den Deckel weg,weil sich die Mehlschwitze sonst auf dem Boden des Topfes ablagert und anbrennt.l Geben Sie die verbleibende Hühnerbrühe,den Lorbeer und den Thymian ssen Sie das Ganze30Minuten köcheln.l Schneiden Sie das Hühnerfleisch und die Andouille-Wurst in kleine Stücke.l Geben Sie das Hühnerfleisch und die Andouille-Wurst in den…Gumbo“.Lassen Sie das Ganze30–45Minuten köcheln.l Rühren Sie die tiefgekühlte Okra und Petersilie unter und lassen Sie den Gumbo kurz aufkochen.l Optional:Geben Sie ein Ei in eine Teetasse und rühren Sie es zügig unter den siedenden Gumbo.Wiederholen Sie das mit denübrigen Eiern.Achten Sie jedoch darauf,dass sich keine Klumpen bil-den.Wenn die Eier wieder an der Oberfläche schwimmen,müssen Sie die Hitze reduzieren und den Gumbo köcheln lassen.l Schmecken Sie ihn mit Salz und Pfeffer(rot,weißund/oder schwarz)ab.l An Reis und Kartoffelsalat servieren.Ergibt12Portionen6.Kein Teil dieses Dokuments darf in irgendeiner Form oder auf irgendeine Weise reproduziert oderüber-tragen werden und ist durch US-amerikanische und internationale Urheberrechtsgesetze geschützt.Die Vervielfältigung und Verbreitung dieses Dokuments ohne schriftliche Genehmigung von PreSonus ist untersagt.Sofern nachstehend nicht anders angegeben,sind die hierin erwähnten Marken,Dienstleistungsmarken und Logos(die…Marken“)Eigentum von PreSonus,werden von PreSonus kontrolliert oder wurden von PreSonus lizensiert.©2021-2022PreSonus Audio Electronics,Inc.Alle Rechte vorbehalten.AudioBox USB,Capture,CoAc-tual,EarMix,Eris,FaderPort,FireStudio,MixVerb,Notion,PreSonus,PreSonus AudioBox,QMix, RedLightDist,SampleOne,Sceptre,StudioLive,Temblor,Tricomp,WorxAudio sowie das Wave-Logo sind eingetragene Warenzeichen von PreSonus Audio Electronics,Inc.Revelator ist ein Warenzeichen von PreSonus Audio Electronics.Studio One ist ein eingetragenes Warenzeichen von PreSonus Soft-ware,Ltd.Bluetooth ist ein eingetragenes Warenzeichen von Bluetooth SIG.Alle weiteren Produktnamen in dieser Anleitung sind Warenzeichen ihrer jeweiligen Hersteller.Änderungen der technischen Daten ohne vorherige Ankündigung vorbehalten.Nur am Rezept möchten wir rein gar nichtsändern.Eris E5BTHochauflösender Medien-und Refe-renzlautsprecher BedienungsanleitungArtikelnummer:70-52000180-A。
侏罗纪植物种类

侏罗纪时期的植物01桫椤2桫椤是白垩世纪时期遗留下来的珍贵树种,被誉为“蕨类植物之王”,是国宝一级保护濒危植物。
它是蕨类植物中最早出现的,比恐龙还早1.5亿年。
02铁树铁树的叶子呈羽毛状,在底部呈线状或片状排列,上面呈尖状,非常锐利。
叶子上的裂片从前端开始呈弧形排列,形成了一种有规则的排列方式。
03种子蕨1种子蕨在晚泥盆世出现,在白垩纪灭绝,是一种原始的种子植物。
04松柏目在侏罗纪时期,地球的陆地表面主要由裸子植物和蕨类植物覆盖。
然而,在那个时代,松柏目以及其他裸子植物已经灭绝,仅存有少数种类。
05裸子植物侏罗纪时期的植物种类非常丰富多样,其中大部分是裸子植物。
裸子植物是指种子没有完全成熟,没有果实的植物。
06百岁兰百岁兰是侏罗纪时期的一组植物,包括1种和1亚种。
它们起源于早白垩纪,至今仍存在。
百岁兰属是地球上现存的最古老的被子植物之一。
07苏铁苏铁是一种裸子植物,具有雌雄异株的特性。
它是由孢子萌发形成的,通过无性生殖方式独立生长。
苏铁的花粉受精后,经过一定的发育过程,最终形成种子。
08舌羊齿舌羊齿是侏罗纪时期的植物之一,属于晚古生代到中生代的早期植物。
它是一种乔木状的落叶植物,叶子呈羊舌状。
舌羊齿的叶子比较细长,上面有明显的中叶脉,叶子呈披针或倒披针形。
09北美红杉北美红杉是侏罗纪时期的植物之一,它是一种具有红色叶子和美丽树干的植物。
在侏罗纪时期,地球气候温暖湿润,植被茂盛,这使得北美红杉得以繁衍生息。
10金毛狗蕨金毛狗蕨是侏罗纪时期的一株活化石,属于国家二级重点保护野生植物。
它起源于原始森林,是大型树状蚌壳蕨科金毛狗属的陆生蕨。
11CaytoniaceaCaytoniacea是群灌木至小型数木大小的植物,是这个时期的另一群重要植物。
12银杏侏罗纪时期的地球已经诞生了2.5亿年的历史,这使得银杏这种古老的植物得以诞生。
13禾本科植物禾本科植物在侏罗纪时期盛行,这是因为侏罗纪时期的植物繁盛,尤其是禾本科植物的叶片坚硬,适合作为高冠齿和偶蹄目的反刍工具,而其他草本植物可能无法满足这些需求。
世纪跳跃器操作指南说明书

JUMP STARTERʼS MANUALIM10139September, 2013Safety Depends on YouCentury charging and jump start-ing equipment is designed and built with safety in mind.However, your overall safety can be increased by proper installa-tion ... and thoughtful operation on your part.DO NOT INSTALL,OPERATE OR REPAIR THIS EQUIPMEN T WITHOUT READ-IN G THIS MAN UAL AN D THE SAFETY PRECAUTION S CON -TAIN ED THROUGHOUT.And,most importantly, think beforeyou act and be careful.For use with machines having Code Numbers:11912TECHNICAL SPECIFICATIONS - Jump Starter / Portable Power Station Manual forK3236-1, (Code 11912)DESCRIPTIONThis unit has a sealed lead acid battery and should bekept fully charged at all times for maximum batterylife. Recharge when first received, immediately aftereach use, and every three months if not used. Failureto do this may cause the battery life to be greatly reduced.CONTROLS AND INDICATORS(See Figure B.1)FIGURE B.1 Storage Holsters forneat clamp storageRed charging andgreen charged LEDsto monitor the charging process 250 cranking amps help startStorage Holstersneat clamp storagecameras and tabletsOn-Off switch with red (reverse)and green (correct) hook-up LEDsfor safe hook-up to battery / chassisOPERATING INSTRUCTIONS:USING AS A JUMP STARTERA. Shield eyes and turn the vehicleʼs key to the OFFposition.B. Make sure the ON/OFF switch of your JumpStarter is in the OFF (counter-clockwise) position.C. Connect the RED clamp to the positive (+) post ofthe vehicleʼs battery.D. Connect the BLACK clamp to a non moving metal(chassis) part of the engine far away from the bat-tery. Do not connect to carburetor or fuel lines.Make sure the unit and cables are not in the path of moving belts or fans. (NEV ER connect to the negative (-) post of the battery on a negative ground vehicle).E. If the red REV ERSE light comes on and the unitbeeps, verify that the connections are correct. If they are not, disconnect both clamps and recon-nect starting at step C. If the green OK light comes on, proceed to step F. If the connections are correct and either the red REV ERSE light comes on, or the green OK light does not come on, the vehicleʼs battery could be bad, DO NOT proceed to step F, test and/or replace the battery.F. If the green (OK) light is on turn the ON/OFFswitch of your Jump Starter to the ON (clockwise) position.G. Stay away from the batteries while starting theengine. Turn the vehicleʼs key to the START posi-tion for a maximum of 3 seconds.H. If the vehicle does not start, wait at least 3 minutesbefore trying again.J. Once the vehicle has started, ALWAYS turn the ON/OFF switch of your Jump Starter to the OFF (counter-clockwise) position.K. ALWAYS disconnect the clamp connected to a non moving metal engine part (chassis) first (BLACK on a negative ground vehicle), then dis-connect the clamp hooked to the battery terminal (RED on a negative ground vehicle) and put them in their storage holsters securely.L. Be sure to recharge the Jump Starter after every ing as a Battery ChargerIf a vehicleʼs battery is discharged, you may plug one end of the 12V charging cord into the 12V socket on the front of the Jump Starter, then plug the other end into the vehicleʼs auxiliary power port plug. (note that some vehicles require that the key be turned to the accessory position for the auxiliary port to be activat-ed).Using as a Power Supply• Power a 12 V dc device using the cigarette style receptacle on the front of the unit.• Charge or power 5Vdc devices using the USB port such as cell phones, cameras and tablets.Note:Press the red BATTERY LEVEL/USB button and the yellow or green light should come onto power the USB port. If the green light doesnot come on, you should charge the JumpStarterʼs internal battery as soon as possibleto maximize battery life.• Be sure to recharge the Jump Starter after every use.Battery Level LightsTo check the battery charge level when not charging, push the red BATTERY LEVEL/USB button to the left of the BATTERY LEVEL lights. If the green light comes on, the unit is fully charged. If the green light does not come on, you should begin charging as soon as possible or the battery life may be reduced. Note: Be sure to press the red BATTERY LEVEL/USB button again (the lights should gooff) or the battery will slowly discharge.CHARGING THE POWER SUPPLY1. Using a 120V AC Wall Outlet (preferred method)Plug the female end of the cord onto the male plug on the front of the power supply, then plug the male end into the AC wall power (if you do not have the cord that came with this unit, a standard extension cord will work).The red CHARGING light will come on indicating the unit is being charged. When the green CHARGED light comes on, the battery is charged.This can take a day or longer depending on the battery ʼs state of charge.2. Using the 12V Dc Charging Cord (alternate method)You can charge the Jump Starter using the 12V dc charging cord. Plug one end of the cord into the 12V socket on the front of the Jump Starter, then plug the other end into the vehicle ʼs auxiliary power port while the vehicle is running. Note that you do not want to charge for more than 15 minutes as the current avail-able from a vehicle can damage the Jump Starter ʼs battery if left in for more than 15 minutesThis unit contains a sealed lead acid battery. It must be disposed of properly as dictated by Law. When the unit / battery is in need of replacement or disposal, remove it according to the instructions below and take it to your local recycling center. Federal, state or local gov-ernments may have additional regu-To remove the battery, lay the unit on it ʼs front and remove the screws holding the case together, lift the back panel out of the way and remove the bolts con-necting the cables to the battery. Be careful not to S29558-2AC Extension CordS29558-1Charging Cord2345 Murphy Blvd. Gainesville, GA 30504。
大班体育活动穿越侏罗纪教案反思

大班体育活动穿越侏罗纪教案反思一、教学内容本节课选自《幼儿园大班体育活动教材》第四章“穿越侏罗纪”,详细内容包括:了解侏罗纪时代的特点,学习恐龙的基本知识,通过穿越侏罗纪的情景模拟,锻炼幼儿的团队协作能力和应变能力。
二、教学目标1. 让幼儿了解侏罗纪时代的基本特点,掌握恐龙的简单知识。
2. 培养幼儿在团队活动中相互协作、共同完成任务的能力。
3. 提高幼儿在面对陌生环境时的应变能力和自我保护意识。
三、教学难点与重点难点:恐龙知识的掌握,团队协作能力的培养。
重点:侏罗纪时代的认识,穿越侏罗纪的情景模拟。
四、教具与学具准备教具:恐龙模型、恐龙图片、PPT、音响设备。
学具:小队旗、探险工具(如指南针、地图等)。
五、教学过程1. 导入:讲述一个关于侏罗纪探险的故事,引发幼儿的兴趣。
2. 知识讲解:通过PPT展示侏罗纪时代的恐龙和特点,引导幼儿认识恐龙。
3. 实践情景引入:将幼儿分成若干小队,发放小队旗和探险工具,进行穿越侏罗纪的情景模拟。
4. 例题讲解:讲解如何通过团队协作,完成侏罗纪探险任务。
5. 随堂练习:幼儿分组进行穿越侏罗纪的实践操作,教师巡回指导。
六、板书设计1. 《穿越侏罗纪》2. 内容:(1)侏罗纪时代的特点(2)恐龙的基本知识(3)团队协作的重要性七、作业设计1. 作业题目:请小朋友们回家后,与家长一起制作一个关于侏罗纪时代的恐龙手工作品。
2. 答案:根据课堂所学,制作出恐龙手工作品。
八、课后反思及拓展延伸1. 反思:本节课通过情景模拟,培养了幼儿的团队协作能力,但在知识讲解环节,部分幼儿对恐龙知识的掌握不够扎实,需要在今后的教学中加强巩固。
2. 拓展延伸:组织幼儿参观博物馆的恐龙化石展,加深对恐龙知识的了解。
同时,开展家庭作业,让幼儿与家长共同完成恐龙手工作品,提高亲子互动。
重点和难点解析:1. 教学难点与重点的确定2. 教具与学具的准备3. 教学过程中的实践情景引入和例题讲解4. 作业设计5. 课后反思及拓展延伸详细补充和说明:一、教学难点与重点的确定在教学难点与重点的确定上,应关注幼儿的认知发展水平和兴趣点。
Prime Time Avenger RV 用户手册说明书
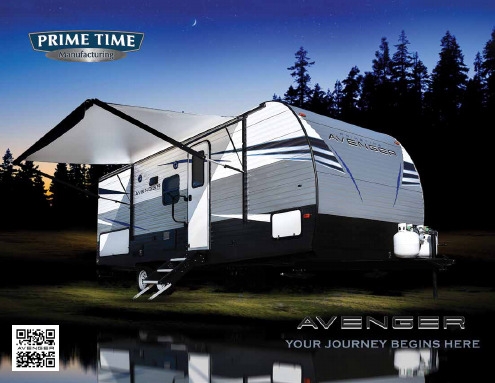
For both the first-time buyer and seasoned camping veteran, the economical Avenger often represents a customer’s first experience with a recreational vehicle from Prime Time Manufacturing.Since first impressions are critical—and last a lifetime—we’ve insisted that Avenger combine comfort, convenience, and style with the industry’s highest standard of quality and construction. By providing a GREAT ownership experience, Avenger is Prime Time’s way of welcoming you to our family. We hope that your future journeys will always include a Prime Time RV.To guarantee that Avengerprovides true customersatisfaction, our engineerscarefully examine everycomponent, every small detail,and every process in theAvenger’s creation.It is important to offerindustry-leading beauty.Shaker-style cabinet doors arepaired with premium fabrics,flooring, and countertops for aluxurious appearance.“Best In Class” features anddesign elements are utilizedto fully maximize customerenjoyment. Industry-leadingconstruction and demandingstandards for testing weredeveloped to ensure long-termquality and durability.If “Your Journey Begins Here,”Avenger is sure to please.32BHS29QBS32BHS29QBS29QBS 31RKD*32DEN32QBIUVW (Unloaded Vehicle Weight) i s the typical weight of the unit as manufactured at the factory. It includes all weight at the unit’s axle(s) and tongue or pin and LP Gas. The UVW does not include cargo, fresh potable water, additional optional equipment or dealer installed accessories.Estimated Average based on standard build optional equipment.CCC (Cargo Carrying Capacity) is the amount of weight available for fresh potable water, cargo, additional optional equipment and accessories. CCC is equal to GVWR minus UVW. Available CCC should accommodate fresh potable water (8.3 lbs per gallon). Before filling the fresh water tank, emptythe black and gray tanks to provide for more cargo capacity. Estimated average based on standard build optional equipment. See back page for additional specification definitions.SPECIFICATIONS20RD21RB21RBS24BHS24RLS26BBS26BK26RDS27DBS27RBS27RKS28REI29QBS29RBS29RSL31RKD32BHS32DEN32QBILENGTH24’ 11”26’ 9”27’ 7”28’ 2”29’ 4”30’ 5”28’ 11”31’ 8”33’ 6”33’ 6”33’33’ 9”36’ 11”33’ 5”34’2”36’ 6”37’ 6”37’ 11”38’HEIGHT10’ 3”10’ 3”10’ 8”10’ 8”10’ 8”10’ 8”10’ 3”10’ 8”10’ 8”10’ 8”10’ 8”10’ 8”11’ 2”10’ 8”10’ 8”11’ 4”11’ 4”11’ 4”11’ 4”HITCH WEIGHT620 lb.587 lb.773 lb.660 lb.581 lb.651 lb.474 lb.700 lb.721 lb.765 lb.681 lb.764 lb.982 lb.770 lb.880 lb.962 lb.845 lb.858 lb.1,000 lb.UNLOADED VEHICLEWEIGHT (UVW)4,294 lb.4,537 lb.5,209 lb.5,481 lb.5,373 lb.5,518 lb.4,763 lb.6,363 lb.6,652 lb.6,663 lb.6,586 lb.7,098 lb.7,030 lb.6,991 lb.6,648 lb.8,226 lb.8,403 lb.7,989 lb.9,029 lb.CARGO CARRYINGCAPACITY (CCC)3,326 lb.3,050 lb.2,564 lb.2,179 lb.2,208 lb.2,133 lb.2,711 lb.1,337 lb.2,869 lb.2,902 lb.2,895 lb.2,428 lb.2,752 lb.3,041 lb.3,032 lb.2,936 lb.2,642 lb.3,069 lb.2,371 lb.AWNING13’13’15’13’16’16’13’19’16’16’16’10’ & 11’19’16’19’9’ & 13’19’16’9’ & 13’20RD21RB21RBS26BBS26BK27DBS*27RBS*27RKS*24BHS24RLS28REI*26RDS29QBS*29RBS*29RSL*26DBS LE28QBS LEFLOORPLANS & SPECIFICATIONSSPECIFICATIONS26DBSLE28DBSLELENGTH30’ 11”34’ 6”HEIGHT10’ 8”10’ 8”HITCH WEIGHT667 lb.785 lb.UNLOADED VEHICLE WEIGHT (UVW)5209 lb.6197 lb.CARGO CARRYING CAPACITY (CCC)2458 lb.1588 lb.AWNING16’19’32BHS** LED TV includedLE16BH16FQ17FQS22BH*16RD17BHSLT SINGLE AXLE TRAILER LINESPECIFICATIONS16BH16FQ16RD17BHS17FQS22BHLENGTH20’ 21’ 1”20’ 11”21’ 8”21’ 7”26’ 2”HEIGHT9’ 11”9’ 11”9’ 11”9’ 11”9‘ 11”10’ 2”HITCH WEIGHT343 lb.386 lb.390 lb.332 lb.355 lb.420 lb.UNLOADED VEHICLEWEIGHT (UVW)2,970 lb.2,880 lb.2,939 lb.3,197 lb.3,014 lb.3,914 lb.CARGO CARRYINGCAPACITY (CCC)810 lb.1,006 lb.951 lb.635 lb.841 lb.3,506 lb.AWNING10’10’10’10’10’10’*NOTE — The 22BH is a tandem axle model. UNDERMOUNT STAINLESS STEEL SINK W/DRYING RACK 6 GALLON GAS/ELECTRICDSI WATER HEATER DELUXE GRAPHICSPACKAGE SHOWER SURROUNDBARN DOOR(SELECT FLOORPLANS)THERMOFOILCOUNTERTOPSDESIGNER WINDOW TREATMENTSWITH LAMBREQUINS 10TH ANNIVERSARY PACKAGEOversized Holding Tanks: Fresh: 38 Gal / Gray: 30 Gal / Black: 30 Gal.Digital TV Antenna12V Electrical System with 40 AMP ConverterSafety Glass Windows Bottle Opener26” Fiberglass Entry Door with Window INTERIOR FEATURESTwo Large Galley Drawers in Kitchen Extended Ball Bearing Drawer Guides Two Burner Cooktop Microwave Range Hood16K BTU Furnace 78” Interior Height LED Interior LightsSeamless Carefree Congoleum Flooring Overhead Storage Above Dinette SkylightOversized Cabinet Above Bed (Most Models)Pleated Night Shades Throughout OPTIONS MVSA QAIAVENGER ADVANTAGE PACKAGE (MANDATORY)2” Wall Construction on 16” Centers Cross- Banded ConstructionDynaspan 5/8” Seamless Floor Decking up to 24’ with 25 Year Warranty 5” LVL Headers Above Slideouts Dexter EZ Lube Axles Radial TiresExterior Hot/Cold Shower Blue LED Outside Speakers LED Lit Power Awning Solar PrepBack Up Camera Prep“Solid Stance” Fold Down Steps LED Interior Lighting Large 17” OvenHigh Rise Kitchen Faucet Kitchen BacksplashFully Enclosed Underbelly (2) 20# LP tanks10TH ANNIVERSARY PACKAGE (MANDATORY)Sliding Barn Door (Select Floor Plans)Thermofoil Seamless Kitchen Countertops Under-mount Stainless Steel Kitchen Sink Stainless Steel Rolling Drying Rack Shower SurroundFolding Grab Handle at Main Entry 10.7 CU. FT. 12V Refrigerator Pleated Black Out Night Shades Gas/Electric DSI Water Heater Designer Window Treatments Deluxe Graphics PackageCONSTRUCTIONPowder Coated I-Beam Frame Full Length Outriggers on Frame 8’ Exterior WidthAluminum Exterior Skin R-7 Insulation Throughout2”x3” Floor Joists on 16” Centers Walk-On Roof with 3/8” Decking One Piece TPO Roof Membrane PEX Plumbing System • Removable Cotter Pins for Easy Tank Access• Fresh Water Tank Direct Valve Overflow • Fully Insulated and Enclosed Underbelly with Radiant Heat • Convenience Panels for Underbelly AccessEXTREME WEATHER PACKAGE • Cross Band Construction • Hurricane Strapped Base• Premium Gutter Rail Above all Slides • Full Framed with Covered Hinge Baggage Doors• Triple Seal Slide SystemGlass Neo-Angle Shower (Select Models)12V Power Vent FanMedicine Cabinet with MirrorAPPLIANCES AND EQUIPMENT Large LED TV (27DBS and Above)*Cable TV Hook-Up with RG6 CoaxDigital TV Antenna with Signal Booster Exterior TV Coax Connection Bluetooth Entertainment System 13,500 BTU Air Conditioner Large 17” Oven3-Burner Range with High Output Front BurnerFlush Mount Glass Range Top Cover Low Profile Range Hood with Light and Exhaust FanLarge Everchill 12V RefrigeratorGas/Electric 6 Gallon DSI Water Heater with Quick Recovery Water Heater BypassAuto Ignition Furnace with Wall Thermostat25K or 30K BTU Furnace (depending on model)In-Floor Ducted Heat Systems Monitor Panel 110V GFCI Protected12V High Capacity Water Pump 12V Electrical System with 55 amp Power Converter 30 amp Power50 amp power with Wire/Brace for 2nd A/C (Mandatory on 28REI, 29QBS, 29RBS, 29RSL, 31RKD, 32BHS, 32DEN and 32QBI)Fireplace (28REI, 29QBS, 29RSL, and 31RKD)SAFETY EQUIPMENT CO Detector LP DetectorFire Extinguisher Smoke AlarmLeak-Guard Assurance Process OPTIONS15K btu Air ConditionerFree Standing Dinette w/4 Chairs (Mandatory 31RKD, Available MAX Slide Models)50 Amp Service with Wire/Frame for 2nd A/C (Mandatory 29RBS, 32BHS, 32DEN, 32QBI)Fireplace, 50 Amp Service with Wire/ Frame for 2nd A/C (Mandatory 28REI, 29QBS, 29RSL, 31RKD)Gas/Electric 6 Cubic Foot Refrigerator QAI Canadian Compliance***Some models vary.**Limited availability based on batch runs.See website for additional details.EXTERIOR FEATURESAerodynamic Radius Front Profile LED Lit Power Awning“Solid Stance” Fold Down Steps (2) 20# LP Bottles 4 Stabilizer JacksDiamond Plate Front Rock Guard Radius Entry Doors with Windows Folding Grab Handle at Main Entry Bottle Opener at Main Entry Solar PrepBack Up Camera Prep Extended Drip Spouts Spare TireOutdoor Kitchen (Select Models)Radial TiresHot/Cold ShowerBlue LED Outside Speakers Black Frame Radius WindowsDOT Approved Safety Glass Windows Fully Vented Windows Throughout Doggy D-Ring City Water FillGravity Fresh tank FillINTERIOR FEATURESOversized MAX Slide (Where Available)Massive 87” U-Shaped Dinette in MAX SlidesLarge Fully Vented Windows Throughout Pleated Black Out Night Shades in Living Room and Dining AreaDesigner Window Treatments Predrilled and Screwed CabinetryResidential Extended Ball Bearing Drawer GuidesLED Interior LightingJacknife Sofa w/LED Cup Holders and USB Charging Ports (Select Models)USB Ports at BunksSeamless Carefree Congoleum Flooring BEDROOMQuilted Residential Bedspread TV Cable Connection Dual Shirt ClosetsExtra Large Enclosed Overhead Cabinet Above BedMassive Under-Bed Storage Bedside USB PortBedside 110V Power OutletsKITCHENUndermount Stainless Steel Deep Basin SinkStainless Steel Rolling Drying Rack High Rise FaucetKitchen Tile BacksplashThermofoil Seamless Countertop Pot & Pan DrawerBATHROOMShower Pans in All Models Shower SurroundShower Curtains with Curved TrackSTANDARDS & OPTIONSPRO PACKAGE 6 CU. FT. Refer 13,500 BTU A/C Kitchen SkylightLED Lit Power AwningSolar Prep and Back-Up Camera Prep Exterior ShowerResidential Sound Bar LED Lit Outside Speakers Doggy D-RingCONSTRUCTIONR-7 Insulation Throughout Powder Coated Frame Dexter E-Z Lube Axles One-Piece TPO Roof2” Wall Construction on 16” Centers EXTERIOR FEATURES Two Rear Stabilizer Jacks Front Diamond Plate Radial TiresSingle #20 LP TankAerodynamic Front Profile Extended Drip Spouts E-Z Open Entry StepOversized Pass-Thru Storage Cable/Satellite Prep6 Gallon DSI Gas Water HeaterLTSTANDARDS & OPTIONSBLACKOUT SHADESLARGE EXTERIOR GRAB HANDLE12V REFRIGERATOR LESTANDARDS & OPTIONSStandards and Options will vary from standard Avenger Travel Trailers.。
- 1、下载文档前请自行甄别文档内容的完整性,平台不提供额外的编辑、内容补充、找答案等附加服务。
- 2、"仅部分预览"的文档,不可在线预览部分如存在完整性等问题,可反馈申请退款(可完整预览的文档不适用该条件!)。
- 3、如文档侵犯您的权益,请联系客服反馈,我们会尽快为您处理(人工客服工作时间:9:00-18:30)。
1、 游戏玩法新颖,刺激,极富休闲娱乐性。 2、 外型设计美观大方,图案鲜艳、细腻,制作精良,材料质量
可靠,安全耐用,是顾客理想的选择; 3、 采用大规模集成化电路,内置程式,工作性能稳定、可靠; 4、 游戏程式及营收比率细腻可调。
2
目录
1、机器规格及技术参数·····································3 2、随机配件清单···········································3 3、安放、固定及搬移方法···································4 4、电源接线方法···········································6 5、游戏玩法说明···········································7 6、控制信号说明···········································7 7、射球机构调节··········································8 8、使用及维护需知·········································9 9、主要元件说明··········································10 10、故障现象与对策表······································14 11、I/O 表················································15
使用说明书 侏罗纪时代
警告 在使用及安裝本产品之前,请务必熟读本说明书。
1
一、公司简介
前言
公司位于中国游戏游艺产业基地、是一家专业从事游艺机、游戏 机设计、研发、生产、销售为一体的公司。公司主要生产嘉年华彩票 机、模拟机、票机、中小型机械类、儿童淘气宝类、摇摆机等游乐 设施,公司每年都自主研发多款新颖产品!
2 随机配件清单
为了你正71常0 的使用本机器, 请你在打开包装1箱94后0 , 仔细检查以下物品是否 齐备:
序号 名称
参数
数量
图
1
电源
10A/250V 1.8m
1
2
保险丝
6.3 A/250V Φ5-20MM
1
备注 220V
3 使用说明书
中文
1
1
4
钥匙
1
5
小球
80
注意:以上参数如有更改,恕不另行通知。
为了让您充份、合理、安全地使用本机器,请您仔细阅读本说明 书,愿它能给您很好的指引,祝您迈向成功之路。
二、产品简介:
“侏罗纪时代”是我公司新开发的一款嘉年华运动彩票机,主题 是模拟侏罗纪时代的画面,让小朋友可以了解侏罗纪时代的恐龙,采 用机械式射球方式(不卡球、采用专用球),适合各个年龄层的玩家 游玩,是专为大众娱乐而设计的一种室内游艺机,而且该机造型新颖、 美观、灯光效果绚丽多彩,操作简便、安全可靠,相信它将是游乐场 玩家的游戏宠儿,是大中型游乐场必不可少的游艺机
清空设置:
10
1、 清空币数:清空机台余币 2、 清空票数:清空机台余票 3、 出错清理:射球异常时,当问题解决后,把出错提示清
空
7.射球机构调节:
②
⑤ ③
①
④
松
紧
①塑胶轮。 ②电机。 ③螺帽。 ④螺母。 ⑤射球力度调节器。
11
注:如果射球无力度或偏移时,可调节图中的(⑤)来调节力度。首 先松开螺帽(③),再调节螺母(④)。向“松”的方向可调节射球力 度减小,反之力度增大。当因塑胶轮磨损而造成射球无力时就要调节 此机构了。如塑胶轮完全磨损后就要更换塑胶轮了。
操作区
3-3.机器不要在以下地方使用:
● 靠近危险物品的地方; ● 光滑或不平稳的地面; ● 湿度较高的环境; ● 在震动严重的地方; ● 在多灰尘的环境。
警告
3-4.固定机器方法
本机必须安放在平坦的地面上。调节脚轮调节座(如图)使机台 平稳。
5
3-5.搬运方法 当要远距离搬运时,装箱和捆绑固定时,机台表面要求包一层软垫,
溢出的液体会导致电器短路损坏器件, 同时高空落物会伤害人 体和破坏机器。 5).在机器排风气口处不要放置物品。
排风气口被挡住时会导致机器内部温度升高, 影响游戏的正常进 行, 甚至损坏器件。 6).不能随意对机器进行修理。 这样可能会引起短路或操作失控等故障。
机器不要在以下地方使用: (1)、会使机器产生凝水或湿度大的冷凝地方。
票机“重设'按钮
图
检测感 应器
1
图2
图3
图4
图5
注意:以上信息只供参考,以实际机台为准
15
16
10.故障及对策表
序号 1 2
3 4 5
7
故障现象 投不进币
不出票
可能故障原因
故障对策
投币器未调整好。
调整投币器。
彩票机无输入 12V 电压。
检查电源盒输出电压与线路。
彩票机驱动信号或消票信号线松 检查驱动消票信号的电压变化与线路。
3
1、机台规格及技术参数
1. 工作电压: AC 220V±10% 50zH AC110v±10% 60HZ 2. 消耗功率: MIN:110W MAX:260W; 3. 外形尺寸: 1900x1050x2000(mm) 4. 重 量: 约 180KG 5. 环境条件:(室内)温度: -10℃∽+40℃ 湿度:≤90%;大气压:86Pa ∽106Pa; 注:以上技术参数如有调进恕不另行通知。
调整射球力度调节器。 调节 12V 电源电压使其达到 12V。 检查 12V 电源与其线路。 更换送球电机。 先关掉电源,再把送球轴手动反转,退出球 后,把破球取出即可。 调高音量。 连接好线路。 更换喇叭。 更换主机板。
机器无动作
无电源输入到机器。 电源开关未打开。 电源保险丝烧坏。 电源盒无电压输出。 主机板无供电电压。 主机板坏。
4
门
币箱 机台放 100 个
3、3、安安放放、、固固定定、、搬搬移移及及维维修修 3-1、安放: A、安放场地:
警告
● 此机台适合在室内使用,在户外使用会影响机台性能,并会缩短机台的使用寿命。
3-2.安放范围尺寸: 机台应按以下尺寸摆放,这样才有足够的空间让机台运行,并确保
顾客安全。
人行区
人行区
人行区
●要使用正确的电压和保险丝(参考技术参数)。 5.5游.游戏戏玩玩法法說說明明
(1)玩前先投币。 (2)投币后,按下开始按钮。
7
(3)进入游戏选关,开始游戏。 (4)在规定的时间内打满能量可以选择下一关,打得越多得票越 高。
6、后台设置说明
投币计数 出票计数
声音 控制
票机修复
上
下 后台设置
1、按下“后台设置”,进入设置主界面
4.电源接线方法
6
电源插座
电源线盒
电源插头
电源线
电源插头
注意
● 电源线不能被重物压住,这样会损坏电线容易导致短路,严重者可能导致火 灾。
●当从插座拔出电源线时, 不能抓住电线拔出。
应抓住插头拔出,
●不能直接用湿手拔出插头。
●不能用力拉伸、扭曲电源线, 不能把电源线外露靠近高温物体。 ● 电源线不能容易被人踢到或接触到。
8.使用及维护须知
为了保证安全使用本产品, 在使用本产品前先阅读以下条文, 以下条文对使用用户、设备主管人员、维修人员皆适合。 仔细阅读 这些条文后按指示设置好本产品,并在有需要适合翻阅本条文。 1).对机台进行维护及修理时必须关断电源。
为了避免电路短路, 有关人员在接触机台内部器件前先关断电源, 如果此操作需要电源接通, 需符合操作说明书的要求。 2).当替换器件时确定选用合适的配件。 使用不正确的配件可能会导致电器短路、损坏主板和主机。 3).不要随意拆缷、组装、改动设备。 这样可能会导致电器短路,机械故障等, 严重者可能导致火灾。 4).不要在机器上面放置装有水的花瓶、杯子、容器等, 也不要在机 器上面放置化学品和重物。
避免刮花。
注意
● 在搬动前必须先关掉电源,并拔掉电源线。 ● 在搬移时如果出现脚轮不能转动,请更换脚轮。 ● 随意的人为移动、翻转、运输等会损坏设备,破坏机械性能等。 ● 确认在移动、翻转、运输等过程中要符合厂家要求。
搬运时小心,不要 压破、碰壁、刮花。
3-6.维修方法 打开后门或前门可以对机台内部正行维修。
12
(2)、在靠近高温物体方。 (3)、靠近危险物品的地方。 (4)、在光滑或不稳定的地方。 (5)、在靠近易产生火花的设备附近。 (6)、在震动严重的地方。 (7)、在多灰尘的环境。
9.、机機台台主主要要元元件件图图
9-1
(1)、锁:X919,可打开后门。 (2)、后门:打开此门可维修电气和机构。 (3)、电源插座:可连接电源。 (4)、排气口:用于机器内部高温散热。 (5)、电源接线盒。 ①.本机器使用交流电“220V±5% 60Hz。
打开供电开关与插好电源线插头。 打开电源开关。 排除电路短路与更换上新保险丝。 更换电源盒。 连接通主机电源连线。 更换主机板。
17
8
2、按上下鍵关卡设置选项说明,按“后台设置 ”进入关卡设置
关卡能量设置:设置过关所需要打败的小怪个数 关卡时间设置:设置关卡的游戏时间 3、其它设置项说明:
9
币率设置:设置每局游戏所需币数(设置为 0,则为免费模 式) 票率设置:设置每张彩票所需的分数(设置为 0,则不出票 模式) 射球模式设置:自动(游戏过程无需手动发射)、手动(游 戏过程需手动按键发射) 语言设置:中文、英文
e. 接线说明:
