康福登convotherm烤箱
【最新】电烤箱说明书

型
号
KX1701
1030080002
额定电压
220V
650W
额定频率
50Hz
12.0L
GB4706.1-2005,GB4706.14-2008
01 简体 中文
电气原理图
指示灯
电阻
上发热管
下发热管 温控器
定时器
部件名称
石英管 烤盘
储屑盘
门拉手
玻璃视窗 加热方式选择开关 电源插头 计时器 烤架
烘烤指南
2. 明火烧烤的缺点? 答:明火烧烤的缺点是:食物直接接触明火,不利于健康,食物长时间暴露在空气 中,不卫生,烧烤过程产生大量油烟。
3. 使用烤箱麻烦吗? 答:一点都不麻烦,人人都能轻松操作(当然也要事先阅读好本说明书),让你轻松 成为烧烤美食家率
额定容量
执行标准
11816
烤箱小贴士 1. 鸡翅是否入味,需要时间,最好24小时以上。 2. 如果想吃其他口味,比如蒜香的,就在腌制的时候放入蒜计、姜味。就放姜汁或姜粉。 3. 烤的时候,注意翻动,使上下颜色均匀。同时多刷几次蜂蜜,颜色会更加漂亮,味道
就没的说啦。
烤红薯 【材料】
红薯300G 【做法】
04 简体 中文
功能简介
1. 红薯用干布擦去上面的土备用。 2. 将烤箱先预热几分钟,把红薯放到烤箱中间一层,用上下管档烤15分钟。如果红薯比
较大则要烤30分钟。 烤箱小贴士 同样做法可用于制作烤玉米、烤芋头、烤土豆等等,营养专家建议定 期食用上述粗粮,有助健康。
目录
安全注意事项
使用本产品时必须遵守下列安全预防措施: 功 能 简 介 … … … … … … … … … … … … … … … … … … … … … … … … 1 1. 使用本电器时,严禁儿童在旁玩耍,以免意外烫伤。
外国烤箱的操作方法

外国烤箱的操作方法外国烤箱的操作方法包括以下几个方面:开启烤箱、设定温度、设置烤制时间、烤箱使用注意事项等。
以下是详细的操作方法说明。
第一步:开启烤箱1. 确保烤箱处于关闭状态并且插上电源。
2. 查找烤箱上的开关按钮,一般位于面板的左上角或右上角。
打开按钮可能是一个具有“开”和“关”标志的开关,或者可能是一个带有数字的旋钮,用于调节烤箱温度。
3. 打开按钮后,烤箱内部的灯泡应该亮起,表示烤箱开启。
第二步:设定温度1. 观察烤箱上的控制面板,通常会有一个具有刻度的旋钮或一个数字按钮,用于设定烤箱温度。
2. 根据需要烤制的食物,设定合适的温度。
一般来说,250度摄氏(或者相应的华氏温度)适合高温烘烤,200摄氏度适合中温,而150摄氏度适合低温。
第三步:设置烤制时间1. 观察烤箱控制面板上的计时器部分,通常会有两个按钮,一个用于增加时间,一个用于减少时间。
另外,你的烤箱也可能配备数字面板,可以直接输入烤制时间。
2. 根据菜谱或烤制要求,设置适当的烤制时间。
通常情况下,应该根据配方的指导来设定时间。
第四步:放置食物1. 打开烤箱门。
在放置食物之前,确保烤箱内干净,无杂物,并且烤盘或烤架放在合适的位置。
2. 根据菜谱或个人需求,设置烤盘或烤架的位置。
通常情况下,高温烘烤需要将食物放在烤箱的上层,中温和低温烘烤则需要将食物放在更低的位置。
第五步:开始烘烤1. 关上烤箱门,确保门完全封闭。
2. 按下开始按钮或启动烘烤的相应按钮,启动烤箱。
3. 在烤制过程中,你可以随时通过打开烤箱门来检查食物的烤制进度。
请注意,每次打开烤箱门都会导致温度的下降,因此尽量减少打开烤箱门的次数。
第六步:烤制结束1. 在设定的烤制时间结束后,烤箱应该会发出声音提示。
如果你的烤箱没有这个功能,你需要依赖计时器来提醒自己烤制时间已过。
2. 关闭烤箱门,关闭烤箱电源。
不要过度烤制食物,以免引起食材糊状或过度干燥。
烤箱使用注意事项:1. 在使用烤箱之前,确保烤箱内部干净。
Mia Cucina GYV34S 内置蒸汽烤箱 用户手册说明书

Built-in Steam Combi OvenGYV34SDear CustomerThank you for choosing Mia Cucina products. These meticulously designed products, manufactured with the highest quality materials, have been carefully tested to satisfy all your needs. Please read and follow the following instructions that ensure correct operation and optimal performance.1 -Care And Maintenance32 -First Use4Using the flat grill4 Using the perforated tray43 -Respect for the Environment54 -The Control Panel6Keypad6 5 -General Oven Information7Error codes7 Beeps7 Default Settings7F Failure Number Codes7Preheat7 Timer7 6 -General Oven Tips8Preheating the Oven8 Operational Suggestions8 High Altitude Baking8 7 -Getting Started9Instructions for initial switch-on9 8 -User Settings10Language10 T emperature & Weight10 Time10 Date11 Brightness11 Volume11 9 -System Setting12Event Log12 Demo12 10 -Starting Your Oven13Switching the oven on and off13 Selecting the cooking mode13 Cooking Mode Tables1411 -Traditional Cooking15Changing the cooking mode15Changing temperature15Pre-heating phase1512 -Steam Cooking16Steam operation16Steam Cooking16Combined Steam and Convection Cooking 17Steam Assist Function 1713 -Using Oven Lights1814 -Time Oven Mode Operation19Cook Time19Stop Time1915 -Setting the Meat Probe (if present)20How use the food probe2116 -Recipes2217 -Oven Care and Cleaning24Oven Clean 24Circuit Clean 24Circuit Discharge 2418 -Replacing the oven Lamp2519 -For the Installer26Installing the oven in a cabinet26Electrical Hook-Up2720 -Solving Traditional Baking Problems2821 -Solving Operational Problems2922 -Assistance or Service30Service Data Record301Dear Customer,W e would like to thank you and congratulate you on your choice.This new product has been carefully designed and built using top quality materials, and meticulously tested to ensure that it meets all your culinary requirements.Please read and observe these simple instructions, which will enable you to achieve excellent results from the very first time you use it. This state-of-the-art appliance comes to you with our very best wishes.THIS PRODUCT IS DESIGNED FOR DOMESTIC USE.THE MANUFACTURER DECL INES AL L RESPONSIBIL ITY FOR PERSONAL INJURY OR PROPERTY DAMAGE DERIVING FROM INCORRECT INSTALL ATION OR IMPROPER, ERRONEOUS OR UNSUITABLE USE.THE APPLIANCE MUST NOT BE USED BY PEOPLE (INCLUDING CHI L DREN) WITH PHYSICA L, SENSORIA L OR MENTA L IMPAIRMENTS, OR BY PEOPL E WITHOUT THE NECESSARY EXPERIENCE OR KNOWLEDGE, UNLESS THEY ARE SUPERVISED OR INSTRUCTED IN THE USE OF THE APPLIANCE BY A PERSON RESPONSIBLE FOR THEIR SAFETY.CHILDREN MUST BE SUPERVISED TO ENSURE THAT THEY DO NOT PLAY WITH THE APPLIANCE.DO NOT P L ACE A L UMINIUM FOI L, POTS OR SIMI L AR OBJECTS IN CONTACT WITH THE BASE INSIDE THE OVEN FOR COOKING.THE APPLIANCE GETS VERY HOT DURING USE. WARNING: DON’T TOUCH THE HEATING EL EMENTS INSIDETHE OVEN.2•Although the cooking chamber is made of high-quality steel, incorrect maintenance can cause corrosion;•The oven must be cleaned periodically and all food residues must be removed;•Do not clean the oven immediately after the dish has been removed because the residual drops of steam are still very hot (danger of burns); check that the display shows a low residual temperature or none.•Take care when opening the door when the oven is on because the exiting steam can cause burns.•If the electricity is interrupted, when it comes back on, the oven requires you to empty the circuit even though there shouldn’t be any water in it.•Do not use rough abrasives or sharp metal scrapers to clean the glass door of the oven because they could scratch the surface and cause the glass to shatter.•During cleaning, take care that no water enters the appliance.•Use only slightly damp rags.•Never spray water inside or outside of the appliance.•Do not use steam devices for cleaning because water that penetrates could cause damage.•Do not use the appliance for heating or humidifying the room.•The appliance must be installed and used in an ambient temperature between 5 °C and 35 °C.•If there is a risk of frost, the residual water in the pumps could freeze and damage them.•Use only the thermal probe recommended for this oven.•The food probe is an accessory available only in some versions of the product•The set of 6 Gastronorm trays is an accessory availableon request3Using the flat grillT o remove the flat grill, pull the grill towards you until it stops and then lift, by pulling upwards, until it comes completely out. T o insert the flat grill, slide it in at an angle of 45° until it locksand then lower it horizontally and push it all the way in.If the flat grill has a low drip tray, to remove it lift it slightly and slide it towards you. To reinsert it, slide it back until it is correctly ing the perforated trayThis tray is used for steam cooking and is positioned on the flatgrill together with its support.NOTE: the set of 6 Gastronorm trays is an accessory available on request.We recommend also using it in combination with the drip tray to catch everything the drips from the food during cooking.The oven should be thoroughly cleaned with soap and water and carefully rinsed.Heat the oven for about 30 minutes at the maximum temperature; this eliminates all the residual manufacturing oils that could cause unpleasant odours during cooking. Use the circular plus fan function without accessories in the oven.Before using the accessories for the first time, clean them carefully with a very hot alkaline washing solution and a soft cloth.4The documentation for this appliance is printed on paper bleached without chlorine or recycled paper to contribute to protecting the environment.The packaging was designed to prevent damage to the environment; they are ecological products that can be recovered or recycled.Recycling the packing saves raw materials and reduces the volume of industrial and domestic waste.TH E PACKING MATERIAL is 100% recyclable and marked with the recycling symbol.Dispose of in conformity with local law. The packing material (plastic bags, polystyrene parts, etc.) must be kept out of thereach of children because it is potentially dangerous.TH IS APPLIANCE is marked in conformity with European Directive 2002/96/EC, Waste Electrical and Electronic Equipment (WEEE). By making sure that this product is disposed of correctly, the user contributes to preventing potential negative consequences for the environment and health.THE SYMBOL on the product or accompanying documentation indicates that this product must not be treated as domestic waste but must be delivered to a suitable collection point for the recycling of electrical and electronic equipment.DISPOSAL MUST BE MADE in conformity with local laws on waste disposal.FOR ADDITIONAL INFORMATION about the treatment, recovery and recycling of this product, contact the local office of competence, the domestic waste collection service or thestore where the product was purchased.BEFORE SCRAPPING, make it unusable by cutting the electrical cord.56KeypadT o operate the key, press gently. The keypad will not work ifmore than one key is pressed at the same time.Y our appliance could vary slightly compared to the illustrations below. - Keypad- Display screenError codesThis code appears in the event of the electronic control indicating a fault. When the error appears, the current function is blocked. If the type of error is related to a safety function, the oven becomes unusable and every time a start attempt is made, the same error appears (in which case call in the after-sales service), while if the error relates to a minor fault, after being restarted the oven can be used for the functions that do not involve the faulty part (e.g., a heating element).BeepsConfirms that the command has been received after a key has been pressed.It also indicates that a time function has been completed (e.g. Timer or Timed Cooking). During the execution of a recipe, an acoustic signal warns the user that the oven is waiting for operation by the user (e.g., insert the dish or turn it over). Beeps also signal an oven fault.Default SettingsThe cooking modes automatically select a suitable temperature when the cooking mode is selected, these can be changed when a different one is needed.F Failure Number CodesThese codes are displayed when the electronic control detects a problem in the oven or in the electronics.The error code is recorded in the Error Log in the Setup menu. This error can be communicated to the service technician so he/she can understand the possible cause of the problem in advance.PreheatWhenever a cooking mode is set and the oven is heating, the preheating starts, during this period, the instantaneous temperature is displayed together with the thermometer icon. As soon as the 100% is reached, the control sounds an “end of preheat” tone and the current temperature value disappears.TimerNOTE: Pressing the OFF button does not reset or stop the timer.1. Press the button and set the desired time using thearrows and confirm with the button . T o switchthe selection between hours and minutes use the arrows.2. The time can be set from 1 minute to 12 hours and 59minutes and, when set, the remaining time is always visible in the bottom status bar until the time expires or is reset. 3. T o change or cancel the time set, you must reset the timerby pressing and holding the button for a few seconds.4. Timer format is usually HR:MIN, switching into MIN:SECduring the last minute.5. When the time expires, the display shows 00:00 and thebuzzer will sound for one minute or until the button is pressed.Before using your oven for the first time remove all packing and foreign materials from the oven(s). Any material of this sort left inside may melt or burn when the appliance is used.7Preheating the Oven• Selecting a higher temperature does not shorten the preheat time.• Preheating is necessary for good results when baking cakes, cookies, pastry and breads.• Preheating will help to sear roasts and seal in meat juices.• Place oven racks in their proper position before preheating.• During preheating, the selected cooking temperature is always displayed.• A beep will confirm that the oven is preheated and the “detected temperature” will turn off.Operational Suggestions• Do not set pans on the open oven door.• Use the interior oven lights to view the food through the oven door window rather than opening the door frequently.High Altitude Baking• When cooking at high altitude, recipes and cooking time will vary from the standard.8Instructions for initial switch-onOnce the oven has been connected to the power supply for the first time, the control automatically prepares for setting a number of user settings, which remain stored in case of any subsequent switch-on.NOTE:Both at the first and subsequent connections to the power supply, the door lock mechanism performs acalibration run - in this phase, always keep the doorclosed.•Language•T emperature & Weight•Time•DateRefer to the USER SETTING paragraph for setting instructions. After making the user settings, the control moves automatically to the “Standby” display page.EN With the oven on, select the icon and confirm with the key to enter the SETTINGS menu. This menu permits personalizing the settings of your oven. To make access, no active cooking or any set time functions must be in progress.NOTE: The Setting menù can never be set if any time functionis already set: first delete all the active time functions.1. Press the keysto select the sub menu and confirm by means of thekey.2. Use this menu to change the following settings:Press the keysor to select the setting or change a sub menu from among the six available ones and confirm by means of thekey.LanguagePress the arrow key to select a language from among those available, and confirm with thekey.T emperature & WeightPress the arrow keyand to select one of the two temperature options “°C/°F” or weight options Kg/ib and confirm with thekey.TimePress the arrow key to select the time format between the options “12h AM/PM or 24h” and confirm with the key. Subsequently, set the time using the arrows and confirm with thekey.DatePress the arrow key to select the date format from among the options “D.M.Y . – Y .M.D. – M.D.Y .” and confirm with the key. Subsequently set the value using the arrows and confirm with thekey.BrightnessPress the arrow keyto choose which luminosity setting to change between ON or STANDBY , then by means of thearrows select the required degree of luminosity and confirm with thekey.VolumePress the arrow key to select the required degree of luminosity and confirm with the key.With the oven on, select the icon and confirm with the key to enter the SETTINGS menu. This menu permits setting a number of parameters or special functions. It also permits accessing the error events list.1. Press the keysto select the sub menu and confirm with thekey.2. Use this menu to change the following settings:Press the keys to select the item to be set or to be displayed from among the three available ones and confirm with thekey.Event LogThe menu permits checking any recorded errors. These codescan be notified to the after-sales service.DemoThe purpose of this function is to set the DEMO mode, which makes the oven useless for cooking but automatically performs a demonstration of functions.1. Press the keysto select the item ON. 2. Confirm with the key.3. Press thekey.After about 30 seconds, the oven starts to operate in this mode.To temporarily stop the DEMO function, simply keep any key pressed for a few seconds until the oven switches to standby. To start it again, press thekey.T o disable the function, enter the DEMO display page and set OFF . Confirm using the key.NOTE: Once set, the function remains enabled even if the ovenis disconnected from the power mains.Switching the oven on and off• The key does not stop the function.• After switching off the oven, the cooling fan could continuePress to switch the oven on and press again to switch it off. The oven returns to standby mode.Selecting the cooking mode1. Select thecooked using the arrows and confirm with thekey .2. On this display page, it is still possible to change the cooking mode by using the keys.3. If the proposed temperature is correct, confirm with the key to start cooking, otherwise, if the key is not pressed within 10 seconds, the oven switches to automatic mode and the cooking mode icon becomes animated.Cooking Mode TablesChanging the cooking mode1. During untimed cooking, a cooking pause can be set by pressing the key. All the settings of the suspended cooking operation remain stored and can be reactivated by pressing the same key again.2. To change the cooking mode while the oven is working, press the key and then the , key. At this point, another cooking mode can be selected from among those availablein the group by means of the arrows.Changing temperature1. From the cooking mode preview display page, the temperature can be changed by means of the arrowssubsequently confirming by means of the key.2. Once cooking has started, the temperature can in any case be changed, at any time, by means of the arrows .Pre-heating phaseWhile the oven is in pre-heating phase, the instantaneoustemperature is displayed underneath the cooking mode icon.Just as soon as the set temperature is reached, an acoustic signal is heard and the instantaneous temperature indicationdisappears.NOTE: it is essential to carefully read the instructions and warnings to ensure correct use.Steam operationSteam cooking is used most for oriental cuisine but it is certainly very useful for our own.It is fat free and has the advantage of preserving the original flavour of the food.In this case, the food is not cooked with water but with water vapour.Steam cooking is different than boiling. In fact, the water vapour works on the inside of the cells, which is fundamentally different from the effect of boiling water.In fact, steam also cooks the food completely but, except for the fat, nothing else comes out of the food.The cell walls and tendons gradually soften, the protein coagulates without coming out, the starches swell and combine and the sugars and minerals remain unchanged.The same goes for odours, which are reduced to a minimum, or coloured substances.Only the fat liquefies due to the heat and, for this reason, it is almost never a good idea to steam cook large cuts of meat or fish. Vitamins are another story because heat generally tends to destroy them; however, depending on the cooking time, some of them are only slightly altered. So, the foods that lend themselves to this cooking method are, generally, those with no fat such as, for example, fish, some types of meat, legumes, potatoes, cereals, eggs, pudding, vegetables, etc.It is not good for vegetables with tough fibres or fruits in general.Useful tipsWhen using the steam oven, always start with the oven cold. Using steam in a hot oven (immediately after traditional cooking) is not recommended because the benefits of cooking with steam will be cancelled out.For steam cooking try to use the perforated stainless steel tray together with the lower stainless steel drip tray as much as possible.The first, resting with its support on the flat grill, allows the steam to fully cook the food while draining everything released by the food during cooking through the holes.The second, lower tray, slid under the grill on its guides, will collect the drippings and keep the oven chamber cleaner. When done cooking, the support of the perforated tray can be used as a support to keep the hot tray off of the counter while you remove the food you just cooked.door is closed, the oven will go into PAUSE mode. Press the key to continue cooking.NOTE: The steam functions will not start until the door is closed. If the door is open, the message CLOSE THEDOOR will be shown on the display. If the door isopened while the oven is on, the oven will go intopause mode. T o restart the function, the door needs tobe closed.Select the desired function and confirm using the key , at this point the circuit will be filled. As soon as the water reaches the right temperature, the steam generated by the boiler will enter the cavity.The function can be paused at any time using the key , when it is pressed againthe function restarts.Steam 100By way of radial ventilation, the steam is distributed to ensure the food is evenly heated and cooked.This holds the advantage of being able to cook on the three different levels at the same time, taking care to insert the more “full-bodied” food on the higher level, and less dense foods such as vegetables on the lower levels (from the first to the third).NOTE: during steam cooking, always place the lower stainless steel tray underneath the perforated cookingcontainer, to collect any food scraps or condensatethat may eventually fall.Steam 130During regeneration, the cooking chamber is heated with steam and warm air, which allows rapid and consistent heating of the food without drying it.Based on the type of food being reheated, this programme offers the possibility to modify the temperature inside the oven so as to manage this function as you please. This type of function is therefore particularly suitable for:• Heating pre-cooked food from 70°C to 130°C;• Preparing ready and semi-ready meals, frozen foods from 70°C to 130°CNOTE: for these types of meals, remember to insert suitable dishes in the oven (not made from synthetic or similarmaterials) and to position them above the grill, makingsure to remove any lids.This type of cooking is called “professional cooking” because the food being cooked is placed into a cold chamber that has not been preheated.After starting the oven, the food is initially exposed to steam (or “steamed”). After a short period of exposure to the steam, depending on the filling volume and therefore on the size of the food being cooked, the appliance automatically moves on to the second warm air phase.This type of function is particularly suited to large meat and seafood dishes for example; large sized bread loaves made from white or wholemeal flour, with yeast or yeast dough at 190°C until 210°C, as well as filled and hollow puff pastry, whether fresh or frozen from 190°C to 210°C.NOTE: For best results when running two consecutive“professional cooking” programmes, the oven mustbe cooled before inserting the second dish.This particular function can only be used with traditional ovenOnce the oven has been turned on, the steam assist function will only become available once the internal oven temperatureNOTE: THIS FUNCTION IS NOT ENABLED DURING STEAMCOOKING. select the iconand and confirm using the key .The steam assist function will be enabled and the change in status can be seen on the animated display. The steam assist function will continue for 5 minutes, humidifying the food so that it doesn’t dry out during cooking. Ideal for roasts in general, large meat/seafood dishes and softer cooking.After 5 minutes, the oven returns to the previously set cooking function.A single light key activates the lights.T ouch to turn lights on or off .Oven lights turn on automatically when the door is opened. When an oven is in use, oven lights turn on automatically when a mode is started.Oven lights will turn off automatically when the oven mode is cancelled.NOTE: Once switched on, the lights go off automatically after3 minutes. To switch them back on, press the key oropen the door.Be sure that the time-of-day clock is displaying the correct time.The timed mode turns off the oven at the end of the cook time.NOTE:T he time functions cannot be used if the meat probe is on. The maximum cooking time that can be set is 12 h.Cook TimeUse the “Cook Time” function to operate the oven for a determinate period of time. The oven starts immediately and switches off automatically once the time has expired.To Set a Timed Mode1. Select the cooking mode and temperature.2. There are two ways to set the function.a) Select to set the duration and press .b) Select to set the stop time and press .3. After selecting one of the two above options, set the time by means of the arrows and confirm with the key.4. After pressing the key, cooking starts and the time cooking information is shown on the display page.• Cooking mode• Temperature• Cooking time• End of cooking time5 After cooking, the oven switches off and an acoustic signal warns that cooking has terminated.T o change the cooking time when the oven is already operating, simply press the e key and enter the new cooking time before pressing the key again.Stop TimeUse the “Stop Time” function to delay the start of timed cooking. Enter the cooking stop time and the oven will automatically calculate the start time. The oven switches on and off automatically.To Delay the Start of a Timed Mode1 First of all set the required timed cooking as indicated in the “COOK TIME” paragraph.2 Select to set the stop time and press .3 Set the cooking stop time by means the arrows and confirm by means of the key.4 After pressing the key, the function positions in standby and the postponed cooking details are shown on the screen.• Cooking mode• T emperature• Cooking stop time• Cooking start timeAfter cooking, the oven switches off and an acoustic signal warns that cooking has terminated.T o change the cooking time and stop time when the oven is already operating, simply press the key and enter the new cooking time or cooking stop time and press the key again.When roasts, steaks or poultry are being cooked, this is the best way to tell when the food is correctly cooked.This oven is optionally provided with the meat probe feature to sense the temperature inside meat and stop cooking as soon as the set value is reached.When the probe is used, the oven automatically checks the cooking time.NOTE : the food probe is an accessory available only in some versions of the product.T enderness, aroma and flavour are the result ofprecise, functional control.The food probe is a thermometer which, when insertedinto the food, makes it possible to check the internaltemperature and use it to establish the end of cooking.For example, meat may look like it is cooked on theoutside, but still be pink on the inside!The temperature reached by food during cooking is closely linked to problems relating to health and hygiene. Bacteria can be contained in every kind of meat, poultry and fish, as well as raw eggs.Certain types of bacteria make food go off, while others, such as Salmonella, Campylobacter jejuni, Listeria monocytogenes, Escherichia coli and Staphylococcus aureus can be seriously harmful to human health. Bacteria multiply very quickly above a temperature of 4.4° up to 60°C. Mince is particularly at risk from this point of view.T o prevent bacteria from multiplying, it is necessary to take the following measures:• Do not defrost food at room temperature, always in the fridge or in the oven using the specific function. In the latter case, cook the food immediately afterwards.• Stuff chicken just before eating it. Never buy pre-packed ready-stuffed chicken and only buy ready-cooked stuffed chicken when you intend to eat it within 2 hours.• Marinate food in the fridge, not at room temperature.• Use a food probe to check the temperature of meat, fish and poultry if they are more than 5 cm thick, to ensure that the minimum cooking temperatures are reached.• The greatest hazards are posed by poorly cooked chicken, particularly at risk from Salmonella.• Avoid interrupting the cooking process, i.e., partially cooking food, storing it and completing the cooking process later. This sequence encourages the growth of bacteria due to the “warm” temperatures reached inside the food.• Roast meat and poultry in the oven at temperatures of atleast 165°C.In any case, we recommend that you consult the followingtable taken from the National Food Safety Database (USA).NOTE:- The meat probe is not enabled for all functions (meat probe function not available also for Recipes).If it is fitted during one of these functions, a proberemoval message appears on the screen.- If the meat probe is accidentally removed duringoperation, a warning message appears on thescreen.- The temperature of the probe can be set between104°F and 212°F (40°C - 100°C).- The oven stores the last temperature set by the user. How use the food probeAs you can see from Figure, the probe socket is located in the upper left corner of the oven chamber, protected by a metal cover with plug.Remove the cover and insert the plug of the probe all the way(you will hear a slight confirming click).Insert the probe in the food without touching fatty parts orbones.Insert the tip of the probe in the central and thickest part of the meat.Make sure the probe is not in contact with the fat, bone, oven parts or dishes.The meat probe is automatically recognised when it is inserted and the icon appears on the screen.When a cooking mode is started with the probe inserted, thedisplay page for setting the function appears automatically.1. Set the required probe temperature by means of the arrowsand confirm with thekey.2. After pressing the key, cooking starts and all probe cooking details appear on the screen.• Cooking mode• Oven temperature• Set probe temperature• Instantaneous probe temperatureOnce the set probe temperature is reached, the oven switches off and an acoustic signal warns that cooking has terminated. NOTE: After cooking has started, the oven temperature can in any case be changed at any time by means of thearrows .To change the probe temperature, press the key and then the key and finally, the key again.。
吉兰德电热烤箱及披萨炉(空气吸取)产品说明书

Page 2Form # E56parts (Rev 1)GARLAND MODEL ELECTRIC BAKE AND PIZZA OVEN(AIR DECK)Contents:Electric Bake And Pizza Oven E56-PB & -PT ............................................................................Page 4Form # E56parts (Rev 1)Page 3Page 4Form # E56parts (Rev 1)Form # E56parts (Rev 1)Page 5GARLAND PARTS IDENTIFICATION Electric Bake And Pizza OvenE56-PB & -PTITEM PART # DESCRIPTIONMODELQUANTITYE56PB E56PT11615001Motor - 3/4 Hp 115/240V 1725rpm11 1616097Motor Assembly - Upper (Items 1, 2 And 4)1 1616098Motor Assembly - Lower (Items 1, 2 And 4)121616099Motor Back Panel 1131613900Blower Wheel Cw Rotation1 1613901Blower Wheel Ccw Rotation141616395Back Element Panel S/W11 1616396Element Panel (T op) Assy 1 1616397Element Panel Bottom S/W151616800208V Element1212 1616801240V Element1212 1728601Brass Buss Bar 18186A 1620200Hi Limit (Air Deck) RTIL-2911 6B* 1620300Hi-Limit Mounting Bracket11 7A 9005400Mercury Contactor 11 7B* 1620000Contactor Mounting Bracket11 8A 1130102Fuse Holder 22 8B* 1130103Fuse 208/240V - 20 Amps 22 91026200Circuit Breaker 3 Pole 50A 11 101193900Terminal Block 3 Pole 11111617292Pwr Mod. Upper Body Side S/W SS1 1617293Pwr Mod. Upper Body Side S/W Painted1 1617294Pwr Mod. Lower Body Side S/W SS11617295Pwr Mod.Lower Body Side S/W Painted1121617002Upper Power Module Body Side Right - Painted1 1617003Upper Power Module Body Side Right - SS1 1617000Power Module Body Side Right- Painted11617001Power Module Body Side Right- SS1131617899Upper Power Module Louvered Panel 1 1617898Lower Power Module Louvered Panel 114A 1611900Thermostat - (Kx-410 - 72)11 14B G02716-1 Dial (Universal) Small Shaft11 14C 1314121Thermostat Dial Insert 11 14D* 1620799Thermostat Bulb Guide W/A11 14E* 1620702T’Stat Bulb Guide Cover 11 14F* 1101402Thermostat Bulb Clip 22 151621001240V Light Red Black Vezel11 161019203Rocker Power Switch 2 Pos 1 Speed On/Off1117A 1617494Control Panel - Upper, 3 Timer Enamelled1 1617495Control Panel - Upper, 1 Timer Enamelled1 1617496Control Panel - Upper, No Timer Enamelled1 1617497Control Panel - Lower, 3 Timer Enamelled11617498Control Panel - Lower, 1 Timer Enamelled11617499Control Panel - Lower, No Timer Enamelled117B 1620400Air Deck Nameplate11 * NOT ILLUSTRA TEDRECOMMENDED STOCK PARTSPage 6Form # E56parts (Rev 1)GARLAND PARTS IDENTIFICATION Electric Bake And Pizza OvenE56-PB & -PTITEM PART # DESCRIPTIONMODELQUANTITYE56PB E56PT17C 1617196Control Box/Upper Power Module -Painted11 1617198Control Box/Upper Power Module -SS11 1617197Control Box/Lower Power Module -Painted11 1617199Control Box/Lower Power Module -SS11181617300Power Module Body Back - Painted11 1617301Power Module Body Back - SS11191619900Field Connection Cover Painted11 1619901Field Connection Cover SS1120A 1613098Door Handle - Chrome Plated11 20B* 1038006Plug Bottom 3/4”22 21A 1611300Outer Door Panel - SS11 21B 190291710” GARLAND Nameplate 11 22A 1611299Door Liner 11 22B* 1611298Complete Door Assembly 11 231612297Door Hinge Right - W/A11 241612296Door Hinge Left - W/A11 251011201Steel T ubing Chrome Spacer 22 261611597T runnion / Bushing Assembly 22 27A 1622299Hinge Plate - Left - W/A11 27B* 1622298Hinge Plate - Right - W/A11 27C 1734099Sprocket22 27D 1622301Sprocket Pin Bracket22 27E 1734400Large Washer - 3/4” x 1-5/16” (Old # 8000319)22 281760401Oven Door Spring 22 29A 1021101Roller Chain - # 40 9-1/2” Lg22 29B* 1021299Connecting Links #40 Components 22 30A 9004701Oven Door Spring Hook 22 30B* 8000303Flat Washer - 1/4”x 5/8” 88 311121400Cotter Pin 3/32 x 1” Lg22 321546000Hinge Pin With Hole22 33A 8000321Washer Retainer - 1/4” x 1-1/4”44 33B 8004401Thumb Screw 1/4-20 X 3/4”22 341613899Lower Restrictor Plate - S/W11 351613503Bottom Front T rim - SS136A 1619300Front Deck Hold Down 11 36B* 1614002Adjusting & Deck Tool 11 36C* 1166900Shoulder Bolt - 10-24 x 9/16”33 371622402Louvered Corner T rim - Left11 381622401Louvered Corner T rim - Right11391613698Left Body Side - Painted 11 1613696Left Body Side - S.S. 11401613699Right Body Side - Painted11 1613697Right Body Side - SS11411611799Interior Air Chamber -Right Side -Lower 11611798Interior Air Chamber -Right Side -Upper 1 1613199Air Box Inner -Right Side -Lower 11613198Air Box Inner -Right Side -Upper 1* NOT ILLUSTRA TEDRECOMMENDED STOCK PARTSPage 7Form # E56parts (Rev 1)GARLAND PARTS IDENTIFICATION Electric Bake And Pizza OvenE56-PB & -PTITEM PART # DESCRIPTIONMODELQUANTITYE56PB E56PT42* 1611199Front Frame 11 431612399Lower Base Plenum11 441618700Upper Air Baffle11 451614699Lower Plenum22 461618997Deck Screen SS33 47A 1618800Rear Jet Screen 11 47B* 1613400Plenum Rod - T op11481612499Return Air Box Lower 11612498Return Air Box Upper 1491618099Flue T ube W/A11 50A 1618299Flue Box 150B 1618298Flue Box Riser - (Bottom Deck T op)1 50C 1621199Flue Box Collector 1150D 11901006” Direct Bell 11 CK4529 Direct Vent Kit 11511614099Upper Restrictor Plate11521616700Body Back - Lower Painted11616702Body Back - Lower SS11616701Body Back -Upper -Painted 1 1616703Body Back -Upper -S.S. 1531611801Top Liner Interior 11611898Top Liner Interior 1541613506Front Trim T op - SS155A 1707201Lower Main T op Left Side - Painted1 1707202Lower Main T op Right Side - Painted155B 1707203Lower Main T op Left Side - SS1 1707204Lower Main T op Right Side - SS155C* 1613598Trim T op Upper - Painted1 1613599Trim T op Upper - SS156* 1613503Bottom Front T rim - SS1Single Unit LegsAll Leg Sizes Listed Will Vary With Adjustable Foot Insert57A 176769720” Leg - Painted (Old # -1612706)2 176769620” Leg - SS ( Old # - 1612702 )2 176769336 1/4” Leg - Painted ( Old # - 1612707 )2 176769236 1/4” Leg - SS ( Old # - 1612703 )2Double Units Only57B 17676998” Leg - Painted ( Old # - 1612704 )2 17676988” Leg - SS ( Old # - 1612704 )2 176769524 1/4” Leg - Painted ( Old # - 1612705 )2 176769424 1/4” Leg - SS ( Old # - 1612705 )2Leg Hardware57C*8003414Mscr-Hh-Stl 3/8-16x5/8 Zp1616 8000309Wshr-Flt 3/8X13/16 Stl Zp161658* 12361001-1/2” Square Foot Insert 44 * NOT ILLUSTRA TEDRECOMMENDED STOCK PARTSPage 8Form # E56parts (Rev 1)GARLAND PARTS IDENTIFICATION Electric Bake And Pizza OvenE56-PB & -PTITEM PART # DESCRIPTIONMODELQUANTITYE56PB E56PTCasters Are Not Available 59* 1708399Warming Rack Complete (Optional)60* CK4537Air Deck Full Retro-Fit Spring KitItems 21 Thru 30C also 34 & #51161* CK4537-A Air Deck Spring Kit 11* NOT ILLUSTRA TEDRECOMMENDED STOCK PARTSPage 9Form # E56parts (Rev 1)GARLAND PARTS IDENTIFICATIONRevision Histor yREV. # PAGE # ITEM # NOTE DATE1 557 A, 57B Was item 54A and 54B Feb 25/04 Page 10Form # E56parts (Rev 1)NOTESForm # E56parts (Rev 1)Page 11。
康福登万能蒸烤箱安全操作及保养规程

康福登万能蒸烤箱安全操作及保养规程蒸烤箱是我们厨房中不可或缺的一部分,它可以帮助我们烤制各种美食,在我们的日常生活中起到了不可替代的作用。
康福登万能蒸烤箱是一款优质的蒸烤设备,但是安全操作和保养对于它的长期使用和安全性都至关重要。
在本文中,我们将介绍康福登万能蒸烤箱的安全操作和保养规程,以保障我们的健康和设备的寿命。
安全操作规程1. 位置放置康福登万能蒸烤箱在使用时应该放置在水平面的地面上,同时要确保周围有足够的空间,离火源和易燃物品至少有50cm的距离。
2. 插头使用使用康福登万能蒸烤箱时,要使用符合国家标准的电插头,并插入符合电源标准的插座。
同时,要注意避免电线损坏和防止电线与机器产生摩擦火花。
3. 使用条件康福登万能蒸烤箱应该在通风和干燥的环境中使用,同时应该避免在潮湿或高温的情况下使用,以免引起电路故障和损坏。
4. 开关使用使用康福登万能蒸烤箱时,要对所有开关进行正确操作,并且要确保电源插座处于关闭状态。
同时,还应该注意不要用手带电击开关等。
5. 清洗和维护康福登万能蒸烤箱使用后,应该先断电,等待其冷却后再进行清洗和维护。
同时要避免用湿抹布或水直接擦拭电器内部,以免发生电击或引起功能故障等。
保养规程1. 清洗和存储使用康福登万能蒸烤箱后,应该及时进行清洗和维护。
在使用前必须先将烤盘和烤网擦干净,然后再用干净的毛巾将烤盘整洁地摆放好。
2. 维护保养康福登万能蒸烤箱在使用中应注意经常维护和保养,定期清洗使用过的部件以及挂蒸和风道部分等。
同时,要注意定期检查康福登万能蒸烤箱的线路,如有线路故障应及时维修。
3. 防水保养康福登万能蒸烤箱应该注意防水保养,以免雾气进入机器内部,造成故障。
同时,要注意在清洗电器时,不要让电器内部积水或残余物等。
注意事项使用康福登万能蒸烤箱时还需要注意以下事项:1.避免使用金属器具刮擦康福登万能蒸烤箱,以免刮伤机身或损坏非加热部位。
2.不要使用破损或损坏的电源线,以免电气故障和触电。
易控蒸烤箱Convotherm mini eT-6.06-RA-CE说明书

mini eT 6.06Convotherm Elektrogeräte GmbH WelbiltTalstraße 35, 82436 Eglfing, Germany Tel: +49(0)8847 67-0Fax: +49(0)8847 4141标准配备操作模式:蒸汽:丰富的蒸汽(30-120°C)带有自动水分调节功能的组合式蒸烤(100-250°C)带有优化的热传导型能的干烤(30-250°C)easyTouch操作界面:7"全触摸屏Press&Go – 通过快速选择按钮自动烹制和烘焙easyStart - 通过产品建议自动烹制和烘焙TrayTimer – 不同食材同时装料管理回温 – 通过预选实现灵活的回温功能ecoCooking – 节能功能NT烹饪(低温烹饪) /Delta-T烹制Cook&Hold—在一个过程中完成烹制和保温可通过各种不同的烹制方案进行编程,每种方案可分为99个步骤,仅在一个画面上完成编程屏幕帮助开始时间预选多点中心温度传感器HACCP和巴氏杀菌值数据保存功能预热和Cool down功能灵活的托板层间距蒸汽缩减器mini eT 6.0629731930_03 Z H O 03/19, © 2019 W e l b i l t . 由于对产品的不断改善,可能在未经明确说明的情况下对产品规格进行更改。
3Convotherm Elektrogeräte GmbH WelbiltTalstraße 35, 82436 Eglfing, GermanyTel: +49(0)8847 67-0Fax: +49(0)8847 4144mini eT 6.069731930_03 Z H O 03/19, © 2019 W e l b i l t . 由于对产品的不断改善,可能在未经明确说明的情况下对产品规格进行更改。
康福登多功能烤箱保养内容讲解
在开始烹饪之前:自动清空和冲洗蒸汽发生器(用于OEB & OGB 型康福登万能蒸烤箱)每天冲洗您的康福登万能蒸烤箱的蒸汽发生器将提高它的(加热)使用寿命和防止故障产生。
我们建议在每天开机后要立即进行冲洗。
1. 用按钮开机。
2. 在日期变化后显示器将显示“冲洗发生器吗?”“是/不”。
3. 按下按钮STOPSTART 开始冲洗蒸汽发生器。
4. 如果您不想冲洗,可用摇臂开关选择“不”并用开关STOPSTART 确认。
然后您可直接开始使用蒸烤箱烹制食物。
但当日期再变化时必须进行冲洗。
5. 如果在10 秒内没有选择“不”,则对蒸汽发生器的冲洗将自动开始。
6. 蒸汽发生器被清空、冲洗,然后重新充水和加热。
根据烘炉的不同大小,这一过程可持续达5 分钟。
然后蒸烤箱将准备工作。
在每天运行过程中:手动清空和冲洗蒸汽发生器(用于OEB & OGB 型康福登万能蒸烤箱)除了每天自动冲洗蒸汽发生器之外,也可以在任何需要的时候手动清洁它。
1. 按下按钮→显示器将显示各种选项。
使用摇臂开关选择“手动冲洗蒸汽发生器”,并按下按钮确认。
2. 按下按钮确认“是” 康福登万能蒸烤箱将被手动冲洗它的蒸汽发生器。
当烹饪结束时:清洁炉膛小心:为了维持不锈钢炉膛的高质量、使康福登万能蒸烤箱的日常运行达到必需的卫生条件,以及为了防止操作故障,请在每天烹饪结束时清洁炉膛。
提示:•对于您新购买的每台蒸烤箱,您将收到全面的资料和一份康福登万能蒸烤箱清洁材料的订单格式。
•为了防止不锈钢变色和腐蚀,您必须定期清洁蒸烤箱,即使只将它用于汽蒸(标准蒸煮)程序也要这样做。
58 中文日常维护保养•应根据着色程度清洁吸气板后面的风扇区域。
为了清洁这一部分,释放吸气板上的快动锁紧并将吸气板转出到炉膛内。
清洁完吸气板后,再将它推至闭合,并用快动锁紧将它固定在位。
•为了看清楚蒸烤箱内部,要定期清洁内部的双玻璃炉门。
先要打开快动锁紧。
小心不要擦伤玻璃,因为这将有可能使它破裂。
西屋电动烤箱使用手册说明书

WARNING Read and understand this entire owner’s manual, including all safety information, before plugging in or using this product. Fail to do so could result in fire, electric shock, or serious personal injury.CAUTION Keep this owner’s manual for future reference. If you sell or give away this product,make sure this manual accompanies this product.NO VENTING REQUIRED120V AC; 60 Hz; 1500 WattsImportant Safety Information (3)Preparation (5)Product Dimension (6)Assembly (7)Battery Information (7)Operation (8)Control Panel (9)Remote Control (10)Care and Maintenance (11)Schematic Diagram (12)FAQ – Frequently Asked Questions (13)Troubleshooting Guide (14)Limited Warranty (15)Customer Service (15)WARNINGRead all instructions before using this heater!This heater is hot when in use. To avoid burns, DO NOT let bare skin touch hot surfaces. If provided,use handles when moving this burning heater.Keep combustible materials,such as furniture, pillows, bedding, papers, clothes, and curtains at least 3 feet (0.9m) from the front of the heater, and keep them away from the sides and rear.Extreme caution is necessary when any heater is used near children or invalids and whenever the heater is left operating and unattended.DO NOT operate any heater with a damaged cord or plug or after the heater malfunctions, has been dropped or damaged in any manner. Discard heater, or return to authorized service facility for examination and/or repair.DO NOT run power cord under carpeting. DO NOT cover power cord with throw rugs, runners, or similar coverings. DO NOT route power cord under furniture or appliances. Arrange power cord away from traffic area, and where it will not be tripped over.DO NOT insert or allow foreign objects to enter any ventilation or exhaust opening, as this may cause electric shock or fire, or damage the heater.To prevent a possible fire, DO NOT block air intakes or exhaust in any manner. This could cause a fire. DO NOT use on soft surfaces, like a bed, where openings may be blocked up.A heater has hot and arcing or sparking parts inside. DO NOT use it in areas where gasoline, paint, or flammable liquids are used or stored.Use this heater only as described in this manual. A ny other usage not recommended by the manufacturer may cause fire, electric shock, or injury to persons.ALWAYS plug heaters directly into a wall outlet/receptacle. NEVER use with an extension cord or relocatable power tap (outlet/power strip).Connect to properly grounded outlets ONLY.DO NOT place the heater near a bed because objects such as pillows or blankets can fall from the bed and be ignited by the heater.NEVER use this heater in bathrooms, laundry rooms, or any other location where the heater could fall into a bathtub or pool, become damp, or touch the water.AVOID FIRE! Regularly inspect all air vents to make sure they are free from dust, lint, or other blockage. Unplug the unit and clean with a vacuum ONLY. DO NOT rinse or get wet. NEVER permanently install in a recessed area of the wall. This may result in blocked air flow, overheating, or fire.WARNING: DO NOT DEPEND ON THE POWER SWITCH THE SOLE MEANS OF DISCONNECTING POWER WHEN SERVICING OR MOVING THE HEATER. ALWAYS UNPLUG THE POWER CORD.WARNING: REDUCE THE RISK OF FIRE OR ELECTRIC SHOCK---DO NOT USE THIS HEATER WITH ANY SOLID STATE SPEED CONTROL DEVICES.For residential use only! NOT for commercial use! Any commercial or public use of thisheater voids all warranties, and could cause injury.This product is not intended to be a primary heat source. It is for supplemental heat only. INDOOR use only!NEVER use this heater outdoors! Doing so may result in electric shock! Risk of electric shock! DO NOT OPEN! No user-serviceable parts inside!NEVER modify this heater. Doing so could result in personal injury or property damage. Modification of this fireplace completely voids all warranties.ALWAYS turn this heater off before unplugging it from the outlet.ALWAYS disconnect this unit from the power supply before performing any assembly or cleaning, or before relocating the electric fireplace.NEVER leave this heater unattended. ALWAYS unplug this heater when not in use.ALWAYS store this heater in a dry location. NEVER use the fireplace if it has become wet. ONLY use this heater on a 120V AC 15-Amp circuit. NEVER overload the circuit. If this heater trips the circuit breaker, unplug all other appliances on the same circuit before the next use. Avoid plugging other appliances into the same circuit as this heater.NEVER plug this heater into an outlet that is old, cracked, or has any loose wires or connections. Plugging this heater into a faulty outlet could result in electric arcing within the outlet that could cause the outlet to overheat or catch fire.ALWAYS check your heater cord and plug connections with each use!i) MAKE SURE the plug fits tight in the outlet! Faulty wall outlet connections or loose plugs cancause the outlet to overheat.ii) Heaters draw more current than small appliances. Overheating may occur even if it has not occurred with the use of other appliances.iii) During use check frequently to see if the plug outlet or faceplate is HOT!iv) If the outlet or faceplate is HOT, discontinue use immediately and have a qualified electrician inspect and/or replace the faulty outlets.This heater has a polarized plug (one blade is widerthan the other). As a safety feature to reduce the risk ofelectrical shock, this plug is intended to fit in a polarizedoutlet only one way. If the plug does not fit fully in theoutlet, reverse the plug. If it still does not fit, contact aqualified electrician. Do not attempt to defeat this safetyfeature.SAVE THESE INSTRUCTIONS!DO NOT use this Electric Fireplace if any part has been under water. Immediately call aqualified service technician to inspect and to replace any part of the electrical system ifnecessary. Keep plastic wrapping away from children.Unpacking the Electric Fireplace. Remove all parts and hardware from the carton and place them on a clean, soft, dry surface. Check the parts list to make sure nothing is missing. Dispose of packaging materials properly. Please recycle whenever possible. Keep the original packaging for future transport and/or storage.Owner’s Manual ×1 pcFireplace InsertFireplace MantelUnits:mmUnits:inchFireplace Insert SizeUnits:inchYour new electric fireplace may be installed virtually anywhere in your home. However, when choosing a location ensure that the general instructions are followed. For best results, install out of direct sunlight. Power supply service must be either completed or placed within the electric fireplace prior to finishing toWhen moving the insert into mantel, Do not let bottom of insert touch the mantel to avoid the scratch.BATTERY REPLACEMENTNOTE:The remote control not include the batteries.NOTE:Do not mix old and new batteries.Do not mix alkaine,standard(carbon zinc),or rechargeable(nicad,nimh,ect.)batteries.Read and understand this entire owner’s manual, including all safety information, beforeplugging in or using this product. Fail to do so could result in e lectric shock, fire, serious injury, or death.PowerMake sure the Power Switch, located on the control panel, is in the OFF position. Plug the power cord into a 110~120 Volt 15 Amp outlet (see IMPORTANT SAFETY INFORMATION on Pages 3 and 4). Make sure the outlet is in good condition and that the plug is not loose. NEVER exceed the maximum amperage for the circuit. DO NOT plug other appliances into the same circuit.Temperature Limiting ControlThis heater is equipped with a Temperature Limiting Control. Should the heater reach an unsafe temperature, the heater will automatically turn OFF. To reset:1. Unplug the power cord from the outlet.2. Turn the Power Switch on the CONTROL PANEL to OFF. Wait at least 5 minutes.3. Inspect the fireplace to make sure no vents are blocked, or clogged with dust or lint. If they are,use a vacuum to clean the vent areas.4. With the Power Switch in the OFF position, plug the power cord back into the outlet.5. If it switches off again, UNPLUG THE HEATER RIGHT AWAY!Have the outlets, wiring, andbreaker box inspected by a professional. Make necessary repairs before using the heater. Heater RatingMaximum heat output: 1500W (5000BTU); Maximum heating area: 400 square feet.OperationReview the IMPORTANT SAFETY INFORMATION on Pages 3 and 4before operating. NOTICE: When the heater is first turned on, a slight odor may be present. This is normal and should not occur again unless the heater is not used for a long period oftime.Open a door on the top right sidefor operation all functionsControl PanelLocated on the right and top side panel of the fireplace.Remote ControlNOTICE: Control panel Power Switch must be ON to use remote control.Aim the remote control at the remote receiver. Make sure you hear a beep each time you press the button! If not, the fireplace will not respond to the signal.Power ON/OFFNOTICE: Operation for all functions are same as the buttons on the fireplace.The TIMER button on the remote control can’t press 10s into the log speaker, also can’t press 10s into the TIMER,but you can press 10s on the fireplace Timer button,then press TIMER on the remote to get the log speaker,also you press the TIMER 10s on the fireplace,then press TIMER on the remote to operate the TIMER from 1hr,2hrs...9hrs,off.ALWAYSturn the heater OFF and unplug the power cord from the outlet before cleaning, performing maintenance, or moving this fireplace. Failure to do so could result in electric shock, fire, or personal injury . CleaningNEVER immerse in water or spray with water. Doing so could result in electric shock, fire, or personal injury.Metal:Buff using a soft cloth, slightly dampened with a citrus oil-based product.DO NOT use brass polish or household cleaners as these products will damage the metal trim.Glass:Use a good quality glass cleaner and dry thoroughly with a paper towel or lint-free cloth.NEVER use abrasive cleansers, liquid sprays, or any cleaner that could scratch the surface.Plastic:Wipe gently with a slightly damp cloth and a mild solution of dish soap and warm water.NEVER use abrasive cleansers, liquid sprays, or any cleaner that could scratch the surface.Vents:Use a vacuum or duster to remove dust and dirt from the heater and vent areas.Clean the exterior of the fireplace with a slightly damp cloth or duster.Maintenance Risk of electric shock ! DO NOT OPEN! No user-serviceable parts inside! ALWAYSturn the heater OFF and unplug the power cord from the outlet before cleaning, performing maintenance, or moving this fireplace. Failure to do so could result in electric shock, fire, or personal injury .Electrical and Moving Parts:The fan motors are lubricated at the factory and will not require lubrication.Electrical components are integrated in the fireplace and are not serviceable by the consumer.Storage:Store heater in a clean dry place when not in use.Replacement parts:Use only replacement parts supplied by the manufacturer. Use of any other parts, or modifying the fireplace in any way, will void all warranties.No internal parts are replaceable or serviceable.WARNING! No other servicing should be performed by the consumer. Do not attempt to service the unit by yourself.IN AC LED lightWhy does the fan blow before the heat comes on, and after the heater is turned off?Heat and cool gradually. The fan blows when the heater is first turned on, and the heat is still heating up. After the heater turns off, the fan will continue to blow air for 10 seconds. This allows the fireplace to cool slowly, and helps prevent overheating.What does the fireplace beep? Can I turn the beeping off?The beeps indicate that the signal from the control panel, or remote control, has been received by the fireplace. The beeping cannot be turned off.Why doesn’t the fireplace function change when remote control setting changes?The fireplace function will only change if there is a beep after pressing the button. If you do not hear a beep, try again. If you hear a beep, the fireplace function will change to match the remote control setting.Why does the remote control not work, or only work sometimes?Check to make sure the batteries are good. If necessary, change to new batteries. If the remote control is not aimed properly, if you are too far away, or if you are too far off to the side, the signal may not reach the fireplace. Get closer, aim at the upper top corner of the screen (where the red heat indicator light is located), and try again.How do I change from high heat to low heater?The heater is controlled by the heater button on the control panel, or the heater buttons on the remote control.Is the thermostat setting accurate?The temperature within a room can vary. Room size, fireplace location, air flow, sunlight, wall type (interior vs. exterior), insulation, etc. all affect temperature. The fireplace setting may not match your home thermostat exactly. This is normal. Try different thermostat setting on your fireplace until you find one that is right for you.N O I T U L O S M E L B O R P There is no power to the fireplace, or it does not turn on. 1. Make sure the power cord is plugged into a functioning and properly grounded 15 Amp 120V AC electrical outlet. 2. Make sure the Power Switch on the control panel is ON. 3. If the unit had been working, but then turned off by itself, the temperature limiting control may need to be reset. See p age 8 for instructions. 4. Check for damage to the power cord or plug. If damaged, DO NOT USE.The control panel functions do not work. 1. Make sure the Power Switch on the control panel is turned on.If it is OFF, the functions will not work. The FLAME button doesn’t work. 1. Make sure the Power Switch on the control panel is ON. 2. If the Power Switch is ON, and the functions do not work,The heater does not work. 1. Make sure the Power Switch on the control panel turned on. 2. Control Panel: Press the heater button on the control panel to override the thermostat at any time. 3. Remote control: Make sure the thermostat is not set too low. If the thermostat is set lower than room temperature, the heater will not turn on. The heater does not blow hot air when it turns on and off. This is normal. The fans blow cool air while the heater gradually heat up. The fans blow after the heater turn off to cool the heater and prevent overheating.The remote control does not work. 1. Make sure the battery is properly installed. 2. Make sure the Power Switch on the control panel is turned on. The remote control will not work unless the POWER SWITCH on the control panel is turned on. 3. Aim the remote control at the receiver. 4. Remove objects that may be in the way. Items between the remote control and the remote control receiver will block the signal. 5. Don’t press the remote control buttons too quickly. Give the unit time to respond to your commands.The thermostat does not work. 1. Make sure the heater is turned on. The thermostat will not work unless the heater is turned on. 2. Make sure the thermostat is not set too low. If the thermostat is set lower than room temperature, the heater will turn on.4. If none of these solutions work, please e-mail us .please e-mail u s.2. If the Power Switch is ON, and the functions do not work, please e-mail us .This warrants to the original purchaser that this product is free from defects in material and workmanship as of the date of purchase and that it will, under normal use and proper care, remain one year from the date of purchase. Missing or initially defective parts will be replaced free of charge during the period of this limited warranty. If parts are unavailable, comparable replacement of refund will be given. The original dated sales receipt is required for all warranty claims. This warranty does not cover damage which has occurred during transport from the point of purchase to the consumer’s home. This warranty does not cover glass, light bulbs, batteries, transportation, labor, or other issues not associated with the manufacture of the product.This product is for residential use only. Any and all commercial use of this product voids all warranties, and absolves the manufacturer from all liability.Read and understand all assembly and operating instructions, and all safety information and warnings, before use. The following will void this warranty: Damage caused by tampering,modifying, or altering the fireplace insert in any manner; Damage due to incorrect assembly, improper care, misuse, or abuse; Damage from being used with the wrong power source; Water damage; Damage caused from this insert being used outdoors; Damage caused by using for excessive periods of time; Damage caused by the insert being used in a commercial application; Damage from use as a primary heat source;Other misuse or abuse not specifically listed herein.This product is not intended to be used as a primary heat source. It is for supplemental heating purposes only.Power supply:120V-60HzPower consumption: 1500WProtection class: ILight bulb: LED。
伊莱克斯 KOAAS31X 电烤箱 蒸汽对流烤箱 用户手册说明书

KOAAS31XZH电烤箱(蒸汽对流烤箱)用户手册我们在想着你感谢您购买伊莱克斯电器。
您选择了具有数十年专业经验和创新的产品。
设计精巧时尚,为您着想。
因此,无论您何时使用它,您都可以放心,因为每次您都会获得出色的结果。
欢迎来到伊莱克斯。
请访问我们的网站,您可以:获取使用建议、产品手册、故障排除指南、服务和维修信息:/support注册您的产品以获得更好的服务:为您的设备购买配件、耗材和原装备件:/shop客户关怀与服务请始终使用原装配件。
在联系我们的授权服务中心时,请确保您已准备好以下信息:型号、产品编号、序列号。
这些信息可以在铭牌上找到。
警告/安全警示信息一般信息和提示环保信息如有更改恕不另行通知2/56内容1. 安全信息 (5)1.1 儿童和弱势群体安全 (5)1.2 一般安全 (5)2. 安全说明 (7)2.1 安装 (7)2.2 电气连接 (7)2.3 使用 (8)2.4 养护和清洁 (9)2.5 蒸汽烹饪 (9)2.6 内部照明 (9)2.7 维修 (9)2.8 报废 (9)3. 产品说明 (10)3.1 概览 (10)3.2 附件 (10)4. 如何打开和关闭烤箱 (12)4.1 控制板 (12)4.2 显示屏 (12)5. 首次使用前 (14)5.1 初步清洁 (14)5.2 首次连接 (14)5.3 初始预热 (14)5.4 设置方法:水硬度 (14)6. 日常使用 (16)6.1 设置方法:加热功能 (16)6.2 水箱 (17)6.3 如何使用: 水箱 (17)6.4 设置方法:蒸汽烹饪 -蒸汽加热功能 (18)6.5 设置方法:真空低温烹饪 (19)6.6 设置方法:辅助烹饪 (20)6.7 加热功能 (20)6.8 备注:润风烘焙 (23)7. 时钟功能 (24)7.1 时钟功能描述 (24)7.2 如何设置: 时钟功能 (24)8. 如何使用:配件 (27)8.1 插入附件 (27)8.2 食物传感器 (27)9. 附加功能 (30)9.1 怎样保存?常用程序 (30)9.2 自动关机 (30)9.3 冷却风扇 (30)10. 建议和提示 (31)10.1 烹饪建议 (31)3/56内容10.2 润风烘焙 (31)10.3 润风烘焙 - 推荐的配件 (31)10.4 测试机构的烹饪表 (32)11. 养护和清洁 (35)11.1 有关清洁的说明 (35)11.2 如何取出:烤架支架 (35)11.3 如何使用:蒸汽清洁 (36)11.4 清洁提示 (36)11.5 如何清洁: 水箱 (36)11.6 如何使用:除垢 (37)11.7 除垢提示器 (38)11.8 如何使用:冲洗 (38)11.9 烘干提醒 (39)11.10 如何使用:烘干 (39)11.11 拆卸和安装方法:烤箱门 (39)11.12 如何更换:照明灯 (40)12. 异常处理 (42)12.1 如果出现以下情况,应该如何处理 (42)12.2 如何管理:错误代码 (43)12.3 维修信息 (44)13. 能效 (45)13.1 节能 (45)14. 菜单结构 (46)14.1 菜单 (46)14.2 子菜单:清洁 (46)14.3 子菜单用于:选项 (47)14.4 子菜单用于:设置 (47)14.5 下列菜单项的子菜单:服务 (48)15. 这很简单! (49)16. 使用快捷键! (51)17. 环保问题 (52)4/561. 安全信息在安装和使用本机之前,请认真阅读随附的操作说明。
惠而浦 WMG186332AC 烤箱 使用说明书

产品示意图控制面板介绍ZH感谢您购买惠而浦电器1.开/关用于开启和关闭电器电源。
2.主页快速访问主菜单。
检索您的收藏功能列表。
从列表中选择,更改电器设置和偏好。
中国大陆暂不可用。
停止除时钟、计时器和童锁以外的任何功能。
3.收藏夹4.显示屏5.工具6.远程控制7.取消1.控制面板2.风扇及热风加热元件3.搁架(不可见)7.探针插入孔(层数标志在烤箱前方)4.炉门5.顶部加热/烧烤元件6.炉灯8.电器铭牌(请勿撕除)9.底部加热元件(不可见)*仅适用于某些型号。
配件的数量和类型可能因购买的型号而异,其他未提供的配件可于售后服务处单独购买。
附件安装网架和其他附件将网架放置在导轨上,水平向内滑动,确保凸起的一侧朝上。
其他附件,如滴盘和烤盘,以与网架相同方式水平拆卸和重新安装搁架●要拆下搁架,请向上提起,然后轻轻地将底部拉出底座,这样就可以拆下了。
●要重新安装搁架,首先将其上部装回基座,保持向上,将其滑入炉腔,然后将底部放回。
安装导轨 如适用从烤箱上拆下搁架,取下导轨上的保护膜。
将导轨上部的卡子固定到搁架上,并将其尽可能地往里滑动,将另一个卡子放置到位。
要固定导轨,请将卡子的下部紧紧地按在导轨上,并确保导轨可以自由移动,在另一个搁架上重复这些步骤。
插入。
ZH用于准确测量烹饪过程中食物的核心温度。
由于它有四个传感点和刚性支撑,食物探针可以用于肉和鱼,也可以用于面包、蛋糕和烘焙糕点。
烹饪功能手动功能••快速预热用于快速预热烤箱。
顶部+底部加热用于烹饪单盘食物。
•烧烤用于烤牛排、肉串和香肠、奶油焗菜或烤面包。
烧烤肉类时,我们建议使用滴盘收集肉汁,将滴盘放在网架下方,并添加500毫升饮用水。
•强力烧烤用于烤大块肉(腿、烤牛肉、整鸡)。
我们建议使用滴盘收集肉汁,将滴盘放在网架下方,并添加500毫升饮用水。
••热风烘烤在若干个网架上(最多三个)同时烹饪需要相同温度的食物。
此功能可用于烹饪不同的食物,而不会串味。
4层烘焙 用于在4层网架上同时烹饪需要相同温度的食物。
满足中国厨房需求的万能蒸烤箱——SelfCookingCenter膳酷盛 中国版
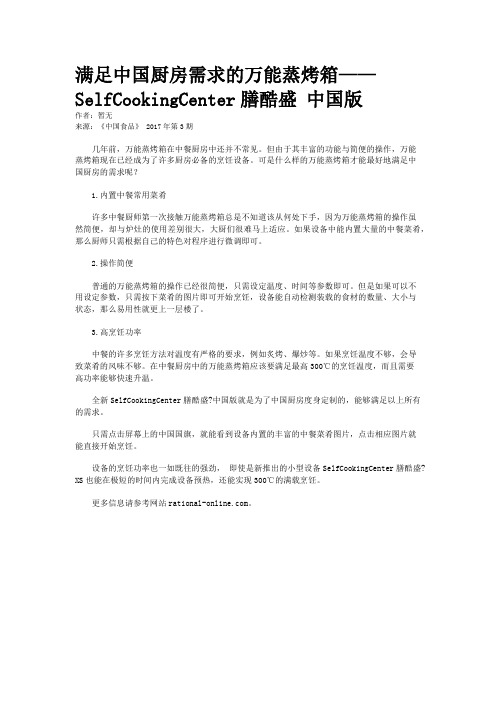
满足中国厨房需求的万能蒸烤箱——SelfCookingCenter膳酷盛中国版
作者:暂无
来源:《中国食品》 2017年第3期
几年前,万能蒸烤箱在中餐厨房中还并不常见。
但由于其丰富的功能与简便的操作,万能
蒸烤箱现在已经成为了许多厨房必备的烹饪设备。
可是什么样的万能蒸烤箱才能最好地满足中
国厨房的需求呢?
1.内置中餐常用菜肴
许多中餐厨师第一次接触万能蒸烤箱总是不知道该从何处下手,因为万能蒸烤箱的操作虽
然简便,却与炉灶的使用差别很大,大厨们很难马上适应。
如果设备中能内置大量的中餐菜肴,那么厨师只需根据自己的特色对程序进行微调即可。
2.操作简便
普通的万能蒸烤箱的操作已经很简便,只需设定温度、时间等参数即可。
但是如果可以不
用设定参数,只需按下菜肴的图片即可开始烹饪,设备能自动检测装载的食材的数量、大小与
状态,那么易用性就更上一层楼了。
3.高烹饪功率
中餐的许多烹饪方法对温度有严格的要求,例如炙烤、爆炒等。
如果烹饪温度不够,会导
致菜肴的风味不够。
在中餐厨房中的万能蒸烤箱应该要满足最高300℃的烹饪温度,而且需要
高功率能够快速升温。
全新SelfCookingCenter膳酷盛?中国版就是为了中国厨房度身定制的,能够满足以上所有的需求。
只需点击屏幕上的中国国旗,就能看到设备内置的丰富的中餐菜肴图片,点击相应图片就
能直接开始烹饪。
设备的烹饪功率也一如既往的强劲,即使是新推出的小型设备SelfCookingCenter膳酷盛? XS也能在极短的时间内完成设备预热,还能实现300℃的满载烹饪。
更多信息请参考网站。
哈密顿海滩 31334-CN 弧形多功能 烤箱 使用说明书
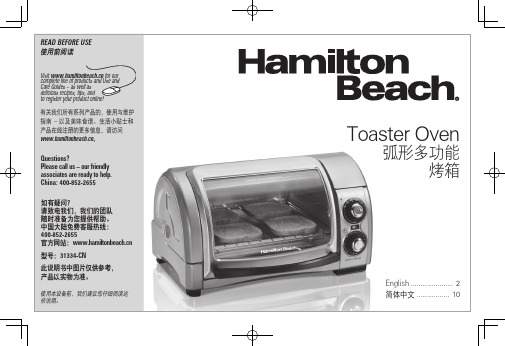
Toaster Oven3Other Consumer Safety InformationThis appliance is intended for household use only.The length of the cord used on this appliance was selected to reduce the hazards of becoming tangled in or tripping over alonger cord. If a longer cord is necessary, an approved extension cord may be used. The electrical rating of the extension cord must be equal to or greater than the rating of the appliance. Care must be taken to arrange the extension cord so that it will not drape over the countertop or tabletop where it can be pulled on by children or accidentally tripped over.This appliance is equipped with a fully tempered safety glass door. The tempered glass is four times stronger than ordinary glass and more resistant to breakage. Tempered glass can break; however, it breaks into pieces with no sharp edges. Care must be taken to avoid scratching door surface or nicking edges. If the door has a scratch or nick, call our toll-free customer service number.Always unplug your toaster oven from the outlet when not in use.BEFORE FIRST USEMost heating appliances produce an odor and/or smoke when used the first time. Plug the toaster oven into an outlet. Turn Temperature Dial to 450°F (230°C). Heat at this t emperature for 10 minutes. The odor should not be present after this initial preheating. Wash baking pan and oven rack before using.SAVE THESE INSTRUCTIONS!17. E xtreme caution should be exercised when using containersconstructed of materials other than metal or glass.18. D o not store any materials, other than manufacturer-recommended accessories, in this oven when not in use.19. D o not place any of the following materials in the oven: paper,cardboard, plastic, and the like.20. D o not cover crumb tray or any part of the oven with metal foil.This will cause overheating of the oven.21. T o turn oven off, turn timer to O (OFF) position. See “Parts andFeatures” section.22. D o not place eyes or face in close proximity with temperedsafety glass door, in the event that the safety glass breaks.23. Always use appliance with crumb tray securely in place.24. D o not use appliance for other than intended use.25. Clean oven interior carefully. Do not scratch or damage heatingelement tube.11其他用户安全信息此电器建议于家庭使用。
满足中国厨房需求的万能蒸烤箱——SelfCookingCenter膳酷盛(R)中国版
满足中国厨房需求的万能蒸烤箱——SelfCookingCenter膳
酷盛(R)中国版
佚名
【期刊名称】《中国食品》
【年(卷),期】2017(000)003
【总页数】1页(P9)
【正文语种】中文
【相关文献】
1.广东团膳配送行业协会上海行——论万能蒸烤箱在现代团餐厨房中的作用 [J],
2.全球专业厨房的标配——记RTIONAL莱欣诺(R)出品的万能蒸烤箱 [J], 安璞
3.中国版SelfCookingCenter膳酷盛(R)亮相第26届上海国际酒店用品博览会 [J],
4.更加节能——RATIONAL莱欣诺推®出配有3层玻璃烹饪腔门、LED照明和能
量计数器的SelfCookingCenter膳酷盛® [J],
5.RATIONAL亮相第22届上海国际酒店用品博览会 SelfCookingCenter Whitefficiency万能蒸烤箱尽展烹饪魅力 [J],
因版权原因,仅展示原文概要,查看原文内容请购买。
魔术厨师12升对流烤箱(型号MCSGC12W)说明书
CONVECTION OVEN 12 LitersINSTRUCTION MANUALModel: MCSGC12WREAD ALL INSTRUCTIONS CAREFULLY BEFORE USING THE PRODUCT.CONTENTSSafety Instructions (3)Important Safeguards (4)Parts and Features (6)Before Use (7)Operating Instructions (8)Cooking Guide (9)Care and Maintenance (13)Warranty (14)What You Need to Know About Safety Instructions Warning and Important Safety Instructions appearing in this manual are not meant to cover all possible conditions and situations that may occur. Common sense, caution and care must be exercised when installing, maintaining, or operating appliance.Always contact your dealer, distributor, service agent or manufacturer about problems or conditions you do not understand.SAVE THESE INSTRUCTIONSFOR HOUSEHOLD USE ONLYIMPORTANT SAFEGUARDSWhen using electrical appliances, basic precautions should always be followed, including the following:1.READ ALL INSTRUCTIONS BEFORE USING.2.This appliance is for household use only. Do not use outdoors.3.Do not use this appliance for other than its intended use.4.Before using for the first time, check if the voltage indicated on the base of theappliance corresponds to the voltage in your home.5.Do not turn the power on unless this appliance is properly assembled.6.Close supervision is necessary when any appliance is used by or near children.7.Do not operate any appliance with a damaged cord or plug, or after the appliancemalfunctions or has been damaged in any manner. Return this appliance to authorizedservice center for examination, repair or adjustment.8.The use of attachments or accessories not recommended or sold by the manufacturermay result in fire, electric shock or injury.9.Unplug the appliance from the outlet when not in use, assembling and disassembling,and before cleaning. Make sure the appliance cools down completely before assembling, disassembling and cleaning.10.Do not let cord hang over edge of table or counter, or touch hot surfaces.11.Do not touch hot surfaces. Use handles or knobs.12.Leave about 6 to 8 inches open spaces all around the exterior of this appliance.13.Do not use this appliance as a fryer. Do not attempt to fill with oil or attempt to deep fry.Such actions may cause fire and injury.14.Do not cover the appliance while in use.15.Oversize foods or metal utensils must not be inserted in the appliance as they maycreate a fire or risk of electric shock.16.Do not place the appliance near or touch flammable material such as curtains, draperies,wall, when in operation.17.Always place the lid on the bowl before plugging the power cord and switching on.18.Extreme caution must be taken when moving an appliance containing hot liquids.19.The oven should be operated on a separate electrical circuit from other operatingappliances. If the electric circuit is overloaded with other appliances, this appliance may not operate properly.20.Do not move or lift the oven while the power cord is still connected to the wall outlet.21.Before removing the lid:a.Turn off the timer.b.Disconnect the power cord.c.Lift the top lid by the carrying handle.22.Do not place the hot underside of the lid directly onto laminated surface, wood surface,paper, plastic or other flammable surfaces.NOTE: Place the lid only on a heat resistant surface.23.Never place the lid on a chair or bench while it is plugged in and operating.24.Do not clean with metal scouring pads. Pieces can break off the pad and touch electricalparts inducing a risk of electric shock.25.The glass bowl container is designed for use with this appliance. It must never be usedon a range top.26.Do not set a hot glass bowl container on a cold surface.27.Do not use a cracked glass bowl container or a glass bowl container having a loose orweakened handle.28.Allow to completely cool and store in a cool dry place.29.Do not wash the lid in the water. Clean the lid with soft cloth if necessary.30.Do not wash the glass bowl when it is hot.PARTS AND FEATURES*Make sure that the power and temperature setting are off before plugging in the cord.SPECIFICATIONS:• Voltage Rating: 240V• Power Rating: 1400 Watts • Maximum Capacity: 12 Liters• Temperature Control: Defrost, 149° – 482°FTimer Thermostat Cooking Air FlowHeated Cooking Air Chrome Steel Racks MotorContainer CONTROL PANELThermostat TimerBEFORE USE1.Carefully unpack the convection oven and remove all packaging materials.2.Select a flat, heat-resistant, and non-flammable surface to place the convection oven.3.Do not immerse the heating element or lid in water or any other liquid.4.To remove any dust that may have accumulated on the removable parts during packaging,clean the surface with a damp cloth and remove any stickers (except for any warning/caution stickers).5.Wash the glass bowl container in warm soapy water. Rinse and dry thoroughly.6.Before first use, heat up the oven, empty, at maximum temperature for five minutes. Thiswill burn off the brand new scent. A little smoke may occur. This is normal and will soon disappear during usage.7.After the timer has turned off and the oven is completely cooled, wipe the inside of the glassbowl container once more.WARNING:To ensure continued protection against the risk of electric shock, connect to properly grounded outlets only.This appliance has a three-prong plug (meaning there are three prongs to fit into a power outlet).To reduce the risk of electric shock, this plug is intended to fit into a three-prong electrical outlet only in one direction. If it does not fit, contact a qualified electrician. Do not attempt to modify the plug in any way.CAUTION:Always be aware that this is an oven and that the glass bowl container and the lid will become very hot during its use.NOTE: Always place a pan or bowl on one of the included racks. Do not place a pan or bowl directly on the bottom of the glass bowl container.OPERATING INSTRUCTIONS1.Place the low rack in the glass bowl container before putting in the food. Keeping thefood approximately 1 to 1.25” from the glass wall to allow maximum hot air circulation.NOTE: Dual rack is used for achieving crispness or browning of the food.2.Place top lid securely on the glass bowl container.NOTE: Make sure that the food does not touch the top of the lid.3.Insert the power cord firmly into the wall outlet.4.Before turning the oven on, push handle down until it snaps securely in place. If thehandle is not completely down, the oven will not turn on.5.Set the timer to the desired time. The power LED lights will illuminate.6.The timer will switch “off” after the preset time period has passed and a bell will soundmomentarily to alert you that the cooking time is over.7.Unplug the cord from the power outlet before removing the lid.8.Do not put the oven lid directly on the countertop or table or cooking surface, otherwise,the cooking surface may leave a spot.9.Always use wooden, heat proof plastic and nylon utensil while cooking. Metal utensilsmay scratch the glass bowl container.NOTE: As a safety feature, the convection oven will switch off when the handle is lifted up.To turn the appliance back on, swing the handle all the way down.COOKING GUIDENOTE: All cooking times are approximate. Always ensure food is fully cooked inside before serving. For chicken and roasts, preheating is strongly recommended.Poultry Cooking Time (min) Temperature Rack Used Whole 35-40 350°-400°F Low Rack ChickenParts 18-25 350°-400°F High RackPoached 6-8 350°F Low Rack EggsSoft-Broiled 5-7 400°F Low RackOmelet 12-14 350°F Low Rack Meats Cooking Time (min) Temperature Rack UsedRare 6-8 475°F High Rack SteakMedium 9-12 475°F High RackWell 14-17 475°F High RackFresh 3-5 400°F Low Rack Hot DogFrozen 6-9 400°F Low Rack Bacon 8-9 400°F Low Rack Sausage Links 5-7 400°F Low Rack Ribs 18-25 475°F Low RackSeafood Cooking Time (min) Temperature Rack Used Fish 18-25 250°-300°F Low Rack Crab 15-20 275°-325°F Low Rack Bread Cooking Time (min) Temperature Rack Used Bread 10-15 250°-275°F Low RackCOOKING TIPSBroiling and Grilling• Place food directly on the low rack without covering. Use the high rack to bring food closer to heat source for additional crispness and browning of food.• If the meat or fish is very lean, brush the rack with cooking oil before arranging the food on the rack.• For a glazing affect, set the food 4 inches away from top heating unit. Apply the desired glaze and broil at 400 to 475F until the desired shade of brown is reached. Fruit jams, preserves and jellies work well as a glaze for broiled foods.Baking• When baking cakes, biscuits, brownies, muffins and cookies make sure the containers fit within the glass bowl and on top of rack. Disposable aluminum foil mini-loaf pans work well as they allow for faster and even cooking. Preheating is not necessary for baking in a convection oven.Air Frying• Little or no oil is used, yet the effect is like pan-frying or deep frying. If oil is used, only a thin layer of oil should be evenly applied to the food with the aid of a pastry brush.• Spray or brush vegetable oil onto the rack to assist with easier removal of cooked food.• Once food has finished cooking, remove the top lid from the glass bowl, otherwise, the steam will cause the food to become soggy instead of crispy.NOTE: NEVER FILL THE GLASS BOWL WITH OIL. THIS APPLIANCE IS NOT TO BE USED AS A DEEP FRYER!SteamingTo steam, place food in a bowl or small pan on top of the low rack making sure that the food does not contact the sides of your container. Pour water or broth into the bottom of the bowl or pan using half cup of liquid for every 1lb of food. Cover tightly with aluminum foil making sure food does not come in contact with the foil. Place wrapped container into the oven and cook at 350F for 5 to 10 minutes depending upon individual taste.RECIPESAll cooking times are approximate. Always ensure that food is fully cooked inside before serving. The following recipe, temperature settings and cooking times are for guidance only; cooking times may vary according to the weight of the food being cooked and individual taste.ROAST BEEF WITH GINGER AND MUSTARDIngredients1 medium piece of topside beef1 teaspoon ground ginger1 teaspoon fresh mustardSaltFreshly ground black pepper2 tablespoons water1 tablespoons corn flourMethodPreheat the oven to 350ºF. Cut slits in the beef and place in a metal roasting tin. Combine ginger, mustard, salt and pepper, and rub over the beef. Wrap the beef in foil. Place beef on low rack for approximately 1 hour depending on the degree of rareness that is required. Baste occasionally. Remove the meat and keep it wrapped in foil. To make the gravy, blend the corn flour with the water and add to the roasting tin, bringing gently to the boil, stirring as it thickens.BAKED CRUMB-TOPPED CODServes: 4Ingredients2 ½ oz skinless firm white cod steaks1 beef steak tomato1 medium leek4 tablespoons stuffing mix4 oz grated mature cheddar cheeseMethodPreheat the oven to 400ºF, wash and pat dry the fish steaks and place on the baking sheet lined with baking parchment. Thinly slice the tomato. Trim and shred the leek. Arrange the tomato over the fish overlapping and pile on the leek. Sprinkle over the stuffing mix, and top with the cheese. Place fish on the low rack and bake in the oven for 10 to15 minutes or until tender and cooked thoroughly.ROASTED WHOLE CHICKENMethodWash and dry the chicken and rub with desired spices. Let seasoning penetrate the chicken for a few hours (overnight is best) before roasting. Line the bottom of the glass bowl with aluminum foil to catch drippings. Place whole chicken on low rack and roast at 400°F for about 10 minutesper pound. For crisper skin, increase temperature to 450°F and continue to roast for an additional 5 to 10 minutes.MACARONI BAKEServes: 4Ingredients4 oz leeks, thinly sliced2/3 cup macaroni2 red onions, finely sliced1 red pepper, finely chopped3 teaspoons olive oil5 oz carton natural yogurt5 oz light cream cheese14 oz can chopped tomatoes, drained salt and freshly ground black pepper 2 oz cheddar cheese, gratedMethodPreheat the oven to 350°F. Cook the macaroni in a large pan of boiling salted water for 10 to12 minutes. Drain and mix the onions and pepper together. Heat the oil in a large frying pan and fry for 3 to 4 minutes until softened. In a bowl, mix the yogurt, cream cheese, tomatoes and seasoning, mix in the macaroni and the vegetables. Put them into a suitable dish and sprinkle with grate cheese. Bake for 20 to 30 minutes until golden.SAUSAGE STUFFED MUSHROOMSIngredients15 medium white mushrooms4 oz Italian style sausageMethodRemove the stem from the mushrooms and press equal amounts of the sausage into each mushroom cap. Place in a pie plate and cook on high rack on high setting for 10 minutes SICILIAN STYLE STEAKIngredients4 to 6 oz sirloin or rib steak2 teaspoons grated Parmesan cheese1 canned anchovy filet1/4 cup canned, chopped tomato1 tablespoon capers1 tablespoon olive oilMethodCook the steak on the high rack on high setting for 5 minutes per side. Meanwhile mix the other ingredients. Spread the mixture over the steak and cook another 3 minutes.CARE AND MAINTENANCECOMPLETELY CLEAN AND DRY ALL PARTS AFTER EVERY USE.1.Unplug the oven and allow it to cool completely before any cleaning or maintenance.2.Once glass bowl has cooled completely clean bowl thoroughly with warm soapy waterand damp cloth. The glass bowl and racks are dishwasher safe.3.For self-cleaning, add 1/2 inch of water with mild liquid detergent. Place lid on the pot.Set thermostat to 200F, set timer for 15 minutes and allow residue to soften as it heats.Unplug and cool completely before continuing to clean.4.To clean fan cover unplug the appliance and cool completely. Wipe top of fan cover witha soapy damp cloth or sponge to remove any grease.CAUTION:If scrubbing is necessary, use a nylon or polyester mesh pad.Do not use a steel wool pad or abrasive material.Never use solvents or cleaning powder.Do not get any liquids inside the lid.STORINGAllow the appliance to cool completely before storing. Store the appliance in a dry location. Do not place any heavy items on top of appliance during storage as this may result in possible damage of appliance.SAVE THESE INSTRUCTIONSLIMITED WARRANTYUnless otherwise prohibited, MC Appliance Corporation warrants each 12 Liter Convection OvenMCSGC12W to be free from defects in material and workmanship and agrees to remedy any such defect or to furnish a new part(s) (at the company’s option) of the unit that fails during the warranty period. A copy of the dated sales receipt or invoice is required to receive warranty service or a refund.This warranty covers an appliance in use within the continental United States, Puerto Rico and Hawaii. The warranty does not cover the following:Damages due to shipping or improper installation.Damages due to misuse or abuse.Content losses due to failure of the unit.Repairs performed by unauthorized service agents.Service calls that do not involve defects in material and workmanship such as instruction on proper use of the product or improper installation.Failure of this product if used for other than for its intended purpose.Disposal costs for any failed unit not returned to our factory.Any delivery costs incurred as the result of a unit that fails to perform as specified.This warranty is in lieu of any and all warranties expressed or implied and no representative or person is authorized to assume for us any other liability in connection with the sale of this product. Under no circumstances is the consumer permitted to return this unit to the factory without prior written consent from MC Appliance Corporation.Model Parts & Labor Type of ServiceMCSGC12W One-Year Carry-InFor Service or Assistance please call888-775-0202Or visit us on the web at to request warranty service。
松下 蒸烤箱 NU-SC211W NU-SC31MB NU-SK3MMB 使用说明书
警告:除有资格的维修人员外, 其他人来执行检修操作都是非常 危险的。请勿擅自对产品进行拆 ህൣѬᝍ 卸、修理或改造。
注: 如 需 维 修, 请 拨 打 Panasonic 顾客咨询服务中心或联系 Panasonic 认定维修店进行修理。
ህൣ
当发现产品工作不正常时,切勿 继续使用。
注:如需维修,请拨打 Panasonic 顾 客咨询服务中心或联系 Panasonic 认 定维修店进行修理。
使用说明书 蒸烤箱
型号:/64$8
/64$.#
/64,..# 仅家庭用
型号:/64$8
使用前,请仔细阅读本说明书及保修证并妥善保管
手机微信扫描二维码 关注松下服务官方微信平台
在线人工客服 一键报修报装 服务进度查询 获取新品咨询
社内检查合格产品
F0003CS00XP-1109.indd cover1
© Panasonic Appliances Microwave Oven (Shanghai) Co., Ltd. 2021
F0003CS00XP-1109.indd 目录2
2021/11/9 9:03:10
操作指南
当您插上产品的电源插头,显示窗显示“
”,即可开始使用。
功能 儿童安全锁设定 / 取消
20 cm
10 cm
5 cm
ѭӈᝨֶ̗ᄊ᫃ԣᮇᦊ ԪܸԍҧǍ
ֶ̗ॹᮌࣱஊ
ˀԻ࠲ֶ̗ஊᎶ̆ᰴພ ຳڡவǍΓݠඡ༯Ἳ ࣜႃӝੋඵയஸǍ
ႃູ వֶ̗ ॹᮌӭ࿘ΎၹΙႃጇፒǍ వֶ̗̰Х̵ܬ ˗Ѭѣ˄ၹΙႃጇፒǍݠˀၹ̆ᤈጇፒἻԻᑟཽ͘ லႃ٨δᬗˍἻथᝬΎၹ10 A ̿ʽᄊδᬗˍǍ ښႃ˗ˀԻΎၹᰴࠔ᧚δᬗˍǍ
蒸烤一体机使用说明教程
蒸烤一体机使用说明教程一、产品介绍蒸烤一体机是一款集蒸煮、烘烤于一体的厨房电器,操作简单,功能强大,为您的烹饪带来便利和多样性。
二、使用前准备1. 将蒸烤一体机放置在干燥通风的台面上,确保电源插座接地可靠。
2. 打开包装箱,取出蒸烤一体机及配件,查看是否完整无损。
3. 仔细阅读产品说明书,了解各功能按钮的作用和使用方法。
三、蒸煮功能1. 先将蒸烤一体机连接电源,按下电源开关,待指示灯亮起。
2. 打开蒸盘,加入适量清水,然后放入待蒸的食材。
3. 调节时间和温度按钮,根据食材种类选择适宜的蒸煮时间和温度。
4. 关上蒸盖,等待蒸烤一体机工作完成后,听到嘀嘀声提示即可关机取出食物。
四、烘烤功能1. 在使用烘烤功能前,确保底部蒸盘中加入适量清水,以防止食材烤糊。
2. 打开烤盘,放入待烘烤的食材,注意摆放均匀。
3. 调节时间和温度按钮,选择合适的烘烤时间和温度。
4. 启动烤箱,等待预热完成后放入食材,定时查看烘烤进度,可随时转动食材位置,确保均匀受热。
5. 烘烤完成后,注意使用防烫手套取出食材,避免烫伤。
五、清洁与保养1. 在清洁蒸烤一体机时,必须确保断开电源,等待冷却后再进行操作。
2. 用湿布蘸少许中性清洁剂擦拭机身表面,切勿使用腐蚀性强的化学品。
3. 将蒸盘、烤盘等易脏的部件取下,用温水和中性洗洁精清洗,擦干后再装回原处。
4. 定期对蒸烤一体机进行保养,注意除尘、防潮,并定期检查电源线是否有损伤。
六、注意事项1. 使用时请勿将蒸烤一体机放置在易燃物品附近,以免发生火灾事故。
2. 操作过程中切勿触碰烤箱内部加热部件,避免烫伤。
3. 禁止在蒸烤一体机内部放入易燃、易爆物品,严禁空炉加热。
4. 在使用过程中如发现异常情况,请及时断开电源并联系售后服务。
七、结束语通过本使用说明教程,相信您已经对蒸烤一体机的使用方法有了更清晰的认识。
正确操作和保养您的厨房电器,将为您带来更便捷、更安全的烹饪体验。
祝您使用愉快!。
ARISTON FH52 FB52 FZ62 C.1 烤箱 说明书

上下火燒烤
此為最常用之烘烤方式,為上火加熱與下火加熱,適用於牛排魚 排或焗烤水果糕點等食物。為讓烘烤溫度平均,建議每次烘烤只 放一層。
H G F
◆
旋風烘烤
此烘烤方式的溫度最均勻,並可同時烘培雙層食物,因箱內溫度 分佈均勻,烤肉(全雞)時,可使用較低溫度來烘烤,肉汁不易流 失。烘培糕點亦常用此加熱方式。若用來解凍紅肉 /白肉時,可 將溫度設在60℃,或使用冷風來解凍肉質纖細之食物。
(分鐘 )
溫度 200 210 200 200 180 180 190 170 200 max max max max max max 220 180 180 180 200 200 180 190 180 90
●
烹調急速冷凍食品時(如薯條、馬鈴薯),可使用烘烤紙再置於烤盤 上,選用生產廠商包裝上建議之最低溫度。
刷子清理。如有需要,以最高溫度空燒30分鐘(頑垢可加長時間), 此可使油污分解。最後再用軟刷將內壁灰粒刷淨。
● 如有需要可將烤箱門拆下清潔。
拆下箱門如圖示: 1.完全將箱門打開 2.將位於門軸二側之小卡榫向上撥。 3.確實握住箱門二側,向身體方向拉出即可。(如圖)
1
2
3
● 型號FZ62
C.1烤盤之支撐架拆卸與安裝方式如下。
E.指示燈
肉質纖細之食物。
◆
上火烘烤
此烘烤方式可將食物外層烤成金黃色,通常是烘烤程序的最後一 步驟。如:糕點表面塗蛋黃後所使用烘烤方式。
◆
上火燒烤
用以極高溫上火用來燒烤牛排、肋排、漢堡等,並可保住肉汁 使肉質鮮美例。
B.烘烤方式選擇
D.計時器
C.烘烤溫度選擇
A 控制面板 B 烘烤方式選擇 C 烘烤溫度選擇 D 定時器 E 指示燈 (指示燈亮起表示持續加熱中)
CONVOTHERM OES 6.20 电加热康富登万能蒸烤箱 说明书
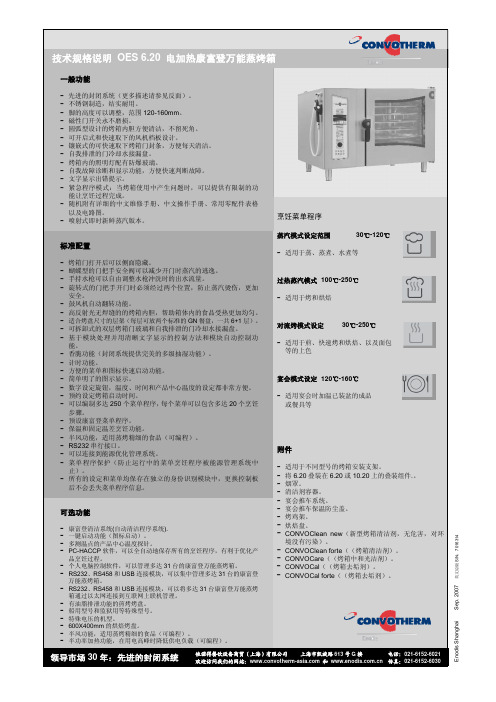
安装信息: (请参见我们的安装手册以获得正 确的安装指导)
电源连接: 每台蒸烤箱均需要独立的三相空气 开关,空气开关应安装在蒸烤箱的 附近。 标准电压:380V/50Hz (三相五线 制,接地性能良好)。
我们还可以提供特殊的电压或船用 电压标准,请在订购时预先说明。
客户需要提供的供电设施:
电源功率:
步骤。 - 预设康富登菜单程序。 - 保温和固定温差烹饪功能。 - 半风功能,适用蒸烤精细的食品(可编程)。 - RS232 串行接口。 - 可以连接到能源优化管理系统。 - 菜单程序保护(防止运行中的菜单烹饪程序被能源管理系统中
止)。 - 所有的设定和菜单均保存在独立的身份识别模块中,更换控制板
后不会丢失菜单程序信息。
安全。 - 鼓风机自动翻转功能。 - 高反射光无焊缝的的烤箱内胆,帮助箱体内的食品受热更加均匀。 - 适合烤盘尺寸的层架(每层可放两个标准的 GN 餐盘,一共 6+1 层)。 - 可拆卸式的双层烤箱门玻璃和自我排泄的门冷却水接漏盘。 - 基于模块处理并用清晰文字显示的控制方法和模块自动控制功
能。 - 香脆功能(封闭系统提供完美的多级抽湿功能)。 - 计时功能。 - 方便的菜单和图标快速启动功能。 - 简单明了的图示显示。 - 数字设定旋钮,温度、时间和产品中心温度的设定都非常方便。 - 预约设定烤箱启动时间。 - 可以编制多达 250 个菜单程序,每个菜单可以包含多达 20 个烹饪
万能蒸烤箱。 - RS232、RS458 和 USB 连接模块,可以将多达 31 台康富登万能蒸烤
箱通过以太网连接到互联网上联机管理。 - 有油脂排泄功能的煎烤烤盘。 - 船用型号和监狱用等特殊型号。 - 特殊电压的机型。 - 600X400mm 的烘焙烤盘。 - 半风功能,适用蒸烤精细的食品(可编程)。 - 半功率加热功能,在用电高峰时降低供电负载(可编程)。
康福登convotherm烤箱

Combi Steamers制作:康福登有限公司房锦青2009年11月版•自我介绍•Convotherm历史介绍•产品介绍•安装及验少•水系统分析•控制电路原理分析及零件认识•故障排除•预防性保养第一部分Convotherm万能蒸烤箱历史介绍1976成立于德国莫尼黑郊区1982推出全球第一台全电子控制的烤箱1998CONVOTHERM 加入ENODIS集团20026000平方米厂房投入使用年产10000台烤箱2005 2005年成立convotherm新加坡2008 CONVOTHERM加入Manitowoc Foodservice 2009现在:-6000万欧元-全球336 位员工-领先的技术-min型烤箱-easy touch•1976 抗菌门缝条•1982 密闭式的烹饪系统(全球专利)•1987 手持式水枪•1989 年直立式烤鸡架•1994 隐藏式移动门•1997 PC-HACCP•2002 全自动清洁系统•2004 最新的第三代•2006 MINI家族•2007 easy touch历史介绍----连锁客户Queen Mary II第二部分Convotherm万能蒸烤箱产品介绍The +3 series ~ electric or gas, boiler or injectorThe mini series ~ with 2/3 GN or 1/1 GN••同类型的烤箱康福登蒸烤箱独特的隐藏式收门设计安全的设计已成为康福登的标准配备打开门---------!然後…门消失了!!两段式门把手设计有效控制开门时不会热气烫伤,避免误操作。
坚固且简易-为了更多的安全第三部分Convotherm 安装及验收一;蒸烤箱应整体水平置放于烟罩下二;蒸烤箱安装要有足够的安全距离1:烤箱后备具其它发热设备或墙体要不少于50MM50MM50MM2;左右两边距离其它发热设备或墙体至少有50MM300mm-500mm 4;烤箱顶部距离烟罩顶部的距离为:300-500MM5;蒸烤箱四脚,准确放置于托架上的,固定螺栓上。
- 1、下载文档前请自行甄别文档内容的完整性,平台不提供额外的编辑、内容补充、找答案等附加服务。
- 2、"仅部分预览"的文档,不可在线预览部分如存在完整性等问题,可反馈申请退款(可完整预览的文档不适用该条件!)。
- 3、如文档侵犯您的权益,请联系客服反馈,我们会尽快为您处理(人工客服工作时间:9:00-18:30)。
Combi Steamers
制作:康福登有限公司房锦青
2009年11月版
•自我介绍
•Convotherm历史介绍
•产品介绍
•安装及验少
•水系统分析
•控制电路原理分析及零件认识•故障排除
•预防性保养
第一部分
Convotherm
万能蒸烤箱历史介绍
1976成立于德国莫尼黑郊区
1982推出全球第一台全电子控制的烤箱
1998CONVOTHERM 加入ENODIS集团20026000平方米厂房投入使用年产10000台烤箱2005 2005年成立convotherm新加坡
2008 CONVOTHERM加入Manitowoc Foodservice 2009现在:-6000万欧元
-全球336 位员工
-领先的技术
-min型烤箱
-easy touch
•1976 抗菌门缝条
•1982 密闭式的烹饪系统(全球专利)•1987 手持式水枪
•1989 年直立式烤鸡架
•1994 隐藏式移动门
•1997 PC-HACCP
•2002 全自动清洁系统
•2004 最新的第三代
•2006 MINI家族
•2007 easy touch
历史介绍----连锁客户
Queen Mary II
第二部分
Convotherm
万能蒸烤箱产品介绍
The +3 series ~ electric or gas, boiler or injector
The mini series ~ with 2/3 GN or 1/1 GN
•
•
同类型的烤箱康福登蒸烤箱
独特的隐藏式收门设计安全的设计已成为康福登的标准配备
打开门---------
!
然後…门消失了!!
两段式门把手设计有效控制开门时不会热气烫伤,
避免误操作。
坚固且简易-为了更多的安全
第三部分Convotherm 安装及验收
一;蒸烤箱应整体水平置放于烟罩下
二;蒸烤箱安装要有足够的安全距离
1:烤箱后备具其它发热设备或墙体要不少于50MM
50MM
50MM
2;左右两边距离其它发热
设备或墙体至少有50MM
300mm-500mm 4;烤箱顶部距离烟罩顶部的
距离为:300-500MM
5;蒸烤箱四脚,准确放置于托架上的,固定螺栓上。
6烤箱的水平校准
7;烤箱托架的地脚螺栓的固定
固定螺栓
进水连接图1
100
100
进水连接图2
排水管连接
电源的连接:
一;康福登万能蒸烤箱要有单独的电源供应,即蒸烤箱的电源没有连接其它的设备。
二;设备的电源要符合安全保护要求,要安装漏电保护,过载保护装置,要有接地接零保护。
三;供电电源与烤箱名牌要一致:
四;要有安全有效的电源防水接插头
五;万能蒸烤箱进行安装或修理前必须切断电源供应。
第四部分Convotherm 水系统原理分析
(OEB )
1.均压阀
2.鼓风机
3.风机挡板
4.蒸烤箱体
5.对流烤加器
6.热风和蒸气流向
7.抽湿盖板
8.蒸烤箱排水
9.蒸烤箱抽湿部件10.冷凝器
11.冷凝器水位圈12.抽湿喷水口13.冷凝器排水口14.冷凝器溢水口15.冷凝喷水口16.抽湿进水管17.冷凝进水管18.锅炉进水管19.通气管20.抽气管
21.锅炉水位探针22.锅炉23.蒸汽出口
24.鼓风机马达
25.电加热机型锅炉加热器26.
锅炉排水泵
工作原理示意图软水流向
普水流向清洁剂流向中和剂流向
1.蒸烤箱排水
2.蒸烤箱底板
3.抽湿进水电磁阀
4.抽湿进水管
5.抽湿喷水口
6.抽湿盘盖板
7.抽湿盘
8.控制板(SM)
9.冷凝器
10.冷凝器溢水口
11.冷凝器出水口
锅炉进水示意图
锅炉进水示意图
锅炉进水示意图
示意图
示意图
示意图
示意图
抽湿功能示意图
抽湿排水示意图
锅炉排水示意图
锅炉排水示意图
示意图
锅炉排水示意图
锅炉进水示意图
清洁程序示意图
清洁程序示意图
清洁程序
示意图。