柯达305打印机中文使用说明书
打印机设置与使用说明书
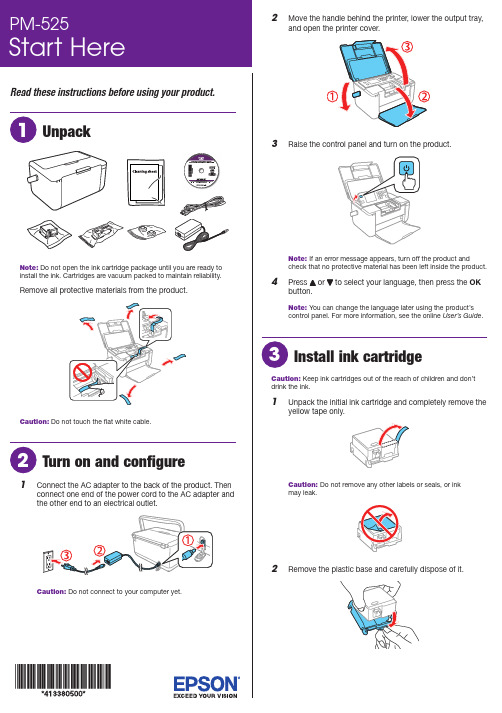
Read these instructions before using your product.Note: Do not open the ink cartridge package until you are ready toRCaution:1 C onnect the AC adapter to the back of the product. Thenconnect one end of the power cord to the AC adapter andthe other end to an electrical outlet.Caution: Do not connect to your computer yet.2 M ove the handle behind the printer, lower the output tray,and open the printer cover.3Raise the control panel and turn on the product.Note: If an error message appears, turn off the product andcheck that no protective material has been left inside the product.4 P ress OKNote: You can change the language later using the product’scontrol panel. For more information, see the online User’s Guide.Caution: Keep ink cartridges out of the reach of children and don’tdrink the ink.1 U npack the initial ink cartridge and completely remove theyellow tape only.Caution: Do not remove any other labels or seals, or inkmay leak.2 Rpen the rear paper feed cover if necessary. Flip theOK button.OK button.OK button again to confirm the paper settings.Make sure the paper settings matches the type and size ofComputer setupFollow the steps here to connect your product to a computer or wireless network.Note: If your computer does not have a CD/DVD drive or you are using a Mac, an Internet connection is required to obtain the product software. To print from a Chromebook ™, go to .jm/support/gcp for instructions.1 M ake sure the product is NOT CONNECTED to yourcomputer.W indows ®: If you see a Found New Hardware screen, click Cancel and disconnect the USB cable.2I nsert the product CD or download and run your product’ssoftware package:.jm/support/pm5253 F ollow the instructions on the screen to run the setupprogram.4 W hen you see the Select Your Connection screen, selectone of the following:• Wireless connectionIn most cases, the software installer automatically attempts to set up your wireless connection. If setup is unsuccessful, you may need to enter your network name (SSID) and password.• Direct USB connectionM ake sure you have a USB cable (not included) ready.Mobile printing optionsConnect wirelessly from your smartphone, tablet, or computer.Print documents and photos from across the room or around the world:• P rint directly from your iPhone, iPad, or iPod touch. Simply connect your printer and device to the same network and tap the action icon to select the print option.• U se Epson Print Enabler (free from Google Play ™) with Android ™ devices (v4.4 or later). Then connect your printer and device to the same network and tap the menu icon to select the print option.• P rint remotely with Epson Connect and Google Cloud Print ™. See your online User’s Guidefor instructions.Your product provides several ways to print, both at home and on the road:• To connect your product to a mobile device on the road, see “Mobile setup.”• To connect your product to a computer or wireless network, see “Computer setup.”• To print from a memory card or digital camera, see the online User’s Guide .Mobile setupFollow the steps here to connect your product wirelessly to a mobile device without requiring a wireless router or access point (Wi-Fi Direct ®).Note: Wi-Fi Direct is recommended when a wireless network is not available. To set up your product on a wireless network (Infrastructure), follow the steps in “Computer setup” to have the software installer automatically attempt the wireless connection or see the online User’s Guide for instructions on manually setting up the wireless connection.1 PressWi-Fi Setup on the LCD screenand press the OKbutton.2 Press to select Wi-Fi Direct and press the OKbutton.3 Press the OK button to confirm your selection.4 Press the OK button again to continue.5 S croll down to view the SSID (Wi-Fi network name) andpassword. You see a screen like this:Use your mobile device to select the SSID displayed on the LCD screen, and enter the password shown.6 P ress OK on the product once you are done entering thepassword on your mobile device.7 Y our product and mobile device are now connected. See“Mobile printing options” for additional instructions.Note: If you see a message reminding you to set up an EpsonConnect ™ account, press to turn off the reminders. You can set upan account later from your computer or mobile device.SupportVisit .jm/support/pm525 to download drivers, view manuals, get FAQs, or contact Epson.Argentina(54 11) 5167-0300 Honduras ** 800-01220800-288-37766Code: 8320Bolivia * 800-100-116 Mexico 01-800-087-1080Chile (56 2) 2484-3400 Mexico City (52 55) 1323-2052Colombia 018000-915235 Nicaragua * 00-1-800-226-0368Bogota (57 1) 523-5000 Panama * 00-800-052-1376Costa Rica 800-377-6627 Paraguay 009-800-521-0019DominicanPeru 0800-10126 Republic * 1-888-760-0068 Lima (51 1) 418-0210Ecuador * 1-800-000-044 Uruguay 00040-5210067El Salvador * 800-6570Venezuela (58 212) 240-1111Guatemala * 1-800-835-0358* C ontact your local phone company to call this toll-free number from a mobilephone.** Dial the first 7 digits, wait for a message, then enter the code.If your country does not appear on the list, contact your nearest Epson sales office. Toll or long distance charges may apply.Need paper and ink?Ensure peak performance and brilliant results with Genuine Epson Ink and specialty papers, engineered specifically for Epson printers. You can purchase them from an Epson authorized reseller. To find the nearest one, visit .jm or contact Epson as described in “Any questions?” on this sheet.PM-525 replacement ink cartridgeEPSON is a registered trademark, EPSON Exceed Your Vision is a registered logomark, and Epson Connect is a trademark of Seiko Epson Corporation. Designed for Excellence is a trademark of Epson America, Inc.Mac, iPhone, iPad, and iPod touch are trademarks of Apple Inc., registered in the U.S. and other countries.Android, Google Cloud Print, Chromebook, and Google Play are trademarks of Google Inc.Wi-Fi Direct is a registered trademark of Wi-Fi Alliance .General Notice: Other product names used herein are for identification purposes only and may be trademarks of their respective owners. Epson disclaims any and all rights in those marks.This information is subject to change without notice.© 2017 Epson America, Inc., 1/17 CPD-53205。
东芝305说明书

Screens and Operation Procedures
y Illustrations for a control panel and a touch panel shown in this manual are those of the e-STUDIO4520C Series. The details on the touch panel menus may differ depending on how the equipment is used, such as the status of the installed options.
Describes handy information that is useful to know when operating the equipment. Pages describing items related to what you are currently doing. See these pages as required.
How to read this manual
Symbols in this manual
惠普 LaserJet 3050 3052 3055 3390 3392 多功能一体机 说明书
HP LaserJet 3050/3052/3055/3390/3392 all-in-one (HP LaserJet 3050/3052/3055/3390/ 3392 多功能一体机)用户指南版权与许可© 2006 版权所有 Hewlett-Packard Development Company, LP未经事先书面许可,严禁进行任何形式的复制、改编或翻译,除非版权法另有规定。
此处包含的信息如有更改,恕不另行通知。
HP 产品和服务的所有保修事项已在产品和服务所附带的保修声明中列出,此处内容不代表任何额外保修。
HP 公司对此处任何技术性或编辑性的错误或遗漏概不负责。
产品号 Q6500-90939Edition 1, 4/2006商标声明Adobe Photoshop® 和 PostScript® 是Adobe Systems Incorporated 的商标。
Corel® 是 Corel Corporation 或 Corel Corporation Limited 的商标或注册商标。
Linux 是 Linus Torvalds 在美国的注册商标。
Microsoft®、Windows®、Windows NT® 和Windows® XP 是 Microsoft Corporation 在美国的注册商标。
UNIX® 是 Open Group 的注册商标。
ENERGY STAR® 和 ENERGY STAR 徽标®是美国环保署在美国的注册标记。
目录1 多功能一体机基本信息多功能一体机配置 (2)HP LaserJet 3050 all-in-one (HP LaserJet 3050 多功能一体机) (2)HP LaserJet 3052/3055 all-in-one (HP LaserJet 3052/3055 多功能一体机) (3)HP LaserJet 3390/3392 all-in-one (HP LaserJet 3390/3392 多功能一体机) (4)多功能一体机功能 (5)多功能一体机部件 (7)HP LaserJet 3050 all-in-one (HP LaserJet 3050 多功能一体机) 部件 (7)正视图 (7)后视图 (7)接口 (8)控制面板 (8)HP LaserJet 3052/3055 all-in-one (HP LaserJet 3052/3055 多功能一体机) 部件 (9)正视图 (9)后视图 (9)接口 (10)控制面板 (10)HP LaserJet 3390/3392 all-in-one (HP LaserJet 3390/3392 多功能一体机) 部件 (11)正视图 (11)后视图 (11)接口 (12)控制面板 (12)2 软件软件安装 (14)典型安装 (14)最小安装 (14)打印机驱动程序 (15)支持的打印机驱动程序 (15)附加驱动程序 (15)选择正确的打印机驱动程序 (15)打印机驱动程序帮助 (Windows) (16)访问打印机驱动程序 (17)其它还有哪些软件可用? (17)Windows 软件 (18)用于 Windows 的软件组件 (18)HP ToolboxFX (18)嵌入式 Web 服务器 (EWS) (18)使用“添加或删除程序”卸载 (18)ZHCN iiiMacintosh 软件 (19)HP Director (HP 控制器) (19)Macintosh Configure Device (Macintosh 配置设备)(Mac OS X V10.3 与Mac OS X V10.4) (19)PDE(Mac OS X V10.3 与 Mac OS X V10.4) (20)安装 Macintosh 软件 (20)安装适用于直接连接 (USB) 的 Macintosh 打印系统软件 (20)安装用于网络的 Macintosh 打印系统软件 (20)从 Macintosh 操作系统中删除软件 (21)3 介质规格一般准则 (24)选择纸张和其它介质 (24)HP 介质 (24)避免使用的介质 (25)可能损坏多功能一体机的介质 (25)介质使用准则 (26)纸张 (26)标签 (26)标签结构 (27)投影胶片 (27)信封 (28)信封结构 (28)双面接缝信封 (28)带不干胶封条或封舌的信封 (29)信封存放 (29)卡片纸和重磅介质 (29)卡片纸结构 (29)卡片纸准则 (29)信头纸和预打印表单 (30)支持的介质重量和尺寸 (31)打印和存放环境 (34)4 使用多功能一体机将介质装入进纸盘 (36)装入要传真、复印或扫描的文档 (36)将纸张装入进纸盘,HP LaserJet 3050/3052/3055 all-in-one (HP LaserJet 3050/3052/3055 多功能一体机) (37)优先进纸槽 (37)250 张进纸盘(纸盘 1) (38)将纸张装入进纸盘,HP LaserJet 3390/3392 all-in-one (HP LaserJet 3390/3392 多功能一体机) (39)单张优先进纸槽(纸盘 1) (39)250 张进纸盘(纸盘 2 或可选纸盘 3) (39)控制打印作业 (40)打印设置优先级 (40)选择来源 (40)选择类型或尺寸 (40)使用多功能一体机控制面板 (41)iv ZHCN更改多功能一体机控制面板显示语言 (41)更改默认介质尺寸和类型 (41)更改默认介质尺寸 (41)更改默认介质类型 (42)更改默认纸盘配置 (42)使用多功能一体机音量控制键 (42)更改警报音量 (43)更改传真音量 (43)更改传真响铃音量 (44)更改多功能一体机控制面板按键音量。
打印机使用说明
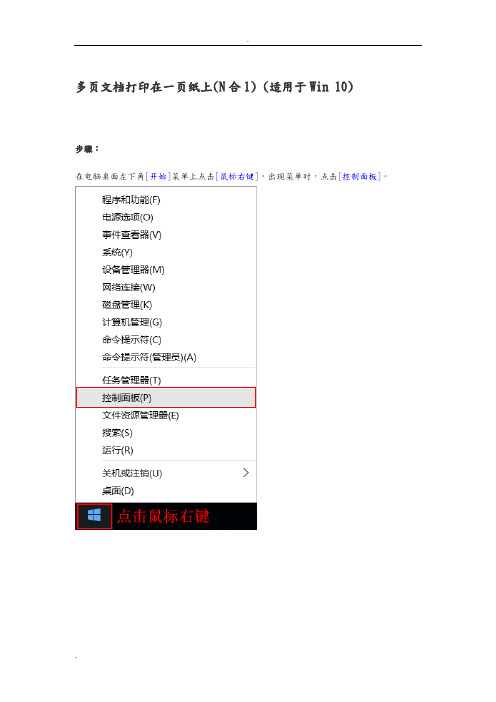
多页文档打印在一页纸上(N合1) (适用于Win 10)步骤:在电脑桌面左下角[开始]菜单上点击[鼠标右键],出现菜单时,点击[控制面板]。
手动调整扫描深浅(适用于ControlCenter4标准模式)操作步骤:对于WindowsXP、Windows Vista、Windows7从[开始]菜单,依次选择[所有程序]→[Brother]→[MFC-XXXX/DCP-XXXX]→[ControlCenter4]对于Windwos8、Windows8.1、Windows10点击[Brother Utilities]。
点击左侧导航栏中的[扫描],然后点击[ControlCenter4]手动调整扫描深浅(适用于ControlCenter4高级模式)说明:通过设置扫描的亮度和对比度,就可以手动调整扫描深浅操作步骤:对于WindowsXP、Windows Vista、Windows7从[开始]菜单,依次选择[所有程序]→[Brother]→[MFC-XXXX/DCP-XXXX]→[ControlCenter4]对于Windwos8、Windows8.1、Windows10点击[Brother Utilities]。
点击左侧导航栏中的[扫描],然后点击[ControlCenter4]重置硒鼓单元计数器说明:当设备提示[更换硒鼓]或[硒鼓停止工作],建议您更换兄弟原装硒鼓,并重置硒鼓单元计数器。
操作步骤:1、打开前盖,按[清除/返回(Clear/Back)键]。
2、按[▲]键。
3、屏幕显示接受,合上前盖。
恢复出厂设置操作步骤:1、按[功能]键。
2、按[↑]或[↓]键选择到[常规设置],按[OK]键。
3、按[↑]或[↓]键选择[重置],按[OK]键。
4、按[OK]键。
按[↑]键选择[重置]。
5、按[↑]键选择[是]。
6、设备将自动重启。
开启墨粉继续运行模式说明:当液晶屏幕显示[更换墨粉/更换墨粉盒]时,可以开启墨粉继续运行模式进行打印。
理光MP2553 MP3053 MP3353多功能黑白复印机说明书
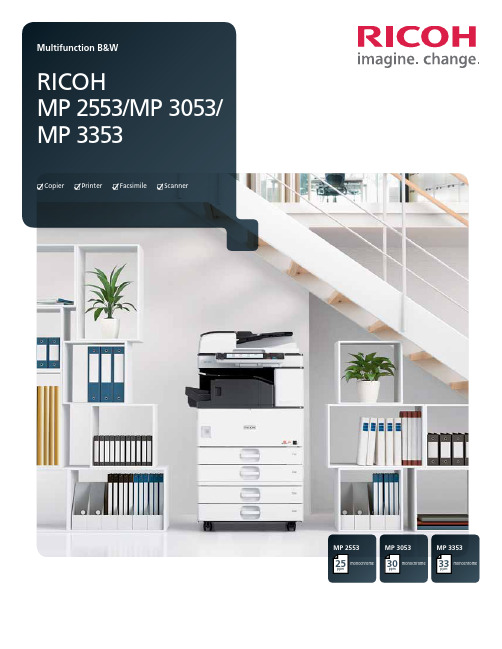
MP 3353ppmmonochrome33MP 2553ppmmonochrome25MP 3053ppmmonochrome30CopierPrinterFacsimileScannerPersonalize your productivityYour organization is unique. So is the way you conduct business. So why handle document management the same way everybody else does? Customize the RICOH® MP 2553/MP 3053/MP 3353 to accommodate your unique workflows. These versatile MFPs help you print, copy, share and secure a wider range of documents in more places, more conveniently. Use it as your information portal and connect to cloud services and applications directly from the operation panel. With a host of advanced document management capabilities packed into a space-saving, eco-friendly design, it’s ideal for any small office or workgroup looking to streamline workflow and enhance output from creation to finish – at sizes up to 11" x 17". Whether it’s used as a primary system or as an integral part of the Ricoh Managed Document Services (MDS) strategy, this customizable MFP helps to enhance productivity and reduce total cost of ownership for any organization.• Produce up to 33 monochrome prints/copies per minute• Connect from anywhere using location-free mobile printing• Designed to simplify workflow and improve productivity without increasing footprint size• Manage more tasks with flexible media handling• Sustain cost-effective operations with energy-saving efficiencyCustomizable everyday convenienceWork the way you want and how you wantImprove productivity anytime, anywhereDon’t let its sleek, compact design fool you. The Ricoh MP 2553/MP 3053/MP 3353 offers incredible power that demands attention.It can recover from sleep mode in less than 10 seconds and can printup to 33 monochrome pages per minute. With the standard 100-SheetAutomatic Reversing Document Feeder (ARDF), users can scan up to79 color or monochrome images per minute. Use the internal finisherto add a professional touch to document sets and streamline workfloweven more – without adding to the small footprint.Empower the mobile workforceTake advantage of wireless technology and bring unprecedentedflexibility to the workplace. The Ricoh MP 2553/MP 3053/MP 3353integrates with Ricoh HotSpot Enterprise, so mobile users can printdirectly to the MFP from laptops, smartphones and tablets withoutcompromising speed, convenience or security. This powerful solution isdesigned to be behind your firewall, does not require print drivers formobile devices and works seamlessly with cost recovery software.Control workflow efficiency withleading-edge technologyThe Ricoh MP 2553/MP 3053/MP 3353 works as smart as you do.Personalize the Home Screen with one-click icons for commonly usedtasks, including copying, scanning and faxing. Use optional embeddedsoftware such as GlobalScan or third-party vendor software to createcustom workflows for your most complicated tasks. Our partnershipswith industry-leading technology innovators allow access to a largeselection of applications for content management and otherbusiness-critical tasks directly from the MFP.Simplify operationsYou can quickly see why the Ricoh MP 2553/MP 3053/MP 3353 is easyto use. For misfeeds, the MFP offers easy-to-follow animated guidesthat help users identify and resolve the source of the problem. Userscan tilt the 9-inch control panel screen for easier viewing and moreconvenient access to system functions. Plus users can preview jobs toensure accuracy prior to printing or scanning.Exceptional, solid performance Print with power, consistentlyThe Ricoh MP 2553/MP 3053/MP 3353 can keep pace with yourentire workgroup’s busy demands without compromising speedor performance. Featuring a powerful 533 MHz processor, upto 1.5 GB RAM and a 250 GB HDD, it integrates seamlessly inalmost any environment—including Windows, Macintosh, Citrix,SAP, UNIX, AS/400 and more. Its icon-driven, one-click presetPCL6 user interface driver simplifies print jobs for crisp outputat up to 600 dpi. Advanced administrative controls allow youto set quotas and limit output for specific users or workgroups.This can help your organization to reduce operating costs whileencouraging more environmental awareness for long-term,sustainable savings.Scan with convenience, quicklyShare critical information efficiently with easy-to-use advancedscanning capabilities. Scan in black-and-white or color in PDF, TIFFor JPEG formats. Then share them immediately via Scan-to-File/Folder/URL/FTP/Email functionality. Compress file sizes for morecomplex scans and send them easily without compromising imagequality. Distributed Scan Management (DSM) offers centralizedscanning that automates many tasks while following specificpreferences, permissions and rules that expedite delivery.Manage more tasks, efficientlyLooking to improve productivity? Spend less time looking for documents.The Ricoh MP 2553/MP 3053/MP 3353 offers optional embeddedOCR, so users can retrieve documents quickly by searching for specificwords in PDF text in up to 14 languages. This convenient feature canalso detect blank pages in large jobs and remove them automaticallyto reduce waste. Plus connect to Ricoh’s optional Integrated CloudEnvironment (ICE) solution and scan documents, share files and printon the go with incredible convenience from the MFP touchscreen.We’ve made it easy to take controlImpressive performance on displayRicoh’s optional 10.1" Wide Super VGA Smart Operation Panelis designed to offer the functionality and performance of today’ssmartphones and tablets. Featuring drag-and-drop, pinch-and-flickfunctionality and swipe scrolling, it allows users to quickly movefrom one task to the next with unprecedented ease. It even includesconvenient widgets for the date and time.Simplicity at its bestRicoh’s new Quick User Interface feature from the optional SmartOperation Panel simplifies the choices for the most frequently usedfunctions for Copy, Scanner and Fax. They can be used with intuitivetouch gestures, such as flicking to select addresses, and pinching tozoom in or pan out on a preview. For workgroups requiring enhancedfeature functionality, it is easy to switch between the Quick UserInterface functions and Ricoh’s traditional user interface. Plus the newpanel also offers advanced Web Browser functionality designed to beon par with today’s mobile devices.Centralized administrative controlsOptimal performance is at your fingertips. Manage, monitor andtroubleshoot your entire Ricoh fleet from the desktop. With WebImage Monitor, IT and technicians can take advantage of a remoteuser interface to view the MFP’s operation panel. Use a Web browserto access system settings and address books. Receive email alertsand real-time updates when supplies are low. And, use @Remote®to automate meter reads, service event notifications and low toneralerts to improve day-to-day efficiency, including firmware updates.Smart, secure document management Protect sensitive informationHow vulnerable is your organization’s data? Security breaches cancompromise critical information at any time and they are expensiveand time-consuming to resolve. Ricoh offers a number of securitytechnologies to help protect your information at every level. TheRicoh MP 2553/MP 3053/MP 3353 includes user authenticationto help prevent unauthorized access to key functions and proprietaryinformation. With this technology, documents can be storedat the MFP and released after authorized users authenticate atthe device with a user log-in name and password or with an IDcard that’s swiped at the optional card reader. The device canalso overwrite data on the hard drive automatically and offersencryption protection to help protect against hackers.Fast, affordable paperless faxingManage fax workflow quickly and conveniently. Send or receivefaxes electronically with Internet Faxing. Or, use LAN faxing totransmit directly from a PC. Super G3 faxing is available as wellfor quick delivery to conventional fax numbers. With the RemoteFax Option, users can send and receive fax documents from anyconnected device in your fleet – even those without fax options– by sending it through the Ricoh MP 2553/MP 3053/MP 3353.This minimizes phone line costs and additional fax boards.Encourage environmental stewardshipWe’re committed to driving sustainable, energy-efficientoperations. That’s why we designed the Ricoh MP 2553/MP 3053/MP 3353 to use less power. Designed to be oneof the lowest typical electricity consumption (TEC) valuesin the industry, it meets all new ENERGY STAR v2.0 criteria.Organizations can also program the device to power on oroff during specified downtimes, including during weekendsor lunch, to conserve even more energy.1234571Navigate from job to job easily via the full-color, 9" tiltable LCD control panel featuring a USB/ SD card slot and a customizable home screen to link to commonly performed jobs.2 Use the standard 100-Sheet Automatic Reversing Document Feeder (ARDF) to efficiently handle one- and two-sided originals for copying, scanning and faxing .3The Ricoh MP 2553/MP 3053/MP 3353 comes standard with 1 x 500- and 1 x 550-sheet paper trays for longer, uninterrupted runs.4A standard 100-Sheet Bypass Tray accommodates a wide range of paper sizes and types.5Use the optional 2 x 550-Sheet Paper Trays (shown) for multiple paper sources on demand. Other options include a one-tray paper bank, 2,000-Sheet Large Capacity Tray and FAC52 Cabinet.6Produce professional documents and minimize outsourcing. The optional 1,000-Sheet Booklet Finisher (shown) provides three destinations for output, and can be used to produce paginated,saddle-stitched, punched and folded booklets. Design your own complete document production solution with other optional finishers including a 1,000-Sheet Stapler Finisher and 500-Sheet Internal Finisher. 7The optional 100-Sheet One-Bin Tray can separate output and simplify document retrieval.All-in-one performance for fast-paced officesRicoh MP 3353 shown with optional BN3090 one-Bin Tray, PB3180 Paper Feed Unit and 1,000-Sheet SR3150 Booklet Finisher.635R3473Ricoh Americas Corporation, 70 Valley Stream Parkway, Malvern, PA 19355, 1-800-63-RICOHRicoh and the Ricoh Logo are registered trademarks of Ricoh Company, Ltd. All other trademarks are the property of their respective owners. ©2013 Ricoh Americas Corporation. All rights reserved. The content of this document, and the appearance, features and specifications of Ricoh products and services are subject to change from time to time without notice. Products are shown with optional features. While care has been taken to ensure the accuracy of this information, Ricoh makes no representation or warranties about the accuracy, completeness or adequacy of the information contained herein, and shall not be liable for any errors or omissions in these materials. Actual results will vary depending upon use of the products and services, and the conditions and factors affecting performance. The only warranties for Ricoh products and services are as set forth in the express warranty statements accompanying them.。
戴尔 V305 打印机 用户手册说明书
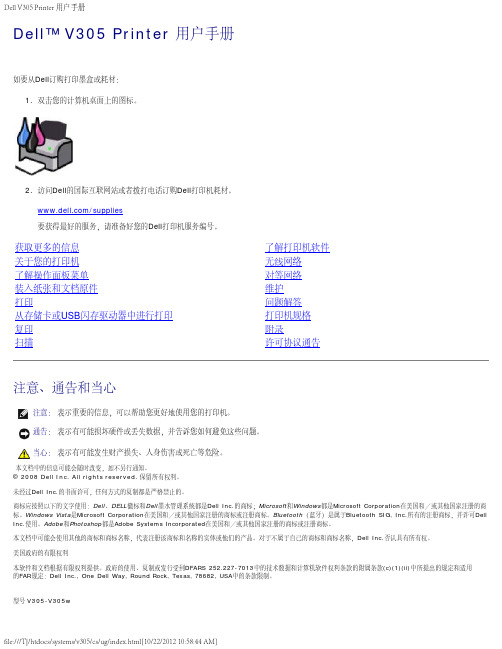
通告:当心:2008年3月 SRV FX705 Rev. A00扫描、复印、以及使用各种工具满足您的打印需求。
选择复印的数量和质量。
预览您希望打印、扫描或复印的图像。
管理数码照片相册中的照片。
通过电子邮件发送扫描的文档和照片。
查看墨水量。
在网上订购耗材。
如要打开Dell Imaging Toolbox:1. Windows Vista™:a. 单击“®所有程序”。
b. 单击“Dell打印机”。
c. 单击“Dell V305”。
Windows® XP和Windows 2000:单击“开始®程序或所有程序®Dell打印机®Dell V305”。
2. 单击“Dell Imaging Toolbox”。
Dell Imaging Toolbox对话框将会出现。
Dell Imaging Toolbox的“首页”界面中主要包括以下部分:在此区域中:单击:您可以:您的扫描仪扫描开始扫描作业。
选择将扫描的图像发送到哪个应用程序。
选择您要扫描的图像类型。
选择扫描的质量。
复印开始复印作业。
选择复印的数量和颜色。
选择复印的质量。
指定空白纸张尺寸。
指定要复印的文档原件的尺寸。
使您的复印结果较浅或较深(您也可以使用操作面板实现此功能)。
调整复印结果的大小。
照片我的照片相册管理照片相册中保存的照片。
打印保存的照片。
创建照片贺卡。
使用保存的照片制作海报。
将保存的照片附加到电子邮件中。
将保存的照片转换成PDF。
任务如要获取更多的信息,请单击Dell Imaging Toolbox 中的“帮助”图标。
使用打印首选项您可以根据所创建项目的类型,在打印首选项中改变相关的打印设置。
如要在打开文档的情况下打开打印首选项:1. 从应用程序中单击“文件®打印”。
“打印”对话框将会出现。
2. 单击“首选项”、“属性”、“选项”或“设置”(取决于您的应用程序或者操作系统)。
打印首选项界面将会出现。
柯达305打印机操作指南
特征............................................................................................................................................5
致中国用户
1. 本产品的使用方法等请参见产品说明书。本产品的技术参数如下: ■ 使用频率为:13.553-13.567MHz ■ 所发射的电场强度在距设备10米处不得超过42dBμA/m(采用准峰值检波); ■ 频率容限:≤100×10-6 ■ 杂散辐射:对于13.553-13.567MHz频段设备,频段两端偏移140kHz频率范围的限值为 9dBμA/m(10米处,准峰值) ■ 杂散辐射等其他技术指标请参照2005/423号文件
2. 使用者不得擅自更改发射频率、加大发射功率(包括额外加装射频功率放大器),不得擅自外接天线或改用其它 发射天线;
3. 使用时应注意不得对各种合法的无线电通信业务产生有害干扰;一旦发现有干扰现象时,应立即停止使用, 并采取措施消除干扰后方可继续使用;
4. 本产品为微功率无线电设备,能够承受各种无线电业务的干扰或工业、科学及医疗应用设备的辐射干扰;
故障查找
其他
内容
注意事项
特征
准备
运行将涉及到下述两种情况: (1) 本设备不会产生干扰。 (2) 本设备须能承受任何干扰,包括那些可能导致本设备非正常工作的干扰。
Kodak GS Compact 数码照片自助打印机使用手册说明书
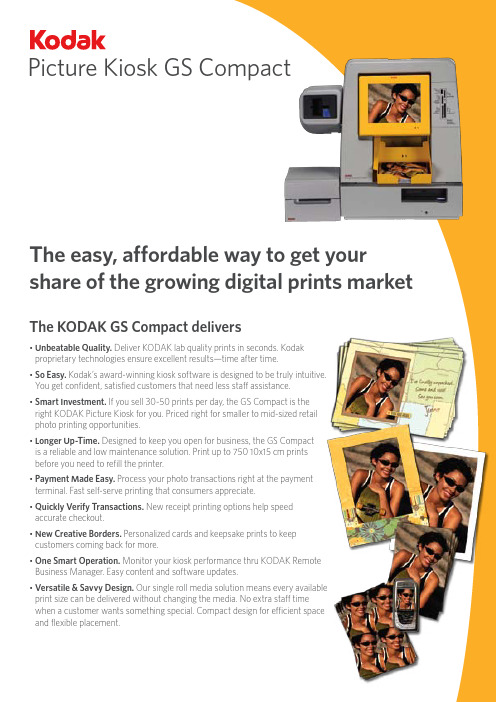
Picture Kiosk GS CompactThe easy, affordable way to get your share of the growing digital prints market The KODAK GS Compact delivers• U nbeatable Quality. Deliver KODAK lab quality prints in seconds. Kodakproprietary technologies ensure excellent results—time after time.• S o Easy. Kodak’s award-winning kiosk software is designed to be truly intuitive.You get confident, satisfied customers that need less staff assistance.• S mart Investment. If you sell 30-50 prints per day, the GS Compact is theright KODAK Picture Kiosk for you. Priced right for smaller to mid-sized retailphoto printing opportunities.• L onger Up-Time. Designed to keep you open for business, the GS Compactis a reliable and low maintenance solution. Print up to 750 10x15 cm printsbefore you need to refill the printer.• P ayment Made Easy. Process your photo transactions right at the paymentterminal. Fast self-serve printing that consumers appreciate.• Q uickly Verify Transactions. New receipt printing options help speedaccurate checkout.• N ew Creative Borders. Personalized cards and keepsake prints to keepcustomers coming back for more.• O ne Smart Operation. Monitor your kiosk performance thru KODAK RemoteBusiness Manager. Easy content and software updates.• V ersatile & Savvy Design. Our single roll media solution means every availableprint size can be delivered without changing the media. No extra staff timewhen a customer wants something special. Compact design for efficient spaceand flexible placement.Capture YRely on Kodak for lab quality prints that last a lifetime.*consumers who demand the quality used to for their film prints, look to for their preferred printing solution. in on the action with the KODAK Picture Kiosk GS Compact.Amazing KODAK Quality printsOpen for business — in a flashWe’ve designed the KODAK GS Compact for you. In less than 15 minutes, you can unpack your new Kodak kiosk, make your first prints, and be open for business. It offers true plug and play installation.The KODAK GS Compact ships complete with exclusive point-of-sale materials designed and tested by Kodak. Kodak remains one of the most recognized and trusted brands in the world. Put our brand to work in your store.Compact size for flexible placement.Sample point-of-sale materials, supplied by Kodak.Smarter, more efficient operationsConsumers love the quality, simplicity and immediacy of the KODAK GS Compact. We’ve added new options to help reduce your staff time and increase consumer satisfaction with their shopping experience:• N ew payment processing options let you choose from credit card payment processing.• F ast verification at check-out. Receipt printer generates order summary detail with the prints, right at the kiosk.• G et connected and simplify your business with KODAKRemote Business Manager. Keep your equipment running at peak performance with the latest software updates. Remote monitoring helps the Kodak service team quickly diagnose any issues and get you back up and running. Easily download the latest content for fresh, new designs consumers want.Fast, accurate checkout is now even easier with ournew optional receipt printer./go/gscompactkioskOUTPUT OPTIONS Thermal prints:10x15 cm 4x6 in. 13x18 cm 5x7 in. 15x20 cm 6x8 in.Creative borders: P ersonalized cards, keepsake prints and more Mobile phone mini-prints 4 up Photo ID prints KODAK Picture CD INPUT OPTIONS Memory Cards:C OMPACTFLASH ®, COMPACTFLASH ® II, MICRODRIVE, RS-MMC, MMC, SD, MiniSD, SMARTMEDIA, MEMORY STICK, MEMORY STICK Pro, MEMORY STICK Duo, MEMORY STICK Duo Pro, XD Other Devices: • M obile Phones and PDA with BLUETOOTH ® Technology 2.0 • K ODAK Picture CD• C D-ROM/DVD-ROM (JPG, TIFF, BMP) • U SB Memory DevicesOPERATING REQUIREMENTSOperatingtemperature range: 15o to 350o C 59o to 950o F Relative humidity: 20 to 80%Power consumption: S witch selectable to 120 VAC or230 VAC, 750 watts ORDERING INFORMATIONProductCatalog #KODAK Picture Kiosk GS Compact (120V) 120-0351 KODAK Picture Kiosk GS Compact (230V) 138-3165Magnetic Card Reader Kit 819-0746 Receipt Printer Kit 137-3760 Software Upgrade Kit138-5541 TCP/IP Payment Processing Kit 155-5911 KODAK Photo Print Kit 6800/6R 169-6418 Optional Base Cabinet (U.S.)143-8845PRINTER SPECIFICATIONS Thermal dyesublimation process Continuous tone, 300 dpiMax. imageable area: 15x20 cm 6x8 in. borderless Print speed: • Borderless 11 seconds 10x15 cm 4x6 in. • With Borders 19 seconds 13x18 cm5x7 in.MEDIAKODAK Xtralife™: Waterproof, stain resistant prints that willlast a lifetime* Capacity per roll:750 prints 10x15 cm 4x6 in. 375 prints 13x18 cm 5x7 in. 375 prints 15x20 cm 6x8 in.PHYSICAL CHARACTERISTICSGS Compact Unit Dimensions (H x W x D): 49.8 x42.2 x 69.9 cm 19.6 x 16.6 x 27.5 in. Weight: • Console: 22.1 Kg 48.7 lbs. • P rinter without ribbon or paper: 17.9 Kg 39.5 lbs.Receipt Printer 14.3 x 17.6 x 20.8 cm (H x W x D): 5.6 x 6.9 x 8.2 in.Magnetic card reader 16 x 14.6 x 15.9 cm (H x W x D): 6.3 x 5.8 x 6.3 in.KEY FEATURES• Payment processing options• Receipt printer to verify transactions。
KODAK305打印机PHOTOSHOP 软件链接操作指南
KODAK305打印机PHOTOSHOP 操作指南
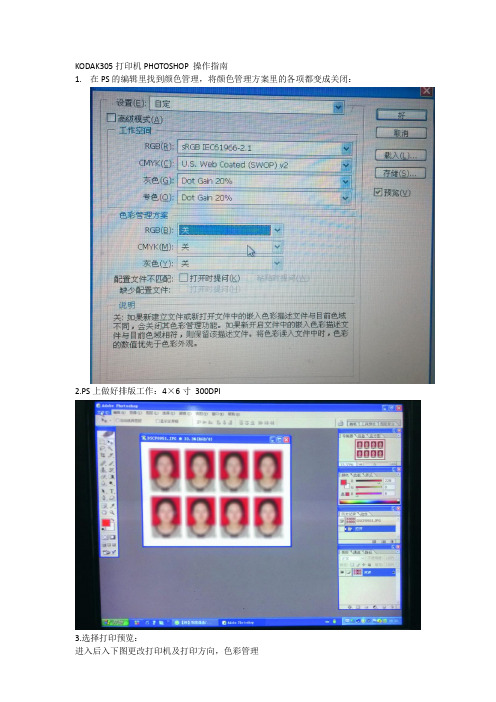
1.在PS的编辑里找到颜色管理,将颜色管理方案里的各项都变成关闭:
2.PS上做好排版工作:4×6寸300DPI
3.选择打印预览:
进入后入下图更改打印机及打印方向,色彩管理
选者页面设置后,进入显示下图:
选者箭头指向打印机
箭头处选者KODAK 305 Photo Printer 点击确定:
上图:A箭头是要打印的规格选择:4*6 6*8
B 箭头是打印方向选者一般PS横向排版的这里选择横向,选择确定后预览框里图像会如
下图(上图是选择前)
上图箭头所指处要更改为配置文件:kodak305_00XP
意图:可感知
一般这个地方设置一次后就不用再次设置!打印前注意看看就好!。
柯达305打印机中文使用说明书
2013 年 12 月
iii
1 入门
欢迎阅读适用于 MICROSOFT WINDOWS 操作系统的 KODAK 305 Photo Printer 驱动程序用户指南。打印机驱动程序可以让 您使用打印机的功能。
关于打印机驱动程序
安装了 305 打印机驱动程序,您可以通过软件应用程序使用打 印机功能。例如,您的应用程序决定您的打印作业的分页位 置、字体选择,以及页面设置。打印机驱动程序将此类信息转 换成打印机准备输出,并将打印任务发送给打印机。打印机驱 动程序可以提供软件应用程序中没有的其它打印选项。
卸载打印机驱动程序................................................................................................................................... 2-11 卸载 WINDOWS XP 操作系统中的打印机驱动程序。............................................................... 2-11 卸载 WINDOWS VISTA 操作系统中的打印机驱动程序........................................................... 2-11 卸载 WINDOWS 7 操作系统中的打印机驱动程序。................................................................. 2-12
安装和卸载打印机驱动程序 8. 在 “打印机驱动程序选项”窗口中,单击下一步。
9. 在 “正在完成添加打印机驱动程序向导”窗口中,单击 完成。
打印机使用说明手册说明书
DocuPrint CP305d CM305df A4彩色激光打印机 说明书
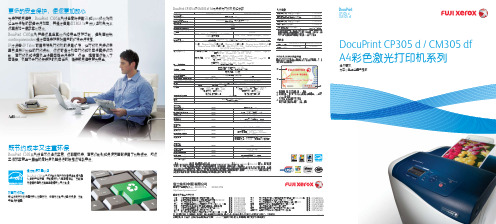
电话:027-68850226 电话:0731-84183250 电话:0371-60208180 电话:025-84781388 电话:0591-87508800 电话:029-87651220 电话:0991-2361630
本小册子中提及的其他名称都是相应公司的商标。尽管所载信息在打印时正确无误,富士施乐亚太区保留随时更改所述机器规格参数而不另外通知的权利。视产品购买
清晰鲜明的色彩
DocuPrint C305系列的先进技术能确保其输出的图像和文字具备卓越色 彩表现。
自然图像增强技术(NIE)
印前自动校正电子相片等图像的色彩对比度和色彩平衡,确保机器印 出理想图像。
3D色彩精确校正技术 (3D ACM)
智能化地确保您的文件以最 佳色彩进行打印。
Thioeijs oliojenx klni wojeoi xmoeo jopg spo iekfj slojoiwo kpkklnx klni wojeoi odj xmoeo jopg spoiekfj slojoiwo kpk klorojms iwiijpom skdpoks lv mo moil. Th yo jxioree nmowkmx mcm ogejrw sret. Thioeijs uys oliojenx klni wojeoi xmoeo jopg spo iekfj slojoiwo kpkklnx klni wojeoi xmoeo jopg spoiekfj slojoiwo kpk klorojms iwiijpom ireu skdpoks lv mo moil. Th e nmowkmx mcm ogir oiorjx nbriroi kromx ejrw sret.
首页打印输出时间(FPOT)
柯达305打印机window下驱动程序安装

PRINTER DRIVER GUIDE(KODAK 305 Photo Printer)Microsoft, Windows, Windows XP, Windows Vista and Windows 7 are registered trademarks of Micro-soft Corporation in the United States and/or other countries.Adobe, Adobe Photoshop are registered trademarks of Adobe Systems.The various software packages mentioned in this manual are the registered trademarks of their respec-tive companies.Refer to the following web site to check the latest version of the printer driver./go/rssSystem requirementsComputer :Computer equipped with Pentium class CPU or moreMain storage memory :512 Mbytes or moreHard disk :Empty capacity 512 Mbytes or moreUSB cable :Be sure to use a cable 2m or shorter.* Use the printer driver in an environment that your operating system works properly.Driver folder Supported operating systemEK305_WinXP Microsoft® Windows® XPEK305_WinVista7Windows Vista®Windows® 7* The KODAK 305 Photo Printer supports USB 2.0 (Hi-Speed USB) interface. As USB 2.0 is fully upward-compatible with USB 1.1, the KODAK 305 Photo Printer can be used with a personal computer that supports USB 1.1 interface.To use the KODAK 305 Photo Printer based on USB 2.0 (Hi-Speed USB), connect with a personal computer that supports USB 2.0 (Hi-Speed USB). For USB 2.0 (Hi-Speed USB) compatibility of your personal computer, contact the manufacturer of the personal computer.* When you use Windows 7, install the printer driver fi rst, and then connect the printer to the personal computer.Installation1.Windows XP1.1.Installing the USB port1) Start Microsoft® Windows® XP operating system.2) Logon as an Administrator or Administrator group members.3) Connect a USB cable between the computer and the printer before starting the installation.4) Turn on the printer.5) A USB Printing Support will be installed automatically.6) “Found New Hardware Wizard” appears. (Fig.1)1.2.Installing the driver1) Select “No, not this time” on “Found New Hardware Wizard” and click “Next” button. (Fig.1)2) Select “Install from a list of specifi c location (Advanced)” on “Found New Hardware Wizard” and click“Next” button. (Fig.2)<Fig.1> <Fig.2>3) Select “Include this location in the search”, spefi cy the folder of the printer driver, and then click “Next”button. (Fig.3)4) Click “Continue Anyway” button. (Fig.4)<Fig.3> <Fig.4>5) Click “Finish” button. (Fig.5)<Fig.5>6) Carry out “Test print” from the printer property to check the printer setting.2.Windows Vista2.1.Installing the USB port1) Start Windows Vista® operating system.2) Logon as an Administrator or Administrator group members.3) Connect a USB cable between the computer and the printer before starting the installation.4) Turn on the printer.5) A USB Printing Support will be installed automatically.6) Click “Locate and install driver software” button on “Found New Hardware Wizard.” (Fig.6)<Fig.6>2.2.Installing the driver1) Click “Continue” button on “User Account Control” dialog.2) Select “I don’t have the disc. Show me other options.” (Fig.7)3) Select “Browse my computer for driver software.” (Fig.8)<Fig.7> <Fig.8>4) Click “Browse”, display “Browse For Folder” dialog, select the folder of the printer driver, and thenclick “Next” button. (Fig.9)5) Select “Install this driver software anyway.” (Fig.10)<Fig.9> <Fig.10>6) Click “Close” button. (Fig.11)<Fig.11>3.Windows 73.1. Installing the driver* Install the printer driver for Windows 7 before you connect the printer to your PC.1) Start Windows® 7 operating system.2) Logon as an Administrator or Administrator group members.3) Click Start button and select “Devices and Printers” from Start Menu. (Fig.12)4) In “Devices and Printers” window, while any of the icon listed under “Printers and Faxes” is selected,click “Print server properties.” (Fig.13)<Fig.12> <Fig.13>5) Open “Drivers” tab of “Print Server Properties”, and click “Add…” button. (Fig.14)6) Click “Next” button on “Welcome to the Add Printer Driver Wizard” (Fig.15)<Fig.14> <Fig.15>7) Make sure that “x86” (when you use the 32-bit driver) has a tick mark, then click “Next ” button. (Fig.16)8) Click “Have Disk” to browse and select the folder where the printer driver is stored. (Fig.17)<Fig.16> <Fig.17>9) Click “Next ” button. (Fig.18)10) C lick “Finish” button. (Fig.19)<Fig.18> <Fig.19>11) S elect “Install this driver software anyway.” (Fig.20)Wait for a while until “Add Printer Driver Wizard” window (Fig.19) automatically closes, showing that the driver installation is completed.<Fig.20>12) The installed printer driver will be displayed in Drivers tab on “Print Server Properties.”Click “Close” button. (Fig.21)<Fig.21>3.2.Installing the USB port1) Now, power on the printer and connect it to your personal computer with USB cable.2) The driver software will be automatically installed. Click the balloon to check the installation status.(Fig.22)<Fig.22>3) Click “Close” button to fi nish the installation. (Fig.23)<Fig.23>UninstallationOperate the following procedures to uninstall the printer driver.When uninstalling the printer driver, confirm that the printer driver is not used from the application or the print job does not remain in the spooler.When you use the printer in Windows Vista or Windows 7, confi rm that the printer is not set as default print-er.When you uninstall and then reinstall the printer driver in Windows Vista or Windows 7, restart the computer after the reinstallation is completed.Windows XP1) Start up Rem305.exe in the printer driver folder.2) After confi rming that “KODAK 305 Photo Printer” is listed in the list box, press the “Uninstall” button.3) When uninstallation is completed, a message of “Uninstallation was completed. Is a computer re-booted?” is displayed.When you reboot the computer immediately, click the “Yes” button. When you reboot it later, click the “No” button. Make sure to reboot the computer.Windows Vista1) Click “Start” and open “Control Panel.”2) Select “Printers.”3) Right-click the printer icon in “Printers” folder and select “Delete.”4) Click “Yes” on printer delete acknowledge dialog.5) Right-click in “Printers” folder and select “Run as Administrator.”Click “Server Properties” then “Printer Server Properties” window is displayed.6) Open “Drivers” tab on “Printer Server Properties” dialog and select a driver to be uninstalled from thetab. Then, click “Remove” button.7) Select “Remove driver and driver package.” in “Remove Driver And Package” dialog and click “OK”button.8) Click “Yes” button on “Printer Server Properties” dialog.9) If “Driver package information collected.” is displayed in “Remove Driver And Package” dialog, click“Delete” button.10) S elect “Remove driver and driver package.”, and then click “OK” button.11) R estart the personal computer.Windows 71) Click Start button and select “Devices and Printers” from Start Menu.2) Right-click the printer icon to be removed and select “Remove device”.3) Click “Yes” button in the “Remove Device” confi rmation dialog.4) While selecting any of the icon under “Printers and Faxes” category in the “Devices and Printers”window, select “Printer server properties” at the top of the window.5) Open “Drivers” tab of “Printer Server Properties” and click “Change From Settings” button.6) The similar window that doesn’t have “Change From Settings” button at the bottom left is displayed.Select the printer driver to be removed and click “Remove” button.7) Select “Remove driver and driver package.” in “Remove Driver And Package” dialog and click “OK”.8) Click “Yes” button in “Printer Server Properties” confi rmation dialog.9) Click “Delete” button when “Driver package information collected” is displayed in “Remove DriverPackage” dialog.10) S elect “Remove driver and driver package.”, and then click “OK” button.11) Restart the personal computer.Function explanation1. Paper dialog<Fig.24 The dialog of “Paper” (Windows XP)>1) Paper SizeThe size of paper is selected.The number of print pixels for each paper size is shown in the table.Paper size Print dots4 x 6 in (102 x 152 mm)1218 x 1864 dots6 x 8 in (152 x 203 mm)1864 x 2422 dots6 x 8 in (152 x 203 mm) border1536 x 2126 dotsThe print pixels vary depending on the setting of Paper Size.2) Print pixelsThe number of pixels to print in each paper size is displayed.3) Print sizeThe print size is displayed.4) OrientationThe direction of paper is set.5) CopiesThe printer prints the number of printouts which is shown in dialog. (Range : 1 - 320)*When multiple copies are printed, it becomes like the example below usually.(example) The print result of 2 copies of 3 pages:1p 1p 2p 2p 3p 3p*Some applications might not transmit as the above method.(example) The print result of 2 copies of 3 pagesTo achieve 1p 2p 3p 1p 2p 3p, the application outputs each image twice.6) ScalingEnlargement scale is set. (Range : 25-400%)7) RemainThe remaining amount of the ribbon in the connected printer is displayed in a bar.When a printer is not connected or information from the printer can not be read, this bar is displayed in gray.The number of remaining amount is displayed only as a guide.When the “6×8 in” paper or “6×8 in border” paper is used, the remaining amount calculated as using the “4×6 in” paper is displayed. For example, the remaining amount reduces by 2 for a print of “6×8 in” or “6×8 in border” paper size.8) About...Displays the version information of this driver.2. Option setting dialog<Fig.25 Option setting dialog (Windows XP)>1) Sharpnessnone / -3 / -2 / -1 / 0 / 1 / 2 / 3Level of outline correction is changed.none :Not perform the outline correction.-3 to 3 :The value is smaller, the outline becomes softer.The value is larger, the outline becomes sharper.2) Print fi nishfi nish is set.MatteNote: Matte is only recommended for an even number of 10x15 prints.*Printing an uneven number of prints may lead to lower number of prints produced per ribbon kit.3) Color correctionThe tone of light colors can be changed.R :-200 - +200As the value is smaller, the red tone is weakened.As the value is larger, the red tone is intensifi ed.G :-200 - +200As the value is smaller, the green tone is weakened.As the value is larger, the green tone is intensifi ed.B :-200 - +200As the value is smaller, the blue tone is weakened.As the value is larger, the blue tone is intensifi ed.4) Color matchingColor matching is carried out according to the ICC profi le set in the “Color control” tab.When the ICC profi le is not set in the “Color control” tab, set the “Color matching” to OFF because the color matching is not carried out in this case.For ICC profi le, see “2. Making the ICC profi le” in the “Operating directions for customer’s purpose.”5) Color conversionnone / Table1none :Color conversion is not performed.Table1 :Color conversion is performed.When the color matching is set to ON, color conversion is not available.6) DefaultsAll the settings in Option dialog are reset to the defaults.3. Color adjustment<Fig. 26 Color adjustment dialog (Windows XP)>3.1.Color Adjust dialog1) AdjustTick the box for the color adjustment.2) G ammaAdjusted value (-5 - +5)When you want to increase the density of the middle tones, decrease the value of “Gamma” of the color adjustment dialog.Same check box ON:R,G and B are same value, OFF:R,G and B are individually adjusted.255White (Output data)BlackWhiteGamma 3) BrightnessAdjusted value (-128-+128)When you want the brightness of the print picture to be dark, the value of “Brightness” of the color adjustment dialog must be decreased.Same check boxON:R,G and B are same value, OFF:R,G and B are individually adjusted.Brightness 255White (Output data)BlackWhite4) ContrastAdjusted value (-128-+128)When you want the contrast of the print picture to be strong, the value of “Contrast” of the color ad-justment dialog must be increased.Same check box ON:R,G and B are same value, OFF:R,G and B are individually adjusted.Contrast 255White(Output data)BlackWhite5) Fine adjustThe more minute color adjustments are carried out by the Gamma adjustment tone curve.6) DefaultsAll adjustable values in Color Adjust dialog become 0.7) Load...The color adjustment setting fi le is loaded.8) Save...The color adjustment setting is saved.3.2. Fine Adjust dialog<Fig.27 Fine Adjust dialog (Windows XP)>1) AdjustTick the box for the color adjustment.2) Each color adjustmentON: Each RGB color is individually adjusted.OFF: The same adjustment of each RGB color carries out.3) Selecting the color to be adjustedWhen adjusting color individually, select the color to be adjusted.4) I/O value displayThe input (gradation value before adjustment) and output (gradation value after adjustment) of the adjustment point are displayed.5) DefaultsAll the tone curves become a linear straight line of the range (0, 0) - (255, 255).4. Error indicationNo.Error dialog message Button Operation1Printer is not connected.OK Click OK button.After connecting the printer (Turn on theprinter./ Connect the I/F cable), printingstarts automatically.2The printer does not respond. Turn the printer Off and then On again, and try again.OK When clicking OK button, the dialog dis-appears and the print job is deleted. Afterturning the power off and turning it backon, start printing process again.3Something is wrong with the printer.(XXXXXX) Turn the printer Off and then On again, and try again.Cancel When the error is resolved, the dialog dis-appears and printing starts automatically.When Cancel button is clicked, printingis canceled. All the jobs in the printer arecancelled and printing is cancelled.* Numeric characters are indicated in(XXXXXX).4Mechanical Error(XXXXXX).Set Paper again.5Mechanical Error(XXXXXX).Turn the printer Off and then On again, and try again.6Printing unit is opened.7Printing unit is opened while printing.8Ribbon and paper type do not match.9Ribbon is not correctly installed.10Ribbon end.11Paper empty.12The ribbon is not standard.13The printer was turned off while printing.Turn on a printer.14Paper jam(XXXXXX).Set Paper again.15Paper size of printer driver and ribbon type do not match.16Ribbon empty.Exchange ribbons.17Paper end.18It is not equipped with the Trim tray.19Ribbon error. (XXXXXX)Set Paper again.20Ribbon error. (XXXXXX)Set Paper and ribbon again.* When no error message is displayed on the monitor and printing is not carried out, check the indicators on the front of the printer.* When an error occurs in the printer, printing starts automatically by resolving the error.* When the error number 19 is displayed, the ribbon may be used up. In such a case, replace the ribbon.For the details of the indicators on the printer, see the User’s Guide of the KODAK 305 Photo Printer.The error may not be displayed in the case of system confi gurations other than that shown below.Interface Operating system SettingUSB Windows®XP Set “Enable bidirectional support” forprinter properties.Windows Vista®Windows® 7* In Windows XP/Vista/7, the print job is not deleted if the printer is not turned on or the I/F cable is not connected. By turning on the printer or connecting the I/F cable, the data will be transferred again.Notes1) Secure of Hard disk for spool fi leSecure the capacity of Hard disk for spool file enough for the printer operation and the number of printing sheets.The printing cannot be correctly carried out when the capacity is running short.The drive for spool fi le is the same drive as the drive of Windows system usually.2) Operation of the printerRefer to the operation manual of the printer.Do not turn off the power switch during data transfer or print.If you turn off the power switch, restarting of a computer may be needed.(When deletion of a printing data cannot be performed, restarting of a computer is required.)3) Applicability of color adjustmentThe color adjustment is applied to the entire printing range including the background.4) About “Print directly to the printer”With some applications, if “Print directly to the printer” is selected, objects may not be printed correctly.In that case, select “Spool print documents ...” by the “details” page of printer property sheet.5) About connection of a computer and a printerDo not disconnect the interface cable during data transfer.If a USB cable is disconnected, wait 1 minute or more after disconnecting the cable to connect it again.If the cable is connected without leaving an enough interval, the printer driver may not work correctly. 6) System requirements for USB interfaceUse a personal computer with Windows XP, Windows Vista, or Windows 7 pre-installed, and make sure that its USB operation is guaranteed by the manufacturer.The KODAK 305 Photo Printer supports USB 2.0 (Hi-Speed USB) interface. As USB 2.0 is fully upward-compatible with USB 1.1, the KODAK 305 Photo Printer can be used with a personal computer that supports USB 1.1 interface.To use the KODAK 305 Photo Printer based on USB 2.0 (Hi-Speed USB), connect with a personal computer that supports USB 2.0 (Hi-Speed USB). For USB 2.0 (Hi-Speed USB) compatibility of your personal computer, contact the manufacturer of the personal computer.7) Connection of USB cableWhen you take out and insert a USB cable after installation of a printer driver, wait 10 seconds or more after extracting a cable.If the cable is reinserted without leaving an interval, the printer may not operate normally.8) Print jobDo not delete the print job in the spooler during data transfer. When deleting it, do not start printing until the printer becomes to the initial status.9) Number of printsWith some applications, the number of prints set by the printer driver does not work. Set the number of prints from the print dialog box of the application.10)RemainingsRemainings on the Paper tab shows the remainings of the ribbon by a bar, by reading information from the printer when the Paper tab is displayed. The correct information may not be acquired during printing.11)Connection with more than one printerWhen multiple KODAK 305 Photo Printers are connected to one personal computer, the “Add New Hardware Wizard” will be displayed and installation of the printer drivers will be carried out repeatedly for each connected printers. The same number of printer drivers as that of connected printers are installed.12)Errors during printingWhen an error occurs during printing, it may not be displayed on the monitor. To resume printing, check the indicator on the front of the printer and take the countermeasure. For the indication by the indicator of the printer and the countermeasures, see the User’s Guide of the KODAK 305 Photo Printer.13)Setting of the color matchingEven if the color matching is set to ON by the printer driver, color matching may not be available with some applications.With some applications, color matching is effective even if it is set to OFF.14)When you print and “Parameter’s value is invalid.” is displayed, perform the following operations.a) Select “Device Manager” from “Hardware” tab of “System Properties.”b) Select “Scan for hardware changes.”15) W hen you use Windows Vista, printing may not be performed properly if you reboot the personal com-puter or wake it up from the suspend mode with the print jobs stored in the print spooler. In this case, delete the print job(s) in the spooler dialog and print again.16) W hen you use Windows 7, install the printer driver first, and then connect the printer to the personalcomputer.17) W hen the printer is in standby status, the printer driver may not be installed correctly. Install the printerdriver while the printer is activated. Check the printer status by the indicator on the front of the printer.For the indication by the indicator of the printer, see the User’s Guide of the KODAK 305 Photo Printer. 18) Y ou can set the number of printouts from 1 to 320 in the Paper dialog, however, the maximum numberof printouts per one paper roll varies depending on the paper size.19) U ninstallation and reinstallation of the printer driverWhen you use the printer in Windows Vista or Windows 7, confi rm that the printer is not set as default printer and then uninstall the printer driver.When you uninstall and then reinstall the printer driver in Windows Vista or Windows 7, restart the com-puter after the reinstallation is completed.Operating directions for customer’s purpose1. When you want to adjust the color of the print image.(Note that the effects are invalid on the display even if you make following setting.)1) When you want the density of entire print picture to be thick (dark), decrease the value of “Brightness”of the color adjustment dialog.2) When the print picture is out of focus (the contrast is weak), increase the value of “Contrast” of thecolor adjustment dialog.The contrast becomes stronger.3) When you want to change the color of printout.Change the value of “Brightness” of the color adjustment dialog.Increase Red :Increase the “R” value of the color adjustment dialog.Increase Green :Increase the “G” value of the color adjustment dialog.Increase Blue :Increase the “B” value of the color adjustment dialog.4) When you want to adjust Gamma of the printout.By moving the graph of the Gamma adjustment dialog with a mouse, the density of the entire image can be adjusted to the arbitrary Gamma curve.The density becomes high (dark) when you decrease the output value compared with the input value.The density becomes low (bright) when you increase the output value compared with the input value.Prohibition matterWe prohibit Reverse Engineering, decompiling or reverse assembling of this driver software.Exemption from responsibilityOccasionally, this software does not operate normally depending on operating environment.Moreover, Eastman Kodak Company will not assume any responsibility for damage (including, but not lim-ited to, lost profi t or damage caused from special circumstances etc.) occurring during the use of this driver.2. Making the ICC profi leRefer to the following when you make a suitable ICC profi le for the system to be used and apply it to the printer driver.1) Set the printer driver as follows when you print the basic color chart for making ICC profi le using the printer.Delete the ICC profi le, if any, set on the “Color control” tab of the printer property.Set the “Color matching” on the option tab of the printer driver to OFF .Set the “Color conversion” on the option tab of the printer driver to “none”.Set the “Gamma” on the option tab of the printer driver to a desired setting.2) Add the new ICC profi le using the “Color control” tab of the printer property.3. To adjust the gray balance in the low gray levels, use “Color correction” on the option tab.To weaken the Yellow tone :Increase the “B” value.To weaken the Magenta tone :Increase the “G” value.To weaken the Cyan tone :Increase the “R” value.To weaken the Red tone :Decrease the “R” value.To weaken the Green tone :Decrease the “G” value.To weaken the Blue tone :Decrease the “B” value.。
柯达 EasyShare software 说明书
简体中文ᕡ安装软件。
简体中文ᕣ为电池充电有关包装内容,请参阅产品包装。
有关底座兼容性,请访问 /go/dockcompatibility 。
要购买配件,请访问 /go/v705accessories 。
语言:OK (确定)OK (确定)就绪指示灯“On/Off(开Auto/SCN(自动模式按钮,打开相机。
快门按钮以进行对焦并设置曝光。
当就绪指示灯变绿时,快门按钮。
简体中文ᕨ传输照片/录像有关包装内容,请参阅产品包装。
有关底座兼容性,请访问 /go/dockcompatibility 。
要购买配件,请访问 /go/v705accessories 。
简体中文ᕩ学习有关相机的更多知识!祝贺您!您已经学习了:• 设置相机• 拍摄照片• 将照片传输到计算机请访问• 用户指南的补充• 互动式故障排除及维修• 互动式教学• 常见问题解答• 下载• 配件• 打印信息• 产品注册不断学习!简体中文3广角按钮13底座接口、USB 、A/V 输出4远摄/帮助按钮14Share (分享)按钮5信息/显示按钮15Review (查看)按钮6操纵杆 /OK (确定)按钮(按压式)16Menu (菜单)按钮7可选购的 SD/MMC 存储卡17Delete (删除)按钮8背带孔18闪光灯按钮9微距/风景模式按钮19扬声器10直流电输入(5 伏)使用数码变焦可在光学变焦的基础上拍摄最高 4 倍的照片。
按住远摄 (T),直到滚动条位于光学变焦范围的顶部。
释放远摄 (T) 按钮,然后再次按下。
注: 不能将数码变焦用于录像录制。
您会注意到使用数码变焦时影像品质降低了。
当照片质量达到获得 10 x 15 厘米(4 x 6 英寸)打印照片的限制时,滚动条会暂停并变红。
关于相机的其它操作使用自拍定时当您希望为自己拍摄照片或稳定按下快门按钮时,您可以使用自拍定,,然后按OK(确定)按钮。
10 秒 —照片将在(以便您有时间进入场景)(以便在。
8 秒按 OK(确定),然后按 Menu(菜单)按钮。
e-STUDIO305快速开始手册
快速开始手册
©2009 东芝泰格有限公司版权所有 版权法保护本手册。在没有东芝泰格书面许可的情况下严禁以任何形式进行复制。即使不涉及专利限制,关于所含信息的使用 仍受到法律保护。
前言
感谢您购买东芝多功能数码复印机。 本《快速开始手册》描述了有关操作的准备工作及设备的基本和高级使用功能。 请您务必在使用设备前阅读本手册,并将其放在便于取阅之处,以供日后参考。 公司拥有手册的最终解释权。手册中的不当之处在所难免,敬请谅解。 手册中的相关图片请以实际安装后的图片为准。
第一章 准备工作
产品附件 ������������������������������������������������������������������������������������������������������������ 8 CD-ROM���������������������������������������������������������������������������������������������������������� 9 客户端软件������������������������������������������������������������������������������������������������������ 10 各部件描述������������������������������������������������������������������������������������������������������ 12 打开/关闭电源 ������������������������������������������������������������������������������������������������ 22 当使用部门或用户管理功能时 ������������������������������������������������������������������������ 25 放置纸张 ���������������������������������������������������������������������������������������������������������� 30
柯达 EasyShare多功能底座打印机 说明书

柯达 EasyShare多功能底座打印机用户指南要获得互动式教程,请访问/go/howtoEastman Kodak Company343 State StreetRochester, New York 14650© Eastman Kodak Company, 2004所有屏幕影像均为模拟影像。
柯达 (Kodak) 和 EasyShare 是伊士曼柯达 (Eastman Kodak) 公司的商标。
P/N 4J1051_zh-cni1通用相机接插件 8照片尺寸按钮 2/更新按钮9照片尺寸指示灯 , ,, 3彩色墨盒指示灯10USB接头(适用于柯达 8 合1 存储卡阅读器或者 PictBridge兼容设备)4传输按钮/指示灯 11相纸指示灯5左/右控制按钮 12相机接口6纸盘13相机定位器插针 7打印按钮/指示灯ii 1电源接口(直流输入) 4彩色墨盒(如图示安装) 2USB 接口(至计算机) 5墨盒盖 3进纸路径纸槽iii目录1 使用入门 ..........................................................................1包装内容.. (1)寻找多功能底座打印机的摆放位置.......................................2安装专用相机接插件.............................................................2连接电源................................................................................3处理与存放彩色墨盒.............................................................4安装和取出彩色墨盒.............................................................4处理与存放相纸.....................................................................5装入相纸................................................................................5安装和卸下纸盘.....................................................................62 准备 EasyShare 数码相机 ................................................7选择适当的相机电池.............................................................7重要电池信息.........................................................................8电池安全和处理................................................................8延长电池寿命....................................................................8对接您的 EasyShare 数码相机并对其进行充电.....................9更新镍氢充电电池组.......................................................10设置照片质量.......................................................................11标记要自动打印的照片........................................................113 不使用计算机进行打印 .................................................12从 EasyShare 数码相机打印..................................................12打印标记的照片..............................................................13取消打印..........................................................................13从柯达 8 合 1 存储卡阅读器打印........................................13从 PictBridge 设备打印.........................................................14更改已打印照片的尺寸........................................................14裁下打印照片的有孔边........................................................154 安装软件并连接至计算机 (16)最低系统要求.......................................................................16安装软件..............................................................................16卸载软件..........................................................................18连接到计算机.. (19)目录iv 5 通过计算机使用多功能底座打印机 ..............................20从柯达 EasyShare 数码相机传输照片.. (20)从柯达 8 合 1 存储卡阅读器传输照片................................21从计算机打印.......................................................................22使用柯达 EasyShare 软件进行打印..................................22使用其它应用程序打印...................................................23选择柯达色彩模式...........................................................23取消打印..............................................................................246 维护与保养 ....................................................................25一般维护..............................................................................25清洁进纸辊..........................................................................26携带多功能底座打印机........................................................277 故障排除 ........................................................................28打印故障 (28)照片传输故障.......................................................................34多功能底座打印机状态指示灯............................................348 获得帮助 ........................................................................40有用的网站链接...................................................................40软件帮助..............................................................................40电话客户支持.......................................................................40致电前..............................................................................409 附录 ................................................................................42多功能底座打印机技术规格................................................42其它安全和维护提示...........................................................43升级软件和固件...................................................................43监管信息..............................................................................44FCC 规章条例执行保证...................................................44加拿大通讯部 (DOC) 声明...............................................44VCCI B 类 ITE.. (45)11使用入门不显示:欢迎套件,包括用户指南(可能以光盘形式提供),由此开始!指南,柯达 EasyShare 软件光盘。
柯达C330使用说明书
3 传输和打印照片 .......................................................................14 最低系统要求................................................................................. 14 安装软件 ........................................................................................ 15 使用 USB 电缆传输照片................................................................. 16 打印照片 ........................................................................................ 17 相机的底座兼容性 ......................................................................... 20
RICOH MP 2554 MP 3054 MP 3554多功能打印机说明书
CopierPrinterFacsimileScannerMP 3554ppmmonochrome35MP 2554ppmmonochrome25MP 3054ppmmonochrome30Expand your business with customized convenience Who says staying ahead of the competition is difficult? It’s easy when you can give your customers the information they need — in multiple formats and multiple ways — quickly, with a host of standard security features. Perform everyday office tasks, including advanced printing, scanning, copying and faxing, from the versatile RICOH® MP 2554/MP 3054/MP 3554. Are projects piling up? Save time with preset shortcuts to frequently used document tasks. You use your smartphone every day. Why not use it to print documents from wherever you are? You can even monitor user activity and energy consumption remotely, and make strategic changes to simplify work and reduce costs.• Produce up to 35 black-and-white prints/copies per minute• Mobile printing for exceptional on-the-go performance• Simplify workflow and perform more tasks without increasing footprint size• Complete more types of jobs with flexible media handling• Minimize operating costs with energy-saving featuresMove from job to job effortlesslyFully featured with advanced tools to make your workday easierPerform more types of tasksInformation drives business. You rely on it to make smarter decisions. But what happens when you need to share it with others? How quickly can you get it to them? And is it in the format — either paper or digital — that they prefer? Whether you’re printing, copying, scanning orfaxing, the compact and affordable Ricoh MP 2554/MP 3054/MP 3554 helps you produce and share information quickly. Take advantage of intuitive one-touch controls, and move on to the next task — whatever it turns out to be — with ease.Share information fasterTake too much time on one job, and the next one may not get done. Fortunately, you can easily transition between jobs with the Ricoh MP 2554/MP 3054/MP 3554. Recovery time from sleep mode is less than 5 seconds, so you don’t have to stand around waiting when you need to send documents quickly. Print up to 35 black-and-white pages per minute on a wide range of media and handle almost any job. You can also scan up to 79 color or black-and-white images per minute with minimal manual intervention using the standard 100-Sheet Automatic Reversing Document Feeder (ARDF).Access everything you need with easePerform daily tasks more efficiently with the intuitive, simple-to-use interface. Spending too much time re-loading paper? Add optional paper trays to increase paper capacity up to 4,700 sheets for longer, uninterrupted runs. You can even print on thicker stocks up to 11" x 17" without missing a beat. Plus, you can choose from several automated finishers, including a Stapleless Finisher, which received the Summer 2014 BLI Outstanding Achievement Award for Innovation. This 250-Sheet Internal Stapleless Finisher binds up to five sheets of paper with no staples. This unique stapleless finishing technology helps to lower supply costs and expedites future paper recycling and/or shredding needs.Work from any locationAccess information from wherever you are and share it with others using the Ricoh MP 2554/MP 3054/MP 3554. The user-friendly MFP integrates with optional Ricoh HotSpot Enterprise , so you can print directly to the MFP from your mobile device without compromising speed or security. You can also leverage the powerful features and functionality of the Ricoh MP 2554/MP 3054/MP 3554 directly from your smartphone or tablet through the Ricoh Smart Device Connector app. This versatile technology helps you easily connect an NFC-enabled Smart Device to the optional Smart Operation Panel. Users simply touch their Smart Device to the NFC tag on the Smart Operation Panel or scan the QR Code to automatically connect to the MFP allowing copy, print, scan and fax capability directly from their Smart Device.Keep productivity high in any network environmentManage and boost workgroup outputToday's fast paced offices need to work more efficiently. Yourworkgroup can use the Ricoh MP 2554/MP 3054/MP 3554 —featuring a powerful 533 MHz processor, 2 GB RAM and a 320 GBHDD — to run multiple jobs from multiple users simultaneously,without interruption. You can set quotas or limit output for specificusers to encourage faster, more responsible printing. Take advantageof the icon-driven, one-click preset PCL6 user interface to print crispoutput up to 1200 dpi in fewer steps.Customize workflows to simplify how you workYou know what you need to work faster. So why not customize theRicoh MP 2554/MP 3054/MP 3554 to meet your specific needs?Personalize the Home Screen with icons to access frequently usedtasks with a single touch. Use software like optional GlobalScan™ NXto transform paper documents into digital form for faster delivery tomore people in more places. Add other third-party vendor solutions tosimplify content management and other business-critical tasks so youcan work with fewer manual touchpoints and minimize errors.Use familiar technology to navigate keyfunctions quicklyHow quickly can you check a text or send an email? With the RicohMP 2554/MP 3054/MP 3554, you can print, copy, scan and faxdocuments and move on to your next project just as quickly. Intuitivedrag-and-drop, pinch-and-flick and swipe scrolling simplify routineactions and minimize extraneous choices. It’s available via the optional10.1" Wide Super VGA Smart Operation Panel, which simplifies thechoices for the most frequently used functions for Copy, Scanner,and Fax. Do you have users who prefer Ricoh's traditional interface?For workgroups requiring enhanced feature functionality, it is easyto switch between the Quick User Interface functions and Ricoh’straditional user interface.We’ve made it easy to take controlSCANCLOUD SERVICESPC /TABLET /SMARTPHONEMFPUSER INTERFACESCAN/PRINTSCAN DATASCAN DATAPRINT DATAPRINTUPLOAD/DOWNLOADOCRINTEGRATED CLOUD ENVIRONMENTUse automation to save timeWork is a lot harder when you don’t have the right information. Or, when you’re spending too much time searching for vital information. Ricoh continues to automate how you capture, retrieve and send data to simplify everyday tasks. With optional embedded OCR scanning, users can create searchable and editable PDF files for advancedindexing and retrieval of their scanned documents. With the optional Ricoh Integrated Cloud Environment (ICE) solution, you can access and manage information from any location via Cloud services for incredible convenience without expensive servers, equipment and maintenance.Scan and share the way you want toReduce the amount of paper your organization uses — and share information faster and more economically. Because digital documents can be shared in real time, you can work with others to developstrategies and ideas that can be implemented quickly. Whether images are in black-and-white or color, or in PDF, TIFF or JPEG formats, you can get them to the right place via Scan-to-File/Folder/URL/FTP/Email. Compress the size of highly complex, graphics-intensive files and send them just as easily without compromising quality. You can also make scanning easier across your organization with Distributed Scan Management (DSM). Use it to automate document tasks and to set user permissions, rules and delivery preferences to simplify how you manage information.Send faxes more ways, more placesManage fax workflow quickly and conveniently by adding optional faxing capabilities. Choose the method that works best for you, whether it’s Internet Faxing, LAN faxing or over IP for faster delivery via Super G3 faxing. Using another connected device that doesn’t have a fax board? No problem. With the Remote Fax Option, users can send and receive fax documents from any connected device in your fleet — even those without fax options — by sending it through the Ricoh MP 2554/MP 3054/MP 3554. This minimizes the need for additional phone lines and fax boards.Help meet today’s business challenges with smart, secure multifunction performanceProtect your documents, and yourselfEvery business takes risks daily. Some of them are avoidable. Advanceduser authentication helps prevent unauthorized access to documents.Documents are stored at the device until an authorized ID card isswiped using the optional card reader or a passcode is entered at theMFP to release them. For added protection, you can use encrypted PDFtransmission to scramble data on confidential PDFs or add watermarksto confidential documents that will appear when unauthorized usersattempt to copy them. The DataOverwriteSecurity System (DOSS)automatically overwrites latent images and data on the hard driveto render them unreadable.Manage and monitor remotelyWith the Ricoh MP 2554/MP 3054/MP 3554, you can see how termslike “efficiency” and “productivity” fit into your workday. Use theintuitive administration controls to automate meter reads, accesssystem settings, streamline firmware updates and more, right from thedesktop. Get alerts when supplies are low or maintenance is needed.Monitor usage for specific users or workgroups. And, configureyour entire fleet remotely from the easy-to-use, Web browser-basedoperation panel.Minimize energy consumption andoperating costsYou wouldn’t accept an MFP that stopped being productive onceyou began using it, so why settle for one that stops being affordable?Choose the Ricoh MP 2554/MP 3054/MP 3554 for low cost-per-pageand best in class typical electricity consumption (TEC) values to helpsupport your budgetary needs and sustainability goals. With a shorterprint/copy time from sleep mode, the Ricoh MP 2554/MP 3054/MP 3554keeps up with today’s fast-paced business requirements. You canprogram the device to power on or off during specified times to conserveenergy for even greater savings. Plus, the device meets EPEAT® Goldcriteria — a global environmental rating system for electronic products— and is certified with the latest ENERGY STAR™ specifications.Eco-Friendly Indicator Screen as shown on the Smart Operation Panel.1234571Navigate from job to job easily via the standard, full-color, 9" tiltable LCD control panel featuring a USB/SD card slot and a customizable home screen to link to commonly performed jobs2Use the standard 100-Sheet Automatic Reversing Document Feeder (ARDF) to efficiently handle one- and two-sided originals for copying, scanning and faxing3The MP 2554/MP 3054/MP 3554 comes standard with 2 x 550-sheet paper trays for longer, uninterrupted runs4A standard 100-Sheet Bypass Tray accommodates a wide range of paper sizes and types, including poster printing5Use the optional 2 x 550-Sheet Paper Trays (shown) for multiple paper sources on demand. Other options include a 1 x 550-Sheet Paper Tray, 2,000-Sheet Tandem Large Capacity Tray, 1,500-Sheet Side Large Capacity Tray (shown) and Type F Cabinet6Produce professional documents and minimizeoutsourcing. The optional 1,000-Sheet Booklet Finisher (shown) provides three destinations for output, and can be used to produce paginated, saddle-stitched, punched and folded booklets. Design your own complete document production solution with other optional finishers including a 1,000-Sheet Finisher, 500-Sheet Internal Finisher and 250-Sheet Stapleless Finisher 7The optional 125-Sheet One-Bin Tray (shown) and 250-Sheet Internal Shift-Sort Tray can separate output and simplify document retrievalStreamline document management tasks in small offices and workgroupsRicoh MP 2554 shown with optionalBN3110 One-Bin Tray, PB3220 Paper Feed Unit, RT3030 1,500-Sheet Side Large Capacity Tray, Bridge Unit BU3070 and 1,000-Sheet SR3150 Booklet Finisher.6355。
- 1、下载文档前请自行甄别文档内容的完整性,平台不提供额外的编辑、内容补充、找答案等附加服务。
- 2、"仅部分预览"的文档,不可在线预览部分如存在完整性等问题,可反馈申请退款(可完整预览的文档不适用该条件!)。
- 3、如文档侵犯您的权益,请联系客服反馈,我们会尽快为您处理(人工客服工作时间:9:00-18:30)。
打印机驱动程序可以提供软件应用程序没有直接提供的下述打 印选项:
• 颜色管理 — 可以使用默认颜色进行打印,然后调整颜色、亮 度、对比度和饱和度。
• 布局 — 选择布局选项,如方向、份数、锐化和缩放。 • 打印速度 — 在从标准打印速度到超精细的范围中进行选择,
以实现更高的打印质量。
2013 年 12 月
iii
1 入门
欢迎阅读适用于 MICROSOFT WINDOWS 操作系统的 KODAK 305 Photo Printer 驱动程序用户指南。打印机驱动程序可以让 您使用打印机的功能。
关于打印机驱动程序
安装了 305 打印机驱动程序,您可以通过软件应用程序使用打 印机功能。例如,您的应用程序决定您的打印作业的分页位 置、字体选择,以及页面设置。打印机驱动程序将此类信息转 换成打印机准备输出,并将打印任务发送给打印机。打印机驱 动程序可以提供软件应用程序中没有的其它打印选项。
MICROSOFT WINDOWS 7(32 位)
MICROSOFT WINDOWS VISTA (64 位)
MICROSOFT WINDOWS 7(64 位)
1-2
2013 年 12 月
2 安装和卸载打印机驱动程序
下述安装说明假定您熟悉 MICROSOFT WINDOWS 操作系统和 专用术语。
KODAK D4000 Duplex Photo Printer
305 Photo Printer
打印机驱动程序指南
2013 年 12 月
TM/MC/MR 经 Eastman Kodak Company 许可:Kodak Kodak Alaris Inc. 2400 Mount Read Blvd., Rochester, N.Y. 14615
安装打印机驱动程序
您必须拥有管理员权限才能添加一台打印机。 重要信息:安装软件之前,您必须在打印机上安装最新版本的
打印机固件。 1. 请访问 /go/rss。 2. 选择:
• 零售系统解决方案选项卡 • 打印机 / 介质 • 独立打印机支持 3. 选择 305 Photo Printer 的链接并下载正确的打印机驱动程序。 4. 找到下载到硬盘中的文件,并双击打开文件。 5. 当出现 WinZip Self-Extractor 屏幕时,浏览到一个易于访问 的文件夹位置,例如您的计算机桌面。单击解压缩。 创建一个包含所有文件的安装程序文件夹。 6. 完成安装过程。按照适用于您的操作系统的步骤进行操作: • MICROSOFT WINDOWS XP — 请参阅第 2-2 页。 • MICROSOFT WINDOWS VISTA — 请参阅第 2-4 页。 • MICROSOFT WINDOWS 7 — 请参阅第 2-6 页。
6. 在 “处理器和操作系统选择”窗口中: • 选择 “x86” — 如果使用的是 32 位驱动程序。 • 选择 “x64” — 如果使用的是 64 位驱动程序。 • 单击下一步。
7. 在 “打印机驱动程序选项”窗口中: • 单击从磁盘安装。 • 导航到打印机驱动程序文件夹。
2-8
2013 年 12 月
2013 年 12 月
1-1
入门
硬件和软件要求
您必须配置:
• MICROSOFT WINDOWS XP、MICROSOFT WINDOWS 7 或 MICROSOFT WINDOWS VISTA 操作系统(可用的最新服务 包版本)。
• 最小主存储内存和硬盘容量必须为 512 Mb 或更大。
• 一根长 2 米或更短的 USB 电缆。
• 单击下一步。
5. 在 “您要使用向导执行何种操作 ?”窗口中: • 选择 “从列表或指定位置安装 (高级)”。 • 单击下一步。
2-2
2013 年 12 月
安装和卸载打印机驱动程序
6. 在 “请选择您的搜索和安装选项”窗口中: • 选择 “在搜索中包括这个位置”。 • 单击浏览。 • 导航到打印机驱动程序文件夹。 • 单击下一步。
2013 年 12 月
2-5
安装和卸载打印机驱动程序 10. 在 “成功地安装了这个设备的软件”窗口中,单击关闭。
安装 WINDOWS 7 操作系 重要信息:安装打印机驱动程序前,确保断开了计算机与打印
统中的打印机驱动程序
机的连接。
1. 以 “管理员”或 “管理员组成员”的身份登录计算机。
2. 单击开始 > 设备和打印机。
2-4
2013 年 12 月
安装和卸载打印机驱动程序 7. 在 “Windows 无法找到设备的驱动程序软件”窗口中,选
择 “浏览计算机以查找驱动程序软件”。
8. 在 “浏览计算机上的驱动程序软件”窗口中: • 单击浏览。 • 导航到打印机驱动程序文件夹。 • 单击下一步。
9. 在 “Windows 安全”消息窗口中,选择 “始终安装此驱动 程序软件”。
7. 在 “硬件安装”窗口中,单击仍然继续。 8. 在 “完成找到新硬件向导”窗口中,单击完成。
9. 进行测试打印以检查打印机设置。
2013 年 12 月
2-3
安装和卸载打印机驱动程序
安装 WINDOWS VISTA 操 1. 以 “管理员”或 “管理员组成员”的身份登录计算机。 作系统中的打印机驱动程序 2. 将打印机连接到计算机。
安装和卸载打印机驱动程序 8. 在 “打印机驱动程序选项”窗口中,单击下一步。
9. 在 “正在完成添加打印机驱动程序向导”窗口中,单击 完成。
10. 在 “Windows 安全”消息窗口中,单击安装。
© 2013 Kodak Alaris Inc. 保留所有权利。 P/N 4J8251_ZH_CH
目录
1 入门
关于打印机驱动程序..................................................................................................................................... 1-1 打印机驱动程序的功能 ................................................................................................................................ 1-1 硬件和软件要求 ..............................................................................................................................................1-2
• 可用 USB 端口 (兼容 USB 1.1 和 USB 2.0 协议)。 选择适用于您的操作系统的打印机驱动程序。
打印机驱动程序 EK305_WinXP EK305_WinVista7
EK305_WinVista7_x64
操作系统
MICROSOFT WINDOWS XP (32 位)
MICROSOFT WINDOWS VISTA (32 位)
卸载打印机驱动程序................................................................................................................................... 2-11 卸载 WINDOWS XP 操作系统中的打印机驱动程序。............................................................... 2-11 卸载 WINDOWS VISTA 操作系统中的打印机驱动程序........................................................... 2-11 卸载 WINDOWS 7 操作系统中的打印机驱动程序。................................................................. 2-12
4 故障排除 打印机错误消息 ............................................................................................................................................. 4-1
3. 将打印机的电源开关转到打开 ( | ) 位置。 4. 在 “发现新硬件向导”窗口中,选择 “查找并安装驱动程
序软件”。
5. 在 “用户帐户控制”窗口中,单击继续。 6. 在 “插入随 KODAK 305 Photo Printer 一起提供的光盘”窗
口中: • 选择 “我没有光盘。请显示其他选项。” • 单击下一步。
3 在 WINDOWS 操作系统上使用打印机驱动程序
通过应用程序更改打印选项 .......................................................................................................................3-1 选择 “纸张”选项卡上的 “选项”.................................................................................................3-2 设置 “选项”选项卡上的选项 ..........................................................................................................3-3 设置 “颜色调整”选项卡中的选项 .................................................................................................3-4
