柯达DX7440 z760数码相机说明书
柯达照相机说明书02
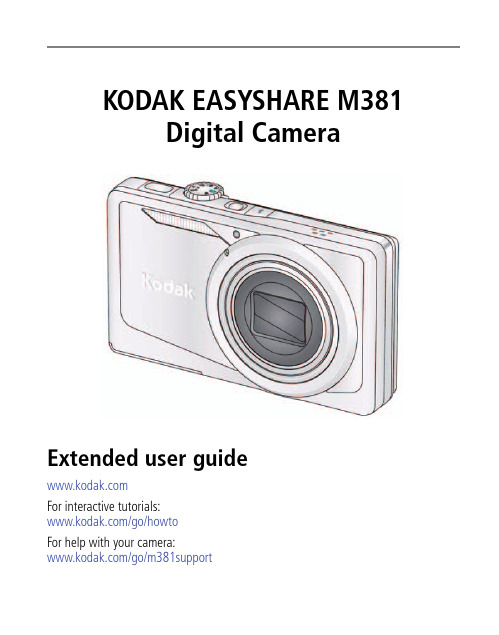
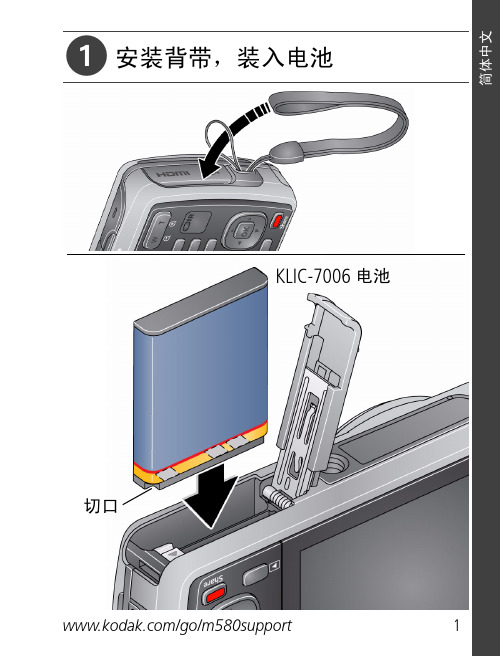
KODAK EASYSHARE M381Digital CameraExtended user guideFor interactive tutorials:/go/howtoFor help with your camera:/go/m381supportEastman Kodak CompanyRochester, New York 14650© Kodak, 2009All screen images are simulated.Kodak, EasyShare, and Perfect Touch are trademarks of Eastman Kodak Company. 4H6510_enProduct featuresFront viewShutter buttonMode dialPower button Flash button Self-timer lightLens/CoverMicro-phoneFlashProduct featuresBack viewlight(Telephoto/Wide Angle) buttonUSB/AV Out DC-In (5V)Strap postOK button SD/SDHC Card/Battery compartmentShare button Tripod socketReview buttonTable of contents1 Setting up your camera (1)Attaching the strap (1)Loading the KLIC-7003 battery (1)Charging the battery (2)Turning on the camera (3)Setting the language and date/time (3)Storing pictures on an optional SD or SDHC Card (4)2 Taking pictures/videos (5)Taking a picture (5)Using optical and digital zoom (6)Using the flash (7)Using different modes (8)Taking a video (10)Using shortcuts (10)Using the self-timer (11)Taking panoramic pictures (12)Understanding the picture-taking icons (13)3 Working with pictures/videos (14)Reviewing pictures/videos (14)Deleting pictures/videos (15)Viewing pictures/videos in different ways (16)Selecting multiple pictures/videos (16)Making a multimedia slide show (17)Using the menu button in review (19)Cropping pictures (20)Using KODAK PERFECT TOUCH Technology (20)Copying pictures/videos (21)Editing videos (21)Understanding the review icons (24)Table of contents4 Using the Menu button (25)Using the Capture tab (25)Using the Setup tab (29)5 Transferring, printing, tagging (32)Installing the software (32)Transferring pictures/videos (33)Printing pictures (34)Tagging/marking your pictures (36)6 Getting help (40)Getting help from your camera (40)Getting help on the Web (41)Troubleshooting (42)7 Appendix (46)Camera specifications (46)Care and maintenance (48)Upgrading your software and firmware (48)Storage capacities (49)Important safety instructions (49)Battery replacement, battery life (50)Limited warranty (51)Regulatory compliance (53)1Setting up your cameraIMPORTANT: For package contents, see your product package.Attaching the strapLoading the KLIC-7003 batteryFor information on replacing the battery and extending battery life, see page 50.Notched cornerSetting up your cameraCharging the batteryOther charging optionsPurchase accessories /go/m381accessoriesBattery Charging light:• Blinking: charging • Steady: finishedTurn off the camera.1Connect the KODAK USB Cable,Model U-8.2frequently, even if power remains.KODAK 5V AC Adapter (May be sold separately)Setting up your cameraTurning on the cameraSetting the language and date/timeNOTE: To change language and date/time in the future, use the Setup tab (see page29).to change current field.for previous/next field.OK to accept.At the prompt, press OK.to change.OK to accept.Language:Date/Time:Setting up your cameraStoring pictures on an optional SD or SDHC CardYour camera has internal memory. You can purchase an SD or SDHC Card to conveniently store more pictures/videos.CAUTION:A card can only be inserted one way; forcing it may causedamage. Inserting or removing a card while the camera is on may damage the pictures, the card, or the camera.Purchase accessories /go/m381accessories1Turn off the camera.2Insert or remove the optional card.3Turn on the camera.2Taking pictures/videos Taking a picture1Turn the Mode dial to Smart Capture . Thenpress the Power button to turn on the camera.2Compose the picture.3Press the Shutter button halfway to focus andset exposure. When the framing marks turn green,press the Shutter button completely down.Using the framing marks to take picturesFraming marks indicate the camera focus area. In Smart Capture mode (and in SCN modes designed for pictures of people), the camera attempts to focus on faces.halfway.completely down toTaking pictures/videosReviewing the picture/video just takenAfter you take a picture/video, the LCD briefly displays a quickview. (To exit the quickview sooner, press the Shutter button halfway.) To review pictures/videos anytime, seepage 14.Using optical and digital zoom1To zoom in, press Telephoto (T).To zoom out, press Wide Angle (W).2Take the picture.NOTE: For focus distances, see Camera Specifications starting onpage 46.To use the 5X digital zoom:■In video mode, press the Telephoto (T) button.■In picture-taking mode, press the Telephoto (T) button until the slider on the LCD is at themaximum optical zoom range. ReleaseTelephoto (T), then press it again.NOTE: Optical zoom is not available in Video mode. Digital zoom is not available in Smart Capture mode.You may notice decreased image quality when using digital zoom. The slider pauses and turns red when the picture quality reaches the limit for an acceptable 4 x 6-in. (10 x 15 cm) print.Delete the current picture/videoOK Play/pause a videoAdjust volumeTaking pictures/videosUsing the flashFlash modesFlash fires AutoWhen the lighting conditions require it.Fill (Flash On)Every time you take a picture, regardless of the lightingconditions. Use when the subject is in shadow or is“backlit” (when the light is behind the subject). In lowlight, hold the camera steady or use a tripod.NOTE: (Not available in Smart Capture mode.)Red Eye Your camera can correctred-eye using 2methods. To choose a red eye setting, see Red Eye Reduction, page 29.PreflashA preflash fires, shrinking the eye pupil, before the picture is taken.Digital Correction A preflash does not fire; the camera corrects red eye.Off NeverPress the flash button repeatedlyto scroll through flash modes.The current flash mode is shown inthe LCD status area.Taking pictures/videosUsing different modesTurn the Mode dial to the mode that best suits your subjects and surroundings.Use this mode ForSmartCapture General picture taking—it offers excellent image quality and ease of use.■Faces are detected.■The scene is analyzed for other content and for lighting.You can choose the best picture size and aspect ratio for your needs—just press the Menu button and choose Picture Size.■3:2 (the best choice when making 4 x 6 prints)■16:9 (wide screen)■4:3 (the default setting)Program Advanced picture taking—allows access to manual settings.BlurReductionReducing blur caused by camera shake or subject motion.Sport Action pictures.Panorama“Stitching” up to 3 pictures into a panoramic scene. (See page12.)Scene Point-and-shoot simplicity when taking pictures in practically anysituation. (See page9.)Video Capturing video with sound. (See page10.)Taking pictures/videosUsing Scene (SCN) modesChoose a Scene mode—for great pictures in practically any situation!1Turn the Mode dial to SCN.2Press to view scene mode descriptions.If the mode description turns off before you finish reading it, press OK.3Press OK to choose a Scene mode.SCN mode ForPortrait Full-frame portraits of people.Landscape Distant scenes.Close-up Close range. Use available light instead of flash, if possible.Flower Close-ups of flowers or other small subjects in bright light.Sunset Subjects at dusk.Backlight Subjects that are in shadow or “backlit” (when light is behind thesubject).Candle Light Subjects illuminated by candle light.Children Action pictures of children in bright light.Manner/ Museum Quiet occasions, like a wedding or lecture. Flash and sound are disabled. Place the camera on a steady surface or tripod.Text Documents. Place the camera on a steady surface or tripod. Beach Bright beach scenes.Snow Bright snow scenes.Fireworks Fireworks. Place the camera on a steady surface or tripod.Self-PortraitClose-ups of yourself. Assures proper focus and minimizes red eye. Night Portrait Reduction of red eye in night scenes or low-light conditions. Night Landscape Distant scenery at night. Flash does not fire.Panning Emphasizing horizontal motion, keeping the foreground sharp. High-ISO Low-light pictures (such as people on a stage).Taking pictures/videosTaking a video1Turn the Mode dial to Video.2Press the Shutter button completely down,then release it. To stop recording, press and releasethe Shutter button again.To review and work with videos, see page14.Using shortcutsFor quick access to the most popular functions:1Press the Info button.The shortcuts appear.2Press to access functions like Exposure Compensation, Self-timer, and Auto focus. (You’ll see different functions in different modes.)3Press to choose a setting.4To hide the shortcuts again, press .ShortcutsTaking pictures/videosUsing the self-timer Use the self-timer when you want to be included in a picture, or to ensure a steadyShutter button press. Place the camera on a tripod or flat surface.1In any picture-taking mode, press the Infobutton to show shortcuts.2Pressto highlight the self-timer icon. Pressto choose a setting:10 seconds— A picture is taken after a 10-second delay (so you have time to get into the scene). 2 seconds— A picture is taken after a 2-second delay (for a steady, shutter release on a tripod).2 shot—The first picture is taken after a 10-second delay. A second picture is taken 8 seconds later.3Compose the scene. Press the Shutter button halfway , then completely down .The camera takes the picture/pictures after the delay.NOTE: In Panoramic modes (page 12), only the 2- and 10-second options are available.Use the same procedure to take a 2- or 10-second self-timer video, but press the Shutter button completely down .1022xTaking pictures/videosTaking panoramic picturesUse panorama to “stitch” up to 3 pictures into a panoramic scene.NOTE: For best results, use a tripod. Only the panoramic picture is saved; individual pictures are not. (Exposure and white balance are set with the first picture. The flash is set to Off.)1Turn the Mode dial to .2Press to highlight Panorama Left-Right or Panorama Right-Left (dependingon the direction you want to pan), then press OK.3Take the first picture.After a quickview, the LCD displays the liveview and an “overlay” from the first picture.4Compose the second picture. Make the overlay from the first picture cover the same portion in the new picture. (You can press the Delete button to re-take a picture.)5If you are taking only 2 pictures, press OK to stitch them together.After you take 3 pictures, the pictures are automatically stitched together.NOTE: To use the self-timer 10-second or 2-second setting, see page 11.Take 2 or 3pictures.Get 1panoramicpicture.Taking pictures/videosUnderstanding the picture-taking icons Battery levelCapturemode Pictures/time remaining Zoom slider Tag name Self timer Flash modeExposure compensation FPO3Working with pictures/videosReviewing pictures/videos 1Press the Review button.2Press for previous/next picture/video.■Press the Shutter button halfway down to returnto Capture mode.■To view pictures/videos as thumbnails, see page 16.Magnifying a picture 1Press T to magnify 1X–8X.2Pressto view other parts of a picture.■Press OK to return to 1X.Playing a videoPress OK to play a video. Press OK to pause/resume.During playback:■Press to adjust the volume.■Press to play at 2X speed; press again for 4X.■Press to reverse at 2X speed; press again for 4X.4X 4X 1X 2X 2XForwardReverse Playback speedDeleting pictures/videos1Press the Review button.2Press for previous/next picture/video.3Press the Delete button.4Follow the screen prompts.NOTE: To delete protected pictures/videos, remove protection before deleting. (See Protecting pictures/videos from deletion.)Using the undo delete featureIf you accidentally delete a picture, you may be able to use Undo Delete to retrieve it. This feature is only available immediately after you delete a picture.Protecting pictures/videos from deletion1Press the Review button.picture/video.previous/next2Press for3Press the Menu button.4Press to highlight Protect, then press OK.The picture/video is protected and cannot be deleted. The Protect icon appearswith the protected picture/video.■Press the Shutter button halfway down to return to Capture mode. IMPORTANT: Your camera offers a built-in Help system. See page40.CAUTION:Formatting internal memory or an SD or SDHC Card deletes all(including protected) pictures/videos. (Formatting internalmemory also deletes email addresses and tag names. To restorethem, see EASYSHARE Software Help.)Viewing pictures/videos in different waysViewing as thumbnails (multi-up)1Press the Review button.The camera shows the last picture that was taken.2Press the Wide Angle (W) button to view pictures/videos as thumbnails. (Press it again to see more, smaller thumbnails.) To view all pictures/videos, highlight the All tab. To sort by favorites, date, or tagged pictures/videos, press and highlight theappropriate tab.3To see a single picture/video, pressto highlight it. Then press the Telephoto (T) button.■To select multiple pictures/videos, see Selecting multiple pictures/videos .■Press the Shutter button halfway down to return to Capture mode.Selecting multiple pictures/videosUse the multi-select feature when you have two or more pictures to print, transfer, delete, etc. Multi-select is used most effectively in Multi-Up mode, page 16.1Press the Review button, thenandto find a picture/video.2Press OK to select pictures/videos.A check mark appears on the picture. You can nowprint, transfer, delete, etc. the selected pictures. You can press OK a second time to remove a check mark.SelectedpicturesMaking a multimedia slide showUse Multimedia Slide Show to display your pictures/videos on the LCD. You can play all pictures/videos, or select pictures to include in the slide show. You can even save a slide show.Make a multimedia slide show that you can save1Press the Review button. Select 2-100 pictures (see page16).2Press the Menu button, then to highlight the Review tab. HighlightMultimedia Slide Show, then press OK.3Press to highlight Preview Show, then press OK.Each picture/video is displayed once. To interrupt the slide show, press OK. After the slide show plays, you may save or modify it.IMPORTANT: Your camera offers a built-in Help system. See page40.Play a multimedia slide show loopWhen you turn on Loop, the slide show is continuously repeated.1On the Multimedia Slide Show menu, press to highlight Loop, then press OK.2Press to highlight On, then press OK.3Press to highlight Preview Show, then press OK.The slide show repeats until you press OK or until the battery is exhausted.Displaying pictures/videos on a televisionYou can display pictures/videos on a television, computer monitor, or any device equipped with a video input. To connect the camera directly to a television, use an A/V cable (may be sold separately).NOTE: Ensure that the Video Out setting (NTSC or PAL) is correct (see page 30). The slide show stops if youconnect or disconnect the cable while the slide show is running. (Image quality on a television screen may not be as good as on a computer monitor or when printed.) Purchase accessories/go/m381accessoriesUsing the menu button in reviewTo use the Menu button in review:1Press the Review button, then the Menu button.2Press to highlight a tab:■Review to view and share pictures/videos■Edit to edit pictures/videos■Setup to control how your camera operates3Press to highlight a setting, then press OK.4Highlight an option, then press OK.IMPORTANT: Your camera offers a built-in Help system. See page40.Cropping picturesYou can crop a picture so that only the desired portion of the picture remains.1Press the Review button, then to find a picture to crop. 2Press the Menu button, thento highlightthe Edit tab. Highlight Crop, then press OK.3Press Telephoto (T) to zoom in, orto move the crop box. Press OK.4Follow the screen prompts.The picture is cropped. (The original is saved.) Cropped pictures cannot be cropped again on the camera. ■Press the Shutter button halfway down to return to Capture mode.IMPORTANT: Your camera offers a built-in Help system. See page 40.Using KODAK PERFECT TOUCH Technology KODAK PERFECT TOUCH Technology helps ensure better, brighter pictures. PERFECT TOUCH Technology is automatically applied to pictures taken in Smart Capture mode. (You cannot apply PERFECT TOUCH Technology to videos, panoramic pictures, orpictures to which PERFECT TOUCH Technology is already applied.)1Press the Review button, then for previous/next picture.2Press the Menu button, then to highlight the Edit tab. Highlight PERFECT TOUCH Tech, then press OK.The enhancement is previewed. Press to view other parts of the picture.3Press OK. Follow the screen prompts to replace the original picture or to save the enhanced picture as a new one.■Press the Shutter button halfway down to return to Capture mode.Picture Cropped pictureCopying pictures/videosYou can copy pictures/videos from a card to internal memory or from internal memory to a card.Copy pictures/videos:1Press the Review button.2Press the Menubutton, then to highlight the Review tab. 3Press to highlight Copy, then press OK. Highlight a choice, then press OK.NOTE:Pictures/videos are copied, not moved. To remove pictures/videos from the original location after copying, delete them (see page15).IMPORTANT: Your camera offers a built-in Help system. See page 40.Editing videosYou can do incredible things with your videos!Making a picture from a video You can choose a single frame from a video, then make a picture suitable for a 4 x 6-inch (10 x 15 cm) print.1Press the Reviewbutton, then to find a video.2Press the Menubutton, then to highlight the Edit tab. Highlight Make Picture, then press OK.3Follow the screen prompts.A picture is created. (The original video is saved.)■Press the Shutter button halfway down to return to Capture mode.IMPORTANT: Your camera offers a built-in Help system. See page 40.Video PictureTrimming a videoYou can remove an unwanted start or end from a video, saving only the desired portion.Press the Review button, thento find a video.Press the Menubutton, then to highlight the Edit tab. Highlight Trim, then press OK.3Follow the screen prompts.The video is trimmed. (You can save it as a new videoor replace the original.)■Press the Shutter button halfway down to return to Capture mode.IMPORTANT: Your camera offers a built-in Help system. See page 40.Video Trimmed videoMaking a video action printFrom a video, you can make a 9-up picture, suitable for a 4 x 6-inch (10 x 15 cm) print.1Press the Reviewbutton, then to find a video.2Press the Menu button, then to highlightthe Edit tab. Highlight Action Print, then press OK.3Highlight an option, then press OK.Auto—The camera includes the first and lastframes, then 7 equally spaced frames.Manual—Choose the first and last frames; thecamera chooses 7 frames.A 9-up picture is created.■Press the Shutter button halfway down to return to Capture mode. IMPORTANT: Your camera offers a built-in Help system. See page40.VideoUnderstanding the review iconsAdd text tag View multi-upSelect pictureEmail tagFavorite tagPrint tag/number of printsProtectedPicture/Video number Upload tagVideo durationBattery levelText tag name Play videoFPO4Using the Menu buttonYou can change settings to get the best results from your camera.1Press the Menu button.2Press to highlight a tab:■Capture/Videofor the most common picture/video-taking settings ■Setupfor other camera settings 3Pressto highlight a setting, then press OK.4Highlight an option, then press OK.NOTE: Some modes offer limited settings. Some settings remain until you change them; others, until youchange modes or turn off the camera.Using the Capture tabPress Menu,, then , and OK to access settings Capture OptionsIMPORTANT: Your camera offers a built-in Help system. See page 40.Exposure CompensationMake a picture lighter ordarker. (Available in Programand Panorama modes.) To usea shortcut, see page 10.0.0, +/-0.3, +/-0.7, +/-1.0, +/-1.3, +/-1.7, +/-2.0Picture SizeChoose a picture resolution.See Camera specifications, page 46.BurstTake up to 3 pictures in quicksuccession. (Burst is notavailable in Panorama mode.)Off On —press the Shutter button halfway to focus and set exposure. Press the Shutter button completely down and hold it to take pictures.Using the Menu buttonSelf-timerTake a picture/video after a delay, or take 2 pictures. (Also see page11.)10 seconds 2 seconds 2-shotFocus ModeSelect a large or concentrated area of focus.Auto—for general picture-taking.Macro—for sharpness and detail in pictures at close range. Use available light instead of flash, if possible. The camera automatically sets the focus distance depending on the zoom position.Infinity—for distant subjects; auto-focus framing marks are unavailable.Long Time Exposure Choose how long the shutter stays open.None0.5, 1.0, 2.0, 4.0, 8.0 secondsColor ModeChoose color tones. Unavailable in Video mode.High ColorNatural ColorLow ColorBlack & WhiteSepiaNOTE: EASYSHARE Software also lets you change a color picture to black-and-white or sepia.AF Control (Still) Choose an auto-focus setting.Continuous AF—because the camera is always focusing, there is no need to press the Shutter button halfway down to focus.Single AF—uses TTL-AF (through-the-lens auto focus) when the Shutter button is pressed halfway down.Press Menu,, then , and OK to access settings Capture OptionsIMPORTANT: Your camera offers a built-in Help system.See page40.Using the Menu buttonWhite BalanceChoose your lighting condition. (Available only in Program and Panorama modes.)Auto—automatically corrects white balance. Ideal for general picture taking.Daylight—for pictures in natural lighting. Tungsten—corrects the orange cast of incandescent light bulbs. Ideal for indoor pictures under tungsten or halogen lighting without flash.Fluorescent—corrects the green cast of fluorescent lighting. Ideal for indoor pictures under fluorescent lighting without flash.Open Shade—for pictures in shade in natural lighting.Face Detect Capture Choose if faces get focus priority.On—in SCN modes designed for pictures of people, the camera attempts to focus on faces.OffNOTE: Not available in Smart Capture mode (because face detection is always on).Exposure Metering Evaluate light levels at specific areas of a scene.Multi-Pattern—evaluates lighting conditions throughout the image to give an optimum picture exposure. Ideal for general picture taking.Center-Weight—evaluates the lighting conditions of the subject centered in the lens. Ideal for backlit subjects. Center-Spot—similar to Center-weight, except the metering is concentrated on a smaller area of the subject centered in the LCD.AF ZoneSelect a large or concentrated area of focus.Multi-Zone—evaluates 5 zones to give an even picture focus. Ideal for general picture taking.Center-Zone—evaluates the small area centered in the lens. Ideal when you need precise focus.Press Menu,, then , and OK to access settings Capture OptionsIMPORTANT: Your camera offers a built-in Help system.See page40.Using the Menu buttonVideo settingsISO SpeedControl the sensitivity of thecamera sensor.See Camera specifications, page 46.Sharpness Control picture sharpness.Sharp NormalSoftPress Menu,, , and OK to access settings Video OptionsIMPORTANT: Your camera offers a built-in Help system. See page 40.Video SizeChoose a video resolution.640 x 480 @ 30 fps (VGA) 320 x 240 @ 30 fps (QVGA)Self-timerTake a picture/video after adelay, or take 2 pictures. (Alsosee page 11.)10 seconds 2 seconds 2-shot Focus ModeSelect a large or concentratedarea of focus.Auto—for general video-taking. TBD Macro—for close range. TBDInfinity—for distant subjects. TBDVideo Blur Reduction Reduce blur caused by camera shake or subject motion.OnOff Press Menu,, then , and OK to access settings Capture OptionsIMPORTANT: Your camera offers a built-in Help system. See page 40.Using the Menu buttonUsing the Setup tabPress Menu,to highlight Setup, thenand OK to access settings Setup Options IMPORTANT: Your camera offers a built-inHelp system. See page 40.Share button Choose how pictures/videos are handled when you press the Share button (via EASYSHARE Software for WINDOWS-OS only).NOTE: Some online services limit video file sizes. Use EASYSHARE Software or choose a preferred online service.Favorite and Upload—pictures/videos aretagged as Favorites and uploaded to yourpreferred online service when you connect to yourcomputer or network.Favorite—pictures/videos are tagged asFavorites (5-star in EASYSHARE Software, on yourcomputer).Upload—pictures/videos are uploaded to yourpreferred online service when you connect to yourcomputer or network.LCD Brightness Choose LCD brightness.Power Save—Lower LCD brightness; conservespower.High Power—Higher LCD brightness; uses morepower.Image Storage Choose a storage location for pictures/videos.Auto—the camera uses the card if one is in thecamera. If not, the camera uses internal memory.Internal Memory—the camera always usesinternal memory, even if a card is installed.Set Tag Create tag names and assign them to pictures/videos. See page 36.New Tag—create a tag.Delete Tag—delete a tag.Clear All—cancel selected tags.Red Eye Reduction Choose how you want to reduce red eye.Preflash—red eye preflash fires before the picture is taken.Digital Correction—red eye preflash does notfire; the camera corrects red eye.Using the Menu buttonQuickview Briefly display a picture after it is taken.OnOffDigital Zoom Turn digital zoom on/off.OnOffOrientation Sensor Orient pictures/videos so that they are displayed with the correct side up.On—the camera rotates pictures so that allappear in the same orientation on the camera.Off—pictures are not rotated.Camera Sounds Choose sound effects, volume.Power OnFocus LockShutterErrorSelf-timerSound Volume (High, Medium, Low, Mute)Date & Time Set date and time.Video Out Choose the regional setting that lets you connect the camera to a television or other external device.NTSC—used in North America and Japan; mostcommon format.PAL—used in Europe and China.LanguageChoose your language.Reset CameraReset settings to their default.Press Menu,to highlight Setup, thenand OK to access settings Setup Options IMPORTANT: Your camera offers a built-inHelp system. See page 40.。
【参考文档】数码相机使用方法说明参考-word范文 (5页)
本文部分内容来自网络整理,本司不为其真实性负责,如有异议或侵权请及时联系,本司将立即删除!== 本文为word格式,下载后可方便编辑和修改! ==数码相机使用方法说明参考数码相机使用方法说明一、基本知识数码相机和传统相机在光学原理上没有什么区别,都是将被摄物体发射或反射的光线通过镜头在相机内部形成倒立的、缩小(或放大、等大)的物像。
但在具体成像中则因光敏介质的不同而有所区别,传统相机使用的是分布于胶片上基于碘化银的感光化学介质。
而数码相机则是采用了CCD作为记录图像的光敏介质,而CCD是通过光照的不同引起的电荷分布的不同来记录被摄物体的视觉特征。
CCD生成的数字图像被传送到相机的另一块内部芯片上。
该芯片负责把图像转换成相机内部存储格式(一般是压缩图像格式,比如说JPEG格式)。
最后,把生成的图像保存在内部存储器中。
数码相机得到的图像其实就是一个数值的集合,所以可以直接下载到计算机中进行处理,无需购买胶卷,并且拍摄时可以随时看到拍摄效果,不满意可以立即重拍,从而比传统相机拥有节约成本、数字化方便、减少误拍等多项优势。
二、技术指导1、 CCD和像素对于数码相机而言,由于利用CCD电荷耦合器来感光。
所谓像素即CCD上的感光元件,像素的多少直接关系着所摄照片的清晰度,像素越多则图像越清晰。
基本上数码相机的像素直接决定相机的最大分辨率,也就是分辨率的乘积等于CCD的象素。
如130万象素的DC240物理象素点为1344×971,其最大分辨率为1280×960。
不过也有例外,Agfa的ePhoto 1680像素只有130万,但通过其相机内制专利插值算法可以将分辨率提高到1600×1200。
如果你拍了照片是放在电脑上浏览看看的,那就选择1M的影像尺寸就可以了,如果想把照片印出来,而且要印成七寸以上的,建议你用3M以上的。
要想放大成12寸以上的照片的,就得选择5~~7M的影像尺寸。
对于一个700万像素的相机来说,最大可以拍成24~~30寸的高品质照片。
柯达相机说明书翻译2007-10-13

安装和取出胶卷安装胶卷装上胶卷以后, 相机会自动把胶卷卷到自己的卷片轴上. 然后每照一张照片, 就有一张胶片回卷到胶卷盒里.1 把拨盘拨到除锁定键以外的任何地方.2 推开相机后盖.3 如图所示,以一定斜度将胶卷装入.4 压着胶卷盒, 拉出胶片头,与相机上的橙色标志对起,然后关上后盖.如果胶片头太长以至超过了橙色标记, 请将多余的退回去.关上相机后盖后,胶片开始缠绕到相机的轴上, 同时胶片记数器开始工作. 然后, 相机发出快门释放的声音, 并显示胶片张数◎如果张数不显示, 就意味着胶卷没有装好. 那么就拿出来重装.第21页本相机不能使用红外线胶卷。
快门帘使用几高精度标准制造。
为了避免损坏,不能触摸。
装胶卷过程中千万小心,保证手指和胶卷不碰它。
取胶卷最后依仗曝光后,相机自动回卷。
当胶卷回卷到头,显示屏上将只显示◎标志。
先检查这个标志是否显示,然后打开相机后盖,取出胶卷。
中途回卷。
最后一张胶卷曝光前回卷胶卷时,请参照以下步骤:1.将命令拨盘转到中途回卷◎《《2.按住◎《《控制按钮不放,至少持续1秒。
胶卷开始回卷。
当回卷到头,相机会发出快门释放的声音。
3打开相机后盖,取出胶卷。
第22页如果你经过回卷就把一格未拍完的胶卷从相机里取出,并装入新胶卷。
这个新胶卷的片头只能回卷到卷盒里。
为了避免这种情形,在装入新胶卷前请关上相机后盖,并完全按下快门一次。
拿稳相机为了排出的照片不模糊,请参考以下的姿势拿相机。
用右手握住相机手柄并抓紧。
将胳膊肘轻轻的靠在自己的身体上。
左手托住镜头。
把相机压在自己的前额上,通过取景器观察图像。
为了更好的稳定,请保持一只脚稍微靠前。
这部分描述命令拨盘基本区域的照相模式。
这些模式能自动设置相机。
需要你做的就三取景和按快门。
而且,这些模式不艘主拨盘和其他控制钮的控制。
从而可以避免意外的错误操作而导致相片效果不好。
相机控制的自动拍摄。
在运用程序影像模式拍摄时,如果闪光灯标志在取景器里闪烁,请用手指抬起内置闪光灯。
柯达DX7440 z760数码相机说明书
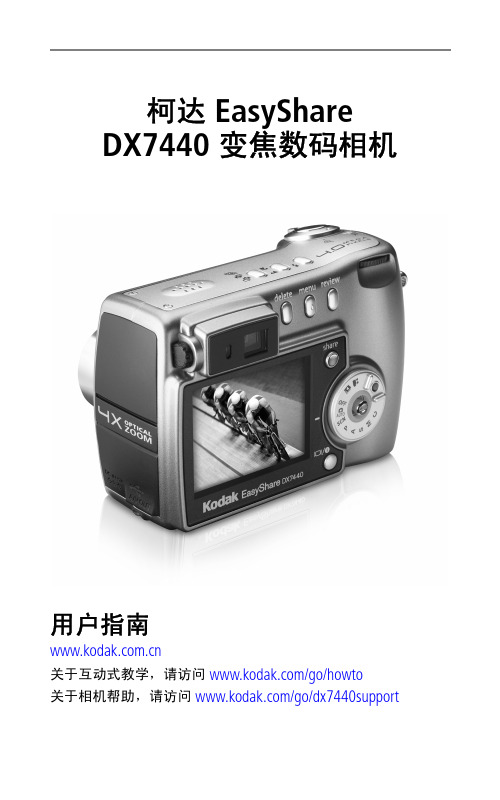
用户指南
关于互动式教学,请访问 /go/howto 关于相机帮助,请访问 /go/dx7440support
Eastman Kodak Company 343 State Street Rochester, New York 14650 © Eastman Kodak Company, 2004
/go/support
ZN-CH iii
在电视上显示照片和录像....................................................32 复制照片和录像 ...................................................................32 查看照片/录像信息 ..............................................................33 4 安装软件 ........................................................................ 34 最低系统要求.......................................................................34 安装软件 ..............................................................................35 5 分享照片和录像 ............................................................. 36 我什么时候可以标记照片和录像?.....................................36 标记照片以进行打印 ...........................................................37 标记照片和录像以便电邮....................................................38 将照片标记为收藏 ...............................................................39 6 传输和打印照片 ............................................................. 41 使用 USB 电缆传输照片/录像 ..............................................41 从计算机上打印照片 ...........................................................42 在线订购照片.......................................................................42 通过可选购的 SD/MMC 存储卡打印 ....................................42 不使用计算机进行打印........................................................42 7 故障排除 ........................................................................ 43 相机故障 ..............................................................................43 计算机/接口问题 ..................................................................44 照片质量问题.......................................................................45 相机就绪指示灯状态 ...........................................................45 8 获得帮助 ........................................................................ 47 帮助链接 ..............................................................................47 电话客户支持.......................................................................48 9 附录 ................................................................................ 49 相机规格 ..............................................................................49 提示、安全和维护 ...............................................................51 存储容量 ..............................................................................52 省电功能 ..............................................................................53 升级软件和固件 ...................................................................54 监管信息 ..............................................................................54
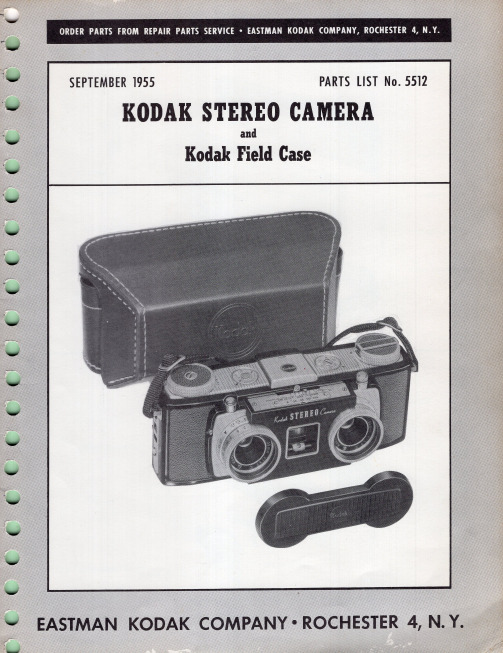
Kodak Stereo Camera 产品说明书
SCREW (2)-128587
,/
PLATE (2)-127395
SCREW (2)-127459 _____ ~
SCREW (2)-122834 - _ _ _,
RETAINER-127419
Figure 6
VIAL-l'27433
/
LENS-127429
BEZEL-127392
HOUSING-127426
PAWL-130271 -----~-.....-
* POST (OLD STYLE}-127436
*(Fa' old style sprocket shaft assembly No. 130268 - refer to figure 14)
*(Fa' new style sprocket shaft assemb.ly No. 132216 - refer to figure 14)
REFER TO FIGURE 4
1- - -_______ LENS-801377
(Install with convex s ide toward front of camer a)
---~ SHAFT-127466
/ ' WASHER-130275
o
Mi
[ : - - - SHAFT-130276
{R IGHT)-129386
COVERING {LEFT)-129387
Figure 15
SPRING-130267 SOCKET-127435
Figure 16
SCREW-124589
BEZEL {LH)-12n39
{E NGLlSH)-131632 {SPANISH)-131634
柯达 数码相机 说明书
分享和标记照片
使用键盘
当您需要键入字符时将会显示键盘。
1按
以选择一个字符,然后按 OK
(确定)。
2 完成时,按
以便选择“OK (确定)”,
然后按 OK (确定)。
3 如果您已添加了新名字,相机将会提示您更新所 有人脸以匹配指定的名字。选择“是”,然后按
OK (确定)。
名字将被指定给所有与其匹配的人脸。
以选择“管理电子邮件地址” (或“管理
相框”),然后按 OK (确定)。
2 要添加电邮地址或相框,请按
以选择“新
电邮”或“新相框”,然后按 OK (确定)。请使
用屏幕键盘进行添加。请参阅第 19 页。
(例如:JohnDoe@)
要编辑电邮地址或相框,请按
以选择地址
的昵称 (“父亲”或“Mary”)或相框,然后按
请参阅补充用户指南 /go/m580support
/go/m580support7来自简体中文前视图
闪光灯
自拍定时/录像/ 自动对焦辅助灯
镜头 麦克风 扬声器
8
/go/easysharecenter
简体中文
后视图
LCD Delete (删除)、 “Me信nu息(”菜按单钮)、(Re查vie看w) 按钮
注:(在智能拍摄模式下不 可用。)
在拍照前,闪光灯预闪,使瞳孔 收缩。
闪光灯不预闪,而是由相机来校正 红眼。
注: 使用数码校正功能时,影像 处理时间会比使用预闪功能 时要长。
不闪光
12 ZH-CN
/go/easysharecenter
关于相机的其它操作
使用光学变焦
1 使用液晶显示屏为主体 取景。
打印/数量 保护 电邮 照片/录像数
柯达相机说明书
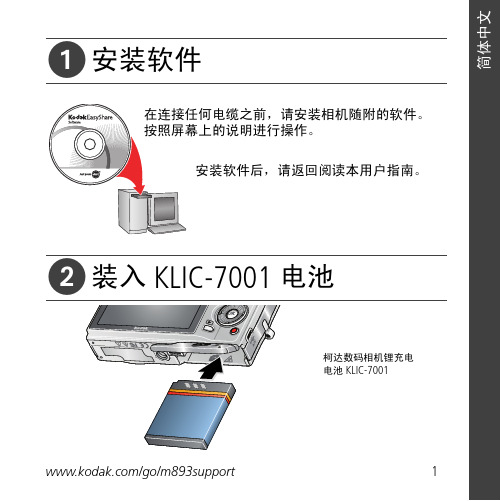
ᕡ安装软件ᕣ为 KLIC-7001 电池充电计算机将 USB 电缆连接到计算机的 USB 端口,而不是集线器。
确保计算机电源已打开并且不处于睡眠模式。
/go/easysharecenter语言:确定确定确定4/go/easysharecenterᕦ拍摄照片/录像按 打开/关闭:完全按下快门按钮然后释放。
要停止录制,请再次按下快门按钮。
• 取景窗格• 状态图标 按快门按钮以进行对焦并设置曝光。
就绪指示灯变绿时完全按下。
/go/m893support5ᕧ以查看上一照片按 Review 录像播放。
调节音量。
以 2 倍速或暂停/播放。
确定播放期间:1关闭相机电源。
2连接 A/Vᕨ传输照片/录像闪光灯镜头/go/easysharecenter/go/m893support 9简体中文/ Menu (菜单)按钮Share (分享)按钮5Delete (删除)按钮13电池仓6变焦按钮(广角/远摄)14SD/SDHC 存储卡插槽7模式转盘15底座接口8直流输入(5 伏),适用于可选购的交流变压器16三脚架连接孔1关于相机的其它操作(T) 可放大。
按广角 (W) 可缩小。
始终使用自动对焦取景标记。
如果不使用变焦(1 倍,广角),则您与主体最近可以相距 0.6 米(2 英尺)。
在变焦时,您需要进一步远离主体。
W T D(广角)(远摄)(数码)10/go/easysharecenter(请参阅下面的闪光灯模式)自动闪光补光关于相机的其它操作使用其它拍摄模式使用此模式适用于自动一般拍照 — 既能保证极高的影像品质又易于使用。
特写近距离。
如有可能,请使用现场光,而不要使用闪光灯。
场景即使在特殊条件下拍照,也可获得对准即拍的简单性。
(请参阅第 13 页。
)高感光度使用较高的 ISO 在室内拍摄弱光场景中的人物。
录像拍摄有声录像。
(请参阅第 4 页。
)收藏夹查看收藏的照片。
SCNISO关于相机的其它操作场景模式选择一种场景模式,以使您无论在何种情景下均可拍摄出精美照片。
Kodak 数字录影机用户指南和数字录影机校准指南(2011年12月)说明书
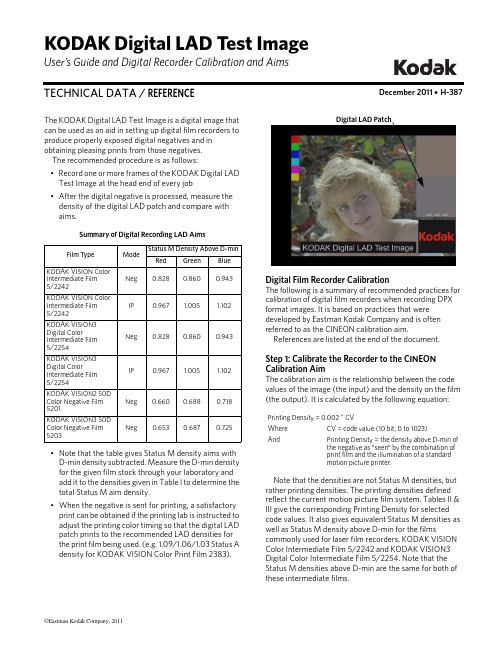
User’s Guide and Digital Recorder Calibration and Aims December 2011 • H-387TECHNICAL DATA / REFERENCEKODAK Digital LAD Test ImageThe KODAK Digital LAD Test Image is a digital image that can be used as an aid in setting up digital film recorders to produce properly exposed digital negatives and in obtaining pleasing prints from those negatives.The recommended procedure is as follows:•Record one or more frames of the KODAK Digital LAD Test Image at the head end of every job •After the digital negative is processed, measure the density of the digital LAD patch and compare with aims.Summary of Digital Recording LAD Aims•Note that the table gives Status M density aims with D-min density subtracted. Measure the D-min density for the given film stock through your laboratory and add it to the densities given in Table I to determine the total Status M aim density.•When the negative is sent for printing, a satisfactory print can be obtained if the printing lab is instructed to adjust the printing color timing so that the digital LAD patch prints to the recommended LAD densities for the print film being used. (e.g. 1.09/1.06/1.03 Status A density for KODAK VISION Color Print Film 2383).Film Type Mode Status M Density Above D-min Red Green Blue KODAK VISION Color Intermediate Film 5/2242Neg0.8280.8600.943KODAK VISION Color Intermediate Film 5/2242IP 0.967 1.005 1.102KODAK VISION3 Digital ColorIntermediate Film 5/2254Neg 0.8280.8600.943KODAK VISION3 Digital ColorIntermediate Film 5/2254IP 0.9671.005 1.102KODAK VISION2 50D Color Negative Film 5201Neg 0.6600.6880.718KODAK VISION3 50D Color Negative Film 5203Neg 0.6530.6870.725Digital LAD PatchDigital Film Recorder CalibrationThe following is a summary of recommended practices for calibration of digital film recorders when recording DPX format images. It is based on practices that were developed by Eastman Kodak Company and is often referred to as the CINEON calibration aim.References are listed at the end of the document.Step 1: Calibrate the Recorder to the CINEON Calibration AimThe calibration aim is the relationship between the code values of the image (the input) and the density on the film (the output). It is calculated by the following equation:Note that the densities are not Status M densities, but rather printing densities. The printing densities defined reflect the current motion picture film system. Tables II & III give the corresponding Printing Density for selected code values. It also gives equivalent Status M densities as well as Status M density above D-min for the filmscommonly used for laser film recorders, KODAK VISION Color Intermediate Film 5/2242 and KODAK VISION3 Digital Color Intermediate Film 5/2254. Note that the Status M densities above D-min are the same for both of these intermediate films.Printing Density = 0.002 * CVWhere CV = code value (10 bit, 0 to 1023)AndPrinting Density = the density above D-min of the negative as "seen" by the combination of print film and the illumination of a standard motion picture printer.Table II: Calibration Aims for Digital Original Negative Recorded onto KODAK VISION Color Intermediate Film 5/2242Table III: Calibration Aims for Digital Original Negative Recorded onto KODAK VISION3 Digital Color Intermediate Film 5/2254Printing Density Code Value Printing Density (Above D-min)Status M (Above D-min)Status M (See Note 1)R G B R G B R G B R G B Digital LAD0000.0000.0000.0000.0000.0000.0000.0710.5500.6032222220.0440.0440.0440.0410.0430.0470.1120.5930.6509595950.1900.1900.1900.1770.1840.2010.2480.7340.8042002002000.4000.4000.4000.3720.3870.4240.4430.937 1.0274454454450.8900.8900.8900.8280.8600.9430.899 1.410 1.546520520520 1.040 1.040 1.0400.967 1.005 1.102 1.038 1.555 1.705685685685 1.370 1.370 1.370 1.274 1.324 1.452 1.345 1.874 2.0558******** 1.600 1.600 1.600 1.488 1.546 1.695 1.559 2.096 2.298900900900 1.800 1.800 1.800 1.674 1.740 1.907 1.745 2.290 2.510968968968 1.936 1.936 1.936 1.801 1.871 2.051 1.872 2.241 2.654100010001000 2.000 2.000 2.000 1.860 1.933 2.119 1.931 2.483 2.7221023102310232.0462.0462.0461.9031.9782.1681.9742.5282.771D-min 0.0710.5500.603Printing Density Code Value Printing Density (Above D-min)Status M (Above D-min)Status M (See Note 1)R G B R G B R G B R G B Digital LAD0000.0000.0000.0000.0000.0000.0000.0670.7100.6872222220.0440.0440.0440.0410.0430.0470.1080.7530.7349595950.1900.1900.1900.1770.1840.2010.2440.8940.8882002002000.4000.4000.4000.3720.3870.4240.439 1.097 1.1114454454450.8900.8900.8900.8280.8600.9430.895 1.570 1.630520520520 1.040 1.040 1.0400.967 1.005 1.102 1.034 1.715 1.789685685685 1.370 1.370 1.370 1.274 1.324 1.452 1.341 2.034 2.139800800800 1.600 1.600 1.600 1.488 1.546 1.695 1.555 2.256 2.382900900900 1.800 1.800 1.800 1.674 1.740 1.907 1.741 2.450 2.594968968968 1.936 1.936 1.936 1.801 1.871 2.051 1.868 2.581 2.738100010001000 2.000 2.000 2.000 1.860 1.933 2.119 1.927 2.643 2.8061023102310232.0462.0462.0461.9031.9782.1681.9702.6882.855D-min 0.0670.7100.687Recorders from different manufacturers will likely have some means to utilize these aims as part of their calibration procedure. Please refer to your recorder's specific instructions regarding how to use this type of data for calibrating the recorder.When creating an interpositive or master positive, a simple inversion of the density to code value relationship would produce a LAD density that is too high. An offset of -0.116 printing density is included to get to a more acceptable LAD density. This forces some high code values to produce a negative density, so these are clipped to a density of zero in the following tables.Table IV: Calibration Aims for Interpositive Digital Recording onto KODAK VISION Color Intermediate Film 5/2242Table V: Calibration Aims for Interpositive Digital Recording onto KODAK VISION3 Digital Color Intermediate Film 5/2254Printing Density Code Value Printing Density (Above D-min)Status M (Above D-min)Status M (See Note 1)R G B R G B R G B R G B Digital LAD000 1.930 1.930 1.930 1.795 1.865 2.045 1.866 2.415 2.648222222 1.886 1.886 1.886 1.754 1.823 1.998 1.825 2.373 2.601959595 1.740 1.740 1.740 1.619 1.682 1.844 1.690 2.232 2.447200200200 1.530 1.530 1.530 1.423 1.479 1.621 1.494 2.029 2.22444544545 1.040 1.040 1.0400.967 1.005 1.102 1.038 1.555 1.7055205205200.8900.8900.8900.8280.8600.9430.899 1.410 1.5466856856850.5600.5600.5600.5210.5410.5930.592 1.091 1.1968008008000.3300.3300.3300.3070.3190.3500.3780.8690.9539009009000.1300.1300.1300.1210.1260.1380.1920.6760.7419659659650.0000.0000.0000.0000.0000.0000.0710.5500.603102310231023-0.116-0.116-0.1160.0000.0000.0000.0710.5500.603D-min 0.0710.5500.603Printing Density Code Value Printing Density (Above D-min)Status M (Above D-min)Status M (See Note 1)R G B R G B R G B R G B Digital LAD000 1.930 1.930 1.930 1.795 1.865 2.045 1.862 2.575 2.732222222 1.886 1.886 1.886 1.754 1.823 1.998 1.821 2.533 2.685959595 1.740 1.740 1.740 1.619 1.682 1.844 1.686 2.392 2.531200200200 1.530 1.530 1.530 1.423 1.479 1.621 1.490 2.189 2.30844544545 1.040 1.040 1.0400.967 1.005 1.102 1.034 1.715 1.7895205205200.8900.8900.8900.8280.8600.9430.895 1.570 1.6306856856850.5600.5600.5600.5210.5410.5930.588 1.251 1.2808008008000.3300.3300.3300.3070.3190.3500.374 1.029 1.0379009009000.1300.1300.1300.1210.1260.1380.1880.8360.8259659659650.0000.0000.0000.0000.0000.0000.0670.7100.687102310231023-0.116-0.116-0.1160.0000.0000.0000.0670.7100.687D-min 0.0670.7100.687The relationship between Status M and printing density changes from film to film. Tables VI and VII give Status M code values for KODAK VISON2 50D Color Negative Film 5201 and KODAK VISION3 50 Color Negative Film 5203. These films are commonly used in CRT film recorders. In certain situations, it may be sufficient to limit the maximum code values to less than 1023, thus requiring lower densities and possibly improving throughput without sacrificing final image quality. The table shown goes to a code value of 800 before clipping.Table VI: Calibration Aims for Digital Recording onto KODAK VISION2 50D Color Negative Film 5201Table VII: Calibration Aims for Digital Recording onto KODAK VISION3 50D Color Negative Film 5203Printing Density Code Value Printing Density (Above D-min)Status M (Above D-min)Status M (See Note 1)R G B R G B R G B R G B Digital LAD0000.0000.0000.0000.0000.0000.0000.1690.5920.9439595950.0000.0000.0000.0000.0000.0000.1690.5920.9432002002000.2100.2100.2100.1980.2060.2150.3670.798 1.1584004004000.6100.6100.6100.5750.6000.6260.744 1.192 1.5694454454450.7000.7000.7000.6600.6880.7180.829 1.280 1.661600600600 1.010 1.010 1.0100.9530.993 1.036 1.122 1.585 1.979685685685 1.180 1.180 1.180 1.113 1.160 1.210 1.282 1.752 2.153800800800 1.410 1.410 1.410 1.330 1.386 1.446 1.499 1.978 2.389900900900 1.610 1.610 1.610 1.330 1.386 1.446 1.499 1.978 2.3891000100010001.8101.8101.8101.3301.3861.4461.4991.9782.389D-min 0.1690.5920.943Printing Density Code Value Printing Density (Above D-min)Status M (Above D-min)Status M (See Note 1)R G B R G B R G B R G B Digital LAD0000.0000.0000.0000.0000.0000.0000.1520.5820.8459595950.0000.0000.0000.0000.0000.0000.1520.5820.8452002002000.2100.2100.2100.1960.2060.2170.3480.788 1.0624004004000.6100.6100.6100.5690.5690.5680.721 1.151 1.4134454454450.7000.7000.7000.6530.6870.7250.805 1.269 1.570600600600 1.010 1.010 1.0100.9420.991 1.046 1.094 1.573 1.891685685685 1.180 1.180 1.180 1.100 1.157 1.222 1.252 1.739 2.067800800800 1.410 1.410 1.410 1.315 1.383 1.460 1.467 1.965 2.305900900900 1.610 1.610 1.610 1.315 1.383 1.460 1.467 1.965 2.3051000100010001.811.811.811.3151.3831.4601.4671.9652.305D-min 0.1520.5820.845KODAK Digital LAD Test ImageRevised 12-11KODAK Digital LAD Test Image KODAK Publication No. H-387Record a Digital LAD ImageOnce the recorder is calibrated, it is recommended that a Digital LAD image be recorded along with each production job. This digital LAD image will consist of or contain a patch recorded at a set of LAD code values. This patch may be printed to standard LAD densities on the print to obtain a reasonable starting print balance. Suitable print densities for the LAD patch are 1.09/1.06/1.03. Status A for KODAK VISION Color Print Film 2383.The recommended code values for a digital LAD patch are:Note that these code values do not result in densities that are exactly the same as those recommended in the KODAKPublication H-61, Laboratory Aim Density (See Table VII, next page). However, the densities are close and still result in an image well placed on the straight-line portion of the film's characteristic curve.Table VII also gives the recommended aim densities for digital recorders when used to make interpositives. The LAD aims for negative are different than for interpositive, even though they're printed from the same code values.Finally note that some facilities may choose to use a digital LAD with code values other than 445, 445, 445. We chose these values to be consistent with a large body of industry practice. However, other values could be chosen, such as a set of code values that give densities closer to the publication H-61 densities.Red Green Blue 445445445Table VII: Summary of Digital Recording LAD AimsReferences1.G. Kennel, "Digital Film Scanning and Recording: The T echnology and Practice," SMPTE Journal, March, 1994.2."Laboratory Aim Density, Using LAD to Set Up an Electronic Color Analyzer and Printing Control," KODAK publication H-61.ModeRedGreenBlueNegative Mode 5/2242Code values for Digital LAD 445445445Printing density for Digital LAD 0.8900.8900.890Status M density above D-min for Digital LAD0.8280.8600.943Status M density for Digital LAD0.899 1.410 1.546Normal LAD aims (per KODAK Publication H-61) 1.001.451.55Negative Mode 5/2254Code values for Digital LAD 445445445Printing density for Digital LAD 0.8900.8900.890Status M density above D-min for Digital LAD0.8280.8600.943Status M density for Digital LAD0.8951.5701.630IP Mode 5/2242Code values for Digital LAD 445445445Printing density for Digital LAD 1.040 1.040 1.040Status M density above D-min for Digital LAD0.967 1.005 1.102Status M density for Digital LAD1.038 1.555 1.705Normal LAD aims (per KODAK Publication H-61) 1.151.601.70IP Mode 5/2254Code values for Digital LAD 445445445Printing density for Digital LAD 1.040 1.040 1.040Status M density above D-min for Digital LAD0.967 1.005 1.102Status M density for Digital LAD1.0381.5551.705Kodak, Eastman, Vision, Vision2, and Vision3 are trademarks.。
柯达 数码相机 说明书
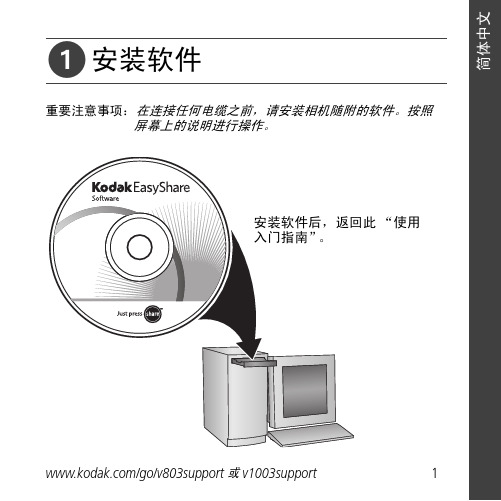
ᕡ安装软件“使用ᕣ为电池充电要使用底座,请参阅其“使用入门指南”。
有关底座兼容性,请访问/go/dockcompatibility。
要购买配件,请访问/go/v803accessories或/go/v1003accessories。
要在以后更新这些设置,请参阅用户指南。
OK OK 语言:日期/OK完全按下快门按钮,然后释放。
要停止录制,请再次按下并释放快门按钮。
“On/Off (开/Auto/SCN (自动/模式按钮,打开相机。
按“录像”模式按钮。
按快门按钮以进行对焦并设置曝光。
就绪指示灯或取景标记变绿完全按下快门按钮。
取景标记录像:播放。
(按 OK在播放期间调整音量。
在播放期间以在播放期间以按住 4 秒钟可跳到一个书签。
ᕨ传输照片/录像要使用底座,请参阅其“使用入门指南”。
有关底座兼容性,请访问/go/dockcompatibility。
要购买配件,请访问/go/v803accessories或/go/v1003accessories。
ᕩ学习有关相机的更多知识!祝贺您!您已经学习了:• 设置相机• 拍摄照片• 将照片传输到计算机请访问• 用户指南• 互动式故障排除及维修• 互动式教学• 常见问题解答• 下载• 配件• 打印信息• 产品注册不断学习!(确定)按钮(按下)电池锁;电池仓可选购的 SD/MMC 存储卡;存储卡插槽4远摄/帮助按钮10三脚架接口16Delete(删除)按钮5USB、A/V 输出11底座接口17闪光灯按钮6背带孔12扬声器使用数码变焦在任何照片拍摄模式下,使用数码变焦可在光学变焦的基础上再放大3 倍。
(录像时不能使用数码变焦。
)按住“远摄 (T)”按钮,直到滚动条位于光学变焦范围的顶部。
释放远摄 (T) 按钮,然后再次按下。
注:您会注意到使用数码变焦时影像品质降低了。
当照片质量达到获得 10 x 15 厘米(4 x 6 英寸)打印照片的限制时,滚动条会暂停并变红。
关于相机的其它操作使用自拍定时当您希望为自己拍照或想要在按下快门按钮时保持相机稳定,可以使用自拍定时。
柯达 EasyShare Z760 变焦数码相机 说明书
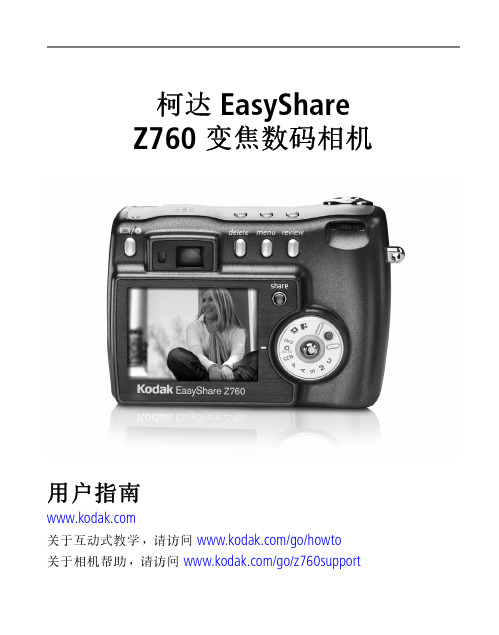
柯达 EasyShareZ760 变焦数码相机用户指南关于互动式教学,请访问/go/howto关于相机帮助,请访问/go/z760supportEastman Kodak Company343 State StreetRochester, New York 14650© Eastman Kodak Company, 2005所有的屏幕影像都是模拟影像。
柯达 (Kodak) 和 EasyShare 是伊士曼柯达 (Eastman Kodak) 公司的商标。
P/N 4J3389 _zh-cn视频输出,用于在电视上USB直流电输入(5 伏)4闪光灯/状态按钮 11镜头5特写/风景按钮 12麦克风6包围曝光/连拍按钮 13光线传感器7扬声器 14自拍/录像指示灯/go/support i移动(确定)按钮—按5Delete(删除)按钮14电池锁6Menu(菜单)按钮15电池仓7Review(查看)按钮16SD/MMC 存储卡插槽8操控旋钮17用于 EasyShare 相机底座或多功能底座打印机 3 系列的三脚架连接孔/定位器9Share(分享)按钮18底座接口ii /go/support/go/support iii目录1 使用入门 (1)先安装软件......................................................................................1为电池充电......................................................................................1插入电池..........................................................................................2打开和关闭相机...............................................................................2设置日期和时间...............................................................................3附接镜头盖......................................................................................4在 SD 或 MMC 存储卡上存储照片 (4)2 拍摄照片和录像 (5)拍摄照片..........................................................................................5拍摄录像..........................................................................................7检查相机和照片状态.......................................................................8查看刚刚拍摄的照片或录像............................................................9使用光学变焦.................................................................................10使用数码变焦.................................................................................10相机模式........................................................................................11使用闪光灯....................................................................................16拍摄特写和风景照片 (17)3 查看照片和录像 (19)查看单张照片和单部录像..............................................................19查看多张照片和多部录像..............................................................20播放录像........................................................................................20删除照片和录像.............................................................................21放大照片........................................................................................21更改可选的查看设置.....................................................................22保护照片和录像,防止删除..........................................................22标记相册的照片/录像....................................................................23放映幻灯片 (24)目录在电视上显示照片和录像 (25)复制照片和录像 (25)查看照片/录像信息 (26)4 安装软件 (27)安装软件 (27)5 关于相机的其它操作 (28)更改拍摄设置 (28)使用设置菜单自定义您的相机 (33)使用连拍 (36)使用包围曝光 (37)预先标记相册名称 (38)分享照片和录像 (39)6 传输和打印照片 (44)使用 USB 电缆传输照片/录像 (44)打印照片 (45)相机的底座兼容性 (48)7 故障排除 (49)相机故障 (49)计算机/接口问题 (50)照片质量问题 (51)相机就绪指示灯状态 (52)帮助链接 (53)电话客户支持 (54)8 附录 (55)相机规格 (55)提示、安全和维护 (58)重要电池信息 (58)存储容量 (60)节电功能 (61)iv /go/support目录/go/supportv每种模式下的闪光灯设置..............................................................62升级软件和固件.............................................................................63保修................................................................................................64监管信息. (66)1/go/support先安装软件重要事项: 请先从柯达 EasyShare 软件光盘中安装软件,然后再将相机(或相机底座)连接到计算机上。
柯达易分享dx6490数码相机使用说明书

The Kodak EasyShare DX6490 zoom digital camera is your key to self-expression. Built to give you endless creative versatility and effortless control, the DX6490 supplies advanced professional-quality features such as a powerful 10X (38-380 mm) optical Schneider-Kreuznach Variogonzoom lens and the most vividly lifelike color possible, thanks to our exclusive Kodak Color Science image processing chip and over 80 years of color science engineering. The results are simply stunning. Razor-sharp focus. Inspired compositions. Dramatic depth. An intimate glimpse into reality, or a surreal look at the abstract. Whatever your eye sees the DX6490 can capture. And with a touch of our exclusive Share button, you can show your vision to the world.Amazing print qualitys Get really close with its 10X (38-380 mm) professional-quality optical Schneider-Kreuznach Variogon™ zoom lens s Features the exclusive Kodak Color Science imageprocessing chip derived from the same color technology that goes into our Professional series cameras s Print stunning pictures up to 20" x 30" with 4.0MPs Get bright pictures – even in low light – with high-speed,low-light capable precision auto-focusVersatile performances Fine-tune for the shot you want with advanced creative and manual controls and an external flash synchs Use the high-resolution electronic viewfinder to see your shots just the way you shot them, or view your pictures through the large 2.2" LCDs Be ready for just about any situation with easily accessible scene modesSophisticated simplicitys Includes a Kodak EasyShare Li-Ion battery and camera dock 6000 for one-touch-simple transferring, e-mailing,printing, and rechargings Capture moments in motion with video and audio s See your vertical shots vertically with auto picture rotations Compatible with Kodak EasyShare printer dock 6000Just pressShoot. T ouch. Share. With the Kodak EasyShare system, sharing is simple. Justplace your Kodak EasyShare digital camera into the dock, touch the button,and your pictures are automatically sent to your computer. Now you ’re ready to e-mail pictures and share great-looking prints with the world.™D X6490EasyShare systemEasySharezoom digital camera and camera dock 6000CD-ROM drive Available USB portColor monitor, 800x600 pixels (16-bit or 24-bit recommended)Macintosh:PowerPC based Macintosh computerMacintosh OS X (OS 8.6/9.x – Share buttonfunctions not supported – OS X is recommended for full functionality)128MB RAM for OS X (64MB RAM for OS 8.6/9.x)200MB hard drive disk space available CD-ROM drive Available USB portColor monitor, 800x600 pixels (thousands or millions of colors recommended)Package ContentsKodak EasyShare DX6490 zoom digital camera and Kodak EasyShare camera dock 6000Audio/video cable USB cable Neck strapLens cap with tetherKodak EasyShare Li-Ion rechargeable battery Kodak EasyShare software CD with interactive software tutorialWelcome kit and user ’s guideCustom camera insert for Kodak EasyShare 6000 series camera and printer docksOrdering InformationKodak EasyShare DX6490 zoom digital camera and Kodak EasyShare camera dock 6000000 0000 (US)000 0000 (Canada)Recommended AccessoriesKodak EasyShare printer dock 6000 – 823 7448Kodak color cartridge and photo paper kit – 123 1349Kodak 6-in-1 card reader – 879 0792Kodak Li-Ion rechargeable battery – 1700 mAh –106 4062Kodak Li-Ion rapid battery charger – 808 0673Kodak Digital Camera Tripod – 806 2135Kodak SD memory cards, 256 MB – 813 2219Kodak Performance Series Digital Camera Case –138 2084Standard FeaturesCCD resolution – 4.23 megapixel (2408x1758 pixels)Image resolution – 4.0 megapixel (2304x1728 pixels)Image quality4.0MP – best (print, enlargement 20" x 30")3.5MP – best (optimized ratio for 4"x6": prints, 3:2) 2.1MP – better (small print)1.1MP – good (e-mail)Lens10X optical zoom, 6.3-63.2 mm (35 mm equivalent: 38-380 mm)3.0X Advanced Digital Zoom 30X total zoomAuto-focus – multi-zone, center-spot Focus distance –wide std: 0.6m (2 ft.) to infinity tele std: 2m (6.6 ft.) to infinitywide/tele infinity: 20m (65.6 ft.) to infinityLCD – 2.2" (5.6 cm), 153k pixels, Indoor/Outdoor displayAperture – f/2.8-8.0 (wide), f/3.7-8.0 (tele)Shutter speed – 16-1/1700 sec.White balance – auto, daylight, tungsten, fluorescent ISO equivalent – auto: 80-160selectable: 80/100/200/400/800 (800 1.1MP quality only)Built-in flash – auto, red-eye, fill, off external flash synch available Flash rangewide: 0.5-4.9m (1.6-16.1 ft.)tele: 2.0-3.7m (6.6-12.1 ft.)Viewfinder – electronic, 1.1 cm (.44 in.) 180K pixels Self-timer – 10 secondsPerformance FeaturesScene modes – auto, sport, night, landscape, close-up,portrait, program (aperture priority, shutter priority, manual)Photo settings – color, black and white, sepia,saturated, neutral, sharpness (sharp, standard, soft)Close-up modewide: 12-70 cm (4.7-27.6 in.)tele: 120-210 cm (47.2-82.7 in.)Burst mode – 3 fps up to 6 picturesExposure metering – TTL-AE (menu selectable: multi-pattern, center weighted, center spot)Exposure compensation –+/-2.0 EV with 0.33 EV step incrementsFor more information on the Kodak EasyShare DX6490 zoom digital camera and camera dock 6000,visit /go/easyshare©Eastman Kodak Company, 2003. Kodak, EasyShare, the Share button, and Share Moments. Share Life. are trademarks of Eastman Kodak Company. Schneider-Kreuznach and Variogon are trademarks of Jos. Schneider Optische Werke GmbH used under license by Eastman Kodak Company. One T ouch T o Better Pictures not available for Macintosh computers. Product specifications subject to change without prior notice. Simulated LCD display image. IC-990 CAT No.803 5669Exposure control – programmed AE aperture priority, shutter priority, manual Click to capture – 0.65 sec.Shot to shot – <2 sec.Movie mode – continuous digital video with audio capture, audio playback on camera Movie resolution – 320x240 at 20 fpsMovie length – up to 80 minutes, limited by capacity of external memory card Ease of Use Features Capture always ready Auto picture rotationDedicated buttons – Share, delete, flash, menu,review, burst/timer, information, close-up/landscape Review options – 2X or 4X magnify, picture info, slide show, multi-up, fast scroll, protect, albums Video – NTSC, PAL (user-selectable)Software – Kodak EasyShare software v3.0Dock compatibility – Kodak EasyShare camera dock 6000 and Kodak EasyShare printer dock 6000Additional FeaturesStorage – 16MB internal memory and MMC/SD expansion card slotPower options – DC in jack on side of camera for 5V adapter; Kodak EasyShare Li-Ion rechargeable battery (KLIC 5000 or KLIC 5501), Kodak EasyShare camera dock 6000 and Kodak EasyShare printer dock 6000Image recording format – Still – JPEG/EXIF v2.2, Video – QuicktimeInterface – USB 2.0 compatible, Kodak EasyShare camera 6000 and Kodak EasyShare printer dock 6000 compatibleLens protection – lens cap tethered to camera body Tripod mount – 1/4 in. standardWeight – without batteries: 337 g (11.9 oz.)Dimensions – WxHxD: 99.6x79.9x81.2 mm (3.9x3.1x3.2 in.)Warranty – one yearSystem Requirements Windows:Windows 98, 98SE, 2000, ME, or XP OS 233 MHz processor or greater64MB RAM (128MB RAM for Windows XP)100MB hard drive disk space availableMaking digital even simplerThe Kodak EasyShare camera dock 6000 makes it simple to transfer pictures from camera to computer in one touch. It even recharges your Kodak camera ’s battery pack – in less than three hours. Want more? The optional Kodak EasyShare printer dock 6000 does everything the Kodak EasyShare camera dock 6000 does, plus it provides the simplest way to print real borderless 4" x 6" Kodak photos – with or without a computer.D X6490Need #s。
照相机说明书
照相机说明书照相机说明书1. 引言本说明书旨在帮助用户了解和正确使用照相机,以便能够拍摄出高质量的照片。
请在使用前仔细阅读本说明书,并根据其中的指示进行操作。
2. 照相机概述照相机是一种用于拍摄照片的设备。
它通过镜头将光线聚焦在感光元件上,并将光的信息转换为数字信号。
这些数字信号经过处理后,可以得到最终的照片。
3. 主要特性- 分辨率:照相机的分辨率决定了照片的清晰度。
较高的分辨率可以捕捉更多的细节。
- 光圈:光圈控制着进入照相机的光线的数量。
较大的光圈可以让更多的光线进入,适用于暗光环境下的拍摄。
- 快门速度:快门速度决定了曝光时间,即感光元件接受光线的时间。
较慢的快门速度适用于拍摄静态场景,而较快的快门速度适用于拍摄运动物体。
4. 操作指南4.1 打开和关闭照相机要打开照相机,按下电源按钮并等待照相机启动。
要关闭照相机,再次按下电源按钮,并确认关闭提示。
4.2 设置拍摄模式照相机通常提供多种拍摄模式,如自动模式、手动模式、场景模式等。
用户可以根据拍摄需求选择相应的模式。
4.3 调整光圈和快门速度在手动模式下,用户可以通过调节光圈和快门速度来控制照片的曝光。
通常,较大的光圈和较慢的快门速度适用于明亮的环境,而较小的光圈和较快的快门速度适用于暗光环境。
4.4 对焦照相机提供多种对焦方式,如自动对焦和手动对焦。
用户可以选择适合自己需求的对焦方式,确保照片清晰。
4.5 拍摄照片在设置好拍摄参数后,按下快门按钮进行拍摄。
最好使用稳定的姿势,以避免模糊的照片。
4.6 查看和删除照片照相机通常提供一个屏幕或取景器,用于查看拍摄的照片。
用户可以通过浏览器模式或者切换按钮来查看不同照片。
如果需要删除照片,可以在查看模式下使用删除按钮进行操作。
5. 注意事项- 在使用照相机之前,请确保电池充足,以免因电池不足导致拍摄中断。
- 避免触摸照相机镜头,以免留下指纹或污迹,影响照片质量。
- 在拍摄时保持稳定的手持姿势,或者使用三脚架,以避免模糊的照片。
Kodak 口袋摄影指南说明书
With every instrument we furnish an illustrated manual which clearly explains each step in making the exposures, in developing and in printing, making it easy for the amateur to do all of the work from "pressing the button" to the completion of the finished print.
4
MECHANICALLY.
Perfection in every part is what we require in all of our instruments. Pocket Kodaks stand the supreme test of mechanical excellence-they work. In shutters, in reel mechanism, in every detail they are accurate and •simple. Their construction is light, yet strong, and they are neat and dainty in appearance.
the necessary holders weigh a pound and a half and are so bulky as to be hard to stowaway in one's pockets. A film cartridge for 12 exposures of the same size weighs 2 ounces; is carried inside the Kodak and will not break. Extra film cartridges, weighing so little and taking up but little space, can be readily carried in one's pockets, and used at any time.
数码相机使用说明
13 使用AF锁定和中心AF进行拍摄
2)返回完全调整后的拍摄状态,见下图。再次完 全按下快门。当您听到哔声时,相机即使用正 确的焦距为人物摄录图像。
14 手动对焦
1)模式盘设置为 /SCN/ 2)按MENU按钮,出现菜单。
3)使用◄/►选择 (FOCUS), 然后使用▲/▼选择与目标的距离。
您可以从以下距离设置中选择。
3)部分按下快门并保持不动。
4 常规图像拍摄
4)完全按下快门
此时将听到一次哗声,拍摄完成,静止图像保存 在“Memory Stick”中。摄录指示灯熄灭时,您可以 拍摄下一幅图像。
4 常规图像拍摄
5)检查最后拍摄的图像(快速复查)
按控制按钮上的◄ 。 要返回到拍摄模式,请轻按快
门或再次控制按钮上的◄ 。
对远处图像对焦,因此便于拍摄 远处的风景。
9 根据场景条件拍摄
1) 将模式盘转动至SCN
2) 使用控制按钮上 的◄/►选择[SCN]。
3) 使用控制按钮上 的▲/▼,选择所需 的模式。
10 在LCD屏幕上查看图像
1)查看单幅图像
将模式盘设置为 ► ,然后 打开相机。此时将显示您最后拍 摄的一幅图像。
•多点AF范围取景器方框变宽。 •中心AF范围取景器方框仅可使用其中心
12 选择对焦方法
2)按MENU按钮,出现选择菜单。
使用◄/►选择 选择:
(FOCUS),然后使用▲/▼
MULTI AF
CENTER AF
13 使用AF锁定和中心AF进行拍摄
13 使用AF锁定和中心AF进行拍摄
1)调整拍摄
首先,使目标位于AF范 围取景器的中心,见右图。并 部分按下快门,当AE/AF锁定 指示符停止闪烁并保持亮起时, 相机发出一次哗声,对焦调节 即完成。
柯达 EasyShare Z740 变焦数码相机 说明书

柯达 EasyShare Z740变焦数码相机用户指南关于互动式教学,请访问/go/howto关于相机帮助,请访问/go/Z740supportEastman Kodak CompanyRochester, New York 14650© Eastman Kodak Company, 2004所有的屏幕影像都是模拟影像。
柯达 (Kodak) 和 EasyShare 是伊士曼柯达 (Eastman Kodak) 公司的商标。
Schneider-Kreuznach 和 Xenar 是 Jos. Schneider Optische Werke GmbH 的商标,伊士曼柯达 (Eastman Kodak) 公司为该商标的授权使用者。
P/N 4J1865_zh-cn产品特色/go/supporti4快门按钮12颈带孔5自拍/连拍按钮13麦克风6特写/风景按钮14镜头7闪光灯按钮15直流输入(3 伏),用于可选购的交流变压器8电源/收藏夹切换钮ii/go/support 4三脚架连接孔12模式拨盘5底座接口13操纵杆/OK(确定)按钮6LCD 屏幕14USB、A/V 输出7信息按钮15用于可选购的 SD 或 MMC 存储卡插槽8EVF(电子取景器)16电池仓目录/go/supportiii1 设置相机 (1)附接镜头盖 (1)附接颈带 (1)装入电池 (2)打开相机电源 (2)第一次设置日期/时间 (3)在 SD 或 MMC 存储卡上存储照片 (4)2 拍摄照片和录像 (5)拍摄照片 (5)使用光学变焦 (8)使用折叠式闪光灯 (9)查看照片和录像 (9)删除照片和录像 (11)3 传输和打印照片 (13)最低系统要求 (13)安装软件 (14)使用 USB 电缆传输照片 (15)打印照片 (15)底座兼容性 (18)4 关于相机的其它操作 (19)使用自拍器 (19)使用连拍 (20)拍摄特写和风景照片 (20)放映幻灯片 (21)更改闪光灯设置 (23)照片拍摄模式 (24)更改拍摄设置 (28)自定义相机 (31)查看照片/录像信息 (33)复制照片和录像 (33)调整曝光补偿 (34)PASM 模式 (34)预先标记相册名称 (36)分享您的照片 (38)目录iv/go/support5 故障排除 (42)相机故障 (42)计算机/接口问题 (43)照片质量问题 (44)直接打印(使用 PictBridge 打印机)问题 (45)6 获得帮助 (46)帮助链接 (46)电话客户支持 (47)7 附录 (48)相机规格 (48)节电功能 (52)存储容量 (52)配件 (53)重要安全事项 (54)电池寿命 (55)升级软件和固件 (56)其它维护和保养 (56)保修 (57)监管信息 (58)1设置相机附接镜头盖附接颈带/go/support1设置相机2/go/support1打开电池仓盖。
- 1、下载文档前请自行甄别文档内容的完整性,平台不提供额外的编辑、内容补充、找答案等附加服务。
- 2、"仅部分预览"的文档,不可在线预览部分如存在完整性等问题,可反馈申请退款(可完整预览的文档不适用该条件!)。
- 3、如文档侵犯您的权益,请联系客服反馈,我们会尽快为您处理(人工客服工作时间:9:00-18:30)。
柯达 (Kodak) 和 EasyShare 是伊士曼柯达 (Eastman Kodak) 公司的
商标。 P/N 4J1201_zh-cn
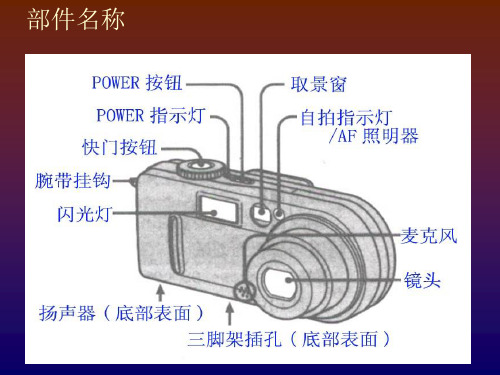
俯视图、前视图
456 3
2
1
产品特色
789
13 12 11 10
1 腕带孔
2 变焦 (广角/远摄); 放大 (查看照片时)
3 快门按钮 4 闪光灯设置按钮
/go/support
ZN-CH iii
在电视上显示照片和录像....................................................32 复制照片和录像 ...................................................................32 查看照片/录像信息 ..............................................................33 4 安装软件 ........................................................................ 34 最低系统要求.......................................................................34 安装软件 ..............................................................................35 5 分享照片和录像 ............................................................. 36 我什么时候可以标记照片和录像?.....................................36 标记照片以进行打印 ...........................................................37 标记照片和录像以便电邮....................................................38 将照片标记为收藏 ...............................................................39 6 传输和打印照片 ............................................................. 41 使用 USB 电缆传输照片/录像 ..............................................41 从计算机上打印照片 ...........................................................42 在线订购照片.......................................................................42 通过可选购的 SD/MMC 存储卡打印 ....................................42 不使用计算机进行打印........................................................42 7 故障排除 ........................................................................ 43 相机故障 ..............................................................................43 计算机/接口问题 ..................................................................44 照片质量问题.......................................................................45 相机就绪指示灯状态 ...........................................................45 8 获得帮助 ........................................................................ 47 帮助链接 ..............................................................................47 电话客户支持.......................................................................48 9 附录 ................................................................................ 49 相机规格 ..............................................................................49 提示、安全和维护 ...............................................................51 存储容量 ..............................................................................52 省电功能 ..............................................................................53 升级软件和固件 ...................................................................54 监管信息 ..............................................................................54
5 特写/风景按钮 6 阶段曝光/连拍按钮 7 扬声器
8 闪光装置 9 取景器
10 镜头 11 麦克风 12 光线传感器 13 自拍器/录像指示灯
/go/support
i ZN-CH
产品特色
侧视图、后视图
4
32 1
56
789 10
11 12 13 14
17 16 15
1 USB 端口 2 音频/视频输出,用于在电视
底视图
3e 相机底座或多功能底座打印机的三脚架连 接孔/定位器
3 电池仓盖、 MMC/SD 存储卡插槽
ii ZN-CH
/go/support
目录
1
1 使用入门 .......................................................................... 1 包装内容 ................................................................................1 先安装软件 ............................................................................1 为电池充电 ............................................................................2 插入电池 ................................................................................2 重要电池信息.........................................................................3 打开和关闭相机 .....................................................................4 设置日期和时间 .....................................................................5 在拍摄模式下检查相机状态 ..................................................5 将照片存储在 SD/MMC 存储卡上 ..........................................6 使用可选配的镜头 .................................................................6
2 拍摄照片和录像 ............................................................... 7 拍摄照片 ................................................................................7 拍摄录像 ................................................................................8 查看刚刚拍摄的照片或录像 ..................................................9 使用光学变焦.........................................................................9 使用数码变焦.......................................................................10 相机模式 ..............................................................................10 使用闪光灯 ..........................................................................15 拍摄特写和风景照片 ...........................................................17 使用阶段曝光.......................................................................18 使用连拍 ..............................................................................19 更改拍摄设置.......................................................................20 使用设置菜单自定义您的相机 ............................................23 预先标记相册名称 ...............................................................26
