Alcatel-7750配置指南
Alcatel-Lucent 7750 SR 高级配置指南说明书
PrefaceAbout This GuideThis guide provides advanced configuration solutions for Alcatel-Lucent’s 7750 SR and 7450 ESSrouter and is meant to be supplemental to the basic user configuration guides listed below.The guide is organized alphabetically and provides feature and configuration explanations, CLIdescriptions and overall solutions.AudienceThis manual is intended for network administrators who are responsible for configuring therouters. It is assumed that the network administrators have a detailed understanding of networkingprinciples and configurations.List of Technical PublicationsThe 7750 SR documentation set is composed of the following guides:•Basic System Configuration GuideThis guide describes basic system configurations and operations.•System Management GuideThis guide describes system security and access configurations as well as event loggingand accounting logs.•Interface Configuration GuideThis guide describes card, Media Dependent Adapter (MDA) and port provisioning.•Router Configuration GuideThis guide describes logical IP routing interfaces and associated attributes such as an IPaddress, as well as IP and MAC-based filtering, and VRRP and Cflowd.•Routing Protocols GuidePrefaceThis guide provides an overview of routing concepts and provides configuration examplesfor RIP, OSPF, IS-IS, BGP, and route policies.•MPLS Configuration GuideThis guide describes how to configure Multiprotocol Label Switching (MPLS) and LabelDistribution Protocol (LDP).•Services Overview GuideThis guide describes how to configure service parameters such as service distributionpoints (SDPs), customer information, and user services.•Layer 2 Services and EVPN GuideThis guide describes Virtual Leased Lines (VLL), Virtual Private LAN Service (VPLS),Provider Backbone Bridging (PBB), and Ethernet VPN (EVPN).•Layer 3 Services GuideThis guide describes Internet Enhanced Services (IES) and Virtual Private RoutedNetwork (VPRN) services.•Versatile Service Module GuideThis guide describes how to configure service parameters for the Versatile Service Module(VSM).•OAM and Diagnostics GuideThis guide describes how to configure features such as service mirroring and Operations,Administration and Management (OAM) tools.•Triple Play GuideThis guide describes Triple Play services and support provided by the routers and presentsexamples to configure and implement various protocols and services.•Quality of Service GuideThis guide describes how to configure Quality of Service (QoS) policy management.•RADIUS Attributes GuideThis guide describes all supported RADIUS Authentication, Authorization andAccounting attributes.•Multi-Service Integrated Service Adapter GuideThis guide describes services provided by integrated service adapters such as ApplicationAssurance, IPSec, ad insertion (ADI) and Network Address Translation (NAT).•Gx A VPs Reference GuideThis guide describes Gx Attribute Value Pairs (A VP).PrefaceTechnical SupportIf you purchased a service agreement for your router and related products from a distributor orauthorized reseller, contact the technical support staff for that distributor or reseller for assistance.If you purchased an Alcatel-Lucent service agreement, contact your welcome center:/wps/portal/supportReport documentation errors, omissions and comments to:**************************************Include document name, version, part number and page(s) affected.Preface。
7750&7710产品介绍-v2

对承载网的可运营可管理要求
快速提供业务
智能故障、设备管理 智能业务统计流量分析 全面的安全管理
对承载网QoS的要求
端到端带宽保证 承载网时延≤40ms;最低要求≤100ms 承载网时延抖动≤10ms;最低要求≤20ms 丢包率≤0.1% ;最低要求≤1%
PE Router
Switch Fabric / CPU 模块架构
SF/CPM A
Switch Fabric A
FRMR
CPM complex A T Chip Q Chip
Alcatel 7750 SR: 模块化接口
模块化设计 混合-和-匹配式接口类型, 优化插槽利用率的 速率和传输范围 贯穿7750SR产品线的MDA/SFP的便利性最大限 度的保护了投资 热插拔MDA和光器件 丰富的连接性选项
领先的端口密度
丰富的 ATM, SONET/SDH 和 Ethernet MDA 连 接性的选择 任何 业务/任意接口
,Belgium
比利时安特卫普 Russia俄罗斯圣彼得堡 Canada加拿大渥太华
St Petersborg
Ottawa
Marcoussis,France
法国Marcoussis US美国普莱诺
Stuttgart,Germany
德国斯图加特
Plano
Shanghai,China 中国上海
Search/ Control Memory
Search/ Control Memory
Programmable Packet Processor
Programmable Packet Processor
CAM
P
Alcatel-Lucent 7750 SERVICE ROUTER 接口配置指南说明书
Alcatel-Lucent 7750SERVICE ROUTER | RELEASE 13.0.R4 INTERFACE CONFIGURATION GUIDEAlcatel-Lucent – Proprietary & ConfidentialContains proprietary/trade secret information which is the property of Alcatel-Lucent. Not to be made available to, or copied or used by anyone who is not an employee of Alcatel-Lucent except when there is a valid non-disclosure agreement in place which covers such information and contains appropriate non-disclosure and limited use obligations.Copyright 2015 © Alcatel-Lucent. All rights reserved.All specifications, procedures, and information in this document are subject to change and revision at any time without notice. The information contained herein is believed to be accurate as of the date of publication. Alcatel-Lucent provides no warranty, express or implied, regarding its contents. Users are fully responsible for application or use of the documentation.Alcatel, Lucent, Alcatel-Lucent and the Alcatel-Lucent logo are trademarks of Alcatel-Lucent. All other trademarks are the property of their respective owners.Copyright 2015 Alcatel-Lucent.All rights reserved.DisclaimersAlcatel-Lucent products are intended for commercial uses. Without the appropriate network design engineering, they must not be sold, licensed or otherwise distributed for use in any hazardous environments requiring fail-safe performance, such as in the operation of nuclear facilities, aircraft navigation or communication systems, air traffic control, direct life-support machines, or weapons systems, in which the failure of products could lead directly to death, personal injury, or severe physical or environmental damage. The customer hereby agrees that the use, sale, license or other distribution of the products for any such application without the prior written consent ofAlcatel-Lucent, shall be at the customer's sole risk. The customer hereby agrees to defend and hold Alcatel-Lucent harmless from any claims for loss, cost, damage, expense or liability that may arise out of or in connection with the use, sale, license or other distribution of the products in such applications.This document may contain information regarding the use and installation of non-Alcatel-Lucent products. Please note that this information is provided as a courtesy to assist you. While Alcatel-Lucent tries to ensure that this information accurately reflects information provided by the supplier, please refer to the materials provided with any non-Alcatel-Lucent product and contact the supplier for confirmation. Alcatel-Lucent assumes no responsibility or liability for incorrect or incomplete information provided about non-Alcatel-Lucent products.However, this does not constitute a representation or warranty. The warranties provided for Alcatel-Lucent products, if any, are set forth in contractual documentation entered into by Alcatel-Lucent and its customers.This document was originally written in English. If there is any conflict or inconsistency between the English version and any other version of a document, the English version shall prevail.。
7750硬件介绍

200809
SR系列
7750 SR-12
宽带 (全双工, 冗余) I/O 插槽 介质相关适配器 (MDAs) 400G 10 20 AC Power (1 + 1) DC Power (1 + 1) Cooling Fans (2 + 1) 交换矩阵/控制处理器模块 (SF/CPM) (1 + 1) 24.5”H x 17.5”W x 25.25”D
200809
Alcatel SR IOM – 流量管理器
Memory Memory
流量管理器(TM)
CAM
NP
NP
输入 输出
Ingress TM
Memory
Egress TM
NP
Memory CAM
Memory
F A
• • • • •
负责缓冲,管理,整形,和其他QoS功能 同一芯片集可用于输入和输出 8K输入和输出队列 每个队列计算器都用于计费政策 输入和输出上200 ms缓冲的排队率
200809
IOM架构 &数据包流
SF/CPM A MAC
MAC
M D A M D A
CAM MEM
NP
2 1
NP
MEM
4
Switch Fabric A
TM TM
SE
Fabric Access
5
3
CAM MEM CAM
NP NP NP
MEM
SE
Framer
CPU
CONTROL PLANE
SF/CPM
CPU FFPC CPU
• 10 Gb/s物理接口终 端 • 以太网, SONET/SDH, 信道化的 SONET/SDH • 可插拔接口模块和可 插拔光接口
阿尔卡特7750配置文档

上海贝尔阿尔卡特7750SR配置标准模板目录一、硬件配置 (5)1.1配置IOM卡 (5)1.1.1 查看已经插入的IOM卡的类型 (5)1.1.2正确配置IOM卡的类型 (5)1.2配置MDA卡 (5)1.2.1查看已经插入的MDA卡的类型 (5)1.2.2正确配置MDA卡的类型 (5)1.3配置MDA端口 (6)1.3.1 POS端口配置 (6)1.3.2 以太口配置 (6)1.3.3 查看port信息 (6)二、设备管理配置 (7)2.1配置路由器名称、LOCATION、CONTACT (7)2.2配置系统时间 (7)2.3配置SNTP (7)2.3.1 打开SNTP(简单网络时间协议) (7)2.3.2 配置SNTP地址 (7)2.4配置SR为TELNET服务器 (7)2.5配置TELNET登陆限制 (8)2.5.1 配置默认动作为允许,因为是所有上主控板的流量。
(8)2.5.2 配置允许IP段的ACL,配置源IP,协议,目的端口 (8)2.5.3 配置一条拒绝的ACL,拒绝其他IP段。
(8)2.6配置用户 (8)2.6.1 配置用户名 (8)2.6.2 配置用户密码 (8)2.6.3 配置用户登陆方式 (9)2.6.4 配置用户所属的组 (9)2.7配置LOG (9)2.7.1 配置log-id (9)2.7.2 配置log信息类型 (9)2.7.3 配置记录log的方式 (9)2.7.4 配置记录log方式的具体配置 (9)2.8配置SNMP (10)2.9配置主备板同步 (10)2.9.1 配置自动同步 (10)2.9.2 手工同步命令 (10)2.10配置空闲时间 (10)2.11配置ANTI-SPOOF (10)三、路由配置 (11)3.1配置路由器系统地址 (11)3.2配置网络接口 (11)3.2.2 配置IP地址 (11)3.2.3 配置关联端口 (11)3.2.4 查看配置的路由器接口 (11)3.3配置静态及OSPF路由协议 (12)3.3.1 配置静态路由 (12)3.3.2 配置OSPF区域 (12)3.3.3 配置ospf接口cost值 (12)3.3.4 配置一个stub区域 (12)3.3.5 配置NSSA区域 (12)3.3.6 配置虚链路 (13)3.3.7 配置认证 (13)3.3.8配置路由聚合 (13)3.3.9 配置静态路由注入到OSPF路由协议 (13)3.3.10 查看运行在ospf协议下的接口 (14)3.3.11 查看ospf邻居建立关系 (14)3.3.12 查看ospf路由表 (14)3.4配置IS-IS (14)3.4.1 配置区域ID (14)3.4.2 配置路由器等级能力 (15)3.4.3 配置IS-IS接口 (15)3.4.4 查看ISIS下的接口 (15)3.4.5 添加已经配置到ISIS的每个网络接口 (15)3.4.6 查看ISIS邻接关系 (15)3.4.7 查看ISIS路由表 (15)3.5BGP配置 (16)3.5.1 创建AS (16)3.5.2 配置路由器 ID5 (16)3.5.3 配置 BGP (16)3.6配置POLICY (16)3.6.1 配置policy名称 (16)3.6.2 配置从静态路由分布到ospf路由协议中的policy (17)3.6.3 配置commit使之生效 (17)3.6.4 应用policy (17)3.7IP F ILTER配置 (17)3.7.1创建ip filter (17)3.7.2 指定默认动作 (17)3. 7.3 创建条目,指定动作、源、目的IP (17)3.7.4 应用ip filter (18)四、 MPLS 配置以及业务配置 (19)4.1MPLS配置 (19)4.1.1 MPLS接口配置 (19)4.1.3 配置 MPLS LSP和主路径 (19)4.1.4 查看命令 (20)4.1.5 改变每个网络接口的最大传输单元(MTU)尺寸 (20)4.2 E P IPE 配置 (20)4.2.1 创建客户并将其与提供的业务相关联 (20)4.2.2 指向客户的接口(在我们的网络中由膝上电脑表示)称为“toCustomer”,必须配置为接入接口。
贝尔7750SR新功能介绍

Replication efficiency N2 RSVP-TE LSPs MAC Explosion
12 | TiMOS-6.0 workshop | March 2008
All Rights Reserved © Alcatel-Lucent 2008
VPLS 扩展性- 利用802.1ah PBB解决MAC空间限制
3
Configure dhcp-relay on group-inf
*A:PE0>config>service>vprn>sub-if>grp-if# info dhcp server 133.174.174.1 gi-address 133.133.3.1 client-applications pppoe
7 | TiMOS-6.0 workshop | March 2008
All Rights Reserved © Alcatel-Lucent 2008
2)HS-MDA引入
新HS-MDA解决什么 ? 解决什么 QoS扩展性的增强 扩展性的增强 160k queues in ingress and egress direction – Queues are grouped in sets of 8 Support of up-to 20k subscribers or 20k saps per MDA – No dual pass required 硬件增强层次化调度 Simpler provisioning and better performance Three levels of hierarchies – Port-level scheduling - 8 strict-priority classes and/or 3 WFQ groups – Sap/subscriber-level scheduling – aggregate-rate-limit – Secondary-shaper level – aggregate-rate-limit (applicable to egress only) 其它方面的该进 Extended accounting possibilities Configurable byte-offset Egress dot1p remarking What is supported in R6.0 10 x 1Gbps Ethernet MDA Supported on 7450, 7750 improved scale and performance
阿尔卡特7750SR路由器现场维护手册

阿尔卡特7750SR路由器日常维护操作手册上海贝尔阿尔卡特股份有限公司互联网事业部二零零六年十月目录1. 总体概述................................................. 错误!未定义书签。
2. 常用软件操作............................................. 错误!未定义书签。
. 通过Console线缆连接路由器....................... 错误!未定义书签。
. SR系列路由器配置过程............................ 错误!未定义书签。
. 设备重启......................................... 错误!未定义书签。
. 路由引擎切换..................................... 错误!未定义书签。
. TiMOS软件升级步骤............................... 错误!未定义书签。
软件升级相关文件............................. 错误!未定义书签。
升级步骤..................................... 错误!未定义书签。
. 密码恢复......................................... 错误!未定义书签。
. 在CLI中获取帮助................................. 错误!未定义书签。
3. 7750SR-12 ................................................ 错误!未定义书签。
. 7750SR-12结构................................... 错误!未定义书签。
设备描述..................................... 错误!未定义书签。
7750 SR OS 基本系统配置指南.pdf_1701713446.1597066说明书

Configuration CommandsFile System CommandsshutdownSyntax[no] shutdown [active] [standby][no] shutdown [cflash-id]Context fileDescription This command shuts down (unmounts) the specified CPM(s).Use the no shutdown [active] [standby] command to enable one or both CPM.Use the no shutdown [cflash-id] command to enable a compact flash (cf1:, cf2:, or cf3:) on the SF/CPMcard. The no shutdown command can be issued for a specific slot when no compact flash is present. Whena flash card is installed in the slot, the card will be activated upon detection.In redundant systems, use the no shutdown command on cf3: on both SF/CPMs in order to facilitate syn-chronization. See the synchronize command on page 408.NOTE: The shutdown command must be issued prior to removing a flash card. If no parameters are speci-fied, then the drive referred to by the current working directory will be shut down.LED Status Indicators — The following states are possible for the compact flash:Operational:If a compact flash is present in a drive and operational (no shutdown), the respective LED is lit green.The LED flickers when the compact flash is accessed.NOTE: Do not remove the compact flash during a read/write operation.State:admin = up, operational = up, equippedFlash defective:If a compact flash is defective, the respective LED blinks amber to reflect the error condition and a trapis raised.State:admin = up/down, operational = faulty, equipped = noFlash drive shut down:When the compact flash drive is shut down and a compact flash present, the LED is lit amber. In thisstate, the compact flash can be ejected.State:admin = down, operational = down, equipped = yesNo compact flash present, drive shut down:If no compact flash is present and the drive is shut down the LED is unlit.State:admin = down, operational = down, equipped = noNo compact flash present, drive enabled:If no compact flash is present and the drive is not shut down the LED is unlit.State:admin = up, operational = down, equipped = noEjecting a compact flash:The compact flash drive should be shut down before ejecting a compact flash card. The LED shouldturn to solid (not blinking) amber. This is the only mode to safely remove the flash card.If a compact flash drive is not shut down before a compact flash is ejected, the LED blinks amber forapproximately 5 seconds before shutting off.State:admin = down, operational = down, equipped = yesThe shutdown or no shutdown state is not saved in the configuration file. Following a reboot all compactflash drives are in their default state.Default no shutdown — compact flash device administratively enabledParameters cflash-id — Enter the compact flash slot ID to be shut down or enabled. When a specific cflash-id is speci-fied, then that drive is shutdown. If no cflash-id is specified, the drive referred to by the current workingdirectory is assumed. If a slot number is not specified, then the active CPM is assumed.Default The current compact flash deviceValues cf1:, cf1-A:, cf1-B:, cf2:, cf2-A:, cf2-B:, cf3:, cf3-A:, cf3-B:active — If active is selected, then all drives on the active CPM are shutdown or enabled.standby — If standby is selected, then all drives on the standby CPM are shutdown or enabled.Note: When both active and standby keywords are specified, then all drives on both CPM are shut-down.File CommandsattribSyntax attrib [+r | -r]file-urlattribContext fileDescription This command sets or clears/resets the read-only attribute for a file in the local file system. To list all files and their current attributes enter attrib or attrib x where x is either the filename or a wildcard (*).When an attrib command is entered to list a specific file or all files in a directory, the file’s attributes are dis-played with or without an “R” preceding the filename. The “R” implies that the +r is set and that the file isread-only. Files without the “R” designation implies that the -r is set and that the file is read-write-all. Forexample:ALA-1>file cf3:\ # attribcf3:\bootlog.txtcf3:\bof.cfgcf3:\boot.ldrcf3:\sr1.cfgcf3:\testcf3:\bootlog_prev.txtcf3:\BOF.SAVParameters file-url — The URL for the local file.Values local-url | remote-url:255 chars maxlocal-url:[cflash-id/][file-path]remote-url[ftp://login:pswd@remote-locn/][file-path]cf1:,cf1-A:,cf1-B:,cf2:,cf2-A:,cf2-B:,cf3:,cf3-A:,cf3-B:+r — Sets the read-only attribute on the specified file.-r — Clears/resets the read-only attribute on the specified file.cdSyntax cd [file-url]Context fileDescription This command displays or changes the current working directory in the local file system.Parameters file-url — Syntax: [local-url | remote-url (255 chars max)local-url - [cflash-id/][file-path]remote-url - [{ftp://|tftp://}login:pswd@remote-locn/][file-path]cf1,cf1-A:,cf1-B:,cf2:,cf2-A:,cf2-B:,cf3:,cf3-A:,cf3-B:<none> — Displays the current working directory... — Signifies the parent directory. This can be used in place of an actual directory name in a directory-url.directory-url — The destination directory.copySyntax copy source-file-url dest-file-url [force]Context fileDescription This command copies a file or all files in a directory from a source URL to a destination URL. At least one of the specified URLs should be a local URL. The optional wildcard (*) can be used to copy multiple filesthat share a common (partial) prefix and/or (partial) suffix.When a file is copied to a destination with the same file name, the original file is overwritten by the new filespecified in the operation. The following prompt appears if the destination file already exists:“Overwrite destination file (y/n)?”For example:To copy a file named srcfile in a directory called test on cf2 in slot B to a filecalled destfile in a directory called production on cf1 in slot A, the syntax is:sr1>file cf2:\ # copy cf2-B/test/srcfile cf1-A/production/destfileTo FTP a file named 121201.cfg in directory mydir stored on cf1 in slot A to a networkFTP server with IP address 131.12.31.79 in a directory called backup with a destinationfile name of 121201.cfg, the FTP syntax is:copy cf1-A/mydir/121201.cfg 131.12.31.79/backup/121201.cfgParameters source-file-url — The location of the source file or directory to be copied.dest-file-url — The destination of the copied file or directory.force — Forces an immediate copy of the specified file(s).file copy force executes the command without displaying a user prompt message.deleteSyntax delete file-url[force]Context fileDescription This command deletes the specified file.The optional wildcard “*” can be used to delete multiple files that share a common (partial) prefix and/or(partial) suffix. When the wildcard is entered, the following prompt displays for each file that matches thewildcard:“Delete file <filename> (y/n)?”file-url — The file name to delete.Values local-url | remote-url:255 chars maxlocal-url:[cflash-id/][file-path]remote-url[ftp://login:pswd@remote-locn/][file-path]cf1:,cf1-A:,cf1-B:,cf2:,cf2-A:,cf2-B:,cf3:,cf3-A:,cf3-B:force — Forces an immediate deletion of the specified file(s).file delete*force deletes all the wildcard matching files without displaying a user prompt message.dirSyntax dir [file-url] [sort-order { d | n | s}] [reverse]Context fileDescription This command displays a list of files and subdirectories in a directory.Parameters file-url — The path or directory name.Use the file-url with the optional wildcard (*) to reduce the number of files to list.Default Lists all files in the present working directorysort-order { d | n | s — Specifies the sort order.Values d — daten — names — sizereverse — Specifies to reverse the sort order.Sample OutputA:cses-E12>file cf3:\ # dir- dir [<file-url>] [sort-order { d | n | s}] [reverse]<file-url> : <local-url>|<remote-url>local-url - [<cflash-id>/][<file-path>]200 chars max, including cflash-iddirectory length 99 chars max eachremote-url - [ftp://<login>:<pswd>@<remote-locn>/][<file-path>]255 chars maxdirectory length 99 chars max eachremote-locn - [ <hostname> | <ipv4-address> |"["<ipv6-address>"]" ]ipv4-address - a.b.c.dipv6-address - x:x:x:x:x:x:x:x[-interface]x:x:x:x:x:x:d.d.d.d[-interface]x - [0..FFFF]Hd - [0..255]Dinterface - 32 chars max, for linklocal addressescflash-id - cf1:|cf1-A:|cf1-B:|cf2:|cf2-A:|cf2-B:|cf3:|cf3-A:|cf3-B:< d | n | s> : Sort order: d - date, n - name, s - size<reverse> : keyword - reverse orderA:cses-E12>file cf3:\ # dirfileSyntax fileContext rootDescription The context to enter and perform file system operations. When entering the file context, the prompt changes to reflect the present working directory. Navigating the file system with the cd.. command results in achanged prompt.The exit all command leaves the file system/file operation context and returns to the <ROOT> CLI context.The state of the present working directory is maintained for the CLI session. Entering the file commandreturns the cursor to the working directory where the exit command was issued.formatSyntax format cflash cflash-id [reliable]Context root>fileDescription This command formats the compact flash. The compact flash must be shutdown before starting the format. Parameters cflash-id — The compact flash type.cf1:, cf1-A:,cf1-B:,cf2:,cf2-A:,cf2-B:,cf3:,cf3-A:,cf3-B:reliable — Enables the reliance file system and dis-ables the default DOS file system. This option is valid only on compact flashes 1 and 2.mdSyntax md file-urlContext fileDescription This command creates a new directory in a file system.Directories can only be created one level at a time.Parameters file-url — The directory name to be created.Values local-url | remote-url:255 chars maxlocal-url:[cflash-id/][file-path]remote-url[ftp://login:pswd@remote-locn/][file-path]cf1:, cf1-A:,cf1-B:,cf2:,cf2-A:,cf2-B:,cf3:,cf3-A:,cf3-B:moveSyntax move old-file-url new-file-url [force]Context fileDescription This command moves a local file, system file, or a directory. If the target already exists, the command fails and an error message displays.The following prompt appears if the destination file already exists:“Overwrite destination file (y/n)?”Parameters old-file-url — The file or directory to be moved.Values local-url | remote-url:255 chars maxlocal-url:[cflash-id/][file-path]remote-url[ftp://login:pswd@remote-locn/][file-path]cf1:, cf1-A:,cf1-B:,cf2:,cf2-A:,cf2-B:,cf3:,cf3-A:,cf3-B:new-file-url — The new destination to place the old-file-url.Values local-url | remote-url:255 chars maxlocal-url:[cflash-id/][file-path]remote-url[ftp://login:pswd@remote-locn/][file-path]cf1:, cf1-A:,cf1-B:,cf2:,cf2-A:,cf2-B:,cf3:,cf3-A:,cf3-B:force — Forces an immediate move of the specified file(s).file move force executes the command without displaying a user prompt message.rdSyntax rd file-url rfrd file-url [force]Context fileDescription The rd command is used to delete a directory.If a directory has files and no sub-directories, the force option must be used to force delete the directory andfiles it contains.If a directory has sub-directories, then the force option will fail and the rf parameter should be used insteadto force delete that directory including the sub-directories.Example:A:nE1>file cf1:\ # rd alcateltestAre you sure (y/n)? yDeleting directory cf1:\alcateltest ..MINOR: CLI Cannot delete cf1:\alcateltest.A:nE1>file cf1:\ # rd alcateltest forceDeleting directory cf1:\alcateltest .MINOR: CLI Cannot delete cf1:\alcateltest.A:nE1>file cf1:\ # rd hussein rfDeleting all subdirectories and files in specified directory. y/n ?yDeleting directory cf1:\hussein\hussein1 ..OKDeleting directory cf1:\alcateltest .OKParameters file-url — The directory to be removed.local-url | remote-url:255 chars maxlocal-url:[cflash-id/][file-path]remote-url[ftp://login:pswd@remote-locn/][file-path]cf1:, cf1-A:,cf1-B:,cf2:,cf2-A:,cf2-B:,cf3:,cf3-A:,cf3-B:rf — The parameter forces a recursive delete.force — Forces an immediate deletion of the specified directory.For example, rd file-url force executes the command without displaying a user prompt message.repairSyntax repair [cflash-id]Context fileDescription This command checks a compact flash device for errors and repairs any errors found.Parameters cflash-id — Specify the compact flash slot ID to be shut down or enabled. When a specific cflash-id is spec-ified, then that drive is shutdown. If no cflash-id is specified, the drive referred to by the current work-ing directory is assumed. If a slot number is not specified, then the active SF/CPMCFM is assumed.Default The current compact flash deviceValues cf1:, cf1-A:, cf1-B:, cf2:, cf2-A:, cf2-B:, cf3:, cf3-A:, cf3-B:scpSyntax scp local-file-url destination-file-url [router router-instance] [force]Context fileDescription This command copies a local file to a remote host file system. It uses ssh for data transfer, and uses the same authentication and provides the same security as ssh. The following prompt appears:“Are you sure (y/n)?” The destination must specify a user and a host.Parameters local-file-url — The local source file or directory.Values[cflash-id/][file-path]: Up to 256 characters.destination-file-url — The destination file.Values user@hostname:destination-fileuser — The SSH user.host — The remote host IP address of DNS name.file-path — The destination path.router-instance — Specify the router name or service ID.Values router-name: Base , managementservice-id: 1 — 2147483647Default Baseforce — Forces an immediate copy of the specified file.file scp local-file-url destination-file-url[router] force executes the command without displaying auser prompt message.typeSyntax type file-urlContext fileDescription Displays the contents of a text file.Parameters file-url — The file contents to display.Values file-url<local-url>|<remote-url>local-url [<cflash-id>/][<file-path>]200 chars max, including cflash-iddirectory length 99 chars max eachremote-url[{ftp://|tftp://}<login>:<pswd>@<remote-locn>/][<file-path>] 255 chars maxdirectory length 99 chars max eachremote-locn [ <hostname> | <ipv4-address> |<ipv6-address> ]ipv4-address a.b.c.dipv6-address x:x:x:x:x:x:x:x[-interface]x:x:x:x:x:x:d.d.d.d[-interface]x - [0..FFFF]Hd - [0..255]Dinterface - 32 chars max, for linklocal addressescflash-id cf1:, cf1-A:, cf1-B:versionSyntax version file-url [check]Context fileDescription This command displays the version of an SR OS *.tim file.Parameters file-url — The file name of the target file.Values local-url | remote-url:255 characters maximumlocal-url:[cflash-id/][file-path]remote-url: [{ftp://|tftp://}login:pswd@remote-locn/][file-path]cflash-id:cf1:, cf1-A:, cf1-B:check — Validates the .tim file.Sample OutputA:Redundancy>filecf3:\#versionftp://test:************.xxx.xx/usr/global/images/6.1/R4/cpm.timTiMOS-C-6.1.R4 for 7750Thu Oct 30 14:21:09 PDT 2008 by builder in /rel6.1/b1/R4/panos/mainA:Redundancy>filecf3:\#versioncheckftp://test:************.xxx.xx/usr/global/images/6.1/R4/cpm.timTiMOS-C-6.1.R4 for 7750Thu Oct 30 14:21:09 PDT 2008 by builder in /rel6.1/b1/R4/panos/mainValidation successfulA:Redundancy>file cf3:\ #viSyntax vi local-urlContext fileDescription Edit files using the vi editor. Refer to VI Editor on page 45.Parameters local-url — Specifies the local source file or directory.Values[cflash-id>/]file-pathcflash-id: cf1:, cf2:, cf3:。
Alcatel7750 确认单板指导
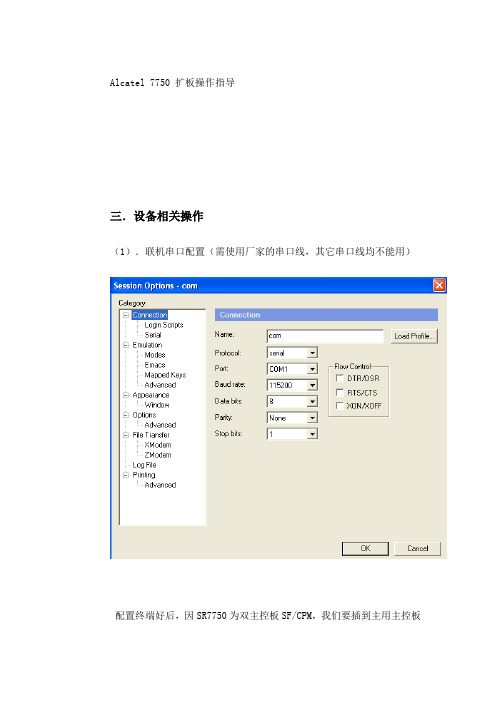
Alcatel 7750 扩板操作指导三.设备相关操作(1).联机串口配置(需使用厂家的串口线,其它串口线均不能用)配置终端好后,因SR7750为双主控板SF/CPM,我们要插到主用主控板上的console口,才能登入设备。
辨别主用主控板还是备用主控板时,我们需要看主控板上的CTL灯,显示为绿色常亮为主用主控板,显示是绿色闪烁的为备用主控板。
主控板CPM的其它灯的显示说明,请参照另一个文档设备的有没有插及插了多少块IOM板及MDA板,通过主控板上的灯是看不出来的,本身它就不具备此功能。
(2)在扩容之前,为安全起见我们需做设备配置的保存: admin save保存好后,需采集目前设备配置:admin display-config 多按几下回车键,才能采完(3)插板顺序,先插IOM板,再插MDA板(4)在插IOM板时一定要注意,主控板和IOM板上有保护胶套要先卸下才能插入槽位,否则板卡是插不位的, 无法加电。
如图:大卡为IOM卡,小卡为MDA卡(5)按设计的槽位插入IOM板卡,插入设备后,需用命令确认能否工作正常A:7750SR12# show card state/查看刚插好的IOM单板具体型号及槽位号,其中的槽位号是从设备面板上看出来的,也可以用此命令看。
我们刚插上的IOM板的型号及槽位号,在此命令下是有显示的,只是该板的admin state和oper state的状态没有达到UP。
确认IOM板命令如下:A:7750SR12#configure card X card-type XXX/具体板卡情况依实际情况定义第一个X代表设备是槽位号,XXX代表IOM的具体型号.这里就是要用到show card state显示的结果了。
确认IOM板卡后,稍等片刻,可以查看其是否工作正常了,命令如下:A:7750SR12#show card state/查看新插入IOM单板的运行状态,待新插入的IOM单板的admin state和oper state为UP状态后进入下一步操作。
7750SR 设备介绍

Presentation Title — 15
All rights reserved © 2011
FP3: 业务性能极大扩展
FP1 Scale
FP2 Scale
New!
FP3 Scale
IP Route Table
L3 Interfaces
VPRN Instances VPLS Instances
Alcatel-Lucent 7750 业务路由器
输入/输出 模块 (IOM-FP1)
每块IOM支持两 个可热插拔的 MDA
灵活的,完全可编程的转发体
以线速(10 Gb/s)进行处理
IOM2-20G
Ctrl. RAM
Ctrl. RAM
到交换矩阵的冗余连 接 (SR-7/12 )
M D
NPU ‘P’ Chip
Presentation Title — 6
All rights reserved © 2011
5Tbps 系统背板
•10 个20/50/100 G IOM •20个MDA
Alcatel-Lucent 7750 路由器 SR-7系统组成
灵活快速路径转发 阵列
10 MDA
5个输入/输出 模块(IOM))
All rights reserved © 2011
100G IMM 平台
100G IMM结构图
• 充分利用FP2 100G能力 • 在输入输出2个方向分别采用
P2/Q2 芯片组 • 采用2个T2 连接
…
12p 10GE IMM 1p 100GE IMM
.
XB200G Layout)
RLDRAM-II RLDRAM-II RLDRAM-II RLDRAM-II
7750 SR高级配置指南.pdf_1701706365.4593518说明书
ESM IPv4: Multicast in a Wholesale/RetailScenarioIn This ChapterThis section describes ESM IPv4 multicast configurations in a wholesale/retail scenario.Topics in this section include:•Applicability on page 2126•Overview on page 2127•Configuration on page 2129•Conclusion on page 21407750 SR Advanced Configuration Guide Page 2125ApplicabilityApplicabilityThis configuration example is applicable to the 7750 SR-7/12/12e with IOM3-XP and IMMs, the7450 ESS -7/12 chassis in mixed mode with IOM3-XP and IMMs, and also to the 7750 SR-c4/12platforms, and requires chassis mode C as a minimum. Note that the 7450 will only operate as anL2TP Access Concentrator (LAC) for L2TP services.The configuration was tested on release 11.0.R1 and covers both IPoE and PPPoE subscribers. Page 21267750 SR Advanced Configuration GuideESM IPv4: Multicast in a Wholesale/Retail Scenario OverviewAlcatel-Lucent’s Triple Play Service Delivery Architecture (TPSDA) allows operators to integrateHigh Speed Internet (HSI), voice and video services within a single network infrastructure. Thegoal of this configuration example is to provide a walk through of a wholesale/retail multicastsetup.There are two wholesale/retail models in TPSDA. In the first model, the retail service is co-locatedwith the wholesale service whereas in the second model, for PPP services only, the retail service ison a separate BNG. The network topology shown in Figure334 is the first model. It consists oftwo 7750s; BNG-1 is a wholesaler Broadband Network Gateway (BNG) with the retail service co-located and the second is a retailer router. Figure335 shows the second model where the retailservice is a separate router and the connection between the wholesale and retail utilizes L2TP. The7450 in both cases is used as an aggregation switch to aggregate all subscribers.Figure 334: Wholesale/Retail Model 1Figure 335: Wholesale/Retail Model 27750 SR Advanced Configuration Guide Page 2127OverviewThe second 7750 is connected directly to the multicast source. On the access side, the BNG isconnected to an aggregation switch aggregating both PPPoE and IPoE subscribers.There are two basic requirements for a subscriber to receive multicast streams. First, the groupinterface for the subscribers must have IGMP enabled. Second, the Enhanced SubscriberManagement (ESM) subscriber must be allowed to receive multicast streams by having IGMPenabled. When both requirements are met, the BNG will process the subscribers’ IGMP messages,otherwise, IGMP messages are dropped. All customer premise device (CPE) originated IGMPmessages are aggregated via the 7450 and passed onto the wholesale BNG. It is always the retailVPRN that processes the IGMP messages. The wholesale VPRN SAPs performs the forwardingof the actual multicast streams.Page 21287750 SR Advanced Configuration GuideESM IPv4: Multicast in a Wholesale/Retail Scenario ConfigurationNote that a basic knowledge of multicast and ESM is assumed.ESM Wholesale-Retail MulticastThere are various ways to provide wholesale and retail multicast function.•For the IPoE and PPPoE Layer 3 wholesale/retail model, the wholesale and the retailservices reside on separate VPRNs.•For the PPPoE Layer 2 wholesale/retail model, L2TP is used.ESM Layer 3 Wholesale-Retail MulticastFigure336 depicts a Layer 3 wholesale/retail scenario for both IPoE and PPPoE. The first BNGcontains both the wholesale and retail configuration. There are two options for the retail BNG todeliver the multicast streams to the wholesale BNG:1.MVPN between the BNGsor2.If using a routed interface between the BNGs, multicast routing is required.This example will use the second option for delivery of the multicast streams in order to keep theconfiguration simple.Figure 336: Layer 3 Wholesale/Retail7750 SR Advanced Configuration Guide Page 2129ESM Layer 3 Wholesale-Retail MulticastStep 1.Below is a configuration extract from the wholesale service on BNG-1 with the group interface added to IGMP. This configuration applies to both IPoE and PPPoE.*A:BNG-1> config>service>vprn>sub-if# info----------------------------------------------unnumbered “system”group-interface "wholesale-sub-int-1" createdhcpclient-applications dhcp pppno shutdownexitauthentication-policy "auth-policy-1"sap 1/1/5:1 createsub-sla-mgmtdef-sub-id use-sap-iddef-sub-profile "multicast-profile-1"def-sla-profile "sla-profile-1"sub-ident-policy "sub-ident-policy-1"multi-sub-sap 10no shutdownexitexitpppoesession-limit 10sap-session-limit 10no shutdownexitexitigmpgroup-interface "wholesale-group-int-1"no shutdownexitno shutdownexitStep 2.Also on BNG-1, a separate VPRN is configured for the retailer. The retail configuration is a little different from the wholesale configuration. Below is a configuration extract fromthe retail VPRN with IGMP enabled. This configuration is applicable to both IPoE andPPPoE. The multicast streams received in the retail VPRN are forwarded to the wholesaleVPRN. Other retail VPRNs can offer multicast streams as well, and the same multicastaddresses can be re-used as long as the address is assigned to a different retail VPRN.*A:BNG-1> config>service>vprn# info----------------------------------------------route-distinguisher 65536:2subscriber-interface "retail-sub-int-1" fwd-service 1fwd-subscriber-interface "wholesale-sub-int-1" createaddress 10.255.255.254/8dhcpserver 192.168.0.1client-applications dhcp pppgi-address 10.255.255.254lease-populate 10no shutdownPage 21307750 SR Advanced Configuration GuideESM IPv4: Multicast in a Wholesale/Retail Scenario exitexitigmpgroup-interface fwd-service 1 "wholesale-group-int-1no shutdownexitexitospf 192.168.2.2area 0.0.0.0interface "system"no shutdownexitinterface "retail-sub-int-1"no shutdownexitinterface "int-BNG-1-BNG-2"no shutdownexitexitexitpiminterface "int-BNG-1-BNG-2"exitexitStep 3.Per host replication is mandatory in a wholesale/retail scenario. A single wholesale SAP might be shared among different retailers. A wholesale host that has requested a multicastgroup will always have the multicast delivered directly. Other hosts on the SAPs mightbelong to a different retailer and therefore 1) retailers might not have the same multicastgroup and sources and 2) their bandwidth should not be impacted by other hosts’multicast. Per-host replication is configured in the igmp-policy igmp-policy-1. This ismandatory for both IPoE and PPPoE subscribers.*A:BNG 1> config>subscr-mgmt>igmp-policy# info----------------------------------------------per-host-replicationStep 4.The interfaces are added to OSPF and to PIM on the retail BNG that is connected to the multicast source.*A:BNG-2> config>service>vprn# info----------------------------------------------ospfarea 0.0.0.0interface "system"no shutdownexitinterface "int-BNG-2-BNG-1"no shutdownexitinterface “int-multicast-source”no shutdownexitexitexit7750 SR Advanced Configuration Guide Page 2131ESM Layer 3 Wholesale-Retail Multicastpiminterface "int-BNG-2-BNG-1"exitinterface "int-multicast-source"exitrpstaticaddress 192.168.4.1group-prefix 224.0.0.0/4exitexitexitexitWith the above the configuration, the wholesale/retail setup is ready to process IGMP messages.Now send an IGMPv3 request to the wholesale SAP. The (S,G) is (192.168.4.2, 239.255.1.1) andthe subscriber IP address is 10.0.0.2. The output below shows that the (S,G) is not registered in thewholesale VPRN but is in the retail VPRN.*A:BNG-1> show router 1 igmp group===============================================================================IGMP Interface Groups==============================================================================================================================================================IGMP Host Groups==============================================================================================================================================================IGMP SAP Groups===============================================================================No Matching Entries===============================================================================*A:BNG-1> show router 2 igmp group===============================================================================IGMP Interface Groups==============================================================================================================================================================IGMP Host Groups===============================================================================(192.168.4.2,239.255.1.1)Fwd List : 10.0.0.2 Up Time : 0d 00:13:01===============================================================================IGMP SAP Groups===============================================================================-------------------------------------------------------------------------------(*,G)/(S,G) Entries : 1===============================================================================Page 21327750 SR Advanced Configuration GuideESM IPv4: Multicast in a Wholesale/Retail ScenarioTo view all subscribers’ (S,G) pairs, use the following command.*A:BNG-1> show service active-subscribers igmp detail===============================================================================Active Subscribers Detail===============================================================================Subscriber IGMP-PolicyHostAddr GrpItf NumGroupsGrpAddr Type Up-Time ModeSrcAddr Type Blk/Fwd-------------------------------------------------------------------------------video_user_01 igmp-policy-110.0.0.2 whole-sale 1239.255.1.1 Dynamic 0d 01:37:55 Include192.168.4.2 Dynamic Fwd-------------------------------------------------------------------------------Number of Subscribers : 1===============================================================================Only the retail VPRN is responsible for processing the IGMP messages. Therefore to troubleshoota wholesale/retail setup, debug is only relevant on the retail router instance.debugrouter "2"igmpgroup-interface fwd-service "1" "whole-sale"host "10.0.0.2"packet mode egr-ingr-and-droppedexitexit7648 2013/05/24 16:59:41.02 EST MINOR: DEBUG #2001 vprn2 IGMP[14]"IGMP[14]: RX-PKT[013 07:56:53.680] IGMP host 10.0.0.2 V3 PDU: 10.0.0.2 -> 224.0.0.22 pduLen20Type: V3 REPORT maxrespCode 0x0 checkSum 0xddf6Num Group Records: 1Group Record 0Type: ALW_NEW_SRCS, AuxDataLen 0, Num Sources 1Mcast Addr: 239.255.1.1Source Address List192.168.4.2"7649 2013/05/24 16:59:41.02 EST MINOR: DEBUG #2001 vprn2 IGMP[vprn2 inst 14]"IGMP[vprn2 inst 14]: igmpIfGroupAddAdding 239.255.1.1 to IGMP host 10.0.0.2 database"7650 2013/05/24 16:59:41.02 EST MINOR: DEBUG #2001 vprn2 IGMP[vprn2 inst 14]"IGMP[vprn2 inst 14]: igmpProcessGroupRecProcess group rec ALW_NEW_SRCS received on host 10.0.0.2 for group 239.255.1.1 in mode INCLUDE. Num srcs 1"7750 SR Advanced Configuration Guide Page 2133ESM Layer 3 Wholesale-Retail Multicast7651 2013/05/24 16:59:41.02 EST MINOR: DEBUG #2001 vprn2 IGMP[vprn2 inst 14]"IGMP[vprn2 inst 14]: igmpIfSrcAddAdding i/f source entry for host 10.0.0.2 (192.168.4.2,239.255.1.1) to IGMP fwdListDatabase, redir if N/A"The same debug command can be used for troubleshooting IGMP leave messages as shownbelow.7652 2013/05/24 16:59:43.90 EST MINOR: DEBUG #2001 vprn2 IGMP[14]"IGMP[14]: RX-PKT[013 07:56:56.560] IGMP host 10.0.0.2 V3 PDU: 10.0.0.2 -> 224.0.0.22 pduLen20Type: V3 REPORT maxrespCode 0x0 checkSum 0xdcf6Num Group Records: 1Group Record 0Type: BLK_OLD_SRCS, AuxDataLen 0, Num Sources 1Mcast Addr: 239.255.1.1Source Address List192.168.4.2"7653 2013/05/24 16:59:43.90 EST MINOR: DEBUG #2001 vprn2 IGMP[vprn2 inst 14]"IGMP[vprn2 inst 14]: igmpProcessGroupRecProcess group rec BLK_OLD_SRCS received on host 10.0.0.2 for group 239.255.1.1 in mode INCLUDE. Num srcs 1"7654 2013/05/24 16:59:43.90 EST MINOR: DEBUG #2001 vprn2 IGMP[vprn2 inst 14]"IGMP[vprn2 inst 14]: igmpProcessIfSrcTimerExpSource Timer expired for IGMP host 10.0.0.2 (192.168.4.2,239.255.1.1)"7655 2013/05/24 16:59:43.90 EST MINOR: DEBUG #2001 vprn2 IGMP[vprn2 inst 14]"IGMP[vprn2 inst 14]: igmpIfSrcDelDeleting i/f source entry for host 10.0.0.2 (192.168.4.2,239.255.1.1) from IGMP Database. DeleteFromAvl: 1 !Redir 0"7656 2013/05/24 16:59:43.90 EST MINOR: DEBUG #2001 vprn2 IGMP[vprn2 inst 14]"IGMP[vprn2 inst 14]: igmpIfGroupDelDeleting 239.255.1.1 from IGMP host 10.0.0.2 database"Page 21347750 SR Advanced Configuration GuideESM IPv4: Multicast in a Wholesale/Retail ScenarioESM L2TP Wholesale/Retail MulticastAs previously mentioned, the other option for PPPoE wholesale/retail is to use an L2TPconnection as shown in Figure337. LAC-1 contains the wholesale configuration while LNS-1contains the retail configuration.Figure 337: L2TP Wholesale-Retail MulticastBelow is a configuration extract for the wholesale L2TP Access Concentrator (LAC) in thewholesale service. It is using the local database, under the pppoe user-db configuration, toauthenticate the subscriber. The wholesale LAC does not process any IGMP messages so it passesall messages to the retailer LNS.*A:LAC-1> config>service>vprn>sub-if# info----------------------------------------------description "L2TP"unnumbered “system”group-interface "LAC-sub-int-1" createsap 1/1/11:222 createsub-sla-mgmtdef-sub-id use-sap-iddef-sub-profile "multicast-profile-1def-sla-profile "sla-profile-1"sub-ident-policy "sub-ident-policy-1"multi-sub-sap 10no shutdownexitexitpppoesession-limit 10sap-session-limit 10user-db "ppp-db-1"no shutdownexitexitl2tpgroup "l2tp-group-1" create7750 SR Advanced Configuration Guide Page 2135ESM L2TP Wholesale/Retail Multicasttunnel "tunnel-1" createauto-establishlocal-name "LAC"peer 192.0.2.3no shutdownexitno shutdownexitno shutdownThe retailer BNG serves as the L2TP Network Server (LNS). Below is a configuration extract forthe LNS. IGMP must be enabled on the ESM group-interface in the retail service.*A:LNS-1> config>service>vprn>sub-if# info----------------------------------------------address 10.255.255.254/8group-interface "LNS-group-int-1" lns createsap-parameterssub-sla-mgmtdef-sub-id use-sap-iddef-sub-profile "multicast-profile-1def-sla-profile "sla-profile-1"sub-ident-policy "sub-ident-policy-1"multi-sub-sap 10no shutdownexitexitdhcpserver 192.168.0.1client-applications pppgi-address 10.255.255.254lease-populate 10no shutdownexitexitl2tpgroup "l2tp-group-1" createtunnel "tunnel-1" createlns-group 1pppauthentication-policy "auth-policy-1"default-group-interface "LNS-group-int-1" service-id 1mtu 1500proxy-authentication alwaysproxy-lcp alwaysexitremote-name "LAC"no shutdownexitno shutdownexitno shutdownigmpgroup-interface "LNS-group-int-1"no shutdownexitno shutdownPage 21367750 SR Advanced Configuration GuideESM IPv4: Multicast in a Wholesale/Retail Scenario With the above configuration applied, the wholesale/retail multicast setup can be verified. Firstly,send an IGMP message from the subscriber, the example below uses IGMPv3. The (S,G) sent is(192.168.4.2, 239.255.1.1) from the subscriber with IP address 10.0.0.2. The show commandsbelow can be used to verify the multicast group being sent to the subscriber.*A:LNS-1> show service active-subscribers igmp detail===============================================================================Active Subscribers Detail===============================================================================Subscriber IGMP-PolicyHostAddr GrpItf NumGroupsGrpAddr Type Up-Time ModeSrcAddr Type Blk/Fwd-------------------------------------------------------------------------------LNS1-pppoe-sub-01 igmp-policy-110.0.0.2 LNS 1239.255.1.1 Dynamic 0d 00:04:41 Include192.168.4.2 Dynamic Fwd-------------------------------------------------------------------------------Number of Subscribers : 1===============================================================================The IGMP group is not seen in the wholesale router instance (as shown by the first output belowon LAC-1), however, it is seen in the retail router instance (as shown by the second output belowon LNS-1).*A:LAC-1> show router 1 igmp group===============================================================================IGMP Interface Groups==============================================================================================================================================================IGMP Host Groups==============================================================================================================================================================IGMP SAP Groups===============================================================================No Matching Entries===============================================================================*A:LNS-1> show router 1 igmp group===============================================================================IGMP Interface Groups==============================================================================================================================================================IGMP Host Groups===============================================================================(192.168.4.2,239.255.1.1)Fwd List : 10.0.0.2 Up Time : 0d 00:08:27===============================================================================IGMP SAP Groups===============================================================================-------------------------------------------------------------------------------7750 SR Advanced Configuration Guide Page 2137ESM L2TP Wholesale/Retail Multicast(*,G)/(S,G) Entries : 1===============================================================================Only the retail BNG (LNS-1) is responsible for processing the IGMP messages. Therefore totroubleshoot ESM multicast for an L2TP service, the following debug commands are used on theLNS.debugrouter "1"igmpgroup-interface "LNS-01"host "10.0.0.2"packet mode egr-ingr-and-droppedexitexit7604 2013/05/24 16:55:49.46 EST MINOR: DEBUG #2001 vprn1 IGMP[8]"IGMP[8]: RX-PKT[013 07:53:02.120] IGMP host 10.0.0.2 V3 PDU: 10.0.0.2 -> 224.0.0.22pduLen 20Type: V3 REPORT maxrespCode 0x0 checkSum 0xddf6Num Group Records: 1Group Record 0Type: ALW_NEW_SRCS, AuxDataLen 0, Num Sources 1Mcast Addr: 239.255.1.1Source Address List192.168.4.2"7605 2013/05/24 16:55:49.46 EST MINOR: DEBUG #2001 vprn1 IGMP[vprn1 inst 8]"IGMP[vprn1 inst 8]: igmpIfGroupAddAdding 239.255.1.1 to IGMP host 10.0.0.2 database"7606 2013/05/24 16:55:49.46 EST MINOR: DEBUG #2001 vprn1 IGMP[vprn1 inst 8]"IGMP[vprn1 inst 8]: igmpProcessGroupRecProcess group rec ALW_NEW_SRCS received on host 10.0.0.2 for group 239.255.1.1 in modeINCLUDE. Num srcs 1"7607 2013/05/24 16:55:49.46 EST MINOR: DEBUG #2001 vprn1 IGMP[vprn1 inst 8]"IGMP[vprn1 inst 8]: igmpIfSrcAddAdding i/f source entry for host 10.0.0.2 (192.168.4.2,239.255.1.1) to IGMP fwdList Database, redir if N/A"The IGMP leave messages can also be seen in the debug, as shown below.7615 2013/05/24 16:58:06.38 EST MINOR: DEBUG #2001 vprn1 IGMP[8]"IGMP[8]: RX-PKT[013 07:55:19.040] IGMP host 10.0.0.2 V3 PDU: 10.0.0.2 -> 224.0.0.22pduLen 20Page 21387750 SR Advanced Configuration GuideESM IPv4: Multicast in a Wholesale/Retail Scenario Type: V3 REPORT maxrespCode 0x0 checkSum 0xdcf6Num Group Records: 1Group Record 0Type: BLK_OLD_SRCS, AuxDataLen 0, Num Sources 1Mcast Addr: 239.255.1.1Source Address List192.168.4.2"7616 2013/05/24 16:58:06.38 EST MINOR: DEBUG #2001 vprn1 IGMP[vprn1 inst 8]"IGMP[vprn1 inst 8]: igmpProcessGroupRecProcess group rec BLK_OLD_SRCS received on host 10.0.0.2 for group 239.255.1.1 in modeINCLUDE. Num srcs 1"7617 2013/05/24 16:58:06.38 EST MINOR: DEBUG #2001 vprn1 IGMP[vprn1 inst 8]"IGMP[vprn1 inst 8]: igmpProcessIfSrcTimerExpSource Timer expired for IGMP host 10.0.0.2 (192.168.4.2,239.255.1.1)"7618 2013/05/24 16:58:06.38 EST MINOR: DEBUG #2001 vprn1 IGMP[vprn1 inst 8]"IGMP[vprn1 inst 8]: igmpIfSrcDelDeleting i/f source entry for host 10.0.0.2 (192.168.4.2,239.255.1.1) from IGMPDatabase. DeleteFromAvl: 1 !Redir 0"7619 2013/05/24 16:58:06.38 EST MINOR: DEBUG #2001 vprn1 IGMP[vprn1 inst 8]"IGMP[vprn1 inst 8]: igmpIfGroupDelDeleting 239.255.1.1 from IGMP host 10.0.0.2 database"7750 SR Advanced Configuration Guide Page 2139ConclusionConclusionMulticast is an essential part of Triple Play Services. The SR/ESS TPSDA solution offering ismuch more than a baseline multicast delivery, it includes individual subscriber awareness andprovides each retailer a separate routing context to manage their own multicast content. Subscriberawareness allows for the fine tuning of each subscriber multicast experience and also fortroubleshooting on a per subscriber basis. This example provides a complete configuration walkthrough for multicast delivery for both IPoE and PPPoE in a wholesale/retail model.Page 21407750 SR Advanced Configuration Guide。
7750 SR OS 基本系统配置指南说明书
Boot Option FilesConfiguring Boot File Options with CLIThis section provides information to configure BOF parameters with CLI.Topics in this section include:•Configuring Boot File Options with CLI on page 173•BOF Configuration Overview on page 174•Basic BOF Configuration on page 175•Common Configuration Tasks on page 176•Configuring BOF Parameters on page 181•Service Management Tasks on page 182→Viewing the Current Configuration on page 182→Modifying and Saving a Configuration on page 184→Saving a Configuration to a Different Filename on page 186→Rebooting on page 186BOF Configuration OverviewAlcatel-Lucent 7750 SR-Series routers do not contain a boot EEPROM. The boot loader code isloaded from the boot.ldr file. The BOF file performs the following tasks:1.Sets up the CPM/ Ethernet port (speed, duplex, auto).2.Assigns the IP address for the CPM/Ethernet port.3.Creates static routes for the CPM/ Ethernet port.4.Sets the console port speed.5.Configures the Domain Name System (DNS) name and DNS servers.6.Configures the primary, secondary, tertiary configuration source.7.Configures the primary, secondary, and tertiary image source.8.Configures operational parameters.Boot Option FilesBasic BOF ConfigurationThe parameters which specify location of the image filename that the router will try to boot fromand the configuration file are in the BOF.The most basic BOF configuration should have the following:•Primary addressPrimary image location•Primary configuration locationFollowing is a sample of a basic BOF configuration.A:SR-45# show bof===============================================================================BOF (Memory)===============================================================================primary-image cf3:/4.0.R20primary-config cf3:/ospf_default.cfgaddres 138.120.189.53/24 activestatic-route 138.120.0.0/16 next-hop 138.120.189.1static-route 172.0.0.0/8 next-hop 138.120.189.1autonegotiateduplex fullspeed100wait3persist onconsole-speed 115200===============================================================================A:SR-45#Common Configuration TasksThe following sections are basic system tasks that must be performed.•Searching for the BOF on page 177→Accessing the CLI on page 179−Console Connection on page 179•Configuring BOF Parameters on page 181For details about hardware installation and initial router connections, refer to the specific 7750 SR-Series hardware installation guide.Boot Option FilesSearching for the BOFThe BOF should be on the same drive as the boot loader file. If the system cannot load or cannotfind the BOF then the system checks whether the boot sequence was manually interrupted. Thesystem prompts for a different image and configuration location.The following example displays an example of the output when the boot sequence is interrupted.. . .Hit a key within 3 seconds to change boot parms...You must supply some required Boot Options. At any prompt, you can type:"restart" - restart the query mode."reboot" - reboot."exit" - boot with with existing values.Press ENTER to begin, or 'flash' to enter firmware update...Software Location-----------------You must enter the URL of the TiMOS software.The location can be on a Compact Flash device,or on the network.Here are some examplescf3:/timos1.0R1ftp://user:**************.xx.xxx/./timos1.0R1tftp://192.168.xx.xxx/./timos1.0R1TheexistingImageURLis'ftp://vxworks:***************.xx.xxx/./rel/0.0/xx'Press ENTER to keep it.Software Image URL:Using:'ftp://vxworks:***************.xx.xxx/./rel/0.0/xx'Configuration File Location---------------------------You must enter the location of configurationfile to be used by TiMOS. The file can be ona Compact Flash device, or on the network.Here are some examplescf1:/config.cfgftp://user:**************.xx.xxx/./config.cfgtftp://192.168.xx.xxx/./config.cfgThe existing Config URL is 'cf3:/config.cfg'Press ENTER to keep it, or the word 'none' forno Config URL.Config File URL:Using: 'cf3:/config.cfg'Network Configuration---------------------You specified a network location for either thesoftware or the configuration file. You need toassign an IP address for this system.The IP address should be entered in standard dotted decimal form with a network length. example: 192.168.xx.xxx/24Displays on no n-Redun-dant Models l The existing IP address is 192.168.xx.xxx/20. Press ENTER to keep it. Enter IP Address:Using: 192.168.xx.xxx/20Display on Redundant models The existing Active IP address is 192.168.xx.xxx/20. Press ENTER to keep it. Enter Active IP Address:Using: 192.168.xx.xxx/20The existing Standby IP address is 192.168.xx.xxx/20. Press ENTER to keep it. Enter Standby IP Address (Type 0 ifno ne desired):Using: 192.168.xx.xxx/20Would you like to add a static route? (yes/no) yStatic Routes-------------You specified network locations which requirestatic routes to reach. You will be asked toenter static routes until all the locations becomereachable.Static routes should be entered in the following format:prefix/mask next-hop ip-addressexample: 192.168.xx.xxx/16 next-hop 192.168.xx.xxxEnter route: 1.x.x.0/24 next-hop 192.168.xx.xxxOKWould you like to add another static route? (yes/no) nNew Settings------------primary-imageftp://vxworks:***************.xx.xx/./rel/0.0/xxprimary-config cf3:/config.cfgaddress 192.168.xx.xx/20 activeprimary-dns 192.168.xx.xxdns-domain static-route 1.x.x.0/24 next-hop 192.168.xx.xxxautonegotiateduplex fullspeed 100wait 3persist offDo you want to overwrite cf3:/bof.cfg with the new settings? (yes/no): y Successfully saved the new settings in cf3:/bof.cfgBoot Option FilesAccessing the CLITo access the CLI to configure the software for the first time, follow these steps:•When the SF/CPM is installed and power to the chassis is turned on, the 7750 SR OS7750 SR OS MG software automatically begins the boot sequence.•When the boot loader and BOF image and configuration files are successfully located, establish a router connection (console session).Console ConnectionTo establish a console connection, you will need the following:•An ASCII terminal or a PC running terminal emulation software set to the parameters shown in the table below.• A standard serial cable with a male DB9.Table 19: Console Configuration Parameter ValuesData Bits8Parity NoneStop Bits1Flow Control NoneFigure 10 displays an example of the Console port on a 7750 SR-1 front panel.Console PortSR10001AFigure 10: 7750 SR-1 Front Panel Console PortTo establish a console connection:Step 1Connect the terminal to the Console port on the front panel using the serial cable. Step 2Power on the terminal.Step 3Establish the connection by pressing the <Enter> key a few times on your terminal keyboard.Step 4At the router prompt, enter the login and password.The default login is admin.The default password is admin.Boot Option FilesConfiguring BOF ParametersThe following output displays a BOF configuration:A:ALA-1>bof# show bof==================================================================Memory BOF==================================================================no autonegotiateduplex fullspeed 100address 10.10.xx.xx/20 activewait 3primary-image cf3:\both.timprimary-config cf3:\test123.cfgprimary-dns 192.168.xx.xxpersist ondns-domain ==================================================================A:ALA-1>bof#Service Management TasksThis section discusses the following service management tasks:•System Administration Commands on page 182→Viewing the Current Configuration on page 182→Modifying and Saving a Configuration on page 184→Deleting BOF Parameters on page 185→Saving a Configuration to a Different Filename on page 186System Administration CommandsUse the following administrative commands to perform management tasks.CLI Syntax:A:ALA-1# admindisplay-configreboot [active|standby] [now]save [file-url] [detail] [index]Viewing the Current ConfigurationUse one of the following CLI commands to display the current configuration. The detail optiondisplays all default values. The index option displays only the persistent indices. The infocommand displays context-level information.CLI Syntax:admin# display-config [detail|index]info detailThe following displays an example of a configuration file:A:7750-3>admin# display-config# TiMOS B-1.0.Ixxx - Copyright (c) 2000-2007 Alcatel, Inc.# Built on Tues Jan 21 21:39:07 2007 by builder in /rel1.0/xx/panos/main# Generated WED Jan 31 06:15:29 2007 UTCexit allconfigure#--------------------------------------------------echo "System Configuration"#--------------------------------------------------systemname "7750-3"contact "Fred Information Technology"Boot Option Files location "Bldg.1-floor 2-Room 201"clli-code "abcdefg1234"coordinates "N 45 58 23, W 34 56 12"ccm 1exitsnmpexitlogin-controlidle-timeout 1440motd text "7750-3"exittimesntpshutdownexitzone UTCexitthresholdsrmonexitexitexit......#--------------------------------------------------echo "Redundancy Configuration"#--------------------------------------------------redundancysynchronize boot-envexit...exit all# Finished FRI Nov 21 15:06:16 2008 UTCA:7750#Modifying and Saving a ConfigurationIf you modify a configuration file, the changes remain in effect only during the current powercycle unless a save command is executed. Changes are lost if the system is powered down or therouter is rebooted without saving.•Specify the file URL location to save the running configuration. If a destination is not specified, the files are saved to the location where the files were found for that bootsequence. The same configuration can be saved with different file names to the samelocation or to different locations.•The detail option adds the default parameters to the saved configuration.•The index option forces a save of the index file.•Changing the active and standby addresses without reboot standby CPM may cause aboot-env sync to fail.The following command saves a configuration:CLI Syntax:bof# save [cflash-id]Example:A:ALA-1# bofA:ALA-1>bof# save cf3:A:ALA-1>bof#The following command saves the system configuration:CLI Syntax:admin# save[file-url] [detail][index]Example:A:ALA-1# admin save cf3:\test123.cfgSaving config.# Saved to cf3:\test123.cfg... completeA:ALA-1#NOTE: If the persist option is enabled and the admin save file-url command is executedwith an FTP path used as the file-url parameter, two FTP sessions simultaneously open to theFTP server. The FTP server must be configured to allow multiple sessions from the same login,otherwise, the configuration and index files will not be saved correctly.Boot Option FilesDeleting BOF ParametersYou can delete specific BOF parameters. The no form of these commands removes the parameterfrom configuration. The changes remain in effect only during the current power cycle unless asave command is executed. Changes are lost if the system is powered down or the router isrebooted without saving.Deleting a BOF address entry is not allowed from a Telnet session.Use the following CLI syntax to save and remove BOF configuration parameters:CLI Syntax:bof# save [cflash-id]Example:A:ALA-1# bofA:ALA-1>bof# save cf3:A:ALA-1>bof#CLI Syntax:bof#no address ip-address/mask [active | standby]no autonegotiateno console-speedno dns-domainno li-local-saveno li-separateno primary-configno primary-dnsno primary-imageno secondary-configno secondary-dnsno secondary-imageno static-route ip-address/mask next-hop ip-addressno tertiary-configno tertiary-dnsno tertiary-imageSaving a Configuration to a Different FilenameSave the current configuration with a unique filename to have additional backup copies and to editparameters with a text editor. You can save your current configuration to an ASCII file.Use either of the following CLI syntax to save a configuration to a different location:CLI Syntax:bof# save [cflash-id]Example:A:ALA-1# bofA:ALA-1>bof# save cf3:A:ALA-1>bof#orCLI Syntax:admin# save [file-url] [detail][index]Example:A:ALA-1>admin# save cf3:\testABC.cfgSaving config.# Saved to cf3:\testABC.cfg... completeA:ALA-1#RebootingWhen an admin>reboot command is issued, routers with redundant CPM are rebooted as well asthe IOMs. Changes are lost unless the configuration is saved. Use the admin>save file-url com-mand to save the current configuration. If no command line options are specified, the user isprompted to confirm the reboot operation.Use the following CLI syntax to reboot:CLI Syntax:admin# reboot [active|standby] [now]Example:A:ALA-1>admin# rebootA:DutA>admin# rebootAre you sure you want to reboot (y/n)? yResetting...OKAlcatel 7xxx Boot ROM. Copyright 2000-2007 Alcatel-Lucent.All rights reserved. All use is subject to applicablelicense agreements.....。
阿尔卡特7750路由器-健康检查手册

阿尔卡特7750SR路由器健康检查手册上海贝尔股份有限公司2015年1月14日一、健康检查标准使用说明1.1 使用说明1.本手册适用产品:阿尔卡特7750SR,适用于CE、AR、DCN、CMNET等应用场景。
1.2 适用的设备软、硬件列表1.设备型号:ALCA TEL 7750SR2.软件版本:TiMOS 9.0.R17二、健康检查项目编号检查内容检查方法检查标准1 检查软件版本在路由器各节点上分别执行:show version为IOS软件版本核对TiMOS,正常情况为为9.0.R17。
如有不同要引起注意,TiMOS异常有可能会造成设备重启后无法正常启动。
2 检查日志信息及日志设置在路由器各节点上分别执行:show log log-id 99show log log-id 100正常情况下,不应该有大量重复信息。
比如端口频繁up/down,以及错误信息等。
3 检查调试信息开关在路由器各节点上分别执行:show debug正常运行时应该全部关闭。
如果发现存在启用Debug,则可以在用户视图使用no debug命令关闭所有Debug。
4 检查设备系统名是否符合中国移动命名规范在路由器各节点上分别查看命令行提示符。
符合中国移动命名规范。
5 检查端口描述是否规范在交路由器各节点上分别执行:show port description所有激活的重要接口都要按照中国移动规范进行描述,按照下列规则对重要端口进行描述:本端设备名-本端端口号->对端设备名-端口号。
6 检查系统时间是否与当地时间和时区一致在路由器各节点上分别执行:show time系统时间和当地时间、时区一致。
●如果没有配置网络时间同步,则时间设置应与当地时间和时区一致,从而便于日后定位故障时间和跟踪信息。
●如果系统时间不精确,则需要在用户视图配置时区和时间,命令如下:A:7750SR#configure system time zone PRC 8●A:7750SR#admin set-time 2011/10/0108:00:007 检查配置文件参数在路由器各节点上分别执行:admin display-config说明建议将最终配置文件另行备份保存到机器外。
阿尔卡特7750培训资料1:路由配置

− L1, L 1-2,和L2 − 从其他协议分发进来的IPv4 的路由汇总 − 汇总路由所通告的量度比其他具体的IPv4 路由的量度要小。。
• 可基于每个消息类型和每个level,支持抑制IS-IS认证。提高与非 7750 IS-IS 部署的互操作性。
• 不间断路由
7750SR 路由和路由策略
Alcatel Proprietary, all rights reserved © 2005, Alcatel
• 出站路由过滤 (ORF) –BGP的一个特征:一个BGP 发送者请求他的
邻居不发送给它特定的路由。在 7750VPRN上支持。 • TTL 安全– 能够指定一个进入的BGP 信息包的最小TTL 值 。
− 多数eBGP对等体关系在邻近的路由器间建立。 − 假如一个信息包的TTL值不在指定的范围内,便丢弃这个信息包并产生一
7750 SR 业务实现R3.0
Alcatel University
代理-ARP
子网 20
主机 A IP add.=IP_A MAC add.= MAC_A
子网 10
主机C IP add.=IP_C MAC add.= MAC_C
接口 X
Alcatel7750SR常用命令集
Alcatel7750SR常用命令集1. 简介本文档是关于Alcatel7750SR常用命令集的指南。
Alcatel7750SR是一款多功能的路由器和交换机,广泛应用于电信运营商和企业网络中。
本文档将介绍一些常用的命令,以帮助用户更好地了解和使用Alcatel7750SR。
2. 登录与退出2.1 登录要登录到Alcatel7750SR设备,可以使用以下命令:login <用户名> <密码>其中,<用户名>和<密码>分别是您的登录名和密码。
2.2 退出要退出登录,可以使用以下命令:logout3. 基本配置3.1 设置主机名可以使用以下命令设置设备的主机名:configure systemset hostname <主机名>end其中,<主机名>是您要设置的主机名。
3.2 设置IP地址要设置设备的IP地址,可以使用以下命令:configure systemset address <接口> ip-address <IP地址>/<子网掩码>end其中,<接口>是设备的接口名,如ethernet 1/1/1,<IP 地址>是您要设置的IP地址,<子网掩码>是IP地址的子网掩码。
4. 路由配置4.1 静态路由要配置静态路由,可以使用以下命令:configure router static-routeadd <目标网络> next-hop <下一跳地址>end其中,<目标网络>是要配置的目标网络,如10.0.0.0/24,<下一跳地址>是下一跳的IP地址。
4.2 动态路由要配置动态路由,可以使用以下命令:configure router dynamic-routeospfarea <区域号>network <网络地址> mask <子网掩码>exitexit其中,<区域号>是OSPF的区域号,<网络地址>是要配置的网络地址,<子网掩码>是网络地址的子网掩码。
阿尔卡特7750配置文档
上海贝尔阿尔卡特7750SR配置标准模板目录一、硬件配置 (5)1.1配置IOM卡 (5)1.1.1 查看已经插入的IOM卡的类型 (5)1.1.2 正确配置IOM卡的类型 (5)1.2配置MDA卡 (5)1.2.1 查看已经插入的MDA卡的类型 (5)1.2.2 正确配置MDA卡的类型 (5)1.3配置MDA端口 (6)1.3.1 POS端口配置 (6)1.3.2 以太口配置 (6)1.3.3 查看port信息 (6)二、设备管理配置 (8)2.1配置路由器名称、LOCA TION、CONTACT (8)2.2配置系统时间 (8)2.3配置SNTP (8)2.3.1 打开SNTP (8)2.3.2 配置SNTP地址 (8)2.4配置SR为TELNET服务器 (8)2.5.1 配置默认动作为允许,因为是所有上主控板的流量。
(9)2.5.2 配置允许IP段的ACL,配置源IP,协议,目的端口 (9)2.5.3 配置一条拒绝的ACL,拒绝其他IP段。
(9)2.6配置用户 (9)2.6.1 配置用户名 (9)2.6.2 配置用户密码 (9)2.6.3 配置用户登陆方式 (10)2.6.4 配置用户所属的组 (10)2.7配置LOG (10)2.7.1 配置log-id (10)2.7.2 配置log信息类型 (10)2.7.3 配置记录log的方式 (10)2.7.4 配置记录log方式的具体配置 (10)2.8配置SNMP (11)2.9配置主备板同步 (11)2.9.1 配置自动同步 (11)2.9.2 手工同步命令 (11)2.10配置空闲时间 (11)2.11配置ANTI-SPOOF (11)三、路由配置 (13)3.1配置路由器系统地址 (13)3.2配置网络接口 (13)3.2.1 配置interface名字及描述 (13)3.2.2 配置IP地址 (13)3.2.3 配置关联端口 (13)3.2.4 查看配置的路由器接口 (13)3.3配置静态及OSPF路由协议 (14)3.3.1 配置静态路由 (14)3.3.2 配置OSPF区域 (14)3.3.3 配置ospf接口cost值 (14)3.3.4 配置一个stub区域 (14)3.3.5 配置NSSA区域 (14)3.3.6 配置虚链路 (15)3.3.7 配置认证 (15)3.3.8 配置路由聚合 (15)3.3.9 配置静态路由注入到OSPF路由协议 (15)3.3.10 查看运行在ospf协议下的接口 (16)3.3.11 查看ospf邻居建立关系 (16)3.3.12 查看ospf路由表 (16)3.4配置IS-IS (16)3.4.1 配置区域ID (16)3.4.2 配置路由器等级能力 (17)3.4.4 查看ISIS下的接口 (17)3.4.5 添加已经配置到ISIS的每个网络接口 (17)3.4.6 查看ISIS邻接关系 (17)3.4.7 查看ISIS路由表 (17)3.5BGP配置 (18)3.5.1 创建AS (18)3.5.2 配置路由器 ID5 (18)3.5.3 配置 BGP (18)3.6配置POLICY (18)3.6.1 配置policy名称 (18)3.6.2 配置从静态路由分布到ospf路由协议中的policy (19)3.6.3 配置commit使之生效 (19)3.6.4 应用policy (19)3.7IP F ILTER配置 (19)3.7.1 创建ip filter (19)3.7.2 指定默认动作 (19)3. 7.3创建条目,指定动作、源、目的IP (19)3.7.4 应用ip filter (20)四、 MPLS 配置以及业务配置 (21)4.1MPLS配置 (21)4.1.1 MPLS接口配置 (21)4.1.2 创建已命名的MPLS路径 (21)4.1.3 配置 MPLS LSP和主路径 (21)4.1.4 查看命令 (22)4.1.5 改变每个网络接口的最大传输单元(MTU)尺寸 (22)4.2 E P IPE 配置 (22)4.2.1 创建客户并将其与提供的业务相关联 (22)4.2.2 指向客户的接口(在我们的网络中由膝上电脑表示)称为“toCustomer”,必须配置为接入接口。
7750SR配置方法

实用文案7750SR路由器配置规范V2.1上海贝尔阿尔卡特股份有限公司互联网事业部二零零六年十一月目录1.概述 (5)2.系统基本配置 (7)2.1.层次化命令结构 (7)2.2.在CLI中获得帮助 (8)2.3.硬件板卡配置 (9)2.4.设备名称配置 (11)2.5.系统时间配置 (11)2.6.NTP配置 (11)2.7.主备卡切换配置 (12)2.8.AAA配置(登录用户) (14)3.端口配置 (16)3.1.Loopback端口配置 (16)3.2.GE端口配置 (16)3.3.POS端口配置 (17)3.4.端口镜像配置 (18)4.安全配置 (23)4.1.ACL配置 (23)4.2.防攻击配置 (24)5.网管配置 (31)5.1.网管地址配置 (31)5.2.TELNET配置 (32)5.3.FTP配置 (33)5.4.SNMP (33)5.5.SYSLOG (35)5.6.配置备份 (36)5.7.SSH配置 (36)Flow备份 (37)6.路由配置 (39)6.1.黑洞路由配置 (39)6.2.静态路由配置 (39)6.3.OSPF配置 (39)6.4.ISIS配置 (44)6.5.BGP配置 (47)7.业务配置 (54)7.1.专线业务配置(IES配置) (54)7.2.MPLS VPN业务配置 (56)7.2.1P路由器配置 (56)7.2.2PE路由器配置(VPRN) (60)7.2.3PE路由器配置(VPLS) (63)8.7750SR常用维护命令 (67)1.概述阿尔卡特7750SR路由器是业内第一个专为高级互联网和虚拟专用网络(VPN)业务而设计和优化的IP/MPLS业务路由器。
阿尔卡特7750SR有三种尺寸可供选择:单槽、7槽和12槽,可提供具有卓越性能和高密度的各种接口。
作为目前业内最具扩展性的路由器平台,阿尔卡特7750SR具有为高效传送基于服务等级协议(SLA)的业务而设计的软件和硬件架构,因此阿尔卡特7750SR不仅仅是强大的互联网路由器,更是一个灵活、强大的业务供应平台。
- 1、下载文档前请自行甄别文档内容的完整性,平台不提供额外的编辑、内容补充、找答案等附加服务。
- 2、"仅部分预览"的文档,不可在线预览部分如存在完整性等问题,可反馈申请退款(可完整预览的文档不适用该条件!)。
- 3、如文档侵犯您的权益,请联系客服反馈,我们会尽快为您处理(人工客服工作时间:9:00-18:30)。
Alcatel 7750 SR 配置指南1.设备配置命令说明 (2)3.1 S YSTEM基本配置 (2)3.2 L OG配置 (3)3.3 P ORT配置 (3)3.4 ISIS协议配置 (5)3.5 M PLS、LDP协议配置 (6)3.6 S ECURITY 配置 (7)3.7 VPN-BGP配置 (9)3.8 P OLICY配置 (10)3.9 S ERVICE配置 (11)3.10 IES业务配置 (11)3.11 VPLS 业务配置 (13)3.12 VPRN业务配置 (15)2.故障排除方法说明 (17)2.1 光路正常但PORT端口DOWN (17)2.2 PING 不通对端地址 (17)2.3 ISIS邻接关系无法建立 (18)2.4 BGP邻居无法正常建立 (18)2.5 BGP表中有路由,但路由没有被放进VPN路由表中 (18)2.6 VPN中用户CE设备无法访问远端 (18)3.业务运行状态检查命令 (19)3.1 查看S ERVICE业务运行状态 (19)3.2 检查路由器接口运行状态 (19)3.3 查看设备P ORT端口运行状态 (20)3.4 查看设备MAC地址表信息 (21)4.删除SERVICE配置步骤 (22)1.设备配置命令说明3.1 System基本配置1.chassis-mode 要配置为C,以支持新的feature。
2.telnet 的session限制为设置为最大数7。
3.时区自定义为BEIJ 08。
配置示例:systemname "YZ-SYL-R-AC7750-01"chassis-mode csnmppacket-size 9216exitlogin-controltelnetinbound-max-sessions 7outbound-max-sessions 7exitno login-bannerexittimesntpshutdownexitzone BEIJ 08exitthresholdsrmonexitexitexit检查命令:show chassis 查看chassis mode是否为C。
Show time 查看系统时间。
3.2 Log配置1.配置本地log用于保存7750SR的日常设备信息,log-id 为11,file-id 为11。
配置示例:logfile-id 11location cf3:exitsnmp-trap-group 98trap-destination 61.177.191.180 "snmpv2c" notify-community "alcateltrap"trap-destination 61.177.191.188 "snmpv2c" notify-community "yzsnmprw123"exitlog-id 11from security changeto file 11exitlog-id 98from main securityto snmp 1024exitexit检查命令:Show log log-id 10查看本地LOG3.3 Port配置PORT配置根据下联交换机的端口类型和协商方式灵活配置。
1.采用7750物理端口与下联设备直联就不需要封装dot1Q,如果有VLAN则需要封装dot1Q。
2.端口下配置的用户数据,如需配置IES、VLL、VPLS、VPRN等数据就需要设置mode为access。
3.与下联设备不需要协商需要配置no autonegotiate。
配置示例:port 1/1/1ethernetexitno shutdownexitport 1/1/2Ethernetmode accessencap-type dot1qno autonegotiateexitno shutdownexit检查命令:Show port查看端口状态是否UP。
1.设备的唯一标识地址系统默认名字为system,配置IP地址。
2.配置系统自治号为64665。
3.打开多链路负载均衡ECMP设置为8。
4.配置设备router-id 为system地址。
配置示例:routerinterface "system"address 58.220.170.3/32exitinterface "to_DBL12416-1_1"address 58.220.165.34/30port 2/1/1exitinterface "to_DBL12416-1_2"address 58.220.165.38/30port 1/1/2exitinterface "to_SYL12416-1_1"address 58.220.165.42/30port 1/1/1exitinterface "to_SYL12416-1_2"address 58.220.165.46/30port 2/1/2exitautonomous-system 64665ecmp 8 - equal cost multi-path router-id 58.220.170.3检查命令:show router interface查看interface是否UP。
show router ecmp查看ecmp是否打开。
3.4 ISIS协议配置1.配置ISIS为leverl-12.配置area-id 为86.4665.05143.将system、与GSR互联的接口、与下联设备互联接口加入到ISIS进程。
配置示例:isislevel-capability level-1area-id 86.4665.0514traffic-engineeringlevel 1wide-metrics-onlyexitinterface "system"level-capability level-1exitinterface "to_SYL12416-1_1"level-capability level-1level 1metric 200exitexitinterface "to_SYL12416-1_2"level-capability level-1level 1metric 200exitexitinterface "to_DBL12416-1_1"level-capability level-1level 1metric 200exitexitinterface "to_DBL12416-1_2"level-capability level-1level 1metric 200exitexitexit检查命令:show router isis adjacency查看ISIS邻接是否建立。
3.5 Mpls、LDP协议配置1.将system、与GSR互联的接口、与下联设备互联接口加入到MPLS和LDP进程。
配置示例:mplsinterface "system"exitinterface "to_SYL12416-1_1"exitinterface "to_SYL12416-1_2"exitinterface "to_DBL12416-1_1"exitinterface "to_DBL12416-1_2"exitno shutdownexitldpimport "block_0_fec"interface-parametersinterface "to_SYL12416-1_1"exitinterface "to_SYL12416-1_2"exitinterface "to_DBL12416-1_1"exitinterface "to_DBL12416-1_2"exitexittargeted-sessionexitexitexit检查命令:show router mpls interfaceshow router ldp session查看LDP邻接是否建立成功。
3.6 Security 配置1.开启telnet、snmp服务。
并对访问IP进行限制。
2.全网7750SR设备关闭SSH服务。
3.配置IPV6-filter。
对每台7750SR的普通上网用户和每个VPRN用户都要进行IPV6包的过滤。
配置示例:systemsecuritytelnet-serverftp-servermanagement-access-filterdefault-action permitentry 10description "fortelnet"action permitsrc-ip 61.177.176.0/22exitentry 20action permitsrc-ip 61.177.191.0/27exitentry 30action permitsrc-ip 222.189.226.0/23exitentry 40action permitsrc-ip 58.220.165.0/24exitentry 50action permitsrc-ip 58.220.166.0/23exitentry 60action permitsrc-ip 58.220.168.0/23exitentry 70action permitsrc-ip 61.177.191.180/32exitentry 80action permitsrc-ip 58.220.170.0/24exitentry 90action permitsrc-ip 10.108.0.5/32exitentry 100action denyprotocol 6dst-port 23 65535exitentry 190action denyprotocol 17dst-port 161 65535exitexitpasswordauthentication-order tacplus localexittacplusaccountingauthorizationtimeout 10single-connectionserver 1 address 221.231.148.6 secret "z05szr1ZBJCPeLCQOtckOk" hash2server 2 address 61.177.64.146 secret "WZBK9MwJl5GOacy0i5JXTE" hash2exituser "admin"password "VeuGBy9agmYtpDhhW0yi359H.JvK5.8c" hash2access console ftp snmpconsolemember "administrative"exitexitsnmpcommunity "yzsnmpro123" r version bothcommunity "yzsnmprw123" rwa version bothexitper-peer-queuingcpm-filterip-filtershutdownexitipv6-filterentry 10 createlog 110matchrouter Baseexitexitentry 20 creatematchrouter ***(VPRN Service ID)exitexitno shutdownexitexit检查命令:Show system security cpm-filter ipv6-filter查看IPV6包的数量。