450磨齿机使用说明书
WP450说明书

Inserting and Removing Tips
Insert tip into the center of the knob at the top of the Water Flosser handle. The colored ring will be flush with the end of the knob if the tip is correctly locked into place.
Important Safeguards Product Description Getting Started Care of Your Waterpik® Water Flosser Troubleshooting Guide Limited Two-Year Warranty
3 TABLE OF CONTENTS
Important! Turn Water Flosser
off and charge for 24 hours
before first use. Plug the cord into any
standard electrical outlet. Make sure you push
the switch into the "O" (OFF) position before
5
• Do not drop or insert any foreign object into any opening on the product • Keep charging unit and cord away from heated surfaces. • Do not operate where oxygen or aerosol sprays are being used. • Do not use mouthwashes/rinses that contain Iodine, Bleach, or Tea
CK450原料磨中控操作规程
TON
&
1S
≥1
≥1
&
TON
5min
升辊命令
≥1
&
升辊模式(慢速)
& 升辊模式(快速)
A230 喂料系统运行
&
≥1
9 降辊脉冲(手动)
&
2S
磨主电机运行
重喂料
喂料运行
压力控制开始 喂料停止
中控初始启动信号 所有磨辊在低位
≥1
液压泵运行
≥1
&
& TON 40S
& 磨辊初始降辊命 令成
初始降辊完成
(3)磨辊液压站自重降辊
风机稀油站故障
风机油站运行 水电阻故障 原料磨出口温度 HH
工艺代号 2327 23273 23271 23272
&
&
风机前、后震动温度 HH
电气代号 21A22M 21A22AR 21A22bAC
启动连锁
安全连锁
2618
启动信号
&
启动连锁 安全连锁
运行连锁
运行联锁 2327
注:(1)主电机启动后 45s,如水电阻启动完毕信号还未到,则停主电机。 (2)电机定子温度 HH 为 130℃,电机轴承 HH 为 70℃,风机轴承温度高高报为 85℃,
选择入库 ZF26161 A2401
A2428
ZR2416 不选择入
1 库
启动信号
&
>
&
&
○1
2616
2608 2607
26061
26051
26062
26052
1604
○1
26063
26053
26064
锯片磨齿机资料文章
【免责声明】该电子书由高速钢锯片网()整理制作,所有内容均来源于互联网,我们不保证其内容或资料的真实性和合法性,文章资料的知识产权归原作者所有,该电子书仅限于个人学习和交流之用,不得用于商业用途,由此产生的后果,本网站概不承担任何法律责任。
锯片从业者交流群:118477369,欢迎大家来这里推广你的锯片品牌。
【温馨提示】为了方便同行学习与交流,欢迎大家任意转发该电子书锯片研磨机资料文章目录教你磨刀 (3)谈谈对中国锯磨机的看法 (4)对进口锯片研磨水平的看法 (5)锯片磨齿机左视图 (6)锯片磨齿机右视图 (7)锯片磨齿机的工作原理与种类 (7)锯片磨齿机研磨前准备 (8)锯片磨齿机研磨开始 (10)锯片研磨机可研磨的锯片种类 (11)如何进行平面磨削的操作? (12)端面磨刀机的技术特点及主要参数 (13)调节锯片磨齿机机头皮带 (15)教你磨刀在锯片铣刀使用过程中,刀口生了我们要去打磨,那么是用什么样的方法可以做到最好呢?我们共同学习。
使用金刚石砂轮是最好的选择。
我们有许多硬质合金刀具,在普通的工具磨床上使用金刚石砂轮效果都很好。
金刚石砂轮加上油性冷却液,可以提高磨削后的粗糙度,也可以提高加工效率。
1)使用金刚石砂轮。
2)分开粗精磨。
3)用12000转以上的高精度刀具磨,机床主轴的精度很重要,跳动和窜动最差也要控制在1C以下,且应具有相当的刚性。
谈谈对中国锯磨机的看法目前本国已然有不少的石材加工企业运用多头的桥式磨抛机,这种磨抛机的使用大大进步了消费效率,降低了人工本钱,加重了休息强度。
一、目前本国外石材锯机加工设备开展现状及比照在意大利等石材加工技巧比拟先进的国度,锯石机锯片多采用主轴两端支撑的方式,锯片支撑刚性好,加工精度高。
与单片锯石机相比,配合锯石机在加工效率、消费本钱、出材率等方面长处分明,因而在意大利、西班牙等欧洲重要石材消费国,都运用两边支撑的多片锯加工板材,单片锯只能做为平料运用,很少用来加工板材。
Invision 450 MPa和Invision 352 MPa工程机械说明书

Issued Feb. 2021 • Index No. DC/23.6Invision 450 MPaInvision 352 MPaSynchronized, truepush-pull wire feed system allows use of extended reach push-pull gun for consistent, versatile and dependable aluminum wire feeding.Synergic pulsed MIG “one-knob” control makes pulsed MIG adjustments easy. Set the wire feed speed control and the system handles the rest (when optimized with an MPa Plus feeder).MPa: M (MIG), P (Pulse), a (Advanced Arc Control). Advanced arc control enables an improved pulse welding arc. The operator has more control over puddle and bead characteristics using SharpArc. In addition, the unit provides a more robust and stable arc at very low arc length, reducing heat input, and providing the ability to weld on a wider range of material thickness.Power source/wire feeder are warrantied for three years, parts and labor.Original main power rectifier parts are warrantied for five years. XR ™ push-pull guns warrantied for one year, parts and labor. Bernard ® push-only gun warrantied for 90 days, parts and labor.Easy to set up. Select wire diameter, wire type and gas being used, set your wire speed and strike an arc. Standard Miller ® inverter features (see page 2).•Wind Tunnel Technology ™ •Fan-On-Demand ™ Standard built-in pulsed MIG programs with synergic capability for the following metals (see page 3). •Steel•Metal core •Aluminum •Stainless steel •Nickel•Silicon bronze •Copper nickelInvision 352 MPa Model OnlyAuto-Line ™ power management technology allows for any input voltage hook-up (208–575 V) with no manual linking required, providing convenience in any job setting. Ideal solution for dirty or unreliable input power. (450 model is 230/460 V or 575 V manual link.) Dinse-style weld disconnects provide high-quality weld cable connections. (450 model utilizes studs.)MIG Welding Power SourceInvision ™M Pa Plus SystemSynergic Welding SystemMiller Electric Mfg. LLCAn ITW Welding Company 1635 West Spencer Street P.O. Box 1079Appleton, WI 54912-1079 USAEquipment Sales US and CanadaPhone: 866-931-9730 FAX: 800-637-2315International Phone: 920-735-4554 International FAX: 920-735-41252Invision ™352/450 MPaWeld Cross Section SharpArc 50SharpArcCertified by Canadian Standards Association to both the Canadian and U.S. Standards.31. Output ON Indicator Light2. Left Display3. Voltage Indicator4. Arc Length Indicator5. Wire Feeder Receptacle6. Adjustment Control7. Right Display8. Setup Indicator9. Amperage Indicator 10. Setup Indicator Lights• Arc Control Indicator • Process Indicator• Wire/Gas Type Indicator • Setup Button52341789610Control PanelThe Invision ™ 352 or 450 MPa model and a 74 MPa Plus single- or dual-wire feeder combine for a synergic system that simplifies and improves MIG and pulsed MIG welding applications for industrial manufacturing.Performance DataInvision 352 MPa Duty Cycle ChartInvision 450 MPa Duty Cycle Chart% Duty Cycle% Duty Cycle30W e l d i n g A m p e r e s101520251004050607090801015202530406050708090100W e l d i n g A m p e r e sThe Invision MPa models have built-in pulsed MIG programs. See the table below for the wide range of pulsed MIG (GMAW-P) welding applications the Invision MPa models can handle.Built-In Pulsed MIG Programs4Bench-Style FeedersSwingarc ™ Boom-Mounted FeedersOptimized Wire Feeder OptionsS-74 MPa PlusSingle-Wire Control Box D-74 MPa PlusDual-Wire Control Box*MPa Plus Wire Drive Motor AssemblySynergic pulsed MIG — The MPa Plus feeders give you the benefit of a synergic pulsed MIG system. As you increase/ decrease the wire feed speed, the pulse parameters increase/decrease, matching the right amount of power output to match the wire speed. Feeders only operate synergically with an MPa power source. Push-pull capability provides consistent, versatile and dependable aluminum wire feeding over greater distances.Trigger schedule select allows the operator to select the alternative schedule by quickly tapping the gun trigger when not welding. When optimized with an MPa power source the operator can also switch from MIG to pulsed MIG.Available as either single- or dual-wire models. Provides trouble-free feeding performance.Dual-wire models allow you to set up one side for soft wires (aluminum) while maintaining the ability to push a variety of hard wires on the other, saving time and money.Trigger hold reduces fatigue by allowing the operator to weld without holdingthe trigger.Program locks and limits allow you to maintain proper weld parameters.Profile Pulse ™ gives you the cosmetic bead appearance for the welds you want to show off.Remote ConfigurationsAvailable in 12- or 16-foot lengths to maximize output. The unique counterbalance design makes it easy and convenient to position the boom exactly where it is needed. This allows you extended reach and the ability to get cables off the ground.360-degree rotation and 60-degree lift angle maximizes work area (24- or 32-foot diameter work area).Offers added flexibility to install the power source, control box and drive assembly in threeseparate places. This is desirable for mounting to custom jibs, booms or other extended-reach applications.S-74 MPa Plus Single-Wire Feeder Swingarc single-wire model shown.D-74 MPa Plus Dual-Wire Feeder*Power Source Compatibility for MPa Plus Wire FeedersNote: Power sources not included in this list are not recommended. For specific information, please contact your local Miller ® distributor.*Only left side of dual-wire model is capable of using push-pull gun.*Only left side of dual-wire model is capable of using push-pull gun.5Control PanelD-74 MPa Plus Dual-Wire Feeder Control Panel Shown1. Voltage/Arc Length Display Meter2. Voltage/Arc Length Adjust3. Amperage/Wire Speed Adjust4. Setup Button5. Start Button6. Amperage/Wire Speed Display Meter7. Program Indicators8. Program Button9. Left/Right Select Button 10. Crater Button 11. Jog/Purge68910117151026 — 151052 — 265255 Drive Roll Kits and GuidesSelect drive roll kits from chart below according to type and wire size being used. Drive roll kits include four drive rolls, necessary guides and feature an anti-wear sleeve for inlet guide.“V” groove for hard wire Polished stainlesssteel “U” groove for aluminum wires contains “U” groove for soft wire or soft-shelled cored wires “V” knurledhard-shelledcored wires for extremely soft wire or soft-shelled cored wires (i.e., hard facing types)*Accommodates .045- and .047-inch (3/64-inch) wire.Nylon Wire Guides for Feeding Aluminum WireNote: “U” groove drive rolls are recommended when feeding aluminum wire.Wire Guides6Certified by Canadian Standards Association to both the Canadian and U.S. Standards.Conforms to European standards.Gun Specifications (Subject to change without notice.)Note: XR-Aluma-Pro Plus and XR-Pistol Plus guns are only compatible with MPa Plus feeders.Push-Pull Welding Gun OptionsSynchronized, true push-pull wire feed system with any of the MPa Plus feeder options shown on page 4.Available in 15- and 25-foot lengths for extended reach with trouble-free, reliable feeding. Guns are available in either air- or water-cooled versions.Aluminum-series-specific tension setting ensures smooth wire feeding performance with 4000 or 5000 series aluminum wires. Replaceable feed cable liner is designed to provide consistent arc performance. It also reduces parts cost and service time by allowing a simple means of removing and replacing liner and not the complete feed cable.Easy-to-rotate self-seating head tube allows for better access into tight spots, providing excellent current transfer. Isolated, common, knurled drive roll helps reduce wear, reducing down time and cost. Serviceability. These guns feature a cable cover with full-length hook-and-loop closure and integrated strain reliefs for easy cable maintenance and protection. Additionally, the Aluma-Pro Plus guns feature quick con n ections between the control cable and electrical components (trigger, motor, potentiometer).Gooseneck-Style GunPistol Grip GunXR ™-Pistol Plus GunXR-Aluma-Pro ™ Plus Gun7Standard ConsumablesD-1APHead Tubes (6-inch)Air (Long)245979Water 245981T-035AL T-047AL T-062ALN-5818CN-3414 and N-HDC(2-pc)Centerfire NozzlesCenterfire Contact Tips Centerfire DiffusersInner Rear 227416InsulatorsOuter Air Long 229673Outer Water Long230420D-1APT-035AL T-047AL T-062ALN-5818CN-3414 and N-HDC(2-pc)Centerfire NozzlesCenterfire Contact Tips Centerfire DiffusersCollared Insulator232284InsulatorsHead TubesAir Outer 180°M1366Air 180° Straight258474Water 180° Straight258475Water Outer 180°M1369Note: Many other Centerfire ™ options are available. Visit for more information.XR-Aluma-Pro ™ Plus GunXR ™-Pistol Plus Gun8Invision ™MPa Plus MIGRunner ™PackagesPush-Pull PackagesMIGRunner system with running gear/cylinder rack.951843 Invision 352 MPa air-cooled package with single-wire feeder 951844 Invision 352 MPa air-cooled package with dual-wire feeder Packages include:Invision 352 MPa (without auxiliary power) power source Single- or dual-wire 74 MPa Plus wire feeder with drive rolls (.035/.047 in. U-groove and .035/.045 in. V-groove) 25 ft. XR-Aluma-Pro ™ Plus push-pull gun for aluminum 15 ft. Bernard ® BTB Gun 400 AIndustrial MIG 4/0 kit w/Dinse-style connectors (see page 10 for contents)Running gear/cylinder rack (MIGRunner cart for single-wire feeders OR running gear cylinder rack for dual-wire feeders)Push-Only PackagesProvides the same great Invision arc characteristics and synergicMIG capabilities as packages above, but comes with BTB Gun 400 A only (no XR-Aluma-Pro ™ push-pull gun)951411 Invision 352 MPa air-cooled package with single-wire feeder 951500 Invision 352 MPa air-cooled package with dual-wire feeder 951499 Invision 450 MPa air-cooled package with single-wire feeder 951457 Invision 450 MPa air-cooled package with dual-wire feeder Packages include:Invision 352 MPa (without auxiliary power)OR Invision 450 MPa (with 115-volt auxiliary power) power source Single- or dual-wire 74 MPa Plus wire feeder with drive rolls (.035/.045 in. V-groove)15 ft. Bernard ® BTB Gun 400 A (two with with dual-wire feeders)Industrial MIG 4/0 kit w/Dinse-style connectors for Invision 352 MPa OR with lug connectors for Invision 450 MPa (see page 10 for contents) Running gear/cylinder rack (MIGRunner cart for single-wire feeders OR running gear cylinder rack for dual-wire feeders)Invision 450 MPa air-cooled push-only package with single-wire feeder shown.970 Series MPa Plus Control Box/Swingarc ™Boom-Mounted FeedersNote: Models include 10-foot 14-pin interconnecting cord, Bernard ® BTB Gun 400 A (two with dual-wire models) with Centerfire ™ contact tips, and .035/.045-inch drive rolls.Pipe Post (required, order separately) 149838 4-foot pipe post with 18-inch base 149839 6-foot pipe post with 18-inch baseSingle-Wire Models 951438 12 ft. (3.7 m) 951439 16 ft. (4.9 m) Dual-Wire Models 951441 12 ft. (3.7 m) 951442 16 ft. (4.9 m)70 Series MPa Plus Control Box, Cables and Wire Drive Motor AssembliesMPa Plus Wire Drive Motor Assembly 300740 Left-hand drive(for use with push-only guns, or XR-Aluma-Pro ™ Plus and XR ™-Pistol Plus push-pull guns)MPa Plus Motor Control Cable (14 conductor) 254864010 10 ft. (3 m) 254864025 25 ft. (7.6 m) 254864050 50 ft. (15.2 m)Wire Drive Motor Assembly 300741 Right-hand drive MPa Plus Control Box 300739 D-74 MPa PlusSingle-Remote ConfigurationIf using spooled wire you will need to order Feeder Base 195369.Genuine Miller® Accessories Wire Feeders and Guns70 Series Wire FeedersS-74 MPa Plus 951291 Single-wire feederD-74 MPa Plus 951292 Dual-wire feeder Order XR-Aluma-Pro Plus gun and U-groove drive rolls separately to match your aluminum needs. Above models are optimized for Invision 352 MPa and 450 MPa, with push-pull capability.S-74S 951196 Single-wire feederS-74D 951198 Single-wire feederD-74S 951203 Dual-wire feederD-74D 951204 Dual-wire feeder70 Series feeders feature Posifeed™ wire drive assembly and handle a variety of wires. Each includes a 15-foot Bernard® BTB Gun 400 A (two with dual-wire feeders) and .035/.045-inch V-groove drive rolls. See literature M/3.0. Extension Cables247831025 25 ft. (7.6 m)247831050 50 ft. (15.2 m)247831080 80 ft. (24.4 m)Eleven conductors to support contactor control and remote voltage control on all Miller®electronic constant-voltage (CV) 14-pin power sources. Additional functions supported when using the Invision 352 MPa or 450 MPa power source include synergic pulsed MIG, and remote process select and side select capabilities. XR-Aluma-Pro™ Plus Guns301575 15 ft. (4.6 m), air-cooled301574 25 ft. (7.6 m), air-cooled301576 15 ft. (4.6 m), water-cooled301577 25 ft. (7.6 m), water-cooledAbove gun models are specific to the 74 MPa Pluswire feeders.This easy-to-use and easy-to-maintaingooseneck-style MIG gun is designed forpush-pull wire feed systems. Available inair- or water-cooled versions. Gun designallows for better access into tight spots.XR™-Pistol Plus Guns300753 15 ft. (4.6 m), air-cooled300754 25 ft. (7.6 m), air-cooled300757 25 ft. (7.6 m), water-cooledAbove gun models are specific to the 74 MPa Pluswire feeders.This easy-to-use and easy-to-maintainpistol-grip MIG gun is designed for push-pullwire feed systems. Available in air- or water-cooled versions.1/16-inch (1.6 mm) Wire Kit 230708Specially designed for 1/16-inch wire. Includesidler roll, head tube liner and inlet guide.Required when running 1/16-inch wires. Notincluded with standard XR-Aluma-Pro Plus orXR-Pistol Plus guns.Hardwire Liner Kit for Steel and Stainless198377For 15-, 25-, or 35-foot (4.6, 7.6 or 10.6 m)guns. Kit consists of gun head tube linerand feed cable liner. Recommend using.030–.045 inch mild steel or stainless steelelectrode wire (.052- and 1/16-inch wirenot recommended).Phosphorous Bronze Liner (Optional)233999 Long head tube (air or water)233998 Short head tube (air only)Spool Covers057607 For S-74 and left side of D-74 models090389 For right side of D-74 modelsFor 12-inch (305 mm) spool.Note: Spool covers cannot be installed if the wire driveassembly is in a rotated position.Wire Reel Assembly108008For 60-pound (27 kg)coil of wire.Industrial MIG 4/0 Kit with Dinse Connectors300405For Invision 352 MPa power source.Includesflowmeter regulator with 10-foot (3 m) gashose, 10-foot (3 m) 4/0 feeder weld cable withDinse-style connector on one end and a lug onthe other, 15-foot (4.6 m) work cable withDinse-style connector on one end and 600-ampC-clamp on the other.Industrial MIG 4/0 Kit 300390For Invision 450 MPa power source.Includesthe same as the kit above, except weld andwork cables have lugs instead of Dinse-styleconnectors.D-74 MPa Plusfeeder shown.10Genuine Miller ®Accessories (Continued)11Running GearMIGRunner ™ Cart 195445For single-wire feeders. Small footprint and easily maneuverable, with cylinder rack low enough that you do not have to lift bottles.Running Gear Cylinder Rack 300408Holds two large gas cylinders and has gun cable hangers and a consumable drawer in front for easy access. A convenient handle allows the cart to be pulled easily through doorways. System components including power source and single- or dual-wire feeders can be mounted to the cart and secured.Coolant SystemsFor more information see literature AY/7.2.Coolmate ™ 3 043007 115 VFor use with water-cooled torches rated up to 600 amps. Unique paddle-wheel indicator, external filter and easy-fill spout.Coolmate ™3.5 300245 115 VIndustrial, 3.5-gallon cooler designed for water-cooled torches rated up to 600 amps.Coolant 043809Sold in cases of four one-gallon recyclable plastic bottles. Miller coolants contain a base of ethylene glycol and deionized water to protect against freezing to -37 degrees Fahrenheit (-38°C) or boiling to 227 degrees Fahrenheit (108°C). Also contains a compound that resists algae growth.Cable Connectors and AdaptersNote: Invision 352 MPa power sources are equipped with Dinse-style connectors for secondary connections.Dinse/Tweco ® Adapter 042465Dinse/Cam-Lok Adapter 042466One-piece adapter with Dinse-style male plug (to power source) on one end and female receptacle (Tweco or Cam-Lok for weld cable connection) on other end.Dinse-Style Connector Kit042418 Accepts #4 to #1/0 AWG cable size. 042533 Accepts #1/0 to #2/0 AWG cable size. Kit includes one Dinse-style male plug which attaches to the work and/or weld cables and plugs into the Dinse-style receptacles on the power source.Extension Kit for Dinse-Style Cable Connectors 042419Accepts #4 to #1/0 AWG cable size. Used to adapt or extend weld and/or work cables. Kit includes one male Dinse-style plug and onein-line female Dinse-style receptacle.Ordering InformationPower Source and Options Stock No. Description Qty. PriceInvision™ 352 MPa907431 Power source only. 208–575 V with Auto-Line™907431001 Power source only. 208–575 V with Auto-Line™ and auxiliary powerInvision™ 352 MPa Plus 951843 With single-wire feeder and MIGRunner cart (see page 8 for package details)Air-Cooled MIGRunner™ Packages 951844 With dual-wire feeder and running gear cylinder rack (see page 8 for package details)Invision™ 352 MPa Plus951411With single-wire feeder and MIGRunner cart (see page 8 for package details)Air-Cooled MIGRunner™ Packages951500 With dual-wire feeder and running gear cylinder rack (see page 8 for package details)(push-only package w/BTB Gun 400 A)Invision™ 450 MPa907485 Power source only. 230/460 V with auxiliary power907486 Power source only. 575 V with auxiliary powerInvision™ 450 MPa Plus 951499 With single-wire feeder and MIGRunner cart (see page 8 for package details)Air-Cooled MIGRunner™ Packages951457 With dual-wire feeder and running gear cylinder rack (see page 8 for package details)(push-only package w/BTB Gun 400 A)Wire Feeders70 Series MPa Plus Feeder 951291 S-74 MPa Plus. Single-wire feeder optimized for Invision MPa with push-pull capability.(Order XR-Aluma-Pro Plus and Includes Bernard® BTB Gun 400 A and .035/.045 in. V-groove drive rollsU-groove drive rolls separately)951292 D-74 MPa Plus. Dual-wire feeder optimized for Invision MPa with push-pull capability.Includes two Bernard® BTB Gun 400 A and .035/.045 in. V-groove drive rolls70 Series Feeder See page 10Extension Cables See page 10Spool Covers057607 12 in. (305 mm) spool for single-wire feeders or left side of dual-wire feeders090389 12 in. (305 mm) spool for right side of dual-wire feedersWire Reel Assembly 108008 For 60 lb. (27 kg) coilSwingarc Boom-Mounted Feeders951438 12 ft. single-wire model with Bernard BTB Gun 400 A and .035/.045 in. V-groove drive rollswith 70 Series MPa Plus Control Box 951439 16 ft. single-wire model with Bernard BTB Gun 400 A and .035/.045 in. V-groove drive rolls951441 12 ft. dual-wire model with two Bernard BTB Gun 400 A and .035/.045 in. V-groove drive rolls951442 16 ft. dual-wire model with two Bernard BTB Gun 400 A and .035/.045 in. V-groove drive rolls70 Series MPa Plus Control Box 300738 Single-wire control box for remote configurations300739 Dual-wire control box for remote configurationsWire Drive Motor Assemblies 300740 MPa Plus for single-wire remote configurations or left side of dual-wire remote configurations300741 Push-only drive for right side of dual-wire remote configurationsMotor Control Cables See page 9Guns and Gun AccessoriesXR-Aluma-Pro™ Plus Guns See page 10XR™-Pistol Plus Guns See page 10XR-Aluma-Pro™ 1/16-inch (1.6 mm) 230708 Required with 1/16-inch drive roll kit below to run 1/16-inch wireWire KitAccessoriesIndustrial MIG 4/0 Kit 300405 With Dinse-style connectors for Invision 352. See page 10300390 With lugs for Invision 450. See page 10Running GearMIGRunner™ Cart 195445 For single-wire feedersRunning Gear Cylinder Rack 300408 For dual-wire feedersCoolant Systems See page 11. See literature AY/7.2Cable Connectors and Adapters See page 11Date: Total Quoted Price:Distributed by:©2021 Miller Electric Mfg. LLC。
450磨齿机使用说明书

MSG -45(型磨齿机操作说明书荆州机械研究所一、技术参数二、关于砂轮三、研磨前准备事项四、研磨锯片五、机头V 型皮带调整方法六、砂轮厚度选择表附图1、机器简图及主要部件图七、附图2、润滑点图附图3、电气原理图感谢您购买本公司产品,为了让您操作机器更方便,得到更完美的产品,请在操作机器前,仔细阅读操作说明。
起动机器之前,最重要的是要确认安装、调整及润滑,只有这样才能节省时间,并避免伤害。
一、技术参数1、研磨锯片外径:50-450mm2、锯片最大齿距:25mm3、锯片最大齿深:8mm4、锯片最大厚度:8mm5、砂轮转速:4200 RPM6、主电机:AEEFA 2-4/2 0.3/0.18kw 0.91/0.73A 380V7、机器外形(长x 宽x 高):700x700x13008、机器重量:约200kg二、关于砂轮1、砂轮的规格及材质本机所使用的砂轮规格直径为150mm孔径为25mm,厚度则依据锯片的齿型和齿距来选择。
砂轮质料是依锯片材质来选择, 据经验其颗粒系介于60到100之间,硬度介于K 和N 之间,主要是采用瓷质烧结法的砂轮,其他如树脂和橡胶粘结法的砂轮仅用于精细和特别小的齿距。
2、大小夹紧盖和中间保护片的使用方法新机出厂时都附有一组大型的砂轮夹紧盖和中间保护片,此外我们也附有一组小型的砂轮夹紧盖和中间保护片,当砂轮外径磨损变小时,小型可用来替代大型的。
中间保护片是用一种中间带有布纱且坚固和有弹性的黑胶制造而成,其作用是在砂轮和夹紧盖之间作有弹性的连接,以避免砂轮爆裂。
如果没有使用中间保护片,砂轮很容易爆裂,这是非常危险的。
中间保护片在没有使用时,要存放于阴凉处。
使用三年后不得继续使用。
更换夹紧盖时要特别注意清洁,避免让夹紧盖上的灰尘、研磨屑、杂质等进入砂轮心轴的轴承。
3、砂轮的测试和安装装砂轮之前,要先做检查。
拿一只小圆铁棒轻敲砂轮,在正常情况,没有受损的瓷质熔结剂砂轮和矿物熔结剂砂轮会发出清脆的声音。
CK450立磨说明手册

在没有仔细阅读并理解本手册所述的关于操作、润滑、维护或维修的内容之前,请不要进行任何关于本产品的操作、润滑、维护或维修的作业。
在本手册中,有两种等级的警示标志:“危险”和“注意”。
危险:表示不当的操作、维护或维修可能导致的死亡或严重伤害。
注意:表示由于不当的操作、维护或者维修可能导致的轻微伤害或财产损失。
★如果忽视警示标志,即使是“注意”警示,也可能带来严重后果。
I 摘要1、结构简述2、主要技术参数II.结构部件1. 壳体部分1) 壳体2) 进风管3) 喷口环及导风环2.基础部分1) 减速机底座2) 摇臂轴承底座及连接梁3) 液压缸底座4) 电机底座3.磨盘总成4.磨辊总成1) 磨辊2) 磨辊润滑系统5.摇臂总成6.立磨主减速机7.液压张紧系统8.喷水系统9.保护仪表1)进油泵的启动条件2)立磨的启动条件3)喂料系统的启动条件4)运行过程中停磨条件5)报警III. 操作、检验和维护1. 中控操作(CCR)1-1开磨准备1-2开磨1-3停磨1-4 运行中的维护和检验2.周期检查维护3.调整3-1 磨辊高低限位的调整3-2 摇臂行程挡块位置的调整3-3 挡料环高度的调整3-4 运行操作参数的调整IV. 主要部件及耐磨部件的拆卸和装配1.磨辊的更换2.磨盘衬板的更换3.减速机的更换4.减速机的安装V.附图Fig. 1-1 总装图1/2Fig. 1-2 总装图2/2Fig. 2-1 壳体装配图01Fig. 2-2 壳体装配图02Fig. 3 底座装配图Fig. 4 磨盘装配图Fig. 5 磨辊装配图Fig. 6 摇臂装配图Fig. 7 磨辊润滑油站原理图Fig. 8 液压站原理图Fig. 9 主减速机油站原理图Fig. 10 磨辊空气密封原理图Fig. 11 喷水系统原理图Fig. 12 摇臂连接销拔出装置Fig. 13 翻转液压缸固定装置Fig. 14 磨辊检修手册Fig. 15 辊皮的吊装Fig. 16 锥环拆卸手册Fig. 17 磨盘衬板定位装置的拆卸手册Fig. 18 磨盘支撑Fig. 19 轴承端盖Fig. 20 辊皮测量装置Fig. 21 磨盘衬板测量装置Fig. 22 磨辊高度探测开关座Fig. 23 辊皮及轴承的拆卸Fig. 24 轴承组装Fig. 25 磨盘衬板定位装置Fig. 26 液压缸销拔出装置I.概述1.结构概述CK辊式磨是由作为研磨部件的磨辊部分和上部的由转子及回灰内筒组成的选粉机部分组成(详见分项介绍)物料经过配料被输送皮带经由回转下料器及下料溜子送入磨内。
数控磨齿机操作规程

数控磨齿机操作规程数控磨齿机操作规程1、操作者必须熟悉本设备结构性能,传动原理以及加工应用程序,经考试合格取得操作证后方可独立操作。
2、操作者要认真做到“三好”(管好、用好、修好)“四会”(会使用、会保养、会检查、会排除故障)。
3、操作者必须遵守使用设备的“五项纪律”和维护设备的“四项要求”的规定。
4、操作者要随时按照“巡回检查内容”的要求对设备进行检查。
5、严格按照设备用油要求进行加油,做到润滑“五定”(定时、定点、定量、定质、定人)。
6、严禁移动或损坏机床上的警示标牌。
7、多人操作时,相互间应协调一致。
8、严禁超负荷、超规范使用设备。
9、当设备停机八小时以上,应先启动机床液压润滑5—10分钟,然后再用手动方式运转各运动轴,查看各部运转是否正常;确认运转正常、润滑良好、无任何报警、方能开始工作。
10、未经许可禁止打开电控柜。
11、禁止在设备上堆放杂物、工具和附件,严禁用撞击方式进行工件找正。
12、禁止用手或其它任何方式接触正在旋转的主轴、工件或其它运动部位。
13、禁止进行尝试性操作,禁止加工过程中变速。
14、工作中注意防止冷却液混入液压系统,防止棉纱等废弃物掉入机床内部。
15、装卸和测量工件时,必须将砂轮主轴退离到安全位置。
16、执行测量程序时,务必再次确认测量参数的准确性。
17、合理选用砂轮和设定磨削参数。
18、更换砂轮时,必须严格检查,防止砂轮有裂纹,必要时须进行静平衡。
19、安装砂轮时内孔与法兰盘径向间隙要均匀,两侧垫好0.5至2mm纸板,紧固螺钉时用力要均匀、合适,严禁用力过猛或敲击。
20、砂轮修整前,必须再次核对相关参数,准确无误后方能加工。
21、砂轮靠近工件时不准用自动进给;砂轮未离开工件前不准停车。
22、使用手轮或快速移动方式移动各轴时,一定要看清各轴方向`“+、-”号标牌后再移动。
移动时先慢转手轮观察机床移动方向无误后方可加快移动速度。
23、启动程序刚开始工作时,右手作好按程序停止按钮的准备,程序在运行当中手不能离开程序停止按钮,如有紧急情况立即按下程序停止按钮。
清新海螺CK450磨中控操作规程
清新海螺1 目的本规程旨在统一操作思想,使操作有序化、规范化,力求做到优质、稳定、高产、低耗,生产出合格的生料,确保窑系统的生料供应。
2 范围本规程适用于原料系统中控操作,即从石灰石堆场、页岩、铁质原料、粘土储库或堆场至生料入库部分及窑尾高温风机以后的废气处理部分。
3 引用标准《工艺设备性能参数》、《工艺规程》、《设备说明书》等4 操作指导思想⑴在各专业人员及现场巡检人员的密切配合下,根据入磨物料水分、粒度、易磨性、振动、电流、磨机出口温度、系统风量等情况,及时调整磨机的喂料量、研磨压力、选粉机转速及各挡板开度,努力做到立磨运行平稳,提高粉磨效率,均化库料位保持在60%以上。
⑵树立安全生产、质量第一的观念,精心操作,不断摸索总结,在操作中充分利用计量监测仪表和先进的DCS自动控制等技术手段,整定出系统最佳运行参数,以达到优质高产,低消耗及长期安全和文明生产的目的。
⑶树立全局观念与窑、发电操作员互相协调,密切配合,三班操作员必须经常交流操作思想,做到统一操作,达到连续稳定运行的目的。
⑷操作员对生料质量直接负责,严格按照各项控制指标进行操作。
5工艺流程(注:因A、B线设备配臵相同,以B线为例:所有设备代码以“2”开头,A线及公用设备以“1”开头)1 配料站进料工艺流程简介⑴原料配料站有四个配料仓,分别为石灰石库2301、砂岩仓2302、铁矿石仓2304、粘土仓2303。
⑵向石灰石仓进料,经1203桥式刮板取料机刮至堆场中心卸入1204及1205、1206皮带,分别卸入A线和B线石灰石仓,1204皮带上设有临时下料口,在1203故障时直接进料。
⑶页岩仓进料。
页岩由行车抓料入2302仓。
⑷铁粉仓进料。
铁粉由行车抓料入2304仓。
⑸粘土仓进料,由行车抓料入2303仓。
2 原料粉磨及废气处理工艺流程简介:1、配料站的三个仓内的砂岩经中型板式喂料机2302(1)卸入皮带秤2302(2)喂入2305皮带,铁矿石经中型板式喂料机2304(1)卸入皮带秤2304(2)喂入2305皮带粘土经中型板式喂料机2303(1)卸入皮带秤2303(2)喂入2305皮带,卸入到2306皮带,石灰石经中型板式喂料机2301(1)卸入皮带秤2301(2)喂入2306皮带再经2307气动推杆三通阀,通过2308回转锁风阀喂入磨机。
450磨齿机使用说明书

450磨齿机使用说明书MSG-450型磨齿机操作说明书荆州机械研究所目录一、技术参数二、关于砂轮三、研磨前准备事项四、研磨锯片五、机头V型皮带调整方法六、砂轮厚度选择表七、附图1、机器简图及主要部件图附图2、润滑点图附图3、电气原理图感谢您购买本公司产品,为了让您操作机器更方便,得到更完美的产品,请在操作机器前,仔细阅读操作说明。
起动机器之前,最重要的是要确认安装、调整及润滑,只有这样才能节省时间,并避免伤害。
一、技术参数1、研磨锯片外径:50-450mm2、锯片最大齿距:25mm3、锯片最大齿深:8mm4、锯片最大厚度:8mm5、砂轮转速:4200 RPM6、主电机:AEEFA 2-4/2 0.3/0.18kw 0.91/0.73A 380V7、机器外形(长x宽x高):700x700x13008、机器重量:约200kg二、关于砂轮1、砂轮的规格及材质本机所使用的砂轮规格直径为150mm孔径为25mm,厚度则依据锯片的齿型和齿距来选择。
砂轮质料是依锯片材质来选择,据经验其颗粒系介于60到100之间,硬度介于K和N之间,主要是采用瓷质烧结法的砂轮,其他如树脂和橡胶粘结法的砂轮仅用于精细和特别小的齿距。
2、大小夹紧盖和中间保护片的使用方法新机出厂时都附有一组大型的砂轮夹紧盖和中间保护片,此外我们也附有一组小型的砂轮夹紧盖和中间保护片,当砂轮外径磨损变小时,小型可用来替代大型的。
中间保护片是用一种中间带有布纱且坚固和有弹性的黑胶制造而成,其作用是在砂轮和夹紧盖之间作有弹性的连接,以避免砂轮爆裂。
如果没有使用中间保护片,砂轮很容易爆裂,这是非常危险的。
中间保护片在没有使用时,要存放于阴凉处。
使用三年后不得继续使用。
更换夹紧盖时要特别注意清洁,避免让夹紧盖上的灰尘、研磨屑、杂质等进入砂轮心轴的轴承。
3、砂轮的测试和安装装砂轮之前,要先做检查。
拿一只小圆铁棒轻敲砂轮,在正常情况,没有受损的瓷质熔结剂砂轮和矿物熔结剂砂轮会发出清脆的声音。
原料磨操作注意事项
全椒海螺液压缸断裂图片:
202X
谢谢大家
单击此处添加副标题
关于原料磨联锁相关知识讲解
2013年7月
联锁的定义
启动联锁:指在设备启动前必须 满足,启动后可以取消的联锁, 如风机启动前的关限位联锁;
保护联锁:指设备内部的,为保 护该设备自身安全的联锁,在设 备启动的前后都不能取消,如主 电机定子温度,轴承温度等。
运行联锁:指在设备运行前后都 必须满足的联锁,一般包含了前 述几种联锁。
原料磨操作运行知识培训
原料磨操作画面
2013年7月
CK-450原料磨 结构特点
单击此处添加副标题
CK-450磨机结构
2013年7月
原料磨设计产量 的决定因素
单击此处添加副标题
1
立磨的设计产量与 磨盘直 径及转速 、磨辊数量及宽 度、喷咀环面积、 研磨压 力 、磨通风量、挡料环高 度等因素有关。
16路高压力>2,3 MPa
TON3m TON3m
TON3m
&
油泵停机 润滑压力<0.12MPa 2点任意滚动轴温>80℃ 4点任意滑动轴温>65℃
润滑油温>65℃
油箱油温<15℃
油箱液位<300mm 高压力<3,4 MPa
16路任意4路高压力<2,3 MPa
16路相邻2路高压力<2,3 MPa
TON2S
造成立磨差压过高的 原因有哪些?在操作
中你将如何调整?
01
系统通风不畅;调整
06
02
通风量。
喂料量过大;调整喂量
磨机出口温度过高; 降低出口温度
05
03
入磨物料粒度大;调整 入磨物料粒度
CK450立磨介绍解读

1 1 4
液位开关 差压开关 流量开关
-
-
2.3 磨辊液压油站的检测仪表
序号 1 2
用途 NO.1/2/3/4磨辊位置 磨辊张紧压力
数量 4 2
检测元件 超声波 -
变送器 US/TM P/TM
量程 0~150 mm 0~20 MPa
输出信号 4 - 20 mA 4 - 20 mA
3 4
5 6
NO.1~4 磨辊在高位 NO.1~4 磨辊在低位
5.2 磨辊液压油站控制概述
磨辊液压站中控控制方式有下述几种运行方式:
1、慢速升辊模式 2、初始等待模式
5、自重降辊模式 6、重喂料等待模式
3、初始降辊模式
4、快速升辊模式
7、研磨压力控制加压模式
8、研磨压力控制减压模式
*
磨辊液压站还可通过现场进行升降辊的操作。
5.2 磨辊液压油站控制概述
准备启动磨机前,选粉机、润滑油站、密封风机 等辅助设备开机,磨辊液压站收到慢速升辊命令
5.1 磨辊润滑油站控制概述
磨辊润滑油站DCS控制信号
序号 1 2 3 4 5 6 信号名称 加热器备妥 磨辊润滑站中控操作状态确认 加热器运行 油站运行 磨辊润滑站至主电机启动条件 磨辊润滑站至喂料运行条件 PLC地址 Q96.0 Q96.1 Q96.2 Q96.3 Q96.4 Q96.5 备注 L6-4 B11-2 L6-1 所有油泵运行 B6-4 B6-3
磨辊液压站液位 磨辊液压站液位
4 4
1 2
接近开关 接近开关
液位开关 温度开关
-
-
无源触点 无源触点
无源触点 无源触点
3 磨辊位置传感器及开关
主电机
3 磨辊位置传感器及开关 仪表参数设置
Omega CA450 过程多功能测试器说明书

Q-1QU 4 to 20 mA Step,0 to 100% Toggle, Auto Step, Sweep Output U T ransmitter Simulate by SINK Function U H ART ® Mode Setting with Loop Power (Adds 250Ω Resistor)U 24V Loop Power Supply and mAMeasurement Available Simultaneously U H igh AccuracyMeasurement of DC mA 0.05%, 30.000 mA U D CS Power Supply Crest ValueMeasurement by Peak Hold Function U D irect Reading (ACA/DCA) of Various Signals by Sensor Mode U D ata Transmission by PC Communication with IR-USB*Process MultimeterLoop Power, 4 to 20 mA Digital Multimeter Output FunctionThe Omega ® Ca450 Process multimeter is a portable test instrument to combine a digital RmS multimeter and a loop calibrator to give processtechnicians the same functionality in one tool. The model Ca450provides 24V loop power, reducing the need for carrying a separate power supply when performing transmitter testing. and with its built-in, selectable 250Ω HaRT resistor, it also eliminates the need for a separate resistor. Process technicians can now do the same job while carrying less equipment.CA450 shown smaller than actual size.CA450 shown calibrating a tunable diode laser during a final inspection test.* For details visit /ir-usbQ-2OMEGACARE SM extended warrantyprogram is available for models shown on this page. Ask your sales respresentative for full details when placing an order.OMEGACARE SM covers parts, labor andequivalent loaners.Q-3QOrdering Example: CA450, process multimeter with loop power and 4 to 20 mA output function.OCW-2, OMEGACARE SM extends standard warranty to an additional two years.SpecificationsMeasurement Functions: DC voltage, aC voltage, DC current, resistance, frequency, continuity check, diode test; data hold (D•H), auto hold (A•H), peak hold (P•H), auto range (Auto), range hold (range hold), maximum, minimum, and average value recording and measurement, zero adjustment (q), relative measured value display (ReL, ReL %), 24V loop power supply, internal resistor on/off for HaRT communicationOutput Functions: 20 am DC current for current output SOURCe and current output SImULa Te (SINK); current span switching and current sweep outputMeasurement Operation Method: modulationOutput: multiplicative DaDisplay: 5-digit LCD (7 segment)Numeric Display, DC Current: Measurement: 33000 Output: 25000 Frequency: 19999 Other: 6600Sub Display: Displayssupplemental information for various functionsPolarity Indicator: automatic display; only the minus sign “–” appears Over Range Indicator: “OL ”Low-Battery Indicator: appears when the battery voltage is below the operating voltageMeasurement Cycle:2.5 to 5 times a second (however, frequency measurement takes place once a second)Operating Temperature and Humidity: -20 to 55°C (-4 to 131°F) (80% RH or less) with no condensation; within the range of 40 to 55°C (104 to 131°F), the humidity must be 70% RH or lessS torage Temperature and Humidity: -40 to 70°C (-40 to 158°F) (70% RH or less) with no condensationTemperature Coefficient (Typical): In the ranges of -20 to 18°C (-4 to 64.4°F) and 28 to 55°C(82.4 to 131°F), add the accuracy of 23°C ± 5°C × 0.1/°CPower Supply: 4 “aa” alkaline batteries (1.5 V LR6) includedBattery Life: When using alkaline batteriesDC Voltage Measurement: approximately 140 hoursDC Current Output (SIMULATE): approximately 140 hoursDC Current Output (SOURCE) 12 mA (500 q load): approximately 10 hoursInsulation Resistance: 100 m Ω or greater at 1000 VdcWithstand Voltage: 6.88 kVac for five seconds (between the input terminals and the case)External Dimensions: approximately 90 W x 192 H x 49 mm D (3.5 x 7.5 x 1.9")Weight: approximately 600 g (1.3 lb)(including the batteries)Safety Compliant Standards: eN61010-1 and eN61010-031Measurement Categories: 1000V Ca TIII, 600V Ca TIVFor Current Measurement and Output: 48 V maximum, 100 ma maximum Ca T ILead Cables (98064): 70 Vdc, 100 ma CaT I; pollution degree 2, indoor use Vibr ation: Sweep vibrationfrequencies 10 to 5 Hz to 10 Hz; amplitude 0.15 mm (peak value); duration 30 minutesShock: 1 m (3.3') drop test as defined by safety standardsAltitude: 2000 m (6562') or less EMC Standards: eN61326-1 Class B, eN61326-2-2; eN55011 Class B group 1; influence of radiatedimmunity: In RF electromagnetic fields of 3 V/m EN61326-1:AC Voltage Measurement, 600 mV Range: 1.5% of range DC Voltage Measurement, 600 mV Range: 1% of range DC Current Measurement, All Ranges: 1.5% of rangeDC current Output: 1.5% of range EN61326-2-2:AC/DC Voltage Measurement, 6V Range or Higher:Within 5 times the accuracy。
CK450操作介绍

回转下料锥 夹层必须保 持无积料, 让热风畅通。 夹层在停机 时要常检查;
此处内部容易磨损,烘 干层积粉状物料,影响通 风效果,造成内部结皮堵 料。
为让热风更流畅 特加一道风管
回转阀下料 锥顶部原先 孔门不便于 检查,后经 过技改开个 小孔门。
孔门开处, 停机检查 时可看锥 部磨损情 况
CK-450立磨生产过程中常见问题 CK-450立磨生产过程中常见问题
4、振动给料机输送能力达不到吐渣量要求
在试生产的时候,CK450立磨所用 在试生产的时候,CK450立磨所用 的排渣设备是振动给料机,由于磨机 本身吐渣量比较大,加上振动给料机 的输送能力比较小,所以造成多次磨 机刮板腔下料口堵料,给试生产带来 了很大的困难,后面经研讨决定和结 合实际情况,将振动给料机换成了皮 带输送机。
闭环管理的功能 正反馈闭环管理系统理论是指在传统和现 代企业管理系统基础上构造具有激励约束 性质的正反馈环节(正反馈机制),将开 环管理系统转变成闭环管理系统,从而显 环管理系统转变成闭环管理系统,从而显 著改善企业管理系统的功能, 著改善企业管理系统的功能,提高企业效 增强企业内部的凝聚力、 率,增强企业内部的凝聚力、驱动力和竞 争力,并使系统本身产生自激发展功能, 争力,并使系统本身产生自激发展功能, 促进企业良性循环。 促进企业良性循环。
基本概念构成 正、负反馈 在自然科学和社会科学领域里,存在 着反馈这一概念,如反馈电路、反馈信息 等。一般来说,凡是把系统末端的某个或 某些量用某种方法或途径送回始端,就叫 反馈。从反馈对系统所产生的作用来分, 可把反馈分为正反馈和负反馈。正反馈可 可把反馈分为正反馈和负反馈。正反馈可 对系统的某个功能起到增强的作用, 对系统的某个功能起到增强的作用,负反 馈则可对该功能起到削弱的作用。 馈则可对该功能起到削弱的作用。
数控磨齿机操作规程
数控磨齿机操作规程1、操作者必须熟悉本设备结构性能,传动原理以及加工应用程序,经考试合格取得操作证后方可独立操作。
2、操作者要认真做到“三好”(管好、用好、修好)“四会”(会使用、会保养、会检查、会排除故障)。
3、操作者必须遵守使用设备的“五项纪律”和维护设备的“四项要求”的规定。
4、操作者要随时按照“巡回检查内容”的要求对设备进行检查。
5、严格按照设备用油要求进行加油,做到润滑“五定”(定时、定点、定量、定质、定人)。
6、严禁移动或损坏机床上的警示标牌。
7、多人操作时,相互间应协调一致。
8、严禁超负荷、超规范使用设备。
9、当设备停机八小时以上,应先启动机床液压润滑5—10分钟,然后再用手动方式运转各运动轴,查看各部运转是否正常;确认运转正常、润滑良好、无任何报警、方能开始工作。
10、未经许可禁止打开电控柜。
11、禁止在设备上堆放杂物、工具和附件,严禁用撞击方式进行工件找正。
12、禁止用手或其它任何方式接触正在旋转的主轴、工件或其它运动部位。
13、禁止进行尝试性操作,禁止加工过程中变速。
14、工作中注意防止冷却液混入液压系统,防止棉纱等废弃物掉入机床内部。
15、装卸和测量工件时,必须将砂轮主轴退离到安全位置。
16、执行测量程序时,务必再次确认测量参数的准确性。
17、合理选用砂轮和设定磨削参数。
18、更换砂轮时,必须严格检查,防止砂轮有裂纹,必要时须进行静平衡。
19、安装砂轮时内孔与法兰盘径向间隙要均匀,两侧垫好0.5至2mm纸板,紧固螺钉时用力要均匀、合适,严禁用力过猛或敲击。
20、砂轮修整前,必须再次核对相关参数,准确无误后方能加工。
21、砂轮靠近工件时不准用自动进给;砂轮未离开工件前不准停车。
22、使用手轮或快速移动方式移动各轴时,一定要看清各轴方向`“+、-”号标牌后再移动。
移动时先慢转手轮观察机床移动方向无误后方可加快移动速度。
23、启动程序刚开始工作时,右手作好按程序停止按钮的准备,程序在运行当中手不能离开程序停止按钮,如有紧急情况立即按下程序停止按钮。
CK-450立磨安装手册
目录I. 安装步骤 (1)1.预埋组件的定位 (1)2.基础件的标记及确认Marking and confirmation of the foundation position (1)3. 安装垫铁Installation of Erection liners (1)4. 减速机、主电机及液压缸底座的安装Installation of Base frame for Reducer, Motor base and cylinder base (2)5.摇臂轴承底座01&02的安装Installation of Arm bearing base frame 01 & 02 (4)6.基础底板及摇臂底座的灌浆Grouting of base frames and arm bearing base frame57. 减速机的安装Installation of Mill reducer (6)8. 液压缸的安装Installation of Hydraulic cylinder (6)9.进风管的安装Installation of Wind box (7)10. 磨盘与刮板的组装Assembling of Scraper under the table (8)11. 磨盘与刮板的安装Installation of Table with scraper (8)12. 磨盘衬板的安装Installation of Table liner (8)13. 挡料环的安装Installation of Dam ring (9)14. 楼梯栏杆的安装Installation of Stairs and hand rail (9)15.摇臂及液压缸臂的组装Installation of Roller arm and Cylinder arm (9)16.磨辊总成的安装Installation of Roller assembly (12)17.立磨壳体01 的安装Installation of Mill shell 01 (14)18. 导风环和喷口环的安装Installation of Armor ring and Nozzle (14)19.选粉机的安装Installation of Classifier (15)20. 磨辊摇臂翻入磨内Swing-in of the Roller arm (16)21.摇臂保护罩的安装Installation of protectors (17)22. 主电机的安装Installation of Main motor (18)23. 液压站和磨辊润滑油站的安装Installation of Hydraulic and Lubrication unit . 1824. 密封风机及风管的安装Installation of seal air blower and piping (18)25. 喷水系统及其管道的安装Installation of water spray unit and piping (18)II.预埋组件的安装Setting procedure for Anchor frame (18)1. FL+300以下的预埋件Under the level of FL+300 (18)2. FL+300以上的预埋件Over the level of FL+300 (22)Ⅲ.摇臂轴承基础的灌浆步骤Execution procedure of concrete for RC stand………21Ⅳ.验收内容Inspection record sheet………………………………………………… .22Ⅴ.安装计划Schedule for installation………………………………………………………32Ⅵ.图纸Drawings (33)I. 安装步骤Installation procedure(*摇臂基础预埋组件安装步骤请参照第Ⅲ节.)后,安装斜垫铁。
MG—450型锯片研磨机操作规程

M G—450型锯片研磨机操作规程
一、操作员操作前必须熟悉机器的性能,用途及操作注意事项。
二、操作人员在操作时须穿适当的衣服,不准戴手套,非操作人员不得接近工
作机器。
三、装砂轮之前,要先做检查。
四、研磨前准备:
1、装置锯片;
2、圆锯片旋转松紧调整;
3、锯片厚度进行调整;
4、切削
角调整;5、齿型变换;6、研磨前应决定是否要磨高低齿,如要磨高低齿则调整高低齿差调整杆至需要之刻度,表中每刻度0.1㎜。
五、研磨锯片:
1、齿锯和推爪调整;
2、齿高低差的设定;
3、开始研磨;
4、倒角研磨。
六、操作人员因事要离开岗位时必须先关机,杜绝在操作中与人攀谈。
七、机器运转异常时,应立即停机交专业人员检修,检修时确保电源断开。
八、下班前必须把机器周围的铁屑清理干净,马达上不准积存铁屑,并作好设
备的日常保养工作。
Leica Biosystems Aperio GT 450 使用者指南说明书
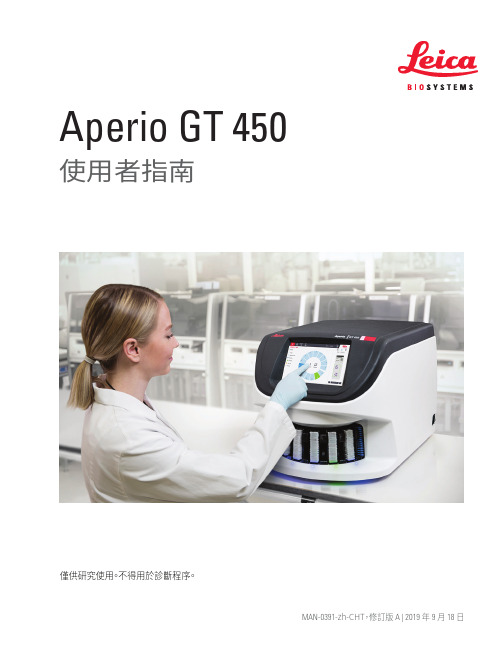
Aperio GT 450使用者指南MAN -0391-zh-CHT ,修訂版 A | 2019 年 9 月 18日僅供研究使用。
不得用於診斷程序。
Aperio GT 450 使用者指南,修訂版 A © Leica Biosystems Imaging, Inc. 20192Aperio GT 450 使用者指南版權聲明ÌÌ© 2019 Leica Biosystems Imaging, Inc. 版權所有,保留所有權利。
LEICA 和 Leica 標誌是 Leica Microsystems IR GmbH 的註冊商標。
Aperio 是 Leica Biosystems 公司集團在美國及其他國家(選擇性)的商標。
其他標誌、產品和/或公司名稱可能為其各自所有人之商標。
ÌÌ本產品受註冊專利保障。
如需專利列表,請聯絡 Leica Biosystems 。
客戶資源ÌÌ如需 Leica Biosystems Aperio 產品及服務的最新資訊,請造訪 /Aperio 。
免責聲明ÌÌ本手冊不能取代 Leica Biosystems Imaging 提供的詳細操作員培訓或其他進階的指示。
若發生任何儀器故障,應立即聯絡 LeicaBiosystems Imaging 駐場代表尋求協助。
硬體安裝應僅由獲得認證的 Leica Biosystems Imaging 服務工程師進行。
23GT450客戶服務部聯絡資訊請聯絡您所在國家的辦公室尋求技術協助。
澳洲:96 Ricketts RoadMount Waverly, VIC 3149AUSTRALIA電話:1800 625 286(免付費)週一至週五上午 8 時 30 分至下午 5 時(澳洲東部時間)。
電子郵件:lbs-anz-service@奧地利:Leica Biosystems Nussloch GmbHTechnical Assistance CenterHeidelberger Strasse 17Nussloch 69226GERMANY電話:0080052700527(免付費)國內電話:+43 1 486 80 50 50電子郵件:support.at@比利時:電話:0080052700527(免付費)國內電話:+32 2 790 98 50電子郵件:support.be@加拿大:電話:+184****2262(免付費)國際直撥電話:+176****1150電子郵件:TechServices@中國:中國上海市黃浦區打浦橋徐家匯路 610 號日月光中心廣場 17 樓郵遞區號:200025電話:+86 4008208932傳真:+86 21 6384 1389電子郵件:@遠端照護電子郵件:@ 丹麥:電話:0080052700527(免付費)國內電話:+45 44 54 01 01電子郵件:support.dk@ 德國:Leica Biosystems Nussloch GmbH Technical Assistance Center Heidelberger Strasse 17Nussloch 69226GERMANY電話:0080052700527(免付費)國內電話:+49 6441 29 4555電子郵件:support.de@ 愛爾蘭:電話:0080052700527(免付費)國內電話:+44 1908 577 650電子郵件:support.ie@ 西班牙:電話:0080052700527(免付費)國內電話:+34 902 119 094電子郵件:support.spain@ 法國:電話:0080052700527(免付費)國內電話:+33 811 000 664電子郵件:support.fr@ 義大利:電話:0080052700527(免付費)國內電話:+39 0257 486 509電子郵件:support.italy@ 日本:1-29-9 Takadannobaba, Sinjuku-kuTokyo 169-0075JAPAN荷蘭:電話:0080052700527(免付費)國內電話:+31 70 413 21 00電子郵件:support.nl@Aperio GT 450 使用者指南,修訂版 A © Leica Biosystems Imaging, Inc. 20193紐西蘭:96 Ricketts RoadMount Waverly, VIC 3149AUSTRALIA電話:0800 400 589(免付費)週一至週五上午 8 時 30 分至下午 5 時(澳洲東部時間)。
- 1、下载文档前请自行甄别文档内容的完整性,平台不提供额外的编辑、内容补充、找答案等附加服务。
- 2、"仅部分预览"的文档,不可在线预览部分如存在完整性等问题,可反馈申请退款(可完整预览的文档不适用该条件!)。
- 3、如文档侵犯您的权益,请联系客服反馈,我们会尽快为您处理(人工客服工作时间:9:00-18:30)。
MSG-450型
磨齿机操作说明书荆州机械研究所
目录
一、技术参数
二、关于砂轮
三、研磨前准备事项
四、研磨锯片
五、机头V型皮带调整方法
六、砂轮厚度选择表
七、附图1、机器简图及主要部件图
附图2、润滑点图
附图3、电气原理图
感谢您购买本公司产品,为了让您操作机器更方便,得到更完美的产品,请在操作机器前,仔细阅读操作说明。
起动机器之前,最重要的是要确认安装、调整及润滑,只有这样才能节省时间,并避免伤害。
一、技术参数
1、研磨锯片外径:50-450mm
2、锯片最大齿距:25mm
3、锯片最大齿深:8mm
4、锯片最大厚度:8mm
5、砂轮转速:4200 RPM
6、主电机:AEEFA 2-4/2 0.3/0.18kw 0.91/0.73A 380V
7、机器外形(长x宽x高):700x700x1300
8、机器重量:约200kg
二、关于砂轮
1、砂轮的规格及材质
本机所使用的砂轮规格直径为150mm孔径为25mm,厚度则依据锯片的齿型和齿距来选择。
砂轮质料是依锯片材质来选择,据经验其颗粒系介于60到100之间,硬度介于K和N之间,主要是采用瓷质烧结法的砂轮,其他如树脂和橡胶粘结法的砂轮仅用于精细和特别小的齿距。
2、大小夹紧盖和中间保护片的使用方法
新机出厂时都附有一组大型的砂轮夹紧盖和中间保护片,此外我们也附有一组小型的砂轮夹紧盖和中间保护片,当砂轮外径磨损变小时,小型可用来替代大型的。
中间保护片是用一种中间带有布纱且坚固和有弹性的黑胶制造而成,其作用是在砂轮和夹紧盖之间作有弹性的连接,以避免砂轮爆裂。
如果没有使用中间保护片,砂轮很容易爆裂,这是非常危险的。
中间保护片在没有使用时,要存放于阴凉处。
使用三年后不得继续使用。
更换夹紧盖时要特别注意清洁,避免让夹紧盖上的灰尘、研磨屑、杂质等进入砂轮心轴的轴承。
3、砂轮的测试和安装
装砂轮之前,要先做检查。
拿一只小圆铁棒轻敲砂轮,在正常情况,没有受损的瓷质熔结剂砂轮和矿物熔结剂砂轮会发出清脆的声音。
砂轮上不可以有纸凸缘,必要时使用铜丝刷或热水清洗,以便将砂轮孔口打开,以增加安全性。
安装砂轮时,要确认能够用手毫无困难的安装,同时注意砂轮孔径和砂轮夹紧盖的间隙也不可太大,否则砂轮会产生偏摆的离心力,造成偏心。
4、砂轮厚度及砂轮形状的选择
根据所要研磨的齿形和齿距选择所要使用的砂轮厚度及砂轮形状。
曲线齿(曲背齿)所使用砂轮的厚度约为所要研磨齿距的0.4~0.5倍,其形状断面为半圆形,如图1所示。
三角齿所使用砂轮的厚度约为所要研磨齿距的0.3~0.5倍,其形状断面为三角形,如图2所示。
图 1图 2
5、砂轮安装及试运转
完成了以上这些步骤,便可把砂轮夹紧盖、中间保护片及砂轮装在砂轮轴上,再将制动扳手插入皮带轮孔内,另一端使用开口扳手将砂轮锁紧。
每次砂轮安装后,都要试运转5分钟,确信安装正常。
这段时间,不允许有
人进入危险区。
三、研磨前准备事项
1、装置锯片(参照附图一、二、三)
测量锯片外径与中心孔径选好定心垫圈30,把锯片装到锯片锁紧螺杆座7,再将垫圈和锯片锁紧螺帽6锁紧。
然后放松锯片座固定螺丝5,再移动锯片座9,使锯片外径之尺寸与锯片座刻度尺23对齐。
再把螺丝5锁紧。
2、使用导磨片研磨
如锯片已严重磨损或新开齿时,须使用导磨片。
一般而言,使用导磨片比较容易研磨,应尽可能使用导磨片。
夹紧的方法如附图三所示。
3、锯片旋转松紧之调整
如果锯片的旋转没有在适当的松紧状态,锯片的前进位移会不稳定,因此当锯片安装好后,需用双手旋转锯片,试其旋转之松紧,如果松紧不当,用17mm 开口扳手,调整螺帽31,使锯片的旋转松紧适当。
松紧的原则,以能消除锯片旋转之惯性,及砂轮之平衡即可,不要太紧。
4、锯片厚度调整
为使锯齿的研磨能上下平均,砂轮的中心和锯片厚度的中心应成一直线,调整的方法是将夹紧座固定螺丝24调松。
再以制动扳手调整锯片厚度调整螺帽11,再看锯片厚度指示表26,使锯片厚度表的指示与锯片厚度相同,再锁紧夹紧座螺丝24。
5、切削角的调整
由于锯片所要切削的材料材质有变化,所以要依被切削材料的材质来选择适用的切削角。
切削角的调整方法是:先放松夹紧座螺丝24,然后旋转锯片座基座至所要的切削角度,再锁紧夹紧座螺丝24。
6、齿形变换
本机器可提供两种齿形:三角齿和曲线齿,研磨前应决定好齿型。
转换齿型应于机器运转时,移开盖板,以“L”型扳手变换齿形双换钮21。
选择所要研磨的
齿形。
7、高低齿差
研磨前应决定是否要磨高低齿,如果磨高低齿则调整高低齿差调整杆至需要之刻度,表中每刻度0.1mm。
注:本资料仅供参考,必须配合实际材质、材料之夹持方式、切削油、切削速度等因素作调整。
四、研磨锯片
1、齿距和推爪调整
将机头快速退离杆16慢慢放松,使机头回复研磨状态。
注意砂轮应与锯片保持10mm以上距离,然后启动机器。
调整齿距调整杆15调整推爪行程,使推爪的移动距离约11/3齿距。
2、齿深调整
机头快速退离杆16慢慢放松,启动机器后,此时机头会出现规则的前后运动。
使用齿深调整螺杆14大约设定齿深,齿深约为齿距的0.3~0.35倍。
3、齿高低差的设定
机器启动后,如果磨高低齿则调整高低齿差调整杆22。
指示指针及刻度25会显示其值,如研磨左右齿,则把高低齿差调整杆锁到底,使高低齿差指针指向零。
4、研磨开始
完成了以上步骤,便可使用砂轮进给螺杆8使砂轮机头往前移动,到快要接触到锯片时再调整对齿调整螺杆13,使锯片原有的齿与砂轮对齐(调整螺杆往“+”方向移动,锯片则往后移动,切削角会磨的较多;调整螺杆往“-”方向移动则相反)。
再使用砂轮进给螺杆8使砂轮机头向前移动,如砂轮前进未磨到齿底,后退时已磨到齿背,代表不够深。
相反则太深,此时使用齿深调整螺杆14把齿深调到砂轮能轻触齿底及齿背为最佳。
5、倒角研磨
A、将齿型转换到三角齿之状态;
B、将切削角调到8°;
C、将高低齿差归零;
D、将推爪调到一次推11/3~2齿距的距离;
E、将机头依砂轮外径调整上下的幅度;
F、对齿时,砂轮不可碰到切削角,否则前功尽弃;
G 、 倒角时应随时监视倒角部分的大小是否符合要求,因锯片本身会偏向,
有时会部份吃大或吃小的情况发生。
6、 如何研磨好齿型 A 、 标准齿型如下:
P :齿距 D :齿深 ω:齿宽 θ:切削角 β;后斜角
B 、 推爪与齿型的关系
一次推一齿时,推爪长度位置约可分为4个位置。
1:最长,磨出的齿形为 2:次长,磨出的齿形为 3:次短,磨出的齿形为 4:最短,磨出的齿形为
由上述知推爪长短关系齿背形状,应根据需要,调整推爪之幅度,才能研磨出期望的齿型。
五、 机头V 型皮带调整方法
为了再拉紧或替换砂轮驱动的V 形皮带,必须移开三个内六角圆柱头螺丝和V 形皮带轮的外面半段。
调整皮带松紧只要移开或加装间隙隔圈即可,把隔圈移
开可增加紧度,而加装隔圈可减轻紧度。
皮带不可拉得太紧,否则马达和砂轮轴
锯片圆周长齿数
P=
12
D=P
承可能因超载而受损。
新安装的皮带通常会有点太长,因此必要时在短时间操作后要再拉紧。
每台机器配有0.5、1.0、2.0和3.0mm四种规格的隔圈,其中一种规格装在机器上,其余三个规格在附件箱中。
图3
六、砂轮厚度选择表
砂轮厚度:mm
160 3.1 2.9 2.7 2.5 2.2 2.1 2.0 1.9 1.8 1.7 1.6 180 2.9 2.6 2.4 2.2 2.0 1.9 1.8 1.7 1.6 1.5 1.4 200 2.5 2.3 2.2 2.0 1.8 1.7 1.7 1.6 1.4 1.4 1.3 220 2.3 2.1 1.9 1.8 1.6 1.5 1.5 1.4 1.3 1.2 1.0 240 2.1 1.9 1.8 1.6 1.5 1.4 1.4 1.3 1.2 1.1 1.0 280 1.8 1.6 1.5 1.4 1.3 1.2 1.2 1.1 1.0 1.0 0.9 七、附图1、机器简图及主要部件图
30 31
930
31
32
6
6
28
29
3
33
32
9
35
34
29
28
27
3
推爪及锯片座图
序号部件名称序号部件名称序号部件名称
1 砂轮机头13 对齿调整螺杆25 高低齿差指示针及刻度表
附图2、润滑点图
:齿轮油,每年加注;
:润滑油,每天加注;:黄油,每年加注;:黄油,每周加注;
附图3、电气原理图
KC Q
~380V。