velocity中文手册
Velocit手册-中文版
Velocity中文手册1关于Velocity 用户指南旨在帮助页面设计者和内容提供者了解Velocity 和其简单而又强大的脚本语言(Velocity Template Language (VTL))。
本指南中有很多示例展示了用Velocity来讲动态内容嵌入到网站之中,但是所有的VTL examples 都同演示用于所有的页面和模版。
感谢选择Velocity!2什么是Velocity?Velocity 是一个基于Java的模版引擎。
它允许web 页面设计者引用JAVA代码预定义的方法。
Web 设计者可以根据MVC模式和JAVA程序员并行工作,这意味着Web设计者可以单独专注于设计良好的站点,而程序员则可单独专注于编写底层代码。
Velocity 将Java 代码从web页面中分离出来,使站点在长时间运行后仍然具有很好的可维护性,并提供了一个除JSP和PHP之外的可行的被选方案。
Velocity可用来从模板产生web 页面,SQL, PostScript以及其他输出。
他也可用于一个独立的程序以产生源代码和报告,或者作为其它系统的一个集成组件。
这个项目完成后,Velocity将为Turbine web 应用程序框架提供模板服务。
Velocity+Turbine 方案提供的模板服务将允许web 应用按真正的mvc模式进行开发。
3 Velocity 可以做什么?Mud Store 示例假设你是一个专门销售泥浆(MUD)的在线商店的页面设计者。
我们称他为"The Online Mud Store"。
生意很好。
客户订购各种各样的类型和数量的泥浆。
他们使用他们的用户名和密码登陆到商店中来,就可以浏览他们的订货和购买其他东西。
现在,赤土陶泥正在促销,这是一种很常用的泥巴。
一少部分顾客很有规律的购买一种亮红土Bright Red Mud,这也是促销产品,但是不太常用,因此被移到页面的边缘。
所有顾客的信息都在数据库中被跟踪,因此有一天问题出现了:为什么不使用Velocity来定位目标客户,这些客户对某种类型的产品特别感兴趣?Velocity 使针对访问者个性的WEB页面客户化(个性化)非常容易。
Velocity配置文件详解

Velocit y配置文件详解在veloci ty的发布方包中有一个v e locit y.propert ies(位于 org.apache.velocit y.runtime.default s package下,文件定义了ve locity的配置信息o r g.apache.velocit y.runtime.Runtime Consta nts中定义了key值)#模板编码:input.encodin g=ISO-8859-1//模板输入编码output.encodin g=ISO-8859-1 //模板输出编码#foreach配置directi ve.foreach.counte= velocit yCount //计数器名称directi ve.foreach.counter.initial.value = 1 //计数器初始值directi ve.foreach.maxloop s = -1 //最大循环次数,-1为默认不限制directive.foreach.iterato = velocit yHasNe x //迭代器名称#set配置directi ve.set.null.allowed = false //是否可设置空值#include配置directi ve.include.output.errorms g.start= <!-- include error : //错误信息提示开始字符串directi ve.include.output.errorms g.end = see error log --> //错误信息提示结束字符串#parse配置directi ve.parse.max.depth = 10 //解析深度#模板加载器配置resourc e.loader= file //模板加载器类型,默认为文件,可定义多个file.resourc e.loader.descrip tion= Velocit y File Resourc e Loader//加载器描述file.resourc e.loader.class =Velocit y.Runtime.Resourc e.Loader.FileRes ourceLoader//加载器类名称file.resourc e.loader.path = . //模板路径file.resourc e.loader.cache = false //是否启用模板缓存file.resourc e.loader.modific ationC heckIn terval = 2 //检查模板更改时间间隔宏配置velocim acro.library//指定宏定义文件的位置velocim acro.permiss ions.allow.inline= true //是否可以行内定义velocim acro.permiss ions.allow.inline.to.replace.global= false //是否可以用行内定义代替全局定义velocim acro.permiss ions.allow.inline.local.scope = false //行内定义是否只用于局部velocim acro.context.localsc ope= false //宏上下文是否只用于局部velocim acro.max.depth = 20 //解析深度velocim acro.argumen ts.strict= false //宏参数是否启用严格模式#资源管理器配置resourc e.manager.class= Velocit y.Runtime.Resourc e.Resourc eManag erImpl//管理器类名称resourc e.manager.cache.class = Velocit y.Runtime.Resourc e.Resourc eCache Impl //缓存器类名称#解析器池配置parser.pool.class= Velocit y.Runtime.ParserP oolImp l //解析池类名称parser.pool.size = 40 //初始大小#evaluat e配置directi ve.evaluat e.context.class= Velocit y.Velocit yConte xt //上下问类名称#可插入intr ospect or配置runtime.introsp ector.uberspe ct = Velocit y.Util.Introsp ection.Uberspe ctImpl //默认intro specto r类名称#日志配置runtime.log = velocit y.log用以指定 Velocit y 运行时日志文件的路劲和日志文件名,如不是全限定的绝对路径,系统会认为想对于当前目录.runtime.log.logsyst em这个参数没有默认值,它可指定一个实现了org.apache.velocit y.runtime.log.LogSyst em.接口的自定义日志处理对象给Velocit y。
Velocity 模板使用指南》中文版
2.Escaping Valid VTL References(封装有效的引用)如下示,如果没有#set( $email = "foo" )这一行且java代码中Context对象中没有放放email对象,将直接输出$email.#set( $email = "foo" )$email如果email己定义了 (比如它的值是foo),而这里你却想输出$email. 这样一个字符串,就需要使用转义字符”\”.## The following line defines $email in this template:#set( $email = "foo" )$email\$email\\$email\\\$email上面的模板在web页面上的输出将是:foo$email\foo\$email但如果email并没有定义,我们这样写:.$email\$email\\$email\\\$email输出就原封不动了:$email\$email\\$email\\\$email注意:当己定义变量和未定义变量一起输出时,会输出字面意思,如下便,$moon是未定义的:#set( $foo = "gibbous" )$moon = $foo输出到web页面中将是$moon = gibbou11.Case Substitution(可选的格式)至此,你对velocity的refenerce己比较熟悉了, 你可以在你的模板中开始应用这些功能. 但你还可以知道的是Velocity references从java语法中汲取了一些优点以便模板设计者更容易使用VTL.比如:$foo$foo.getBar()## 等同于$foo.Bar$data.setUser("jon")##等同于#set( $er = "jon" )$data.getRequest().getServerName()##等同于$data.Request.ServerName## is the same as${data.Request.ServerName}这里示例了你可选的一些引用方式. VTL汲取了java语法和java bean的一些简洁语法以解析java代码中Context中的对象和这些对象的命令及属性---这样,一个java对象的所有功能都可以展示到视图中了.Velocity也借见了java Bean的规范(Bean specifications defined by Sun Microsystems), 是大小写敏感的; 但Velocity会尽可能的帮你修正错误. 当命令getFoo()通过指令 $bar.foo在模板中引用时,Velocity的搜索规则我们在前面己讲了,你还记得是什么吗?.注意:模板中引用的必须是通过java Bean中的getter/setter 实现的,而直接的java对象的数据域是不能直接引用的,如$ 会解析到 class Foo's getName() 的实例方法,但不会解析到Foos类的public Name 这个实例变量.12.Directives(指令符号)模板设计者使用“引用“生成动态内容, 指令(directives)–简单的说就是设计者在模板中操作java 对象—让视图设计者全面控制输出内容的格式.指令总是以 #开头后面紧跟具体的指令符. 就像引用一样(指令的一种),可以将指令理解为”表示这里是一个什么东东).如下例生成一个出错提示:#if($a==1)true enough#elseno way!#end这个例子中应使用括号将else分开.#if($a==1)true enough#{else}no way!#end1.#set指令#set用来给一个引用赋值.值可以被赋给变量引用或属性引用, 但要将它们放入括号中,如下示:#set( $primate = "monkey" )#set( $customer.Behavior = $primate )“左操作数被赋值“是引用操作的一个规则.=号右侧可能是以下类型之一:∙Variable reference变量引用∙String literal字符串∙Property reference 属性引用∙Method reference 命令引用∙Number literal 数字∙ArrayList 数组∙Map 映射下面是对上述类型设置的示例:#set( $monkey = $bill ) ## variable reference#set( $monkey.Friend = "monica" ) ## string literal#set( $monkey.Blame = $whitehouse.Leak ) ## property reference#set( $monkey.Plan = $spindoctor.weave($web) ) ## method reference#set( $monkey.Number = 123 ) ##number literal#set( $monkey.Say = ["Not", $my, "fault"] ) ## ArrayList#set( $monkey.Map = {"banana" : "good", "roast beef" : "bad"}) ## Map注意: 在ArrayList类型引用的例子中,其原素定义在数组 [..]中, 因此,你可以使表$monkey.Say.get(0)访问第一个元素.类似的,引用Map 的例子中, 原素定义在 { } 中,其键和值间以:隔成一对,使用$monkey.Map.get("bannana") 在上例中将返回 'good', ( $monkey.Map.banana也会有同样效果).下面是一般的计算表达式:#set( $value = $foo + 1 )#set( $value = $bar - 1 )#set( $value = $foo * $bar )#set( $value = $foo / $bar )但注意:如果右边的操作数是一个属性或命令的引用而返回null,那么赋值将不会成功,且在随后的VTL 中也不能再取出使用. 如下例:#set( $result = $query.criteria("name") )The result of the first query is $result#set( $result = $query.criteria("address") )The result of the second query is $result如果$query.criteria("name")返回的是字符串 "bill", 但$query.criteria("address")返回null, 上面的TVL输出结果将是:The result of the first query is billThe result of the second query is bill这对与初学者的理解有些麻烦,比如在#foreach loops中,你使用#set给一个属性或命令赋值时,如下例示:#set( $criteria = ["name", "address"] )#foreach( $criterion in $criteria )#set( $result = $query.criteria($criterion) )#if( $result )Query was successful#end#end在上例中,就不能依赖if( $result )来决定查询是否成功. $result一但被#set 为null (context会同样), 它将不能被赋其它值 (不能从 context中取出).一个解决办法是,每次都将$result设为false. 如果$query.criteria()调用成功,就可以检测到. #set( $criteria = ["name", "address"] )#foreach( $criterion in $criteria )#set( $result = false )#set( $result = $query.criteria($criterion) )#if( $result )Query was successful#end#end注意:#set不需要使用#end来声明结尾.2.Literals (语义解析)使用#set指令时,变量如果用“”引起会被解析,如:#set( $directoryRoot = "www" )#set( $templateName = "index.vm" )#set( $template = "$directoryRoot/$templateName" )$template输出的将是:www/index.vm但当用单引号引起来时,就不会被解析::#set( $foo = "bar" )$foo#set( $blargh = '$foo' )$blargh输出后会是:bar$foo默认情况下,不会解析单引号中的变量,当然,这可以通过改变Velocity的配置参数来改变:velocity.properties such that stringliterals.interpolate=false.另外, 指令#literal元素可以用来输出字面意思,如下示.#literal()#foreach ($woogie in $boogie)nothing will happen to $woogie#end#end会输出::#foreach ($woogie in $boogie)nothing will happen to $woogie#end3.Conditionals(条件判断)1.If / ElseIf / Else#if指令用来根据条件在页面中输出内容, 如下简单的例子:#if( $foo )<strong>Velocity!</strong>#end根据变量$foo计算后是否为true决定输出, 这会有两种情况: (i) $foo的是值是一个boolean (true/false)型并有一个true value, 或(ii) 它是一个非null值. 要记者,Velocity context 中只能包含Objects, 因此当我们讲'boolean'时, 它就是一个Boolean (the class).在#if和#end的内容是否会输出,由$foo是否为true决定. 这里,如果$foo is true, 输出将是: "Velocity!". 如果$foo为null或false,将不会有任何输出.#elseif或#else可以#if和组合使用. 如果第一个表达式为true,将会不计算以后的流程,如下例假设t $foo是15 and $bar产6.#if( $foo < 10 )<strong>Go North</strong>#elseif( $foo == 10 )<strong>Go East</strong>#elseif( $bar == 6 )<strong>Go South</strong>#else<strong>Go West</strong>#end输出将会是Go South.2.Relational and Logical Operators(关系和逻辑运算)Velocity使用==来做比较,如下例.#set ($foo = "deoxyribonucleic acid")#set ($bar = "ribonucleic acid")#if ($foo == $bar)In this case it's clear they aren't equivalent. So...#elseThey are not equivalent and this will be the output.#end注意:==计算与java中的==计算有些不同:不能用来测试对象是否相等(指向同一块内存). Velocity 中是否相等仅直接的用来比较numbers, strings的值, or objects的toString()结果是否相等. 如果是不同的对象,会调用它们的toString()命令结果来比较.Velocity也使用AND, OR and NOT 执行逻辑运算.详细说明请参看《VTL参考中文版》,如下是一些简单示例:## logical AND#if( $foo && $bar )<strong> This AND that</strong>#end仅当$foo$bar和都为true时,#if()才会输出中间内容.OR 运算例子## logical OR#if( $foo || $bar )<strong>This OR That</strong>#end$foo或$bar只要有一个为true就可以输出。
velocity2.0 入门 变量 方法

1. 什么是velocity2.0?velocity2.0是一个模板引擎,用于在Web开发中,特别是在Java Web开发中,用于生成HTML、XML等静态文件。
velocity2.0可以将模板文件中的变量替换为具体的数值,也可以执行一些简单的逻辑操作,比如条件判断、循环等。
它的主要作用就是将模板和数据整合在一起,生成最终的文件输出。
2. velocity2.0的入门指南想要学习和使用velocity2.0,首先需要了解它的基本语法和用法。
下面是velocity2.0入门的一些基本概念和内容。
3. 变量在velocity2.0中,变量用来表示一些数值、字符串或者对象,在模板中可以通过变量名来引用这些值。
变量的命名规则和作用域和Java中的情况很类似,这些都是需要在学习velocity2.0时需要注意的地方。
4. 变量定义与赋值在velocity2.0模板中,可以通过#set指令来定义和赋值一个变量,比如:```#set($name = "velocity2.0")```这样就定义了一个名为name的变量,并赋值为"velocity2.0"。
5. 变量的引用定义了变量之后,就可以在模板中引用这个变量了。
比如:```Wee to $name!```这样就会在生成的文件中,将$name替换为具体的数值,也就是"velocity2.0"。
6. 变量的作用域velocity2.0中的变量和作用域和Java中的类似,有全局变量和局部变量之分。
全局变量是在整个模板中都可以访问的,而局部变量只在某个指令块中可以访问。
7. 方法除了变量之外,方法也是velocity2.0中比较重要的概念。
在模板中,可以通过方法来执行一些逻辑操作,比如字符串的拼接、条件判断、循环等。
8. 方法的定义与调用在velocity2.0模板中,可以通过#macro指令来定义一个方法,然后通过#call指令来调用这个方法。
Velocity软件使用说明bak

Velocity汉化步骤首先确认Velocity2.0门禁系统软件已经安装完毕。
1、将Customs.cst文件复制到C:\Programs Files\Hirschelectronics\Velocity目录下。
2、点击“开始”\“程序”\Hirsch Electronics Velocity\Velocity键,进入软件中。
3、点击Files\Import\Export\Customsation进入汉化文件导入界面,点击“Next”后选择“Import”进行汉化。
4、第3步完成后,点击“Console”目录下的最后一项“参数选择”,将“概要”中第2项打上“√”。
5、第4步完成后,在计算机屏幕右下角用右键点击“Services”\Setting,同样将“Database”中第2项打上“√”。
6、以上步骤完成后,退出软件,重新启动计算机进入Velocity软件。
软件使用说明1、首先确认系统硬件已经和计算机连接完毕(计算机通过Com口与控制器通讯)。
设置端口2、打开Velocity软件,在配置\DIGI*TRAC配置\SNET点击增加新SNET端口,在名称处给该端口一个新名称(一般设为Com1),然后在端口配置中选择波特率(一般选9600)和端口,然后点确认键完成该端口的添加。
添加控制器3、端口增加完毕后,点击该端口并继续点击增加新控制器,在新控制器属性界面内名称处给控制器设定一个新名称;在地址处给该控制器设定地址(控制器内的地址拨码开关是几则在该处就设定几);在型号处给该控制器设定型号(根据添加该控制器的具体型号而定,如2门控制器为M2、8门控制器为M8);在控制器时区处选择中国,其余均为默认值,点击确认键完成该控制器的添加。
门属性设置4、以8门控制器为例:控制器添加完毕后,点击该控制器并继续点击门,出现了Door1~Door8,双击Door1,在Door1的属性界面内点击报警输入,在设置界面内的报警模块处选择模块类型(一般默认值为DTLM2\MELM2),将出门按钮选中,选择触发继电器并屏蔽报警;其余均为默认值,点击确认键完成该Door1的设置。
velocity简介
VTL语法
注意事项: 算术表达式只支持整型/结果为整数;如果非整型数值返回null;如果RHS 的结果为null,是不会赋值给LHS的
#set( $criteria = ["name", "address"] ) #foreach( $criterion in $criteria ) #set( $result = $query.criteria($criterion) ) #if( $result ) Query was successful #end #end
VTL语法
<ul> #foreach( $product in $allProducts ) <li>$product</li> #end </ul> <ul> #foreach( $key in $allProducts.keySet() ) <li>Key: $key -> Value: $allProducts.get($key)</li> #end </ul>
VTL语法
6. #stop #stop指令停止模板引擎的执行并返回。这在Debug时很有用。 7. #macro #macro指令允许定义一段重复使用的VTL模板(称Velocimacros)。 Velocimacros可以有0或多个参数。
#macro( tablerows $color $somelist ) #foreach( $something in $somelist ) <tr><td bgcolor=$color>$something</td></tr> #end #end #set( $greatlakes = ["Superior","Michigan","Huron","Erie","Ontario"] ) #set( $color = "blue" ) <table> #tablerows( $color $greatlakes ) </table>
velocity入门教程

</servlet> <servlet-mapping>
<servlet-name>velocity</servlet-name> <url-pattern>*.vm</url-pattern> </servlet-mapping> </web-app>
velocityContext.put("txt", "hello, world!");
StringWriter stringWriter = new StringWriter(); template.merge(velocityContext, stringWriter);
System.out.println(stringWriter.toString()); } }
代码中首先初始化一个 velocity 引擎,并载入一个.vm 文件,vm 就是 velocity 模板文
件的标准后缀,初始化 velocity 上下文,将一个叫做“hello, world!”的字符串以一个名
为“txt”的键,加入 velocity 上下文中,然后输出最终结果。
4
hello.vm 的内容为$txt
response); }
}
代码中,我们仅仅是向 request 域中放入了一个叫做“txt”的属性,然后指定了 vm
视图的路径,和使用 JSP 视图做法是一样的。
在/WEB-INF/views 下,创建一个 test.vm,内容如下
《Velocity Web应用开发指南中文版》
《V elocity1.4使用指南中文版》中文版来源声明:转载请保留此页声明**************************************************************************此文档为蓝杰实训学员拓展实训之用.蓝杰实训不对译文中某些说法可能会对您的系统或开发造成损害负责.如对您有所帮助,我们不胜荣幸!*************************************************************************本文属中的Velocity中文系列,本系包含如下文章:《Velocity Java开发指南中文版》(Developer`s Guide)《Velocity模板使用指南中文版》(User`s Guide)《Velocity Web应用开发指南中文版》(Web Application Guide)《VTL语法参考指南中文版》(VTL Reference)《DB4O中文系列之起步篇》...更多资料请访问/下载.**************************************************************************译者:javaFoundMail:javafound@@*************************************************************************目录1.使用Velocity构建Web应用 (3)e a Framework (3)3.Web应用用例 (3)4.不要改变己输出对象的状态! (4)5.HTML/XML字符转义 (4)6.应用安全性 (5)7.日志文件 (5)8.布署指南 (5)1.使用Velocity构建Web应用Velocity常见的用途是生成web页面,通常用来替换JSP技术.使用它生成页面有以下优势:∙简洁–一般的web美工不需要懂程序语言的就可以设计动态业面.∙Web系统容易维护–MVC推荐的做法是在页面中不要存在其它的脚本语言出现..∙容易访问数据模型的命令和属性–页面设计者通过引用简单的就可访问context中的java数据对象.∙一致性–Velocity可用做其它的文本模板生成任务,如如发送email.本文讲解了将Velocity应用与web应用的一些基本方法.e a FrameworkVelocity的主要目标是通过模板生成格式文档.因此,Velocity自身不提供任何Web相关的功能.当你需要开发Web应用时,需要一个框架来接收HTTP请求和,处理用户认证,执行业务逻辑调用,最后生成应答内容返回给客户端。
Velocity教程

#set($monkey = $bill)变量reference #set($monkey.Friend = “monica”)##String literal #set($monkey.Blame = $whitehouse.leak)##属性reference #set($monkey.Plan = $spindoctor.weave($web))##方法 #set($monkey.Number = 123)##Number literal #set($monkey.Say = [”Not” ,$my, ”fault”])##ArrayList 最后一个的取值方法是:$monkey.Say.get(0)
一次可以导入多个文件
#macro ( d ) <tr><td></td></tr> #end 上面的模板定义为d,调用时: #d() Velocity 将用<tr><td></td></tr>替换#d()
一个参数是color,另一个参数是一个数组: #macro( tablerows $color $somelist) #foreach( $something in $somelist ) <tr><td bgcolor=$color>$something</td></tr> #end #end
UED实习生
——欧阳涛
是基于java的模板引擎; 名称字面翻译为:速度、速率、迅速; Jsp的替代品; Apache对它的定义是:一种基于Java的模板引擎,但 允许任何人使用简单而强大的模板语言来引用定义在 Java代码中的对象;
在Velocity中,变量的定义都是使用“$”开头的,$作 为Velocity的标识符。字母、数字、中划和下划线都可 以作为Velocity的定义变量。未被定义的变量被看做字符串! 需要注意的是Velocity特色的变量定义,如: $student.No、$student.Address:
Micronics PF LV550 Level-Velocity Logger 用户指南说明书

USER'S GUIDEInstallation & OperationInstructionsLevel-Velocity LoggerModel PF LV550Manual Series A.1Note: This page has been left blank intentionally.INDEXFUNCTION TEST (5)BATTERY INSTALLATION (5)CONFIDENCE DISPLAY (6)CALIBRATION (6)INSTALLATION - SENSOR LOCATION (7)ENCLOSURE INSTALLATION (9)USB CONNECTION (10)LOGGER SOFTWARE (10)START-UP (10)FIELD TROUBLESHOOTING (16)FREQUENTLY ASKED QUESTIONS (17)SENSOR CLEANING INSTRUCTIONS (18)APPLICATIONS HOTLINE (19)APPENDIX A - OPTIONS (22)SPECIFICATIONS (24)IMPORTANT NOTE: This instrument is manufactured and calibrated to meet product specifications. Please read this manual carefully before installation and operation. Any unauthorized repairs or modifications may result in a suspension of the warranty.Available in Adobe Acrobat pdf formatQuick Start GuidePF LV550 Level-Velocity Logger1. Remove the battery box, install 4 Alkaline D-cellbatteries (included) and replace the box. Allow10 seconds for the PF LV550 to activate thenpress the button on the face of the PF LV550.The LCD display will turn On. If the displaydoes not turn On check that batteries have beencorrectly installed. After 1 minute the displaywill turn Off automatically.2. Install Logger software on your Windows PC orlaptop computer. Insert the CD and runSetup.exe. If you encounter error messagesduring installation, open and review thereadme.txt file on the CD.3. Connect the PF LV550 to your PC or laptop withthe USB cable (included). Run Logger andreview the ‘Quick Start Guide’ instructionswhich appear onscreen or select the Help drop-down menu.4. Configure Logger software CommunicationSettings. PF LV550 baud rate is fixed at28800 Baud. Identify the serial port on yourlaptop or PC. Refer to the Logger ‘Help’ file‘Connection Setup’ for detailed instructionsif you are not sure which COM port orvirtual port you are connected to.5. Configure the logging interval through Loggersoftware’s Real Time Monitor. Select a logginginterval and click “Write” to properly initializethe PF LV550.INTRODUCTION:The PF LV550 Level-Velocity Logger measures and data logs level, velocity and liquid temperature in open pipes and channels. It is designed for flow surveys in sewers, streams and irrigation channels. FUNCTION TEST:1. Connect the sensor plug to the watertight fitting on the PF LV550 enclosure.2. Make sure new batteries are installed.3. Wait 10 seconds then press the display button on the face of the PF LV550 to activate theLCD display.4. Place the QZ02L sensor (flat to the bottom) in a bucket of water about 6”/150mm deep.Double press the display button to freeze on selected parameter. Stir the water to causemotion over the sensor and display a velocity reading.BATTERY INSTALLATION:Unscrew the two thumbscrews. Remove the battery boxUse new, premium quality Alkaline D-Cell batteries only (Energizer E95 or Duracell/Procell MN1300). Insert batteries as shown:Replace the battery box and tighten thumbscrews.CONFIDENCE DISPLAYThe PF LV550 includes a built-in Bargraph display.Activate the display by pressing the button on theinstrument face. It will scroll between level, velocity,temperature, remaining battery power and remaininglogger capacity. To conserve battery power, thedisplay will shut Off after 1 minute.Double press the button to freeze the display on oneparameter (Parameter flashes).CALIBRATIONPF LV550 does not require field calibration.It is factory-calibrated to measure level from the bottom of the pipe or channel to the water surface (maximum 15 ft / 4.5 m), and velocity from 0 to 10 ft/sec (0 to 3.05 m/sec).INSTALLATION - SENSOR LOCATION1. Choose a sensor mounting location where silt or deposits are least likely to accumulate.2. For best results flow should be evenly distributed across the channel and relatively free of turbulence.(The PF LV550 is very effective at averaging level and velocity readings in turbulent conditions, but best accuracy and response time is achieved with evenly distributed flow.)3. Avoid vertical drops, obstructions or elbows immediately up and downstream from the sensor. Locatethe QZ02L sensor at least 10 times maximum Head (level) and 10 times the channel width from these flow disturbances.QZ02L VELOCITY-LEVEL SENSOR MOUNTINGMount the QZ02L sensor with the stainless steelbracket and hardware supplied. Ensure that the sensoris parallel to the water surface (check with a level).Mount with the tapered end of the sensor pointingupstream and the sensor cable pointing downstream.Clip or tie wrap the sensor cable securely to the pipeor channel wall.Note: The mounting bracket is designed to releasethe sensor if weeds or rags are caught by thesensor.The QZ02L sensor requires a minimum waterlevel of 1" (25.4 mm) above the bottom of thepipe or channel.OPTIONAL PIPE BAND MOUNTING WITH QZ02L SENSORInstall the stainless steel pipe band with the sensor mountingbracket at the invert (bottom) of the pipe. Ensure that thesensor bracket is parallel to the water surface (check with alevel). Mount so the tapered end of the sensor will pointupstream and the sensor cable will point downstream. (Turnt he ¼” hex nut clockwise to expand the bracket and secureto the pipe wall by friction fit.)Insert the sensor into the mounting bracket and clip or tie wrap the sensor cable securely to the stainless steel pipe band as illustrated.ENCLOSURE INSTALLATIONClose the PF LV550 cover and ensure that the sensor cable connector is tightened snugly for a watertight seal (do not damage the connector by over tightening the coupling). Wipe the enclosure cover gasket with a clean cloth to remove dirt or grit before closing.Use a chain or mounting bracket to hang the enclosure from the manhole ladder or any available secure location. The enclosure should be located above the high water level so that it will not be accidentally submerged.PF LV550 is rated for operation from -20°C to 60°C (-4°F to 140°F). The batteries will not function below the rated temperature. To prevent overheating, avoid mounting the enclosure in direct sunlight. PF LV550 enclosure is rated IP67, watertight and dustproof.USB CONNECTIONUse the USB Micro-B cable supplied with each PF LV550 for communication with a PC computer or laptop.LOGGER SOFTWARELogger (for Windows) is supplied with each PF LV550 and is required to download log files and to set the logging interval of the PF LV550 data logger. Install on any PC running Windows 7 , 8.1 or XP with SP3. Requires a PC with USB port and at least 5MB of available disk space.NOTE: Refer to the Logger Help menu for complete instructions on using this software. The following information covers only basic functions of this powerful software program.START-UPWhen you connect to a PF LV550 for the first time follow this procedure:1. Connect the PF LV550 to your PC using mini-USB cable.2. Use Communication/Connection Setup to configure your PC for communications.3. Use Real Time Monitor to configure the logging frequency and click Write to initializelogging, date and time. Date and time are read by the PF LV550 from your PC.4. Use Retrieve DataLog to download log files from a PF LV550.CONNECTION SETUPUnder the communication drop-down select**Scan for USB Instruments** to automaticallydetect your PF LV550 and establish aconnection.REAL TIME MONITORSelect Data Logging/Real Time Monitor ON toview ‘real-time’ level, velocity and temperaturefrom the connected PF LV550. Readings areupdated every 10 seconds.Remaining Logger capacity and remaining batterypower are indicated.LOGGING INTERVALUse the Logging Settings selector to change thePF LV550’s logging interval, then press the Writebutton to transmit the new setting to the PF LV550.IMPORTANT: Write action deletes existing logfile and begins a new data log. Download and save existing log files before executing Write. The PF LV550 will take measurements for 10seconds and record the sampled data. It willthen enter a low power "sleep" mode for theremainder of the interval time. While in sleepmode, the PF LV550 consumes minimal power.This means that the logging interval alsodetermines the battery life of the instrument.The table below shows the maximum amount oftime the PF LV550 can log while at a constant68 °F (20 °C).Low temperatures and varying battery quality will reduce the amount of time the PF LV550 can log until the batteries need to be changed. Because of their higher power capacity, and better low temperature characteristics, it is recommended that only premium quality Alkaline D-cell batteries (Energizer E95 or Duracell MN1300) be used in the PF LV550.NOTE: It is a good practice to download and save an existing log file and then install new batteries when you start (Write) a new data log.MEMORY WRAP AROUNDClick the Wrap Around On box to enable data wrap around. When the PF LV550 data log is full, and wrap around is enabled, the PF LV550 will overwrite the oldest data at the beginning of the log. This allows the PF LV550 to always have a record of the most recent flow events. If this option is unchecked (deselected), the PF LV550 will stop logging when the data log is full and keep the log in memory until a new log is started.RETRIEVE LOGEnsure that communicationssettings are properly configuredunder the Communications /Connection Setup menu. Connect aPF LV550 using the RS232 cablesupplied.Click the Retrieve Log icon orselect Data Logging / Retrieve Logfrom the drop drown menu. Loggerwill download the log file and agraph window will open.Click and drag the mouse pointeracross a section of the graph tozoom in or press the Zoom In iconto view portions of the flow log.Click the Show Data Table icon or select View / Data Table drop down menu to open a table view of the log file.Select File/Save to save a copy of the log file (with a .DAT file extension). The file can be reopened using File/Open menu.FLOW CALCULATIONClick Generate Flow Log from the drop drown menu to calculate flow.Logger supports flow calculation for common channel shapes:Round pipeSquare channelEgg shape pipeTrapezoid channelSelect the Channel Type and enter the dimensions.Level Offset should be set to 0.000 unless the sensor is elevated above the bottom of the channel or pipe.RoundSelect Round for open pipes and enter the pipe ID (Inside Diameter). SquareSelect Square for rectangular channels and enter the width of the channel. EggSelect Egg for channels with cross-section dimensionedas shown.TrapezoidSelect for trapezoidal shaped channels. EnterWidth and Slope.V shaped channels may also be monitoredwhere the channel width is entered as 0.NOTE: To calculate flow for channel shapes other than Round, Square, Egg or Trapezoid, export the data (File/Export Data) and perform the flow calculation using a spreadsheet program likeMicrosoft Excel and your own conversion formula.Flow Calculation for Flumes and WeirsLogger supports flow calculation from level data log files for the following:V-Notch WeirsParshall FlumesPalmer Bowlus FlumesLeopold Lagco FlumesRectangular WeirsRectangular Weirs with End ContractionsKhafagi FlumesTrapezoidal FlumesCustom FlumesTo collect level data the PF LV550 sensor should be installed at the correct location in the flume or weir for level/flow measurement.To Generate a Flow Log1. Select Data Tools from the drop down menu andthen click Extract Level Data. A new graph windowwill open with Level data only.2. Select Data Tools from the drop down menu andthen click Generate Flow Log. The Channel Setupwindow will open.3. From theChannel Setup window select your flume type andthen Flume Size. Click OK and a new Flow log window will openindicating flow for the flume or weir you selected.4. Use the View drop down menu and click Change Units tochange flow volume units as required.FIELD TROUBLESHOOTINGThe PF LV550 uses an ultrasonic level sensor to determine water LEVEL and an ultrasonic Doppler sensor to measure flow VELOCITY.The QZ02L transducer combines both sensors in one housing.FREQUENTLY ASKED QUESTIONS1. How to turn PF LV550 On and Off?PF LV550 is On when batteries are installed. Default logger rate is 30 seconds which will run for 45 days before filling the logger memory and discharging the batteries. To turn Off the PF LV550 remove the batteries.2. Is logger memory retained with batteries removed and PF LV550 Off?Yes, logger memory is maintained with PF LV550 batteries removed. The only way to delete logger memory is through Logger software Real-Time display and clicking Write.3. How long do D-cell Alkaline batteries last?New D-cell Alkaline batteries will power the PF LV550 for the same time duration as the logger capacity. Refer to “Logging Interval” in this manual, page 12.SENSOR CLEANING INSTRUCTIONS BEFORE HANDLINGPF LV550 sensors that have been immersed in sewage should be cleaned before handling.1. Rinse sensor and cable to remove debris.2. Immerse sensor and cable in a solution of 1 part household bleach (Javex, Clorox etc.) to 20 parts water for 5 minutes. Do not immerse open end of sensor cable or cable plug. Ensure that the protective cap is properly fitted to the cable plug before immersing in water or cleaning solution3. Remove grease from sensor with clean water and mild soap. Do not use abrasive cleaners, solvents or high pressure washers.SENSOR CLEANING WHILE PF LV550 IS IN OPERATIONUse a soft brush or broom to wipe the sensor face. DO NOT USE an abrasive tool or gouge the surfaces of the sensor. Use dish washing soap to remove grease after installation.Remove the sensor from its mounting bracket to remove severe build-up of debris or “stringers” attached to the sensor, cable or mounting bracket.APPLICATIONS HOTLINEFor applications assistance, advice or information on any Micronics Limited contact your Sales Representative, write to Micronics or phone the Applications Hotline below:Tel: +44 (0) 1628 810456 Fax: +44 (0) 1628 531540Email: *********************.ukWeb Site: Micronics LimitedKnaves Beech Business Centre,Davies Way, Loudwater,High Wycombe, Buckinghamshire,United Kingdom HP10 9QRPRODUCT RETURN PROCEDUREInstruments may be returned to Micronics for service or warranty repair.1Obtain an RMA Number from Micronics -Before shipping a product to the factory please contact Micronics by telephone, fax or email toobtain an RMA number (Returned Merchandise Authorization). This ensures fast service andcorrect billing or credit.When you contact Micronics please have the following information available:1. Model number / Software Version2. Serial number3. Date of Purchase4. Reason for return (description of fault or modification required)5. Your name, company name, address and phone number2Clean the Sensor/Product -Important: unclean products will not be serviced and will be returned to the sender at their expense.1. Rinse sensor and cable to remove debris.2. If the sensor has been exposed to sewage, immerse both sensor and cable in a solution of 1 parthousehold bleach (Javex, Clorox etc.) to 20 parts water for 5 minutes. Important: do not immerse open end of sensor cable.3. Dry with paper towels and pack sensor and cable in a sealed plastic bag.4. Wipe the outside of the enclosure to remove dirt or deposits.5. Return to Micronics for service.3Ship to Micronics -After obtaining an RMA number please ship the product to the appropriate address below:Customers:Micronics LimitedKnaves Beech Business Centre,Davies Way, Loudwater,High Wycombe, Buckinghamshire,United Kingdom HP10 9QRRMA#LIMITED WARRANTY_____________________________________Micronics Limited warrants, to the original purchaser, its products to be free from defects in material and workmanship for a period of one year from date of invoice. Micronics will replace or repair, free of charge, any Micronics product if it has been proven to be defective within the warranty period. This warranty does not cover any expenses incurred in the removal and re-installation of the product.If a product manufactured by Micronics should prove defective within the first year, return it freight prepaid to Micronics Limited along with a copy of your invoice.This warranty does not cover damages due to improper installation or handling, acts of nature, or unauthorized service. Modifications to or tampering with any part shall void this warranty. This warranty does not cover any equipment used in connection with the product or consequential damages due to a defect in the product.All implied warranties are limited to the duration of this warranty. This is the complete warranty by Micronics and no other warranty is valid against Micronics. Some states do not allow limitations on how long an implied warranty lasts or limitation of incidental or consequential damages, so the above limitations or exclusions may not apply to you.This warranty gives you specific legal rights, and you may also have other rights which vary from state to state.Micronics Limited.APPENDIX A - OPTIONSSENSOR CABLE EXTENSION(OPTION PVXC5)Each PF LV550 QZ02L sensor includes 25 ft. (7.6 m) submersible tri-coaxial sensor cable. This cable is shielded from electrical interference and is watertight with a polyurethane jacket.Extend sensor cable an additional 50 ft (15 m) with one PVXC5 Sensor Cable Extension connected between the PF LV550 enclosure and the sensor. The extension includes watertight, submersible connector plugs.NOTE: Use only one PVXC5 Sensor Cable Extension for a total cable length of 75 ft (23 m).SS PIPE MOUNTING BAND - OPTION VSJSPECIFICATIONSElectronics Enclosure:Watertight, airtight, dust proof(IP 67) polycarbonateAccuracy:Level: ± 0.25% of Range.Velocity: ± 2% of ReadingDisplay:LCD displays: Level, Velocity,Water Temperature, Battery andMemory capacityOperating Temp. (electronics):-4° to 140°F (-20° to 60°C)Instrument Set-up:via Logger software for Windows:Logging Time Interval, Site NameLogger Interval:10 sec (15 days), 30 sec (45days), 1 min (3 months), 2 min (6months), 5 min (1 year), 10 min(2 years), 20 min (4 years)Data Logger Capacity:130,000 data pointsPower: 4 Alkaline 'D' cellsOutput/Communications:USB, 28,800 BaudUSB Cable: 6 ft (2m) USB Micro-BSoftware:Logger for Windows. Supportsreal-time monitoring, log filedownload and export, graph and data table presentation, level/velocityto flow conversionVelocity/Level Sensor QZ02LVelocity Measurement Range:0.1 to 10 ft/sec (0.03 to 3.05 m/sec)Level Measurement Range:Minimum Head: 1 in (25.4 mm). Maximum Head: 15 ft. (4.5 m) Operating Temperature: 5 to 150°F (-15 TO 65°C)Exposed Materials:PVC, polyurethane, epoxySensor Cable:25 ft. (7.6 m) submersible polyurethane jacket, shielded, 3 coaxial Sensor Mounting:includes MB-QZ stainless steel mounting bracketTemperature Compensation:Automatic, continuous。
Velocity Intel CPU 水晶块用户手册说明书
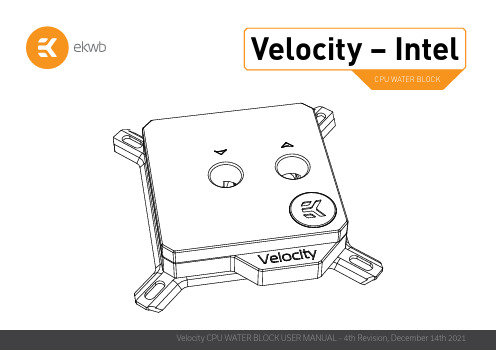
This product is intended for installation only by expert users. Pleaseconsult with a qualified technician for installation. Improper installation mayresult in damage to your equipment. EK Water Blocks assumes no liabilitywhatsoever, expressed or implied, for the use of these products, nor theirinstallation. The following instructions are subject to change withoutnotice. Please visit our website at for updates. Beforeinstallation of this product, please read important notice, disclosure, andwarranty conditions that are printed on the back of the box.Before you start using this product, please follow these basic guidelines:Please carefully read the manual before beginning the installationprocess.Please remove your graphics card from the computer to assure thesafest mounting process and prevent any possible damage to yourGPU and/or graphics card circuit board (PCB).The EK Fittings require only a small amount of force to screwthem firmly in place since the liquid seal is ensured by the rubberO-ring gaskets.The use of corrosion inhibiting coolants is always recommendedfor liquid cooling systems, and mandatory for nickel platedwater blocks!Do not use pure distilled water! For best results EK rrecommendsthe use of EK-CryoFuel coolants.Make sure to thoroughly bleed air out of your water block, or you willnot reach optimal performance.TABLE OF CONTENTGENERAL INFORMATION ON WATER BLOCK COMPATIBILITY 4 BOX CONTENTS 5 WATER BLOCK DIMENSIONS 6 TECHNICAL SPECIFICATIONS AND WATER BLOCK PARTS 7SUPPORT AND SERVICE 18 SOCIAL MEDIA 18GENERAL INFORMATION ON WATER BLOCK COMPATIBILITYThis CPU liquid cooling unit is pre-assembled for use with modern Inteldesktop socket type motherboards. By default (out of the box) this waterblock supports the following CPU sockets:- Intel LGA-1150/1151/1155/1156- Intel LGA-1200- Intel LGA-2011(-3)- Intel LGA-2066Washer (5 pcs)Spring (4 pcs)Standoff - LGA 115x / AMD (4 pcs)BOX CONTENTSStandoff - 20xx (4 pcs) EK-Velocity universal CPU water block with the Intel bracket (1 pc)Allen Key 2.5 mm (1 pc)Thumb Nut (4 pcs)EK-Loop Intel CPU Backplate M4 (1 pc)Additional Jet Plate – 0.8 mm (1 pc)Thermal grease (1 pc)Universal Mounting Mechanism – You may not need every screw from this package. EAN: 3831109813065WATER BLOCK DIMENSIONSTECHNICAL SPECIFICATIONS AND WATER BLOCK PARTSTechnical Specification:- Dimensions (L x H x W): 91 x 91 x 22 mm - D-RGB cable length: 500 mm - D-RGB LED count: 20- D-RGB connector standard 3-pin (+5V, Data, Blocked, Ground)- Dimensions (L x H x W): 91 x 91 x 22 mm- D-RGB cable length: 500 mm- D-RGB LED count: 1- D-RGB connector standard 3-pin (+5V, Data, Blocked, Ground)REPLACING THE JET PLATE PROCEDURESTEP 1Please reference the table below to determine the optimal insert andjet plate needed for your type of socket.J1d= 1 mm J2d= 0.8 mmSTEP 2Unscrew the four M4 screws in counter-clock-wise direction from the bottom of the water block using the enclosed 2.5 mm Allen key to release the assembly, which consists of the water block top and jet plate. Upon replacing the jet plate, please reassemble the water block as shown in STEP 1 and STEP 2. Pay special attention to the insert orientation relative to the copper base and the water block top.Screw the four screws back in firmly, but not forcefully.INSTALLING THE WATER BLOCKBACKPLATESTEP 1 – NEW BACKPLATEInstall the Intel backplate for LGA-115x/1200 socket to the back of your motherboard. Align the holes on the motherboard with the holes on the backplate.STEP 2 – NEW BACKPLATEInstall four (4) M3 thumb screws onto your motherboard. It is mandatory to put 0.7mm plastic washer underneath each of the M3 thumb screws. Tighten the screws to the metal backplate until you reach the end of the thread. Using tools (such as pliers) is not recommended.BACKPLATESTEP 1 – OLD BACKPLATEIf already installed, please remove the motherboard from your computer and place it on an even surface with front facing down. STEP 2 – OLD BACKPLATEPreparing backplate rubber gasketThe enclosed rubber gasket is an essential part of the backplate and mounting system and must be used every time you install this water block on your motherboards.CONNECTING THE RGB LED STRIP (Optional)STEP 4 – OLD BACKPLATEInstall four (4) M3 thumb screws onto your motherboard. It is mandatory to put 0.7mm plastic washer underneath each of the M3 thumb screws. Tighten the screws to the metal backplate until you reach the end of the thread. Using tools (such as pliers) is not recommended.SUPPORT AND SERVICEIn case you need assistance or wish to order spare parts or a new mounting mechanism, please contact:https:///customer-support/For spare parts orders, refer to the page with “TECH NICAL SPECIFICATIONS AND WATER BLOCK PARTS” where you can find the EAN number of each part you might need.Include the EAN number with quantity in your request. Mounting Mechanism EAN can be found under “BOX CONTENTS”Thermal pads are readily available in the EK shop SOCIAL MEDIAEKWaterBlocks@EKWaterBlocksekwaterblocksEKWBofficialekwaterblocks。
Terminal Velocity 软件使用手册
Terminal Velocity用户手册1开始 (3)安装程序 (3)登陆 (3)修改密码 (3)创建各人设置 (3)2工作区 (9)默认工作区 (9)保持多个工作区打开 (9)将工作区保存为文件 (9)从文件打开工作区 (9)3PANELS面板 (10)帐户综合信息 (10)持仓资金值 (10)持仓货币 (11)报告 (11)下定单 (12)仓位 (12)订单 (12)观察列表 (13)货币报价视窗 (13)图表 (14)历史报价 (15)事件日志 (15)4交易 (16)市价单 (16)市价单结合止损或止赢 (16)未执行订单 (16)限价单 (16)止损单 (16)二则一订单 (16)关闭订单 (16)5创建您自己的交易系统 (18)A LERTS警报 (18)表格警报 (18)视觉顾问 (18)交易系统 (19)附录A –使用图表 (20)附录 B –图表面板的层设置 (21)附录 C –画图工具栏按钮: (22)附录D –技术分析的指标 (23)附录E –交易范围 (24)1 开始安装程序点击以下链接开始运行VT平台/installer/程序使用自运行安装包,您将获得最新版本的程序。
下载版本平均大小为25-30MB.平台运行最小机器要求:∙处理器1.5GHz∙内存1024MB∙硬盘空间40MB∙显示器最小显示清晰度1024*768∙Windows 2000 / XP / 2003 Server / Vista / 2008 Server R1 / 2008 Server R2 / Win 7∙运行环境包MS .Net Framework3.5每次您运行程序后,自动更新管理会自动检查可用更新。
一旦有可用更新,自动更新管理会显示一条信息询问您对更新的确认。
您可以点击取消并稍后自行升级和安装。
您也可以其他时候检查更新,点击“帮助-》检查更新”删除VT,选择“开始菜单-》程序-》VelocityTrader-》删除VelocityTrader”登陆双击桌面图表或选择“开始-》程序-》VelocityTrader”输入登陆名和密码(由Velocity在开户时提供)并且点击“链接”在登陆后,您能够修改您的密码。
Velomitor CT Velocity Transducer说明书
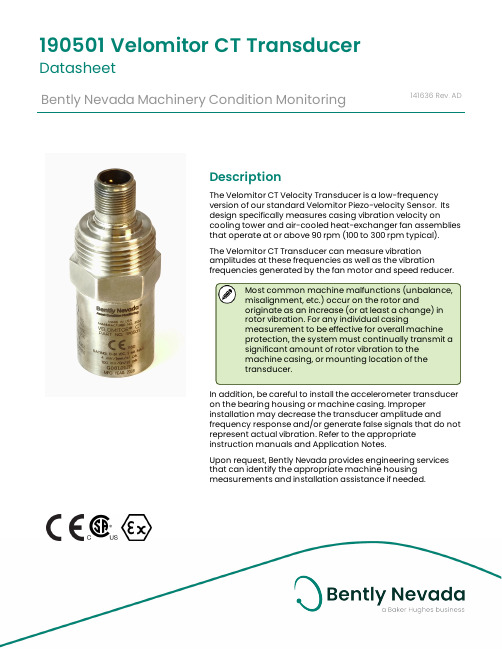
DescriptionThe Velomitor CT Velocity Transducer is a low-frequencyversion of our standard Velomitor Piezo-velocity Sensor. Itsdesign specifically measures casing vibration velocity oncooling tower and air-cooled heat-exchanger fan assembliesthat operate at or above 90 rpm (100 to 300 rpm typical).The Velomitor CT Transducer can measure vibrationamplitudes at these frequencies as well as the vibrationfrequencies generated by the fan motor and speed reducer.Most common machine malfunctions (unbalance,misalignment, etc.) occur on the rotor andoriginate as an increase (or at least a change) inrotor vibration. For any individual casingmeasurement to be effective for overall machineprotection, the system must continually transmit asignificant amount of rotor vibration to themachine casing, or mounting location of thetransducer.In addition, be careful to install the accelerometer transduceron the bearing housing or machine casing. Improperinstallation may decrease the transducer amplitude andfrequency response and/or generate false signals that do notrepresent actual vibration. Refer to the appropriateinstruction manuals and Application Notes.Upon request, Bently Nevada provides engineering servicesthat can identify the appropriate machine housingmeasurements and installation assistance if needed.190501Velomitor CT Transducer DatasheetBently Nevada Machinery Condition Monitoring141636Rev.ADSpecificationsParameters are specified from +20°C to +30°C (+68°F to +86°F) and 100 Hz unless otherwise indicated.Operating the transducer outside thespecified limits will result in falsereadings or loss of machinemonitoring.ElectricalSensitivity 3.94 mV/mm/s (100 mV/in/s)±5%.Frequency Response 3.0 Hz to 900 Hz(180 to 54,000 cpm) ±1.0 dB 1.5 Hz to 1.0 kHz(90 to 60,000 cpm) ±3.0 dBTemperature Sensitivity -8% to +5% typical over the operating temperature range.Velocity Range 63.5 mm/s pk (2.5 in/s pk) see Operating Range for Metric Units on page 13.See Operating Range for English Units on page 14.. Vibration components in excess of 10g pk above 1 kHz can significantly reduce this range.Transverse Response Less than 5% of the axial sensitivity.Amplitude Linearity ±2% to 63.5 mm/s pk (2.5 in/s pk)Mounted Resonant Frequency 9 kHz, minimum (stud mounted, except quick disconnect)Output Bias Voltage 10.1 Vdc ± 1.0 Vdc, Pin A referenced to Pin BDynamicOutputImpedance<400 Ω typical Broadband 0.229 mm/s (0.009 in/s) pk.Noise Floor(1.5 Hz to 1kHz)For more information, seeTypical Low Frequency NoiseFloor on page 15.Base StrainSensitivity0.43 mm/s/μstrain (0.017in/s/μstrain).Grounding Internal electronics are isolatedfrom case.MaximumCableLength305 metres (1,000 ft.) of cable(part number 02173006) withno degradation of signal.Maximum continuous length ofcable available is 91.44 metres (300ft.) If longer lengths are requiredthey must be spliced or have aconnector installed on them.Environmental LimitsOperatingTemperature-40°C to +85°C(-40°F to +185°F).StorageTemperature-40°C to +100°C(-40°F to +212°F).Shock Limit5000 g pk, maximum. HumidityLimit100% condensing,non-submerged.MagneticFieldSusceptibility<0.0068 mm/s/gauss (0.268mil/s/gauss) @ 50 gauss, 50-60HzMechanicalWeight<297 g (10.5 oz.), typical.Mounting Surface 33 mm diameter (1.3 in diameter).Height82 mm (3.2 in).CaseMaterial316L stainless steelConnector2-pin 316L stainless steel MIL-C-5015, top.Mounting Torque 4.5 N-m ± 0.6 N-m (40 in–lbf ± 5 in-lbf).Polarity Pin A goes positive with respect to Pin B when velocity is from base to top of the transducer.MountingAngle Any orientation.For more information on this product, please refer to the Velomitor CT Piezo-Velocity Transducer User Guide (document 125389).Compliance and CertificationsFCCThis device complies with part 15 of theFCC Rules. Operation is subject to thefollowing two conditions:l This device may not cause harmfulinterference.l This device must accept anyinterference received, includinginterference that may causeundesired operation.EMCEMC Directive 2014/30/EURoHSRoHS Directive 2011/65/EU Hazardous Area ApprovalsFor the detailed listing of country andproduct specific approvals, refer tothe Approvals Quick Reference Guide(108M1756) available from . CSA/NRTL/C190501 (Agency Approval Options 01 through 04)IntrinsicallySafeEx ia IIC T4:Class I, Div 1, Groups A, B, C, D.Class II, Group E, F and GClass IIIAEx ia IIC T4:Class I, Div 1, Groups A, B, C, D;Class II, Groups E, F, GClass IIIInstall per drawing 167536T4 @ -40°C ≤ Ta ≤ +100°C(-40°F ≤ Ta ≤ +212°F)IntrinsicallySafe andNon-IncendiveEx nL IIC T4Class I, Division 2, Groups A, B, Cand DAEx nA T4Class I, Division 2, Groups A, B, Cand DInstall per drawing 167536T4 @ -40°C ≤ Ta ≤ +100°C(-40°F ≤ Ta ≤ +212°F)ATEX/IECEx190501 Entity ParametersII 1 G Ex ia IIC T4 GaII 3 DEx na IIC T4 GcEx tc IIIC T130°C DcT4@ Ta = -55°C to 121°CZone 0/1 Zone 2 Ui= 30V Ui= 30V Ii= 200mA Ii= 200mA Pi= 0.75W Pi= 1.14W Ci-27.2nF Li= 0Hazardous Area Conditions of Safe UseATEX/IECExZone 0/1:Equipment must be connected to equipment, which meets the abovelisted entity parameters.The cables type A or B (in compliance with EN 60079-25) must respect the cable parameters listed with the entity parameters.Zone 2 :The supply electrical parameters shall not exceed the values mentioned in the tables above.Ordering Information Velomitor CT Velocity Transducer 190501 - AA - BB - CCA: Mounting Hardware Option0 0No stud0 1Stud 3/8-in 24 to 3/8-in 240 2Stud 3/8-in 24 to 1/2-in 200 3Adhesive Stud 3/8-in 240 4Stud M6x1 with 3/8-in 24 adapter0 5Adhesive Stud M6x1 with 3/8-24adapter0 6Stud 3/8-in 24 to 1/4-in 280 7Plate Stud 3/8-in 24 to 3/8-in 24 0 8Plate Stud 3/8-in 24 to 1/2-in 200 9Plate Stud 3/8-in 24 to 1/4-in NPT1 0Plate Stud M6x1 to M6x1with 3/8-in 24 adapter1 1Plate Stud 3/8-in 24 to 1/4-in 28 1 2Plate Stud 3/8-in 24 to M8x11 3Quick disconnect stud1 4Adapter, 3/8-in 24 to 1/4-in 20 1 5Adapter, 3/8-in 24 to 5/16-in 18 1 6Adapter, 3/8-in 24 to 3/8-in 24 1 7Adapter, 3/8-in 24 to 3/8-in 16 1 8Adapter, 3/8-in 24 to 1/2-in 131 9Adapter, 3/8-in 24 to 1/4-in 18NPT2 0Adapter, 3/8-in 24 to 3/8-in 18NPT2 1Adapter, 3/8-in 24 to 1/2-in 14NPT2 2Adapter, 3/8-in 24 to 3/4-in 14NPT2 3Adapter, 3/8-in 24 to 1.0-in 11.5NPT2 4Adapter, 3/8-in 24 to 1.25-in 11.5NPTB: Connection Option0 0MIL-C-5015 connection interface 9 9Unit with included 32-foot cable C: Agency Approval Option0 0No Approvals0 1 through0 4CSA/NRTL/C (Class I, Division 1),ATEX/IECEx/CSA (Class I, Zone0/1)Interconnect CableCB2W100 - AAADescription: Connectors: MIL-C 5015, 2 Socket, Splash Proof, Premium, isolated to blunt cut, Cable: 20 AWG, twisted pair, shielded, yellow Teflon jacket. LOCKING RING, ADAPTER SEAL, AND O-RING ARE INCLUDED.A: Length0 1 515 feet (4.57 metres)0 3 232 feet (9.75 metres)0 6 464 feet (19.5 metres)1 1 2112 feet (34.1 metres)1 2 5125 feet (38.1 metres)1 5 0150 feet (45.7 metres)2 0 0200 feet (61.0 metres)2 5 0250 feet (76.2 metres)Accessories128608-021/2-in NPT conduit adapter04284020-01Adhesive mount base kit. The adhesive mount base kit design is for machines with thin casings that do not permit drilling and tapping a mounting hole. Kit contains material (adhesive and bases) for 2 each 3/8-in 24 UNF adhesive-mount bases. One kit can outfit 2 Velomitor CT Transducers.Spare Mounting AdaptersAll mounting adapters are made from 300 series stainless steel.Standard Studs043656573/8-in 24 to 3/8-in 24 stud 87910-013/8-in 24 to 1/2-in 20 stud87931-01M6x1 to M6x1 metric stud(requires metric adapter) 87055-013/8-in 24 to M6x1 metric adapter 89139-013/8-in 24 to 1/4-in 28 stud Hex Plate Studs107756-013/8-in 24 to 3/8-in 24 plate stud 107755-013/8-in 24 to 1/2-in 20 plate stud 107754-013/8-in 24 to 1/4-in NPT plate stud107757-01M6x1 to M6x1 plate stud (requiresmetric adapter)125094-013/8-in 24 to M8x1 metric platestud128038-013/8-in 24 to 1/4-in 28 Plate Stud Quick Disconnect ComponentsThe following three components are included with the quick disconnect mounting option for the Velomitor CT Transducer. The quick disconnect option allows you to remove the transducer without rotating it, allowing you to keep the cable connected to the transducer.128689-013/8-in 24 to 1¾-in 16 quickdisconnect stud base. Attachedto the machine.43055-011¾-in 16 mounting base nut.Interface between stud baseand transducer piece. 128690-013/8-in 24 quick disconnect studtransducer piece. Attached tothe Velomitor CT Transducer. FittingsConduit fittings allow connection of flexible, metal, liquid-tight conduit or armor to the conduit adapter.038392011/2-in NPT straight male conduitfitting. For connecting flexible,liquid-tight conduit to theconduit adapter or aweatherproof enclosure. 038500001/2-in NPT straight, malecompression-type fitting. Forconnecting Teflon™-coated3/8-in stainless steel armor tothe transducer or aweatherproof enclosure. Fittingwill fit Teflon™-coated armorwith a maximum outer diameterof 13.8 mm (0.543 in) (includingTeflon™ thickness).Teflon-Coated Stainless Steel Armor106924-AAThis part includes the Teflon-coatedarmor but not the cable. You willrequire 2 1/2-in NPT compressionfittings (part number 03850000) toattach the armor to the conduitadapter and terminate it at anenclosure.A: Armor Length Option in FeetOrder in increments of 10 ft (3.0 m) Minimum Length: 10 ft (3.0 m)Maximum Length: 60 ft (18.3 m) Flexible Metal Conduit14847-AAA: Flexible Conduit Length Option in Feet Order in increments of 1 ft (0.3 m) Minimum Length: 01 ft (0.3 m)Maximum Length: 99 ft (30.2 m)106769-01Terminal housing. Provides a convenient interface between the transducer signal cable and monitor signal cable.Graphs and FiguresNote: All dimensions shown are in millimeters (inches) unless noted otherwise.1. 1/2” NPT x 12.2 DP (1/2” NPT x 0.48 DP)2. 35.6 (1.40) diameter3. Cable (not included)4. Conduit adaptor P/N 128608-02 (not included)5. 31.8 (1.25) hex flat6. 31.5 (1.24) diameter7. 3/8-24 UNF X 8.9 DP (3/8-24 UNF X 0.35 DP)Figure 1: Velomitor CT Outline DrawingSpare Mounting AdaptersAll mounting adapters are made from 300 series stainless steel. Illustrations shown are not to scale.Table 1: Standard StudsTable 2: Adhesive StudsTable 3: 1-3/8 Hex Plate StudsTable 4: Quick Disconnect StudsIllustrationGraphsFigure 2: Typical Phase ResponseFigure 3: Typical Amplitude Response1. Velocity axis (mm/s peak-peak)2. Displacement axis (mm peak-peak)3. Acceleration axis (m/s2 peak-peak)Figure 4: Operating Range for Metric Units1. Velocity axis (in./s peak-peak)2. Displacement axis (in. peak-peak)3. Acceleration axis (g peak-peak)Figure 5: Operating Range for English UnitsFigure 6: Typical Low Frequency Noise FloorCopyright 2021 Baker Hughes Company. All rights reserved.Bently Nevada, Adapt, Velomitor and Orbit Logo are registered trademarks of Bently Nevada, a Baker Hughes Business, in the United States and other countries. The Baker Hughes l ogo is a trademark of Baker Hughes Company. All other product and company names are trademarks of their respective holders. Use of the trademarks does not imply any affiliation with or endorsement by the respective holders.Baker Hughes provides this information on an “as is” basis for general information purposes. Baker Hughes does not make any representation as to the accuracy or completeness of the information and makes no warranties of any kind, specific, implied or oral, to the fullest extent permissible by law, including those of merchantability and fitness for a particular purpose or use. Baker Hughes hereby disclaims any and all liability for any direct, indirect, consequential or special d amages, claims for lost profits, or third party claims arising from the use of the information, whether a claim is asserted in contract, tort, or otherwise. Baker Hughes reserves the right to make changes in specifications and features shown herein, or discontinue the product described at any time without notice or obligation. Contact your Baker Hughes representative for the most current information.The information contained in this document is the property of Baker Hughes and its affiliates; and is subject to change without prior notice. It is being supplied as a service to our customers and may not be altered or its content repackaged without t he express written consent of Baker Hughes. This product or associated products may be covered by one or more patents. See /legal.1631 Bently Parkway South, Minden, Nevada USA 89423Phone: 1.775.782.3611 (US) or /support。
Velocity用户手册
Velocity用户手册-摘抄Velocity的能力远不止web站点开发这个领域,例如,它可以从模板(template)产生SQL和PostScript、XML,它也可以被当作一个独立工具来产生源代码和报告,或者作为其他系统的集成组件使用。
Velocity也可以为Turbine web开发架构提供模板服务(template service)。
Velocity+Turbine提供一个模板服务的方式允许一个web应用以一个真正的MVC模型进行开发。
Velocity能为我们作什么?The Mud Store Example假设你是一家专门出售Mud的在线商店的页面设计人员,让我们暂且称它为“在线MUD商店”。
你们的业务很旺,客户下了各种类型和数量的mud订单。
他们都是通过输入用户名和密码后才登陆到你的网站,登陆后就允许他们查看订单并购买更多的mud。
现在,一种非常流行的mud正在打折销售。
另外有一些客户规律性的购买另外一种也在打折但是不是很流行的Bright Red Mud,由于购买的人并不多所以它被安置在页面的边缘。
所有用户的信息都是被跟踪并存放于数据库中的,所以某天有一个问题可能会冒出来:为什么不使用 velocity来使用户更好的浏览他们感兴趣的商品呢?Velocity使得web页面的客户化工作非常容易。
作为一个web site的设计人员,你希望每个用户登陆时都拥有自己的页面。
你会见了一些公司内的软件工程师,你发现他们每个人都同意客户应该拥有具有个性化的信息。
那让我们把软件工程师应该作的事情发在一边,看一看你应该作些什么吧。
你可能在页面内嵌套如下的VTL声明:Java代码1.<html>2.<body>3.Hello $!4.<table>5.#foreach( $mud in $nudsOnSpecial );6.#if ( $customer.hasPurchased( $mud ); );7.<tr><td>$flogger.getPromo( $mud );</td></tr>8.#end9.#end10.</table>Velocity Template Language(VTL):AN introductionVTL意味着提供最简单、最容易并且最整洁的方式合并页面动态内容。
vilocity中文手册

第一章Velocity简介1. Velocity是什么?Velocity是一个基于java的模板引擎(template engine)。
它允许任何人仅仅简单的使用模板语言(template language)来引用由java代码定义的对象。
当V elocity应用于web开发时,界面设计人员可以和java程序开发人员同步开发一个遵循MVC架构的web站点,也就是说,页面设计人员可以只关注页面的显示效果,而由java程序开发人员关注业务逻辑编码。
Velocity将java代码从web页面中分离出来,这样为web 站点的长期维护提供了便利,同时也为我们在JSP和PHP之外又提供了一种可选的方案。
Velocity的能力远不止web站点开发这个领域,例如,它可以从模板(template)产生SQL 和PostScript、XML,它也可以被当作一个独立工具来产生源代码和报告,或者作为其他系统的集成组件使用。
Velocity也可以为Turbine web开发架构提供模板服务(template service)。
Velocity+Turbine提供一个模板服务的方式允许一个web应用以一个真正的MVC模型进行开发。
2. Velocity能为我们作什么?The Mud Store Example假设你是一家专门出售Mud的在线商店的页面设计人员,让我们暂且称它为"在线MUD商店"。
你们的业务很旺,客户下了各种类型和数量的mud订单。
他们都是通过输入用户名和密码后才登陆到你的网站,登陆后就允许他们查看订单并购买更多的mud。
现在,一种非常流行的mud正在打折销售。
另外有一些客户规律性的购买另外一种也在打折但是不是很流行的Bright Red Mud,由于购买的人并不多所以它被安置在页面的边缘。
所有用户的信息都是被跟踪并存放于数据库中的,所以某天有一个问题可能会冒出来:为什么不使用velocity 来使用户更好的浏览他们感兴趣的商品呢?Velocity使得web页面的客户化工作非常容易。
velocity教程

velocity教程Velocity是⼀个基于java的模板引擎(template engine)。
它允许任何⼈仅仅简单的使⽤模板语⾔(template language)来引⽤由java代码定义的对象。
当Velocity应⽤于web开发时,界⾯设计⼈员可以和java程序开发⼈员同步开发⼀个遵循MVC架构的web站点,也就是说,页⾯设计⼈员可以只关注页⾯的显⽰效果,⽽由java程序开发⼈员关注业务逻辑编码。
Velocity将java代码从web页⾯中分离出来,这样为web站点的长期维护提供了便利,同时也为我们在JSP和PHP之外⼜提供了⼀种可选的⽅案。
⼀、Velocity脚本语法摘要1. 变量(1)变量的定义:#set($name = "hello") 说明:velocity中变量是弱类型的。
当使⽤#set 指令时,括在双引号中的字⾯字符串将解析和重新解释,如下所⽰:#set($directoryRoot = "www" )#set($templateName = "index.vm" )#set($template = "$directoryRoot/$templateName" )$template输出将会是:www/index.vm注:在velocity中使⽤$2.5这样的货币标识是没有问题得的,因为velocity中的变量总是以⼀个⼤写或者⼩写的字母开始的。
(2)变量规范的写法${name} ,也可以写成:$name。
提倡⽤前⾯的写法。
例如:你希望通过⼀个变量$vice来动态的组织⼀个字符串。
Jack is a $vicemaniac.本来变量是$vice现在却变成了$vicemaniac,这样Veloctiy就不知道您到底要什么了。
所以,应该使⽤规范的格式书写: Jack is a ${vice}maniac现在Velocity知道变量是$vice⽽不是$vicemaniac。
velocity中文手册
Velocity用户指南什么是VelocityVelocity是基于Java的模板引擎。
它允许Web页面开发者引用Java代码中定义的方法。
Web设计者可以和Java程序开发者并行开发遵循MVC模式的Web站点。
这意味着,Web设计者可以将精力放在好的Web站点设计上,而Java程序开发者可以将精力放在编写代码上。
Velocity将Java代码从Web页面中分离,使Web站点更具长期可维护性,并提供了一种替代JSP或PHP的方案。
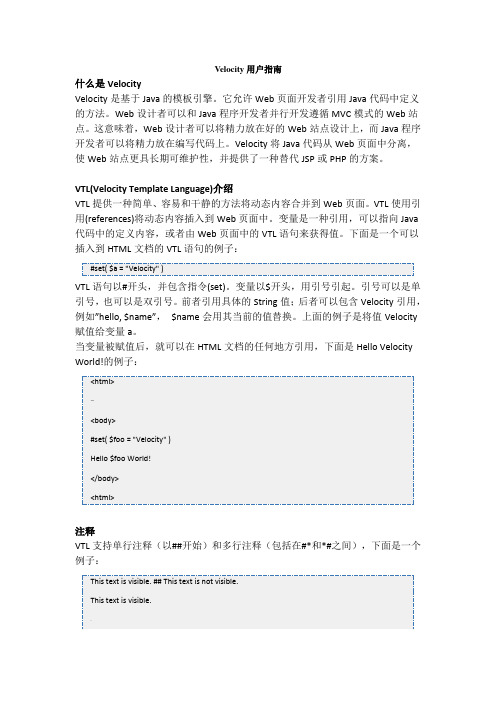
VTL(Velocity Template Language)介绍VTL提供一种简单、容易和干静的方法将动态内容合并到Web页面。
VTL使用引用(references)将动态内容插入到Web页面中。
变量是一种引用,可以指向Java 代码中的定义内容,或者由Web页面中的VTL语句来获得值。
下面是一个可以插入到HTML文档的VTL语句的例子:VTL语句以#开头,并包含指令(set)。
变量以$开头,用引号引起。
引号可以是单引号,也可以是双引号。
前者引用具体的String值;后者可以包含Velocity引用,例如”hello, $name”,$name会用其当前的值替换。
上面的例子是将值Velocity 赋值给变量a。
当变量被赋值后,就可以在HTML文档的任何地方引用,下面是Hello Velocity World!的例子:注释VTL支持单行注释(以##开始)和多行注释(包括在#*和*#之间),下面是一个例子:This text is visible. #* This text, as part of a multi-line comment,is not visible. This text is not visible; it is also part of themulti-line comment. This text still not visible. *# This text is outsidethe comment, so it is visible.## This text is not visible.引用VTL有3种类型的引用:变量、属性和方法。
Velocity java开发指南

《Velocity java开发指南》中文版源文见声明: 转载请保留此页声明**************************************************************************此文档为蓝杰实训学员拓展实训之用.蓝杰实训不对译文中某些说法可能会对您的系统或开发造成损害负责.如对您有所帮助,我们不胜荣幸!*************************************************************************本文属中的Velocity中文系列,本系包含如下文章:《Velocity Java开发指南中文版》(Developer`s Guide) 《Velocity模板使用指南中文版》(User`s Guide)《Velocity Web应用开发指南中文版》(Web Application Guide)《VTL语法参考指南中文版》(VTL Reference)《DB4O中文系列之起步篇》. . .更多资料请访问/下载.**************************************************************************译者:javaFoundMail: javafound@@*************************************************************************目录1.开始入门1.Getting Started2.Dependencies 依赖资源2.参考资源:3.它是如何工作的?1.基本使用模式4.单实例还是多实例(To Singleton Or Not To Singleton...)?1.Singleton Model2.Separate Instance5. The Context1.The Basics2.在模板中用#foreach指令支持迭代对象3.Context Chaining4.模板中的己创建对象5.Context对象的其它用法ing Velocity In Servlets1.Servlet Programming2.Deployment7. Using Velocity In General Applications1.The Velocity Helper Class2.Exceptions3.其它细节8.Application Attributes9.EventCartridge and Event Handlers(事件分发和处理)1.Event Handlersing the EventCartridge使用事件分发器10.Velocity Configuration Keys and Values(配置参数名字和值说明)1.Runtime Log2.字符集编码问题3.#foreach() Directive4.#include() and #parse() Directive5.资源管理6.Velocimacro(宏配置)7.语义更改8.运行时配置11.Configuring the Log System(日志记录配置)1.一般的可选日志功能:2.Simple Example of a Custom Logger12.Configuring Resource Loaders(资源装载器配置)1.Resource Loaders2.Configuration Examples3.插入定制资源管理器和Cache实现13.Template Encoding for Internationalization(字符编码和国际化)14.Velocity and XML15.FAQ (Frequently Asked Questions)1.Why Can't I Access Class Members and Constants from VTL?2.Where does Velocity look for Templates?16.Summary17.Appendix 1 : Deploying the Example Servlet1.开始入门Velocity是一基于java语言的模板引擎,使用这个简单、功能强大的开发工具,可以很容易的将数据对象灵活的与格式化文档组装到一起;希望本文能指引使用velocity 在开发基于servlet或一般java应用程序的应用上快速起步。
- 1、下载文档前请自行甄别文档内容的完整性,平台不提供额外的编辑、内容补充、找答案等附加服务。
- 2、"仅部分预览"的文档,不可在线预览部分如存在完整性等问题,可反馈申请退款(可完整预览的文档不适用该条件!)。
- 3、如文档侵犯您的权益,请联系客服反馈,我们会尽快为您处理(人工客服工作时间:9:00-18:30)。
Velocity 用户指南什么是 Velocity? Velocity 是基于 Java 的模板引擎。
它允许 Web 页面开发者引用 Java 代码中定 义的方法。
Web 设计者可以和 Java 程序开发者并行开发遵循 MVC 模式的 Web 站点。
这意味着,Web 设计者可以将精力放在好的 Web 站点设计上,而 Java 程序开发者可以将精力放在编写代码上。
Velocity 将 Java 代码从 Web 页面中 分离, Web 站点更具长期可维护性, 使 并提供了一种替代 JSP 或 PHP 的方案。
VTL(Velocity Template Language)介绍 VTL 提供一种简单、容易和干静的方法将动态内容合并到 Web 页面。
VTL 使 用引用(references)将动态内容插入到 Web 页面中。
变量是一种引用,可以指向 Java 代码中的定义内容,或者由 Web 页面中的 VTL 语句来获得值。
下面是一 个可以插入到 HTML 文档的 VTL 语句的例子:#set( $a = "Velocity" )VTL 语句以#开头,并包含指令(set)。
变量以$开头,用引号引起。
引号可以是 单引号,也可以是双引号。
前者引用具体的 String 值;后者可以包含 Velocity 引用,例如”hello, $name”, $name 会用其当前的值替换。
上面的例子是将值 Velocity 赋值给变量 a。
当变量被赋值后, 就可以在 HTML 文档的任何地方引用, 下面是 Hello Velocity World!的例子:<html> <body> #set( $foo = "Velocity" ) Hello $foo World! </body> <html>注释 VTL 支持单行注释(以##开始)和多行注释(包括在#*和*#之间),下面是一 个例子:This text is visible. ## This text is not visible. This text is visible. This text is visible. #* This text, as part of a multi-line comment, is not visible. This text is not visible; it is also part of the1multi-line comment. This text still not visible. *# This text is outside the comment, so it is visible. ## This text is not visible.引用 VTL 有 3 种类型的引用:变量、属性和方法。
作为一个设计者,必须和 Java 工程师在 VTL 引用的名称(标识符)上一致,以便在模板中使用它们。
引用是 作为 String 对象处理的。
(1)变量 变量的格式:$VTL 标识符 VTL 标识符以字母开始,由字母、数字、横划线(-)或下划线(_)组成。
变量或者 从模板中的 set 指令获得值(如前面的例子),或者 Java 代码(同名变量)中 获得值。
Velocity 只处理已定义的变量引用, 对于没有定义的变量引用, Velocity 原样返回。
例如下面的例子:#set( $foo = "gibbous" ) $moon = $foo输出结果是:$moon = gibbous (2)属性 属性的格式:$VTL 标识符. VTL 标识符 下面是属性引用的例子:$customer.Address $purchase.Total拿第一例子来说,有两种意思: 返回 Hashtable 对象 customer 中键值为 Address 的值 $customer.getAddress()方法引用的缩写 (JavaBean 属性的 getter 方法) 至于是哪种情况,Velocity 会做决定,返回合适的值。
(3)方法 方法的格式:$VTL 标识符(参数列表) 下面是方法引用的例子:$customer.getAddress() $purchase.getTotal() $page.setTitle( "My Home Page" ) $person.setAttributes( ["Strange", "Weird", "Excited"] )2前面两个例子可以缩写成属性引用(如属性引用的例子)。
属性引用和方法引用 的主要区别是方法引用可以指定参数列表。
(4)正式引用符号:{} 正式引用符号在使用变量引用含糊的地方进行区分。
看下面的例子:#set( $vice = "klepto" ) Jack is a $vicemaniac.输出结果是:Jack is a $vicemaniac.($vicemaniac 没有定义,原样输出)#set( $vice = "klepto" ) Jack is a ${vice}maniac.输出结果是:Jack is a kleptomaniac.(使用正式引用符号将$vice 和其它文本 区分开) (5)Quit 引用符号:! 看下面的例子:<input type="text" name="email" value="$email"/>初始时,$email 没有值,所以文本框中会显示值$email,而更希望是空白。
下 面是使用 Quit 引用符号的例子:<input type="text" name="email" value="$!email"/>当$email 没有值时,Velocity 会用空串替代$email。
(6)特殊字符转义 对于$、#等特殊字符要正常显示,可以使用\进行转义,\\转义为\。
下面是一 个例子:#set( $email = "foo" ) $email\$email \\$email \\\$email 输出结果是:foo $email\foo \$email 指令(Directives)引用允许模板设计者为 Web 站点生成动态内容,而指令使巧妙处理 Java 代码的脚本元素容易使用。
3(1)#set 格式:#set( LHS = RHS ) LHS 可以是变量引用或属性引用 RHS 可以是引用、字符串、数字、ArrayList 或 Map下面的例子展示了上面的每种 RHS 类型:#set( $monkey = $bill ) ## variable reference #set( $monkey.Friend = "monica" ) ## string literal #set( $monkey.Blame = $whitehouse.Leak ) ## property reference #set( $monkey.Plan = $spindoctor.weave($web) ) ## method reference #set( $monkey.Number = 123 ) ##number literal #set( $monkey.Say = ["Not", $my, "fault"] ) ## ArrayList #set( $monkey.Map = {"banana" : "good", "roast beef" : "bad"}) ## Map对于 ArrayList 和 Map,可以使用对应的 Java 方法访问其中的元素值:$monkey.Say.get(0) $monkey.Map.get("bannana") $monkey.Map.banana ## same as above RHS 可以是简单的算术表达式#set( $value = $foo + 1 ) ## Addition #set( $value = $bar - 1 ) ## Subtraction #set( $value = $foo * $bar ) ## Multiplication #set( $value = $foo / $bar ) ## Division #set( $value = $foo % $bar ) ## Remainder算术表达式只支持整型。
/的结果为整数;如果非整型数值,返回 null 如果 RHS 的结果为 null,是不会赋值给 LHS 的看下面的例子:#set( $criteria = ["name", "address"] ) #foreach( $criterion in $criteria ) #set( $result = $query.criteria($criterion) ) #if( $result ) Query was successful #end4#end上面使用$result 检查是否执行成功是有问题的。
如果第一次执行成功,$result 不为 null,则后面的执行 不管是否成功,检查条件总是成立。
改进的方法是在每次执行前初始化为 false:#set( $criteria = ["name", "address"] ) #foreach( $criterion in $criteria ) #set( $result = false ) #set( $result = $query.criteria($criterion) ) #if( $result ) Query was successful #end #end String 文字可以使用双引号或单引号括起。
两者的主要区别是双引号中的引用会替换成相应的值, 而单引号中的引用原样输出#set( $directoryRoot = "www" ) #set( $templateName = "index.vm" ) #set( $template = "$directoryRoot/$templateName" ) $template输出结果是:www/index.vm 如果使用单引号:#set( $template = '$directoryRoot/$templateName’ )输出结果是:$directoryRoot/$templateName 使用双引号可以实现字符串的串联,如下面的例子:#set( $size = "Big" ) #set( $name = "Ben" ) #set($clock = "${size}Tall$name" ) The clock is $clock.(2)#if / #elseif / #else #if 指令在条件成立时, 显示#if 和#end 之间的内容, 否则显示#else 和#end 之间的内容。
