上海千立滴液机说明书
注射剂药物输注时间(滴速)要求汇总(2023)
注射剂药物输注时间(滴速)要求汇总(2023)注射剂药物说明书提到有滴速要求的,临床实际操作中建议根据输液器说明中的点滴系数进行换算。
静脉输液中ImI有多少滴?输液皮条厂家不同滴速不同,约在15-20滴/毫升左右,精密输液器为15滴/毫升,普通输液器20滴/毫升,压力套装为30滴/毫升。
加入一些药物,如头袍类、红霉素等药物后,药液变浓稠,液滴张力随之变大,液珠变小,这样的液体滴注时可为22滴/毫升。
一般输液器包装上标明:规格0.7mm的针头,滴蒸储水20滴/毫升。
药品说明书对输注时间(滴速)有要求的药物:一、抗菌药物1左氧氟沙星(扬子江药业)每250m1不得少于2小时,500m1不得少于3小时2莫西沙星(拜耳先灵医药)静脉给药0.4g的滴注时间应为90分钟3万古霉素(V IANEXSA)以至少IOOm1溶媒进行稀释溶解后,静脉滴注时间应60分钟以上4亚胺培南西司他丁(杭州默沙东)剂量W500mg,给药时,静脉滴注时间应不少于20〜30分钟;剂量>500mg,给药时,应不少于40〜60分钟。
如病人滴注时出现恶心状态,可减慢滴注速度5阿奇霉素(辉瑞制药)配置成浓度为2mg∕m1,25On11的溶液滴注时间应不少于1小时;配置成浓度为1mg∕m1,50Om1的溶液时滴注时间应不少于3小时6两性霉素B(华北制药)浓度不超过IOmg∕100m1,避光缓慢静滴,每次滴注时间6小时以上7伏立康哇(PharmaciaUpjohn)浓度不应高于5mg∕m1,滴注速度最快不超过每小时3mg∕kg,每瓶滴注时间须1至2小时8注射用更昔洛韦(科益药业)不少于1小时9注射用醋酸卡泊芬净(MerckSharpDohme)静脉缓慢输注约1小时以上10注射用替加环素(惠氏制药)成人:静脉滴注时间约30〜60分钟;儿童:静脉滴注时间至少60分钟二、抗肿瘤药物1吉西他滨(江苏豪森)30分钟2注射用奥沙利钻(赛诺菲)2〜6小时3白消安注射液(浙江大冢制药)2小时4盐酸多柔比星脂质体注射液(石药集团)起始给药速率应不大于1mg∕min o如果无滴注反应,以后的滴注可在60分钟完成。
Maglumi2000系列操作规程SOP
MAGLUMI 2000系列标准化操作规程注意1.收到新试剂盒,请阅读试剂说明书!2.每天早上检查系统液量、激发物量,尽量避免在仪器运行测试过程中出现不够的情况!(仪器运行中加系统液、激发物的方法,详见“MAGLUMI2000仪器常见故障及处理方法”)系统液液位不要低于桶高的1/4,不够就请灌满或更换到备用桶(系统液配置方法:往备用的空系统液桶里加至快满纯净水,再倒一瓶714ml/瓶的浓缩液轻轻摇匀,放置3小时以上才可用,故建议前一天配置好备用)激发物量,液位不要低于瓶高的1/4,不够就请灌满或更换(同批号可直接灌满用,不同批号则更换上新批号的底物)开机1.开启仪器(先总后副)和操作电脑,然后双击“M2000 应用软件”图标,输入用户名1和密码1确定,仪器开始初始化,初始化结束前不要点任何菜单,(如果初2.从冰箱取出当日用试剂盒,将磁珠瓶手工旋转稍微摇匀(如果此试剂盒马上就开始做,则必须手工将磁珠彻底转匀,否则,就让此试剂盒在试剂仓自动摇匀30分钟,之后才可用,不然会影响结果);然后扫描试剂盒并插入试剂仓3.每天反应杯模块重新设置:在主界面右下方,点水桶样图标重新设置确定系统测试每天早上在做样本或定标前做(前提:仪器已开机半小时以上,否则温育区温度不够)1.主界面上方点“系统测试”加样臂、清洗区、测量室:依次为3,3,3;BGW,LC-le,LC-ri:依次为1,0,0确定确定。
在主界面的“持续时间”处,会显示所需时间。
“结果”左下“系统测试”里显示BGW值,范围200-1000,CV<5定标建议同批号的新试剂盒要定标,不同批号的新试剂盒必须定标1.在“试剂区域”点选要定标的试剂盒2.点下方“开始”,仪器立即开始做定标(前提:仪器已开机半小时以上,否则温育区温度不够,磁珠没摇匀,都会影响结果)。
在主界面的“持续时间”处,会显示所需时间,“结果”“实验结果”显示定标运行状态及已出的定标值(光强度)3.定标光强度已得出后,在“试剂区域”点相应试剂盒“重新计算相关样本”样本编辑及运行1.将样本管放入样本架(血清不够的请再次离心,液面高度1厘米为最佳,否则会影响结果),然后将样本架扫描插入样本区,2.样本编辑:在“样本区域”界面,选择对应的样本条输入样本号,选择项目或组合“确定”退出“浏览”3.主界面上方点“开始”,仪器立即开始做样本(前提:仪器已开机半小时以上,否则温育区温度不够,磁珠没摇匀,都会影响结果),在主界面的“持续时间”处,会显“实验结果”显示样本运行状态示所需时间,点“结果”仪器运行中添加普通样本、急诊样本及试剂盒1.添加样本:直接打开样本仓门,把包括急诊样本在内的所有样本插入样本条,扫描插入样本区,关闭样本仓门。
ZSD-2型自动水分滴定仪使用标准操作规程
1 使用前的检查:1.1 检查滴定仪应完好,如有故障,仪器操作人员应先排除故障后才能使用,如仪器操作人员不能排除的故障应及时填写《设备请修单》交设备科安排维修人员进行故障排除后才能使用。
1.2 检查滴定仪当前的状态标识应完善(包括校验、清洁及运行状态标识等),使用现场不应遗留有与此次操作无关的物品。
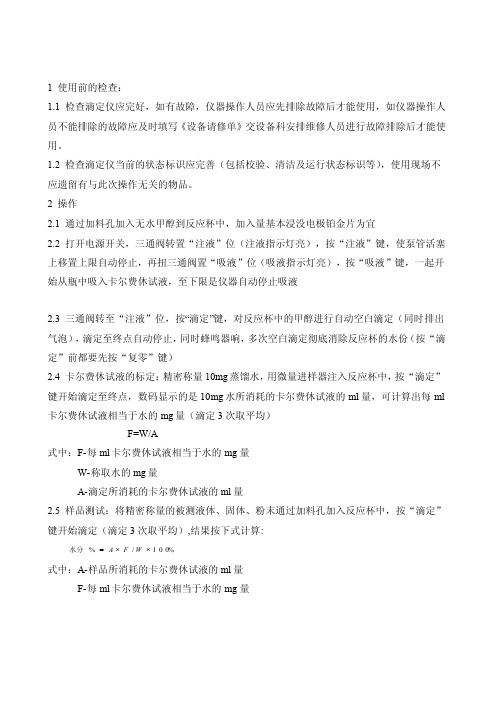
2 操作2.1 通过加料孔加入无水甲醇到反应杯中,加入量基本浸没电极铂金片为宜2.2 打开电源开关,三通阀转置“注液”位(注液指示灯亮),按“注液”键,使泵管活塞上移置上限自动停止,再扭三通阀置“吸液”位(吸液指示灯亮),按“吸液”键,一起开始从瓶中吸入卡尔费休试液,至下限是仪器自动停止吸液2.3 三通阀转至“注液”位,按“滴定”键,对反应杯中的甲醇进行自动空白滴定(同时排出气泡),滴定至终点自动停止,同时蜂鸣器响,多次空白滴定彻底消除反应杯的水份(按“滴定”前都要先按“复零”键)2.4 卡尔费休试液的标定:精密称量10mg蒸馏水,用微量进样器注入反应杯中,按“滴定”键开始滴定至终点,数码显示的是10mg水所消耗的卡尔费休试液的ml量,可计算出每ml 卡尔费休试液相当于水的mg量(滴定3次取平均)F=W/A式中:F-每ml卡尔费休试液相当于水的mg量W-称取水的mg量A-滴定所消耗的卡尔费休试液的ml量2.5 样品测试:将精密称量的被测液体、固体、粉末通过加料孔加入反应杯中,按“滴定”键开始滴定(滴定3次取平均),结果按下式计算:F=WA水分/%⨯100%⨯式中:A-样品所消耗的卡尔费休试液的ml量F-每ml卡尔费休试液相当于水的mg量W-样品称重mg量2.6 废液的排除:废液过多时,按“排液”键排除液体2.7 试验完毕,用无水甲醇清洗管路和反应杯3 注意事项3.1 仪器在工作过程中,泵体活塞接近上限位时,应及时在吸液位吸满溶液再滴,如果再滴定开始键工作过程中泵体活塞到达上限位停滴时,应先按复零键后再在吸液位吸液,吸满液后再按“滴定”键继续滴,此时按复零键前的滴定ml数和继续滴定到终点的ml数应相加。
微量注射泵公式常用药物用法精选文档

微量注射泵公式常用药物用法精选文档TTMS system office room 【TTMS16H-TTMS2A-TTMS8Q8-微量注射泵公式泵速(ml/h)=所需药物剂量(ug/kg/min)××体重(kg)×注射器毫升数÷药物剂量(mg)。
静脉输液滴速公式:(若输液器的滴速为15滴约等于1亳升时)滴速=所需剂量(ug/kg/min)××kg ×液体毫升数(ml)÷药物剂量(mg)。
注射器毫升数:指你用的注射器的毫升数,如你选用20ML就用20;药物剂量指:你用的药物的剂量如用多巴胺40MG,药物剂量就是40。
举例:病人70KG,需要用多巴胺5ug/kg/min。
用20ML注射器抽多巴胺40MG 加生理盐水至20ML。
套用公式:泵速(ml/h)=5**70*20/40=。
即将泵速调为。
也就是一小时常用药物用量配法多巴胺:(公斤体重×3)mg 稀释至50ml 如泵速为1ml/h,泵入量为1μg/kgmin,常用剂量1-20μg/kgmin;起始剂量5μg/kgmin;多巴酚丁胺:配法同多巴胺,常用剂量1-20μg/kgmin,起始剂量1μg/kgmin;硝普钠:5%GS50ml+硝普钠50mg,即1mg/ml(1000μg/ml),常用剂量10-200μg/min或-2μg/kgmin,起始剂量5-10μg/min。
硝酸甘油:(公斤体重×)mg 稀释至50ml 如泵速为1ml/h,泵入量为μg/kgmin 或:NS44ml+硝酸甘油30mg,即ml(600μg/ml),常用剂量10-200μg/min或-2μg/kgmin,起始剂量5-10μg/min(-1ml/h)。
去甲肾上腺素:(公斤体重×)mg 稀释至50ml 如泵速为1ml/h,泵入量为μg/kgmin常用剂量-2μg/kgmin,起始剂量μg/kgmin(应经中心静脉使用去甲肾上腺素)肾上腺素:配法同去甲肾上腺素, 起始剂量为μg/kgmin,常用剂量为-1μg/kgmin(尽可能经中心静脉用药)严重低血压及过敏性休克- ih或iv异丙肾上腺素:(公斤体重×)mg 稀释至50ml 如泵速为1ml/h,泵入量为μg/kgmin起始剂量μg/kgmin,以目标心率为终点。
LC-1000D型液相色谱(P1010输液泵)说明书

售后服务
如果此仪器发生任何故障,请按"故障排除" 一章中所述进行检查并采取适当的 应对操作。如果仍存在问题或症状未包含在“故障排除”一章中,请与山东鲁南 瑞虹化工仪器有限公司办事处联系。
II
介绍
安全说明
• 为确保仪器的安全操作,请在使用前仔细阅读这些“安全说明”。 • 请遵守本节中所述的所有“警告”和“小心”信息。这些信息对安全极为重要。 • 在本说明书中,使用以下惯例表示警告和小心信息;应用的预防措施
LC-1000D型溶剂输送单元
用于山东鲁南瑞虹化工仪器有限公司高效液相色谱
P1010 说明书版本
1.00A
!注意: 使用产品前请仔细阅读本说明书。 请妥善保管本说明书以备今后参考。
介绍
!请在使用仪器前仔细阅读本说明书。
感谢您购买本仪器。本说明书描述了有关:安装、操作、硬件认证、使用注意事 项以及附件和选件的详细信息。 请在使用仪器前仔细阅读本说明书。请根据说明 书的说明使用仪器。请妥善保管本说明书以备今后参考。
III
目录 概述...................................................................................................................................... - 1 1.1. P1010 输液泵主要特点........................................................................................... - 1 1.2. P1010 高压输液泵技术参数...............................................
界面张力仪
旋转滴界面张力仪定义:专业用于测量液体表面张力值的专业测量/测定仪器,通过白金板法、白金环法、最大气泡法、悬滴法、旋转滴法等原理,实现精确液体的表面张力值的测量。
同时,利用软件技术,可能测得随时间变化而变化的表面张力值。
而旋转滴法超低界面张力仪为采用旋转滴的形式拍摄液滴图形进行界面张力分析的专业界面张力分析仪器。
通常应用于三次采油应用与研发,驱油剂开发中的测试界面以及表面张力值(油聚界面张力以及表面张力测定),聚合物表面活性剂研制等,以及化装品行业居多。
就目前成功开发的旋转滴界面张力仪,我们通常能够看到的有TX500C旋转滴界面张力仪、Texas500旋转滴界面张力仪,德国KRUSS 的site100型旋转滴界面张力仪(包括德国dataphysics的SVT20视频旋转滴张力仪)以及国产的旋转滴界面张力仪JJ2000A/B系列、SD200系列旋转滴界面张力仪等。
提醒您注意的是,TX500并非原来国内引进的Texas500型旋转滴界面张力仪。
具体见下文论述。
千万不要因为有些用户理解错误而误认为是一个东西或是这个型号的升级版本。
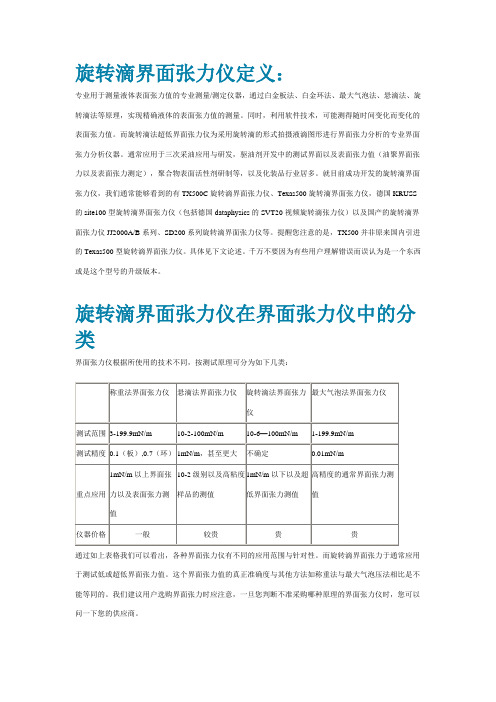
旋转滴界面张力仪在界面张力仪中的分类界面张力仪根据所使用的技术不同,按测试原理可分为如下几类:通过如上表格我们可以看出,各种界面张力仪有不同的应用范围与针对性。
而旋转滴界面张力于通常应用于测试低或超低界面张力值。
这个界面张力值的真正准确度与其他方法如称重法与最大气泡压法相比是不能等同的。
我们建议用户选购界面张力时应注意,一旦您判断不准采购哪种原理的界面张力仪时,您可以问一下您的供应商。
旋转滴界面张力仪基本原理旋转滴界面张力仪测试原理概述为测定超低界面张力,须人为地改变原来重力与界面张力间的平衡,使平衡时液滴的形状便于测定。
在旋转滴界面张力仪中,通常采用使液液或液气体系旋转,增加离心力场的作用而实现。
这就是旋转滴法界面张力仪的基本原理。
通常,我们在样品管中充满高密度相液体,再加入少量低密度相液体(或气体,用于测液体与气体间的界面张力值),密封地装在旋转滴界面张力仪上,使样品管平等于旋转轴并与转轴同心。
大学物理实验-密立根油滴试验

一、实验目的1.用CCD微机密立根油滴仪是验证电荷的不连续性及测量基本电荷的电量的物理实验仪器。
2.学习了解CCD图像传感器的原理及应用、学习电视显微测量方法。
二、实验仪器及结构仪器主要由油滴盒、CCD电视显微镜、电路箱、监视器等组成。
油滴盒是个重要部件,从图一上可以看到,上下电极直接用精加工的平板垫在胶木圆环上,这样极板间的不平衡度、极板间的间距误差都可以控制在0.01mm以下。
在上极板中间有一个0.4mm的油滴落入孔,在胶木圆环上开有显微镜观察孔和照明孔。
油滴盒外罩有防风罩,罩上放置一个可取下的油雾杯,杯底中心有一个落油孔及一个挡片,用来开关落油孔。
在上电极上放有一个可以左右拨动的压簧,注意,只有将压簧拨到最边位置,方可取出上极板。
照明灯安装在照明座中间位置,采用了带聚光的半导体发光器件。
图一电路箱体内装有高压产生、测量显示等电路。
底部装有三只调平手轮,面板结构见图二。
由测量显示电路产生的电子分划板刻度,与CCD摄像头的行扫描严格同步,相当于刻度线是做在CCD器件上的。
图二⨯结构,垂直线视场为2mm,分8格,每格OM98/OM99油滴仪的标准分划板是83值为0.25mm。
在面板上有两只控制平行极板电压的三档开关,K1控制上极板电压极性,K2控制极板上电压的大小。
当K2处于中间位置,即“平衡”档时,可用电位器调节平衡电压。
打向“提升”档时,自动在平衡电压的基础上增加200~300V的提升电压,打向“0V”档时,极板上电压为0V。
为了提高测量精度,OM98/OM99油滴仪将K2的“平衡”、“0V”档与计时器的“计时/停”联动。
在K2由“平衡”打向“0V”时,油滴开始匀速下落的同时开始计时,油滴下落到预定距离时,迅速将K2由“0V”档打向平衡档,油滴停止下落的同时停止计时。
这样,在屏幕上显示的是油滴实际的运动距离及对应的时间,提供了修正参数。
这样可提高测距、测时精度。
根据不同的教学要求,也可以不联动。
微量注射泵公式及常用静脉泵入药物的配制及应用方法
2012-10-12 23:17微量注射泵公式及常用静脉泵入药物的配制及应用方法泵速(ml/h)=所需药物剂量(ug/kg/min)×0.06×体重(kg)×注射器毫升数÷药物剂量(mg)。
静脉输液滴速公式:(若输液器的滴速为15滴约等于1亳升时)滴速=所需剂量(ug/kg/min)×0.015×kg×液体毫升数(ml)÷药物剂量(mg)。
注射器毫升数:指你用的注射器的毫升数,如你选用20ML就用20;药物剂量指:你用的药物的剂量如用多巴胺40MG,药物剂量就是40。
举例:病人70KG,需要用多巴胺5ug/kg/min。
用20ML注射器抽多巴胺40MG加生理盐水至20ML。
套用公式:泵速(ml/h)=5*0.06*70*20/40=10.5。
即将泵速调为10.5。
也就是一小时10.5ML常用药物用量配法多巴胺:(公斤体重×3)mg 稀释至50ml 如泵速为1ml/h,泵入量为1μg/kg•min,常用剂量1-20μg/kg•min;起始剂量5μg/kg•min;多巴酚丁胺:配法同多巴胺,常用剂量1-20μg/kg•min,起始剂量1μg/kg•min;硝普钠:5%GS50ml+硝普钠50mg,即1mg/ml(1000μg/ml),常用剂量10-200μg/min或0.1-2μg/kg•min,起始剂量5-10μg/min(0.3-0.6ml/h)。
硝酸甘油:(公斤体重×0.3)mg 稀释至50ml 如泵速为1ml/h,泵入量为0.1μg/kg•min或:NS44ml+硝酸甘油30mg,即0.6mg/ml(600μg/ml),常用剂量10-200μg/min或0.1-2μg/kg•min,起始剂量5-10μg/min(0.5-1ml/h)。
去甲肾上腺素:(公斤体重×0.3)mg 稀释至50ml 如泵速为1ml/h,泵入量为0.1μg/kg•min常用剂量0.1-2μg/kg•min,起始剂量0.1μg/kg•min(应经中心静脉使用去甲肾上腺素)肾上腺素:配法同去甲肾上腺素, 起始剂量为0.1μg/kg•min,常用剂量为0.1-1μg/kg•min(尽可能经中心静脉用药)严重低血压及过敏性休克0.3-0.5mg ih或iv异丙肾上腺素:(公斤体重×0.03)mg 稀释至50ml 如泵速为1ml/h,泵入量为0.01μg/kg•min起始剂量0.01μg/kg•min,以目标心率为终点。
水分仪--831中文操作手册

目录1.概况 (4)2.湿化学部分 (6)2.1 库仑法KF测定原理 (6)2.2 安装滴定杯....... (7)2.3 首次测定 (8)2.4 无隔膜再生电极 (9)2.4.1 试剂 (9)2.4.2 清洗 (9)2.5 隔膜再生电极 (10)2.5.1 试剂 (10)2.5.2 清洗 (10)2.6 加入样品 (11)2.6.1 样品量 (11)2.6.2 液体样品 (11)2.6.3 固体样品 (12)2.7 优化工作条件 (13)2.7.1 漂移值 (13)2.7.2 更换试剂 (14)2.7.3 指示电极 (14)3.操作手册 (15)3.1 键盘 (15)3.2 数据输入原则 (16)3.3 输入文本 (17)3.4 配置,<CONFIG>键 (18)3.4.1 利用Dosino更换试剂 (26)3.5 选择模式,<MODE>键 (27)3.6 参数,<PARAM>键 (28)3.6.1 滴定程序 (32)3.6.2 控制参数和Ipol (33)3.6.3 漂移值 (33)3.6.4 再生电极电流 (34)3.7 结果计算 (35)3.8 统计计算 (38)3.9 公共变量 (40)3.10 数据输出 (41)3.10.1 测量结束后输出报告 (41)3.10.2 报告输出的其它方式 (43)3.10.3 显示滴定曲线 (43)3.11 用户名称,<USER>键 (44)3.12 存储方法,<USER METH>键 (45)3.13现时样品数据,<SMPL DATA>键 (47)3.14样品数据仓储 (48)3.15 存储测定结果和仓储计算 (51)3.15.1 存储测定结果 (51)3.15.2 仓储计算 (52)4 错误信息,故障排除 (55)4.1 错误信息 (55)4.2 错误和专用信息 (56)4.3 外接打印机问题 (59)4.4 仪器初试化 (60)4.5 测试测量输入 (61)5 准备 (62)5.1 安装仪器 (62)5.1.1 连接搅拌器或滴定台 (62)5.1.2 安装内置热敏打印机的打印纸 (63)5.1.3 安装滴定杯 (64)5.2 连接Disino (65)5.2.1 安装吸液部件 (65)5.2.2 安装滴定杯的吸液部件 (66)5.3 连接KF Oven (67)5.3.1 连接滴定杯与卡氏炉 (68)5.4 连接774 Oven Sample Processor (69)5.4.1 连接滴定杯与Oven Sample Processor (69)5.5 连接外置打印机 (70)5.6 连接天平 (71)5.7 连接计算机 (72)5.8 连接Remote Box (73)5.8.1 连接条形码读出器 (73)5.8.2 连接计算机键盘 (74)6 附录 (75)6.1 技术规格 (75)6.2 仪器检定,GLP模式 (77)6.2.1 电子测试 (77)6.2.2 湿法测试 (78)6.2.3 仪器的维护与调节 (78)6.3 用户方法 (79)6.3.1 连接KF Oven (80)6.3.2 连接774 Oven Sample Processor (82)缩写:< > 键,例如:<START>date 1998-04-23标准操作水平的显示run number 1只是专家操作水平的显示1概况仪器面板:1 内置热敏打印机热敏打印机订货号:6.2237.0202显示屏幕3KF Coulometer控制键和指示灯键Coulometer电源开关键搅拌开关<PAPER>键打印机进纸(手动打印报告)。
KF-1A型水分测定仪产品使用说明书

KF-1A型水份测定仪产品使用说明书KF-1A水份测定仪说明书一、工作原理:本仪器为卡尔·费休(Kart Fischer)容量滴定法测定水份含量的仪器,采用“永停法”来确定终点,。
根据半电池反应:I2+2e <=> 2Iˉ溶液中同时存在I2及Iˉ时上述反应分别在两个电极上进行,既在一个电极上I2被还原,而再另一个电极上Iˉ被氧化,因此在两个电极之间有电流通过。
如果溶液中只有Iˉ而无I2则电极间无电流通过。
当滴定终点时溶液中有微量卡尔·费休试剂存在,即有Iˉ及I2同时存在,这时溶液导电,仪器显示滴定到达终点。
反应式:I2+SO2+3C5H5N+CH3OH+H2O→2C4H5N·HI+C5H5N·HSO4CH3根据滴定反应中所消耗的卡尔·费休试剂量来算出样品中水份的含量。
二、仪器性能及适应范围:1、仪器性能:a、电源:220V±10% 50Hzb、相对湿度:≤80%c、环境温度:5℃--40℃d、测量范围:0.03%~100%。
e、相对误差≤3%(平行测定以水为标样,测定卡尔·费休试剂的水当量,应该注意的是它的水当量必须大于等于3mg/ml。
)2、适应范围:本仪器主要用于测定化肥、医药、食品、轻工、化工原料以及其它工业产品中的水份含量。
根据资料及美国材料协会标准ASTM,使用卡尔·费休法可直接测定的化合物包括:有机化合物-饱和的不饱和的碳氢化合物,缩醛、酸类、酰基卤、醇类、稳定的酰、酰胺、弱的胺、酐、二硫化物、酯类、醚卤化物、碳氢化合物,稳定的酮、过氧化物,原酸酯,亚硫酸盐、硫氰酸盐及硫醚等。
无机化合物-酸、酸性氧化物、氧化铝、酐、过氧化钡、碳化钙、氧化铜、干燥剂、硫酸肼、部分有机和无机酸的盐等。
测定水份含量在0.1%-10%时,选用10毫升滴定管(最小分度为0.05毫升)。
测定水份含量<0.1%时,应适当增大取样量并可选用5毫升或2毫升滴定管(最小分度为0.02毫升)。
液滴检测仪产品规格表说明书

Flat-Surface, Self-Cleaning pH and ORP Electrodes Insertion/wet-tap pH and ORP electrodes, assemblies and cablesSpecificationsRange 0-14pH (0-12pH without Na+ error)+/- 2000mV for ORPWetted MaterialsBody/Junction: CPVC/HDPE ("-CD" models)PVDF/ Porous PVDF ("-KD" models)Measuring Surface: pH glass (pH), Platinum or Gold (ORP)O-rings: VitonGasket: EPRTemperature/Pressure Range(all models ending in "-CD") = 0C* - 75C (0-100psig), 80C (0-85psig)(all models ending in "-KD") = 0C* - 100C (0-100psig)Note: From 0 to 10C, electrodes will exhibit slower response time.Reference Type Ag/AgCl, Sealed Double JunctionInstallation Any directionQuick disconnect design saves time and moneyInstalls in seconds, no tools necessaryFlat-surface design resists coatingCPVC or PVDF constructionAvailable with or without ATC elementsProtective tip reduces pH glass breakage (S656CD)Without the need for system shutdown for electrodemaintenance, the insertion assembly allows pH measure-ments to be made in pressurized tanks and main lines. Theassembly’s adjustable insertion depth allows it to be placedin a turbulent flow region, enabling it to operate in the self-cleaning mode.In abrasive applications, the electrode is best positionedflush with the pipe wall or tank wall. High suspended solidsand viscous liquid pH measurements are simple with theinsertion assembly and electrode pair. The speciallydesigned internal makes the electrode mountable invirtually any direction, including inverted. A 1” full-portball-valve (Sensorex BV-1) is recommended for installation.New part number S656CD has four protective pads toreduce pH glass breakage. The S656CD replaces the 970283which is now obsolete. In addition to the protective padfeature, the S656CD also includes our high performanceacrylamide gel that provides longer life in manyapplications.S656CD S656CD-ORPCPVC and KYNAR ELECTRODESCPVC pH and ORP Insertion Assemblies ( With and Without ATC) -S675, S675TCPVDF pH and ORP Insertion Assemblies ( With and Without ATC)-S675K, S675TKORDERING INFORMATIONSystems without temperature compensationSystems with temperature compensationSELF-CLEANING OPERATION ABRASION-FREE OPERATIONVISCOUS MATERIAL OPERATIONORDERING INFORMATION - REPLACEMENT PARTS11751 Markon Dr.Garden Grove, CA 92841 USA Tel: 714-895-4344 Fax: 714-894-4839E-mail:*****************Description CPVC Parts KYNAR (PVDF) PartsInsertion tube 12” depth (18” length)* INSA-012 INSA-012K Insertion tube 18” depth (24” length)** INSA-018 N/A Insertion tube 24” depth (30” length)***INSA-024IN/AInsertion tube 12” depth*, with ATC INSA-012TC INSA-012TK Insertion tube 18” depth**, with ATC INSA-018TC N/A Insertion tube 24” depth***, with ATC INSA-024TC N/A Packing gland sliding seal, O-ring INSA-OR130INSA-OR130Packing gland INSA-PG170 INSA-PG234Adapter Body INSA-AB171 INSA-AB233Retainer NutINSA-NUT121INSA-NUT205O-ring face seal (Large ring on PG170 and PG234) INSA-OR126INSA-OR131Compression Nut and Ferrule INSA-CL131 INSA-CL131Steel Retainer RingINSA-RET162INSA-RET162Cable connection (1/2” NPT)INSA-CC111INSA-CC111。
立式注射泵产品说明书

~s2.3版目录第一章产品简介 (3)1.1概述 (3)1.2命名规则 (3)1.3注射泵结构 (4)1.4注射泵基本外形 (4)1.4.1不含驱动立式注射泵 (4)1.4.2含驱动立式注射泵 (6)1.542步进电机说明书 (6)1.6典型应用举例说明(电磁阀与注射泵连接) (7)1.7注射泵基本参数 (8)1.8端口定义 (10)第二章注射泵控制代码说明 (11)2.1概述 (11)2.2安装调试 (11)2.3通讯协议说明 (11)2.3.1控制命令格式 (11)2.3.2普通指令格式(发送8字节,回送8字节) (11)2.3.3工厂指令格式(发送14字节,回送8字节) (13)第三章简易故障排查 (16)第四章技术支持 (17)第一章产品简介1.1概述产品的外形如图所示,称为立式注射泵,有5ml、10ml、20ml三种规格,根据有无驱动器分为含驱动系列和不含驱动系列。
主要用途:主要在生物实验室使用,控制器、执行单元为分体结构,执行单元有夹持机构。
立式注射泵精密、小巧、结构紧凑,易于安装、操作便捷,并且立式安装结构可方便地与显微操作仪、脑立体定位仪等生物仪器配套使用,广泛应用于各种生物实验领域。
1.2命名规则型号参数如下:举例:5ml0.9度步进电机单孔内螺纹含驱动注射泵,命名为:ZSB-LS-0.9-1-5-1-Q1.3注射泵结构1.4注射泵基本外形1.4.1不含驱动立式注射泵不含驱动控制器的立式注射泵,专用2只日本原装进口的OMRON光电传感器(型号:EE-SX95-R),安装2只光电传感器分别控制上限位和下限位,可以防止注射泵活塞上下运动时撞坏玻璃管或注射泵泵头;光电传感器调节方法:转动电机,使活塞到达上止点位置,移动上面的光耦,在光耦检测到信号时,锁紧固定螺丝。
下面的光耦安装保持在最低端位置锁紧。
注意:调试过程中应使用低转速,防止活塞挤压到上端。
1.4.1.1不含驱动立式注射泵外形尺寸(单位:mm)1.4.1.2光电传感器1.4.2含驱动立式注射泵1.4.2.1含驱动立式注射泵外形尺寸(单位:mm)1.542步进电机说明书最大功率1.6典型应用举例说明(电磁阀与注射泵连接)1、接管方式如下图所示:2、动作流程:注射泵抽取液体时,电磁阀的长开端和公共端连通,将A 箱内的液体抽至注射泵腔体内;注射泵向外排出液体时,电磁阀通电,此时电磁阀的长开端关闭,长闭端打开并与公共端连通,将注射泵腔体内的液体排至B 箱,即抽出液体结束。
k100表面张力仪使用手册ppt

接触角的测量
测量原理
h
2
=
C rσ c o s θ × t 2η
式中:h为液体上升高度,C为常数,r为粉末间空隙的当量毛细管半径, 对指定的体系来说Cr为定值;σ为液体表面张力;η为液体黏度,θ为固 体对液体的接触角。 假设在均匀的玻璃钢中进行实验并且装填均匀,则上升液体的高度与 液体的质量满足如下关系式: '
KRUSS K100表面张力仪 使用手册
目录
仪器简介 注意事项 表面张力测量 界面张力测量 接触角测量 临界胶束浓度测量
仪器简介
K100是目前应用极 广泛的表面张力仪。 其测量结果精确, 测量速度快,界面 友好,控制灵活使 用方便。 仪器可用于测量液体的表面张力;液液界面 张力;表面活性剂的临界胶束浓度;动态接 触角测量;液体和固体密度测量以及测量沉 淀速率和阻力
拟合的点应该尽 量多,拟合度应 该尽量大,至少 保持在0.98以上
接触角的测量
测量毛细常数时选择的液体最好是能完全润湿 固体的液体,此时测量的毛细常数较准确。 该方法的测量范围理论上为0-90度,当超过90 度后会默认为90度。 90 该方法测量得到的结果是一个相对接触角大小, 并不是绝对值。 当测量液体的接触角与参比液很接近或者是比 参比液还小时,有可能会得不到测量角度。 该方法最好应用于比较润湿能力的大小。
界面张力的测量
测量操作
清洁测量环,移开轻相,把重相倒入烧杯,把环 固定在天平上,把液体靠近测量环。 按OK键继续,K100动作完成后,出现如下提示:
把轻相倒到重相上,按OK键继续,K100 开始测量界面张力。结论在Result中显示。
接触角的测量
测量原理
如右图毛细管插入到液体中,会产生一个附 加压力F1,在附加压力的作用下,液体在毛 细管中上升。 由于是附加压力驱动液体渗透,因此液体的 渗透速率受到的毛细半径r,液体的表面张力γ 以及液体对固体的接触角θ的影响。 在上升的过程中还受到粘滞阻力F2和重力F3 的影响,阻止液体渗透,由于附加压力大于 重力和粘滞阻力的作用液体缓慢上升。 Washburn研究了各种力的关系,最后得到 Washburn方程式,指出了液体上升高度与上 升时间,毛细管半径,液体粘度,液体表面 张力以及接触角的关系,根据Washburn方程 式就可以测量接触角的大小。
新滴灌使用说明书
滴灌微喷系统使用说明指南目录一、概述 (1)二、用途和使用围 (1)三、滴灌设备的规格和技术参数 (1)四、滴灌管路系统结构 (2)五、运行管理 (5)六、使用与操作规程 (7)七、故障与排除 (8)八、维修和保养 (10)九、安全注意事项 (10)效果图 (12)滴灌材料表 (16)主管线 (17)次管线 (19)管件类 (25)滴头 (27)太阳能水泵 (31)其他(打孔器、施肥罐、过滤器、控制设备) (35)滴灌及微喷设备使用说明书一、概述滴灌(drip irrigation)是利用塑料管道将水通过直径约10mm毛管上的孔口或滴头送到作物根部进行局部灌溉。
它是目前干旱缺水地区最有效的一种节水灌溉方式,水的利用率可达95%。
滴灌较喷灌具有更高的节水增产效果,同时可以结合施肥,提高肥效一倍以上。
可适用于果树、蔬菜、经济作物以及温室大棚灌溉,在干旱缺水的地方也可用于大田作物灌溉。
其不足之处是滴头易结垢和堵塞,因此应对水源进行严格的过滤处理二、用途和使用围滴灌是一种先进的节水灌溉技术,具有省水、省工、省肥、保持水土、增收增产等优点。
滴灌可广泛用于大田、温室蔬菜、果树、葡萄、花卉、苗圃等各种经济作物的膜上(膜下)灌溉。
微量灌溉,水肥渗漏较少,故可节省化肥施用量,减轻污染。
运用灌溉施肥技术,为作物及时补充价格昂贵的微量元素提供了方便,并可避免浪费。
滴灌系统仅通过阀门人工或自动控制,又结合了施肥,故又可明显节省劳力投入,降低了生产成本。
滴灌属微量灌溉,水分缓慢均匀地渗入土壤,对土壤结构能起到保持作用,并形成适宜的土壤水、肥、热环境。
微喷洒水的雾化程度高,也就是水滴细小,因而对农作物的打击强度小,均匀度好,不会伤害幼苗。
微喷所需工作压力低,一般在0.7—3公斤/平方厘米围可以运作良好。
农作物从苗期到成长收获期全过程都适用。
它利用低压水泵和管道系统输水,在低压水的作用下,通过特别设计的微喷喷头,把水喷射到空中,并散成细小水滴,洒在作物枝叶上或树冠下地面的一种灌水方式,简称为微喷。
Endress+Hauser CUA 461 可折叠液滴计测试仪操作手册说明书
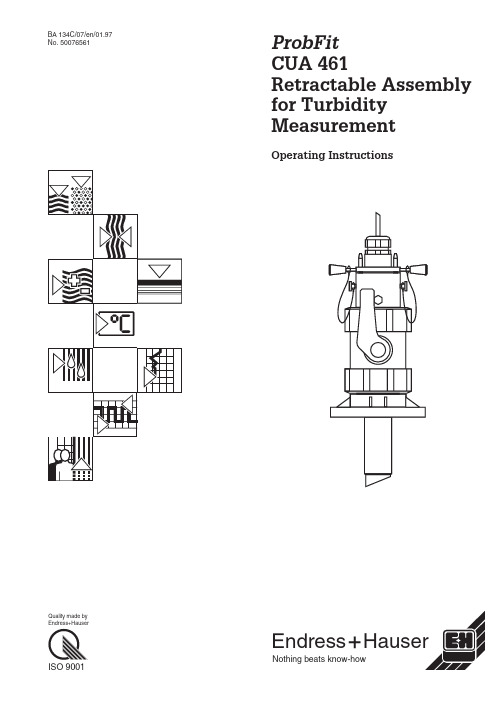
BA 134C/07/en/01.97No.50076561ProbFit CUA 461Retractable Assembly for Turbidity MeasurementOperating InstructionsNothing beats know-howEndressHauserQuality made by Endress+HauserISO 9001Table of contents1General information (2)1.1Symbols used (2)1.2Safety notes (2)2Description (3)2.1Areas of application (3)2.2Design of CUA 461assembly (3)2.3Function (4)2.4Assembly variants (4)2.5Accessories (5)3Installation (6)3.1Unpacking (6)3.2Dimensions (6)3.3Installation and application notes (7)3.4Installation of turbidity sensor in assembly (8)3.5Rinse ports (9)4Operation (10)4.1Moving the sensor into the process space,measurement (10)4.2Withdrawing the sensor from the ongoing process (10)4.3Calibration (10)5Maintenance (11)5.1Cleaning of turbidity sensor and assembly (11)5.2Seals and spare parts (11)5.3Repairs (11)6Appendix (12)6.1Technical data (12)6.2Index...............................................................13BE0UA461.CHPProbFit CUA 461Endress+Hauser11General information1.1Symbols usedWarning:This symbol alerts to hazards which may cause irreparable damage.Caution:This symbol alerts to possible malfunction due to operator error.Note:This symbol indicates important items of information.Safety notesWarning:Operating the assembly in any way other than as intended may compromise the safety and function of the assembly and corresponding measuring system and is therefore impermissible.This device may only be installed,commissioned,operated and serviced by properly trained specialist personnel authorised by the system operator.The specialist personnel must be familiar with and adhere to these operating instructions.1General information ProbFit CUA 4612Endress+Hauser2Description2.1Areas of applicationThe retractable assembly ProbFit CUA 461is primarily used in the water and sewage treatment areas.It can be used to install a turbidity sensor CUS 1or CUS 4on a pipe or tank in such a manner as to permit sensor checks and cleaning without interrupting the process.This manually operated assembly permits the sensor to be moved into and withdrawn from the process space under process conditions (up to 2bar at 20°C,up to 1bar at 50°C).All parts in contact with the medium are made of polypropylene (PP),the seals consist of EPDM or Viton.The process connection is established via a DN 50DIN flange or a 2"ANSI flange.2.2Design of CUA 461assemblyThe following drawing shows the design of the CUA 461assembly:Process connection (accessory)Fig. 2.1Design of assembly ProbFit CUA 461BE2UA461.CHPProbFit CUA 4612DescriptionEndress+Hauser 32.3FunctionThe sensor guide with the built-in turbidity sensor CUS 1or CUS 4is moved into the process space by hand for measurement.The sensor guide can be withdrawn to the service position without interrupting the process.The interior of the assembly is sealed off from the process by closing the ball valve.The turbidity sensor can then be cleaned,calibrated or replaced.2.4Assembly variantsThe order code on the rating plate can be used to identify the assembly variant by comparison with the followingchart:Fig.2.2Rating plate of CUA 461Retractable assembly ProbFit CUA 461Version /mounting typeA Process connection DN 50DIN flangeB Process connection 2’’ANSI flangeO-ring seals 1Material EPDM 2Material VitonCUA 461-⇐complete order code2Description ProbFit CUA 4614Endress+Hauser2.5AccessoriesAdapter for process connection:Welded fitting for pipe diameters of more than 80mm,with DN 50/2"ANSI combination flange,flange seal,4M16x60screws,4M16nuts and 4M16washersFig.2.3:Process connection adapter for CUA 461BE2UA461.CHPProbFit CUA 4612DescriptionEndress+Hauser 53Installation 3.1Unpacking•Verify that the contents are undamaged! Inform the post office or freight carrier as well as the supplier of any damage.•Check that the delivery is complete and agrees with the shipping papers and your order:–Quantity delivered–Assembly type and version according torating plate(cf.chapter2.4)–Operating instructions–Accessories(process connection adapter)•Keep the original packaging materials for future storage or shipping of the assembly.If you have any questions,consult your supplier or the Endress+Hauser sales agency in your area(see back cover of these operating instructions for addresses).3.2DimensionsFig.3.1:Dimensions ofProbFit CUA461➡Process connection:DIN flange DN 50or2"ANSI➭Process connectionadapter(accessory) Fig.3.2Flange dimensions3Installation ProbFit CUA461 6Endress+Hauser3.3Installation and application notesThe CUA 461assembly with the built-inturbidity sensor should preferably be installed in places with uniform flow conditions.The minimum pipe diameter should be DN 80.Optimal installation conditions can beobtained by using the process connection adapter (see chapter 2.5‘Accessories’).Caution:Do not install the assembly in places where air may collect,where foam bubbles are likely to form or where constituents may settle.Inaccurate measurement may result if the sensor is not completely immersed in the medium or if the measuring optics are covered up by deposits.Align the inclined measuring surface of the turbidity sensor installed in the assembly in the flow direction to obtain optimal measuring results and the desired self-cleaning effect.Unscrew the upper union of the ball valve housing one quarter turn,align the measuring surface by rotating the guide body,and hand-tighten the union when finished.Warning:The sensor must only be aligned when the pipe is empty and unpressurised.Proper access to the place of installation must be assured.To remove the sensor in its guide,a clearance of at least 650mm,measured from the lower flange edge,is required.The ball valve locking handle,the locking ring and its handles and the places where the safety ropes are attached must also be easily accessible.When mounting the assembly,the screws are to be inserted from the flange side towards the assembly.Adequate clearance is required.Note:After an appropriate period of time following the initial start-up,the sensor should be checked for soiling and deposits.The sensor must be removed from the assembly for checks andcleaning.See chapter 5.1for sensorcleaning.Fig. 3.3:Recommended mounting positions for ProbFit CUA 461Fig.3.4:Insertionofscrews for process connection fromthe flange to the assemblyBE3UA461.CHPProbFit CUA 4613InstallationEndress+Hauser 73.4Installation of turbidity sensor in assemblyTurbidity sensors CUS 1or CUS 4can be installed.Proceed as follows to install the turbidity sensor in the unmounted assembly:➡Loosen the knurled screws that are used to attach the safety ropes to the assembly.➭Push the locking ring down slightly by exerting pressure on its two handles and turn clockwise all the way (top view of assembly).Hold the assembly by the process connection flange and pull the sensor guide out all the way by the locking ring handles.➳Remove the screws that hold together the two parts of the sensor guide.Unscrew the cap from the Pg 29cable gland and remove the split clamping insert.➺Insert the sensor cable through the top of the guide and the cable gland from below and screw the sensor into the sensor holding thread.Make sure the O-ring on the sensor is properly seated.Place the two halves of the cable glandclamping insert around the sensor cable and insert in the union.Do not pull the sensor cable tight!Install and tighten the top part of the cable gland.➱Screw the bottom of the sensor guide back on.Make sure the O-rings are properly seated.Carefully insert the sensor guide in theassembly and push down approx.100mm. Reattach the safety ropes with the knurled screws.Close the vent valve before mounting the assembly.The turbidity sensor is now installed,and the assembly can bemounted.Fig.3.5:First installation of turbidity sensor3Installation ProbFit CUA 4618Endress+Hauser3.5Rinse portsRemove the blind screw and the vent valveto use the resulting two openings(G1/8")as rinse ports.These can be used to pass water, cleaning agent or flushing air through the assembly.BE3UA461.CHPProbFit CUA4613Installation Endress+Hauser94Operation4.1Moving the sensor into the process space,measurementWarning:Make sure that the turbidity sensor has been properly installed before moving the assembly into the process space.Fasten the safety ropes properly and close the vent valve before opening the ball valve.•To open the ball valve,push down on the locking lever on the ball valve handle.•Push the sensor guide all the way in by the locking ring handles.•Push the locking ring down vertically and turn counterclockwise to latch the locking ring in under the locking bolts.4.2Withdrawing the sensor from the ongoing processWithdrawal from the process spaceWarning:Before retracting the assembly,makesure that the safety ropes areproperly fastened.When you loosen the locking ring,theprocess pressure may push out thesensor guide.•Push the locking ring down slightly by its two handles and turn clockwise all the way (top view of assembly).•Pull out the sensor guide until the safety ropes are tight.•Close the ball valve.It is locked in the closed position.•Open the vent valve and wait until the overpressure is released,then close the valve once more.Sensor removal and cleaningNow you can remove and clean or calibrate the sensor guide and the turbidity sensor as described in chapter3.4.Caution:Flush the assembly with water aftersensor guide removal.Do not allow medium residue,e.g.activated sludge,to dry on theassembly and turbidity sensor.Dried-up residue may impair thefunction of the assembly and thesensor and is difficult to remove.4.3CalibrationTo assure the reliability of the turbidity measurement,the measuring system must be calibrated regularly and carefully.The calibration intervals depend on individual operating conditions and the desired accuracy.The turbidity sensor must be removed from the assembly for calibration(see chapters4.2 and3.4).Calibrate the sensor as described in the operating instructions for the turbiditysensor. 4Operation ProbFit CUA 461 10Endress+Hauser5Maintenance5.1Cleaning of turbidity sensor and assemblyDeposits on the sensor optics can render the measurement inaccurate.Therefore the sensor must be cleaned at specific time intervals.These intervals depend on each individual system and are to be determined based on operator experience.The sensor optics and assembly are to be cleaned with the following agents according to the type of soiling:•Short-term treatment with a commercially available deliming agent in the case of deposits containing calcium.•Remove general soiling with water and a brush.•Oily and greasy soiling can be removed with a cleaning agent based on water-soluble surfactants,e.g.household dish detergents.Caution:Do not scratch the optics with sharp objects.5.2Seals and spare partsA spare parts kit comprising four O-ring seals and one vent valve is available for the CUA 461assembly.To replace the O-ring seals,dismantle the assembly as described in chapters 4.2and 3.4.Lubricate the seals and sensor guide with a suitable assembly grease during assembly.5.3RepairsRepairs may be performed at the manufacturer’s works or by theEndress+Hauser Service Organization only.Refer to the back cover of these operating instructions for an overview of the Endress+Hauser servicenetwork.BE5UA461.CHPProbFit CUA 4615MaintenanceEndress+Hauser 116Appendix ProbFit CUA4616Appendix6.1Technical dataMaterials in contact with medium......................PP,partially glass fibre-reinforcedO-ring seals in contact with medium....................................EPDM/VitonDimensions of O-rings in sensor guide...................................48.9x2.62Dimensions of O-rings in sensor sleeve41.0x1.78Locking ring,bolts..................................................special steelSafety ropes..............................special steel1.4301,tensile strength200kpProcess connection................................DN50DIN flange/2"ANSI flangeProcess pressure...........................max.2bar at20°C or max.1bar at50°CTemperature max.50°CRinse ports.............................................................G1/8"Dimensions:Sensor moved out installation height:300mmSensor retracted...........................required clearance above flange:650mm 12Endress+Hauser6.2IndexAAccessories5-6 Accuracy and reliability10 Adapter for process connection5 Alignment of measuring surface7 Application notes7 Areas of application3 Assembly variants4 BBall valve10 CCable gland8 Calibration10 Cleaning7,11 Compressed air12 Connection2 DDeposits7,11 Description of assembly3-5 Design of CUA461assembly3 Dimensions6 FFunction4 GGeneral information2 IInstallation6-9 Installation notes7 Installation of turbidity sensor8 KKnurled screws8 LLocking lever10 Locking ring10 MMaintenance2,11 Materials12 Measuring surface7 Mounting clearance6 Moving sensor into medium10OO-ring seals11Operation10Optics11Order code4Overpressure10PPackaging materials6Place of installation7Pressure10Process connection adapter7Process space10RRating plate4Retraction of sensor10Rinse port9SSafety2Safety ropes8Scope of delivery6Sensor guide8,10Service2Soiling7,11Symbols2TTechnical data12UUnpacking6VVent valve8WWelded fitting5BE5UA461.CHPProbFit CUA461Endress+Hauser13ProbFit CUA461 14Endress+HauserEuropeAustria❑Endress+Hauser Ges.m.b.H.WienT el.(0222)88056-0,Fax(0222)88056-35BelarusBelorgsintezMinskT el.(0172)263166,Fax(0172)263111Belgium❑Endress+Hauser S.A./N.V.BrusselsT el.(02)2480600,Fax(02)2480553 BulgariaINTERTECH-AUTOMA TIONSofiaT el.(02)652809,Fax(02)652809 Croatia❑Endress+Hauser GmbH+Co.ZagrebT el.(01)415812,Fax(01)447859CyprusI+G Electrical Services Co.Ltd.NicosiaT el.(02)484788,Fax(02)484690Czech Republic❑Endress+Hauser GmbH+Co.OstravaT el.(069)6611948,Fax(069)6612869 Denmark❑Endress+Hauser A/SSøborgT el.(31)673122,Fax(31)673045 EstoniaElvi-Aqua-T ehT artuT el.(7)422726,Fax(7)422726Finland❑Endress+Hauser OyEspooT el.(90)8596155,Fax(90)8596055 France❑Endress+HauserHuningueT el.(03)89696768,Fax(03)89694802 GermanyEndress+Hauser Meßtechnik GmbH+Co. Weil am RheinT el.(07621)975-01,Fax(07621)975-555 Great Britain❑Endress+Hauser Ltd.ManchesterT el.(0161)2865000,Fax(0161)9981841 GreeceI& G Building Services Automation S.A. AthensT el.(01)9241500,Fax(01)9221714 HungaryMile Ipari-ElektroBudapestT el.(01)2615535,Fax(01)2615535 IcelandVatnshreinsun HFReykjavikT el.(05)889616,Fax(05)332022IrelandFlomeaco Company Ltd.KildareT el.(045)868615,Fax(045)868182Italy❑Endress+Hauser Italia S.p.A. Cernusco s/N MilanoT el.(02)92106421,Fax(02)92107153 LatviaRaita Ltd.RigaT el.(02)254795,Fax(02)7258933 LithuaniaAgava Ltd.KaunasT el.(07)202410,Fax(07)207414Luxembourg❑Endress+Hauser S.A./N.V.BrusselsT el.(02)2480600,Fax(02)2480553Netherlands❑Endress+Hauser B.V.NaardenT el.(035)6958611,Fax(035)6958825Norway❑Endress+Hauser A/ST ranbyT el.(032)851085,Fax(032)851112PolandEndress+Hauser Polska Sp.z o.o.WarsawT el.(022)6510174,Fax(022)6510178PortugalT ecnisis-T ecnica de Sistemas IndustriaisLinda-a-VelhaT el.(01)4172637,Fax(01)4185278RomaniaRomconseng SRLBucharestT el.(01)4101634,Fax(01)4101634RussiaAvtomatika-Sever Ltd.St.PetersburgT el.(0812)5550700,Fax(0812)5561321Slovak RepublicT ranscom technik s.r.o.BratislavaT el.(7)5213161,Fax(7)5213181SloveniaEndress+Hauser D.O.O.LjubljanaT el.(061)1592217,Fax(061)1592298Spain❑Endress+Hauser S.A.BarcelonaT el.(93)4734644,Fax(93)4733839Sweden❑Endress+Hauser ABSollentunaT el.(08)6261600,Fax(08)6269477Switzerland❑Endress+Hauser AGReinach/BL1T el.(061)7156222,Fax(061)7111650TurkeyIntek EndüstriyelÖlcüve Kontrol SistemleriIstanbulT el.(0212)2751355,Fax(0212)2662775UkraineIndustria UkraïnaKyivT el.(44)2685213,Fax(44)2685213AfricaEgyptIAB OfficeEt CairoT el.(02)3616117,Fax(02)3609676MoroccoOussama S.A.CasablancaT el.(02)241338,Fax(02)405602NigeriaJ F T echnical Invest.Nig.Ltd.LagosT el.(1)62234546,Fax(1)62234548South Africa❑Endress+Hauser Pty.Ltd.SandtonT el.(011)4441386,Fax(011)4441977TunisiaControle,Maintenance et RegulationT unisT el.(01)793077,Fax(01)788595AmericaArgentinaServotron SACIFIBuenos AiresT el.(01)3310168,Fax(01)3340104BoliviaT ritec S.R.L.CochabambaT el.(042)50981,Fax(042)50981BrazilServotekSao PauloT el.(011)5363455,Fax(011)5363457Canada❑Endress+Hauser Ltd.Burlington,OntarioT el.(905)6819292,Fax(905)6819444ChileDIN Instrumentos Ltda.SantiagoT el.(02)2050100,Fax(02)2258139ColombiaColsein Ltd.Santafe de Bogota D.C.T el.(01)2367659,Fax(01)6107868Costa RicaEURO-TEC S.A.San JoseT el.2961542,Fax2961542EcuadorInsetec Cia.Ltda.QuitoT el.(02)461833,Fax(02)461833El SalvadorACISASan Salvador,C.A.T el.(02)840748GuatemalaACISA Automatiziacion Y ControlCiudad de Guatemala,C.A.T el.(02)327432,Fax(02)327431MexicoMaquinaria y Accesorios S.A.de C.V.Mexico D.F.T el.(5)5638188,Fax(5)3932937ParaguayIncoel S.R.L.AsuncionT el.(021)203465,Fax(021)26583PeruEsim S.A.LimaT el.(01)4714661,Fax(01)4710993UruguayCircular S.A.MontevideoT el.(02)925785,Fax(02)929151USA❑Endress+Hauser Inc.Greenwood,IndianaT el.(317)535-7138,Fax(317)535-1489VenezuelaH.Z.Instrumentos C.A.CaracasT el.(02)9798813,Fax(02)9799608AsiaChinaEndress+Hauser BeijingBeijingT el.(010)4072120,Fax(010)4034536Hong Kong❑Endress+Hauser(H.K.)Ltd.Hong KongT el.25283120,Fax28654171India❑Endress+Hauser India Branch OfficeBombayT el.(022)6045578,Fax(022)6040211IndonesiaPT Grama BazitaJakartaT el.(21)7975083,Fax(21)7975089Japan❑Sakura Endress Co.,Ltd.T okyoT el.(0422)540611,Fax(0422)550275Malaysia❑Endress+Hauser(M)Sdn.Bhd.Petaling Jaya,Selangor Darul EhsanT el.(03)7334848,Fax(03)7338800PhilippinesBrenton Industries Inc.Makati Metro ManilaT el.(2)8430661,Fax(2)8175739Singapore❑Endress+Hauser(S.E.A.)Pte.,Ltd.SingaporeT el.4688222,Fax4666848South KoreaHitrol Co.Ltd.Kyung Gi-DoT el.(032)6723131,Fax(32)6720090TaiwanKingjarl CorporationT aipei R.O.C.T el.(02)7183938,Fax(02)7134190Thailand❑Endress+Hauser Ltd.BangkokT el.(2)2723674,Fax(2)2723673VietnamT an Viet Bao Co.Ltd.Ho Chi Minh CityT el.(08)8335225,Fax(08)8335227IranT elephone T echnical Services Co.Ltd.T ehranT el.(021)8827426,Fax(021)8827336IsraelInstrumetrics Industrial Control Ltd.T el-AvivT el.(03)6480205,Fax(03)6471992JordanA.P.Parpas Engineering S.A.AmmanT el.(06)839283,Fax(06)839205Kingdom of Saudi ArabiaIntrahDammamT el.(03)8347879,Fax(03)8344832KuwaitKuwait Maritime &Mercantile Co.K.S.C.SafatT el.2434752,Fax2441486LebanonNetwork Engineering Co.JbeilT el.(3)254052,Fax(9)944080Sultanate of OmanMustafa&Jawad Sience&Industry Co.L.L.C.RuwiT el.602009,Fax607066United Arab EmiratesDescon T rading EST.DubaiT el.(04)359522,Fax(04)359617YemenY emen Company for Ghee and Soap IndustryT aizT el.(04)230665,Fax(04)212338Australia+ New ZealandAustraliaGEC Alsthom L TD.SydneyT el.(02)6450777,Fax(02)7437035New ZealandEMC Industrial InstrumentationAucklandT el.(09)4449229,Fax(09)4441145All other countries❑Endress+Hauser GmbH+Co.Instruments InternationalWeil am RheinT el.(07621)975-02,Fax(07621)975345BA134C/07/en/01.97 Printed in Germany /DT。
污水测定仪使用说明书

KF—1型水份测定仪使用说明书一、原理本仪器为卡尔·费休(Kart Fischer)容量滴定法测定水份的仪器,采用“永停法”来确定终点。
根据半电池反应:I2+2e 2I-溶液中同时中存在I2及I- 时上述反应分别在二个电极上进行,即在一个电极上I2被还原,而在另一个电极上I-被氧化,因此两个电极之间有电流通过。
如果溶液中只有I-而无I2则电极间无电流通过。
当滴定终点时溶液中有微量卡尔·费休试剂存在,即有I-及I2同时存在,这时溶液导电,仪器显示滴定到达终点。
反应式:I2十 SO2十3C5H5N十CH3OH+H2O→2C5H5N·HI+ C5H5N·HSO4CH3可以根据滴定反应中所消耗的卡尔·费休试剂量来计算出水份的含量。
二、仪器性能及适用范围1、仪器性能:1)测量范围:30×10-6~100%2)以水为标样,测定卡尔·费休试剂的水当量,平行测定相对误差≤3%3)电源电压:交流220V士22V2、适用范围:本仪器主要用于测定化肥、医药、食品、轻工、化工原料以及其它工业产品中的水份含量。
水份仪可广泛用于化工原料的水份含量测定。
根据资料及美国材料协会标准ASTM,使用卡尔·费休法可直接测定的化合物包括:有机化合物—饱和的、不饱和的碳氢化合物、缩醛、酸类、酰基卤、醇类、稳定的酰、酰胺、弱的胺、酐、二硫化物、脂类、醚卤化物,碳氢化合物、过氧化物,原酸脂、亚硫酸盐、硫氰酸盐及硫醚等。
无机化合物—酸、酸性氧化物、酐、过氧化钡、碳化钙、干燥剂、硫酸肼、部分有机和无机酸的盐等。
测定水份含量在0.1%~10%时可选用10ml滴定管(最小分度为0.05 ml)测定水份含量<0.1%的试样时,应适当增大取样量并可选用5ml或2ml滴定管(最小分度为0.02 ml或0.01ml)测定水份含量>10%的试样时,应适当减小取样量并可选用25ml滴定管(最小分度为0.05ml)。
KF-1水分测定仪说明书

KF-1型水分测定仪说明书一、原理本仪器为卡尔费休(Kart fischer)滴定法测定水分仪器,采用“永停法”来确定终点:根据半电池反应:I2+2E=2I溶液中同时存在I2及I时上述反应分别在两个电极上进行,即在一个电极上I2被还原,而在另一个电极上I被氧化,因此在两个电极之间有电流通过。
如果溶液中只有I而无I2则电极间无电流通过。
当滴定终点时溶液中有微量卡尔费休试剂存在才有I及I2同时存在,这时溶液导电,电流表指针偏转,指示达到终点。
反应式:I2+SO2+3C5H5N+CH2→2C4H5.HSO4CH3根据滴定反应中消耗的碘来计算水分二、仪器的性能及适用范围1、仪器性能A电源:220V±10% 50HZB相对湿度:小于80%C环境湿度:5摄氏度-40摄氏度D测量范围:1ppm-100ppmE相对误差:小于等于3%(平行测定以水为标准样品,测定卡氏试剂的水当量)注意:它的水当量必须大于等于3.00毫克/毫升2、适用范围本仪器主要用于测定化肥,医药。
化工原料及其他工业产品的水分含量。
一般测定水分含量在0.1%-10%时用10ml自动滴定管(最小分度为0.05ml)根据资料及美国材料协会标准ASTM,使用卡氏法可直接测定的化合物包括:有机化合物-饱和的不饱和碳化物,缩醛,酸类,酰基卤,醇类,稳定的酰,酰胺,弱的胺,酐,二硫化物,酯类,醚卤化物,碳氢化合物,稳定的酮,过氧化物,原酸酯,亚硫酸盐,硫氢酸盐及硫醚。
无机化合物-酸,酸性氧化物,氧化铝,酐,过氧化钡,碳化钙,氧化铜,干燥剂,硫酸肼,部分有机盐和无机盐。
采用KF-1型自动水分测定仪,可达到与国外仪器同样的效果,本产品经辽宁省江苏省上海市等各药检所与瑞士(METTLE)公司生产的DL-18型做对比测试,验证,具有同样的准确性和稳定性,而价格仅为进口仪器的百分之五,可以称为国产唯一准确,可靠,经济实惠的卡氏水分测定仪器。
并被许多行业推荐为贯彻国家标准的仪器,其生产计量许可证批号为011 30020号。
全自动多功能滴定仪ZDJ-400DS标准操作规程
全自动多功能滴定仪ZDJ-400DS标准操作规程**********有限公司GMP文件文件名称:ZDJ-400DS全自动多功能滴定仪标准操作规程文件编号:SOP-**-**-***-00起草人日期年月日第 1 页,共 4 页审核人日期年月日分发号QA审核日期年月日生效日期年月日批准人日期年月日颁发部门质量部分发部门质量部1 目的:建立全自动多功能滴定仪的标准操作规程,保证其正确使用。
2 依据:全自动多功能滴定仪使用说明书、《中华人民共和国药典》2010年版二部。
3 适用范围:全自动多功能滴定仪4 责任者:QC主任、QC检验员5 规程内容:5.1功能简介本滴定仪用于等当点滴定、终点滴定、水分测定及溶液的PH值测量。
可完成经学分析中的酸碱滴定、氧化还原滴定、络合滴定、沉淀滴定、恒PH滴定等。
本滴定仪组装简单便,具有独立的滴定台,恒温水浴装置,馈液系统,选择相应配件可完成电位滴定、卡氏微量水分测定、永停滴定等试验;可通过更换装有不同滴定剂的滴定管快速进行各种滴定,并可存储多种滴定方法。
5.2功能键系统:进行系统参数设定、实验员登录、修改密码等操作。
样品:调用预先设定好的方法,输入样品信息,开始滴定。
方法:选择、编辑方法;“方法”中包含公式编辑;在需要输入中文时安些键可以切换至区位码输入。
清洗:定量更换滴定管路中的液体,可以设定一个固定值来定量推出一定量的滴定液;在浏览标定结果时按此键可以删除所有标定值。
单步:设定定量推出滴定管的液体,在最大体积足够大时连续按住单步可以达到清洗的效果。
公式:浏览、编辑公式,重新计算实验结果。
数据:浏览、统计、打印保存的数据;在公式编辑中,数据键可以用来输入负号。
校正:启动PH测量及校正功能。
可以显示PH值,校正电极斜率,显示电极斜率及删除原来校正的电极斜率。
回零:驱动主控制箱转动使滴定管活塞回到初使位置,此时滴定管处于可拆卸状态;在浏览标定结果时按此键可以删除当前标定值。