少儿编程分享:手把手教你用Python编写俄罗斯方块(九)
俄罗斯方块小游戏编程实现

俄罗斯方块小游戏编程实现俄罗斯方块(Tetris)是一款经典的游戏,它的设计简单,玩法有趣,备受玩家喜爱。
在本文中,我们将探讨如何使用编程语言来实现俄罗斯方块小游戏。
1. 游戏介绍俄罗斯方块是一款由七种不同形状的方块组成的拼图游戏。
这些方块会从屏幕顶部逐渐下落,玩家需要通过调整方块的位置和旋转来使其完全填满一行。
当一行被填满时,该行会消除,并玩家会获得相应的分数。
游戏的目标是尽可能多地消除行并获得高分。
2. 游戏设计在编程实现俄罗斯方块游戏时,我们需要考虑以下几个关键因素:- 方块的形状:俄罗斯方块由七种不同形状的方块组成,每个方块由四个小方块组成。
- 方块的移动:玩家可以通过按下不同的按键来移动方块的位置,包括向左、向右和向下。
- 方块的旋转:方块可以按照一定的规则进行旋转,玩家可以通过按下相应的按键来实现旋转。
- 方块的下落:方块会以一定的速度从屏幕顶部下落,玩家需要控制方块的下落速度以适应游戏进程。
- 行的消除:当一行被填满时,该行会被消除,并玩家会获得相应的分数。
消除行后,上方的方块会下落填补空缺。
3. 编程实现为了编程实现俄罗斯方块游戏,我们可以选择使用一种合适的编程语言,例如Java、C++或Python。
这些语言都具备强大的图形库和用户交互功能,能够很好地支持游戏的图形界面和用户操作。
在编程实现过程中,我们可以使用面向对象的思想来设计游戏的各个组件,例如方块、游戏区域和玩家。
我们可以将方块抽象成一个类,其中包含方块的属性和操作方法。
游戏区域可以设计成一个矩形框,其中保存了方块的位置和状态。
玩家可以通过键盘输入来移动和旋转方块。
通过合理的设计和编程,我们可以实现一个功能完善的俄罗斯方块小游戏。
在游戏中,玩家可以使用键盘进行操作,控制方块的移动、旋转和下落,以达到消除行的目的并获得高分。
4. 总结俄罗斯方块小游戏是一款简单而有趣的游戏,通过编程实现它可以锻炼我们的逻辑思维和编程能力。
在本文中,我们探讨了俄罗斯方块游戏的设计要点,并提到了一些实现该游戏的编程思路。
python俄罗斯方块小游戏代码
import pygameimport random# 游戏参数WIDTH = 800HEIGHT = 600FPS = 60# 颜色常量BLACK = (0, 0, 0)WHITE = (255, 255, 255)RED = (255, 0, 0)GREEN = (0, 255, 0)BLUE = (0, 0, 255)# 方块大小和行列数BLOCK_SIZE = 30ROWS = HEIGHT // BLOCK_SIZECOLS = WIDTH // BLOCK_SIZE# 初始化Pygamepygame.init()screen = pygame.display.set_mode((WIDTH, HEIGHT))clock = pygame.time.Clock()# 定义方块类class Block(pygame.sprite.Sprite):def __init__(self, color):super().__init__()self.image = pygame.Surface((BLOCK_SIZE, BLOCK_SIZE))self.image.fill(color)self.rect = self.image.get_rect()# 定义俄罗斯方块类class Tetris:def __init__(self):self.grid = [[None] * COLS for _ in range(ROWS)]self.current_block = Noneself.next_block = Noneself.score = 0def create_block(self):shapes = [[[1, 1, 1, 1]], # I[[1, 1], [1, 1]], # O[[1, 1, 0], [0, 1, 1]], # Z[[0, 1, 1], [1, 1, 0]], # S[[1, 1, 1], [0, 0, 1]], # J[[1, 1, 1], [1, 0, 0]], # L[[1, 1, 1], [0, 1, 0]] # T]shape = random.choice(shapes)color = random.choice([RED, GREEN, BLUE])block = pygame.sprite.Group()for r in range(len(shape)):for c in range(len(shape[r])):if shape[r][c] == 1:b = Block(color)b.rect.x = c * BLOCK_SIZEb.rect.y = r * BLOCK_SIZEblock.add(b)return blockdef check_collision(self):for block in self.current_block:if block.rect.bottom >= HEIGHT or \self.grid[block.rect.bottom // BLOCK_SIZE][block.rect.x // BLOCK_SIZE] is not None:return Truereturn Falsedef update_grid(self):for block in self.current_block:self.grid[block.rect.y // BLOCK_SIZE][block.rect.x // BLOCK_SIZE] = blockdef remove_completed_rows(self):completed_rows = []for r in range(ROWS):if None not in self.grid[r]:completed_rows.append(r)for row in completed_rows:for c in range(COLS):self.grid[row][c] = Nonefor r in range(row, 0, -1):for c in range(COLS):self.grid[r][c] = self.grid[r - 1][c]if self.grid[r][c] is not None:self.grid[r][c].rect.y += BLOCK_SIZEself.score += 10def draw_grid(self):for r in range(ROWS):for c in range(COLS):block = self.grid[r][c]if block is not None:screen.blit(block.image, block.rect)def draw_score(self):font = pygame.font.SysFont(None, 30)text = font.render(f"Score: {self.score}", True, WHITE)screen.blit(text, (10, 10))def game_over(self):font = pygame.font.SysFont(None, 60)text = font.render("Game Over", True, RED)screen.blit(text, (WIDTH/2 - text.get_width()/2, HEIGHT/2 - text.get_height()/2))pygame.display.flip()pygame.time.wait(3000)def run(self):self.current_block = self.create_block()self.next_block = self.create_block()running = Truewhile running:clock.tick(FPS)for event in pygame.event.get():if event.type == pygame.QUIT:running = Falseelif event.type == pygame.KEYDOWN:这是一个简单的俄罗斯方块小游戏的Python代码示例。
Python实现简单的俄罗斯方块游戏
Python实现简单的俄罗斯⽅块游戏本⽂实例为⼤家分享了Python实现俄罗斯⽅块游戏的具体代码,供⼤家参考,具体内容如下玩法:童年经典,普通模式没啥意思,⼩时候我们都是玩加速的。
源码分享:import osimport sysimport randomfrom modules import *from PyQt5.QtGui import *from PyQt5.QtCore import *from PyQt5.QtWidgets import *'''定义俄罗斯⽅块游戏类'''class TetrisGame(QMainWindow):def __init__(self, parent=None):super(TetrisGame, self).__init__(parent)# 是否暂停ingself.is_paused = False# 是否开始ingself.is_started = Falseself.initUI()'''界⾯初始化'''def initUI(self):# iconself.setWindowIcon(QIcon(os.path.join(os.getcwd(), 'resources/icon.jpg')))# 块⼤⼩self.grid_size = 22# 游戏帧率self.fps = 200self.timer = QBasicTimer()# 焦点self.setFocusPolicy(Qt.StrongFocus)# ⽔平布局layout_horizontal = QHBoxLayout()self.inner_board = InnerBoard()self.external_board = ExternalBoard(self, self.grid_size, self.inner_board)layout_horizontal.addWidget(self.external_board)self.side_panel = SidePanel(self, self.grid_size, self.inner_board)layout_horizontal.addWidget(self.side_panel)self.status_bar = self.statusBar()self.external_board.score_signal[str].connect(self.status_bar.showMessage)self.start()self.center()self.setWindowTitle('Tetris —— 九歌')self.show()self.setFixedSize(self.external_board.width() + self.side_panel.width(), self.side_panel.height() + self.status_bar.height()) '''游戏界⾯移动到屏幕中间'''def center(self):screen = QDesktopWidget().screenGeometry()size = self.geometry()self.move((screen.width() - size.width()) // 2, (screen.height() - size.height()) // 2)'''更新界⾯'''def updateWindow(self):self.external_board.updateData()self.side_panel.updateData()self.update()'''开始'''def start(self):if self.is_started:returnself.is_started = Trueself.inner_board.createNewTetris()self.timer.start(self.fps, self)'''暂停/不暂停'''def pause(self):if not self.is_started:returnself.is_paused = not self.is_pausedif self.is_paused:self.timer.stop()self.external_board.score_signal.emit('Paused')else:self.timer.start(self.fps, self)self.updateWindow()'''计时器事件'''def timerEvent(self, event):if event.timerId() == self.timer.timerId():removed_lines = self.inner_board.moveDown()self.external_board.score += removed_linesself.updateWindow()else:super(TetrisGame, self).timerEvent(event)'''按键事件'''def keyPressEvent(self, event):if not self.is_started or self.inner_board.current_tetris == tetrisShape().shape_empty:super(TetrisGame, self).keyPressEvent(event)returnkey = event.key()# P键暂停if key == Qt.Key_P:self.pause()returnif self.is_paused:return# 向左elif key == Qt.Key_Left:self.inner_board.moveLeft()# 向右elif key == Qt.Key_Right:self.inner_board.moveRight()# 旋转elif key == Qt.Key_Up:self.inner_board.rotateAnticlockwise()# 快速坠落elif key == Qt.Key_Space:self.external_board.score += self.inner_board.dropDown()else:super(TetrisGame, self).keyPressEvent(event)self.updateWindow()'''run'''if __name__ == '__main__':app = QApplication([])tetris = TetrisGame()sys.exit(app.exec_())以上就是本⽂的全部内容,希望对⼤家的学习有所帮助,也希望⼤家多多⽀持。
俄罗斯方块游戏编程
俄罗斯方块游戏编程俄罗斯方块是一款非常经典且富有挑战性的游戏,它起源于俄罗斯,现已风靡全球。
这款游戏的编程实现涉及到许多关键的算法和技术,下面将为大家介绍一下俄罗斯方块游戏的编程过程。
一、游戏的整体结构俄罗斯方块游戏的编程可以分为前端和后端两个部分。
前端是指游戏的界面和用户交互逻辑,后端则负责游戏的核心算法和各种游戏逻辑的实现。
在前端部分,需要实现游戏界面的绘制和刷新,包括游戏区域的绘制、方块的绘制和下落效果、得分的实时更新等。
同时,还需要监听玩家的键盘操作,控制方块的移动、旋转和下落。
前端的编程通常使用图形库或者游戏引擎进行实现,比如常用的Python图形库Pygame。
在后端部分,核心算法是方块的下落和碰撞检测。
方块的下落是整个游戏的核心,需要考虑到方块的速度、位置和边界等因素。
碰撞检测是指判断方块是否与其他方块或者游戏区域的边界发生碰撞,如果发生碰撞,则需要停止方块的下落,并进行相关的处理,比如消除已满的行、生成新方块等。
此外,游戏还需要实现游戏开始、暂停、结束等功能,以及相应的状态管理和逻辑判断。
二、方块的表示和操作在俄罗斯方块游戏的编程中,方块是整个游戏的基本组成单元。
方块通常使用二维数组来表示,数组中的每个元素代表方块的一个单元格。
通过对方块数组的操作,可以实现方块的移动、旋转等效果。
方块的移动可以通过改变方块数组中元素的位置来实现。
比如向左移动方块,只需要将方块数组中每个元素的列索引减一;向右移动方块,则将列索引加一。
类似地,对于方块的旋转,可以通过改变方块数组中元素的行列索引来实现。
需要注意的是,在改变方块的位置和形状时,要进行边界检测,以防止方块超出游戏区域或者与其他方块发生重叠。
三、碰撞检测和处理在俄罗斯方块游戏中,碰撞检测是一个非常关键的环节。
碰撞检测的主要目的是判断当前的方块是否与其他方块或者游戏区域的边界发生碰撞,从而决定方块是否需要停止下落,并进行相应的处理。
对于方块与其他方块的碰撞检测,可以通过比较方块数组和游戏区域数组中相应位置的元素来实现。
python实现简单的俄罗斯方块
python实现简单的俄罗斯⽅块本⽂实例为⼤家分享了python实现简单的俄罗斯⽅块的具体代码,供⼤家参考,具体内容如下1. 案例介绍俄罗斯⽅块是由 4 个⼩⽅块组成不同形状的板块,随机从屏幕上⽅落下,按⽅向键调整板块的位置和⽅向,在底部拼出完整的⼀⾏或⼏⾏。
这些完整的横条会消失,给新落下来的板块腾出空间,并获得分数奖励。
没有被消除掉的⽅块不断堆积,⼀旦堆到顶端,便告输,游戏结束。
本例难度为⾼级,适合具有 Python 进阶和 Pygame 编程技巧的⽤户学习。
2. 设计要点边框――由 15*25 个空格组成,⽅块就落在这⾥⾯。
盒⼦――组成⽅块的其中⼩⽅块,是组成⽅块的基本单元。
⽅块――从边框顶掉下的东西,游戏者可以翻转和改变位置。
每个⽅块由 4 个盒⼦组成。
形状――不同类型的⽅块。
这⾥形状的名字被叫做 T, S, Z ,J, L, I , O。
如下图所⽰:模版――⽤⼀个列表存放形状被翻转后的所有可能样式。
全部存放在变量⾥,变量名字如 S or J。
着陆――当⼀个⽅块到达边框的底部或接触到在其他的盒⼦话,就说这个⽅块着陆了。
那样的话,另⼀个⽅块就会开始下落。
3. ⽰例效果4. ⽰例源码import pygameimport randomimport ospygame.init()GRID_WIDTH = 20GRID_NUM_WIDTH = 15GRID_NUM_HEIGHT = 25WIDTH, HEIGHT = GRID_WIDTH * GRID_NUM_WIDTH, GRID_WIDTH * GRID_NUM_HEIGHTSIDE_WIDTH = 200SCREEN_WIDTH = WIDTH + SIDE_WIDTHWHITE = (0xff, 0xff, 0xff)BLACK = (0, 0, 0)LINE_COLOR = (0x33, 0x33, 0x33)CUBE_COLORS = [(0xcc, 0x99, 0x99), (0xff, 0xff, 0x99), (0x66, 0x66, 0x99),(0x99, 0x00, 0x66), (0xff, 0xcc, 0x00), (0xcc, 0x00, 0x33),(0xff, 0x00, 0x33), (0x00, 0x66, 0x99), (0xff, 0xff, 0x33),(0x99, 0x00, 0x33), (0xcc, 0xff, 0x66), (0xff, 0x99, 0x00)]screen = pygame.display.set_mode((SCREEN_WIDTH, HEIGHT))pygame.display.set_caption("俄罗斯⽅块")clock = pygame.time.Clock()FPS = 30score = 0level = 1screen_color_matrix = [[None] * GRID_NUM_WIDTH for i in range(GRID_NUM_HEIGHT)]# 设置游戏的根⽬录为当前⽂件夹base_folder = os.path.dirname(__file__)def show_text(surf, text, size, x, y, color=WHITE):font_name = os.path.join(base_folder, 'font/font.ttc')font = pygame.font.Font(font_name, size)text_surface = font.render(text, True, color)text_rect = text_surface.get_rect()text_rect.midtop = (x, y)surf.blit(text_surface, text_rect)class CubeShape(object):SHAPES = ['I', 'J', 'L', 'O', 'S', 'T', 'Z']I = [[(0, -1), (0, 0), (0, 1), (0, 2)],[(-1, 0), (0, 0), (1, 0), (2, 0)]]J = [[(-2, 0), (-1, 0), (0, 0), (0, -1)],[(-1, 0), (0, 0), (0, 1), (0, 2)],[(0, 1), (0, 0), (1, 0), (2, 0)],[(0, -2), (0, -1), (0, 0), (1, 0)]]L = [[(-2, 0), (-1, 0), (0, 0), (0, 1)],[(1, 0), (0, 0), (0, 1), (0, 2)],[(0, -1), (0, 0), (1, 0), (2, 0)],[(0, -2), (0, -1), (0, 0), (-1, 0)]]O = [[(0, 0), (0, 1), (1, 0), (1, 1)]]S = [[(-1, 0), (0, 0), (0, 1), (1, 1)],[(1, -1), (1, 0), (0, 0), (0, 1)]]T = [[(0, -1), (0, 0), (0, 1), (-1, 0)],[(-1, 0), (0, 0), (1, 0), (0, 1)],[(0, -1), (0, 0), (0, 1), (1, 0)],[(-1, 0), (0, 0), (1, 0), (0, -1)]]Z = [[(0, -1), (0, 0), (1, 0), (1, 1)],[(-1, 0), (0, 0), (0, -1), (1, -1)]]SHAPES_WITH_DIR = {'I': I, 'J': J, 'L': L, 'O': O, 'S': S, 'T': T, 'Z': Z}def __init__(self):self.shape = self.SHAPES[random.randint(0, len(self.SHAPES) - 1)]# ⾻牌所在的⾏列self.center = (2, GRID_NUM_WIDTH // 2)self.dir = random.randint(0, len(self.SHAPES_WITH_DIR[self.shape]) - 1) self.color = CUBE_COLORS[random.randint(0, len(CUBE_COLORS) - 1)] def get_all_gridpos(self, center=None):curr_shape = self.SHAPES_WITH_DIR[self.shape][self.dir]if center is None:center = [self.center[0], self.center[1]]return [(cube[0] + center[0], cube[1] + center[1])for cube in curr_shape]def conflict(self, center):for cube in self.get_all_gridpos(center):# 超出屏幕之外,说明不合法if cube[0] < 0 or cube[1] < 0 or cube[0] >= GRID_NUM_HEIGHT or \ cube[1] >= GRID_NUM_WIDTH:return True# 不为None,说明之前已经有⼩⽅块存在了,也不合法if screen_color_matrix[cube[0]][cube[1]] is not None:return Truereturn Falsedef rotate(self):new_dir = self.dir + 1new_dir %= len(self.SHAPES_WITH_DIR[self.shape])old_dir = self.dirself.dir = new_dirif self.conflict(self.center):self.dir = old_dirreturn Falsedef down(self):# import pdb; pdb.set_trace()center = (self.center[0] + 1, self.center[1])if self.conflict(center):return Falseself.center = centerreturn Truedef left(self):center = (self.center[0], self.center[1] - 1)if self.conflict(center):return Falseself.center = centerreturn Truedef right(self):center = (self.center[0], self.center[1] + 1)if self.conflict(center):return Falseself.center = centerreturn Truedef draw(self):for cube in self.get_all_gridpos():pygame.draw.rect(screen, self.color,(cube[1] * GRID_WIDTH, cube[0] * GRID_WIDTH,GRID_WIDTH, GRID_WIDTH))pygame.draw.rect(screen, WHITE,(cube[1] * GRID_WIDTH, cube[0] * GRID_WIDTH,GRID_WIDTH, GRID_WIDTH),1)def draw_grids():for i in range(GRID_NUM_WIDTH):pygame.draw.line(screen, LINE_COLOR,(i * GRID_WIDTH, 0), (i * GRID_WIDTH, HEIGHT))for i in range(GRID_NUM_HEIGHT):pygame.draw.line(screen, LINE_COLOR,(0, i * GRID_WIDTH), (WIDTH, i * GRID_WIDTH))pygame.draw.line(screen, WHITE,(GRID_WIDTH * GRID_NUM_WIDTH, 0),(GRID_WIDTH * GRID_NUM_WIDTH, GRID_WIDTH * GRID_NUM_HEIGHT)) def draw_matrix():for i, row in zip(range(GRID_NUM_HEIGHT), screen_color_matrix):for j, color in zip(range(GRID_NUM_WIDTH), row):if color is not None:pygame.draw.rect(screen, color,(j * GRID_WIDTH, i * GRID_WIDTH,GRID_WIDTH, GRID_WIDTH))pygame.draw.rect(screen, WHITE,(j * GRID_WIDTH, i * GRID_WIDTH,GRID_WIDTH, GRID_WIDTH), 2)def draw_score():show_text(screen, u'得分:{}'.format(score), 20, WIDTH + SIDE_WIDTH // 2, 100)def remove_full_line():global screen_color_matrixglobal scoreglobal levelnew_matrix = [[None] * GRID_NUM_WIDTH for i in range(GRID_NUM_HEIGHT)]index = GRID_NUM_HEIGHT - 1n_full_line = 0for i in range(GRID_NUM_HEIGHT - 1, -1, -1):is_full = Truefor j in range(GRID_NUM_WIDTH):if screen_color_matrix[i][j] is None:is_full = Falsecontinueif not is_full:new_matrix[index] = screen_color_matrix[i]index -= 1else:n_full_line += 1score += n_full_linelevel = score // 20 + 1screen_color_matrix = new_matrixdef show_welcome(screen):show_text(screen, u'俄罗斯⽅块', 30, WIDTH / 2, HEIGHT / 2)show_text(screen, u'按任意键开始游戏', 20, WIDTH / 2, HEIGHT / 2 + 50)running = Truegameover = Truecounter = 0live_cube = Nonewhile running:clock.tick(FPS)for event in pygame.event.get():if event.type == pygame.QUIT:running = Falseelif event.type == pygame.KEYDOWN:if gameover:gameover = Falselive_cube = CubeShape()breakif event.key == pygame.K_LEFT:live_cube.left()elif event.key == pygame.K_RIGHT:live_cube.right()elif event.key == pygame.K_DOWN:live_cube.down()elif event.key == pygame.K_UP:live_cube.rotate()elif event.key == pygame.K_SPACE:while live_cube.down() == True:passremove_full_line()# level 是为了⽅便游戏的难度,level 越⾼ FPS // level 的值越⼩# 这样屏幕刷新的就越快,难度就越⼤if gameover is False and counter % (FPS // level) == 0:# down 表⽰下移⾻牌,返回False表⽰下移不成功,可能超过了屏幕或者和之前固定的# ⼩⽅块冲突了if live_cube.down() == False:for cube in live_cube.get_all_gridpos():screen_color_matrix[cube[0]][cube[1]] = live_cube.colorlive_cube = CubeShape()if live_cube.conflict(live_cube.center):gameover = Truescore = 0live_cube = Nonescreen_color_matrix = [[None] * GRID_NUM_WIDTH for i in range(GRID_NUM_HEIGHT)] # 消除满⾏remove_full_line()counter += 1# 更新屏幕screen.fill(BLACK)draw_grids()draw_matrix()draw_score()if live_cube is not None:live_cube.draw()if gameover:show_welcome(screen)pygame.display.update()以上就是本⽂的全部内容,希望对⼤家的学习有所帮助,也希望⼤家多多⽀持。
俄罗斯方块python代码
俄罗斯方块python代码俄罗斯方块Python代码俄罗斯方块是一款经典的电子游戏,由前苏联科学家阿列克谢·帕基特诺夫于1984年创造。
这个游戏的目标是通过移动、旋转和摆放不同形状的方块,使它们在屏幕上形成完整的水平行,当一行被填满时,会消除并得到积分。
下面是一个使用Python编写的俄罗斯方块代码示例:```pythonimport pygameimport random# 方块的形状SHAPES = [[[1, 1, 1, 1]], # I形状[[1, 1], [1, 1]], # O形状[[1, 1, 0], [0, 1, 1]], # Z形状[[0, 1, 1], [1, 1, 0]], # S形状[[1, 1, 1], [0, 1, 0]], # T形状[[1, 1, 1], [0, 0, 1]], # L形状[[1, 1, 1], [1, 0, 0]] # J形状]# 初始化游戏界面def init_game():pygame.init()screen = pygame.display.set_mode((300, 600))pygame.display.set_caption("俄罗斯方块")return screen# 创建方块def create_block():shape = random.choice(SHAPES)return shape# 绘制方块def draw_block(screen, block, x, y):for i in range(len(block)):for j in range(len(block[i])):if block[i][j] == 1:pygame.draw.rect(screen, (255, 0, 0), (x + j * 30, y + i * 30, 30, 30))# 游戏主循环def main():screen = init_game()clock = pygame.time.Clock()x, y = 100, 0 # 方块的初始位置block = create_block() # 创建一个方块while True:for event in pygame.event.get():if event.type == pygame.QUIT:pygame.quit()returnkeys = pygame.key.get_pressed()if keys[pygame.K_LEFT]:x -= 30if keys[pygame.K_RIGHT]:x += 30if keys[pygame.K_DOWN]:y += 30screen.fill((0, 0, 0)) # 清空屏幕draw_block(screen, block, x, y) # 绘制方块pygame.display.update()clock.tick(5) # 控制游戏帧率if __name__ == "__main__":main()```以上是一个简单的俄罗斯方块游戏的Python代码示例。
俄罗斯方块python代码
俄罗斯方块python代码首先,解释一下俄罗斯方块的规则。
俄罗斯方块是一种经典的益智游戏,玩家需要操作方块,在一个逐渐升高的场景中,将方块拼接在一起,以便填满场地的横行。
一旦填满一行,该行将被消除,这样就会为新的方块提供更多的空间。
玩家可以利用不断下落的方块,进行更高难度的拼图和连锁爆破,获取更高的分数。
下面我将介绍如何用Python编写俄罗斯方块游戏。
首先要实现的是基本的游戏框架。
我们需要使用Python中的pygame库,它提供了许多游戏开发所需的功能。
通过pygame实现的基本游戏框架如下:import pygame from pygame.locals import *# 初始化pygame pygame.init()# 定义颜色 BLACK = ( 0, 0, 0) WHITE = ( 255, 255, 255) BLUE = ( 0, 0, 255)# 设置屏幕尺寸 size = (400, 500) screen = pygame.display.set_mode(size)# 设置窗口标题 pygame.display.set_caption("俄罗斯方块")# 游戏主循环 done = False while not done: for event in pygame.event.get(): ifevent.type == pygame.QUIT: done = True # 界面绘制 screen.fill(WHITE)# 画出方块 pygame.draw.rect(screen, BLUE, [500, 0, 50, 50])# 将图像更新到屏幕上pygame.display.flip()# 退出游戏 pygame.quit()上述代码创建了一个窗口,准备开始游戏开发。
但是我们需要对其进行改进,以便创建一个完整的俄罗斯方块游戏。
接下来,我们需要定义方块的基本形状。
原创Python编写俄罗斯方块游戏
原创Python编写俄罗斯方块游戏需要安装Pygame库import pygameimport randomimport ospygame.init()# 设置窗口的位置os.environ['SDL_VIDEO_WINDOW_POS'] = "%d,%d" % (100, 20)# 创建游戏主窗口screen = pygame.display.set_mode((400, 800))clock = pygame.time.Clock()# 添加背景图bg = pygame.image.load("图片-背景.png")# 设置全屏矩阵marx = [[0, 0, 0, 0, 0, 0, 0, 0, 0, 0],[0, 0, 0, 0, 0, 0, 0, 0, 0, 0],[0, 0, 0, 0, 0, 0, 0, 0, 0, 0],[0, 0, 0, 0, 0, 0, 0, 0, 0, 0],[0, 0, 0, 0, 0, 0, 0, 0, 0, 0],[0, 0, 0, 0, 0, 0, 0, 0, 0, 0],[0, 0, 0, 0, 0, 0, 0, 0, 0, 0],[0, 0, 0, 0, 0, 0, 0, 0, 0, 0],[0, 0, 0, 0, 0, 0, 0, 0, 0, 0],[0, 0, 0, 0, 0, 0, 0, 0, 0, 0],[0, 0, 0, 0, 0, 0, 0, 0, 0, 0],[0, 0, 0, 0, 0, 0, 0, 0, 0, 0],[0, 0, 0, 0, 0, 0, 0, 0, 0, 0],[0, 0, 0, 0, 0, 0, 0, 0, 0, 0],[0, 0, 0, 0, 0, 0, 0, 0, 0, 0],[0, 0, 0, 0, 0, 0, 0, 0, 0, 0],[0, 0, 0, 0, 0, 0, 0, 0, 0, 0],[0, 0, 0, 0, 0, 0, 0, 0, 0, 0],[0, 0, 0, 0, 0, 0, 0, 0, 0, 0],[0, 0, 0, 0, 0, 0, 0, 0, 0, 0],]# 创建六个图形,四个方向# 图形0shape00 = [[(0, 0), (0, 1), (1, 0), (1, 1)],[(0, 0), (0, 1), (1, 0), (1, 1)],[(0, 0), (0, 1), (1, 0), (1, 1)],[(0, 0), (0, 1), (1, 0), (1, 1)]]shape01 = [[(0, 0), (1, 0), (1, 1), (2, 1)],[(1, 0), (0, 1), (1, 1), (0, 2)],[(0, 0), (1, 0), (1, 1), (2, 1)],[(1, 0), (0, 1), (1, 1), (0, 2)]]shape02 = [[(0, 1), (1, 1), (1, 0), (2, 0)],[(0, 0), (0, 1), (1, 1), (1, 2)],[(0, 1), (1, 1), (1, 0), (2, 0)],[(0, 0), (0, 1), (1, 1), (1, 2)]]shape03 = [[(0, 1), (1, 1), (2, 1), (3, 1)],[(1, 0), (1, 1), (1, 2), (1, 3)],[(0, 1), (1, 1), (2, 1), (3, 1)],[(1, 0), (1, 1), (1, 2), (1, 3)]]shape04 = [[(1, 0), (0, 1), (1, 1), (2, 1)],[(0, 0), (0, 1), (1, 1), (0, 2)],[(0, 0), (1, 0), (2, 0), (1, 1)],[(1, 1), (2, 0), (2, 1), (2, 2)]]shape05 = [[(2, 0), (0, 1), (1, 1), (2, 1)],[(0, 0), (0, 1), (1, 2), (0, 2)],[(0, 0), (1, 0), (2, 0), (0, 1)],[(1, 0), (2, 0), (2, 1), (2, 2)]]shapes = [shape00, shape01, shape02, shape03, shape04, shape05]chosed = Falsea = 0r = pygame.image.load("图片-方块00.png")shape, x, y = None, 0, 0# 形状的方向toward = 0# 加速freq = 60# 游戏循环while True:clock.tick(60)# 绘制在屏幕screen.blit(bg, (0, 0))# 记录上一次的XlastX = xfor event in pygame.event.get():if event.type == pygame.KEYDOWN:if event.key == pygame.K_a or event.key == pygame.K_LEFT: x -= 1elif event.key == pygame.K_d or event.key ==pygame.K_RIGHT:x += 1elif event.key == pygame.K_SPACE:# 修改方向toward += 1if toward == 4:toward = 0elif event.key == pygame.K_DOWN:freq = 1elif event.type == pygame.KEYUP:if event.key == pygame.K_DOWN:freq = 60if not chosed:shape = shapes[random.randint(0, 5)]x = 4y = -4chosed = True# 判断一下左右移动for s in shape[toward]:if x + s[0] < 0:x += 1if x + s[0] > 9:x -= 1if marx[y + s[1]][x + s[0]] == 1:x = lastXfor s in shape[toward]:if 0 <= x + s[0] <= 9 and 0 <= y + s[1] <= 19:screen.blit(r, ((x + s[0]) * 40, (y + s[1]) * 40))if y + s[1] == 19:chosed = False# 坐标添加到大矩阵for sh in shape[toward]:marx[y + sh[1]][x + sh[0]] = 1breakelif marx[y + s[1] + 1][x + s[0]] == 1:chosed = Falsefor sh in shape[toward]:marx[y + sh[1]][x + sh[0]] = 1breaka += 1if a % freq == 0:y += 1a = 0# 遍历大矩阵,绘制落地的图像for yy in range(0, 20):for xx in range(0, 10):if marx[yy][xx] == 1:screen.blit(r, (xx * 40, yy * 40))# 检测消除for yy in range(19, -1, -1):if marx[yy] == [1, 1, 1, 1, 1, 1, 1, 1, 1, 1]:for i in range(yy, 0, -1):marx[i] = marx[i - 1]# 更新显示pygame.display.update() pygame.quit()。
python实现简单俄罗斯方块游戏
python实现简单俄罗斯⽅块游戏本⽂实例为⼤家分享了python实现简单俄罗斯⽅块游戏的具体代码,供⼤家参考,具体内容如下import pygame,sys,random,timeall_block = [[[0,0],[0,-1],[0,1],[0,2]],[[0,0],[0,1],[1,1],[1,0]],[[0,0],[0,-1],[-1,0],[-1,1]],[[0,0],[0,1],[-1,-1],[-1,0]],[[0,0],[0,1],[1,0],[0,-1]],[[0,0],[1,0],[-1,0],[1,-1]],[[0,0],[1,0],[-1,0],[1,1]]]background = [[0 for column in range(0,10)] for row in range(0,22)]background[0] = [1 for column in range(0,10)]select_block = list(random.choice(all_block))block_initial_position = [21,5]times = 0score = [0]gameover = []press = Falsepygame.init()screen = pygame.display.set_mode((250,500))title = pygame.display.set_caption("俄罗斯⽅块")#下落、位置、数组检测、得分、屏幕信息def block_move_down():y_drop=block_initial_position[0]x_move=block_initial_position[1]y_drop-=1for row,column in select_block:row+=y_dropcolumn+=x_moveif background[row][column]==1:breakelse:block_initial_position.clear()block_initial_position.extend([y_drop,x_move])returny_drop,x_move=block_initial_positionfor row,column in select_block:background[y_drop+row][x_move+column]=1complete_row=[]for row in range(1,21):if 0 not in background[row]:complete_row.append(row)complete_row.sort(reverse=True)for row in complete_row:background.pop(row)background.append([0 for column in range(0,10)])score[0]+=len(complete_row)pygame.display.set_caption(str(score[0])+'分')select_block.clear()select_block.extend(list(random.choice(all_block)))block_initial_position.clear()block_initial_position.extend([20,5])y_drop,x_move=block_initial_positionfor row,column in select_block:row+=y_dropcolumn+=x_moveif background[row][column]:gameover.append(1)#⽅块设置、变化、背景改变def new_draw():y_drop,x_move=block_initial_positionfor row,column in select_block:row+=y_dropcolumn+=x_movepygame.draw.rect(screen,(255,165,0),(column*25,500-row*25,23,23))for row in range(0,20):for column in range(0,10):bottom_block=background[row][column]if bottom_block:pygame.draw.rect(screen,(0,0,255),(column*25,500-row*25,23,23)) #⽅块的移动,防⽌出界,碰撞def move_left_right(n):y_drop,x_move=block_initial_positionx_move+=nfor row,column in select_block:row+=y_dropcolumn+=x_moveif column<0 or column>9 or background[row][column]:breakelse:block_initial_position.clear()block_initial_position.extend([y_drop,x_move])#旋转,位置都进⾏变化def rotate():y_drop,x_move=block_initial_positionrotating_position=[(-column,row)for row,column in select_block]for row,column in rotating_position:row+=y_dropcolumn+=x_moveif column<0 or column>9 or background[row][column]:breakelse:select_block.clear()select_block.extend(rotating_position)while True:screen.fill((255,255,255))for event in pygame.event.get():if event.type==pygame.QUIT:sys.exit()elif event.type==pygame.KEYDOWN and event.key==pygame.K_LEFT: move_left_right(-1)elif event.type==pygame.KEYDOWN and event.key==pygame.K_RIGHT: move_left_right(1)elif event.type==pygame.KEYDOWN and event.key==pygame.K_UP:rotate()elif event.type==pygame.KEYDOWN and event.key==pygame.K_DOWN: press=Trueelif event.type==pygame.KEYUP and event.key==pygame.K_DOWN:press=Falseif press:times+=10if times>=50:block_move_down()times=0else:times+=1if gameover:sys.exit()new_draw()pygame.time.Clock().tick(200)pygame.display.flip()效果:以上就是本⽂的全部内容,希望对⼤家的学习有所帮助,也希望⼤家多多⽀持。
基于python语言编写的俄罗斯方块源代码
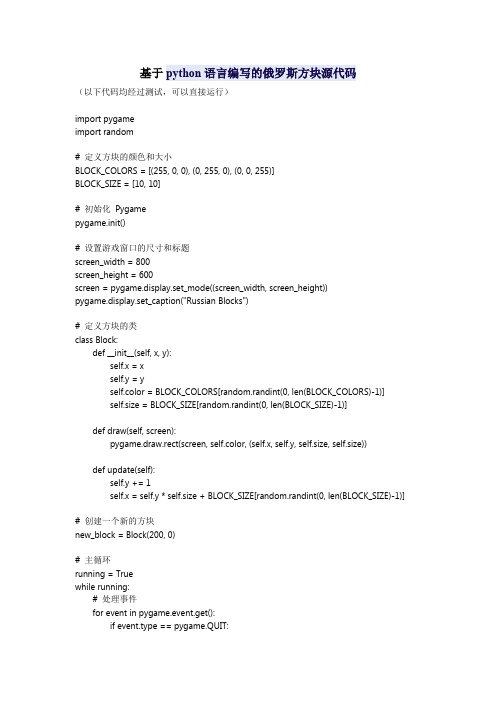
基于python语言编写的俄罗斯方块源代码(以下代码均经过测试,可以直接运行)import pygameimport random# 定义方块的颜色和大小BLOCK_COLORS = [(255, 0, 0), (0, 255, 0), (0, 0, 255)]BLOCK_SIZE = [10, 10]# 初始化Pygamepygame.init()# 设置游戏窗口的尺寸和标题screen_width = 800screen_height = 600screen = pygame.display.set_mode((screen_width, screen_height))pygame.display.set_caption("Russian Blocks")# 定义方块的类class Block:def __init__(self, x, y):self.x = xself.y = yself.color = BLOCK_COLORS[random.randint(0, len(BLOCK_COLORS)-1)]self.size = BLOCK_SIZE[random.randint(0, len(BLOCK_SIZE)-1)] def draw(self, screen):pygame.draw.rect(screen, self.color, (self.x, self.y, self.size, self.size)) def update(self):self.y += 1self.x = self.y * self.size + BLOCK_SIZE[random.randint(0, len(BLOCK_SIZE)-1)] # 创建一个新的方块new_block = Block(200, 0)# 主循环running = Truewhile running:# 处理事件for event in pygame.event.get():if event.type == pygame.QUIT:running = False# 移动方块new_block.update()new_block.draw(screen)# 检查是否有新方块放置在顶部if new_block.x < new_block.size:# 把新方块放置在顶部new_block.y = random.randint(请注意,此代码只是一个简单的示例,可能需要更多的工作和技能才能实现完整的游戏。
Python-俄罗斯方块游戏
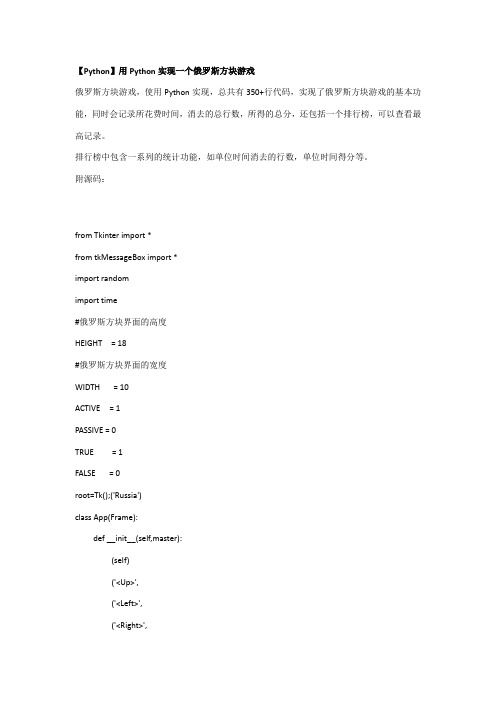
【Python】用Python实现一个俄罗斯方块游戏俄罗斯方块游戏,使用Python实现,总共有350+行代码,实现了俄罗斯方块游戏的基本功能,同时会记录所花费时间,消去的总行数,所得的总分,还包括一个排行榜,可以查看最高记录。
排行榜中包含一系列的统计功能,如单位时间消去的行数,单位时间得分等。
附源码:from Tkinter import *from tkMessageBox import *import randomimport time#俄罗斯方块界面的高度HEIGHT = 18#俄罗斯方块界面的宽度WIDTH = 10ACTIVE = 1PASSIVE = 0TRUE = 1FALSE = 0root=Tk();('Russia')class App(Frame):def __init__(self,master):(self)('<Up>',('<Left>',('<Right>',('<Down>',#('<Down>',('<space>',('<Control-Shift-Key-F12>',('<Key-F6>',="#%02x%02x%02x" % (120,150,30)="#%02x%02x%02x" % (40,120,150)="#%02x%02x%02x" % (150,100,100)="#%02x%02x%02x" % (210,130,100)=Label(master,text='Lines: ',bg='black',fg='red')=Label(master,text='0',bg='black',fg='red')=Label(master,text='Score: ',bg='black',fg='red')=Label(master,text='0',bg='black',fg='red')#Display time=Label(master,text='Time: ',bg='black',fg='red')=Label(master,text='',bg='black',fg='red')#Display time==0;=0#Game over=FALSE#Pause=FALSE#Start=FALSE=[];=[]r=0;c=0for k in range(4*4):LN=Label(master,text=' ',bg=str,fg='white',relief=FLAT,bd=4) (row=r,column=WIDTH+c,sticky=N+E+S+W)c=c+1if c>=4:r=r+1;c=0=[]=[];=[]=[];=[]row=0;col=0for i in range(HEIGHT*WIDTH):L=Label(master,text=' ',bg=str,fg='white',relief=FLAT,bd=4) (row=row,column=col,sticky=N+E+S+W)=row;=col;=PASSIVEcol=col+1if col>=WIDTH:row=row+1;col=0=[];=[]#filefw=open('','a')()hasHead=FALSEf=open('','r')if (5)=='score':hasHead=TRUE()=open('','r+a')if hasHead==FALSE:'score line time scorePtime linePtime scorePline date\n')=1000()def __del__(self):# passdef Pause(self,event):=def Up(self,event):BL=;LL=Moveable=TRUExtotal=0;ytotal=0;count=0for i in range(HEIGHT):for j in range(WIDTH):if LL[i][j].isactive==ACTIVE:xtotal=xtotal+i;ytotal=ytotal+j;count=count+1SourceList=[];DestList=[]for i in range(HEIGHT):for j in range(WIDTH):if LL[i][j].isactive==ACTIVE:x0=(xtotal+ytotal)/count;y0=(ytotal-xtotal )/countxr=(xtotal+ytotal)%count;yr=(ytotal-xtotal)%countx=x0-j;y=y0+iif xr>=count/2:x=x+1if yr>=count/2:y=y+1([i,j]);([x,y])if x<0 or x>=HEIGHT or y<0 or y>=WIDTH:Moveable=FALSEif x>=0 and x<HEIGHT and y>=0 and y<WIDTH and BL[x][y]==1 and LL[x][y].isactive==PASSIVE:Moveable=FALSEif Moveable==TRUE:for i in range(len(SourceList)):(SourceList[i][0],SourceList[i][1])for i in range(len(DestList)):(DestList[i][0],DestList[i][1])def Left(self,event):BL=;LL=Moveable=TRUEfor i in range(HEIGHT):for j in range(WIDTH):if LL[i][j].isactive==ACTIVE and j-1<0:Moveable=FALSEif LL[i][j].isactive==ACTIVE and j-1>=0 and BL[i][j-1]==1 and LL[i][j-1].isactive==PASSIVE:Moveable=FALSEif Moveable==TRUE:for i in range(HEIGHT):for j in range(WIDTH):if j-1>=0 and LL[i][j].isactive==ACTIVE and BL[i][j-1]==0:(i,j-1);(i,j)def Right(self,event):BL=;LL=Moveable=TRUEfor i in range(HEIGHT):if LL[i][j].isactive==ACTIVE and j+1>=WIDTH:Moveable=FALSEif LL[i][j].isactive==ACTIVE and j+1<WIDTH and BL[i][j+1]==1 and LL[i][j+1].isactive==PASSIVE:Moveable=FALSEif Moveable==TRUE:for i in range(HEIGHT-1,-1,-1):for j in range(WIDTH-1,-1,-1):if j+1<WIDTH and LL[i][j].isactive==ACTIVE and BL[i][j+1]==0:(i,j+1);(i,j)def Space(self,event):while 1:if (0)==FALSE:breakdef OnTimer(self):if ==TRUE and ==FALSE:= + float/1000if ==FALSE:(0)if >=1000:=900if >=2000:=750if >=3000:=600if >=4000:=400,def Down(self,event):BL=;LL=Moveable=TRUEfor i in range(HEIGHT):if LL[i][j].isactive==ACTIVE and i+1>=HEIGHT:Moveable=FALSEif LL[i][j].isactive==ACTIVE and i+1<HEIGHT and BL[i+1][j]==1 and LL[i+1][j].isactive==PASSIVE:Moveable=FALSEif Moveable==TRUE:for i in range(HEIGHT-1,-1,-1):for j in range(WIDTH-1,-1,-1):if i+1<HEIGHT and LL[i][j].isactive==ACTIVE and BL[i+1][j]==0:(i+1,j);(i,j)if Moveable==FALSE:for i in range(HEIGHT):for j in range(WIDTH):LL[i][j].isactive=PASSIVE()()if ==TRUE:showinfo('T_T','The game is over!');();return FALSEfor i in range(4):for j in range(4):(i,j)()return Moveabledef JudgeLineFill(self):BL=;LL=count=0;LineList=[]for i in range(WIDTH):(1)#display flashfor i in range(HEIGHT):if BL[i]==LineList:count=count+1for k in range(WIDTH):LL[i][k].config(bg=str)LL[i][k].update()if count!=0:(100)#delete blockfor i in range(HEIGHT):if BL[i]==LineList:#count=count+1for j in range(i,0,-1):for k in range(WIDTH):BL[j][k]=BL[j-1][k]LL[j][k]['relief']=LL[j-1][k].cget('relief')LL[j][k]['bg']=LL[j-1][k].cget('bg')for l in range(WIDTH):BL[0][l]=0LL[0][l].config(relief=FLAT,bg=str)=+countif count==1:=+1*WIDTHif count==2:=+3*WIDTHif count==3:=+6*WIDTHif count==4:=+10*WIDTHdef Fill(self,i,j):if j<0:returnif [i][j]==1:=TRUE[i][j]=1[i][j].isactive=ACTIVE[i][j].config(relief=RAISED,bg=str)def Empty(self,i,j):[i][j]=0[i][j].isactive=PASSIVE[i][j].config(relief=FLAT,bg=str)def Play(self,event):showinfo('Made in China','^_</font></p><p><span mce_name="em" style="font-style: italic;" class="Apple-style-span" mce_style="font-style: italic;"><span style="font-size: small; " id="" mce_style="font-size: small;"><br></span></span></p><p><span mce_name="em" style="font-style: italic;" class="Apple-style-span" mce_style="font-style: italic;"><span style="font-size: small; " id="" mce_style="font-size: small;"> </span></span></p><p><br></p>)def NextFill(self,i,j):[i][j].config(relief=RAISED,bg=str)def NextEmpty(self,i,j):[i][j].config(relief=FLAT,bg=str)def Distroy(self):#saveif !=0:savestr='%-9u%-8u%%%%%s\n' % ,,,,,float/,('%Y-%m-%d %H:%M:%S',()))for i in range(HEIGHT):for j in range(WIDTH):(i,j)=0;=0;==FALSE=FALSE=1000for i in range(4):for j in range(4):(i,j)def Start(self):if ==1:(0,WIDTH/2-2);(0,WIDTH/2-1);(0,WIDTH/2);(0,WIDTH/2+1) if ==2:(0,WIDTH/2-1);(0,WIDTH/2);(1,WIDTH/2-1);(1,WIDTH/2)if ==3:(0,WIDTH/2);(1,WIDTH/2-1);(1,WIDTH/2);(1,WIDTH/2+1)if ==4:(0,WIDTH/2-1);(1,WIDTH/2-1);(1,WIDTH/2);(1,WIDTH/2+1) if ==5:(0,WIDTH/2+1);(1,WIDTH/2-1);(1,WIDTH/2);(1,WIDTH/2+1) if ==6:(0,WIDTH/2-1);(0,WIDTH/2);(1,WIDTH/2);(1,WIDTH/2+1)if ==7:(0,WIDTH/2);(0,WIDTH/2+1);(1,WIDTH/2-1);(1,WIDTH/2)=TRUEdef Rnd(self):=(1,7)if ==1:(0,0);(0,1);(0,2);(0,3)if ==2:(0,1);(0,2);(1,1);(1,2)if ==3:(0,2);(1,1);(1,2);(1,3)if ==4:(0,1);(1,1);(1,2);(1,3)if ==5:(0,3);(1,1);(1,2);(1,3)if ==6:(0,1);(0,2);(1,2);(1,3)if ==7:(0,2);(0,3);(1,1);(1,2)def RndFirst(self):=(1,7)def Show(self):strHeadLine= dictLine={}strTotalLine=''for OneLine in temp=int(OneLine[:5]) dictLine[temp]=OneLinelist=sorted(),key=lambda d:d[0])ii=0for onerecord in reversed(list):ii=ii+1if ii<11:strTotalLine+=onerecord[1]showinfo('Ranking', strHeadLine+strTotalLine)def Start():();();()def End():()def Set():passdef Show():()mainmenu=Menu(root)root['menu']=mainmenu gamemenu=Menu(mainmenu) (label='game',menu=gamemenu) (label='start',command=Start) (label='end',command=End) ()(label='exit',command= setmenu=Menu(mainmenu) (label='set',menu=setmenu) (label='set',command=Set) showmenu=Menu(mainmenu) (label='show',menu=showmenu) (label='show',command=Show) app=App(root)()。
python实现简单俄罗斯方块

python实现简单俄罗斯⽅块本⽂实例为⼤家分享了python实现俄罗斯⽅块的具体代码,供⼤家参考,具体内容如下# teris.py# A module for game teris.# By programmer FYJfrom tkinter import *from time import sleepfrom random import *from tkinter import messageboxclass Teris:def __init__(self):#⽅块颜⾊列表self.color = ['red','orange','yellow','purple','blue','green','pink']# Set a core squre and any shape can be drawn by the relative location.#字典存储形状对应7种形状元组存储坐标self.shapeDict = {1:[(0,0),(0,-1),(0,-2),(0,1)], # shape I2:[(0,0),(0,-1),(1,-1),(1,0)], # shape O3:[(0,0),(-1,0),(0,-1),(1,0)], # shape T T型4:[(0,0),(0,-1),(1,0),(2,0)], # shape J 右长倒L盖⼦5:[(0,0),(0,-1),(-1,0),(-2,0)], # shape L6:[(0,0),(0,-1),(-1,-1),(1,0)], # shape Z7:[(0,0),(-1,0),(0,-1),(1,-1)]} # shape S#旋转坐标控制self.rotateDict = {(0,0):(0,0),(0,1):(-1,0),(0,2):(-2,0),(0,-1):(1,0),(0,-2):(2,0),(1,0):(0,1),(2,0):(0,2),(-1,0):(0,-1),(-2,0):(0,-2),(1,1):(-1,1),(-1,1):(-1,-1),(-1,-1):(1,-1),(1,-1):(1,1)}# 初始⾼度,宽度核⼼块位置self.coreLocation = [4,-2]self.height,self.width = 20,10self.size = 32# Map can record the location of every square.i宽 j⾼self.map = {}#全部置0for i in range(self.width):for j in range(-4,self.height):self.map[(i,j)] = 0#添加边界for i in range(-4,self.width+4):self.map[(i,self.height)] = 1for j in range(-4,self.height+4):for i in range(-4,0):self.map[(i,j)] = 1for j in range(-4,self.height+4):for i in range(self.width,self.width+4):self.map[(i,j)] = 1# 初始化分数0 默认不加快按下时加快self.score = 0self.isFaster = False# 创建GUI界⾯self.root = Tk()self.root.title("Teris")self.root.geometry("500x645")self.area = Canvas(self.root,width=320,height=640,bg='white')self.area.grid(row=2)self.pauseBut = Button(self.root,text="Pause",height=2,width=13,font=(18),command=self.isPause)self.pauseBut.place(x=340,y=100)self.startBut = Button(self.root,text="Start",height=2,width=13,font=(18),command=self.play)self.startBut.place(x=340,y=20)self.restartBut = Button(self.root,text="Restart",height=2,width=13,font=(18),command=self.isRestart)self.restartBut.place(x=340,y=180)self.quitBut = Button(self.root,text="Quit",height=2,width=13,font=(18),command=self.isQuit)self.quitBut.place(x=340,y=260)self.scoreLabel1 = Label(self.root,text="Score:",font=(24))self.scoreLabel1.place(x=340,y=600)self.scoreLabel2 = Label(self.root,text="0",fg='red',font=(24))self.scoreLabel2.place(x=410,y=600)#按键交互self.area.bind("<Up>",self.rotate)self.area.bind("<Left>",self.moveLeft)self.area.bind("<Right>",self.moveRight)self.area.bind("<Down>",self.moveFaster)self.area.bind("<Key-w>",self.rotate)self.area.bind("<Key-a>",self.moveLeft)self.area.bind("<Key-d>",self.moveRight)self.area.bind("<Key-s>",self.moveFaster)self.area.focus_set()#菜单self.menu = Menu(self.root)self.root.config(menu=self.menu)self.startMenu = Menu(self.menu)self.menu.add_cascade(label='Start',menu=self.startMenu)self.startMenu.add_command(label='New Game',command=self.isRestart)self.startMenu.add_separator()self.startMenu.add_command(label='Continue',command=self.play)self.exitMenu = Menu(self.menu)self.menu.add_cascade(label='Exit',command=self.isQuit)self.helpMenu = Menu(self.root)self.menu.add_cascade(label='Help',menu=self.helpMenu)self.helpMenu.add_command(label='How to play',command=self.rule)self.helpMenu.add_separator()self.helpMenu.add_command(label='About...',command=self.about)#先将核⼼块的所在位置在map中的元素设为1,通过self.shapeDict获取其余⽅块位置,将map中对应元素设为1。
python如何写个俄罗斯方块
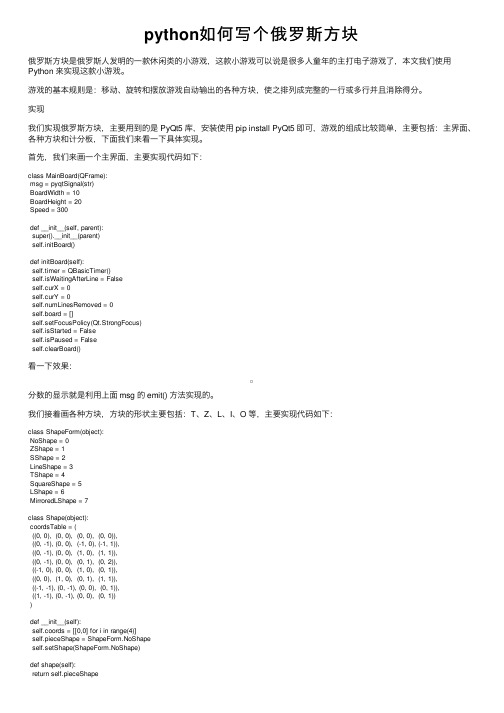
python如何写个俄罗斯⽅块俄罗斯⽅块是俄罗斯⼈发明的⼀款休闲类的⼩游戏,这款⼩游戏可以说是很多⼈童年的主打电⼦游戏了,本⽂我们使⽤Python 来实现这款⼩游戏。
游戏的基本规则是:移动、旋转和摆放游戏⾃动输出的各种⽅块,使之排列成完整的⼀⾏或多⾏并且消除得分。
实现我们实现俄罗斯⽅块,主要⽤到的是 PyQt5 库,安装使⽤ pip install PyQt5 即可,游戏的组成⽐较简单,主要包括:主界⾯、各种⽅块和计分板,下⾯我们来看⼀下具体实现。
⾸先,我们来画⼀个主界⾯,主要实现代码如下:class MainBoard(QFrame):msg = pyqtSignal(str)BoardWidth = 10BoardHeight = 20Speed = 300def __init__(self, parent):super().__init__(parent)self.initBoard()def initBoard(self):self.timer = QBasicTimer()self.isWaitingAfterLine = Falseself.curX = 0self.curY = 0self.numLinesRemoved = 0self.board = []self.setFocusPolicy(Qt.StrongFocus)self.isStarted = Falseself.isPaused = Falseself.clearBoard()看⼀下效果:分数的显⽰就是利⽤上⾯ msg 的 emit() ⽅法实现的。
我们接着画各种⽅块,⽅块的形状主要包括:T、Z、L、I、O 等,主要实现代码如下:class ShapeForm(object):NoShape = 0ZShape = 1SShape = 2LineShape = 3TShape = 4SquareShape = 5LShape = 6MirroredLShape = 7class Shape(object):coordsTable = (((0, 0), (0, 0), (0, 0), (0, 0)),((0, -1), (0, 0), (-1, 0), (-1, 1)),((0, -1), (0, 0), (1, 0), (1, 1)),((0, -1), (0, 0), (0, 1), (0, 2)),((-1, 0), (0, 0), (1, 0), (0, 1)),((0, 0), (1, 0), (0, 1), (1, 1)),((-1, -1), (0, -1), (0, 0), (0, 1)),((1, -1), (0, -1), (0, 0), (0, 1)))def __init__(self):self.coords = [[0,0] for i in range(4)]self.pieceShape = ShapeForm.NoShapeself.setShape(ShapeForm.NoShape)def shape(self):return self.pieceShapedef setShape(self, shape):table = Shape.coordsTable[shape]for i in range(4):for j in range(2):self.coords[i][j] = table[i][j]self.pieceShape = shape我们知道⽅块是不断⾃动下落的,因此需要⼀个计时器来控制,主要实现代码如下:def timerEvent(self, event):if event.timerId() == self.timer.timerId():if self.isWaitingAfterLine:self.isWaitingAfterLine = Falseself.newPiece()else:self.oneLineDown()else:super(MainBoard, self).timerEvent(event)在⽅块下落的过程中,我们需要通过键盘来控制⽅块的形状以及左右移动,因此,我们需要⼀个按键事件来控制它,主要实现代码如下:def keyPressEvent(self, event):if not self.isStarted or self.curPiece.shape() == ShapeForm.NoShape:super(MainBoard, self).keyPressEvent(event)returnkey = event.key()if key == Qt.Key_P:self.pause()returnif self.isPaused:returnelif key == Qt.Key_Left:self.tryMove(self.curPiece, self.curX - 1, self.curY)elif key == Qt.Key_Right:self.tryMove(self.curPiece, self.curX + 1, self.curY)elif key == Qt.Key_Down:self.tryMove(self.curPiece.rotateRight(), self.curX, self.curY)elif key == Qt.Key_Up:self.tryMove(self.curPiece.rotateLeft(), self.curX, self.curY)elif key == Qt.Key_Space:self.dropDown()elif key == Qt.Key_D:self.oneLineDown()else:super(MainBoard, self).keyPressEvent(event)当⽅块落到底部后,需要来检测是否有构成⼀条直线的,因此我们需要有⼀个⽅法来找到所有能消除的⾏并且消除它们,主要实现代码如下:def removeFullLines(self):numFullLines = 0rowsToRemove = []for i in range(MainBoard.BoardHeight):n = 0for j in range(MainBoard.BoardWidth):if not self.shapeAt(j, i) == ShapeForm.NoShape:n = n + 1if n == 10:rowsToRemove.append(i)rowsToRemove.reverse()for m in rowsToRemove:for k in range(m, MainBoard.BoardHeight):for l in range(MainBoard.BoardWidth):self.setShapeAt(l, k, self.shapeAt(l, k + 1))numFullLines = numFullLines + len(rowsToRemove)if numFullLines > 0:self.numLinesRemoved = self.numLinesRemoved + numFullLinesself.msg.emit(str(self.numLinesRemoved))self.isWaitingAfterLine = Trueself.curPiece.setShape(ShapeForm.NoShape)self.update()我们来看⼀下最终实现效果:是不是有内味了。
python编写俄罗斯方块
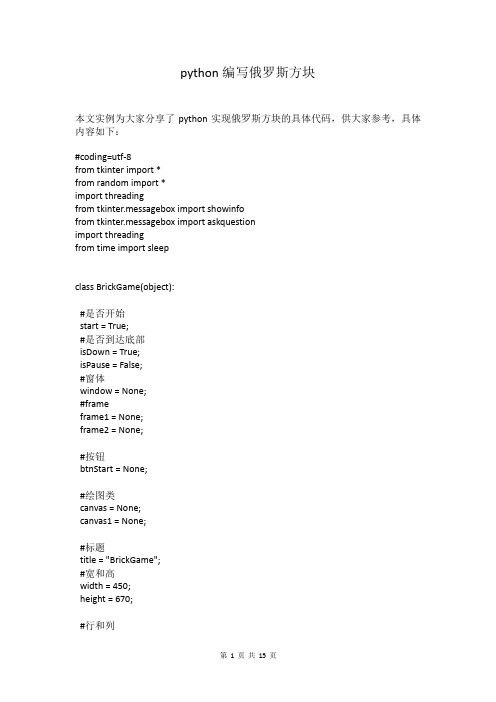
python编写俄罗斯方块本文实例为大家分享了python实现俄罗斯方块的具体代码,供大家参考,具体内容如下:#coding=utf-8from tkinter import *from random import *import threadingfrom tkinter.messagebox import showinfofrom tkinter.messagebox import askquestionimport threadingfrom time import sleepclass BrickGame(object):#是否开始start = True;#是否到达底部isDown = True;isPause = False;#窗体window = None;#frameframe1 = None;frame2 = None;#按钮btnStart = None;#绘图类canvas = None;canvas1 = None;#标题title = "BrickGame";#宽和高width = 450;height = 670;#行和列rows = 20;cols = 10;#下降方块的线程downThread = None; #几种方块brick = [[[[0,1,1],[1,1,0],[0,0,0]],[[1,0,0],[1,1,0],[0,1,0]],[[0,1,1],[1,1,0],[0,0,0]],[[1,0,0],[1,1,0],[0,1,0]]],[[[1,1,1],[1,0,0],[0,0,0]],[[0,1,1],[0,0,1],[0,0,1]],[[0,0,0],[0,0,1],],[[1,0,0],[1,0,0],[1,1,0] ]],[[[1,1,1],[0,0,1],[0,0,0] ],[[0,0,1],[0,0,1],[0,1,1] ],[[0,0,0],[1,0,0],[1,1,1] ],[[1,1,0],[1,0,0],[1,0,0] ]],[[[0,0,0],[0,1,1],[0,1,1] ],[[0,0,0],[0,1,1],[0,1,1] ],[[0,0,0],[0,1,1],],[[0,0,0],[0,1,1],[0,1,1] ]],[[[1,1,1],[0,1,0],[0,0,0] ],[[0,0,1],[0,1,1],[0,0,1] ],[[0,0,0],[0,1,0],[1,1,1] ],[[1,0,0],[1,1,0],[1,0,0] ]],[[[0,1,0],[0,1,0],[0,1,0] ],[[0,0,0],[1,1,1],[0,0,0] ],[[0,1,0],[0,1,0]],[[0,0,0],[1,1,1],[0,0,0]]],[[[1,1,0],[0,1,1],[0,0,0]],[[0,0,1],[0,1,1],[0,1,0]],[[0,0,0],[1,1,0],[0,1,1]],[[0,1,0],[1,1,0],[1,0,0]]]];#当前的方块curBrick = None;#当前方块数组arr = None;arr1 = None;#当前方块形状shape = -1;#当前方块的行和列(最左上角)curRow = -10;curCol = -10;#背景back = list();#格子gridBack = list();preBack = list();#初始化def init(self):for i in range(0,self.rows):self.back.insert(i,list());self.gridBack.insert(i,list());for i in range(0,self.rows):for j in range(0,self.cols):self.back[i].insert(j,0);self.gridBack[i].insert(j,self.canvas.create_rectangle(30*j,30*i,30*(j+1),30*(i+1),fill=" black"));for i in range(0,3):self.preBack.insert(i,list());for i in range(0,3):for j in range(0,3):self.preBack[i].insert(j,self.canvas1.create_rectangle(30*j,30*i,30*(j+1),30*(i+1),fill=" black"));#绘制游戏的格子def drawRect(self):for i in range(0,self.rows):for j in range(0,self.cols):if self.back[i][j]==1:self.canvas.itemconfig(self.gridBack[i][j],fill="blue",outline="white");elif self.back[i][j]==0:self.canvas.itemconfig(self.gridBack[i][j],fill="black",outline="white");#绘制预览方块for i in range(0,len(self.arr1)):for j in range(0,len(self.arr1[i])):if self.arr1[i][j]==0:self.canvas1.itemconfig(self.preBack[i][j],fill="black",outline="white");elif self.arr1[i][j]==1:self.canvas1.itemconfig(self.preBack[i][j],fill="orange",outline="white");#绘制当前正在运动的方块if self.curRow!=-10 and self.curCol!=-10:for i in range(0,len(self.arr)):for j in range(0,len(self.arr[i])):if self.arr[i][j]==1:self.canvas.itemconfig(self.gridBack[self.curRow+i][self.curCol+j],fill="blue",outline=" white");#判断方块是否已经运动到达底部if self.isDown:for i in range(0,3):for j in range(0,3):if self.arr[i][j]!=0:self.back[self.curRow+i][self.curCol+j] = self.arr[i][j]; #判断整行消除self.removeRow();#判断是否死了self.isDead();#获得下一个方块self.getCurBrick();#判断是否有整行需要消除def removeRow(self):count=0for i in range(0,self.rows):tag1 = True;for j in range(0,self.cols):if self.back[i][j]==0:tag1 = False;break;if tag1==True:#从上向下挪动count=count+1for m in range(i-1,0,-1):for n in range(0,self.cols):self.back[m+1][n] = self.back[m][n];scoreValue = eval(self.scoreLabel2['text']) scoreValue += 5*count*(count+3)self.scoreLabel2.config(text=str(scoreValue))#获得当前的方块def getCurBrick(self):self.curBrick = randint(0,len(self.brick)-1); self.shape = 0;#当前方块数组self.arr = self.brick[self.curBrick][self.shape]; self.arr1 = self.arr;self.curRow = 0;self.curCol = 1;#是否到底部为Falseself.isDown = False;#监听键盘输入def onKeyboardEvent(self,event):#未开始,不必监听键盘输入if self.start == False:return;if self.isPause == True:return;#记录原来的值tempCurCol = self.curCol;tempCurRow = self.curRow;tempShape = self.shape;tempArr = self.arr;direction = -1;if event.keycode==37:#左移self.curCol-=1;direction = 1;elif event.keycode==38:#变化方块的形状self.shape+=1;direction = 2;if self.shape>=4:self.shape=0;self.arr = self.brick[self.curBrick][self.shape];elif event.keycode==39:direction = 3;#右移self.curCol+=1;elif event.keycode==40:direction = 4;#下移self.curRow+=1;if self.isEdge(direction)==False:self.curCol = tempCurCol;self.curRow = tempCurRow;self.shape = tempShape;self.arr = tempArr;self.drawRect();return True;#判断当前方块是否到达边界def isEdge(self,direction):tag = True;#向左,判断边界if direction==1:for i in range(0,3):for j in range(0,3):if self.arr[j][i]!=0 and (self.curCol+i<0 or self.back[self.curRow+j][self.curCol+i]!=0): tag = False;break;#向右,判断边界elif direction==3:for i in range(0,3):for j in range(0,3):if self.arr[j][i]!=0 and (self.curCol+i>=self.cols or self.back[self.curRow+j][self.curCol+i]!=0):tag = False;break;#向下,判断底部elif direction==4:for i in range(0,3):for j in range(0,3):if self.arr[i][j]!=0 and (self.curRow+i>=self.rows or self.back[self.curRow+i][self.curCol+j]!=0):tag = False;self.isDown = True;break;#进行变形,判断边界elif direction==2:if self.curCol<0:self.curCol=0;if self.curCol+2>=self.cols:self.curCol = self.cols-3;if self.curRow+2>=self.rows:self.curRow = self.curRow-3;return tag;#方块向下移动def brickDown(self):while True:if self.start==False:print("exit thread");break;if self.isPause==False:tempRow = self.curRow;self.curRow+=1;if self.isEdge(4)==False:self.curRow = tempRow;self.drawRect();#每一秒下降一格sleep(1);#点击开始def clickStart(self):self.start = True;for i in range(0,self.rows):for j in range(0,self.cols):self.back[i][j] = 0;self.canvas.itemconfig(self.gridBack[i][j],fill="black",outline="white"); for i in range(0,len(self.arr)):for j in range(0,len(self.arr[i])):self.canvas1.itemconfig(self.preBack[i][j],fill="black",outline="white"); self.getCurBrick();self.drawRect();self.downThread = threading.Thread(target=self.brickDown,args=()); self.downThread.start();def clickPause(self):self.isPause=not self.isPauseprint(self.isPause)if not self.isPause:self.btnPause["text"]="暂停"else:self.btnPause["text"]="恢复"def clickReStart(self):ackRestart =askquestion("重新开始","你确定要重新开始吗?")if ackRestart == 'yes':self.clickStart()else:returndef clickQuit(self):ackQuit =askquestion("退出","你确定要退出吗?")if ackQuit == 'yes':self.window.destroy()exit()#判断是否死了def isDead(self):for j in range(0,len(self.back[0])):if self.back[0][j]!=0:showinfo("提示","你挂了,再来一盘吧!");self.start = False;break;#运行def __init__(self):self.window = Tk();self.window.title(self.title);self.window.minsize(self.width,self.height);self.window.maxsize(self.width,self.height);self.frame1 = Frame(self.window,width=300,height=600,bg="black"); self.frame1.place(x=20,y=30);self.scoreLabel1 = Label(self.window,text="Score:",font=(30))self.scoreLabel1.place(x=340,y=60)self.scoreLabel2 = Label(self.window,text="0",fg='red',font=(30))self.scoreLabel2.place(x=410,y=60)self.frame2 = Frame(self.window,width=90,height=90,bg="black");self.frame2.place(x=340,y=120);self.canvas = Canvas(self.frame1,width=300,height=600,bg="black");self.canvas1 = Canvas(self.frame2,width=90,height=90,bg="black");self.btnStart = Button(self.window,text="开始",command=self.clickStart);self.btnStart.place(x=340,y=400,width=80,height=25);self.btnPause = Button(self.window,text="暂停",command=self.clickPause);self.btnPause.place(x=340,y=450,width=80,height=25);self.btnReStart = Button(self.window,text="重新开始",command=self.clickReStart); self.btnReStart.place(x=340,y=500,width=80,height=25);self.btnQuit = Button(self.window,text="退出",command=self.clickQuit);self.btnQuit.place(x=340,y=550,width=80,height=25);self.init();#获得当前的方块self.getCurBrick();#按照数组,绘制格子self.drawRect();self.canvas.pack();self.canvas1.pack();#监听键盘事件self.window.bind("<KeyPress>",self.onKeyboardEvent);#启动方块下落线程self.downThread = threading.Thread(target=self.brickDown,args=());self.downThread.start();self.window.mainloop(); self.start=False;pass;if __name__=='__main__': brickGame = BrickGame();。
Python小游戏之300行代码实现俄罗斯方块

Python⼩游戏之300⾏代码实现俄罗斯⽅块前⾔本⽂代码基于 python3.6 和 pygame1.9.4。
俄罗斯⽅块是⼉时最经典的游戏之⼀,刚开始接触 pygame 的时候就想写⼀个俄罗斯⽅块。
但是想到旋转,停靠,消除等操作,感觉好像很难啊,等真正写完了发现,⼀共也就 300 ⾏代码,并没有什么难的。
先来看⼀个游戏截图,有点丑,好吧,我没啥美术细胞,但是主体功能都实现了,可以玩起来。
现在来看⼀下实现的过程。
外形俄罗斯⽅块整个界⾯分为两部分,⼀部分是左边的游戏区域,另⼀部分是右边的显⽰区域,显⽰得分、速度、下⼀个⽅块样式等。
这⾥就不放截图了,看上图就可以。
游戏区域跟贪吃蛇⼀样,是由⼀个个⼩⽅格组成的,为了看得直观,我特意画了⽹格线。
import sysimport pygamefrom pygame.locals import *SIZE = 30 # 每个⼩⽅格⼤⼩BLOCK_HEIGHT = 20 # 游戏区⾼度BLOCK_WIDTH = 10 # 游戏区宽度BORDER_WIDTH = 4 # 游戏区边框宽度BORDER_COLOR = (40, 40, 200) # 游戏区边框颜⾊SCREEN_WIDTH = SIZE * (BLOCK_WIDTH + 5) # 游戏屏幕的宽SCREEN_HEIGHT = SIZE * BLOCK_HEIGHT # 游戏屏幕的⾼BG_COLOR = (40, 40, 60) # 背景⾊BLACK = (0, 0, 0)def print_text(screen, font, x, y, text, fcolor=(255, 255, 255)):imgText = font.render(text, True, fcolor)screen.blit(imgText, (x, y))def main():pygame.init()screen = pygame.display.set_mode((SCREEN_WIDTH, SCREEN_HEIGHT))pygame.display.set_caption('俄罗斯⽅块')font1 = pygame.font.SysFont('SimHei', 24) # ⿊体24font_pos_x = BLOCK_WIDTH * SIZE + BORDER_WIDTH + 10 # 右侧信息显⽰区域字体位置的X坐标 font1_height = int(font1.size('得分')[1])score = 0 # 得分while True:for event in pygame.event.get():if event.type == QUIT:sys.exit()# 填充背景⾊screen.fill(BG_COLOR)# 画游戏区域分隔线pygame.draw.line(screen, BORDER_COLOR,(SIZE * BLOCK_WIDTH + BORDER_WIDTH // 2, 0),(SIZE * BLOCK_WIDTH + BORDER_WIDTH // 2, SCREEN_HEIGHT), BORDER_WIDTH)# 画⽹格线竖线for x in range(BLOCK_WIDTH):pygame.draw.line(screen, BLACK, (x * SIZE, 0), (x * SIZE, SCREEN_HEIGHT), 1)# 画⽹格线横线for y in range(BLOCK_HEIGHT):pygame.draw.line(screen, BLACK, (0, y * SIZE), (BLOCK_WIDTH * SIZE, y * SIZE), 1)print_text(screen, font1, font_pos_x, 10, f'得分: ')print_text(screen, font1, font_pos_x, 10 + font1_height + 6, f'{score}')print_text(screen, font1, font_pos_x, 20 + (font1_height + 6) * 2, f'速度: ')print_text(screen, font1, font_pos_x, 20 + (font1_height + 6) * 3, f'{score // 10000}')print_text(screen, font1, font_pos_x, 30 + (font1_height + 6) * 4, f'下⼀个:')pygame.display.flip()if __name__ == '__main__':main()⽅块接下来就是要定义⽅块,⽅块的形状⼀共有以下 7 种:I 型O 型T 型S 型Z 型L 型J 型这⾥我做了多次的更改,因为⽅块最⼤的长度是长条形的,为4格,所以我统⼀⽤了 4 × 4 的⽅格来定义。
Python使用pygame模块编写俄罗斯方块游戏的代码实例

Python使⽤pygame模块编写俄罗斯⽅块游戏的代码实例⽂章先介绍了关于俄罗斯⽅块游戏的⼏个术语。
边框——由10*20个空格组成,⽅块就落在这⾥⾯。
盒⼦——组成⽅块的其中⼩⽅块,是组成⽅块的基本单元。
⽅块——从边框顶掉下的东西,游戏者可以翻转和改变位置。
每个⽅块由4个盒⼦组成。
形状——不同类型的⽅块。
这⾥形状的名字被叫做T, S, Z ,J, L, I , O。
如下图所⽰:模版——⽤⼀个列表存放形状被翻转后的所有可能样式。
全部存放在变量⾥,变量名字如S_SHAPE_TEMPLATE orJ_SHAPE_TEMPLATE着陆——当⼀个⽅块到达边框的底部或接触到在其他的盒⼦话,我们就说这个⽅块着陆了。
那样的话,另⼀个⽅块就会开始下落。
下⾯先把代码敲⼀遍,试着了解作者意图,体会俄罗斯⽅块游戏的制作过程。
import random, time, pygame, sysfrom pygame.locals import *FPS = 25WINDOWWIDTH = 640WINDOWHEIGHT = 480BOXSIZE = 20BOARDWIDTH = 10BOARDHEIGHT = 20BLANK = '.'MOVESIDEWAYSFREQ = 0.15MOVEDOWNFREQ = 0.1XMARGIN = int((WINDOWWIDTH - BOARDWIDTH * BOXSIZE) / 2)TOPMARGIN = WINDOWHEIGHT - (BOARDHEIGHT * BOXSIZE) - 5# R G BWHITE = (255, 255, 255)GRAY = (185, 185, 185)BLACK = ( 0, 0, 0)RED = (155, 0, 0)LIGHTRED = (175, 20, 20)GREEN = ( 0, 155, 0)LIGHTGREEN = ( 20, 175, 20)BLUE = ( 0, 0, 155)LIGHTBLUE = ( 20, 20, 175)YELLOW = (155, 155, 0)LIGHTYELLOW = (175, 175, 20)BORDERCOLOR = BLUEBGCOLOR = BLACKTEXTCOLOR = WHITETEXTSHADOWCOLOR = GRAYCOLORS = ( BLUE, GREEN, RED, YELLOW)LIGHTCOLORS = (LIGHTBLUE, LIGHTGREEN, LIGHTRED, LIGHTYELLOW)assert len(COLORS) == len(LIGHTCOLORS) # each color must have light colorTEMPLATEWIDTH = 5TEMPLATEHEIGHT = 5S_SHAPE_TEMPLATE = [['.....','.....','..OO.','.OO..','.....'],['.....','..O..','..OO.','...O.','.....']]Z_SHAPE_TEMPLATE = [['.....','.....','.OO..','..OO.','.....'],['.....','..O..','.OO..','.O...','.....']]I_SHAPE_TEMPLATE = [['..O..', '..O..','..O..','..O..','.....'],['.....','.....','OOOO.','.....','.....']]O_SHAPE_TEMPLATE = [['.....', '.....','.OO..','.OO..','.....']]J_SHAPE_TEMPLATE = [['.....', '.O...','.OOO.','.....','.....'],['.....','..OO.','..O..','..O..','.....'],['.....','.....','.OOO.','...O.','.....'],['.....','..O..','..O..','.OO..','.....']]L_SHAPE_TEMPLATE = [['.....', '...O.','.OOO.','.....','.....'],['.....','..O..','..O..','..OO.','.....'],['.....','.....','.OOO.','.O...','.....'],['.....','.OO..','..O..','..O..','.....']]T_SHAPE_TEMPLATE = [['.....', '..O..','.OOO.','.....','.....'],['.....','..O..','..OO.','..O..','.....'],['.....','.....','.OOO.','..O..','.....'],['.....','..O..','.OO..','..O..','.....']]PIECES = {'S': S_SHAPE_TEMPLATE,'Z': Z_SHAPE_TEMPLATE,'J': J_SHAPE_TEMPLATE,'L': L_SHAPE_TEMPLATE,'I': I_SHAPE_TEMPLATE,'O': O_SHAPE_TEMPLATE,'T': T_SHAPE_TEMPLATE}def main():global FPSCLOCK, DISPLAYSURF, BASICFONT, BIGFONTpygame.init()FPSCLOCK = pygame.time.Clock()DISPLAYSURF = pygame.display.set_mode((WINDOWWIDTH, WINDOWHEIGHT))BASICFONT = pygame.font.Font('freesansbold.ttf', 18)BIGFONT = pygame.font.Font('freesansbold.ttf', 100)pygame.display.set_caption('Tetromino')showTextScreen('Tetromino')while True: # game loopif random.randint(0, 1) == 0:pygame.mixer.music.load('tetrisb.mid')else:pygame.mixer.music.load('tetrisc.mid')pygame.mixer.music.play(-1, 0.0)runGame()pygame.mixer.music.stop()showTextScreen('Game Over')def runGame():# setup variables for the start of the gameboard = getBlankBoard()lastMoveDownTime = time.time()lastMoveSidewaysTime = time.time()lastFallTime = time.time()movingDown = False # note: there is no movingUp variablemovingLeft = FalsemovingRight = Falsescore = 0level, fallFreq = calculateLevelAndFallFreq(score)fallingPiece = getNewPiece()nextPiece = getNewPiece()while True: # game loopif fallingPiece == None:# No falling piece in play, so start a new piece at the topfallingPiece = nextPiecenextPiece = getNewPiece()lastFallTime = time.time() # reset lastFallTimeif not isValidPosition(board, fallingPiece):return # can't fit a new piece on the board, so game overcheckForQuit()for event in pygame.event.get(): # event handling loopif event.type == KEYUP:if (event.key == K_p):# Pausing the gameDISPLAYSURF.fill(BGCOLOR)pygame.mixer.music.stop()showTextScreen('Paused') # pause until a key presspygame.mixer.music.play(-1, 0.0)lastFallTime = time.time()lastMoveDownTime = time.time()lastMoveSidewaysTime = time.time()elif (event.key == K_LEFT or event.key == K_a):movingLeft = Falseelif (event.key == K_RIGHT or event.key == K_d):movingRight = Falseelif (event.key == K_DOWN or event.key == K_s):movingDown = Falseelif event.type == KEYDOWN:# moving the piece sidewaysif (event.key == K_LEFT or event.key == K_a) and isValidPosition(board, fallingPiece, adjX=-1): fallingPiece['x'] -= 1movingLeft = TruemovingRight = FalselastMoveSidewaysTime = time.time()elif (event.key == K_RIGHT or event.key == K_d) and isValidPosition(board, fallingPiece, adjX=1):fallingPiece['x'] += 1movingRight = TruemovingLeft = FalselastMoveSidewaysTime = time.time()# rotating the piece (if there is room to rotate)elif (event.key == K_UP or event.key == K_w):fallingPiece['rotation'] = (fallingPiece['rotation'] + 1) % len(PIECES[fallingPiece['shape']])if not isValidPosition(board, fallingPiece):fallingPiece['rotation'] = (fallingPiece['rotation'] - 1) % len(PIECES[fallingPiece['shape']])elif (event.key == K_q): # rotate the other directionfallingPiece['rotation'] = (fallingPiece['rotation'] - 1) % len(PIECES[fallingPiece['shape']])if not isValidPosition(board, fallingPiece):fallingPiece['rotation'] = (fallingPiece['rotation'] + 1) % len(PIECES[fallingPiece['shape']])# making the piece fall faster with the down keyelif (event.key == K_DOWN or event.key == K_s):movingDown = Trueif isValidPosition(board, fallingPiece, adjY=1):fallingPiece['y'] += 1lastMoveDownTime = time.time()# move the current piece all the way downelif event.key == K_SPACE:movingDown = FalsemovingLeft = FalsemovingRight = Falsefor i in range(1, BOARDHEIGHT):if not isValidPosition(board, fallingPiece, adjY=i):breakfallingPiece['y'] += i - 1# handle moving the piece because of user inputif (movingLeft or movingRight) and time.time() - lastMoveSidewaysTime > MOVESIDEWAYSFREQ:if movingLeft and isValidPosition(board, fallingPiece, adjX=-1):fallingPiece['x'] -= 1elif movingRight and isValidPosition(board, fallingPiece, adjX=1):fallingPiece['x'] += 1lastMoveSidewaysTime = time.time()if movingDown and time.time() - lastMoveDownTime > MOVEDOWNFREQ and isValidPosition(board, fallingPiece, adjY=1): fallingPiece['y'] += 1lastMoveDownTime = time.time()# let the piece fall if it is time to fallif time.time() - lastFallTime > fallFreq:# see if the piece has landedif not isValidPosition(board, fallingPiece, adjY=1):# falling piece has landed, set it on the boardaddToBoard(board, fallingPiece)score += removeCompleteLines(board)level, fallFreq = calculateLevelAndFallFreq(score)fallingPiece = Noneelse:# piece did not land, just move the piece downfallingPiece['y'] += 1lastFallTime = time.time()# drawing everything on the screenDISPLAYSURF.fill(BGCOLOR)drawBoard(board)drawStatus(score, level)drawNextPiece(nextPiece)if fallingPiece != None:drawPiece(fallingPiece)pygame.display.update()FPSCLOCK.tick(FPS)def makeTextObjs(text, font, color):surf = font.render(text, True, color)return surf, surf.get_rect()def terminate():pygame.quit()sys.exit()def checkForKeyPress():# Go through event queue looking for a KEYUP event.# Grab KEYDOWN events to remove them from the event queue.checkForQuit()for event in pygame.event.get([KEYDOWN, KEYUP]):if event.type == KEYDOWN:continuereturn event.keyreturn Nonedef showTextScreen(text):# This function displays large text in the# center of the screen until a key is pressed.# Draw the text drop shadowtitleSurf, titleRect = makeTextObjs(text, BIGFONT, TEXTSHADOWCOLOR)titleRect.center = (int(WINDOWWIDTH / 2), int(WINDOWHEIGHT / 2))DISPLAYSURF.blit(titleSurf, titleRect)# Draw the texttitleSurf, titleRect = makeTextObjs(text, BIGFONT, TEXTCOLOR)titleRect.center = (int(WINDOWWIDTH / 2) - 3, int(WINDOWHEIGHT / 2) - 3)DISPLAYSURF.blit(titleSurf, titleRect)# Draw the additional "Press a key to play." text.pressKeySurf, pressKeyRect = makeTextObjs('Press a key to play.', BASICFONT, TEXTCOLOR) pressKeyRect.center = (int(WINDOWWIDTH / 2), int(WINDOWHEIGHT / 2) + 100)DISPLAYSURF.blit(pressKeySurf, pressKeyRect)while checkForKeyPress() == None:pygame.display.update()FPSCLOCK.tick()def checkForQuit():for event in pygame.event.get(QUIT): # get all the QUIT eventsterminate() # terminate if any QUIT events are presentfor event in pygame.event.get(KEYUP): # get all the KEYUP eventsif event.key == K_ESCAPE:terminate() # terminate if the KEYUP event was for the Esc keypygame.event.post(event) # put the other KEYUP event objects backdef calculateLevelAndFallFreq(score):# Based on the score, return the level the player is on and# how many seconds pass until a falling piece falls one space.level = int(score / 10) + 1fallFreq = 0.27 - (level * 0.02)return level, fallFreqdef getNewPiece():# return a random new piece in a random rotation and colorshape = random.choice(list(PIECES.keys()))newPiece = {'shape': shape,'rotation': random.randint(0, len(PIECES[shape]) - 1),'x': int(BOARDWIDTH / 2) - int(TEMPLATEWIDTH / 2),'y': -2, # start it above the board (i.e. less than 0)'color': random.randint(0, len(COLORS)-1)}return newPiecedef addToBoard(board, piece):# fill in the board based on piece's location, shape, and rotationfor x in range(TEMPLATEWIDTH):for y in range(TEMPLATEHEIGHT):if PIECES[piece['shape']][piece['rotation']][y][x] != BLANK:board[x + piece['x']][y + piece['y']] = piece['color']def getBlankBoard():# create and return a new blank board data structureboard = []for i in range(BOARDWIDTH):board.append([BLANK] * BOARDHEIGHT)return boarddef isOnBoard(x, y):return x >= 0 and x < BOARDWIDTH and y < BOARDHEIGHTdef isValidPosition(board, piece, adjX=0, adjY=0):# Return True if the piece is within the board and not collidingfor x in range(TEMPLATEWIDTH):for y in range(TEMPLATEHEIGHT):isAboveBoard = y + piece['y'] + adjY < 0if isAboveBoard or PIECES[piece['shape']][piece['rotation']][y][x] == BLANK:continueif not isOnBoard(x + piece['x'] + adjX, y + piece['y'] + adjY):return Falseif board[x + piece['x'] + adjX][y + piece['y'] + adjY] != BLANK:return Falsereturn Truedef isCompleteLine(board, y):# Return True if the line filled with boxes with no gaps.for x in range(BOARDWIDTH):if board[x][y] == BLANK:return Falsereturn Truedef removeCompleteLines(board):# Remove any completed lines on the board, move everything above them down, and return the number of complete lines.numLinesRemoved = 0y = BOARDHEIGHT - 1 # start y at the bottom of the boardwhile y >= 0:if isCompleteLine(board, y):# Remove the line and pull boxes down by one line.for pullDownY in range(y, 0, -1):for x in range(BOARDWIDTH):board[x][pullDownY] = board[x][pullDownY-1]# Set very top line to blank.for x in range(BOARDWIDTH):board[x][0] = BLANKnumLinesRemoved += 1# Note on the next iteration of the loop, y is the same.# This is so that if the line that was pulled down is also# complete, it will be removed.else:y -= 1 # move on to check next row upreturn numLinesRemoveddef convertToPixelCoords(boxx, boxy):# Convert the given xy coordinates of the board to xy# coordinates of the location on the screen.return (XMARGIN + (boxx * BOXSIZE)), (TOPMARGIN + (boxy * BOXSIZE))def drawBox(boxx, boxy, color, pixelx=None, pixely=None):# draw a single box (each tetromino piece has four boxes)# at xy coordinates on the board. Or, if pixelx & pixely# are specified, draw to the pixel coordinates stored in# pixelx & pixely (this is used for the "Next" piece).if color == BLANK:returnif pixelx == None and pixely == None:pixelx, pixely = convertToPixelCoords(boxx, boxy)pygame.draw.rect(DISPLAYSURF, COLORS[color], (pixelx + 1, pixely + 1, BOXSIZE - 1, BOXSIZE - 1))pygame.draw.rect(DISPLAYSURF, LIGHTCOLORS[color], (pixelx + 1, pixely + 1, BOXSIZE - 4, BOXSIZE - 4))def drawBoard(board):# draw the border around the boardpygame.draw.rect(DISPLAYSURF, BORDERCOLOR, (XMARGIN - 3, TOPMARGIN - 7, (BOARDWIDTH * BOXSIZE) + 8, (BOARDHEIGHT * BOXSIZE) + 8), 5) # fill the background of the boardpygame.draw.rect(DISPLAYSURF, BGCOLOR, (XMARGIN, TOPMARGIN, BOXSIZE * BOARDWIDTH, BOXSIZE * BOARDHEIGHT))# draw the individual boxes on the boardfor x in range(BOARDWIDTH):for y in range(BOARDHEIGHT):drawBox(x, y, board[x][y])def drawStatus(score, level):# draw the score textscoreSurf = BASICFONT.render('Score: %s' % score, True, TEXTCOLOR)scoreRect = scoreSurf.get_rect()scoreRect.topleft = (WINDOWWIDTH - 150, 20)DISPLAYSURF.blit(scoreSurf, scoreRect)# draw the level textlevelSurf = BASICFONT.render('Level: %s' % level, True, TEXTCOLOR)levelRect = levelSurf.get_rect()levelRect.topleft = (WINDOWWIDTH - 150, 50)DISPLAYSURF.blit(levelSurf, levelRect)def drawPiece(piece, pixelx=None, pixely=None):shapeToDraw = PIECES[piece['shape']][piece['rotation']]if pixelx == None and pixely == None:# if pixelx & pixely hasn't been specified, use the location stored in the piece data structurepixelx, pixely = convertToPixelCoords(piece['x'], piece['y'])# draw each of the boxes that make up the piecefor x in range(TEMPLATEWIDTH):for y in range(TEMPLATEHEIGHT):if shapeToDraw[y][x] != BLANK:drawBox(None, None, piece['color'], pixelx + (x * BOXSIZE), pixely + (y * BOXSIZE))def drawNextPiece(piece):# draw the "next" textnextSurf = BASICFONT.render('Next:', True, TEXTCOLOR)nextRect = nextSurf.get_rect()nextRect.topleft = (WINDOWWIDTH - 120, 80)DISPLAYSURF.blit(nextSurf, nextRect)# draw the "next" piecedrawPiece(piece, pixelx=WINDOWWIDTH-120, pixely=100)if __name__ == '__main__':main()代码⼀开始仍是⼀些变量的初始化,我们这⾥还加载了time模块,后⾯会⽤到。
趣味python编程之经典俄罗斯方块
gameOver=False #游戏结束标志
pause=False #游戏暂停标志
def printTxt(content,x,y,font,screen,color=(255,255,255)): '''显示文本 args: content:待显示文本内容 x,y:显示坐标 font:字体 screen:输出的screen color:颜色 ''' imgTxt=font.render(content,True,color) screen.blit(imgTxt,(x,y))
class point(object): '''平面坐标点类 attributes: x,y:坐标值 ''' def __init__(self,x,y): self.__x=x self.__y=y
def getx(self): return self.__x
def setx(self,x): self.__x=x
完整程序代码:
# -*- coding:utf-8 -*''' 经典俄罗斯方块
游戏基于python2.7、pygame1.9.2b8编写。
游戏注解中出现的术语解释: 舞台:整个游戏界面,包括堆叠区、成绩等显示区,下个出现方块预告区。 堆叠区:游戏方块和活动方块形状堆放区域,游戏中主要互动区。 方块(基础方块):这里的方块是对基础的小四方形统称,每个方块就是一个正方形。 方块形状:指一组以特定方式组合在一起的方块,也就是大家常说的下落方块形状,比如长条,方形,L形等。 固实方块:特指堆叠区中不能再进行移动,可被消除的基础方块集合。
x=property(getx,setx)
45分钟教你学会编制俄罗斯方块
第一;程序架构我们来编写俄罗斯方块这个程序,那我们就先来个庖丁解牛,将俄罗斯反怪分解为我们需要解决的各个1、构建方块,2、初始化3、随机生成方块4、方块进入操作界面5、判断方块所处环境6、移动操控的方块7、变形按键处理8、消除处理9、时间处理10、其余杂项处理以上就是我们将俄罗斯方块分解后的几个模块,这样,整个程序的架构就基本完成了。
第二:程序设计也就是程序的主要部分了,我们可以先新建一个模块,0、公共变量罗列(建议琢磨时间30秒)我们先把我这个程序涉及到的变量罗列一下,不用刻意去看啥意思。
后面我们在每个模块当中都会提到Public Declare Function SetTimer Lib "user32.dll" (ByVal hWnd As Long, ByVal nIDEvent As Long, ByVal uElapse As Long, ByVal lpTimerFunc As Long) As Long Public Declare Function KillTimer Lib "user32.dll" (ByVal hWnd As Long, ByVal nIDEvent As Long) As Long''以上两个函数可能有人没见过。
是用来设定每隔多少时间执行一个过程的函数。
不晓得的话照抄还不会吗?settimer就是设定间隔并生效执行,killtimer就是去除这个设定。
Public CurrentBlock, NextBlock, TempBlock''CurrentBlock 当前方块NextBlock 下一个方块TempBlock 临时方块Public CurrentColor, NextColor ''当前方块颜色,下一个方块颜色Public InterTime ''间隔时间,就是方块自然下降的速度。
简单俄罗斯方块程序代码

简单俄罗斯方块程序代码俄罗斯方块是一款非常经典的游戏,它需要玩家通过操作方块来消除行,随着游戏的深入,难度越来越大。
我们可以用Python语言来编写俄罗斯方块程序,它可以让我们体验到这个经典游戏的乐趣。
首先,我们需要导入相关的模块:```pythonimport pygameimport random```其中,pygame模块可以让我们创建图形化界面,random模块可以用于生成随机数,方便我们随机生成方块。
接下来,我们需要定义一些常量和变量:```python# 定义常量WIDTH = 480HEIGHT = 640CELL_SIZE = 30# 定义变量board = [[0] * 10 for i in range(20)]score = 0ticks = 0fall_speed = 60next_block = random.randint(0, 6)block_pos = (0, 3)current_block = None```这里定义了几个常量:游戏窗口的宽度和高度,单元格的大小。
同时,我们还需要一个二维数组board来表示游戏画面上的格子状态,score来表示当前得分,ticks表示已经落下的方块数量,fall_speed表示方块下落的速度,next_block表示下一个方块的类型,block_pos表示当前方块的位置,current_block则表示当前正在下落的方块。
接下来,我们需要定义一些函数来实现游戏的各种功能。
首先是绘制游戏画面的函数:```pythondef draw_game():screen.fill((0, 0, 0))# 绘制已经落下的方块for i in range(20):for j in range(10):if board[i][j] != 0:pygame.draw.rect(screen, (255, 255, 255),(j * CELL_SIZE, i * CELL_SIZE, CELL_SIZE, CELL_SIZE))# 绘制正在下落的方块if current_block:for i in range(4):for j in range(4):if current_block[i][j] != 0:pygame.draw.rect(screen, (255, 255, 255),((block_pos[1] + j) * CELL_SIZE, (block_pos[0] + i) * CELL_SIZE, CELL_SIZE, CELL_SIZE))# 绘制下一个方块draw_next_block()# 绘制得分font = pygame.font.SysFont('SimHei', 20)text = font.render('得分:%d' % score, True, (255, 255, 255))screen.blit(text, (10, 10))pygame.display.flip()```这个函数会首先清空画面,然后遍历board数组,绘制已经落下的方块。
- 1、下载文档前请自行甄别文档内容的完整性,平台不提供额外的编辑、内容补充、找答案等附加服务。
- 2、"仅部分预览"的文档,不可在线预览部分如存在完整性等问题,可反馈申请退款(可完整预览的文档不适用该条件!)。
- 3、如文档侵犯您的权益,请联系客服反馈,我们会尽快为您处理(人工客服工作时间:9:00-18:30)。
游戏分享:手把手教你用Python编写
俄罗斯方块(九)
2017.12.27
看了这么久文字
是时候该看一下图文并茂的了
isOnBoard()和isValidPosition()函数
390.def isOnBoard(x,y):
391.return x>=0and x<BOARDWIDTH and y<BOARDHEIGHT
isOnBoard()是一个简单的函数,它检查传递的XY坐标表示板上存在的有效值。
只要XY坐标不小于0或大于或等于BOARDWIDTH和BOARDHEIGHT常数,则函数返回True。
394.def isValidPosition(board,piece,adjX=0,adjY=0):
395.#Return True if the piece is within the board and not colliding 396.for x in range(TEMPLATEWIDTH):
397.for y in range(TEMPLATEHEIGHT):
398.isAboveBoard=y+piece['y']+adjY<0
399.if isAboveBoard or SHAPES[piece['shape']][piece['rotation']][y][x]
==BLANK:
400.continue
isValidPosition()函数给出了一个底板数据结构和一个积木数据结构,如果该积木中的所有方块都在底板上并且不与底板上的任何方块重叠,则返回True。
这是通过拍摄片段的XY坐标(实际上是5x5方块上右上方框的坐标),并在积木数据结构中添加坐标。
这是几张照片,以帮助说明这一点:
在左边的底板子上,掉落的积木(即落下的积木的左上角)XY坐标是底板上的(2,3)。
但是落下的部分坐标系中的方块有自己的坐标。
要找到这些作品的“底板”坐标,我们只需要添加掉落积木左上方的“底板”坐标和方块的“积木”坐标。
在左侧底板,下落积木中的方块在下列积木的坐标
(2,2)(3,2)(1,3)(2,3)
当我们将坐标(2,3)(底板上积木的坐标)添加到上述坐标时,它看起来像这样:
(2+2,2+3)(3+2,2+3)(1+2,3+3)(2+2,3+3)
添加坐标(2,3)后,方块位于以下“底板”的坐标:
(4,5)(5,5)(3,6)(4,6)
现在我们可以弄清楚下落块的框是哪个板坐标,我们可以看到它们是否与已经在底板上的着陆的方块重叠。
行396和397上的嵌套for循计算所有下落积木上的每个可能的坐标。
我们想检查一个下降的方块是否在底板子上,或者与底板上的一个方块重叠。
(虽然一个例外是如果方块在底板上方,当下降的部分刚刚开始下降时,它是可能
的)。
行398创建一个名为isAboveBoard的变量,如果在坐标上的下降方块部分上的方块指出x和y在底板上显示为True。
否则设置为False。
行399上的if语句检查该片上的空格是否在板上或空白。
如果其中任何一个为True,则代码执行一个连续运行并转到下一个继续重复运行。
(注意,行399的结尾具有[y][x]而不是[x][y],这是因为PIECES数据结构中的坐标相反,参见上一节“设置积木模板”)。
401.if not isOnBoard(x+piece['x']+adjX,y+piece['y']+adjY): 402.return False
403.if board[x+piece['x']+adjX][y+piece['y']+adjY]!=BLANK: 404.return False
405.return True
行401上的if语句检查该积木上的方块不在底板上。
行403上的if语句检查该方块的位置的底板空间不为空。
如果这些条件之一为True,则isValidPosition()函数将反馈为False。
请注意,这些if语句还会调整传递给函数的adjX和adjY参数的坐标。
如果代码经过嵌套的for循环,并且没有找到反馈为False的原因,则该积木的位置必须是有效的,因此函数在第405行反馈为True。
Checking for,and Removing,Complete Lines查找删除完整行
407.def isCompleteLine(board,y):
408.#Return True if the line filled with boxes with no gaps.
409.for x in range(BOARDWIDTH):
410.if board[x][y]==BLANK:
411.return False
412.return True
isCompleteLine在y参数指定的行中进行简单的检查。
当每个空间都被一个方块填满时,板上的一行被认为是“完整的”。
行409上的for循环遍历行中的每个空格。
如果一个空格是空白的(它是由与BLANK常量相同的值引起的),那么函数返回False。
415.def removeCompleteLines(board):
416.#Remove any completed lines on the board,move everything above them down,and return the number of complete lines.
417.numLinesRemoved=0
418.y=BOARDHEIGHT-1#start y at the bottom of the board
419.while y>=0:
removeCompleteLines()函数将在传递的板数据结构中找到任何完整的行,删除行,然后将板上的所有框移动到该行的下一行。
该函数将反馈已删除的行数(由numLinesRemoved变量跟踪),以便将其添加到分数中。
该函数的工作方式是运行在从第419行开始的循环中,y变量从最下面的行开始(这是BOARDHEIGHT-1)。
每当y指定的行不完整时,y将递减到下一个最高的行。
一旦y达到-1,循环终止。
420.if isCompleteLine(board,y):
421.#Remove the line and pull boxes down by one line.
422.for pullDownY in range(y,0,-1):
423.for x in range(BOARDWIDTH):
424.board[x][pullDownY]=board[x][pullDownY-1]
425.#Set very top line to blank.
426.for x in range(BOARDWIDTH):
427.board[x][0]=BLANK
428.numLinesRemoved+=1
429.#Note on the next iteration of the loop,y is the same.
430.#This is so that if the line that was pulled down is also 431.#complete,it will be removed.
432.else:
433.y-=1#move on to check next row up
434.return numLinesRemoved
如果y引用的行完成,则isCompleteLine()函数将返回True。
在这种情况下,程序需要将删除的行上方的每行的值复制到下一个最下行。
这就是第422行的for 循环(这就是为什么它调用range()函数从y开始,而不是0.另外注意它使用range()的三个参数形式,以便它返回的列表从y开始,以0结束,每次迭代之后“增加”为-1)
我们来看下面的例子。
为了节省空间,只显示底板的前五行。
行3是一条完整的行,这意味着它上面的所有行(行2,1和0)必须“下拉”。
首先,第2行被复制到第3行。
右侧的板显示完成之后,底的外观如何:
这个“下拉”实际上只是将更高的行的值复制到第424行下面的行。
将行2复制到行3后,将行1复制到行2,然后将行0复制到行1:
完整的行被删除后,执行到达行419开始的while循环的结尾,因此执行将跳回循环的开头。
请注意,当行被删除并且行被拉下时,y变量根本没有改变。
所以在下一次迭代中,y变量指向与之前相同的行。
这是需要的,因为如果有两条完整的线,那么第二条完整的线将被拉下来,也必须被消除。
然后代码将消除此完整的行,然后转到下一个重复。
只有当没有完成的行,y变量在行433上递减。
一旦y变量一直递减到0,执行将退出while循环。
(未完待续)。
