Historian软件快速使用向导
Battery-Historian工具使用
Battery-Historian⼯具使⽤Battery-Historian⼯具使⽤在Android官⽹上有这⼀个⼯具的使⽤⽅法,具体可以查看该官⽹。
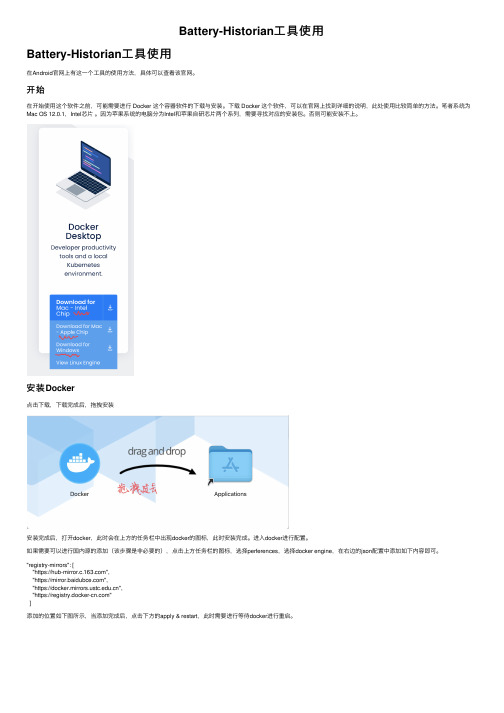
开始在开始使⽤这个软件之前,可能需要进⾏ Docker 这个容器软件的下载与安装。
下载 Docker 这个软件,可以在官⽹上找到详细的说明,此处使⽤⽐较简单的⽅法。
笔者系统为Mac OS 12.0.1,Intel芯⽚。
因为苹果系统的电脑分为Intel和苹果⾃研芯⽚两个系列,需要寻找对应的安装包。
否则可能安装不上。
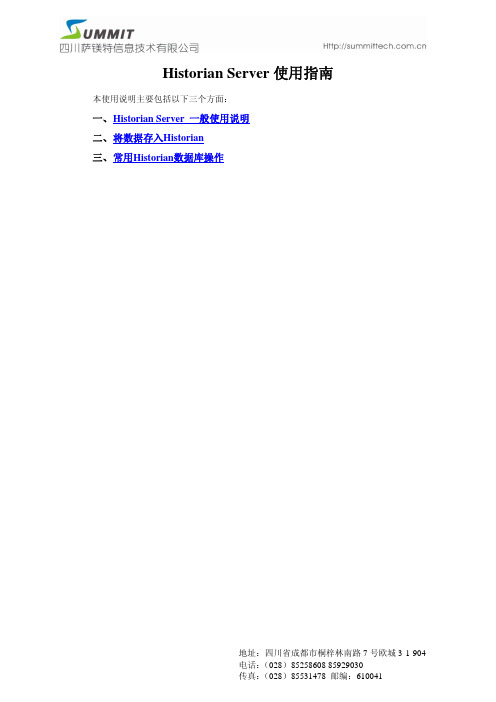
安装Docker点击下载,下载完成后,拖拽安装安装完成后,打开docker,此时会在上⽅的任务栏中出现docker的图标,此时安装完成。
进⼊docker进⾏配置。
如果需要可以进⾏国内源的添加(该步骤是⾮必要的),点击上⽅任务栏的图标,选择perferences,选择docker engine,在右边的json配置中添加如下内容即可。
"registry-mirrors": ["https://","https://","https://","https://"]添加的位置如下图所⽰,当添加完成后,点击下⽅的apply & restart,此时需要进⾏等待docker进⾏重启。
此时添加源完成。
在终端中间进⾏输⼊docker run hello-world以查询docker是否安装成功,如果成功,会在终端中输出如下的内容。
此时,恭喜你,安装docker成功。
安装Battery Historian因为Battery Historian需要跑在Docker上,因此在安装Battery Historian前安装Docker是必不可少的。
此处默认安装完成Docker。
打开终端,输⼊docker search battery进⾏查找 Battery Historian 软件,此时终端中会显⽰多个 Battery Historian 软件,此时需要选择⼀个软件进⾏安装。
Historian Server使用指南
Historian Server使用指南本使用说明主要包括以下三个方面:一、 H istorian Server 一般使用说明二、 将数据存入Historian三、 常用Historian数据库操作一、Historian Server 一般使用说明1、安装完成后的历史数据库管理界面集成在SMC中,点击“开始/程序/wonderware/System Management Console”可以打开SMC。
备注:在较早的版本中,Historian Server的名称为:IndustrialSQL Server,只是名称的区别。
2、展开历史数据库,如下界面参数分别表示:z TANGMING:表示历史数据库安装所在的计算机名称;z Management Console:历史数据库管理台;♦Status:主要用于启动/停止历史数据库;♦Data Acquisition:查看历史数据库存储数据的状态;♦Clients:当前连接到历史数据库的客户端;♦History Blocks:历史数据块存放的路径。
z Configuration Editor:配置环境。
♦System Configuration:系统配置模块;♦Public Groups:公共数据点分组,系统默认;♦Private Groups:私有数据点分组,可以自定义将数据点分组。
3、在Status上点击右键,选择Start启动历史数据库。
4、弹出如下对话框,输入相应的计算机用户名和密码,点击“确定”。
z Domain:域名称,若用户未使用“域”,则不需要填写;z Login Name:计算机用户名(推荐使用具有Administrator权限的用户);z Password:计算机用户名相应的密码。
5、启动成功后,点击Status按钮可看到右侧运行状态面板全部变为绿色:6、点击“Data Acquisition”可以看到右侧的面板,绿色表示正在存储该主题的数据,红色表示未存储。
iHistorian说明书
IHistorian 数据库管理使用说明iHistorian 是Intellution 自动化公司出品的用于采集iFIX 历史数据的一个企业级实时历史数据库平台。
iHistorian 可通过不同节点的 iFIX 数据采集器采集 SCADA 网络系统中各个节点的数据,经过分析、运算和压缩将这些数据存储在 iHistorian 服务器中。
使用微软 Excel 软件,可实现对采集数据的分析和报表输出等功能。
在 iFIX 中也能利用趋势显示的功能调用iHistorian 服务器中的数据。
第一章 iHistorian 软件使用说明一 . 软件说明我们使用的 iHistorian 注册使用的权限为:最大同时采集1000 个过程数据标签;可以有 5 个管理者(administrator )同时登录 iHistorian 服务器进行管理。
二 . 软件安装我们在 SCADA网络服务器上安装 iHistorian “ Server ”,把它作为iHistorian 服务器,同时安装进行数据的管理。
在 iFIX 操作员站上安装iHistorian “collector ”进行对该节点数据的采集工作。
在iFIX 工程师站上安装“ administrator ”作为 iHistorian 的管理者。
系统结构如下图1-1. 所示服务器操作员站工程师站图1-1下面介绍安装步骤:(一)服务器安装1.关闭服务器,切断电源。
将iH 的“加密狗”插于并口,重新启动服务器。
2. 在服务起器光驱中放入iHistorian 安装盘,光盘自动运行,点击“install iHistorian ”, 按提示进入后出现如图1-2. 所示画面图1-23. 选择“ Server ”、“iHistorian Administrator ”、和“ iHistorianExcel Add-in ”、点击“ Next ”进入下一步,出现如下图 1-3. 所示画面4.点击“ browse” , 修改安装路径为“d:\Program Fils\iHistorian ”。
Historian IDAS使用指南

Wonderware Historian 使用指南•Historian 一般使用说明•将数据存入Historian•常用Historian数据查询一、 Historian 一般使用说明1.成功后的历史数据库管理界面集成在SMC,点击“开始/程序/wonderware/System Management Console”可以打开SMC。
打开后的SMC界面为:2.展开Historian,如下界面参数分别表示为:3.在Status上点击右键,选择Start启动Historian。
4.弹出如下对话框,输入相应的计算机用户名和密码,点击“确定”。
Domain:域名称。
若用户未使用域,则不需要填写Login Name:计算机用户名(推荐使用具有Administrator权限的用户);Password:计算机用户名相应的密码。
5.启动成功后,点击Status按钮可以看到右侧运行面板全部变为绿色:6.点击“Data Acquisition”可以看到右侧的面板,绿色表示正在存储该主题的数据,红色表示未存储。
二、将数据存入Historian Server数据存入Historian可以通过两种方式:1.将DA Server数据中需要存储的数据加入Historian;2.将INTOUCH中的标记批量导入Historian;在现场,采用的为方式一,具体操作步骤为:1.点击Configuration Editor/System Configuration/Data Acquisition/IDAS。
点击右键,选择New I/O Server。
2.弹出如下界面,进行如下配置,完成后点击Finish。
3.新添加的IO Server出现在IDAS下面。
4.在新添加的IO Server上点击右键,选择New Topic。
5.弹出如下面板,并进行相应的配置:6.完成后点击Finish,新增的Topic出现在列表中。
7.在新增的Topic上点击右键,选择New Analog。
Historian使用
1.InTouch从Historian中取实时数据配置如下
首先运行InSQLServer采集数据(本例中是通过导入intouch demo的TagNanme采集数据),在网络中需要用InTouch取Historian的数据的计算机上配置InTouch访问名,节点名输入Historian的计算机名,应用程序名和主题名为aahIOSvrSvc和tagname,新建标记名所对应的Item名对应Historian中的Tag Name,最好新建标记名和Item名相同。
2.Historian的IDAS采集远程IOServer中数据
首先在远程IOServer配置好数据采集并运行,本例中是用FSGateway采集InTouchDEMO 中的数据,然后在IDAS中配置如下
新建IOServer
新建Topic,与IOServer中的TOPIC一致
新建模拟量标记
Item名与FSGateway的Device Item是中的名字相同,为了便于记忆unique Tagname与此item 相同
设定存储方式
要采集数据点已加入
记得要提交改变
在MSSQLServer中查询已有数据存储
查询中输入的Tagname是在数据库中添加模拟量标签中命名的,而不是IOServer中的,因为查询的是数据库中的tagname
3.Historian采集远程IDAS中数据。
Historian Server使用指南
Historian Server使用指南本使用说明主要包括以下三个方面:一、 H istorian Server 一般使用说明二、 将数据存入Historian三、 常用Historian数据库操作一、Historian Server 一般使用说明1、安装完成后的历史数据库管理界面集成在SMC中,点击“开始/程序/wonderware/System Management Console”可以打开SMC。
备注:在较早的版本中,Historian Server的名称为:IndustrialSQL Server,只是名称的区别。
2、展开历史数据库,如下界面参数分别表示:z TANGMING:表示历史数据库安装所在的计算机名称;z Management Console:历史数据库管理台;♦Status:主要用于启动/停止历史数据库;♦Data Acquisition:查看历史数据库存储数据的状态;♦Clients:当前连接到历史数据库的客户端;♦History Blocks:历史数据块存放的路径。
z Configuration Editor:配置环境。
♦System Configuration:系统配置模块;♦Public Groups:公共数据点分组,系统默认;♦Private Groups:私有数据点分组,可以自定义将数据点分组。
3、在Status上点击右键,选择Start启动历史数据库。
4、弹出如下对话框,输入相应的计算机用户名和密码,点击“确定”。
z Domain:域名称,若用户未使用“域”,则不需要填写;z Login Name:计算机用户名(推荐使用具有Administrator权限的用户);z Password:计算机用户名相应的密码。
5、启动成功后,点击Status按钮可看到右侧运行状态面板全部变为绿色:6、点击“Data Acquisition”可以看到右侧的面板,绿色表示正在存储该主题的数据,红色表示未存储。
histcite用法
histcite⽤法引⽂分析软件histcite简介已有 9187 次阅读2010-11-13 15:57|个⼈分类:⽂献管理与信息分析|系统分类:教学⼼得|关键词:引⽂分析,引⽤次数,SCI,研究历史,研究前沿这是《⽂献管理与信息分分析》课程内容的⼀部分。
对于科研⼯作者来说,除了掌握快速的收集信息和有效管理信息的能⼒之外,还需要有⼀定的信息分析能⼒。
譬如,检索某个研究⽅向,结果⽂献有上千篇,此时我们该如何对待这些⽂献?精炼检索条件很可能会导致有价值的⽂献被排除在外。
在交叉科学盛⾏的今天,如果想了解其它领域的进展情况,由于缺乏相应的专业知识,如何判断哪些⽂献是有重要参考价值的⽂献?这些问题的解决都需要我们具备⼀定的⽂献信息分析能⼒。
有⼈说,在WOS⾥按照引⽤次数排序,引⽤次数最多的必定参加价值更⼤,其实不然,后⾯会有解释。
我所知的⽂献信息分析软件有基于引⽂的分析软件histcite,基于内容分析的refviz、omniviz、Tda等,还有分析研究前沿的citespace等。
这⾥先简要介绍⼀下引⽂分析软件histcite它的功能和⽤法。
histcite=history of cite,意味引⽂历史,或者叫引⽂图谱分析软件。
该软件系sci的发明⼈加菲尔德开发,能够⽤图⽰的⽅式展⽰某⼀领域不同⽂献之间的关系。
可以快速帮助我们绘制出⼀个领域的发展历史,定位出该领域的重要⽂献,以及最新的重要⽂献。
软件的最新试⽤版本可以从/doc/43668711227916888486d7cd.html ⽹站下载到。
软件的试⽤⾮常简单,但如何从软件给出的图谱中得出有价值的信息,以及不同图谱展⽰的内在含义,需要我们不断揣摩和理解。
下⾯先介绍⼀下如何使⽤软件;然后介绍⼀下软件⾥涉及的⼀些概念;最后给出⼏个个⽰例。
⼀、软件使⽤1、从histcite⽹站下载软件,安装之后,点击histcite图标即可开启软件;软件打开后的窗⼝类似IE的界⾯;2、数据的获取;histcite⽬前⽤于分析的⽂献信息只能来源于web of science 数据库;在wos 数据库进⾏检索后,在页⾯的底端选择需要导出的数据记录,由于wos⽬前只⽀持每次导出500条记录,如果检索结果超过500条需要分多次导出。
Histcite使用教程 个人总结
Histcite使用(Histcite=history of cite引文历史)1、读的文献要是精品,读精华的文献,不要读太多垃圾文章,你得到的都是垃圾信息。
通过读文献来了解一个领域,就如同盲人摸象,最忌讳的就是得到的都是碎片化的信息,那样就很难保证能看清全貌!2、文献调研的目标:追踪进展,特定参考,基金申请。
如何快速了解领域:综述,教材,专著,问专家。
如何获得重要文献?向导师要,网站检索,文本分析,引文分析。
但要记住,分析文献永远不能代替阅读文献。
先知道该领域哪个人文章发得多,很可能他是该领域的大牛,然后再去找他写的综述。
3、WOS里面对文章进行引用次数降序排列时,有些时候靠前的文章也不靠谱,因为那里统计的引用是全部的引用,有同行的,外行的引用。
我们真的需要知道的是我们的同行到底引用了哪些文献,我这个领域内,到底哪些文献引用次数高!4、对于文献引用,要这样去理解:因为相关所以引用,引用相当于投票(赞一个/顶一下)!共引即相关。
5、Histcite功能:快速描绘一个领域发展脉络,快速锁定某个领域内重要文献,快速锁定某个领域内专家和大牛。
描绘新进展。
还有一个重要功能是找出“无指定关键词”的重要文献!!!6、数据下载(WOS),导入Histcite。
注意,目前Histcite只能支持WOS中搜索得到的文献信息,例如从Scopus,中文数据库等文献信息它是不能分析。
在WOS数据库中进行检索时,我们选定一个检索关键词如“自清洁”,即“self-cleaning”,然后按主题项检索(检索范围设置成“主题”,不要是“标题”,那样得到的结果太少,引文分析我们希望得到的数据是尽量全面,不一定要百分百精确)7、从导入的很多文献中,Histcite可以挑出它分析后认为重要的几十篇文献(当然这个数值也可以调节,到底选用多少篇文章进行作图我们可以自由选择),然后列出它们之间的相互引用关系图。
箭头被指说明这篇文献被引用,箭头指出表示引用别人。
- 1、下载文档前请自行甄别文档内容的完整性,平台不提供额外的编辑、内容补充、找答案等附加服务。
- 2、"仅部分预览"的文档,不可在线预览部分如存在完整性等问题,可反馈申请退款(可完整预览的文档不适用该条件!)。
- 3、如文档侵犯您的权益,请联系客服反馈,我们会尽快为您处理(人工客服工作时间:9:00-18:30)。
Contents
Tutorial Outline .............................................................................................. 3 Historian Overview ......................................................................................... 4 Server Applications and Services ................................................................... 4 Client and Reporting Applications ................................................................... 5 Architecture ................................................................................................ 6 Preparing Your System ................................................................................. 7 Installation ............................................................................................... 10 Creating the Project ...................................................................................... 13 Configuring the Data Source .......................................................................... 15 Vijeo Citect Configuration - CtAPI ................................................................ 15 Vijeo Citect Configuration – Historize Setting ................................................. 16 Creating the Data Source............................................................................ 16 Historize and Publish .................................................................................... 19 Historising ................................................................................................ 19 Publishing................................................................................................. 20 Permissions and User Security ..................................................................... 20 Creating the Historian Database ..................................................................... 23 Starting the Data Service .............................................................................. 25 Viewing Data ............................................................................................... 27 Process Analyst ......................................................................................... 27 Database Security for Process Analyst ............................................................. 30 Project Database ....................................................................................... 30 Historian Database .................................................................................... 31 Further Resources ........................................................................................ 33
Tutorial Outline
In this tutorial we will describe the steps involved in installing and configuring Vijeo Historian. We will collect data from a Vijeo Citect control system, and view this data using a client application. Before getting started, we will briefly cover an overview of Historian, where it fits in with other Schneider Electric products and a discussion of Historian components and architecture. As you proceed through the tutorial, take care to follow the steps completely and in order. Tips will be provided along the way (in the margin at right) to help you learn more about the task and adapt the steps to different environments. You can also see where you are in the tutorial by using the tutorial outline (bottom of margin). Although you can follow the tutorial using older versions, we will focus on using Vijeo Historian 4.40 and Vijeo Citect 7.30. You will need to have Vijeo Citect installed and running to complete the tutorial. We will be using the Example project provided with Vijeo Citect, though you can use your own project if you wish.
Overview Install Create project Configure Data source
Legal Information –
need to clarify whether to include and/or update this
Schneider Electric (Australia) Pty Ltd makes no representations or warranties with respect to the contents or use of this manual and, to the extent permitted by law, expressly limits its liability for breach of any warranty that may be implied to the replacement of this manual with another. Schneider Electric (Australia) Pty Ltd assumes no responsibility for any errors that may be in this document and reserves the right to revise this document at any time without incurring an obligation to notify any person of the revision. Copyright © 2012, Schneider Electric (Australia) Pty Ltd. All rights reserved. No part of this document may be reproduced, photocopied, or transmitted in any form or by any means (electronic or mechanical), for any purpose, without the express written permission of Schneider Electric (Australia) Pty Ltd.