MOMO5升级手册
ZHIYUN SMOOTH 5 说明书

此PDF电子文档支持以下功能**需阅读软件支持,以AdobeReader为例。
SMOOTH 5说明书Z H I Y U N -C N -v 1 . 1 0Contents■■产品清单产品清单■ (1)■■认识SMOOTH■5认识SMOOTH■5■ (3)■■电池及充电说明电池及充电说明■ (4)■■安装及调平安装手机■ (5)安装补光灯■ (6)平衡调节■ (7)■■稳定器的使用控制按键/指示灯/接口说明■ (8)工作模式说明■ (11)手调定位■ (14)快速待机■ (15)收纳■ (15)■■APP的使用下载APP■ (16)如何连接■ (16)APP主要功能介绍■ (17)■■固件升级与校准固件升级■ (18)校准方法■ (20)■■参数说明■■免责声明与警告阅读提示■ (24)警告■ (24)安全操作指引■ (24)■■保修卡质保期限说明■ (26)质保不包括■ (26)为获得智云(ZHIYUN)质保服务,请按下列步骤操作■ (26)■■联络卡产品清单使用本产品前,请仔细检查产品包装内是否包含以下所有物品,若有缺失,请联系客“*”■代表购买SMOOTH■5手机智能云台■COMBO套装包含此配件。
认识SMOOTH 5认识SMOOTH 51.磁吸补光灯安装位2.跟焦/变焦滚轮3.跟焦/变焦切换键4.手柄5.三脚架6.手机供电接口7.手机夹8.横滚轴臂9.横滚轴臂锁紧扳手10.横滚轴电机11.指示灯/控制面板12.俯仰轴电机13.俯仰轴锁紧卡口14.横滚轴锁紧卡扣15.1/4螺纹孔16.电源键17.■FN按键18.手机夹旋转轴19.航向臂20.航向轴电机21.航向轴锁紧开关22.■Type-C充电■/■固件升级接口23.扳机键24.挂绳口25.■鳞甲SMOOTH■5磁吸补光灯(购买SMOOTH■5手机智能云台■COMBO套装包含此配件)电池及充电说明电池及充电说明SMOOTH■5采用内置电池,首次使用前,请先给SMOOTH■5充满电以激活电池,保证产品顺利使用。
MB525刷机教程

刚买的MB525入手后自己试着刷机。
过程如下:准备工作:必备工具:USB数据线驱动:MotoHelper_2.0.40_Driver_4.9.0刷机软件:rsdlite_5.0ROOT工具:一键ROOT工具SuperOneClick2.1第三方刷机工具:SndInitDefy_1.8.apk(MIUI专用刷机工具第三方Recovery.apk)底包:ROM 3.4.2-177.5(也可以到各大论坛找最新最稳定的北欧或是中欧底包。
)刷机包ROM:MIUI defy 2.3.7a最新版(注:小米系统带有“a”的是稳定版)可选工具:豌豆荚手机精灵刷机步骤:1. 首先确保您的电脑里安装了MOTO Defy 的最新USB数据线驱动程序。
安装完毕后,重启电脑。
2. 下载并在电脑安装RSDlite5.0刷机工具。
3. 下载MOTO Defy 官方原版完整固件ROM 3.4.2-177.5 底包,也就是最新Android 2.2.2 的北欧版。
解压后得到一个扩展名称为sbf的文件,360MB大小这个就是底包了,将这个文件放在一个全英文目录下。
(也可以用中欧或是精精英的底包,不过我没有用过,成不成功就看人品了)4.把下载下来的SndInitDefy_1.8.apk放到手机内存卡里面(目录路径不能带中文),建议放在根目录里。
把下载下来的刷机包ROM:MIUI defy 2.3.7a也放在根目录里。
注意这个时候的刷机包是*.zip不用解压)5. 在手机上操作同时按住电源键和音量(-)键,进入绿色机器人界面;同时按住音量(+)和音量(-)键,进入recovery(蓝色英文界面);(部分机型连续点击屏幕下方也可进入)音量(+)(-)选择,电源键确认;选择"wipe data/factory reset"然后"Yes——delete all user date";继续选择"wipe cache partition"6. 最后选择"reboot system now"重启手机。
SUUNTO 5 用户指南说明书

SUUNTO 5用户指南2022-11-291. 预期用途 (4)2. 安全 (5)3. 快速入门 (6)3.1. 按钮 (6)3.2. SuuntoLink (7)3.3. Suunto App (7)3.4. 光学心率 (8)3.5. 调整设置 (8)4. 设置 (10)4.1. 按钮锁定和屏幕变暗 (10)4.2. 背光灯 (10)4.3. 提示音和振动 (10)4.4. 蓝牙连接 (10)4.5. 飞行模式 (11)4.6. “请勿打扰”模式 (11)4.7. 通知 (11)4.8. 时间和日期 (12)4.8.1. 闹钟 (12)4.9. 语言和单位制 (13)4.10. 表盘 (13)4.10.1. 月相 (13)4.11. 日出和日落闹铃 (13)4.12. 省电 (14)4.13. 位置格式 (14)4.14. 设备信息 (15)5. 功能 (16)5.1. 记录锻炼 (16)5.1.1. 运动模式 (17)5.1.2. 锻炼时使用目标 (17)5.1.3. 锻炼期间的导航 (18)5.1.4. 电池电量管理 (18)5.1.5. 游泳 (19)5.1.6. 间歇训练 (19)5.1.7. 显示屏主题 (20)5.1.8. 自动暂停 (20)5.1.9. 感觉 (21)5.2. 媒体控件 (21)5.3. 日志 (22)5.4. 导航 (22)25.4.1. 海拔导航 (22)5.4.2. 高度计 (22)5.4.3. 路线 (23)5.4.4. 查找回程 (24)5.4.5. 由 Komoot 提供支持的转向导航 (24)5.4.6. 兴趣点 (25)5.4.7. GPS 精度和节能模式 (28)5.5. 每日活动 (28)5.5.1. 活动监测 (28)5.5.2. 即时心率 (29)5.5.3. 每日心率 (30)5.6. 训练洞察 (30)5.7. 自适应训练指导 (31)5.8. 恢复 (33)5.9. 睡眠跟踪 (33)5.10. 压力与恢复 (35)5.11. 体能水平 (35)5.12. 胸部心率传感器 (36)5.13. 配对 POD 和传感器 (36)5.13.1. 校准自行车 POD (37)5.13.2. 校准 Foot POD (37)5.13.3. 校准 Power POD (38)5.14. 计时器 (38)5.15. 强度区间 (39)5.15.1. 心率区间 (39)5.15.2. 配速区间 (41)5.15.3. 功率区间 (42)5.16. FusedSpeed™ (43)6. Suunto高能训练 (45)7. Suunto高能运动应用程序 (46)8. 保养与支持 (47)8.1. 操作指南 (47)8.2. 电池 (47)8.3. 废弃处置 (47)9. 参考资料 (48)9.1. 合规性 (48)9.2. CE (48)31. 预期用途Suunto 5 是跟踪运动以及心率和卡路里等其他指标的运动腕表。
摩托ME525的刷机教程,最新2.35的

处女贴:整套服务之“兜兜复出第二弹~全新Defy2.3.5稳定版~HiapkV3.7”刷机实操,由预工具-双Wipe-刷底包-做ROOT-更新升级包-说体现-见靓相让你一路走好…..成功使用2.3ROM固体..此是安卓2.3.5版前言:本人真感谢兜兜,是他让我有了冲动。
在23号的晚上,我足足被DEFY搞到零时五点多才上床。
当我见到DEFY全新面,全新的速度感,可以说比兴奋还要兴奋!参考的贴子:[2.3 固件ROM] [2011.08.20]兜兜复出第二弹~全新Defy2.3.5稳定版~HiapkV3.7~稳定为主~疾速为辅~网址:/thread-2379207-1-1.html[2011.06.18]今天兜兜来教你刷Defy-2.3~(顺便发布全新一键root发布)网址:/thread-1593334-1-1.htmlHIAPK兜兜首发~DEFY刷机全指导~[2011.01.24更新底包下载]/thread-886301-1-1.html都是兜兜兄为大家所做过的分享,以下教程就是整合这三篇文章,估一下真正能操的刷机过程分享大家!工具准备:1、“1.满电的电板~2.不会断电的电脑~3.完美的数据线~”引用兜兜的话;2、DEFY FOR WINXP驱动:MotoConnect_1.1.31_Driver_4.7.1.rar下载地址:/attachment.php?aid=672817&k=21f0a7473dfc7fcc06628f2961f16328&t=13 14230330&sid=9768tqTWzyWUC7eXE6Xw3tp8NFKhNjUL43T7szw1juFCTUg&flag=123、moto的RSD LITE软件下载地址:/attachment.php?aid=672862&k=36d46e22eb11fc7d0b0b40a58cafc32f &t=1314289238&sid=696ctGLqzmetbpEuR3tUNjRpulqb18Teiplptr%2FPY2m7ilM&flag=1 24、预准备升级为2.3.5的原版北欧底包:/file/cl61tpqz5、获取DEFY权限的程序:OneClickRoot+Recovery下载地址:/attachment.php?aid=1123812&k=5a579b580b7da09e03a002b63b608e20&t= 1314289222&sid=5231dWjbWMGCOuGLVTDS3obEWMmSBRChFK34OOKy2NrDOuM&flag =126、感谢兜兜复出第二弹所提供的全新Defy2.3.5稳定版HiapkV3.7优化升级包下载网址:/c0gb2v1se1第1步MB525的双Wipe方法:[此方法有区别于平时所见到的WIPE教程,我的机子是四月出产的DEFY]1. 关机2. 然后一直按住音量减小键同时再按开机键,是摁住哦,别松开.等待几秒, 等到屏幕出现小机器人后就松开,如图:3. 同时按音量上下键[区别之处就在此处]4. 我们就能看到四个选项,分别是reboot system phone(重启手机系统)update.zipWipe data/factory resetWipe cache partition如图:5、使用音量上下键做选择,电量键为确认,选择\"Wipe data/factory reset\",再选择中间那个YES,在运行时屏幕有个很多的。
陌陌各版本升级说明
陌陌各版本升级说明功能介绍·注册登录账号,可上传多张图片,管理个人移动名片· 精准定位,查找附近的陌生人· 免费通信,发送文字、图片和位置信息,查询导航路线· 关注好友,方便查看和TA的距离* 说明:由于电信CDMA定位准度不足,使用该*络用户只能通过wifi定位。
陌陌会在不久后完善对电信CDMA的支持,敬请谅解。
更新说明此版本中的新功能:相互关注的好友可以发送语音签名同步到微博等第三方平台分享陌陌账号邀请好友增强定位功能,支持GPS定位(可进行定位设置和检查) 增加消息和语音音效修复头像错位/登录闪退/*络切换黑屏等问题修复部分手机聊天时无法选择图片问题更新功能 [新增] 备注名:给以关注的好友添加备注名;行业列表:新增11个行业可选,让你的资料更丰富; [改进] 优化了聊天界面交互;修复发送消息有一定失败率的问题;修复了显示“未连接”的问题;版本 .1 中的新功能 [改进] 修复了部分用户升级到版本后不能正常登录的问题更新功能 [新增] 表情:添加了全新设计的表情,让聊天更生动; [改进] 优化了稳定性;添加了对日本历、佛历的支持;优化了聊天界面的交互;安卓版本更新内容 .4更新内容1.修复部分手机上传图片失败问题。
最新版本新增动态聊天表情支持微博绑定方式检查客户端是否含病毒或盗版更新功能1、群组功能:你可以加入附近的群组,和更多的人进行互动,也可以创建自己感兴趣的群组;2、全新界面:对陌陌界面进行了全新的改版,更加大气,并且加入更多有趣的元素;3、*络优化:改良了通讯方案,连接*络速度更快,即使在较弱*络环境下也能顺畅收发消息;.2更新内容安卓版本1.优化通知栏提示效果2.使用更智能快速的定位3.新浪微博快速绑定和过期提醒更新内容:1.增加群活动功能,聚会交友更方便2.增加群等级显示和说明拆分出表情插件,以后升级节约一半流量 .1更新内容2、修复升级后可以会导致的消息列表显示空白或部分消息不显示的问题(通过此更新可恢复消息内容);3、修复聊天时可能会出现消息顺序错乱、消息内容显示空白的问题;4、修复iPod touch第五代用户无法全屏显示的问题。
纽曼 X05 数码播放器 说明书

纽曼数码播放器—X05用户手册ver 4.3您 好:感谢您选用本公司生产的产品!为了使您尽快轻松自如地操作您的播放器,我们随机配备了内容详尽的用户手册,您可以获取有关产品介绍、使用方法等方面的知识。
使用您的播放器之前,请仔细阅读我们随机提供的所有资料,以便您能更好地使用该产品。
在编写本手册时我们非常认真和严谨,希望能给您提供完备可靠的信息,然而难免有错误和疏漏之处,请您给予谅解并由衷地欢迎您批评和指正。
如果您在使用该产品的过程中发现什么问题,请及时拨打我们的服务热线,感谢您的支持和合作!请随时备份您的数据资料到您的台式(笔记本)计算机上。
本公司对于因软件、硬件的误操作、产品维修、电池更换或其它意外情况所引起的个人数据资料的丢失和损坏不负任何责任,也不对由此而造成的其它间接损失负责。
同时我们无法控制用户对本手册可能造成的误解,因此,本公司将不对在使用本手册过程中可能出现的意外损失负责,并不对因使用该产品而引起的第三方索赔负责。
本手册中的信息如有变更,恕不另行通知。
本手册信息受到版权保护,其任何部分未经本公司事先书面许可,不准以任何方式影印和复制。
本公司保留对本手册、三包凭证及其相关资料的最终解释权。
企业执行标准:Q/YK 001-2005企业标准备案:QB/440304L2666-2005注 意 事 项★ 禁止儿童单独玩耍本机。
★ 请不要在特别热、冷、多尘或潮湿的环境中使用,避免水溅在机器上。
★ 使用时不要让播放器摔落、或与硬物摩擦撞击,否则可能会导致播放器表面磨花、电池脱落或其它硬件损坏。
★ 尽量避免在特别干燥的环境下操作播放器,以防静电。
★ 请及时备份存放在播放器中的个人数据资料。
★ 建议在驾驶机动车或自行车时不要使用耳机,请保证行车安全。
★ 使用耳机时如果音量过大,可能导致永久性的听力受损。
因此请将您的播放器调整至合适的音量大小,并控制使用时间,以免您的听力受损。
★ 手册中对于某些文字或内容会以特殊方式标明,说明如下: 【注意】 提供特别需要留意的事项。
黑莓图文刷机教程
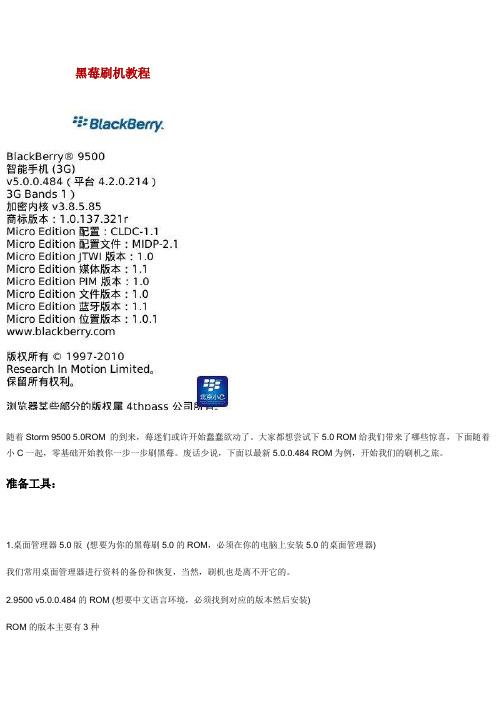
黑莓刷机教程随着Storm 9500 5.0ROM 的到来,莓迷们或许开始蠢蠢欲动了。
大家都想尝试下5.0 ROM给我们带来了哪些惊喜,下面随着小C一起,零基础开始教你一步一步刷黑莓。
废话少说,下面以最新5.0.0.484 ROM为例,开始我们的刷机之旅。
准备工具:1.桌面管理器5.0版(想要为你的黑莓刷5.0的ROM,必须在你的电脑上安装5.0的桌面管理器)我们常用桌面管理器进行资料的备份和恢复,当然,刷机也是离不开它的。
2.9500 v5.0.0.484的ROM (想要中文语言环境,必须找到对应的版本然后安装)ROM的版本主要有3种Multilanguage 多国语言版(不包含中文,主要面向欧美)All Languages 所有语言版(包含中文,安装包体积最大)EastAsia 东亚版(当然包含中文)3.wipe 工具我们可以这样理解,就是把您的手机格式化,所有数据清空,这是刷机前常用的一个动作。
以上工具,文章下面会统一提供下载。
刷机步骤:1.安装5.0的桌面管理器,下载、安装对应型号的ROM。
2.利用桌面管理器对手机的通讯录,短信等私人数据还有手机的各种设置备份。
(数据不重要的,不需要的可以跳过此步。
)3.wipe 清空手机4.用桌面管理器进行刷机5.用桌面管理器进行数据的恢复,导入手机,刷机成功。
(没有备份数据的,无需恢复。
)详细图文刷机过程:1.桌面管理器的安装,对应ROM版本的下载,安装:双击下载好的桌面管理器安装包,一路Next下去,用默认路径进行安装,避免一些不必要的麻烦。
程序安装完成,桌面会默认出现桌面管理器(DM)的快捷方式图标。
ROM的下载、安装由于RIM黑莓手机大多数都是和运营商捆绑发售,ROM版本的发布也会由各地不同国家的运营商主导发布,ROM的版本也会不断更新。
时刻关注网上我们的小C博客,随时掌握ROM的最新版本情况。
这里我们点击BlackBerry Storm 9500 OS 5.0.0.484 (All Languages) ROM的官网下载页面,选择对应机型进行页面跳转,这里我们当然选择Storm机型继续。
魅玛轻型迷你PTZ控制器RM-LP5用户手册说明书
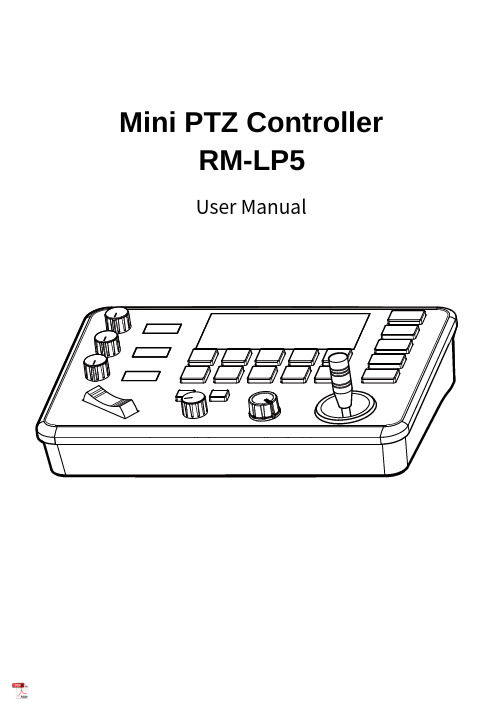
Mini PTZ Controller RM-LP5User ManualParameters & Specs Communication & Control Interface Camera Control or Operation Control Signal FormatPower Supply and ConsumptionPhysical & Others Description of Button & Knob FunctionInterface Function and Connection Diagram Upgrade Interface RS422/RS485 Interface RS232 Interface LAN Interface12V DC Power InterfaceSystem Menu Operation Instructions System Menu Function Explanation Keyboard System Menu System Setting Comm Setting Ethernet SettingPassword SettingSystem Menu Guide Products DimensionsContent2 2 2 2223 7 7788910 10 10 10 11 11 12 12 13④⑤⑪⑮①This Rotation Knob which was to adjustment the Camera Exposure Parameter or Red Gain Value, Turn Right Rotation was to changed the valued Increased, Turn Left Rotation was changed the Valued Decreased.②This Rotation Knob which was to adjustment the Camera Exposure Parameter or Blue Gain Value, Turn Right Rotation was to changed the valued Increased, Turn Left Rotation was changed the Valued Decreased.③This Rotation Knob which was to adjustment the Camera Exposure Parameter, Turn Right Rotation was to changed the valued Increased, Turn Left Rotation was changed the Valued Decreased.④LED Display, Real-time display of items and parameter values of adjusted by " knob ①".⑤LED Display, Real-time display of items and parameter values of adjusted by " knob ②".⑥LED Display, Real-time display of items and parameter values of adjusted by " knob ③".⑦Zoom Bridge KeyIt is used to control the camera to Zoom In/Out, for example, press the TELE end of the bridge key, the camera will Zoom in the TELE direction object, When you Press with more Large Pressure, then the Zoom Speed changed more Faster.⑧ Focus Function ZoonWhen the Backlight of [AUTO]Button is Light up, it means that the current focusing mode is the automatic; When the Backlight of [AUTO] Button is Light Off, it means that Current Focus Mode is changed to Manual. User can Press this button to switch the mode.[OPT key] is used to trigger the single focus of the camera.At the same time, the camera enters the one-shot auto focus mode.⑨PTZ Speed Adjustment KnobThis knob is used to adjust the speed of Camera Pan, Tlit and Zoom, with a total of 7 gears.The Current Gear will be display at Led Display. The Gear Value is more small then the pan/tilt rotation speed or the zoom speed of the camera controlled by the keyboard will be more Slowly.⑩ 2-Aixs JoystickThe joystick supports control camera to Up/Down, Left and Right movement. When the camera or keyboard menu is opened, the joystick is used to control the menu cursor Up/Down,Left/Right movement and modify parameters.⑪ Channel Button Zone[ CAM1 ] to [ CAM5 ] are shortcut keys for camera channels, which can be Freely switched and selected according to your need. When you select any camera channel, the backlight of the corresponding camera channel will be light up in green, and all the parameters and settings of the keyboard will be changed to the current Channel.Note: The communication parameters (address ID, protocol, baud rate, IP address, port number, etc.) of each channel can be set individually.Support mixed use of multiple protocols through different channel.⑫ Presets Function Zone●[ Number Keys ]SETING PRESETS :Long Press and hold the number key for 2 seconds (such as [Number key 1], when the screen displays "Set Preset 1” means that preset 1 has been saved) CALL PRESETS :Short press the preset number to be call Presets, (for example, [Number key 1],when you press the [Number key 1]the screen displays "Show Preset 1", it means that preset 1 has been call).●[ RESET Key ]TO BE CLEAR THE PRESET SETTINGPress[RESET key]+[Number key]to clear the preset position setting. After pressing the [RESET key], the green backlight starts to flash, Then press the preset number that needs to be cleared, (for example,[RESET]+ [Number key 1], at this time, the green Backlight of button of the [RESET key]stops flashing, and at the same time, “Reset Preset 1” is displayed on the screen, which means that preset 1 has been cleared.⑬ FOCUS KnobThis Knobs is using to adjustment camera’s focal length, Rotation right direction is adjustment focus length near, Rotation Left direction is adjustment focus length Far; (When User using this function, the keyboard’s Focus mode will be changed to Manual, It wasn’t available on AUTO Mode).⑭ Function Key Zone●[Menu Key]This key is to Turn ON/OFF Camera Menu, Long Press with 3secs will turn on Keyboard system Menu.●[AE MODE Key]This key is used to change the automatic exposure mode of the camera. Each time is pressed, the camera changes to different exposure mode. Under in difference of exposure mode, the corresponding functions of Knob 1, Knob 2 and Knob 3 are different. It is shown in real time on the display at the right of the knob.● [ WB MODE Key ]This Key is used to changed the White Balance of the camera. Each Time is pressed, the camera will be changed to different WB Mode.Under in difference ofWB mode, the corresponding functions of Knob 1, Knob 2 are different.The specific functions of the knobs are shown in Table 2:●[ Fn Keys ]This key is reserved for adding custom functions.The factory default state is: short press this key to send the command to enter theSub-menu of the camera, long press this key for 3 seconds to back Home Position of Camera.⑮ LED DISPLAYIt is used to display the current status information & Setting information of the keyboard in real time (including IP address, Port number, serial port address, communication protocol, Baud Rate and other information) and keyboard menu,the brightness of the display can be set through the keyboard menu.White Balance ModeKnob 1Knob 2AutoNOT USED NOT USED Manual Red GainBlue GainTable 2The interface is for upgrade of Hardware of keyboard by Laptop. Using Micro USB Cable direct connection with PC, And Upgrade by our upgrade tools software.This Interface is using to Connection with Camera by RS422 or RS485,detail connection diagram as follows pictures:③ RS232 InterfaceThis Interface is using to connection with Camera through RS232, detailThe LAN Interface is using for connection with Network switch or others.Network PTZ Camera, detail connection diagram as follows:●This interface is the Power supply interface, you can direct connection it with Power adapter; please don’t using non-original Power adapter.⑤ DC Power Supply Interface● Connect with multiple cameras by LAN interface detail connection diagram as follows:(When connecting multiple cameras, you need to set the IP of each camera separately1.Long Press [ MENU ] with 3secs will turn on Keyboard system Menu;2.The joystick swings up and down: control the system menu cursor to move up and down / change the parameters of the current menu item;3.The Joystick swings Right: enter the current menu item / save and exit the current menu item;4.The Joystick swings Left: Exist current Menu item/ No Saved and Exit current Menu item;5.Press [ MENU ]to exist System Menu;6.Press the number keys[0]~[9]: input numerical value (only valid for menu items that need to input numerical value). example IP Address or Port number setting.7.When the current value is number input, the green backlight of [CAM1]~[CAM5] is Light on, and at this time [CAM1]~[CAM5] Corresponds to the numbers 6~0 on the silk screen above the buttons.SYSTEM MENU 1.Long Press [ MENU ] with 3 secs will turn on Keyboard system Menu.2.The joystick swings up and down to control the menu cursor to move up and down SYSTEM SETTING The joystick swings up and down the Cursor to [ System Setting ], then Movement right to enter System Setting menu.● [ Language ]The Joystick swings up/down to [Language], then Movement right to enter setting. The Joystick swing up/down can changed the current Parameters setting, Swing the joystick to the right to save the current parameters and exit the language settingstate. The following menus operate setting is same.Optional Language: Chinese, English; other languages can be customized and developed according to customer needs.● [ LED Display Brigtness ]Change the brightness of the LED display: Low, Normal, High.● [ Automatically Standby ]Set the keyboard to automatically enter standby mode without any operation within a limited time.Select-able: Off, 1 minute, 2 minutes, 5 minutes, 10 minutes, 20 minutes, 30 minutes, 60 minutes.● [ Itself IP ]To setting Keyboard itself IP Address / Port Number, default IP is 192.168.1.88, default Port 52381.System Menu Operation & Explanation 1. System Setting 2. COMM Setting 3. Ethernet Setting 4. Password Setting1. Language : English2. LED Display Brigtness: Normal3. Automatically Standby: Off4. Itself IP: 192.168.001.0885. Itself Port: 523816. Factory default Setting7. About Keyboard●[ Factory default Setting ]To change the Keyboard restore to Factory default setting.● [ About Keyboard ]To review the relevant information of the keyboard, including: keyboard model, Firmware version, factory S/N and other information.●[ Address ]To set the serial communication address of the corresponding channel.If the current communication protocol is VISCA, the communication address can be selected from 1~7. If the current communication protocol is PELCO-D/P,The communication address can be selected from 1~255.●[ Baud Rate ]To set the serial communication Baud Rate of the corresponding channel.Available in: 2400, 4800, 9600, 19200, 38400bps.●[ Protocol ]To set the Serial communication Protocol of the corresponding channel ( Including Serial Communication Protocol and Internet Communication Protocol).Available in: VISCA, PELCO P/D, UDP .ETHERNET SETTINGTo move the cursor to [ Ethernet Setting ], then Movement right to enter Ethernet Setting:●[ Channel ]The available channels CAM1~5 correspond to the buttons [CAM1]~[CAM5].●[ Cam IP ]To set the Cam IP of the corresponding channel, which can be directly input through the number keys. When the number of input digits reaches 3, the cursor will automatically Jump to the next entry.●[ Port ]To set the UDP Port of the corresponding channel, it depend for the UDP Port 1. Channel: CAM1 2. Cam IP: 192.168.1.1623. Port: 52381PASSWORD SETTINGTo move the cursor to [ Password Setting ], then Movement right to enter Password :●[ Using Password ]How to Using the Password Function:To changed the Password setting is Enable;When the password function is Enable, a password is required to enter the menu.The default password is: 8888●[ Modify Password ]The user can change the password by himself. If the password is not changed, the password is the default password.Warning: Please use this function with caution. If the product cannot be used normally due to the password set by the customer, the manufacturer does not assume any responsibility.1. Using Password: Enabled2. Modify PasswordSYSTEM MENU GUIDE nguage: Chinese, EnglishProducts Dimensions The size for Mini Pro PTZ Controller is as below:(Unit of length: mm)。
ME525 最全面刷机图文并茂教程

ME525 ME526如果你不想导致刷机失败的话,刷机前请看完整帖,特别是表明“注意”的地方以及刷机须知及常见问题,谢谢支持!基于CM7 RC1 最新版优化一键刷机内置两种版本给机油选择(强烈推荐)A优化装机稳定版以下简称A版等同于recovery的镜像包❶安装了部分常用程序有需要可以自行卸载升级❷镜像打包前经过了待机省电优化设置,开关设置等,便于大家方便实用。
❸A包其实就是B包的装机镜像,经过系统设置后的镜像。
❹可以节省装机时间,装完不需wipeB优化升级包以下简称B版等同于recovery的zip升级包可以保存你的个人数据❶适用于已刷我的ROM用户升级到最新版使用。
所以其它版本直刷可能导致无法开机。
建议其它版本刷过来的先直刷A包。
❷适用于重刷底包,对CM比较熟悉的用户使用。
❸纯净完整优化版就不介绍了原汁原味只修正了已知BUG 此版是升级包❹如果不会设置或初次使用CM7的机油用这个版本可能会比较耗电================================================信号稳定(需要选择自己合适的基带)无线网络稳定自动亮度正常传感器正常蓝牙正常USB 正常音频正常闪光灯正常拍照摄像正常 720P录制暂不支持LED 正常720p解码正常可通过moboplayer 硬件 720PGPS 室外定位30秒内收音机正常通话正常部分机油反应挂电话会黑屏搓光线才能感应恢复指南针 GPS精确定位的时候才能启动短信可添加联系人显示归属地MOTO丽音功能默认百度输入法来去电归属地 B版的机油在设置通话设置打开此功能开机可用内存300M+正常也有250M+运行相当流畅待机时间比2.2更给力!不同销售地机器底包不同耗电量有不同=======================================================本人已测试刷实测北欧底包比新新英更省电均能完美运行======刷机教程======请机油们一定要按步骤来,刷机一定要看刷机须知=====================================刷机前请先下载好所需用到的工具楼下提供全套服务刷机方法三步走备份完自己的数据后如果你现在是2.2或者其它系统,建议刷机前先清理安装在sd卡中的程序,或者备份出重要的文件格式化SD卡那些2.2系统的机油啊!注意啊!要稳定的话就别偷这个懒,认真刷次底包!我提供三个底包均已测试。
OMM升级指导书310h-310k
ZXWR-RNC 升级指导1-1ZXWR-OMM 版本升级指导书OMM3.17.310h 到OMM3.17.310k中兴通讯股份有限公司ZTE CORPORATION2009年11月ZXWR-OMM升级指导修改记录ZXWR-OMM升级指导第1章概述.............................................................................................................................. 1-5第2章版本升级准备................................................................................................................ 2-62.1 主板和冷备版一致性检查................................................................................................ 2-62.2 主板升级前的准备 .......................................................................................................... 2-62.2.1 备份ztd文件.......................................................................................................... 2-72.2.2 备份数据库文件 ..................................................................................................... 2-72.2.3 空间清理................................................................................................................ 2-72.2.4 上传并解压新版本.................................................................................................. 2-82.2.5 运行检查工具......................................................................................................... 2-82.3 冷备板升级前的准备....................................................................................................... 2-92.3.1 恢复主板数据......................................................................................................... 2-92.3.2 空间清理...............................................................................................................2-102.3.3 上传并解压版本文件 .............................................................................................2-102.3.4 运行检查工具........................................................................................................ 2-11第3章ZXWR-OMM升级步骤................................................................................................3-123.1 冷备板的升级 ................................................................................................................3-123.1.1 冷备板的升级步骤.................................................................................................3-123.2 主板和冷备板的切换......................................................................................................3-133.3 主板的升级....................................................................................................................3-143.3.1 OMM主板的升级步骤 ...........................................................................................3-14第4章升级回退步骤...............................................................................................................4-154.1 冷备板的回退 ................................................................................................................4-154.1.1 OMM升级失败的回退 ...........................................................................................4-154.1.2 OMM升级成功,不能启动OMM...........................................................................4-154.1.3 OMM版本bug需要回退........................................................................................4-154.2 主板的回退....................................................................................................................4-164.2.1 升级失败的回退步骤 .............................................................................................4-164.2.2 启动OMM失败 ....................................................................................................4-16ZXWR-OMM升级指导ZXWR-OMM升级指导第1章概述本文主要介绍在非主备情况下的升级和恢复步骤。
motoME525 刷机教程

1.简单扫盲刷机前应该了解的手机信息:RM(工厂代码)、CODE、系统版本RM每一款手机都有它的RM,由于行货、水货的不同它的RM也有差别,例如N85,就有RM-333(亚太\欧版\港版) RM-334(美版) RM-335(国行)。
CODE即使相同RM的手机,也会因它所面向的区域不同而不一样,每个Code代表不同的区域,例如香港、越南、泰国、北美、欧洲等等,它决定手机的语言。
系统版本手机系统也和软件一样,有版本之分。
通常高版本比低版本有更好的性能、更多的功能、更稳定,这也是很多机友要刷机的动机。
用凤凰刷机的话,只需要知道手机的RM及系统版本就可以了,在手机输入*#0000#可以查到。
2.关于刷机软件的选择刷机的方法常用的有三种:用NSS程序修改CODE后在线更新、JAF刷机、凤凰刷机。
在线升级比较简单,只要用NSS修改CODE后用官方软件更新就行,这是比较多新手选用它的原因。
但它刷机不稳定,很容易出怪问题,例如:刷机过程很顺利却不开机。
不推荐。
JAF,曾经辉煌一时的软件,目前比较稳定的版本是1.98.62,但对新机型支持不太好。
最新版本1.98.65不稳定。
凤凰,其实也是NOKIA的产品,功能极端强大。
不过我们使用的XX版不能完全发挥出来,但刷机的功能是完整的。
它刷机稳定、速度快、完美支持新机型,实在是刷机的首选。
让新手望而却步的是看似复杂的刷机步骤,其实只要明白相关知识后再去看刷机教程,它也是很简单的。
3.刷机要不要拆下Sim卡及存储卡,要不要关闭杀毒软件及防火墙Sim卡拆不拆是不要紧的。
存储卡推荐拆下来,因为有某些机型会刷出存储卡密码锁(不走运),安全起见,拆下吧。
关闭杀毒软件及防火墙是完全没有必要的。
4.凤凰刷机要准备些什么A.安装好凤凰,到这儿下载最新版/thread-6473241-1-173-1.html安装过程一直点next 就行了。
B.安装好固件(也叫资料包),到这儿找对应手机的固件下载。
MoTo DEFY+ME525刷MIUI刷机教程

MoTo DEFY+/ME525刷MIUI刷机教程这里为大家的准备的是MoTo Defy+/ME525刷MIUI教程指导,提供了MoTo ME525 MIUI刷机包下载以及MoTo ME525刷机工具,另外也提供了MoTo ME525 Root,刷Recovery教程,下面来看看MoTo ME525刷MIUI教程详解。
MoTo ME525刷MIUI前的准备1、如果软件版本已经升级至最新版2.3.6或者更高,请勿刷机,后果严重。
2、本教程只针对DEFY+国际版, 国行MOTO DEFY+未经过测试暂不推荐刷机。
MoTo ME525刷MIUI教程一、下载MoTo ME525刷MIUI的必要文件1、下载MIUI ROM for Defy+ 最新安装包立即下载,如果已经在下载页面下载过最新安装包,无需重新下载。
2、下载刷机工具包立即下载3、准备一张剩余空间大于256MB的MicroSD/TF卡,将刷机工具包defy+_tools.zip解压至电脑桌面。
不要解压MIUI ROM安装包将MIUI 最新ROM包直接拷贝到SD卡根目录下。
二、MoTo ME525安装USB驱动准备工作:安装必要的驱动,为后续刷机做准备。
本步骤安装USB驱动。
如已经安装过USB驱动:可略过本步骤,前往下一步打开刷机工具包Drive目录中MotoHelper_2051_Driver_520.exe.三、MoTo ME525恢复官方系统保证有充足的电量,进行本步骤操作之后手机将会失去所有用户资料并会失去保修。
1、在手机上操作执行本步骤前请先关闭手机,同时按住电源键和音量上键,此时进入了Bootloader界面。
2、在电脑上操作将手机使用USB连接线连接至电脑。
打开桌面上defy_tools+中RSD Lite文件夹下,选择SDL.exe。
点击黄色圈选区域,选择defy+_tools中DFPRC_U_4.5.3-109_DPP-6-7_SIGNED_USADEFYPRCB1B50A A00A.0R_JRDNGIBRRTGC_P025_A019_HWp3a_Service1FF.s bf;选择蓝色圈选区域,选择设备;点击红色圈选区域,Start,开始刷机。
Moxa NPort P5150A Series 固件更新说明说明书

Firmware for NPort P5150A Series Release NotesSupported Operating SystemsNotesChangesApplicable ProductsBugs Fixed• Accessible IP list can now be used to restrict all device services.• Complies with Moxa Security Guidelines on the following: Account Authentication Management,Network Service Management, and Audit and Log Management.• CVE-2017-14028: An attacker may be able to exhaust memory resources by sending a large amount of TCP SYN packets.• CVE-2017-16715: An attacker may be able to exploit a flaw in the handling of Ethernet frame padding that may allow for information exposure.• CVE-2017-16719: An attacker may be able to inject packets that could potentially disrupt the availability of the device.• Remove unnecessary information displayed on the Web, Telnet, and Serial consoles during the login process.• Remove the TTL limitation (1) on multicast packets.• Pair connection mode cannot resolve the domain name.EnhancementsN/ANPort P5150A Series• Supports HTTPS.• Supports MXview auto-topology function.• Supports MXconfig.• Supports SNMPv2c.New FeaturesN/AN/ASupported Operating SystemsNotesChangesApplicable ProductsBugs FixedN/A• The user’s password and SNMP community name may be exposed by a buffer overflow issue.EnhancementsN/ANPort 5110A, NPort 5130A, NPort 5150A, NPort 5110A-T, NPort 5130A-T, NPort 5150A-T, NPort P5150AN/ANew FeaturesN/AN/ASupported Operating SystemsNotesChangesApplicable ProductsBugs Fixed• Enhanced web login security and supports 5 users logged in simultaneously.• Extended HTTP challenge ID length from 32 bits to 256 bits.• Enabled the default password "moxa".• Increased CSRF protection mechanism.• Increased XSS protection mechanism.• The IP address of the NPort can be set to an address ending with 0 or 255.• Supports "ARP probe" in RFC5227. NPort would respond for ARP requests with sender IP address 0.0.0.0.• NPort cannot send e-mail using Google's SMTP server.• In pair connection mode, master does not pull down RTS/DTR signal after the TCP connection is broken.• Command port sends lots of "D_ASPP_CMD_ALIVE" packets after running for 50 days.• NPort may reboot or hang from several buffer overflow attacks through Telnet, SSH, DSCI, SNMP,HTTP, and HTTPS.• Too many connections to the HTTP server at the same time would block new connections for a while.• The Ethernet frame should be padded (with octets of zero) to meet the Ethernet minimum frame size.• System had the wrong system uptime.EnhancementsN/ANPort 5110A, NPort 5130A, NPort 5150A, NPort 5110A-T, NPort 5130A-T, NPort 5150A-T, NPort P5150AN/ANew FeaturesN/AN/ASupported Operating SystemsNotesChangesApplicable ProductsBugs Fixed• Uses model name instead of "NULL" for SNMP object "sysDescr".• Supports connecting to the server by domain name and the server IP will change dynamically.• Supports updating the ARP table by gratuitous ARP.• Supports RFC2217 NOTIFY-LINESTATE for Transfer Shift Register Empty and Transfer Holding Register Empty.• If an SNMP GETNEXT command is issued on an object that does not exist, 'no such name error' is displayed.• When DHCP renews IPs, if the IP was originally given by a relay agent, NPort should send a DHCP request to the relay agent, not the DHCP server.• In Real COM mode, when the modem status of the NPort's serial port is changed frequently, the NPort will sometimes fail to notify the change to the driver.• In reverse telnet mode, the NPort will try to subnegotiate the COM port control options without option negotiation first.• In RFC2217 Mode, when data from the Ethernet side has many FF characters, some data may be lost on the serial side.• Modified data parsing mechanism to fix import file failure.• In the web console for the NPort P5150A, there is no selection for RS422 or RS485 for serial interface settings.EnhancementsN/ANPort 5110A, NPort 5130A, NPort 5150A, NPort 5110A-T, NPort 5130A-T, NPort 5150A-T, NPort P5150AN/ANew FeaturesN/AN/A。
MAGICO S5使用手册说明书

MAGICO S5 User’s GuideMAGICO S5 User’s GuideALON WOLF, CEOMAGICO, LLCWARNINGPosition the crate as close to listening position as possible.Remove 10 clamps using a flat-head screwdriver or pry bar .Remove crate lid and 3 pieces of interior foam.With two people, lift the walls off of the crate, straight up and over the speaker, careful not to hit the bottom or the top of the speaker. Set aside.With two people, lift the speaker from the bottom and move the speaker down on the base of the crate until theTilt Speaker up on to a soft surface, Make sure that back of speaker does not hit the crate and that the binding posts do not touch the floor.If it is necessary to move the speaker from the crate to thelistening position, use a hand truck with a study piece of foam to protect the speaker.Remove the velvet packing bag,protective plastic and Foam Tweeter guard.Remove Accessory Kit from crate.Screw one hex-JAM NUT onto eachCarefully tilt the Speaker to the side while another person screws in the spiked foot.Position the floor saver under the spiked foot and slowly lower the speaker so that the spike rests in the floor saver.Repeat for other side and rear foot. To adjust the level of the speaker, partially unscrew two of the feet until level and stability areachieved. Screw hex-jam nut upwards so that it is flush with the round puck of the foot assembly.The speakers are now ready to hook up.MAGICO S5 User’s Guide31.2.3.4.5.6.MAGICO S5 User’s GuideEMAIL:***************11。
Softomotive ProcessRobot 企业级自动化处理软件升级指南说明书

process robotProcessRobot Upgrade Guide Enterprise Robotic Process Automation 2019ContentsUpgrading ProcessRobot ______________________________________________ 1−Upgrading ProcessRobot to the latest Version _____________________________ 1 FAQ _______________________________________________________________ 16Upgrading ProcessRobotUpgrading ProcessRobot to the latest VersionStart the upgrading process by double clicking on the “ProcessRobotServerSetup-201x.x.xxxx.exe” file (make sure that you are running it as an administrator).Firstly, you will be prompted to uninstall the previous ProcessRobot version.After this is done, the installation wizard will begin by setting up some requirements for ProcessRobot. Click ‘Next’ to proceed with the installation.Accepting the terms of the license agreement is necessary to proceed. Choose which components to install:For example, in this Server installation, also include all Client Tools plus a SideBot:Enter the Connection String for the existing SQL Server database to be used for ProcessRobot. Optionally select if a second database should be used for Logs. If this option is not selected, Logs will be stored in the same database as the other ProcessRobot data.Enter the Connection String in the format:Password=<password>; Persist Security Info=True; User ID=<dbUserName>; Initial Catalog=<dbName>; Data Source=<serverName\SQLEXPRESS>;Where:<password> is the database user’s password<dbUserName> is the database user name<dbName> is the name of the database to be used for ProcessRobot<serverName\SQLEXPRESS>: serverName is the name of the Server machine, and SQLEXPRESS is the correct instance of SQL Server. By default, this should be SQLEXPRESS, but if multiple instances of SQL Server exist on the machine, the instance may have a different name, eg SQLEXPRESS01.When selecting to use a separate database for Logs, a second connection must be entered.Select whether to install the Softomotive Browser Extensions for Chrome and Firefox. These are necessary for allowing ProcessRobot to perform web automation tasks on those browsers. Both Extensions are recommended.Choose whether to create Desktop shortcuts for the Client Tools / Robot.Enter the IP address, host name or Fully Qualified Domain Name (FQDN) of the Server machine and the port number.The number entered should correspond to a port that is not currently in use, and which complies with ITSEC and IANA (https:///assignments/service-names-port-numbers/service-names-port-numbers.xhtml).A quick way to see which ports are currently in use is to run the following command as an Administrator in the Command Prompt:netstat -a -bAs an example, this guide will use port number 6090.In cases where the ProcessRobot Server and Client machines belong to the same Active Directory domain, the host name should suffice.Note that if there are issues with the DNS, the other ProcessRobot components will not be able to communicate with the Server using only the host name or FQDN. DNS issues can be identified by pinging the host name or FQDN. In such cases, either the Server's IP address must be used instead, or the DNS issues must be resolved.Select whether to use a Redis deployment. This guide will proceed without enabling this option.When Client Tools or a Robot are installed, it is necessary to also enter the Server address and port number previously entered in the format <server>:<port>. The <server> value can be entered in any of the three ways described previously, for example:•10.1.182.106:6090 (IP address)•PR-SERVER:6090 (host name)•:6090 (FQDN)Select the destination file path for the ProcessRobot installation. The default location is: C:\Program Files\ProcessRobot.Optionally enter a Certificate Name to use for ProcessRobot Custom Authentication. The Certificate must already be set up on the Server machine. Setting up Certificates, as well as enabling Custom Authentication, will be covered later in this guide.Once the Certificate Name has been entered, there are several Certificate Validation Modes to choose from. For Self-Signed Certificates, choose “None”.For Production grade deployments, the Mode will likely be different. In order to learn more about the Certificate validation modes and decide which one fits your environment, please visit:https:///en-us/dotnet/api/system.servicemodel.security.x509certificatevalidationmode?view=netframework-4.8Set the Program Folder name.At this stage, you will be prompted to override an already existing Global Settings database. Since our purpose is to simply upgrade to the latest Version, we will select “No” in this case.Click “Finish” to exit the ProcessRobot installer.Once the installation is finished, in case the "ProcessRobot Server" service does not start, navigate to the installation folder (usually to C:\Program Files\ProcessRobot\Server) and execute the file ProcessRobotDatabaseUpgrader.exe. This will setup the ProcessRobot database automatically so that the service will start.To verify that everything went well, check if the ProcessRobot service is up and running. To do so, open the Windows Task Manager. Under the "Services" tab, find the ProcessRobot Server service.Allow the ProcessRobot Server to communicate through the firewall by either allowing the Port # or theProcessRobot.Server.exe.Keep in mind that this procedure will have to be repeated in every machine where an upgrade is required.FAQ1. Do I have to go through the installation on each and every machine that was hosting aProcessRobot Component?Yes.2. Do I need to upgrade my license, when installing a new ProcessRobot Version?ProcessRobot versions are represented as follows:A.B.C.D like 2018.1.2.3251In every change of A or B, you will need a new license.In every change of C or D, you will not need a new license.Contact Softomotive in order to be provided with your new license, if you need one.3. Do I have to take a backup of my database upon upgrading?Apart from your own backup schedule on the machine that hosts your database,ProcessRobot, automatically takes a backup of your PR Database for you upon upgrade and keeps it in “C:\ProgramData\Softomotive\ProcessRobot\BackupServer\YourDatabase_yyyy_MM_dd_hh_ss.bak”4. Where can I find the connection string that is used upon upgrading the ProcessRobotServer?It is in the following directory"C:\Program Files\ProcessRobot\Server\AppConnectionString.config"on the machine that hosts the ProcessRobot Server.5. Where can I find the config file that targets the ProcessRobot Server on the ClientTools machines?The default full path of the config file is:"C:\Program Files\ProcessRobot\Server\AppServerAddress.config"on the machine that hosts the ProcessRobot Server and any of the Client Tools.6. Will all my processes be running with no issue? Are they going to be affected in anyway from the upgrade?All your processes will run fine, and the upgrading will not affect them in any way.。
广州五芯级网络科技有限公司 - 五芯级维修宝典V5.13产品说明书

中文版International version1、五芯级-维修宝典安装包V5.13(中国服务器下载)2、五芯级-维修宝典免安装包V5.13(中国服务器下载)3、五芯级简易教程1、Installation Package V5.13(click to download google link)2、installation package V5.13.zip(click to download)3、Five core level simple tutorial更新内容:2023年12月23日●新增HW系列●畅享_60Pro【单层点位图】●新增Phone系列●Phone6S Plus6SP进水不开机⑥、Phone6S Plus6SP进水不开机无声音、Phone6S Plus6SP进水不照相、Phone6S Plus6SP进水后不定时重启、Phone6S Plus6SP进水无触摸、Phone6S Plus6SP进水无送话录音无声●共6例【维修方案】●Update:December23,2023●New HW series added●Enjoy_60Pro[Single layer dot map]●New Phone series added●⑥Phone6S Plus6SP does not turn on due to water ingress⑥,Phone6S Plus6SP does not turn on due to wateringress⑥,Phone6S Plus6SP does not take photos due to water ingress⑥,Phone6S Plus6SP restarts irregularly after water ingress⑥,Phone6S Plus6SP does not touch when water ingress occurs,Phone6S Plus6SP does not send voice recordings due to water ingress⑥●6cases in total[maintenance plan]更新内容:2023年12月22日●新增HW系列●Mate60【单层点位图】●新增Phone系列●Phone6S Plus6SP加电漏电90MA、Phone6S Plus6SP进水保资料搬板、Phone6S Plus6SP进水不开机②、Phone6S Plus6SP进水不开机③、Phone6S Plus6SP进水不开机④、Phone6S Plus6SP进水不开机⑤●共6例【维修方案】●Update:December22,2023●New HW series added●Mate60[Single layer dot map]●New Phone series added●Phone6S Plus6SP power leakage of90MA,Phone6S Plus6SP water ingress protection data transfer,Phone6S Plus6SPwater ingress does not turn on②,Phone6S Plus6SP water ingress does not turn on③,Phone6S Plus6SP water ingress does not turn on④,Phone6S Plus6SP water ingress does not turn on⑤●6cases in total[maintenance plan]更新内容:2023年12月21日●新增HW系列●荣耀_Play7T【单层点位图】●新增Phone系列●Phone6S Plus6SP二修无显示、Phone6S Plus6SP二修无显示②、Phone6S Plus6SP耗电快WiFi发热不换WiFi解决方法、Phone6S Plus6SP耗电快提示温度过高、Phone6S Plus6SP 换屏导致无显示、Phone6S Plus6SP加电大电流不开机●共6例【维修方案】●Update:December21,2023●New HW series added●Honor_Play7T[Single layer dot map]●New Phone series added●Phone6S Plus6SP second repair without display,Phone6S Plus6SP second repair without display②,Phone6SPlus6SP fast power consumption WiFi heating without replacing WiFi solution,Phone6S Plus6SP fast power consumption prompt with high temperature,Phone6S Plus6SP screen change causing no display,Phone6S Plus6SP power on high current does not turn on●6cases in total[maintenance plan]更新内容:2023年12月20日●新增HW系列●荣耀_X50【单层点位图】●新增Phone系列●Phone6S Plus6SP二修不充电无电池数据自动重启、Phone6S Plus6SP二修不照相、Phone6SPlus6SP二修不照相不充电、Phone6S Plus6SP二修掉件不开机、Phone6S Plus6SP二修连锡导致不开机、Phone6S Plus6SP二修无背光●共6例【维修方案】●Update:December20,2023●New HW series added●Honor_X50[Single layer dot map]●New Phone series added●Phone6S Plus6SP second repair does not charge,no battery data automatically restarts,Phone6S Plus6SP secondrepair does not take photos,Phone6S Plus6SP second repair does not take photos and does not charge,Phone6S Plus6SP second repair parts do not turn on,Phone6S Plus6SP second repair soldering causes no turning on, Phone6S Plus6SP second repair has no backlight●6cases in total[maintenance plan]更新内容:2023年12月19日●新增HW系列●Mate30_RS1【单层点位图】●新增Phone系列Phone6S Plus6SP无灯光②、Phone6S Plus6SP无服务分集接收坏、Phone6S Plus6SP无服务无3G信号、Phone6S Plus6SP无服务③、Phone6S Plus6SP无服务电量显示百分之一、Phone6S Plus6SP无后照相供电保护电感坏引起●共6例【维修方案】●Update:December19,2023●New HW series added●Mate30_RS1[Single layer dot map]●New Phone series added●Phone6S Plus6SP has no lighting②,Phone6S Plus6SP has no service diversity reception failure,Phone6SPlus6SP has no service or3G signal,Phone6S Plus6SP has no service③,Phone6S Plus6SP has no service battery level display of1%,Phone6S Plus6SP has no rear camera power supply protection inductance damage caused●6cases in total[maintenance plan]更新内容:2023年12月18日●新增OPPO系列●OP_A1Pro【单层点位图】●新增Phone系列●Phone6S Plus6SP通话无声、Phone6S Plus6SP尾插坏不充电、Phone6S Plus6SP无WiFi(灰色)、Phone6S Plus6SP无WiFi(灰色)②、Phone6S Plus6SP无触摸、Phone6S Plus6SP无灯光●共6例【维修方案】●Update:December18,2023●New OPPO series added●OP_A1Pro[Single layer dot map]●New Phone series added●Phone6S Plus6SP calls silently,Phone6S Plus6SP tail plug is broken and does not charge,Phone6S Plus6SPhas no WiFi(gray),Phone6S Plus6SP has no WiFi(gray),Phone6S Plus6SP has no touch,Phone6S Plus6SP has no light●6cases in total[maintenance plan]更新内容:2023年12月17日●新增OPPO系列●OP_A96【单层点位图】●新增Phone系列Phone6S Plus6SP摔后WiFi音频照相感光等维修、Phone6S Plus6SP摔后刷机报错4014、Phone6S Plus6SP提示温度过高待机漏电、Phone6S Plus6SP提示温度过高待机漏电②、Phone6S Plus6SP提示温度过高待机漏电③、Phone6S Plus6SP提示温度过高②●共6例【维修方案】●Update:December17,2023●New OPPO series added●OP_A96[Single layer dot map]●New Phone series added●Repair of WiFi audio,camera,and photosensitivity after falling of Phone6S Plus6SP,flashing error4014after falling of Phone6S Plus6SP,warning of high temperature standby leakage,warning of high temperature standby leakage of Phone6S Plus6SP,warning of high temperature standby leakage of Phone6S Plus6SP,warning of high temperature standby leakage of Phone6S Plus6SP,warning of high temperature standby leakage of Phone6S Plus6SP,warning of high temperature②●6cases in total[maintenance plan]更新内容:2023年12月16日●新增HW系列●荣耀70Pro【单层点位图】●新增Phone系列Phone6S Plus6SP声音卡顿无法录音、Phone6S Plus6SP刷机报错9焊盘掉点、Phone6S Plus6SP刷机报错14、Phone6S Plus6SP刷机报错56②、Phone6S Plus6SP刷机报错4014硬盘坏、Phone6S Plus6SP刷机后无法激活NFC坏●共6例【维修方案】●Update:December16,2023●New HW series added●HONOR70Pro5G[Single layer point map]●New Phone series added●Phone6S Plus6SP sound lag unable to record,Phone6S Plus6SP flashing error9solder pad drop,Phone6S Plus6SPflashing error14,Phone6S Plus6SP flashing error56②,Phone6S Plus6SP flashing error4014hard disk failure, inability to activate NFC after Phone6S Plus6SP flashing●6cases in total[maintenance plan]更新内容:2023年12月15日●新增HW系列●Mate_50Pro【单层点位图】●新增Phone系列●Phone6S Plus6SP开机定在80MA、Phone6S Plus6SP扩容后不开机、Phone6S Plus6SP扩容后刷机4014、Phone6S Plus6SP偶尔重启CPU虚焊导致、Phone6S Plus6SP屏幕右边不亮、Phone6S Plus6SP屏幕左边不亮开机慢●共6例【维修方案】●Update:December15,2023●New HW series added●Mate_50Pro[Single layer dot map]●New Phone series added●Phone6S Plus6SP is set to power on at80MA,does not turn on after expansion,crashes after expansion4014,occasionally restarts due to CPU soldering,does not light up on the right side of the Phone6S Plus6SP screen, does not light up on the left side of the Phone6S Plus6SP screen,and starts slowly●6cases in total[maintenance plan]新内容:2023年12月14日●新增HW系列●畅享50【单层点位图】●新增Phone系列Phone6S Plus6SP进水不开机⑥、Phone6S Plus6SP进水不开机无声音、Phone6S Plus6SP进水不照相、Phone6S Plus6SP进水后不定时重启、Phone6S Plus6SP进水无触摸、Phone6S Plus6SP 进水无送话录音无声●共6例【维修方案】●Update:December14,2023●New HW series added●Enjoy50【Single layer bitmap】●New Phone series added●Phone6S Plus6SP does not turn on due to water ingress⑥,Phone6S Plus6SP does not turn on due to water ingress⑥,Phone6S Plus6SP does not take photos due to water ingress⑥,Phone6S Plus6SP restarts irregularly afterwater ingress⑥,Phone6S Plus6SP does not touch when water ingress occurs,and Phone6S Plus6SP has no sound recording when water ingress occurs●6cases in total[maintenance plan]更新内容:2023年12月13日●新增HW系列●Mate30_RS1【单层点位图】●新增Phone系列Phone6S Plus6SP加电漏电90MA、Phone6S Plus6SP进水保资料搬板、Phone6S Plus6SP进水不开机②、Phone6S Plus6SP进水不开机③、Phone6S Plus6SP进水不开机④、Phone6S Plus6SP 进水不开机⑤●共6例【维修方案】●Update:December13,2023●New HW series added●Mate30_RS1[Single layer dot map]●New Phone series added●90MA leakage during power on of Phone6S Plus6SP,loading of water protection data for Phone6S Plus6SP,failureto turn on Phone6S Plus6SP due to water ingress②,failure to turn on Phone6S Plus6SP due to water ingress③,failure to turn on Phone6S Plus6SP due to water ingress④,failure to turn on Phone6S Plus6SP due towater ingress⑤●6cases in total[maintenance plan]更新内容:2023年12月12日●新增HW系列●MateX2【单层点位图】●新增Phone系列●Phone6S Plus6SP二修无显示、Phone6S Plus6SP二修无显示②、Phone6S Plus6SP耗电快WiFi发热不换WiFi解决方法、Phone6S Plus6SP耗电快提示温度过高、Phone6S Plus6SP 换屏导致无显示、Phone6S Plus6SP加电大电流不开机●共6例【维修方案】●Update:December12,2023●New HW series added●MateX2[Single layer dot map]●New Phone series added●Phone6S Plus6SP second repair without display,Phone6S Plus6SP second repair without display②,Phone6SPlus6SP fast power consumption WiFi heating without replacing WiFi solution,Phone6S Plus6SP fast power consumption prompt with high temperature,Phone6S Plus6SP screen change causing no display,Phone6S Plus6SP power on high current does not turn on●6cases in total[maintenance plan]更新内容:2023年12月11日●新增HW系列●Mate9Pro【单层点位图】●新增Phone系列Phone6S Plus6SP二修不充电无电池数据自动重启、Phone6S Plus6SP二修不照相、Phone6S Plus6SP二修不照相不充电、Phone6S Plus6SP二修掉件不开机、Phone6S Plus6SP二修连锡导致不开机、Phone6S Plus6SP二修无背光●共6例【维修方案】●Update:December11,2023●New HW series added●Mate9Pro[Single layer dot map]●New Phone series added●Phone6S Plus6SP second repair does not charge,no battery data automatically restarts,Phone6S Plus6SP secondrepair does not take photos,Phone6S Plus6SP second repair does not take photos and does not charge,Phone6SPlus6SP second repair parts do not turn on,Phone6S Plus6SP second repair soldering causes no turning on, Phone6S Plus6SP second repair has no backlight●6cases in total[maintenance plan]更新内容:2023年12月10日●新增HW系列●Mate20X_5G【单层点位图】●新增Phone系列Phone6S Plus6SP不开机指南针进水腐蚀造成、Phone6S Plus6SP不开机加电漏电600MA、Phone6S Plus6SP不照相 1.2V短路造成、Phone6S Plus6SP不照相供电管腐蚀造成、Phone6S Plus6SP不照相供电管坏、Phone6S Plus6SP触摸有时不灵●共6例【维修方案】●Update:December10,2023●New HW series added●Mate20X_5G[Single layer dot map]●New Phone series added●Phone6S Plus6SP does not turn on due to water ingress and corrosion of the compass,Phone6S Plus6SP doesnot turn on due to power leakage of600MA,Phone6S Plus6SP does not take photos due to1.2V short circuit, Phone6S Plus6SP does not take photos due to corrosion of the power supply pipe,Phone6S Plus6SP does not take photos due to power supply pipe damage,and Phone6S Plus6SP sometimes does not touch properly●6cases in total[maintenance plan]更新内容:2023年12月9日●新增HW系列●Mate40_Pro【单层点位图】●新增Phone系列●Phone6S Plus6SP不开机硬盘坏、Phone6S Plus6SP不开机指南针进水腐蚀造成、Phone6SPlus6SP不开机加电漏电600MA、Phone6S Plus6SP不照相 1.2V短路造成、Phone6S Plus6SP 不照相供电管腐蚀造成、Phone6S Plus6SP不照相供电管坏●共6例【维修方案】●Update:December9,2023●New HW series added●Mate40_Pro[Single Layer Dot Map]●New Phone series added●Phone6S Plus6SP does not power on due to hard drive failure,corrosion caused by water ingress from the compasswhen Phone6S Plus6SP does not power on,leakage of600MA when Phone6S Plus6SP does not power on and power on,1.2V short circuit caused by Phone6S Plus6SP not taking photos,corrosion caused by power supply pipe of Phone6S Plus6SP not taking photos,and damage to power supply pipe of Phone6S Plus6SP not taking photos ●6cases in total[maintenance plan]更新内容:2023年12月8日●新增HW系列●Mate_50Pro单层点位图】●新增Phone系列●Phone6S Plus6SP不充电3V供电短路造成、Phone6S Plus6SP不充电TIGRIS_PMID短路造成、Phone6S Plus6SP不充电无电池数据自动重启、Phone6S Plus6SP不定时重启、Phone6S Plus6SP不开机定在60MA、Phone6S Plus6SP不开机修开机后不照相●共6例【维修方案】●Update:December8,2023●New HW series added●Mate_50Pro Single Layer Dot Map●New Phone series added●Phone6S Plus6SP does not charge due to a3V power supply short circuit,and Phone6S Plus6SP does not chargeTIGRIS_PMID short circuit caused,Phone6S Plus6SP does not charge and automatically restarts without battery data,Phone6S Plus6SP restarts irregularly,Phone6S Plus6SP does not power on and is set at60MA,Phone6S Plus6SP does not power on and does not take photos after repair●6cases in total[maintenance plan]更新内容:2023年12月7日●新增HW系列●Mate_50Pro单层点位图】●新增Phone系列Phone6S Plus6SP GPS信号弱、Phone6S Plus6SP WiFi信号弱、Phone6S Plus6SP按Home键自动Siri、Phone6S Plus6SP按任何功能黑屏重启、Phone6S Plus6SP白苹果重启显示几行英文、Phone6S Plus6SP搬板●共6例【维修方案】●Update:December7,2023●New HW series added●Mate_50Pro Single Layer Dot Map●New Phone series added●Phone6S Plus6SP GPS signal weak,Phone6S Plus6SP WiFi signal weak,Phone6S Plus6SP automatic Siri by pressingHome key,Phone6S Plus6SP black screen restart by pressing any function,Phone6S Plus6SP white apple restart display a few lines in English,Phone6S Plus6SP board removal●6cases in total[maintenance plan]更新内容:2023年12月6日●新增HW系列●畅玩_60Pro单层点位图】●新增Phone系列Phone77开机大电流能进系统、Phone77开机定在50MA CPU虚焊引起、Phone77开机定在60MA 上盖1.8V电感虚焊、Phone77开机卡死③、Phone77开机无限白苹果重启●共6例【维修方案】●Update:December6,2023●New HW series added●Play freely_60Pro Single Layer Dot Map●New Phone series added●Phone77power on with high current entering the system,Phone77power on set at50MA CPU caused by virtualsoldering,Phone77power on set at60MA cover with1.8V inductor virtual soldering,Phone77power on stuck③,Phone77power on infinite white Apple restart●6cases in total[maintenance plan]更新内容:2023年12月6日●新增HW系列●畅玩_60Pro单层点位图】●新增Phone系列Phone77开机大电流能进系统、Phone77开机定在50MA CPU虚焊引起、Phone77开机定在60MA 上盖1.8V电感虚焊、Phone77开机卡死③、Phone77开机无限白苹果重启●共6例【维修方案】●Update:December6,2023●New HW series added●Play freely_60Pro Single Layer Dot Map●New Phone series added●Phone77power on with high current entering the system,Phone77power on set at50MA CPU caused by virtualsoldering,Phone77power on set at60MA cover with1.8V inductor virtual soldering,Phone77power on stuck③,Phone77power on infinite white Apple restart●6cases in total[maintenance plan]更新内容:2023年12月5日●新增MI系列●REDMI_Note11T单层点位图】●新增Phone系列Phone77刷机后处于恢复模式、Phone77摔后不开机多种故障、Phone77摔机修复、Phone77主供电短路不开机滤波电容坏、Phone77主供电短路不开机、Mate30Pro_5Gmate30Pro5G 主板注释图●共6例【维修方案】●Update:December5th,2023●New MI series added●REDMI_Note11T Single Layer Dot Map●New Phone series added●Phone77is in recovery mode after flashing,there are various faults such as not turning on after falling,repairing a falling phone,short circuit in the main power supply of Phone77that does not turn on,damaged filter capacitor,short circuit in the main power supply of Phone77that does not turn on,Mate30Pro_Annotated image of5G mate30Pro5G motherboard●6cases in total[maintenance plan]更新内容:2023年12月4日●新增VIVO系列●VI_Y30【单层点位图】●新增Phone系列Phone7Plus7P不开机I2C总线问题、Phone7Plus7P不开机按开机键500MA大电流、Phone7Plus7P不开机电源IC发烫、Phone7Plus7P不开机及漏电、Phone7Plus7P不开机上盖坏单换保资料、Phone7Plus7P不联机●共6例【维修方案】●Update:December4th,2023●New VIVO series added●VI_Y30[Single layer point map]●New Phone series added●Phone7Plus7P does not power on,I2C bus issue,Phone7Plus7P does not power on,pressing the power buttonfor500MA high current,Phone7Plus7P does not power on,power IC burns,Phone7Plus7P does not power on and leaks electricity,Phone7Plus7P does not power on,top cover is damaged,replacement warranty information,Phone7Plus7P is not online●6cases in total[maintenance plan]更新内容:2023年12月3日●新增VIVO系列●VI_Y10【单层点位图】●新增Phone系列Phone7Plus7P不照相供电管坏引起、Phone7Plus7P不照相、Phone7Plus7P不照相全景又可以照②、Phone7Plus7P充电部分维修、Phone7Plus7P充电电感坏不充电、Phone7Plus7P充电提示不支持此配件●共6例【维修方案】●Update:December3,2023●New VIVO series added●VI_Y10[Single layer point map]●New Phone series added●Phone7Plus7P does not take photos due to a broken power supply pipe,Phone7Plus7P does not take photos,Phone7Plus7P does not take photos and can still take panoramic photos②,Phone7Plus7P charging part repair, Phone7Plus7P charging inductor is damaged and cannot be charged,Phone7Plus7P charging prompt does not support this accessory●6cases in total[maintenance plan]更新内容:2023年12月2日●新增HW系列●P60【单层点位图】●新增Phone系列Phone7Plus7P白苹果重启刷机报错9、Phone7Plus7P白苹果重启WiFi坏造成、Phone7Plus7P 背光电容坏引起开机大电流、Phone7Plus7P不充电Q4001损坏造成、Phone7Plus7P不充电USB 芯片坏●共5例【维修方案】●Update:December1,2023●New HW series added●P50E[Single layer point map]●New Phone series added●Phone7Plus7_The return button is too sensitive or malfunctioning after replacing the7P screen,Phone77_WiFi signal weak,Phone7Plus7P white apple fixed screen,Phone7Plus7P white apple fixed screen③, Phone7Plus7P white apple fixed screen④,Phone7Plus7P white apple restart flashing error9更新内容:2023年12月1日●新增HW系列●P50E【单层点位图】●新增Phone系列Phone7Plus7_7P换屏后返回键太灵敏或者失灵、Phone77_WiFi信号弱、Phone7Plus7P白苹果定屏、Phone7Plus7P白苹果定屏③、Phone7Plus7P白苹果定屏④、Phone7Plus7P白苹果重启刷机报错9●、共5例【维修方案】●Update:December1,2023●New HW series added●P50E[Single layer point map]●New Phone series added●Phone7Plus7_The return button is too sensitive or malfunctioning after replacing the7P screen,Phone77_WiFi signal weak,Phone7Plus7P white apple fixed screen,Phone7Plus7P white apple fixed screen③, Phone7Plus7P white apple fixed screen④,Phone7Plus7P white apple restart flashing error9更新内容:2023年11月30日●新增VIVO系列●VI_S16【单层点位图】●新增Phone系列●PhoneXS MAXXS MAX开机没反应、PhoneXS MAXXS MAX按开机键没反应、PhoneXS MAXXS MAX按开机键没反应不开机、PhoneXS MAXXS MAX不开机连电脑显示8P、PhoneXS MAXXS MAX 不开机定在260MA、共5例【维修方案】●Update:November29,2023●New VIVO series added●VI_S16[Single layer point map]更新内容:2023年11月29日●新增VIVO系列●VI_S16【单层点位图】●新增Phone系列●PhoneXS MAXXS MAX开机没反应、PhoneXS MAXXS MAX按开机键没反应、PhoneXS MAXXS MAX按开机键没反应不开机、PhoneXS MAXXS MAX不开机连电脑显示8P、PhoneXS MAXXS MAX 不开机定在260MA、共5例【维修方案】●Update:November29,2023●New VIVO series added●VI_S16[Single layer point map]●New Phone series added●PhoneXS MAXXS MAX does not respond when turned on,PhoneXS MAXXS MAX does not respond when pressed the powerbutton,PhoneXS MAXXS MAX does not respond when pressed the power button,does not turn on,PhoneXS MAXXS MAX does not turn on and displays8P when connected to the computer,and PhoneXS MAXXS MAX does not turn on,set at260MA,a total of5cases[Maintenance Plan]更新内容:2023年11月28日●新增VIVO系列●VI_X80Pro【单层点位图】●新增Phone系列PhoneXS MAXXS MAX触发电流摆动到600MA后归零、PhoneXS MAXXS MAX进水不开机4、PhoneXS MAXXS MAX开机没电流反应、PhoneXS MAXXS MAX开机显示花屏、PhoneXS MAXXS MAX开机显示花屏②●共5例【维修方案】●Update:November28,2023●New VIVO series added●VI_X80Pro[Single layer dot map]●New Phone series added●PhoneXS MAXXS MAX triggers current swing to600MA and returns to zero,PhoneXS MAXXS MAX does not turn ondue to water ingress4,PhoneXS MAXXS MAX does not respond to current when turned on,PhoneXS MAXXS MAX displaysa blurred screen when turned on,PhoneXS MAXXS MAX displays a blurred screen when turned on②●5cases in total[maintenance plan]更新内容:2023年11月27日●新增OPPO系列●OP_Reno10Pro【单层点位图】●新增Phone系列PhoneXS MAXXS MAX触发0-100MA摆动不开机、PhoneXS MAXXS MAX触发30MA不开机、PhoneXS MAXXS MAX触发40MA不开机、PhoneXS MAXXS MAX触发80MA归零不开机、PhoneXS MAXXS MAX 触发大电流、●共6例【维修方案】●Update:November27,2023●New OPPO series added●OP_Reno10Pro[Single Layer Dot Map]●New Phone series added●PhoneXS MAXXS MAX triggers0-100MA swing without turning on,PhoneXS MAXXS MAX triggers30MA without turningon,PhoneXS MAXXS MAX triggers40MA without turning on,PhoneXS MAXXS MAX triggers80MA to zero without turning on,PhoneXS MAXXS MAX triggers high current●Update:November25,2023●6cases in total[maintenance plan]更新内容:2023年11月26日●新增OPPO系列●OP_Reno10X【单层点位图】●新增Phone系列PhoneXS MAXXS MAX开机没反应、PhoneXS MAXXS MAX按开机键没反应、PhoneXS MAXXS MAX 按开机键没反应不开机、PhoneXS MAXXS MAX不开机连电脑显示8P、PhoneXS MAXXS MAX不开机定在260MA●共6例【维修方案】●Update:November26,2023●New OPPO series added●OP_Reno10X[Single layer dot map]●New Phone series added●PhoneXS MAXXS MAX does not respond when turned on,PhoneXS MAXXS MAX does not respond when pressing the powerbutton,PhoneXS MAXXS MAX does not respond when pressing the power button and does not turn on,PhoneXS MAXXS MAX does not turn on and displays8P when connected to the computer,PhoneXS MAXXS MAX does not turn on and is set to260MA●6cases in total[maintenance plan]更新内容:2023年11月25日●新增HW系列●荣耀60【单层点位图】●新增HW系列荣耀play4T ProPlay4Tpro-HL5LRAM_VB、荣耀X20荣耀X20-HN5NTNM-实物扫描图、荣耀X10荣耀X10-HL5TELM实物标注图、荣耀X10荣耀X10-HL5TELM-实物扫描图、荣耀X10_MAX荣耀X10MAX-HN10TSM实物标注图、荣耀X20SE荣耀X20SE-HN5CHLMVB-实物扫描图、荣耀X30荣耀X30-HN3ANYM-实物扫描图、荣耀X30i荣耀X30i-HN1TFYM-实物扫描图、荣耀X10_MAX荣耀X10Max连不上WiFi和蓝牙、荣耀X20荣耀X20-9008、荣耀play4T Pro荣耀Play4T Pro-9008、荣耀paly4Pro荣耀Play4T-9008、荣耀_PLAY5T Pro荣耀PLAY5T Pro-9008、荣耀_Play5T荣耀Play5T-9008、荣耀play6T荣耀Play6T-9008、荣耀X10_MAX荣耀X10MAX重摔不触摸、荣耀X10_MAX荣耀X10MAX-9008、荣耀X10荣耀X10-9008、荣耀X10荣耀X10不充电故障维修、荣耀X10荣耀x10后置相机打开闪退、荣耀X10荣耀X10开机亮3秒后不亮灯,短接这里修复、荣耀X20SE荣耀X20SE-9008、荣耀X30荣耀X30-9008、荣耀X30i荣耀X30i-9008●共34例【维修方案】●新增MI系列MI_civi原理图、MI_civi位置图●共2例【原理图】●Update:November25,2023●New HW series added●HONOR60[Single layer point map]●New HW series added●Honor Play4T ProPlay4Tpro HL5LRAM_VB,Glory play6TPLAY6T-HN1CMAM-component labeling diagram,HONOR X20Glory X20-HN5NTNM-physical scanning diagram,HONOR X20Glory X20-HN5NTNM-component labeling diagram, Glory_X40_HN1RMON Honor X40GT-HN1ADTM physical scan,Honor_X40_HN1RMON Honor X40GT-HN1ADTM component annotation diagram,Honor Play6T Pro Honor Play6T Pro-HN1TFYM component annotation diagram,Honor X10Honor X10-HL5TELM physical annotation diagram,Honor X10Honor X10-HL5TELM physical scanning diagram,Honor X10_ MAX Glory X10MAX-HN10TSM Physical Label,HONOR X20SE HONOR X20SE-HN5CHLMVB-Component Label,HONOR X20 SE Glory X20SE-HN5CHLMVB-Physical Scan,HONOR X30Glory X30-HN3ANYM-Physical Scan,HONOR X30i Glory X30i-HN1TFYM-Physical Scan,HONOR X30i Glory X30i-HN1TFYM-Component Label,Glory_X40i Honor X40I-HN1DIOM -Physical scan,Honor_X40i Honor X40I-HN1DIOM-Component Annotation Diagram,Honor_X50i Honor X50i HN1CRTM VER.F Physical Scanned Image,Honor X10_MAX glory X10Max can't connect to WiFi and Bluetooth,HONOR X20 glory X20-9008,glory play4T Pro glory Play4T Pro-9008,glory paly4Pro glory Play4T-9008,glory_PLAY5T Pro Glory PLAY5T Pro-9008,Glory_Play5T Glory Play5T-9008,Glory play6T Glory Play6T-9008,Glory X10_MAX Honor X10MAX Heavy Drop No Touch,Honor X10_MAX Glory X10MAX-9008,Glory X10Glory X10-9008,Glory X10 Glory X10No charge fault repair,Glory X10Glory x10rear camera on flash back,Glory X10Glory X10lights up for3seconds,short circuit here to repair,HONOR X20SE HONOR X20SE-9008,HONOR X30Glory X30-9008, HONOR X30i Glory X30i-9008●34cases in total[maintenance plan]●New MI series added●MI_Civi schematic,MI_Civi Location Map●2examples in total[schematic diagram]更新内容:2023年11月23日●新增HW系列●畅享7S【单层点位图】●新增Phone系列Phone12Mini12mini搬板机关机插充电器重启开机充电死机、Phone12Mini12mini不定时重启报错kernel、Phone12Mini12mini插充电器重启、Phone12Mini12mini短路不开机、Phone12 Mini12mini二修有振动无铃声无录音、Phone12Mini12mini进水插卡无4G、Phone12Mini12mini进水移动电信无4G、Phone12Mini12mini面容录取什么都不提示、Phone12Mini12mini同行插充电器重启、Phone12Mini12mini无5G WiFi信号、Phone12Mini12mini 无基带、Phone12Mini12mini信号跳水无摔无进水、Phone12Mini12mini重摔无基带、Phone1313WiFi部分的维修(待续)、Phone1313板上下层后无4G、Phone1313不定时重启报错Kernel data abort、Phone1313触摸部分的维修、Phone1313二修关机能充电开机后不能充电、Phone1313分层导致音量键用不了、Phone1313关机可以充电开机后不充电、Phone1313开机无电流反应、Phone1313扩容导致无显示、Phone1313面容不可用、Phone1313系列面容修复须知、Phone1313显示部分的维修、Phone1313移植电池方法、Phone1313有基带无串号、Phone1313正常使用花屏通病②、Phone1313重启报错代码LLC、Phone1313重启数据分析②、Phone1313重启数据分析③、phone1414白苹果重启、phone1414打电话有杂音、phone1414改14plus、phone1414静音键失灵、phone1414摔后更换后玻璃无限重启、phone1414摔后重启刷机报错9、phone1414息屏后无法唤醒、phone1414照相无法保存相片、●共39例【维修方案】●Updated content:November23,2023●New HW series●Changxiang7S【Single layer bitmap】●New Phone series added●Phone12Mini12mini board moving mechanism,machine plugging in charger,restart,charging crash,Phone12Mini12mini irregular restart error kernel,Phone12Mini12mini charger plugging in,Phone12Mini12mini short circuit does not start,Phone12Mini12mini secondary repair has vibration without ringing tone without recording,Phone12Mini12mini water inlet card without4G,Phone12Mini12mini water inlet mobiletelecommunications without4G,Phone12Mini12mini face recognition does not prompt anything Phone12 Mini12mini comes with a plug-in charger to restart,Phone12Mini12mini does not have5G WiFi signal,Phone12 Mini12mini does not have baseband,Phone12Mini12mini signal jumps without falling or entering water,Phone12 Mini12mini falls heavily without baseband,Phone1313WiFi repair(to be continued),Phone1313board does not have4G after upper and lower layers,Phone1313occasionally restarts with an error Kernel data abort, Phone1313touch part repair Phone1313secondary repair shutdown can be charged but cannot be charged after startup,Phone1313layering causes the volume button to be unusable,Phone1313shutdown can be charged but cannot be charged after startup,Phone1313startup has no current response,Phone1313expansion causes no display,Phone1313face is not available,Phone1313series face repair instructions,Phone1313display maintenance,Phone1313battery transplantation method,Phone1313has baseband but no serial number Phone1313 normal use of splash screen common problems②,Phone1313restart error code LLC,Phone1313restart data analysis②,Phone1313restart data analysis③,Phone1414white apple restart,Phone1414phone noise, Phone1414changed to14plus,Phone1414mute key failure,Phone1414glass infinite restart after replacement after falling,Phone1414restart after falling,error report9,Phone1414cannot wake up after screen rest, Phone1414camera cannot save photos MI12S Pro schematic diagram,MI12S Pro location diagram●A total of39cases[maintenance plan]更新内容:2023年11月22日●新增HW系列●Nova11Pro【单层点位图】●新增Phone系列进水机子的维修方法、苹果iPhone+iPad IC通用表、修机注意事项、自动重启或定屏关机故障维修、自制烧机神器免分层修复加电大电流、Phone12Pro Max6-12ProMax I2C总线框架图、Phone12Pro Max6-12ProMAX RFFE总线框图、Phone12Pro Max6-12ProMAX音频总线框图、phone146-14码片飞线图、Phone1311-13移植电池方法、phone141314系列面容修复须知、phone13Pro MaX13ProMAX搬板机信号跳水无服务、phone13Pro MaX13ProMAX不充电能连电脑、phone13Pro MaX13ProMAX不开机①、phone13Pro MaX13ProMAX美版改国行搬板无服务、phone13Pro MaX13ProMAX无触摸通病、phone13Pro MaX13ProMAX相机不对焦、phone13Pro MaX13ProMAX正常使用指南针不准、phone13Pro MaX13ProMAX正常使用转圈重启、Phone1313系列花屏通病、phone14Pro14Pro上层通用14ProMAX、phone14Pro14Pro摔后频发重启、phone14Pro14Pro信号跳水、phone14Pro14Pro有基带无服务、phone1414硬盘容量区分、Phone13iPhone13WiFi部分的维修、Phone13iPhone13触摸部分的维修、Phone13iPhone13显示部分的维修、iPhone移植电芯修复电池效率、iPhone移植电芯知识、iPhone硬盘容量识别大小、PhoneXX-11PRO面容修复(移高点移低点)、IOS重启日志故障分析②●共33例【维修方案】●Updated content:November22,2023●New HW series●Nova11Pro【Single layer point bitmap】●New Phone series added●Maintenance methods for water inlet machine,Apple iPhone+iPad IC universal meter,maintenance precautions,automatic restart or fixed screen shutdown fault repair,self-made machine burning device without layered repair and high current charging,Phone12Pro Max6-12ProMax I2C bus framework diagram,Phone12Pro Max6-12ProMAX RFFE bus diagram,Phone12Pro Max6-12ProMAX audio bus diagram,Phone146-14chip flying line diagram,Phone1311-13battery transplantation method Phone141314Series Facial Repair Notice,Phone13Pro MaX13ProMAX Plate Mover Signal Diving No Service,Phone13Pro MaX13ProMAX Can Connect to Computer Without Charging,Phone13Pro MaX13ProMAX Does Not Power On①,Phone13Pro MaX13ProMAX American Version Changed to National Line Plate Mover No Service,Phone13Pro MaX13ProMAX No Touch Fault,Phone13Pro MaX13ProMAX Camera Out of Focus,Phone13Pro MaX13ProMAX Normal Use Compass Inaccuracy Phone13Pro MaX13ProMAX is normally used and restarted in a circle.Phone1313series has a common problem with screen scrolling,Phone14Pro14Pro is a universal upper layer14ProMAX,Phone14Pro14Pro frequently restarts after falling,Phone14Pro14Pro signal jumps,Phone14Pro14Pro has a baseband but no service,Phone1414hard drive capacity differentiation, Phone13iPhone13WiFi maintenance,Phone13iPhone13touch maintenance,Phone13iPhone13display maintenance IPhone transplant battery cell repair battery efficiency,iPhone transplant battery cell knowledge,iPhone hard drive capacity recognition size,PhoneXX-11PRO face repair(moving high point to low point),IOS restart log fault analysis②●A total of33cases[maintenance plan]更新内容:2023年11月21日●新增VIVO系列●VI_S12Pro【单层点位图】●新增Samsung系列SM-A526B_QCOM_Common_Service_Schematic_Full、SM-A528B_QCOM_Common_Service_Schematic_Full、SM-A536B_EXYNOS_Common_Service_Schematic_Full、SM-A536E_EXYNOS_Common_Service_Schematic_Full、SM-A546B_EXYNOS_Common_Service_Schematic_Full、●共5例【原理图】●Update:November21,2023●New VIVO series●VI_S12Pro【Single layer point bitmap】●New Samsung series●SM-A526B_QCOM_Common_Service_Schematic_Full,SM-A528B_QCOM_Common_Service_Schematic_Full,SM-A536B_。
F5设备软件版本升级操作手册
F5设备软件版本升级操作⼿册F5设备软件版本升级操作⼿册(9.1.2升级到9.3.1HF4)⼀、检查与备份及准备检查1.通过终端进⼊系统命令⾏下执⾏switchboot -l 检查系统当前启动分区2.执⾏switchboot命令,并选择另⼀个分区作为缺省启动分区(注意不要选择CF卡所在分区),并确认选择的该系统版本⾼于9.0.4,如该系统版本已经为9.3.1,请直接跳⾄“安装补丁”步骤准备1.准备好local-install-9.3.1.37.1.im⽂件,该⽂件可从F5⽹站下载或由F5⼯程师提供2.通过图形界⾯,重新产⽣doosier⽂件,并在F5⽹站执⾏重新激活⼯作,获得新license⽂件。
注:先保存旧的license⽂件。
3.使⽤新license⽂件激活设备4.记录当前系统主机名以备⽤5.上传local-install-9.3.1.37.1.im和Hotfix-BIGIP-9.3.1-58.0-HF4.im到/var/tmp下,share/tmp(这次)备份1. 备份配置bigpipe config save config.ucs将此ucs⽂件同时保存⼀份到本地PC,⽤以备⽤。
⼆、升级安装1.执⾏reboot重启系统,并注意观察启动过程中终端界⾯,确认系统已使⽤新系统启动。
2.上传之前备份的config.ucs⽂件到/⽬录下3.进⼊/var/tmp执⾏MD5校验md5sum local-install-9.3.1.37.1.im将得出的值与F5官⽅提供的MD5值⽐较,结果应该相同4.修改系统主机名为准备⼯作中记录的主机名5.进⼊/var/tmp⽬录,执⾏Im local-install-9.3.1.37.1.im出现Terminal type? [vt100]提⽰后回车。
随后按照屏幕提⽰操作即可。
点击新建,新建账户。
主机名为要访问的IP地址。
⽤户名和密码为要访问的信息。
输⼊完成后点击保存。
陌陌升级规则
陌陌升级规则
大家好,跳跳为你解答以上问题。
陌陌升级规则在哪,陌陌升级规则这个问题很多人还不知道,现在让我们一起来看看吧!
解答:
1、陌陌升级规则:
2、注册,填写相关信息,如生日、头像等数据,最后完成注册。
此时是最低星级:1星,即新手用户。
3、完成1星用户后,打开手机通讯录功能,完善所有个人资料,即可快速升级为2星用户。
4、升级为2星用户后,根据陌陌的星级规则,最高星级为5星,所以如果想升级更高的星级,需要积累一些成长值,可以加快星级升级:使用文明用语,坚持每天发布一点个人消息,语言图片文明规范,不做广告或一些禁用语言。
然后,加好友。
不能用一些不良信息交友的词。
最好在手机通讯录中添加好友,这样可以快速提高你的真实性,达到升级的目的。
最后,多加正规的群,多真实的发言,经常和一些高星级的用户保持联系,这样星级提升会很快。
本文到此讲解完毕了,希望对大家有帮助。
标签:陌陌升级规则
免责声明:本文由用户上传,如有侵权请联系删除!。
M55刷机指南
M55刷机指南(增加了刷机失败的解决方法)一、简单的知识了解1.刷机软件:有两种:V-KLAY和FREIA(就是ALLSIEMENS)2.而手机里的记忆体是FULLFLASH(我们简称为FUBU:FULLFLASH BACKUP),用FREIA备份的FUBU称为FIRMWARE。
而EEP和BOOTCORE是包含在FUBU中的。
EEP里面有手机的设置,网络设置和密码,电参等等;而BOOTCORE是启动核心,刷FUBU时,会跳出警告框:是否不刷入BOOTCORE!我们强烈建议,选“是”,就是表示不刷入!3.用FREIA备份的格式是.FLS,VK备份的手机记忆体的格式是.BIN强烈建议,用VKLAY IN格式,用FREIA刷FLS格式。
4.我们的刷机步骤一般是先用VK备份FUBU,EEP,最好用FREIA备份电参,再刷新的FUBU,最后刷回EEP(如果EEP没有备份,就用FREIA直接做MAP解锁,再刷回电参然后就可以开机)其中要注意的要点是:EEP的偏移量问题:备份EEP的时候偏移量是0xDC0000 ,但刷回EEP时是0x000000!二、请在刷机前在待机状况下“*#06#”,可以看到你的IMEI号,请抄下来,如果刷机失败后有用再按左软键一次看一下P-DATE:如果是2003的,那么恭喜你,你可以直接连上VKLAY刷机了如果是2004的,你需要先破解你的小M,请参阅这篇帖子:用04年产M55的蝎友看过来!/viewthre ... 4%B9%FD%C0%B4%A3%A1修改Bootcore 的Java程序pm55amd 下载地址点击下载(因为04的机器换用了AMD的FLASH芯片,启动核心BOOTCORE变了,一定要用PM55AMD破解之后才能连上VKLAY,FREIA等刷机软件)请换过主板的机友特别注意!请注意:某些换过主板的机器,03,04年弄混淆了(即按*#06#后P-DATE显示03的,可能是04的板,要破解;而有些换过板的机器,显示为04的,但其实是03的板,无须破解)解决对策:换过板显示为03或04的机器先选03的板对应的M55或M55(BOOTCORE BUG),如果连不上再用PM55AMD破解!三、一定要作好备份工作!切记!我们一般用VKLAY备份你的FULLFLASH,EEP,BOOTCORE用FREIA备份你的电参(包含在EEP中,关系到你的电池使用时间长短,和使用寿命的一个MAP文件)用GHOSTMOBILE或SDS(DES)备份你的文件管理器的所有文件(包括隐藏的系统文件)作好备份工作,不管你以后手机刷完补丁不能开机了,还是想重刷FUBU,都比较方便!可以让手机恢复到刷机之前的状态!所以。
