Oracle 10G DataGuard Real Time Apply & Flashback Database features
Oracle 10g 安装配置说明
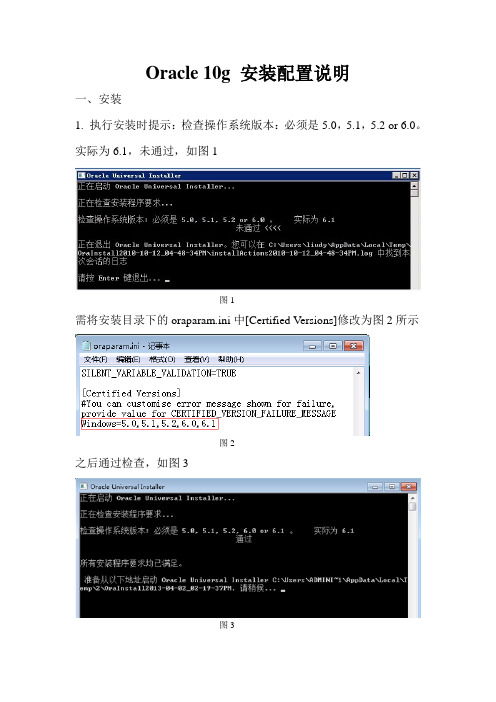
Oracle 10g 安装配置说明一、安装1. 执行安装时提示:检查操作系统版本:必须是5.0,5.1,5.2 or 6.0。
实际为6.1,未通过,如图1图1需将安装目录下的oraparam.ini中[Certified Versions]修改为图2所示图2之后通过检查,如图3图32. 选择“高级安装”,点击“下一步”,如图4图43. 选择“企业版”,点击“下一步”,如图5图5图65. 勾选没有通过验证的两项,点击“下一步”,如图7图7图87. 选择“一般用途”,点击“下一步”,如图9图9图10 9. 默认设置,点击“下一步”,如图11图1110. 继续默认设置,点击“下一步”,如图12图1211. 默认设置,点击“下一步”,如图13图1312. 选择输入同一个口令“isofthome_123”,如图14图1413. 默认设置。
点击“下一步”,如图15图1514. 确认安装信息,点击“安装”,如图16图1615. 确认数据库创建信息,点击“确认”,如图17图1716. 完成安装,点击“退出”,如图18图18二、创建数据库1. 打开数据库创建程序(DBCA)2. 点击“下一步”3. 选择“创建数据库”,点击“下一步”4. 选择“一般用途”,点击“下一步”5. 输入全局数据库名“isoft”,点击“下一步”6. 默认设置,点击“下一步”7. 输入同一口令“isofthome_123”,点击“下一步”8. 默认设置,点击“下一步”9. 默认设置,点击“下一步”10. 继续默认设置,点击“下一步”11. 默认设置,点击“下一步”12. 点击“下一步”13. 点击“下一步”14. 点击“完成”15. 确认创建信息,点击“确定”16. 数据库创建完成,点击“退出”。
ORACLE 10G介绍

AWR采集与性能相关的统计数据,并从那些统计数 据中导出性能量度,以跟踪潜在的问题。与 Statspack 不同,快照由一个称为 MMON 的新的后台 进程及其从进程自动地每小时采集一次。为了节省空 间,采集的数据在 7 天后自动清除。快照频率和保 留时间都可以由用户修改。要查看当前的设置,您可 以使用下面的语句:
不是客户端安装的工具,实际上它是位于数据库服务 器上的一个 HTTP 服务器(称为 DB 控制台,参见下 图)。你可以使用任何浏览器查看 EM 界面。
DB 控制台使用的端口号可在 $ORACLE_HOME/install/portlist.ini 文件中找到。 以下是一个文件的示例(根据主机情况不一样,端口 可能不相同)
AWR 使用几个表来存储采集的统计数据,所有的 表都存储在SYSAUX 表空间中的SYS 模式下,并且以 WRM$_* 和 WRH$_* 的格式命名。前一种类型存储元 数据信息(如检查的数据库和采集的快照),后一种 类型保存实际采集的统计数据。
在这些表上构建了几种带前缀 DBA_HIST_的视图, 这些视图可以用来编写您自己的性能诊断工具。视图 的名称直接与表相关;例如,视图 DBA_HIST_SYSMETRIC_SUMMARY是在 WRH$_SYSMETRIC_SUMMARY表上构建的。 AWR 历史表采集的信息比 Statspack 多许多,这 些信息包括表空间使用率、文件系统使用率、甚至操 作系统统计数据。这些表的完整的列表可以通过以下 命令从数据字典中看到:
ORACLE 10G 简介
亚信联创 曹震
概
述
Oracle 10g于2003年9月9日在旧金山发布,代 号中的G代表GRID,表示ORACLE将提供一个网格计 算体系,是自Oracle 8I提供互联网功能后的一次 重大更名,并在今年发布了可能是Oracle10g的最 后一个补丁集10.2.0.5 。 Oracle 10g可以分为4个版本,分别是: 1、Oracle Database Standard Edition One, 最基本的商业版本,包括基本的数据库功能。
ORACLE 10g 安装教程[图文]
![ORACLE 10g 安装教程[图文]](https://img.taocdn.com/s3/m/347b923610661ed9ad51f353.png)
ORACLE 10g 安装教程[图文]转载原文链接/blog/451991刚刚接触ORACLE的人来说,从那里学,如何学,有那些工具可以使用,应该执行什么操作,一定回感到无助。
所以在学习使用ORACLE之前,首先来安装一下ORACLE 10g,在来掌握其基本工具。
俗话说的好:工欲善其事,必先利其器。
我们开始吧!首先将ORACLE 10g的安装光盘放入光驱,如果自动运行,一般会出现如图1安装界面:单击“开始安装”,就可以安装ORACLE 10g,一般会检查系统配置是否符合要求,然后出现“Oracle DataBase 10g安装”对话框,如图2所示:在安装Oracle DataBase 10g时可以选择“基本安装”和“高级安装”两种方法。
选择“基本安装”时,“Oracle主目录位置”用于指定Oracle DataBase 10g软件的存放位置;“安装类型”用于指定Oracle产品的安装类型(企业版、标准版和个人版)。
如果选择“创建启动数据库”,那就要指定全局数据库名称和数据库用户的口令。
选择“高级安装”,单击“下一步”,会出现“指定文件对话框”,在源路径显示的是安装产品所在的磁盘路径;目标名称用于资定Oracle 主目录所对应的环境变量,目标路径用于指定安装Oracle软件的目标安装路径。
设置目标名称为:OraDb10g_home1,目标路径为:D:oracleproduct10.1.0db1。
如图3:单击“下一步”,会加载Oracle产品列表,然后出现“选择安装类型”对话框;如图4:选择安装类型时一般选择“企业版”,单击“下一步”,会出现“选择数据库配置”对话框,如图5 :在“选择数据库配置”对话框中可以选择是否要创建启动数据库,如果要创建数据库还要选择建立数据库的类型。
选择“不创建启动数据库”单击“下一步”,会出现“概要”对话框,如图6所示:单击“安装”,就会开始安装Oracle DataBase 10g产品了。
oracle10g数据库安装
oracle10g数据库安装ORACLE10G数据库的安装注意:此教程分为四部分,第一部分教你安装数据库,比较简单。
第二部分教你如何在安装好的数据库上创建新的数据库,过程比较复杂,请认真完成,掌握每一步操作的实际内涵。
第三部分教你创建一个数据库监听器和oracle服务的管理。
第四部分教你使用数据库管理工具SQLDeveloper连接数据库。
第一部分:安装数据库单击“开始安装”,就可以安装ORACLE10g,一般会检查系统配置是否符合要求,然后出现“OracleDataBae10g安装”对话框,如下图所示:在安装OracleDataBae10g时可以选择“基本安装”和“高级安装”两种方法。
选择“基本安装”时,“Oracle主目录位置”用于指定OracleDataBae10g软件的存放位置;“安装类型”用于指定Oracle产品的安装类型(企业版、标准版和个人版)。
如果选择“创建启动数据库”,那就要指定全局数据库名称和数据库用户的口令。
注意我们不选择创建数据库:然后一直默认点击下一步,下一步,最后就安装完成了。
注意:如果对ORACLE比较熟悉的同学可以选择高级安装。
但是在安装的时候建议不添加数据库,建议在安装完成后再创建数据库。
第二部分:创建数据库(一些基本概念:数据库名(databaename):就是数据库的名称标识,如myOracle,这种叫法一般只适用于单机;全局数据库名(globaldatabaename):就是数据库处于一个网络中的名称标识。
比如数据库宿主机的域为mydomain,则数据库的全局数据库名为myOracle.mydomain;实际上myOracle和myOracle.mydomain两者指的是同一个数据库.即:全局数据库名=数据库名+"."+网络位置(宿主机所在的域)SID=Oracle实例SID是Oracle实例的唯一名称标识,用户去访问数据库,实际上是向某一个Oracle实例发送请求,oracle实例负责向数据库获取数据。
使用Oracle企业管理器10g 管理Oracle应用服务器 Oracle 白皮书

使用Oracle企业管理器10g管理Oracle应用服务器Oracle 白皮书2004 年 7 月使用Oracle企业管理器10g管理Oracle应用服务器引言 (4)管理拓扑结构 (4)随取随用管理 (5)集中和综合的管理 (5)使用应用服务器控制进行管理 (6)单点管理 (6)应用服务器环境的拓扑结构 (7)部署 J2EE 应用程序 (8)统一的管理操作 (9)集中的端口管理 (9)诊断日志查看器 (10)更改基础架构服务 (11)身份管理 (12)元数据信息库 (12)场信息库管理 (12)自动的服务保障 (13)使用网格控制管理 (13)随取随用的监视 (13)历史记录收集和分析 (14)J2EE 应用程序诊断 (15)应用程序服务级别管理 (15)应用程序可用性 (16)预先监视商务事务处理 (17)了解最终用户体验 (18)交互跟踪商务事务处理 (19)分析中间层页面的性能 (19)使应用程序性能相互关联 (20)管理应用服务器网格 (21)企业配置管理 (22)系统数据的自动收集 (22)报告收集的数据 (22)收集数据的查询和分析 (23)补丁 (24)克隆 Oracle 主目录 (25)结论 (26)使用Oracle企业管理器10g管理Oracle应用服务器引言Internet 为企业提供了快速发展更多客户的机会,同时降低了业务流程和信息系统的复杂性。
利用应用服务器(如 Oracle 应用服务器 10g)可以实现第二个好处,这些服务器允许用户集成完全不同的业务系统,并简化基于Web 的应用程序的开发和部署。
管理这样的动态应用服务器环境具有一定的挑战性。
Oracle 应用服务器提供了各种各样的功能,并在平台内集成了若干组件。
此外,应用服务器并不能独立存在,还需要其他服务和组件(例如,主机、数据库、负载平衡器等)作为应用服务器的宿主。
这样分散的环境自然很复杂,一直以来都需要经过培训的和专门的人员对其进行管理。
ORACLE双机、RAC、Dataguard区别

双机热备(HA)和RAC有啥区别呢?
1、对于硬件来说,基本上一样,共享存储、光纤线(也有还用SCSI线的)、多台小型机(可以做多节点的相互热备,也可以做多节点的RAC)、光纤交换机(如果是用光纤卡的话);但做RAC,在主机之间,最好使用高带宽网络交换机(虽然不用也可以做成);因此硬件成本相差不大。
Oracle 双机/RAC/Dataguard的区别 收藏
Data Guard 是Oracle的远程复制技术,它有物理和逻辑之分,但是总的来说,它需要在异地有一套独立的系统,这是两套硬件配置可以不同的系统,但是这两套系统的软件结构保持一致,包括软件的版本,目录存储结构,以及数据的同步(其实也不是实时同步的),这两套系统之间只要网络是通的就可以了,是一种异地容灾的解决方案。而对于RAC,则是本地的高可用集群,每个节点用来分担不用或相同的应用,以解决运算效率低下,单节点故障这样的问题,它是几台硬件相同或不相同的服务器,加一个SAN(共享的存储区域)来构成的。
4、优缺点。这个,看看RAC的官方论述吧。如果能用好,确实是很有好处的。目前我们的40多个客户的使用情况来看,RAC确实大大降低了他们的downtime,另一方面可以说就是提高了生产力咯。
Dataguard:一般是出于容灾的目的。是主数据库的备用库(standby 库)通过自动传送和接受archivelog,并且在dataguard库自动apply 这些log,从而达到和主数据库同步的目的,可能dataguard 库是建立的异地的,当主库所在的区域出现了致命性的灾难时(火灾、地震等),主库没法修复时,这时可以切换dataguard 为主库的模式,对外提供服务,而它的数据基本是当前最新的。目前可能大家对于 dataguard 库的使用已经拓展出了其他更多的用途,比如备份,跑报表等等。
Oracle 10g通过Rman DUPLICATE实现dataguard
Oracle 10g可以通过基于备份的rman DUPLICATE实现dataguard,通过步骤需要对数据库进行备份,并在standby侧进行数据库的恢复。
而到了11g,oracle推出了Duplicate From Active Database技术,不需要再对数据库进行rman备份恢复,一切动作都通过网络自动完成。
1.对主数据库进行必要的更改。
a. 启用force logging。
b. 拷贝密码文件到从节点。
c. 创建备用redo 日志。
d. 修改参数文件,使其适用于Dataguard。
2. 确保sql*net 连接正常。
3. 使用主数据库活动文件,通过网络创建备用数据库。
a. 创建密码文件b. 为备用数据库(辅助数据库)创建初始化参数文件c. 为数据库文件创建需要的装载点或文件夹d. 连接至主数据库作为其目标数据库,以运行创建备用ON STANDBY。
第一步:主库(primary)的环境配置1、确认数据库处于归档模式:SQL> select log_mode from v$database;2、允许数据库强制日志SQL> ALTER DATABASE FORCE LOGGING;SQL>select force_logging from v$database;3、添加standby日志文件SQL> alter database add standby logfile '/opt/app/oracle/oradata/study/standby01.log' size 100M;SQL> alter database add standby logfile '/opt/app/oracle/oradata/study/standby02.log' size 100M;SQL> alter database add standby logfile '/opt/app/oracle/oradata/study/standby03.log' size 100M;SQL> alter database add standby logfile '/opt/app/oracle/oradata/study/standby04.log' size 100M;4,修改primary参数文件spfile,需要设置以下8个参数SQL>alter system set LOG_ARCHIVE_CONFIG='DG_CONFIG=(pridb,stadb)';SQL> alter system set db_unique_name='pridb' scope=spfile;SQL> alter system set LOG_ARCHIVE_DEST_1='LOCATION=/opt/app/oracle/pridb VALID_FOR=(ALL_LOGFILES,ALL_ROLES) DB_UNIQUE_NAME=pridb';SQL>alter system set LOG_ARCHIVE_DEST_2='SERVICE=stadb LGWR ASYNC VALID_FOR=(ONLINE_LOGFILES,PRIMARY_ROLE) DB_UNIQUE_NAME=stadb';SQL> alter system set LOG_ARCHIVE_DEST_STATE_1=ENABLE;SQL> alter system set FAL_SERVER=stadb;SQL> alter system set FAL_CLIENT=pridb;SQL> alter system set DB_FILE_NAME_CONVERT='/opt/app/oracle/oradata/study','/opt/app/oracle/oradata/aux' scope=spfile;SQL> alter system set LOG_FILE_NAME_CONVERT='/opt/app/oracle/oradata/study ','/opt/app/oracle/oradata/aux' scope=spfile;第二步、网络相关配置(确保sql*net 连接正常)1、在备库stadb中的listener.ora中加入stadb的条目:SID_LIST_LISTENER =(SID_LIST =(SID_DESC =(GLOBAL_DBNAME = stadb)(ORACLE_HOME = /opt/app/oracle/product/10.2.0/db_1)(SID_NAME = stadb)))LISTENER =(DESCRIPTION =(ADDRESS = (PROTOCOL = TCP)(HOST = 192.168.7.9)(PORT = 1521)))2、在主库上修改service_names参数:SQL>alter system set service_names='studby,pridb';3、主库和备库的TNSNAMES.ORA 应该有两个条目:STADB =(DESCRIPTION =(ADDRESS_LIST =(ADDRESS = (PROTOCOL = TCP)(HOST = 192.168.7.9)(PORT = 1521)))(CONNECT_DATA =(SERVICE_NAME = stadb)))PRIDB =(DESCRIPTION =(ADDRESS_LIST =(ADDRESS = (PROTOCOL = TCP)(HOST = 192.168.7.239)(PORT = 1521)))(CONNECT_DATA =(SERVICE_NAME = pridb)))4、在主数据库和备用数据库中使用以下命令,检查SQL*Net 配置:$tnsping pridb$tnsping stadb第三步:创建备用数据库1、从主数据库$ORACLE_HOME/dbs 中复制密码文件,并将其重命名为备用数据库名称。
oracledataguard原理
oracledataguard原理Oracle Data Guard是Oracle数据库提供的一种可靠的灾难恢复解决方案。
它基于数据库备份和恢复技术,并使用了物理和逻辑日志来确保数据的一致性和可用性。
本文将介绍Oracle Data Guard 的原理和工作机制。
我们需要了解Oracle数据库的基本概念。
Oracle数据库由多个数据文件组成,这些数据文件存储了表、索引和其他数据库对象的实际数据。
数据库还包含了控制文件、日志文件和参数文件等元数据文件。
控制文件记录了数据库的结构信息,日志文件记录了数据库操作的详细信息,参数文件包含了数据库的配置参数。
在Oracle Data Guard中,主数据库(Primary Database)是数据的源头,负责处理用户的请求并维护数据的完整性。
而备用数据库(Standby Database)则是主数据库的一个精确副本,负责保持与主数据库的同步。
Oracle Data Guard的工作原理如下:1. 数据传输:主数据库将数据更改记录在归档日志文件(Archive Log)中,并将这些日志文件传输到备用数据库。
备用数据库通过重做应用进程(Redo Apply)将这些日志文件应用到自己的数据库中,从而与主数据库保持同步。
2. 故障检测:Oracle Data Guard使用心跳(Heartbeat)机制来检测主数据库和备用数据库之间的连接状态。
如果主数据库发生故障,备用数据库会接收不到主数据库发送的心跳信号,从而判断主数据库是否可用。
3. 自动故障转移:当主数据库不可用时,备用数据库可以自动接管主数据库的角色,并成为新的主数据库。
这个过程称为自动故障转移(Automatic Failover)。
自动故障转移可以在几秒钟内完成,从而最大限度地减少系统停机时间。
4. 故障恢复:当主数据库恢复后,它会自动变为备用数据库,并与新的主数据库同步。
这个过程称为故障恢复(Failback)。
双机备份dgrac的区别
双机备份,dg,rac的区别Data Guard是Oracle的远程复制技术,它有物理和逻辑之分,但是总的来说,它需要在异地有一套独立的系统,这是两套硬件配置可以不同的系统,但是这两套系统的软件结构保持一致,包括软件的版本,目录存储结构,以及数据的同步(其实也不是实时同步的),这两套系统之间只要网络是通的就可以了,是一种异地容灾的解决方案。
而对于RAC,则是本地的高可用集群,每个节点用来分担不用或相同的应用,以解决运算效率低下,单节点故障这样的问题,它是几台硬件相同或不相同的服务器,加一个SAN(共享的存储区域)来构成的。
Data Guard由两个多两个以上的独立的数据库构成,他们各自有各自的存储,Oracle 负责他们之间的切换和数据同步双机热备由两台计算机和一个共享存储设备构成,通过第三方软件(HA Rose等)实现切换,不需要做数据同步建议应用RAC+Dataguard,RAC保证可用性,Dataguard在RAC组独立磁盘上和另外一台主机上,保证可靠性。
双机就是人们所说的双机热备,数据库放在共享设备上,同一时刻只能有一台主机接管,另一台待用,这种方式只能保护实例,不能保护db,而且备机长期处于闲置,对资源是一种极大的浪费!如果原本是双机,建议转换为RAC规划好应用,DML操作从一个节点跑,查询操作从另一个节点跑,通常不需要太多调优就可以利用闲置的另外一台机器了RAC服务器共用一套存储,同时提供服务,没有主备之分.宕一个其它的可以继续服务.双机热备,共用一套存储,一个提供服务一个备份,主机宕了切换到备份服务器提供服务. data guard完全两套系统,存储是单独的,用日志同步.RAC:实例层冗余DG:数据库层冗余热备:仅仅只是数据冗余个人理解:RAC:实例冗余,而且还可以做到数据库的loadbalance。
DG:多份数据,所以能做到数据冗余,但是只有主节点提供服务。
热备:与RAC最大的差异可能就是RAC有多个实例,一个数据库。
Dataguard 维护文档

SELECT DEST_ID,VALID_TYPE,VALID_ROLE,VALID_NOW FROM V$ARCHIVE_DEST;
三.常见错误
3.1.0
standby服务器里存在日志,但日志无法恢复.
ORA-19909: datafile 1 belongs to an orphan incarnation
alter system set log_archive_dest_state_2 = 'enable';
5):新备库(原主库)开启Redo apply
ALTER DATABASE RECOVER MANAGED STANDBY DATABASE DISCONNECT;
-rw-r----- 1 oracle oinstall 1024 Mar 29 16:50 1_119_714650269.arch
-rw-r----- 1 oracle oinstall 1024 Mar 29 16:50 1_120_714650269.arch
scp 1_116_714650269.arch 1_117_714650269.arch 1_118_714650269.arch 1_119_714650269.arch 1_120_714650269.arch 192.168.143.219:/archive
正常状况,可以切换。
2:查询结果为空的
Dataguard配置不正确,确认dataguard配置,
(例如:
所有LOG_ARCHIVE_DEST_n参数是否正确。
tnsnames.ora里面是否配置正确,是否可以连通。
密码文件Orapw$ORACLE_SID是否正确,可用sqlplus sys/sys@beadb as sysdba 测试。
ORACLE10g 命令大全
ORACLE 10g命令大全构件与体系结构常用的环境变量ORACLE_HOME:将要安装oracle软件的目录,指向oracle二进制文件应该安装到的位置。
ORACLE_BASE:主机服务器上用于oracle软件的顶级目录ORACLE_SID:定义一个unix用户会话应该连接到服务器上的那个实例,不能多于8个字符。
ORACLE_OWNERORACLE_TERMDISPLAYSHLIB_PATHLD_LIBRARY_PATH:指定oracle共享对象库的位置.在unix系统上,这个变量通常指向$ORACLE_HOME/lib 或者是$ORACLE_HOME/lib32目录ORA_NLS33NLS_LANGPATH:告诉操作系统在unix那些目录中查找可执行文件TMPDIRTNS_ADMIN:保存oracle net配置文件的位置DBCA_RAW_CONFIGTERMCLASSPATHTWO_TASK:指定一个将要用在unix系统上的默认oracle net连接串—如果用户没有指定任何连接串OFA模型用于unix文件系统和安装点的命名约定用于目录路径的命名约定用于数据文件的命名约定用于oracle相关文件的标准位置Oracle企业管理框架网格控制必须管理许多的数据库、应用服务器、web服务器和其他构件的企业可以采用em grid controlEm grid control是一个基于web的用户界面,它与oracle企业内所有构件进行通讯并集中管理这些构件。
Dba可以从一个统一的位置使用em grid control来监视和管理整个计算环境,其中包括主机、数据库、监听器、应用服务器、http服务器和web应用软件。
oracle管理服务器是一个基于java的web构件,该构件是dba用来监视和控制oracle企业框架内各个受管理目标的实际界面oracle储存库已收集到并与受管理目标有关的配置和监视信息被存储到一个oracle管理储存库中。
data_guard_ppt
Talent Show
Primary database
LGWR ASYNC归档过程
standby database RFS MRP/LSP
LGWR
no us As yn ch ro
Real time apply
online redo log files
standby
LNSn
redo log files
北京时代朝阳数据库技术中心
Talent Show
Data Guard的logs文件
Online Redo Logs Files 联机重做日志文件 Archived Redo Logs Files 归档重做日志文件 Standby Redo Logs Files 备用重做日志文件
北京时代朝阳数据库技术中心
北京时代朝阳数据库技术中心
Talent Show
Data Guard配置(Data Guard Configurations)
Standby 数据库 : 物理standby RAC数据库、单实例数据库 逻辑standby RAC数据库、单实例数据库 Primary 数据库 : RAC数据库、单实例数据库
有无数个名字,有人叫它dg,有人叫它数据卫士 , 在oracle的各项特性中它有着举足轻重的地位 。 大多数人以为dg是一个备份恢复的工具。其实它不 仅仅是为了恢复数据 ,应该说它的存在是为了确保 企业数据的高可用性,数据保护以及灾难恢复 。 Data guard通过数据库的冗余来实现对数据的保护. Data guard通过在备用库应用redo data或sql实现 主、备数据库同步。 管理员可以通过将一些操作转移到standby数据库执 行的方式改善数据库性能。
LNSn
oracle10G安装使用手册

oracle10G安装使用手册杭州广域软件有限公司2009目录一.服务器端安装 (3)1.1.安装Oracle服务端 (3)1.2.安装Oracle客户端 (8)1.3.oracle数据的使用 (20)一.服务器端安装1.1.安装Oracle服务端我们选用的是10201_database_win32.zip版本,解压后,打开文件夹database,双击其安装文件中的setup.exe,弹出安装菜单。
如下图所示:主目录位置不要去修改他,易出错。
修改全局数据库名,数据库口令,确认口令都为GUANGYU。
如下图所示。
之后点击下一步,出现产品先决条件检查如下图。
再点击下一步。
点击安装。
出现安装界面,耐心等待其安装完成(由于本人机器上已经安装了一个oracle,故当前演示的oracle装在非默认文件下,这里只是讲解下安装使用的过程,与方法)之后进入下面界面在之后的安装完成弹出界面中,点击完成,不用点口令管理。
之后进入到安装结束界面,点击退出。
1.2.安装Oracle 客户端解压10201_client_win32.zip 包,打开文件夹下的setup.exe 。
出现安装界面在出现的安装类型选择界面中,选择管理员目录详情可不修改,再点击下一步在出现的产品先决条件检查中,点击下一步在出现的概要界面中点击安装之后就是安装界面。
之后出现和点击下一步下一步下一步下一步中的主机名,可在我的电脑,单击右键-属性中的,完整的计算机名称中找到。
再点击下一步下一步下一步下一步下一步下一步完成。
点击退出是。
1.3.oracle数据的使用依次点击“开始”→“程序”→“Oracle – OraClient10g_home1”→“Enterprise Manager Console”,如下图所示:弹出“Oracle Enterprise Manager Console 登录”对话框,在此窗口中选择“独立启动(S)”,并单击“确定”,如下图所示:此时弹出“Oracle Enterprise Manager Console,独立”窗口,如下图所示:以下就以创建重庆数据库,为例若上面的网络中,没有数据库文件夹的,则按照如下方式添加数据库。
Linux安装Oracle10g(图文详解 教程)
1安装RedHat Enterprise Linu x 31.1 准备安装介质安装介质一共4张光盘(CD版),版本号为:2.4.21-27.ELsmp设置BIOS为光盘启动,放入第一张光盘即可。
进入到RedHat Enterprise Linux3(以下均简称为Linux)的启动界面,屏幕上出现[boot]字样,如果采用图形化方式安装,直接按回车继续,如果想采用命令行模式进行,输入“linux text”后回车,如有其他需要,按屏幕提示选择选项进行(比如安装SATA硬盘或网卡时可能需要先安装其驱动)。
1.2 安装过程1.欢迎界面,点击Next继续2.选择安装语言界面,可以选择“Chinese(Simplified)简体中文”,点击Next继续3.选择键盘界面,默认即可(U.S. English),点击“下一步”继续4.选择鼠标界面,默认即可(3键鼠标(USB)),点击“下一步”继续5.磁盘配置界面,选择“用Disk Druid手工分区”,点击“下一步”继续6.设置分区:(以下为160G硬盘)分区需注意:最多只能4个主分区,其中逻辑分区也是一个主分区,同时,还需要注意/t mp分区,建议系统有/tmp目录,因为很多软件在安装的时候都需要往此目录写文件,比如Oracle10g就要求/tmp目录有400M以上的空间。
设置好以后,点击“下一步”继续7.设置引导装载程序配置默认保留“Red Hat Enterprise Linux AS…”勾选框,点击“下一步”继续8.防火墙设置,选择“无防火墙”,点击“下一步”继续9.系统默认的语言设置,默认(Chinese (P.R. of China)),点击“下一步”继续10. 选择时区,默认,点击“下一步”继续11. 设置root用户密码,点击“下一步”继续12. 软件包组设置,选择“定制要安装的软件包集合”,点击“下一步”继续13. 选择要安装的软件包特别注意:在“遗留网络服务器”中的细节中,勾选“telnet”服务点击“下一步”继续14. 确认界面,点击“下一步”继续15. 等待安装首先会根据第6步的设置进行磁盘分区和格式化然后会根据第13步的设置进行软件安装,安装过程会提示换光盘进行,按提示进行16. 安装完成17. 设置图形化界面(X)配置,默认即可18. 设置显示器配置,默认即可19. 设置图形化配置,默认即可(如有需要,可以把登录类型改成“文本”)20. 配置完成,退出重启就可以了2配置RedHat Enterprise 32.1 安装网卡驱动有些机器的网卡可能在安装操作系统时就能自动安装好,因此安装好Linux系统以后,可以通过ifconfig来查看是否有eth0设备,如果只有lo设备,说明网卡驱动未成功。
oracle10g安装教程

oracle10g安装教程Oracle 10g 是一款强大的关系型数据库管理系统,下面是Oracle 10g 的安装教程:第一步:下载 Oracle 10g 安装包。
可以在 Oracle 官方网站上下载适用于您的操作系统的 Oracle 10g 安装包。
下载完成后,确保安装包与您的操作系统兼容。
第二步:解压安装包。
将下载的安装包解压到您想要安装 Oracle 10g 的目录中。
您可以使用压缩解压工具(如WinRAR)或自带的压缩工具进行解压。
第三步:运行安装程序。
在解压完成后,进入到解压目录,并找到名为“setup.exe” 或“install.exe” 的安装程序。
双击运行该程序以启动安装向导。
第四步:选择安装类型。
安装向导会提示您选择“创建和配置数据库”或“仅安装软件”。
如果您想在本地计算机上创建和配置 Oracle 数据库,选择第一个选项。
如果只是想安装 Oracle 10g 的软件,选择第二个选项。
第五步:配置数据库实例和监听器。
如果选择了“创建和配置数据库”选项,安装向导会要求您提供一些配置信息,如数据库名称、端口号和管理员密码等。
根据您的需求,填写相应的信息,并点击“下一步”继续。
第六步:选择安装位置。
安装向导会要求您选择 Oracle 10g 的安装位置。
您可以选择默认路径或自定义路径。
点击“下一步”继续。
第七步:进行安装。
在确认了安装选项和安装位置后,点击“下一步”开始安装。
安装过程可能需要一些时间,请耐心等待。
第八步:完成安装。
安装完成后,安装向导会弹出安装完成的提示窗口。
点击“完成”退出向导。
至此,您已经成功安装了 Oracle 10g 数据库。
完成安装后,您可以通过启动菜单或桌面上的 Oracle 10g 快捷方式来启动Oracle 10g 数据库,并开始使用它来创建和管理数据库。
总结:安装 Oracle 10g 数据库需要先下载安装包,然后解压安装包,并运行安装程序。
在安装向导中,需要选择安装类型、配置数据库实例和监听器、选择安装位置,最后进行安装。
Oracle 11G数据库DataGuard灾备切换方案
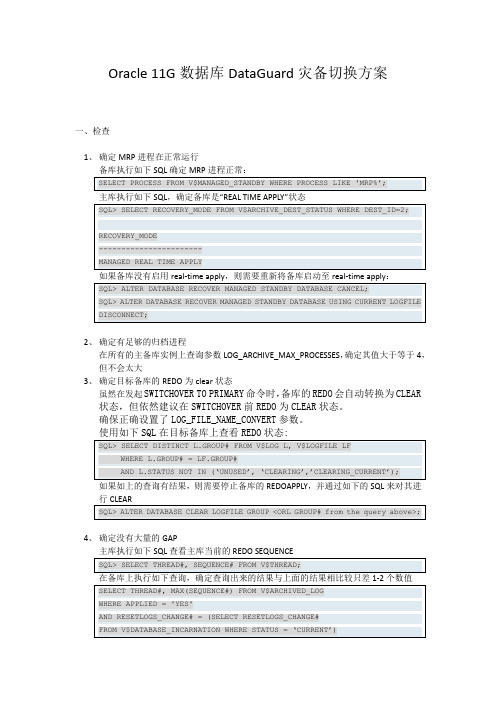
Oracle 11G数据库DataGuard灾备切换方案一、检查1、确定MRP进程在正常运行备库执行如下SQL确定MRP进程正常:2、确定有足够的归档进程在所有的主备库实例上查询参数LOG_ARCHIVE_MAX_PROCESSES,确定其值大于等于4,但不会太大3、确定目标备库的REDO为clear状态虽然在发起SWITCHOVER TO PRIMARY命令时,备库的REDO会自动转换为CLEAR 状态,但依然建议在SWITCHOVER前REDO为CLEAR状态。
确保正确设置了LOG_FILE_NAME_CONVERT参数。
行CLEAR4、确定没有大量的GAP5主备库分别执行如下SQL,查看tempfile是否正常,如果备库上缺失文件则需要进行二、切换1、检查主库是否可切换至STANDBY主库执行如下SQL执行检查如上的SQL查询结果如果为”” 或者””表示主库可切换至STANDBY,如果不为这两个值,则说明REDO传输存在问题。
2、停止主库第一个节点以外的所有实例(RAC)最好使用shutdown normal或者shutdown immediate方式停止数据库。
如果使用了shutdown abort将其他节点进行了关闭,则需等待RAC reconfig完成,且第一个节点将其余REDO正常前滚或回滚3、切换主库至STANDBY角色如果遇到已为”PHYSICAL STANDBY”,则可继续(这种问题的出现其中一个可能是数据库有大量的数据文件)。
4、确定STANDBY收到EOR5、检查STANDBY能够切换至PRIMARY如上的SQL查询结果如果为”PRIMARY” 或者””表示目标备库可切换至PRIMARY,如果不为这两个值,则说明REDO传输或者应用存在问题。
6、切换备库至PRIMARY7、打开新的主库8、检查新主库的TEMPFILE如果存在问题则进行处理。
9、重启新的备库10、意外或回退参考Appendix A.4.5 Roll Back After Unsuccessful Switchover and Start Over三、无法正常切换的处理若主数据库异常中断无法连接做switchover处理,需要将灾备环境强制切换为主库(即failover),需要注意的是,此种切换是将备库强制进行切换,可能会由于主备库之间并未完全同步导致有数据丢失,需慎重处理。
物理DATAGUARD主备切换对OGG(DML)同步影响测试
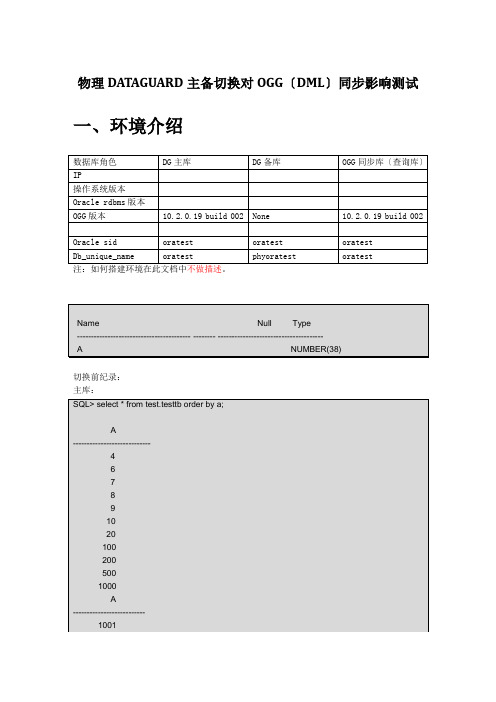
物理DATAGUARD主备切换对OGG〔DML〕同步影响测试一、环境介绍注:如何搭建环境在此文档中不做描述。
切换前纪录:主库:OGG查询库:通过表中的数据比拟可以看到主库与OGG查询库为同步状态。
主库后台日志:可以看到当前主库归档日志为48号,在线日志为49号〔未归档〕DG灾备库后台日志:可以看到当前灾备库已经Media Recovery的归档日志为48号,等待的下个日志为49号综上,可以判断出主库与灾备库当前为同步状态。
二、DG主备切换:主库操作:1. Alter system switch logfile; 主库后台日志:备库后台日志:2. 在主库关闭OGG查询库同步进程3.查看主库状态并切换主->备主库操作:主库后台日志:备库后台日志:4. 启动主库到mount状态,并查看主库状态主库操作:可以看到已经转变为备库5.查看备库状态并切换备->主备库操作:原主库后台日志:原备库后台日志:6. 查看当前原备库状态可以看到已经转变为主库7. 在原主库开启DG同步原主库后台日志:8. 在原备库对表test.testtb进行一系列dml操作,并切换日志备库操作:原备库后台日志:可以看到当前已经归档的日志文件为52号。
原主库后台日志:可以看到当前原主库已经Media Recovery到第52号归档文件,正在等待53号归档文件通过后台日志,可以确认当前主备切换后的DG体系,同步正常。
三、DG主备再切换〔即复原为最初的主备状态〕1.查看原备库〔即当前的主库〕状态并切换备->主原备库操作:原备库后台日志:原主库后台日志:2. 启动原备库到mount状态,并查看切换后状态可以看到当前原备库已经切换为备库。
3.查看原主库状态并进行切换备->主原主库操作:可以看到原主库已经切换为主库原主库后台日志:4. 在原备库启动DG同步原备库后台日志:5. 测试切换后DG同步情况主库操作:主库后台日志:可以看到当前主库已经归档到第55号归档日志文件备库后台日志:可以看到当前备库已经Media Recovery到第55号归档日志文件,正在等待第66号归档日志通过后台日志比拟可以看出主备库DG当前同步情况正常6.查看主库中表test.testtb与OGG查询库数据〔此时OGG同步为开启〕主库:可以看到在切换后原备库进行的DML操作都同步到了原主库OGG查询库:可以看到此时由于OGG还没有开启,故在主备切换后操作的数据没有被同步从上面的过程中可以看到OGG的抽取能正常启动,并到当前最新的日志。
- 1、下载文档前请自行甄别文档内容的完整性,平台不提供额外的编辑、内容补充、找答案等附加服务。
- 2、"仅部分预览"的文档,不可在线预览部分如存在完整性等问题,可反馈申请退款(可完整预览的文档不适用该条件!)。
- 3、如文档侵犯您的权益,请联系客服反馈,我们会尽快为您处理(人工客服工作时间:9:00-18:30)。
Oracle 10G Data Guard Real Time Apply & Flashback Database Features –An Implementation ExperienceTJ MitraDatacom Systems LimitedNZOUG 2007 Presentation--------------------------------------------------------------------------------------------------------------------------------- The BackgroundMy recent project involves upgrading one of our Client’s Banking databases from Oracle version 9i Release 9.2 to Oracle version 10G Release 10.2.The Pre-Production environment has Primary and Standby Databases hosted on different Solaris Servers geographically located in two separate cities.This paper tries to analyse & discuss various high availability aspects around Oracle 10G R2 Data Guard and usage of Flashback Database features.Analysis of the Current environment∙Because of the Banking environment, the high availability & the integrity of the Data are of mandatory requirements∙Currently the Oracle version is Oracle 9.2.0.6.0∙Data Guard environment is Physical Standby∙Log Transport from Primary to Standby happens using Archiver(ARCH), not Log Writer(LGWR)∙Standby Mode is Maximum Performance∙Network Transmission Mode is ASYNC∙The Redo Log Sizes are 512KB∙Log shipping happens only when the Primary Redo Log fills up and switches∙This Data Guard version doesn’t support Real-Time Apply but uses Redo Apply∙Redo Apply means Redo generated at Primary is applied to Standby only when there is a log switch at the Primary∙There is no Automatic Apply Delay set in the Standby meaning as soon as Archive Log arrives at the Standby host, it gets applied onto the Standby database ∙Operations Menu has an option to disable the Log Apply to the Standby when desired, that will stop Standby following Primary∙Because of the smaller size of the Redo Logs, very frequent log switches have been observed during Batch Runs∙There is no flashback mechanism available in the current system∙Flashback is an Oracle RDBMS 10G Technology feature which allows database to be rewound back in the past based on Time Stamp or System Change Numbe r(SCN) or adefined Restore point∙Using Oracle Data Guard Role Transition Services commands embedded in the Operations Menu, Switchover & Switchback happens between Primary & Standby Sitesat regular month intervals∙Capability of Failover to the Standby Database after a Primary failure has been built into the Operations MenuFollowing were the special considerations when the Current System was designed:∙Oracle Redo Log size was chosen as 512k to be compatible with the then available Network Bandwidth & Latency and also to minimize the risk of data loss ∙Standby Mode was chosen as Maximum Performance∙Because redo transmission happened over the Wide Area Network(WAN), Maximum Protection mode was not chosen as it needed highly reliable network with low latency,high bandwidth, resilience and redundancy∙In Maximum Protection mode, redo is not committed on Primary unless it is also committed on Standby, so that could have negative performance impact on the Primary if redo transmission over slow WAN causes Redo Apply on Standby to become slow ∙Also, in Maximum Protection mode if the Standby is shutdown that will cause Primary to shutdownFollowing are the requirements for the Application∙Data/Transaction Loss should be minimum in case of a Failover to Standby following Primary failure∙There should be no performance impact on the Primary during Log Shipping∙Primary must not shutdown for any Redo Transport or Redo Apply problem∙There will not be any Redo Log Apply Delay on the Standby∙The Standby should try to follow the Primary as closely as possible∙But, at the same time, it should be possible to stop the Log Apply on Standby when and if desired or required∙If the Primary is rewound in time, then the Standby also should be rewound to the same point in time.∙ E.g. if there is any problem in the Primary database e.g. failed Batch, then through Menu option, Operations Support should be able to rewind both the Primary & Standbydatabases back into the past to the point in time just before the problem has happened ∙Capability of Alternate Site Switchover & Switchback using Oracle Data Guard Role Transition Services must continue to be available∙Capability of Failover to the Standby Database after a Primary failure must continue to be available∙As future enhancement, the possibility of using the DR database as Reporting Server is to be exploredProposed EnhancementsTo address the above mentioned requirements, the following Oracle 10G features were explored:∙Managed Recovery of the Physical Standby in Real Time Apply mode to minimise Data Loss on the Standby in the event of Primary failure∙Implementation of Flashback database feature in both Primary & Standby introducing the capability of rewinding both the databases to a defined state in the past without goingthrough time-consuming Media Restore & Recovery ProcessOracle RDBMS Version∙Oracle RDBMS 10G will be used∙Initially Oracle 10G R1 was chosen, but because of few bugs (few mentioned below) it has been decided Oracle 10G R2 is to be used∙As Patch Release 10.2.0.3 has addressed fixes around flashback, this patch release is to be used∙Current Oracle 10G Patch version on the Servers is 10.2.0.2, so all Oracle Servers starting from Development to UAT to Pre-Production will be patched to Oracle 10.2.0.3 ∙Oracle Critical Patch released as of January 2007 will be applied on all Oracle Servers Data Guard Environment∙The Data Guard Environment will continue to remain Physical Standby∙As the Primary/Standby Pair operates over a Wide Area Netwo rk and also as of other operational issues, Oracle 10G Data Guard Standby Mode will remain MaximumPerformance, though possibility of using Maximum Protection mode could be explored ∙Log Transport from Primary to Standby will happen using Log Writer not Arc hiver∙LGWR ASYNC LNS Buffer was set to 50MB as available in Oracle 10G R1 (10MB in Oracle 9i). In Oracle 10G R2, as further enhancement LNS process, instead of readingfrom in-memory buffer, reads from Primary online redo log, so is not constrained to in-memory buffer filling up situation. Also, Net_timeout attribute is not needed inLog_archive_dest_2 parameter as from Oracle 10.2, LGWR never waits for LNS.∙Send Data Unit (SDU) will be set to 32k for optimum performance of Sqlnet WAN improvement∙WAN performance has been improved by five fold. This was possible by upgrading all the network gears and increased WAN bandwidth. Additional carriers were added forredundancyOracle 10G Data Guard Standby Real-Time Apply∙Oracle Data Guard 10G Standby Real-Time Apply mechanism will be used∙Real Time Apply will use LGWR on the Primary to write redo data to Standby Redo log on the Standby and Log Apply Services can apply the redo data in real-time without theneed of the current standby redo log being archived∙In Real Time Apply, once a transaction is committed on the Primary, the committed changes will be available on the Standby in Real Time even without s witching the log at the Primary∙Operations Menu will continue to have the option to disable the Log Apply to Standby when desired, that will stop Standby following Primary∙Because of the Real-Time Apply, the Database On-line Redo Log Sizes can be increased to 20MB each as suggested by Oracle 10G RDBMS Advisor during test Batch Runs. This will absorb frequent log switches during batch runs∙For good Real-Time Apply Performance, Oracle suggests Wide Area Network(WAN) Return Trip Time(RTT) to remain below 100ms∙Current WAN RTT, even during most active Batch Period, has been observed to be in the range of 15-20ms, well below the critical range∙ A call was logged with Oracle to confirm that Oracle 10G Data Guard Real-Time Apply doesn’t introduce any corruption of Data∙Oracle Corporation has confirmed, as of now, for usage of this feature no bug has been observed which could potentially lead to Data CorruptionOracle 10G Flashback Database Feature∙Oracle 10G Flashback Database feature will be enabled on both Primary & Standby∙Flashbacking capability will be defined for 5 days∙Also, Named Restore Points, as available in Oracle 10G R2, will be used∙The Restore Points will be created with ‘guarantee flashback database’ option∙Operations Menu will have option to manually register Restore points for flashback∙Menu will have option to display the Restore points & the time each Restore point the database can flashback to∙Menu will have option to issue command to flashback the database to a desired Restore Point∙Menu will have option to drop old & obsolete Restore Points∙For Batch Application, there will be a named Restore Point called ‘PreBatch’ automatically dropped and re-created from within the Application at the beginning of the Batch every day.∙In case of Batch failure, instead of a DBA Callout, using Menu, Operations Support will Flashback the database to the Restore Point ‘PreBatch’∙Currently to recover from that scenario, a DBA call out is necessary and would take about approximate 3-4 hours to recover the Database from the Backup∙Also, currently after a Failover, DBA needs to rebuild the original Primary as the current Standby from a most recent backup of the new Primary∙If Flashback feature is enabled, then this lengthy procedure can be avoided because a Flashback enabled Primary database can be easily rewound to a consistent point and then be made as new Standby and start receiving & applying logs from the new Primary ∙Another call was logged with Oracle to confirm that Oracle 10G Flashback Database feature doesn’t introduce any corruption of Data∙Oracle Corporation has confirmed, as of now, for the usage of this feature no bug has been observed which could potentially lead to Data Corruption∙Business has been made aware of that Flashback Database is applicable to address Logical Errors only, it is not a replacement for Database Media Recovery required after a Media failure.Possibility of using Standby Database as Reporting Server∙This is very much possible, but when the Standby database is opened for Reporting it can not apply logs, so DR environment is compromised∙To address that situation, two Physical Standby Databases could be configured, One perpetually remaining in Managed Recovery mode providing DR, and the Otherremaining in Managed Recovery mode but earmarked for Reporting, and the latter canbe taken out of Managed Recovery mode when desired and can be opened in Read Only mode for Reporting∙The Change of State of a Physical Standby between Managed Recovery Mode & Read Only Mode is not automatic and has to be achieved using Operations Menu when desired or through the Report Job at the beginning of running report∙Possibility of using a Logical Standby for Reporting could be explored (Business has been informed that using Oracle Application Express as Reporting tool, the usage ofLogical Standby as Reporting Server has been implemented in another Client Site) ∙Oracle Data Guard Logical Standby, unlike Physical Standby, is an Open Database where Oracle applies Sqls instead of Redo Logs∙Oracle Logical Standby also supports Real Time Apply and Flashback features∙In previous versions of Oracle, a Physical Standby could have only two modes –Managed Recovery mode or Read Only mode∙Oracle 10G R2 has introduced a Read Write Mode of a Physical Standby, which gives the capability of opening Standby for not only doing Selects but also DMLs for runningjobs, at the end of which it can be flashed back to a Restore Point and then can beconverted back as Physical Standby and be put back in the Managed Recovery modeagainOverview of Oracle 10G Data Guard TechnologyOracle 10G Data Guard is vastly improved from its previous versions and addresses the High Availability in a very effective manner.Oracle Data Guard offers two types of Standby features – Physical Standby & Logical Standby. Physical Standby replicates data from the Primary by way of applying the Redo generat ed on the Primary.Logical Standby replicates data from the Primary by applying sql statements mined by the Log miner from the Archive Redo logs. (Logical Standby implementation is described in detail in a previous presentation at NZOUG 2005.au/pls/portal30/docs/FOLDER/NZOUG_CONF_07/MITRA+-+TAPAN.PDF) Physical Standby can operate in 3 modes: Managed Recovery Mode, Read Only Mode & temporary Read-write Mode.Oracle Data Guard has 3 protection modes – Maximum Protection, Maximum Availability & Maximum Performance.Data Guard consists of 3 main services, namely:∙Log Transport Services, which control transfer of redo data from Primary to Standby in automated manner∙Log Apply Services, which apply redo data on the StandbyRole Management Services, which handle the change of role of a database from Standby to Primary or from Primary to Standby using either Switchover/Switchback or Failoveroperation.The difference between Redo Apply & Real-Time ApplyNormally, by default, Archiver processes will be responsible for Redo Transport from Primary to Standby.Once a log switch happens on the Primary, the online redo log is archived in the Local Archive destination as pointed to by Log_archive_dest_1 by an Archiver process. Another Archiver process will then transmit the redo to the remote standby destination as indicated byLog_archive_dest_2. Data Guard Remote File Server (RFS) Process on the Standby then writes redo data from the Standby redo log file to archive redo log file. Log apply services then makes use of Managed Recovery Process (MRP) process to apply the redo to the standby database.This method of propagating redo from the primary to standby is called Redo Apply and it happens only on log switch at the Primary.When using Redo Apply mode, the status of MRP in v$managed_standby view will show as WAIT_FOR_LOG.Real Time Apply, in contrast, uses either LGWR or Archiver on the Primary to write redo data to Standby Redo log on the Standby and Log Apply Services can apply the redo data in real-time without the need of the current standby redo log being archived. Once a transaction is commit ted on the Primary, the committed changes will be available on the Standby in Real Time even without switching the log.When using Real Time Apply mode, the status of MRP in v$managed_standby view will show as APPLYING_LOG.The Primary/Standby Pair Set upThe TNSNAME for the Primary is ‘proddb’.The TNSNAME for the Standby is ‘standby_proddb’.The Primary database must have to be in archivelog mode.The Primary database will have the following Data Guard related init parameters:The Standby database will have the following init parametersTNSNAMES entries will be as follows :In the respective Listener entries at the Primary & Standby hosts, SDU entry will be added as followsAs part of the Real-Time Apply, the two requirements are as follows:∙Use Log Writer (LGWR) for Redo Transport from Primary to Standby∙Standby Redo Logs must be available on the StandbyStandby Redo Logs of size similar to the online redo logs were created at PrimaryA cold backup of the Primary Database including datafiles, redo logfiles & standby redologfiles was transferred to the Standby Host.A Standby Controlfile was created on the Primary and transferred to Standby.On Primary the following command was used to create a standby controlfileOn StandbyFrom this Standby controlfile, multiplex ed controlfiles were created at their respective locations with proper names as mentioned in the init parameter file.Then the Standby database is started in mounted mode:Following is the command to put the Standby in Redo Apply mode:Following is the command to put the Standby in Real Time Apply mode:Cancelling Managed RecoveryAt any time, to cancel Managed Recovery, either using Redo Apply or Real Time Apply, following command is used:To put the Standby database in Read-Only mode, following command is used:In pre Oracle 10G versions, to open a Standby database in Read-Only mode, the ‘read only’This clause is not needed in Oracle 10G any more.Oracle Flashback DatabaseOracle Flashback Database is an Oracle 10G RDBMS technology feature which allows the database to be rewound back to the past to a particular SCN, Point in time timestamp or a defined Restore Point.This is possible by defining a Flashback Area & a Flashback Retention Period and turning on the Flashback capability within the Database (Guaranteed Restore Points can be created with or without Flashback database feature ON). The database must be in Archivelog mode.Following are the parameters defined for Flashback in Pre-Production:As the transactions progress in the Database, Oracle 10G RDBMS RVWR process at regular intervals generates flashback logs in the flashback area. Flashback logs contain copies of thepre-images of all altered blocks in the datafiles.An estimation of how much space needs to be added to the flash recovery area for flashback logs can be done by monitoring v$flashback_database_log view after running the database for a workload with a desired flashback retention target.Flashback Recovery Area can be monitored using views v$flash_recovery_are a_usage &v$recovery_file_dest.Demonstration of Data Guard Real-Time Apply & Flashback Database featuresFirst we do the Real-Time Apply DemoOn PRIMARY, count the number of rows of a tableOn STANDBY, check the number of rows and verify that it matches with that on Primary & then put the Standby in Real Time Apply modeOn PRIMARY, increase the number of rows of the table from 7 to 56, commit & do not switch logOn STANDBY, check that it has applied redo from Primary in Real Time without a Log Switch on PrimaryNow we do the Flashback Database DemoWe turn on flashback in both Primary & Standby Databa se s now On PRIMARYOn STANDBYOn PRIMARY, find out the current scn and increase the number of rows from 56 to 224On STANDBY, check that number of rows has gone up to 224On PRIMARY, Flashback the database to the previously recorded SCN 489802 and check that the number of rows of the table has gone back to 56On PRIMARY, obtain the value of (resetlogs_change# - 2) from the view v$databaseOn STANDBY, obtain the current_scn from the standby databaseIf the current_scn on the Standby is more than (resetlogs_change# - 2) on the Primary, flashback the Standby database to (resetlogs_change# - 2) and open it to check that the number of rows has gone back successfully to 56Restore Points - Facts about Re store PointsFrom Oracle Version 10G R2, Oracle has introduced named Restore Points the database can flashback to.There are two types of Restore Points – Normal Restore Point & Guaranteed Restore Point. Creation of Restore Points makes entries in the controlfile.Normal Restore Point is like a bookmark to specific time or scn.Guaranteed Restore Point is different from Normal Restore Point, Guaranteed Restore Point s can be created in the database with or without ‘Flashback Database’ feature on.Guaranteed Restore Point, taken at a particular SCN ensures that the database can be flashed back to that scn, even if the flashback logging is not enabled in the database.Guaranteed Restore Point with flashback logging enabled makes sure that flashback logs will be retained to be able to flashback the database to any point in time after the creation of earliest Guaranteed Restore Point.Following is an example of how to define a Restore Point with a Guaranteed Clause, which will ensure that the database can be flashed back to the named restore point.This example is without Flashback Database Feature on.On STANDBY, create a Guaranteed Restore Point PRE_INSERT_STANDBY even without enabling Flashback database featureFor normal restore point storage_size will be zero.On PRIMARY, create a Guaranteed Restore Point PRE_INSERT_PRIMARY. If the Flashback feature is not on, creation of first guaranteed restore point will need database to be in mount mode.Then, Increase the number of rows in the table from 57344 to 114688On STANDBY, cancel managed recovery and check that number of rows in the table ‘test’ has become the same as of Primary, then put it back into the Managed Recovery modeOn PRIMARY, flashback database to the Guaranteed Restore Point PRE_INSERT_PRIMARY and check that the number of rows has gone back to 57344On STANDBY, flashback standby database to the Guaranteed Restore PointPRE_INSERT_STANDBY and check that the row counts has gone back to 57344.Then put it back into Managed Recovery ModeOn PRIMARY, switch a log file for resynchronisationDemo of using Physical Standby in Temporary Read-Write modeIn Oracle 10G R2, flashback database beyond resetlogs capability enables usage of Physical Standby in Read Write mode for more effective application testing/processing instead of just query processing which is possible in Read Only mode.On STANDBY, create a Restore PointOn PRIMARY, a logfile is switched and remote log shipping is disabledOn STANDBY, activate the Standby database and open for Read WriteOn this Activated database, do some DMLNow, we revert the temporarily activated database back to become Physical Standby database again by flashing it back to the defined Restore PointOn PRIMARY, enable log shipping to standby and switch logfileOn STANDBY, Real Time Apply starts again from the same pointFew Observations∙So far, the best version to turn on the flashback feature in the database is Oracle Server Enterprise Edition - Version 10.2.0.3, as it has addressed few bug fixes around flashback ∙Oracle Server versions 10.1.0.1 to 10.1.0.4 have got few bugs and issues with flashbackse.g.Instance crashes when the Flashback Log is Inaccessible Ref: Metalink Note311150.1Bug 4764435 ORA-600[2662]After Flashback, Recover and Flashback, bugfixed in Oracle version 10.2.0.2Bug 5106952 Flashback Log space not being reclaimed, bug fixed in Oracleversion 10.2.0.3Bug 4874986 OERI[2142] while using flashback feature, bug fixed in Oracleversion 10.2.0.3∙It has been observed that when a Batch Stream ran, it generated about 200MB worth of Archive Logs, it also generated similar amount of Flashback Log∙For a Batch Run of 15 minutes, It has taken about 6 minutes to Flashback the entire database to the PreBatch State∙By doing comparisons between database runs with & without Flashback, no major performance degradation has been observed in the Flashback enabled database for both OLTP & Batch operations. Of course, any performance impact for flashback logging in avery high volume transaction oriented system should be measured in a test/pre-production environment before implementation∙By doing comparisons between database runs with & without Real Time Apply, no major performance degradation has been observed for both OLTP & Batch processing in theReal Time Apply enabled Data Guard environment∙Guaranteed Restore Points with Database Flashback logging can cause significant space pressure in the flashback recovery area (to satisfy guarantee, flashback logs are notdeleted even if there is space pressure) and hence close monitoring is required to check the space used in the flash recovery areaIn conclusion, Oracle 10G Data Guard Real Time Apply & Flashback Database features are great advancements in Oracle RDBMS technology and by utilizing those features the High Availability requirements of the Databases and the Applications could very well be established.Ref used: Oracle 10G R2 Documentations & Oracle Metalink Knowledge Base。
