唐信电话录音系统说明书_T3系列
T3用户使用说明书v2.3

LOGOT3产品使用说明书(2010-12-2)感谢您购买T3。
本手册能够帮助您了解T3的功能与特性。
使用本产品之前,请先仔细阅读本手册,并在充分理解内容的基础上,正确使用。
本手册中的所有描述均基于T3的默认设定。
请妥善保存本手册,以便日后能随时查阅。
目录1 概述 (4)1.1 外观 (4)1.2 配件 (4)1.3 3D电磁笔 (5)1.4 按键与接口 (6)1.5 存储卡 (7)1.6 电池及充电 (8)2 使用入门 (9)2.1 开机和关机 (9)2.2 开启和关闭屏幕 (9)2.3 取笔 (10)2.4 主界面 (10)2.5 触摸屏 (10)2.6 状态栏 (11)2.7 通知面板 (11)2.8 输入文本 (12)2.9 连接网络 (13)2.10 使用U盘模式 (14)2.11 安装和卸载应用程序 (15)2.12 系统升级 (16)2.13 恢复出厂设置 (16)3 桌面 (17)3.1 切换屏幕 (17)3.2 添加内容到屏幕 (17)3.3 移动屏幕上的内容 (17)3.4 从屏幕上删除内容 (18)3.5 更改壁纸 (18)3.6 访问最近使用过的程序 (18)4 设置 (18)4.1 访问设置功能列表 (18)4.2 日期和时间 (18)4.3 声音设置 (19)4.4 调整音量 (20)4.5 显示设置 (20)4.6 语言区域 (21)4.7 SD卡和机器内存 (21)4.8 重力感应 (22)5 浏览器 (22)5.1 关于浏览器 (22)5.2 浏览网页 (22)5.3 书签 (22)6 记事本 (23)6.1 关于记事本 (23)6.2 添加删除记事本 (23)6.3 使用记事本 (24)6.4 查找笔记 (24)6.5 笔记分享 (24)6.6 笔记加密 (24)7 手写邮件 (25)7.1 关于手写邮件 (25)7.2 首次设置电子邮件账户 (25)7.3 手动设置帐户 (25)7.4 删除邮箱帐户 (27)7.5 更改电子邮件账户设置 (27)7.6 撰写邮件 (27)7.7 添加附件 (27)7.8 发送邮件 (28)7.9 接收邮件 (28)7.10 阅读邮件 (28)7.11 查看附件 (28)7.12 邮件提醒 (28)8 掌上证券 (28)9 商务助理 (29)9.1 Office (29)10 E本网 (29)10.1 关于E本网 (29)10.2 E本网有哪些服务 (29)10.3 如何登录E本网 (29)11 休闲娱乐 (30)11.1 游戏 (30)11.2 音乐 (30)11.3 媒体播放器 (32)12 安全加密 (32)13 产品规格 (33)13.1 规格 (33)13.2 安全和清洁 (33)14 如何获得服务与支持 (35)1概述欢迎您使用T3。
SYNCO WMic-T3 耳机说明书
SYNCO WMic-T3,WMic-T3 Microphone User Manual**********************ContentsPackage List (1)Main Features (2)Notice for Using SYNCO WMic-T3 Microphone (3)Components and Instruction (4)① Transmitter and Receiver② Function Button Instruction③ Indicator Light Instruction④ Screen Display Specifications (9)Warranty (11)Total 100 channels for your choices Array75Hz / 150Hz low-cut filter for noise reduction Suitable for different scenariosReset function to restore the initial settingsMono / Stereo output180m working distance in the line-of-sight area, 100m in obstacle area Dual-channel receiver can work with two transmittersAll metal housing for excellent shielding performanceThe transmitters and receiver should keep a distance of more than 20cm with each other while using.Otherwise, the wireless signal receiving part of the receiver will perform a protective action, turning off the wireless signal reception, and the audio may be interrupted. This is a normal phenomenon;When using auto IR sync, please keep the product within 30cm, otherwise the signal may be too weak and the sync will fail;In the case of stereo/mono mode switch, please preset the mode before using to avoid the transient interference caused by switching during usage;The antennas will affect the working distance. Please protect the antenna and avoid any man-made damage;When using this product in a short distance, it is recommended to set RF strength at ‘LOW’ to reduce the power consumption;Please keep this product in dry environment;Do not expose the device in rain or humid environment, otherwise there will be a danger of short circuit;①②③④⑤⑥⑦⑧⑨⑩⑪⑫⑬⑭AntennaIR Frequency MatchingIR IndicatorAudio IndicatorLCD ScreenPower Button (MUTE)MIC / LINE IN InputType-C PortForced Shutdown"SET" Menu Button1/4" Mounting HoleFunction Selection Button △Function Selection Button ▽Belt ClipTransmitter (TX)⑥①②③④⑤1. Structure①②③④⑤⑥⑦⑧⑨⑩⑪⑫⑬⑭⑮⑯AntennaIR Frequency Matching Group A Working Status Indicator Group B Working Status Indicator LCD ScreenPower Button Antenna3.5mm Audio Monitoring Socket 3.5mm Audio Output Socket Type-C Port Forced Shutdown "SET" Menu Button1/4" Mounting Hole Function Selection Button △Function Selection Button ▽Belt ClipReceiver (RX)Signal Strength HighSignal Strength Low 4. Screen Display Transmitter Receiver Group B Signal Strength Display Bar Power Indicator Group B Receiving Audio Status Indicator Group B Group B Transmitter Power Channel of Group B Frequency Transmitter AUDIO Green Light Keeps On Normal recording statusMuting modeChannel doesn’t matchIR matchingNormal working status after the channel matches Red Light Keeps On Red Light Flicker Green Light Keeps OnGreen Light Flicker IR A IR/RF B IR/RF Receiver 3. Indicator Light InstructionChannels Group A Wireless Frequency Group B Wireless Frequency Antenna Transmitting Power Stray Radiation Sound DelayLow-cut Filter Audio Output ScreenAudio Distortion Working DistanceChannelsGroup A Wireless FrequencyGroup B Wireless FrequencySignal / NoiseSensitivityAntennaSound DelayHeadphone Output PowerAudio OutputVolumeScreenAudio Distortion100UHF 512~537MHzUHF 564~589MHZ1/4 Wavelength WireAntenna10mW/30mW<-60dBc<20ms75Hz/150HzMono/StereoLCD Display<0.5%@1KHz180m in line-of-sightarea, about 100m inbarrier area100UHF 512~537MHzUHF 564~589MHZ≥85dB–95dBm1/4 Wavelength WireAntenna<20ms100mW@32ΩMono/Stereo0-15 LevelLCD Display<0.5%@1KHzTransmitter (TX)Receiver (RX)PowerBatteryWorking TimeMaterialCompatibilityDimensionOperating TemperatureStorage Temperature Working Distance Power Battery Working Time Material CompatibilityDimension Operating Temperature Storage TemperatureType-C Charging≤3.5H, DC5V@≥1000mA Built-in Li-ion Battery, 3.7V@1800mA/H 10 Hours Aluminum Alloy For Camera/Camcorder/ Smartphone94×58×20.3mm 0℃ ~ 50℃-20℃ ~ 60℃180m in line-of-sight area, about 100m in barrier area Type-C Charging≤3.5H, DC5V@≥1000mA Built-in Li-ion Battery, 3.7V@1800mA/H10 Hours Aluminum Alloy For Camera/Camcorder/ Smartphone94×58×20.3mm 0℃ ~ 50℃-20℃ ~ 60℃Warranty PeriodThank you for purchasing SYNCO products.1. Customers are entitled to free replacement or repair service in case of quality defect(s) found in the product under normal use within 30 days upon receipt of the product.2. Original SYNCO products are entitled to 12-month limited warranty service. The warranty period begins on the date of purchase of brand new, unused products by the first end-user.Within the warranty period, if product defect or failure is attributable to material defection or technological problem, the defective product or defective part will be repaired or replaced without charge (service and materials fee).Warranty Exclusions and LimitationsFaults resulted from inappropriate use of a product without following its operation specification Artificial damage, e.g. crash, squeeze, scratch, or soakingModifications to a product by its user or a third party without prior written consent of SYNCO, e.g. replacement of element or circuit, label alterationThe code on product is inconsistent with that of warranty certificate, or the code on the product or warranty certificate is altered or torn offAll consumable accessory attached to a product, like cable, wind muff, batteryFaults as a result of force majeure, such as fire, flood, lightning, etc.Warranty Claim ProcedureIf failure or any problem occurs to your product after purchase, please contact a local agent for assistance, or you can always contact SYNCO’s customer service through email at**********************.Please retain your sales receipt and warranty certificate as proof of purchase. If any of these documents is missing, only sales return or chargeable service will be provided.If the SYNCO product is out of the warranty coverage, the service and the parts cost will be charged.Solved Unsolved Returned(Replaced)。
STLAN网络型数字录音系统(增强版)使用手册 v1.1
STLAN网络型数字录音系统使用手册V1.1版权所有©2013杭州雨燕电子科技有限公司目录1公司简介 (4)2.1简介 (5)2.2主要特性 (5)2.3主要功能 (5)2.4设备参数 (6)2.5软件运行环境 (6)3示意图 (7)3.1网络结构图 (7)3.2设备接口示意图 (8)4安装 (10)4.1硬件安装 (10)4.1.1接线 (10)4.1.2设置设备的IP地址 (10)4.2软件安装 (11)5使用说明 (14)5.1录音 (14)5.1.1录音启动方式 (14)5.1.2录音时段 (15)5.1.3文件格式和编码格式 (16)5.1.4自动增益(AGC) (17)5.1.5录音文件存放路径 (17)5.1.6告警和循环录音 (18)5.1.7禁止录音的电话号码 (19)5.2查询、播放和编辑 (21)5.2.3查询录音记录 (21)5.2.4选择要显示的详细信息 (23)5.2.5播放录音文件 (24)5.3实时监听 (26)5.4备份 (26)5.5导出和导入 (27)5.6日志 (28)5.7查看磁盘可用空间 (29)6Web访问 (31)6.1远程用户权限管理 (31)6.2启动Web服务 (32)6.3Web登录 (33)6.4Web查询 (34)6.5Web播放 (37)6.6Web查看通道状态 (38)6.7Web修改密码 (39)7注意事项 (42)7.1主叫(来电)显示 (42)7.2影响录音的CPU占用率 (42)7.3网络带宽 (42)附录A Internet NAT开端口 (43)附录B图表目录 (44)1公司简介杭州雨燕电子科技有限公司(以下简称雨燕电子)成立于2008年,是一家专注音频采集和通讯行业的高科技企业。
目前,雨燕电子的主营产品是现场拾音器、各种录音设备(包括电话录音,现场录音,会议录音)等产品。
雨燕电子的宗旨是,让沟通更美好!2概述2.1简介随着技术的进步和市场的需要,雨燕电子公司推出了新一代的网络型数字录音系统STLAN,该系统采用了以太网接口,通过TCP/IP等协议通行和数据传输,完全独立于计算机硬件,安装简单、使用方便、功能强大,除了通常的多通道录音和查询播放等功能外,还可以集中录音管理、远程实时监听、导入导出数据和备份等。
T3使用手册

MOTOA780—T3 使用手册二○○六年第一版目录前言 (3)一、防火墙的使用 (3)二、无声拍照 (6)三、内存扩展 (8)四、手机提速 (9)五、手机抓图 (11)六、响铃设置 (11)七、声震同步 (12)八、重启手机 (13)九、幻铃王的使用 (14)十、超级任天堂模拟器的使用 (15)十一、动态屏保 (19)十二、主题管理器 (20)十三、电子书院 (21)十四、自定义字体 (22)十五、换图精灵 (23)十六、世嘉模拟器 (24)十七、主题精灵 (25)十八、备份电话短信 (26)十九、无声拍照 (27)二十、个人文件夹 (27)二十一、开关机铃声的改变 (28)二十二、EQ播放器 (29)二十三、自动背光灯 (30)二十四、flash播放器 (30)二十五、蓝牙音频 (31)二十六、掌上电视 (32)二十七、歌词同步 (33)二十八、暴风影音使用说明 (35)前言T3刷好的朋友可以检查一下版本号如下图下面说明一下T3里面所有功能都是双向选择所以下面只写开启方法,如果想取消再点一下就显示关闭了。
一、防火墙的使用首先找到防火墙打开(废话,难道打119)如下图然后点开如下图选择启用注意事项本版本不同于网络上免费的防火墙有挂断的声音,而且是完全是不占内存的版本。
对方听到一音短暂的接通声然后很快就滴滴一声或者直接就没有了反映,不会让对方以为是挂断了,同时本机上没有来电未接的提示:-p 实现了真正意义上的拒接来电。
是最新一代的防火墙。
并且增加了拒接来电时间记录的功能。
本版本我称其为T3-1版本。
使用注意:切记如果设置为来电禁音或震动就不能自动挂断来电。
以后将增加拒接来电记录的功能。
使用方法:在手机上用录音机录制一个短暂的无声文件并改名为deny.amr,如图:第二步,在您的电话联系人找到你要设为拒接人的电话,如图点击“编辑”出现下图找到“铃音”选项,选择“浏览”找到“deny.amr”这个文件的储存位置选中“deny.amr”并点击“插入”,此时会现以下界面点“完成”即可然后启动来电防火墙就可以了。
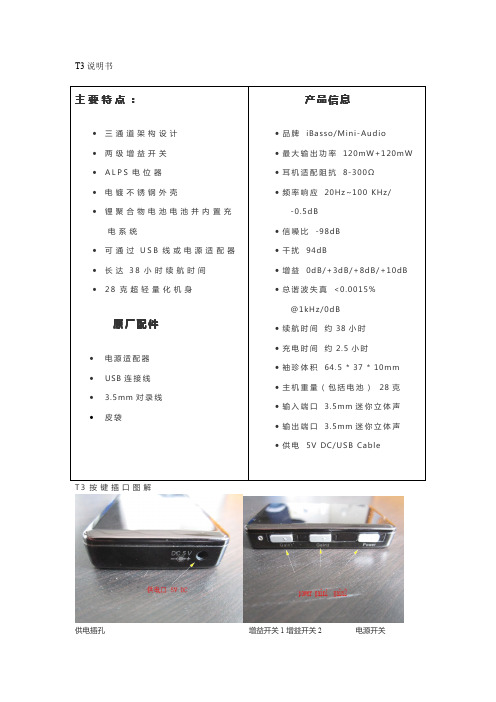
t3说明书
产品信息
• 品 牌 iBasso/Mini-Audio • 最 大 输 出 功 率 120mW+120mW • 耳 机 适 配 阻 抗 8-300Ω • 频 率 响 应 20Hz~100 KHz/
-0.5dB • 信 噪 比 -98dB • 干 扰 94dB • 增 益 0dB/+3dB/+8dB/+10dB • 总 谐 波 失 真 <0.0015%
T3 说明书
主要特点:
• 三通道架构设计 • 两级增益开关 • ALPS 电 位 器 • 电镀不锈钢外壳 • 锂聚合物电池电池并内置充
电系统 • 可 通 过 USB 线 或 电 源 适 配 器 • 长 达 38 小 时 续 航 时 间 • 28 克 超 轻 量 化 机 身
原厂配件
• 电源适配器 • USB 连 接 线 • 3.5mm 对 录 线 • 皮袋
本质保不包含事故变更,水分渗入,修改未经授权 的服务,
误用、滥用,采用与产品不相容的附件,附件或未按操 作,或索
赔的时间后做出此范围内。为进一步了解产品和质 量信息,关 1 增益开关 2
电源开关
轮式音量调节器
3.5mm 输出\输入插孔
注意事项
增益开关调节介绍,例如:当按键在1和3时 增益为零。详细请看下表。
请注意不要长时间使用过高的音量,以免听觉永久 性受损。 电源灯闪烁时,正在充电。电源适配器 USB 缆线都 可充电 本产品有过充保护 质保 在购买之日起一年内非人为损坏,凭保修卡得到质 保维修。
@1kHz/0dB • 续 航 时 间 约 38 小 时 • 充 电 时 间 约 2.5 小 时 • 袖 珍 体 积 64.5 * 37 * 10mm • 主 机 重 量 ( 包 括 电 池 ) 28 克 • 输 入 端 口 3.5mm 迷 你 立 体 声 • 输 出 端 口 3.5mm 迷 你 立 体 声 • 供 电 5V DC/USB Cable
WTN3语音芯片说明书资料V0.15

引脚描述........................................................................................................................................................................... 3
(3).输出信号 (IO1, IO2)................................................................................................................................................... 7
(f).脉冲不可重复........................................................................................................................................... 9
应用举例........................................................................................................................................................................... 3
直流特性........................................................................................................................................................................... 4
唐信电话录音系统说明书
目录第一章前言 (2)第二章基本功能 (3)第三章安装及连接 (4)3.1微机配置 (4)3.2 P111、P112型号安装及连线 (4)3.3P102、G102型号软件安装与硬件连接 (8)3.4录音卡(P311、P312、P201、P202)安装及连接 (13)3.5 E1 30B+D PRI卡连接及安装 (19)3.6 嵌入式电话录音系统 (25)第四章常用功能设置 (25)第五章软件操作 (27)5.1 主工作界面及通道状态说明 (28)5.2 登录系统 (28)5.3 软件设置 (28)5.3.1 录音设置 (28)5.3.2 硬盘管理 (29)5.3.3密码设置及权限分配 (30)5.3.4 座席设置(POPUP来电弹屏系统) (31)5.3.5 分机功能 (31)5.3.6 声音播放方式设置 (33)5.3.7 如何隐藏录音系统 (33)5.3.8 FTP备份 (33)5.3.9 特殊号码处理 (34)5.4 录音查询 (34)5.5自动回复及留言 (37)5.6 通话监听 (40)5.6.1 本地监听 (41)5.6.2网络监听(Lan\Internet).................................................................. .. (41)第六章POPUP客户信息弹屏系统 (41)6.1弹屏系统功能说明 (41)6.2 单机版弹屏设置方法 (41)6.3 网络版弹屏设置方法 (42)6.4 系统设置 (42)6.5 客户管理 (43)6.6 来电日志 (44)第七章Client(客户查听端使用) (44)7.1 客户查听端安装 (45)7.2 如何使用录音系统查听客户端 (45)7.3 在客户查听端按指定通道查询录音 (47)第一章前言欢迎您选用Tansonic唐信电话录音系统!在安装及使用Tansonic唐信电话录音系统之前,请先详细阅读本说明书。
唐信电话录音系统说明书_PCI录音卡
内录音,也可以是 24 小时录音,录音起始时间可以灵活设置。
4、方向辨别
自动辨别电话的“拨出”或“拨入”方向,自动检测来电制式并记录所有外
拨电话号码与来电显示号码。
5、实时监听
可实时监听每一条通道的通话内容。
6、自动循环录音
可以设置多达 4 个盘(可以是硬盘、分区或网络映射盘)自动循环录音,当
系统的硬盘空间将满时,系统将自动清除最先录音的文件,确保系统常年不间断
操作系统。
800MHZ Pentium 系列 CPU 以上 可用的 PCI 插槽、一个以上 USB 接口 内存 256M(视配置的增加须适当增加)
硬盘 40G 以上(在压缩比为 1:4 的情况下,每 G 每通道可录约 140 小时,40G 可录约 5600 小时,80G 可录约 12000 小时)
音箱
12、网络查听
在一台 PC 安装电话录音系统以后,可以在局域网里的其它 PC 查听录音。
13、用户管理
系统具有多级用户管理功能,不同权限的用户只能操作其相应的功能。
14、留言信箱
让您的企业不错过任何一个商机,第一时间回复客户,提高客户满意度。在
您的电话无人应答时,将自动转入语音留言系统,并记录下每一次的留言内容,
5.9 未接电话…………………………………………………………………………………………………36
5.10 日志浏览…………………………………………………………………………………………………37
5.11 启动弹屏…………………………………………………………………………………………………36
5.11.1 弹屏系统功能说明……………………………………………………………………………………..36
电话录音系统—用户手册0.0.1
电话录音系统——用户手册文档状态: 文档编号: DHLY-SOLUTION[ ] Draft[√] Released[ ] Modifing编 撰: 宇同阳光 编撰日期: 2009-05-11保密级别: 机密文档版本: 0.0.1电话录音系统用户手册昆明宇同阳光信息技术有限公司地址:昆明市龙泉路云南财经大学博华楼一楼电话:(0871)—8042285,8042286 传真:(0871)—8042284目录第一章前言 (3)第二章系统配置说明 (3)1、程序结构 (3)1.1、录音服务程序结构 (3)1.2、录音记录管理程序结构 (4)1.3、数据库 (4)2、首次使用配置说明 (5)2.1、录音服务程序 (5)2.2、录音记录管理程序数据连接hibernate.cfg.xml (5)2.3、附加数据库 (5)第三章系统操作说明 (6)1、运行录音服务程序 (6)2、设置开机启动 (6)3、启动录音服务 (6)4、停止录音服务 (7)5、退出录音服务程序 (8)6、打入、打出电话 (8)7、录音记录管理 (9)7.1、打开录音记录管理程序 (9)7.2、查询录音记录 (9)7.3、播放录音 (10)7.4、录音记录归档 (12)用户手册第一章 前言在工作中一下关键的领域,需要对打入打出电话进行录音,实施电话语音监控,并希望对这些录音实现可查询、可管理、可调出播放等功能。
电话录音系统便提供了这种功能,录音对于打电话的双方是透明的,且录音和管理是分开的,这样在提高程序的隐蔽性和监控性。
第二章 系统配置说明1、程序结构电话录音程序分为两个部分,即录音服务程序以及录音记录管理程序:1.1、录音服务程序结构录音服务程序包含以下文件及文件夹电话机电脑 录音服务电话语音电话网络 数据库服务器录音记录库Web 服务器 录音记录管理程接话员记录管理文件名说明recodServer.exe 可执行文件dbconfig.ini 数据库连接配置.h、.dll、.lib 程序运行的必备文件voice 录音文件的临时文件夹,注意:里面的录音文件可以删除,但文件夹不能删除语音卡驱动程序首次使用前必须先安装此驱动程序1.2、录音记录管理程序结构录音记录管理程序video,其中数据连接配置文件video\WEB-INF\classes\jdbc.properties,归档时用到的关联业务下拉选择框中的关联业务配置文件video\app\source\linkBusiness.xml,部署后程序反问URL是 http://{服务器IP}:{端口}/video/app/main.html1.3、数据库数据库是record_db,存储记录的表名tb_record_voice。
录音系统使用说明-etlog用户手册(精简)
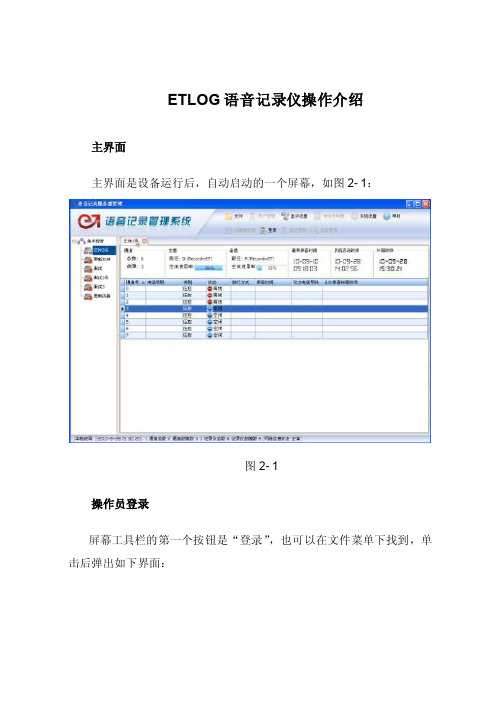
ETLOG语音记录仪操作介绍主界面主界面是设备运行后,自动启动的一个屏幕,如图2- 1:图2- 1操作员登录屏幕工具栏的第一个按钮是“登录”,也可以在文件菜单下找到,单击后弹出如下界面:图2- 2ETLOG语音记录仪出厂前的默认设置有一个超级管理员:1. 操作员:etlog(系统管理员)密码:123(可以更改)如果想为不同的操作人员设置不同的操作员代码,并根据不同的密码进入系统,可以增加新的操作员代码,并设置密码;也可以删除已经存在的操作员。
具体操作参考“用户管理”。
录音查询条件选择图2- 31.根据录音时间查询:输入“起始时间”、“结束时间”,点击“查询”按钮即可,查询时间可以精确到秒。
2.根据所录电话的通道号查询如果你只想选择ETLOG语音记录仪监控的某路电话的录音,请单击“选择”按钮,弹出“通道列表”对话框,选择你要查询的通道,默认查询所有通道的记录,界面如下:图2- 43.根据拨号方式和电话号码查询:1) “拨号方式”项列出了四种类型:所有记录、所有拨入、所有拨出、未接电话,默认为“所有记录”。
2) ETLOG语音记录仪可以记录未接电话,如果你想查询某个被监控电话的未接记录,请选择“未接电话”,录音长度为振铃长度。
3) 如果您想根据主叫方或者被叫方的电话号码来查询,请在“电话号码”框输入相应的电话号码进行查询。
4.根据注释进行查询:选择“注释”项,是根据您所给定的注释条件来查找所需的录音记录;填入注释的关键字即可进行相关的模糊查询;如何给定注释请参考“注释”功能。
5.根据录音时间长度进行查询:如果您想查询录音长度大于多少秒的录音,则可选择“按录音长度”查询。
可以设置最小录音长度,单位是:秒,系统默认查询的是大于5秒的录音记录。
6.排序1)如果想让查询结果按一定的顺序排列,请单击列表某列的表头,进行升序或者降序排列。
2)默认按录音时间降序排列。
查询结果查询条件输入后单击“查询”,就会得到如图2-6所示的查询结果。
Jensen JWM72A 移动音频系统用户手册说明书
Installation and Owner's ManualMOBILE AUDIO SYSTEMJWM72AJWM72AIntroduction (3)Disc Notes (4)Installation (5)Wiring (6)Basic Operation (7)Tuner Operation (10)Disc Operation (11)DVD/VCD Operation (12)MP3/USB Operation (14)Bluetooth Operation (16)App Operation (17)Remote Control Operation (18)DVD Setup Menu (20)Care and Maintenance (22)Troubleshooting (22)Specifications (23)FCC Notice (23)INTRODUCTIONDISC NOTESInsert label side up.Do not bend.Never touch theunderside of the disc.INSTALLATIONWIRINGBASIC OPERATIONNote: Beep tone off will not affect the audible tone of the alarm clock.You can connect a USB device directly to USB interface (10) on the front of the JWM72A for playback of compatible files. Press the MODE button repeatedly until USB mode is selectable. Refer to “MP3/USB Operation” on page 13 for NOTE: USB will not support Apple device playback. The USB input suppliesJWM72ANo12 Device StatusUser OperationOperation ResultsRemarksHead UnitHead UnitTVTVPower ON (HDMI ARC)Power ON Power OFF Power OFF Power OFFPower OFFPower OFFPower ONPower OFFPower OFF(Last mode is HDMI ARC before Power OFF)Power OFF(Last mode is HDMI ARC before Power OFF)Power ON(HDMI ARC)DISC ModeDISC disc content TV, AV, USB, HDMI(non HDMI ARC)TV, AV, USB, HDMI(non HDMI ARC)TV, AV, USB, HDMI(non HDMI ARC)TV, AV, USB, HDMI(non - HDMI ARC)TV, AV, USB,HDMI(non- HDMI ARC)Power OFF Head Unit Power ON Head Unit Power ON Head UnitAudio OutAudio Out Audio Out Audio OutAudio Out Audio Out Audio Out No Audio out(No HDMI ARC Audio Out)TV CEC Mode OFF TV Audio Receiver OFF TV Audio Receiver ONTV CEC Mode ON Audio Recevier ONNo Audio OutNo Audio Out No Audio OutNo Audio OutNo Audio Out No Audio OutNo Audio Out TV Speaker ONTV Speaker ON TV Speaker ON TV Speaker ON TV Speaker ONIf the TV can play the device automatically, there will be TV audio out. Otherwise, switch to USB mode to play the device.Power OFF TVPower ON TV HDMI ARC ModeHDMI ARC ModeHDMI ARC ModePower ON (HDMI ARC)Power ON (Last mode before power off)34567 89 Switch Head unit to another mode(Such as FM, Bluetooth, DVD or AUX)Switch TV to another(such asTV, AV, USB, non-HDMI ARC mode)Switch to HDMI ARC Mode and Audio out from Head unit in HDMI ARC mode See the ARC function Operation in the following table:TUNER OPERATIONAutomatically Store / Preset Scan (AS/PS)Automatically StoreSelect a band. Press and Hold the AS/PS button (12) for more than3 seconds and the unit will automatically scan for and store 12 or 18 strongeststations for AM or FM respectively. To stop this function before the automatic storingis complete, press AS/PS again.DISC OPERATION2. Use the or cursor buttons (15) on the remote control to access the TRK ##/## –"1/18" indicates the first of 18 tracks on the CD is currentlyplaying.and “Press the button on the remote control (26) repeatedly to view the following information for elapsed/remaining playing time:00:02:18 –total elapsed playing time of current track;C –00 :34 :37–remaining playing time of current track;2. Use the ◄►or ▲▼cursor buttons (15) on the remote control to accessthe fields on the "PROG" screen.3. Use the number buttons on the remote control to enter a track number in each field.4. Press the u/|| button (17) on the remote control or highlight “PLAY” on screen and then press the ENTER button (5) to begin playback in the numbered order indicated to delete the list, highlight “CLEAR” and then press ENTERPROG to exit the programmed playback screen.TT 5/8 – “5 / 8" indicates the fifth of 8 titles on the DVD is currently playing. CH 2/16 – “2 / 16" indicates that the second of 16 chapters on the DVD is 1/5 ENG –English is the selected audio language out of 5 possible choices;5.1 CH –The current language is recorded in 5.1 surround sound;1/4 ENG –English is the selected subtitle language out of 4 possible choices;OFF –There are no alternate angles recorded for this scene.1Programmed Playback1. Press the PROG button (7) on the remote control to access the programmedMP3/USB OPERATIONSelect one of these icons to access the corresponding media on your disc or USBIf the media type is not present, the icon will not be selectable.Photos:VideoPlay/PausePress the || button (7) to suspend or resume media playback.Track Selector >>| buttons (6, 8) or |<< or >>|button (14) on the remote control toadvance to the next or previous track in the current folder. The selected track number4.Press the ENTER knob (4) to confirm selection.TRK ##/## – “9/150” indicates the ninth of 150 tracks on the disc is currently playing.– “X” indicates repeat play is OFF, “1” indicates repeat song, and “D” indicatesrepeat directory (folder).Press repeatedly to view the following information for elapsed/remaining playing00:02:18 – total elapsed playing time for discC –00 :34 :37 – remaining playing timeRemote Control Direct Track EntryTo select a file directly, use the number pad on the remote control (9). For singledigit entries, press the corresponding number. For two digit entries, press the10+ button followed by the last digit (i.e., for file 16, press 10+ and thenBLUETOOTH OPERATIONPausing PlaybackREMOTE CONTROL OPERATION1920 2122 23 24 25 26 2728TITLERPTANGLEGOTODisplayAS/PSMENUPress to view titlemenu. Use directionalarrows and play buttonto play selected title.May not be supportedby all discs.Repeat track Repeat chapterSOURCEZOOMAUDSelect source forplaybackAccess Audio Menuoptions.Browse preset stations(10 sec. interval). Pressand hold to scan/storestations.Access system MENU.Access system MENU.Access system MENU.Access Audio Menuoptions.Access Audio Menuoptions.Access Audio Menuoptions.Select source forplaybackSelect source forplaybackSelect source forplaybackSelect exact time, trackor chapter for playback.Select exact time, trackor chapter for playback.Select alternate viewingangle, if available.Zoom picture or pressrepeatedly to changemagnification level.Display currentplayback information onthe screen.Display currentplayback information onthe screen.Press to access systemMENU. Press and holdto access DVD MENU.JWM72ADVD SETUP MENU–TV System: This item is used to select a TV signal system to match your TV set. Select one of the following options: AUTO, NTSC or PAL.–Screen Saver: Turn Screen Saver feature On/Off.–TV Type: Select one of the following picture formats: 4:3PS, 4:3 LB or 16:9.4:3 is a letterbox selection, and 16:9 is wide screen.–Password: This item allows the selection of a new four-digit code to use for security purposes.–Rating: Select the parental control level for all DVD play. The security password is required to make changes to this feature.–Default: Use this item to restore default settings at any time. On-Screen Display (OSD) Language: Set the OSD language to one of the following: English, German, Spanish, French.Audio Language: Set the audio language to one of the following:English, Japanese, French, Spanish, Portuguese, Latin or German.Subtitle Language: Set the subtitle language to one of the following: English, French, Spanish, Portuguese, German or OFF.Menu Language: Set the menu language to one of the following: English, French, Spanish, Portuguese, German.While in the setup menus, use your directional arrows to select and changeAudio Out: This item defines the digital output format.Key: This item changes the audio output key.Video SetupDigital Setup The Video Setup menu controls the following features: The Speaker Setup menu controls the following features:–Brightness –Contrast –Hue –Saturation –Sharpness–OP Mode: Select LINE OUT or RF REMOD. –Dynamic Range: Select FULL, 6/8, 4/8, 2/8 or OFF. –Dual Mono: Select STEREO, MONO/L, MONO/R or MIX MONO.JWM72ACARE AND MAINTENANCETROUBLESHOOTING –Keep the product dry. If it does get wet, wipe it dry immediately. Liquids might contain minerals that can corrode the electronic circuits. –Keep the product away from dust and dirt, which can cause premature wear of parts. –Handle the product gently and carefully. Dropping it can damage circuit boards and cases, and can cause the product to work improperly. –Wipe the product with a dampened cloth occasionally to keep it looking new. Do not use harsh chemicals, cleaning solvents, or strong detergents to clean the product. –Use and store the product only in normal temperature environments. Hightemperature can shorten the life of electronic devices, damage batteries,and distort or melt plastic parts. Ignition Interference The most common source of noise in reception is the ignition system. This is a result of the radio being placed close to the ignition system (engine). This type of noise can be easily detected because it will vary in intensity of pitch with the speed of the engine. Usually, the ignition noise can be suppressed considerably by using a radiosuppression type high voltage ignition wire and suppressor resistor in theignition system. (Most vessels employ this wire and resistor but it may benecessary to check them for correct operation.) Another method of suppressionis the use of additional noise suppressors. These can be obtained from mostCB/A radio or electronic supply shops. Radio reception in a moving environment is very different from reception in a stationary environment (home). It is very important to understand the difference.AM reception will deteriorate when passing under a bridge or when passingunder high voltage lines. Although AM is subject to environmental noise, it hasthe ability to receive at great distance. This is because broadcasting signalsfollow the curvature of the earth and are reflected back by the upper atmosphere. Symptom Solution Radio will not turn ON or No front panel operation Radio turns ON,but no sound Bluetooth Device will not connect/pair CD/DVD does notplay correctly CD/DVD does notplay correctlyNo AM or FM reception DVD plays sound but no video Unit does not respond toRemote ControlTry the reset button. Check fuse.Check 12V+ on accessory wire to radio (RED wire)Check Ground.Verify Volume, Fader/Balance, Mute controls are set correctly (see owner's manual). Try the reset button.Verify proper speaker selection.Verify proper speaker connections.Check for shorts or open circuits on speaker wires.ŸIf short on “A” channel, “B & C” channels will continue tofunction.ŸIf short on “B and/or C” channels, “A” channel will continueto function. Make sure the disc is a compatible disc.Make sure unit has power and no other CD/DVD is currently inside.Make sure no devices are already connected. Disconnect any connected devices.On your smart device, turn the Bluetooth off and on and try again.Check to make sure disc is inserted correctly. Verify disc is free from dirt, scratches, etc. Check with factory Cds. Check factory original CDs for compatibility warnings (due tovarious copy-protection, multimedia content, etc.).Verify you are tuned to a valid station.Check your antenna connection on rear of stereo.Try a different antennaMake sure the HDMI cable is routed from the HDMI output tothe input on the television.Verify that you have a clear line of sight for the IR signal.Check the batteries. JWM72ASPECIFICATIONS。
3Mic AutoZoom+录音器说明书

Superior distance recordingwith 3Mic AutoZoom+Capture lectures and interviews in outstanding sound quality. The 3Mic AutoZoom+ technology suppresses surrounding noises for crisp and clearrecordings. A motion sensor automatically selects the right microphone for each situation.Superior audio quality• 3Mic AutoZoom+ recording for capturing distant speakers • Motion sensor for automatic microphone sensitivity adjustment • Pre-recording function for never missing a single word • MP3 recording for clear playback and easy file sharing Easy and intuitive experience• Large color display for clear recording status information • Calendar search for quick and easy retrieval of recordings • Rechargeable li-polymer battery for extra-long recording • Plug and play in Windows, macOS and Linux Designed around you• 8 GB memory built-in for up to 88 days of recording • MicroSD memory card slot for virtually unlimited recording • Robust and ergonomic metal design for extra durability • Voice-activation for hands-free recordingNo 1 in SPS globalcustomer satisfaction survey 09/2015.Voice TracerAudio recorderDigitalDistance recording 8 GBPC connectionDVT1110DVT60103Mic AutoZoom+When recording distant speakers, their voices are often too quiet. The innovative 3Mic AutoZoom+ technology, optimized for lectures and interviews, analyses the incoming audio signal and automatically adapts the zoom level to the distance to the sound source. Use 3Mic AutoZoom+ to focus on the directional center microphone and filter sounds from the side. Surrounding noises are suppressed while the speaker's voice is crystal clear.Motion sensorThe built-in motion sensor detects the recorder when it is placed on a desk or held and selects the microphone sensitivity to suit the recording situation preventing you from accidently blocking the audio you want to record.Pre-recording functionThe pre-recording function allows you to record the last five seconds before you press the record key. The device switches into a standby mode and records a five-second loop without saving it. Press the record key to save the five-second loop. This feature allows you to spontaneously record important parts of a conversation.MP3 recordingCapture your recordings in MP3. The popular file format allows you to play back your files virtually anywhere and simply share themwith others.Large color display The large color display offers sharp images, making it easier to see and read everything at first glance. The clear user interface supports eight languages and is optimized for easy, intuitive operation.Calendar searchA time stamp with the date and time is added to every recording, allowing you to easily navigate through your library and find files. Finding recordings is quick and easy.Extra long battery lifeThe high-capacity Li-polymer battery can be easily charged through a standard micro USB jack. This guarantees extended battery life for extra-long recording ensuring that yourrecorder will always be ready to work when you are.Plug and playThanks to Plug and Play in Windows, macOS and Linux, you can quickly access yourrecordings without installing any additional software. The recorder is automatically displayed as a removable drive once connected to your computer via USB. It can also be used as a convenient way to store, back up and share files.8 GB internal memoryCapture and store up to 88 days of continuous recording thanks to the 8 GB of internal memory.MicroSD memory card slotVirtually unlimited recording and storage capacity thanks to a microSD memory card slot supporting up to 32 GB of additional memory.Robust metal designIts robust and lightweight design maximizes comfort and the metal surface creates a robust shell around the device. With the integrated fold-out stand you can conveniently position the recorder towards the sound source. Two ergonomically placed soft keys allow for convenient, quick and direct access to the most important functions.Voice-activated recordingVoice-activated recording is a convenient feature for hands-free recording. When enabled, recording will start automatically when you begin speaking. Recording pauses when you stop and resumes automatically when you begin speaking again.Connectivity Headphones: 3.5 mmMicrophone: 3.5 mm, Built-in microphone, Microphone stereo socket Micro-SD card socket USB: High-speed USB 2.0DisplayType: LCD color display BacklightDiagonal screen size: 1.77"/4.5 cm Resolution: 128 × 160 pixels Audio recordingBuilt-in microphone: 3 MIC System, high-sensitivity, HQ Stereo, low-noise microphone Recording formats: MPEG1 layer 3 (MP3), PCM (WAV)Recording modes: PCM 1411 kbps, SHQ 192 kbps, HQ 96 kbps, SP 64 kbps, LP 8 kbps Sample rate: 44,1 kHz (PCM/SHQ), 32 kHz (HQ), 22 kHz (SP), 16 kHz (LP)Bit rate: 8, 64, 96, 192, 1411 kbps File overwrite and append mode Record monitor functionRecording time: 2280 h (LP), 284 h (SP), 190 h (HQ), 90 h (SHQ), 12 h (PCM)Silent recording mode Prerecording mode SoundSound enhancement: ClearVoice Frequency response: 50–20,000 Hz Signal-to-noise ratio: > 60 dB Speaker output power: 110 mW Speaker diameter: 28 mm Storage mediaBuilt-in memory capacity: 8 GB Built-in memory type: NAND Flash Mass storage class compliantTunerFrequency range: 87.5–108 MHz Station presets: 20Auto digital tuning Tuner bands: FM stereoSpecificationsMusic playbackCompression format: MP3, WMA Equalizer settings: Jazz, Pop, Classic ID3 tag supportMP3 bit rates: 8–320 kbpsWMA bit rates: 48–320 kbps (44 kHz), 64–192 (48 kHz), stereoConvenienceFirmware upgradeable Keypad lockMulti language: English, French, German, Spanish, Italian, Russian, Polish, Simplified ChineseVariable playback speed Voice volume indicator Voice-activated recording AutoAdjust+ recordingAutoZoom+ recording: 15 m zoom Calendar searchInstant one-touch recordingOptimized for notes, conversations, lectures and interviews PowerLi-polymer built-in batteryBattery lifetime: up to 50/25 hours in LP record mode (built-in memory / microSD memory card)System requirements Free USB portOperating system: Windows 10/8/7, macOS 10, Linux Design and finishingColour(s): Silver shadow/anthracite Green specifications Lead-free soldered product Package contentsRecorderStereo headphones USB cable Quick start guide Product dimensionsProduct dimensions (W × H × D): 4.5 × 12.5 × 1.8 cm / 1.75 × 4.9 × 0.71 inch Weight: 84 g/2.96 oz.EAN: 0855971006229Issue date 2016-07-08Version 1.0/dictation© 2016 Speech Processing Solutions GmbH. All rights reserved.Specifications are subject to change without notice. Philips and the Philips shield emblem are registered trademarks of Koninklijke Philips N.V. and are used by Speech Processing Solutions GmbH underlicense from Koninklijke Philips N.V. All trademarks are the property of their respective owners.。
igtronics Transcom III 可携带电池驱动音频通信设备说明书

PORTABLE BATTERY POWERED STEREO INTERCOMInput from a portable stereo music source or a cell phone for music and phone calls. Included Aux cable can be used for either purpose. Just plug one end into your device and the other into The Transcom III is powered by an internal 9V battery enabling up to 13 hours of operation in airplanes lacking a cigarette lighter socket. An auxiliary 4 foot power cord with is supplied for use in airplanes which have a socket. The voice activation feature allows “hands-free” communication between all headsets plugged into the Transcom III. Start speaking and the intercom instantly turns on (no clipping) to relay your message clearly to the other headsets; stop talking and it turns off Use your portable push-to-talk switch for transmitting to air traffic control. Transmitting can be accomplished from two positions (pilot and copilot). The intercom function is automatically disabled during transmitting, so that only the voice of the person transmitting goes over the air. However, the transmitting person’s voice is heard at all headset positions via the intercoms side-tone output. This feature is especially valuable to the instructor and the student who wish to FAIL SAFE RADIO COMMUNICATIONS: Even with the intercom “OFF”, the pilot can hear all radio communications and can transmit through the aircraft radio using the headset boom mic.WARRANTY: The Transcom III is constructed of high quality components, carries a five year parts and labor warranty.SPECIFICATIONS:SPO-23W eight: 13.8 oz. with battery and auxiliary power cord.Size: 4” x 2.9” x 2” Power: 11-34 VDC Maximum Current Drain: 0.05 amps.TRANSCOM III MODELS: Intercoms are available in Standard and High Noise Environment versions (N models). 2-way: SPO-23 and SPO-23N 4-way: SPO-43 and SPO-43N 6-way: SPO-63 and SPO-63N CONTROLS:Power Switch: On-OffVolume Control: Controls intercom volume.S quelch Control:This control is normally used to adjust for variations in background noise found in different aircraft. Squelch setting also effects outgoing cell phone mic audio.Stereo / Mono Switch: Set for the type of headsets (stereo or monaural) plugged into the intercom.A uxiliary Jack:Accepts a 1/8” standard 3 conductor mini stereo headphone plug from your portable music source or a 1/8” 4 conductor plug for cell phone connection.Specia ists in “SOUND” Management178 East Arrow Highway, San Dimas, CA 91773 (909) 305-9399w w w.s i g t r o n i c s.c o make and receive cell phone calls through the ic input for Cell Phone or MP3 player.ncludes a cell phone/music input cable and a orks with stereo or monaural headsets.perates on battery or aircraft power.P age 2S igtronicS t ranScom iii S tereo i ntercomSwww .SigtronicS .comTranscom III Connection SchematicAircraft HeadphoneJackAircraft Hand mic JackAircraft Auxiliary Power JackControlVolume ControlOn–Off Power ControlHeadphone PlugTransmit Switch PlugMicrophone Plug Pilot’s Jacks Headphone Plug Transmit Switch Plug Transmit SwitchPTT-ICS*Portable Transmit SwitchMicrophoneOutput CableAudio(Headphone)Input CablePower Input CableAUX Input Cable (Cell Phone /M usic)Indicator/M ono Switch Note: T ransmit with the unit ‘OFF’ isonly from the pilot’s position.* I f your Push-To-Talk switch has a female jack do not connect it. PTT switches not included.Sigtronics S-58S Stereo Headsets shown not included.Microphone and Headphone CablesEnd Satellite P/N 800239Microphone and Headphone CablesEnd Satellite P/N 8002391 Power Input CableSPO-43Included in the system: SPO-43 Main unit 1 End Satellite unit1 Cell Phone/Music Input Cable 1 Power Input CableSPO-23 System。
唐信电话录音系统方案
唐信电话录音系统方案—电力调度行业一、建设背景在电力系统运行中,电力调度是电网运行管理、倒闸操作和事故处理的指挥机构,每个调度员是保证电网安全运行、稳定运行和经济运行的直接指挥者。
在电网运行中,任何不规范的行为,都可能影响电网安全、稳定运行,甚至造成重大事故。
如果电力调度员发生误判断误调度引起误操作,将会给家庭、企业和社会带来不可估量的经济损失和政治影响。
矚慫润厲钐瘗睞枥庑赖。
矚慫润厲钐瘗睞枥庑赖賃。
为了反对习惯性违章,避免误操作、误调度事故,确保人身、设备安全,完善调度中心的内部管理,因此,为电力调度中心配备一套性能稳定,功能强大的录音系统至关重要。
唐信电话录音系统将为电力中心调度通信系统提供查找事故责任、监督工作质量的重要手段和依据。
聞創沟燴鐺險爱氇谴净。
聞創沟燴鐺險爱氇谴净祸。
二、系统技术要求:1、运用现代化的技术,为电力调度公司提供现代化的管理手段,提高管理部门信息的收集、处理能力,为各级领导和管理人员提供准确、及时的分析数据,提高管理的科学性和工作效率,促进企业管理工作合理化、规范化、系统化。
残骛楼諍锩瀨濟溆塹籟。
残骛楼諍锩瀨濟溆塹籟婭。
2、相关部门,相关工作岗位与客户的通话都必须全程记录,且音质清晰,不能失真。
例如,把调度员的通话记录保存了以后,如果调度人员不敬业,或者操作不规范,这些弊端都可以从录音系统反映出来,企业可及时安排调度员培训,提高调度员的技术水平,企业拥有了人才就等于拥有了竞争能力。
酽锕极額閉镇桧猪訣锥。
酽锕极額閉镇桧猪訣锥顧。
3、查找录音文件方便,在软件上可以通过多种条件来查找录音,如通话时间,来电号码等等。
4、企业管理层可以随时监听,调用与查听录音。
5、在同一台计算机对8条电话线进行录音。
三、方案设计根据电力调度中心的技术要求及对录音数据的重要性,方案推荐使用唐信P311型录音设备进行录音,将分机及直线电话等线路集中在调度中心的机房配线架上,然后将集中的通道高阻并联连接到录音设备中集中录音。
冠信录音系统

电话录音系统用户操作手册(For Windows 2000/XP/2003/Vista)版本1.0.1电话录音系统 (1)第一章系统简述 (4)1.1基本功能 (4)1.2性能特点 (4)1.3录音方式 (5)1.4硬件配置 (5)第二章系统安装 (6)2.1系统配置 (6)2.2语音卡的硬件安装 (6)2.2.1、插入PCI电话录音卡 (6)2.2.2、接线: (6)2.3语音卡驱动程序安装 (6)2.4录音系统软件安装 (6)第三章录音系统使用说明 (7)3.1系统主界面 (7)3.1.1、主界面 (7)3.1.2、界面所示其他信息: (8)3.2系统配置文件设置 (8)3.2.1、标题 (8)3.3登陆 (9)3.4界面切换 (10)3.4录音查询监听: (11)查询录音信息,并回放录音内容。
如图5所示: (11)3.4.1查询按钮:对录音记录进行查询。
(12)3.4.2 删除按钮: (13)3.4.3提取按钮: (13)3.4.4导出按钮: (14)3.4.5打印按钮: (14)3.4.6未接电话: (14)3.4.7操作日志: (15)3.5通话统计 (15)3.6实时监听 (16)3.6.1电话图片试如下图12所示:: (16)3.6.2列表方式如图12所示: (17)3.7客户资料设置: (18)3.8系统设置 (19)3.9通道设置: (20)3.10权限设置 (22)3.10.1 登陆项: (23)3.10.2 权限项: (23)3.10.3 客户资料信息项: (24)3.11工作时间/语言设置 (24)3.12录音参数设置 (26)3.12号码设置录音参数设置 (27)3.13备份 (28)3.13.1 本地磁盘方式: (28)3.10.2 FTP方式,如图24: (29)3.10.3 数据恢复,如图25所示: (30)3.14帮助: (30)3.15关闭系统 (30)第四章电话远端查询 (31)4.1功能 (31)4.2设置 (31)4.3操作 (31)第五章POP弹屏客户端 (32)5.1功能概述 (32)5.2安装 (32)5.3设置 (32)5.3.1 客户资料设置: (32)5.3.2 POP客户端登录: (32)5.4、登录 (33)5.5、主界面 (34)5.7、未接来电界面 (36)5.8、客户信息 (37)5.9、弹屏信息 (38)5.10、统计 (38)第一章系统简述电话录音系统是我公司自行研发,能同时支持各种电话线路(模拟、数字中继、数字终端)的录音设备软件。
电话商务录音系统使用说明书
第一章简介本公司将先进语音技术同大容量磁盘存储技术相结合推出性能优异的新一代多路电话商务录音管理系统是对电话双方通话过程进行实行自动录音和实时监听功能的软硬件集成系统。
能对多路电话同时进行超长时间录音显示记录主叫号码、被叫号码及通话时长等通话信息并保存于电脑系统管理人员可以对任意正在通话的通道进行实时监听而通话不受任何影响。
录音采用国际通用语音处理及压缩技术符合CCITT标准将话音信号经取样数字化压缩后存储在计算机磁盘中。
放音则是通过对磁盘上的语音数据进行解压后通过外接音箱(耳机)播放。
是生产调度、服务热、110、火警、防讯报警、银行委托、证卷行业等领域不可缺少的工具。
产品已布及国家和地区:美国、港澳台地区新加坡马来西亚印度尼西亚等东南亚国家南美诸国中东地区以及西亚地区出口品质值得信赖。
产品通过CE/FCC认证.系统基本功能:●支持Windows 98/NT/2000/XP/2003操作环境。
●提供USB接口2路PCI接口单卡4路8路16路数字30B+D(30路)。
●可实时监听每一条线路的通话内容。
●支持三种录音模式自动录音(压控)声控可手动录音(键控)。
●可以对所有的拨入、拨出未接电话进行清单列表、打印、支持条件查询及添加通话备注。
●支持直线交换机的内线分机接入同时录音。
●系统支持自动备份可将语音文件自动备刻录到DVD支持自动循环录音。
●系统附带来电客户信息管理系统可识别来电身份及自定义来电座席弹屏。
●录音起始时间可以灵活设置可以是一段时间内录音也可以是每天24小时录音。
●用户可在特殊号码表里自定义不录音的电话号码如拨打95555,163上网录音系统不启动录音)。
●系统具有完整的操作日志可以记录对系统的所有操作。
●支持每个用户对某些线路拥有操作的权限可设定不同等级的密码保护除了系统管理员使用最高级的密码外还有用户密码、录音文档查询密码等多种保护措施。
●线路适用于普通电话外线、分机内线、ISDN引出的模拟线、无线对讲机的音频输出线等。
电话录音盒说明书

DOBOLY多宝莱D103电话录音盒使用说明书(电子档)安装1.1硬件安装首先确定你的电话是否开通了“来电显示”功能,如果没有,请向当地运营商申请开通。
该项业务会导致你每月会向运营商支付一定的费用。
本系统只针对已经开通“来电显示”功能的电话使用。
本系列产品是USB接口架构,请确定你的电脑有空闲的USB端口,将硬件连接在电脑上,将电话进线接在“line”端口,“phone”与话机相连。
1.2软件安装首先确定你的电脑是否安装了WINDOWS 2000/XP或以上版本的操作系统,本系统只支持WINDOWS 2000/XP或以上版本的操作系统。
1. 在/mysoft/d103.rar下载软件包2. 解压后,找到“多宝莱电话管理系统.exe”,选择安装,如下图:点击选择“下一步”,然后出现:首先请你先连接好硬件设备,在开始运行软件EXE文件点下一步建议你选择D,或者F等非系统盘* 请选择允许操作程序驱动安装中1.3、安装补充1.设置系统必备参数:a) 设置本地号码长度/有无拨号前缀/需要拨号前缀的是外线号码,还是内线号码,在客户端:系统管理-->系统参数根据实际情况设置,可参考描述。
b) 在某些现场电话线路条件极不理想的情况下,出现通话偶有断线等现象,这是因线路负载引起。
检测的办法是在该路电话上并一部话机,如果通话偶有断线。
则需要查找现场的电话线路故障。
2.电话机的来电显示(Caller ID)即显示主叫号码是电信等运营商提供的付费业务,必须要向其申请,方可有此功能。
交换机向电话机传输来电显示的方式有两种:i. FSK(频移键控)制式。
ii. DTMF(双音多频)制式。
FSK制式Caller ID是在第一声振铃和第二声振铃之间用FSK方式进行传送;DTMF制式Caller ID一般情况下是在第一声振铃之前用DTMF方式进行传送,也有象FSK制式Caller ID在第一声振铃和第二声振铃之间传输的。
一般情况下,市局级交换机给模拟话机提供的来电显示号码是FSK制式传输的,小型交换机可能会以DTMF方式来传输,本系统驱动程序缺省为FSK制式接收来电显示。
- 1、下载文档前请自行甄别文档内容的完整性,平台不提供额外的编辑、内容补充、找答案等附加服务。
- 2、"仅部分预览"的文档,不可在线预览部分如存在完整性等问题,可反馈申请退款(可完整预览的文档不适用该条件!)。
- 3、如文档侵犯您的权益,请联系客服反馈,我们会尽快为您处理(人工客服工作时间:9:00-18:30)。
Tansonic唐信电话录音系统---T3系列说明书深圳市唐信科技有限公司目录第一章系统简介 (2)第二章基本功能 (2)第三章技术参数 (3)第四章系统安装 (3)4.1 硬件安装 (3)4.2 软件安装 (6)4.3 录音卡接口示意图 (6)4.4 连线 (7)第五章软件操作 (7)5.1 启动系统 (7)5.2 主界面 (7)5.3 登录系统 (10)5.4 数据库选择设置 (11)5.5 录音设置 (12)5.6 系统设置 (14)5.7 录音查询 (19)第六章技术支持 (23)第一章系统简介感谢您选用Tansonic唐信电话录音系统T3系列产品!当基于法律需求或责任认定等原因,需要保留电话通讯过程的录音时,配备一套完善的电话录音系统便显得极为重要。
如何准确无误的保留电话录音以及如何高质量的、方便的查听录音记录,均是系统面临的重要课题。
Tansonic唐信电话录音系统T3系列经过唐信科技在TX2006系列的基础上技术改进有重大突破的新一代电话录音产品。
其功能解决早期因电信机房线路较远或其他因素导致通话双方不平衡,录音声音一方声音大另一方声音小问题、解决以前录音数据量特别巨大的情况下,出现数据库单一(ACCESS数据库)处理速度较慢问题,现可支持多种数据库选择使用;豪华的人机界面继承原TX2006版熟悉的用户使用习惯,通俗易懂的操作习惯让人操作起来得心应手,软件安装完毕几乎不用看说明书都懂得怎样使用。
Tansonic电话录音系统可广泛的应用于商业电话录音,电力调度录音,热线服务电话录音,投诉电话录音,关键岗位电话录音,金融证券录音,公安报警录音,安全部门的监听电话,航空、铁路、交通运输调度录音及各行业的生产调度录音。
第二章基本功能1. 支持XP/WIN2003/VISTA/WIN7/WIN2008等中英文操作环境。
2. 单机系统最多支持1920通道电话同时录音。
3. 采用全新的PCI接口的即插即用录音卡。
4. 录音、监听对通话双方没有任何影响。
5. 可实时监听每一条线路的通话内容。
6. 可以根据任意设定的条件对录音、备份资料进行快速、简洁的回放查听。
7.系统具有自动备份功能、分机记录、计费、指定分机不录音等功能。
8. 全自动检测来电制式并记录所有外拨电话号码与来电显示号码。
9. 强大的电话管理功能,可以对所有的拨入、拨出电话进行清单列表、打印、汇总等。
10. 可以设置多达4个盘(可以是硬盘、分区或网络映射盘)自动循环录音。
11. 录音启动方式灵活,具有压控、键控、声控多种启动方式。
12. 分时段录音,可以是某段时间内录音,也可以是每天24小时录音。
13. 提供不同的压缩率,满足不同用户的需要,20G的硬盘最多可以保存1500多个小时。
14. 线路适用于电话外线、分机内线、ISDN引出的模拟线等。
15. 当系统的硬盘将满时,系统将自动清除最先录音的资料,以保证系统可以常年不间断运行。
16. 方向判别,自动判别出呼叫方向,如呼入还是拨出。
17. 系统采用多种灵活的权限方式管理,根据不同的功能权限只能做所对应的操作。
18. 系统具有完整的操作日志,可以记录对系统的所有操作。
19. 来电弹出客户资料。
20. 网络查听录音。
21、通道自动增益功能22、支持多种免费数据库方式,ACCESS-MDB/MSSQL/MYSQL等多种数据,数据更强大!速度更快捷!~系统默认状态:1、登录用户名:admin 密码:admin。
2、所有通道为可监听。
3、录音方向为全录。
4、录音文件存储路径为C:\TxRec\。
5、录音时段为24小时录音。
6、录音启动方式为压控。
第三章技术参数尺寸:205MM*106MM*15MM阻抗:高阻> 8兆欧信噪比:≥38dB录放音失真度:≤2%频率响应:300—3400HZ数位方法:ADPCM 16KBPS采集数率:8 Kbps/1s 每通道放音输出功率≥50mW(耳机驱动)放音回声抑制比≥40Db录放音编解码格式:CCITT A/μ-Law 64kbps,IMA ADPCM 32kbps录音时间:无限制温度:-20℃—+85℃湿度:5%—80%第四章系统安装本录音系统硬件由微机(工控机)、录音卡、连线组成。
为了让Tansonic唐信电话录音系统能够正常运行,我们推荐的PC要求如下:●Windows XP操作系统以上。
●Pentium Dual-core E5800 3.2GHz 系列CPU以上●可用的PCI 插槽、一个以上USB接口●内存2GB●硬盘500G以上●音箱电脑正常运行所需的其它设备。
4.1 硬件安装:安装步骤:1、关闭计算机的电源。
2、拧下机盖的螺丝,卸下机箱上盖。
3、将录音卡安装到PCI插槽,并固定好。
4、将配带的USB加密狗插到计算机的USB口上。
5、将电话线连接到相应的电话接口上。
16路录音卡外观示意图(8路卡可参照16路卡的参数,只是通道少8个)(图4.1.1) T3P16板卡采用RJ45接口。
每个板卡上提供4个RJ45接口,一个接口内置4个通道。
每个RJ45接口是8针的,其引脚的排列和对应的通道组合如下图:RJ45接口说明(图4.1.2)32路录音卡外观示意图(图4.1.3)4.2 软件安装(以16路录音卡的安装为例)1、正确安装PCI 录音卡以后,启动计算机后系统会出现“添加新硬件”向导,取消向导。
2、放入唐信电话录音系统安装光盘,从光盘上找到“T3 Driver-setup ”文件,双击,然后根据安装导航的相关提示操作,直至把驱动安装完成。
3、安装录音系统主程序,找到光盘里的“T3 Setup.exe ”文件,按向导完成主程序安装,完成软件安装后,系统会自动在桌面创建一个T3的快捷方式,双击开始运行。
4.3 录音卡接口示意图左下图为8通道PCI 录音卡录音输入线(RJ11)分布(自上到下):右下图为16路录音卡录音输入线(RJ11)分布(自上到下):将音箱音频连接线插入录音卡放音输出插座进行放音。
(见图4.1.2)注意:以上全部设置必须在微机电源关闭的情况下进行,由于电话录音系统一般在无人操作的情况下长时间运行,因此必须关闭CMOS 和WINDOWS 操作系统中的电源管理中有关CPU 、硬盘等省电的选项,使微机始终处于全速运行状态,否则可能导致性能下降或出现意外错误。
第2路第4路第6路第8路第2路第4路第6路第8路第10路第12路第14路第16路4.4 连线(图1.4-1)如1.4-1为8路卡的录音卡接入连线,连线接入录音卡的第一个端口分为4个通道,L1表示第1条通道,L2表示第2条通道,L3表示第3通道,L4表示第4条通道。
接入录音卡的第二个端口表示的连线的L1表示为第5条通道,L2表示第6通道,L3表示第7通道,L4表示第8通道。
图1.4-2为16路卡的录音卡接入连线,连线接入录音卡的第一个端口分为4个通道,L1表示第1条通道,L2表示第2条通道,L3表示第3通道,L4表示第4条通道。
接入录音卡的第二个端口表示的连线的L1表示为第5条通道,L2表示第6通道,L3表示第7通道,L4表示第8通道,以此类推。
PCI录音卡与外线端口必须正确并联起来才能正常工作。
为了接线方便提供如(图1.4-3)3通端子插座,将被录音的线路并联起来,一端接入录音卡,另一端接入外线,再把另一端接电话机。
将录音线的水晶插头插入录音卡的插座,听到“嗒”的一声后表示已插好。
32路的单张卡可以使用配线架卡线方式并联连接。
第五章软件操作5.1 启动系统进入WINDOWS7操作系统后,在桌面双击T3的快捷方式图标,启动系统后可看到通道的当前状态。
为了保证系统使用安全性,本软件设置里的所有操作都必须登录系统后方可操作。
5.2 主界面为了更加贴切客户使用习惯,产品为客户准备了四种界面显示模式,客户可以根据实际应用需求选择。
模式更换方法是:在登录系统后直接点击模式切换菜单按钮即可,每按一次显示一种模式,不同的模式显示的通道图标大小不同,显示图标主要是为了看更加清楚通道的使用状态如何,线路是否连接完好?通道号码设置是否与实际线路一致?等等。
(以下软件图片说明在WINDOWS7系统下剪切的效果为例)。
界面模式1:显示的图标大,显示的通道数量相对少。
(如下图1所示)(图1)界面模式2:显示的图标中等,显示的通道数量更多一点。
(如图2所示)界面模式3:显示的图标较小,显示的通道数量最多。
(如图3所示)界面模式4:显示的图片较小,但可以显示最详细的通道状态信息(如图4所示)显示图标的状态说明:线路未接入录音卡或接触不好,显示为断线状态。
如下图5所示:线路已接好,未使用电话的前提下,显示为空闲状态。
如下图6所示:电话拨入,显示为振铃状态、振铃次数、来电号码、来电时间等信息均有记录。
如果如下图7所示:(图7)拨打电话或接听电话显示为通话状态、拨出号码、拨出时间、通话时长等信息均有记录。
在通话的过程中选中图标点击右键可以选择实时监听。
如下图8所示:(图8)电话通话完毕挂机后,界面框下方自动产生一条录音记录,使用鼠标单击选定该记录,双击播放记录内容,点击鼠标右键选择指定播放或另存为。
如下图9、10、11所示:(图9)(图10)(图11)软件系统智能地计算出硬盘的容量,可以存储的录音时长、进入系统的用户名,系统时间等信息。
如下图12所示:(图12)1.当系统主界面启动后,录音系统即处于工作状态。
2.监听:本系统提供即时监听功能,用户用鼠标单击某一线路的图标,点击右键选定监听,即可监听此线路,再次点击右键选定取消监听则停止监听。
实时监听只能对正在使用的通道并同时只能监听一个通道。
3.通道状态图标说明:空闲(线已连通)断线监听振铃来电摘机声控方式启用声控方式正在录音5.3 登录系统与注销登录在软件的左侧菜单栏选择“登录”菜单下的“登录系统”按钮或直接点击“登录系统”按钮后直接按快捷键F2等方式均可出现以下界面登录系统。
如图13、14所示:(图13)(图14)1、登录:用户输入用户名与密码后,不同的用户有不同的权限。
默认用户名:admin, 密码:admin;如果不想每次都要输入用户名及密码则可以在自动登录上选择框里打勾即可。
如果想更改用户名及密码请在“系统设置”中的“口令选项”里直接选定就可以进行修改,修改完成后回车确认然后再按保存修改。
添加用户则在点击“新加”按钮,输入新的用户名及密码,用户名可以输入中文、英文、数字等有效数值;输入完成后给用户配置合适的权限,也就是在对应的用户权限后面打勾的表示允许使用,不打勾表示禁止使用。
删除则选定需要删除的用户后点击删除。
所有数据修改后均要按保存修改,修改内容才能保存生效。
则如图15所示:(图15)2、注销:为了防止对没有授权的人员操作本系统,对录音系统进行有条件保护。
