P5系列机器液晶面板的一些使用方法
Easergy MiCOM P5 Protection Relay 用户手册说明书

Easergy MiCOM P5Protection Relay用户手册版本: P5/CN M/11A11/2019法律信息本指南提到的施耐德电气的品牌,施耐德电气SE以及各子公司的商标是施耐德电气SE以及各子公司的资产。
所有其它品牌可能是其它拥有者的商标。
本指南及其内容受适用的版权法保护,仅供参考。
未经施耐德电气事先许可,不得以任何方式(电子,机械,复印,录音,其它),为何种目的,复制或者传输本指南的任何部分。
施耐德电气不授予任何权利或许可作为商业用途来使用本指南或其内容,除了是出于非排他性的,个人的许可,用于基础咨询作用。
施耐德电气产品和设备必须由合格的人员安装、操作、维修及维护。
由于标准、说明书和设计会不时发生变化,本指南所载的的信息可能会在没有发出通知的情况下更改。
在适用法律允许的范围内,施耐德电气及其子公司不对本指南的内容信息中的任何错误或遗漏或由本指南所包含的的信息的使用而产生的后果承担任何责任或者赔偿责任。
目录目录使用 (119)介绍 (119)人机界面 (120)介绍 (120)按钮 (122)LED 指示灯 (123)自定义本地面板 (124)液晶显示介绍 (1125)MiCOM P5继电保护装置服务周期 (11)菜单结构 (12)登录和退出 (16)登录 (16)退出 (16)液晶对比度调整(MiCOM P5x20) (17)修改语言 (17)改变参数 (18)管理告警信息 (133)矩阵操作 (134)控制对象 (135)语言包更改 (136)eSetup Easergy Pro (137)概述 (137)操作模式 (138)设置连接 (139)Web HMI (141)概述 (141)设备重启提醒 (141)Firefox (142)Windows 7浏览器 (143)Windows 10中的Edge浏览器 (145)EcoStruxure电力设备应用 (149)使用保护装置使用介绍当地面板可以输入MiCOM P5继电保护装置操作所需要的所有数据,也可以存取装置管理的数据。
飞利浦 105S5 彩色显示器 说明书

SAFETY PRECAUTIONS AND MAINTENANCEDisconnect the monitor from the mains supply if the monitor is not to be used for extended period of time.Do not attempt to remove the back cover, as you will be exposed to shock hazard. The back cover should only be removed by qualified services personnel.Do not place objects on top of the monitor cabinet, which could fall into vents or which could cover them and prevent proper cooling of the monitor’s electronic devices.Do not expose the monitor to rain or excessive moisture to avoid the risk of shock or permanent damage to the set.Avoid exposing the monitor to direct sunlight, stoves or any other heat sources.To prevent overheating, make sure that the ventilation openings of the monitor are not covered. Keep moisture and dust away.Keep away from any magnetic objects, such as speakers, electric motors, transformers,…etc. When positioning this monitor, make sure that the mains plug and socket are easily accessible. Do not use alcohol or ammonia based liquid to clean the monitor. If necessary, clean with a slightly damp cloth. Disconnect the monitor from the mains supply before cleaning.Consult a service technician if the monitor does not operate normally when operating instructions of this manual are followed.1INTRODUCTIONWe would like to thank you for your purchase of this Philips color monitor 105S5. This monitor set can be used with IBM PC and PS/2 computers or compatibles with analog RGB output. It also supports timings of graphics adapters including:-VGA, SVGA, XGA, 1024X768Please read this user’s guide carefully to obtain the best performance from your Monitor, and keep this user’s guide for future reference.FEATURESAutomatically scan horizontal and vertical frequencies.Analog input signal provides the capability of unlimited display colors.Horizontal size/position, vertical size/position and pincushion controls are adjustable to adapt to a variety of graphics cards.Fine phosphor pitch provides greater image clarity.On-Screen-Display and Digital Control features provide user-friendliness and easy-to-use when operating the monitor.ENERGY STAR® is a U.S. registered mark.As an ENERGY STAR® Partner, we have determined that this product meets theENERGY STAR® guidelines for energy efficiency.IBM, IBM PC and IBM PS/2 are registered trademarks of International Business Machines Corporation.Windows is a registered trademark of Microsoft Corporation.VESA is a registered trademark of the Video Electronics Standards Association.DDC are trademarks of VESA.23INSTALLATION INSTRUCTIONSCAUTION:Be sure to turn off the AC Power to the monitor before making connections1. Assemble the tilt/swivel base as shown below.2. Connect the power cord.3. Connect the end of the signal cable to the display connector of the computer and tightenthe screws.CONTROLS AND OPERATIONTILT/SWIVEL BASETurn the monitor for comfortable viewing angle within 180° horizontally and 20° vertically. (please refer to installation instructions.)SIGNAL CABLE CONNECTOR (15-pin mini D-SUB)Connect to the display adapter output of a computer having analog video output.AC INPUT CONNECTOR (Appliance coupler)Connect to AC outlet with supplied power cord.POWER SWITCH AND INDICATORPress this switch to turn on the monitor and the indicator will light up.To turn off the monitor, press it again.USER ADJUSTMENT BUTTONSTo Display OSD main menu.Push again to exit from main menu.To entry the adjustment function.4OSD MENUBASIC CONTRASTBRIGHTNESSFACTORY RESETZOOMH-POSITIONH-SIZEV-POSITIONV-SIZEGEOMETRY PINCUSHIONPIN BALANCETRAPEZOIDPARALLELCOLOR 9300o K/6500 o KUSERLANGUAGE ENGLISHFRENCHSPANISHCHINESE(simple font)CHINESE(complex font)OTHER H.MOIREV.MOIREOSD H-POSITIONOSD V-POSITIONINPUT LEVEL POWER MANAGEMENT5THIS MONITOR CAN SUPPORT EPA AND NUTEK POWER MANAGEMENT SYSTEMS, INDICATED BY THE LED ON THE FRONT PANEL:The monitor remains in the power-saving state until you press a key on the keyboard or move the mouse (if available).INPUT PIN ASSIGNMENTSTATE LED COLOR OSD INDICATIONPOWERCONSUMPTIONON GREEN -------------- 75W ACTIVE OFF AMBER POWER SAVING < 8WPinSIGNALNo1 Red Video2 Green Video3 Blue Video4 Digital Ground or No Pin5 Digital Ground or No Pin6 Red Video Return7 Green Video Return8 Blue Video Return9 Digital Ground or No Pin10 Digital Ground or No Pin11 Digital Ground or No Pin12 SDA (DDC1/2B Data)13 Horizontal Sync14 Vertical Sync15 SCL (DDC1/2B Clock) SPECIFICATIONS78TROUBLE SHOOTING GUIDEMODEL105S5SIZE15” DIAGONAL (14” VIEWABLE)DEFLECTION ANGLE90 DEGREES CRTPHOSPHOR PITCH0.28MM RESOLUTION (MAX)1024X768 VIDEO BANDWIDTH75MHz HORIZONTAL30~54KHz SYNCHRONI-ZATIONVERTICAL 50~120HzVIDEORGB ANALOG 0.7 Vp-p, 1Vp-p/75 Ohms POSITIVEINPUT SIGNALSYNCTTL SEPARATE/COMPOSITE (+/-)DISPLAY COLORSUNLIMITEDDISPLAY AREA (HXV)270mmX202mm(RECOMMENDED)Problem Possible Cause RemedyNo pictureIs the power Cord Connected?Is the power switch on?Is the signal cable properlyconnected?Is the monitor in the powersave mode? Connect power cord.Turn on power switch. Connect signal cable properly. Check connector for bent pins. Press any key on the keyboard or move the mouse.Picture is unstable Is the signal cable properlyconnected?Is the scanning frequencyoutside the acceptable range?Are the pin arrangements ofthe signal connector correct?Connect signal cable properly.Check for bent or missing pins.Reconfigure the graphics board.within the range of the monitor.Use correct signal cable.The color of image on screen is abnormal. Is there magnetic object nearby?Are the pin arrangements of thesignal connector correct?Move the object away.Use correct signal cable.* Due to continuous product improvement, the specifications in this manual are subject to change without notice.Your International GuaranteeDear Customer,9Thank you for purchasing this Philips product which has been designed and manufactured to the highest quality standards.If, unfortunately, something should go wrong with this product Philips guarantees free of charge labor and replacement parts irrespective of the country where it is repaired during a period of 12 months from date of purchase. This international Philips guarantee complements the existing national guarantee obligations to you of dealers and Philips in the country of purchase and does not affect your statutory rights as a customer.The Philips guarantee applies provided the product is handled properly for its intended use, in accordance with its operating instructions and upon presentation of the original invoice or cash receipt, indicating the date of purchase, dealer's name and model and production number of the product.The Philips guarantee may not apply if:• the documents have been altered in any way or made illegible;• the model or production number on the product has been altered, deleted, removed or made illegible;• repairs or product modifications and alterations have been executed by unauthorized service organizations or persons;• damage is caused by accidents including but not limited to lightning, water or fire, misuse or neglect.Please note that the product is not defective under this guarantee in the case where modifications become necessary in order for the product to comply with local or national technical standards which apply in countries for which the product was not originally designed and/or manufactured. Therefore always check whether a product can be used in a specific country.In case your Philips product is not working correctly or is defective, please contact your Philips dealer. In the event you require service whilst in another country a dealer address can be given to you by the Philips Consumer Help Desk in that country, the telephone and fax number of which can be found in the relevant part of this booklet.In order to avoid unnecessary inconvenience, we advise you to read the operating instructions carefully before contacting your dealer. If you have questions which your dealer cannot answer or any related question please contact the Philips Consumer Information Centers or via:Website: 使用及安全須知:10若顯示器長久不用請與主機斷開連接。
P5全彩LED显示屏操作说明书[版本V17
P5全彩LED显示屏操作说明书[版本:V17.07] LED显示屏根据型号规格不同,按更新方式分U盘版和WIFI版两种,并非所有型号都带WIFI功能,请根据您实际购买型号规格进行操作。
====================================================1.W IFI设置(U盘版可跳过本章节,从第2步开始)1.1LED显示屏WIFI仅适用于笔记本电脑或带无线网卡的电脑,不带无线网卡的台式电脑请使用U盘更新方式。
1.2将LED屏接通电源,通电后LED屏会显示当前WIFI编号(默认6位)。
1.3在电脑右下角打开无线网络设置,找到与当前LED屏相同的WIFI名称进行连接。
(WIFI名称:HC-LED[屏幕编号];WIFI密码:12345678)2.软件安装2.1请将产品附带的光盘放入电脑光驱打开,将光盘内的【LED Display P5-RGB】整个文件夹复制到电脑D盘或E盘。
2.2打开复制出来的文件夹,找到“LED P5-RGB [V17.07]”软件,双击打(软件为免安装版,建议:右击发送到>桌面快捷方式,方便下次使用。
)3.参数设置3.1打开软件,在软件顶部选择:控制>系统设置>底部输入密码: 168 按Enter回车键3.2选择:导入>根据LED屏规格选择配置文件>打开>确定>确定完成。
4.文本输入4.1在软件左侧,选择“添加文字”。
在中间黑色文字输入框内编辑文本,输入框顶部可设置字体效果、颜色、大小。
4.2软件底部可设置播放方式、速度、流水边框等效果5.发送节目(根据实际型号配置,二选一)5.1WIFI版录制:在软件顶部:选择“WIFI录制”,弹出窗口选择“是”,即可发送节目至显示屏,更新成功。
5.2U盘版录制:将U盘插入电脑,在软件左上角:选择“U盘录制”>用电脑参数录制>提示完成后从电脑拨下U盘>插入LED屏USB接口>屏幕显示OK后拨出U盘>更新成功。
液晶模块操作方法

液晶模块操作方法
液晶模块的操作方法通常包括以下几个步骤:
1. 连接电源:将液晶模块与电源连接,通常是通过插座或者线缆来连接。
2. 电源开启:将电源打开,液晶模块会显示出来,一般会显示一些启动信息或者屏幕的测试画面。
3. 按键操作:如果液晶模块有按键,可以通过按键来进行操作,如选择菜单、调整亮度、对比度等。
4. 触摸操作:如果液晶模块支持触摸功能,可以通过触摸屏来进行操作,如点击、拖动、放大缩小等。
5. 软件控制:除了按键和触摸操作外,液晶模块还可以通过软件来进行控制,需要通过相应的程序代码来控制液晶模块上的显示内容、显示效果等。
6. 关闭电源:当使用完毕时,将电源关闭,液晶模块将停止显示。
需要注意的是,具体的操作方法可能因液晶模块的型号和品牌而有所差异,需要参考相应的产品说明书或者用户手册来进行操作。
另外,在操作液晶模块时应当
注意安全,避免用力过度、摔落等可能导致液晶模块损坏的行为。
五键液晶开关操作方法

五键液晶开关操作方法
五键液晶开关通常具有以下操作方法:
1. 开关机:通过按下开/关键来打开或关闭液晶开关。
该键通常标有一个电源符号或字母“P”。
2. 模式选择:在打开液晶开关后,可以通过按下模式键来切换不同的模式。
液晶开关通常具有多种模式选择,如制冷模式、制热模式、送风模式、干燥模式等。
模式键通常标有模式符号或文字。
3. 温度调节:在选择了合适的工作模式后,可以通过调节温度键来设置所需的室内温度。
液晶开关通常具有上下箭头键或加减键,用于增加或减少温度。
温度调节方式可以是单一的调整,也可以是精确到0.1度的调节。
4. 风速控制:液晶开关通常具有风速控制功能,可以通过按下风速键来选择不同的风速档位。
风速键通常具有自动风速、低风速、中风速和高风速等选项。
5. 定时功能:许多五键液晶开关还具有定时功能,可以通过按下定时键来设置开关机的时间。
液晶开关通常具有设置定时开关机的小时和分钟选项,使用户可以根据需要设置开关机的具体时间。
请注意,具体的操作方法可能会因不同的液晶开关品牌和型号而有所不同。
请按
照所购买的液晶开关的使用说明书进行正确的操作。
P550液晶面板使用指南
h. 选择功能1 ,进入正常的操作模式
贴一些以前贴的面板字母含义
OS IPL types
A IPL from disk using copy A of the system Licensed Internal Code.
B IPL from disk using copy B of the system Licensed Internal Code.
C Reserved for hardware service use only under the direction of Rochester development support. Attention: Severe data loss can occur with improper use of this function.
1、进入手动模式(将“N”改为“M")
使用上下翻键和确认键进入”02“ -> 使用确认键将”<”移动到“N”上,而后使用上下翻键将其改为“M” -> 两次确认键确认并退出“02”。此时系统将进入手动模式,再按上下翻键时会发现多出许多功能选项,如可以查看管理网卡IP地址,操作关机等。
S Slow override for one IPL. Full hardware diagnostics run. Use whenever hardware is changed, for intermittent hardware failure, and on th diagnostics are run: v Main storage tests. v CEC Inter-chip interface tests (wire test). v Extended Logical Built-in Self Tests.
P5系列机器液晶面板的一些使用方法

ibm P5小机的HMC1和HMC2的IP地址默认为192.168.2.147和192.168.3.147,如果对此默认IP做过改动,后来又遗忘的情况下,通过进入P5小机液晶控制面板上的功能30, 就能读出HMC端口的IP地址。
具体步骤如下:a. 为服务器接通电源,直到控制面板上的显示不再变化,且电源指示灯缓慢闪烁。
b. 使用控制面板的<↑> 或<↓> 按钮选择功能2 . 按< →> 按钮进入功能2,按<→> , 选中N(Normal), 使用<↑> 或<↓> 按钮将N 改成M(Manual)按2次<→> 退出功能2.b. 使用<↑> 或<↓> 按钮选择功能30,按< →> 按钮进入。
控制面板显示30**c. 使用<↑> 或<↓> 按钮,使面板显示3000 或3001,然后按< →> ,就能控制面板上读出所对应HMC端口的IP 地址了。
如:SP_A:_ETH0:_ _ _T59.5.105.243_ _ _ _ _ _HMC0端口的IP地址是9.5.105.243.d. 检查完成后,使用控制面板的<↑> 或<↓> 按钮选择功能2 . 按< →> 按钮进入功能2,按<→> , 选中N, 使用<↑> 或<↓> 按钮将M 改成N然后按2次<→> 退出功能2e. 选择功能1 ,进入正常的操作模式。
各位,给大家共享一下p5、i5系列机器的液晶面板的一些使用方法。
想必老大们早已熟知,算是给新手们一个提示。
注意:如果你不确认这些功能是作什么用的,请不要在业务服务器上随便更改,不正确的使用某些功能可能造成丢失用户数据!1、进入手动模式(将“N”改为“M")使用上下翻键和确认键进入”02“-> 使用确认键将”<”移动到“N”上,而后使用上下翻键将其改为“M”-> 两次确认键确认并退出“02”。
BenQ FP556ms LCD 彩色显示器 使用者手册

FP556msLCD 緐緐緐緐緐15.0 緐緐 (38.1 緐緐) LCD 緐緐緐緐緐緐緐緐緐楬ΰ緐緐2緐緐緐著作權所有 © 2003 年,BENQ Corporation 。
所有權利均予保留。
未經 BENQ Corporation 事前書面之許可,本文的任何部分皆不可以任何形式或任何方法,包括電子、機械、磁性、光學、化學、手寫或任何方式予以重製、傳輸、轉譯、儲存於檢索系統或翻譯成任何文字或電腦語言。
緐緐緐緐對於本文之任何明示或暗示內容,BENQ Corporation 不做任何保證,亦拒絕對任何特殊目的之商用性或適用性目的予以保證。
此外,BENQ Corporation 保留修改或變更本文之權利,並且修改或變更內容將不另行通知。
緐緐緐緐緐緐緐緐緐緐緐緐緐緐緐緐緐緐緐緐緐緐緐緐緐緐緐緐緐緐緐緐緐緐緐緐緐•交流電插頭會將本設備與交流電電源隔離。
•電源線是插電設備的電源隔絕裝置。
插座應設於設備附近,以便使用。
•本產品必須使用標籤上所指定的電源類型操作。
如果您不確定可用電源類型,請洽詢您的經銷商或當地的電力公司。
緐緐緐緐緐•清潔。
在清潔之前,請務必先將顯示器插頭從牆上插座上拔除。
請使用無線頭、不粗糙的軟布清潔 LCD 顯示器表面。
請避免使用任何清潔溶劑或玻璃清潔劑。
•螢幕外殼後方或上方的縫隙或開口是為了通風。
請勿堵住或蓋住這些縫隙或開口。
顯示器不可靠近或放在散熱器或熱源上方,或是放在密閉的裝置中,除非該裝置備有良好的通風條件。
•請勿將任何物體插入或將液體濺入本產品之中。
緐緐緐緐•請勿嘗試自行維修本產品,因為打開或移除本機外殼時,可能會有觸電或其他的危險。
如果發生上述的錯誤操作或掉落等意外,請洽詢合格的服務人員進行維修。
i ii iii iv vi緐緐緐緐 (5)緐緐緐緐緐 (6)前視圖 (6)後視圖 (1) (6)後視圖 (2):插頭與插座位置 (7)緐緐緐緐緐緐緐 (8)拆卸底座 (9)緐緐緐緐緐緐緐 (10)緐緐緐緐緐緐緐緐緐 (37)緐緐緐緐緐緐緐緐緐 (39)緐緐緐緐緐緐緐 (41)緐緐緐緐緐 (42)控制面板概觀 (42)快速鍵模式 (43)主功能表模式 (44)緐緐緐緐 (52)常見問題 (FAQ) (52)需要更多協助? (53)緐緐緐緐緐緐緐 (54)緐緐緐緐 (55)目錄34目錄5入門緐緐打開包裝時,請確認包裝內是否含有下列項目。
i-Tech Company LLC 5英寸LCD屏幕操作指南说明书

Small Industrial Open Frame Metal Housing OSD User Manual Model: YOP0500BNC5" LCD 800x480 350nits 500:1 with VGA + BNC inputSetup for OperationThe OSD (On Screen Display) menu enables user to manipulate the image and settings OSD Main menu consists of source:PCPress “+” to increase or “-” to decrease the brightness, contrast or color temp.ł CONTRASTAdjust the contrast of the screen.ł BRIGHTNESSAdjust the brightness of the screen.ł COLOR TEMP.Set color to NORMAL, WARM, COLD, SRGB, USER.You can select the screen’s color level of the white color field from the default color temperature settings. Also, you can fine tune the color temperature by USER option if necessary.ł SCALESet to FULL or CENTER.PICTURE OVERSCANPC5050>< OFF >AUDIOThe setting of audio.ł BASSAdjust the bass of the audio.ł TREBLEAdjust the treble of the audio.ł BALANCEAdjust the balance of the audio. ł SOUND MODESet sound mode to STANDARD, USER, MOVIE, MUSIC.ł EQUALIZERSet equalizer to 120Hz, 500Hz, 1500Hz, 5KHz, 10KHz.ł AVCSet AVC to turn ON or OFF.ł SOUND EFFECTSet sound effect to OFF, SRS, MSTAR.AUDIO505050>>OSDYou can adjust the OSD menu.ł SLEEP TIMERSet sleep timer to OFF, 15M, 30M, 45M, 60M.ł LANGUAGESelect one of the 7 languages.ł H-POSITIONAdjust the horizontal position of OSD menu screen’s image.ł V-POSITIONAdjust the vertical position of OSD menu screen’s image.ł DURATIONAdjust OSD display time.ł HALFTONEAdjust the halftone of OSDs menu screen’s image.ł BLUE SCREENSet blue screen to ON or OFF.ł RESTOREReturn to factoru original setting.IMAGE REVERSEOSD50501550< OFF >>GEOMETRYYou can adjust the value of screen quality automatically.ł H-POSITIONAdjust the horizontal position of the screen’s image.ł V-POSITIONAdjust the vertical position of the screen’s image.ł CLOCKUse to adjust the value of horizontal image.ł PHASEUse to adjust the phase control.ł AUTO ADJUST4126100100 >Display Type 5.7” TFT-LCD Panel-Display Color262k colors-Brightness350nits-Resolution VGA (800x480) -Contrast Ratio500:1-Backlight Unit LED- Viewing Angle (R/L/U/D)80/80/70/70-Response Time25ms Environmental-TempOperationStorage 0°C~50°C 20°C~60°COptional Touch, Glass System Specifications:Mechanical Drawing:。
PHILIPS 170S5 说明书

Safety and Troubleshooting Information•安全措施及维修• 安装地点• 常见问题• 故障检修• 有关规定• 其他相关信息安全和故障检修安全措施与维修警告:使用本文件规定以外的控制、调整或程序,可能导致遭受电击、触电以及/或者机械危险。
连接和使用电脑显示器时,请阅读并遵循以下说明:● 如果较长时间不准备使用显示器,应拔出显示器电源插头。
● 如需用微潮的布擦试显示器,应拔出电源插头。
当电源切断时可用干布擦试屏幕,但切不可使用酒精、溶剂或含氨的液体。
● 如果遵守本手册说明时显示器仍不能正常运转,应向维修技师查询。
● 外壳应只有合格维修人员方可打开。
● 显示器应避免直接日晒,勿靠近火炉或其他热源。
● 任何可能掉入孔口或妨碍显示器各电子元件正常降温的物体皆应挪开。
● 勿阻塞机体通风口。
● 保持显示器干燥。
为防电击起见,勿将其暴露于雨中或过多湿气中。
● 放置显示器时,确信电源插头和输出口容易取用。
● 如果以拔出电源线或直流电电源线之方式关闭显示器,6 秒钟方可再插入电源线或直流电电源线以便重新正常运转。
● 为防止机身遭受电击或永久性损坏,勿将显示器暴露于雨中或过多湿气中。
● 请注意:在使用应用程序时请保持启动一个屏幕保护程序。
如果一个高对比度的图象长时间停留在屏幕上时,该图象将在你的屏幕上产生一个所谓的“殘影”或“鬼影”。
这在LCD技术固有的一些缺陷中是常见的现象。
通常在关闭显示器电源后,该殘影会逐渐消失。
值得注意的是,这种殘影症状是无法修复的,并不属于保修范围之内。
如果遵守本手册操作说明时显示器仍不能正常运转,应向维修技师查询。
返回页首安装地点● 避开高温和严寒● 不可在高温、直接日晒或严寒地点存放或使用液晶显示器。
● 避免在气温差别很大的地点之间移动液晶显示器。
选择符合以下气温和湿度标准范围的场所。
file:///D|/My%20documents/dfu/W7/china/170s5/safety/safety.htm (1 of 2)2004/6/7 下午 02:57:08Safety and Troubleshooting Informationr气温:摄氏 5-40度/华氏 41-104度r湿度:相对湿度(RH) 20-80%● 勿使液晶显示器受到严重振动或置之于高压力下的环境中。
Omron HMI-P5 Series产品说明书

Features1. Bright and Easy-to-Read Display A brand new bright 2-color backlight LCD display. The easy-to-read screen in any location makes checking and setting pro-cedures a cinch.2. Simple OperationSeesaw buttons make operating the unit even easier than before.3. Short Body of only 64.5 mm 2.539inch (screw type) or 70.1 mm 2.760inch (pin type)With a short body, it easily installs in even narrow control panels.4. Conforms to IP66’s Weather Resistant StandardsThe water-proof panel keeps out water and dirt for reliable operation even in poor environments.5. Screw terminal and Pin Type are Both Standard OptionsThe two terminal types are standard options to support either front panel installation or embedded installation.6. Changeable Panel CoverAlso offers a black panel cover to meet your design considerations.7. 4-digit or 6-digit displayTwo sizes of displays are offered for you to choose the one that suits your needs.8. Compliant with UL, c-UL and CE.6-digit displayPin type Screw terminal typeinchUL File No.: E122222C-UL File No.: E122222LC4H CountersRoHS Directive compatibility information/Features1. Low PriceAll this at an affordable price to provide you with unmatched cost performance.2. Display is a bright reflective-type LCD.3. Inherits all of the characteristics of the LC4H digital timer.• Seesaw switches ensure easy operation.• IP66 environmental protection.• Shortened body(pin type: 70.1 mm 2.760 inch , screw type: 64.5 mm 2.539 inch underhead).4. Compliant with UL, c-UL and CE.64.5AEL11 Series (4-digit display)AEL13 Series (6-digit display)Pin type Screw terminal typeinchUL File No.: E122222C-UL File No.: E122222LC4H-L CountersPart namesSpecifications• 4-digit display type• 6-digit display typeSetting the operation mode and set valueSetting procedure 1) Setting the operation mode (input mode and output mode)Set the input and output modes with the DIP switches on the side of the counter.DIP switches Setting procedure 2) Setting the set valueSet the set value with the UP and DOWN keys on the front of the counter.Front display section2) Set the DIP switches before installing the counter on the panel.3) When the DIP SW setting is changed, turn off the power once.4) The DIP switches are set as ON before shipping.• 4-digit display typeQ Counter display W Set value display E Controlled output indicator R Reset indicator T Lock indicator Y UP keys Changes the corresponding digit of the set value in theaddition direction (upwards).U DOWN keysChanges the corresponding digit of the set value in the subtraction direction (downwards).I RESET switchResets the counting value and the output.O LOCK switchLocks the operation of all keys on the counter.• 6-digit display type Q Counter display W Set value displayE Controlled output indicator R Reset indicator T Lock indicatorY UP keysChanges the corresponding digit of the set value in the addition direc-tion (upwards).U RESET switchResets the counting value and the output.I LOCK switchLocks the operation of all keys on the counter.• Changing the set value1. It is possible to change the set value with the up and down keys (4-digit type only) even during counting.However, be aware of the following points.1) If the set value is changed to less than the count value with counting set to the addition direction, counting will continue until it reaches full scale (9999 with the 4-digit type and 999999 with the 6-digit type), returns to zero, and then reaches the new set value. If the set value is changed to a value above the count value, counting will continue until the count value reaches the new set value.2) Suppose that the counter is preset to count down. Whether a preset count-down value is smaller or larger than the count value, the counter counts down to “0(Zero)”.2. If the set value is changed to “0,”the unit will not complete count-up. It starts counting up when the counting value comes to “0 (Zero)” again.1) Up-count (addition) input when count-ing is set to the addition direction, count-ing will continue until full scale is reached (9999 with the 4-digit type and 999999with the 6-digit type), return to zero, and then complete count-up.2) Down-count (subtraction) input when counting is set to the subtraction direc-tion, counting will continue until full scale is reached (-999 with the 4-digit type and -99999 with the 6-digit type), and then the display will change to with the 4-digit type and with the 6-digit type. The counting value does not become “0” and so the counter does not count up.3) For directive, independent, and phase input, when the counting value increases or decreases from the value "0" and then returns back to the value "0," count-up is completed.Table 1: Setting the output modeOperation modes1. Input modeFor the input mode, you can choose one of the following five modes • Addition • Subtraction • Directive • Independent • PhasePHASEIND DIR DOWN UP2. Output modeFor the output mode, you can choose one of the following seven modes • Maintain output/hold count • Maintain output/over count I • Maintain output/over count II • One shot/over count • One shot/recount I • One shot/recount II • One shot/hold countSHOT-D SHOT-C SHOT-B SHOT-A HOLD-C HOLD-B HOLD-A。
Philips 55BDL6051C 65BDL6051C 显示器使用说明书
/welcomeUser Manual (English)ProfessionalDisplay SolutionsC Line55BDL6051C/65BDL6051C55BDL6051C 65BDL6051CSafety InstructionsSafety precautions and maintenanceWARNING: Use of controls, adjustments or procedures other than those specified in this documentation mayresult in exposure to shock, electrical hazards and/or mechanical hazards.Read and follow these instructions when connecting and using your display:Operation:• Keep the display out of direct sunlight and away from stoves or any other heat sources.• Keep the display away from oil, otherwise the plastic cover may be damaged.• Remove any object that could fall into ventilation holes or prevent proper cooling of the display’s electronics.• Do not block the ventilation holes on the cabinet.• When positioning the display, make sure the power plug and outlet are easily accessible.• When turning off the display by detaching the power cord, wait 6 seconds before re-attaching the power cord for normal operation.• Ensure the use of an approved power cord provided by Philips at all times. If your power cord is missing, please contact your local service center.• Do not subject the display to severe vibration or high impact conditions during operation.• Do not knock or drop the display during operation or transportation.• The eye bolt is for usage in short-time maintenance and installation. We suggest not to use the eye bolt for more than 1 hour.Prolong usage is prohibited. Please keep a clear safety area under the display while using the eye bolt.Maintenance:• To protect your display from possible damage, do not put excessive pressure on the LCD panel. When moving your display, grasp the frame to lift; do not lift the display by placing your hand or fingers on the LCD panel.• Unplug the display if you are not going to use it for an extensive period of time.• Unplug the display if you need to clean it with a slightly damp cloth. The screen may be wiped with a dry cloth when the power is off. However, never use organic solvent, such as, alcohol, or ammonia-based liquids to clean your display.• To avoid the risk of shock or permanent damage to the set, do not expose the display to dust, rain, water or an excessively moist environment.• If your display becomes wet, wipe it with dry cloth as soon as possible.• If a foreign substance or water gets in your display, turn the power off immediately and disconnect the power cord. Then remove the foreign substance or water, and send the unit to the maintenance center.• Do not store or use the display in locations exposed to heat, direct sunlight or extreme cold.• In order to maintain the best performance of your display and ensure a longer lifetime, we strongly recommend using the display in a location that falls within the following temperature and humidity ranges.-Temperature: 0-40°C 32-104°F-Humidity: 20-80% RH• LCD panel temperature need to be 25 degrees Celsius at all time for better luminance performance.IMPORTANT: Always activate a moving screen saver program when you leave your display unattended. Always activate a periodic screen refresh application if the unit will display unchanging static content. Uninterrupted display of still or static images over an extended period may cause “burn in”, also known as “after-imaging” or “ghost imaging”, on your screen. This is a well-known phenomenon in LCD panel technology. In most cases, the “burned in” or “after-imaging” or “ghost imaging” will disappear gradually over a period of time after the power has been switched off.WARNING: Severe “burn-in” or “after-image” or “ghost image” symptoms will not disappear and cannot be repaired. This is also not covered under the terms of your warranty.Service:• The casing cover should be opened only by qualified service personnel.• If there is any need for repair or integration, please contact your local service center.• Do not leave your display under direct sunlight.55BDL6051C 65BDL6051C If your display does not operate normally, having followed the instructions set out in this document, pleasecontact a technician or your local service center.Stability HazardThe device may fall, causing serious personal injury or death. To prevent injury, this device must be securely attached to the floor/wall in accordance with the installation instructions.Read and follow these instructions when connecting and using your display:• Unplug the display if you are not going to use it for an extensive period of time.• Unplug the display if you need to clean it with a slightly damp cloth. The screen many be wiped with a dry cloth when the power is off. However, never use alcohol, solvents or ammonia-based liquids.• Consult a service technician if the display does not operate normally when you have followed the instructions in this manual.• The casing cover should be opened only by qualified service personnel.• Keep the display out of direct sunlight and away from stoves or any other heat sources.• Remove any object that could fall into the vents or prevent proper cooling of the display’s electronics.• Do not block the ventilation holes on the cabinet.• Keep the display dry. To avoid electric shock, do not expose it to rain or excessive moisture.• When turning off the display by detaching the power cable or DC power cord, wait for 6 seconds before re-attaching the power cable or DC power cord for normal operation..• To avoid the risk of shock or permanent damage to the set do not expose the display to rain or excessive moisture.• When positioning the display, make sure the power plug and outlet are easily accessible.• IMPORTANT: Always activate a screen saver program during your application. If a still image in high contrast remains on the screen for an extended period of time, it may leave an ‘after-image’ or ‘ghost image’ on thefront of the screen. This is a well-known phenomenon that is caused by the shortcomings inherent in LCDtechnology. In most cases the afterimage will disappear gradually over a period of time after the power hasbeen switched off. Be aware that the after-image symptom cannot be repaired and is not covered underwarranty.• If provided with a 3-pin attachment plug on the power cord, plug the cord into a grounded (earthed) 3-pin outlet. Do not disable the power cord grounding pin, for example, by attaching a 2-pin adapter. The groundingpin is an important safety feature.EU Declaration of ConformityThis device complies with the requirements set out in the Council Directive on the Approximation of the Laws of the Member States relating to Electromagnetic Compatibility (2014/30/EU), Low-voltage Directive (2014/35/EU), RoHS directive (2011/65/ EU), ErP directive (2009/125/EC).This product has been tested and found to comply with the harmonized standards for Information Technology Equipment, these harmonized standards published under Directives of Official Journal of the European Union.ESD WarningsWhen user close to the monitor may cause the equipment discharge and reboot to the display of main menu.Warning:This equipment is compliant with Class A of EN55032/CISPR 32. In a residential environment this equipment may cause radio interference.Federal Communications Commission (FCC) Notice (U.S. Only)NOTE: This equipment has been tested and found to comply with the limits for a Class A digital device,pursuant to part 15 of the FCC Rules. These limits are designed to provide reasonable protection against harmfulinterference when the equipment is operated in a commercial environment. This equipment generates, uses, andcan radiate radio frequency energy and, if not installed and used in accordance with the instruction manual, maycause harmful interference to radio communications. Operation of this equipment in a residential area is likely tocause harmful interference in which case the user will be required to correct the interference at his own expense.55BDL6051C 65BDL6051CChanges or modifications not expressly approved by the party responsible for compliance could void the user’sauthority to operate the equipment.Use only an RF shielded cable that was supplied with the display when connecting this display to a computer device.To prevent damage which may result in fire or shock hazard, do not expose this appliance to rain or excessive moisture.This device complies with Part 15 of the FCC / ISED’s licence-exempt RSSs Rules. Operation is subject to the following two conditions: (1) This device may not cause harmful interference, and (2) this device must accept any interference received, including interference that may cause undesired operation.Le présent appareil est conforme aux CNR d’ ISED applicables aux appareils radio exempts de licence. L’exploitation est autorisée aux deux conditions suivantes : (1) le dispositif ne doit pas produire de brouillage préjudiciable, et (2) ce dispositif doit accepter tout brouillage reçu, y compris un brouillage susceptible de provoquer un fonctionnement indésirable.Envision Peripherals Inc.490 N McCarthy Blvd, Suite #120Milpitas, CA 95035USAEurope StatementIMPORTANT NOTE:The device is restricted to indoor use only when operating in the 5150 to 5350MHz frequency range. ( for 5G product only)AT BE BG HR CY CZ DKEE FI FR DE EL HU IEIT LV LT LU MT NL PLPT RO SK SI ES SE UK(NI)UKRadiation Exposure Statement:T his equipment complies with CE radiation exposure limits set forth for an uncontrolled environment. This equipment should be installed and operated with minimum distance 20cm between the radiator & body.The frequency, mode and the maximum transmitted power in EU are listed below:2400-2483.5MHz: < 20 dBm (EIRP) ( for 2.4G product only)5150-5250MHz: < 23 dBm (EIRP)5250-5350MHz: < 23 dBm (EIRP)5470-5725MHz: < 30 dBm (EIRP)5725-5825MHz: < 13.98 dBm (EIRP)55BDL6051C 65BDL6051C Taiwan:低功率電波輻射性電機管理辦法取得審驗證明之低功率射頻器材,非經核准,公司、商號或使用者均不得擅自變更頻率、加大功率或變更原設計之特性及功能。
飞利浦 246V5 用户手册说明书
/welcome246V5ZH 用户手册1 客户服务与保修 14 故障排除和常见问题解答17目录1. 重要 (1)1.1 安全措施与维修 (1)1.2 标志说明 (2)1.3 产品和包装材料的废弃 (3)2. 设置显示器 (4)2.1 安装 (4)2.2 操作显示器 (6)2.3 卸下底座支撑臂和底座 (8)3. 图像优化 (9)3.1 SmartContrast (9)4. 技术规格 (10)4.1 分辨率和预设模式 (12)5. 电源管理 (13)6. 客户服务与保修 (14)6.1 飞利浦平板显示器像素缺陷规定 146.2 客户服务与保修 (16)7. 故障排除和常见问题解答 (17)7.1 故障检修 (17)7.2 一般常见问题解答 (18)1. 重要此电子版用户指南适合使用 Philips 显示器的所有用户。
请在使用您的显示器之前花点时间阅读本 User Manual (用户手册)。
它包含与使用显示器相关的重要信息和注意事项。
产品享受飞利浦保修须符合下列条件:产品适当用于其设计目的、符合操作说明、返修时提供原始帐单或付款收据,帐单或收据应载明购货日期、销售商名称、产品型号及生产号。
1.1 安全措施与维修警告使用本文档中未介绍的控制、调整或过程可能导致碰撞、电气危险和/或机械危险。
在连接和使用计算机显示器时,阅读并遵循下列注意事项:操作• 请使显示器远离阳光直接照射、明亮强光线、以及任何其他热源。
长期暴露于此类环境可能导致显示器褪色和损坏。
• 移开任何可能掉入通风孔的物品或者会妨碍显示器电子器件正常冷却的物品。
• 请勿堵塞机壳上的通风孔。
• 放置显示器时,确保电源插头和插座便于插拔。
• 如果通过拔掉电源线或直流电源线关闭显示器电源,则在重新连接电源线或直流电源线以进行正常操作之前,必须等待 6 秒钟。
• 请务必使用由 Philips 提供的经过认可的电源线。
如果电源线缺失,请与您当地的服务中心联系。
液晶显示器使用技巧

使用技巧·不要让显示器靠近水源,如浴室、洗碗机、厨房、洗衣机、游泳池或在潮湿的地下室。
·不要把显示器置于不稳的车子、椅子、桌子上,若显示器落下,它会伤害到使用者,并有可能导致设备的损伤。
用车子或椅子放置可参考厂商或显示器供货商的建议。
若把显示器固定于墙上或架子上,固定的安装需得到厂商承认并严格按照程序安装。
·在后壳的上部及下部有许多狭长的开孔是通风用的。
为保证显示器持续操作而不过热,这些散热孔不能被堵塞或覆盖。
故显示器不能置于床、沙发、毛毯或类似的表面上,也不能靠近于辐射体或热源之上。
除非通风得到保障,否则不能放在书柜或箱子内。
·显示器操作的电源电压范围标识于后壳标签上。
若您不能确认所供应的电压可洽询经销商或当地的电力公司。
·当显示器长期不使用,请切断电源。
这样做能防止在雷雨天受到电击以及异常电源电压的损伤。
·不能让插座过载,否则会引起火灾或电击。
·不要把异物放入机内,它能引起短路而导致火灾或电击。
·不能打开后壳,以免遭受高压或其它危险。
若有故障,请直接与售后服务人员联系。
·为保证安全的工作,请确保电源电压为100~240V AC,电流至少为5A。
·请将显示器的插头插到附近最方便连接的电源插座上。
使用技巧1、尽量避免长时间显示同一张画面和CRT显示器一样,液晶显示器也会因为长时间的工作引起内部的老化或烧坏,尤其糟糕的是在长时间内显示同一张画面。
如果长时间地连续显示一种固定的内容,就有可能导致某一些像素过热,进而造成内部烧坏,产生坏点。
这种损坏是不可逆的,且不能修复。
因此在使用时应该注意:没事可干时,关闭显示器;如果只是暂时的没事干,就选择屏幕保护程序。
或者是把显示屏的亮度调低一点,也可以是让屏幕全白;不过这样只是保护了液晶,后面的光管还在一直工作,所以更赞成直接关了显示器。
2、平常最好是使用推荐的最佳分辨率这一点和CRT大不相同!传统的CRT显示器的显示是采用逐行扫描的方式,在分辨率上没有什么大问题;而液晶显示器的显示原理则完完全全与CRT显示器不一样。
变频器液晶屏操作
变频器液晶屏操作
1、液晶屏分为六种屏幕状态,通过“PRG”键依次切
换,第一屏为系统状态屏,第二屏为功能设置屏,
第三屏为参数设置屏,第四屏为故障记录屏,第五屏
为运行累计时间屏,第六屏为时间设置屏.
2、系统状态屏共分两屏,分别为输入参数屏和输出参
数屏,可以通过“ALT+”和“ALT-”在两屏之间切
换。
3、故障记录屏:变频器最多可以记录10个已发生的重
故障,可以通过“ALT+”和“ALT-”在各次故障间
切换,0表示最新故障,用“▲”/“▼”查看该故
障下的各单元状态(每次显示三相同一位置的三个
单元),以确定发生故障单元的编号,更换对应编号
的故障单元。
4、变频器上电后等到“高压指示灯”(红色指示灯)亮。
液晶屏显示“系统待机”。
5、当液晶屏不亮时可以按“SET”或键点亮“ALT+”,
“ALT-”。
运行中切勿按动红色“STOP”键,以免
造成电机停机。
Philips 190S5 48 cm (19) SXGA LCD 显示器说明书
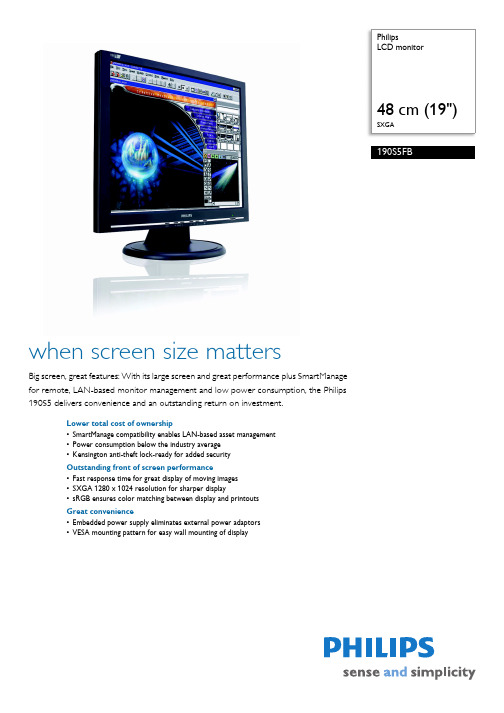
Philips48 cm (19")SXGA190S5FBwhen screen size mattersBig screen, great features: With its large screen and great performance plus SmartManagefor remote, LAN-based monitor management and low power consumption, the Philips190S5 delivers convenience and an outstanding return on investment.Lower total cost of ownership•SmartManage compatibility enables LAN-based asset management•Power consumption below the industry average•Kensington anti-theft lock-ready for added securityOutstanding front of screen performance•Fast response time for great display of moving images•SXGA 1280 x 1024 resolution for sharper display•sRGB ensures color matching between display and printoutsGreat convenience•Embedded power supply eliminates external power adaptors•VESA mounting pattern for easy wall mounting of displayIssue date 2011-06-07Version: 3.0.412 NC: 8639 000 15553© 2011 Koninklijke Philips Electronics N.V.All Rights reserved.Specifications are subject to change without notice. Trademarks are the property of Koninklijke Philips Electronics N.V. or their respective SpecificationsLCD monitor48 cm (19") SXGAHighlightsSmartManage enabledSmartManage is a system for monitoring, managing and checking status of display devices as well as delivering remote support to users who experience difficulties - all accomplished over a LAN.Lower power consumptionReduction of the electrical power required to operate a device.Kensington lock compatibleSmall apertures built into the display's frame for use with a locking device that secures a display to a fixed object for added protection against theft.Fast response timeResponse time measures signal reaction speed in milliseconds. On/off response time measures the time required for the screen to turn fromcompletely white to completely black and vice versa. Fast on/off response time improves display of text. Gray-to-grey response time measures the average time of transition between several sets of random gray levels - Lower numbers mean faster transitions. Faster is better because a fast response timeeliminates visible image artifacts that could dampen your experience when viewing fast moving images or objects.SXGA, 1280 x 1024 resolutionFor graphics monitors, the screen resolution signifies the number of dots (pixels) on the entire screen. For example, a 1280-by-1024 pixel screen is capable of displaying 1280 distinct dots on each of 1024 lines, or about 1.3 million pixels.sRGB readysRGB is an industry standard that ensures the best possible match between the colors displayed on your screen and those in your printouts.Embedded power supplyAn embedded power supply is a power adaptor built into the body of a display device that replaces a bulky external power adaptor.VESA mounting holesA unified industry standard for wall mounting IT equipment set by the Video Electronics StandardsAssociation.Picture/Display •LCD panel type: 1280 x 1024 pixels, Anti-glare polarizer, RGB vertical stripe •Panel Size: 19"/ 48 cm•Effective viewing area: 376.3 x 301.1 mm •Pixel pitch: 0.294 x 0.294 mm •Brightness: 250 cd/m²•Contrast ratio (typical): 500:1•Display colors: 16 M•Viewing angle: @ C/R > 5•Viewing angle (H / V): 160 / 160 degree •Response time (typical): 12 ms•White Chromaticity, 6500K: x = 0.313 / y = 0.329•White Chromaticity, 9300K: x = 0.283 / y = 0.297•Maximum Resolution: 1280 x 1024 @ 75 Hz •Optimum resolution: 1280 x 1024 @ 60 Hz •Factory Preset Modes: 15 modes •User definable modes: 14 modes•Horizontal Scanning Frequency: 30 - 82 kHz •Refresh Rate (V): 56 - 76 Hz •sRGBConnectivity•Signal Input: VGA (Analog )Convenience•User convenience: On-screen Display, SmartManage•Monitor Controls: Auto, Brightness Control, Left/Right, Menu (OK), Power On/Off, Up/Down •OSD Languages: English, French, German, Italian,Simplified Chinese, Spanish•Other convenience: Kensington lock•Plug & Play Compatibility: DDC CI, sRGB, Windows 98/ME/2000/XP•Regulatory approvals: CE Mark, E2000, EMC, NUTEK, Energy Star, SEMKO, TCO '99, TÜV/GS, TÜV Ergo, FCC-B, UL, CSA •Tilt: 5° to 25°•VESA Mount: 100 x 100 mmAccessories•User Manual•Included accessories: AC Power Cord, VGA cable •Optional accessories: Super Ergo BaseDimensions•Dimensions (with base) (W x H x D): 425 x 419 x 235 mm •MTBF: 50,000 hrs•Relative humidity: 20% - 80%•Temperature range (operation): 5°C to 35°C •Temperature range (storage): -20°C to 60°C •Weight:5.8 kgPower•Complies with: E2000, Energy Star, NUTEK •Consumption (On mode): 34W (Typical)•Consumption (Off Mode): 1 W•Power LED indicator: Operation - green, Stand by/sleep - Amber•Power supply: Built-in。
Philips 5000系列LCD显示器说明书
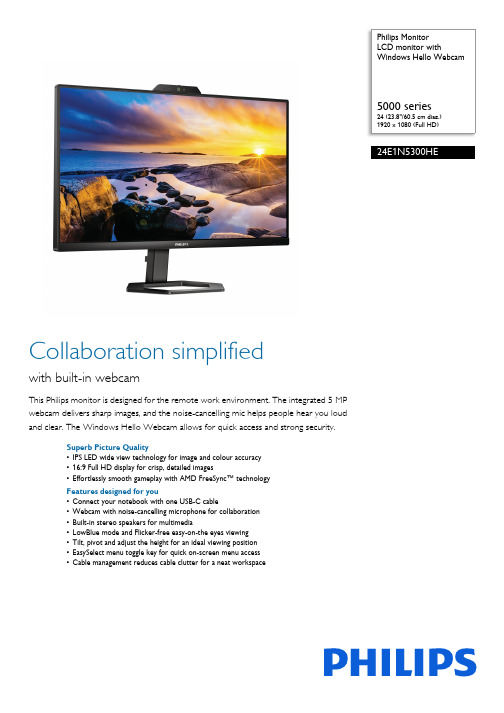
Philips MonitorLCD monitor withWindows Hello Webcam Array 5000 series24 (23.8"/60.5 cm diag.)1920 x 1080 (Full HD)24E1N5300HECollaboration simplifiedwith built-in webcamThis Philips monitor is designed for the remote work environment. The integrated 5 MPwebcam delivers sharp images, and the noise-cancelling mic helps people hear you loudand clear. The Windows Hello Webcam allows for quick access and strong security.Superb Picture Quality•IPS LED wide view technology for image and colour accuracy•16:9 Full HD display for crisp, detailed images•Effortlessly smooth gameplay with AMD FreeSync™ technologyFeatures designed for you•Connect your notebook with one USB-C cable•Webcam with noise-cancelling microphone for collaboration•Built-in stereo speakers for multimedia•LowBlue mode and Flicker-free easy-on-the eyes viewing•Tilt, pivot and adjust the height for an ideal viewing position•EasySelect menu toggle key for quick on-screen menu access•Cable management reduces cable clutter for a neat workspaceHighlightsUSB-C connectionThis Philips display features a USB type-C connector with power delivery. Withintelligent and flexible power management, you can power charge your compatible device directly. Its slim, reversible USB-C allows for easy, one-cable connection. You can watch high-resolution video and transfer data at super speed, while powering up and recharging your compatible device at the same time.IPS technologyIPS displays use an advanced technology that gives you extra-wide viewing angles of 178/178 degrees, making it possible to view the display from almost any angle. Unlike standard TN panels, IPS displays give you remarkably crisp images with vivid colours, making them ideal not only for Photos, movies and web browsing, but also for professional applications that demand colour accuracy and consistent brightness at all times.Ultra-smooth gaming Gaming shouldn't be a choice between choppy gameplay or broken frames. With the new Philips monitor it doesn't have to be. Get fluid, artefact-free performance at virtually any frame rate with AMD FreeSync™ technology, smooth, quick refresh and ultra-fast response time.Webcam and noise-cancelling micThis Philips monitor comes with a built-in 5 MP webcam, a noise-cancelling microphone, and speakers, making it perfect for working from home and collaborating remotely. The webcam is certified for Windows Hello and is equipped with advanced sensors for Windows Hello™ facial recognition, which conveniently logs you into your Windows devices in less than2 seconds. The physical camera switch offers extra privacy when not in use. The noise-cancelling microphone and dual 5 watt integrated speakers deliver clear communications.Built-in stereo speakersA pair of high-quality stereo speakers built into a display device. They may be visible front firing, or invisible down firing, top firing, rear firing etc. depending on model and design.LowBlue Mode and Flicker-freeOur LowBlue Mode and Flicker-freetechnology have been developed to reduce eye strain and fatigue often caused by long hours in front of a monitor.Compact Ergo BaseThe Compact Ergo Base is a people-friendly Philips monitor base that tilts, pivot and height-adjusts so each user can position the monitorfor maximum viewing comfort and efficiency.Issue date 2023-06-29 Version: 4.1.112 NC: 8670 001 80242 EAN: 87 12581 78334 1© 2023 Koninklijke Philips N.V.All Rights reserved.Specifications are subject to change without notice. Trademarks are the property of Koninklijke Philips N.V. or their respective owners.SpecificationsPicture/Display•LCD panel type: IPS technology•Backlight type: W-LED system•Panel Size: 23.8 inch/60.5 cm•Display Screen Coating: Anti-Glare, 3H, Haze 25%•Effective viewing area: 527.04 (H) x 296.46 (V)•Aspect ratio: 16:9•Maximum resolution: 1920 x 1080 @ 75 Hz*•Pixel Density: 92.56 PPI•Response time (typical): 4 ms (Grey to Grey)*•MPRT:1ms•Brightness: 300 cd/m²•Contrast ratio (typical): 1000:1•SmartContrast: Mega Infinity DCR•Pixel pitch: 0.2745 x 0.2745 mm•Viewing angle: 178º (H) / 178º (V), @ C/R > 10•Flicker-free•Picture enhancement: SmartImage game •Colour gamut (typical): NTSC 104.8%*, sRGB 120.9%*•Display colours: 16.7 M•Scanning Frequency: 30–85 kHz (H) / 48–75 Hz (V)•LowBlue Mode•EasyRead•sRGB•AMD FreeSync™ technologyConnectivity•Signal Input: HDMI 1.4 x 1, DisplayPort 1.2 x 1, USB-C 3.2 Gen 1 x 1 (upstream, Power Delivery up to 65 W)•USB:: USB 3.2 x 4 (downstream with 1 fast charge B.C 1.2)•Sync Input: Separate Sync•Audio (In/Out): Audio outUSB•USB-C: Reversible plug connector•Super speed: Data and Video transfer•DP: Built-in Display Port Alt mode•Power delivery: USB PD version 3.0•USB-C max. power delivery: Up to 65 W (5V/3A, 9V/3A, 10V/3A, 12V/3A, 15V/3A, 20V/3.25A) Convenience•Built-in Speakers: 5 W x 2•Built-in webcam: 5.0 megapixel camera with microphone and LED indicator (for Windows Hello)•Noise cancellation•User convenience:Power On/Off, Menu, Volume, Input, SmartImage Game•OSD Languages: Brazil Portuguese, Czech, Dutch, English, Finnish, French, German, Greek, Hungarian, Italian, Japanese, Korean, Polish, Portuguese, Russian, Simplified Chinese, Spanish, Swedish, Traditional Chinese, Turkish, Ukrainian •Other convenience: Kensington lock, VESA mount(100 x 100 mm)•Plug and Play Compatibility: DDC/CI, Mac OS X,sRGB, Windows 10 / 8.1 / 8 / 7Stand•Height adjustment: 130 mm•Pivot: -/+ 90 degree•Tilt: -5/20 degreePower•On mode: 24.2 W (typ.)•Standby mode: 0.5 W (typ.)•Off mode: 0.3 W (typ.)•Energy Label Class: E•Power LED indicator: Operation - White, Standbymode - White (flashing)•Power supply: External, 100–240 VAC, 50–60 HzDimensions•Product with stand (max height):540 x 494 x 198 mm•Product without stand (mm): 540 x 336 x 43 mm•Packaging in mm (W x H x D): 600 x 526 x 143 mmWeight•Product with stand (kg): 4.37 kg•Product without stand (kg): 2.71 kg•Product with packaging (kg): 7.65 kgOperating conditions•Temperature range (operation): 0 to 40 °C•Temperature range (storage): -20 to 60 °C•Relative humidity: 20%-80 %•Altitude: Operation: +12,000 ft (3658 m), Non-operation: +40,000 ft (12,192 m)•MTBF: 50,000 hrs (excluding backlight) hour(s)Sustainability•Environmental and energy: RoHS•Recyclable packaging material: 100 %•Specific Substances: Mercury free, PVC/BFR freehousingCompliance and standards•Regulatory Approvals: CB, CE Mark, CU-EAC,EAEU RoHS, FCC Class B, ICES-003, TUV/ISO9241-307, TUV-BAUARTCabinet•Colour: Black•Finish: TexturedWhat's in the box?•Monitor with stand•Cables: HDMI cable, USB-C to USB-A/C Y cable,Power cable•User Documentation*"IPS" word mark / trademark and related patents on technologiesbelong to their respective owners.*The maximum resolution works for either HDMI input or DP input.*For best output performance, please always ensure that your graphiccard is capable of achieving the maximum resolution and refresh rateof this Philips display.*Response time value equal to SmartResponse*MPRT adjusts the brightness for blur reduction, so the brightnesscannot be adjusted while MPRT is turned on. To reduce motion blur,the LED backlight will strobe in time with the screen refresh rate,which may cause a noticeable change in brightness.*MPRT is a gaming-optimised mode. Turning on MPRT may causenoticeable screen flickering. It is recommended to turn this mode offwhen you are not using the gaming function.*NTSC Area based on CIE 1976*sRGB Area based on CIE1931*2020 Advanced Micro Devices, Inc. All rights reserved. AMD, theAMD Arrow logo, AMD FreeSync™ and combinations thereof aretrademarks of Advanced Micro Devices, Inc. Other product namesused in this publication are for identification purposes only and maybe trademarks of their respective companies.*For Video transmission via USB-C, your Notebook/device mustsupport USB-C DP Alt mode*For USB-C power and charging function, your Notebook/devicemust support USB-C standard Power Delivery specifications. Pleasecheck with your Notebook user manual or manufacturer for moredetails.*The monitor may look different from feature images.。
操作面板按键操作使用说明书

操作面板按键操作使用说明书第 1 页共 16 页第 2 页 共 16 页1.操作面板概述操作面板(如图1-1所示),正面分为两大区域:液晶显示区域及按键操作区。
图1-1在整个操作面板正面的左边偏上位置,为液晶显示区域,用于显示当前系统状态,包括缝纫模式、各种参数、前/后固缝设置,以及抬压脚、停针位、剪线、慢速起缝等液晶字符。
系统上电后操作面板将自动进行一次自检,这时液晶显示区内的所有图标会闪亮一次,而后只显示系统的当前设置,其他没有选择的功能其所代表的图标将不被点亮。
如图1-2所示,图中是所有液晶字段均被点亮的状态。
图1-2操作面板每个按键的说明详见表1。
表1 :操作面板按键说明序号 外观 描述1功能键:主要起确定操作和确认参数设置的作用,还可以与其它按键组合进入更高一级的参数设置;2前加固缝(起始倒针)功能选择键:每有效按动一次,设置将在前单固缝、前双固缝、前四固缝和无前固缝之间循环选择,选择时液晶屏幕左边会显示出设置的前固缝液晶字符标识;详细见“2.1.2前/后加固缝设置”说明。
3后加固缝(结束倒针)功能选择键:每有效按动一次,设置将在后单固缝、后双固缝、后四固缝和无后固缝之间循环选择,选择时液晶屏幕左边会显示出设置的后加固缝液晶字符标识;详细见“2.1.2前/后加固缝设置”说明。
第 3 页 共 16 页序号 外观 描述4自由缝纫模式键:每有效按动一次系统即进入自由缝工作模式状态,功能选择后液晶屏幕下方会显示自由缝状态标识,详细见“2.1.1 缝纫模式设置”说明。
5多段缝模式选择键:每有效按动一次,液晶显示出多段缝的段数设置参数,按P 键后进入各段数的针数设置,功能选择后液晶屏幕下方会显示多段缝状态标识,详细见“2.1.1 缝纫模式设置”说明中多段缝的设置说明。
6 W 缝键:每有效按动一次,系统即进入W 缝工作模式状态,功能选择后液晶屏幕下方会显示W 缝状态标识,详细见“2.1.1 缝纫模式设置”说明中W 缝的设置说明。
- 1、下载文档前请自行甄别文档内容的完整性,平台不提供额外的编辑、内容补充、找答案等附加服务。
- 2、"仅部分预览"的文档,不可在线预览部分如存在完整性等问题,可反馈申请退款(可完整预览的文档不适用该条件!)。
- 3、如文档侵犯您的权益,请联系客服反馈,我们会尽快为您处理(人工客服工作时间:9:00-18:30)。
ibm P5小机的HMC1和HMC2的IP地址默认为192.168.2.147和192.168.3.147,如果对此默认IP做过改动,后来又遗忘的情况下,通过进入P5小机液晶控制面板上的功能30, 就能读出HMC端口的IP地址。
具体步骤如下:a. 为服务器接通电源,直到控制面板上的显示不再变化,且电源指示灯缓慢闪烁。
b. 使用控制面板的<↑> 或<↓> 按钮选择功能2 . 按< →> 按钮进入功能2,按<→> , 选中N(Normal), 使用<↑> 或<↓> 按钮将N 改成M(Manual)按2次<→> 退出功能2.b. 使用<↑> 或<↓> 按钮选择功能30,按< →> 按钮进入。
控制面板显示30**c. 使用<↑> 或<↓> 按钮,使面板显示3000 或3001,然后按< →> ,就能控制面板上读出所对应HMC端口的IP 地址了。
如:SP_A:_ETH0:_ _ _T59.5.105.243_ _ _ _ _ _HMC0端口的IP地址是9.5.105.243.d. 检查完成后,使用控制面板的<↑> 或<↓> 按钮选择功能2 . 按< →> 按钮进入功能2,按<→> , 选中N, 使用<↑> 或<↓> 按钮将M 改成N然后按2次<→> 退出功能2e. 选择功能1 ,进入正常的操作模式。
各位,给大家共享一下p5、i5系列机器的液晶面板的一些使用方法。
想必老大们早已熟知,算是给新手们一个提示。
注意:如果你不确认这些功能是作什么用的,请不要在业务服务器上随便更改,不正确的使用某些功能可能造成丢失用户数据!1、进入手动模式(将“N”改为“M")使用上下翻键和确认键进入”02“-> 使用确认键将”<”移动到“N”上,而后使用上下翻键将其改为“M”-> 两次确认键确认并退出“02”。
此时系统将进入手动模式,再按上下翻键时会发现多出许多功能选项,如可以查看管理网卡IP地址,操作关机等。
平时不要让其处于手动状态,否则开机将会进入服务模式。
2、“04”模式该模式是进行所有状态灯检测用的。
进入并确认后,会发现系统所有的告警灯都将亮起。
别担心,系统没有故障,4分钟后或重新启动后灯将熄灭。
3、“08”模式该选项用于快速关闭服务器。
在特殊情况,需要立即关闭机器是很有用。
4、”20“进入该选项,可以查看机器的序列号等信息。
5、”30“进入该选项,一般有”3000“和”3001“可供选择。
进入后,将能够查看sp卡上网卡目前的IP地址。
这对于网络中存在未知的DHCP Server造成动态IP改变是非常有用的。
贴一些以前贴的面板字母含义OS IPL typesA IPL from disk using copy A of the system Licensed Internal Code.B IPL from disk using copy B of the system Licensed Internal Code.C Reserved for hardware service use only under the direction of Rochester development support. Attention: Severe data loss can occur with improper use of this function.D IPL from media other than load-source disk. Alternate IPL for code installation support. System operating mode valuesManual (M) Allows you to access DST and perform an attended IPL.Normal (N) Allows you to access the operating system and perform an unattended IPL. IPL speedsF Fast override for one IPL. Fast IPL run. Some hardware diagnostics are skipped.S Slow override for one IPL. Full hardware diagnostics run. Use whenever hardware is changed, for intermittent hardware failure, and on the first installation IPL. The following diagnostics are run: v Main storage tests. v CEC Inter-chip interface tests (wire test). v Extended Logical Built-in Self Tests.V=F Use system-defined speed. Fast IPL set by system value (displayed at function 01). V=S Use system-defined speed. Slow IPL set by system value (displayed at function 01). V Fast IPL or slow IPL set by the system value (selected at function 02). Function 02 selection or the system default at each IPL.Firmware IPL typesP IPL from disk using copy P of the system Licensed Internal Code.T IPL from disk using copy T of the system Licensed Internal Code.HMC indicatorsHMC=1 The HMC is connected.HMC=0 The HMC is disconnected.使用HMC管理单台P5服务器的方法内容提要:1. 连接HMC与受管服务器2. 设置HMC以识别受管服务器说明:一、连接HMC与受管服务器用来管理P5服务器的HMC有两种外观:台式(7310-C03)和机架式(7310CR2)。
它们的外部接口如下图所示。
1 1、电源接口8 8、AGP 插槽2 2、鼠标接口9 9、音频输出接口3 3、并行接口10 10、麦克风接口4 4、USB 接口11 11、USB 接口5 5、以太网接口12 12、VGA 监视器接口6 6、音频输入接口13 13、串行接口7 7、PCI 插槽14 14、键盘接口首先将HMC的键盘、鼠标和显示器连接好。
然后将与HMC 包装在一起的以太网电缆(或交叉电缆)从HMC 上的以太网端口连接到在受管服务器上标记为HMC1 的以太网端口。
对于独立HMC 型号,将电缆连接到位于后面板上的集成以太网端口(此端口在后面的配置步骤中标记为eth0);不要使用位于PCI 卡(如果已安装)上的以太网端口。
对于机架安装式HMC 型号,将电缆连接到两个纵向排列的以太网端口中位置靠下的那个端口(标为端口1)。
注意:此时不要将受管服务器连接到电源。
二、设置HMC以识别受管服务器将HMC连接到电源。
按照以下指示信息,通过指导式安装向导配置HMC。
注意:确保此时受管系统未连接电源。
1、启动指导式安装向导:按HMC 上的电源按钮以将其打开。
如果首选语言为英语,请继续执行。
如果首选语言不是英语,则当系统提示您更改语言环境时,请输入数字2。
注意: 如果您不执行任何操作,则此提示将在30 秒后超时。
如果数字小键盘不工作,则改用常规数字键。
在“语言环境选择”窗口的列表中,选择您要显示的语言环境,然后单击确定。
语言环境确定HMC 界面显示的语言。
2、使用以下缺省用户标识和密码登录到HMC:标识:hscroot密码:abc123系统在以后将提示您为此标识提供一个新的7 字符密码。
要继续进行操作,请接受硬件管理控制台许可协议。
如果拒绝此许可协议,则将无法完成HMC 配置。
3、当显示指导式安装向导时,完成此向导以配置HMC。
如果未显示指导式安装向导,则可以从HMC 界面手工访问此向导。
请参阅使用HMC 界面启动指导式安装向导。
4、在配置网络时,将HMC设置为DHCP服务器:在第二个“配置网络设置”窗口中,选择标为eth0 的LAN 适配器。
单击下一步。
在“LAN 适配器速度”窗口中,单击下一步。
在“配置(LAN 适配器名称)”窗口中,单击下一步。
在第二个“配置(LAN 适配器名称)”窗口中,选择专用服务网络。
单击下一步。
在第三个“配置(LAN 适配器名称)”窗口中,选择是,启用HMC 作为DHCP 服务器。
单击下一步。
在“配置网络设置”窗口中,选择否。
(您可以在以后配置余下的任何LAN 适配器。
)单击下一步。
在“后续步骤”摘要窗口中,单击下一步。
5、将受管系统连接到电源。
然后,受管系统将打开其服务处理器电源。
在HMC 上,单击服务器和分区> 服务器管理,以查看受管系统的状态。
显示状态可能需要几分钟的时间。
注意:如果没有将HMC 配置为“动态主机配置协议”(DHCP)服务器,则HMC 将不会自动检测受管系统。
6、为受管服务器设置密码。
在执行以上步骤之后,您就可以使用HMC来管理P5服务器了。
