插卡音箱方案XK313规格书
煤矿KTK113A井下语音广播系统方案
KTK113广播系统设计方案系统版本:R2.0 (Cover Title 2)文档编号:CHI-PT-NJBL-GBXT-A2南京北路自动化系统有限责任公司位于南京江宁经济技术开发区,是南京市高新技术企业,现有高级工程师、工程师及其他专业技术人员100余名。
是专业从事煤矿通信、自动化、信息化产品的研发、生产、销售及服务的高科技公司。
公司拥有ISO9001:2008质量管理体系认证,坚持“质量第一、至诚服务、用户至上、持续改进”的质量方针,得到了广大客户的信赖和支持。
目前公司产品覆盖全国10多个省、自治区,并在多个煤炭主产区设有售后服务机构。
公司以满足客户需求为己任,不断生产高性价比的产品,为客户创造价值。
南京北路自动化系统有限责任公司联系地址:南京市江宁开发区菲尼克斯路99号邮政编码:211106电话号码:(025)52187543传真:(025)52185703邮件地址:*****************客户服务电话:400-611-5166客户支持网站:目录1系统概述 (5)2设计原则、设计标准 (5)2.1硬件设计原则 (5)2.2软件设计原则 (5)2.3设计依据、规范和标准 (6)3系统组成 (6)3.1组网方式 (7)4系统主要功能 (7)4.1应急救援指挥 (7)4.2生产调度指挥 (7)4.3紧急呼叫和双向通信 (8)4.4与安全监控系统联动 (8)4.5广播功能 (8)4.5.1预排功能 (8)4.5.2区域播放 (8)4.6在线状态管理 (8)5系统特点 (9)5.1数字化 (9)5.2全矿井覆盖 (9)5.3点播 (9)5.4自动播放 (9)5.5组网简单 (9)6主要技术指标 (9)7系统设计 (11)7.1系统组成及连接 (11)7.2井下区域划分及广播分站布置 (11)8质量保证及售后服务 (12)8.1产品质量保障 (12)8.2服务人员组织 (12)8.3试运行期服务 (13)8.4保修期内服务 (13)8.5保修期后服务 (13)8.6服务响应时间 (13)8.7人员培训计划 (14)9系统清单 (15)10系统设备设计图 (15)插图目录图3-1 通信电缆图.................................................................................................. 错误!未定义书签。
JBL L100 Classic 3-Way 书架扬声器说明书
2Thank you for purchasing the JBL ® L100 Classic 3-Way Loudspeaker For more than 70 years, JBL has been providing audio equipment for concert halls, recording studios and movie theaters around the world and has become the trusted choice of leading recording artists and sound engineers. The legendary JBL 4310 professional studio monitor helped produce many of the most popular albums of the 1960s and ‘70s. The 4310 was the inspiration for the L100 home audio loudspeaker introduced in 1970, which became JBL’s all-time best selling speaker. The L100 Classic is a modern interpretation of the original L100. The new L100 Classic honors this storied legacy with its iconic 12-inch (300mm) 3-way configuration, but with all-new drivers, crossover network, enclosure, and features to bring the design up to the highest 21st-century performance standards. Utilizing a compact monitor-type footprint, the L100 Classic features advanced JBL transducers including the JW300PW-8 Pure Pulp cone woofer, the 105H-1 Polymer-coated Pure Pulp cone midrange, and the JT025TI1-4 Titanium tweeter. The L100 Classic retains all of the performance attributes that endeared the original L100 to listeners in the ‘70’s and ‘80s, such as exceptional dynamic range and contrast, clean and effortless high output, and precise high impact bass. The updated L100 Classic adds even greater detail resolution across the full bandwidth, lower distortion and more lifelike stereo imaging, particularly off-axis. The L100 Classic is sure to become a new legend among music lovers everywhere.PACKAGE CONTENTS • One L100 Classic loudspeaker • One Quadrex foam grille • One L100 Classic Owner’s Manual PLACEMENT AND POSITIONING CAUTION: The L100 Classic weighs 58.8 lb. (26.7 kg) each. Before placing the speaker on a shelf or platform, be sure that it is sturdy enough to support the speaker’s weight.Before deciding where to place your speakers, survey your room and think about placement, using the illustration below as a guide.• A void placing the speakers near power amplifiers, heat registers or other objects that generate large amounts of heat.• D o not place the speakers in very humid or dusty places.• D o not place the speakers in direct sunlight or where they will be exposed to other intense light.• F or best results, place the speakers 6–8 feet (1.8-2.4m) apart. If you set the speakers farther apart than this, angle them toward the listening position.• T he speakers will produce the most accurate stereo soundstage when the angle between the listener and the speakers is between 40 and 60 degrees.• G enerally, bass output will increase as the speaker is moved closer to a wall or corner. For best performance, we recommend that you place the speakers at least 20 inches (50cm) away from the sidewalls.• T he speaker will yield the best stereo imaging when oriented vertically.• T he L100 Classic may be stand mounted with optional JBL metal stands (model JBL JS-120, sold separately) that angle the speaker upward. • I f not using the optional stands with built-in angle, then we recommend you to position each speaker so that its tweeter is approximately at ear level.min 20 inches (50cm)6-8 feet (1.8-2.4m)40° – 60°Listening PositionCAUTION: Make sure that all of the system’s electrical components are turned OFF (and preferably unplugged from their ac outlets) before making any connections.Speakers and amplifiers have corresponding positive and negative (“+” and “–”)connection terminals. The L100 Classic has color-coded connection terminals. The“+” terminal is red, while the “–” terminal is black. See the illustration on the right.The L100 Classic is designed so that a positive voltage at the “+” (red) terminalwill cause the speaker drivers to move outward (toward the room).We recommend using a high-quality speaker cable with polarity coding. The sideof the wire with a ridge or other coding is usually considered positive polarity (“+”).To ensure proper polarity, connect each “+” terminal on the back of the amplifieror receiver to the respective “+” (red) terminal on each speaker. Connect the “–” (black) terminals in a similar way. See your receiver or amplifier’s owner’s manual to confirm its connection procedures.BASIC SINGLE-WIRE CONNECTIONConnect the amplifier to each speaker as shown inthe illustration on the right.IMPORTANT: Do not reverse polarities (i.e., “+”to “–” or “–” to “+”) when making connections.Doing so will cause poor stereo imaging anddiminished bass performance.The L100 Classic’s gold-plated speaker terminalscan accept a variety of wire connector types:bare wire, spade connectors, pin connectorsand banana connectors.USING BARE WIRE OR PIN CONNECTORS:IMPORTANT: Make sure that the (+) and (–) wires orpins do not touch each other or the other terminal.Touching cables can cause a short circuit that candamage your receiver or amplifier.USING SPADE CONNECTORS:IMPORTANT: Make sure the (+) and (–) spade connectorblades do not touch each other or the other terminal.Touching blades can cause a short circuit thatcan damage your receiver or amplifier.USING BANANA CONNECTORS:Negative (-)TerminalPositive (+)Terminal+-Receiver or Amplifier(one channel shown)SpeakerConnector Panel A. Unscrew CapB. I nsert Bare Wire or Pin Connector through Hole in PostC. T ighten Cap to SecureA. Unscrew CapB. Insert SpaceConnector Bladesaround PostC. T ighten CapB. I nsert Banana Connectorinto Hole in CapA. T ighten Cap3L100 Classic Owner’s ManualCONTROLS/ADJUSTMENTSThe L100 Classic has front-panel adjustments that let you balancethe levels of the midrange driver (MF) and tweeter (HF) relative tothe woofer.You can use these controls to adjust the speaker’s sound accordingto your room’s acoustics, or your personal taste. The “0dB” defaultposition is a good place to start. Whatever sounds best to you inyour room is the right setting.As with most speakers, after you start playing the L100 Classic itwill take the drivers’ suspensions several weeks to “break in” andachieve optimum performance. During this period, the balancebetween the woofer, midrange, and tweeter may change, so werecommendthat you adjust the midrange and tweeter controls again after the break-in period.NOTE: There is a protective plastic film on the front control panel label that may be removed.CARING FOR YOUR SPEAKERS• W ipe the cabinet with a clean, dry cloth to remove dust. Damp cloths or cleaning paper may dull the cabinet’s finish.• D o not use volatile liquids such as benzene, paint thinner, alcohol, etc., on the cabinet. Do not spray insecticide near the cabinet.• T o remove dust from the foam grille, use a vacuum cleaner set to low suction.• D o not wash the grille in water.• I f the surfaces of the woofer and midrange cones become dusty, you can carefully sweep them clean witha soft, dry calligraphy brush or paintbrush. Do not use a damp cloth.• N EVER touch anything to the tweeter dome.SPECIFICATIONSSystem Type3-way bookshelf loudspeakerWoofer 12-inch (300mm) Pure Pulp cone (JW300PW-8)Midrange 5-1/4 inch (130mm) Polymer-coated, Pure Pulp cone (105H-1) Tweeter 1-inch (25 mm) Titanium dome with soft surround (JT025TI1-4) Impedance 4 ohmsRecommended Amplifier Power25-200 Watts RMSSensitivity (2.83V/1m) 90dBFrequency Response 40Hz-40kHz (-6dB)Crossover Frequencies 450Hz, 3.5kHzControls Attenuators for MF and HF DriversConnector Type Five-way gold-plated Binding PostsFinish Genuine walnut veneer enclosure with Quadrex foam grille in a choice of Black, Burnt Orange or Dark BlueDimensions (H x W x D)25.06" H x 15.34" W x 14.625" D (636.6mm x 389.7mm x 371.5mm)Weight 58.5 lb (26.7 kg) each Tweeter ControlMidrange Control4。
K03 萌宠系列蓝牙音箱说明书

K03 萌宠系列蓝牙音箱谢谢您的购买;在使用产品前,请详细阅读本说明书,正确操作,以更好地发挥产品的优越性能;请保管好此说明书。
产品组件:1.K03蓝牙音箱………………………………………………………… 1 台B充电线…………………………………………………………… 1 条3.产品说明书…………………………………………………………… 1 份产品特点:多款卡通萌宠造型硅胶外套,舒适掌握挂绳设计,小巧便携支持蓝牙、TF连接方式优质内次喇叭蓝牙5.0低功耗设计产品参数:产品名称:萌宠系列蓝牙音箱产品型号:K03输出功率:3W电池容量:400mAh 3.7V充电电流:5V/500mA产品尺寸:78x60.5x75.5mm(内胆)产品重量:135g(内胆)音乐播放时间:4~5小时(最大音量)通话时间:6~8小时支持模式:蓝牙/TF卡连接功能指示:1. 加号键(音量加/下一曲)2. 咪口3. 开关机键(开关机/播放/暂停/接听/拒接电话/模式切换)4. LED指示灯5. 减号键(音量减/上一曲)6. 复位键7. USB充电口8. TF卡槽开机/关机长按开关机键2S,开机,有开机提示音长按开关机键2S,关机,有关机提示音蓝牙/TF卡模式切换1. 开机后,音箱无TF卡时,默认进入蓝牙搜索状态;2. 有TF卡插入时,音箱自动切换到TF卡模式,双击开关机键可切换到蓝牙模式(仅支持32G 以内TF卡);蓝牙连接开机后,音箱进入蓝牙配对状态(白色LED指示灯快闪),用手机或电脑等蓝牙设备搜索名为“K03”的蓝牙音箱,点击连接,蓝牙连接成功后,音箱会“嘀”声提示(白色LED指示灯处于长亮状态)。
注意1. 在手机配对的配置项中,有手机音频以及媒体音频两个选项;(1)当关闭手机音频时,蓝牙音箱只播放手机音乐,无法接听或者拒接电话;(2)当关闭媒体音频时,蓝牙音箱只接听或者拒接电话,无法进行手机音乐播放;2. 蓝牙音箱开机后,在满足蓝牙连接条件下,音箱会默认连接到最后一次连接的蓝牙设备。
美声音箱:Mission M3 中文用户手册
为 M3 环绕音箱设置为最高频率(150Hz),如果出现重低音或声音不清晰,则调低频率直到 达到最理想的效果。
自动开关:在普通模式下,超重低音一直处于打开状态。当系统其它设备都关闭,而只有
超重低音处于开启状态时,就可能会发出嗡嗡的噪音。将 AUTO 开关打到 ON,输入端口检 测到任何信号输入时,超重低音就会自动打开;如果一段时间没有进行操作,超重低音音箱 又会自动关闭(进入待机状态)。所以建议您在一般操作过程中,将 AUTO 开关打到 ON 的 位置上。 在自动模式下,当系统与电源连接,超重低音的指示灯会一直保持亮的状态,即便是待机状 态下。如果超重低音与电源断开或电源开关是“off”则指示灯熄灭。长时间不使用系统时, 建议您关掉超重低音,以免产生噪音。
正确的系统连接图
您的超重低音是为和数字处理器的最优搭配而设计的。如果您的 AV 处理器有低电平输出端 或 LFE 超重低音输出端,您应当采用上图的连接方式。 您需要从经销商处购买一根单独的屏蔽 RCA 音频线,按上图将音频线与超重低音的 LFE 输入 端连接起来。
超重低音的多种连接方式
您可以使用处理器上的一根 Y 形音频线来连接超重低音上的两个输入端,这种超重低音的输 入电平会偏高些。
是普通的线材。您可以咨询您的经销商。按 下图所示正确连接音箱。
连接无源音箱
请务必为每台音箱准备一条长度合适的音 频线,建议您选用专业的优质音频线,而不
确保超重低音的红色端子连接到功放的红色(+)端子上,按相同的方法将超重低音的黑色 端子连接到功放的黑色(-)端子上。
使用音频线有色彩的一端可以方便地把音箱的正极红色端子连接起来。
插卡小音箱方案

插卡小音箱方案1. 简介插卡小音箱是一种便携式音箱设备,可以通过插入存储卡或者连接外部设备播放音乐。
它具有体积小巧、便携性强的特点,使得用户可以随时随地享受高品质的音乐。
本文档将介绍插卡小音箱的硬件需求、软件设计以及产品测试等方面的内容。
2. 硬件需求插卡小音箱的硬件需求主要包括以下几个方面:2.1 主控芯片插卡小音箱需要一款性能稳定、功耗低的主控芯片。
常见的主控芯片选择包括ARM Cortex-M系列芯片、ESP32芯片等。
选择合适的主控芯片可以保证音箱的稳定性和功能扩展性。
2.2 音频芯片音箱需要一款高性能的音频芯片来实现音频处理和解码功能。
常见的音频芯片选择包括MAX98357A芯片、PAM8403芯片等。
音频芯片的选择对音质和功耗有着重要影响,需要根据产品需求进行选择。
2.3 存储卡接口插卡小音箱需要提供一个存储卡接口,以支持用户插入存储卡播放音乐。
常见的存储卡接口包括SD卡接口、TF卡接口等。
存储卡接口的设计需要考虑到插拔的方便性和接口稳定性。
2.4 用户界面插卡小音箱需要提供一个用户界面,以便用户进行音量调节、播放控制等操作。
用户界面可以采用液晶显示屏、按键、旋钮等形式。
用户界面的设计应简洁、直观,方便用户操作。
3. 软件设计插卡小音箱的软件设计包括系统软件和应用软件两个部分。
3.1 系统软件系统软件主要负责底层硬件的驱动和管理。
它包括主控芯片的初始化、中断处理、存储卡的读写等功能。
系统软件需要保证音箱的稳定性和响应速度。
3.2 应用软件应用软件主要负责音乐的播放和控制。
它需要支持存储卡中不同格式音乐文件的解码和播放,同时提供音量调节、播放模式切换等功能。
应用软件需要与用户界面进行交互,提供友好的用户体验。
4. 产品测试为了保证插卡小音箱的质量和性能,需要进行一系列的产品测试。
4.1 功能测试功能测试包括音乐播放、音量调节、存储卡读写等功能的测试。
通过测试可以验证音箱的功能是否符合设计要求。
CK30 CK32使用说明书
10寸2分频2单元倒相式KTV音箱KTVwoofer KW 102514KT NEO TM低音单元系统类型 高音单元C K 32参数 SPECIFICATIONS TMCK3SERIES20 Hz501002005001K2K5K10K20KOhm5678910203040506070809010020020 Hz501002005001K2K5K10K20KdBSPL5060708090100110曲线特性CK30频率响应特性阻抗特性CK3220 Hz 501002005001K 2K 5K 10K 20KdBSPL 506070809010011020 Hz 501002005001K 2K 5K 10K 20KOhm 56789102030405060708090100200频率响应特性阻抗特性一米距离高音和低音中间一米距离高音和低音中间示意图CK30CK321.所有的事项特别是安全注意事项,必须仔细阅读说明书中提供的重要信息。
2.禁止在没有安装和连接音箱时开启功放,音箱设备线材(功放输出)内带有高的电流,以免陷入电击的危险。
3.确保所有连接正确,扬声器的输入是适合功放的输出阻抗。
4.防止音响线材受损;确保他们在适合的位置避免被物品踩踏或挤压。
,5.确保没有物体或液体可以进入到产品,否则会引起短路。
6.如果不按照说明书描述,禁止进行任何操作,修改或修理本产品.发生下列情况请与被授权的服务中心或者专业人士联系: -音响工作异常 -线材被损坏 -物体或液体进入箱体 -音箱由于超负荷运行或火灾而损害。
7.如果音响设备发出任何奇怪的气味或烟,应立即关闭功放后再将线材拔出。
8.不要将本产品连接到任何设备或无法预见的辅助程序。
只有用专用电葫芦才能悬浮安装,禁止使用不适合或者不是本产品特定的装置来悬挂音箱。
机械振动通常由换能器生成的,随着时间的推移,为了确保产品安装的安全,请检查支撑音箱安装面的固定(墙壁,天花板,建筑物等)以及附件的组成 (螺旋锚,螺丝),括号中不是由PEAVEY公司提供。
西门子S1131消防产品手册
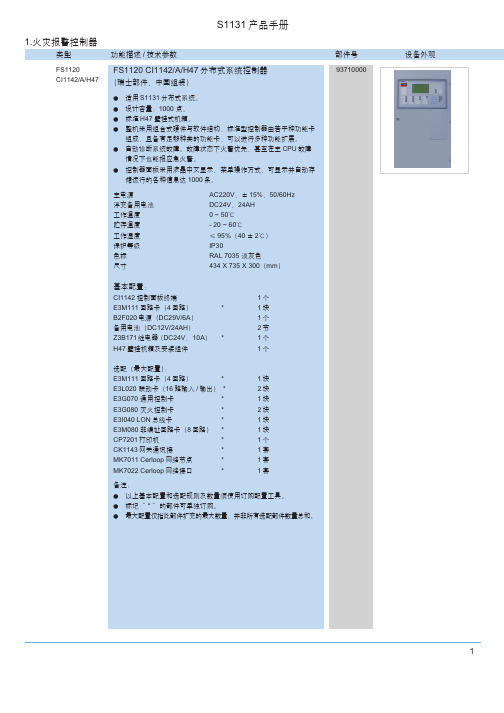
选配(最大配置):
BCH1935 双琴台
(1)
1个
Rack/WG 立柜(带玻璃门)
(1)
1个
ZA2711B/24 火警通讯盘
1个
ZA2711B/40 火警通讯盘
*
1个
ZA5711A 总线制火警通讯盘
*
1个
ZA2715/10 电话主机
*
1个
ZA2715/30 电话主机
*
1个
ZA2721A 广播录放盘
*
设备外观
3
S1131 产品手册
类型
功能描述 / 技术参数
部件号
FS1120
FS1120 CC114x-/A/Rack 分布式系统控制器 (上柜式)
CC114x-/A/Rack (瑞士部件,中国组装)
● 适用 S1131 分布式系统。 ● 设计容量:2000 点。 ● 标准 H67 安装底板组件,可安装于 BCH1950 双琴台或 Rack/WG
AC220V,± 15%,50/60Hz DC24V,38AH 0 ~ 50℃ - 20 ~ 60℃ ≤ 95%(40 ± 2℃) IP30 RAL 7035 淡灰色 434 X 1130 X 300 (mm)
基本配置:
CC1142 主 CPU 控制单元
1个
CT1142 控制面板终端
1个
E3M111 回路卡(4 回路) B2F020 电源(DC29V/6A)
基本配置:
BCH1950 双琴台
(1)
1个
CC1142 主 CPU 控制单元
1个
E3M111 回路卡(4 回路)
*
1块
B2F020 电源(DC29V/6A)
插卡音箱方案设计
插卡音箱方案设计引言插卡音箱是一种便携式音箱方案,主要通过插卡的方式进行音乐播放。
本文档将介绍插卡音箱的设计方案,包括硬件设计、软件设计以及用户体验设计。
硬件设计硬件组成插卡音箱的硬件主要由以下组件组成: 1. 主控芯片:用于控制音频播放、插卡检测等功能。
2. 音频解码芯片:负责对音频数据进行解码,并输出到音箱喇叭。
3. 存储模块:用于存储音频文件,一般采用SD卡或TF卡的形式。
4. 音箱喇叭:负责将解码后的音频信号转化为声音输出。
5. 控制按键:用于控制音箱的开关、音量调节等功能。
硬件设计原则在设计插卡音箱的硬件时,需要遵循以下原则: 1. 小巧便携:插卡音箱主要用于户外使用,因此需要设计成小巧便携的形式,方便携带。
2. 低功耗:为了延长音箱的使用时间,需要考虑降低功耗,采用低功耗的硬件方案。
3. 高音质:音箱作为音频设备,音质是用户关注的重点,因此需要选择高性能的音频解码芯片和高质量的喇叭。
软件设计软件功能插卡音箱的主要软件功能包括: 1. 插卡检测:检测插卡状态,并自动播放插卡中的音频文件。
2. 音频播放控制:支持播放、暂停、停止等音频播放控制功能。
3. 音量调节:支持调节音箱的音量大小。
4. 文件管理:支持浏览插卡中的音频文件,并进行删除、重命名等操作。
软件架构插卡音箱的软件可以采用以下架构: 1. 操作系统:选择适合嵌入式设备的轻量级操作系统,如FreeRTOS或uC/OS。
2. 音频解码库:选择高性能的音频解码库,如madplay、libmad等。
3. 应用层:实现插卡检测、音频播放控制、音量调节等功能。
软件设计原则在设计插卡音箱的软件时,需要遵循以下原则: 1. 可靠性:音箱作为一种消费电子设备,需要保证其稳定可靠的工作。
2. 用户友好性:用户体验是重要的考虑因素,因此需要设计直观、易用的用户界面。
3. 可扩展性:在未来可能出现的升级需求时,软件应具备一定的可扩展性。
DGSHOW乐麦插卡音箱说明书
感谢您使用领秀科技生产的便携式移动音箱产品,为了让您轻松体验产品,我们随机配备了内容详尽的使用说明,您从中可以获得有关产品的介绍,使用方法等方面的知识,在您使用本机之前请先仔细阅读说明书,以便您能正确使用本机,如有任何印刷错误或翻译失误望广大用户谅解,当涉及内容有所更改时,恕不另行通知。
一、产品概述本机是一款外观小巧、设计精美、携带方便的多媒体小音箱,适用于家居、户外旅游、办公室等场所,可随时随地享受音乐带来的轻松,为您的电脑、数码音乐播放器、手机等视听产品提供超值完美的音质。
二、功能特点[MP3 播放]直接播放TF卡或U盘内存放的MP3文件。
[FM收音机]FM数字立体声收音机,电台记忆播放。
[外挂耳机]本机配置标准3.5mm耳机接口,可选配耳机聆听音乐。
[音频输入]立体声音频输入接口,轻松连接电脑、数码音乐播放器、手机等音源设备。
[断点记忆]自动记忆上次退出时的曲目,音量大小。
[在线下载]连接电脑,有读卡器功能,可拷贝或删除TF卡中的歌曲。
[快捷选歌]在音乐模式下,可连续按[P/V-]、[N/V+]键,选择指定序号的歌曲。
[可充锂电]内置可充电锂电池,环保,节能,实用。
[智能充电]配送USB接口充电线,可连接电脑的USB接口进行充电,或使用手机充电器进行充电。
三、播放音乐操作本机开机时自动检测识别外接设备,开机后进入待机模式,插入U盘或TF卡自动识别播放,后者优先原则;插入音频信号线不自动切换,通过MODE键切换到AUX模式下播放,详细功能操作请阅读第四项“产品的按键、插孔功能定义”。
四、产品的按键、插孔功能定义(以实物为准)1.[ON/OFF]:电源开关。
2.[O/PLAY]:播放/暂停。
FM搜台过程中短按结束搜台,并记忆已搜到的电台。
在音乐模式下,长按为EQ选择(E1:正常/E2:流行/E3:摇滚/E4:爵士/E5:古典)3.[P/V-]:短按上一曲,选择上一个收音电台,长按调节音量减小。
Christie Vive Audio LS3S 扬声器用户手册说明书
Christie Vive Audio LS3SSpeakerU s e r M a n u a l020-101269-02NOTICESCOPYRIGHT AND TRADEMARKS© 2017 Christie Digital Systems USA Inc. All rights reserved.All brand names and product names are trademarks, registered trademarks or trade names of their respective holders.GENERALEvery effort has been made to ensure accuracy, however in some cases changes in the products or availability could occur which may not be reflected in this document. Christie reserves the right to make changes to specifications at any time without notice. Performance specifications are typical, but may vary depending on conditions beyond Christie's control such as maintenance of the product in proper working conditions. Performance specifications are based on information available at the time of printing. Christie makes no warranty of any kind with regard to this material, including, but not limited to, implied warranties of fitness for a particular purpose. Christie will not be liable for errors contained herein or for incidental or consequential damages in connection with the performance or use of this material. Canadian manufacturing facility is ISO 9001 and 14001 certified.WARRANTYProducts are warranted under Christie’s standard limited warranty, the complete details of which are available by contacting your Christie dealer or Christie. In addition to the other limitations that may be specified in Christie’s standard limited warranty and, to the extent relevant or applicable to your product, the warranty does not cover:a.Problems or damage occurring during shipment, in either direction.b.Projector lamps (See Christie’s separate lamp program policy).c.Problems or damage caused by use of a projector lamp beyond the recommended lamp life, or use of a lamp other than a Christielamp supplied by Christie or an authorized distributor of Christie lamps.d.Problems or damage caused by combination of a product with non-Christie equipment, such as distribution systems, cameras,DVD players, etc., or use of a product with any non-Christie interface device.e.Problems or damage caused by the use of any lamp, replacement part or component purchased or obtained from anunauthorized distributor of Christie lamps, replacement parts or components including, without limitation, any distributor offering Christie lamps, replacement parts or components through the internet (confirmation of authorized distributors may be obtained from Christie).f.Problems or damage caused by misuse, improper power source, accident, fire, flood, lightening, earthquake or other naturaldisaster.g.Problems or damage caused by improper installation/alignment, or by equipment modification, if by other than Christie servicepersonnel or a Christie authorized repair service provider.h.Problems or damage caused by use of a product on a motion platform or other movable device where such product has not beendesigned, modified or approved by Christie for such use.i.Problems or damage caused by use of a projector in the presence of an oil-based fog machine or laser-based lighting that isunrelated to the projector.j.For LCD projectors, the warranty period specified in the warranty applies only where the LCD projector is in “normal use” which means the LCD projector is not used more than 8 hours a day, 5 days a week.k.Except where the product is designed for outdoor use, problems or damage caused by use of the product outdoors unless such product is protected from precipitation or other adverse weather or environmental conditions and the ambient temperature is within the recommended ambient temperature set forth in the specifications for such product.l.Image retention on LCD flat panels.m.Defects caused by normal wear and tear or otherwise due to normal aging of a product.The warranty does not apply to any product where the serial number has been removed or obliterated. The warranty also does not apply to any product sold by a reseller to an end user outside of the country where the reseller is located unless (i) Christie has an office in the country where the end user is located or (ii) the required international warranty fee has been paid.The warranty does not obligate Christie to provide any on site warranty service at the product site location.PREVENTATIVE MAINTENANCEPreventative maintenance is an important part of the continued and proper operation of your product. Please see the Maintenance section for specific maintenance items as they relate to your product. Failure to perform maintenance as required, and in accordance with the maintenance schedule specified by Christie, will void the warranty.EnvironmentalThe product is designed and manufactured with high-quality materials and components that can be recycled and reused. means that electrical and electronic equipment, at their end-of-life, should be disposed of separately from regular waste. Please dispose of the product appropriately and according to local regulations. In the European Union, there are separate collection systems for used electrical and electronic products. Please help us to conserve the environment we live in!Table of ContentsSafety Information . . . . . . . . . . . . . . . . . . . . . . . . . . . . . . . . . . . . . . . . . . . . 4 Technical support . . . . . . . . . . . . . . . . . . . . . . . . . . . . . . . . . . . . . . . . . . . . . . . .5Introduction . . . . . . . . . . . . . . . . . . . . . . . . . . . . . . . . . . . . . . . . . . . . . . . . . 6 Overview . . . . . . . . . . . . . . . . . . . . . . . . . . . . . . . . . . . . . . . . . . . . . . . . . . . . . .6What’s in the box? . . . . . . . . . . . . . . . . . . . . . . . . . . . . . . . . . . . . . . . . . . . . . . .6Installation . . . . . . . . . . . . . . . . . . . . . . . . . . . . . . . . . . . . . . . . . . . . . . . . . . 7 Connect the speaker wire . . . . . . . . . . . . . . . . . . . . . . . . . . . . . . . . . . . . . . . . . .7Wall mount the LS3S . . . . . . . . . . . . . . . . . . . . . . . . . . . . . . . . . . . . . . . . . . . . .8Troubleshooting . . . . . . . . . . . . . . . . . . . . . . . . . . . . . . . . . . . . . . . . . . . . . 10 The speaker does not function . . . . . . . . . . . . . . . . . . . . . . . . . . . . . . . . . . . . . .10The speaker sound is degraded . . . . . . . . . . . . . . . . . . . . . . . . . . . . . . . . . . . . .10There is speaker noise or hiss . . . . . . . . . . . . . . . . . . . . . . . . . . . . . . . . . . . . . .11Specifications . . . . . . . . . . . . . . . . . . . . . . . . . . . . . . . . . . . . . . . . . . . . . . . 12 Audio . . . . . . . . . . . . . . . . . . . . . . . . . . . . . . . . . . . . . . . . . . . . . . . . . . . . . . .12Connections . . . . . . . . . . . . . . . . . . . . . . . . . . . . . . . . . . . . . . . . . . . . . . . . . . .13Power . . . . . . . . . . . . . . . . . . . . . . . . . . . . . . . . . . . . . . . . . . . . . . . . . . . . . . .13Physical . . . . . . . . . . . . . . . . . . . . . . . . . . . . . . . . . . . . . . . . . . . . . . . . . . . . .13Parts . . . . . . . . . . . . . . . . . . . . . . . . . . . . . . . . . . . . . . . . . . . . . . . . . . . . . . .13Accessories . . . . . . . . . . . . . . . . . . . . . . . . . . . . . . . . . . . . . . . . . . . . . . . . . . .14Safety Information•Read this information thoroughly before installing or operating a speaker.•Read these instructions.•Keep these instructions.•Do not install near any heat sources such as radiators, heat registers, stoves, or other devices (including amplifiers) that produce heat.•Do not use this apparatus near water.•Do not install the speaker near water where the electrical components can be exposed to moisture. Do not place objects containing liquids, such as vases, on the product.•Clean only with a dry cloth.•Do not overpower or underpower speaker systems.•Use only in accordance with manufacturer’s specifications and installation guidelines.•Exposure to extremely high noise levels may cause permanent hearing loss. Individuals vary considerably in their susceptibility to noise-induced hearing loss, but nearly everyone will lose some hearing if exposed to sufficiently intense noise for a sufficient time. These are thepermissible noise level exposures specified by the United States Occupational Safety and Health Administration (OSHA):Duration (Consecutive)Sound Pressure Level (dbA), SlowResponses8 hrs906 hrs924 hrs953 hrs972 hrs1001.5 hrs1021 hr10530 min110Safety Information•According to the OSHA, any exposure in excess of the above permissible limits could result insome hearing loss. Earplugs or protectors to the ear canals or over the ears must be worn when operating this amplification system to prevent permanent hearing loss, if exposure is in excess of the described limits.•Two people are required to safely lift and install the speaker .•Speakers and speakers mounted to brackets must be affixed to a suitable structure following all local safety standards and regulations.•Always install all legally required additional redundant safety straps or cables.•Install the minimum number of rigging wires (refer to Installation for more details) that arerequired to suspend the speaker . Observe load ratings and all applicable local safety codes.•Only use attachments or accessories specified by Christie.•To reduce the risk of system damage, turn off the power amplifier and then disconnect thespeaker wire before performing a repair or maintenance.•All servicing must be completed by qualified service personnel. Servicing is required when the apparatus has been damaged in any way. For example, liquid has been spilled or objects have fallen onto the apparatus, the apparatus has been exposed to rain or moisture, does notoperate normally, or has been dropped.•Changes or modifications to the product not expressly approved by the party responsible forcompliance could void the user’s authority to operate the equipment.Technical supportTechnical support for Christie products is available at:•NorthandSouthAmerica:+**********************************************************,MiddleEast,andAfrica:+44(0)********************************************•AsiaPacific:+*********************************************•Coolux:+******************************************************•ChristieManagedServices:+***************************************≤15 min 115Duration (Consecutive)Sound Pressure Level (dbA), SlowResponsesIntroductionThis user manual provides surround speaker installation, troubleshooting, and specification information.OverviewThe LS3S line source surround speaker is designed for auditoriums with up to approximately 350 seats as part of a horizontal array. It may also be paired with S115 or S215 subwoofers and bi-amped to create a surround system with bass management.It may also be used for a range of other applications, where vertical coverage and maximum throw distance are appropriate.The speaker contains an internal passive crossover, allowing it to operate with a single channel amplifier. Multiple hardware attachment points on the speaker allow for multiple installation options.What’s in the box?This table lists the components that are shipped with the LS3S.Quantity Description Part number1Christie LS3S line source surround speakerorChristie LS3S line source surround speaker with grill 145-107109-XX or145-129103-XXInstallationComplete the following procedures to install the speaker .Connect the speaker wire1.Install the speaker according to the mounting instructions provided in this manual.2.Connect the speaker wire to the positive (A) and negative (B) terminals on the back of thespeaker.Use a #8 spade lug (part number: 145-159106-XX) if you are creating crimped spade lugterminations.Warning! Failure to comply with the following could result in death or serious injury.• Before installation, inspect all components for cracks, deformations, corrosion, andmissing or damaged parts that could reduce their installation strength.• Speakers must be affixed to a suitable structure following all local safety standards andregulations.• Only use attachments or accessories specified by the manufacturer.Notice. Failure to comply with the following may result in property damage.• Allow speakers exposed to extremely low temperatures to warm for a minimum of onehour before playing them at typical application levels. Failure to comply may result inequipment or property damage.• Speaker wire affects sound quality. Make sure the speaker wire quality and gauge areappropriate for your application.Notice. Failure to comply with the following may result in property damage.• The amplifier must be turned off and unplugged before you start this procedure.3.Connect the negative and positive speaker wires from the speaker to the correspondingterminals on the amplifier.4.Turn on the amplifier and verify that the speaker is receiving power.Wall mount the LS3S1.Remove the four pre-installed M8 button head screws on the back of the speaker.2.Attach one of the following brackets to the back of the speaker using the four M8 button headscrews.3.Mount the speaker to the wall using the manufacturer documentation provided with the bracketor the Christie Vive Audio BKW-SUR User Manual .APositive (+) connection B Negative (-) connection DescriptionPart number Christie BKW-SUR fixed wall mount bracket145-128102-XX Wall mount bracket (MM-017)111-694201-XX Wall mount bracket (MM-024)111-681207-XX Wall mount bracket (MM-060)111-682208-XXALS3S speaker BWall mount bracketTroubleshootingCaution! Failure to comply with the following could result in minor or moderate injury ordamage.• Do not service the speaker. All servicing must be completed by qualified servicepersonnel.The speaker does not functionThe speaker is connected to the amplifier, but is not producing any sound.Resolution•Verify that the speaker is receiving power from the amplifier.•Verify that the circuit breaker for the main circuit to the amplifier is closed.•Reset the circuit breaker. If the AC mains breaker continues to open, check the voltage and amperage of the circuit.•Verify that the negative and positive speaker wires from the speaker are correctly connected to the terminals on the amplifier.The speaker sound is degradedThe speaker is powered on and sound is being produced, but it is distorted.Resolution•Visually inspect the speaker for deterioration or holes.•Reduce the output level of the source.•Verify that the negative and positive speaker wires from the speaker are securely connected to the terminals on the amplifier.•Verify that there are no missing screws. Replace all screws that you removed during installation.Troubleshooting •Have an authorized dealer complete an audio test (for example, pink noise, frequency sweeps, and content and program material).There is speaker noise or hissThe speaker is producing static noise or hiss when powered.Resolution•Mute channels, one at a time, to isolate the problem.•Verify that the cables are in good working condition.•Reroute audio cables away from AC power and lighting cables.•Verify correct gain structuring of B Chain and input and output levels of source devices and amplifiers.•Check the polarity.SpecificationsAudioaLS3S was measured in 2pi conditions. Such conditions most closely match typical indoor wall mount applications.Averaged in the 500 Hz-10 kHz range, -6 dB.bAES, 6 dB crest factor at 1 m. Maximum continuous SPL is calculated based on sensitivity and AES power handling.Short-term IEC 268-5 pink noise, 12 dB crest factor . The crest factor was specifically increased to reflect real life parameters of digital cinema soundtracks. Peak SPL is calculated based on short-term power .SpecificationDescriptionSystem type Line source, 2.5-way, passive, vented enclosure.Driver components One 3.5 in. Kapton ribbon driver with Neodymium magnets and two 6.5 in. (mid-bass + bass) paper/Kevlar composite drivers.CrossoverLinear phase, 2 way, passive at 2.5 kHz 12 dB/octave, low pass at 800 Hz for bass driver , 6 dB/octave.Frequency response a70 Hz - 20 kHz @ -6 dBMaximum sound pressure level (SPL)b110 dB (AES) continuous, 122 dB, peakSystem coverage 120° horizontal dispersion, 60° vertical dispersion Sensitivity a , 1 W/1 m88 dBRecommended amplifier power 125 W - 250 W (FTC) at 4 Ohms / Christie CDA3 or Christie CDA5 (depending on application)Rated impedance4 OhmsConnectionsPowerPhysicalPartsSpecificationDescriptionInputsScrew terminal barrier stripSpecificationDescriptionPower handling b125-250 W (AES), 250 W (IEC) short-term (12 dB crest factor)SpecificationDescriptionEnclosureVented box alignment 18mm marine plywood Heavily damped and bracedDimensions (H x W x D)50 cm x 28 cm x 23 cm (19.7 in.) x (11 in.) x (9 in.)Weight (net) 5.8 kg (12.8 lb)SpecificationPart Number6.5 in. cones003-120888-XX or 003-120889-XX TWTR & Face Plate 3.5 in. Kapton003-121026-XXAccessoriesSpecification Part Number145-128102-XX Christie BKW-SUR fixed wallmount bracketWall mount bracket (MM-017)111-694201-XX Wall mount bracket (MM-024)111-681207-XX Wall mount bracket (MM-060)111-682208-XX145-158105-XX SpeakON Connector (foramplifier output to speaker)145-159106-XX #8 Spade Lug (for speaker inputfrom amplifier)United Kingdomph: +44 (0) 118 977 8000United Arab Emirates ph: +971 4 3206688Spainph: +34 91 633 9990Singaporeph: +65 6877-8737Republic of South Africa ph: +27 (0)11 510 0094Korea (Seoul)ph: +82 2 702 1601Japan (Tokyo)ph: 81 3 3599 7481Indiaph: +91 (080) 6708 9999Germanyph: +49 2161 664540Franceph: +33 (0) 1 41 21 44 04Eastern Europe and Russian Federation ph: +36 (0) 1 47 48 100China (Shanghai)ph: +86 21 6278 7708China (Beijing)ph: +86 10 6561 0240Brazilph: +55 (11) 2548 4753Australiaph: +61 (0) 7 3624 4888Worldwide offi cesItalyph: +39 (0) 2 9902 1161Consultant offi cesCanada – Kitchener ph: 519-744-8005USA – Cypress ph: 714-236-8610Corporate offi ces。
君武仕960插卡迷你音箱使用说明书
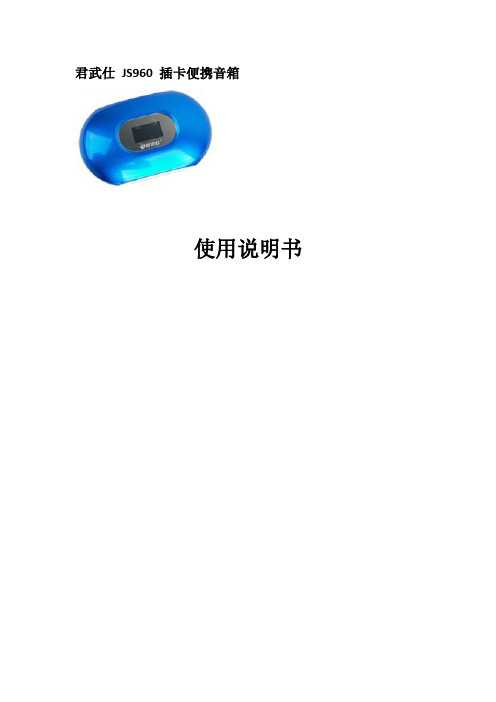
君武仕JS960 插卡便携音箱使用说明书产品功能:★歌词同步,录音功能。
★立体声音质,超强重低音大功率喇叭。
★支持MP3 格式音乐文件★支持TF/MMC卡★支持外接MP3/MP4/电脑等★支持音频输入功能可调解Line-in音量★DC5V和5P-USB供电充电,支持可换诺基亚电池功能键:从左往右依次为:前进、后退、播放/暂停、菜单(M)。
前进或后退键:播放下一首或上一首音乐、向前或向后搜索电台、增加或减少数值、向下或向上移动菜单、调整(长按)音量大小。
播放/暂停键:音乐播放或暂停、向后选择下一个电台、继续或暂停电台录音、保存(长按)收音录制文件、返回到上级菜单、软开关机(长按)。
菜单(M)键:进入各级菜单、确认各种设置、保存(长按)收音录制文件、返回(长按)待机状态。
开关机:开关机有软硬两种方式。
硬开关就是拨动电源开关,拨向内侧(ON)为开,拨向外侧(OFF)为关;软开关就是在电源开关在ON一侧时,长按播放/暂停键5秒以上关机,再长按播放/暂停键5秒以上开机。
连接电脑:把数据线一端插入设备,另一端插入电脑USB接口即完成与电脑连接。
设备与电脑连接后无论电源开关拨到哪边,设备都不会有任何反应。
关闭电源开关(在OFF一侧)时连接电脑:开始为设备充电,建立设备与电脑数据通信,电脑识别为可移动磁盘(背光灯常亮),可以对SD卡进行复制或删除音乐文件等操作。
按一下菜单键,断开设备与电脑数据通信,设备进入待机状态。
如果想再次建立设备与电脑数据通信,可长按播放/暂停键重启或拔掉设备重新连接。
打开电源开关(在ON一侧)时连接电脑:如果设备处于软关机状态,连接电脑后开始为设备充电,建立设备与电脑数据通信,电脑识别为可移动磁盘(背光灯常亮),可以对SD卡进行复制或删除音乐文件等操作。
按一下菜单键,断开设备与电脑数据通信,设备进入待机状态。
如果想再次建立设备与电脑数据通信,可长按播放/暂停键重启;如果设备处于待机状态或其它模式,连接电脑后仅为设备充电。
MP3插卡音箱使用说明

MP3插卡音箱使用说明第一章:产品介绍1.1产品概述1.2产品特点①采用无线蓝牙技术,可以实现与手机、电脑等设备的无缝连接。
②支持插卡播放功能,可以通过插入TF卡或U盘存储设备,直接播放其中的音乐文件。
③音量、音质可调节,可以根据个人喜好进行调整。
④支持FM调频收听,可以随时收听到最新的资讯。
⑤带有内置电池,方便外出携带和使用。
第二章:安全使用须知2.1产品安全注意事项①请勿将音箱置于高温或潮湿的环境中。
②请勿将音箱长时间放置在阳光直射的地方,以防止硬件及电池受损。
③请勿将音箱浸入水中或受到大的外力冲击。
④使用时请根据指示正确插入插头,以免损坏音箱或电源。
第三章:产品使用指南3.1功能说明①音量调节:通过旋钮或遥控器可以调节音量大小。
②播放控制:通过按钮或遥控器可以实现暂停、播放、上一首、下一首等操作。
③插卡播放:打开音箱后,将TF卡或U盘插入相应插槽,即可自动播放其中的音乐文件。
④蓝牙连接:打开设备蓝牙功能,并连接音箱,即可实现无线播放功能。
3.2插卡播放操作说明①开启音箱电源,进入插卡播放模式。
②将TF卡或U盘插入相应插槽,音箱自动识别并开始播放音乐文件。
③可通过音箱上的按钮或遥控器来调节音量大小、切换歌曲等操作。
3.3蓝牙连接操作说明①长按音箱上的蓝牙按钮,等待蓝牙指示灯开始闪烁。
②打开手机或电脑的蓝牙功能,设备名称,并与之进行配对连接。
③连接成功后,手机或电脑上播放的音乐将通过音箱进行输出。
第四章:故障排除4.1音箱无法开机可能是电池电量过低,请将音箱连接电源适配器,充电一段时间后再尝试开机。
4.2蓝牙连接失败①确保音箱处于蓝牙连接模式。
②确保手机或电脑的蓝牙功能已打开且与音箱处于合适的距离范围内。
③尝试重新配对连接。
4.3音箱无法识别插卡检查插卡是否插入到正确的槽口中,尝试重新插卡。
第五章:维护与保养5.1定期清洁使用柔软的干布轻轻擦拭音箱表面,避免使用含有化学成分的清洁剂,以免造成损坏。
插卡音箱方案

插卡音箱方案引言随着多媒体技术的快速发展,音箱作为一种重要的音频输出设备,已经成为现代娱乐生活中不可或缺的一部分。
插卡音箱,作为一种方便携带的音箱解决方案,其特点是可以直接插入音频存储卡,无需连接其他设备即可播放音乐。
本文将介绍插卡音箱的方案设计以及相关技术细节。
设计原理插卡音箱方案的设计原理主要基于以下几个方面:1.音频解码:插卡音箱需要支持多种音频格式的解码,例如MP3、WAV等。
因此,需要搭载专用的音频解码芯片,以实现对不同音频格式的解码和播放。
2.存储卡接口:插卡音箱需要支持与音频存储卡的直接连接。
可选的存储卡接口包括SD卡、TF卡等。
通过存储卡接口,插卡音箱可以读取存储卡中的音频文件进行解码和播放。
3.音频输出:插卡音箱需要能够输出高质量的音频信号。
一般采用数字音频放大器芯片来实现音频的放大和输出。
数字音频放大器具有高效、低功耗等特点,适合用于插卡音箱的设计。
硬件设计主控芯片选择插卡音箱的主控芯片需要具备较强的处理能力和低功耗特性。
常见的主控芯片选型包括:•STM32系列:该系列的主控芯片性能强大,具备丰富的外设接口和低功耗特性,适用于插卡音箱的设计。
•ESP32系列:主控芯片集成了Wi-Fi和蓝牙功能,适合需要无线连接的应用场景。
•Arduino UNO:Arduino开发板易于学习和使用,更适合初学者进行DIY设计。
音频解码模块选型音频解码模块是插卡音箱的核心部件,主要用于对音频文件进行解码和播放。
常用的音频解码模块有:•VS1053:具有强大的音频解码能力,可支持多种音频格式,适用于插卡音箱的设计。
•DFPlayer Mini:体积小巧,使用简单,适用于DIY设计。
存储卡接口设计存储卡接口是插卡音箱与音频存储卡之间的连接方式。
常用的存储卡接口有:•SD卡接口:广泛应用于音箱、手机等设备中,具有较高的兼容性。
•TF卡接口:体积小巧,易于插拔,适合小型设备的设计。
音频输出模块选型音频输出模块负责将解码后的音频信号放大,并输出到音箱的扬声器中。
音箱资料

尊宝(JAMO)C605C 605落地音箱是一款3分频低音反射式系统。
具有2个155mm/6in低音安远,一只155mm/6in中音单元和一只25mm/1i n DTT (减震高音技术)高音单元。
音箱装有一个高质量的接线板,使它具有双线分音的能力;以及高质量的脚钉,与R 9 09音箱上使用的一样。
C 605带来令人信服的、开放的、非常具有音乐味的声音还原。
C 605可以下潜至32Hz,直接证明了不需要大口径的低音单元,也能获得让人印象深刻的低频。
C60 CEN是一款高性能的两路低音反射式中置音箱,体积小巧,采用两只重型的102mm/4音吋低音单元和一只25mm/1英吋DTT高音单元,音色能与C60系列的所有型号天衣无缝地匹配。
C60 CEN既能直接安装在墙上,也能放置在视频架上C60 SUR采用了“中频相位扩散”(MPD),这个技术有偶极音箱的优势,而没有这种构造典型的低频缺失。
因为在理想状况下,你应该无法断定环绕音箱的确切位置,带MPD的C60 SUR是环绕音箱的明智之选。
C60 SUR备有墙壁安装托架。
如果你喜欢更隐蔽的环绕音箱,可以在我们的特制安装类产品中考虑采用8.521K4SUB 250在独特的窄槽式倒相箱体里安装了8吋低音单元,采用了强劲的BASH放大器,提供250W峰值功率。
以它的尺寸和价格而论,SUB 250有着出色的表现,能够重放低至30HZ的频率。
SUB 250有非常平坦的频率响应,与传统的低音反射式超低音相比,它能以一种非常有力的方式播放低频信号,频率响应一直延伸到150Hz。
这点很重要,因为许多超低音炮的频率输出在100Hz左右陡降(有些型号更低),这样它们就很难与小音箱匹配。
C 807C 80是尊宝立体声和环绕声系统中的顶级系列。
这个系列的目的是为了获得完美的音乐体验——恰如其分。
无论尺寸大小,这个系列里的每个产品都是用字母C开头,成为Concert系列一员。
C 80系列如同艺术品一般,高质量的贴皮和完美、和谐的声音,带来无与伦比的音乐和电影体验,我们都会喜爱他们,而且从中都能感受到非凡的愉悦。
插卡音箱方案
插卡音箱方案插卡音箱方案引言插卡音箱是一种便携式音频设备,可以通过插卡播放音乐或其他音频内容。
音箱体积小巧,使用便捷,适用于户外活动、旅行、教育和娱乐等场景。
本文将介绍插卡音箱的原理、特点以及市场应用。
一、插卡音箱的原理插卡音箱的工作原理基于数字音频技术。
它使用数字信号处理器 (DSP) 将存储在插卡中的音频文件解码成模拟信号,然后通过音箱的扬声器播放出来。
主要的原理包括:1. **解码技术**:插卡音箱使用各种解码算法,例如 MP3、WAV 等,将音频文件解码成数字信号。
2. **数字音频处理**:通过数字信号处理器 (DSP),插卡音箱对解码后的信号进行降噪、均衡、音量控制等处理,以优化音质。
3. **功放技术**:插卡音箱使用功率放大器将处理后的信号放大,使其能够驱动音箱的扬声器发出声音。
4. **扬声器设计**:插卡音箱的扬声器通常采用独立腔体设计,以提供更好的低频效果和音质。
二、插卡音箱的特点插卡音箱具有以下几个特点,使其在市场上备受欢迎:1. **便携性**:插卡音箱通常体积小巧,重量轻,方便携带。
用户可以将其放入口袋或背包中,随时随地享受音乐。
2. **多媒体支持**:插卡音箱支持多种音频格式,如 MP3、WAV 等,同时也可插入TF 卡或 U 盘播放音乐文件。
用户可以根据自己的喜好和需求选择音乐来源。
3. **长时间播放**:插卡音箱通常配备高容量的电池,能够支持较长时间的播放。
一次充电后,用户可以连续播放多个小时的音频内容。
4. **蓝牙连接**:部分插卡音箱支持蓝牙功能,可以与手机或其他蓝牙设备进行无线连接。
用户可以通过蓝牙连接播放存储在手机或其他设备中的音乐。
5. **音质优化**:插卡音箱利用数字音频处理技术对音频进行优化,提供更好的音质。
用户可以享受到清晰、逼真的音乐效果。
三、插卡音箱的市场应用插卡音箱在不同领域有着广泛的市场应用,主要包括以下几个方面:1. **户外活动**:插卡音箱的便携性使其成为户外活动的理想音频设备。
插卡音响方案
插卡音响方案引言插卡音响是一种便携式音频设备,其主要特点是可以通过插入不同类型的卡片来播放音乐或其他类型的媒体内容。
该方案旨在设计一种插卡音响方案,满足用户的需求并提供可靠的性能。
设计概述插卡音响方案的设计包括硬件设计和软件设计两个部分。
硬件设计将涉及音箱、音频处理器、插卡接口等组件的选择和集成。
软件设计则包括音频解码、播放控制等功能的实现。
音箱选择在设计插卡音响方案时,首先需要选择合适的音箱。
音箱的选择应考虑音质、功率和尺寸等因素。
目前市场上有许多优秀的音箱品牌和型号可供选择。
音频处理器音频处理器是插卡音响方案的核心组件之一。
它负责接收音频信号,并对其进行解码和处理。
常见的音频处理器包括DSP芯片和SoC芯片。
在选择音频处理器时,应考虑其解码格式的支持、功耗和集成度等因素。
插卡接口是插卡音响方案的关键组件之一。
它用于接收各种类型的卡片,如SD卡、TF卡等。
在选择插卡接口时,应考虑接口的兼容性、稳定性和速度等因素。
电源管理电源管理模块是插卡音响方案中必不可少的组件。
它负责对电源进行管理,确保音响的稳定运行。
电源管理模块可以提供电池充电、电源切换等功能,以满足用户对便携性的要求。
软件设计音频解码音频解码是插卡音响方案中的重要部分。
通过合适的解码算法,可以将音频信号解码为可播放的声音。
常见的音频解码算法包括MP3解码、AAC解码等。
在实现音频解码功能时,需要注意解码质量和解码效率的平衡。
播放控制播放控制是插卡音响方案中必不可少的功能之一。
它负责控制音频的播放、暂停和停止等操作。
在实现播放控制功能时,可以通过按键、触摸屏等方式与用户交互。
用户界面用户界面是插卡音响方案中用户与音响进行交互的重要组成部分。
它负责显示当前播放的音乐信息、播放控制按钮等内容。
用户界面可以通过液晶屏、LED等方式实现。
总结插卡音响方案是一种便携式音频设备,其通过插卡的方式提供音乐和其他媒体内容的播放。
本文介绍了插卡音响方案的硬件设计和软件设计两个方面。
插卡mp3方案

插卡mp3方案以下为插卡 MP3 方案:1. 硬件要求:插卡 MP3 需要具备插卡槽的硬件设计,可以支持不同类型的存储卡,如 SD 卡或 microSD 卡。
同时需要有音频解码芯片和 DAC(数模转换器)来实现音频解码和输出功能。
2. 软件开发:需要设计并开发一套适配的固件或操作系统,来管理插卡 MP3 的各项功能,包括音频解码、播放控制、存储卡的读写和格式化等。
同时要提供用户界面和操作方式,如按键控制、显示屏等。
3. 存储卡支持:需要支持不同类型的存储卡,如 SD 卡或microSD 卡,并能够读取存储卡中的音频文件。
可以使用通用的文件系统,如 FAT32,来管理音频文件的存储和读取。
4. 音频解码与输出:需要使用音频解码芯片来实现对音频文件的解码,并通过 DAC 将数字信号转换为模拟信号输出。
可以使用现成的音频解码芯片,如 VS1003,以及高质量的 DAC 芯片来提供良好的音频输出质量。
5. 电源管理:插卡 MP3 需要一定的电源管理功能,包括低功耗设计、电池充电控制和电池寿命管理等。
可以使用集成的电源管理芯片来实现这些功能。
6. 用户界面和操作方式:需要提供适合用户操作的界面和操作方式,如按键、旋钮或触摸屏等。
可以根据产品需求设计用户界面,并通过开发相应的用户界面控制软件来实现。
7. 其他功能:根据需求,可以为插卡 MP3 添加其他功能,如FM 收音机、录音功能、音频输出接口(如耳机或扬声器接口)、蓝牙无线传输等。
总之,插卡 MP3 方案需要对硬件和软件进行设计和开发,包括音频解码与输出、存储卡支持、电源管理、用户界面和操作方式等方面。
通过合理的设计和开发,可以实现功能完善、性能良好的插卡 MP3 产品。
- 1、下载文档前请自行甄别文档内容的完整性,平台不提供额外的编辑、内容补充、找答案等附加服务。
- 2、"仅部分预览"的文档,不可在线预览部分如存在完整性等问题,可反馈申请退款(可完整预览的文档不适用该条件!)。
- 3、如文档侵犯您的权益,请联系客服反馈,我们会尽快为您处理(人工客服工作时间:9:00-18:30)。
XK313/048Highly-integrated Digital Music ControllerFEATURE DATASHEETConfidential V1.1 June 20, 2011INFORMATION IN THIS DOCUMENT IS PROVIDED IN RELATION TO XK PRODUCTS, AND IS BJECT TO CHANGE WITHOUT NOTICE. NOTHING IN THIS DOCUMENT SHALL BE CONSTRUED AS GRANTING ANY LICENSE, EXPRESS OR IMPLIED, BY ESTOPPEL OR OTHERWISE, TO ANY INTELLECTUAL PROPERTY RIGHTS IN XK PRODUCTS OR TECHNOLOGY. ALL INFORMATION IN THIS DOCUMENT IS PROVIDED ON AS "AS IS" BASIS WITHOUT GUARANTEE OR WARRANTY OF ANY KIND. XK ELECTRONIC RESERVES THE RIGHT TO CHANGE PRODUCTS OR SPECIFICATION WITHOUT NOTICE.XK313/048 Feature DatasheetCONTENT1. 2. 3. FEATURES................................................................................................................................................................ 3 GENERAL DESCRIPTION........................................................................................................................................ 3 PAD AND PIN............................................................................................................................................................ 4 3.1. 3.2. 4. TQFP48 PIN ASSIGNMENT .................................................................................................................................. 4 PIN DESCRIPTION ............................................................................................................................................... 5ELECTRICAL SPECIFICATIONS ............................................................................................................................. 7 4.1. 4.2. ABSOLUTE MAXIMUM RATINGS ............................................................................................................................. 7 SYSTEM ELECTRICAL CHARACTERISTICS ............................................................................................................... 75. 6.PACKAGE OUTLINE INFORMATION ...................................................................................................................... 8 HISTORY ................................................................................................................................................................... 82011/6/202/9V1.1XK313/048 Feature Datasheet1. FEATURES● Enhanced single-cycle 8051 MCU core ● Built-in 64K Byte Flash Program Block and 2K Byte Flash Data block ● Built-in USB2.0 full speed OTG controller Act as host support one device address Act as device support setup/bulk/isochronous transfer Support full speed (12Mbps) USB transfer● Built-in simplified MMC/SD card engine Support 1-Line mode Support write & read operation● Software information: Support MPEG1/2/2.5 Audio Layer 3 decoding: 8k~48kHz sampling frequencies, 8k~320kbps bit rates, single/dual channel, mono/stereo format, equalizer Support WMA decoding: 8k~48kHz sampling frequencies, 5k~384kbps bit rates, single/dual channel, mono/stereo format, equalizer Support tone/balance adjust. Support 8 EQ mode● On-chip CODEC: 16-bit Sigma-Delta stereo DAC with 3.3V operation voltage Build-in 2 groups dual-channel Aux-in 6-channel 8-bit SAR ADC support key-scan, digital voice recording and power detection● 32 GPIOs with flexible I/O setting, 4 GPIOs output 1/2 bias voltage for LCD driver ● Typical power voltage: 3.3V (for I/O) and 1.8V (for core) ● Internal or external oscillator optional Support external 12MHz oscillator with on chip PLL and 32.768KHZ for RTC Built-in 12MHz RC oscillator● Embedded in SPI interface for external serial flash ● Built-in 5V-to-3.3V and 5V-to-1.8V regulators ● Built-in infrared remote control module ● Support 1/2 bias voltage 4-COM x 12-SEG LCD (VCC=3.3V) ● In-system firmware program/upgrade through U-disk or MMC/SD. Support code protect ● USB/SD/Key/RTC wakeup STOP ● Three reset sources: Power-on reset (POR) Lower voltage reset (LVR) Watchdog reset (WDR)● Low power mode & wake up by RTC/USB/KEY/SD Support IDLE mode. LDO enter suspend mode Support SLEEP mode. Disable 12M OSCI and LDO enter suspend mode Support STOP mode. Disable LDO output 1.8V & 3.3V voltage● Available in standard TQFP48 packages2.GENERAL DESCRIPTIONSH86313 is a new generation single-chip highly integrated digital multimedia SOC designed for Boombox. SH86313 combines a high performance MCU core with embedded RAM and ROM, a 16-bit Sigma-Delta stereo DAC, an 8-bit SAR ADC, USB Host into a single chip. SH86313 also provides an interface to SPI flash, MMC/SD, STN LCD, Infrared receiver, button & switch inputs and FM control.2011/6/203/9V1.1XK313/048 Feature Datasheet3.3.1.PIN ASSIGNMENT AND DESCRIPTIONTQFP48 Pin AssignmentPA2/AUX1L/TDO25AUX0R/MSCMDAUX0L/MSDATPD4/ADCIN028PD6/ADCIN227363534333231302926PD7/ADCIN3AGNDDACAVCCDACVREFDACVOUTRVOUTLVCC18VCC5V VCCRTC VCC33 DP DM GND RTCXO RTCXI VCC18 PB3/COM3/SPDO PB0/COM0 PB1/COM1/SPCLK124 23 22 21 20 19 18 17 16 15 14 13 10 11 12 2 3 4 5 6 7 8 9SH86313U/048URPA3/AUX1R/TMS PA5/OSCI PA4/OSCO PD5/ADCIN1 PA1/MSCMD/TDI PA0/MSDAT/TCK PC0/LCMD0 PC1/LCMD1 PC2/LCMD2 PC3/LCMD3 PC4/LCMD4 PC5/LCMD5PD0/PLAYPB6/LCMWEPB4/CLKOPB7/MSCLKPD1/MSCDPD2/GCONPD3/IRSPB2/COM2/SPDIPB5/LCMA0PG0PC7/LCMD7Figure 1. TQFP48 Pin AssignmentNo. 1 2 3 4 5 6 7 8 9 10 11 12Name PB2/COM2/SPDI PB4/CLKO PB5/LCMA0 PB6/LCMWE PB7/MSCLK PD0/PLAY PD1/MSCD PD2/GCON PD3/IRS PG0 PC7/LCMD7 PC6/LCMD6No. 13 14 15 16 17 18 19 20 21 22 23 24Name PC5/LCMD5 PC4/LCMD4 PC3/LCMD3 PC2/LCMD2 PC1/LCMD1 PC0/LCMD0 PA0/TCK PA1/TDI PD5/ADCIN1 PA4/OSCO PA5/OSCI PA3/AUX1R/TMSNo. 25 26 27 28 29 30 31 32 33 34 35 36Name PA2/AUX1L/TDO PD7/ADCIN3 PD6/ADCIN2 PD4/ADCIN0 AUX0R/MSCMD AUX0L/MSDAT VREFDAC VOUTL VOUTR AVCCDAC AGNDDAC VCC18PC6/LCMD6No. 37 38 39 40 41 42 43 44 45 46 47 48Name VCC5V VCCRTC VCC33 DP DM GND RTCXO RTCXI VCC18 PB3/COM3/SPDO PB0/COM0 PB1/COM1/SPCLKTable 1. TQFP48 Pin Assignment2011/6/204/9V1.1XK313/048 Feature Datasheet3.2. Pin DescriptionPin Name PB2 COM2 SPDI PB4 CLKO PB5 LCMA0 PB6 LCMWE PB7 MSCLK PD0 PLAY PD1 MSCD PD2 GCON PD3 IRS PG0 PC7 LCMD7 PC6 LCMD6 PC5 LCMD5 PC4 LCMD4 PC3 LCMD3 PC2 LCMD2 PC1 LCMD1 PC0 LCMD0 PA0 TCK PA1 TDI PD5 ADCIN1 PA4 OSCO PA5 OSCI PA3 AUX1R TMS PA2 AUX1L TDO PD7 ADCIN3 PD6 ADCIN2 PD4 ADCIN0 Type I/O O I I/O O I/O O I/O O I/O O I/O I I/O I I/O O I/O I I/O I/O I/O I/O I/O I/O I/O I/O I/O I/O I/O I/O I/O I/O I/O I/O I/O I/O I I/O I I/O I I/O O I/O I I/O I I I/O I O I/O I I/O I I/O I Description Bit2 of general purpose port B LCD 1/2-bias voltage output 2 SPI data input Bit4 of general purpose port B Clock output Bit5 of general purpose port B LCD driver data/command selection Bit6 of general purpose port B LCD driver write enable (active low) Bit7 of general purpose port B MMC/SD interface clock line Bit0 of general purpose port D PLAY key detection pin Bit1 of general purpose port D MMC/SD card detection pin Bit2 of general purpose port D Global control pin Bit3 of general purpose port D Infrared receiver interface signal Bit0 of general purpose port G Bit7 of general purpose port C Bit7 of LCD driver data bus Bit6 of general purpose port C Bit6 of LCD driver data bus Bit5 of general purpose port C Bit5 of LCD driver data bus Bit4 of general purpose port C Bit4 of LCD driver data bus Bit3 of general purpose port C Bit3 of LCD driver data bus Bit2 of general purpose port C Bit2 of LCD driver data bus Bit1 of general purpose port C Bit1 of LCD driver data bus Bit0 of general purpose port C Bit0 of LCD driver data bus Bit0 of general purpose port A Debug interface: test clock in Bit1 of general purpose port A Debug interface: test data in Bit5 of general purpose port D ADC channel 1 analog input Bit4 of general purpose port A 12MHz crystal osc. output Bit5 of general purpose port A 12MHz crystal osc. or external clock input Bit3 of general purpose port A Aux-in 1 right channel analog input Debug interface: test mode select Bit2 of general purpose port A Aux-in 1 left channel analog input Debug interface: test data out Bit7 of general purpose port D ADC channel 3 analog input Bit6 of general purpose port D ADC channel 2 analog input Bit4 of general purpose port D ADC channel 0 analog input Table 2. PIN Description Pin No. 1 2 3 4 5 6 7 8 9 10 11 12 13 14 15 16 17 18 19 20 21 22 23 2425 26 27 282011/6/205/9V1.1XK313/048 Feature DatasheetPin Name AUX0R MSCMD AUX0L MSDAT VREFDAC VOUTL VOUTR AVCCDAC AGNDDAC VCC18 VCC5V VCCRTC VCC33 DP DM GND RTCXO RTCXI VCC18 PB3 COM3 SPDO PB0 COM0 PB1 COM1 SPCLKType I I/O I I/O O O O P P P P P P I/O I/O P O I P I/O O O I/O O I/O O ODescription Aux-in 0 right channel analog input MMC/SD interface command line Aux-in 0 left channel analog input MMC/SD interface data line DAC reference voltage output DAC left channel analog output DAC right channel analog output 3.3V analog power supply for DAC Analog ground for DAC 1.8V power supply 5V power supply 5V power supply for RTC 3.3V power supply USB data positive pin terminal USB data negative pin terminal Power ground 32.768kHz crystal oscillator output 32.768kHz crystal oscillator or external clock input 1.8V power supply Bit3 of general purpose port B LCD 1/2-bias voltage output 3 SPI Data output Bit0 of general purpose port B LCD 1/2-bias voltage output 0 Bit1 of general purpose port B LCD 1/2-bias voltage output 1 SPI serial clock Table 3. PIN Description (continue)Pin No. 29 30 31 32 33 34 35 36 37 38 39 40 41 42 43 44 45 46 47 482011/6/206/9V1.1XK313/048 Feature Datasheet4.4.1.ELECTRICAL SPECIFICATIONSAbsolute Maximum RatingsStresses above those listed under Absolute Maximum Ratings may cause permanent damage to the device. These are stress ratings only, and functional operation of the device at these or any other conditions beyond those listed under Recommended Operating Conditions is not implied. Exposure to Absolute Maximum Rating conditions for extended periods of time may affect device reliability. Symbol VCC5V VCC33 VCC18 VIN TOPR TSTG Parameter 5V power supply 3.3V power supply 1.8V power supply Input signal voltage Min. -0.3 -0.3 -0.3 -0.3 Typ. Max. 5.5 3.6 2.0 3.6 70 125 Unit V V V V ℃ ℃Operating temperature -10 Storage temperature -40 Table 4. Absolute Maximum Ratings4.2.System Electrical CharacteristicsVCC5V=5V, VCC33=3.3V, VCC18=1.8V, VSSR=GND=0V, TAMB=25°C, unless otherwise specified.4.2.1.System DC CharacteristicsSymbol Parameter Min. Typ. Max. Unit Conditions VOL 3.3V I/O output low-level voltage 0 1.0 V |IOL3| = 4mA or 16mA 3.3V I/O output high-level voltage 2.3 3.3 V |IOH3| = 4mA or 16mA VOH 3.3V I/O input low-level voltage 0 1.0 V VIL 3.3V I/O input high-level voltage 2.3 3.3 V VIH 5V I/O input low-level voltage 0 1.0 V VIL5 VIH5 5V I/O input high-level voltage 2.3 5.0 V 1.63 1.65 1.67 V VCC33=3.3V VBIOS PB port BIAS state output voltage RH Internal pull-high resistor value 75 kΩ (except MSCMD) RL Internal pull-low resistor value 75 kΩ (except MSCMD) RH-CMD MSCMD internal pull-high resistor 10 20 kΩ RL-CD MSCD internal pull-low resistor value 1 MΩ Note: 1. VOH / VOL / VIH / VIL are applicable to the following pins: PA0 ~ PA7, PB0 ~ PB7, PC0 ~ PC7, PD0 ~ PD7, PE0 ~ PE7, PF0 ~ PF7 and PG0 ~ PG3. 2. VIH5 / VIL5 are applicable to the PLAY and MSCD pins. 3. RH and RL are applicable to the following pins: PA0 ~ PA7, PB0 ~ PB7, PD0, PD2 ~ PD7, MSDAT, PLAY and GCON. 4. RH-CMD is applicable to the MSCMD pin. 5. RL-CD is applicable to the MSCD pin. Table 5. System DC Characteristics2011/6/207/9V1.1XK313/048 Feature Datasheet5. PACKAGE OUTLINE INFORMATIONFigure 2. TQFP48 Outline DimensionsSymbol A A1 A2 A3 A4 B B1 B2Dimensions (inch) Dimensions (mm) Min. Max. Min. Max. 0.346 0.362 0.270 0.278 0.006 0.010 0.020 Typ. 0.026 Typ. 0.346 0.362 0.270 0.278 0.026 Typ. 12° Typ. 12° Typ. 0° - 7° 7° Typ. 8.80 9.20 6.85 7.05 0.15 0.25 0.5 Typ. 0.65 Typ.Symbol C C1 C2 C3 C4 D D1 R1 R2Dimensions (inch) Dimensions (mm) Min. Max. Min. Max. 0.035 0.041 0.004 0.008 0.002 0.006 0.017 Typ. 0.017 Typ. 0.033 0.045 0.018 0.003 0.006 Typ. 0.006 Typ. 0.90 1.05 0.09 0.20 0.05 0.15 0.4365 Typ. 0.4365 Typ. 0.85 1.15 0.45 0.75 0.15 Typ. θ1 0.15 Typ. θ2θ3 θ48.80 9.20 6.85 7.05 0.65 Typ. 12° Typ. 12° Typ. 0° - 7° 7° Typ. Table 6. TQFP48 Outline Dimensions6.HISTORYVersion 1.0 1.1 Date 2011.5.18 2011.6.20 1. 1. Modify Content Original Add AVCCDAC pin, delete PG1 pin.2011/6/208/9V1.1XK313/048 Feature Datasheet 7、中文简介● ● ● ● ● ● ● ● ● ● ● ● ● ● ● ● ● ● ● ● 单芯片解决方案,电路极为简洁 直接支持 MP3、WMA 双解 音质纯净细腻,层次分明,支持 8 种固定音效和自定义音效 芯片集成 FLASH 存储器,可更新 10 万次 直接支持 TF 卡软件更新升级(在 128*64 点阵屏下) 声音淡进淡出,不会产生爆炸声 内部集成存储记忆芯片,可继续上次未完成任务 芯片直接支持电池电压检测,可做到低电压自动关机,防止电池过放电而损坏 直接外部 U 盘插入机器,并歌曲播放功能 直接支持无驱 USB 声卡功能 直接读取 SD 或 TF 歌曲 在 U 盘模式下,电脑可直接读取机器 TF/SD 卡 直接支持 line in 线录功能 具有 FM 收音机专用接口功能,使得收音机价格更低,音质更好 直接支持红外遥控功能 直接支持电筒控制功能,无需另加单片机控制 直接支持 STN 段码 LCD、数码管 LCD 和 128*64 点阵屏,无需另加驱动芯片 支持实时时钟和闹钟功能 支持歌词显示功能(在 128*64 点阵屏下) 先进的软开关机功能,无需拨动开关,关机后具有待机超低功耗,待机电流小于 30uA魏小鹏189********189******** @ 深圳市芯科心智科技有限公司 深圳市南山区西丽龙珠 5 路南纷大厦 510 2011/6/209/9V1.1。
