JAVA生成缩略小图片类
Java获取图片的大小、宽、高
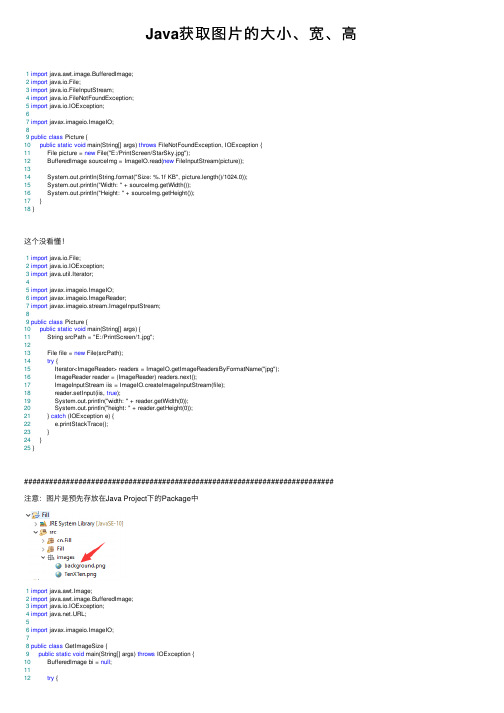
Java获取图⽚的⼤⼩、宽、⾼ 1import java.awt.image.BufferedImage;2import java.io.File;3import java.io.FileInputStream;4import java.io.FileNotFoundException;5import java.io.IOException;67import javax.imageio.ImageIO;89public class Picture {10public static void main(String[] args) throws FileNotFoundException, IOException {11 File picture = new File("E:/PrintScreen/StarSky.jpg");12 BufferedImage sourceImg = ImageIO.read(new FileInputStream(picture));1314 System.out.println(String.format("Size: %.1f KB", picture.length()/1024.0));15 System.out.println("Width: " + sourceImg.getWidth());16 System.out.println("Height: " + sourceImg.getHeight());17 }18 }这个没看懂!1import java.io.File;2import java.io.IOException;3import java.util.Iterator;45import javax.imageio.ImageIO;6import javax.imageio.ImageReader;7import javax.imageio.stream.ImageInputStream;89public class Picture {10public static void main(String[] args) {11 String srcPath = "E:/PrintScreen/1.jpg";1213 File file = new File(srcPath);14try {15 Iterator<ImageReader> readers = ImageIO.getImageReadersByFormatName("jpg");16 ImageReader reader = (ImageReader) readers.next();17 ImageInputStream iis = ImageIO.createImageInputStream(file);18 reader.setInput(iis, true);19 System.out.println("width: " + reader.getWidth(0));20 System.out.println("height: " + reader.getHeight(0));21 } catch (IOException e) {22 e.printStackTrace();23 }24 }25 }##########################################################################注意:图⽚是预先存放在Java Project下的Package中1import java.awt.Image;2import java.awt.image.BufferedImage;3import java.io.IOException;4import .URL;56import javax.imageio.ImageIO;78public class GetImageSize {9public static void main(String[] args) throws IOException {10 BufferedImage bi = null;1112try {13 URL u = GetImageSize.class.getClassLoader().getResource("images/background.png");14 bi = ImageIO.read(u);15 } catch (IOException e) {16 e.printStackTrace();17 }18 Image img = bi;1920 System.out.println(img.getWidth(null));21 System.out.println(img.getHeight(null));22 }23 }。
java中实现压缩图片(指定图片宽度和高度或者压缩比例对图片进行压缩)
java中实现压缩图⽚(指定图⽚宽度和⾼度或者压缩⽐例对图⽚进⾏压缩)package com.thinkgem.jeesite.test;import java.awt.Image;import java.awt.image.BufferedImage;import java.io.File;import java.io.FileInputStream;import java.io.FileOutputStream;import java.io.InputStream;import javax.imageio.ImageIO;import com.sun.image.codec.jpeg.JPEGCodec;import com.sun.image.codec.jpeg.JPEGImageEncoder;@SuppressWarnings("restriction")public class ReduceImgTest {/*** 指定图⽚宽度和⾼度或压缩⽐例对图⽚进⾏压缩** @param imgsrc 源图⽚地址* @param imgdist ⽬标图⽚地址* @param widthdist 压缩后图⽚的宽度* @param heightdist 压缩后图⽚的⾼度* @param rate 压缩的⽐例*/public static void reduceImg(String imgsrc, String imgdist, int widthdist, int heightdist, Float rate) {try {File srcfile = new File(imgsrc);// 检查图⽚⽂件是否存在if (!srcfile.exists()) {System.out.println("⽂件不存在");}// 如果⽐例不为空则说明是按⽐例压缩if (rate != null && rate > 0) {//获得源图⽚的宽⾼存⼊数组中int[] results = getImgWidthHeight(srcfile);if (results == null || results[0] == 0 || results[1] == 0) {return;} else {//按⽐例缩放或扩⼤图⽚⼤⼩,将浮点型转为整型widthdist = (int) (results[0] * rate);heightdist = (int) (results[1] * rate);}}// 开始读取⽂件并进⾏压缩Image src = ImageIO.read(srcfile);// 构造⼀个类型为预定义图像类型之⼀的 BufferedImageBufferedImage tag = new BufferedImage((int) widthdist, (int) heightdist, BufferedImage.TYPE_INT_RGB);//绘制图像 getScaledInstance表⽰创建此图像的缩放版本,返回⼀个新的缩放版本Image,按指定的width,height呈现图像//Image.SCALE_SMOOTH,选择图像平滑度⽐缩放速度具有更⾼优先级的图像缩放算法。
JAVA图片压缩到指定大小
JAVA图⽚压缩到指定⼤⼩这是压缩到⼩于300KB的,循环压缩,⼀次不⾏再压⼀次,不废话,直接贴代码<!-- 图⽚缩略图 --><dependency><groupId>net.coobird</groupId><artifactId>thumbnailator</artifactId><version>0.4.8</version></dependency><dependency><groupId>mons</groupId><artifactId>commons-lang3</artifactId></dependency><!--<dependency><groupId>commons-codec</groupId><artifactId>commons-codec</artifactId></dependency>--><dependency><groupId>mons</groupId><artifactId>commons-io</artifactId><version>1.3.2</version></dependency><dependency><groupId>mons</groupId><artifactId>commons-collections4</artifactId><version>4.4</version></dependency>package com.uniview.keepalive.util;import lombok.extern.slf4j.Slf4j;import net.coobird.thumbnailator.Thumbnails;import mons.io.FileUtils;import org.slf4j.Logger;import org.slf4j.LoggerFactory;import java.io.ByteArrayInputStream;import java.io.ByteArrayOutputStream;import java.io.File;import java.io.IOException;@Slf4jpublic class PicUtils {private static Logger logger = LoggerFactory.getLogger(PicUtils.class);public static void main(String[] args) throws IOException {byte[] bytes = FileUtils.readFileToByteArray(new File("C:\\Users\\Administrator\\Desktop\\邓111111.jpg"));long l = System.currentTimeMillis();bytes = pressPicForScale(bytes, 300, "x");// 图⽚⼩于300kbSystem.out.println(System.currentTimeMillis() - l);FileUtils.writeByteArrayToFile(new File("C:\\Users\\Administrator\\Desktop\\邓11111压缩后.jpg"), bytes);}/*** 根据指定⼤⼩压缩图⽚** @param imageBytes 源图⽚字节数组* @param desFileSize 指定图⽚⼤⼩,单位kb* @param imageId 影像编号* @return压缩质量后的图⽚字节数组*/public static byte[] compressPicForScale(byte[] imageBytes, long desFileSize, String imageId) { if (imageBytes == null || imageBytes.length <= 0 || imageBytes.length < desFileSize * 1024) {return imageBytes;}long srcSize = imageBytes.length;double accuracy = getAccuracy(srcSize / 1024);try {while (imageBytes.length > desFileSize * 1024) {ByteArrayInputStream inputStream = new ByteArrayInputStream(imageBytes);ByteArrayOutputStream outputStream = new ByteArrayOutputStream(imageBytes.length); Thumbnails.of(inputStream).scale(accuracy).outputQuality(accuracy).toOutputStream(outputStream);imageBytes = outputStream.toByteArray();}("【图⽚压缩】imageId={} | 图⽚原⼤⼩={}kb | 压缩后⼤⼩={}kb",imageId, srcSize / 1024, imageBytes.length / 1024);} catch (Exception e) {logger.error("【图⽚压缩】msg=图⽚压缩失败!", e);}return imageBytes;}/*** ⾃动调节精度(经验数值)** @param size 源图⽚⼤⼩* @return图⽚压缩质量⽐*/private static double getAccuracy(long size) {double accuracy;if (size < 900) {accuracy = 0.85;} else if (size < 2047) {accuracy = 0.6;} else if (size < 3275) {accuracy = 0.44;} else {accuracy = 0.4;}return accuracy;}}。
详解javagoogleThumbnails图片处理

详解javagoogleThumbnails图⽚处理在后端开发的过程中,都逃不开与⽂件传输特别是图⽚的传输打交道,但是因为现在各种拍照设备发展越来越快,拍出的照⽚更是越来越清晰,但是照⽚⽂件的⼤⼩也是越来越⼤了,⼿机拍照⼩则2M⼤则30M这在⽹络传输过程中谁顶得住呀!所以在⽤户发布照⽚,后端对图像⽂件进⾏保存的过程中压缩图像⽂件是必不可少的⼀个过程。
⽽Thumbnails就是⼀个很好的图像处理⼯具,他把复杂的图像处理封装的很好,只需要短短的⼀⾏代码就能完成对图像的压缩。
Thumbnails⽀持:指定⼤⼩进⾏缩放按照⽐例进⾏缩放不按照⽐例,指定⼤⼩进⾏缩放旋转⽔印裁剪转化图像格式输出到OutputStream输出到BufferedImage输出到ByteArrayOutputStream(OutputStream)输出到ByteArrayInputStream(InputStream)输出到byte[]Thumbnails导⼊依赖<dependency><groupId>net.coobird</groupId><artifactId>thumbnailator</artifactId><version>0.4.8</version></dependency>⼀,指定⼤⼩进⾏缩放//size(宽度, ⾼度)/** 若图⽚横⽐200⼩,⾼⽐300⼩,不变* 若图⽚横⽐200⼩,⾼⽐300⼤,⾼缩⼩到300,图⽚⽐例不变* 若图⽚横⽐200⼤,⾼⽐300⼩,横缩⼩到200,图⽚⽐例不变* 若图⽚横⽐200⼤,⾼⽐300⼤,图⽚按⽐例缩⼩,横为200或⾼为300*/Thumbnails.of("images/a380_1280x1024.jpg").size(200, 300).toFile("c:/a380_200x300.jpg");Thumbnails.of("images/a380_1280x1024.jpg").size(2560, 2048).toFile("c:/a380_2560x2048.jpg");⼆,单个图⽚等⽐例缩放File file = new File("c:\\test.png");Thumbnails.of(new FileInputStream(file)).scale(3.0).toFile(new File("c:\\yyyyy.png"));3.0是⼀个double类型的数字,缩放⽐例,⼤于1就是变⼤,⼩于1就是缩⼩三,不按照⽐例,指定⼤⼩进⾏缩放//keepAspectRatio(false) 默认是按照⽐例缩放的Thumbnails.of("images/a380_1280x1024.jpg").size(200, 200).keepAspectRatio(false).toFile("c:/a380_200x200.jpg");四,批量产⽣缩略图Thumbnails.of(new File("D:\\pics").listFiles()).scale(0.2).outputFormat("png").toFiles(Rename.PREFIX_DOT_THUMBNAIL);五,控制图⽚质量,图⽚尺⼨不变File fromPic = new File("C:\\Users\\Administrator\\Desktop\\IdCardPositive_987136936_1531741954688.jpeg");File toPic =new File("C:\\Users\\Administrator\\Desktop\\IdCardPositive_987136936_08.jpeg");Thumbnails.of(fromPic).scale(1f).outputQuality(0.25f).toFile(toPic);outputQuality就是⽤来控制图⽚质量的六,给图⽚加⽔印Thumbnails.of(fromPic).scale(0.8).watermark(Positions.BOTTOM_RIGHT, ImageIO.read(waterPic), 0.5f).outputQuality(0.8f).toFile(toPic);//watermark(位置,⽔印图,透明度)Thumbnails.of("images/a380_1280x1024.jpg").size(1280, 1024).watermark(Positions.BOTTOM_RIGHT, ImageIO.read(new File("images/watermark.png")), 0.5f).outputQuality(0.8f).toFile("c:/a380_watermark_bottom_right.jpg");Thumbnails.of("images/a380_1280x1024.jpg").size(1280, 1024).watermark(Positions.CENTER, ImageIO.read(new File("images/watermark.png")), 0.5f).outputQuality(0.8f).toFile("c:/a380_watermark_center.jpg");fromPic是原图,waterPic是⽔印图⽚,toPic是⽣成后的图⽚七,旋转图⽚Thumbnails.of(fromPic).scale(0.5).rotate(90).toFile(toPic);⼋,图⽚裁剪Thumbnails.of(fromPic).sourceRegion(Positions.CENTER, 300, 300).scale(1.0).toFile(toPic);//sourceRegion()//图⽚中⼼400*400的区域Thumbnails.of("images/a380_1280x1024.jpg").sourceRegion(Positions.CENTER, 400,400).size(200, 200).keepAspectRatio(false).toFile("c:/a380_region_center.jpg");//图⽚右下400*400的区域Thumbnails.of("images/a380_1280x1024.jpg").sourceRegion(Positions.BOTTOM_RIGHT, 400,400).size(200, 200).keepAspectRatio(false).toFile("c:/a380_region_bootom_right.jpg");//指定坐标Thumbnails.of("images/a380_1280x1024.jpg").sourceRegion(600, 500, 400, 400).size(200, 200).keepAspectRatio(false).toFile("c:/a380_region_coord.jpg");九,WEB输出流图⽚某些应⽤上传的图⽚可能质量⽐较⾼,但是⽤户在列表浏览的时候,⼜不想原图展⽰,因为带宽要求较⾼,此时可以降低图⽚质量(上⾯提到的outputQuality),以outputstream输出流的⽅式response给浏览器去展⽰@RequestMapping("/getImages")public void getImages(HttpServletRequest request, HttpServletResponse response) throws IOException {Thumbnails.of("images/a380_1280x1024.jpg").scale(1f).outputQuality(0.5f).outputFormat("jpg").toOutputStream(response.getOutputStream());}⼗,图像的格式转换//outputFormat(图像格式)Thumbnails.of("images/a380_1280x1024.jpg").size(1280, 1024).outputFormat("png").toFile("c:/a380_1280x1024.png");Thumbnails.of("images/a380_1280x1024.jpg").size(1280, 1024).outputFormat("gif").toFile("c:/a380_1280x1024.gif");⼗⼀,输出到BufferedImage//asBufferedImage() 返回BufferedImageBufferedImage thumbnail = Thumbnails.of("images/a380_1280x1024.jpg").size(1280, 1024).asBufferedImage();ImageIO.write(thumbnail, "jpg", new File("c:/a380_1280x1024_BufferedImage.jpg"));⼗⼆,输出到ByteArrayOutputStream(OutputStream)ByteArrayOutputStream thumbnailOutputStream = new ByteArrayOutputStream();Thumbnails.of("images/a380_1280x1024.jpg").scale(1f).outputQuality(0.5f).outputFormat("jpg").toOutputStream(thumbnailOutputStream);⼗三,输出到ByteArrayInputStream(InputStream)ByteArrayOutputStream thumbnailOutputStream = new ByteArrayOutputStream();Thumbnails.of("images/a380_1280x1024.jpg").scale(1f).outputQuality(0.5f).outputFormat("jpg").toOutputStream(thumbnailOutputStream);ByteArrayInputStream byteArrayInputStream = new ByteArrayInputStream(thumbnailOutputStream.toByteArray());⼗三,输出到byte[]ByteArrayOutputStream handlerOutputStream = new ByteArrayOutputStream();Thumbnails.of(inputStream).scale(1f).outputQuality(0.25f).outputFormat("jpg").toOutputStream(handlerOutputStream);byte[] bytes = handlerOutputStream.toByteArray();到此这篇关于java google Thumbnails 图⽚处理的⽂章就介绍到这了,更多相关java google Thumbnails 图⽚处理内容请搜索以前的⽂章或继续浏览下⾯的相关⽂章希望⼤家以后多多⽀持!。
c#生成图片缩略图的类(2种实现思路)

c#⽣成图⽚缩略图的类(2种实现思路)复制代码代码如下:/**//// <summary>/// ⽣成缩略图/// </summary>/// <param name="originalImagePath">源图路径(物理路径)</param>/// <param name="thumbnailPath">缩略图路径(物理路径)</param>/// <param name="width">缩略图宽度</param>/// <param name="height">缩略图⾼度</param>/// <param name="mode">⽣成缩略图的⽅式</param>public static void MakeThumbnail(string originalImagePath, string thumbnailPath, int width, int height, string mode) {Image originalImage = Image.FromFile(originalImagePath);int towidth = width;int toheight = height;int x = 0;int y = 0;int ow = originalImage.Width;int oh = originalImage.Height;switch (mode){case "HW"://指定⾼宽缩放(可能变形)break;case "W"://指定宽,⾼按⽐例toheight = originalImage.Height * width/originalImage.Width;break;case "H"://指定⾼,宽按⽐例towidth = originalImage.Width * height/originalImage.Height;break;case "Cut"://指定⾼宽裁减(不变形)if((double)originalImage.Width/(double)originalImage.Height > (double)towidth/(double)toheight){oh = originalImage.Height;ow = originalImage.Height*towidth/toheight;y = 0;x = (originalImage.Width - ow)/2;}else{ow = originalImage.Width;oh = originalImage.Width*height/towidth;x = 0;y = (originalImage.Height - oh)/2;}break;default :break;}//新建⼀个bmp图⽚Image bitmap = new System.Drawing.Bitmap(towidth,toheight);//新建⼀个画板Graphics g = System.Drawing.Graphics.FromImage(bitmap);//设置⾼质量插值法g.InterpolationMode = System.Drawing.Drawing2D.InterpolationMode.High;//设置⾼质量,低速度呈现平滑程度g.SmoothingMode = System.Drawing.Drawing2D.SmoothingMode.HighQuality;//清空画布并以透明背景⾊填充g.Clear(Color.Transparent);//在指定位置并且按指定⼤⼩绘制原图⽚的指定部分g.DrawImage(originalImage, new Rectangle(0, 0, towidth, toheight),new Rectangle(x, y, ow,oh),GraphicsUnit.Pixel);try{//以jpg格式保存缩略图bitmap.Save(thumbnailPath, System.Drawing.Imaging.ImageFormat.Jpeg);}catch(System.Exception e){throw e;}finally{originalImage.Dispose();bitmap.Dispose();g.Dispose();}}关键⽅法Graphics.DrawImage见ms-help://FrameworkSDKv1.1.CHS/cpref/html/frlrfsystemdrawinggraphicsclassdrawimagetopic11.htm 4个重载⽅法,有直接返回Image对象的,有⽣成缩略图,并且保存到指定⽬录的!复制代码代码如下:using System.IO;using System.Drawing;using System.Drawing.Imaging;/// <summary>/// 图⽚处理类/// 1、⽣成缩略图⽚或按照⽐例改变图⽚的⼤⼩和画质/// 2、将⽣成的缩略图放到指定的⽬录下/// </summary>public class ImageClass{public Image ResourceImage;private int ImageWidth;private int ImageHeight;public string ErrMessage;/// <summary>/// 类的构造函数/// </summary>/// <param name="ImageFileName">图⽚⽂件的全路径名称</param>public ImageClass(string ImageFileName){ResourceImage=Image.FromFile(ImageFileName);ErrMessage="";}public bool ThumbnailCallback(){return false;}/// <summary>/// ⽣成缩略图重载⽅法1,返回缩略图的Image对象/// </summary>/// <param name="Width">缩略图的宽度</param>/// <param name="Height">缩略图的⾼度</param>/// <returns>缩略图的Image对象</returns>public Image GetReducedImage(int Width,int Height){try{Image ReducedImage;Image.GetThumbnailImageAbort callb=new Image.GetThumbnailImageAbort(ThumbnailCallback); ReducedImage=ResourceImage.GetThumbnailImage(Width,Height,callb,IntPtr.Zero);return ReducedImage;}catch(Exception e){ErrMessage=e.Message;return null;}}/// <summary>/// ⽣成缩略图重载⽅法2,将缩略图⽂件保存到指定的路径/// </summary>/// <param name="Width">缩略图的宽度</param>/// <param name="Height">缩略图的⾼度</param>/// <param name="targetFilePath">缩略图保存的全⽂件名,(带路径),参数格式:D:Images ilename.jpg</param> /// <returns>成功返回true,否则返回false</returns>public bool GetReducedImage(int Width,int Height,string targetFilePath){try{Image ReducedImage;Image.GetThumbnailImageAbort callb=new Image.GetThumbnailImageAbort(ThumbnailCallback); ReducedImage=ResourceImage.GetThumbnailImage(Width,Height,callb,IntPtr.Zero);ReducedImage.Save(@targetFilePath,ImageFormat.Jpeg);ReducedImage.Dispose();return true;}catch(Exception e){ErrMessage=e.Message;return false;}}/// <summary>/// ⽣成缩略图重载⽅法3,返回缩略图的Image对象/// </summary>/// <param name="Percent">缩略图的宽度百分⽐如:需要百分之80,就填0.8</param>/// <returns>缩略图的Image对象</returns>public Image GetReducedImage(double Percent){try{Image ReducedImage;Image.GetThumbnailImageAbort callb=new Image.GetThumbnailImageAbort(ThumbnailCallback); ImageWidth=Convert.ToInt32(ResourceImage.Width*Percent);ImageHeight=Convert.ToInt32(ResourceImage.Width*Percent);ReducedImage=ResourceImage.GetThumbnailImage(ImageWidth,ImageHeight,callb,IntPtr.Zero);return ReducedImage;}catch(Exception e){ErrMessage=e.Message;return null;}}/// <summary>/// ⽣成缩略图重载⽅法4,返回缩略图的Image对象/// </summary>/// <param name="Percent">缩略图的宽度百分⽐如:需要百分之80,就填0.8</param>/// <param name="targetFilePath">缩略图保存的全⽂件名,(带路径),参数格式:D:Images ilename.jpg</param> /// <returns>成功返回true,否则返回false</returns>public bool GetReducedImage(double Percent,string targetFilePath){try{Image ReducedImage;Image.GetThumbnailImageAbort callb=new Image.GetThumbnailImageAbort(ThumbnailCallback); ImageWidth=Convert.ToInt32(ResourceImage.Width*Percent);ImageHeight=Convert.ToInt32(ResourceImage.Width*Percent);ReducedImage=ResourceImage.GetThumbnailImage(ImageWidth,ImageHeight,callb,IntPtr.Zero); ReducedImage.Save(@targetFilePath,ImageFormat.Jpeg);ReducedImage.Dispose();return true;}catch(Exception e){ErrMessage=e.Message;return false;}}}。
java利用javacv和ffmpeg截取视频提取视频封面生成缩略图,精减引用包
java利用javacv和ffmpeg截取视频提取视频封面生成缩略图,精减引用包java利用javacv和ffmpeg截取视频提取视频封面,精减引用包废话少说,直接上代码:package /doc/114340539.html,mons.util;import org.bytedeco.javacv.FFmpegFrameGrabber;import org.bytedeco.javacv.FrameGrabber;import org.bytedeco.javacv.Java2DFrameConverter;import org.slf4j.Logger;import org.slf4j.LoggerFactory;import javax.imageio.ImageIO;import java.awt.*;import java.awt.image.BufferedImage;import java.io.File;import java.io.IOException;public class VideoUtil {static Logger log = LoggerFactory.getLogger(VideoUtil.class);/*** 获取视频时长,单位为秒** @param video 源视频文件* @return 时长(s)*/public static Long getVideoDuration(File video) {Long duration = 0L;FFmpegFrameGrabber ff = new FFmpegFrameGrabber(video);try {ff.start();duration = ff.getLengthInTime() / (1000 * 1000);ff.stop();} catch (FrameGrabber.Exception e) {e.printStackTrace();}return duration;}/*** 截取视频获得指定帧的图片** @param video 源视频文件* @param picPath 截图存放路径*/public static void getVideoPic(File video, String picPath) {FFmpegFrameGrabber ff = new FFmpegFrameGrabber(video);try {ff.start();// 截取中间帧图片(具体依实际情况而定)int i = 0;int length = ff.getLengthInFrames();int middleFrame = length / 2;org.bytedeco.javacv.Frame frame = null;while (i < length) {frame = ff.grabFrame();if ((i > middleFrame) && (frame.image != null)) {break;}i++;}// 截取的帧图片Java2DFrameConverter converter = new Java2DFrameConverter();BufferedImage srcImage = converter.getBufferedImage(frame);int srcImageWidth = srcImage.getWidth();int srcImageHeight = srcImage.getHeight();// 对截图进行等比例缩放(缩略图)int width = 480;int height = (int) (((double) width / srcImageWidth) * srcImageHeight);BufferedImage thumbnailImage = new BufferedImage(width, height, BufferedImage.TYPE_3BYTE_BGR);thumbnailImage.getGraphics().drawImage(srcImage.getScal edInstance(width, height, Image.SCALE_SMOOTH), 0, 0, null);File picFile = new File(picPath);ImageIO.write(thumbnailImage, "jpg", picFile);ff.stop();} catch (IOException e) {e.printStackTrace();}}public static void main(String[] args) {String videoPath ="d:\\111.mp4";// String audioPath = "d:\\20200222_161159.m4a";File video = new File(videoPath);String picPath = "d:\\video.jpg";getVideoPic(video, picPath);long duration = getVideoDuration(video);System.out.println("videoDuration = " + duration);}}网上一般说,maven引用如下:org.bytedecojavacv-platform1.5.2结果引用了一大堆包,超过500M,我特意花了不少时间,进行了精减,正确的maven引用如下:org.bytedeco javacv1.5.2org.bytedeco javacpporg.bytedeco openblasorg.bytedeco opencvorg.bytedeco ffmpegorg.bytedeco flycaptureorg.bytedeco libdc1394org.bytedeco libfreenectorg.bytedeco libfreenect2org.bytedeco librealsenseorg.bytedeco librealsense2org.bytedeco videoinputorg.bytedeco artoolkitplusorg.bytedeco flandmarkorg.bytedeco leptonica。
Java使用Thumbnails对大图片压缩

Java使⽤Thumbnails对⼤图⽚压缩引⾔在最近的项⽬开发中,经常会使⽤到图⽚上传,但是过⼤的图⽚在查看的时候会影响打开速度,浪费流量以及服务器存储空间,所以需要在后端处理完图⽚再上传,这⾥我们⽤到了Thumbnails图⽚处理⼯具类。
Thumbnails主要⽀持以下⼀些功能1、指定⼤⼩进⾏缩放2、按照⽐例进⾏缩放3、不按照⽐例,指定⼤⼩进⾏缩放4、旋转5、⽔印6、裁剪7、转化图⽚格式8、输出到OutputStream9、输出到BufferedImage使⽤步骤:⼀、添加Maven<dependency><groupId>net.coobird</groupId><artifactId>thumbnailator</artifactId><version>0.4.8</version></dependency>⼆、具体操作1:指定⼤⼩进⾏缩放/*** 指定⼤⼩进⾏缩放** @throws IOException*/private void test1() throws IOException {/** size(width,height) 若图⽚横⽐200⼩,⾼⽐300⼩,不变* 若图⽚横⽐200⼩,⾼⽐300⼤,⾼缩⼩到300,图⽚⽐例不变若图⽚横⽐200⼤,⾼⽐300⼩,横缩⼩到200,图⽚⽐例不变* 若图⽚横⽐200⼤,⾼⽐300⼤,图⽚按⽐例缩⼩,横为200或⾼为300*/Thumbnails.of("images/test.jpg").size(200, 300).toFile("C:/image_200x300.jpg");Thumbnails.of("images/test.jpg").size(2560, 2048).toFile("C:/image_2560x2048.jpg");}2:按照⽐例进⾏缩放/*** 按照⽐例进⾏缩放* scale 图⽚的压缩⽐例值在0-1之间,1f就是原图,0.5就是原图的⼀半⼤⼩ * outputQuality 图⽚压缩的质量值在0-1 之间,越接近1质量越好,越接近0 质量越差 * @throws IOException*/private void test2() throws IOException {/*** scale(⽐例)*/Thumbnails.of("images/test.jpg").scale(0.25f).outputQuality(0.8f).toFile("C:/image_25%.jpg");Thumbnails.of("images/test.jpg").scale(0.75f).outputQuality(0.8f).toFile("C:/image_110%.jpg"); }3:不按照⽐例,指定⼤⼩进⾏缩放/*** 不按照⽐例,指定⼤⼩进⾏缩放** @throws IOExceptionprivate void test3() throws IOException {/*** keepAspectRatio(false) 默认是按照⽐例缩放的*/Thumbnails.of("images/test.jpg").size(120, 120).keepAspectRatio(false).toFile("C:/image_120x120.jpg"); }4:旋转/*** 旋转** @throws IOException*/private void test4() throws IOException {/*** rotate(⾓度),正数:顺时针负数:逆时针*/Thumbnails.of("images/test.jpg").size(1280, 1024).rotate(90).toFile("C:/image+90.jpg");Thumbnails.of("images/test.jpg").size(1280, 1024).rotate(-90).toFile("C:/iamge-90.jpg");}5:⽔印/*** ⽔印** @throws IOException*/private void test5() throws IOException {/*** watermark(位置,⽔印图,透明度)*/Thumbnails.of("images/test.jpg").size(1280, 1024).watermark(Positions.BOTTOM_RIGHT, ImageIO.read(new File("images/watermark.png")), 0.5f) .outputQuality(0.8f).toFile("C:/image_watermark_bottom_right.jpg");Thumbnails.of("images/test.jpg").size(1280, 1024).watermark(Positions.CENTER, ImageIO.read(new File("images/watermark.png")), 0.5f).outputQuality(0.8f).toFile("C:/image_watermark_center.jpg");}6:裁剪/*** 裁剪** @throws IOException*/private void test6() throws IOException {/*** 图⽚中⼼400*400的区域*/Thumbnails.of("images/test.jpg").sourceRegion(Positions.CENTER, 400, 400).size(200, 200).keepAspectRatio(false).toFile("C:/image_region_center.jpg");/*** 图⽚右下400*400的区域*/Thumbnails.of("images/test.jpg").sourceRegion(Positions.BOTTOM_RIGHT, 400, 400).size(200, 200).keepAspectRatio(false).toFile("C:/image_region_bootom_right.jpg");/*** 指定坐标*/Thumbnails.of("images/test.jpg").sourceRegion(600, 500, 400, 400).size(200, 200).keepAspectRatio(false).toFile("C:/image_region_coord.jpg");}7:转化图⽚格式/*** 转化图⽚格式** @throws IOException*/private void test7() throws IOException {/*** outputFormat(图像格式)*/Thumbnails.of("images/test.jpg").size(1280, 1024).outputFormat("png").toFile("C:/image_1280x1024.png");Thumbnails.of("images/test.jpg").size(1280, 1024).outputFormat("gif").toFile("C:/image_1280x1024.gif");}8:输出到OutputStream* 输出到OutputStream** @throws IOException*/private void test8() throws IOException {/*** toOutputStream(流对象)*/OutputStream os = new FileOutputStream("C:/image_1280x1024_OutputStream.png");Thumbnails.of("images/test.jpg").size(1280, 1024).toOutputStream(os);}9:输出到BufferedImage/*** 输出到BufferedImage** @throws IOException*/private void test9() throws IOException {/*** asBufferedImage() 返回BufferedImage*/BufferedImage thumbnail = Thumbnails.of("images/test.jpg").size(1280, 1024).asBufferedImage();ImageIO.write(thumbnail, "jpg", new File("C:/image_1280x1024_BufferedImage.jpg"));}三、对图⽚⽂件进⾏Base64操作/*** 对内存中的图⽚⽂件进⾏Base64处理** @throws IOException*/public String Base64ImageByMemory(BufferedImage pic) {String imgString = "";ByteArrayOutputStream newBaos = new ByteArrayOutputStream();//io流try {ImageIO.write(pic, "jpg", newBaos);//写⼊流中byte[] bytes = newBaos.toByteArray();//转换成字节imgString = URLEncoder.encode(new BASE64Encoder().encode(bytes), "UTF-8");} catch (Exception e) {e.printStackTrace();}return imgString;}四、获取服务器图⽚⽂件⼤⼩/*** 输出到OutputStream** @throws IOException*/public void getImageFileSize(){int size;URLConnection conn;try {String path="";path="https:///pic/a8773912b31bb051c36044e93b7adab44bede0af";//世界地图 //path="http://10.30.23.217:9017/image/0c09ca36-abea-4efa-85b0-99b6d261f66c"; //服务器上图⽚URL url = new URL(path);conn = url.openConnection();size = conn.getContentLength();if (size < 0){System.out.println("Could not determine file size.");}else{System.out.println("The size of file is = " + size + " bytes");BigDecimal filesize = new BigDecimal(size);BigDecimal megabyte = new BigDecimal(1024 * 1024);float returnValue = filesize.divide(megabyte, 2, BigDecimal.ROUND_UP).floatValue();System.out.println("The size of file is = "+returnValue+"M");}conn.getInputStream().close();} catch (IOException e) {e.printStackTrace();}}⾄此,图⽚压缩的相关处理和Base64以及获取服务器⽂件⼤⼩的功能就总结完了!以上就是Java 使⽤Thumbnails对⼤图⽚压缩的详细内容,更多关于java ⼤图⽚压缩的资料请关注其它相关⽂章!。
JAVA将任意图片文件压缩成想要的图片类型与大小
本文由我司收集整编,推荐下载,如有疑问,请与我司联系JAVA 将任意图片文件压缩成想要的图片类型与大小2012/11/06 0 二话不说,直接贴出代码:import java.awt.Image;import java.awt.image.BufferedImage;import java.io.File;import java.io.IOException;import javax.imageio.ImageIO;public class imageTest {//测试方法public static void main(String[] args){//定义源文件File sourcefile = new File( D:\\qwe.png //定义压缩后的文件名File newFile = new File( D:\\xx.png try { imageCompress(sourcefile,newFile, 1028, 800, png } catch (IOException e) {e.printStackTrace();}}/** * 生成缩略图* @param sourceFile 源始文件路径*@param destFile 目标文件路径* @param destWidth 目标文件宽度* @param destHeight 目标文件高度* @return flag 是否写入成功* @throws IOException*/public static boolean imageCompress(File sourceFile, File destFile,int destWidth,int destHeight,String imageTpye) throws IOException{//保存源文件图像Image srcImage = null;//保存目标文件图像BufferedImage tagImage = null;//判断目标文件图像是否绘制成功boolean flag = false;//判断图片文件是否存在以及是否为文件类型if(sourceFile.exists() sourceFile.isFile()){//读取图片文件属性srcImage = ImageIO.read(sourceFile);//生成目标缩略图tagImage = new BufferedImage(destWidth,destHeight,BufferedImage.TYPE_INT_RGB);//根据目标图片的大小绘制目标图片tagImage.getGraphics().drawImage(srcImage,0,0,destWidth,destHeight,null);flag = ImageIO.write(tagImage, imageTpye, destFile);}else{flag = false;} return flag; }}tips:感谢大家的阅读,本文由我司收集整编。
Java将大图片转成小图片

我们经常会将一个小的图片变成小一些的图片,利用java可以方便的实现,而且实现了这个功能后就可以实现更强大的功能,将一个文件夹中的所有图片都变成一个尺寸。
这里提供一个将大图变成小图的方法。
并且提供一个根据这个方法的写好的一个:图片批量尺寸处理器。
可以将一个文件夹下的所有图片,批量的按照一定尺寸都保存到另一个文件夹中。
该工具在操作超大图片的时候会出现内存溢出的错误。
功能简单也没有做太多出错处理,一般情况下挺好用的,大家将就着用吧。
import java.awt.Graphics2D;import java.awt.Image;import java.awt.geom.AffineTransform;import java.awt.image.AffineTransformOp;import java.awt.image.BufferedImage;import java.io.File;import java.io.FileInputStream;import java.io.FileNotFoundException;import java.io.IOException;import java.io.InputStream;import javax.imageio.ImageIO;public class Temp01{private Temp01(){}private void imageOp(InputStream inFile, String outFilePath, int width, int height){Image image = null;try {image = ImageIO.read(inFile);} catch (IOException e) {System.out.println("file path error...");}int originalImageWidth = image.getWidth(null);int originalImageHeight = image.getHeight(null);BufferedImage originalImage = new BufferedImage( originalImageWidth,originalImageHeight,BufferedImage.TYPE_3BYTE_BGR);Graphics2D g2d = originalImage.createGraphics();g2d.drawImage(image, 0, 0, null);BufferedImage changedImage =new BufferedImage(width,height,BufferedImage.TYPE_3BYTE_BGR);double widthBo = (double)width/originalImageWidth;double heightBo = (double)width/originalImageHeight; AffineTransform transform = new AffineTransform();transform.setToScale(widthBo, heightBo);AffineTransformOp ato = new AffineTransformOp(transform, null);ato.filter(originalImage, changedImage);File fo = new File(outFilePath); //将要转换出的小图文件try {ImageIO.write(changedImage, "jpeg", fo);} catch (Exception e) {e.printStackTrace();}}private void imageOp(String inFilePath, String outFilePath, int width, int height){File tempFile = new File(inFilePath);Image image = null;try {image = ImageIO.read(tempFile);} catch (IOException e) {System.out.println("file path error...");}int originalImageWidth = image.getWidth(null);int originalImageHeight = image.getHeight(null);BufferedImage originalImage = new BufferedImage(originalImageWidth,originalImageHeight,BufferedImage.TYPE_3BYTE_BGR);Graphics2D g2d = originalImage.createGraphics();g2d.drawImage(image, 0, 0, null);BufferedImage changedImage =new BufferedImage(width,height,BufferedImage.TYPE_3BYTE_BGR);double widthBo = (double)width/originalImageWidth;double heightBo = (double)width/originalImageHeight;AffineTransform transform = new AffineTransform();transform.setToScale(widthBo, heightBo);AffineTransformOp ato = new AffineTransformOp(transform, null);ato.filter(originalImage, changedImage);File fo = new File(outFilePath); //将要转换出的小图文件try {ImageIO.write(changedImage, "jpeg", fo);} catch (Exception e) {e.printStackTrace();}}public static void main(String[] args) throws FileNotFoundException { Temp01 t1 = new Temp01();t1.imageOp("C:/p02.jpg", "C:/p03.jpg", 400, 300);InputStream in = new FileInputStream(new File("C:/p02.jpg")); t1.imageOp(in, "C:/p04.jpg", 400, 300);}}。
Java 图片处理 格式转换

Java 图片处理(包括 Jmagick 的应用) 图片处理( 的应用)作者: 佚名, 出处:IT 专家网,2010-10-29 08:30责任编辑: 谢妍妍,近期有使用到图片的压缩处理,由于在之前用 Java 处理时,在低像素的情况下, Java 处理的效果确实很差,然后尝试了用网上推荐的免费开源的第三方软件,利用 Java 的 jni 调用 dll 文件进行处理,效果还可以。
在此记录下,方便以后继续积累。
近期有使用到图片的压缩处理, 由于在之前用 Java 处理时, 在低像素的情况下, Java 处理的效果确实很差,然后尝试了用网上推荐的免费开源的第三方软件,利用 Java 的 jni 调用 dll 文件进行处理,效果还可以。
在此记录下,方便以后继续积累。
1、纯 Java 类处理图片代码Java 代码以下是代码片段: 以下是代码片段: /** * 转换图片大小,不变形 * * @param img * 图片文件 * @param width * 图片宽 * @param height * 图片高 */ public static void changeImge(File img, int width, int height) { try { Image image = ImageIO.read(img); //图片尺寸的大小处理, 如果长宽都小于规定大小, 则返回, 如果有一个大于规定大小, 则等比例缩放 int srcH = image.getHeight(null); int srcW = image.getWidth(null); if (srcH <= height && srcW <= width) { return;} int tmpH = width; int tmpW = height; //在长度和宽度都做了限制,不能超过设定值 while (srcH > height || srcW > width) { if(srcW > width) { tmpH = srcH * width / srcW; srcH = tmpH; srcW=width; } if(srcH > height) { tmpW = srcW * height / srcH; srcW = tmpW; srcH=height; } } BufferedImage bufferedImage = new BufferedImage(srcW, srcH, BufferedImage.TYPE_3BYTE_BGR); bufferedImage.getGraphics().drawImage( image.getScaledInstance(srcW, srcH, Image.SCALE_SMOOTH), 0, 0, srcW, srcH, null); FileOutputStream fos = new FileOutputStream(img); JPEGImageEncoder encoder = JPEGCodec.createJPEGEncoder(fos); encoder.encode(bufferedImage); fos.close(); // System.out.println("转换成功..."); } catch (IOException e) { e.printStackTrace(); throw new IllegalStateException("图片转换出错!", e); } }2、使用 Jmagick 辅助Html 代码(1)使用的 windows 下的 jmagick-win-6.3.9-q16.zip 地址是: /6.3.9/(2)doc 对应的 api 地址:/jmagick-doc/(3)安装 imagemagick,官方网站:/我使用的是:imagemagick-6.4.6-4-q16-windows-dll.exe :点击下载(4) 安装 imagemagick-6.4.6-4-q16-windows-dll.exe,将 安装目录下(按自己所 安装的目录找) 下的所有 dll 文件 copy 到系统盘下的 “c:\windows\system32\”文件 夹里(5) 配置环境变量再环境变量 path 里添加新的值 “c:\program files\imagemagick-6.4.6-4-q16“使 用 ide 可以不用配置(6)解压 jmagick-win-6.3.9-q16.zip将 jmagick.dll 复制到系统盘下的 “c:\windows\system32\”文件夹里 和 复制到 jdk 的 bin(例“d:\jdk6\bin”)文件里各一份将 jmagick.jar 复制到 tomcat 下的 lib 文件夹里 和 所使用项目的 web-inf 下 lib 文件里 各一份(7)web 应用如果部署到 tomcat 下,那么最好在 catalina.bat 文件中改变如下设置set java_opts=%java_opts% -xms256m -xmx768m -xx:maxpermsize=128m – djava.util.logging.manager=org.apache.juli.classloaderlogmanager – djava.util.logging.config.file=”${catalina.base}\conf\logging.properties”避免 heap 溢出的问题,参数看你自己的机器而定。
javascript实现获取图片大小及图片等比缩放的方法
javascript实现获取图⽚⼤⼩及图⽚等⽐缩放的⽅法本⽂实例讲述了javascript实现获取图⽚⼤⼩及图⽚等⽐缩放的⽅法。
分享给⼤家供⼤家参考,具体如下:获取图⽚⼤⼩:var originImage = new Image();function GetImageWidth(oImage) {if (originImage.src != oImage.src) originImage.src = oImage.src;return originImage.width;}function GetImageHeight(oImage) {if (originImage.src != oImage.src) originImage.src = oImage.src;return originImage.height;}图⽚等⽐缩放:function SetImage(ImgD, FitWidth, FitHeight) {var image = new Image();image.src = ImgD.src;if (image.width > 0 && image.height > 0) {if (image.width / image.height >= FitWidth / FitHeight) {if (image.width > FitWidth) {ImgD.width = FitWidth;ImgD.height = (image.height * FitWidth) / image.width;} else {ImgD.width = image.width;ImgD.height = image.height;}} else {if (image.height > FitHeight) {ImgD.height = FitHeight;ImgD.width = (image.width * FitHeight) / image.height;} else {ImgD.width = image.width;ImgD.height = image.height;}}}}更多关于JavaScript相关内容感兴趣的读者可查看本站专题:《》、《》、《》、《》、《》、《》、《》及《》希望本⽂所述对⼤家JavaScript程序设计有所帮助。
thumbnails 实现原理

thumbnails 实现原理
Thumbnails是一个用于生成图像缩略图的Java库。
它的实现原理主要包括以下几个步骤:
1. 打开原始图像文件:使用Java的ImageIO包中的read()方法打开原始图像文件,并将其加载到内存中。
2. 调整图像大小:通过使用Java 2D API中的AffineTransform 类创建一个变换矩阵,将原始图像的像素坐标映射到新的坐标系上,从而实现图像大小的调整。
3. 缩放图像:使用Java 2D API中的RescaleOp类对图像进行缩放操作。
该类接受一个源图像、一个目标尺寸和一个缩放因子作为输入,并返回一个缩放后的新图像。
4. 裁剪图像:如果需要,可以使用Java的ImageIO包中的read()方法读取原始图像的一个子区域,从而得到一个缩略图。
5. 保存缩略图:使用Java的ImageIO包中的write()方法将缩略图保存到磁盘上。
总的来说,Thumbnails库通过使用Java的内置图像处理API,实现了快速、高效的图像缩略图生成。
java实现图像压缩
g.drawRect(this.getWideth() - 120, h - 18,119,17);
g.setColor(new Color(255,102,0));
g.drawString(t, this.getWideth() - 100, h - 5);
tag.getGraphics().drawImage(srcFile, 0, 0, width, height, null);
String filePrex = oldFile.substring(0, oldFile.indexOf('.'));
g.drawImage(src, 0, 0, this.getWideth(), h, null);
if(t!=null)
{
g.setColor(new Color(242,242,242));
g.fillRect(this.getWideth() - 120, h - 18,120,18);
return (int) hh;
}
else
{
this.setWideth(w);
return h;
}
}
public void proce(String fpath) throws Exception
{
int h=this.getHeight(wideth,height);
BufferedImage tag = new BufferedImage(this.getWideth(),h,BufferedImage.TYPE_INT_RGB);
Graphics g=tag.getGraphics();
JAVA生成图片缩略图、JAVA截取图片局部内容

JAVA⽣成图⽚缩略图、JAVA截取图⽚局部内容⽬前,google已经有了更好的处理JAVA图⽚的⼯具,请搜索:Thumbnailatorpackage com.ares.image.test;import java.awt.Color;import java.awt.Graphics;import java.awt.Image;import java.awt.image.BufferedImage;import java.io.File;import java.io.IOException;import java.util.Arrays;import javax.imageio.ImageIO;import org.slf4j.Logger;import org.slf4j.LoggerFactory;import com.ares.slf4j.test.Slf4jUtil;/*** <p>Title: ImageUtil </p>* <p>Description: 使⽤JDK原⽣态类⽣成图⽚缩略图和裁剪图⽚ </p>* <p>Email: icerainsoft@ </p>* @author Ares* @date 2014年10⽉28⽇上午10:24:26*/public class ImageUtil {static {Slf4jUtil.buildSlf4jUtil().loadSlf4j();}private Logger log = LoggerFactory.getLogger(getClass());private static String DEFAULT_PREVFIX = "thumb_";private static Boolean DEFAULT_FORCE = false;/*** <p>Title: thumbnailImage</p>* <p>Description: 根据图⽚路径⽣成缩略图 </p>* @param imagePath 原图⽚路径* @param w 缩略图宽* @param h 缩略图⾼* @param prevfix ⽣成缩略图的前缀* @param force 是否强制按照宽⾼⽣成缩略图(如果为false,则⽣成最佳⽐例缩略图)*/public void thumbnailImage(File imgFile, int w, int h, String prevfix, boolean force){if(imgFile.exists()){try {// ImageIO ⽀持的图⽚类型 : [BMP, bmp, jpg, JPG, wbmp, jpeg, png, PNG, JPEG, WBMP, GIF, gif]String types = Arrays.toString(ImageIO.getReaderFormatNames());String suffix = null;// 获取图⽚后缀if(imgFile.getName().indexOf(".") > -1) {suffix = imgFile.getName().substring(imgFile.getName().lastIndexOf(".") + 1);}// 类型和图⽚后缀全部⼩写,然后判断后缀是否合法if(suffix == null || types.toLowerCase().indexOf(suffix.toLowerCase()) < 0){log.error("Sorry, the image suffix is illegal. the standard image suffix is {}." + types);return ;}log.debug("target image's size, width:{}, height:{}.",w,h);Image img = ImageIO.read(imgFile);if(!force){// 根据原图与要求的缩略图⽐例,找到最合适的缩略图⽐例int width = img.getWidth(null);int height = img.getHeight(null);if((width*1.0)/w < (height*1.0)/h){if(width > w){h = Integer.parseInt(new java.text.DecimalFormat("0").format(height * w/(width*1.0)));log.debug("change image's height, width:{}, height:{}.",w,h);}} else {if(height > h){w = Integer.parseInt(new java.text.DecimalFormat("0").format(width * h/(height*1.0)));log.debug("change image's width, width:{}, height:{}.",w,h);}}}BufferedImage bi = new BufferedImage(w, h, BufferedImage.TYPE_INT_RGB);Graphics g = bi.getGraphics();g.drawImage(img, 0, 0, w, h, Color.LIGHT_GRAY, null);g.dispose();String p = imgFile.getPath();// 将图⽚保存在原⽬录并加上前缀ImageIO.write(bi, suffix, new File(p.substring(0,stIndexOf(File.separator)) + File.separator + prevfix +imgFile.getName()));} catch (IOException e) {log.error("generate thumbnail image failed.",e);}}else{log.warn("the image is not exist.");}}public void thumbnailImage(String imagePath, int w, int h, String prevfix, boolean force){File imgFile = new File(imagePath);thumbnailImage(imgFile, w, h, prevfix, force);}public void thumbnailImage(String imagePath, int w, int h, boolean force){thumbnailImage(imagePath, w, h, DEFAULT_PREVFIX, force);}public void thumbnailImage(String imagePath, int w, int h){thumbnailImage(imagePath, w, h, DEFAULT_FORCE);}public static void main(String[] args) {new ImageUtil().thumbnailImage("imgs/Tulips.jpg", 100, 150);}}效果:(原图是电脑"图⽚"⽂件夹下的郁⾦⾹图⽚,⼤⼩1024*768,⽣成的图⽚为200*150⼤⼩,保持4:3的⽐例)JAVA 截取图⽚局部内容:package com.ares.image.test;import java.awt.Color;import java.awt.Graphics;import java.awt.Image;import java.awt.image.BufferedImage;import java.io.File;import java.io.FileInputStream;import java.io.FileNotFoundException;import java.io.IOException;import java.io.OutputStream;import java.util.Arrays;import javax.imageio.ImageIO;import javax.imageio.ImageReadParam;import javax.imageio.ImageReader;import javax.imageio.stream.ImageInputStream;import org.slf4j.Logger;import org.slf4j.LoggerFactory;import com.ares.slf4j.test.Slf4jUtil;/*** <p>Title: ImageUtil </p>* <p>Description: </p>* <p>Email: icerainsoft@ </p>* @author Ares* @date 2014年10⽉28⽇上午10:24:26*/public class ImageUtil {static {Slf4jUtil.buildSlf4jUtil().loadSlf4j();}private Logger log = LoggerFactory.getLogger(getClass());private static String DEFAULT_THUMB_PREVFIX = "thumb_";private static String DEFAULT_CUT_PREVFIX = "cut_";private static Boolean DEFAULT_FORCE = false;/*** <p>Title: cutImage</p>* <p>Description: 根据原图与裁切size截取局部图⽚</p>* @param srcImg 源图⽚* @param output 图⽚输出流* @param rect 需要截取部分的坐标和⼤⼩*/public void cutImage(File srcImg, OutputStream output, java.awt.Rectangle rect){if(srcImg.exists()){java.io.FileInputStream fis = null;ImageInputStream iis = null;try {fis = new FileInputStream(srcImg);// ImageIO ⽀持的图⽚类型 : [BMP, bmp, jpg, JPG, wbmp, jpeg, png, PNG, JPEG, WBMP, GIF, gif]String types = Arrays.toString(ImageIO.getReaderFormatNames()).replace("]", ",");String suffix = null;// 获取图⽚后缀if(srcImg.getName().indexOf(".") > -1) {suffix = srcImg.getName().substring(srcImg.getName().lastIndexOf(".") + 1);}// 类型和图⽚后缀全部⼩写,然后判断后缀是否合法if(suffix == null || types.toLowerCase().indexOf(suffix.toLowerCase()+",") < 0){log.error("Sorry, the image suffix is illegal. the standard image suffix is {}." + types);return ;}// 将FileInputStream 转换为ImageInputStreamiis = ImageIO.createImageInputStream(fis);// 根据图⽚类型获取该种类型的ImageReaderImageReader reader = ImageIO.getImageReadersBySuffix(suffix).next();reader.setInput(iis,true);ImageReadParam param = reader.getDefaultReadParam();param.setSourceRegion(rect);BufferedImage bi = reader.read(0, param);ImageIO.write(bi, suffix, output);} catch (FileNotFoundException e) {e.printStackTrace();} catch (IOException e) {e.printStackTrace();} finally {try {if(fis != null) fis.close();if(iis != null) iis.close();} catch (IOException e) {e.printStackTrace();}}}else {log.warn("the src image is not exist.");}}public void cutImage(File srcImg, OutputStream output, int x, int y, int width, int height){cutImage(srcImg, output, new java.awt.Rectangle(x, y, width, height));}public void cutImage(File srcImg, String destImgPath, java.awt.Rectangle rect){File destImg = new File(destImgPath);if(destImg.exists()){String p = destImg.getPath();try {if(!destImg.isDirectory()) p = destImg.getParent();if(!p.endsWith(File.separator)) p = p + File.separator;cutImage(srcImg, new java.io.FileOutputStream(p + DEFAULT_CUT_PREVFIX + "_" + new java.util.Date().getTime() + "_" + srcImg.getName()), rect); } catch (FileNotFoundException e) {log.warn("the dest image is not exist.");}}else log.warn("the dest image folder is not exist.");}public void cutImage(File srcImg, String destImg, int x, int y, int width, int height){cutImage(srcImg, destImg, new java.awt.Rectangle(x, y, width, height));}public void cutImage(String srcImg, String destImg, int x, int y, int width, int height){cutImage(new File(srcImg), destImg, new java.awt.Rectangle(x, y, width, height));}/*** <p>Title: thumbnailImage</p>* <p>Description: 根据图⽚路径⽣成缩略图 </p>* @param imagePath 原图⽚路径* @param w 缩略图宽* @param h 缩略图⾼* @param prevfix ⽣成缩略图的前缀* @param force 是否强制按照宽⾼⽣成缩略图(如果为false,则⽣成最佳⽐例缩略图)*/public void thumbnailImage(File srcImg, OutputStream output, int w, int h, String prevfix, boolean force){if(srcImg.exists()){try {// ImageIO ⽀持的图⽚类型 : [BMP, bmp, jpg, JPG, wbmp, jpeg, png, PNG, JPEG, WBMP, GIF, gif]String types = Arrays.toString(ImageIO.getReaderFormatNames()).replace("]", ",");String suffix = null;// 获取图⽚后缀if(srcImg.getName().indexOf(".") > -1) {suffix = srcImg.getName().substring(srcImg.getName().lastIndexOf(".") + 1);}// 类型和图⽚后缀全部⼩写,然后判断后缀是否合法if(suffix == null || types.toLowerCase().indexOf(suffix.toLowerCase()+",") < 0){log.error("Sorry, the image suffix is illegal. the standard image suffix is {}." + types);return ;}log.debug("target image's size, width:{}, height:{}.",w,h);Image img = ImageIO.read(srcImg);// 根据原图与要求的缩略图⽐例,找到最合适的缩略图⽐例if(!force){int width = img.getWidth(null);int height = img.getHeight(null);if((width*1.0)/w < (height*1.0)/h){if(width > w){h = Integer.parseInt(new java.text.DecimalFormat("0").format(height * w/(width*1.0)));log.debug("change image's height, width:{}, height:{}.",w,h);}} else {if(height > h){w = Integer.parseInt(new java.text.DecimalFormat("0").format(width * h/(height*1.0)));log.debug("change image's width, width:{}, height:{}.",w,h);}}}BufferedImage bi = new BufferedImage(w, h, BufferedImage.TYPE_INT_RGB);Graphics g = bi.getGraphics();g.drawImage(img, 0, 0, w, h, Color.LIGHT_GRAY, null);g.dispose();// 将图⽚保存在原⽬录并加上前缀ImageIO.write(bi, suffix, output);output.close();} catch (IOException e) {log.error("generate thumbnail image failed.",e);}}else{log.warn("the src image is not exist.");}}public void thumbnailImage(File srcImg, int w, int h, String prevfix, boolean force){String p = srcImg.getAbsolutePath();try {if(!srcImg.isDirectory()) p = srcImg.getParent();if(!p.endsWith(File.separator)) p = p + File.separator;thumbnailImage(srcImg, new java.io.FileOutputStream(p + prevfix +srcImg.getName()), w, h, prevfix, force); } catch (FileNotFoundException e) {log.error("the dest image is not exist.",e);}}public void thumbnailImage(String imagePath, int w, int h, String prevfix, boolean force){File srcImg = new File(imagePath);thumbnailImage(srcImg, w, h, prevfix, force);}public void thumbnailImage(String imagePath, int w, int h, boolean force){thumbnailImage(imagePath, w, h, DEFAULT_THUMB_PREVFIX, DEFAULT_FORCE);}public void thumbnailImage(String imagePath, int w, int h){thumbnailImage(imagePath, w, h, DEFAULT_FORCE);}public static void main(String[] args) {new ImageUtil().thumbnailImage("imgs/Tulips.jpg", 150, 100);new ImageUtil().cutImage("imgs/Tulips.jpg","imgs", 250, 70, 300, 400);}}效果如下:(使⽤在上传图⽚时取缩略图和截图的地⽅,例如,图像截取并缩略)。
Java调用ffmpeg + menconder 转换视频格式,提取视频缩略图
import java.io.IOException;import java.io.InputStream;import java.util.List;public class Ffmpeg {public static void main(String[] args) {//视频文件String videoRealPath = "E:\\Eclipse2\\a.avi";//截图的路径(输出路径)String imageRealPath ="E:\\Eclipse2\\atest.jpg";//方法一:调用批处理程序,调用批处理文件ffmpeg.bat转换视频格式// try {// //调用批处理文件// Runtime.getRuntime().exec("cmd /c start C:\\Users\\Administrator\\Desktop\\test\\ffmpeg.bat " + videoRealPath + " " + imageRealPath);// } catch (IOException e) {// // TODO Auto-generated catch block// e.printStackTrace();// }//方法二:通过命令提示符来调用需要添加系统路径(Path),调用menconder 转换视频各种// commendF// .add("cmd.exe /c mencoder E:\\Eclipse2\\test.flv -o e:\\Eclipse2\\test.avi// -oac mp3lame -lameopts cbr:br=32// -ovc x264 -x264encopts bitrate=440 -vf scale=448:-3");//方法三:调用系统中的可执行程序调用ffmpeg 提取视屏缩略图 List<String> commend = new java.util.ArrayList<String>();commend.add("E:\\Eclipse2\\Mplayer\\ffmpeg-git-4082198-win32-static\\ bin\\ffmpeg.exe");commend.add("-i");commend.add(videoRealPath);commend.add("-y");commend.add("-f");commend.add("image2");commend.add("-ss");commend.add("8");commend.add("-t");commend.add("0.001");commend.add("-s");commend.add("350*240");commend.add(imageRealPath);try {ProcessBuilder builder = new ProcessBuilder();mand(commend);builder.redirectErrorStream(true);System.out.println("视频截图开始...");// builder.start();Process process = builder.start();InputStream in = process.getInputStream();byte[] re = new byte[1024];System.out.print("正在进行截图,请稍候");while (in.read(re) != -1) {System.out.print(".");}System.out.println("");in.close();System.out.println("视频截图完成...");} catch (Exception e) {e.printStackTrace();System.out.println("视频截图失败!");}}}。
自动生成缩略图(质量没有损失)
自动生成缩略图(质量没有损失)最近做一摄影作品管理程序,用到自动生成缩略图的方法。
开始方法较简单,用GDI+中默认方法,但生成图片质量不佳,并且压缩质量为中等。
潜心研究了一下,找到以下方法,主要分二布,第一步为画布描绘时的质量设置,第二步为保存图片时JPEG压缩的设置。
代码如下:private Size NewSize(int maxWidth, int maxHeight, int width, int height){double w = 0.0;double h = 0.0;double sw = Convert.ToDouble(width);double sh = Convert.ToDouble(height);double mw = Convert.ToDouble(maxWidth);double mh = Convert.ToDouble(maxHeight);if ( sw < mw && sh < mh ){w = sw;h = sh;}else if ( (sw/sh) > (mw/mh) ){w = maxWidth;h = (w * sh)/sw;}else{h = maxHeight;w = (h * sw)/sh;}return new Size(Convert.T oInt32(w), Convert.ToInt32(h));}private void SendSmallImage(string fileName, int maxWidth, int maxHeight){System.Drawing.Image img = System.Drawing.Image.FromFile(Server.MapPath(fileName));System.Drawing.Imaging.ImageFormat thisFormat = img.RawFormat;Size newSize = NewSize(maxWidth, maxHeight, img.Width, img.Height);Bitmap outBmp = new Bitmap(newSize.Width, newSize.Height);Graphics g = Graphics.FromImage(outBmp);// 设置画布的描绘质量positingQuality = CompositingQuality.HighQuality;g.SmoothingMode = SmoothingMode.HighQuality;g.InterpolationMode = InterpolationMode.HighQualityBicubic;g.DrawImage(img, new Rectangle(0, 0, newSize.Width, newSize.Height),0, 0, img.Width, img.Height, GraphicsUnit.Pixel);g.Dispose();if (thisFormat.Equals(ImageFormat.Gif)){Response.ContentType = "image/gif";}else{Response.ContentType = "image/jpeg";}// 以下代码为保存图片时,设置压缩质量EncoderParameters encoderParams = new EncoderParameters();long[] quality = new long[1];quality[0] = 100;EncoderParameter encoderParam = new EncoderParameter(System.Drawing.Imaging.Encoder.Quality, quality);encoderParams.Param[0] = encoderParam;//获得包含有关内置图像编码解码器的信息的ImageCodecInfo 对象。
thumbnails类方法
thumbnails类方法Thumbnails类方法简介在开发和设计中,经常需要使用缩略图来展示、预览和导航大量的图像或视频资源。
Java提供了Thumbnails类的方法,可以方便地生成缩略图,省去了繁琐的计算和处理过程。
方法1.ofSize(int width, int height)–该方法用于设置缩略图的宽度和高度。
–参数:width为缩略图的宽度,height为缩略图的高度。
2.scale(float scaleFactor)–该方法用于设置缩放因子,可以将原始图像按照指定的比例进行缩放。
–参数:scaleFactor为缩放比例,大于1的值表示放大,小于1的值表示缩小。
3.rotation(int angle)–该方法用于旋转缩略图。
–参数:angle为旋转角度,正值表示顺时针旋转,负值表示逆时针旋转。
4.watermark(Image watermark, Position position, floatopacity)–该方法用于给缩略图添加水印。
–参数:watermark为水印图片,position为水印位置(可以是左上、左下、右上、右下等),opacity为水印透明度。
5.outputFormat(String format)–该方法用于设置输出的图像格式。
–参数:format为图像格式,如JPEG、PNG等。
6.toFile(File file)–该方法用于将缩略图保存到指定的文件中。
–参数:file为保存文件的路径。
示例以下示例演示了如何使用Thumbnails类的方法来生成缩略图:import ;import ;import ;public class ThumbnailExample {public static void main(String[] args) {try {File originalFile = new File("path/to/");File thumbnailFile = new File("path/to/");(originalFile).ofSize(200, 150).scale().rotation(90).watermark(("path/to/").scale().asBu fferedImage(), _RIGHT, ).outputFormat("JPEG").toFile(thumbnailFile);("Thumbnail generated successfully!");} catch (IOException e) {();}}}结论通过以上介绍,可以看出Thumbnails类提供了丰富的方法,可以方便地生成缩略图,并支持缩放、旋转和水印等操作。
SpringBoot2.x整合thumbnailator图片处理的示例代码
SpringBoot2.x整合thumbnailator图⽚处理的⽰例代码1、序在实际项⽬中,有时为了响应速度,难免会对⼀些⾼清图⽚进⾏⼀些处理,⽐如图⽚压缩之类的,⽽其中压缩可能就是最为常见的。
最近,阿淼就被要求实现这个功能,原因是客户那边嫌速度过慢。
借此机会,阿淼今⼉就给⼤家介绍⼀些⼀下我做这个功能时使⽤的Thumbnailator库。
Thumbnailator是⼀个优秀的图⽚处理的 Google 开源 Java 类库,专门⽤来⽣成图像缩略图的,通过很简单的 API 调⽤即可⽣成图⽚缩略图,也可直接对⼀整个⽬录的图⽚⽣成缩略图。
两三⾏代码就能够从现有图⽚⽣成处理后的图⽚,且允许微调图⽚的⽣成⽅式,同时保持了需要写⼊的最低限度的代码量。
可毫不夸张的说,它是⼀个处理图⽚⼗分棒的开源框架。
⽀持:图⽚缩放,区域裁剪,⽔印,旋转,保持⽐例。
有了这玩意,就不⽤在费⼼思使⽤ Image I/O API,Java 2D API 等等来⽣成缩略图了。
废话少说,直接上代码,先来看⼀个最简单的例⼦:2、代码⽰例2.1. 新建⼀个springboot项⽬2.2. 引⼊依赖 thumbnailator<dependency><groupId>net.coobird</groupId><artifactId>thumbnailator</artifactId><version>0.4.8</version></dependency>2.3. controller主要实现了如下⼏个接⼝作为测试:@RestControllerpublic class ThumbnailsController {@Resourceprivate IThumbnailsService thumbnailsService;/*** 指定⼤⼩缩放* @param resource* @param width* @param height* @return*/@GetMapping("/changeSize")public String changeSize(MultipartFile resource, int width, int height) {return thumbnailsService.changeSize(resource, width, height);}/*** 指定⽐例缩放* @param resource* @param scale* @return*/@GetMapping("/changeScale")public String changeScale(MultipartFile resource, double scale) {return thumbnailsService.changeScale(resource, scale);}/*** 添加⽔印 watermark(位置,⽔印,透明度)* @param resource* @param p* @param shuiyin* @param opacity* @return*/@GetMapping("/watermark")public String watermark(MultipartFile resource, Positions p, MultipartFile shuiyin, float opacity) {return thumbnailsService.watermark(resource, Positions.CENTER, shuiyin, opacity);}/*** 图⽚旋转 rotate(度数),顺时针旋转* @param resource* @param rotate* @return*/@GetMapping("/rotate")public String rotate(MultipartFile resource, double rotate) {return thumbnailsService.rotate(resource, rotate);}/*** 图⽚裁剪* @param resource* @param p* @param width* @param height* @return*/@GetMapping("/region")public String region(MultipartFile resource, Positions p, int width, int height) {return thumbnailsService.region(resource, Positions.CENTER, width, height);}}3、功能实现其实引⼊了这个Thumbnailator类库后,代码其实很少,因为我们只需要按照规则调⽤其 API 来实现即可。
- 1、下载文档前请自行甄别文档内容的完整性,平台不提供额外的编辑、内容补充、找答案等附加服务。
- 2、"仅部分预览"的文档,不可在线预览部分如存在完整性等问题,可反馈申请退款(可完整预览的文档不适用该条件!)。
- 3、如文档侵犯您的权益,请联系客服反馈,我们会尽快为您处理(人工客服工作时间:9:00-18:30)。
boolean proportion=true; //是否等比缩放标记(默认为等比缩放)
public Small_pic(){
//初始化变量
InputDir="";
OutputDir="";
InputFileName="";
OutputFileName="";
this.OutputHeight=OutputHeight;
}
public void setW_H(int width,int height){
this.OutputWidth=width;
this.OutputHeight=height;
}
public String s_pic(){
this.InputDir=InputDir;
//输出图路径
this.OutputDir=OutputDir;
//输入图文件名
this.InputFileName=InputFileName;
//输出图文件名
this.OutputFileName=OutputFileName;
//设置图片长宽
* 本java类能将jpg图片文件,进行等比或非等比的大小转换
* 具体使用方法
* s_pic(大图片路径,生成小图片路径,大图片文件名,生成小图片文名,生成小图片宽度,生成小图片高度,是否等比缩放(默认为true))
*/
public class Small_pic{
String InputDir; //输入图路径
encoder.encode(buffImg);
tempout.close();
}catch(IOException ex){
System.out.println(ex.toString());
}
}
return "转换成功!";
}
public String s_pic(String InputDir,String OutputDir,String InputFileName,String OutputFileName){
return s_pic();
}
public String s_pic(String InputDir,String OutputDir,String InputFileName,String OutputFileName,int width,int height,boolean gp){
//输入图路径
new_w=(int)(((double)img.getWidth(null))/rate);
new_h=(int)(((double)img.getHeight(null))/rate);
}
else{
new_w=OutputWidth; //输出的图片宽度
new_h=OutputHeight; //输出的图片高度
Graphics2D g2d = (Graphics2D) bufImg.getGraphics();
g2d.drawString("Test123",10,10);
ByteArrayOutputStream boutstream = new ByteArrayOutputStream();
一个生成文字图片的JAVA函数
该文章转载自网络大本营:/Info/13803.Html
try {
BufferedImage bufImg = new BufferedImage(30,30,BufferedImage.TYPE_INT_RGB);
g.fillRect(0,0,new_w,new_h);
g.drawImage(img,0,0,new_w,new_h,null);
g.dispose();
JPEGImageEncoder encoder = JPEGCodec.createJPEGEncoder(tempout);
try{
this.OutputFileName=OutputFileName;
}
public void setOutputWidth(int OutputWidth){
this.OutputWidth=OutputWidth;
}
public void setOutputHeight(int OutputHeight){
try {
img=tk.getImage(InputDir+InputFileName);
mt.addImage(img, 0);
mt.waitForID(0);
}catch(Exception e) {
e.printStackTrace();
}
if(img.getWidth(null)==-1){
double rate1=((double)img.getWidth(null))/(double)OutputWidth+0.1;
double rate2=((double)img.getHeight(null))/(double)OutputHeight+0.1;
double rate=rate1>rate2?rate1:rate2;
fimage.close();
} catch (Exception e) {
System.out.println(e);
}
--------------------------------------------------------------------------
import java.sql.*;
/**
*缩略图类
* @param mapping
* @param form
* @param request
* @param response
* @return ActionForward
* @author 蒲刚 2007-1-2 21:00
Small_pic mypic =new Small_pic();
System.out.println(
mypic.s_pic("E:\\JAVA\\","E:\\JAVA\\","1.jpg","new1.jpg",80,80,true)
);
}
}
////////////////////////////////////////////////////////////////////////
}catch(Exception ex){
System.out.println(ex.toString());
}
Image img=null;
Toolkit tk=Toolkit.getDefaultToolkit();
Applet app=new Applet();
MediaTracker mt = new MediaTracker(app);
System.out.println(" can't read,retry!"+"<BR>");
return "no";
}else{
int new_w;
int new_h;
if (this.proportion==true) //判断是否是等比缩放.
{
//为等比缩放计算输出的图片宽度及高度
OutputWidth=80;
OutputHeight=80;
rate=0;
}
public void setInputDir(String InputDir){
this.InputDir=InputDir;
}
public void setOutputDir(String OutputDir){
}
BufferedImage buffImg = new BufferedImage(new_w,new_h,BufferedImage.TYPE_INT_RGB);
Graphics g = buffImg.createGraphics();
g.setColor(Color.white);
JPEGImageEncoder enc = JPEGCodec.createJPEGEncoder(boutstream);
JPEGEncodeParam params = JPEGCodec.getDefaultJPEGEncodeParam(bufImg);
params.setQuality(100, true);
JAVA生成缩略小图片类2007-01-25 17:13生成缩略小图片类,把它放在tgcom_cdsia\src\tgcom\common下,使用方法:
s_pic(大图片路径,生成小图片路径,大图片文件名,生成小图片文名,生成小图片宽度,生成小图片高度)
源代码:
package mon;
setW_H(width,height);
//是否是等比缩放 标记
this.proportion=gp;
return s_pic();
}
public static void main(String [] a)
{
//s_pic(大图片路径,生成小图片路径,大图片文件名,生成小图片文名,生成小图片宽度,生成小图片高度)
