中走丝电柜说明书
中走丝培训教材
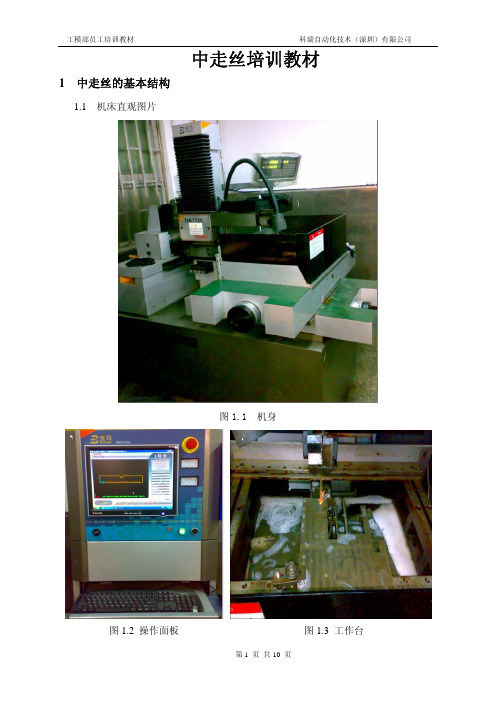
工模部员工培训教材科瑞自动化技术(深圳)有限公司中走丝培训教材1 中走丝的基本结构1.1 机床直观图片图1.1 机身图1.2 操作面板图1.3 工作台1.2 中走丝机床主要由:机械部分、脉冲电源、控制器三部分组成。
1.2.1 机械部分主要由:床身、工作台、线架、锥度装置、运丝机构、工作液、夹具附件、防水罩等部件组成。
1.2.2 脉冲电源主要由:直流电源、振荡级、前置放大级、功率放大级和取样电路。
1.2.3 控制器由:电柜电源控制、操作面板控制、运丝启停控制。
2 中走丝的基本知识2.1 中走丝的其它名称:苏三光中走丝、宝玛中走丝。
2.2 中走丝的分类:一般可以按机床的控制方式、脉冲电源的形式。
2.2.1 控制方式:数字程序控制或微机控制机床。
2.2.2 脉冲电源的形式:分组脉冲电源及自适控制电源机床2.3 中走丝的加工原理:利用工具电极(电极丝)和工件间施加电压,在一定的工作液介质中,到达一定的放电间隙击穿而产生火花放电的一种工艺方法。
其加工原理图2.1所示:图2.11—工作液箱2—储丝筒3—电极丝4—供液管5—导电块6 工件7—夹具8—脉冲电源9—工作台拖板2.4 电极丝的类型及规格:2.4.1 电极丝类型有:钼丝、钨丝两种2.4.2 直径规格有:¢0.03mm、¢0.15mm、¢0.18mm、¢0.2mm2.4.3 最常用的钼丝直径规格为:¢0.18mm3 加工特点3.1 该机床性能优越、操作方便简单易懂,同时刚性好、切削力小、承载量大、运动平稳、操作安全可靠。
3.2 该机床适合加工高硬度、高韧性的导电金属模具,样板及形状复杂的零件,特别适合加工冷冲模、挤压模、塑料模、滚齿刀、精密零件(包括锥度、等锥、不等锥、上下异形等复杂面)及大载荷和大厚度的大型模具。
3.3 最大切割厚度:500mm3.4 最大生产效率:440C淬火件厚度40mm时, >1002mm/min3.5 最佳表面粗糙度:440C淬火件厚度40mm时一次切割, Ra<2.5um440C淬火件厚度40mm时多次切割, Ra<1.5um3.6 加工精度: 440C淬火件厚度40mm时圆柱:¢12.0mm 圆度:< 0.015mm圆锥:¢12.0mm 锥度:< 0.04mm3.7 工作台移动误差:0.005mm3.8 工作台移动重复定位精度:0.002mm3.9 工作台移动定位精度:纵向 < 0.015mm ;横向 < 0.015mm4 操作与学习流程4.1 操作前必须先熟悉机床的各个部件和掌握电控柜的正确使用方法。
SG系列中走丝说明书

SG 电火花线切割中速走丝控制柜使用说明书本线切割智能控制柜,是基于HF加工软件平台,自主开发的一款全新的线切割机床加工控制系统(具有自主知识产权)。
它具有:加工速度快、工件光洁度高、加工稳定性好和操作简单等4大特点。
其卓越加工性能足以给传统的快走丝线切割行业带来一场新的革命!1.主要技术参数㈠最大加工速度:150平方毫米/min㈡最佳表面粗糙度:Ra 1.0μm2.操作说明1. 16A415V五芯电源插座为控制柜的电源输入端。
N为零线;L1、L2、L3为相线;接地端应可靠接地。
2. 26芯航空插座是控制柜与机床连接的端口之一。
定义如下:注:●1、12脚为步进电机公共电源24V+●2至11脚、13至18脚为步进电机驱动信号●19脚为取样+;20脚为取样-●21、22为高频+;23、24为高频-3. 20芯航空插座是控制柜与机床连接的端口之二。
定义如下:注:●1、2、3为运丝电机电源(采用三角形接法,电压220V)●4脚α:为停机行程开关常闭点一端●5脚β:运丝开按钮常开点的一端●6脚γ:接左行程开关开点●7脚δ:接右行程开关开点●8脚ε:接左右行程开关公共点●9、10脚接断丝保护●11脚为运丝开运丝关公共端●15、16是一组24V直流电,用作机床照明电源●17脚是运丝电机及水泵电机的接地端●18,19,20脚为水泵电源.如是220V的18、20为水泵电源停机行程开关脚机床行程开关,运丝按钮接线图㈢参数设置 10523148加工设置段号脉宽脉间功率管频率高低压在切割加工之前,须进行加工参数设置(加工参数设置面板的功能定义见下图)。
本控制柜可一次性设置,完成最多7次的自动切割,按段号分别设置每次切割的加工参数。
1~7段为多次自动(切割过程中不可修改参数)切割组;0段为单次手动(切割进程中可任意修改参数)切割组。
注意,在加工中如遇特殊情况,需对1~7段自动加工组的参数进行修改,请按住“加工参数热修改钮”,进行参数改动。
京特中走丝使用说明
京特中走丝使用说明
京特中走丝能正常运转必须具备下列条件:
1、京特中走丝加工工件的被加工表面和机器切面间隙要视不同的材料要求的不同参数而定,以保证精准。
2、京特中走丝使用的放电火花必须是脉冲火花,具有间隙性,脉冲能在两极间不断地间隙放电。
3、为了避免产生脉冲性的高压放电火花导致产物和冷却电极间会产生作用。
一定要保证加工工件的被加工表面和机器切面间隙,如果是间隙过大,则会击穿介质产生电火花放电,若是间隙过于小,就会短路连接,也导致会同样的放电情况。
机床使用操作规范
使用中走丝线切割的中走丝机床更适应高精度、高明度,高密度的导电金属材料,包括样板和形式式样较大的物体也可以使用该机床进行加工。
此外更是能适应,制作各种不同锥度的不同形状的异性的大载荷大厚度的大型特性模具。
在使用中走丝切割机床前一定要有专门的知识操作步骤,目的是要更熟知中走丝切割技术的使用并且能够进行规范的机床操作和进行规范的后期的保养和维护,使用机器前请务必阅读使用说明书,在遇到操作难题也要随时翻阅操作说明解决问题。
DK7732E中走丝线切割.doc技术资料
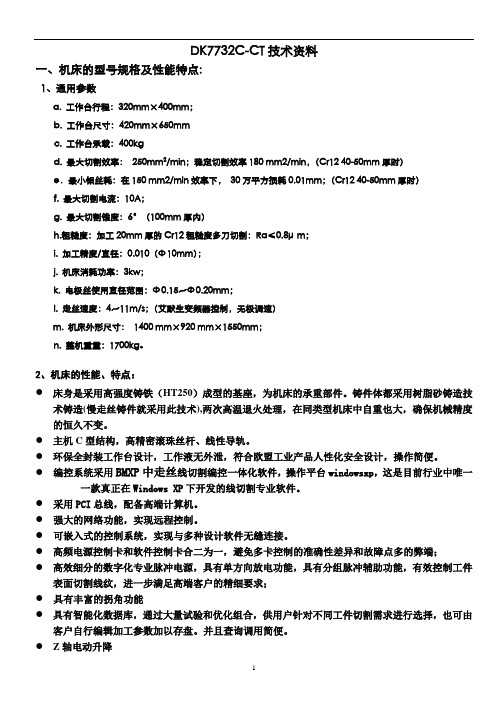
苏州威汉数控科技有限公司DK7732E技术资料(配置XKG2010中走丝电柜)一、机床的型号规格及性能特点:1、机床的型号、规格及参数:a. 机床的型号: DK7732E;b. 工作台面行程:320mm×400mm;c. 切割工件最大厚度: 300mm可调;d. 切割工件最大锥度:3°(100mm内可达);e. 最大切割效率:>120mm2/min(Cr12 80mm厚时);f. 最大切割电流:6A;g. 粗糙度:加工40mm厚的Cr12粗糙度效率Ra≤1.2 μmh. 加工精度/直径:0.012(Φ10mm);i. 机床消耗功率:1.5kw;j. 电极丝直径:Φ0.10~Φ0.18mm;k. 走丝速度:4~11m/s;(变频器控制)2、机床的性能、特点:●本机是利用电极线和高频电源,在CNC系统控制下,按预定轨迹对工件进行电火花切割加工的线切割机床。
该机床刚性较好、运行平稳、功能强、操作方便可靠,适合加工高精度、高韧性、难加工的导电金属模具,复杂的金属零件和样板。
该机种极大拓展了线切割机的加工范围,针对塑钢门窗异形材成型模具,铝合金门窗异形成型模具、汽车零部件、电视机、洗衣机等家用电器外壳塑成模具。
广泛应用于模具、电子仪器、精密机械、汽车零部件、军工等部门。
●床身是采用高强度铸铁,成型的基座,为机床的承重部件。
威汉的铸件体都采用树脂砂铸造技术铸造,两次高温退火处理,在同类型机床中自重也大,确保机械精度的恒久不变。
●电控柜部分具有多次切割功能,采用变频技术使运丝更加稳定,工件表面光洁度提高到﹤1.5µm,加工精度到﹤0.012mm●采用CNC数字控制走丝方式,提高了工件表面光洁度●具有单方向放电功能,有效控制工件表面切割线纹●具有智能化数据库,通过大量试验和优化组合,供用户针对不同工件切割需求进行选择●具有高低压调档电流功能,满足不同工件材质下的加工电流的选择●具有分组脉冲辅助功能,进一步满足高端客户的精细要求●特别选用新式三层过滤式水箱,延长了工作液的使用寿命,提高了工作液的洁净度,排渣性能增强,最终促使加工工件光洁度的提高,配合采用最新型的冷却液—水基工作液,对操作工及环境无害,符合环保要求,●采用引进德国威图公司技术生产XKG型电柜,外形美观大方,内部结构优良合理。
中走丝电柜安全操作及保养规程

中走丝电柜安全操作及保养规程1. 前言中走丝机床作为一种高精度、高效率的加工设备,其重要组成部分之一就是电柜。
电柜作为整个机床的“大脑”,控制、组织、协调各个部分的运转,对机床的安全运转和稳定性有着至关重要的作用。
而在电柜的使用过程中,如何正确操作及定期进行保养,也是保证机床高质量生产的重要环节。
因此,为了保证您的工作安全,增加电柜的使用寿命,特制定此中走丝电柜安全操作及保养规程,希望能为您的工作提供帮助。
2. 安全操作2.1 电源在开启或关闭机床电源时,应按照以下操作:•先开启或关闭加工材料的电源,确认加工材料已经停止运行后,再按照机床电源的启动/关闭顺序依次操作。
•在开启电源时,应先将电柜里的所有设备关闭,然后按照机床电源的操作顺序依次操作。
操作顺序:开启电源,电机启动(若需要),检查水、气、油、液压等系统,确认正常后方可开始生产加工。
•当电柜出现报警、故障等情况时,应按照电柜上的说明进行相应的检查和处理。
2.2 机器停机在机器长时间停机后启动时,应进行检查,特别是需要检查以下几个方面:•机床接地是否正常。
•保险设备是否受损、完整。
•通风口及散热装置是否被堵住。
•机器内部是否有异物。
•各部分能否灵活运转。
如:给水泵、油泵、风扇等。
2.3 维护•定期检查电器箱内部和接口处的标志、状态。
如遇破损、损坏、发黑、变形等现象,应立即更换对应的元件。
•定期清洁电器箱内的灰尘和其他污物,避免其对电器、信号和接口的影响。
•定期对机器上的紧固连接件、电路、电缆布线、接插件等进行加固或调整。
•定期检查电缆是否磨损、损坏、老化。
如有异常情况,应及时更换。
•定期检查机器运行声音、震动等情况。
对于异常情况,应进行具体排查。
3. 保养规程3.1 电器箱内部保养电器箱是中走丝电柜的重要组成部分之一,它包含了各种电器控制单元、设备、信号管理单元、接线、配电和信号采集器。
因此,定期对电器箱内部进行保养和清洁十分重要。
•定期对电器箱内部进行清洁。
标准中走丝安全操作及保养规程

标准中走丝安全操作及保养规程走丝是一种常用的金属材料切割和焊接工艺,广泛应用于工业生产和制造过程中。
然而,走丝操作也存在着一定的危险因素,因此在进行走丝操作前,必须充分了解操作规程、操作方法以及安全措施。
一、走丝操作规程1.准备工作在进行走丝操作之前,必须进行充分的准备工作。
包括:•检查设备: 确保所有的设备正常运转,并进行必要的调整和维护;•环境准备:走丝操作需要在通风良好、没有可燃物的地方进行,确保工作场所清洁和安全。
•工作材料准备:根据工作需要,准备好所需的金属材料以及相关的走丝材料,如钨丝等。
2.操作方法•钨丝的安装和调整:钨丝的安装和调整需要根据不同的工作需求进行,可根据设备的说明书进行操作。
•生产操作:在操作时,需要根据走丝操作的需要进行调节,尽量避免产生任何安全隐患。
3.结束工作走丝操作完成之后,必须按照以下要求进行清理和维护:•清理:将走丝设备进行彻底清洁,清除设备表面和内部的各种杂质、残留物等,以免影响下一次的操作效果。
•维护:及时检查设备并进行必要的维护,如更换损坏或失效的部件等。
二、走丝安全操作措施在进行走丝操作时,除了按照操作规程进行操作之外,还需要注意以下安全措施:1.安全防护装置在走丝操作期间,必须确保设备上的安全防护装置完整,包括护目镜、防护网等。
2.个人防护在操作时应穿戴符合相关标准的个人防护设备,包括:手套、防护服、防护鞋等。
3.操作人员在进行走丝操作之前,必须对操作人员进行专业培训,并且必须具备有操作资格的证书。
4.检查设备走丝设备和配件必须经过检查,以确保正常运转。
此外,设备必须安装在坚固的平台上,以保证稳固。
5.保持设备干燥操作结束后,所有设备和输送线都需要进行保养,尤其是防止潮气,以减少设备的堆积时间,提高设备寿命。
三、走丝设备保养在进行走丝操作之前,必须对设备进行充分的检查和维护,以确保设备的正常运转以及避免出现不必要的安全隐患。
下面是一些保养的要点:1.清洁设备表面走丝设备表面,尤其是油池和输送线等需要经常进行清洗,以便更好地支持下一次操作。
WinCut中走丝线切割控制系统产品手册

1.5
重要安全提示 ......................................................................................................................... 1
2 系统简介和主要功能............................................................................................................................. 2
3.2.2 Z 型控制盒安装步骤...................................................................................................... 5
3.3
与机床连接的 25 针并口的定义 ........................................................................................... 5
格式正确,但字符输入有误:系统会自动回复如下内容的短信“请注意大小写及数字 0 和 字母 O”,此时,请用户仔细检查序列号和授权码,尤其是授权码中不应该有阿拉伯字母 O, 只能有数字 0。
回复正确的授权码:如用户输入的序列号和授权码格式完全正确,大小写也完全正确,那 么系统回复的内容即是“16 位的注册码”。
1.1
版权声明................................................................................................................................. 1
型中走丝一体机安全操作及保养规程

型中走丝一体机安全操作及保养规程前言型中走丝一体机是一种高精度金属加工设备,因其高精度和高效率被广泛应用于制造业。
但是,如果不注意安全操作和定期维护,它也可能成为一个安全隐患。
本文将介绍型中走丝一体机的安全操作规程和保养规程,希望能够为型中走丝一体机的使用者提供帮助。
安全操作规程前期准备阶段1.在使用型中走丝一体机之前,首先要了解设备的结构和原理,并按照操作手册正确组装和安装设备。
2.检查设备的各个零部件是否齐全、完好,并进行必要的调整。
3.熟悉设备的控制面板及其操作方法,了解开关和按钮的功能和使用方法。
操作阶段1.在操作型中走丝一体机时,一定要穿戴好安全衣物、护目镜、安全手套等安全设备,确保人员安全。
2.在操作型中走丝一体机时,不得穿戴过于宽松、易被卷入走丝机的衣物,避免造成事故。
3.在添加和更换切割液时,必须先关闭走丝机的电源。
4.在操作期间,不得在设备附近或切割区内走动,避免被卷入走丝机或被切割物体击中。
5.在设备正常运行过程中,不得随意触摸、拆卸或更改任何设备部件,以免影响设备的正常工作。
操作结束后的安全措施1.在设备正常运行过程中,不得随意触摸、拆卸或更改任何设备部件,以免影响设备的正常工作。
2.在关闭型中走丝一体机之前,必须先将所有安全设备和电源按钮关闭,确保设备停止运行。
3.清理切割区内的切割物体和废液,以确保设备的卫生和安全。
保养规程日常保养1.每天使用型中走丝一体机时,应先对设备进行外部清洁,特别是切割区和滚轮区。
2.定期检查电缆、走丝轴、传动带等易磨损部件,进行必要的更换或修理。
3.每天使用型中走丝一体机结束后,应对设备进行内部清洁和维护,检查输送管道的通畅性和清洁度,并及时更换切割液。
4.每周对设备的各个部件进行一次全面检查,并加以调整和维护。
定期保养1.每个月需对型中走丝一体机进行一次高级的保养工作。
对电路板和打印机进行仔细的检查,并清洁走丝轴和对切割液做必要的更换。
2.定期更换走丝轴、传动带以及机器润滑油等易磨损部件。
电柜使用说明书

EQE5660A-BEQE5660A-S EQE5600A-SUser ManualRefrigerationEN2使用手冊HK雪櫃22 WE’RE THINKING OF YOUThank you for choosing Electrolux. We have designed this product to make your life simpler and deliver impeccable performance for many years. Please spend a few minutes reading this document to get the best from your new Electrolux appliance.Always use original spare parts.When contacting our Authorised Service Centre, ensure that you have the following data available: Model, PNC, Serial Number. The information can be found on the rating plate. Warning / Caution-Safety information.General information and tips. Environmental information.Subject to change without notice.Subject to change without notice.Warning / Caution-Safety information.General information and tips.Environmental information.Thank you for choosing this Electrolux product. We have created it to give you impeccable performance for many years, with innovative technologies that help make life simpler features you might not find on ordinary appliances. Please spend Always use original spare parts.When contacting our Authorised Service Centre, ensure that you have the follow-ing data available: Model, PNC, Serial Number.The information can be found on the rating plate.Subject to change without notice.Warning / Caution-Safety information.General information and tips.Environmental information.W G E Thank you for choosing this Electrolux product. We have created it to give you impeccable performance for many years, with innovative technologies that helpmake life simpler features you might not find on ordinary appliances. Please spenda few minutes reading to get the very best from it.Always use original spare parts.When contacting our Authorised Service Centre, ensure that you have the follow-ing data available: Model, PNC, Serial Number.The information can be found on the rating plate.1.SAFETY INFORMATION ..............................................................................................................................................................32. DESCRIPTION OF THE APPLIANCE .......................................................................................................................................53. INSTALLING YOUR NEW APPLIANCE ...................................................................................................................................74. TEMPERATURE CONTROL.........................................................................................................................................................115. STORAGE FEATURES ...................................................................................................................................................................176. AUTOMATIC ICE & WATER DISPENSER ............................................................................................................................207. GENERAL INFORMATION ........................................................................................................................................................228. FOOD STORAGE GUIDE...........................................................................................................................................................249. TROUBLESHOOTING .................................................................................................................................................................2510. NOISES . (29)CONTENTS3EN 1.SAFETY INFORMATIONNote: You must read these warnings carefully before installing or using the refrigerator. If you need assistance, contact your customer care centre. The manufacturer will not accept liability, should these instructions or any other safety instructions incorporated in this book be ignored.WARNING•It is essential the electric outlet is properly earthed to ground. Consult a qualified electrician if you are unsure.•Do not use electrical appliances inside the food storage compartments of theappliance, unless they are of the type recommended by the manufacturer.•Unplug the refrigerator before cleaning or moving it to avoid electric shock.•Never unplug the refrigerator by pulling the electrical cord as this may damage it. Grip the plug firmly and pull straight out.•If the power cord is damaged, it must be replaced by the manufacturer, its service agent or similarly qualified persons in order to avoid a hazard.•Don’t use a steam cleaner. If live components come into contact withcondensing steam, they may short-circuit or cause an electric shock.•Do not store explosive substances such as aerosol cans with a flammable propellant this appliance. If pressurised aerosolcontainers bear the word ‘flammable’ and/or a small flame symbol, do not store theminside any refrigerator or freezer.If you do so you may cause an explosion.•Do not damage the refrigerant circuit.•This appliance contains insulation formed with flammable blowing gases. Avoid safety hazards by carefully disposing of this appliance.•If you wish to discard this refrigerator, please contact your local authorities and ask for the correct method of disposal.•When you dispose of your old refrigerators and freezers, remove any doors. Children can suffocate if they get trapped inside.•When positioning the appliance, ensure the supply cord is not trapped or damaged.WARNINGR600a refrigerant warningThis appliance contains flammable R600a refrigerant. Avoid safety hazards by carefully installing, handling, servicing and disposing of this appliance.•Ensure that the tubing of the refrigerantcircuit is not damaged during transportation and installation.•Leaking refrigerant may cause eye injuries or ignite.•The room for installing appliance must be at least 1m 3 per 8g of refrigerant.The amount of refrigerant in the appliance can be found on the rating plate inside the appliance.•If you are unsure of the refrigerant check the rating plate inside the refrigerator compartment.•It is hazardous for anyone other than an Authorised Service Person to service this appliance. In Queensland Australia the Authorisation Service Person MUST hold a Gas Work Authorisation for hydrocarbon refrigerants to carry out servicing or repairs which involve the removal of covers.•Keep ventilation openings in the appliance enclosure or in the built-in structure, clear of obstruction.•Do not use mechanical devices or other means to accelerate the defrosting process, other than those recommended by the manufacturer.4 GENERAL WARNINGSRead the following carefully to avoid damage or injury. It is important to use your refrigerator safely. Check these safety points before using your refrigerator.•The appliance must be plugged into its own dedicated electrical outlet.•The plug must be accessible when the refrigerator is in position.•It is essential the powerpoint is properly earthed to ground. Consult a qualified electrician if you are unsure.•Don’t use extension cords or adapter plugs with this refrigerator.•If the supply cord is damaged, it must be replaced by the manufacturer, its service agent or similarly qualified persons in order to avoid a hazard.•Unplug the appliance before cleaning and before changing the light bulb(when fitted) to avoid electric shock.•Never unplug the refrigerator by pulling the electrical cord as this may damage it. Grip the plug firmly and pull straight out.•Choose a location for your refrigerator that isn’t too cold. The ambient room temperature should be above 10°C.•Stand your refrigerator in a dry place avoid areas of high moisture or humidity.•Don’t put the refrigerator in frosty or unprotected areas like a garage or on the verandah.•Don’t plug your refrigerator into a timer fitted to the powerpoint.•Do not put the refrigerator in direct sunlight, near stoves, fires or heaters.•Do not put the refrigerator on an uneven surface.•Do not store flammable materials on or under the appliance, e.g. aerosols.•Do not store explosive substances such as aerosol cans with a flammable propellant in this appliance.•Never store fizzy drinks in the freezer compartment.•Never try to repair the refrigerator yourself, only use a qualified or authorised service •Never use electric heaters or dryers to defrost the freezer because you can receive an electric shock.•When transporting and installing the refrigerator, care should be taken to ensure that no parts of the refrigerating circuit are damaged.•When installed correctly, your refrigerator should:–Have adequate space at the backand sides for air circulation.–Be vertically aligned to the surroundingcupboards.–Have doors that will self-close from apartially open position.•The appliance is not to be used by persons (including children) with reduced physical, sensory or mental capabilities, or lack of experience and knowledge, unless they have been given supervision or instruction concerning use of the appliance by a person responsible for their safety.•Children being supervised not to play with the appliance.NOTE: You must read these warnings carefully before installing or using the refrigerator. If you need assistance, contact your Customer Care Department. The manufacturer will not accept liability, should these instructions or any other safety instructions incorporated in this book be ignored.ENVIRONMENTAL INFORMATIONThis appliance is intended to be usedin household and similar applicationssuch as,•The kitchen areas in shops, officesand other working enviroments;•Farm house and by clients in hotels,motels and other residential typeenviroments;•Bed and breakfast typeenvironments;•Catering and similar non-retailapplications;22322258977131110Water Dispenser Trigger Door Bins*Door Bin Small*Water Tank Bottle Storage Bins Egg Tray Glass shelves Air FilterUI Control Panel (on the left side wall)Anti-Oxidant Filter TasteLockAuto Drawer TasteSealPlus Drawer Drawer DeliAutomatic Ice Maker Ice Storage Small Ice Storage Bin Freezer Freezer DrawerNOTE:*Door bin (3) is the slighly smaller than Door bin (2) ,112111356867911Door Bins*Door Bin Small*Bottle Storage Bins Egg Tray Air Filter Glass shelvesUI Control Panel (on the left side wall)Anti-Oxidant Filter TasteLockAuto Drawer TasteSealPlus Drawerr Drawer DeliTwist & Serve Ice Bin Ice Storage Bin Freezer Freezer DrawerNOTE:*Door bin (2) is the slighly smaller than Door bin (1) ,7EN Product Dimensions Total width (W)mm 896Total depth (D)mm 726Maximum height (H)mm 1795Cabinet width (W1)mm 890Cabinet depth (D1)mm 640Depth door open 90° (D2)mm1104When positioned in a corner area, spacing of at least 285mm on the hinge side will allow the doors to open enough to enable the removal of bins and shelves.Installation options for optimal aesthetics :Minimum side clearance kitchen cabinet Fridge must sit 10mm proud of kitchen cabinetry.Minimum cabinetry opening (WxDxH) : 900mm x 649mm x 1800mmFront of fridge body in line with kitchen cabinetSide clearance must be 25mm either side of fridge body, to have the fridge doors siting proud of the kitchen cabinetry. Minimum cabinetry opening (WxDxH) : 940mm x 659mm x 1800mm3.INSTALLING YOUR NEW APPLIANCEUnpackingENVIRONMENTMost of the packing materials are recyclable. Please dispose of those materials through your localrecycling depot or by placing them in appropriate collection containers.Important – check for any damages or marks. If you find the refrigerator is damaged or marked, you must report it within 7 days should you wish to claim for damage/ marks under the manufacturers warranty. This does not affect your statutory rights.Clean your refrigerator thoroughly following the instructions in the “Cleaning” section and wipe off any dust that has accumulated during shipping.Locating the refrigeratorCAUTIONAutomatic aerosol systems (such as insect control) should not be located adjacent to the product as the spray may cause long term damage to the external plastics of he appliance.Do not put the refrigerator in a location that is too cold or is unprotected, for example in a garage or on a veranda. The ambient temperature should be above 10°C.Put the refrigerator in a dry place avoiding areas of high moisture or humidity.Ensure the refrigerator is located on an even surface.Installing your refrigeratorNote : Spacers supplied to assist10 11EN 4. TEMPERATURE CONTROLThe following pages explain the various functions of the user interface to help you better understand how to get the most out of your new refrigerator.IMPORTANTNOTE: When you set a temperature, you set an average temperature for the wholerefrigerator cabinet. Ensuring that you make only small adjustments and wait at least 24 hours to see if the new temperature is correct to your liking.Checking the softness of ice cream is a good indication that your freezer is the righttemperature, while checking the temperature of water kept in the refrigerator is a good way of checking the temperature of the food compartment.Temperatures inside each compartment may vary, depending on how much food you store and where you place it.High or low room temperature may also affect the actual temperature inside the refrigerator.1 TasteSeal Plus Control2 Fast Ice Botton3 Auto Ice Maker Control4 Fridge Temp Tontrol5 Freezer Temp Control6 Drinks Chill Button7 Tasteguard Ioniser 8 Air Filter Reset Button4.1 Functions of the user interfaceEQE5660EQE560012 13 EN14 15 EN16 Check water Alert (EQE5660 model only)When water tank is empty, the Ice maker senses the lack of warm water feeding in, and will turn off the ice maker.This trigger will also displays the "Check water alert". The intention is the alert user that Ice maker has been turn off due to the lack of water.The alert can be dismissed by turning on Ice maker. If no water is detected again, ice maker will be turn off again, and the check water alert turns on.Error codesBoth Fridge & Freezer displays are used to communicate problems by code.When error codes are displayed in the numeric display, the unit requires service attention."Er" shows up on Fridge displayVarious error codes on Freezer display4.2 Alert and AlarmsDoor AlarmWhen any of the door is left open for 2 minutes. The alarm will sound, and all LEDs that are currently on.• The alarm is turned off by closing the door or resetting the countdown by pressing any key on the control panel.High Temperature alertIn the event of high temperature condition, audio alarm is played every 10 seconds until the alert is acknowledged.The alarm by pressing any key on the control panel.Display and blink “HI” in the correspondent compartment display, whichever is in the high temperature condition.ECO indicatorEco mode indicator will light up automatically to 100% when the fridge and freezer compartments are set within a temperature range.Fridge range: 4°C to 7°C Freezer range: -18°C to -14°CSelecting any of these mode: Quick Freeze, Quick Chill, Fast Ice or Drinks Chill willdeactivate the Eco mode, the Eco icon will fade.Air Filter Alert and ResetAir Filter alert warns user that the Air filters have to be changed as soon as possible.When air filter is used for 6 months since the last filter reset, the LED "Replace" will automatically turn ON.Note:1. Users could reset the filter when alert is not visible. Play tone_Confirm once it is reset.2. LED_air filter remains visible during sleep mode, except when door is closed.High Temp indicator on Fridge display High Temp indicator on Freezer display17EN Glass shelvesfruits, vegetables, and other fresh produce. Crispers have an auto humidity control (with 5. STORAGE FEATURESTo remove the auto humidity control membrane:1. Reach to back of humidity control cover.2. Pull up on cover.3. Pull cover towards back of cabinet and remove.4. Replace humidity membrane.5. Replace cover by reversing the steps above.Repeat for both crispers.IMPORTANTIt’s not required to replace the Auto humidity membrane unless it becomes damaged or ruined. If the membrane becames soiled or dirty, it can be washed with soap and water. Ensure membrane is dry before putting back in crisper drawer. Please contact our service provider when need to replace your AHC membrane.To remove the crisper for cleaning:1. Pull the drawer out until it stops.18 3. Remove water tank lid ( 1 ), water tank tube ( 2 ) and filter ( 3 ).NOTE: The water tank for EQE5660 model onlyDoors Storage binsbe adjusted to your needs.To remove the door bin:1. lift and unlock from lugs to remove.2. Replace by lift up and push bin down until Water TankCAUTIONBEFORE REMOVE; to empty the water in the tank.To remove the water tank and disassembly cleanable parts follow these steps:1. Life up water tank until locking release.2. Pull water tank forward.EN191.2.Twist & Serve Ice Bin (EQE5600 model only) :1. Prior the first use clean the ice tray.2.3.4.6•••1.2.about 1½ minutes.3. Continue dispensing water for about four minutes to flush the system and plumbing connections of any impurities (stopping to empty the glass as necessary).IMPORTANTTurning off the ice maker simply d isables ice making. You will still be able to dispense existing ice, and you will still be able to dispense water.EN21Ice maker/dispenser tips• The following sounds are normal when theice maker is operating:- Motor running- Ice dropping into ice bin- Water valve opening or closing- Running waterCAUTIONIf the water supply to your refrigeratoris softened, be sure the softener isproperly maintained. Chemicals froma water softener can damage the icemaker.Cleaning the ice makerClean the ice maker and ice bin at regularintervals, especially prior to vacation or moving.1. Turn off the icemaker.2. Remove the ice bin by pulling straight out.3. Empty and carefully clean the ice bin withmild detergent. Do not use harsh or abrasivecleaners. Do not place in dishwasher. Rinsewith clear water.4. Allow the ice bin to dry completely beforeplacing it back into the freezer.5. Place ice bin back into position. Turn the icemaker on.22 7. GENERAL INFORMATION7.1 Cleaning your refrigeratorWARNINGBEFORE CLEANING: Turn therefrigerator off at the power point andunplug the cord to prevent any chanceof electrocuting yourself.Stainless Steel:Your stainless steel refrigerator is manufactured from mark-resistant stainless steel. This stainless steel has a special advanced protective coating that eases the removal of marks such as fingerprints and water spots. To keep its appearance, clean it regularly with lukewarm soapy water and a soft cloth.CAUTIONNever use stainless steel cleaners,abrasive pads or other cleaners thatwill scratch the surface. Damage to theappliance after d elivery is not coveredby your warranty.InteriorClean the inside of your refrigerator regularly with a soft cloth, unscented mild soap and lukewarm water. Thoroughly dry all surfaces and removable parts and avoid getting water on the controls. Replace removable parts, plug power cord in and switch the power on before returning the food.Door sealsAlways keep door seals clean by washing them with a mild detergent and warm water, followed by a thorough drying. Sticky food and drink can cause seals to stick to the cabinet and tear when you open the door.Never use hot water, solvents, commercial kitchen cleaners, aerosol cleaners, metal polishes, caustic or abrasive cleaners, or scourers to clean your refrigerator. Many commercially available cleaning products and detergents contain solvents that will damage your refrigerator. Use only a soft cloth with an unscented mild soap and lukewarm water.CAUTIONTo clean a crisper simply wipe with adamp cloth and warm soapy water.Never immerse the cover in water, asthis could affect the operation of theslide.Switching off your refrigeratorIf you switch off your refrigerator for an extended period, follow these steps to reduce the chances of mould.1. Remove all food.2. Remove the power plug from the powerpoint.3. Thoroughly clean and dry the Interior.4. Ensure that all the doors are wedged openslightly for air circulation.7.2 Air FilterThe air filter is located in the top center of the fresh food compartment.Replacing your Air FilterTo ensure optimal filtering of refrigerator odors, you should change the air filter six months (The filter status light on the Touch Panel prompts you to replace the filter after six month)1. Remove the air filter cover by squeezing thesides of the cover together and removingEN237.3 Ice and Water (selected models)Clean the components of the ice maker/waterdispenser regularly with a soft cloth, unscentedmild soap and rinsing thoroughly with lukewarmwater.For further information on the care andcleaning of your ice maker, ice dispenser ofwater dispenser refer to the section “Ice andWater Models”7.4 Water TankThe water tank is intended to be removed onlyfor cleaning purposes, to fill the portable wateronly, the tank must be placed on the door andthe funnel on the lid has to be used.Clean the inside of the water tank regularlywith a soft cloth and the filter use the softbrush to clean, unscented mild soap and rinsethoroughly with lukewarm water to completelyremove any soap residue.NOTE: When customer assembled tank to doorTo avoid water leaks ensure that tank nozzlefully engaged with housing socket..24 8. FOOD STORAGE GUIDEIMPORTANTPlease note, use this information as a guide only, actual storage times will vary dependingon how you use your refrigerator, climatic conditions and the freshness of the food.25EN 9. TROUBLESHOOTINGAppliance does not operate at desired temperatureIn a modern frost free refrigerator / freezer, cold air is circulated around the various compartments through air vents using a high efficiency fan.Appliance noiseYour new refrigerator may make sounds that your old one didn’t make. Because the sounds are new to you, you might be concerned about them. Most of the new sounds are normal. Hard surfaces, like the floor, walls and cabinets, can make the sounds seem louder than they actually are. Thefollowing describes the kinds of sounds and what may be making them.26 Crisper OperationRefrigerator operation27EN28 Door operationIf you still require serviceIf you have a problem, and the problem persists after you have made the checks mentioned,contact your nearest Electrolux approved Service Centre or the dealer you bought the refrigeratorfrom. Be ready to quote the model number, the 9-digit PNC and 8-digit serial number, which isstated on the label inside the refrigerator compartment.29EN . NOISESAppliance noiseYour new refrigerator may make sounds that your old one didn’t make. Because the sounds are new to you, you might be concerned about them. Most of the new sounds are normal. Hard surfaces, like the floor, walls and cabinets, can make the sounds seem louder than they actually are. The following describes the kinds of sounds and what may be making them.10. NOISES Appliance noise Your new refrigerator may make sounds that your old one didn’t make. Because the sounds are new to you, you might be concerned about them. Most of the new sounds are normal. Hard surfaces, like the floor, walls and cabinets, can make the sounds seem louder than they actually are. Thefollowing describes the kinds of sounds and what may be making them.2 我們一心為您感謝您選擇 Electrolux 。
中走丝DK7732C-CT技术资料
DK7732C-CT技术资料一、机床的型号规格及性能特点:1、通用参数a. 工作台行程:320mm×400mm;b. 工作台尺寸:420mm×650mmc. 工作台承载:400kgd. 最大切割效率:250mm2/min;稳定切割效率180mm2/min,(Cr12 40-50mm厚时)e.最小钼丝耗:在150mm2/min效率下,30万平方损耗0.01mm;(Cr12 40-50mm厚时)f. 最大切割电流:10A;g. 最大切割锥度:6°(100mm厚内)h.粗糙度:加工20mm厚的Cr12粗糙度多刀切割:Ra≤0.8μm;i. 加工精度/直径:0.010(Φ10mm);j. 机床消耗功率:3kw;k. 电极丝使用直径范围:Φ0.15~Φ0.20mm;l. 走丝速度:4~11m/s;(艾默生变频器控制,无极调速)m. 机床外形尺寸:1400 mm×920 mm×1550mm;n. 整机重量:1700kg。
2、机床的性能、特点:●床身是采用高强度铸铁(HT250)成型的基座,为机床的承重部件。
铸件体都采用树脂砂铸造技术铸造(慢走丝铸件就采用此技术),两次高温退火处理,在同类型机床中自重也大,确保机械精度的恒久不变。
●主机C型结构,高精密滚珠丝杆、线性导轨。
●环保全封装工作台设计,工作液无外泄,符合欧盟工业产品人性化安全设计,操作简便。
●编控系统采用BMXP中走丝线切割编控一体化软件,操作平台windowsxp,这是目前行业中唯一一款真正在Windows XP下开发的线切割专业软件。
●采用PCI总线,配备高端计算机。
●强大的网络功能,实现远程控制。
●可嵌入式的控制系统,实现与多种设计软件无缝连接。
●高频电源控制卡和软件控制卡合二为一,避免多卡控制的准确性差异和故障点多的弊端;●高效细分的数字化专业脉冲电源,具有单方向放电功能,具有分组脉冲辅助功能,有效控制工件表面切割线纹,进一步满足高端客户的精细要求;●具有丰富的拐角功能●具有智能化数据库,通过大量试验和优化组合,供用户针对不同工件切割需求进行选择,也可由客户自行编辑加工参数加以存盘。
中走丝电柜说明书
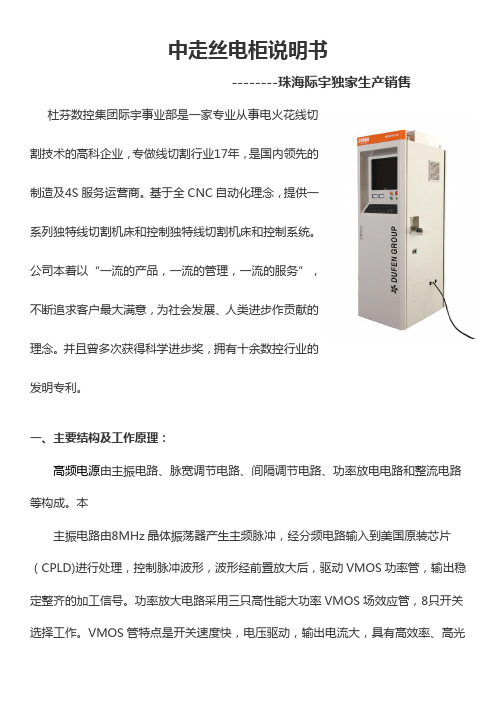
中走丝电柜说明书--------珠海际宇独家生产销售杜芬数控集团际宇事业部是一家专业从事电火花线切割技术的高科企业,专做线切割行业17年,是国内领先的制造及4S服务运营商。
基于全CNC自动化理念,提供一系列独特线切割机床和控制独特线切割机床和控制系统。
公司本着以“一流的产品,一流的管理,一流的服务”,不断追求客户最大满意,为社会发展、人类进步作贡献的理念。
并且曾多次获得科学进步奖,拥有十余数控行业的发明专利。
一、主要结构及工作原理:高频电源由主振电路、脉宽调节电路、间隔调节电路、功率放电电路和整流电路等构成。
本主振电路由8MHz晶体振荡器产生主频脉冲,经分频电路输入到美国原装芯片(CPLD)进行处理,控制脉冲波形,波形经前置放大后,驱动VMOS功率管,输出稳定整齐的加工信号。
功率放大电路采用三只高性能大功率VMOS场效应管,8只开关选择工作。
VMOS 管特点是开关速度快,电压驱动,输出电流大,具有高效率、高光洁度线切割专用脉冲电源。
二、常见故障分析与维修1) 驱动电源部分步进电机无法通电锁定。
1、X、Y①驱动电源整流桥损坏。
②+12V电源故障或断线。
2、X或Y步进电机缺相。
①步进电机断线。
②驱动板故障。
③电脑控制卡故障或断线。
3、X或Y步进电机行走丢步。
①航空插头或矩形插头接触不良。
②整流电解电容失效。
2)高频电源部分1、电压表无电压指示。
①熔断器熔芯烧断,整流桥或线路短路。
②接触不良或断线。
③整流桥损坏开路。
2、有加工电压,无高频输出。
①控制卡故障。
②用粗导线在高频电源正负之间短路,如有电流,则为高频输出线开路。
3、加工电流异常增大①VMOS功率管损坏。
依次接通功率输出开关,找出对应电流偏大的功率管,并更换掉。
②振荡电路故障,脉冲信号占空比变大。
③并接在红黑高频输出接线柱处的反向二极管击穿。
④控制卡(控制器)的取样变频电路故障。
中走丝设备操作规程
审核
批准
批准日期
设备编号
第1页
E201004
共1页
中走丝设备操作规程编号:
3.3.保持机器与周围环境的干净整洁,定时清理机器内部杂物污渍等。
3.4.机器润滑:工作台每周一次,运丝机构每天一次。
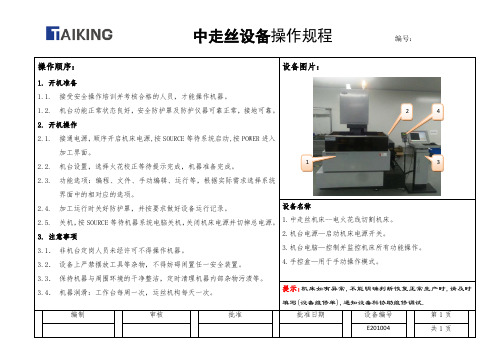
设备图片:
设备名称
1.中走丝机床--电火花线切割机床。
2.机台电源—启动机床电源开关。
3.机台电脑—控制并监控机床所有功能操作。
4.手控盒—用于手动操作模式。
提示:机床如有异常,不能明确判断恢复正常生产时,请及时填写(设备维修单),通知设备科协助维修调试.
2.3.功能选项:编程、文件、手动编辑、运行等,根据实际需求选择系统界面中的相对应的选项。
2.4.加工运行时关好防护பைடு நூலகம்,并按要求做好设备运行记录。
2.5.关机,按SOURCE等待机器系统电脑关机,关闭机床电源并切掉总电源。
3.注意事项
3.1.非机台定岗人员未经许可不得操作机器。
3.2.设备上严禁摆放工具等杂物,不得妨碍闲置任一安全装置。
操作顺序:
1.开机准备
1.1.接受安全操作培训并考核合格的人员,才能操作机器。
1.2.机台功能正常状态良好,安全防护罩及防护仪器可靠正常,接地可靠。
2.开机操作
2.1.接通电源,顺序开启机床电源,按SOURCE等待系统启动,按POWER进入加工界面。
2.2.机台设置,选择火花校正等待提示完成,机器准备完成。
HL中走丝系统使用说明

HL®卡多次切割功能操作与接线说明(一)进入HL®主画面,将光标移到“Multi参数1”,按回车键,或直接按M键,进入重复加工参数表(图一)。
(对于2号副卡,对应菜单项为“multI参数2”、按I键直接进入)。
(二)图一所示为HL®主卡的重复加工参数表,其中第1列为行号,共有10行参数。
编程时所产生3B文件中有一些含有“R D”的行,其作用是让程序输出控制指令,这个过程会停顿四秒,使丝筒转速、高频脉冲、高频电流、变频跟踪等作好变化,以便下一刀使用不同的切割参数。
开始加工后,首先转到第一行参数,每到“R D”,自动转到下一行参数。
正在加工的参数行以红色显示。
图一、重复加工参数表(三)参数说明:第2列参数“脉宽Pw”是脉冲宽度,单位为微秒,取值范围2~200微秒;第3列“脉间Pi”是脉冲间隔,单位为脉冲宽度的倍数,如脉宽为10微秒,脉间为5,则脉冲间隔等于50微秒,取值范围2~15;第4列“调制F.M.”是分组脉冲设定,0:无,1~5:分组脉冲宽度分别为1-5微秒;第5列“电流Amp.”是高频电流强度(参看第五节),取值范围1~15;第6列“丝速W.S.”是丝筒转速端子设置(参看第六节),取值范围0~7;第7列“变频V.F.”是变频跟踪变量。
(四)参数的设置和修改:按上下左右箭头键选择要修改的项,按“+”、“-”键进行调节。
按“ESC”退出。
(五)如图二所示,高频脉冲信号由HF0、HF1、HF2、HF3输出,高频电流强度是控制这四路输出的有无(参看表一)。
用户只要将HF0接1个功率场效应管、HF1接2个功率场效应管、HF2接4个功率场效应管、HF3接8个功率场效应管,通过调节“电流Amp.”参数,可使高频电流强度分为1-15挡,如图三所示,使用了15个功率场效应管。
用户也可自行选择功率管的个数,如HF0、HF1各接1个,HF2、HF3各接3个,共8个功率场效应管。
[注意1]:HF0、HF1、HF2、HF3以及AC12H1、AC12H2必须使用屏蔽线,屏蔽线的一端连接到电脑外壳(即15芯接头的金属壳),而另一端不要有任何连接。
智能型中走丝系列安全操作及保养规程
智能型中走丝系列安全操作及保养规程概述智能型中走丝数控电火花加工机床是一种精密加工设备,采用中走丝铜电极放电加工工艺,具有高精度、高效率、高可靠性等特点,广泛用于模具制造、精密机械零部件加工、航空航天制造等领域。
本文将从安全操作和保养两个方面,详细介绍智能型中走丝数控电火花加工机床的使用规程。
安全操作规程1. 机床周围环境1.机床周围应保持整洁、明亮,且不应有易燃、易爆物品等危险品,必要时应设置防护栏杆。
2.机床应安装在平稳地面上,且地面应有良好的承载能力,不宜在强磁场和强振动场附近使用。
3.机床安装在有电线电缆和气源管道的位置时,应区分开来,以免发生危险。
2. 机床安全防护1.机床保护罩必须牢固安装,不得随意拆卸或改动。
2.加工时操作人员应穿戴好劳保用品,如眼镜、手套、口罩、防护鞋等。
3.机床应安装防护门限、安全光栅等安全保护装置,保证操作人员的安全。
3. 加工操作规程1.加工前,首先要检查机床加工腔内是否有异物、油污等情况,加工前应清洗干净。
2.在加工过程中,应注意不得撞击机床保护罩,避免损坏保护罩和损伤操作人员。
3.将工件夹紧后,应进行加工前试运转,确保机床运转正常。
待试运转成功后才能正式开工。
4.加工过程中,应进行严格监控,避免因加工参数设置错误或操作错误导致事故的发生。
5.加工完毕后,应关闭机床主机电源和水源电源,关闭过滤器开关后再切断电源,清理待加工的工件表面。
回收过滤器中的残渣后清理过滤器,以免影响下一次加工质量。
保养规程为了保障智能型中走丝数控电火花加工机床的使用寿命和加工精度,必须按照以下保养规程进行维修保养。
1. 机床日常保养1.机床应保持干燥、清洁、无尘、无杂物等状态,加工完毕后及时清理,以免影响下次加工的质量和机床的持续使用寿命。
2.机床要保持良好的润滑状态,定期检查并按照维修手册和润滑系统说明进行润滑作业。
3.机床操作完毕后,要关闭电源开关和水源开关,定期检查电缆的接线状态,避免接头松动引发危险。
精密中走丝安全操作及保养规程

精密中走丝安全操作及保养规程前言中走丝加工是一种精密的加工方法,可以用于加工出极其精细的零件。
但是在中走丝加工过程中,如果不合理地操作,或者缺乏保养,会给自己和设备带来不小的安全隐患。
因此,为了保证安全和稳定的生产,本文将详细介绍精密中走丝安全操作及保养规程。
安全操作规程1. 设备准备在进行中走丝加工之前,应该对设备进行准备。
操作人员应该检查设备是否处于良好状态,确保所有连接部分都紧固牢固,并检查设备是否存在损坏。
另外,操作人员应该熟悉设备的结构和使用方法。
2. 防护措施在操作中走丝时,需要佩戴防护眼镜,确保眼睛不会受到微小金属屑的伤害。
另外,操作人员应该佩戴透气、防滑的鞋子,避免滑倒。
在长时间的操作中,可以使用耳塞来减少噪音对听力的影响。
3. 操作规范操作人员应该熟悉中走丝的操作方法,并严格遵守操作规范。
在操作中,不得离开设备,必须时刻保持警惕,避免发生事故。
如有疑问或需要调整,应该在关机状态下进行操作。
4. 材料处理在进行中走丝加工时,应该使用合适的材料,确保材料质量和机器的匹配性。
在材料处理期间,应该注意对材料的切削速度和压力进行调整,避免对设备和材料造成损坏。
5. 加工结束在加工完成后,应该及时关掉设备,并对设备进行清洁和保养。
如果需要进行调整或更换工具,应在断电状态下进行操作,确保操作的安全性。
另外,加工过程中产生的材料和工具应该妥善处理,避免造成其他人员的伤害。
保养规程1. 日常保养为了保证设备的正常使用和延长寿命,应该在日常使用中进行维护和保养。
操作人员应该进行设备的清洁和检查,确保设备油量的充足,并定期更换润滑油和风扇滤芯。
另外,操作人员还应该检查设备连接和螺丝的牢固程度,避免设备松动或者崩塌。
2. 定期保养除日常保养外,操作人员还应该对设备进行定期保养,一般可以根据生产工艺来进行安排。
定期保养包括对设备进行全面检查,更换累积运行时间较长的零部件,检查电接点的状态,确保设备能够保持稳定的运行状态。
中走丝控制柜安全操作及保养规程

中走丝控制柜安全操作及保养规程背景中走丝控制柜是机台上不可或缺的电子设备之一,它作为机台的“大脑”,通过对机台各部分的电控信号的控制,来确保机台正常运行。
因此,对中走丝控制柜的安全操作及保养具有非常重要的意义,能够有效地提高机台的工作效率和延长机台使用寿命,同时也保障了操作人员的人身安全。
安全操作规程安全操作是中走丝控制柜使用的前提与基础,下面分别从使用前、使用中和使用后三个方面进行说明:使用前1.确认中走丝控制柜的电压、电流等参数符合机台需求;2.检查控制柜的电源、接地、保护器等是否正常;3.操作人员必须熟知中走丝控制柜的所有功能及启动与停止操作方法;4.操作人员在进行控制柜开关和按钮操作之前必须确认已切断机台电源。
使用中1.操作人员禁止在拆卸/更换/维修中走丝控制柜零部件时对零部件作出任何改造;2.操作人员禁止在中走丝控制柜工作时对开关和按钮作胡乱操作;3.操作人员禁止在工作区域内堆放过多的物品,以免遮挡空气循环孔或造成机器过热。
使用后1.停止使用中走丝控制柜之前,必须先关闭机台电源;2.操作人员需清理中走丝控制柜表面的灰尘、油污等杂物;3.在无法启动中走丝控制柜的情况下,请及时联系专业维修人员。
保养规程正确的保养机台上的中走丝控制柜可以有效延长其使用寿命,同时也能提高机台的稳定性,下面从控制柜的日常清理和定期维护两个方面分别阐述如下:日常清理1.操作人员应每日清理中走丝控制柜外表面的污秽和异物;2.操作人员应当注意清理中走丝控制柜周围的工作环境,以及工作区内其他电器设备的积尘和异物;3.长时间不使用的中走丝控制柜,应使用干净布将其上的油污、灰尘擦拭干净。
定期维护1.确保中走丝控制柜在操作正常的情况下,定期检查机台电气线路及连线接头的紧密性;2.定期检查中走丝控制柜的散热器是否工作正常,整体清洗散热器,保证通风良好,防止过热带来的损坏;3.定期检查中走丝控制柜的电子元器件是否有锈蚀或者其他损坏,有问题及时修理和更换。
CHK编控说明书

一、概述CHK中走丝线切割电脑编控系统是本企业最新开发的中走丝软件,综合国外慢走丝软件的优点,采用外置式控制卡和电脑USB端口进行数据通讯,WINDOWS/XP或WINDOWS2000操作系统,而且具有多次切割、往复运丝、单向切割功能,在每次切割中,电机丝速快慢、高频参数、跟踪速度等参数由软件自动切换一步完成,使操作更加方便,功能更加强大,突破了传统软件的各种限制,从而有效地提高了加工件表面光洁度和模具精度。
注意:本系统是计算机辅助编程控制工具,本公司仅负责产品自售出日起一年内产品软硬件的维修、维护、以及技术上的改进。
不承担由于该产品使用于配套的线切割机床可能导致的加工产品损坏的直接或间接责任。
二、开机和关机说明开机:控制柜固定安装完成后,控制柜上的绿色按钮为开控制柜“总电源开关”,开启后绿色按钮指示灯亮;再持续按住黄色按钮最少4秒钟时间则UPS不间断电源和电脑同时运行,黄色按钮指示灯亮(若电脑不能运行,则按金黄色按钮再按一下时间不要超过一秒钟),这样电脑就会进入WINDOWS/XP操作界面。
关机:电脑一定要先退出WINDOWS/XP操作系统后,再按红色蘑菇开关,则控制柜总电源马上关闭,绿色按钮指示灯暗掉。
然后再连续按住黄色按钮最少五秒钟时间则UPS 不间断电源报警一下,黄色按钮指示灯暗掉;(注意:停电或者下班关机后,黄色按钮指示灯一定要暗掉,否则电能耗尽会造成UPS不间断电源的损坏)停电关机:遇到突然停电控制柜绿色指示灯暗掉,但黄色指示灯亮着,而且UPS不间断电源报警(UPS电源遇停电最多用4分钟),先退出WINDOWS/XP操作系统,再按住黄色按钮最少4秒钟则UPS电源报警一下关掉,黄色指示灯暗掉则停电关机操作完成。
三、CHK编控系统界面各个栏目功能简介1、开机进入WINDOWS/XP操作系统后,鼠标双击界面上的“CHK”图标的快捷方式运行软件,进入软件控制界面。
CHK界面主要由居中的作图区、右侧的快捷菜单栏、主菜单栏、工具栏和底部的对话状态栏组成,如下图:2、退出系统:选择菜单栏〖文件〗命令的下拉菜单中的〖退出〗或直接用鼠标点击右上角的即可退出系统(注:若系统正在加工中,则系统自动保存加工状态退出)。
中走丝安全操作及保养规程

中走丝安全操作及保养规程中走丝是一种常见的机械加工设备,在金属加工、电力设备制造等行业中得到广泛应用。
然而,由于中走丝涉及机械冲击、高速运动等危险作业环境,如果不加注意安全操作,极易发生意外伤害事故。
本文将介绍中走丝的安全操作原则和保养规程,帮助操作人员有效地预防事故发生,确保生产安全。
一、安全操作原则1.了解机器结构和工作原理在操作中走丝前,首先要了解清晰它的结构和工作原理。
掌握中走丝的各个部件和运动方式,可以有效预防操作不当造成的意外伤害事故。
此外,了解设备的安全保护装置和紧急停机机制等特点,更能提高操作安全性。
2.严格遵守操作规程中走丝的操作规程在各个厂家都有明确的规定,需要严格遵守,不能随意更改或忽视。
在进行操作前,应熟悉操作规程,按照步骤执行操作。
特别是对操作中的高速旋转部件,需要严格按照规程进行操作,确保人员生命安全。
3.佩戴安全防护用具在操作中走丝时,需要佩戴相应的安全防护用具,如护目镜、耳塞、手套等。
这些防护用具能够有效地保护人员的眼睛、耳朵和手部等部位,防止因操作不当造成的损伤和事故的发生。
4.注意作业环境安全中走丝的作业环境也要保证安全。
操作人员在操作时应保持清醒,避免喝酒和疲劳驾驶现象的出现。
同时,还需保证操作环境的干燥、通风,仔细清除操作区周围的杂物,保持良好的秩序和通畅的出入口。
5.紧急情况的处理在操作中走丝的过程中,经常面临一些特殊情况,如故障、操作不当等。
此时,操作人员需要熟练掌握设备的紧急停机机制,并且及时采取相应的应急措施来防止意外伤害的发生。
二、保养规程中走丝在生产中发挥了重要的作用,也是一种较为复杂的设备。
如果不进行适当的保养,长时间使用会产生磨损和故障,影响生产效率。
因此,保养中走丝也非常重要。
1.对设备进行检查在正常使用中,需要对中走丝设备进行定期检查。
检查的重点是各个部件的运行情况、润滑情况和紧固情况等。
2.清洁设备保养中走丝必须清洁设备,尤其是清洁设备内的灰尘和金属屑等物质。
正华中走丝DK7763
正华中走丝DK7763技术资料一、机床的型号规格及性能特点:1、机床的型号、规格及参数a. 机床的型号: DK7763;b. 工作台面行程:630mm×800mm;c. 切割工件最大厚度: 800mm可调;d. 切割工件最大锥度:6°(100mm内可达);e. 最大切割效率:>120mm2/min(Cr12 80mm厚时);f. 最大切割电流:6A;g. 粗糙度:加工40mm厚的Cr12粗糙度效率多刀切割:Ra≤1.2μm;h. 加工精度/直径:0.15(Φ10mm);i. 机床消耗功率:3kw;j. 电极丝直径:Φ0.15~Φ0.20mm;k. 走丝速度:4~11m/s;(进口变频器控制)l. 机床外形尺寸:2265mm×1865mm×1980mm;m. 整机重量:3000kg。
2、机床的性能、特点:●床身是采用高强度铸铁(HT250)成型的基座,为机床的承重部件。
一体式结构,铸件体都采用树脂砂铸造技术铸造(慢走丝铸件就采用此技术),两次高温退火处理,在同类型机床中自重也大,确保机械精度的恒久不变。
●采用PCI总线,配备高端计算机。
●强大的网络功能,实现远程控制。
●可嵌入式的控制系统,实现与多种设计软件无缝连接。
●高频电源控制卡和软件控制卡合二为一,避免多卡控制的准确性差异和故障点多的弊端;●高效细分的数字化专业脉冲电源,具有单方向放电功能,具有分组脉冲辅助功能,有效控制工件表面切割线纹,进一步满足高端客户的精细要求;●具有丰富的拐角功能●具有智能化数据库,通过大量试验和优化组合,供用户针对不同工件切割需求进行选择,也可由客户自行编辑加工参数加以存盘。
并且查询调用简便。
●特别选用新式三层过滤式水箱,延长了工作液的使用寿命,提高了工作液的洁净度,排渣性能增强,最终促使加工工件光洁度的提高,配合采用最新型的冷却液—水基工作液,对操作工及环境无害,符合环保要求,●采用引进德国技术生产新型电柜,外形美观大方,内部结构优良合理。
- 1、下载文档前请自行甄别文档内容的完整性,平台不提供额外的编辑、内容补充、找答案等附加服务。
- 2、"仅部分预览"的文档,不可在线预览部分如存在完整性等问题,可反馈申请退款(可完整预览的文档不适用该条件!)。
- 3、如文档侵犯您的权益,请联系客服反馈,我们会尽快为您处理(人工客服工作时间:9:00-18:30)。
中走丝电柜说明书
--------珠海际宇独家生产销售杜芬数控集团际宇事业部是一家专业从事电火花线切
割技术的高科企业,专做线切割行业17年,是国内领先的
制造及4S服务运营商。
基于全CNC自动化理念,提供一系
列独特线切割机床和控制独特线切割机床和控制系统。
公
司本着以“一流的产品,一流的管理,一流的服务”,不
断追求客户最大满意,为社会发展、人类进步作贡献的理
念。
并且曾多次获得科学进步奖,拥有十余数控行业的发明专利。
一、主要结构及工作原理:
高频电源由主振电路、脉宽调节电路、间隔调节电路、功率放电电路和整流电路等构成。
本
主振电路由8MHz晶体振荡器产生主频脉冲,经分频电路输入到美国原装芯片(CPLD)进行处理,控制脉冲波形,波形经前置放大后,驱动VMOS功率管,输出稳定整齐的加工信号。
功率放大电路采用三只高性能大功率VMOS场效应管,8只开关选择工作。
VMOS 管特点是开关速度快,电压驱动,输出电流大,具有高效率、高光洁度线切割专用脉冲电源。
二、常见故障分析与维修
1) 驱动电源部分
步进电机无法通电锁定。
1、X、Y
①驱动电源整流桥损坏。
②+12V电源故障或断线。
2、X或Y步进电机缺相。
①步进电机断线。
②驱动板故障。
③电脑控制卡故障或断线。
3、X或Y步进电机行走丢步。
①航空插头或矩形插头接触不良。
②整流电解电容失效。
2)高频电源部分
1、电压表无电压指示。
①熔断器熔芯烧断,整流桥或线路短路。
②接触不良或断线。
③整流桥损坏开路。
2、有加工电压,无高频输出。
①控制卡故障。
②用粗导线在高频电源正负之间短路,如有电流,则为高频输出线开路。
3、加工电流异常增大
①VMOS功率管损坏。
依次接通功率输出开关,找出对应电流偏大的功率管,并更换掉。
②振荡电路故障,脉冲信号占空比变大。
③并接在红黑高频输出接线柱处的反向二极管击穿。
④控制卡(控制器)的取样变频电路故障。