911拨号器说明书
Tiger 911语音拨号器安装与编程
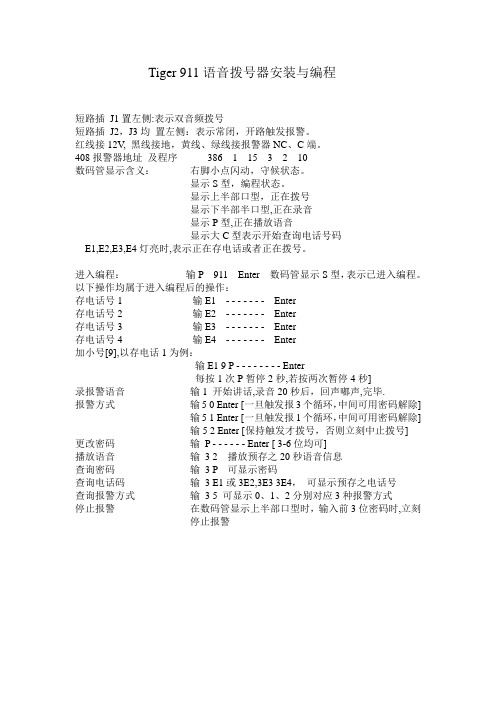
Tiger 911语音拨号器安装与编程短路插J1置左侧:表示双音频拨号短路插J2,J3均置左侧:表示常闭,开路触发报警。
红线接12V, 黑线接地,黄线、绿线接报警器NC、C端。
408报警器地址及程序386 1 15 3 2 10数码管显示含义:右脚小点闪动,守候状态。
显示S型,编程状态。
显示上半部口型,正在拨号显示下半部半口型,正在录音显示P型,正在播放语音显示大C型表示开始查询电话号码E1,E2,E3,E4灯亮时,表示正在存电话或者正在拨号。
进入编程:输P 911 Enter 数码管显示S型,表示已进入编程。
以下操作均属于进入编程后的操作:存电话号1 输E1 - - - - - - - Enter存电话号2 输E2 - - - - - - - Enter存电话号3 输E3 - - - - - - - Enter存电话号4 输E4 - - - - - - - Enter加小号[9],以存电话1为例:输E1 9 P - - - - - - - - Enter每按1次P暂停2秒,若按两次暂停4秒]录报警语音输1 开始讲话,录音20秒后,回声嘟声,完毕.报警方式输5 0 Enter [一旦触发报3个循环,中间可用密码解除]输5 1 Enter [一旦触发报1个循环,中间可用密码解除]输5 2 Enter [保持触发才拨号,否则立刻中止拨号]更改密码输P - - - - - - Enter [ 3-6位均可]播放语音输 3 2 播放预存之20秒语音信息查询密码输 3 P 可显示密码查询电话码输 3 E1或3E2,3E3 3E4,可显示预存之电话号查询报警方式输 3 5 可显示0、1、2分别对应3种报警方式停止报警在数码管显示上半部口型时,输入前3位密码时,立刻停止报警Tiger 911拨号器常见故障双击自动滚屏发布者:admin 发布时间:2010-1-5 17:00:45 阅读:435次【字体:大中小】常见故障如下:1、不拨号在测试前应并联一台带免提的电话机以供拨号时监听。
tiger-911电话拨号器
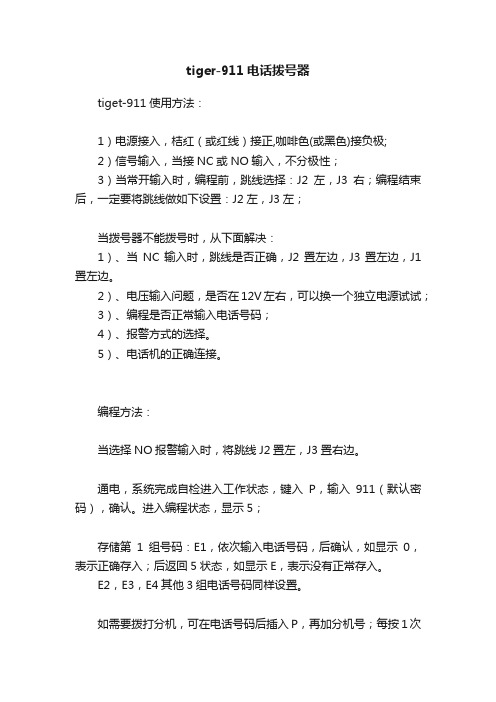
tiger-911电话拨号器tiget-911使用方法:1)电源接入,桔红(或红线)接正,咖啡色(或黑色)接负极;2)信号输入,当接NC或NO输入,不分极性;3)当常开输入时,编程前,跳线选择:J2左,J3右;编程结束后,一定要将跳线做如下设置:J2左,J3左;当拨号器不能拨号时,从下面解决:1)、当NC输入时,跳线是否正确,J2置左边,J3置左边,J1置左边。
2)、电压输入问题,是否在12V左右,可以换一个独立电源试试;3)、编程是否正常输入电话号码;4)、报警方式的选择。
5)、电话机的正确连接。
编程方法:当选择NO报警输入时,将跳线J2置左,J3置右边。
通电,系统完成自检进入工作状态,键入P,输入911(默认密码),确认。
进入编程状态,显示5;存储第1组号码:E1,依次输入电话号码,后确认,如显示0,表示正确存入;后返回5状态,如显示E,表示没有正常存入。
E2,E3,E4其他3组电话号码同样设置。
如需要拨打分机,可在电话号码后插入P,再加分机号;每按1次P,暂停2秒,按2次P,暂停4秒。
查询电话号码:在编程状态下,按3,显示C,再按E1,E2,E3,E4分别查看这4组的电话号码。
修改密码:在编程状态下,按P,再加6位密码,确认。
查看密码:在编程状态下,按3,显示C,再按P。
三种可选报警方式的选择1)、依次键入-5-0-enter,报警信号一旦触发,连续拨号报警3个循环,中间可以用密码解除,2)、依次键入-5-1-enter,报警信号一旦触发,连续拨号报警1个循环,中间可以用密码解除,3)、依次键入-5-2-enter,报警信号保持触发才拨号,一旦报警信号中断,拨号器报警也就立即停止。
检查键入--3---5,对应A,B,C分别显示0,1,2。
存储求救录音:在编程状态下,按1,显示R,就可以录音了。
录音时间10秒。
播放录音:在编程状态下,按3--2,显示P,播放录音。
工作电压:DC11V-15V拨号方式:音频和脉冲,利用J1跳线来选择,J1设为左边为音频,J1设为右边为脉冲;报警方式:1)、NC输入,就是报警输入信号开路时报警。
XO VoIP E911服务终端用户指南说明书

1© Copyright 2012. XO Communications, LLC. All rights reserved. XO, the XO design logo, and all related marks are trademarks of XO Communications, LLC. All other trademarks are property of their respective owners. Nomadic E-911Welcome! As an XO ® VoIP-enabled customer, you can now take an Internet-based phone to virtually any destination and with an Internet connection. With the XO Nomadic E-911 End-user Portal, you can utilize our online tool to help you enter your location as you take your phone from site to site. Once entered, emergency services will have your correct physical location. The capabilities are available to you online 24x7 via our robust and easy-to-use customer self-service website.XO does NOT automatically detect when a phone moves. You must update your own location using the separate end-user portal.This guide explains how to use the portal.AccessYou can update your location at the dashboard: https:///xo/You have a default username and password to access this dashboard:∙ Username: Your TN prefixed with "n". Example: n5145551234∙Password: The last seven digits of your TN. Example: 5551234End User DashboardThe End User Portal has three tabs:∙ Active Location displays the current E911 address.∙Saved Locations stores previously used addresses.o Using the buttons provided, end userscan make a previous address active again or delete it completely.∙My Settings allows users to update their password & email.o Passwords must be at least eightcharacters in length.Changes To Your AddressEnter the new address information and click Update. The portal will validate the address information and, if necessary, provide a pop-up asking the user to make changes to the address.If necessary, correct any address validation errorsCSZ ErrorsThis error frequently appears when the street number or name cannot be confirmed.Alternative selections are sometimes provided in the pull-down menus.Double-check the address and try again.。
Ec3910智能拨号器

有源信号:有源信号是带电信号,EC3910A 型拨号器支持有源信号触发,拨号器接受高 电平和低电平信号。
高电平触发,常态电压幅度为 0V,电平幅度为+2.5V≤信号幅度≤+15V 时,拨号器被 触发,摘机,按*0*0,再按 7*设定。
低电平触发,常态电压幅度为+2.5V≤信号幅度≤+15V,电压变为 0V 时拨号器被触发, 摘机,按*0*0,再按 7#设定。
触发的允许和禁止 在使用拨号器过程中,有时需要暂时停止拨号功能,但频繁拆装拨号器是件低效率的事
情,有没有简单的方法? EC3910A 和 B 都可以通过关闭拨号器的触发端口,来禁止拨号器的拨号功能。 打开触发端口,允许触发。摘机,按*0*0,再按 0*设定。 关闭触发端口,禁止触发,摘机,按*0*0,再按 0#设定。
EC3910 智能拨号器产品手册
起源 Ec3910 智能拨号器的创造,是为了解决各种设备与电话网的接入、通讯问题,也可单
独使用。拨号器使用固话网络,使用拨号器可以快速搭建固网通讯提示系统。
基本原理 Ec3910 智能拨号器通过电话线接入电话网络,用同一电话线上的电话机设置各项功能,
被触发后,拨号器遵循电话机通讯规则,拨通预置号码,发出声音提示。
删除号码 按数字加上#号可删除对应组的电话号码,例如删除第一组号码,摘机,按*0*0,然后
按 1#即可。
触发模式设定
拨号器的触发模式为两种:跟随触发和脉冲触发。 跟随触发状态下,触发信号存在,执行拨号动作,触发信号消失,停止拨号动作。 脉冲触发状态下,只触发一次,拨号器即开始拨号,此后不论触发信号是否消失,拨号
FC-2409 图像扬声器拨号器使用说明书

FC-2409User Manual Picture Speakerphone Dialer 1Function descriptionz9photo keys and911key(indirect memories)z One or Two touch Memory dialingz Tone dialing functionz Speakerphonez32digits last number redialz Pause function(on Redial key)z Flash functionz Electronic Mute functionz Speaker V olume controlz Ringer Hi/Lo/Off controlz In-use LED(RED)z Ringer LED(Green)z Wall mountablez No Batteries or A/C adaptor neededz The memories will be backed up for life even if disconnected the phone line.2Features(See picture)1.Dialing keypad、Memories key(0~9)+911key2.Memory key(MEM)3.Redial/Pause key4.In-use LED/Ringer LED5.Mute key6.Flash key7.Handsfree key8.Normal/Program=N/P/One Touch=O/T switch9.Store key at back of unit10.Ringer volume switch11.Phone Jack12.Line Jack13.Handsfree volumecontrol3InstallationszConnect the telephone Line Cord to the Line jack and the wall socket.zTo connect a parallel phone if needed plug the phone line cord into the Phone jack socket.4OperationsDuring a call the In-Use LED will light up.4.1Storing number into one touch or two touch picture dialer When programing switch (8)must be in N/P positionzPress Handsfree Key to turn on handsfree function.z Press Store key at back of unit.z Entering the desired phone number.z Press Store key at back of unit.z Press a numerical key (0~9)for 10indirect /direct memories.zPressHandsfree Key again to turn off handsfree function.4.2Disconnecting 911KeyAs the 911key is preprogramed from the factory,if you need to disconnect the 911key you may program any other number you wish or just the digit “1”into this key by the following.....zPress Handsfree Key to turn on handsfree function.z Press Store key at back of unit.z Entering “1”or any number you wish to store .z Press Store key at back of unit.z Press 911key.zPressHandsfree Key again to turn off handsfree function.4.3Taking a callzzPress Handsfree Key to take the call.4.4Making a callz Press Handsfree Key to turn on handsfree function.zEnter the telephone number you wish to dialORz Press Mem key.zPress an indirect Picture memory key (0~9)when the switch (8)is in N/P positionORzPress a direct Picture memory key (0~9)when the switch (8)is in O/T position4.5Ending a CallzWhen you finish your conversation,Press Handsfree Keyto end the call...4.6Redialingz Press Handsfree Key to turn on handsfree function.zPress Redial key to call previously dialed number.4.7Pause functionFor some network services such as home banking or PABX’swhich give a secondary dial tone before further dialing,it may be necessary to insert a pause between digits.z Press Redial key to add3.6seconds pause during dialing a phone number.z Press Redial key to add3.6seconds pause during storing a number into memory keys4.8Flash FunctionPress Flash key the phone line will break and disconnected.It is for Call-Waiting or other functions offered by local telephonecompany.4.9Mute FunctionDuring your phone call,if you want a private conversation not to be heard by the other party on the line.z Press the Mute key.z To continue your phone call,press the Mute key again.SERVICEAccording to FCC regulation.This equipment which has been certified and registered by the FCC,may only be repaired by authorized person,the FCC certification may be voided.Should you encounter any problems,please call the FUTURE CALL LLC.Toll-free Customer Hotline for assistance:1-888-934-CALL(2255)Monday-Friday between the hours of9:00am-6:00pm PSTFor general inquires,you can e-mail to*********************or visit our website at FOR WARRANTY AND OUT-OF WARRANTY SERVICE:You may call our toll-free hot line on1-888-934-CALL(2255)9AM-6PM PST or E-mail to********************QUESTIONS?STOP...doesn’t take unit back to the store.LOOK...for the toll-free“help”telephone number.LISTEN...as our experts talk you through the problem. LIMITED WARRANTY AND SERVICEFUTURE CALL LLC.warrants this product to be free from defective materials or factory workmanship and will replace or repair this unit or any part thereof, except batteries,if it proves to be defective in normal use or service within90 days fromdate of original purchase.Our obligation under this warranty is the repair or replacement of the defective instrument or any part thereof,except batteries. This warranty will be considered void if unit is tampered with,improperly serviced,or subjected to misuse,negligence or accidental damage.There are no other express warranties other than those stated herein.This warranty gives you specific legal rights,and you may also have other rights which vary from state to state.TO OBTAIN SERVICE PLEASE E-MAIL US ON********************OR CALL US TOLL FREE1-888-934-CALL (2255)9AM-6PM PST(IF THE UNIT IS UNDER WARRANTY PROOF OF PURCHASE MUST BE PROVEN。
国内IP拨号器使用说明书
17970绑定方式拨打电话:*9*1**17970*#**。“嘟”
17970绑定方式2号位查询余额:*9*2**17970*#*#*1#**。(嘟)
广东200:*9*1**200*1*0#*2**(嘟)
主叫IP输入:*9*卡存放序号(可选择1—8)**IP切入号**(嘟)。
5.5、设置数据锁定和开锁
锁定数据:*#*4位密码#(嘟)。
在数据锁定后,以后所有除“*#*”外的拨号照拨,不会影响交换机含*、#的服务。一般在设置完成检测无误后请将设置的数据锁定。在锁定数据状态要更改数据必须先对编程数据开锁:数据开锁方法:*#*4位密码*(嘟)。
请记住正常使用后把数据锁定,可防止误操作更改数据。在加入密码后所有锁定和解锁都必须输入正确密码方可操作,否则将禁止一切操作。
取消密码触发功能:**59#(嘟)。
启动该命令后拨打所有电话都必须使用密码
设置触发密码:**58X(2—4位密码)*(嘟)。
删除密码:**58X(2—4位密码)#嘟。
X为要触发IP卡序号(1—7)为分帐触发,可设置7个密码分别触发1-7张卡,类似个人密码。X=8为全局触发。全部设置使用一个密码。
一般情况下尽量使用全局密码:**588+密码*(嘟),拨打电话方便。
5)正常IP卡选择模式7:**4*切入码*7#。结束码为“#”。
6)要屏蔽拨完号码后的语音提示使用模式6:**4*切入码*6#。结束码为“#”。
结束码一般为“#“,不要结束码时结束码位选择”0“
3.5、IP卡拨打长途电话类型设置
**0*卡的存放序号+拨打电话的类型(0、1、2、3、4)*(或#)。
OPSSON S115i GSM GPRS数字移动电话 说明书
使用手册
【目 录】
前言 .......................................................................................... 5 安全事项.................................................................................... 5 1 您的手机 ............................................................................... 7 1.1 手机外观........................................................................... 7 1.2 按键说明........................................................................... 7 1.3 界面图标说明................................................................... 9 1.4 耳机 ................................................................................ 10 2 开始使用 ............................................................................. 10 2.1 电池 ................................................................................ 10 2.1.1 电池的拆装 ................................................................... 10 2.1.2 电池的充电 ................................................................... 10 2.2 SIM 卡的安装...................................................................11 2.3 存储卡的安装..................................................................11 2.4 资源管理..........................................................................11 2.5 开机和关机..................................................................... 12 3 通话功能 ............................................................................. 12 3.1 拨打电话 ........................................................................... 12 3.1.1 拨打国内电话 ............................................................... 12 3.1.2 拨打固定电话分机 ....................................................... 12 3.1.3 拨打国际长途电话 ....................................................... 12 3.1.4 使用电话本拨打电话 ................................................... 13 3.1.5 重拨最近拨过的电话号码 ........................................... 13 3.2 接听电话......................................................................... 13 3.3 拒绝接听电话................................................................. 13 3.4 通话中选项..................................................................... 13 4 输入文本 ............................................................................. 14 4.1 切换输入法..................................................................... 14 4.2 拼音输入法..................................................................... 14 4.3 英文输入法..................................................................... 15
GPS-911(R) 简易操作手册

G P S-911(R)簡易操作手冊Mini USB3. 安裝步驟說明步驟1 第一次使用,請先將鋰電池充飽8個小時。
步驟2 安裝SIM 卡(1) 首先,翻到主機背後,打開電池蓋,然後鬆開SIM 卡插槽。
(2) 將SIM 卡金色面朝下,裝入SIM 卡槽。
SIM 卡平整放入托盤中,並完全推入主機至有卡住的感覺。
步驟3 裝上鋰電池後,再蓋上電池蓋。
步驟4 開啟電源,確認GPS 接收正常。
方法:觀察主機的GPS 燈號(橘燈),如果能於1~3分鐘內從恆亮變為閃爍,表示可以正常定位。
橘燈(GPS)會恆亮Step3. 約15秒後,閃10下。
(Park)及紅燈(SOS)會一起亮起來,約15秒後暗掉,此時代表主機開機完成。
關機:GPS-911狀態為開機時,按下開關按鈕會閃爍3次,然後燈號整個熄滅,此時代表主機關機完成。
(2) SOS求救服務當SOS按鈕被按下時,紅燈(SOS)會閃爍,GPS-911會發出緊急求救簡訊,被通知者可做發簡訊,執行監聽狀態,可以適時提供協助。
求救電話設定由使用者設定之。
(3) 通話功能主動通話:當使用者想要與設定之號碼進行對話,直接按快速撥號即可,需特別注意的是,GPS-911 設定有二組快速撥號號碼可供駕駛者使用。
被動通話:當自己最親密之親朋好友想要與駕駛人進行雙向溝通時,只要撥打GPS-911之電話號碼,接通後駕駛者聽到電話鈴響後按接聽鍵即可進行對話。
(4) 鈴聲設定調整聲音:當使用者按住D1鍵約3~5秒後喇叭會發出來電鈴聲,此時你可由D1(+)、D2(-)調整你的聲音大小,選擇完後按接聽鍵確認。
調整鈴聲:當使用者按住D2鍵約3~5秒後喇叭會發出來電鈴聲,此時你可由D1(+)、D2(-)調整你要的鈴聲,選擇完後按接聽鍵確認。
(5) 看人(車)服務當Park按鈕被按下時,此時藍燈(Park)會做閃爍的動作。
當看人(車)服務狀態下人離開或車子被移動、拖吊時,GPS-911會回報狀況,讓被通知者可以明確的掌握人(車)當時動態,即時做第一時間之危機處理,獲得相當之安全保障。
Tiger 911 语音拨号器安装与编程
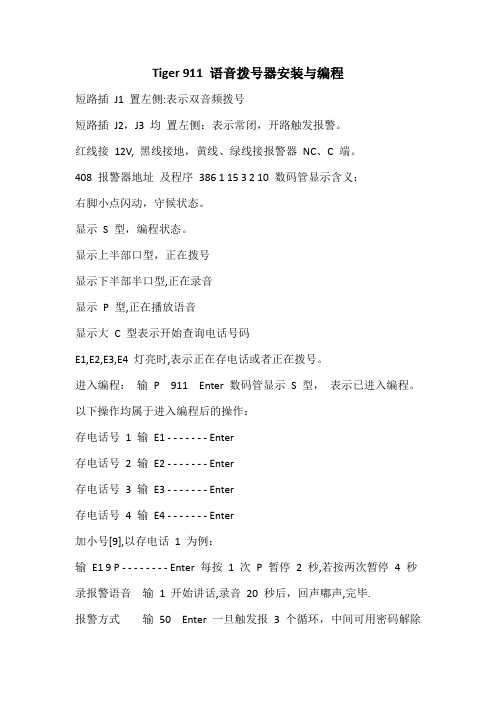
Tiger 911 语音拨号器安装与编程短路插J1 置左侧:表示双音频拨号短路插J2,J3 均置左侧:表示常闭,开路触发报警。
红线接12V, 黑线接地,黄线、绿线接报警器NC、C 端。
408 报警器地址及程序386 1 15 3 2 10 数码管显示含义:右脚小点闪动,守候状态。
显示S 型,编程状态。
显示上半部口型,正在拨号显示下半部半口型,正在录音显示P 型,正在播放语音显示大C 型表示开始查询电话号码E1,E2,E3,E4 灯亮时,表示正在存电话或者正在拨号。
进入编程:输P 911 Enter 数码管显示S 型,表示已进入编程。
以下操作均属于进入编程后的操作:存电话号1 输E1 - - - - - - - Enter存电话号2 输E2 - - - - - - - Enter存电话号3 输E3 - - - - - - - Enter存电话号4 输E4 - - - - - - - Enter加小号[9],以存电话1 为例:输E1 9 P - - - - - - - - Enter 每按1 次P 暂停2 秒,若按两次暂停4 秒录报警语音输1 开始讲话,录音20 秒后,回声嘟声,完毕.报警方式输50 Enter 一旦触发报3 个循环,中间可用密码解除输51 Enter 一旦触发报1 个循环,中间可用密码解除输52 Enter 保持触发才拨号,否则立刻中止拨号更改密码输P - - - - - - Enter [ 3-6 位均可]播放语音输3 2 播放预存之20 秒语音信息查询密码输3 P 可显示密码查询电话码输 3 E1 或3E2,3E3 3E4,可显示预存之电话号查询报警方式输3 5 可显示0、1、2 分别对应3 种报警方式停止报警在数码管显示上半部口型时,输入前 3 位密码时,立刻停止报警。
tiger911拨号器说明书
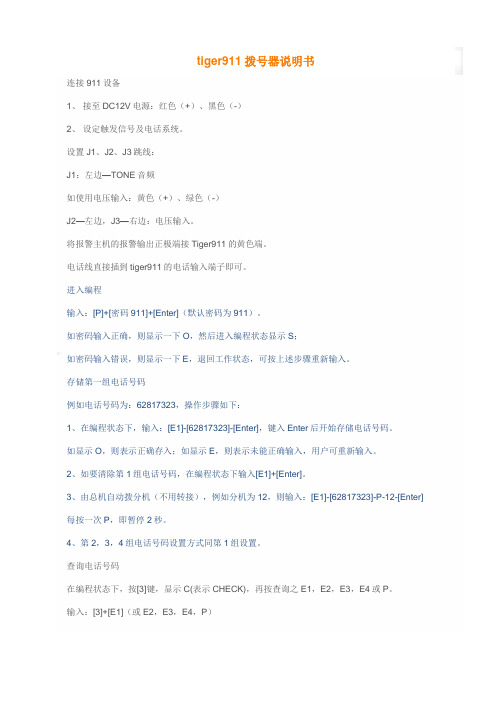
tiger911拨号器说明书连接911设备1、接至DC12V电源:红色(+)、黑色(-)2、设定触发信号及电话系统。
设置J1、J2、J3跳线:J1:左边—TONE音频如使用电压输入:黄色(+)、绿色(-)J2—左边,J3—右边:电压输入。
将报警主机的报警输出正极端接Tiger911的黄色端。
电话线直接插到tiger911的电话输入端子即可。
进入编程输入:[P]+[密码911]+[Enter](默认密码为911)。
如密码输入正确,则显示一下O,然后进入编程状态显示S;如密码输入错误,则显示一下E,退回工作状态,可按上述步骤重新输入。
存储第一组电话号码例如电话号码为:62817323,操作步骤如下:1、在编程状态下,输入:[E1]-[62817323]-[Enter],键入Enter后开始存储电话号码。
如显示O,则表示正确存入;如显示E,则表示未能正确输入,用户可重新输入。
2、如要清除第1组电话号码,在编程状态下输入[E1]+[Enter]。
3、由总机自动拨分机(不用转接),例如分机为12,则输入:[E1]-[62817323]-P-12-[Enter] 每按一次P,即暂停2秒。
4、第2,3,4组电话号码设置方式同第1组设置。
查询电话号码在编程状态下,按[3]键,显示C(表示CHECK),再按查询之E1,E2,E3,E4或P。
输入:[3]+[E1](或E2,E3,E4,P)存储语音信息可存储20秒语音信息。
在编程状态下,1、直接录音。
按[1]键,显示R(表示RECORD)。
输入[1]+开始讲话,录音2、播放语音。
按[3],再按[2]键,显示P(表示PLAY)。
输入[3]+[2]+播放存储的20秒录音存储及查询密码1、存储密码:例如密码为714160(密码为0-6位)输入:[P]+714160+[Enter]2、查询密码:输入[3]+[P]3、按下[RESET]按钮,恢复默认密码911三种编程可选报警方式A、输入[5]+[0]+[enter]:报警信号一旦触发,则连续拨号3次,中间可用密码解除。
无线四防区智能拨号器 说明书

QQ9: 怎样开启、关闭不同方位?
本系统分为四个报警防区,每个防区可备多个门磁、红外或烟雾燃气探测器,通过主机设置,可关闭或开启其 中一个或多个防区。设置方法如下: 开启、关闭的选择 设置的代码 安装时候的选择 防区 1 开启 设防键+1 防区 1 关闭 设防键+2 防区 2 开启 设防键+3 防区 2 关闭 设防键+4 防区 3 开启 设防键+5 防区 3 关闭 设防键+6 防区 4 开启 设防键+7 防区 4 关闭 设防键+8 ★:某个防区关闭后,该防区在接收到报警信息后将不会报警,与遥控器的设防或撤防无关。
QQ14: 方位触发过程说明
四方位智能拨号电话机上锁后,当有人进入方位内或有紧急时,本机将根据您预先设置不同方位相应的号码自 动拨出,拨通后可播放您预先录制的语音. 然后按照接到智能拨号后的处理方法, 进行处理.
QQ15:怎样安装与使用门磁?
门磁探测器安装在活动的门上,首先将门对应位置擦干净,取出无线门磁探测器,在底部贴上双面胶。门缝探 测器安装应注意以下几点: 1.发射器安装在固定的门框上,而磁铁则应安装在活动的门上。 2.磁铁与发射器上下对正,两者之间的距离不应大于 1CM。 3.安装完毕后在开门的瞬间指示灯闪亮表示安装完好。 4.门磁指示灯闪亮一秒表示报警提示,指示灯长亮表示电量不足提示。 5.门缝探测器可用螺丝加固。
QQ10: 怎样设置电话外线断线检测开启?(该功能因为电话线路的差异已经取消)
电话外线断线检测开启:编辑键+7 ★:设置后,在布防状态下,如果电话故障、电话线断或被人恶意剪断,警号会鸣响报警.
根据防区情况 自动拨出电话号码
无线四防区智能拨号器
QQ11: 怎样设置电话外线断线检测关闭?(出厂时已经默认为检测关闭)
VESTA 9-1-1 下一代911呼叫处理解决方案商品说明书

The heart of the VESTA NG9-1-1 SuiteOver 60% of all U.S. 9-1-1 calls are received by the VESTA 9-1-1 call handling solutionsIntegrated VESTA® Map Local quickly identifies caller location VESTA® Analytics offers actionable MIS details VESTA® Network & Security Operations Center offerings help ensure uptime and reliabilityTransform your PSAP with Next Generation 9-1-1 Call Handling solutions from AT&T.Rely on smarter call handling technology, support and services that help improve response times as well as public safety outcomes. VESTA 9-1-1 by Motorola Solutions is one of the most flexible, user-centric voice, data and video emergency call management solutions for PSAPs.Motorola Solutions' VESTA 9-1-1Greater public safety starts here.VESTA 9-1-1 is a smart and flexible emergency call handling system that simplifies operations, allowing you to respond quickly and accurately. The VESTA 9-1-1 system continues to rise to the challenge, helping call takers do their job with confidence. y Born in 2012 and has evolved based on standards and customer feedback to become the most trusted 9-1-1 solutiony Over 14,400 positions in more than 2,400 PSAPS trust VESTA 9-1-1y Powerful ways to support valuable PSAP resources, increase productivity and make it easy to provide fast responses that save livesCoreAdvantages of the Motorola Solutions'VESTA SuiteVESTA ®9-1-1 Call Handlingby Motorola SolutionsSmarter & Safer TM Greater system capacityVESTA 9-1-1 supports up to:y250 Positions per host systemy100 Agenciesy750 Linesy200 Queuesy90 IP Phonesy2,000 AgentsIntegrationsy AT&T ESInet™ Servicey West TXT29-1-1y SIP PBXy RapidSOSy3rd-Party Call RecordingMotorola Solutions' VESTA 9-1-1 Call HandlingDeployed in more than two-thirds of the most populous U.S. cities, VESTA 9-1-1 is unrivaled in its number of deployments and its flexibility to meet the needs of PSAPs of any size.y More than 100,000 Telecommunicators interact with our 9-1-1 equipment every day to protect over 200 million people 24/7y Nearly 150 VESTA call handling systems are in service at Federal and Military installations worldwidey Use of our VESTA Emergency Notification solutions spans over 20 countries and over 20 industriesVESTA 9-1-1 for a better, richer and more intuitiveuser experience.Call takers and PSAP supervisors appreciate the highly configurable user interface that gives them flexibility to customize the console, placing key elements where they need them to more easily and confidently do their jobs.y Multiple layouts and workflowsy Advanced dial directory for best-in-class contact management and dialing controly Roles-based login with PSAP selectiony Automatic Call Distribution (ACD)y Skills-based routingy Dynamic conferencingy Full multimedia and geolocation servicesVESTA® 9-1-1 by Motorola Solutions – p. 2 (A4 012219)Learn more at /ng911Enhance productivity and operational efficiency.Enhanced Auto Attendant functionality, System Health Monitoring and Automatic Abandoned Callback help keep up to 2,000 agents focused and functioning at peak efficiency.This is in addition to other valuable features, including:y VESTA® 9-1-1 Heads-up Display (optional) shows call taker status and overall system statusy Local Survivability to help remote PSAPs continue to take calls when connection to the host PSAP is lost y Direct PSAP Interconnect, allowing multiple consoles at different PSAPs to interact through a transfer orconference cally Multi-agency support (up to 100) y Abandoned Call Queue y Configurable audible alerts y Enhanced IP phoney Enhanced Instant Recall Recorder (IRR)Motorola Solutions' VESTA Map LocalHelp pinpoint callers’ location faster – with greater accuracy – to save more lives.y Optimal user experience provides a detailed interface for managing incidents and expands views pastjurisdictional lines to more easily locate wireless callers on ArcGIS online mapsy Delivers operational efficiencies by saving valuable time with interactive tools, measuring area and distance withaddress and search tools – speeds response times by bringing GIS data to the forefront of decision makingy Helps first responders better serve wireless callers, following their movement and showing a confidence zone oftheir locationsy Utilizes new and powerful Esri technology, enabling a future proof solution and smart investmentyIntegrates seamlessly with VESTA 9-1-1 call handling system for an all inclusive NG9-1-1 call handling solutionSmarter & SaferTMMotorola Solutions' VESTA AnalyticsGet the indisputable facts to run your center more effectively.y Enables sophisticated search and filtering for incident reconstruction, and features an Integrated ScenarioManagement System and optional business intelligence solution for customized data viewsy Provides KPIs specific to the emergency call center and supplies a real-time event list with automatic eventassociation and related detail informationy Permits easy access and maintenance with a highly secure, browser-based application and best-in-class software y Displays critical PSAP Information, allowing trend analysis on call count, call answer times, average wait time andagent availability within the VESTA Analytics DashboardVESTA® 9-1-1 by Motorola Solutions – p. 3 (A4 012219)Learn more at /ng911Motorola Solutions' VESTA® Network & Security Operations CenterThe comprehensive offerings of our VESTA Network & Security Operations Center provide. y Monitoring and Response: Proactive monitoring of key systems to mitigate risksy Virus Protection: Optimizes system security without involving personnel or compromising operations y Patch Management: Helps ensure data integrity, software compliance and system security at all timesy Disaster Recovery: Automatic data "saves" and real-time "snapshots" of all remotely monitored systems to a separate backup systemMotorola Solutions' VESTA® SMSMinimize change, reduce disruption and simplify the learning with this integrated Text-to-9-1-1 solution.y Allows users to switch between active voice and SMS sessions, supports pre-configured messages and routes SMS calls via Policy-based Routing Function (PRF)y Integrates with VESTA Analytics, as well as VESTA Map Local to support location display of SMS calls, and offers configurable waiting times and the ability to manage up to 10 active text sessionsMotorola Solutions' VESTA® CommandPOSTAutomate your operations quickly and easily with our unique and cost-effective mobile 9-1-1 solution.y Extends public safety’s reach, providing remote 9-1-1 call handling capabilities directly at the point of need to keep people connected when it matters mosty Ruggedized mobile package that is also lightweight, portable and versatile to meet Public Safety demandsModernize to NG9-1-1 with a Smarter Partner.Let AT&T — the industry leader in Public Safety emergency communications — help you implementMotorola Solutions' VESTA ® 9-1-1 Call Handling.Smarter technology customized to your PSAP can help simplify your transition to NG9-1-1, improve caller locationaccuracy, clarify incident details as well as improve response times and public safety outcomes.Smarter & SaferTM©2019 AT&T Intellectual Property. All other marks are the property of their respective owners.VESTA® 9-1-1 by Motorola Solutions – p. 4 (A5 041420)Learn more at /ng911i3C omplia nt。
911拨号器说明书
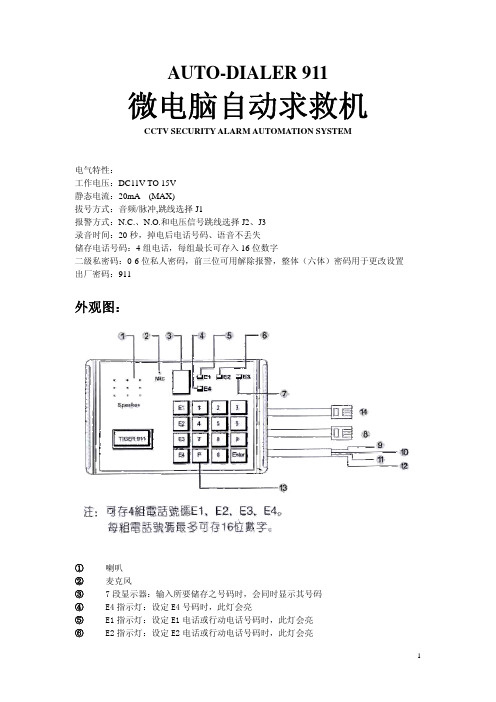
AUTO-DIALER 911微电脑自动求救机CCTV SECURITY ALARM AUTOMATION SYSTEM电气特性:工作电压:DC11V TO 15V静态电流:20mA (MAX)拔号方式:音频/脉冲,跳线选择J1报警方式:N.C.、N.O.和电压信号跳线选择J2、J3录音时间:20秒,掉电后电话号码、语音不丢失储存电话号码:4组电话,每组最长可存入16位数字二级私密码:0-6位私人密码,前三位可用解除报警,整体(六体)密码用于更改设置出厂密码:911外观图:① 喇叭② 麦克风③ 7段显示器:输入所要储存之号码时,会同时显示其号码④ E4指示灯:设定E4号码时,此灯会亮⑤ E1指示灯:设定E1电话或行动电话号码时,此灯会亮⑥ E2指示灯:设定E2电话或行动电话号码时,此灯会亮⑦ E3指示灯:设定E3电话或行动电话号码时,此灯会亮若设定密码时,E1、E2、E3及E4指示灯会亮⑧ 接至电话接头⑨○10 接至DC12V电源,桔色线(或红色)接正电压,咖啡色线(或黑色)接负电压 ○11○12 信号触发线,当接到N.C.或N.O.干接点时,不分极性,作为DC12V电压输入时,蓝色线(或黄色)接正电压,绿色线接负电压○13 P按键可作为以下用途:可储存6位数字作为密码当使用于语音自动回报系统之总机时,可作为暂停时间,按1次,两秒;按2次,4秒,以此类推.有此功能,即可自动打到分机○14 接并联电话机设定触发信号及电话系统:①打开背盖②可看见印刷电路板上有3个跳线座J1、J2、J3,依序并排。
可根据附图调整触发信号及电话系统③ 配合电信局设定电话为TONE或PULSE系统将J1设定于“左边”即为TONE系统将J1设定于“右边”即为PULSE系统④ 触发信号,请根据保全主机或感应器触发后输出接点,选择适当之跳线座组合。
(A)N.C.输入:将J2置于“左边”,J3亦置于“左边”(B)N.O.输入:将J2置于“右边”,J3置于“左边”(C)电压输入:将J2置于“左边”,J3置于“右边”⑤ 设定完成后,请将背盖盖上微电脑自动求救机AUTO-DIALER操作程序开机后先自检:自检完毕后进入工作状态,七段显示器的右下角小数点闪烁,若已存有信息,则收到报警信号后AUTO-DIALER自动开始报警,如要设置或改变设置,按以下步骤可以储存,检查电话号码,密码及录音、放音1 进入编程状态:位)然后按下注意:出厂密码为911例如:新机器未更改密码时进入编程状态操作如下:P ⑨ ① ① ENTER如密码输入正确则显示一下 □ , 然后进入编程状态显示 5若密码输入错误则显示一下 E ,退回工作状态,可按上述步骤重新输入2 储存第1组电话号码:在编程状态下,即显示 5 状态下:例如电话号码为93953399,则操作程序如下:A9○3○5○3○3○99□ ,则表示已正确存入, 然后返回 5 状态,如显示一下E ,则表示未能正确存入,机器会返回 5 状态,用户可重新操作,如要清除第1组电话号码时,只需在 5 状态下B 若先拨至语音自动播报总机,不透过接线员转接,再自动拨到分机,假设分机号码为12,则储存方式如下:9○3○5○3○3○99①②C 每按一次(储存第2、3、4组电话号码方式均与第1组相同)3查询所预存之电话号码:在编程状态下,即显示5状态下,按3键,此时显示匚,表示CHECK,再按所欲查询之E1、E2、E3、E4或PAUSE,显示器开始显示号码,其操作程序如下:或或或显示器开始显示所预存之电4储存及播放求救语音信息:A 本机可储存20秒语音信息,在编程状态下,即5状态下,按1键(此时显示器显示┌表示RECORD),即可直接录音,其操作程序如下:①开始讲话,录音回音嘟响(20秒后录音完毕,即自动停止。
- 1、下载文档前请自行甄别文档内容的完整性,平台不提供额外的编辑、内容补充、找答案等附加服务。
- 2、"仅部分预览"的文档,不可在线预览部分如存在完整性等问题,可反馈申请退款(可完整预览的文档不适用该条件!)。
- 3、如文档侵犯您的权益,请联系客服反馈,我们会尽快为您处理(人工客服工作时间:9:00-18:30)。
911拨号器说明书
911拨号器是由我们自行开发的一款产品,使用简单,方便携带,并且拥有良好的性能。
本产品具有以下优点:-使用简单,容易上手;-方便携带。
-可连接笔记本电脑的紧急通话设备等功能更多,操作更方便;-无需电池。
产品详情:请见本说明书。
1. 产品包装
[表格][结束上表]产品包装的内包装为:说明书、合格证、保修卡等。
2. 使用说明和注意事项
请将本品安装在你的笔记本电脑上,并保证其处于开机状态。
使用本品的前提是:必须连接到一个网络或者电话线上(不包括有线网)。
请将本产品放置在干燥,通风良好的地方保存。
由于本产品体积较
小,使用时应注意避免磕碰和跌落。
请务必在正常条件下操作本品,如果发现任何异常现象,请立即停止使用此产品,并联系客服进行处理。
当您使用本品的同时也可以拔打911报警电话。
3. 保修条件
-产品质保期为一年。
-您可以选择通过当地经销代理商或者本公司进行保修。
-在保修期内,如果产品出现质量问题,我们会根据您的要求免费为您维修。
-维修时请带上你的发票、购物小票、保修卡和产品包装盒中所有物品以便在保修期间内进行保修。
4■注意事项
-请务必使用原装电池,以免发生爆炸;-请勿在高温环境下操作本产品。
-当你用它来拨打紧急电话时,请把它和随身携带的电话保持距离。
-当拨打紧急电话时,请注意不要把机器与他人或者其他设备放置。
