UsbBlaster仿真器说明书
EDA实验箱简介及USB-Blaster下载器的使用[1]
![EDA实验箱简介及USB-Blaster下载器的使用[1]](https://img.taocdn.com/s3/m/10a3bc0e76c66137ee061954.png)
1、KHF-5实验系统简介 2、USB-Blaster下载器介绍 3、QuartusII下USB-Blaster的使用 4、实验任务
copyright@2008.9-电子基础教学实验中心.邹云海
自行研发的USBBlaster下载器,通 过JTAG方式下载
1、KHF-5 EDA实验系统简介
共阴数码管显示区 LED指示灯,高电平点亮
74138作译码做动 态位选扫描显示
7段直接 静态显示
行列式键盘
FPGA主芯片背板,系 列:ACEX1K;型号: EP1K100QC208-3
单次脉冲
自锁按键开关,按下为高电平
copyright@2008.9-电子基础教学实验中心.邹云海
左起第1个 左起第2个 左起第3个 左起第4个 左起第5个 左起第6个 左起第7个 左起第8个 左起第9个 左起第10个 左起第11个 左起第12个 左起第13个 左起第14个 左起第15个 左起第16个
复用做单次脉冲开关KP1 复用做单次脉冲开关KP2 复用做单次脉冲开关KP3 复用做单次脉冲开关KP4
动态扫描显示,用 74LS138做位选译码
独立静态显示, 单独IO口控制
16个LED指示 灯,高电平灯亮
copyright@2008.9-电子基础教学实验中心.邹云海
KHF-5常用连接介绍(1/2)
FPGA主芯片信号为ALTERA公司ACEX1K系列 (Family)的EP1K100QC208-3(Devices) 本实验箱FPGA芯片由50MHz晶振提供振荡频 率,接至FPGA的P183管脚 ; 本实验箱中有16个数据开关(SW1-SW16),4 个脉冲开关(KP1-KP4)。在通常状态下数据开 关和脉冲开关为低电平。数据开关和脉冲开关可 配合使用,也可单独使用。 若二者配合使用,在数据开关为低电平时,按下 脉冲开关则产生一个高电平脉冲;在数据开关为 高电平时,按下脉冲开关则产生一个低电平脉 冲。
USB Blaster安装和使用手册

安装和使用手册安装和使用手册 (1)1. USB B l ast er图片 (3)2. USB Blaster下载线特性 (3)3. 系统配置 (4)4. 产品清单 (4)5. 注意事项 (4)6. 接口定义 (4)7. USB-Blaster安装过程 (6)8.SignalTap II逻辑分析仪使用方法 (9)9. 用AS模式下载口对EPCSx配置器件编程 (16)10. 用JTAG接口对FPGA编程 (19)11. 异常处理 (20)1、USB B l ast er图片图片下载线特性2、USB Blaster下载线特性1、 真正完美支持 1.2V 到 5V 的 J TAG/ASP IO 电压(部分型号只支持 2V 到 5V);2、 支持 S ignalTap 嵌入式逻辑分析仪功能3、 支持 A LTERA 公司的全系列器件-- CP LD:MAX3000、MAX7000、MAX9000、和 M AXII 等系列-- FPGA:Stratix、Stratix II、StratixIII、Stratix IV、HardCopy I、HardCopy II、HardCopy III、 HardCopy IV、Cyclone I、Cyclone II、Cyclone III、Cyclone IV、ACEX1K、ACEX20K 和 A CEX10K 等-- 主动串行配置器件:EPCS1、EPCS4、EPCS16 等以及其它第三方配置器件-- 增强型配置器件:EPC1、EPC4、EPC16 等。
4、 支持三种下在模式:EPCI、EPCS4、EPCS16 等;5、 支持与 N ios II 嵌入式软核处理器的通信和在系统调试;6、 速度快:比常用的并口下载线 B yteBlasterII 快 6倍;7、 使用方便:USB 接口连接方便,2 个状态指示灯使调试更加得心应手;8、必须:目前笔记本电脑几乎已经淘汰了并口,所以常用的 B yteBlasterMV 和 B yteBlasterII下 载线都已经不能在笔记本上使用,所以对于笔记本用户来说,选用 USB 下载线即时方便, 更是必须;9、 完全兼容 A LTERA USB B laster,使用方法和性能都和 A LTERA 原厂下载线一致。
USB_Blaster安装和使用

6安装USB下载线驱动安装软件以后,我们还需要安装USB BLASTER(下载线)的驱动。
USB BLASTER 的驱动是有Quartus II软件提供的在安装过程中,大家要注意点,就是驱动的路径是:X:\altera\11.1\quartus\drivers\usb-blaster千万不要进入X32或x64文件路径下。
如果您是WIN7系统用户,如果出现不能安装的情况,请将防火墙,杀毒软件都关掉,然后重新安装。
在这里,我简单说明一下USB下载线的使用方法。
支持两种下载方式,一种是JTAG方式,一种是AS方式。
对应的在核心板上有两个10针的接口,上面有标识AS口和JTAG口。
USB下载线一端与电脑的USB口相连接,另一端与JTAG口或者AS口相连。
在同一时刻,我们只能使用其中一个接口。
其中JTAG方式负责FPGA在线仿真,程序通过USB下载线下载到FPGA内部SRAM 中。
由于FPGA是基于SRAM技术的,所以掉电以后,程序会丢失;AS方式是将程序下载到FPGA外部的配置芯片EPCSX中的,EPCSX实质是一种串行FLASH,因此,掉线以后,程序不会丢失。
每次上电,EPCSX中的程序都会自动加载到FPGA 中,然后再开始运行。
USB BLASTER本身就有仿真和下载两种功能,因此,FPGA开发过程中只需要USB BLASTER既可以实现在线仿真和程序固化两个功能。
其中JTAG方式主要用于在线仿真,而AS方式用于最终的程序固化到外部的配置芯片EPCSX中。
程序下载测试上述过程都完成以后,接下来,我们就要试试是否可以进行下载程序了,您也一定期待已久了吧,那现在我们就开始吧。
在光盘中,我们为大家准备了已经编译好的固件测试程序,在文件夹测试固件下。
下面我将为大家演示如何进行下载测试。
在这里要首先要说一下,拿到光盘以后,建议大家先将光盘内容拷贝到硬盘中,还有一点要注意的,就是不要放到含有中文和空格的路径下。
usb blaster 制作
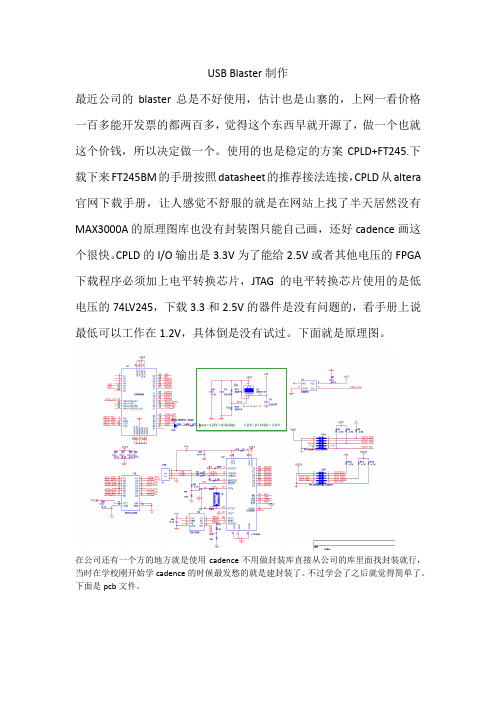
USB Blaster制作最近公司的blaster总是不好使用,估计也是山寨的,上网一看价格一百多能开发票的都两百多,觉得这个东西早就开源了,做一个也就这个价钱,所以决定做一个。
使用的也是稳定的方案CPLD+FT245.下载下来FT245BM的手册按照datasheet的推荐接法连接,CPLD从altera 官网下载手册,让人感觉不舒服的就是在网站上找了半天居然没有MAX3000A的原理图库也没有封装图只能自己画,还好cadence画这个很快。
CPLD的I/O输出是3.3V为了能给2.5V或者其他电压的FPGA 下载程序必须加上电平转换芯片,JTAG的电平转换芯片使用的是低电压的74LV245,下载3.3和2.5V的器件是没有问题的,看手册上说最低可以工作在1.2V,具体倒是没有试过。
下面就是原理图。
在公司还有一个方的地方就是使用cadence不用做封装库直接从公司的库里面找封装就行,当时在学校刚开始学cadence的时候最发愁的就是建封装了。
不过学会了之后就觉得简单了。
下面是pcb文件。
为了省钱pcb的尺寸是5*5CM的这个尺寸好几个厂家都是50元作10块的有一个是深圳嘉力创还有一个是捷易顺,我选的是第二家因为他家的黑色阻焊不需要多加钱。
第一家需要加钱。
算上邮费也刚72块钱还是很便宜的。
而且一周就可以拿到货了。
下面是生产回来的pcb。
生产回来之后立刻用中午休息的一个小时焊接了两块出来,测量没有短路之后插上usb,测量电压发现4V多,立马断开了检查问题,找来找去发现是FT245的1脚被我删掉了,虽然焊接的时候对了一下但是给搞错了。
用烙铁拆下来有焊接了回去,插上usb电压正常了,整个板子就这个芯片贵,最后还好没坏,真是万幸。
用另一个下载器把CPLD程序下载进去,程序稍稍做了一下改动正常插上usb的时候指示灯是不亮的,只有当下载程序的时候是亮的,我给她做了个反向让他插上的时候是亮的下载的时候是不亮的正好可以当作电源指示。
USB Blaster驱动安装说明
USB-Blaster 快速安装向导
杰瑞电子工作室 /
尊敬的用户,感谢您购买本工作室的USB-Blaster 产品。
下面对本产品的驱动安装过程作简单说明。
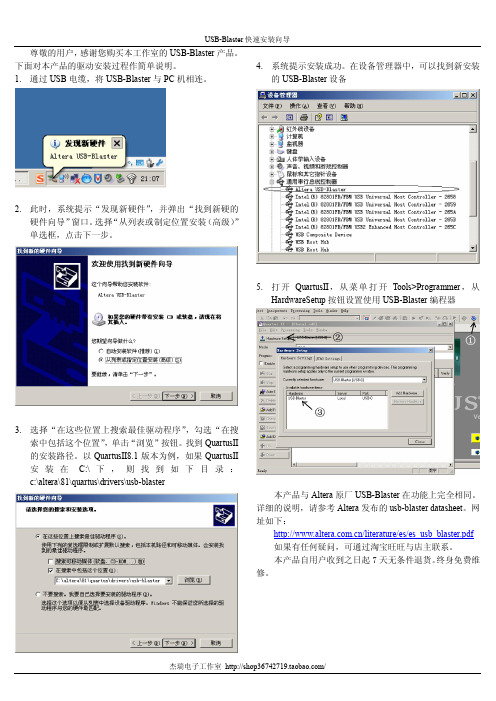
1. 通过USB 电缆,将USB-Blaster 与PC 机相连。
2. 此时,系统提示“发现新硬件”,并弹出“找到新硬的
硬件向导”窗口。
选择“从列表或制定位置安装(高级)”单选框,点击下一步。
3. 选择“在这些位置上搜索最佳驱动程序”,勾选“在搜
索中包括这个位置”,单击“浏览”按钮。
找到QuartusII 的安装路径。
以QuartusII8.1版本为例,如果QuartusII 安装在C:\下,则找到如下目录:
c:\altera\81\quartus\drivers\usb-blaster
4. 系统提示安装成功。
在设备管理器中,可以找到新安装
的USB-Blaster 设备
5. 打开QuartusII ,从菜单打开Tools>Programmer ,从
HardwareSetup 按钮设置使用USB-Blaster 编程器
本产品与Altera 原厂USB-Blaster 在功能上完全相同。
详细的说明,请参考Altera 发布的usb-blaster datasheet 。
网址如下:
/literature/es/es_usb_blaster.pdf 如果有任何疑问,可通过淘宝旺旺与店主联系。
本产品自用户收到之日起7天无条件退货。
终身免费维修。
USB Blaster使用说明

首先安装QuartusII软件,指定合法的授权文件, 将USB-Blaster编程器的USB口插入计算机, 如果是第一次使用USB-Blaster,将出现以下窗口, 选择如下路径中的驱动程序:FTD2XX.sys
3、设置与配置
如下图接好,并与PC机相接
用QuartusII打开测试程序
USB-Blaster下载方式
设置In-System Memory Content Editor
ห้องสมุดไป่ตู้
In-System Memory Content Editor 应用
杭州康芯电子有限公司
E-Mail:eda82@ span88@
地址:浙江 杭州 文一西路 西斗门7号7楼 310012 电话:0571-88914587/3;0571-85525171,传真:
设置USB硬件端口
2、点击此按纽 1、选择JTAG
4、 在此出现USB-Blaste
3、如果出现“USB-Blaster” 说明,USB-Blaste编程器安 装连接正确,双击此项!
5、 关闭
编程成功!
对FPGA配置
打开对FPGA EP1C6的示例工程
将SOF文件通过USB口载入FPGA中
USB BLASTER用户手册

USB Blaster 使用手册2008年2月3日一、USB Blaster 的介绍USB Blaster全面兼容Altera的USB Blaster下载电缆,通过计算机的USB接口可对Altera的FPGA/CPLD以及配置芯片进行编程、调试等操作。
器件支持:支持的Altera FPGA/CPLD器件如下:Stratix II、Stratix GX及Stratix系列Cyclone II及Cyclone系列APEX II 及APEX 20K系列ACEX 1KMercuryFLEX 10K、FLEX 10KE和FLEX 10KA全系列ExcaliburMAX 3000、MAX 7000和MAX II全系列支持的配置芯片如下:EPC2, EPC4, EPC8, EPC16, EPC1441EPCS1, EPCS4, EPCS16,EPCS64支持的目标板IO电压:1.5V、1.8V、2.5V、3.3V、5V支持SignalTap II 嵌入式逻辑分析仪功能支持三种下载模式(AS、PS和JTAG)电源需求:■从USB电缆端提供直流5.0V;■从目标板下载接口提供直流1.5V 至5.0V。
软件需求:Windows 2000和XP 操作系统。
需要安装QuartusII4.0 及以上版本。
Quartus II Programmer (编程或配置操作需要)Quartus II SignalTap II logic analyzer (逻辑分析操作需要)Quartus II Programmer (standalone version)Quartus II SignalTap II logic analyzer (standalone version)二、硬件连接请按如下步骤顺序操作:1. 关掉目标板电源。
2. 将USB 电缆一端接到PC 或笔记本电脑上的USB 接口,另一端接到USB Blaster。
3. 将USB Blaster 的10PIN Female(母头)接头按照方向指示连接到目标板上的下载接口。
粤嵌嵌入式实验室-USB_Blaster使用说明
USB-Blaster使用说明粤嵌教育新浪官方微博/gecedu粤嵌教育官方网站USB-Blaster功能SOF文件对FPGA的配置下载POF文件通过AS模式对EPCS系列Flash的编程下载POF文件通过JTAG模式对CPLD编程下载JIC文件通过JTAG口对于FPGA配置器件EPCSx的编程下载IDE环境中NiosII软件下载和调试SignalTapII逻辑分析仪使用In-System Memory Content Editor应用USB-Blaster编程器USB-Blaster编程器组件包括:1、USB-Blaster编程器一个;2、USB通信线一条,10芯线一条;3、使用说明书1本。
USB-Blaster编程器USB-Blaster下载线基本特性1.稳定支持SignalTap II 嵌入式逻辑分析仪功能2.支持ALTERA 公司全系列器件。
◇ CPLD:MAX3000、MAX7000、MAX9000 和MAXII 等◇ FPGA:Stratix、StratixII、StratxIII、Cyclone、CycloneII、CycloneIII、ACEX1K、APEX20K和FLEX10K等◇主动串行配置器件:EPCS1、EPCS4、EPCS16、EPCS64等◇增强配置器件:EPC1、EPC4 等。
3.支持三种下载模式:AS、PS和JTAG;4.支持与Nios II 嵌入式软核处理器的通信和在系统调试5.速度快:比常用的并口下载线ByteBlasterII快6倍;10PIN 接口引脚定义 TDI STATUS TMS TDO TCK USB-Blaster JTAGNCnCS3,3VnCEGNDo o o o o o o o o o 采用Altera 标准10PIN 接口引脚定义系统配置1、支持WindowsXP,Windows Vista, Windows7系统,USB接口;2、Quartus II 版本4.0,即其以上;驱动程序安装首先安装QuartusII软件,指定合法的授权文件,将USB-Blaster编程器的USB口插入计算机,如果是第一次使用USB-Blaster,将出现以下窗口,选择如下路径中的驱动程序:FTD2XX.sys设置与配置用QuartusII打开示例程序设置与配置1、点击Tools2、点击此按钮设置USB硬件端口1、选择JTAG2、点击此按纽3、如果出现“USB-Blaster”说明,USB-Blaste编程器安装连接正确,双击此项!4、在此出现USB-Blaste5、关闭下载成功点击此按钮。
USB_Blaster用户手册
USB Blaster用户手册/wiki/USB_Blaster_Manual#.E8.BF.9E.E6.8E.A5.E5.88.B0PC.E6.9C.BA产品相关介绍产品简介USB Blaster适用于ALTERA CPLD/FPGA器件,可以通过计算机的USB接口对器件及其配置芯片进行编程、调试等操作。
USB Blaster功能简述- 支持ALTERA 公司全系列CPLD/FPGA器件- 支持ALTERA公司全系列主动串行配置器件- 支持ALTERA公司全系列增强配置器件- 支持AS﹑PS﹑JTAG三种下载模式- 高速、稳定,内部采用FT245R+CPLD设计- 支持1.2-5V编程电压- 支持 SignalTap II 嵌入式逻辑分析仪- 支持Nios II嵌入式处理器的通信和调试支持的软件- Quartus II集成开发环境- NIOS II IDE 集成开发环境- NIOS II EDS集成开发环境支持的器件- CPLD:MAX3000、MAX7000A/B/S、MAX9000和MAX II 等- FPGA:Stratix、Stratix II、Cyclone、Cyclone II、CycloneIII、ACEX 1K、APEX 20K 和FLEX 10K等- 主动串行配置器件:EPCS1、EPCS4、EPCS16等- 增强配置器件:EPC1、EPC4 等- 新器件不断增加中......产品特性- 采用高速下载方案:FT245+CPLD+244,下载速度接近原装ALTERA USB BLASTER - 相比其它下载方案,如68013或C8051F等方案,速度快1-3倍与PC机的连接- 通过USB 2.0接口与计算机连接与目标板的连接- 通过JTAG、AS或PS接口与目标板连接USB Blaster状态灯说明- 红灯是电源灯- 绿灯是信号指示灯。
进行软件下载时,绿灯闪烁说明下载正常Altera USB Blaster用户手册(英文)Altera USB Blaster用户手册参考设备连接设备连接与软硬件平台一个完整的CPLD/FPGA开发环境,需具备“软件开发平台”和“硬件开发平台”。
Altera下载线USB Blaster用户手册
Altera下载线USB Blaster使用手册
北京联华众科科技有限公司
Revision record 修订记录
Date 日期
Revisi CR Section Change Description on ID / Number 修改描述 Versi Defect 修 改
产品名称Product name Altera下载线USB Blaster使用手册 产品版本Product version 1.0
密级Confidentiality level 普通
Total 26pages 共26页
Altera 下载线 USB Blaster使用手册
Prepared by 拟制
Reviewed by 评审人
on ID 章节 修 订 CR号
版本
Author 作者
北京联华众科科技有限公司 All rights reserved 版权所有,侵权必究
Page 2 , Total 26 第2页,共26页
Altera下载线USB Blaster使用手册
北京联华众科科技有限公司
Content 目 录
1 概述 ........................................................................................................................................6 2 硬件连接 .................................................................................................................................7 3 安装驱动 .................................................................................................................................9 4 下载线设置 ...........................................................................................................................14 5 下载 ......................................................................................................................................19 5.1 JTAG方式-下载程序到FPGA内 .......................................................................................19 5.2 AS方式-下载程序到配置芯片内.......................................................................................22
USB-Blaster下载线使用指南
USB Blaster 下载线使用指南感谢您使用达尔EDA工作室提供的USB-Blaster下载线,对于第一次使用该下载线的用户可按以下说明进行操作,说明过程已经尽量做到详细,如您在使用过程中还有不了解的地方可联系我们进行咨询。
一、USB Blaster 驱动安装首次使用时,将附带的USB线缆(A-B型)一头连接USB Blaster 一头连至PC端。
此时将会跳出“找到新的硬件向导”如下图:选择“否,暂时不”,点击下一步;选择“从列表或制定位置安装(高级)”,点击下一步:勾上“在搜索中包括中个位置”在此处将路径指向QuartusII安装路径下的quartus\drivers\usb-blaster路径。
Quartus的在安装过程已经usb blaster 驱动的放置在该路径下。
由于USB Blaster驱动是没有通过Windows微标测试的程序,所以安装过程会跳出以上窗口,这里选择“仍然继续”。
出现以上程序安装进度条。
驱动安装完成时,出现以上界面,点击完成退出安装。
二、QuartusII软件设置打开QuartusII软件,新建一个工程并生成配置文件或打开现有工程,点击工具栏的下载图标,出现程序数据下载界面如下,由于没有选择下载线,所以显示“No Hardware”,点击Hardware Setup。
安装过USB Blaster驱动程序后可在以上Hardware Setup窗口中的Available Hardware items:栏中看到USB Blaster下载线的信息,此时用鼠标双击栏中的USB Blaster字符以选中该下载线。
在Curently selected hardware显示的是被选中的下载线,此时应该显示“USB-Blaster[USB-0]”表示当前使用的是USB Blaster类型下载线,如下图:点击Close完成下载线配置。
回到下载界面可看到USB-Blaster下载线已被启用,见下图:至此下载线已安装并配置完成。
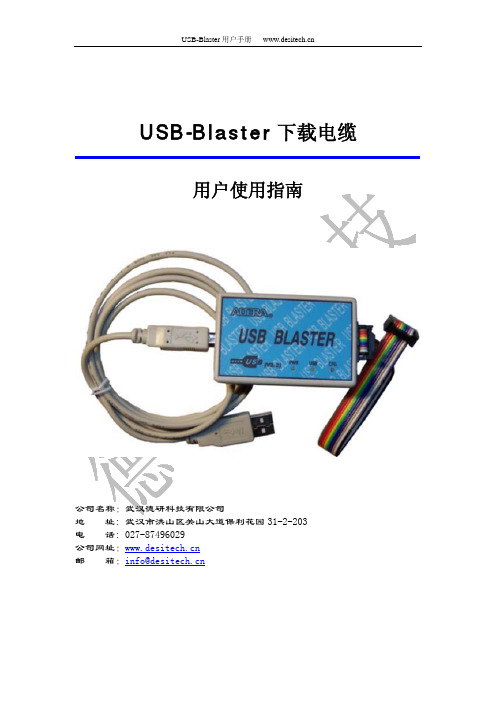
altera+USB-Blaster使用指南
3
USB-Blaster 用户使用指南
图 1-3 安装驱动第一步
3. 选择“是,仅这一次(Y)”后,点击【下一步】继续,如图 1-4 所示。
图 1-4 安装驱动第二步
4. 选择“从列表或指定位置安装(高级)(S)”后,点击【下一步】继续,如 图 1-5 所示。
图 1-7 安装驱动第五步
8. 进入“设备管理器”,查看硬件安装是否正确。正确安装 USB-Blaster 驱 动后,会在“通用串行总线控制器”中出现“ALTERA USB-Blaster”的 设备。如图 1-8 所示。
第二章 USB-Blaster 规格指标 ...............................................................................10
USB-Blaster 的连接关系 .....................................................................................10 电压要求........................................................................................................10 下载电缆的连接............................................................................................10 USB-Blaster 的下载连接头 ..........................................................................11 目标板下载插座............................................................................................12
USB_Blaster用户手册-推荐下载
USB Blaster用户手册/wiki/USB_Blaster_Manual#.E8.BF.9E.E6.8E.A5.E5.88.B0PC.E6.9C.BA目录[隐藏]∙ 1 产品相关介绍o 1.1 产品简介o 1.2 Altera USB Blaster用户手册(英文)∙ 2 设备连接o 2.1 设备连接与软硬件平台o 2.2 连接到PC机o 2.3 连接到目标板的接口简介∙ 3 软件使用说明o 3.1 软件简介o 3.2 利用JTAG接口在线配置FPGA(掉电后配置丢失,需要重新下载)o 3.3 利用JTAG接口编程串行配置器件(掉电后配置不丢失)产品相关介绍产品简介USB Blaster适用于ALTERA CPLD/FPGA器件,可以通过计算机的USB接口对器件及其配置芯片进行编程、调试等操作。
USB Blaster功能简述- 支持ALTERA 公司全系列CPLD/FPGA器件- 支持ALTERA公司全系列主动串行配置器件- 支持ALTERA公司全系列增强配置器件- 支持AS﹑PS﹑JTAG三种下载模式- 高速、稳定,内部采用FT245R+CPLD设计- 支持1.2-5V编程电压- 支持 SignalTap II 嵌入式逻辑分析仪- 支持Nios II嵌入式处理器的通信和调试支持的软件- Quartus II集成开发环境- NIOS II IDE 集成开发环境- NIOS II EDS集成开发环境支持的器件- CPLD:MAX3000、MAX7000A/B/S、MAX9000和MAX II 等- FPGA:Stratix、Stratix II、Cyclone、Cyclone II、CycloneIII、ACEX 1K、APEX 20K 和FLEX 10K等- 主动串行配置器件:EPCS1、EPCS4、EPCS16等- 增强配置器件:EPC1、EPC4 等- 新器件不断增加中......产品特性- 采用高速下载方案:FT245+CPLD+244,下载速度接近原装ALTERA USB BLASTER- 相比其它下载方案,如68013或C8051F等方案,速度快1-3倍与PC机的连接- 通过USB 2.0接口与计算机连接与目标板的连接- 通过JTAG、AS或PS接口与目标板连接USB Blaster状态灯说明- 红灯是电源灯- 绿灯是信号指示灯。
USB Blaster DIY 教程
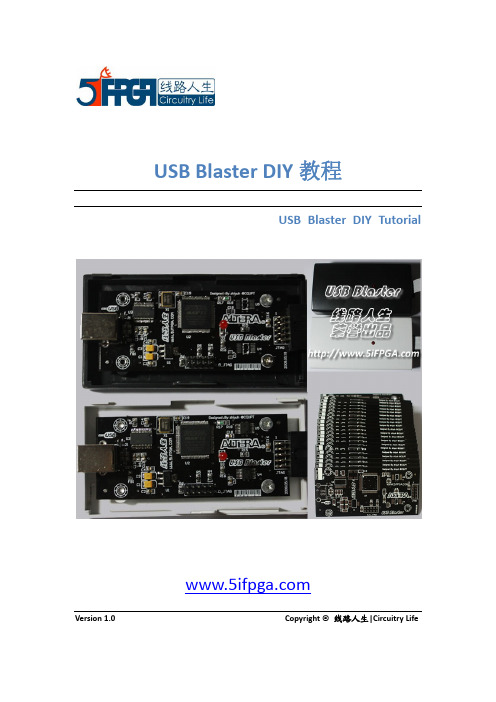
USB Blaster DIY 教程 USB Blaster DIY Tutorial Version 1.0 Copyright © 线路人生|Circuitry Life 线路人生|Circuitry Life 版本修订记录 Version 1.0 Author zhiyuh Data 2009‐06‐23 USB Blaster DIY 教程 Description First draft. 备注:关于修订的说明 ~ 2 ~ 线路人生|Circuitry Life USB Blaster DIY 教程 目录 1. 模块介绍 ........................................................................................................................... 4 1.1 1.2 模块主要功能 ............................................................................................................ 4 模块适用范围 ............................................................................................................ 4 2. 包装清单 ........................................................................................................................... 4 2.1 2.2 DIY 套件模块包装清单 ............................................................................................. 4 安装说明 .................................................................................................................... 4 3. 硬件说明 ........................................................................................................................... 5 3.1 3.2 3.3 电路概述 .................................................................................................................... 5 MAX3378 进行电平转换 ........................................................................................... 5 使用 MAX II 自身特性进行电平转换 ....................................................................... 5 4. 编程和安装驱动 ............................................................................................................... 6 4.1 4.2 4.3 准备好相应的文件和软/硬件工具 .......................................................................... 6 相关软件的安装 ........................................................................................................ 6 编程 CPLD .................................................................................................................. 8 4.3.1 新建一个工程 ......................................................................................................... 8 4.3.2 加入相应的文件 ...................................................................................................... 9 4.3.3 新建 bdf 文件........................................................................................................ 11 4.3.4 锁定引脚 ................................................................................................................ 12 4.3.5 编译项目 ............................................................................................................... 12 4.3.6 编程 CPLD ............................................................................................................. 13 . 4.4 编程 FT245RL 中的 EEPROM ................................................................................... 14 4.4.1 安装 FT245 的驱动 ............................................................................................... 14 4.4.2 编程 EEPROM ........................................................................................................ 16 4.5 5. 6. 7. 8. 安装 USB Blaster 的驱动 ......................................................................................... 17 器件清单(BOM) ......................................................................................................... 20 使用注意事项 ................................................................................................................. 21 技术支持 ......................................................................................................................... 22 硬件原理图 ..................................................................................................................... 22 ~ 3 ~ 线路人生|Circuitry Life USB Blaster DIY 教程 1. 模块介绍 1.1 模块主要功能 数字系统和 SOPC 设计在广大学生和爱好者中已经形成了一定的学习氛围和规模,开发 工具(下载电缆)是必不可少的,以前可以使用廉价的并口下载电缆 ByteBlaster II。
Sound Blaster Tactic3D Rage USB 游戏头沿说明书

Congratulations!System RequirementsMinimum Requirements5128712Recommended Requirements2Note:Your Headset At a GlanceSound Blaster Tactic3D Rage USB Gaming Headset 211-Adjustable headband2-Detachable noise-cancelling microphone123541-Microphone mute LED2-Microphone jack3-4-pole analog jack 4-Volume control wheel 5-Micro-USB portUsing Your Sound Blaster Tactic3D Rage USBSetting Up for Initial UseStep1: Connect the headsetStep2: Set the default audio device(Mac OS ONLY)1.and click Sound.2.Rage USB"in both the Output and Input tabs.Step3:Wear itheadset rests lightly on your head.Do not tighten excessively.Step4: Downloading and Installing the SoftwareNote:1.2.3.and launch the software package.4.the on-screen instructions to complete the installation.5.prompted,restart your computer.6.the application by clicking Start>Programs or All Programs>Creative> SoundTactic(3D)>Sound Blaster Tactic(3D)Control Panel".1.your web browser,visit creative and locate the software package for the Mac OS for your2.this package into your local hard disk.3.the downloaded file to uncompress it.4.the uncompressed DMG file.5.the Install icon and follow the subsequent on-screen instructions to complete the6.the application from the Applications>Creative> Sound Blaster Tactic(3D)>Blaster Tactic(3D)Control Panel.details on the software and the various features it has to offer,please refer to Using theAdjusting the VolumeThe Volume Control Wheel on the headset cup can be used to adjust your headsetvolume to a comfortable level.You can also adjust the volume via the software orthe in-built volume settings on your computer.CAUTION:Do not listen to audio on your headset at high volumes for prolonged periods oftime to avoid impairing your hearing.Connecting to Smart Devicesthe power of the Sound Blaster Tactic3D Rage USB gaming headset on-the-go with portabledevices including iPhones,android phones and tablets.Simply connect the headset using the4-to4-pole analog cable.The headset draws power directly from the smart device for operation.Note:Ear cup illumination and SBX Pro Studio enhancements are not available when the headset is connected to any device via the4-pole jack.If both the analog cable and the USB cable are connected to the same device(such as on alaptop),the USB cable connection is prioritized unless manually configured otherwise.Usage ScenariosPlaying GamesRestoring Audio Effects in Games with Creative ALchemy7 1.2.3.4.1.2.3.Note:Communicating with Voice over Internet Protocol(VoIP)Using the SoftwareNotes:Installation and Uninstallation-WindowsInstallingNotes:1.2.3.and launch the software package.4.the on-screen instructions to complete the installation.5.prompted,restart your computer.6.a number of configurations that help you control the basic functions of yoursoftware enhancement configurations that can be made to heighten yourClick each of the menu bars to expand the configurations available.Uninstallingan uninstallation is required(such as for upgrades),please follow the following1.>Control Panel>Uninstall a program.2.Sound Blaster Tactic(3D)entry.3.button.Account Control dialog box appears,click the Continue button.4.button.5.restart your computer.Installation and Uninstallation-MacInstallingNotes:1.2.3.the downloaded file to uncompress it.4.the uncompressed DMG file.5.the Install icon and follow the subsequent on-screen instructions to complete the6.the application from the Applications>Creative> Sound Blaster Tactic(3D)>Blaster Tactic(3D)Control Panel.includes a number of configurations that help you control the basic functions of your plus several software enhancement configurations that can be made to heighten yourperformance.Click each of the menu bars to expand the configurations available.Uninstallingevent that an uninstallation is required(such as for upgrades),please follow the following1.Applications>Creative> Creative Uninstaller.2.the Creative products to be uninstalled.3.the Uninstall button.4.the on-screen instructions.Using the Sound Blaster Tactic(3D)Control PanelManaging Your Profiles1.2.1.Control Panel2.the active profile.and[Export] Note:Customizing Your Display AvatarAdjusting Your Volume SettingsConfiguring your general settingsthe top of the and the the list.Enhancing the Audio-SBX Pro Studio1.checkbox next to one or more of the available enhancements to enable it.2.the level of enhancements to be applied individually.3.to play the demo video to test your configurations.4.if necessary.includes a number of enhancements for movies and gaming,elevating your movie and to the next level.These include:-restores the natural dynamic range that is lost when music files(iTunes and gets compressed.This makes the music sound as good as the artist originally intended, an enhanced level of realism for movies and games.-provides immersion control to enhance the natural sense of audio depth and by creating virtual surround sound channels.Stereo content or multi-channel will sound as if its coming from all sides while voices remain centered in front andbalance and timbre is preserved.-fills in the missing low frequency tones and gives the extra impact for a better enter-experience.Consumers no longer have to tolerate a lack of bass in speakers as thetechnology dramatically improves the sound experience even in the absence of aPlus-enhances the voices in movies for clearer dialog,allowing the listener to dialog over the rest of the soundtrack and over ambient noise in the listening envi-Volume-addresses the problem of abrupt volume level changes during playbacksongs by continously measuring volume automatically,applying gain and atten-intelligently to compensate for any changes.Enhancing the Microphone-VoiceFX™1.VoiceFX checkbox to enable this feature.2.VoiceFX preset from the drop down menu and click[Test].Speak into your microphoneto your voice with the selected VoiceFX preset applied.3.below to adjust the VoiceFX settings as desired.Test and readjust as necessary.4.to save the adjusted settings into a new preset or click[Delete]to delete theNote:list of VoiceFX presets cannot be deleted.Equalizer SettingsSettings interface,select"Equalizer"from the menu.To apply and adjust an1.EQ checkbox to enable the use of the equalizer.2.drop down menu,select the preset to use.3.vertical slider bars to achieve your desired level.4.to save the changes to the active preset or to a new preset.any user created equalizer presets by selecting the preset from the drop down[Delete].Notes:equalizer presets cannot be deleted.Customizing the Illumination and Theme161.RGB Color"option and use the color picker below to select a LED color for your2.down menu,select the idle time before the LED is switched to standby mode.3.and Pulsation settings for the LED using the two slider bars.4.along with tune"option enables the earcup LED illumination to pulsate according toplaying music track.General Specifications ConnectivityInterfacesSBX Pro Studio TechnologyTroubleshootingWhat do the various LED statuses mean?Headset LEDsThe onboard audio chipset seems to be in conflict with Sound Blaster Tactic3D Rage USB.No sound from the headset.There is clipping/distortion during audio playback.Some features are disabled when playing certain games.Safety InformationAvoid Hearing DamagePermanent hearing loss may occur if the Sound Blaster Tactic3D Rage USB headset is used at high volume.Set the volume to a safe level.You can adapt over time to a higher volume of sound that may sound normal but can be damaging to your hearing.If you experience ringing in your ears or muffled speech,stop listening and have your hearing checked.The louder the volume,the less time is required before your hearing could be affected.Hearing experts suggest that to product your hearing:l Limit the amount of time you use the Sound Blaster Tactic3D Rage USB headset at high volume.l Avoid turning up the volume to block out noisy surroundings.l Turn the volume down if you can't hear people speaking near you.。
Sound Blaster EVO USB 娱乐头戴式耳机说明书
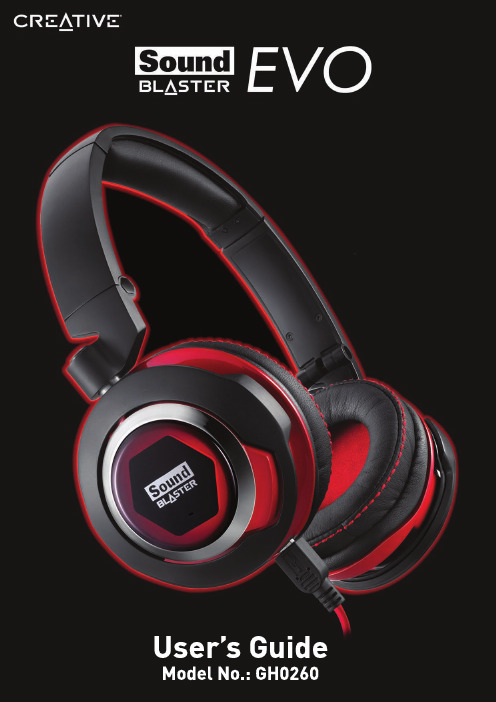
U s e r’s G u i d e M o d e l N o.:G H0260Congratulations!Package ChecklistMinimum System Requirements2.287 Note:Overview OR213451-Adjustable Headband 2-Volume Control 3-Multifunction Button (for calls and playback)4-4-Pole Analog Jack 5-MicroUSB PortFlexible Connection OptionsCable to your PC/MacCable*to your Soundcardnot includedUsing Your Sound Blaster EVO USB 1.2.3.Step1:Connect your headsetConnecting to a Computer(USB Digital Mode)Note:device(for Mac only)1.Preferences and click Sound.2.Blaster EVO USB in both the Output and Input tabs.Connecting to a Mobile Device (4-Pole Analog Mode)Note:and the Multifunction button function in4-Pole Analog Mode.analog cable and the USB cable are connected to the same device(such as on aUSB cable connection is prioritized unless manually configured otherwise.Step2: Install the Software Note:1.2.3.4.5.6.7.1.2.3.4.5.6.7.Step3:Use ItWearing the HeadsetAdjusting the VolumeIn USB digital mode,the Volume Control on the headset cup can beused to adjust your headset volume to a comfortable level.You canalso adjust the volume via the software or the built-in volumesettings on your computer.CAUTION:Do not listen to audio on your headset at high volumes for prolongedperiods of time to avoid impairing your hearing.Usage ScenariosPlaying Music or MoviesDialog Plus feature brings out the dialog in movies for maximum clarity,while the SBX Bass the low frequency tones and gives the extra impact for a dramatically improved soundThe SBX Surround enhances your movie or music playback by producing virtual speakers above and below you,creating an immersive audio experience.1.or Pause Musicthe Multifunction button once to play music and again to pause it.Similarly,tap on the same to resume.2.Volumethe volume control to increase or decrease the music level.Not applicable in4-Pole Analog Mode.Answering and Ending CallsAnswerDeclinemic technology will be automatically enabled.The Voice Focus feature is able to pick up your while the Noise Reduction effect eliminates unwanted background noise from both ends You may choose to morph your voice with special effects with the Voice FX too!1.or End a Callthere's an incoming call from your mobile device while you are listening to music,the music out and the ringtone will gradually be heard.the Multifunction button once to answer the call,and tap on the same button again to end it.will resume after the call has ended.headset is connected to a computer,click on the answer call button prompted on the computer to enter voice communication.st Numberthe Multifunction button twice to redial the last called number.This feature may vary depending on your phone and is not available in USB Digital Mode.3.Voice Commandvoice command(e.g.Siri),press and hold the Multifunction button for3seconds to the function.This feature may vary depending on your phone and is not available in USB Digital Mode.Using the Software Note:a number of configurations that help you control the basic functions of your software enhancement configurations that can be made to heighten yourClick each of the menu bars to expand the configurations available.Using the Sound Blaster EVO Control PanelManaging Your Profiles1.Profile menu to view the SBX Profile screen.2.desired profile from the screen.changes to the active profile,1.button to modify the profile you have selected.2.through the various other menu options of the Sound Blaster EVO Control Panel andconfigurations as desired.Configuring your general settingsthe top of the and the theEnhancing the Audio-SBX Pro Studio1.next to one or more of the available enhancements to enable it.2.level of enhancements to be applied individually.3.to play the demo video to test your configurations.4.if necessary.5.to save the adjusted settings or Reset to restore default settings.includes a number of enhancements for movies and gaming,elevating your movie and to the next level.These include:-provides immersion control to enhance the natural sense of audio depth and by creating virtual surround sound channels.Stereo content or multi-channel will sound as if its coming from all sides while voices remain centered in front andand timbre is preserved.-restores the natural dynamic range that is lost when music files(iTunes and gets compressed.This makes the music sound as good as the artist originally intended, an enhanced level of realism for movies and games.-fills in the missing low frequency tones and gives the extra impact for a better enter-experience.Consumers no longer have to tolerate a lack of bass in speakers as thetechnology dramatically improves the sound experience even in the absence of aVolume-addresses the problem of abrupt volume level changes during playbacksongs by continously measuring volume automatically,applying gain and atten-to compensate for any changes.Plus-enhances the voices in movies for clearer dialog,allowing the listener to dialog over the rest of the soundtrack and over ambient noise in the listening envi-Enhancing the Microphone-CrystalVoice™1.recording device and adjust its microphone volume using the volume slider.2.checkbox next to one or more of the available enhancements to enable it.3.and speak into your microphone to listen to your voice with the selected presetsReadjust if necessary.helps you hear and be heard clearly by all participants of the conference, noisy background distortions and unclear communication that disrupts your online experience.The various enhancements available include:FX™-enables the alteration of voice with a variety of effects which can be used the tone of a voice,create interesting accents or even allow someone to sound like adifferent person.Noise Reduction-enables the speaker to be heard clearly over background constantly monitoring the environment and eliminating unwanted noise that interferesconversation.Focus-creates a zone and suppresses noise outside it to enable the speaker be heard with amazing clarity.Multiple microphones are used to focus,enhance thevoice,and eliminate sounds outside the zone.Note:Focus feature will be turned on automatically at all times.Equalizer Settingssettings,go to the SBX Profile screen and select a profile.Click Edit and then .To adjust and apply an equalizer preset,1.EQ checkbox to enable the use of the equalizer.2.drop down menu,select the preset to use.3.vertical slider bars to achieve your desired level.4.to save the changes to the active preset or to a new preset.any user created equalizer presets by selecting the preset from the drop downDelete.Note:equalizer presets cannot be deleted.Headphones SettingsNote:to listen to audio with the selected configuration.Mixer SettingsAdvanced FeaturesPlaying GamesRestoring Audio Effects in Games with Creative ALchemy71.2.3.Note:General Specifications Connectivity5500SBX Pro Studio Technology CrystalVoice TechnologyTroubleshootingWhat do the LED statuses mean?The onboard audio chipset seems to be in conflict with Sound Blaster EVO USB. No sound from the headset.There is clipping/distortion during audio playback.Some features are disabled when playing certain games.Additional Guide for Windows Usersstereo cable bundle allows you to connect your headset to your iPhone /Android some phone /tablet's 4-pole female jack has different configuration and this support if the configuration is different from the jack (bundled)as illustrated below:(a) Audio Left (b) Audio Right(c) Microphone(d) Groundto connect your headset to an MP3Player,you will need to check if the its 4-pole female jack is compatible.Safety Informationis used at high volume.Set the volume to a safevolume of sound that may sound normal but can beringing in your ears or muffled speech,stop listening andvolume,the less time is required before your hearing couldto protect your hearing:headphone at high volume.out noisy surroundings.people speaking near you.Find out more about your headset by clicking on the Resources Link.。
- 1、下载文档前请自行甄别文档内容的完整性,平台不提供额外的编辑、内容补充、找答案等附加服务。
- 2、"仅部分预览"的文档,不可在线预览部分如存在完整性等问题,可反馈申请退款(可完整预览的文档不适用该条件!)。
- 3、如文档侵犯您的权益,请联系客服反馈,我们会尽快为您处理(人工客服工作时间:9:00-18:30)。
UsbBlaster仿真器使用说明书
敬告用户
欢迎使用UsbBlaster仿真器,在阅读此敬告前请勿使用我公司产品。
如果你已经开始使用,说明您已经阅读并接受本敬告。
a、本说明书中的资料如有更改,恕不另行通知。
b、在相关法律允许的范围内,本公司及其经销商对于因本产品故障所造成的任何损失均不承担责任。
无论损害的方式如何,本公司及其经销商所赔付给您或其他责任人的责任总额,以您对本产品的实际以付为最高额。
c、本公司及其经销商对所售产品自购买之日起一年内免维修费用(不包括更换元件费用),其前提是您按说明书正常操作,对于非正常操作所致的损坏,实行收费修理。
目录:
一、功能及特点
二、JTAG 接口定义
三、使用范围
四、随机物品
五、驱动安装
一、功能及特点
l完全兼容ALTERA原厂的UsbBlaster 下载电缆,通过计算机的USB接口可对Altera的FPGA/CPLD以及配置芯片进行编程、调试等操作。
l采用USB接口,完全即插即用,只是在第一次使用时,要求添加驱动,以后使用都是自动添加设备。
l下载速度快,下载FPGA 配置程序是ByteblasterII 的5到6 倍。
l无需外接电源,携带方便
二、JTAG 接口定义
1、SOPC接口定义(长排线):
2、EDA接口定义(短排线):
三、使用范围
l支持5V、3.3V和2.5V应用系统
l支持ALTERA公司全系列芯片:
CPLD:MAX3000、MAX7000、MAX9000和MAXIID等系列
FPGA:StratixII、Stratix、CycloneII、Cycclone、ACEX1K和FLEX 10
等系列。
主动串行配置芯片:EPCS1、EPCS4、EPCS16。
增强型配置器件:EPC1、EPC4 。
l支持JTAG、AS、PS三种下载模式,有Verify、BankCheck功能。
l支持NIOS I I 嵌入式软核处理器在系统调试,在线Debug、单步、中断等都能稳定执行。
四、随机物品
l UsbBlaster 仿真器一个
l10PIN扁平电缆
l USB2.0 PC连接电缆
五、驱动安装
1、将USB电缆一端接到仿真器,另一端插入计算机USB接口,在桌面任务栏将提示检测到Altera USB-Blaster。
接着会弹出如下提示:
2、选择“是,仅这一次”,点下一步,继续。
3、点击“从列表或指定位置安装(高级)”,点下一步,继续。
4、选中“在搜索中包括这个位置”,点击浏览找到驱动程序的位置。
驱动程序就位于Quartus II安装目录的Drivers/usb-blaster子目录下。
本图中的Quartus II安装在D:\altera\quartus50目录下。
5、点击“仍然继续”。
6、点击“完成”,结束驱动安装。
进入设备管理器,在通用串行总线控制器列表中,您将会看到ALTERA USB-Blaster。
7、在Quartus II Hardware Setup中将能看到USB-Blaster,端口是USB-0。
附件:
详情可参考:ALTER原厂的UsbBlaster安装手册“ug_usb_blstr.pdf”。
