除湿干燥机说明书-纳金
组合式干燥机使用说明书分解

组合式干燥机使用说明书目录安全总则 (4)使用前注意事项 (4)1 概述 (5)1.1工作原理 (5)1.2工艺流程 (5)1.3特点 (6)2 型号编制说明 (7)3 配置及安装 (7)3.1配置建议 (7)3.2安装要求 (7)3.3排水器的安装 (8)3.4配电要求及方法 (8)3.5安全使用注意事项 (8)3.6干燥机日常保养注意事项 (9)4 操作方法 (10)4.1开机前检查 (10)4.2控制面板说明 (10)4.3显示器操作说明 (12)4.4干燥机的开/停机程序 (14)5 故障原因及排除 (15)5.1全部不能运转 (15)5.2启动后不良 (16)5.3自动排水系统不良 (16)5.4运转正常,但效果不佳 (16)5.5干燥机除水情况不良 (17)5.6压力降太大 (17)5.7控制器及吸附系统 (18)技术性能保证....................................................................................... 错误!未定义书签。
服务....................................................................................................... 错误!未定义书签。
附图....................................................................................................... 错误!未定义书签。
质保书................................................................................................... 错误!未定义书签。
除湿机操作说明

除湿机控制器功能说明书1 总技术要求采用单压缩机,风扇单、双档风速控制,采用毛细管节流。
具有各种保护及显示功能。
1.1 工作电压:单相交流220VAC/50Hz;1.2 输入功率(W):视能力而定;1.3 除湿量:取决于系统;1.4 功能:除湿及除霜;1.5 保护功能:符合本控制方案的要求;1.6 安全要求:符合GB4706.32-1996;1.7 EMC要求:符合GB4343.2-99及有关家电产品的IEC标准。
2 操作面板2.1 除湿机的操作面板由一个LCD液晶屏、指示灯(红/绿色)和五个按键组成(如下图)。
(ADJUSTMENT)“调节”(MENU)键,注:五个按键,从左到右分别为“电源“(POWER)键,“菜单”键,“开始/停止除湿”(START/STOP)键,“水泵开/关”(PURGING)键。
2.2 液晶屏显示内容,见下图。
3 操作3.1 参数设定内容,见下表。
参数代号意义单位分辨率默认值调整范围3.2 参数设定3.2.1 在关机状态下,先按“除湿”键,再按“菜单”键持续5秒,背光屏亮,蜂鸣器短响,进入参数设定状态。
3.2.2 显示内容为“P0:20”;“20”处于闪烁状态,频率为1Hz。
“P0”为参数号,按“开始/停止除湿”键来实现从“P0~P6”的切换;“20”为对应参数值,按“菜单”键调整对应参数值。
3.2.3 完成参数设定后,按“电源”键,则熄灭背光屏、蜂鸣器短响、退出并保存参数值,返回关机状态。
进入设定后15秒之内没有按键,则自动保存参数值并退出,返回关机状态。
3.3 运行操作3.3.1 在关机状态下按“电源”键,进入待机状态。
3.3.2 在待机状态,默认显示“当前湿度(CURRENT)”工作环境的湿度值。
液晶屏上部分显示:3.3.2 .1 “时钟图标群组”(P17 –‘时钟图标’,P41-‘大方框’,P18-‘TIMER’,P20 -‘TOTAL’,P22 -‘JOB’)、“湿度图标群组”(P24 -‘湿度’,P42 –‘大方框’,P26 -‘小方框’,P27 –‘SET’)、“温度图标群组”(P29 –‘温度’,P43–‘大方框’,P30 -‘华氏度(o F)’,P32 -‘摄氏度(o C)’)图标亮;3.3.2 .2 “P25 -‘CURRENT’”图标闪烁,频率为1Hz,闪五次后不闪,图标亮。
吸附式干燥机 使用手册说明书
吸附式干燥机使用说明书感谢您选用吸附式干燥机。
本《使用手册》为正确的安装、使用的产品维护作了简要的说明。
您应该熟悉与其相关的安全结构,性能,维护和修理方面的说明。
对设备无故障运行的操作,基本的和特殊的安全知识是必须具备的。
使用前请认真阅读本说明书。
请将本手册放在便于查阅的地方。
一、目录二、安全事项说明2.1 你不可以做什么2.2 担保和赔偿责任2.3 持续运行的安全措施2.4 电能的危险性2.5 吸附剂的危险性2.6 在维护、检修和修理工作中的危险性2.7 对操作者的要求三、设备说明3.1 设备的部件3.2 工作原理流程3.3 运输和安装四、开机/停机/卸压五、故障信息和故障排除六、维护和检修附件: 吸附式干燥机控制器说明二、安全事项说明2.1 你不可以做什么不要对设备作任何结构上的改变——对设备作结构上的改变只能由制造商进行。
你在现场所希望对设备所作的任何改变必须先征得制造商的书面认可。
绝不使用非原厂零件——仅使用由制造商提供的原厂备件和配件,对设计和制造非原厂零件来满足设备的安全和操作需求将不被担保。
绝不焊接压力容器或管道——所有在压力容器和管道上的工作,诸如焊接、结构改变、安装等工作都是禁止的。
2.2 担保和赔偿责任由以下一种或多种情况引起的人身伤害和物件损坏不承担索赔要求。
□不适当地使用或操作设备□技术上不正确的安装,起动,运行和维护□当缺陷确实存在时对设备的操作□违背操作手册所给予的运输、储存、安装、运动和维护方面的规定□主动承担对对设备结构上的变更□对已损耗的设备元件未作适当检测□未作恰当的修理□使用非原厂零件2.3 持续运行的安全措施设备安全工作和无故障运行的一个基本的先决条件是熟知和遵守本说明的工作,操作和安全管理,而且还需遵循所有工厂的内部管理。
□在规定的间隔处检查设备外观的损坏□仅允许合适的经训练的人员操作控制器或设备□制造商预设的参数不作保证,如需要作改变,必须先注意已有参数。
空气干燥机使用说明书

1、注 意 事 項
☆請勿將乾燥機橫放或倒放。
☆請務必接地以防漏電而造 成觸電。
☆請勿變更配電盤內的配線。
☆檢修時,請停止空壓機的運 轉,關閉空氣乾燥機的電源, 並完全排放掉內部的壓縮空 氣。
☆避免頻繁的啟動/停止機台 運轉。
-3-
2、各部名稱及功能
2.1、外觀
配電箱
控制面板
壓縮空氣入口 壓縮空氣出口
0使用說明書冷凍式壓縮空氣除濕設備空氣乾燥機fr20003000w水冷式本空氣乾燥機設計為工業用途請妥為使用請詳讀說明書再依說明操作本設備請保存本說明書以備隨時參考mfr20003000w011前言尊敬的用戶
MFR2000~3000W-01
使用說明書
冷凍式壓縮空氣除濕設備
空氣乾燥機
FR2000~3000W 水冷式
空壓機室
用氣現場
若配管有向上 彎曲情形時
空壓機
儲氣筒
空氣乾燥機
請加裝排水閥
1) 請注意不要弄錯空氣乾燥機的出入口。 2) 在空氣壓縮機及空氣乾燥機之間的配管,應避免有向上彎的配管方式, 若不可避免而需要設置上彎管路時,請裝上洩水閥或自動排水閥以利排水。 3) 空氣乾燥機的出入口之間請配置旁通管路。 4) 請不要將配管的重量直接加在空氣乾燥機上。 5) 在寒冷地區請將室外的配管包覆斷熱材料。室內的配管部份,若是空氣 乾燥機的出口管路有結露的現象時,亦請以斷熱材料包覆。 6) 配管時,請注意不要讓灰塵或異物進入空氣管路。
彈簧
■ 清潔的方法
1) 關閉球閥;
2) 利用空氣槍等工具將過濾網、濾杯等內部的污垢清除;
3) 利用中性清潔劑將分解開的零件加以清洗;
4) 檢查各個零件是否有受損的情形,特別是 O 形環應注意檢查。
干燥机说明书范文

干燥机说明书范文一、产品简介干燥机是一种电器产品,主要用于将潮湿的衣物或其他物品快速干燥,提高生活效率和舒适度。
本产品具有以下特点:1.高效干燥:采用先进的干燥技术,能够在短时间内彻底干燥衣物,提高干燥效率。
2.多功能操作:提供多种干燥模式供用户选择,包括普通模式、快速干燥模式、衣物烘洗模式等,满足不同需求。
3.安全可靠:产品内置多种安全保护装置,如过热自动断电、电机过载保护等,确保用户安全使用。
二、产品外观及参数1.外观:本产品外观简约大方,采用耐磨防火材质制成,配备触摸式面板,操作简单方便。
2. 尺寸:本产品尺寸为XXXmm(长)×XXXmm(宽)×XXXmm(高)。
3. 重量:本产品重量为XXXkg,便于搬运和使用。
4.电源:本产品采用XXX电源,额定功率XXXW,工作电压XXXXV。
三、使用方法1.连接电源:将插头插入电源插座,确保电源连接正常。
2.打开干燥机:按下电源开关,LED显示屏亮起,表明干燥机已开启。
3.选择干燥模式:根据需要选择合适的干燥模式,可以通过触摸式面板上的按钮进行选择。
4.放置衣物:将需要干燥的衣物均匀地放置在干燥机内,不要堆积过多以免影响干燥效果。
5.关闭干燥机:在衣物干燥完成后,按下电源开关,干燥机即可关闭。
四、使用注意事项为了确保您能够安全、正确地使用干燥机,避免不必要的损坏或事故发生,请注意以下事项:1.首次使用前,请务必阅读本说明书,了解产品特点、使用方法和注意事项。
2.本产品仅适用于家庭使用,请勿将其用于其他用途。
3.在使用过程中,请勿将干燥机暴露在水或其他液体中,以免发生短路或触电。
4.请确保干燥机周围的空气流通良好,避免堵塞通风口。
5.请勿在高温、潮湿的环境中使用干燥机,并避免阳光直射,以免损坏产品。
6.请勿将产品放置在易燃物体附近,以免引发火灾。
7.在清洁和维护产品时,请务必先关闭电源,以免触电。
五、维护保养1.使用一段时间后,请定期清洁干燥机内部以确保其正常运行。
吸干机操作使用手册

吸干机操作使用手册一、安装1. 确定干燥机进气压力符合选型工作压力,同时应考虑阀门、管道、过滤器等附件产生的压力降,和再生气量的损失,选择干燥机时按工作压力比压缩机排气压力低1bar来计算;2. 确认干燥机进气温度符合选型时的工作温度,以满足规定的压力露点(-40℃或-70℃);3. 干燥机前面应安装储气罐,以确保最优性能,(确定所要求的压缩空气容积流量,计算确定储气罐尺寸的空气需求峦量);4. 管道应与压缩机排气管道尺寸一致,对多台干燥机并联安装,所有干燥机应与集气总管相连);5. 确认干燥机牢固地安装在适合的、平整的、没有振源的斟础上,安装时使用螺栓通过安装架与基础相连;6. 考虑安全性和维护方便,应确保干燥机周围有足够的空间,同时应包括起吊设备和装卸空间;7. 确保每台干燥机中心距大于500mm;8. 检查铭牌电源参数与所供电压/频率应一致;9. 外部电源开关必须安装在安全简易的操作地方,且符合电源需求,同时必须安装小型自动断路器;10. 干燥机通风良好,使产生的热量容易散发出去;11. 确认安装有过滤器,过滤器质量等级、大小及型号应符合要求,WS/AO/AA级过滤器安装在干燥机之前,AR或AAR级过滤器应安装在干燥机之后;12. 选择干燥机安装地点时,应考虑其噪声;13. 应考虑干燥机去除的水分,如果排放的再生气用管子引出,则管径应合适,最小为100mm14. 每个过滤器应有单独的排污管,排至合适的地方,确保任何液体得到适当处理;15. PNEUDRI干燥机不能靠墙安装;16. 没有中线,加热再生式DH型不能通电;17. 没有合适的前后置过滤器不要安装干燥机18. 多台干燥机并联安装时,中心距不要低于500mm(否则仪表箱不能打开);19. 多台干燥机并联安装时,进气集气总管不能采用叉型结构.二、系统配置1. 确保系统的压缩空气流量不得大于干燥机额定处理理(偶然峰值也不能超过);2. 干燥机的处理量与压缩机排气量一致,而储气罐储存了一定容积的压缩空气,因此,系统的容积流量有可能超过压缩机的排气量,干燥机存在超负荷;3. 为避免干燥机超负荷,在出口软管里安装流量控制装置(FCD)当压差高时,表示干燥机处于超负荷状态;4. 理想的配置是干燥机前后均安装储气罐,干燥机应牢固地安装在适合的结构、平整的水平地面或者没有振动的基础上,用螺栓通过安装架与基础牢固地连接;三、系统安装安装干燥机的地方,环境尽可能的干净,环境温度不要超过干燥机最高工作温度,拆去干燥机进排气口的防尘盖,将压缩空气进气管和排气管分别与干燥机的进排气口相连,干燥机前后置过滤器安装位置应正确,箭头指向与干燥机气流方向一致;四、操作A).开机程序1. 合上外部电源开关;2. 确认进排气切断阀均关闭;3. 确认进气集气管内的冷凝水全部排放干净;4. 慢慢打开进气切断阀直至全开位置;5. 干燥机完全充压后,二侧工作腔压力表之一显示与进气相同压力,此时凸轮定时器开始工作;6. 打开排气切断阀;7. 压力表指示干燥机运行状况,再生腔压力为0,工作腔压力表指示为系统压力;8. 干燥机运行循环开始于腔A侧或腔B侧,并保持系统压力;9. 干燥循环将要结束时,二侧腔体压力相同,表明在干燥机切换前,再生腔已充压完毕,等待切换;10. 运行继续进行,真至执行停机程序;B).停机程序1. 慢慢关闭排气切断阀,再关闭进气切断阀;2. 等待干燥机泄压(可有压力表指示);3. 在排气室内可能会保持一定的压力,对干燥机进行维护以前,可打开后置过滤器的排污阀不释放此压力;4. 关闭电源开关.五、维护1. 检查干燥机及其系统是否漏气;2. 打开干燥机底部的放水阀,排尽可能能带进的水分3. 湿度监测试纸;4. 检查进滤器指示计和自动排污阀功能5. 检查排放消声器,当压差达350mbar,或者已使用一年,应更换排放消声器;6. 检查进排气过滤器,当压差达350mbar或者已使用一年,应更换进排气过滤器;。
氢气除湿干燥器说明书( XFG-1型)

⑤. 氢气干燥器的右下侧的置换进口阀门 AA603,应该准备出连接的 管线。以便二氧化碳净化,或另外选择用便携式容器来净化。
设备安装之前,为了更好的发挥设备的氢气的干燥效果,希望您 能从头至尾仔细阅读本说明书的内容。
欢迎您使用我公司产品。我们将以先进的设备,可靠的质量、完 善的售后服务,竭诚地为您服务。
目录
一、主要技术参数 ......................................... 3 二、数值设定及正常读数: ................................. 4 三、设备型号说明 ......................................... 5 四、工作原理 ............................................. 5 五、设备的安装 ........................................... 6
204 ℃ 163℃±28℃(加热 2 小时)
82℃±11℃
小于 38℃
气源压力设定数值 控制箱压力设定数值
0.6-0.8Mpa 1±0.8KPa
4
三、设备型号说明
XFG—1F—1 (无)氢气出入口没有选配露点仪 (1)氢气入口选配一台露点仪 (2)氢气出入口各选配一台露点仪 适用于氢冷发电机 设计序号 干燥器 干燥方式-吸附式
四、工作原理
XFG-1F 氢气干燥器是清除氢冷发电机氢气中水蒸气的专用设备。 XFG-1F 氢气干燥器对氢气进行干燥处理的原理是利用活性氧化 铝对水分子具有吸引力特性。活性氧化铝是一种固态干燥剂,清除氢 冷发电机氢气中的水蒸气,是将氢气通过一定量的活性氧化铝的吸收 塔来实现的。高疏松度的活性氧化铝具有非常大的表面积和强吸湿能 力,对绝大数气体和水蒸气来说,使用活性氧化铝作为干燥剂主要是 利用它的化学惰性和无毒特性。当活性氧化铝吸收水分达到饱和后。 再生-通过加热来清除干燥剂自身束缚的水分,从而恢复它的吸湿能 力,并且活性氧化铝的性能和效率并不受重复再生的影响。 在设备的干燥塔中,埋入式的高密电加热器加热干燥剂使束缚的 水分汽化;与此同时一股封装的氢气流过吸附层带走释放出的水蒸 气,干燥剂恢复最初的特性,然后将氢气(含有水蒸气)冷却,冷凝 水通过汽水分离器排出,一般情况下活性氧化铝的吸湿性能可通过加 热方式来完成它的再生,并可重复进行。
干燥机说明书

毕业设计说明书摘要关键词目录前言干燥技术在我国的应用已经有着了十分悠久的历史。
近几年,我国干燥工业大多数采用常压热风干燥,原因是这种方式设备成本低廉、操作方法简单,但是其不足是能量利用率低、能耗成本高。
而近几年中,热泵冷冻干燥技术发展十分迅速,,热泵干燥技术1950年在美国获得了专利权,之后因为起明显的节能优势在工业领域迅速获得了应用,20世纪50年代在日本就有超过百分之十的干燥装置采用热泵干燥技术。
采用热泵干燥技术处理的物料也由早期的木材干燥扩展到食品加工、茶叶烘干、蔬菜脱水、鱼类干燥、陶瓷烘焙、药物及生物制品的灭菌与干燥、污泥处理。
化工原料及肥料干燥等诸多领域。
[1]而目前,食品工程、生物工程、医学工程和化学工程对冷冻干燥也产生了强烈的依赖,使冷冻干燥成为了使水分蒸发的重要方法之一。
[2]但是单凭冷冻干燥存在干燥时间长,干燥速率低、干燥过程能耗高和干燥设备投资费用大的缺点。
所以,为了解决冷冻干燥单位产品能耗高,干燥时间长,干燥速率低、干燥过程能耗高、使得产品市场不能全面展开的缺点,,除了对设备和工艺的改进外,还可以通过组合干燥的方法进行改造。
本文将冷冻干燥技术和热泵干燥技术进行联合,计划从工艺层面降低冷冻干燥的能耗,同时获得与冷冻干燥接近的产品品质。
[3]通过事前了解和分析苹果的含水量、干燥工艺和干燥特性[4],是本次设计的依据。
热泵除湿常压冷冻干燥机的干燥原理[5]:从冷凝器中出来的吸热饱和蒸汽掠过苹果表面,将热量传递给苹果而饱和蒸汽被苹果冷却后吸收水分,湿分由苹果传入空气,并被带走。
降低干燥能耗是一项十分重要而有意义的工作,已引起各界人士的高度重视,当今科研工作者们正从不同方面和角度对干燥节能作了许多研究。
[15]目前,国内外对脱水蔬菜的联合干燥技术研究较少,缺少系统深入的理论研究。
因此开展联合干燥技术方面的研究,探索“优质低耗”的干燥新方法,对农产品干燥技术的发展有着重要的学术价值和现实意义。
无热再生干燥器使用说明
无热再生干燥器使用说明一、设备介绍无热再生干燥器是一种利用吸附材料去除湿气的设备。
设备由主机、吸湿器、脱水器和控制系统组成。
主机是设备的核心部分,包括空气进出口、排水口和调节阀等。
吸湿器是用来吸附空气中的湿气的,通常采用干燥剂作为吸湿材料。
脱水器是用来去除吸湿器中的湿气的,通过压缩空气对吸湿器进行再生。
控制系统用于监控和调节设备的运行状态。
二、设备安装1.将无热再生干燥器安装在通风良好的室内,确保设备的正常运行。
2.将主机与干燥系统柜、管路进行连接,确保连接处密封可靠。
3.将设备与电源进行连接,确保设备正常供电。
三、设备操作1.开启设备电源,并打开设备的电源开关,待设备自检完成后,设备进入待机状态。
2.调节设备的供气压力,确保设备的正常运行。
一般情况下,供气压力为0.4-0.8MPa。
3.调节设备的排气压力,根据实际情况设置合适的排气压力。
一般情况下,排气压力为0.1-0.3MPa。
4.设备正常运行后,打开设备的空气进口阀门和排水阀门,将待处理空气引入设备,并排出设备中的湿气和杂质。
5.调节设备的工作时间和再生时间。
根据实际情况,设置适当的工作时间和再生时间,以保证设备的正常运行和吸湿效果。
6.在设备工作过程中,定期监测设备的运行状态,如压力、温度等,确保设备的正常运行。
7.定期更换干燥剂和脱水剂,以保证设备的吸湿效果和再生效果。
四、设备维护1.定期清洁设备内部和外部的杂质和污物,以保持设备的正常运行。
2.定期检查设备的零部件和连接件,如阀门、管道等,确保设备的工作正常。
3.定期更换设备的滤网和密封件,以保证设备的过滤效果和密封性。
4.在设备停止使用时,将设备的电源关闭,切断电源供应。
五、注意事项1.禁止在设备工作过程中进行维修和拆卸,以免造成人身伤害和设备损坏。
2.设备使用环境温度应在5℃-50℃之间,湿度不超过85%。
3.在设备运行过程中,禁止使用易燃、易爆和腐蚀性物质。
通过以上的使用说明,用户可以正确地使用无热再生干燥器,并保持设备的正常运行,达到预期的干燥效果。
MD-700 Nafion 干燥器用户手册说明书

Large Diameter Dryer for Aerosol AnalysisControl Humidity in Your Samples Without Particle LossesThe MD-700 has been specifically developed for humidity control in particle measurement and aerosol analysis applications. In order to minimize particle losses, a laminar sample flow should be maintained through the flow path of the dryer. The MD-700 addresses these performance needs while providing the moisture removal necessary to make accurate measurements across a wide range of flow rates. All moisture is removed in the vapor phase with a purge gas flow.Some features and benefits of the dryer:•Low Particle Losses — Large diameter Nafion® tubing maintains a laminar flow of the sample through the dryer.•Eliminate Heating — Volatile particulates are preserved in the sample by eliminating the need to heat the sample to control RH.•Low Service Costs — Eliminates the need to repeatedly replace desiccant.•Three Modes of Operation — Designed for use with instrument air, vacuum purge or partial reflux methods.•Stainless Steel Construction — Grounded Stainless Steel construction eliminates build up of static charges in the flow path.•Long Service Life — Replaceable Nafion® dryer elements are available to extend service life.• Available in four sizes for specific flow rates:o15 cm (6”) – 0-1.5 lpmo30 cm (12”) – 1.5-4 lpmo60 cm (24”) – 3-8 lpmo90cm (36”) – 6-12 lpmo120 cm (48”) – 8-16.7 lpmLarge Diameter Dryer for Aerosol Analysis•Performance curves shown below are for the 60 cm (24”) and 120cm (48”) versions operated in 80% reflux mode (80% of the sample flow is returned to the dryer for used as the purge gas) at 25° C ambienttemperature.Operating condition limits –•Pressure -o Maximum of 1000 mbar (15 psid) positive pressure differential between the sample gas and purge gas volumes (higher pressure on the sample volume).o Maximum of 200 mbar (3 psid) negative pressure differential between the sample gas and purge gas volumes (higher pressure on the purge volume).•Temperature –o0-40° C range•Humidity –o0-99% RH (non-condensing)Large Diameter Dryer for Aerosol AnalysisModes of operation -There are three typical modes used to purge the dryer of water vapor. Each of the modes has its advantages and disadvantages but all are simple to configure and operate. In each case, the outlet humidity can be changed by adjusting the purge vacuum level and or flow. Typically, in the case of the split sample and reflux modes, higher purge vacuum reduces sample gas outlet humidity and lower purge vacuum increases sample gas outlet humidity."Reflux" mode employs a vacuum pump to purge the dryer. In this mode, a portion to 100% of the dry sample gas that is exhausted from the analyzer is returned to the dryer, expanded through a needle valve or other flow restrictor, and used as the purge gas. This requires a tube in addition to the sample gas tube to be connected to the analyzer.•Schematic Diagram – RefluxSee notes Array•Purge vacuum range: 20in-hg vacuum (336 millibar abs.) to full vacuumNotes:1.If the analyzer incorporates its own sample gas pump, it is recommended that the outlet be vented to atmosphere asshown. This will ensure that the pressure in the analyzer is not affected in the event the analyzer’s sample pump and thepurge vacuum pump are operated at different flow rates. Depending on the purge vacuum pump performance curve,controlling the purge flow rate at a lower level than the analyzer sample flow rate will be desireable and will increasedrying performance.2.If the analyzer does not incorporate its own sample gas pump, the dryer purge vacuum pump may be used to draw thesample gas through the entire circuit. In this case,the atmospheric vent must be closed."Split Sample" mode is essentially the same as the "reflex "mode except the sample gas is split into two flows after it exits the dryer. One stream flows to the analyzer and the other stream flows back to the dryer to be used as the dryer purge gas. The main advantages of this mode over the reflux mode are only one tube is needed torun to the analyzer, the drying process is independent of the analyzer, and none of the sample gas needs to bereturned to the dryer once it exhausts from the analyzer. The disadvantage is that this creates the need for additional sample flow through the dryer to be used as purge gas. To maintain a similar level of drying performance to that of the reflux mode, there is a need for a somewhat larger vacuum pump that can generate a deeper vacuum. In order to optimize drying performance, the dryer purge flow rate must be minimized as to not unnecessarily increase the total flow rate through the dryer. This also allows the pump to generate purge vacuum that is as deep as possible.Large Diameter Dryer for Aerosol AnalysisSchematic Diagram – Split Sample•Purge vacuum range: 25in-hg vacuum (167 millibar abs.) to full vacuum"Normal" mode is the most basic configuration. There are no moving parts and it is quieter than having a vacuum pump running continually but requires that instrument grade air be available for use as the dryer purge gas. In general, more purge flow reduces sample gas outlet humidity, less increases sample gas outlet humidity.•Schematic Diagram – Normal•Purge air humidity: Oil-less air, Instrument grade air is required, -40° C range dew point or below.•Purge air flow rate: 2x the sample flow rate. (Additional flow will be of little or no benefit)Large Diameter Dryer for Aerosol AnalysisFigure 1 - Assembly DrawingFigure 2。
除湿干燥机的操作指导书
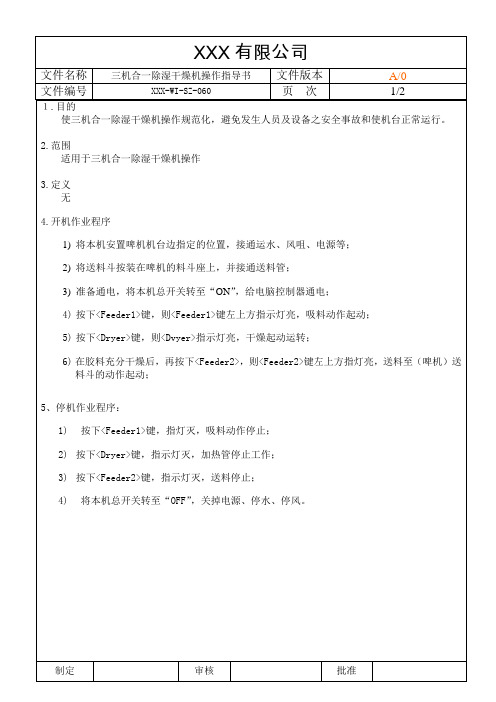
3)按下<Feeder2>键,指示灯灭,送料停止;
4)将本机总开关转至“OFF”,关掉电源、停水、停风。
1.目的
使三机合一除湿干燥机操作规范化,避免发生人员及设备之安全事故和使机台正常运行。
2.范围
适用于三机合一除湿干燥机操作
3.定置,接通运水、风咀、电源等;
2)将送料斗按装在啤机的料斗座上,并接通送料管;
3)准备通电,将本机总开关转至“ON”,给电脑控制器通电;
4)按下<Feeder1>键,则<Feeder1>键左上方指示灯亮,吸料动作起动;
5)按下<Dryer>键,则<Dvyer>指示灯亮,干燥起动运转;
6)在胶料充分干燥后,再按下<Feeder2>,则<Feeder2>键左上方指灯亮,送料至(啤机)送料斗的动作起动;
5、停机作业程序:
1)按下<Feeder1>键,指灯灭,吸料动作停止;
组合式干燥机使用说明书

组合式干燥机使用说明书目录安全总则 (4)使用前注意事项 (4)1 概述 (5)1.1工作原理 (5)1.2工艺流程 (5)1.3特点 (6)2 型号编制说明 (7)3 配置及安装 (7)3.1配置建议 (7)3.2安装要求 (7)3.3排水器的安装 (8)3.4配电要求及方法 (8)3.5安全使用注意事项 (8)3.6干燥机日常保养注意事项 (9)4 操作方法 (10)4.1开机前检查 (10)4.2控制面板说明 (10)4.3显示器操作说明 (12)4.4干燥机的开/停机程序 (14)5 故障原因及排除 (15)5.1全部不能运转 (15)5.2启动后不良 (16)5.3自动排水系统不良 (16)5.4运转正常,但效果不佳 (16)5.5干燥机除水情况不良 (17)5.6压力降太大 (17)5.7控制器及吸附系统 (18)技术性能保证......................................................................................... 错误!未定义书签。
服务......................................................................................................... 错误!未定义书签。
附图......................................................................................................... 错误!未定义书签。
质保书..................................................................................................... 错误!未定义书签。
干燥机中文说明书
目录安全总则 (2)1.0工作原理及流程 (3)2.0安装 (4)2.1位置 (4)2.2配管 (4)2.3电源及配线 (4)3.0运行 (5)3.1冷冻部分 (5)3.2吸附部分 (7)3.3电器及控制部分 (7)4.0维护 (9)4.1冷冻部分 (9)4.2吸附部分 (10)5.0常见故障及处理方法 (12)5.1冷冻部分 (12)5.2吸附部分 (14)安全总则◆组合式干燥器是带有压力容器的设备,工作压力必须在铭牌上标明的工作压力范围之内。
◆组合式干燥器在电力驱动下运行,请按国家电力标准进行安装。
◆在进行任何电气检修工作前,务必切断总电源。
◆在进行空气管路、阀件(冷凝水系统)检修前,务必泄放完该处空气压力。
◆在进行制冷管路阀件检修前,务必泄放完该处制冷剂。
◆请在安全模式下操作所有设备,并有专人负责。
1.0 工作原理及流程组合式干燥器是合理的将冷冻干燥器和吸附干燥器结合在一起,通过冷干器处理后的压缩空气,压力露点在5℃左右,含水量相当少约5.6 g/m3,温度比进口温度低约10℃,此时进吸附干燥器继续进行深层吸附。
因此组合式干燥器可以达到-60℃稳定的露点。
进吸附干燥器前已经通过冷干器将一部分水除去,减轻了吸附干燥器工作量,因此,吸附干燥器的切换时间可以延长,从而减少耗气量,延长吸附剂的使用寿命。
以上流程图只作参考。
本公司对产品不断研究、改进,保有变更权,流程更改恕不另行通知。
2.0 安装2.1位置1.组合式干燥器应安装在环境温度为2~40℃,四周通风良好、空气洁净的建筑物内。
当室内通风条件不良时,需在机房内安装换气排风设备;2.组合式干燥器与空压机之间应保持一定距离,以防止空压机产生的振动影响组合式压缩空气干燥器的正常运行;3.组合式干燥器应水平安装在平整的水泥地面上; 4.组合式干燥器在压缩空气系统中的布置可参考下图固体尘<μ1m≤./01P P M w w 残余含油量固体尘<μ2m ≤ /P P M w w2残余含油量组合式干燥器2.2 配管1. 注意压缩空气接入口和出口的接口位置是否正确;2. 组合式干燥器串接在气源系统中,最好在空气入口和出口之间并联旁路管道,中间设截止阀以供调试、维修时使用;3. 管径配置不要太小,尽量减少管路弯头,选用全开型阀门等,皆可减少压降,避免引起大的压降;4. 管道安装完毕后,最好能通入压缩空气,检查空气管道、法兰接口和排水器有无空气泄漏,若有泄漏,及时排除故障; 2.3 电源及配线1.应按铭牌上标定之电压、相数、容量配置电源,电源线勿使用太细; 2.电压波动范围不得超过额定电压的10%,其值如下:220V 时,电压的范围208-230V ; 380V 时,电压的范围342-418V 。
干燥机控制面板说明书
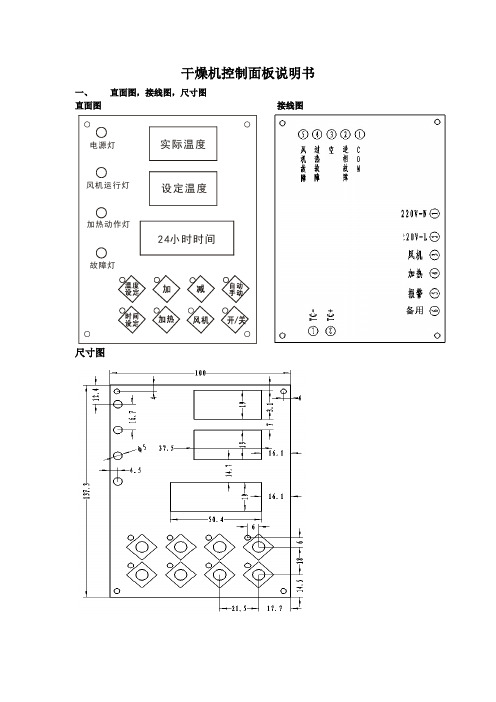
干燥机控制面板说明书一、 直面图,接线图,尺寸图直面图 接线图尺寸图电源灯风机运行灯加热动作灯故障灯实际温度设定温度24小时时间二、功能说明①.测、控温范围:0-400度②.加热、为PID控温方式③.24小时实时时间显示④.九段定时开,关机功能⑤.开机延时和关机延时⑥.一周七天预约时间设定方法:在上电情况下,长按“时间设定键”3S,设定灯亮,则在PV上显示“1ON”星期一开机时间,此时可以通过按“加键”或“减键”和“移位键”可修改当前设定值,再按一下“时间设定键”,则在PV上显示“1OF”星期一关机时间,此时可以通过按“加键”或“减键”和“移位键”可修改当前设定值,如此类推在“1ON-1OFF~7ON-7OFF”之间循环显示,按照上述操作,可设置周一至周七的开、关机的时间。
并且此时在“TIME”显示器上以闪烁方式显示对应的时间,完成设定后再长按“时间设定键”,或不操作10S,退出并保存参数。
⑦.时钟时间校正设定:(设定范:24小时实时时间)在上电状态下,按一下“时间SET”键,设定灯亮,进入设定状态,PV显示器显示“TNE”字样,此时“TIME”显示器闪动,此时按“加键”或“减键”和“移位键”可修改当前实时时间值。
再按一下“时间SET”键,PV显示器显示“DAY”,系统进入星期校正,此时按“加键”或“减键”和“移位键”可调整当前为星期几,范围(1~7)⑧.自动运行方式:当一周预约时间设置好后,按下“手/自动键”此时”手/自灯亮”,系统按设置好的一周预约时间,运行。
⑨.电源未开启时,按“风机”和“加热”键无效,风机未开启时,按“加热”键无效,电源开启后开,关“风机”键有效,风机开启后,开、关“加热”键有效⑩.过温温度:指PV上的测量温度大于此项温度设定时,则系统停止加热并同时输出报警三、操作按键时有风鸣音作提示开、关机过程①.上电时在PV上显示3S倒计时,在SV上显示软件版本号,3S过后,则在PV上显示“OFF”字样(此为关机状态)②.开机过程:在关机状态下,此时,按一下开/关机键,则PV、SV上立即显示出相应参数,电源指示灯亮,此时按一下“风机”键,则风机灯亮,风机继电器吸合,此时按一下“加热”键,则加热灯亮,加热继电器作PID输出,加热输出灯随加热继电器输出亮和灭(此为开机过程)③.关机过程:1.直接通过按开/关键关机时:先关加热,延时完关机风机延时后,再关风机,在延时过程中,PV上以交替方式显示“OFF”和当前温度。
作业指导书:除湿干燥机操作及保养

QS9000品质管理体系之规除程湿干燥机操作及保养有限公司1. 目的正确操作维护与保养除湿干燥机、规范除湿干燥机操作方式,确保原材料烘烤质量,提高机器使用寿命,保护操作人员安全。
2. 范围适用于本厂内所有除湿干燥机的操作。
3. 定义无4. 操作职责注塑部加料员依本作业指导书正确使用除湿干燥机,保护除湿机不受损坏正常运转,保证机台清洁整齐。
5. 内容5. 1将控制箱内电流断路开关全置于“ON”位置,按控制面板上的运转/停止[RUN/STOP]键,指示灯亮开始运转,运转中再按一次运转/停止[RUN/STOP]键,指示灯慢闪亮,冷却运转,运转5分钟后即关机。
5. 2干燥温度的设定:按模式切换]MOKE CHANGE ]键两次,此时干燥温度设定显示器上显示有C单位符号,按■“△”设定干燥温度。
5. 3一次输送料运转:按下输送1运转/停止]LOADRI RUN/STOP]键材料从储料箱内送到干燥料桶内,此时指示灯快速闪速,当再次按下输送1运转/停止]LOADRIRUN/STOP ]键,指示灯慢慢闪烁直到停止,当指示灯不闪时表示满桶。
5. 4二次输送料运转:按下输送2运转/停止]LOADRI RUN/STOP]键,材料从干燥料桶内送到机台储料斗,此时指示灯快速闪烁,当再次按下输送2运转/停止]LOADRI RUN/STOP]键时,指示灯慢慢闪烁直到停止,当指示灯不闪时表示满桶。
5. 5三次输送运转,与二次送料操作方式一致,但按键为输送3运转/停止]LOADRI步RUN/STOP ]键。
5. 6除湿干燥机自动操作从储料箱往干燥筒中运料及从干燥筒中往成型机料斗送料时,须先打开输送1,保持干燥筒内材料满桶,然后按下输送2 (输送3)即从干燥筒中往成型机料斗送料,当料斗内材料满桶时,料斗上感应指示灯亮,同时输送 2 (输送3)指示灯亮,若成型机料斗上指示灯不亮,输送 2 (输送3)将自动从干燥筒内往成型机料斗上送料直到指示灯亮为止。
脱湿干燥机操作说明
文件修正一览表规范/表单权责维护主导单位:成型课变更前:1. 目的使操作人员熟悉所有相关机器知识,安全情报以及注意事项。
然后正确使用该设备。
2. 范围适用脱湿干燥机3. 参考记录3.1《除湿干燥机检点表》4. 名词定义无5.维护单位成型课6. 权责成型课:管理、操作、保养本机器7.安全使用注意事项7.1电气安全7.1.1需按照电气设备基准、内线规定以及厂家操作说明书的规定进行电气施工。
7.1.2不要使用指定外的电源。
7.1.3紧固机器本体、计测器用电线的接插件和连接端子。
7.1.4不要破坏电线,不要给电线施加压力,不要在电线上放置重物,不要夹住电线。
可能会引起触电。
7.1.5配线以及检查工作请专业技术人员进行。
7.1.6因检查、清扫而需要拆开机器时,请先切断电源和压缩空气源。
7.1.7在进行线路检测之前必须先切断电源,10分钟后用万用表测量电压,确保安全后再进行检测。
7.1.8在通电过程中,不得随意打开控制盘门、配线端子箱门、电控箱门。
7.1.9不得用湿手去触碰机器本体、控制部、其他附属品。
7.1.10不得将装置放在有谁的地面上。
7.1.11除机器厂家售后人员外,其他人员不得私自拆卸修理装置。
7.1.12手工投料时,请在机器运转前,将干燥料筒盖子盖好,相关部品准备好。
7.1.13确保机器本体、各零部件等连接可靠,螺栓螺母无松动。
7.1.14不要使再生排气口直接对着人或者其他可燃物。
7.1.15装置本体以及与之关联的装置附近禁止放置可燃性物质,以免在温度上升引燃这些物质。
7.1.16当控制部分发生故障时,应立即切断电源,以免电流过大引起火灾。
7.2操作使用安全7.2.1在规定的干燥能力,输送能力以内使用机器。
7.2.2机器运转中如果出现异常声音和震动等时,应马上停止运转。
这是发生事故的预兆。
7.2.3电机保护装置(热继电器、变频器)的定额电流需使用规定的设定值。
7.2.4操作面板及机器的各种需要调整的设定值已在出厂设置成最适值,需要变更设定时需先确认。
应用指南系列-干燥机说明书
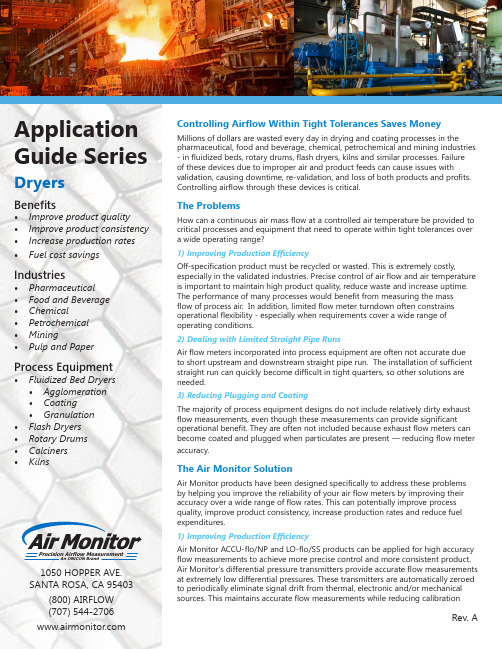
Application Guide Series DryersBenefits• Improve product quality • Improve product consistency • Increase production rates • Fuel cost savings Industries• Pharmaceutical• Food and Beverage• Chemical• Petrochemical• Mining• Pulp and Paper Process Equipment• Fluidized Bed Dryers• Agglomeration• Coating• Granulation• Flash Dryers• Rotary Drums• Calciners• Kilns Controlling Airflow Within Tight Tolerances Saves Money Millions of dollars are wasted every day in drying and coating processes in the pharmaceutical, food and beverage, chemical, petrochemical and mining industries - in fluidized beds, rotary drums, flash dryers, kilns and similar processes. Failureof these devices due to improper air and product feeds can cause issues with validation, causing downtime, re-validation, and loss of both products and profits. Controlling airflow through these devices is critical.The ProblemsHow can a continuous air mass flow at a controlled air temperature be provided to critical processes and equipment that need to operate within tight tolerances overa wide operating range?1) Improving Production EfficiencyOff-specification product must be recycled or wasted. This is extremely costly, especially in the validated industries. Precise control of air flow and air temperature is important to maintain high product quality, reduce waste and increase uptime. The performance of many processes would benefit from measuring the massflow of process air. In addition, limited flow meter turndown often constrains operational flexibility - especially when requirements cover a wide range of operating conditions.2) Dealing with Limited Straight Pipe RunsAir flow meters incorporated into process equipment are often not accurate dueto short upstream and downstream straight pipe run. The installation of sufficient straight run can quickly become difficult in tight quarters, so other solutions are needed.3) Reducing Plugging and CoatingThe majority of process equipment designs do not include relatively dirty exhaust flow measurements, even though these measurements can provide significant operational benefit. They are often not included because exhaust flow meters can become coated and plugged when particulates are present — reducing flow meter accuracy.The Air Monitor SolutionAir Monitor products have been designed specifically to address these problems by helping you improve the reliability of your air flow meters by improving their accuracy over a wide range of flow rates. This can potentially improve process quality, improve product consistency, increase production rates and reduce fuel expenditures.1) Improving Production EfficiencyAir Monitor ACCU-flo/NP and LO-flo/SS products can be applied for high accuracy flow measurements to achieve more precise control and more consistent product. Air Monitor’s differential pressure transmitters provide accurate flow measurements at extremely low differential pressures. These transmitters are automatically zeroed to periodically eliminate signal drift from thermal, electronic and/or mechanical sources. This maintains accurate flow measurements while reducing calibrationRev. APrecision Airflow MeasurementAn ON I CON Brand1050 HOPPER AVE. SANTA ROSA, CA 95403 (800) AIRFLOW(707) 544-2706 requirements and improving reliability. Air Monitor products are designed to measure temperature inputand absolute pressure of the process accurately which enables an accurate and reliable mass flow rate through its temperature and pressure compensation algorithms. 2) Reducing Error from Limited Straight Pipe RunsThe Air Monitor Combustion Airflow (CA) Station, ACCU-flo, and LO-flo/SS products with a multi-point sensing array are utilized in applications with high temperature and high accuracy requirements in small, medium, and large size ducts. Accurate flow measurements can often be obtained within less than two diameters of straight pipe which is a significant improvement over the performance of insertion flow meters installed with limited straight run.3) Plugging and CoatingPlugging and coating can be mitigated by incorporating an Air Monitor AUTO-purge III that periodically clears the flow meter sensing elements with clean compressed air to ensure reliable flow meter operation when particulate is present. What The Tech?Air Monitor’s products rely on two technologies for measuring air flow that allow for accurate readings, which are essential in drying. Pitot Averaging Technology is a multi-point self-averaging technique that measures true velocity pressure, not just a reference pressure. When drying, users can be assured that true velocity pressure (total pressure minus true static pressure) is being calculated, resulting in the highest quality products with less product loss. It also uses the Fechheimer method of true static pressure measurement, ensuring an accurate velocity pressure measurement. This can be modified depending upon specific drying needs.Differential Pressure Technology also translates to accuracy through the drying product range, especially when measuring air flow over a large velocity range. This improves drying efficiencies. The technology is based on using an extensive selection of differential pressure (DP) transducers that have multiple upper range limits (URLs) to precisely match the application. Air Monitor couples ultra-low range (0.05” w.c.) sensing capability with an auto-zero function. This means a highly accurate DP measurement.。
干燥机说明书

日常维护要点:Daily maintenance:1.新设备投入运行一个月后,应检查并填补一次吸附剂,视实际情况(6-12月)全部更换吸附剂。
The absorbent should be checked and added after one month operation of the new equipment. The absorbent should be completely changed after 6-12 months, depending on the actual situation of the equipment.2.定期清洗、吹扫电磁切换阀,并检查阀门运动情况。
The electro-magnetic switch should be regularly cleaned, and the valve should be checked.3.前置过滤器上的自动排水器应定期清洗,确保滤筒体内不积液体。
To make sure that liquid will not be trapped in the cylinder, the automatic water drainer on the pre-filter should be regularly cleaned.4.前置过滤器滤芯寿命为8000H,到时(或滤芯压力降达0.07MPa时)就更换滤芯。
The life time of the core of the pre-filter is 8000 hours, the core should be changed after 8000 hours (or when the pressure drop reaches 0.07MPa).5.定期检查管线接头、法兰、阀门有无泄气现象。
Regularly check the joints, flange and valves for leakage.6.干燥器停用期间,请半闭好所有阀门,防止泄漏,以免吸附剂受潮。
9 升干燥剂除湿机使用说明书 GDDEKD9

9 LITRE DESICCANT DEHUMIDIFIER INSTRUCTION MANUAL GDDEKD9Read and retain these instructions for future referenceCONTENTSSpecifications 2 Where to position 3 Before use 3 Parts 6 Programming Feature 7 Operation 10 Drainage 11 Maintenance 12 Trouble shooting 14SPECIFICATIONS• Above is measured under RT 30ºC, RH 80%.• Current & Fuse: F2L250V or T2L250VDisposalThis product should be taken to our local recycling centre for safety treatment.Waste electrical and electronic products must not be disposed of withhousehold waste.WHERE TO POSITIONThe dehumidifier should be positioned so that it can draw moisture from all areas of your home.When positioning the dehumidifier, ensure that it is placed on a level surface andthat there is a minimum of 20 cm (8”) of space on either side of the unit to allow for efficient airflow.Heater advice for DRY CLOTHES function, the distance between the air vent & the clothes must be kept at least 40cm apart to avoid having water drip into machine and cause damage.Suitable to use in basement, kitchen, living room etc.BEFORE USECAUTION!• O perate this unit on a firm, flat surface to avoid water leakage. Ensure that it is kept upright at all times (including transport and storage).• Do not place on soft surfaces.• E nsure that there is at least 300mm between the sides of the appliance and any flammable materials.• E nsure that there is at least 900mm from the top of the appliance and any flammable materials.• T he unit contains a chemical substance. The unit will emit a chemical smell during the 1st hour of operation without any dangerous consequences.• T he unit features an anti-tip safety device that will switch the unit off if it is tipped during operation.• O nly connect the unit to a properly installed and easily accessible socket so that you can quickly pull the plug in an emergency.• D o not obstruct the air intakes and exhausts.• F or indoor use only.• Do not expose the unit to direct sunlight.• D o not use in cabinet, closet, boats, caravans or similar locations.• D o not use the unit in bathrooms, swimming pools, washrooms or similar wet areas.• D o not use the unit close to a bathtub, shower, sink etc.• D o not use the appliance in locations where paint, petrol or other flammable liquids are used or stored.• D o not allow the appliance to tip over when there is water in the tank.• Avoid getting the unit wet. Do not let any liquid enter the unit.• Do not place a container with liquid on top of the unit.• T he condensed water is not for drinking; either for humans or animals.• Do not use bug sprays or flammable cleansers on the unit.• Do not lay the cord under carpets/rugs so that you can regularly check its condition.• Do not touch the plug of the unit with wet hands.• Never use the cord of the unit as a carrying strap.• B efore moving the unit, first switch off, then unplug and empty the water tank. It takes around 2 minutes for the unit to stop.This allows the heater to cool down.• A lways unplug the unit from the mains power source and wait for at least one hour before carrying out any maintenance, transport or cleaning of the unit.• Always switch the unit off and pull the plug out of the socket:– If you are not using the unit.– Before you clean the unit.– Before you assemble the accessories.– If a fault occurs.– In the event of a storm.• A void over-twisting, coiling or pulling the power cord. Never use nylon or iron wire to tie the power cord.• Do not use extension cords.• I f the power cord is damaged, it must be replaced by an electrician or similarly qualified person, to avoid a hazard.• T he power supply must conform to the specification shown on the rating plate at the back of the unit.• T he appliance shall be installed in accordance with national wiring regulations.• N ever reach to retrieve the unit if it has fallen in water. In such case, immediately pull the plug. Have the unit checked before using it again.• T his appliance can be used by children aged from 8 years and above and persons with reduced physical, sensory or mental capabilities or lack of experience and knowledge if they have been given supervision or instruction concerning use of the appliance in a safe way and understand the hazards involved. Children should not play with the appliance. Cleaning and user maintenance should not be done by children without supervision.• Appliances intended for indoor use (excluding laundry room).• W hile using DRY CLOTHES mode, please keep the unit AT LEAST 40CM away from the objects (ex. the clothes) and ensure no water drips into the air vent of the unit.• W e suggest sending the unit for professional maintenance periodically.• O nly a licensed professional is allowed to dismantle or modify the appliance.• T he machine is to be used only for its prescribed purpose. Any other use isdeemed to be a case of misuse. The user/operator, not the manufacturer will be liable for any damage or injuries of any kind caused as a result of this.DO NOT USE YOUR DESICCANT UNDER THE FOLLOWING DO NOT USE YOUR DESICCANT UNDER THE FOLLOWING If the power cable wires are frayed or cut Near water Exposed to the weather ourdoorsWhere small children may be leftunattendedPARTS1. F AN SPEED Indicator(Sleep, NORM, TURBO)2. Humidity/Timer Display Window3. TIMER Indicator4. AUTO button5. AIR CLEAN Indicator6. FAN SPEED Button7. DRY CLOTHES Indicator 8. DRY CLOTHES (TURBO) Button 9. Humidity Button 10. O N indicator (heat element operation indicator) 11. Power (ON/OFF) Button 12. “Full Tank” indicator 13. TIMER button 14. AIR CLEAN Button• POWER BUTTON: Press this button to start or turn off the machine.• FAN SPEED BUTTON: There are 3 selections under this button:• S LEEP (MUTE): the unit will run in low ventilation/low heat, thus, the unit is quieter. And, if the ambient humidity is less than set humidity, it will run with fan (ventilation) only, no heat. Note! In sleep mode, the humidity indicator in the front plate will not light up.PROGRAMMING FEATURE• N ORMAL: the unit will run in Medium ventilation/HIGH Heat. And, if the ambient humidity is less than the set humidity, the unit will run in Medium fan speed only, no Heat.• T URBO: the unit will run in HIGH ventilation/HIGH Heat. And, when the ambient humidity is less than the set humidity, the unit will run in HIGH fan speed only, no Heat.• AUTO BUTTON: By pressing this button, the unit will work automatically as below:– Ambient humidity ≥ 70% …. unit works in HIGH speed dehumidify.– 70% > ambient humidity ≥ 55% …. unit works in LOW speed dehumidify– A mbient humidity < 55%, …. unit stops for 30mins -> fan resumes to work, todetect the ambient humidity. If higher than 55%, the unit resumes to work.• O PERATION MODES: As an additional safety procedure, the dehumidifier rests for at least 30 minutes every 8 hours of operation. Every 30 minutes of rest, the fan mode turns on to check the ambient humidity and if needed (depending on the set mode), the dehumidifier will resume operation.• D RY CLOTHES (LAUNDRY) BUTTON: This mode is designed to really dry out a room to allow clothes to dry faster. The dehumidifier will work continuously at a target humidity level of 40% humidity / high fan/high heat. The DRY CLOTHES indicator will light up. The dehumidify will also rest every 8 hours of operation.– Under this mode, the fan speed is always fixed at HIGH speed and is not adjustable.• H UMIDITY BUTTON: Set the humidity level you need: CNT (continuous dehumidify), 40%, 50%, 60% or 70%. The set HUMIDIFY level will show on the LED display.I f the HUMIDITY button is not set, the unit will work in the default setting: 50% humidity / low fan / low heat.• C ONTINUOUS DEHUMIDIFY MODE: The dehumidifier rests for 30 minutes between every 8 hours of dehumidification (at the set humidity level).–C ontinuous dehumidify mode + Ambient humidity less than 35%The heater works for 15 minutes, then rests for a few minutes and repeats this cycle, unless the humidity level rises.• U sage when ambient temperature is higher than 36ºCThe heater stops, but the fan keeps running to check humidity, then follows the general logic of stopping for 30 minutes if the desired humidity is reached.• W orking with humidity setting: 40%, 50%, 60% or 70%The dehumidifier rests for 30 minutes between every 8 hours of dehumidification (at the set humidity level).TIMER BUTTON1. I N OPERATION TIMER: while the dehumidifier is operating, press TIMER button to set the number of hours you want the dehumidifier to continue operation. While pressing the button, the LED display will show the number of hours you set (between 0 and 24 in a cycle). The TIMER Indicator will light up at the same time.When the set time has been reached, the machine will turn off automatically.2. D ELAYED START TIMER: while the dehumidifier is turned off/in standby mode, press the TIMER button to select the number of hours you want the dehumidify to countdown until it turns on. For example, if you select the timer to ‘2’, the unit will turn on automatically after 2 hours and enter into the last used mode.• A IR CLEAN BUTTON: By pressing this button, the unit will work in FAN (ventilation) only, no heat. AIR CLEAN indicator light will turn on at the same time. The fan speed is adjustable in this mode.• DISPLAY WINDOWThis can display the:– room temperature (0~50ºC).– room humidity (35~95% humidity).– set humidity, while pressing the HUMIDITY button.– s et time while pressing the TIMER. After 8 seconds, the display returns to room humidity.• ON INDICATOR (heat operation indicator)– lights up in GREEN as the heat element is working.– lights up in RED and blinks if the unit is tipped over.• W ATER FULL INDICATOR: The light turns red and blinks when the water tank is full or if the tank is not in the correct position.• H UMIDITY INDICATOR IN THE FRONT: This unit has a special HUMIDITY INDICATOR in the front, enabling the user to tell the ambient humidity level immediately. It will light up in 3 different colors:ambient humidity level immediaOPERATION1. P lug the unit into the correct mains socket.2. OPEN THE AIR DEFLECTOR at the top.3. P ress the POWER button to turn on the unit. The unit will start to work in LOW FAN/LOW HEAT/LOW DEHUMIDIFY (humidity setting: 50%)4. P ress the HUMIDITY button to set the room humidity you need: continuous5. P, NORMAL(normal/standard) or TURBO.6. Press the TIMER button to set the working hours you need (1~24 hours).7. T o turn off the unit, press the POWER button again.• Y ou may also set the unit in AUTO mode or DRY CLOTHES mode, please refer to the description in the previous page.IMPORTANT!1. A fter switching off the unit, it takes at least 2 minutes for the unit to shut offcompletely, this allows the heater to cool down. DO NOT DISCONNECT THEPLUG DIRECTLY FOR A QUICK SHUT OFF.2. Do not operate the unit without the AIR FILTER.3. W hile using the DRY CLOTHES mode, please keep the air vent (air outlet) of the unitAT LEAST 40CM away from the objects (eg. the clothes) and ensure no water drips into the air vent of unit.* ATTENTION! DO NOT use the unit in the closet or wardrobe.wardrobe .4. T ip Over protection: This unit is equipped with a tilt switch for overheat protection. If the unit is tipped, the unit will stop automatically. The ON indicator will turn RED and blink as a warning, also the display window will show E5.After repositioning the unit upright, press the POWER button to re-start.5. S elf-Diagnosis: This machine is equipped with a self-diagnosis function. If something is wrong with the machine, the LED will display Error E1 to E7 (each represents a different situation).E5 means the unit is tipped over. Please reposition the unit upright, press POWER button to re-start.F or other errors, please call Glen Dimplex or your service centre. DO NOT dismantle the machine by yourselves in any case.DRAINAGEWhile the water tank is full, the unit will stop working for self-protection. The water full indicator will blink in red and the unit will buzz a warning.To empty the tank, please follow these steps:1. Hold the unit with one hand to steady it.2. Pull out the tank squarely from the unit.3. R emove the cover of the tank and carry it by its handle to empty the water.4. A fter the tank is emptied, replace the tank cover and reinsert the water tank to the dehumidifier. Make sure it is properly positioned, so the ‘water full’ indicator light goes out and your dehumidifier is operating as normal again.Please note, if the water tank has not been positioned correctly, the water full indicator will stay red and the unit will keep buzzing.CONTINUOUS DRAINAGEWhen the dehumidifier is operated in very high humidity, the water tank will require more frequent drainage. In this situation, it may be more convenient to set the unit up for continuous drainage with the following procedures:1. Cut off the cover of the continuous drain at the back of the unit.2. Unplug the water plug.3. Connect the drain hole with a water tube of inner diameter 11mm.* Please note, the water tube is not supplied with the unit.4. P ull out the water tank, plug the dropping gate inside the unit with the water plug taken from the continuous drain.5. Return the water tank to the correct position.the water tank to the correct position.MAINTENANCEAlways unplug the unit from the mains and wait for at least one hour before carrying out any maintenance or cleaning of the unit.CLEANING THE BODYUse a soft cloth to wipe the unit clean.Don’t use volatile chemicals, gasoline, detergents, chemically treated clothes, or other cleaning solutions. These all could possibly damage the dehumidifier.CLEANING THE FILTERDraw out the air filter from the rear of the unit.For dust filter and filter frame:1. U se a vacuum cleaner or tap the filter lightly for easy cleaning. If the filter is particularly dirty, use warm water.2. Make sure the filter is completely dry before replacing.3. Do not expose the filter to sunlight.For HEPA filter:This filter is not washable. Its life span is variable and depends on the ambient conditions where the appliance is used. The filter should be checked periodically (about every 6 months) and replaced if necessary. See the retailer where you purchased this product for spare filters.STORAGE:If the unit is not used for an extended period of time. Please:• Turn the unit off, unplug and tidy the power cord.• Completely empty the water tank and wipe it clean.• Cover the unit and store it where it will not be in direct sunlight.TROUBLE SHOOTINGPlease TURN off the power immediately when the unit emits strange noises, odors, etc.Phone: 09 274 8265Fax: 09 274 8472Email:********************.nz Web: Glen Dimplex New Zealand Ltd 38 Harris Road, East Tamaki Auckland, New Zealand P.O. Box 58473, Botany Manukau 2163, New Zealand。
- 1、下载文档前请自行甄别文档内容的完整性,平台不提供额外的编辑、内容补充、找答案等附加服务。
- 2、"仅部分预览"的文档,不可在线预览部分如存在完整性等问题,可反馈申请退款(可完整预览的文档不适用该条件!)。
- 3、如文档侵犯您的权益,请联系客服反馈,我们会尽快为您处理(人工客服工作时间:9:00-18:30)。
电话:+86-769-81086963 传真: +86-769-81086936 地址:广东省东莞市横沥镇横沥村综合开发区 官网:
电话:+86-769-81086963 传真: +86-769-81086936 地址:广东省东莞市横沥镇横沥村综合电话:+86-769-81086963 传真: +86-769-81086936 地址:广东省东莞市横沥镇横沥村综合开发区 官网:
电话:+86-769-81086963 传真: +86-769-81086936 地址:广东省东莞市横沥镇横沥村综合开发区 官网:
电话:+86-769-81086963 传真: +86-769-81086936 地址:广东省东莞市横沥镇横沥村综合开发区 官网:
电话:+86-769-81086963 传真: +86-769-81086936 地址:广东省东莞市横沥镇横沥村综合开发区 官网:
本文来自东莞纳金机械:
电话:+86-769-81086963 传真: +86-769-81086936 地址:广东省东莞市横沥镇横沥村综合开发区 官网:
电话:+86-769-81086963 传真: +86-769-81086936 地址:广东省东莞市横沥镇横沥村综合开发区 官网:
电话:+86-769-81086963 传真: +86-769-81086936 地址:广东省东莞市横沥镇横沥村综合开发区 官网:
电话:+86-769-81086963 传真: +86-769-81086936 地址:广东省东莞市横沥镇横沥村综合开发区 官网:
电话:+86-769-81086963 传真: +86-769-81086936 地址:广东省东莞市横沥镇横沥村综合开发区 官网:
电话:+86-769-81086963 传真: +86-769-81086936 地址:广东省东莞市横沥镇横沥村综合开发区 官网:
电话:+86-769-81086963 传真: +86-769-81086936 地址:广东省东莞市横沥镇横沥村综合开发区 官网:
电话:+86-769-81086963 传真: +86-769-81086936 地址:广东省东莞市横沥镇横沥村综合开发区 官网:
除湿干燥机
使 用 说 明 书
东莞纳金机械有限公司
TEL:+86-769-81086963 FAX:+86-769-81086936 安装使用控制器之前请详细阅读本说明书! 电话:+86-769-81086963 传真: +86-769-81086936 地址:广东省东莞市横沥镇横沥村综合开发区 官网:
