OutLook使用教程
outlook怎么用

Outlook怎么用1. 简介Outlook是一款由微软开发的电子邮件客户端程序,广泛应用于个人和商业工作场景中。
除了电子邮件,Outlook还提供日历、联系人管理、任务管理等功能,帮助用户高效地组织和管理工作。
本文将介绍Outlook的常用功能和操作方法,以帮助读者更好地利用这一工具进行日常工作。
2. 基础操作2.1 登录和设置在第一次运行Outlook之前,需要进行登录和设置。
用户需要提供自己的电子邮件账号和密码,然后Outlook将自动进行邮箱的配置。
对于POP3或IMAP电子邮件账户,需要手动输入相应的服务器信息。
2.2 收发邮件Outlook的主要功能之一就是收发电子邮件。
在Outlook的主界面,用户可以点击“新建邮件”按钮来打开一个新的邮件窗口。
在邮件窗口中,用户可以输入收件人的邮箱地址、邮件主题和邮件正文,并可以附加文件、设置优先级等。
发送邮件后,Outlook会将该邮件放入“已发送”文件夹中。
收到新邮件时,Outlook会自动将邮件放入收件箱中,并发出提示。
2.3 管理文件夹为了更好地组织和管理邮件,Outlook提供了文件夹功能。
用户可以创建文件夹,并将相关的邮件移动到相应的文件夹中。
文件夹可以有层级关系,用户可以根据自己的需求进行设置。
2.4 查找和筛选邮件当邮件数量较大时,查找和筛选邮件成为必要的操作。
Outlook提供了强大的搜索功能,可以根据发件人、主题、关键词等进行邮件搜索。
此外,Outlook还支持根据时间、标签、未读状态等进行邮件筛选,以帮助用户快速找到所需的邮件。
3. 高级功能3.1 日历管理Outlook的日历功能可以帮助用户管理个人和团队的日程安排。
用户可以创建日历事件,并设置起始时间、结束时间、提醒等。
Outlook还支持共享日历,用户可以与团队成员共享自己的日程安排,以提高工作的协调性。
3.2 联系人管理Outlook提供了联系人管理功能,用户可以保存联系人的姓名、邮箱、电话号码等信息,并可以根据需要创建联系人分组。
Outlook教程
Outlook教程第一章:Outlook概述Outlook是一款由微软开发的电子邮件管理程序。
它不仅提供了电子邮件服务,还集成了日历、任务管理、联系人管理等功能,使用户能够更加高效地处理个人和商务事务。
第二章:安装和设置Outlook1. 下载和安装Outlook:用户可以从微软官方网站或其他安全的来源下载Outlook的安装程序。
安装过程简单,只需按照向导提示进行操作即可。
2. 创建Outlook账户:在首次运行Outlook时,用户需要通过提供个人信息来创建一个Outlook账户。
这个账户将用于登录和管理所有Outlook的功能。
3. 设置邮箱:在Outlook中添加和设置邮箱非常重要。
用户可以添加多个邮箱,包括POP3、IMAP和Exchange等类型的邮箱,并设置相关的服务器和登录信息。
第三章:基本操作1. 探索界面:Outlook的界面分为几个主要部分,包括导航栏、邮件列表、邮件预览窗格和工具栏。
用户可以通过这些部分来浏览、查看和管理邮件。
2. 收发邮件:用户可以使用Outlook收发电子邮件。
点击“新邮件”按钮,填写收件人、主题和正文等信息,然后点击发送即可。
同时,用户可以设置自动回复、添加附件等功能来增强邮件的实用性。
3. 管理邮件:Outlook提供了一系列邮件管理工具,使用户能够对邮件进行归档、标记、分类和过滤等操作。
用户可以使用文件夹和标签来组织邮件,以便更轻松地查找和管理。
第四章:高级功能1. 日历管理:Outlook的日历功能使用户能够创建和管理个人或团队的日程安排。
用户可以设置提醒、共享日历、发送会议邀请等,以便更好地安排时间和会议。
2. 任务管理:Outlook的任务功能帮助用户记录和跟踪待办事项。
用户可以创建任务、设置截止日期和优先级,并通过提醒和分类等功能来提高工作效率。
3. 联系人管理:Outlook的联系人功能允许用户创建联系人列表,并记录各种联系信息。
用户可以通过邮箱导入联系人、设置联系人分组和标签,以及通过邮件和日历等功能与联系人保持联系。
outlook怎么用
Outlook怎么用1. 简介Outlook是由微软公司开发的一款邮件管理软件,它提供了集成的电子邮件、日程安排、联系人管理和任务管理等功能。
无论是个人用户还是企业用户,Outlook都是一款十分强大且易于使用的邮件应用程序。
本文将介绍如何使用Outlook的基本功能,包括设置邮件账户、发送和接收邮件、管理联系人和日程安排等。
2. 设置邮件账户在开始使用Outlook之前,我们首先要设置一个或多个邮件账户。
下面是设置邮件账户的步骤:1.打开Outlook应用程序。
2.点击菜单栏中的“文件”选项。
3.在弹出的菜单中选择“添加帐户”选项。
4.在添加帐户向导中,输入您的姓名、电子邮件地址和密码。
5.点击“下一步”按钮,Outlook会自动配置您的邮件账户。
6.完成配置后,您的邮件账户将出现在Outlook的左侧导航栏中。
3. 发送和接收邮件一旦您设置好了邮件账户,就可以开始发送和接收邮件了。
Outlook提供了多种发送和接收邮件的方式,以下是其中的几种常用方式:3.1. 手动发送和接收要手动发送和接收邮件,请按照以下步骤操作:1.点击Outlook的菜单栏中的“发送/接收”选项。
2.在弹出的子菜单中,选择“发送/接收全部邮件”选项。
3.2. 自动发送和接收Outlook也提供了自动发送和接收邮件的选项,可以根据您的设置定期自动发送和接收邮件。
下面是设置自动发送和接收的步骤:1.点击Outlook的菜单栏中的“文件”选项。
2.在弹出的菜单中选择“选项”选项。
3.在“Outlook选项”窗口中,点击左侧导航栏的“高级”选项。
4.在“发送和接收”部分,点击“发送/接收”按钮。
5.在“发送/接收设置”窗口中,点击“自动发送/接收”选项。
6.设置发送和接收邮件的时间间隔。
7.点击“关闭”按钮保存设置。
4. 管理联系人Outlook的联系人管理功能可以帮助您方便地管理您的联系人信息。
以下是如何管理联系人的步骤:1.点击Outlook的菜单栏中的“人员”选项。
outlook写邮件流程
outlook写邮件流程Outlook写邮件流程一、概述Outlook是一款常用的电子邮件客户端软件,它可以用于发送、接收、管理和组织电子邮件。
本文将介绍使用Outlook编写邮件的详细流程及一些注意事项。
二、打开Outlook打开Outlook软件。
在开始菜单或桌面上找到Outlook图标,双击打开。
如果是第一次使用Outlook,可能需要进行一些初始设置,如输入电子邮件账户和密码等。
三、创建新邮件在Outlook的主界面上,可以看到“新邮件”按钮,点击它可以创建一封新的电子邮件。
也可以使用快捷键Ctrl+N来创建新邮件。
四、填写收件人在新邮件界面的收件人一栏中,填写邮件的接收人。
可以直接输入接收人的电子邮件地址,多个地址之间用分号隔开。
也可以通过点击“收件人”按钮,从Outlook通讯录或其他地址簿中选择接收人。
五、填写主题在邮件主题一栏中,填写邮件的主题。
主题应简明扼要地概括邮件内容,以便接收人快速了解邮件的主要内容。
六、编辑邮件内容在邮件正文的编辑框中,输入邮件的具体内容。
可以使用字体、字号、颜色等功能对邮件内容进行格式化。
注意,邮件内容要简洁明了,用词准确,避免歧义或错误信息。
另外,不要在邮件中插入过多的图片或附件,以免增加邮件大小,影响发送和接收速度。
七、添加附件如果需要在邮件中添加附件,可以点击“附件”按钮或使用快捷键Ctrl+Shift+A。
然后选择要添加的文件,可以是文档、图片、音频、视频等各种类型的文件。
添加附件时,要注意附件文件大小的限制,通常不要超过几十兆字节。
八、设置邮件格式Outlook支持多种邮件格式,如纯文本、HTML和富文本等。
可以在“选项”菜单中的“邮件格式”选项中选择合适的格式。
一般情况下,HTML格式是最常用的,因为它可以实现更多样式和布局的效果。
九、检查邮件在发送邮件之前,务必仔细检查邮件的内容、附件是否准确无误。
可以通过点击“拼写检查”按钮或使用快捷键F7来检查拼写错误。
outlook使用手册
outlook使用手册Outlook是一款广泛使用的电子邮件客户端。
它是一个功能强大的程序,可以管理您的电子邮件、日历、任务和联系人。
使用Outlook 可能会有一些困惑,特别是对于新手来说。
下面是一些步骤,让您能够熟练掌握Outlook。
第一步:设置你的Outlook账户在开始使用Outlook之前,您需要设置一个Outlook账户。
要设置Outlook账户,请按照以下步骤操作:1. 打开Outlook程序2. 点击“文件”选项卡3. 点击“添加账户”4. 输入您的名称、电子邮件地址和密码5. 点击“下一步”按钮,Outlook将自动配置您的账户第二步:管理你的电子邮件Outlook非常适合管理电子邮件,以下是一些操作步骤:1. 进入“收件箱”选项卡,在左侧窗格中看到所有的电子邮件。
2. 点击“撰写”选项卡,创建新的电子邮件。
3. 点击“发送/接收”按钮,Outlook会自动检查您的新邮件。
4. 右键单击电子邮件,可以进行删除、移动和标记为已读或未读等操作。
第三步:时间管理Outlook还具有强大的时间管理功能,可以轻松安排您的日程表、任务和会议。
以下是一些操作步骤:1. 进入“日历”选项卡,创建新的预约或会议。
2. 进入“任务”选项卡,设置您的任务和优先级。
3. Outlook会自动提醒您的日程表和任务的截止日期。
第四步:联系人管理Outlook还有一个功能强大的联系人管理系统,可以帮助您管理您的客户和业务联系人。
以下是一些操作步骤:1. 进入“人员”选项卡,点击“新建联系人”按钮。
2. 添加联系人的姓名、电子邮件、地址和电话号码等基本信息。
3. 您还可以添加联系人的公司名称、职位和备注信息等。
4. 您可以在“人员”选项卡,管理和查看您保存的所有联系人信息。
总结Outlook是一款非常强大且功能丰富的应用程序。
使用这些步骤,您可以轻松地管理您的电子邮件、日历、任务和联系人信息。
当然,Outlook仍有许多功能,您可以自己进一步探索和学习。
outlook使用教程
OUTLOOK 使用教程之青柳念文创作一、设置1、双击桌面图标,打开outlook 软件.2、首次使用时弹出一个对话框,按“下一步”操纵.3、这时会提示要求新建配置一个邮箱用户,选择“是”,然后“下一步”.4、选择选择电子邮件服务器,这里选择POP3服务器.5、选择手动设置电子邮件地址,然后“下一步”.6、选择“microsoft exchange”,然后“下一步”.7、在‘Microsoft Exchange服务器(E)’一栏填写服务器地址,这里要勾选“使用缓存exchange形式”,用户名输入帐户名,然后“下一步”. 8、这时要求输入用户名和暗码,用户名格式为zhongyong/姓名.9、完成新建账户.10、在OUTLOOK主界面的“工具”菜单,点击“帐户设置”.11、在对话框这里选择“数据文件”选项.12、单击“添加”按钮.13、在新的对话框中选择“office outlook 个人文件夹文件(.pst)”选项,然后单击“确定”按钮.14、阅读到当地计算机个人文件夹,创建或打开outlook数据文件,然后单击“确定”.15、在弹出的对话框中输入称号,然后“确定”就新建了保管到当地计算机的邮件数据文件.16、打击刚刚新建的数据文件,选中它,然后单击“设为默许值”.17、这时会弹出一个框,单击“”按钮就默许将邮件的数据都保管在个人计算机里了.18、在主界面工具栏中单击“发送/接纳”旁边的三角符号,在弹出的下拉框中依次选择“发送/接纳设置—定义发送/接纳组”.19、在弹出的对话框中设置自动接纳邮件的时间间隔.二、使用1、通讯地址簿:在主界面工具栏里,可以直接输入称号搜索地址,也可以单击左边的按钮,进入通讯簿查找.2、发送邮件(1)、单击主界面工具栏“新建”按钮(2)、写邮件,然后发送:收件人可以直接输入收件人地址,也可以点击“收件人”按钮,进入通讯地址簿查找所要发送的收件人.。
outlook使用方法
outlook使用方法Outlook是Microsoft开发的电子邮件管理软件,它不仅可以帮助用户管理邮件,还可以处理日历、联系人、任务等各种信息,是一个非常实用的办公工具。
下面是Outlook 的使用方法。
一、设置电子邮件账户在安装Outlook之后,第一步需要设置新的电子邮件账户。
首先打开Outlook,在主菜单栏中点击“文件”选项卡,然后点击“添加账户”按钮。
在弹出的窗口中填写相应的邮箱地址和密码,Outlook会自动识别邮箱的主要设置,用户只需要按照提示操作即可。
二、撰写新邮件在Outlook中写邮件非常简单:首先在主菜单栏中单击“新邮件”按钮,然后在“收件人”框中输入收件人的地址,填写邮件的主题和正文,最后点击发送按钮即可。
三、收发电子邮件在成功设置电子邮件账户之后,Outlook会自动将收件箱中的邮件下载到本地。
当有新邮件到达时,Outlook会发出提示音并在“邮件”选项卡中的收件箱下显示未读邮件的数量。
用户只需要单击收件箱即可查看邮件的具体内容,并可以通过回复或转发按钮进行相应的操作。
四、管理联系人在Outlook中管理联系人非常方便:选中主菜单栏中的“人脉”选项卡,点击“新联系人”按钮,然后填写相应的信息。
用户还可以在Outlook中创建分组,以便更好地管理不同类别的联系人。
五、处理日历Outlook的日历功能可以帮助用户记录重要的日程安排,包括会议、约会、提醒等。
用户只需要在日历中填写相关信息即可,Outlook会在预定时间提醒用户,并且提供相应的操作选项。
六、处理任务七、设置邮件筛选规则在Outlook中,用户可以根据不同的邮件类型和关键词设置邮件筛选规则,自动将某类邮件分类或直接删除。
用户只需要单击“文件”选项卡中的“管理规则和提示”按钮,然后输入相应的筛选条件即可。
八、安全性Outlook还提供了一些安全性功能,包括对邮件内容和附件的加密、对恶意软件的筛选和阻止等。
用户只需要单击“文件”选项卡中的“选项”按钮,然后单击“信任中心”选项卡,在相关选项中进行设置。
最全面的Outlook使用技巧教程
最全面的Outlook使用技巧教程Outlook是一款功能强大的电子邮件和日历管理工具。
在这份教程中,我们将介绍一些最全面的Outlook使用技巧,帮助您更加高效地使用这个工具。
以下是一些常见的技巧和功能:1. 设置自动回复有时候我们需要暂时离开,无法即时回复邮件。
在Outlook中,您可以设置自动回复,告知发件人您暂时不在办公室,并给出预计回复时间。
这功能非常实用,可以避免错过重要消息。
2. 使用快捷键掌握Outlook的快捷键可以提高您的工作效率。
比如,按下Ctrl + N可以快速创建新邮件,Ctrl + R可以回复邮件,Ctrl + Enter可以发送邮件等。
探索并记住这些快捷键将为您带来便利。
3. 优化邮件管理Outlook提供了强大的邮件管理功能。
您可以使用标签、信封和过滤器等功能来帮助您更好地组织和筛选收件箱。
另外,您还可以创建邮件规则,自动将特定的邮件分类、移动或删除。
这将帮助您更快速地处理和找到重要邮件。
4. 有效使用日历Outlook的日历功能也非常实用。
您可以在日历中创建、编辑和分享事件,并设置提醒。
除此之外,您还可以通过Outlook与他人共享日历,方便协调会议和安排时间。
5. 管理联系人Outlook的联系人管理功能可以帮助您更好地组织和跟踪联系人信息。
您可以创建联系人群组,将联系人归类,并快速查找和编辑联系人信息。
这一功能对于经常需要与多个联系人互动的人来说尤为重要。
6. 远程访问和同步如果您经常需要在不同设备上使用Outlook,可以设置远程访问和同步功能。
这样,无论您在哪里,您的邮件、日历和联系人都将自动更新和同步。
这将极大地方便您的工作和通信。
7. 安全和隐私设置保护个人隐私和提高安全性是使用Outlook的重要注意事项。
您可以设置密码、加密邮件和启用双重身份认证来增强账户的安全性。
定期检查和更新安全设置是非常必要的。
以上是一些最全面的Outlook使用技巧教程。
outlook基本用法
outlook基本用法Outlook是一款由微软公司开发的电子邮件客户端,它可以帮助用户管理电子邮件、日历、联系人、任务等信息。
本文将介绍Outlook的基本用法,包括如何设置邮箱、发送和接收邮件、管理日历、联系人和任务等。
一、设置邮箱在使用Outlook之前,需要先设置邮箱。
在Outlook中,可以添加多个邮箱账户,包括Outlook、Gmail、Hotmail等。
以下是设置邮箱的步骤:1. 打开Outlook,点击“文件”选项卡,选择“添加账户”。
2. 输入邮箱地址和密码,点击“下一步”。
3. Outlook会自动检测邮箱设置,如果设置正确,会显示“恭喜,一切就绪!”的提示,点击“完成”即可。
4. 如果设置不正确,需要手动设置服务器信息。
在“高级选项”中,选择“手动设置服务器或其他服务器类型”,点击“下一步”。
5. 选择“Internet电子邮件”,点击“下一步”。
6. 输入邮箱账户信息和服务器信息,包括服务器类型、入站服务器、出站服务器等。
这些信息可以在邮箱提供商的网站上找到。
7. 点击“测试账户设置”按钮,测试是否能够成功连接服务器。
8. 如果测试成功,点击“下一步”和“完成”按钮,完成邮箱设置。
二、发送和接收邮件设置好邮箱之后,就可以开始发送和接收邮件了。
以下是发送邮件的步骤:1. 点击“新邮件”按钮,打开新邮件窗口。
2. 在“收件人”栏中输入收件人的邮箱地址。
3. 在“主题”栏中输入邮件主题。
4. 在邮件正文中输入邮件内容。
5. 点击“发送”按钮,发送邮件。
接收邮件的步骤如下:1. 在Outlook的主界面中,点击“发送/接收”选项卡。
2. Outlook会自动检查新邮件,如果有新邮件,会自动下载到收件箱中。
3. 点击收件箱中的邮件,即可查看邮件内容。
三、管理日历Outlook的日历功能可以帮助用户管理日程安排,包括添加、编辑和删除日程等。
以下是管理日历的步骤:1. 点击“日历”选项卡,打开日历窗口。
Microsoft Outlook for Email 使用教程及界面介绍翻译
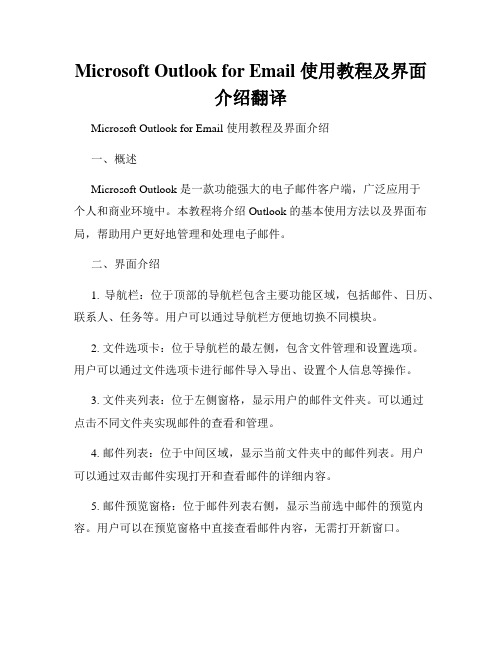
Microsoft Outlook for Email 使用教程及界面介绍翻译Microsoft Outlook for Email 使用教程及界面介绍一、概述Microsoft Outlook 是一款功能强大的电子邮件客户端,广泛应用于个人和商业环境中。
本教程将介绍 Outlook 的基本使用方法以及界面布局,帮助用户更好地管理和处理电子邮件。
二、界面介绍1. 导航栏:位于顶部的导航栏包含主要功能区域,包括邮件、日历、联系人、任务等。
用户可以通过导航栏方便地切换不同模块。
2. 文件选项卡:位于导航栏的最左侧,包含文件管理和设置选项。
用户可以通过文件选项卡进行邮件导入导出、设置个人信息等操作。
3. 文件夹列表:位于左侧窗格,显示用户的邮件文件夹。
可以通过点击不同文件夹实现邮件的查看和管理。
4. 邮件列表:位于中间区域,显示当前文件夹中的邮件列表。
用户可以通过双击邮件实现打开和查看邮件的详细内容。
5. 邮件预览窗格:位于邮件列表右侧,显示当前选中邮件的预览内容。
用户可以在预览窗格中直接查看邮件内容,无需打开新窗口。
6. 邮件详细视图:位于邮件列表下方,可以显示当前选中邮件的详细内容,包括发件人、收件人、主题、正文等。
用户可以在详细视图中进行回复、转发等操作。
7. 快速步骤工具栏:位于邮件详细视图上方,可以快速对选中的邮件进行常用操作,如删除、移动、标记等。
8. 搜索栏:位于界面右上方,可以通过关键词快速搜索邮件内容。
三、基本功能操作1. 发送邮件:点击导航栏的“邮件”选项,然后点击“新邮件”按钮,在弹出的窗口中填写收件人、主题和正文,点击“发送”按钮即可发送邮件。
2. 接收邮件:Outlook 会自动检查新邮件,并在邮件列表中显示新的未读邮件。
用户可以通过点击邮件列表中的邮件打开并查看邮件内容。
3. 回复和转发邮件:在邮件详细视图中,点击“回复”按钮可以回复邮件,点击“转发”按钮可以将邮件转发给其他人。
outlook教程
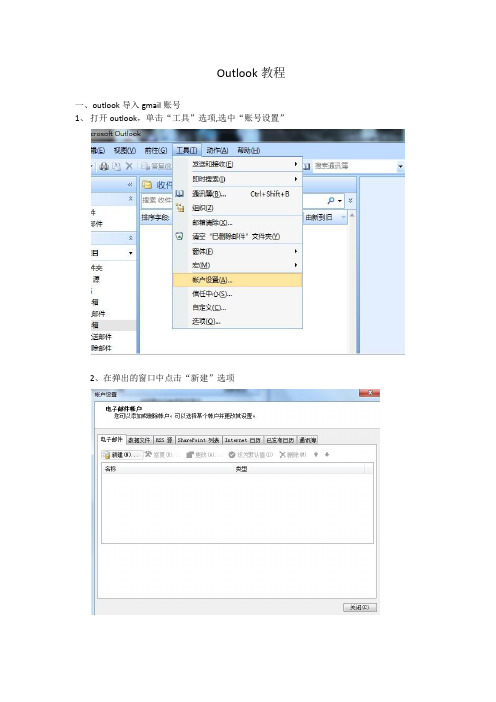
Outlook教程一、outlook导入gmail账号1、打开outlook,单击“工具”选项,选中“账号设置”2、在弹出的窗口中点击“新建”选项3、在弹窗中选中“Microsoft Exchange、POP3、IMAP或HTTP(M)”,并然后选择“下一步”4、在“添加新电子邮件账户”上,分别对应输入“您的姓名”、“电子邮件地址”“密码”“重新键入密码”,然后点下一步。
Ps:“电子邮件地址”记得要加上后缀5、等待outlook配置,若出现以下界面并且gmail收到测试邮件,则点击“完成”,添加账号成功。
PS:加成功后,gmail上的邮件会自动复制到outlook上,并且gmail上的邮件还会继续保留,不会消失。
不过邮件有时需要等会才会自动复制邮件到outlook,不会马上复制。
二、outlook导入gmail导出的通讯录1、点击outlook主界面的“联系人”选项,窗口切换到联系人窗口,右击“联系人”,选择“新建文件夹”,然后在“新建文件夹”弹窗中,输入“鼎甲”,然后确定,新建“鼎甲”成功。
2、点击“文件”,选中“导入和导出”3、选中“从另一程序或文件导入”,下一步4、选中逗号分隔的值(Windows),下一步。
5、点击“浏览”选择gmail导出的通讯录,并在下面选上“用导入的项目替换重复的项目”,然后下一步。
6、选中刚才新建的“鼎甲”文件夹,下一步。
7、点击“映射自定义字段(M)”,在弹出的“映射自定义字段”窗口上把左侧的first name、last name、E-mail Address 、E-mail 1 Address、E-mail 2 Address分别拖到右侧相对应的中文字段上。
8、映射好字段后,点“确定”,回到“导入文件”窗口,点“完成”。
等待通讯录导入,然后点击“鼎甲”,可以看到通讯录了。
三、outlook设置签名1、点击“工具”选项,选中“选项(O)”选项2、在弹窗中点击“邮件格式”,然后点击签名3、在“签名和信纸”弹窗中,于左上角新建一个签名(比如鼎甲签名),然后双击“鼎甲签名”,在“编辑签名”下面空白处编辑自己的签名,编辑好签名后,在左上角点击“保存”,然在在“新邮件(M)”那里选择“鼎甲签名”,最好点确定。
Outlook简易设置指南
Outlook简易设置指南I. 介绍OutlookOutlook是微软公司开发的一款全功能的电子邮件和个人信息管理软件。
它拥有强大的邮件收发功能、日历、联系人管理、任务提醒等特点,广泛应用于个人和商务场景。
本文将为您提供Outlook的简易设置指南。
II. 下载和安装Outlook1. 访问Microsoft官方网站2. 在产品和服务页面,点击"Outlook"选项3. 选择适用于您的操作系统的Outlook版本进行下载4. 安装Outlook并按照向导进行设置III. 配置邮件账户1. 打开Outlook软件2. 点击“文件”选项卡,选择“添加账户”3. 输入您的邮件地址和密码,并根据向导提示完成账户设置过程4. 如果您的邮件提供商不在Outlook自动配置列表中,选择“手动配置账户”选项,并按照提供商提供的设置说明进行手动配置IV. 设置发送和接收邮件1. 点击“文件”选项卡,选择“选项”2. 在“Outlook选项”对话框中选择“高级”选项卡3. 在“发送和接收”部分,点击“发送/接收”按钮4. 在“发送/接收组”对话框中,选择要包括的账户,设置自动发送和接收邮件的时间间隔,点击“关闭”V. 创建和管理联系人1. 点击“人员”选项卡,选择“新建联系人”2. 输入联系人的姓名、电子邮件地址、电话号码等信息3. 点击“保存”按钮,将联系人添加到联系人列表中4. 若要编辑或删除联系人,右键点击联系人并选择相应的选项VI. 设置和管理日历1. 点击“日历”选项卡,选择“新建日历项”2. 输入日历项的主题、时间、地点等信息3. 设置提醒时间,以确保您不会错过重要的日程安排4. 若要查看日历项,可以在日历视图中通过点击日期或搜索功能进行查找VII. 配置任务提醒1. 点击“任务”选项卡,选择“新建任务”2. 输入任务的主题、截止日期、重复性等信息3. 设置提醒时间,以确保您能按时完成任务4. 在任务列表中可以编辑、标记完成或删除任务VIII. 设置其他首选项1. 点击“文件”选项卡,选择“选项”2. 根据个人需求配置Outlook的首选项,比如界面语言、邮件签名、邮件预览方式等3. 点击“确定”按钮保存设置IX. 将其他邮件导入Outlook1. 点击“文件”选项卡,选择“打开与导入”2. 选择“从其他文件导入”并按照向导提示选择要导入的文件类型和位置3. 完成导入过程后,您将在Outlook中看到导入的邮件和文件X. 安全和备份1. 定期备份Outlook的数据,以防止数据丢失2. 使用强密码保护Outlook账户,避免未授权访问3. 勿点击来历不明的邮件附件或链接,防止电脑被恶意软件感染4. 注意定时更新Outlook及计算机的安全补丁,确保系统安全性总结:本文提供了Outlook的简易设置指南,内容涵盖了下载安装、配置邮件账户、设置发送和接收邮件、创建和管理联系人、设置和管理日历、配置任务提醒、设置其他首选项、导入邮件以及安全和备份等方面的内容。
Outlook-操作手册
Outlook-操作手册1.密送及发件人设置1.点击菜单栏“Home”内的“New E-mail”2.在打开的新邮件中点击“Options”,可以看到“Show Bcc (密送)”与“Show From(发件人)”设置2.群组设置1、点击左下角的“Contacts”2、弹出的页面中,“New Contact”是添加联系人;“New Contact Group”是添加群组3、新建群组需先点击进入“New Contact Group”,然后点击“Add Members”选项中的“From Address Book”选择要添加的群组成员4、在“Select Members”中双击要选择的群组成员人名后点击“OK”5、群组名称和组内人员都设置好后点击“Save&Close”即可保存Tips:以后在发邮件时直接输入群组名即可批量发送3.格式字体设置、发送重点邮件“Basic T ext”内可设置字体,”High Importance”即标注为重点邮件发送。
4.标注重点邮件1.点击”Tags”右下角的小箭头2.进入”Properties”界面后,可选择”Importance”内的”Low”、”Normal”和”High”来标注邮件的重要性5.邮箱签名设置1.点击菜单栏中的“File”,选择“Options”选项2.在“Outlook Options”中,点击“Mail”,再点击“Signatures”3.点击“New”,在New Signature页面的框中输入新签名的名字后点击“OK”4.在标红框内设计好自己的邮箱签名后,点击“Save”即可另一种设置方式1.在新邮件编写的主界面,点击”Include”中的“signature”,选择“signatures…”选项2.进入该界面后可选择是新建还是编辑签名。
6.邮件撤回1.双击打开已经发送出去的邮件,点击”move”-“Action”内的“Recall This Message…”2.选择删除该邮件的未读副本还是删除未读副本并用新邮件替换。
使用outlook的技巧
使用outlook的技巧Outlook,作为一种流行的电子邮件和日历管理工具,为我们的工作和生活提供了许多便利。
然而,许多人只是简单地使用Outlook发送和接收电子邮件,而忽略了其许多强大的功能和技巧。
在本篇文章中,我们将一步一步介绍如何最好地使用Outlook,并学习一些有用的技巧,以提高我们的效率。
第一步:设置Outlook。
在使用Outlook之前,您需要设置一些基本配置,以确保它最好地适应您的需求。
首先,您可以设置默认的电子邮件字体和格式。
转到Outlook选项,然后在邮件部分进行所需的更改。
此外,您还可以设置默认的签名,以便在每个电子邮件末尾显示您的联系信息。
此外,您可能还希望设置Outlook以自动检查新邮件和提醒您有新邮件到达。
第二步:组织您的收件箱。
Outlook收件箱可能会变得非常杂乱,这使得寻找特定邮件变得困难。
为了提高您的生产力,您可以使用规则来自动将特定类型的邮件分类到不同的文件夹中。
例如,您可以设置规则,将所有来自特定人或具有特定主题的邮件移动到一个单独的文件夹中。
这样,您只需要专注于重要邮件,而不必被垃圾邮件或其他次要邮件所干扰。
第三步:使用Outlook的搜索功能。
Outlook的搜索功能非常强大,可以帮助您快速找到需要的电子邮件或其他项目。
您可以使用搜索栏在当前文件夹中搜索特定关键词。
此外,如果您要搜索的项目存储在其他文件夹中,您可以使用高级搜索功能。
这将使您能够搜索多个文件夹,并根据日期、发件人、接收者等进行更精确的搜索。
第四步:了解和使用Outlook的快捷键。
Outlook有许多方便的快捷键,可以帮助您更快地完成任务。
例如,按Ctrl + N可以快速创建新电子邮件。
按Ctrl + R可以回复邮件,按Ctrl + F可以转发邮件。
此外,使用Ctrl + Shift + M可以创建新的通知提醒,Ctrl + Shift + A可以创建新的约会等等。
掌握这些快捷键将大大提高您的工作效率。
outlook21版使用手册
outlook21版使用手册Outlook 21版使用手册Outlook 21版是一款功能强大且广泛使用的电子邮件和日程安排管理软件。
它提供了许多工具和功能,以帮助用户更高效地管理和组织工作和个人生活。
本使用手册将详细介绍Outlook 21版的各项功能,并提供一些建议和技巧,以便用户能够充分利用这一软件。
一、介绍和安装Outlook 21版是微软公司最新发布的一款邮件管理软件。
它提供了丰富的功能,如电子邮件收发、日历管理、联系人管理等。
用户可以通过微软官方网站下载并安装Outlook 21版,安装过程简单明了。
二、设置邮箱在开始使用Outlook 21版之前,用户需要设置并添加邮箱账户。
用户可以选择添加电子邮件服务提供商,如Gmail、QQ、126等,也可以添加自定义邮箱。
只需输入邮箱地址和相应的密码,Outlook 21版将自动完成邮箱设置。
三、收发电子邮件Outlook 21版提供了简洁明了的邮件收发界面。
用户可以通过点击“写邮件”按钮来编写新邮件,填写收件人、主题和正文,并附加文件或图片。
在收件箱中,用户可以查看已接收到的邮件,并进行回复、转发等操作。
Outlook 21版还支持邮件的分类、标记和过滤,帮助用户更好地管理邮件。
四、日历管理Outlook 21版内置了强大的日历管理功能。
用户可以创建新的日历事件,并设置提醒、重复等选项。
通过点击日历视图,用户可以查看当天、当周或当月的日程安排。
此外,Outlook 21版还支持共享日历功能,用户可以与他人共享日程安排,以便更好地协同工作。
五、联系人管理Outlook 21版提供了全面的联系人管理功能。
用户可以添加新的联系人,并填写姓名、邮箱、电话等详细信息。
通过联系人列表,用户可以方便地查找和编辑联系人信息。
Outlook 21版还支持将联系人导入或导出,以便在不同设备间同步联系人数据。
六、任务管理Outlook 21版的任务管理功能可以帮助用户更好地组织和跟踪待办事项。
Outlook-使用技巧培训

Outlook 2023 新增功能预览
Outlook 2023 新增功能预览
Outlook 2023 新增功能预览
Outlook2023-管理邮件
四、日程、日历
Outlook2023-日程、日历
Outlook2023旳一种很实用旳功能就是日程、日历旳管 理。我们能够用Outlook2023旳日程管理功能统计下我 们待办旳工作、会议及约会等。Outlook2023将会在我 们设定旳时间弹出提醒。这个贴心旳功能能够以便我 们更合理旳管理时间,防止遗忘主要旳工作内容。
单中旳“通讯组列表”,如图。
Outlook2023-通讯录管理
输入通讯组列表名 称,点击“选择 组员”,拟定组 员后点击“拟 定”,单击“保 存并关闭”,通 讯组列表新建完 毕。
Outlook2023-通讯录管理
三、管理邮件
邮件管理
邮件众多
阅读繁琐 查找困难
邮件旳分类 整顿
简朴
类别混乱
高效
及时
Outlook2023-新建邮件账户
假如不成功(前提是顾客信息、服务器信息、登陆信息正确 ),点击“其他设置”按钮,弹出“Internet 电子邮件设置” 对话框,在“Internet 电子邮件设置”对话框中选择“发送服 务器”标签页,把“我旳发送服务器(SMPT)要求验证”选 项打上勾,点击“拟定”按钮,完毕账户设置。如下图:
在“名称”处输入想要建立旳联络人列表名称,如“综 合部”,点击“拟定”。
Outlook2023-通讯录管理
办公神器—Outlook邮箱使用指南
办公神器—Outlook邮箱使用指南第一章:Outlook邮箱简介Outlook邮箱是一款由微软公司开发的电子邮件管理软件,广泛应用于企业、机构以及个人办公场景中。
它不仅具备传统邮箱的基本功能,还集成了日历、联系人、任务管理等实用功能,极大地提升了工作效率。
第二章:Outlook邮箱的安装与登录1. 安装Outlook邮箱应用:根据操作系统的不同,选择Windows版或Mac版Outlook邮箱应用进行下载,并按照安装向导进行安装。
2. 登录Outlook邮箱:打开Outlook邮箱应用,输入邮箱地址和密码,点击登录按钮即可成功进入邮箱界面。
第三章:Outlook邮箱的基本功能1. 邮件收发:点击新建邮件按钮,填写收件人地址、主题和正文,点击发送即可完成邮件的发送。
对于收到的邮件,可通过单击邮件标题打开邮件内容进行阅读。
2. 邮件分类:Outlook邮箱支持对邮件进行分类,如可以将重要邮件标记为“重要”、“紧急”等,以便更好地组织和管理邮件。
3. 文件附件:Outlook邮箱可附带文件进行发送。
在新建邮件界面,点击附件按钮,选择要发送的文件,点击确定即可将文件附加在邮件中。
第四章:Outlook邮箱的高级功能1. 日历管理:Outlook邮箱的日历功能可帮助用户安排、跟踪和共享日程安排。
用户可以创建日程安排、设置提醒、邀请他人参加会议,并可以通过日历共享功能与团队成员共享日程信息。
2. 联系人管理:Outlook邮箱的联系人功能可方便地管理联系人信息,包括姓名、手机号码、电子邮件地址等。
用户可以创建联系人分组、导出或导入联系人,并通过邮件合并功能批量发送邮件给联系人。
3. 任务管理:Outlook邮箱的任务功能允许用户创建、分配、跟踪任务,设置截止日期和优先级,并通过邮件提醒、彩信通知等方式进行任务提醒。
第五章:Outlook邮箱的高级设置1. 自动回复:Outlook邮箱的自动回复功能可在用户离开或暂时无法回复邮件时自动回复发件人,提醒对方用户的状况。
outlook 使用方法
outlook 使用方法摘要:1.引言2.Outlook 的安装与注册3.Outlook 的界面与功能区4.创建和发送电子邮件5.接收和阅读电子邮件6.管理邮件和联系人7.使用日历和任务功能8.设置Outlook 账户9.Outlook 的安全和隐私设置10.常见问题及解决方法正文:Outlook 是一款由微软公司开发的电子邮件客户端,它不仅可以用于发送和接收邮件,还可以管理联系人、日历和任务等。
下面将详细介绍Outlook 的使用方法。
2.Outlook 的安装与注册在安装Outlook 之前,需要先下载并安装Microsoft Office,Outlook 是其中的一个组件。
安装完成后,打开Outlook,需要输入电子邮件地址和密码进行注册。
注册成功后,就可以开始使用Outlook 了。
3.Outlook 的界面与功能区Outlook 的界面分为多个功能区,包括导航栏、功能区、侧边栏和底部工具栏。
导航栏包括“邮件”、“联系人”、“日历”和“任务”等选项卡,功能区包括“发送和接收”、“组织和搜索”、“邮件选项”等选项卡。
侧边栏可以显示联系人列表、日历和任务列表等。
底部工具栏包括“新邮件”、“撰写”、“阅读”和“删除”等按钮。
4.创建和发送电子邮件要创建新邮件,可以在导航栏中点击“新邮件”按钮,或者在功能区中点击“发送和接收”选项卡中的“新邮件”按钮。
在邮件窗口中,输入收件人地址、主题和邮件内容,然后点击“发送”按钮即可发送邮件。
5.接收和阅读电子邮件当有新邮件到达时,Outlook 会自动弹出提示窗口。
点击“阅读”按钮打开邮件窗口,可以查看邮件内容、附件和图片等。
如果要回复邮件,可以直接在邮件窗口中输入回复内容,并点击“发送”按钮。
6.管理邮件和联系人在导航栏中点击“邮件”按钮,可以查看所有收件箱中的邮件。
在功能区中点击“组织和搜索”选项卡,可以对邮件进行分类、标记和搜索。
要管理联系人,可以在导航栏中点击“联系人”按钮,然后添加、编辑和删除联系人信息。
Outlook电子邮件使用技巧方法大全(超全)
Outlook电子邮件使用技巧方法大全(超全)1. 自定义快捷键您可以通过设置自己的快捷键,加速处理邮件的效率。
打开选项,然后选择快捷键,即可进行设置。
2. 使用过滤器和规则通过设置过滤器和规则,您可以将重要的邮件自动分类和排序。
在“开始”选项卡中,选择“规则向下箭头”,然后选择“新建规则”。
3. 提醒功能Outlook可以帮助您在重要邮件到达时提醒您及时查收。
选择“文件”选项卡,然后选择“选项”。
在“高级”选项中,您可以设置提醒时间和提醒方式。
4. 使用任务列表使用任务列表可以帮助您更好地安排和管理工作日程。
在“任务”选项卡中,您可以设置任务的截止日期、提醒时间和重要程度等。
5. 不同的编辑器6. 快速搜索功能使用Outlook搜索功能可以更快地找到您需要的邮件。
在搜索框中输入您想要查找的关键词即可。
7. 在邮件中添加附件在撰写邮件时,如果需要添加附件,可以先将附件保存在本地,然后在邮件中选择“附件”选项,将附件添加到邮件中。
8. 自动回复如果您无法及时处理邮件,可以设置自动回复。
在“文件”选项卡中,选择“自动回复设置”,然后设置自动回复的内容和时间范围。
9. 收件人建议在撰写邮件时,Outlook会自动建议收件人列表。
根据建议选择收件人可以更快地完成撰写邮件的任务。
10. 自动归档通过设置自动归档规则,可以将已读和未读邮件等自动归档。
在“文件”选项卡中,选择“选项”,然后选择“高级”选项卡,在“自动归档”中进行设置。
以上就是Outlook邮件使用的一些技巧和方法,希望对您有所帮助。
快速学会使用Outlook进行邮件管理教程
快速学会使用Outlook进行邮件管理教程Outlook是一款常用的电子邮件管理工具,功能强大且易于使用。
本文将向您介绍如何快速学会使用Outlook进行邮件管理,以提高您的工作效率。
以下是具体的步骤和技巧:一、设置邮箱账户1. 打开Outlook应用程序,并点击"文件"选项卡。
2. 在弹出的窗口中,选择"添加账户"。
3. 输入您的邮箱地址,并点击"连接"按钮。
4. 输入邮箱密码,并点击"连接"按钮。
5. Outlook将自动配置您的邮箱账户,并显示在左侧导航栏中。
二、收发邮件1. 在左侧导航栏中选择您的邮箱账户。
2. 点击"新邮件"按钮,在弹出的窗口中填写收件人、主题和正文。
3. 添加附件:在新邮件窗口的工具栏上,点击"附件"按钮,选择要添加的文件。
4. 点击"发送"按钮,即可发送邮件。
三、邮件分类和筛选1. 创建文件夹:在左侧导航栏中右键单击邮箱账户,选择"新建文件夹",输入文件夹名称,并点击"确定"按钮。
2. 移动邮件到文件夹:选中要移动的邮件,在工具栏上点击"移动到文件夹"按钮,选择目标文件夹。
3. 设置自动分类规则:点击"文件"选项卡,选择"自动清理",在弹出的窗口中设置规则,可自动将指定邮件移动到相应文件夹。
四、标记和跟踪邮件1. 标记邮件:选中要标记的邮件,在工具栏上点击"标记"按钮,选择合适的标记颜色。
2. 设置邮件提醒:右键单击邮件,选择"快速步骤",选择"新建提醒",设置提醒时间。
3. 跟踪邮件状态:右键单击邮件,选择"跟踪",选择"请求传递和阅读回执",即可收到对方的回执通知。
- 1、下载文档前请自行甄别文档内容的完整性,平台不提供额外的编辑、内容补充、找答案等附加服务。
- 2、"仅部分预览"的文档,不可在线预览部分如存在完整性等问题,可反馈申请退款(可完整预览的文档不适用该条件!)。
- 3、如文档侵犯您的权益,请联系客服反馈,我们会尽快为您处理(人工客服工作时间:9:00-18:30)。
Topics•Mailbox Basis •Managing Your Mailbox •Creating and Sending Mails •Scheduling a meeting •Contacts•Calendar•TasksMailbox Basis•The Today page•Reading Mail•Replying to and Forwarding Messages •Creating an E-Mail SignatureThe Today page•When you start Outlook by double clicking the Outlook icon , Outlook first shows you the Today window. The Outlook Today page provides a preview of your day. You can see a summary of your appointments, a list of your tasks, and how many new e-mail messages you have.当你打开Outlook第一眼看到的是“今日”窗口,“今日”提供一个当天的全部预览,你可以看到你在当天的约会,任务以及有多少新邮件•The navigation pane on the left side of the screen consists of two parts.Using the icons in the lower part you can jump to the various areas ofOutlook:•屏幕左侧的导航栏由两部分组成,点击不同的图标可以跳出不同的部分•shows you incoming and outgoing mail as well as your mail folders:显示接收和发送的邮件已经邮件文件夹takes you to your calendar to schedule appointments and meetings:可以到日程表中计划约会和会议•lets you organize your contacts and mailing lists:组织你的联系人和邮件表shows you which tasks you want to accomplish•向你展示哪些任务你需要完成•takes you to the “Notes”section where you can store personal notes:可以将信息记录在便笺上•shows you the folder list (this is the default view at the first start of Outlook). The folder view basically just provides a different view of allfolders (including Calendar, Contacts and others)•显示所有的文件夹列表(Outlook缺省时的开始视图),•文件夹视图提供一种不同浏览所有文件夹视图的方式(包括联系人和日程表等)shows you the shortcut list:显示快捷方式列表•The upper part of the navigation pane changes depending on what you have chosen in the lower part. E.g. if you display your calendar, the upper part of the navigation pane shows you an overview of the current and next month.•Between the upper part and the lower part of the navigation pane you can see a blue horizontal bar . Drag this bar up or down to show more or fewer buttons in the navigation pane.•导航栏上部显示的内容取决于你选择了下部的哪个图标,例如你选择日程表,那么上部导航栏将显示最近两个月的日程安排。
导航栏上下部分之间有一个蓝色拖拽条,可以根据你的喜好拖动该条在导航栏中显示多一些或少一些图标•Going back to the Today page 回到“今日”视图To go back to the Today page, click on “Mail”in the navigation pane and then on “personal folders”in the upper part of the navigation pane.要回到“今日”视图,在导航条上点击邮件图标然后点击“个人文件夹”,可以在屏幕右侧显示“今日”页•Customizing the today page 自定义“今日”视图You can change the design of the Today page. Therefore click on in the right upper corner of the Today page. The options dialogue will be displayed.Here you can change the number of days for which appointments will be shown on the Today page and make other settings.如果你想修改“今日”视图的样式,点击右上角的“自定义Outlook今日”按钮,在选项对话框里面你可以修改显示约会的天数以及其他设置•To save the changes, you made, click on in the heading of the dialogue.•点击对话框标题中的“保存修改”Reading Mail•The Inbox: 收件箱In your Inbox Microsoft Outlook displays all the messages you receive –until you move them to different folders. By default messages are sorted by receive date in a descending order.•所有收到的邮件都将保存到收件箱中,除非将他们移动到其他文件夹中。
默认情况下,所有的邮件以收到的时间来进行排序•Unread messages appear in bold face and have a yellow closed envelope in front of them. Messages you opened, appear in normal style with anopened envelope in front of them.在收件箱中未读邮件会以粗体显示,并且在前面有黄色未拆信封图标。
已读邮件显示为正常字体并且前面有已拆信封图标Here is a brief overview of icons which can appear before a message and what it means:•Reading a message:阅读邮件To read a message you can either single click on it to open it in the reading pane (if the reading pane is enabled) or just double click on it. Outlook then opens a it in a new window.•要阅读邮件,你可以单击某封邮件并在阅读窗格读取邮件正文(在启用阅读窗格的情况下)或者双击这封邮件,Outlook将把这封邮件在一个新窗口中打开•Opening/saving an attachment:打开/保存邮件附件As described above messages with attachments have the in front of them.Double click on the message to open it in a new window. Attachments are displayed in the Attachments field in the mail header:上文提到过得如果一封邮件有附件,那么在邮件的前面会有图标,双击在新窗口打开这封邮件,附件将会在邮件顶部的附件区域显示To open an attachment just double click on it. Windows will then open the attachment with the application linked to the extension of the file name. •要打开附件,只需要双击附件图标即可。
Windows将会选择适当的应用程序打开该附件。
•If you want to save an attachment to disk instead of opening it,right click on the attachment and then choose “Save as”from the appearing contextmenu.如果只是希望保存附件到本地磁盘而不是直接打开,右键点击该附件并在菜单中选择“另存为”,选择保存路径即可You can also print the attachment directly from Outlook, therefore right click the attachment and choose “Print”.•你也可以直接通过Outlook打印附件,只需在右键菜单中选择“打印”即可•Printing a message:打印邮件Printing a message is easy: Open it first and then click in the toolbar.Alternatively you can press CTRL-P as a shortcut or use “File”–“Print”.•打印邮件是非常容易实现的,只需要打开这封邮件并点击工具栏上的即可,或者你也可以点击键盘上的CTRL+P组和或使用“文件”菜单中的“打印”项Replying to and ForwardingMessages•Replying to a message 回复邮件To reply to a message, either open the message by double-clicking on it or select the message by clicking on it once and press the Reply button, . •The original sender will automatically be put in the To: line of the response, and you can add whatever text you want to the response before you send it.•要回复一封邮件,可以通过双击该邮件打开或单击选中该邮件然后点击“回复”按钮。
