奇力速KILEWS数字扭力计操作手册
数字扭力计测试仪操作指导书
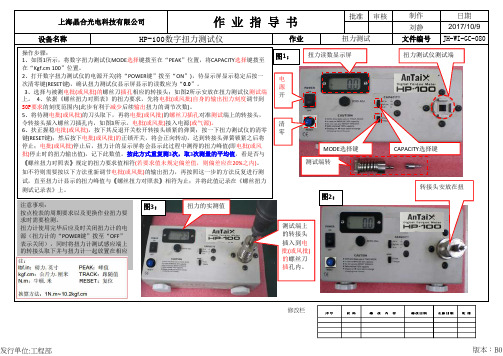
批准审核设备名称 上海晶合光电科技有限公司作 业 指 导 书制作日期刘静2017/10/9JH-WI-GC-080HP-100数字扭力测试仪作业扭力测试文件编号操作步骤:1、如图1所示,将数字扭力测试仪MODE 选择键拨至在“PEAK ”位置,将CAPACITY 选择键拨至在“Kgf.cm 100”位置。
2、打开数字扭力测试仪的电源开关(将“POWER 键”拨至“ON ”),待显示屏显示稳定后按一次清零键(RESET 键),确认扭力测试仪显示屏显示的读数应为“0.0”。
3、选择与被测电批(或风批)的螺丝刀插孔相应的转接头;如图2所示安放在扭力测试仪测试端上。
4、依据《螺丝扭力对照表》的扭力要求,先将电批(或风批)自身的输出扭力刻度调节到SOP 要求的刻度范围内(此步有利于减少后续输出扭力的调节次数)。
5、将待测电批(或风批)的刀头取下,再将电批(或风批)的螺丝刀插孔对准测试端上的转接头,令转接头插入螺丝刀插孔内,如图3所示。
电批(或风批)接入电源(或气源)。
6、扶正握稳电批(或风批),按下其反退开关松开转接头锁紧的弹簧;按一下扭力测试仪的清零键(RESET 键);然后按下电批(或风批)的正锁开关,将会正向转动,达到转接头弹簧锁紧之后将停止;电批(或风批)停止后,扭力计的显示屏将会显示此过程中测得的扭力峰值(即电批(或风批)停止时的扭力输出值),记下此数值。
按此方式重复测3次,取3次测量的平均值,看是否与《螺丝扭力对照表》规定的扭力要求值相符(若要求值未规定偏差值,则偏差应在20%之内)。
如不符则需要按以下方法重新调节电批(或风批)的输出扭力,再按照这一步的方法反复进行测试,直至扭力计显示的扭力峰值与《螺丝扭力对照表》相符为止;并将此值记录在《螺丝扭力测试记录表》上。
注意事项:按点检表的周期要求以及更换作业扭力要求时需要检测。
扭力计使用完毕后应及时关闭扭力计的电源(扭力计的“POWER 键”拨至“OFF ”表示关闭),同时将扭力计测试感应端上的转接头取下并与扭力计一起放置在相应的包装内。
奇力速产品手册2015

Kilews Assembly Management SystemKL-AMS 系統架構圖SKC-PTA-BE Series KL-WSCBSN(BT 藍芽無線傳輸/Bluetoothcommunication )10MKL-CTDS + Power SKD-BNK Series 網路連線) (Ethernet ) Wi-Fi or cable燈號 Lamp 蜂鳴器 Buzzer 控制開關 Control Switch ... PLC Bar Code Reader 工站管理電腦工作站KL-CMS Station (辦公室管理 電腦工作站) WEB Browser 工具鎖付管理 Tool operation control Prevent Error 時間 Time 扭力 Torque 圈數(角度) Turns(Angel) 確認 (Confirm) Count 組別 List/Group 螺絲數 Screw list Process 緩停止)Slow Start/Stop 正反轉先後行程 Procedure for forward or reverce 三段轉速方向控制 Three stage speed/direction control I/O ControlStart/Shutoff (Output) OK/NG/OKALL (Output) Dir/Start/Disable (Input) Data Transmission 工件/工位 管理 Work piece/startion control 工具選擇設定 Tool choice setting 工位順序設定 Work station sequence setting 工具校正管理 Tool rectify control 工件參數設定 Work piece parameter setting 1.工具序號 Tool S/N 2.工位編號條件 Work station S/N 3.工件編號條件 Work piece S/N 工具鎖付參數設定 Tool operation setting (三) 生產線管理 Production line control 1. 生產狀態監看2. 生產數據統計3. 鎖付資料分析4. 生產流程設定5. 生產參數設定1. 工件設定2. 工位設定3. 工具設定4. 其他6. 校正管理 Rectify control 7. 維修管理 Maintenacnce control 8. 作業人員管理9. 外部資料存取介面10. 其他 Others。
奇力速KILEWS数字扭力计操作手册

KILEWS JAPAN CO., LTD.□ KTM - 10□ KTM - 100□ KTM - 50S数字扭力计操作手册DIGITAL TORQUE METER INSTRUCTION MANUALDigital Torque Meter操作前请阅读全部说明一. 安全警告!!1. 工作场所要保持干净。
◎ 杂乱的工作区域及台面容易造成伤害。
2. 注意工作场所的环境。
◎ 勿将扭力计置放于雨中或潮湿处。
◎ 请在正常室温下(约24℃)使用扭力计。
◎ 工作场所应照明良好。
◎ 勿于有易燃液体或气体之处所使用扭力计。
3. 勿让孩童接近。
◎除操作人员以外应避免他人靠近工作场所。
4. 穿着适宜。
◎勿穿着太宽松的衣物或珠宝,以免操作工具时勾扯拉到。
5. 谨慎操作。
◎操作扭力计时应小心使用,注意操作方式及工作场所安全。
6. 稳固的固定机身主体。
◎当测量较大扭力时应使用夹子或虎头钳等工具来固定起子,如此会比较安全,同时可用双手操作起子。
7. 勿测试超过负荷量的扭力。
◎若测试超过负荷量会使仪器损坏甚至产生意外或伤害。
8. 勿拆卸、撞击或震动仪器。
◎自行拆卸仪器或仪器遭过度撞击、震动,可能导致仪器损坏。
9. 电击警告!!◎勿以潮湿的手碰触电源插座以免电击。
10. 使用专用的充电器充电。
◎使用非专用的充电器可能会损坏仪器,更可能引起火灾意外。
11. 适当的充电。
◎ 请依指示电压充电。
勿使用直流供电机或发电机充电,如此会产生高热引发火灾。
◎ 充电时间不要超过8小时,过量充电会引起爆炸、过热和电池漏液,引起火灾。
12. 绝不可将电池(嵌装于扭力计内)丢弃火中。
◎如此会导致爆炸或释放有毒物质。
(丢弃电池的程序应依当地法律规定妥善处理或送到专门的回收处)13. 如有下列情况应关闭电源。
◎ 没有使用时或进行充电时。
◎ 进行修理时。
◎ 其它可能招致危险的情况时。
14. 细心保养扭力计。
◎ 请经常检查弹簧座,不要使用变形或坏掉的接头,以使操作正常安全。
数字扭矩仪使用说明书

数字扭矩仪使用说明书Ver 0.01SHIMPO1.本产品的特点z可以测得开栓方向或闭栓方向的扭距z可以用USB向电脑传输数据z可以测得峰值(峰值保持)z存储功能可以最多存储1000个计测时的峰值。
z比对功能可以判断产品的合格与否(判定结果通过LED显示)z由于采用了镍氢电池,没有AC适配器也可以方便地使用。
z额定扭距为2N、5N、10N的机种。
z可以切换为各种单位(国内只可以转换)z计测周期(显示周期)最大可从8次/秒中选择。
2.各部分名称及工作2.1主机部分■ (前面)①Power键键键键键⑥液晶显示部分①Power キー用于电源的开/关②Recall キー开栓计测或闭栓计测模式时读取已存储的数据※平均计测模式时不能读取存储数据。
用于功能模式时③Mem キー在开栓计测或闭栓计测模式下将保持峰值输入、存储。
※平均计测模式下不能存储输入。
用于存储数据完全清除时用于功能模式时。
④Mode キー切换计测模式。
读取存储数据时按本按钮会返回计测模式。
在功能模式时使用。
⑤Zero/RST キー平均计测模式时:进行归零开栓、闭栓计测模式时:进行峰值归位用于功能模式启动时用于功能模式时⑥液晶显示部分显示计测数据、计测单位⑦计测模式显示灯中有一个灯亮,表示计测模式。
⑧对比判定显示灯对比判定有效的情况下,中一个灯亮,表示对比判定结果。
平均模式:对计测数据进行比较、判断后显示其结果。
开栓计测、闭栓计测模式:用比对器对保持了的峰值进行判定,显示结果。
用比对器进行判定无效时,灯不亮。
4/153. 显示部分3.1 各部分名称3.2 数值显示部分用符号和4位数值显示测定值。
开栓方向扭距用正数、闭栓方向的扭距用负数来显示。
3.3 单位显示部分显示单位。
过载的时候显示“OVR ”。
在自动关机前1分钟内显示“PWR ”。
5/15充电显示部分 单位显示部分数值显示部分(测量值显示)自动关机前1分钟内 过载3.4充电显示部分根据充电状态会显示如下数据:内置镍氢电池的电压降低时“LO BAT”闪烁。
奇力速 SKP-32BC-60WN 電動起子控制器 使用說明書说明书

電動起子控制器操作手冊OPERATION AND MAINTENANCE MANUALSKP-32BC-60WN(In: AC 100~240V Out: DC 24V / 32V)奇力速工業股份有限公司KILEWS INDUSTRIAL CO., LTD.Important safety information enclosed.Read all these instructions before placing tool in service or operation this tool and save these instructions. It is the responsibility of the employer to place the information in this manual into the hands of the operator. Failure to observe the following warnings could result in injury. When using electric tools, Basic safety precautions should always be followed to reduce the risk of fire, electric shock and personal injury, including the following:1. Important Safety Instructions2. Operations Cautions3. Grounding Instructions4. Installation Instructions5. Specifications6. ServicingImportant Safety InstructionsWARNING!Read all instructions Failure to follow all instructions listed below may result in electric shock fire and/or serious injure. The term “power tool” in all of the warning listed below refer to your mains operated (corded) power tool or battery operated (cordless) power tool.SAVE THESE INSTRUCTIONS1) Electrical Safetya) Keep work area clean and well lit. Cluttered and dark areas invite accidents.b) Do not operate power tools in explosive atmosphere, such as in the presence of flammable liquids,gases or dust. Power tools creat sparks which may ignite the dust of fumes..c) Keep children, and bystanders away while operating a power tool. Distractions can cause you to losecontrol.2) Electrical Safetya) Power tool plugs must match the outlet. Never modify the plug in any way. Do not use any adapterplugs with earthed (grounded) power tools. Unmodified plugs and matching outlets will reduce risk of electric shock.b) Avoid body contact with earthed or grounded surfaces such as pipes, radiators, ranges and refrigerators. There is an increased risk of electric shock if your body is earthed or grounded.c) Don’t expose power tools to rain or wet conditions. Water entering a power tool will increase the risk of electric shock.d) Do not abuse the cord. Never use the cord to carrying, pulling or unplugging the power tool. Keep cord away from heat, oil, sharp edges or moving parts. Damaged or entangled cords increase the risk of electric shock.e) When operating a power tool outdoors, use an extension cord suitable for outdoor e of cord suitable for outdoor use reduces the risk of electric shock .3) Personal Safetya) Stay alert, watch what you are doing and use common sense when operating a power tool. Do not use power tool while you are tired or under the influence of drugs, alcohol, or medication. A moment of inattention while operating power tools may result in serious personal injury.b) Use safety equipment. Always wear eye protection. Safety equipment such as dust mask, non-skid safety shoes, hard hat, or hearing protection used for appropriate conditions will reduce personal injuries.c) Avoid accidental starting. Ensure the switch is in the off position before plugging in. Carrying power tools with your finger on the switch or plugging in power tools that have the switch on invites accidents. d) Remove any adjusting keys or wrench before turning the power tool on. A wrench or a key that is left attached to a rotating part of the power tool may result in personal injury.e) Do not overreach. Keep proper footing and balance at all times. This enables better control of the power tool in unexpected situations.f) Dress properly. Do not wear loose clothing or jewellery. Keep your hair,clothing, and gloves away from moving parts. Loose clothes, jewellery, or long hair can be caught in moving partsg) If devices are provided for the connection of dust extraction and collection facilitys, ensure these are connected and properly used. Use of these devices can reduce dust related hazards.h) If devices are provided for the connection of dust extraction and collection facilitys, ensure these are connected and properly used. Use of these devices can reduce dust related hazards.4) Power tool Use and Carea) Do not force the power tool. Use the correct power tool for your application. The correct power tool will do the job better and safer at the rate for which it was designed.b) Do not use power tool if switch does not turn it on or off. Any power tool that cannot be controlled with the switch is dangerous and must be repaired.c) Disconnect the plug from the power source before making any adjustments, changing accessories, or storing the power tools. Such preventive safety measures reduce the risk of starting the power tool accidentally.d) Store idle power tools out of reach of children and do not allow persons unfamiliar with the power tool or these instructions to operate the power tool. Power tools are dangerous in the hands of untrained users.e) Maintain power tools. Check for misalignment or binding of moving parts, breakage of parts and any other condition that may affect the power tools operation. If damaged, have the power tool repaired before use. Many accidents are cause by poorly maintained power tools.f) Keep cutting tools sharp and clean, Properly maintained cutting tools with sharp cutting edges are less likely to bind and are easier to control.g) Use the power tools, accessories and tool bits ect., in accordance with these instructions and in the manner intended for the particular type of power tool, taking into account the working conditions and the work to be performed. Use of the power tool for operations different from intended could result in a hazardous situation.5) SERVICEa) Have your power tool serviced by qualified repair person using only indentical replacement parts,This will ensure that the safety of the power tool is maintained.Additional information shall be providea) Instruction for putting into use1. Setting-up or fixing power tool in a stable position as appropriate for power tools which can be mountedon a support.2. Assembly3. Connection to power supply, cabling, fusing, socket type and earthing requirements.4. Illustrated description of functions.5. Limitations on ambient conditions.6. List of contents.b) Operating Instructions.1. Setting and testing.2. Tool changing.3. Clamping of work.4. Limits on size of work piece.5. General instructions for use.c) Maintenance and servicing.1. Regular cleaning, maintenance, and lubrication.2. Servicing by manufacture or agent, list of addresses.3. List of user-replaceable parts.4. Special tools which may be required.Operations Cautions1. Please read the operating manual thoroughly and comply with safety regulation to operate thisMulti-Function Controller.2. Please grasp the plug of power cord while plugging in or out the plugs of connecting cord of ElectricScrewdriver and power cord.3. Please fix the power controller to avoid any danger of pulling and dragging the power cord.4. Do not near oil, chemical materials or heated objects, also please be alert not to scratch the power cordby sharp object.5. This type of Controller can only be applied to Kilews Electric Screwdriver with Counter. Do not useElectric Screwdriver Controller on other types of machinery.6. In case of the Controller is overheated or overloaded with maximum current rating of fuse, thehigh-speed fuse will be melt down and cut off the power. If the Controller continues to jump off or has an abnormal switching reaction, please stop the operation immediately and send back the Controller for repair.7. When Electric Screwdriver is running, if slides Forward/Reverse Switch instantly, device will generate theprotection program to force Electric Screwdriver stop.8. Please do not disassemble Electric Screwdriver casually and try to repair it by self.9. When Controller is not in use, please turn the main power switch OFF and unplug the power.WARNING!DO NOT OPERATE THIS TOOL WITHOUTPROTECTIVE EARTH CONNECTEDGrounding InstructionsThe tool should be grounded while in use to protect the operator from electric shock. The tool is equipped with a three-conductor cord and three-prong grounding-type plug to fit the proper grounding-type receptacle. The green (or green and yellow) conductor in the cord is the grounding wire. Never connect the green (or green and yellow) wire to a live terminal.Green and yellow----- EarthBlue ------ NeutralBrown ------ LiveInstallation Instructions1. Use the controller voltage recommended in the specification of this manul.2. When using a commercial power supply be sure to set up circuit and safety breakers.You must also properly ground the mechanisms.3. The temperature and humidity should be kept at appropriate levels.4. Do not set up the power supply in a room that has poor ventilation and where it may beexposed to dust and metallic flakes.5. Do not put heavy object on top of power supply or pile thing on it.6. Attach the power supply securely to a flat, stable surface. If the power supply is put ahigh place, take special care to ascertain that there is no danger of it falling.7. Keep bystanders away. Do not permit unauthorized personnel to operate this controller.8. Do not set up the power supply near high voltage machinery or in an excessively noisyenvironment.9. Avoid setting up or storing the power supply in wet or oily environments or where itmight be exposed to corrosive or flammable gases.10. We emphasize that the power supply should be placed in stable, fixed location.SAVE THESE INSTRUCTIONNOTICEThe use of other than genuine KILEWS replacement parts may result in decreased controller performance and increased maintenance, and may invalidate all warranties.Maintenance and Inspection :1. The controller must be operated in top condition, one day working hour must be not more than eight hours.2. Please note don’t let the controller get over heated, every minute use 10~15 screws to operate.3. The frequency use of this electric screw driver is over eight hours a day, still it needs periodically testingand treatment. Every 5-6 months.1. The use of other than genuine KILEWS replacement parts may Result in decreased tool performanceand increased maintenance, and may invalidate all warranties.2. All repairs and maintenance of this tool and its word must be performed by an authorized servicecenter.3. KILEWS is not responsible for customer modification of tools for applications on which KILEWS wasnot consulted.4. Repairs should by made only by authorized, trained personnel. Consult your nearest KILEWSauthorized service center.5. It is the responsibility of the employer to place the information in this manual into the hands of theoperator.6.Please refer to Kilews website for the detail component list.DO NOT ATTEMPT TO REPAIR THIS EQUIPMENTAll repairs and maintenance of the Controller and its cordmust be performed by authorized service centerSAVE THESE INSTRUCTIONSDO NOT DESTROY操作前請閱讀全部說明(內附零件分解圖)警告為了安全起見,在使用電動螺絲起子控制器前請詳閱電動螺絲起子控制器操作說明書,且務必依照說明書指示操作,並注意所有的警示重要安全說明事項1.使用電動螺絲起子控制器說明書規定的電壓。
扭力测试仪操作指导书
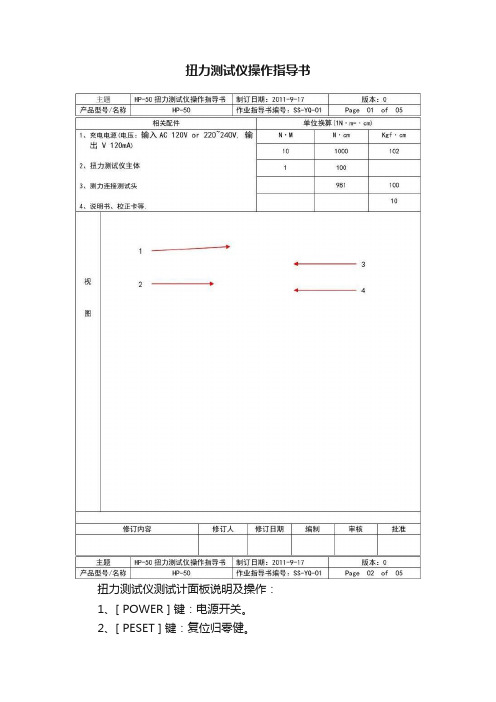
扭力测试仪操作指导书扭力测试仪测试计面板说明及操作:1、[ POWER ] 键:电源开关。
2、[ PESET ] 键:复位归零健。
3、显示屏4、[ ZERO ADJ ]调零旋钮5、[ UNIT ] 键:测量单位转换键,按此键设置测量单位,可以活动按钮,:。
6、[ MODE ] 键:测量模式键,按此键选择[ PEAK]峰值、[ TRACK ] 跟随值。
7、安全固定框8、固定旋钮二、功能设置:报警值设置:当扭力达到上限扭矩时,机器会发出用蜂鸣声提示。
HP-50 扭力测试仪扭力范围:0至 / 0~充电时间为8小时;电充足时连接使用时间可达30小时。
电压:输入AC 120V or 220~240V, 输出 V 120mA5、此扭力测试仪精确度为±%以内.XXXXXXXXXXXXXX公司扭力测试仪操作指导书在使用扭力测试仪前,先确定测试仪电量是否足够,再打开电源开关。
若电量不足时,将自动关机,需充足电(充电时间3—5小时)。
要固定扭力测试仪,可使用固定旋钮;如图1所示。
调节调零旋钮来做扭力测试仪测试前数值调零。
(调零时,模式开关必须处于TRACK档上。
)根据测试需要,选择单位切换开关来调整力矩单位(后续按Kgf·cm作为测量单位)。
选择需要的测量模式,通过测量模式开关选定跟随值(TRACK)或峰值(PEAK)。
当需要测量最大峰值时,设定模式开关至峰值(PEAK)档,测量出来的数值会保留15秒以上。
假如按一下复位按钮,数据会自动清除归零。
根据不同的被测物,来选择匹配的带安全框的测试配件。
当使用扭力测试仪测量电动螺丝刀或风批等工具时,选用合适的测试配件安置在测试传感头上。
(可为不同的被测物定制合适的治具)。
测量完成后,关闭电源,取下附件和待测物。
测力连接测试头使用:利用其可以测量除风批以外的其它工具的扭力。
比如:转轴、手表链、灯座、电批等扭力及校准扭力工具等。
除用高精度转接器或螺纹杆外,亦可自制转接器将不同尺寸的扭力工具头连接到连接座作测量。
数字扭力计的准备与操作
数字扭力计的准备与操作数字扭力计是一种用于测量扭力的设备。
它可以在机械工程、电子工程和自动化工程等领域中使用。
本文将介绍数字扭力计的准备和操作方法。
准备在开始使用数字扭力计之前,您需要进行以下准备工作:步骤一:检查设备首先,您需要检查数字扭力计是否在良好的工作状态。
检查门窗、配件和所有其他部件是否紧固,以确保设备完整无损。
步骤二:了解测量对象在使用数字扭力计之前,您需要了解测量对象的基本信息。
需要了解测量对象的物理属性、尺寸、材料和精度等信息。
步骤三:校准扭力计使用扭力计之前必须先进行校准。
通过校准,可以确定扭矩值是否准确,并针对各种物理和环境条件进行校准。
步骤四:连接设备将数字扭力计连接到测试装置。
需要正确设置控制器,并密切关注连接线路是否正确。
确保您使用的设备与测试装置相匹配。
操作数字扭力计的操作和其他仪器大同小异,但您需要注意以下几点:步骤一:测量前的准备在开始测量之前,确认测量装置的工作状态,并将测试装置固定在扭矩测量设备上。
步骤二:安全注意事项在进行扭力测量时,请注意必须实施安全措施。
应该注意危险,采取相应的安全措施。
步骤三:选择合适的模式根据不同的测量要求,选择不同的测量模式,并将数字扭矩计设置为适当的测量范围。
步骤四:记录数据在完成扭矩测量后,应该记录数据。
此时可以确定实际扭矩值是否在要求范围内。
要确保数据获取过程可靠,记录准确。
步骤五:注意仪器保养及时进行仪器保养,清洁测量仪器并维护其正常运行。
需要定期对数字扭矩计进行校准和检查,确保其性能和精度。
总结数字扭力计是一种常见的工具,被广泛用于各个领域。
准备和操作数字扭力计需要一定的技术和经验。
掌握数字扭力计的基本操作步骤可以有效地提高测量准确性,为工作的成功提供保障。
数字扭力测试仪操作方法注意事项 扭力测试仪如何操作
数字扭力测试仪操作方法注意事项扭力测试仪如何操作数字扭力测试仪是检测和测试及校准各种力矩的精密仪器,适用于各种需要测量力矩的转轴、轴承等产品、卡具、夹具等工具。
今日我们紧要来介绍一下数字扭力测试仪操数字扭力测试仪是检测和测试及校准各种力矩的精密仪器,适用于各种需要测量力矩的转轴、轴承等产品、卡具、夹具等工具。
今日我们紧要来介绍一下数字扭力测试仪操作方法及使用注意事项,希望可以帮忙用户更好的应用产品。
1、安装测力调整器于测量仪的测力传感头上,且用测力传感头上的4个固定螺丝将测力调整器固定,待测螺丝刀的抓口套在精度测量仪的轴头上。
2、设定电动启子开关在反向位置(可用手)返转启子,使测力调整器中的弹簧松弛;3、按复位按钮,使显示值为“0”;4、设定电动螺丝刀开关在正向位置,并启动使之旋转直至自动停止,(弹簧已绷紧压缩);5、当螺丝刀停止时,在显示板上产生的测量数值为螺丝刀的输出扭力;6、再次反转螺丝刀,使精度调整器回到原来高度,按复位按钮除去数值。
注意事项:1、定期更换测力调整器的推力轴承,若重复频繁使用,轴承会磨损,因而会失去平滑旋转并引发测量精度退化。
2、使用前检查调整器。
灰尘、缺少黄没或中轴弯曲都会降低测量精度;3、利用附属物可以测量除电动螺丝刀以外的其他工具的扭力,在使用附属物时应注意:1传感头和附属物应密合;2附属物需充分耐用,不致于在测量环境中坏掉;3充电时关掉开关;充电时间应不超过8小时;充电时不可使用;—专业分析仪器服务平台,试验室仪器设备交易网,仪器行业专业网络宣扬媒体。
相关热词:等离子清洗机,反应釜,旋转蒸发仪,高精度温湿度计,露点仪,高效液相色谱仪价格,霉菌试验箱,跌落试验台,离子色谱仪价格,噪声计,高压灭菌器,集菌仪,接地电阻测试仪型号,柱温箱,旋涡混合仪,电热套,场强仪万能材料试验机价格,洗瓶机,匀浆机,耐候试验箱,熔融指数仪,透射电子显微镜。
扭力测试仪使用警告扭力测试仪假如操作错误,可能会损坏扭力测试仪或导致严重的事故。
扭力计操作规程
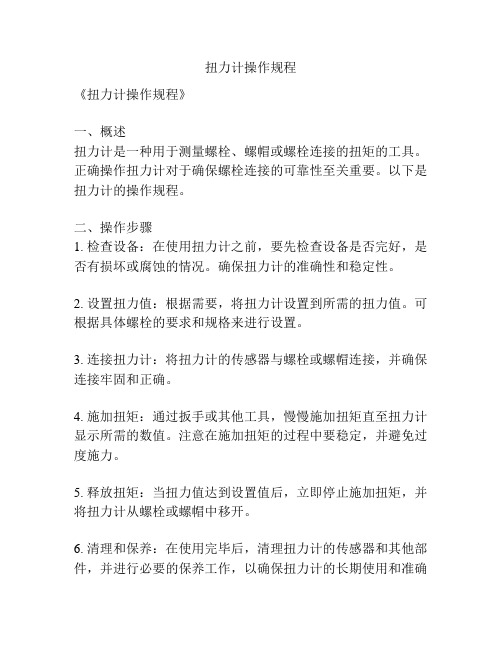
扭力计操作规程
《扭力计操作规程》
一、概述
扭力计是一种用于测量螺栓、螺帽或螺栓连接的扭矩的工具。
正确操作扭力计对于确保螺栓连接的可靠性至关重要。
以下是扭力计的操作规程。
二、操作步骤
1. 检查设备:在使用扭力计之前,要先检查设备是否完好,是否有损坏或腐蚀的情况。
确保扭力计的准确性和稳定性。
2. 设置扭力值:根据需要,将扭力计设置到所需的扭力值。
可根据具体螺栓的要求和规格来进行设置。
3. 连接扭力计:将扭力计的传感器与螺栓或螺帽连接,并确保连接牢固和正确。
4. 施加扭矩:通过扳手或其他工具,慢慢施加扭矩直至扭力计显示所需的数值。
注意在施加扭矩的过程中要稳定,并避免过度施力。
5. 释放扭矩:当扭力值达到设置值后,立即停止施加扭矩,并将扭力计从螺栓或螺帽中移开。
6. 清理和保养:在使用完毕后,清理扭力计的传感器和其他部件,并进行必要的保养工作,以确保扭力计的长期使用和准确
性。
三、注意事项
1. 避免超负荷:在使用扭力计时,务必避免超负荷施力,以防损坏扭力计或引起意外伤害。
2. 定期校准:定期对扭力计进行校准,以确保其准确性和稳定性。
3. 避免震动和冲击:在使用过程中,避免扭力计受到明显的震动和冲击,以免影响其测量准确性。
4. 调整和存放:在使用扭力计之前,要按照说明书对其进行调整,并保持在干燥、清洁的环境中存放。
以上就是使用《扭力计操作规程》,希望能够帮助大家正确、安全地使用扭力计,保障螺栓连接的可靠性。
数字扭力测试仪操作指导书
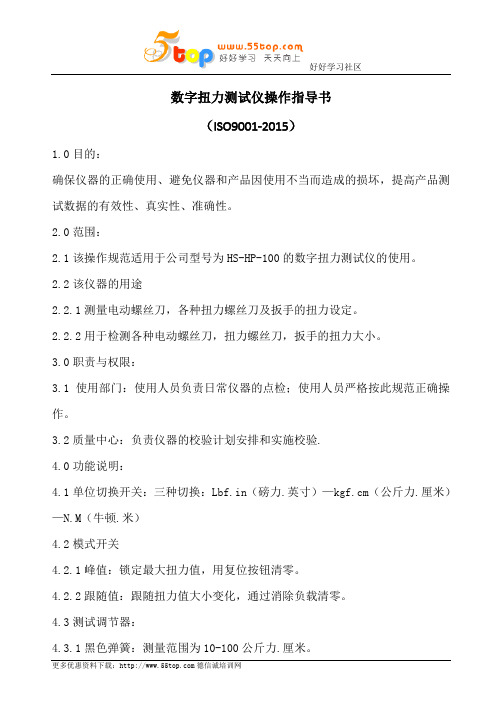
数字扭力测试仪操作指导书(ISO9001-2015)1.0目的:确保仪器的正确使用、避免仪器和产品因使用不当而造成的损坏,提高产品测试数据的有效性、真实性、准确性。
2.0范围:2.1该操作规范适用于公司型号为HS-HP-100的数字扭力测试仪的使用。
2.2该仪器的用途2.2.1测量电动螺丝刀,各种扭力螺丝刀及扳手的扭力设定。
2.2.2用于检测各种电动螺丝刀,扭力螺丝刀,扳手的扭力大小。
3.0职责与权限:3.1使用部门:使用人员负责日常仪器的点检;使用人员严格按此规范正确操作。
3.2质量中心:负责仪器的校验计划安排和实施校验.4.0功能说明:4.1单位切换开关:三种切换:Lbf.in(磅力.英寸)—kgf.cm(公斤力.厘米)—N.M(牛顿.米)4.2模式开关4.2.1峰值:锁定最大扭力值,用复位按钮清零。
4.2.2跟随值:跟随扭力值大小变化,通过消除负载清零。
4.3测试调节器:4.3.1黑色弹簧:测量范围为10-100公斤力.厘米。
4.3.2黄色弹簧:测量范围为5-10公斤力.厘米。
4.3.3银色弹簧:测量范围为0.8-5公斤力.厘米。
5.0操作方法:在开始测量之前,确定扭力计已充电足够,再打开开关,若充电不足,会在显示板左上角显示:“LOBAT”当出现“LOBAT”时,需再使用专用充电器充电3小时以上。
5.1固定仪器,必要时使用固定夹;5.2调整单位切换开关到需要的单位;5.3把模式开关调整到跟随值位置;5.4左右调节调零旋钮,使显示数值为0;5.5当需要测量最大值时,设定模式开关至峰值,此数值会保持5秒以上,假如你按一下复位按钮,该数值则自动删除。
5.6当使用扭力控制设备测量电动螺丝刀或气动螺丝刀时,使用合适的测力调节器安置在测力传感头里。
5.7在测量其它各种旋转工具或以上未提及的其它各类螺丝刀的扭力时,需使用合适于测力传感头的附加。
5.8测量操作完成以后,关掉电源,从插座上取下辅助物或待测物。
扭力计操作规范

四.功能及参数
项目
测量 范围 参
kgf.cm N.m
lbf.in
精度
数
采样速率
充电时间
操作温度
操作湿度
审核
设备型号 页码
规格 0.15-10 0.015-1 0.15-9 ±0.5%以内
600Hz <8小时 ±0℃-40℃ 35%-65%RH
制订
HP-10 1/1
POWER
单位转 换指示
峰值/跟 踪指示
变更 记录
日期
页码
保存年限:下一版次发行之前
版本
摘要
变更人
ቤተ መጻሕፍቲ ባይዱ
功能/导航选项键
4.电源插座 1.液晶显示
2.功能按
5.通信接口 3.扭力测试
RESET
UNIT 单位转
MODE 峰值/跟
6.固定旋钮
五.操作步骤
1.使用前先检查设备的电量是否充足、固定件是否固定 2.确保正常后打开电源开关 3.根据实际需要,选择相应量测单位和功能 4.选择相应扭力测试头安装在测试具上 5.将显示扭力读值清零,按下起子开关测试 6.测试读数记录【如右图示】
扭力计使用操作规程
批准
文件编号 发行日期
2011/10/10
设备名称 版次
扭力计 1.0
设备厂商 涉密等级
艾固 C级
一.目的:为设备的规范使用与正确测量提供依据。 二.适用范围:本司所使用之扭力计。 三.参考文件:《产品使用操作说明书》 四.权责:1.制造课:严格按规程规范作业,定期点检。
2.质管课.监督生产是否按规范作业,跟踪执行后效果的确认。
接好电源, 读数记录
按UINT键
选择相应测试头
扭力计的使用方法
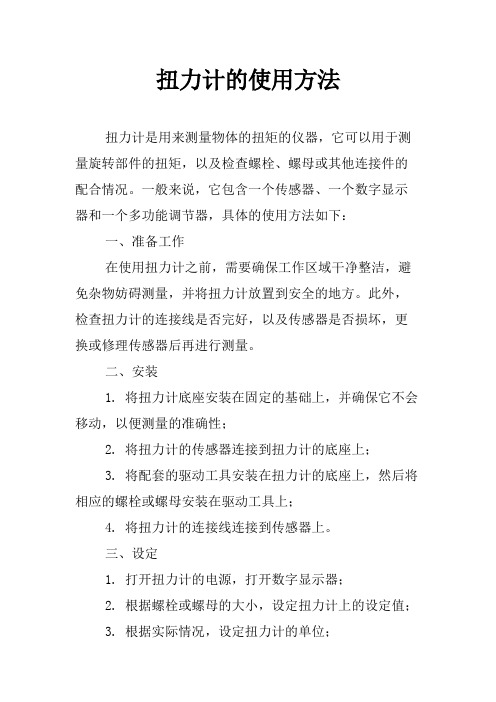
扭力计的使用方法扭力计是用来测量物体的扭矩的仪器,它可以用于测量旋转部件的扭矩,以及检查螺栓、螺母或其他连接件的配合情况。
一般来说,它包含一个传感器、一个数字显示器和一个多功能调节器,具体的使用方法如下:一、准备工作在使用扭力计之前,需要确保工作区域干净整洁,避免杂物妨碍测量,并将扭力计放置到安全的地方。
此外,检查扭力计的连接线是否完好,以及传感器是否损坏,更换或修理传感器后再进行测量。
二、安装1. 将扭力计底座安装在固定的基础上,并确保它不会移动,以便测量的准确性;2. 将扭力计的传感器连接到扭力计的底座上;3. 将配套的驱动工具安装在扭力计的底座上,然后将相应的螺栓或螺母安装在驱动工具上;4. 将扭力计的连接线连接到传感器上。
三、设定1. 打开扭力计的电源,打开数字显示器;2. 根据螺栓或螺母的大小,设定扭力计上的设定值;3. 根据实际情况,设定扭力计的单位;4. 设定扭力计的警报值,当达到预设的扭矩值时,扭力计将发出警报。
四、使用1. 将驱动工具对准螺栓或螺母,慢慢地加紧;2. 随着加紧的过程中,扭力计的数字显示器上的数字也会随之变化,当达到设定的扭矩值时,扭力计将发出警报;3. 再次检查螺栓或螺母是否紧固;4. 将驱动工具慢慢拧松,当达到设定的拧松扭矩值时,扭力计将发出警报。
五、检查1. 检查扭力计的传感器是否完好,如果有损坏的地方需要及时更换或修理;2. 检查扭力计的数字显示器是否准确,如果有明显偏差可以进行校准;3. 检查驱动工具的功能,如果发现有问题应及时修理;4. 检查连接线是否完好,如果有损坏的地方需要及时更换。
六、保存1. 当使用完扭力计后,应将扭力计安全地放回原处;2. 将扭力计放置在干燥通风的地方,避免受潮;3. 将扭力计的电源关闭,以便节约能源;4. 对于电池供电的扭力计,应及时更换电池,以保证扭力计的正常使用。
总之,使用扭力计前一定要做好准备,确保在使用过程中安全、有效、准确。
奇力速 BNK 電動起子扭力顯示盒使用手冊说明书
Dear Partners,Please refer the KL-CTDS-V2.0 torque display user manual as attached, in this document page 11 mentioned that Please switch the power controller HI/LO switch to "HI" position in Yellow color,Due to if switched to LO position the voltage will be changed,and so the performance of torque value and stability will results significant different from setting in HI.Thank you for your attention on this notice.Loover-Kilews Industrial Co., LtdBNK電動起子扭力顯示盒使用手冊Torque Display User ManualModel : KL - CTDS(Ver 2.00)奇力速工業股份有限公司KILEWS INDUSTRIAL CO., LTD.Y2F167-2-006一、外觀功能顯示屏:1.四位七段顯示扭力數值2.16X2 LCM顯示設定功能。
C : 9 9 T : 9 . 9 9 9 9 9 . 9 Q : 5 5 0 . 0 0 K O K A L L ●C:顯示計數數值。
●T:顯示起子動作時間。
●999.9顯示圈數。
●Q:顯示扭力數值●S:顯示狀態(OK,NGT,NGQ,NGC,OKALL....)上鍵:設定模式上鍵切換功能。
下鍵:設定模式下鍵切換功能。
P鍵:按壓三秒進/離開設定模式清除工序。
E/C:回復出廠設定功能/清除計數值/CONFIRM鍵。
数字式扭力计安全操作及保养规程
数字式扭力计安全操作及保养规程前言数字式扭力计是用来测量螺栓和螺母紧固力矩的一种工具。
由于扭矩的控制对于机械装置的安全运行非常关键,因此使用数字式扭力计非常重要。
本文将介绍数字式扭力计的操作和保养规程,以保障设备安全运行。
安全操作充电数字式扭力计一般使用内置电池供电,应通过随附的充电器进行充电。
在使用之前,应将数字式扭力计充满电。
充电器应仅使用专门为该型号扭矩计设计的充电器。
充电前,应先确认电压范围。
操作界面使用数字式扭力计时,需要了解其应有的操作界面。
数码显示屏幕上应该显示当前测量到的扭矩值,并以可辨识的方式显示单位和模式。
通过观察此数值,用户将了解扭矩值与其设置值之间的差异。
数码屏幕上的所有数字和符号都应清晰可见。
操作顺序使用数字式扭力计时应按照以下步骤:1.选定要测量的螺栓。
先测量并设置扭矩值,然后在扭力计显示屏终端上按下“T”按键,直到第一个音响信号发出。
2.将扭力计固定在电机或其他设备上,并装上适当的插头。
接下来,紧固和锁定要测量的螺栓,以便于测量扭矩。
3.根据操作手册上的指示,操作扭力计。
当数字显示屏显示所需扭矩时,停止扭矩增加并将扭力传递到螺栓上。
停止操作使用数字式扭力计后,应按以下步骤操作以停止使用:1.扭矩计器使用完毕后,应立即将其从电机或其他设备上取下。
在此过程中,应注意避免将其遗弃在危险区域。
2.在操作手册上的指导下,将数字式扭力计重新装入其包含在内的夹层中,并保证其安全地存储。
安全注意事项以下是数字式扭力计的一些安全注意事项:1.使用前请确保秤臂应对准扭矩方向。
如果使用不正确,则会造成不准确的扭矩读数。
2.使用扭矩计器时应尽可能避免强烈撞击或震荡,避免扭矩计器损坏或误差扩大。
3.电池低电量、电池短路、充电电压过高都会导致损坏数字式扭力计。
使用扭矩计器前,请检查充电状态。
4.避免将扭矩计器浸泡在任何液体中,避免损坏数字式扭力计及其电子器件。
保养规程为了保障数字式扭力计的使用寿命和准确性,需要进行适当的保养。
【最新】扭力计操作指导书-范文模板 (3页)
本文部分内容来自网络整理,本司不为其真实性负责,如有异议或侵权请及时联系,本司将立即删除!== 本文为word格式,下载后可方便编辑和修改! ==扭力计操作指导书篇一:扭力计操作保养指导书德信诚培训网扭力计操作保养指导书一.主要用途: 螺丝扭力之量测.二.型号及种类: 各种不同螺丝头孔型(梅花孔、四角孔、割沟、十字型、米字型、六角孔).三.操作方法:(一). 使用前应注意事项:1. 校验标签内容是否为有效.2. 使用前先擦拭测定台,不得有铁屑、灰尘.3. 扭力计是否归零.(二). 使用要领:1. 选择适当的扭力扳手.2. 将套筒内装入bit (梅花孔、四角孔、一字型、十字型、米字型、六角孔).3. 螺丝垂直夹在夹具上,锁在夹具上约露出2-3牙处,并锁紧.4. 将夹具上之压盘向下压紧.5. 扭力扳手套入套筒上方,保持平稳.6. 套筒与夹具保持直立,套筒与扭力扳手保持水平.7. 扭力扳手旋转时保持直立与水平,旋转时间保持2-5秒,样品扭断时,让出针盘表上之测试值.(三). 使用中应注意事项:1. 扭力扳手刻度范围不得超过百分之75以上使用,避免扭力扳手弹性疲劳.2. 避免过负荷使用,及防止掉落地面.3. 扭力扳手正转逆转测试值差距在3%以上时,应送供货商或校准机构调整和校验.四.保养内容:(一). 以拭布沾防锈油擦拭表面.(二). 扭力扳手应防止碰撞、磨损,以确保精度.五.校验:(一). 校验周期:一年一次.(二). 校验方法:委外校验.(三). 允许标准:参照外校单位之允许标准.更多免费资料下载请进:好好学习社区篇二:扭力计操作作业指导书扭力計操作作业指导书適用范圍﹕ADT-50/100﹑HP-100等型號扭矩測試儀 PCQM-03-677 0 1/1一、目的:為使用者提供正確的儀器操作與測量方法,確保測量精確度,提升品質,延長儀器使用壽命。
二、適用范圍:本公司各部門使用的ADT-50/100﹑HP-100等型號扭矩測試儀(扭力計)。
数字扭力测试仪操作规范
1.目的:确保仪器的正确使用、避免仪器和产品因使用不当而造成的损坏,提高产品测试数据的有效性、真实性、准确性。
2.范围:2.1该操作规范适用于公司型号为HS-HP-20的数字扭力测试仪的使用。
2.2该仪器的用途2.2.1 测量电动螺丝刀,各种扭力螺丝刀及扳手的扭力设定。
3.职责与权限:3.1使用部门:使用人员负责日常仪器的点检;使用人员严格按此规范正确操作。
3.2质量中心:负责仪器的校验计划安排和实施校验.4.功能说明:4.1单位切换开关:三种切换:Lbf.in(磅力.英寸)—kgf.cm(公斤力.厘米)—N.M(牛顿.米)4.2模式开关(MODE)(PEAK):锁定最大扭力值,用复位按钮清零。
(TRACK):跟随扭力值大小变化,通过消除负载清零。
4.3测试调节器:5.操作方法:在开始测量之前,确定扭力计已充电足够,再打开开关,若充电不足,会在显示板左上角显示:“LOBAT”当出现“LOBAT”时,需再使用专用充电器充电3小时以上。
5.1固定仪器,必要时使用固定夹;5.2调整单位切换开关到需要的单位;5.3把模式开关调整到跟随值位置(TRACK);5.4左右调节调零旋钮(ZERO ADJ),使显示数值为0;5.5当需要测量最大值时,设定模式开关至峰值(PEAK),此数值会保持5秒以上,假如你按一下复位按钮(RESET),该数值则自动删除。
5.6当使用扭力控制设备测量电动螺丝刀或气动螺丝刀时,使用合适的测力调节器安置在测力传感头里。
5.7在测量其它各种旋转工具或以上未提及的其它各类螺丝刀的扭力时,需使用合适于测力传感头的附加。
5.8测量操作完成以后,关掉电源,从插座上取下辅助物或待测物。
6.测量程序:6.1安装测力调节器于测量仪的测力传感头上,且用测力传感头上的4个固定螺丝将测力调节器固定,待测螺丝刀的抓口套在精度测量仪的轴头上。
6.2设定电动启子开关在反向位置(可用手)返转启子,使测力调节器中的弹簧松弛;6.3按复位按钮,使显示值为“0”;6.4设定电动螺丝刀开关在正向位置,并启动使之旋转直至自动停止,(弹簧已绷紧压缩);6.5当螺丝刀停止时,在显示板上产生的测量数值为螺丝刀的输出扭力;6.6再次反转螺丝刀,使精度调节器回到原来高度,按复位按钮消除数值。
KILEWS 数位扭力计 KTM-10 KTM-100 KTM-50S操作手册

○2
○1
○19
○18
○17 ○16 ○15 ○14
○13
○12
○3
○6
○10
○11
○4
○7
○8 ○9
○5
SJ-3
SJ-10
SJ-10K
SJ-50
KILEWS ®
二、2 KTM-50S 外觀
① 歸零開關 (RESET SW) ② 電源開關 (POWER SW) ③ 低電量顯示 (LOBAT DISPLAY) ④ 液晶顯示器 (DISPLAY) ⑤ 資料輸出埠 (DATA OUTPUT) ⑥ 類比式資料輸出埠 (ANALOG OUTPUT)
※設定完成
完成設定後
UP 鍵
UP 鍵
PRG/SET
警示狀況 LED 蜂鳴器
低於下限值 紅色(NG)閃爍 斷續音
上下限值以內 綠色(GOOD)亮燈 連續音
超過上限值 紅色(NG)閃爍 斷續音
超出扭力計的扭力 紅色(NG)亮燈 連續音
4-5 最大值、最小值、平均值: 若想要知道測試的最大、最小、平均值可以利用此扭力計的 AVE 功能鍵來計算測試的數值(最多測試 30 組數據做運算)。 ① 確認測試模式為「PP」或者「PD」,不可為 TRACK。 ② 若想要此功能再作測試時必須先按一下 AVE 鍵,液晶螢幕會有「AVE」字在閃爍。 ③ 測試幾次後(最多 30 次)。 ④ 再按一次 AVE,則液晶螢幕毀自動秀出 計數次數----最大值(MAX)----最小值(MIN)-----平均值(AVE)。
KTM-100 (NEW)
KTM-10 (NEW)
1.5~90.0 lbf・in
0.15~9.00 lbf・in
1.5~100.0 kgf・cm
輔助手臂操作手冊说明书

輔助手臂操作手冊OPERATION AND MAINTENANCE MANUAL奇力速工業股份有限公司KILEWS INDUSTRIAL CO., LTD.Y2F112-1-003安全說明注意-不遵守安全與操作準則可能會導致人身傷害與/或設備損壞。
僅限由合格的專家安裝與使用我們的碳扭力臂。
務必將本手冊所述的安全準則告知全部使用它及其附近環境的人員。
安裝及使用可以使用合適的固定材料安裝扭力臂在立柱、型材或牆壁上面。
確保安裝附件永久固定並適用於負載。
當選擇彈簧平衡器或平衡器時,請考慮支撐件的重量(+工具重量)並確保足夠的安全性。
●扭力臂必須與已經安裝的安裝板及其孔一起固定。
●已用的彈簧平衡器或平衡器必須始終連接於2個獨立的工作點。
使用額外的鏈條或鋼纜固定平衡器。
●每天檢查碳管是否損壞,例如裂縫、斷裂等●每天檢查工具在刀架中的附件。
●如果發現損壞,請立即停止使用產品並聯絡客戶服務部。
●切勿超過扭力臂的最大規定負載能力。
●如果用戶不熟悉本產品,請以低扭力開始緊固測試,以便您逐漸熟悉本產品。
●每天檢查全部螺紋接頭。
●定期檢查扭力臂的全部功能,從各個方向移動手臂,然後完全拉出它。
如果發生卡住,請檢查碳管是否變形。
●灰塵將會增加磨損,因此,請保持扭力支撐清潔,必要時,使用乾布清理。
●切勿擅自修改或更改本產品。
當接觸高壓時,扭力臂無絕緣隔離,禁止於有爆炸危險的環境中使用。
注意事項1.工作場所請保持乾淨。
2.請勿任意更換其他非原廠零件,否則保證無效。
3.當更換機械手臂上的螺絲起子或碳刷時應先確定電動起子正反開關在”OFF”的位置,且將電源插頭拔離插座,以免誤觸而發生危險。
4.勿使用此機械手臂用於非正常用途,如鑚孔等。
5.定期檢查機械手臂的關節處,遇有損壞或不順暢應由指定之服務部門修理;機身需保持乾淨,避免油污弄髒。
6.注意懸臂式輔助手臂所能承受的重量,避免力臂過重無法復歸。
安裝與操作本公司的扭力臂具有最高品質及耐用性-德國製造。
- 1、下载文档前请自行甄别文档内容的完整性,平台不提供额外的编辑、内容补充、找答案等附加服务。
- 2、"仅部分预览"的文档,不可在线预览部分如存在完整性等问题,可反馈申请退款(可完整预览的文档不适用该条件!)。
- 3、如文档侵犯您的权益,请联系客服反馈,我们会尽快为您处理(人工客服工作时间:9:00-18:30)。
KILEWS JAPAN CO., LTD.□ KTM - 10□ KTM - 100□ KTM - 50S数字扭力计操作手册DIGITAL TORQUE METER INSTRUCTION MANUALDigital Torque Meter操作前请阅读全部说明一. 安全警告!!1. 工作场所要保持干净。
◎ 杂乱的工作区域及台面容易造成伤害。
2. 注意工作场所的环境。
◎ 勿将扭力计置放于雨中或潮湿处。
◎ 请在正常室温下(约24℃)使用扭力计。
◎ 工作场所应照明良好。
◎ 勿于有易燃液体或气体之处所使用扭力计。
3. 勿让孩童接近。
◎除操作人员以外应避免他人靠近工作场所。
4. 穿着适宜。
◎勿穿着太宽松的衣物或珠宝,以免操作工具时勾扯拉到。
5. 谨慎操作。
◎操作扭力计时应小心使用,注意操作方式及工作场所安全。
6. 稳固的固定机身主体。
◎当测量较大扭力时应使用夹子或虎头钳等工具来固定起子,如此会比较安全,同时可用双手操作起子。
7. 勿测试超过负荷量的扭力。
◎若测试超过负荷量会使仪器损坏甚至产生意外或伤害。
8. 勿拆卸、撞击或震动仪器。
◎自行拆卸仪器或仪器遭过度撞击、震动,可能导致仪器损坏。
9. 电击警告!!◎勿以潮湿的手碰触电源插座以免电击。
10. 使用专用的充电器充电。
◎使用非专用的充电器可能会损坏仪器,更可能引起火灾意外。
11. 适当的充电。
◎ 请依指示电压充电。
勿使用直流供电机或发电机充电,如此会产生高热引发火灾。
◎ 充电时间不要超过8小时,过量充电会引起爆炸、过热和电池漏液,引起火灾。
12. 绝不可将电池(嵌装于扭力计内)丢弃火中。
◎如此会导致爆炸或释放有毒物质。
(丢弃电池的程序应依当地法律规定妥善处理或送到专门的回收处)13. 如有下列情况应关闭电源。
◎ 没有使用时或进行充电时。
◎ 进行修理时。
◎ 其它可能招致危险的情况时。
14. 细心保养扭力计。
◎ 请经常检查弹簧座,不要使用变形或坏掉的接头,以使操作正常安全。
◎ 定期检查电线和延长线,更换有损坏的线材。
Digital Torque Meter15. 不可猛烈拉扯电线。
◎ 不可搬运悬挂着电线的仪器,也不要拉扯电线来拔开插头。
◎ 不可将电线放在高温、油腻和有锐利边缘的物品旁。
16. 检查有无因零件损坏所造成的功能损失。
◎ 在进一步使用仪器前,仔细检查有无损坏、能否正常运作。
◎ 检查任何有可能会影响运作的零件是否正常。
17. 请由专业的人员来修理仪器。
◎ 勿改装此产品。
◎ 应在购买的经销商处维修产品,若由非专业人员修理此产品,有可能会无法正常运作,甚至引起意外或伤害。
18. 请使用专用的配件或附件。
◎勿使用本操作手册指示以外的配件或附件。
19. 不使用时请小心储放。
◎ 扭力计应储放在干燥且儿童无法接触之处、或是安全的地方。
在运送时可利用此产品原有的包装盒。
二. 外观(1) RESET SW (归零开关) (2) POWER SW (电源开关)(3) LOBAT DISPLAY (低电量显示) (4) DISPLAY (液晶显示器)(5) DATA PUTPUT (数据输出端口)(6)ANALOG OUTPUT(模拟式数据输出端口) (7) DC IN (AC 充电孔) (8) SOCKET (测试底座) (9) KNOB (脚座固定螺丝) (10) UNIT SW (单位切换开关)(11) MODE SELECT SW (测量模式选择开关) (12) ZERO ADJUST (归零调整器)【KTM-50S限定】SCREW JOINT三. 规格型号KTM-100 KTM-10 KTM-50S1.5 ~ 90.0 Lbf.in 0.15 ~9.0 Lbf.in 0.434 ~ 43.40Lbf.in1.5 ~ 100 Kgf.cm0.15 ~ 10.0 Kgf.cm 0.5 ~ 50Kgf.cm测量范围0.15 ~ 10 N.m 0.015 ~ 1.0 N.m 0.049 ~ 4.90N.m正确度200 ~ 1000数字显示为±0.5% 15 ~ 199数字显示为±1%显示器三位元半LCD影像显示测试方向正、反时钟方向P-P(PEAK) 峰值模式显示负荷力最高值测量模式TRACK 变值模式显示负荷力值的变化P-D(PEAK DOWN) 初值模式显示负荷力最初峰值数据输出RS232序列输出(速率9600BPS)电池配置6VDC (Ni-Cd 1.2V x5 )使用扭力单位Lbf.in 、Kgf.cm 、N.m充电时间少于8小时连续使用时间约12小时电池寿命可充电300次以上,视操作情况而定专用充电器输入:AC 110V or 220V 输出:DC 7.25V(120mA)底座尺寸20方形和9.5方形机体尺寸230(长)x123(宽)x65(高)重量约1.5Kg四. 准备与测量方法4-1 安装(1)测量仪器在测量较大扭力时可能会挥动起来。
因此测量仪器必须用稳固的脚座器具来固定它。
(2)KTM-50S 只能测试本公司产品半自动型号例如:SK-205LS;SK-215LS;SK-2125LS;SK-2135LS;SK-2145LSSK-2205LS;SK-2215LS;SK-2225LS;SK-2235LS;SK-2245LSTKS-1300LS;TKS-1500LS;TKS-2500LS;TKS-3500LS;TKS-4500LSBSD-1000LS;BSD-1200LS(3)KTM-10;KTM-100 皆可以测试电动起子全自动型号的扭力;但是必需慎选测试弹簧座。
4-2 测量模式的设定有以下两种模式可供选择。
(视使用用途来选择)(1) P-P(PEAK) 峰值模式:显示测量到的最大扭力值。
(2) TRACK 变值模式:显示实时的扭力值。
(3) P-D(PEAK DOWN) 初值模式:显示第一个峰值。
4-3 测量方式(1) 归零调整: 打开扭力计电源,再将测量模式切换到"TRACK",此时显示器的数值应为零。
若不是零则按"归零开关"将数值归零(若为KTM-50S型号,请直接旋转"归零调整器"即可),接着将测量模式切换为"PEAK" 。
(2) 准备好受测工具并衔接,并开始测量扭力。
(3) 测量时应顺时针完全锁紧或工具自行停止或跳脱为止。
(4) 当测量完成后,显示器上的数值就是该次测量的扭力值。
(5) 如果要再进行测量,再次测量前按"归零开关"将显示器的数据清除。
(6) 仪器在连续10分钟未使用的情况下,将会自动关机。
(7) 若使用者需要测量扭力变化可切至TRACK变值模式五. 充电当显示器上出现"LOBAT"字样时表示扭力计电量不足,需进行充电。
请关闭扭力计电源,以随机配备的充电器,接妥正确电源与扭力计充电孔即可进行充电。
充电时间请勿超过8小时,以免造成电池过热、漏液甚至燃烧等伤害。
六. 数据传输(只限PEAK模式)数据传输(需搭配专用传输线与软件) : 在每次测量完毕按归零开关时(或机器自动归零时),扭力计会自动将测得的数据经传输装置输出到计算机上。
※ 搭配用的传输装置为选购产品;扭力测试仪必须切于PEAK模式。
七. 服务保证本产品在购买后一年内若有因生产或运送过程瑕疵而产生的故障情况,本公司无条件提供修理服务;但下情况则被排除在外:◎ 不当使用、修理或重组仪器而导致故障者。
◎ 在购买后因摔落等事故而导致故障者。
◎ 因天然灾害、污染和不正常的电压所导致的故障。
八. 校正服务本产品于出厂前皆已做过可靠且符合国际标准的准确度校正,但为维持扭力计的精确度,应将扭力计做定期的校验。
本公司另提供专业并符合标准的调修服务,唯保证期间外的校验服务得另收费用。
九. 电动起子与扭力计1.电动起子之扭力调整a. 旋转扭力调整环以增加或减少扭力输出。
顺时针方向调至较高刻度,代表增加扭力;逆时针方向调至较低刻度,代表减少扭力。
b. 操作电动起子时应循序渐进,先操作小扭力试锁螺丝,若感觉扭力不足再渐渐调高扭力。
c. 电动起子的扭力输出和扭力刻度的相互关系可参考说明书内的"扭力曲线图"。
锁紧螺丝之扭力大小取决于螺丝本身之型式、材质尺寸及其铆合物之材质。
d.当被锁对象锁附完成时,视其符合质量标准后,再用扭力计测量该电动起子的正确扭力,若锁附状况未达标准,则调整电动起子扭力,直到符合标准为止。
e. 电动起子用扭力计测量并记录好扭力后,将起子外壳前锁环旋开,换上扭力固定环,如此可以防止异常的扭力变动。
2、扭力计的使用方法(工具:扭力计、全自动电动起子)a. 根据螺丝锁附所需要的扭力选择适当的电动起子型号,可参考电动起子目录或电动起子向量图表b. 选择合适的扭力计: KTM-10最大可测扭力为10Kgf-cm,KTM-100可测最大扭力为100 Kgf-cm,KTM-50S 可测最大扭力为50Kgf.cm;选择扭力计弹簧座(依欲测试的扭力为准可分为四种,请参考以下表格)。
使用范围(Kgf-cm) 扭力计弹簧座备注3.0以下KTM-10 SJ-3 最大可测3Kgf-cmKTM-10 SJ-10N3.0~10.0KTM-100 SJ-10最大可测10Kgf-cm10.0~50.0 KTM-100 SJ-50 最大可测50Kgf-cm0.5~50.0 KTM-50S J-50S 最大可测50Kgf-cm 半自动起子专用c. 测试步骤:1打开电源开关。
2测量模式(MODE)设定为“TRACK”。
3单位切换开关设定为欲测试的单位(Lbf-in;Kgf-cm;N-m)。
d. 归零调整: 检视显示器数值是否为归零状态,若不是则按归零开关(Reset),使显示归零。
e. 测量模式(MODE)设定为“PEAK”。
f. 电动起子套上接杆,另一端则置于弹簧座接头端,启动电动起子开始测量电动起子输出扭力。
g. 当数值显示后即表示电动起子测量正常与完成;显示器上的数值就是电动起子输出扭力值。
h. 完成电动起子测定后,需反转放松弹簧座(J-50除外),以防止弹簧座弹性疲乏,按归零开关清除屏幕后即可继续测量。
i. 使用同一把电动起子于不同厂牌型号的扭力计(或扭力计弹簧座)会产生不同的扭力值误差,其误差来源多为弹簧座的弹簧特性不同所致。
同一工作场所有两台以上的扭力计时,使用单位应定期校验扭力计并比对其弹簧座的弹簧特性差异是否过大,若差异过大则应替换新的弹簧或整组弹簧座。
j. 使用扭力计时请勿同时进行充电,以免影响测试数据的准确性。
Operation Menul for Digital Torque MeterModel: KTM-100 KTM-10 KTM-50S1.Caution for safety______________________________________________________1. Keep work area always clean.Cluttered areas and benches may invite injuries.2. Consider work area environment.Do not use torque meter in the rain or in the damp or wet place.Use the product at a place left at constant temperature(about 24℃).Keep work place well lighted.Do not use or charge the product in presence of flammable liquids or gases.3. Keep children away.Keep any person other than the operator(s) away from work area.4. Dress properly.Do not wear loose clothing or jewelry, which may be caught in moving parts.5. Work with the most care.When using the product, carefully work, with consideration to how to handle, how to work, work environment, etc.6. Fix main body firmly.When operated for measuring a large torque, use clamps or a vise, etc. ,It is not only more safe than holding by hand but also makes it possible to grip the screwdriver by both hands.7. Do not apply a torque exceeding the permissible load.If applied beyond the permissible load, it may cause damage to the detector, resulting in accident or injury.8. Do not disassembly, shock and vibrate this product.Avoid disassembling the product that is a precise instrument. If the torque meter is damaged by excessive shock or vibration, the product may not only show the full performance but also result in accident or injury.9. Caution to electric shockDo not touch power plug by wet hand. It may cause electricshock.10. For charging the battery be sure to use only exclusive charger.Using a charger other than specified may cause a fire or injury.11. Charge properly.Charge on the indicated voltage. Do not use DC power or engine generator. It may cause abnormal heat, resulting in a fire.Keep the charging time not longer than 8 hours. Overcharge may bursting, overheat and liquid leakage, resulting in a fire or injury.Charge in a well-ventilated place. While being charged, do not cover with cloth.12. Never throw the battery(built-in the torque meter) into fire.It may cause burst or give off toxic substance. (The procedure for scrapping the battery shall be followed in accordance with local or regional law on waste disposal. If there is no local or regional law on waste disposal, be sure to dispose of the battery at a recycling shop.)13. In the following cases, turn off the main switch and disconnect the plug from outlet.When not used or charged;When repaired;When any other danger is expected.14. Maintain torque meter with care.For better and safer performance, check screw joints regularly and use ones whose tips are free from deformation and wear down.For replacement of accessories follow the instruction manual.Inspect cords and extension cords periodically and if damaged, replace them.15. Do not handle cord violently.Do not carry the product hanging by cord or draw out socket from outlet by pulling cord.Do not put cord near to a hot, oily or edgy part.16. Check for absence of damaged parts.Before further use of the product, carefully check for no damage, normal operation, or intended functions.Check whether or not any other components that may affect its operation are normal.Replace parts according to the instruction manual.17. Have the product repaired by the specialized dealer.Do not modify this product.Repair should be made always by the dealer where you purchased the product. If repaired by any person with no knowledge or skills of repair, it may not only show the full performance but also may cause any accident or injury.18. Use only the specified accessories and attachments.Do not use any accessories and attachments other than ones specified in this instruction manual.19. Store properly when not in use.Store the torque meter in a dry place and in a height out of children's reach, or secured area. To transport the product, reuse the packing case with which this product was delivered.2.Appearance_________________________________________________________(1) Reset Switch (7)AC Adaptor Terminal(2) Power Switch (8) Socket(3) Lobat Display (9) Knob(4) Display (10) Measering Unit Switch(5) Data Output Terminal (11) Mwasering Mode Select Switch(6) Analog Output Terminal (12) ZERO ADJUST 【SKM-50S ONLY】SCREW JOINT3. Specifications ____________________________________ ___________________MODEL KTM-100KTM-10 KTM-50S lbf・in 1.5~90.0 0.15 ~9.0 Lbf.in 0.434 ~ 43.40Lbf.in kgf・cm 1.5~100.0 0.15 ~ 10.0 Kgf.cm 0.5 ~ 50Kgf.cm Measuring rangeN・m0.15~10.00 0.015 ~ 1.0 N.m 0.049 ~ 4.90N.mAccuracyFrom 200~1000 digit display within +/- 0.5% From 15~199 digit display within +/-1digitDisplay 3.5 figures of LCD Measuring direction CW・CCWP-P (peak) Peak load value hold.TRACK Indication of real time torque value.Measurementmode 3 wayP-D (peak down) Indication peak down point and hold.Data transfer Serial interface RS232C (Baud rate :9600)Power supply6 VDC (Ni-Cd chargeable battery1.2V ×5cells )Measuring unit lbf・in-kgf・cm-N・m (selectable) Charging time From empty – 8hours Continuous working time About 12hoursBattery lifeChargeable for 300 times or more. However,it varies depending on operating conditions.Exclusive chargerINPUT :120V or 230V 60HzOUTPUT :DC7.25V 120mASocket size 20mm square and 9.5mm square Size 230(W) × 123(D) × 65(H) Weight About 1 kg *Do not use for measurement of impact tool. Do not apply more than the specified torque.4. Preparation and the measuring method4.1 InstallationA measuring instrument may be brandished at the time of measurement of a large torque. Surely, a measuring instrument should use a fixed knob etc. and fix it firmly.4.2 A setup in the measurement modeThe 3 following modes can be chosen with the setting. (It unites with the use purpose and please choose.)(1) PP (peak measurement) : The maximum under measurement is always displayed.(2) TRACK (track measurement) : The value of the load torque concerning the detection machine is displayed as it is. (3) PD (peakdown measurement) : Value when load torque value changes from a rise to descent is displayed. Carry out after pushing a CLEAR button at once when applying re-load. *PD and PP measurement operates from 10 or more numerical values.4.3 Measuring method(1) Check that the display part is zero at the time of power supply ON. If display is not show as zero,set a measurement mode select switch toTRACK, push CLEAR button,and set it as back PP which performed zero adjustment.(2) The bit of screwdriver to measure among the screw part of screw joint is set firmly, and screwdriver is started.(3)It checks that operation of screwdriver has been completed normally, the measurement torque value of a display part is read, and it becomes ameasurement end.(4) After a measurement end, if CLEAR button is pushed, a display will be cleared by zero.When continuing measurement, it repeats from (1) again. (5) Choose the TRACK mode , if real time torque value want to be measured5. Power supplyIf this measuring instrument is left 10 minutes or more or battery capacity stops being sufficient, a power supply is turned off automatically.If battery capacity decreases, since LOBAT will be displayed, charge by inserting the connector of an exclusive charger in an AC ADAPTOR terminal.The fully charge is in the state which turned OFF the power supply switch, and takes about 8 hours.(Do not perform charge of 8 hours or more. It may become the cause of the fire by a burst of a battery, generation of heat, and liquid leak, or an injury by fault charge.)Moreover, when turning off a power supply, a power supply SW is pushed for about 1 second.6. Date transfer (PEAK Mode Only)6.1 Date formatData transfer is RS-232C output conformity. Data can be outputted to the printer corresponding to RS-232C, or a personal computer etc.Data bit length Start bit 1 + data bit 8 + stop bit 2 + NO parityBaud rate 9600bpsConnector form D-Sub-9pinSpec.Connector spec. No. 3 pin:Data output / No. 5 pin:GND18 ○○○ OE 20 +/-○○○○○ 20 OF○○○○○○ODCAN ※ SO Space Mark Measuredvalue Space SI UnitCR All data 21CAN : Cancellation※ : Case in the memory mode Number of samples ・ Usually case in the mode SpaceSO : Double width expansion printing specification+/- : Measurement mark + the direction of bolting ・ - return directionMeasured value : A decimal point is also included.The last is a space when there is no decimal point.1 0 . 0 0 → 10.00 SI.SI : Double width expansion printing releaseUnit : In the case of N・m etc., the remainder spaceN ・ m → N・m ( k g f ・ c m → kgf・cm )CR : Carriage return△cautions An interface cable is used for connection of a computer.Unite with a computer and prepare a cable.Please inquire about a cable of a dealer where you purchased the product.6.2 Output method of dataData is outputted whenever it pushes CLEAR key after a measurement end.Date output of the time of use of an date clear function is automatically carried out in setting time.7. GuaranteeIt is allowed to fix gratuitously, if the fault which will originate in manufacture, ransportation, etc. of our company within one year after a purchase should occur, although product was manufactured under sufficient quality control.In the following case, it becomes the charge also within a guarantee term.Failure by the error, and unjust repair and unjust reconstruction and damage on useFailure by fall etc. and damage after a purchaseFailure by the natural disaster, pollution, and unusual voltage, and damage8. Calibration trust servicePeriodical calibration is required in order to manage the accuracy of torque meter. By ourcompany, the calibration with the high reliability traced to the national standard is performed, and in order to use it within accuracy, I recommend you calibration of one year. I offer an result of calibration document, a certification on calibration, and a traceability system figure by demand. (Periodical calibration is a charge.)Documents appended at the time of product purchaseResult of calibration documentCertification on calibration documentTraceability system figureThe cautions on use* Please do not apply the load more than the measurement range by any means.* Attached grease is attached to the bolt or the bearing part, please check before use.* Where a spring is loosened, please be sure to keep after use.The number of times of an exchange standard is about 2500 times.When the following condition comes out, please stop use, and use new joint.When there is bend and wear of a screw threadWhen there is sound etc.For any inquiry, please contact your dealer !。
