worldserver中文说明
worldserverconf中文翻译

worldserverconf中文翻译本文将给出指南,让用户学习如何使用WorldServer.conf文件来配置WorldServer世界服务器的设置。
WorldServerConf 中文翻译WorldServerConf(以下简称WSC)是一个用于建立和管理游戏服务端的开源库,在多人游戏中,它可以帮助你提高游戏用户之间的互动性,以实现更高级别的游戏体验,并且更安全高效地让玩家在服务器间互动。
它是一个完整的游戏引擎解决方案,可实现从认证到游戏网络事件的处理,以及服务端游戏逻辑的实时计算,灵活的消息传递,以及用户登录状态结算,这是一个非常强大的系统。
一、WSC对游戏开发者的意义1. 多服支持WSC支持多服务器,可以显著提高游戏用户之间的互动性,并且更安全高效地让玩家在服务器间互动。
2. 秒级响应WSC可以在秒级实现游戏内容的响应,以避免游戏运行中出现的延迟问题,确保游戏画面流畅。
3.一体式解决方案WSC提供一体式的解决方案,可实现从认证到游戏网络事件的处理,以及服务端游戏逻辑的实时计算,灵活的消息传递,以及用户登录状态结算,大大简化游戏开发者在建立服务端过程中所要面临的技术和时间投入。
二、WSC的主要特点1. 支持多平台WSC支持多种平台,包括Windows,Linux,Mac OS X,它可以根据个人所需,快速和轻松地搭建服务端,而无需担心复杂的服务器设置和维护。
2. 认证验证WSC支持多种服务端与客户端之间的认证验证,具有强大的安全保障,从而尽可能地减少游戏中流失用户的情况。
3. 高性能WSC可以在毫秒级别内解决复杂的服务器请求,满足时时发生的游戏活动,以及大规模游戏中现实的多种活动。
4. 灵活升级WSC支持动态升级,让服务端以及游戏的其他层面根据业务发展的需要,随时可以进行安全的升级和优化。
综上所述,WorldServerConf是一款非常优秀的游戏服务端解决方案,它可以显著提高游戏用户之间的互动性,以及游戏服务器的安全性和性能,因此被广泛用于多人游戏的服务端开发中。
IO服务器Wonderwaer产品安装说明书V1.1
单位简称分发列表修改列表修订版本列表目录1.概述 (4)2. I/OSERVER FSGATEWAY 2.0的安装 (5)3. WONDERWARE INSQL 9.0 组件IDAS (11)4. WONDERWARE INSQL 9.0 SP2 (15)5.授权的安装 (17)1.概述本文件是I/O服务器Wonderwaer产品安装说明书的流程及具体方法,为了保证软件安装的正确性,未来工作的顺利进行和有效维护,以及便于工作人员之日常操作,特此做出如下的操作指引。
I/O服务器主要是12台服务器的2台一主一备,进行数据的采集。
操作员站的具体配置如下:操作系统:Windows 2008 Server应用软件:Wonderware InSql 9.0 组件IDAS和I/Oserver FSGateWay 2.02.I/OServer FSGateWay 2.0的安装FSGateWay 2.0是Wonderware I/O、DA Server的一个,根据该服务器的需要我们在该计算机只安装这一个软件即可。
下面介绍具体安装过程:步骤1:将Device Integration安装盘放入计算机中(或者是在计算机上找到Device Integration 的文件夹,点击安装运行),会自动弹出如下画面。
步骤2:如下图所示进行选择。
步骤3:点击右侧画面中的“FSGateway”,出现如下所示的提示画面。
步骤4:点击运行,出现如下所示的提示画面。
步骤5:点击运行,出现如下画面。
此过程是安装产品时的所需的必备组件列表,如果没有准备其中的一些产品或功能,它们所需的必备组件也可以不必安装,必备组件一旦安装将无法卸载。
点击对话框下方的安装必备组件按钮,开始安装必备组件。
完成后出现如下画面。
步骤6:点击运行,出现如下画面。
步骤7:点击下一步,出现如下画面。
步骤8:点击下一步,出现如下画面。
步骤9:进行用户账户及密码的设定,设置用户名及密码供节点及数据服务器间通讯使用。
worldserver中文说明
#
# LoginDatabase.SynchThreads
# WorldDatabase.SynchThreads
# CharacterDatabase.SynchThreads
# 用几个线程连接数据库,默认:1、1、2
# 登陆服务器设置,RealmID必须匹配Realmlist,默认:1
RealmID = 1
#
# DataDir
# 数据文件目录设置(DBC/Maps/vMaps)
DataDir = "data"
#
# LogsDir
# 日志文件目录设置
#
# SessionAddDelay
# Description: Time (in microseconds) that a network thread will sleep after authentication
# protocol handling before adding a connection to the world session map.
LoginDatabase.SynchThreads = 1
WorldDatabase.SynchThreads = 1
CharacterDatabase.SynchThreads = 2
#
# MaxPingTime
# 最高ping数据库的时间间隔,默认:30(分钟)
LogDB.Opt.ClearTime = 0
#
# MaxCoreStuckTime
# 周期的检查如果过程已经冻结, 如果发现过程已经冻结将在多少秒之后重启控制器。
曙光曙光服务器gridview3.2普通用户手册

Gridview3.2普通用户用户手册DAWNING INFORMATION INDUSTRY CO.,LTD.声明本手册的用途在于帮助您正确地使用曙光公司服务器产品(以下称“本产品”),在安装和第一次使用本产品前,请您务必先仔细阅读随机配送的所有资料,特别是本手册中所提及的注意事项。
这会有助于您更好和安全地使用本产品。
请妥善保管本手册,以便日后参阅。
本手册的描述并不代表对本产品规格和软硬件配置的任何说明。
有关本产品的实际规格和配置,请查阅相关协议、装箱单、产品规格配置描述文件,或向产品的销售商咨询。
如您不正确地或未按本手册的指示和要求安装、使用或保管本产品,或让非曙光公司授权的技术人员修理、变更本产品,曙光公司将不对由此导致的损害承担任何责任。
本手册中所提供照片、图形、图表和插图,仅用于解释和说明目的,可能与实际产品有些差别,另外,产品实际规格和配置可能会根据需要不时变更,因此与本手册内容有所不同。
请以实际产品为准。
本手册中所提及的非曙光公司网站信息,是为了方便起见而提供,此类网站中的信息不是曙光公司产品资料的一部分,也不是曙光公司服务的一部分,曙光公司对这些网站及信息的准确性和可用性不做任何保证。
使用此类网站带来的风险将由您自行承担。
本手册不用于表明曙光公司对其产品和服务做了任何保证,无论是明示的还是默示的,包括(但不限于)本手册中推荐使用产品的适用性、安全性、适销性和适合某特定用途的保证。
对本产品及相关服务的保证和保修承诺,应按可适用的协议或产品标准保修服务条款和条件执行。
在法律法规的最大允许范围内,曙光公司对于您的使用或不能使用本产品而发生的任何损害(包括,但不限于直接或间接的个人损害、商业利润的损失、业务中断、商业信息的遗失或任何其他损失),不负任何赔偿责任。
对于您在本产品之外使用本产品随机提供的软件,或在本产品上使用非随机软件或经曙光公司认证推荐使用的专用软件之外的其他软件,曙光公司对其可靠性不做任何保证。
云服务器 Windows系统云服务器运维手册 说明书
【版权声明】©2015-2016 腾讯云版权所有本文档著作权归腾讯云单独所有,未经腾讯云事先书面许可,任何主体不得以任何形式复制、修改、抄袭、传播全部或部分本文档内容。
【商标声明】及其它腾讯云服务相关的商标均为腾讯云计算(北京)有限责任公司及其关联公司所有。
本文档涉及的第三方主体的商标,依法由权利人所有。
【服务声明】本文档意在向客户介绍腾讯云全部或部分产品、服务的当时的整体概况,部分产品、服务的内容可能有所调整。
您所购买的腾讯云产品、服务的种类、服务标准等应由您与腾讯云之间的商业合同约定,除非双方另有约定,否则,腾讯云对本文档内容不做任何明示或模式的承诺或保证。
文档目录文档声明 (2)登录Windows云服务器 (4)控制台VNC登录Windows云服务器 (4)外网登录无公网IP的Windows云服务器 (7)Windows格式化数据盘 (10)Windows云服务器数据盘分区和格式化 (10)Linux重装为Windows后读取原EXT类型数据盘 (37)Windows环境配置 (39)安装配置IIS及PHP (39)配置高性能电源管理 (64)正版激活 (66)系统更新 (69)更新 Virtio 网卡驱动 (73)关机相关 (76)WIndows恢复模式 (79)Windows2003系统续用 (81)Windows 云服务器修改SID操作说明 (84)Windows程序安装 (86)上传文件到Windows云服务器 (86)登录Windows云服务器控制台VNC登录Windows云服务器VNC登陆是腾讯云为用户提供的一种通过web浏览器远程连接云服务器的方式。
在没有安装远程登陆客户端或者客户端远程登陆无法使用的情况下,用户可以通过VNC登陆连接到云服务器,观察云服务器状态,并且可通过云服务器账户进行基本的云服务器管理操作。
VNC登陆的场景至少包括以下几种:查看云服务器的启动进度无法通过客户端SSH远程登录时,通过VNC登陆来登录服务器注:要正常使用VNC登录,需要使用现代浏览器,如:chrome,firefox,IE10及以上版本等。
Windows Server 2012 教程:功能和操作指南说明书
About the T utorialWindows Server 2012 codenamed Windows Server 8 is the most recent version of the operating system from Microsoft regarding server management, but not the last one which is Windows Server 2016. Officially it was released on August 1, 2012 and is just a commercial version as of now.Windows Server 2012 has four editions: Foundation, Essentials, Standard and Datacenter. Each one of them has their own limitations except the Datacenter version, which is also the most expensive one.This is an introductory tutorial that explains all the fundamentals of Windows Server 2012.AudienceThis tutorial has been designed for all those readers who want to learn the features of Windows Server 2012. It is especially going to be useful for all those professionals who are required to install and use this operating system to perform various duties in their respective organizations.PrerequisitesWe assume the readers of this tutorial have a practical experience of handling a Windows-based Servers. In addition, it is going to help if the readers have a basic knowledge of how to install and use an operating system.Disclaimer & CopyrightCopyright 2018 by Tutorials Point (I) Pvt. Ltd.All the content and graphics published in this e-book are the property of Tutorials Point (I) Pvt. Ltd. The user of this e-book is prohibited to reuse, retain, copy, distribute or republish any contents or a part of contents of this e-book in any manner without written consent of the publisher.We strive to update the contents of our website and tutorials as timely and as precisely as possible, however, the contents may contain inaccuracies or errors. Tutorials Point (I) Pvt. Ltd. provides no guarantee regarding the accuracy, timeliness or completeness of our website or its contents including this tutorial. If you discover any errors on our website or inthistutorial,******************************************T able of ContentsAbout the Tutorial (1)Audience (1)Prerequisites (1)Disclaimer & Copyright (1)Table of Contents (2)1.WINDOWS SERVER 2012 – OVERVIEW (5)Improvements in Windows Server 2012 (5)2.WINDOWS SERVER 2012 – INSTALLATION (8)System Requirements (8)3.WINDOWS SERVER 2012 – SERVER ROLES (15)4.WINDOWS SERVER 2012 − POWERSHELL (22)PowerShell ISE (24)PowerShell Basic Commands (27)5.WINDOWS SERVER 2012 − REMOTE MANAGEMENT (29)Adding a Server for Remote Management (30)6.WINDOWS SERVER 2012 − WINDOWS FIREWALL (33)How to Create a New Firewall Rule? (36)7.WINDOWS SERVER 2012 − REMOTE DESKTOP MANAGEMENT (45)8.WINDOWS SERVER 2012 − RESOURCE MON ITOR (49)9.WINDOWS SERVER 2012 − ACTIVE DIRECTORY (51)10.WINDOWS SERVER 2012 − DC ACCOUNTS (61)11.WINDOWS SERVER 2012 − FILE SYSTEM (65)12.WINDOWS SERVER 2012 − GROUP MANAGED SERVICE ACCOUNTS (67)13.WINDOWS SERVER 2012 − GROUP POLICY OVERVIEW (70)14.WINDOWS SERVER 2012 − DHCP ROLE (73)Post-deployment Configuration (79)Scope Implementation of DHCP (81)15.WINDOWS SERVER 2012 − DNS ROLE (91)16.WINDOWS SERVER 2012 − PRIMARY ZONES (96)17.WINDOWS SERVER 2012 − MANAGE RECORDS (100)18.WINDOWS SERV ER 2012 − IIS OVERVI EW (105)19.WINDOWS SERVER 2012 − IIS SECURITY (111)20.WINDOWS SERVER 2012 − HYPER-V (119)21.WINDOWS SERVER 2012 − ADVANCED CONFIGURATION (124)22.WINDOWS SERVER 2012 − CONFIGURE WSUS ROLE (130)23.WINDOWS SERVER 2012 – WSUS POLICIES & TUNING (134)24.WINDOWS SERVER 2012 − SHARING OF FILES (144)25.WINDOWS SERVER 2012 − FILE MANAGER (151)26.WINDOWS SERVER 2012 − PRINT SERVER (160)27.WINDOWS SERVER 2012 − EASY PRINTING (163)28.WINDOWS SERVER 2012 − CONFIGURE PRINT DRIVERS (166)29.WINDOWS SERVE R 2012 − NETWORK SER VICES (168)30.WINDOWS SERVER 2012 − BACKUP MANAGEMENT (176)Windows Server 2012 Windows Server 2012 codenamed Windows Server 8 is the most recent version of the operating system from Microsoft regarding server management. But it is not the last one, as the last one is Windows Server 2016. Officially it was released on August 1st, 2012 and is being sold as a commercial version only.Improvements in Windows Server 2012The major Improvements on this version are as follows:∙It is ready to be integrated with cloud systems and it still can maintain the classic features of local datacenters as a result Hyper-V Virtualization has new features Hyper-v replicas, it allows you to create virtual machines replications between clusters and storage systems.∙The Storage migration virtual disks can be moved to different physical storages, Virtual machine snapshots, virtual machines can be deleted from the Hyper-v and also from the virtual disks and it can be used directly without the need to shut down the virtual machine.∙The Core server installation easily switches to GUI installation without the need of reinstallation.∙The file server and storage service improvement is that it eliminates identical copies in the same volumes as such and saves space.∙The Storage pools and storage spaces allows you to group the hard disks to one or more storage pools then it allows to create virtual disks. It can add other disks to the storage pools and make available to the users without impacting them.∙The iSCSI Target Server can offer block storage to other servers and applications on the network using the iSCSI standard.∙Active Directory cloning can deploy additional domain controllers by cloning an existing virtual domain controller.Windows Server 2012 – OverviewThe Windows Server 2012 has four editions: Foundation, Essentials, Standard and Datacenter. Each one of them has their own limitation accept the Datacenter version which is also the most expensive one.The following table will show what is the right one for your business needs:For finding out the cost of licensing you can click on the following link:https:///en-us/server-cloud/products/windows-server-2012-r2/purchasing.aspxWindows Server 2012 – InstallationWindows Server 2012In this chapter, we will discuss regarding the requirements and prerequisites of the Windows Server 2012.System RequirementsAlthough most of the servers nowadays probably have the necessary requirements for Windows Server 2012. It will certainly be useful to know them in case you want to upgrade from an older system.The main requirements are:∙CPU socket minimum 1.4 GHz (64-bit processor) or faster for single core and Microsoft recommends is 3.1 GHz (64-bit processor) or faster multi-core.∙RAM memory minimum is 2GB, but Microsoft recommends 8GB.∙160 GB hard disk with a 60 GB system partition space in your hard disk.One important thing to note here is that the installation process itself will verify your computer hardware and let you know if it qualifies for a Windows Server 2012 installation. If not, then you will need to upgrade your hardware.InstallationThe following steps are to be adhered for the installation of Windows Server 2012.Step 1: We can download the evaluation ISO of Windows Server 2012 R2 from the following link:https:///en-us/evalcenter/evaluate-windows-server-2012-r2But you will need to sign in first with a Microsoft account like Hotmail for example in order to complete the download and the good thing is that the evaluation period will last for 180 days, so you will have enough time to know if it will be the right product for you or not.At the end, if you decide to buy the license of your Windows server 2012 R2. You can purchase it online via a Microsoft online store found in –/store/msusa/en_US/list/Windows-Server/categoryID.70676900?icid=BusinessR_Software_80_Windows_Server_112315 For the Enterprise solution, I would recommend to purchase it via a Microsoft partner that is found in your country.Step 2: After downloading the ISO of Microsoft, create a boot USB driver which can be created with the Microsoft tool called Windows USB/DVD Download Tool and can be downloaded from the following link:https:///en-us/download/windows-usb-dvd-download-toolAfter downloading the EXE file, open it and select the ISO file location and then click next like in the following screenshot, and wait up to the end when the Boot USB is created.Step 3: After completing the above given steps, plug-in the USB to the server and wait for a while till it loads the files. This will continue for about a couple of minutes as shown in the following screenshot.Step 4: After the files are loaded, you will see the screen of language settings of installation, keyboard, time and currency format. Generally, all the default ones are also good enough to start with. Click Next.Step 5: Click “Install now”.Step 6: Once you have clicked on Install Now, the setup will start and it will load all the files and the screen will look as shown in the following screenshot.Step 7: Wait until the files are loaded and then you will see the following screen. Let’s select Windows Server 2012 DataCenter Evaluation (Server with GUI) and click Next.Step 8:Click “I accept the license terms” and the n click on the Next button as shown in the following screenshot.Step 9:The following screen will appear. In “Driver Options” you can create a new partition, delete or format the Hard disk. After you have done this process then you can select the partition where the Windows server 2012 R2 will be installed in our case we have one partition. Once all this is done, then click on Next.Step 10:Let’s wait until this process finishes during this ti me and then the server will reboot.Step 11: Once the reboot is done the following screen will appear. Set the password for the server and then click on “Finish”.Step 12: It will take some minutes until the setup finishes completely.Step 13: Once all this is done, you have completed the installation process and the following screen will appear.CongratulationsWindows Server 2012Like the previous version, Windows Server 2012 has the following roles which can be used and in the subsequent chapter, we will see how to install and configure the most important ones.The following picture shows all the roles. A small reminder! – Roles and Features are the tools that you need to install or activate in order to complete your IT Administration duties, without their installation you cannot do anything.To add a role in the server we should adhere to the following steps:Windows Server 2012 – Server RolesStep 1: Click with the mouse on Server Manager which is found in the task bar as shown in the following screenshot.Step 2: After opening the “Server Manager”, click on the second option “Add roles and features”.Step 3: The following screen will appear, then you can Click on the Next button.Step 4:Select the Role-based or feature-based installation and then click on the Next button.In the next screen that appears, you will have the following two options:Option 1: Select a server from the server pool. This option is –if you want to install the services in the physical server like being done in the following screenshot.Option 2: Select a virtual Hard disk if you want to install the services in a virtual disk that can be somewhere in the network storage. Take a look at the following screenshot for better understanding.Step 5:The last step will be to check the service that you want to install, but in the upcoming chapters we will continue this setup for each and every important services.Windows Server 2012Windows PowerShell is a command-line shell and scripting language designed especially for system administration. It ’s analogue in Linux is called as Bash Scripting. Built on the .NET Framework, Windows PowerShell helps IT professionals to control and automate the administration of the Windows operating system and applications that run on Windows Server environment.Windows PowerShell commands, called cmdlets , let you manage the computers from the command line. Windows PowerShell providers let you access data stores, such as the Registry and Certificate Store, as easily as you access the file system.In addition, Windows PowerShell has a rich expression parser and a fully developed scripting language. So in simple words you can complete all the tasks that you do with GUI and much more.PowerShell Icon can be found in the task bar and in the start menu. Just by clicking on the icon, it will open.To open it, just click on the icon and then the following screen will open and it means that PowerShell is ready for you to work on.Windows Server 2012 − PowerShellThe latest version of PowerShell is 5.0 and to check what is installed in our server we type the following command –:$PSVersionTable as shown in the following screenshot and from the screen we also know that we have PSVersion 4.0To update with the latest version where it has more Cmdlets we have to download Windows Management Framework 5.0 from the following link –https:///en-us/download/details.aspx?id=50395 and install it.PowerShell ISEThe Windows PowerShell Integrated Scripting Environment (ISE) is a host application for Windows PowerShell. In Windows PowerShell ISE, you can run commands and write, test, and debug scripts in a single Windows-based graphic user interface with multiline editing, tab completion, syntax coloring, selective execution, context-sensitive help, and support for right-to-left languages.You can use menu items and keyboard shortcuts to perform many of the same tasks that you would perform in the Windows PowerShell console. For example, when you debug a script in the Windows PowerShell ISE, to set a line breakpoint in a script, right-click the line of code, and then click Toggle Breakpoint.To open it you just go to Start –Search and then Type –PowerShell as shown in the following screenshot.Then click on Windows PowerShell ISE. Or click on the downward Arrow as shown in the following screenshot.It will list all the applications installed on the server and then click on Windows PowerShell ISE.The following table will be open –It has three sections, which include –The PowerShell Console with number 1, then Scripting File number 2 and the third is the Command Module where you can find the module.End of ebook previewIf you liked what you saw…Buy it from our store @ https://。
使用入门——精选推荐
使用入门商用PC文档部件号:384106-AA12005年5月当您按照快速安装指南中详述的各个步骤进行操作之后,便会用到本指南。
它将帮助您设置计算机出厂时附带的 软件。
它还包含基本的故障排除信息,有助于您解决初始启动过程中可能遇到的问题。
©版权所有2005 Hewlett-Packard Development Company, L.P.本文档中包含的信息如有更改,恕不另行通知。
Microsoft和Windows是Microsoft Corporation在美国和其它国家/地区的商标。
随HP产品和服务附带的明示保修声明中阐明了此类产品和服务的全部保修服务。
本文档中的任何内容均不应理解为构成任何额外保证。
HP对本文档中出现的技术错误、编辑错误或遗漏之处不承担责任。
本文档包含的所有权信息受版权法保护。
事先未经Hewlett-PackardCompany书面许可,不得影印、复制本文档的任何部分或将其翻译成其它语言。
Å警告:以这种方式出现的文字表示如果不按照指示操作,可能会造成人身伤害或带来生命危险。
Ä注意:以这种方式出现的文字表示如果不按照指示操作,可能会损坏设备或丢失信息。
使用入门商用PC第1版(2005年5月)文档部件号:384106-AA1目录安装与自定义软件 . . . . . . . . . . . . . . . . . . . . . . . . . . . . . . . .1安装操作系统. . . . . . . . . . . . . . . . . . . . . . . . . . . . . . . . .1 Microsoft Security Update(Microsoft安全更新) . . .2安装系统中已加载的Microsoft关键更新. . . . . . .2从Microsoft Windows Update网站下载更新 . . . .3可访问性. . . . . . . . . . . . . . . . . . . . . . . . . . . . . . . . . . . . .4安装或升级设备驱动程序. . . . . . . . . . . . . . . . . . . . . . .4自定义显示器显示. . . . . . . . . . . . . . . . . . . . . . . . . . . . .5保护软件 . . . . . . . . . . . . . . . . . . . . . . . . . . . . . . . . . . . . . . . .5传输文件和设置 . . . . . . . . . . . . . . . . . . . . . . . . . . . . . . . . . .5恢复软件 . . . . . . . . . . . . . . . . . . . . . . . . . . . . . . . . . . . . . . . .6关闭计算机 . . . . . . . . . . . . . . . . . . . . . . . . . . . . . . . . . . . . . .6查找详细信息 . . . . . . . . . . . . . . . . . . . . . . . . . . . . . . . . . . . .7使用文档和诊断程序CD. . . . . . . . . . . . . . . . . . . . . . . .8提请技术支持之前的准备工作 . . . . . . . . . . . . . . . . . . . . . .9有益提示 . . . . . . . . . . . . . . . . . . . . . . . . . . . . . . . . . . . . . . .11排除基本故障 . . . . . . . . . . . . . . . . . . . . . . . . . . . . . . . . . . .13解决常见问题. . . . . . . . . . . . . . . . . . . . . . . . . . . . . . . .13解决硬件安装问题. . . . . . . . . . . . . . . . . . . . . . . . . . . .17解释诊断指示灯和声音的含义. . . . . . . . . . . . . . . . . .20使用入门安装与自定义软件Ä注意:在成功安装操作系统之前,请勿在计算机中添加可选硬件或第三方设备。
WINODWS服务说明-11页精选文档

Alerter微软:通知选取的使用者及计算机系统管理警示。
如果停止这个服务,使用系统管理警示的程序将不会收到通知。
如果停用这个服务,所有依存于它的服务将无法启动。
补充:一般家用计算机根本不需要传送或接收计算机系统管理来的警示(Administrative Alerts),除非你的计算机用在局域网络上依存: Workstation建议:已停用Application Layer Gateway Service微软:提供因特网联机共享和因特网联机防火墙的第三方通讯协议插件的支持补充:如果你不使用因特网联机共享 (ICS) 提供多台计算机的因特网存取和因特网联机防火墙 (ICF) 软件你可以关掉依存: Internet Connection Firewall (ICF) / Internet Connection Sharing (ICS)建议:已停用Application Management (应用程序管理)微软:提供指派、发行、以及移除的软件安装服务。
补充:如上说的软件安装变更的服务建议:手动Automatic 更新s微软:启用重要 Windows 更新的下载及安装。
如果停用此服务,可以手动的从 Windows 更新网站上更新xx作系统。
补充:允许 Windows 于背景自动联机之下,到 Microsoft Servers 自动检查和下载更新修补程序建议:已停用Background Intelligent Transfer Service微软:使用闲置的网络频宽来传输数据。
补充:经由 Via HTTP1.1 在背景传输资料的?#124;西,例如 Windows 更新就是以此为工作之一依存: Remote Procedure Call (RPC) 和 Workstation建议:已停用ClipBook (剪贴簿)微软:启用剪贴簿检视器以储存信息并与远程计算机共享。
如果这个服务被停止,剪贴簿检视器将无法与远程计算机共享信息。
intouch7.11入门手册

通过运用InTouch您可以创建强大的、功能齐全的应用程序,充分利用Microsoft Windows的关键功能, 包括ActiveX控件、OLE图形和网络等。InTouch可以通过添加自定义 ActiveX 控件、向导、常规对象以及 创建InTouch QuickScript等来进行充分地扩展。
InTouch包括三个主要程序,它们是 InTouch 应用程序管理器、WindowMaker和WindowViewer此外, InTouch还包括诊断程序WonderwareLogger 。
18. 单击“确定”后,出现以下对话框,告知 InTouch 安装完成:
19. 单击“确定”,退出安装程序,InTouch 安装完成,你可以开始使用 InTouch 软件。 7
Wonderware InTouch 7.11 中文版入门手册
第一章 欢迎使用 InTouch
欢迎使用Wonderware InTouch。它是创建Microsoft Windows2000和Windows NT操作系统下的人机界面 (HMI)应用程序的最简便快捷的方法。InTouch 是Wonderware FactorySuite 的一个组成部分。InTouch广泛 应用于包括食品加工、半导体、石油、汽车、化工、制药、纸浆和造纸、交通等在内的全球众多纵向市场。
DELL服务器R配置详细中文手册

D E L L服务器R配置详细中文手册集团标准化办公室:[VV986T-J682P28-JP266L8-68PNN]此文档为自行整理,非官方提供资料,一些概念的翻译可能不够准确,仅供参考。
疏漏之处敬请反馈。
对RAID进行操作很可能会导致数据丢失,请在操作之前务必将重要数据妥善备份,以防万一。
名称解释:Disk Group: 磁盘组,这里相当于是阵列,例如配置了一个RAID5,就是一个磁盘组VD (Virtual Disk): 虚拟磁盘,虚拟磁盘可以不使用一个阵列的全部容量,一个磁盘组可以分为多个VDPD (Physical Disk): 物理磁盘HS (Hot Spare): 热备Mgmt (Management): 管理1、按照屏幕下方的虚拟磁盘管理器提示,在VD Mgmt菜单(可以通过CTRL+P/CTRL+N切换菜单),按F2展开虚拟磁盘创建菜单2、在虚拟磁盘创建窗口,按回车键选择”Create New VD”创建新虚拟磁盘3、在RAID Level选项按回车,可以出现能够支持的RAID级别,RAID卡能够支持的级别有RAID0/1/5/10/50,根据具体配置的硬盘数量不同,这个位置可能出现的选项也会有所区别。
选择不同的级别,选项会有所差别。
选择好需要配置的RAID级别(我们这里以RAID5为例),按回车确认。
4、确认RAID级别以后,按向下方向键,将光标移至Physical Disks列表中,上下移动至需要选择的硬盘位置,按空格键来选择(移除)列表中的硬盘,当选择的硬盘数量达到这个RAID级别所需的要求时,Basic Settings的VD Size中可以显示这个RAID的默认容量信息。
有X标志为选中的硬盘。
选择完硬盘后按Tab键,可以将光标移至VD Size栏,VD Size可以手动设定大小,也就是说可以不用将所有的容量配置在一个虚拟磁盘中。
如果这个虚拟磁盘没有使用我们所配置的RAID5阵列所有的容量,剩余的空间可以配置为另外的一个虚拟磁盘,但是配置下一个虚拟磁盘时必须返回VD Mgmt创建(可以参考第13步,会有详细说明)。
Windows Server 2016 云端操作系统说明书

Windows Server 2016 – The cloud-ready operating systemWindows Server 2016 is the cloud-ready operating system that delivers new layers of security and Azure-inspired innovation for the applications and infrastructure that power your business.• Increase security and reduce business risk with multiple layers of protection built into the operating system.• Evolve your datacenter to save money and gain flexibility with software-defined datacenter technologies inspired by Microsoft Azure.• Innovate faster with an application platform optimized for the applications you run today as well as the cloud-native apps of tomorrow.Most organizations today are running a mixture of traditional and cloud-based workloads. Windows Server 2016 is a great operating system for hybrid environments. Evolve your on-premises datacenter to be more secure and efficient. Plus, benefit from cloud-consistency built into Windows Server 2016 to move workloads from on-premises to Azure, in virtual machines or containers.Get started today and use Windows Server licenses with Software Assurance to save up to 49 percent when you move workloads to the cloud with the Azure Hybrid Benefit.How to use this comparison guideUse this guide to compare specific features of Windows Server versions to understand the differences between the version you are running today and the latest version available from Microsoft.Security is a top priority for IT teams. New threats have made it harder than ever for IT to secure data and applications. Windows Server 2016 gives you new capabilities to help prevent attacks and detect suspicious activity, with features to control privileged access, help protect virtual machines, and harden the platform against emerging threats.Datacenter operations seem to earn more scrutiny than budget these days. New applications stretch the operational fabric and create infrastructure backlogs that can slow business. IT organizations are expected to do more with less, but an aging infrastructure with little automation becomes a hindrance to moving forward. As organizations look beyond server virtualization for more efficiency, they can use Windows Server 2016 capabilities to meet operational and security challenges, freeing up IT resources to plan and innovate on future solutions that drive business success.Support developers in the race to create cloud-ready, business-changing appsand services, whether on-premises or in any cloud, using technologies such as containersand microservices architectures. Windows Server 2016 can help you modernize your appsand innovate faster.Fully SupportedTake the next step. Learn more at/windowsserver。
Dell Server Management Pack Suite 4.0 版用户指南说明书

Dell™ Server Management Pack Suite Version 4.0 For Microsoft® System Center Operations Manager 2007 SP1/R2 and System Center Essentials 2007 SP1用户指南w w w.d e l l.c o m|s u p p o r t.d e l l.c o m注和小心注:“注”表示可以帮助您更好地使用计算机的重要信息。
小心:“小心”表示可能会损坏硬件或导致数据丢失,并说明如何避免此类问题。
____________________本说明文件中的信息如有更改,恕不另行通知。
© 2009Dell Inc.版权所有,翻印必究。
.未经 Dell Inc. 书面许可,严禁以任何形式复制这些材料。
本文中使用的商标:Dell、DELL徽标、PowerEdge、PowerVault 及 OpenManage 是Dell Inc. 的商标;Microsoft、Windows、Vista 及 Windows Server是 Microsoft Corporation 在美国和其它国家/地区的商标或注册商标。
本说明文件中述及的其它商标和产品名称是指拥有相应商标和产品名称的公司或其制造的产品。
Dell Inc. 对本公司的商标和产品名称之外的其它商标和产品名称不拥有任何专有权。
Dell 对外部网站及其内容的可用性不负任何责任。
2009 年 8 月目次1简介 (7)访问管理包和文档 (7)Dell Server Management Pack Suite v4.0 中的新功能.8了解 Dell Server Management Pack Suite v4.0 (9)Dell 硬件组定义 (9)Windows 服务器 (9)可扩展管理包与详细管理包的比较 (12)Dell 机箱管理控制器 (CMC) (12)Dell Remote Access Controller (DRAC) (13)支持的 Dell 设备 (13)支持的操作系统 (14)支持的 DRAC 和 CMC 设备固件版本 (14)您可能需要的其他说明文件 (14)获得技术帮助 (15)2系统 (17)Management Station 要求 (17)一般要求 (17)受管系统要求 (18)以正常用户权限配置Management Server Action 帐户 (18)目次3将管理包导入 SCOM (19)Dell Server Management Pack Suite v4.0的导入后任务 (20)Microsoft 对于 Operations Manager 2007 SP1/R2性能与可扩展性的指南 (22)从之前版本的管理包升级 (22)删除管理包 (22)安全注意事项 (23)3了解 Dell Server ManagementPack Suite 的操作 . . . . . . . . . . . . . . . . .25发现和分组 (25)警报和陷阱 (26)任务 (26)报告 (27)自定义 (27)Web 控制台 (27)发现 (27)Dell 网络设备 (28)监视 (29)警报视图 (29)图表视图 (29)状态视图 (36)性能和电源监控视图 (37)任务 (37)Dell 模块化和单片系统任务 (39)Dell Remote Access Controller (DRAC) 任务 (42)Dell 机箱管理控制器 (CMC) 任务 (42)4目次报告 (43)OpenManage Windows 事件日志 (43)BIOS 配置 (44)固件和驱动程序版本 (44)RAID 配置 (44)自定义 Dell Server Management Pack Suite (45)设备监测器 (45)对象发现 (47)规则 (48)A附录 A- SCOM 2007 SP1/SCE SP1中的已知问题 . . . . . . . . . . . . . . . . . . . . . 51已知限制 (52)SCOM/SCE (52)SCE (52)SCOM/SCE 和 Dell Server ManagementPack Suite v4.0 (52)Dell Server Management Pack Suite v4.0 (52)Microsoft®的 SCOM 2007 SP1 修复程序 (53)词汇表 . . . . . . . . . . . . . . . . . . . . . . . . . . . . . . 55 Index (59)目次56目次1简介本文档适用于使用 Dell™ Server Management Pack Suite v4.0 来管理和监测Dell系统的系统管理员。
Server说明书 8.1.01 使用说明
ServerGuide 8.1.01使用说明一关于ServerGuideIBM ServerGuide 通过自动检测安装的配件并提供相应驱动的方式,实现减少服务器部署的复杂性。
ServerGuide向导会检测服务器型号和已安装的适配器,并指导您您完成服务器的配置和操作系统的装。
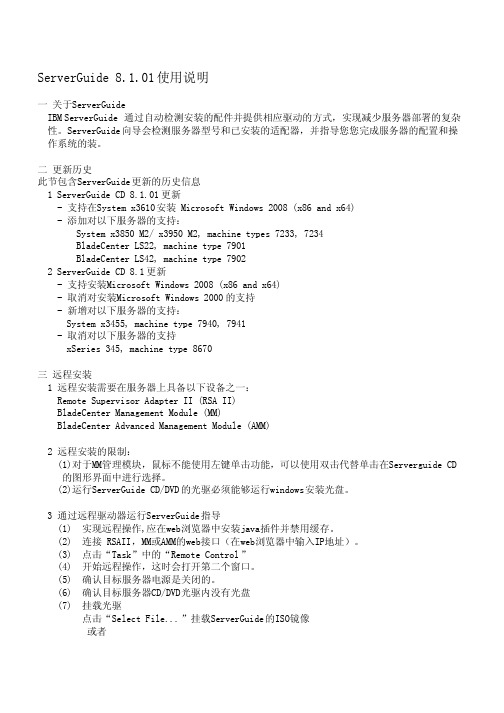
二更新历史此节包含ServerGuide更新的历史信息1 ServerGuide CD 8.1.01更新- 支持在System x3610安装 Microsoft Windows 2008 (x86 and x64)- 添加对以下服务器的支持:System x3850 M2/ x3950 M2, machine types 7233, 7234BladeCenter LS22, machine type 7901BladeCenter LS42, machine type 79022 ServerGuide CD 8.1更新- 支持安装Microsoft Windows 2008 (x86 and x64)- 取消对安装Microsoft Windows 2000的支持- 新增对以下服务器的支持:System x3455, machine type 7940, 7941- 取消对以下服务器的支持xSeries 345, machine type 8670三远程安装1 远程安装需要在服务器上具备以下设备之一:Remote Supervisor Adapter II (RSA II)BladeCenter Management Module (MM)BladeCenter Advanced Management Module (AMM)2 远程安装的限制:(1)对于MM管理模块,鼠标不能使用左键单击功能,可以使用双击代替单击在Serverguide CD的图形界面中进行选择。
(2)运行ServerGuide CD/DVD的光驱必须能够运行windows安装光盘。
WebSphere Application Server for z OS 8.5概述和演示说明书

BPM:PS V7.5
("IBM Business Process Manager Advanced: Process Server") V. 7.5 - Still pre-req'd the Feature Packs for XML, SCA, & SDO. - Dropped the "WebSphere" name. Included WLE - WebSphere Lombardi Edition
Uploading and running the jobs is the easy part.
The real challenge is coming up with all the names and values and ports the PMT is going to ask for.
Without a plan for those names you’ll very quickly get confused.
wassmpe = /shared/phere/V8R5
/shared zWebSphere
/V8R5
Configuration HFSes for each node – Read/Write:
Mount Points (WAS_HOME directories):
Dmgr: /wasv8config/b8cell/b8dmnode/DeploymentManager NodeA: /wasv8config/b8cell/b8nodea/AppServer
4
Reviewing HFS Directories, Roots & Homes
惠普 ES server ES server 使用者手冊说明书

ES server 使用者手冊目錄1引言 (4)1.1預期用途 (4)1.2使用說明 (4)1.3目標使用者 (4)1.4臨床受益 (4)1.5本手冊所使用的慣例 (4)1.6擬議的解決方法 (5)1.7重要限制與警告 (5)1.8一般網路安全建議 (6)2硬體要求 (6)3連線 ES server 的裝置 (6)3.1連線裝置的類型 (7)3.2遠端伺服器連線 (7)3.3已連線裝置的數量和伺服器回應時間 (9)3.3.1配置 1 –基本 (9)3.3.2配置 2 –高容量 (9)4伺服器基礎架構 (10)4.1ES server 軟體 (10)4.2Instrument Monitoring Client (儀器監測終端) (10)4.3備份服務 (11)4.4網路介面 (12)4.5電腦(EmbryoViewer 軟體)的介面 (12)4.6培養箱介面 (12)4.7與外部系統的介面(例如與 EMR 系統集成) (13)4.8伺服器基礎架構的圖形化概述 (14)5授權 (15)6配置 EmbryoViewer 軟體以與其他伺服器通信 (15)7ES server 和 EmbryoViewer 之間的連線斷開 (17)7.1伺服器尚未啟動 (17)7.2編輯資料時,與 ES server 斷開連線 (18)8符號和標籤 (20)9廢棄物處理 (20)10聯絡方式 (21)CohortView,CulturePro,EmbryoScope,EmbryoSlide,EmbryoViewer,Guided Annotation,iDAScore 和 KIDScore 係 Vitrolife Group 的商標或注冊商標。
©2022 Vitrolife A/S. 保留所有權利。
1 引言此手冊主要介紹了關於 ES server 的基礎資訊。
為了確保充分利用此手冊,您需要具備 CulturePro 系統和/或 EmbryoScope time-lapse 系統(版本 D,+,Flex 或 8)工作原理的基本知識,還需要有關常規 IT,尤其是需要具備網路配置的高級知識。
宽带我世界是宽带接入和宽带内容融合为一体的统一客户

目录1 简介 (2)1.1 系统要求 (2)1.2 检查包装盒内物品 (3)2 客户端的安装与卸载 (3)2.1 安装 (3)2.2 卸载 (5)3客户端操作指南 (7)3.1客户端架构 (7)3.2功能使用指南 (9)3.3频道功能介绍 (18)3.4转到功能使用指南 (19)3.5搜索功能使用指南 (20)3.6系统隐含功能 (21)4附录—常见问题 (22)1 简介宽带我世界是宽带接入和宽带内容融合为一体的统一客户端;为用户提供国内电信运营商省网及宽带城域网的接入认证、内容/增值业务的支撑和计费结算。
1.1 系统要求需要满足:台式或笔记本PC,支持IBM-PC标准及其兼容机(即非苹果公司生产的PC);硬件环境:⏹PentiumII 400 MHz 以上CPU,32M可用磁盘空间;⏹在Windows98se/ME 操作系统环境下,推荐使用64M以上内存;⏹在Windows2000/XP/2003 Server 操作系统环境下,推荐使用128M以上内存。
软件环境:“宽带我世界”简体中文版目前支持以下的MS Windows简体中文操作系统:⏹Windows 98(II)⏹Windows ME⏹Windows 2000 (Professional、Server、Advanced Server)⏹Windows 2003 Server⏹Windows XP(Home、Professional)。
⏹Windows Vista1.2 检查包装盒内物品包装盒内的物品列表请参见表1-1。
表 1-1包装盒内的物品2 客户端的安装与卸载2.1 安装安装步骤如下:(1) 请您将客户端软件安装光盘放入PC光驱中。
如果安装程序没有自动运行,请点击“我的电脑”,打开光盘驱动器,双击“setup.exe”文件启动安装程序。
(2) 安装程序执行解压缩操作,如图2-1所示。
图2-1安装程序解压缩(3) 如果以前安装过客户端软件,则弹出如图2-2所示对话框,单击【继续】按钮。
微软项目服务器软件使用指南说明书
SERENA®DIMENSIONS® RM 12.4 Integration Guide for Microsoft® Project Serena Proprietary and Confidential InformationCopyright © 2001–2016 Serena Software, Inc. All rights reserved.This document, as well as the software described in it, is furnished under license and may be used or copied only in accordance with the terms of such license. Except as permitted by such license, no part of this publication may be reproduced, photocopied, stored in a retrieval system, or transmitted, in any form or by any means, electronic, mechanical, recording, or otherwise, without the prior written permission of Serena. Any reproduction of such software product user documentation, regardless of whether the documentation is reproduced in whole or in part, must be accompanied by this copyright statement in its entirety, without modification.This document contains proprietary and confidential information, and no reproduction or dissemination of any information contained herein is allowed without the express permission of Serena Software.The content of this document is furnished for informational use only, is subject to change without notice, and should not be construed as a commitment by Serena. Serena assumes no responsibility or liability for any errors or inaccuracies that may appear in this document.TrademarksSerena, TeamTrack, StarTool, PVCS, Comparex, Dimensions, Prototype Composer, Mariner and ChangeMan are registered trademarks of Serena Software, Inc. The Serena logo, Version Manager and Mover are trademarks of Serena Software, Inc. All other products or company names are used for identification purposes only, and may be trademarks of their respective owners.U.S. Government RightsAny Software product acquired by Licensee under this Agreement for or on behalf of the U.S. Government, its agencies and instrumentalities is "commercial software" as defined by the FAR. Use, duplication, and disclosure by the U.S. Government is subject to the restrictions set forth in the license under which the Software was acquired. The manufacturer is Serena Software, Inc., 1850 Gateway Drive, 4th Floor, San Mateo California, 94404-4061.Publication date: April 2016Table of ContentsPreface . . . . . . . . . . . . . . . . . . . . . . . . . . . . . . . . . . 5Objective . . . . . . . . . . . . . . . . . . . . . . . . . . . . . . . . . . . . . . . . . . . . .5Audience. . . . . . . . . . . . . . . . . . . . . . . . . . . . . . . . . . . . . . . . . . . . . .5Manual Organization . . . . . . . . . . . . . . . . . . . . . . . . . . . . . . . . . . . . .5Related Documents . . . . . . . . . . . . . . . . . . . . . . . . . . . . . . . . . . . . . .6Contacting Serena Technical Support. . . . . . . . . . . . . . . . . . . . . . . . . .6Integrating Dimensions RM and Microsoft Project. . . . . . . 9Exporting Data from Microsoft Project . . . . . . . . . . . . . . . . . . . . . . . . .9Configuring a Schema in Dimensions RM . . . . . . . . . . . . . . . . . . . . . . .10Importing Data into Dimensions RM. . . . . . . . . . . . . . . . . . . . . . . . . . .13Importing Data from the CSV File with RM Browser. . . . . . . . . . . . .13Integration Guide for Microsoft® Project3Table of Contents4Serena® Dimensions® RM 12.4PrefaceThis document describes the Serena® Dimensions® RM integration with Microsoft®Office Project Professional.The instructions in this document outline how to import data from Microsoft Project intothe Dimensions RM database, update project data in Dimensions RM, and export the databack into Microsoft Project. These instructions assume that you are familiar with MicrosoftProject. If not, consult the documentation provided by Microsoft. These instructions alsoassume that you know how to manipulate Dimensions RM project information. If not,consult the Serena Dimensions RM User’s Guide and the Serena Dimensions RMAdministrator’s Guide.These instructions assume that both Microsoft Project and Dimensions RM are alreadyinstalled on your system. See the Serena Dimensions RM Installation Guide forinformation on installing Dimensions RM.The instructions in this document are provided by Serena Software, Inc. for illustrativepurposes only. The instructions have been verified only for Microsoft Office ProjectProfessional 2003 as made available to Serena. Other versions of Microsoft Project mayintegrate with Dimensions RM in a similar manner, or a different manner, or not at all.Serena makes no representations or warranties regarding Microsoft Project, that theinstructions are valid, or that the instructions are applicable to any other version ofMicrosoft Project.The instructions do not replace the documentation provided by Microsoft for MicrosoftProject. The documentation for Microsoft Project should be your primary source ofinformation regarding Microsoft Project.ObjectiveThe purpose of this book is to describe how to integrate Dimensions RM with MicrosoftProject.AudienceThis document is intended for members of project teams who use Dimensions RM tocreate, manage, and track requirements during the lifecycle of a project. Manual OrganizationThe single chapter in this document describes how to integrate Dimensions RM andMicrosoft Project.Integration Guide for Microsoft® Project56Serena ® Dimensions ® RM 12.4PrefaceRelated DocumentsContacting Serena Technical Supportintersolv provides technical support for all registered users of this product, including limited installation support for the first 30 days. If you need support after that time, contact intersolv Support at the following URL and follow the instructions:Language-specific technical support is available during local business hours. For all other hours, technical support is provided in English.You can use the intersolv Support Web page to:⏹Report problems and ask questions.⏹Obtain up-to-date technical support information, including that shared by ourcustomers via the Web, automatic e-mail notification, newsgroups, and regional user groups.⏹Access a knowledge base, which contains how-to information and allows you to search on keywords for technical bulletins.⏹Download updates and fix releases for your Serena products.TitleDescriptionSerena® Dimensions® RM User’s GuideGuide to creating, managing, and tracking requirements during the lifecycle of a project.Serena® Dimensions® RM Administrator’s Guide Guide to configuring, managing, and administering projects and users.Serena® Dimensions® RM Installation GuideGuide to installing Dimensions RM.Serena® Dimensions® RMCommand Line Parameters Quick ReferenceList of the parameters used to issue commands from the command line.Serena® Dimensions® RM Integration Guide for IBM® Rational® Software Modeler Guide to integrating Dimensions RM and Rational Software Modeler (RSM).Serena® Dimensions® RMIntegration Guide for HP Quality CenterGuide to integrating Dimensions RM and Quality Center .Serena® Dimensions® RM Integration Guide for Serena® TeamTrack®Guide to integrating Dimensions RM and TeamTrack.License and Copyright Information for Third-Party SoftwareIntegration Guide for Microsoft ® Project7License and Copyright Information for Third-Party SoftwareLicense and copyright information for third-party software included in this release can be found as part of the software download available at:/Download/Default.aspxPreface8Serena® Dimensions® RM 12.4Integration Guide for Microsoft ® Project9Integrating Dimensions RM and Microsoft ProjectIntegrating Serena® Dimensions ® RM and Microsoft® Project lets you show traceability between the schedule information in your project and the other data that is stored in Dimensions RM.The integration provides the following capabilities:⏹Tracing a particular task through its entire life cycle⏹Justifying a particular life cycle activity by showing its relationship to a currently scheduled task⏹Performing detailed schedule tracking and impact analysisThe integration includes the following steps:1"Exporting Data from Microsoft Project" on page 92"Configuring a Schema in Dimensions RM" on page 103"Importing Data into Dimensions RM" on page 13Exporting Data from Microsoft ProjectTo export data from Microsoft Project:1Start Microsoft Project and open an existing project that contains data that is ready to be transferred to Dimensions RM.2Select File > Save As . The Save As dialog opens.3Enter a file name in the File name list.4Select CSV (Comma delimited) in the Save as type list.5Click Save . The Export Wizard starts. Click Next .6Select New Map and click Next .7The Map Options screen opens. Do the following:⏹Under Select the types of data you want to export , select Tasks .⏹Under Text file options , select the Export includes headers check box.8Click Next. The Task Mapping screen opens.IMPORTANT! Before you can save to a CSV file, you may need to set an option to allow Microsoft Project to save to legacy file formats. To do this, select Tools | Options. Then, on the Security tab, select the Allow loading files with legacy or non default file formats option under Legacy Formats .10Serena ® Dimensions ® RM 12.4Integrating Dimensions RM and Microsoft Project9Map the items in the From: Microsoft Office Project Field column to thecorresponding items in the To: Text File Field column. These names are exported as the titles of the data columns on the first row of the CSV file.10Click Next . The End of Map Definition screen opens. 11Click Save Map .12In the Map Name field, enter a name for the map. 13Click Save .14Click Finish when you have finished mapping items. The exported data is saved in a CSV file.You can view the CSV file in any text editor , or in Microsoft® Excel.15Close Microsoft Project. If you are prompted to save changes to the project, click Yes .Configuring a Schema in Dimensions RMTo configure a schema in Dimensions RM:1In RM Manage, select an existing project or create a new project.2Select File > Define Project Schema . The Class Definition tool opens.3Add a Schedule class to the project.4Activate the Schedule class, if not already activated. To do so, perform the following steps:a Right-click an empty space in the schema diagram.b Select Add Class > Manage class types . The Manage Class Types dialog opens.c Select Schedule and then click OK .5Add relationships between the Schedule class and other pertinent classes. For example, you could create a relationship between the Schedule class and the Tests class. Relationships are intended to show the schedule requirements (cost,duration, task name, and resource) for the products the tasks are associated with.NOTE The mapping should include all columns in your Microsoft Project project, plusthe Unique ID item. IMPORTANT! You may need to set an option to allow Microsoft Project to save to legacy file formats. To do this, select Tools | Options. Then, on the Security tab, select the Allow loading files with legacy or non default file formats option under Legacy Formats .Configuring a Schema in Dimensions RM The following illustration shows a portion of the schema diagram that contains the Schedule class and its relationship to the Tests class.6Double-click the Schedule class in the schema diagram. The Definition of class dialog opens.7Add attributes to the Schedule class that correspond to the fields in the CSV file generated from Microsoft Project, and delete attributes that do not correspond toIntegrating Dimensions RM and Microsoft Projectfields in the CSV file. These are the attributes into which data will be mapped from fields in the CSV file.8Change the date format to match the Microsoft Project date format. To do so, perform the following steps:a In the Definition of class dialog, double-click the Start Date attribute.b Click the Date tab.c In the Display Format field, type DY MM/DD/YYYY .d Repeat this procedure for the Finish Date attribute, and for any other attributes that contain date data.9Edit the Schedule class attribute list to add an Alpha Numberic attribute (A1) with the name Unique ID, as well as any other attributes to store additional Microsoft Project data. The Unique ID field will store the Project Unique ID to allow for consistent data exchange with Mcirosoft Project.10Select File > Saveto save the project schema.NOTE Use alphanumeric (not numeric) attributes wherever a numeric value is to be stored. This prevents Dimensions RM from transforming numeric decimal values into mathematical equivalents that may not be recognized correctly by Microsoft Project during future transfers. An example of such an attribute is an Outline_Numberattribute with a value of 1.2.Importing Data into Dimensions RMImporting Data into Dimensions RMImporting Data from the CSV File with RM Browser To import data from the CSV file:1On the Home view, click the CSV Import button. The CSV Import dialog box appears.2In the File Name field, enter or browse to find the CSV file you want to import.3To create new requirements, select Create from the Import Mode list. You can also replace attributes in existing requirements with values from the CSV file. For more on import options for CSV files, see the Dimensions RM User’s Guide.4From the Field Separator list choose Comma .5To limit the range of rows to import, select From from the Rows to Be Imported option and enter the range. Otherwise, leave All selected to imported data from all rows in the file.6Select the File has header row option.7From the Log Level list you can choose the level of detail in the summary report that displays after you start the import. Choose Terse or Verbose .8Under the RM Mapping heading, you must enter criteria to define how data from the CSV file will be imported to Dimensions RM. When you use the Create Import mode, you must map columns from the CSV file to requirements attributes in RM. Data from the columns you select will be imported to the attributes you map the columns to, in the new requirements. First select the requirements class from the RM Class field. Then, select the column from the CSV Column List field and the corresponding attribute from the RM Attribute field. Click the right arrow button to add the mapped pair to the Mapped List field.9Click Importwhen you have completed the mapping.NOTE In the procedures in this section, all data will be imported into the same class. However , subsets of project data from the same CSV file can be imported into different Dimensions RM classes.Integrating Dimensions RM and Microsoft Project。
全球网 V4 版客户说明书
目录1. 引言 (4)1.1 编写目的 (4)1.2 全球网简介 (4)1.3 手册主要内容 (6)1.4 术语定义 (6)1.5 参考资料 (6)2. 注册成全球网的会员 (7)2.1 功能描述 (7)2.2 流程描述 (7)2.3 功能路径 (7)2.3.1 注册入口 (7)2.3.2 角色选择 (8)2.3.3 填写注册信息并提交 (8)2.3.4 注册成功 (9)2.3.5 会员首页与全球网首页之间的切换 (9)3. 贷款申请 (10)3.1 功能描述 (10)3.2 流程描述 (10)3.3 功能路径 (10)3.3.1 填写企业资料 (10)i. 基本信息 (10)ii. 贷款账户信息 (12)iii. 经营状况信息 (13)iv. 抵押物相关信息 (14)v. 电子商务经营信息 (15)3.3.2 选择贷款产品 (16)i. 新申请订单 (16)ii. 续贷订单 (17)iii. 贷款体检 (17)3.3.3 填写贷款申请资料 (18)i. 银行补充信息 (18)ii. 产品补充信息 (18)3.3.4 提交贷款申请 (19)i. 新申请订单的提交 (19)ii. 续贷订单提交 (20)3.3.5 成功提交贷款申请 (20)3.3.6 随时关注贷款进度 (21)4. 查看群组等信息 (22)4.1 功能描述 (22)4.2 功能路径 (22)5. 申请贷款延伸服务 (22)5.1 功能描述 (22)5.2 功能路径 (23)6. 贷后管理 (24)6.1 功能描述 (24)6.2 功能路径 (24)7. 申请理财产品 (24)7.1 功能描述 (24)7.2 功能路径 (25)8. 查看募资信息 (25)9. 查看相关资讯 (26)10. 修改账户信息 (26)11. 下载代理协议 (27)12. 查看全球网联系方式 (27)1.引言1.1编写目的本文是针对企业级客户,在全球网申请贷款产品而编写的帮助手册。
- 1、下载文档前请自行甄别文档内容的完整性,平台不提供额外的编辑、内容补充、找答案等附加服务。
- 2、"仅部分预览"的文档,不可在线预览部分如存在完整性等问题,可反馈申请退款(可完整预览的文档不适用该条件!)。
- 3、如文档侵犯您的权益,请联系客服反馈,我们会尽快为您处理(人工客服工作时间:9:00-18:30)。
UpdateUptimeInterval = 100
#
# LogDB.Opt.ClearInterval
# WUPDATE_CLEANDB 计时器清理log表旧数据的时间间隔。必须大于0,默认: 10 分钟
#
###################################################################################################
###################################################################################################
SocketTimeOutTime = 900000
#
# SessionAddDelay
# Description: Time (in microseconds) that a network thread will sleep after authentication
Compression = 1
#
# PlayerLimit
# 除GM之外,游戏最大在线玩家数量,默认: 1000
PlayerLimit = 100
#
# SaveRespawnTimeImmediately
# 记录生物/游戏对象等再生时间设置,在生物死亡或箱子等被使用/打开情况下。
小值是2, 0为取消检测),默认:2
MaxOverspeedPings = 0
#
# GridUnload
# 卸载Grids (如果里的内存够大,可以禁用,提高玩家第二次经过新Grids时候的速度)
[worldserver]
###################################################################################################
SessionAddDelay = 10000
#
# GridCleanUpDelay
# 默认地图网格清理延迟(单位毫秒),默认: 300000 (5 分钟)
GridCleanUpDelay = 300000
#
# MapUpdateInterval
# 默认地图更新间隔(单位毫秒),默认: 100 (1 秒)
vmap.ignoreSpellIds = "7720"
#
# vmap.petLOS
# 对宠物开启vmaps,默认:0(不启用,低Cpu占用),1(启用,高Cpu占用)
vmap.petLOS = 1
#
# vmap.enableIndoorCheck
# 室内外检查光环 (坐骑等).
# 默认: 1 - (启用)
# 0 - (禁用,降低一些的CPU使用率)
vmap.enableIndoorCheck = 1
#
# DetectPosCollision
# 检查最后的移动位置, 召唤位置, 可看见的碰撞以及其他对象或墙壁等位置测试(墙壁测试,只有当副本测试设置vmaps的相关设置启用后生效)
vmap.enableHeight = 1
#
# vmap.ignoreSpellIds
# 这些法术将被忽略准线算法,列表的ID以符号分割 ','
# 例: "7720,1337"
# 默认: "7720"
# P.S: Grids就是地图上刷出来的东西,玩家经过一个地方 就会加载该地方的环境,离开的时候 就卸载该地方的环境
# 默认: 1 (卸载), 0(不卸载)
GridUnload = 1
#
# SocketTimeOutTime
# 与客户端断开连接当玩家在选择人物界面超过多少时间,默认:900000 (15分钟)
# worldserver.exe使用的系统端口,默认:8085
WorldServerPort = 8085
#
# BindIP
# worldserver.exe绑定的IP地址/主机,默认:"0.0.0.0"
BindIP = "0.0.0.0"
MapUpdateInterval = 100
#
# ChangeWeatherInterval
# 默认天气更新间隔 (单位毫秒),默认: 600000 (10 分钟)
ChangeWeatherInterval = 9000000
#
# PlayerSaveInterval
#
# LoginDatabase.SynchThreads
# WorldDatabase.SynchThreads
# CharacterDatabase.SynchThreads
# 用几个线程连接数据库,默认:1、1、2
LoginDatabase.SynchThreads = 1
# 数据库链接设置,格式:ip;端口;用户名;密码;数据库名称
LoginDatabaseInfo = "127.0.0.1;3306;root;root;ZH"
WorldDatabaseInfo = "127.0.0.1;3306;root;root;SJ"
DataDir = "data"
#
# LogsDir
# 日志文件目录设置
LogsDir = "data"
#
# LoginDatabaseInfo
# WorldDatabaseInfo
# CharacterDatabaseInfo
WorldDatabase.SynchThreads = 1
CharacterDatabase.SynchThreads = 2
#
# MaxPingTime
# 最高ping数据库的时间间隔,默认:30(分钟)
MaxPingTime = 30
#
# WorldServerPort
# protocol handling before adding a connection to the world session map.
# Default: 10000 - (10 milliseconds, 0.01 second)
CharacterDatabaseInfo = "127.0.0.1;3306;root;root;JS"
#
# LoginDatabase.WorkerThreads
# WorldDatabase.WorkerThreads
# CharacterDatabase.WorkerThreads
# 默认: 1 (启用, 占用更多的CPU资源),0
(关闭, 不理想的设置, 但可以节省较多的CUP资源,适合服务器档次较差的情况)
DetectPosCollision = 1
# 更大的距离,会使生物们表现更加完美, 较小的距离, 将会让生物们反应更精确敏感。
# 默认: 1.5
TargetPosRecalculateRange = 1.5
#
# UpdateUptimeInterval
# 系统正常运行更新时间周期以分钟为单位(用于更新 'uptime' 数据表)。必须大于0,默认: 10 分钟
# 用几个线程处理Mysql数据异步(即延迟),默认:1、1、1
LoginDatabase.WorkerThreads = 1
WorldDatabase.WorkerThreads = 1
CharacterDatabase.WorkerThreads = 1
# 进程优先权设置(只在Windows系统下使用),默认: 1 (高优先),0 (正常优先权)
ProcessPriority = 1
#
# Compression
# 发送到客户端的数据包的压缩级别(1到9),默认: 1 (速度快,不压缩),9 (速度慢,最好的压缩)
#
# TargetPosRecalculateRange
# 重新计算目标移动后的依次的远近范围, 从移动的目标点 (+移动者的大小) 和被瞄准对象 (+大小)的最大距离
# 根据激活瞬间的移动目标点开始重新计算协助半径,最大: 混战攻击范围(5), 最小: 联络范围(0.5)
# 默认玩家数据保存间隔(单位毫秒),默认:900000 - (15 分钟)
PlayerSaveIntervayerSave.Stats.MinLevel
# 最低多少等级将玩家的属性数据保存到数据库
# 默认: 0 (不保存玩家的属性属性)
# 默认: 1 (保存生物/游戏对象再生时间,开始于当前格没有卸载)
# 0 (保存生物/游戏对象再生时间,开始于当前格卸载后)
SaveRespawnTimeImmediately = 1
#
# MaxOverspeedPings
# 最大的超速限制,在玩家被踢出之前(最
# 1+ (保存玩家的数据,玩家的等级 + 1)