sicily course使用指南
电子白板使用说明书
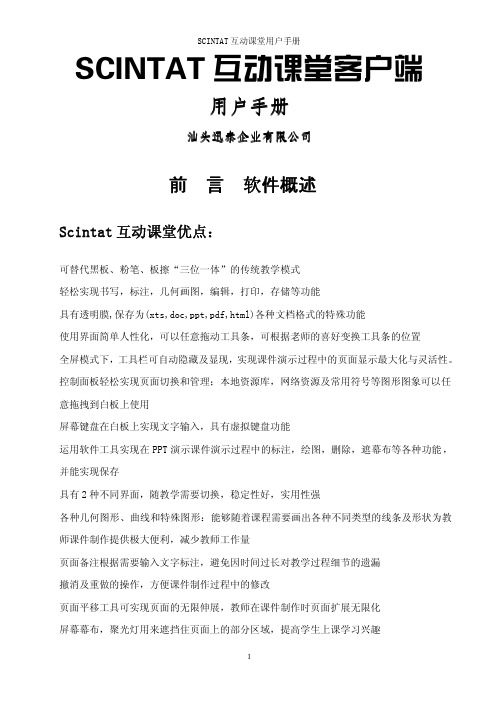
SCINTAT互动课堂客户端用户手册汕头迅泰企业有限公司前言软件概述Scintat互动课堂优点:可替代黑板、粉笔、板擦“三位一体”的传统教学模式轻松实现书写,标注,几何画图,编辑,打印,存储等功能具有透明膜,保存为(xts,doc,ppt,pdf,html)各种文档格式的特殊功能使用界面简单人性化,可以任意拖动工具条,可根据老师的喜好变换工具条的位置全屏模式下,工具栏可自动隐藏及显现,实现课件演示过程中的页面显示最大化与灵活性。
控制面板轻松实现页面切换和管理;本地资源库,网络资源及常用符号等图形图象可以任意拖拽到白板上使用屏幕键盘在白板上实现文字输入,具有虚拟键盘功能运用软件工具实现在PPT演示课件演示过程中的标注,绘图,删除,遮幕布等各种功能,并能实现保存具有2种不同界面,随教学需要切换,稳定性好,实用性强各种几何图形、曲线和特殊图形:能够随着课程需要画出各种不同类型的线条及形状为教师课件制作提供极大便利,减少教师工作量页面备注根据需要输入文字标注,避免因时间过长对教学过程细节的遗漏撤消及重做的操作,方便课件制作过程中的修改页面平移工具可实现页面的无限伸展,教师在课件制作时页面扩展无限化屏幕幕布,聚光灯用来遮挡住页面上的部分区域,提高学生上课学习兴趣照像机捕捉屏幕上的内容,摄像机进行动态的录音录象,可以使用主流播放器进行回放,同步记录软件操作过程及声音,方便教师回放给学生复习页面管理可实现页面向前翻页,向后翻页,方便教学过程应用。
小纸条能够在屏幕上滚动显示文字内容,提示学生学习要点。
学科专用工具直角三角尺,等腰三角尺,量角器,圆规等,减少教师教学负担,使老师授课事半功倍。
英数汉字识别结合文字工具,实现在手写板上将手写文字转换成印刷体文本。
图形识别工具将随意绘制的图形智能识别三角形,圆形,矩形,多边形等多种几何图形,激发学生想像力,创造力。
支持插入在课件中音频及视频的独立播放,提升教学质量。
页面链接,文件链接,实现在同一课件不同页面或不同文件之间的超链接跳跃选择。
Skritter使用说明

Skritter使用说明登录您的账号,将出现如下界面:在导航栏,点击“vocabulary”, 选择您想学习的汉字,如箭头所示,将会出现如下界面:如图所示,Skritter有不同种类的学习资源可供选择,点击“textbook”,你就可以选择想要的课本进行学习,如箭头所示,这样,将出现如下界面:假设想学习“All Things Considered”, 则点击它,将出现如下界面:单击“Study List”, 如红色箭头所示,就能选择您所想学习的课文生字生词;如果您想自己制定一份字词表,单击“More Action”下的“Remix”,如绿色箭头所示。
选择好要学习的字词后,就可以开始练习了。
如下所示:点击“practice”, 将出现如下的界面:在您已经添加好的学习资源中,选择想学习的一个资源,并点击该学习资源前的“Cram”, 如箭头所示,将出现如下界面,此时可以开始学习了:根据汉语拼音和英语的提示,您可以用鼠标开始学习汉字,窗口下面还有工具栏可以供您选择:这些图标的功能如下:“back”:返回上一个练习的字“erase”:更正写错了的字或笔画“show”:若您无法根据汉语拼音和英语解释写出该汉字,则可以点击“show”查看该字。
“correct”:写好汉字后,可以点击它查看是否正确。
“next”:点击它有两种情况:(1)若为单击,则会出现如下界面:如箭头所示,表示的声调的图标,一次分别为一声,二声,三声,四声和平声,选择该汉字相匹配的声调图标点击,Skritter能很快给出反馈,若选择了错误的声调,它能及时告诉您正确的声调。
(2)若双击了“next”, 则进入到下一个字的学习中。
下面几幅图片将给您更形象的感受:根据汉语拼音和英语解释,可知练习的汉字是“坐”,如果不知道,可点击“show”查看,拖动鼠标开始写汉字,如下所示:继续拖动鼠标就可以写好“坐”字,这时,单击“next”,出现上面所说的声调符号,如下所示:假设选择的是二声,则会出现如下反馈:如图所示,Skritter 能告诉您正确的声调,如果您想知道这个汉字的发音,则可以点击屏幕上方的扬声器图标,如箭头所示。
sciencedirect online使用指南

请确保关键词的准确性和相关性,使用适当的同义词或短语进行检索。
检索方式
Sciencedirect Online支持多种检索方式,如简单检索、高级检索和 专业检索。请根据需求选择合适的检索方式。
数据库内容
Sciencedirect Online的数据库内容可能存在更新延迟或不全的情况, 建议尝试其他数据库或多次检索。
建立完善的学术不端行为监测机制,及时发现和处置学术不 端行为,维护学术诚信。
THANKS
感ቤተ መጻሕፍቲ ባይዱ观看
引用格式不正确
总结词 软件兼容性
格式设置 引文内容
可能的原因包括引文软件不兼容、引文格式设置错误或引文内 容不完整。
请确保您使用的引文软件(如EndNote、Mendeley等)与 Sciencedirect Online兼容,并更新至最新版本。
请根据您所投期刊的要求,正确设置引文格式。Sciencedirect Online通常支持多种引文格式,如APA、MLA等。
浏览与下载
总结词
用户可以通过 Sciencedirect Online 浏览和下载符合需求的文献,方便快捷地获取学 术资源。
详细描述
在文献列表中,用户可以点击任意一篇文献的标题,进入文献详情页。在文献详情页, 用户可以查看文献的摘要、关键词、作者等信息,并下载全文。如果需要下载多篇文献,
可以使用 Sciencedirect Online 的批量下载功能。
VS
不足
尽管 Sciencedirect Online 拥有许多优 势,但也存在一些不足之处,如部分资源 需要付费访问、存在一定的版权问题以及 一些老旧文献可能无法获取等。此外,由 于它是国外平台,对于一些非英语母语的 用户来说,阅读和理解英文文献可能存在 一定的困难。
ScienceDirect使用指南说明书
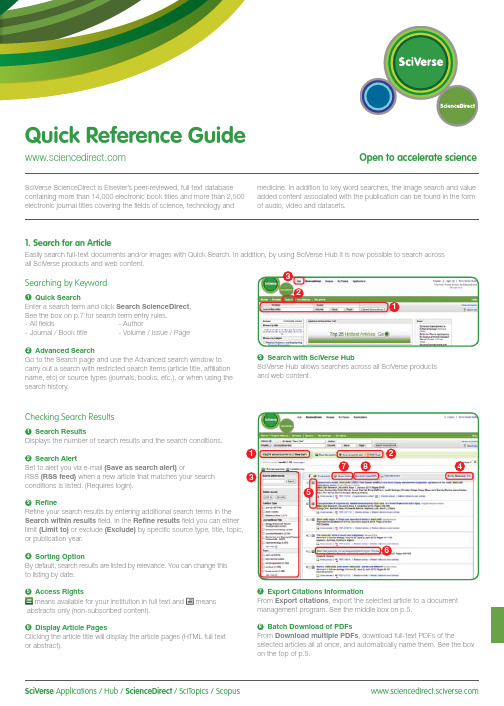
SciVerse Applications / Hub / ScienceDirect / SciTopics / Scopus carry out a search with restricted search items (article title, affiliation name, etc) or source types (journals, books, etc.), or when using the search history.and web content.Checking Search Results1Search ResultsDisplays the number of search results and the search conditions.2Search AlertSet to alert you via e-mail (Save as search alert) orRSS (RSS feed) when a new article that matches your search conditions is listed. (Requires login).3RefineRefine your search results by entering additional search terms in the Search within results field. In the Refine results field you can either limit (Limit to) or exclude (Exclude)or publication year.4Sorting OptionBy default, search results are listed by relevance. You can change this to listing by date.5 Access Rightsmeans available for your institution in full text and meansabstracts only (non-subscribed content).6Display Article PagesClicking the article title will display the article pages (HTML full text or abstract).7Export Citations InformationFrom Export citations , export the selected article to a document management program. See the middle box on p.5.8Batch Download of PDFsFrom Download multiple PDFs , download full-text PDFs of theselected articles all at once, and automatically name them. See the box on the top of p.5.17846532Searching for Images1 Image SearchSelecting Images in Quick Search allows you to limit your searchtargets to images (illustrations, tables, video).2 RefineLimit the search to a specific image type in the Refine Image results field.3 Enlarge ViewHolding the mouse over the image will enlarge the image view.Holding the mouse over the caption will display the bibliographicinformation and the caption.4 Display Full TextPlease click View within article.Methods Search ApplicationUse the Methods Search application in SciVerse Hub and search theMethods section of the full text available on SciVerse ScienceDirect.Efficiently search for related documents when planning your experimentsor at any other stage in the research process.Matching Sentences ApplicationThe Matching Sentences application is displayed on the top right of theSciVerse Hub search results. It displays sentences that the search termshave found and allows you to quickly access the appropriate content.13422Searching with SciVerse HubSciVerse Hub enables combined searches of SciVerse ScienceDirect and SciVerse Scopus (subscribers only), and quality web sources. In addition, by SciVerse Hub you can carry out special searches that meet your particular needs as a researcher and scientist.1Article Display FormatDisplay the article as Article (HTML full text), Abstract, Figures / Tables, References , or PDF (as a bound volume).2Author InformationCheck the corresponding author and the author’s e-mail address.3Supplementary ContentAudio, video or any other file provided by the author – in addition to the article itself can be viewed in the Supplementary content for this Article field.4Related ArticlesArticles in ScienceDirect that are closely related to this article are shown in the Related Articles field.5Citations in Other DocumentsThe latest three documents to cite this article are displayed in the Cited by field. It is also possible to display all the articles on SciVerse Scopus. If you are not a SciVerse Scopus subscriber then you can display the most recent twenty.SciVerse Scopus, provided by Elsevier, is the world’s largestbibliographic and citation database. It stores over 18,500 journals from more than 5,000 publishers around the world.6 Related Reference WorksEncyclopedia articles in ScienceDirect closely related to this article are displayed in the Related reference work articles field.7Added value from other datasetsKeywords extracted with the Life Science Database from NextBio are displayed in the Relevant terms from this article field. Providing you the context around the content ScienceDirect provides relevant information directly in connection to the article.NextBio ( ) provides various integrated public resources (PubMed, clinical trial results, experimental data, news, researcher information, etc.) in the life sciences fields.8Highlight Keywords menuFull texts in the life sciences fields will have the NextBio keywords highlighted by default. Selecting Reflect from the Highlight keywords dropdown menu allows you to switch between highlighting of the keywords using the Reflect dictionary.Reflect is an application developed by the European Molecular Biology Laboratory and highlights words within a web page that are related to proteins, genes, and so on. Clicking the highlighted words displays additional related information.32. Check Article PagesHTML full texts provide a number of additional functions not found in PDF full texts. It is possible, for example, to check for video or audio playback, display of related articles, use SciVerse Scopus to check for other documents citing this article.Selecting from the Journal / Book Title List1Browse TitlesSelecting the Browse menu displays the journal / book title list.2Access Rightsmeans available for your institution in full text (includes freepublications) and means abstracts only (non-subscribed content).3Change Browse MethodChange the way the title list is displayed from alphabetic to by field or to by favorites.4Refine Title ListLimit the title list to full text journals, abstracts, books, or reference works.5Display Journal / Book HomepageClicking on the title will display the table of contents page for that title’s latest issue.1523. Reading an Article from the Title ListRead an article by selecting the title of the journal or book. You can also read articles before they are published by selecting Articles in Press , or set up an alert to let you know when the latest issue is published.2834576184Reading the Index from the Journal / Book Homepage1Volume ListBy default, the table of contents for the latest issue is displayed. You can also look via Articles in Press .2Access Rightsmeans available for your institution in full text (includes freepublications) and means abstracts only (non-subscribed content).3Display Article PageClicking the article title will display the article page (HTML full text or abstract).4Export Bibliographic InformationFrom Export citations , you can export the selected article to a document management program. See p.5.5Batch Download of PDFsDownload multiple full-text PDFs of the selected articles all at once, and automatically name them. See p.5.6Volume/Issue AlertYou can be alerted by e-mail (Alert me about new volumes / issues) or RSS (New Article Feed) when the latest issue of a given title is listed. (Requires login)7FavoritesRegister your favorites with Add to Favorites . (Requires login).8Journal InformationFrom About this Journal , you can check different sorts ofinformation about a given journal, such as scope, editorial committee, impact factor, and so on.9Online SubmissionFrom Submit your Article you can be linked to the online submission system.289376451User Registration and Login1LoginIf you already have a user name and password then click Login and enter them in the login box.If you check Remember me , your login information will be stored in your computer and you will be permanently logged in.If you have forgotten your password, click Forgotten your username and password? and enter the e-mail address you used when you registered.2User RegistrationTo register as a new user, click Register . Enter the required information, such as your name and e-mail address, in the registration window.To have access to subscribed content outside of your institution, you can easily set up a self remote access account. Select the remote access option here.3UsernameYour username will be displayed when registration is complete. It may have a number added to it in case someone with the same full name has already registered.4. Using Personal FunctionsIf you register as a user, you will be able to use a number of convenient personal functions such as e-mail alerts. Your username and password are the same as for SciVerse Scopus, so you only need a single sign-on.2135Online SubmissionSubmit articles online using the Elsevier Editorial System (EES). It lists information about each journal, the submission standards, support information, etc.E-mail:**************************Export CitationsExport bibliographic informationExport as RIS format (for document management programs such as EndNote), RefWorks, ASCII format (text), and BibTeX format.If you are using RefWorks, you can link seamlessly by embedding yourRefWorks ID/PW in the My settings menu.Download PDFBatch Download and Automatic NamingDownload multiple PDF files and assign them names based on specified rules. The file names can be specified from a combination of author, publication year, article title, journal, etc.The maximum number of files you can download at one time is 20. Java required.1452367For more information about SciVerse ScienceDirect, please contact your nearest Elsevier Regional Sales Office.05.2011For more information please visit: /sciencedirectAsia and Australia Tel: +65 6349 0222Fax: +65 6733 1050Email: sginfo@elsevier .comEurope, Middle East and AfricaTel: +31 20 485 3767Fax: +31 20 485 3739Email: nlinfo@JapanTel: +81 3 5561 5034Fax: +81 3 5561 5047Email: jpinfo@ KoreaTel: +82 2 6714 3000Fax: +82 2 732 8689Email: krinfo@North, Central America and CanadaTel: +1 888 615 4500Fax: +1 212 462 1974Email: usinfo@elsevier .comSouth AmericaTel: +55 21 3970 9300Fax: +55 21 2507 1991Email: brinfo@Copyright 2011 Elsevier B.V . All rights reserved. SciVerse is a registered trademark ofElsevier Properties S.A. and used under licence. SciVerse ScienceDirect is a registered trademark of Elsevier B.V .SciVerse ScienceDirect information page: /sciencedirect/。
ScienceDirectOnline使用指南精品PPT课件

ISSN
0092-8674 0962-8924 1535-6108 0140-6736 0955-0674 1471-4906 1097-2765 1074-7613 1534-5807 0968-0004 0896-6273 0165-6147 1360-1385 0959-437X 0016-5085 0167-5729 0166-2236 0169-5347 0301-0082 0952-7915
8
全文数据库
囊括了ELSEVIER及旗下品牌出版的2000多种期刊
SCI收录1375,EI收录522
获取超过七百万篇学术全文及六千万条摘要,包括在编文章 Science Direct 得到70多个国家认可,
中国高校每月下载量高达250万篇 目前回溯到1995年的数据 回溯至创刊号
最早的期刊 LANCET 1823 回溯年限 1823-1994(171年)
被引次数
137333 7658 2208
123292 12565 2675 19510 20385 3448 14647 40833 8747 5062 7218 46174 2167 14558 9125 7047 8019
影响因子
26.626 19.612 18.913 18.316 18.176 18.153 16.835 16.016 14.807 14.273 14.109 13.965 13.405 13.143 12.718 12.650 12.631 12.449 12.327 12.118
7
ScienceDirect 中国集团
2000年 11所高等院校和研究机构加入集团采购 在清华大学,上海交通大学建立镜像站点
2001年 17所高等院校加入SDOS集团 2002年 28所高等院校和研究机构加入SDOS集团 2003年 35所高校及中科院所有院所 2004年 超过110所高校及70个中科院所 2005年 超过130所高校及70个中科院所
ScienceDirectOnline使用指南精品PPT课件

被引次数
137333 7658 2208
123292 12565 2675 19510 20385 3448 14647 40833 8747 5062 7218 46174 2167 14558 9125 7047 8019
影响因子
26.626 19.612 18.913 18.316 18.176 18.153 16.835 16.016 14.807 14.273 14.109 13.965 13.405 13.143 12.718 12.650 12.631 12.449 12.327 12.118
6
学科领域
农业和生物学(120)
环境科学(78)
人文和艺术(47)
免疫学和微生物学(80)
生物化学、遗传学和分子生物学(215) 材料科学(108)
商业、管理和会计学(77)
数学(89)
化学工程学(71)
医学(534机科学(115)
护理与卫生(91)
ScienceDirect Online (SDOL)
2005. 12
使用指南
何淑琴(培训经理)
Springboard to New Knowledge
培训目的
了解爱思唯尔Elsevier公司及其核心产品 ScienceDirect全文数据库的内容
学习如何通过ScienceDirect查找信息 检索功能 浏览功能
功能:
检索和浏览相结合;检索结果可按相关性或出版日期排列,全文 可用HTML或PDF格式显示;有检索历史功能
个性化服务 使用报告及管理工具 开放的链接技术,便捷的数据传输 – IP控制,无并发用户限制
形式:
Science Direct Online(SDOL)-国外主站点,提供个性化服务 Science Direct Onsite(SDOS)-国内镜像站,无国际流量费
思而优录课软件教程(1)
一、概述思而优录课软件为中山思而优教育集团(以下简称思而优)研发的一款集视频播放、录制与编辑于一体的软件产品。
该产品的目标是成为一款的界面友好、功能实用、操作简单的视频处理软件,为广大教育工作者提供一站式的线上课程服务。
思而优录课软件图标软件目前最主要的功能就是:1,支持主流格式视频的播放,具体格式包括AVI、MP4、FLV等等,播放过程中可以实现快放、慢放、暂停、停止和全屏;2,支持视频的本地录制,生成的视频主要包括FLV和AVI两种格式,录制模式下可以调整录制比例和区域、可以进行暂停、停止和保存操作;3,支持视频的简单编辑,主要包括视频的插入和剪切。
二、安装思而优录课软件(SEYMediaSetup)的安装过程极其简单,运行软件,程序将自动进入“下一步”,直到完成安装即可,桌面会出现程序的快捷图标。
已安装的用户可以通过运行SEYMediaSetup,实现对该软件的卸载和修复,用户同样可以通过控制面板来卸载本软件。
另外,您可能需要了解以下两点:1,本软件将默认安装至用户电脑的C盘内,软件在64位系统的存放路径为Program Files(×86)/SEYEducation,在32位系统的存放路径则为Program Files/SEYEducation;2,软件录制过程中的缓存文件将会临时被保存至SEYEducation内的temprecord文件夹内。
软件安装界面三、软件界面运行软件,点击登录,进入软件的主界面。
思而优录课软件的菜单栏主要包括“文件”、“用户”、设置和“帮助”四部分内容。
点击登录直接进入软件在设置部分中用户可以进行“录屏设置”,在“声音设备”中选择需要录制的声音来源,分别是没有声音、麦克风声音、电脑设备声音(不同电脑显示的设备名称可能不一样),在快捷键设置中可以添加录制操作的开始/暂停快捷键和停止快捷键,默认为空格键和F1,用户可以输入其他键位来进行更改,还可以通过Backspace或者Delete键来进行删除。
通时课学习平台用户使用手册-教师应用

通识课在线学习平台使用手册(教师)目录1系统登录-------------------------------------------------------------------------------------------- 31.1课程设置 ----------------------------------------------------------------------------------- 51.1.1考核标准查看 --------------------------------------------------------------------- 51.2课程资源 ----------------------------------------------------------------------------------- 71.2.1资源管理 --------------------------------------------------------------------------- 71.3课程通知 --------------------------------------------------------------------------------- 121.3.1发布通知 ------------------------------------------------------------------------- 121.4题库管理 --------------------------------------------------------------------------------- 161.4.1题库管理 ------------------------------------------------------------------------- 171.5课程作业 --------------------------------------------------------------------------------- 221.5.1作业设置 ------------------------------------------------------------------------- 221.5.2作业批阅 ------------------------------------------------------------------------- 291.6课程考试 --------------------------------------------------------------------------------- 311.6.1考试设置 ------------------------------------------------------------------------- 311.6.2考试批阅 ------------------------------------------------------------------------- 391.7课程答疑 --------------------------------------------------------------------------------- 431.7.1课程答疑 ------------------------------------------------------------------------- 441.8课程讨论 --------------------------------------------------------------------------------- 451.8.1课程讨论 ------------------------------------------------------------------------- 451.9统计管理 --------------------------------------------------------------------------------- 471.9.1作业统计 ------------------------------------------------------------------------- 471.9.2考试统计 ------------------------------------------------------------------------- 501.9.3讨论统计 ------------------------------------------------------------------------- 531.9.4答疑统计 ------------------------------------------------------------------------- 541.9.5学习进度 ------------------------------------------------------------------------- 55 2教师首页------------------------------------------------------------------------------------------ 57 3课程中心------------------------------------------------------------------------------------------ 58 4修改密码------------------------------------------------------------------------------------------ 59 5退出登录------------------------------------------------------------------------------------------ 611系统登录【功能】利用有效的用户名、密码,身份验证合格后登录本系统。
希亚思课堂智能评测软件用户手册说明书

希亚思课堂智能评测软件用户手册共 1 册第 1 册Revision History(修改历史)目录第一章概述 (4)1.1前言 (4)1.2系统介绍 (4)1.3编写目的 (4)1.4适用对象 (4)第二章软件运行环境 (5)2.1软件环境 (5)第三章系统功能 (6)3.1登录系统和退出 (6)3.1.1登陆系统 (6)3.1.2退出系统 (7)3.2业务服务 (8)3.2.1角色管理 (8)3.2.1.1进入角色管理 (8)3.2.1.2查看角色信息 (8)3.2.1.3新增角色 (9)3.2.1.4修改角色权限 (9)3.2.1.5删除角色 (10)3.2.2用户管理 (11)3.2.2.1进入用户管理 (11)3.2.2.2查看用户 (11)3.2.2.3新增用户 (12)3.2.2.4修改用户信息 (12)3.2.2.5删除用户 (13)3.2.2.6密码重置和修改 (14)3.2.2.6.1重置密码 (14)3.2.2.6.2修改密码 (14)3.2.3校区管理 (16)3.2.3.1. 进入校区管理 (16)3.2.3.2. 新增校区 (16)3.2.3.3. 修改校区信息 (17)3.2.3.4. 删除校区 (18)3.2.4教室管理 (19)3.2.4.1进入教室管理 (19)3.2.4.2新增教室 (19)3.2.4.3教室信息修改 (20)3.2.4.4删除教室 (21)3.2.5教师管理 (22)3.2.5.1进入教师管理 (22)3.2.5.2新增教师 (22)3.2.5.3修改教师信息 (23)3.2.5.4删除教师 (23)3.2.6学生管理 (25)3.2.6.1进入学生管理 (25)3.2.6.2新增学生 (25)3.2.6.3修改学生信息 (26)3.2.6.4学生评价报告 (26)3.2.6.5删除学生 (27)3.2.7班级管理 (29)3.2.7.1进入班级管理 (29)3.2.7.2新增班级 (29)3.2.7.3修改班级信息 (30)3.2.7.4删除班级 (30)3.2.7.5课程表 (31)3.2.8数据导入 (33)3.2.8.1进入数据导入 (33)3.2.8.2下载数据模板 (33)3.2.8.3导入数据 (34)3.2.9课堂管理 (35)3.2.9.1进入课堂管理 (35)3.2.9.2开始课程分析 (35)3.2.9.3结束课程分析 (36)3.2.9.4选择回看课堂 (37)3.2.9.5查看学生数据 (40)3.2.9.6课堂考勤 (41)3.2.9.7评教 (41)3.2.10我的班级 (43)3.2.10.1查看我的班级 (43)3.2.11课堂对比 (45)3.2.11.1进入课堂对比 (45)3.2.12异常提醒 (47)3.2.12.1进入异常提醒 (47)3.2.12.2检索异常 (47)3.2.13网络巡课 (48)3.2.13.1进入网络巡课 (48)3.2.14实时监测 (49)3.2.14.1进入实时监测 (49)第一章概述1.1前言“希亚思课堂智能评测软件”。
西利思地图系列应用用户指南说明书

34 /arcuserThis is the story of how the manager of a small city in West Virginia came up with a big idea: convert the city council agenda from a drab document to a lively account of municipal business using an Esri Story Maps app.The agenda is a tried and true document that guides city council meetings. It lists items up for discussion or vote. Typically written in a bureaucratic style and void of visuals, the agenda is often posted as a PDF on a city government’s website.That’s no longer true in Oak Hill, West Virginia, where the city council replaced a static agenda with an animated story map to guide its monthly meetings. Using the Esri Story Map Series app, the city’s lone GIS employee Marvin Davis creates an itemized, in-teractive agenda describing each item and providing maps, photo-graphs, and links to documents such as reports, legal notices, and correspondence.Oak Hill is a city of 8,500 people that lies just west of the New River Gorge National River, a 70,000-acre national park. Earlier this year, Esri account manager Daniel Peters showed city manager Bill Hannabass an Esri story map and he immediately thought, “Gosh, I could use that for the council presentation. It’s visual.”Hannabass used maps to view assets when he served in the US Army. “I lived and died by maps,” as he remembers it. He was naturally drawn to the ability of maps to tell a story visu-ally and tell it quickly. He was also impressed that the cloud-based interactive maps from the city’s ArcG IS Online organization ac-count could be used in story maps. Esri Story Maps apps are currently available at no additional cost to ArcGIS Online account holders like the City of Oak Hill.Davis, the G IS coordinator, was given the task of turning the month-ly city council agenda into a story map. Davis selected the Story Map Series app with the side accordionlayout. Because that layout automatically builds a numbered list of items that run down the left side of the story map, Davis just writes a short header and one line of text that describes each agenda item; adds a related map or a photo; and then creates links to any other images, legal documents, notices, or correspondence.A More Informed View ofCity BusinessBy Carla Wheeler, ArcWatch EditorOne agenda item Davis worked on for the April city council meet-ing dealt with structural inspection board recommendations on several buildings around town that needed to be repaired or demol-ished. Davis mapped the buildings’ locations in the story map and added links to images of those structures and related documents such as demolition orders and bids. “It makes [the agenda] informa-tive,” Davis said. He said the story map format gives those looking at the agenda the geographic context of the issue, and all the informa-tion on it is at their fingertips.Oak Hill City Council members and local media outlets receive story map agendas in a ShareFile packet that Hannabass sends in an email prior to meetings. During the city council meetings, Hannabass also goes through each numbered item on the story map agenda, which is displayed on two screens in City Hall.Agenda items often have geographic reference points, so Hannabass said using a story map as an agenda makes it easy for him to answer questions if onecomes up. “If there are four dilapi-dated structures that I have to tear down and someone asks [about a particular building], ‘What street is that one on?’, I can pull up a map,” Hannabass said.Because photos and legal or other types of documents can be linked in the story map, those are easy to access and view, too, if necessary. No longer does Hannabass need to display the agenda as35/arcuser Special Sectiona Microsoft Word document or PowerPoint presentation. Gone are the PDFs or scanned images of maps. If anyone asks him a question, Hannabass has “a ton of information” to dig into. “You don’t have a ton of boring PDFs to flip through.”Hannabass said online story maps are an excellent medium for sharing information to a city council, board of directors, or other group—public or private. People are often overwhelmed by reams of paper they receive before a meeting. “Our council packets were three to five inches thick,” Hannabass said. “It is crazy to have that much paperwork.”He put an end to paper-based agendas in Oak Hill some time ago. According to Davis, Hannabass has been a strong advocate for a mu-nicipal GIS. He brought Davis on board as GIS coordinator and recent-ly helped negotiate an enterprise license agreement between thecity and Esri.That agreement, scheduled to begin in July 2018, will in-crease the number of city employees with access to GIS and beef up capabilities to do analysis. “Hannabass has been my biggest cham-pion here,” Davis said.The city also plans to share the city council story map agendas online with the public soon, making it easier for Oak Hill residents to stay informed about what’s happening in their community. Right now, city council members and the media can study the city coun-cil agenda plus all the related documents in one online app beforeå GIS coordinator Marvin Davis turns the monthly city council agenda into a story map. For each item, he adds a related map or a photo and creates links to any related images or documents.meetings begin.“That is transparency that is beyond what is typical,” Hannabass said. “It [will] be more transparent on the website.”Davis said that there’s often a geographic component to city business, which is why sharing information via a story map agenda makes perfect sense. If viewers want to take a closer look, for exam-ple, at zoning designations or a proposed new one-way street on a story map, they can just pan around and zoom in on the geographic locations. A PDF or a scanned image of a map restricts their view. “I am biased,” said Davis, referring to his interest in geogra-phy and his job in GIS. “But I think [the story map agenda] offers a more informed view. You are able to look at pertinent documentationand a map.”Since Esri released the first Esri Story Mapsapp in 2014, people around the world have built more than 600,000 story maps. Oak Hill’s story map designed specifically for city council agendas seems to be a first. The city’s adoption of the Story Map Series app to produce the agendas impressed Allen Carroll, who leads the Esri Story Maps team and is program manager of storytelling.“We’re always thrilled to see fresh and unexpected new uses of Esri Story Maps,” Carroll said. “Oak Hill’s use of our Story Map Series app to present its council agenda is a delightful example of the versa-tility and power of map-based storytelling.”æ Davis says the story map format gives those looking at theagenda the geographic context of the issue and all the related information.。
C-Day项目视频指南说明书

C-Day Project Video GuideRead this entire document before you start your project. If you wait, you may find that you missed something that would have helped had you known it earlier.Video Presentation of Your ProjectEach project team is expected to create a short video (five minutes maximum) to show off their project. Dr. Peltsverger will upload your video to YouTube and make it available to the judges. The project teams are encouraged to be creative in making your videos. This will be easiest if you collect material for the video during the course of the project.Requirements of the Short Video1.The video should have appropriate title and ending credits.2.The video should have 1280×720 or 1920×1080 resolution. The length of the video must notexceed three minutes.3.Acceptable types of videosa.Mini movie like – composed of the pictures, screen shots, or short clips. Example:ht tps:///watch?time_continue=22&v=2-wZPtfgRCw&feature=emb_logob.System demonstration – show how the developed system works. Example:https:///watch?v=3iykKVIE4-s&feature=youtu.bec.Explanation of project – use PowerPoint slides or a poster to introduce your project andexplain what you have done in this project. Example:https:///watch?v=jv0-z6Sosfw&feature=youtu.beYou may combine video types. For example, you could use PowerPoint to explain the project and a system demonstration (screencast) to show how the system works. You will need video editing software (see below) to do this. To combine video formats successfully, all parts need to have the same height and width. If you’re going to try this, experiment very early so that you have time to make adjustments. You don’t have to be finished; just do a little bit of each format, combine them, and be sure the pieces fit.About the Contents of Your VideoYou’ve worked on your project all semester; you won’t be able to explain everything in five minutes. You’ll have to focus on the important points. Tell people:•What you did•Why it’s important•Some, or maybe only one, of the problems you encountered and how you overcame them.Submitting Your VideoYour video file name must be the same as your C-Day project ID. Upload your video to th e correct SharePoint location listed on the Instructions for poster, slide, and presentation submission on the Student Information page for C-Day.Your video must be submitted not later than the date given in the C-Day Student Information web page: https:///computing-showcase/student-information.phpThe Capstone Program Coordinator will place your video in the C-Day YouTube channel, and Dr. Peltsverger will link it to the C-Day Program.Project Video Best Practices•Quality is important. A slick presentation won’t conceal poor scholarship, but a presentation with obvious faults can detract from even the best project. Be sure the video images are clear, not blurred, and not shaky. Use a good microphone and be sure you’re close enough to it. Try to record in a place that’s free from extraneous background noise.•Organize your presentation. Like a written document, your presentation should have an introduction, a body, and a conclusion. Your time is limited, so make introduction andconclusion short, but don’t leave them out.•Use a script for narration. A script will let you capture all the important points and make your presentation go more smoothly. Don’t worry if you depart from the script slightly, just be sure what you say covers the important points that you included in the script. Pro tip:PowerPoint allows you to include speaker notes with every slide. If you have two monitors, you can display the slides on one and the notes on the other. This is called “presentationmode” and is selected on the Slideshow tab.•Brighten things up with faces. Your video is about your project, but it’s also about you, the students who completed the project. People want to see you. Consider including a “talking head” narration as part of your video, or use still photographs. You might include a group picture of the team in your introduction. Take pictures throughout the semester and consider whether any of them will add to your video.•Brighten things up with pictures. If your project involved building an artifact, include pictures of it. If you have charts or graphs, include the most important of them. Don’t add irrelevant images.•Brighten things up with music. A little music at the beginning or end can brighten up a video.A lot of music will bore your audience; they want to know about your project, not hear aconcert. For an introduction, seven to ten seconds is plenty.•Copyright,a word of warning: Your video will be on the C-Day channel on YouTube.YouTube automatically scans uploads for copyright violations and may remove videos that appear to violate others’ rights. If you’re going to use a little music or a video clip fromelsewhere, be sure you have the legal right to use it. Then, make a test video with your extra content and upload the test video directly to YouTube. Do this early to be sure it’s not going tobe flagged by YouTube. One source of royalty-free music is https:/// Remember, seven to ten seconds only.•Beware of “voice over music.” It takes both special equipment and special expertise to make this work. Without both, you make the spoken part difficult to understand. Our advice: don’t.•Beware of “waving the cursor.” Unless you’re demonstrating an application, the mouse cursor should not appear in your video. At all! In particular, don’t try to use the mouse cursor as a pointer to emphasize parts of a screen. Most video software has a way of addingannotations to the video, so use an arrow, a circle, or something similar to point out a particular item. If you’re using PowerPoint, you can use animations to have shapes like circles or arrows appear and disappear. Use fade-in and fade-out for the animation effect, and use the default (fast) speed. Avoid the more complex animations.•Test early: Record some material using the setup you’re going to use for the final presentation.Set your computer’s audio to 50% volume, play back your clip, and stand ten feet away. Does it sound like the speaker is mumbling? Now set the audio to 100% and play it again. Does the audio over drive the computer’s speakers and distort what’s being said? Adjust as needed.Similarly, do a dry-run test of the video technique you intend to use and check for quality of the result.Resources for Video ProductionMS TeamsIf you want to create a “recorded presentation” style of video, one way is to use MS Teams which is part of MS Office 365 Suite; you all have free license to this software.Notes:a)Finished recordings will be uploaded under the user account that initiated the recording. All participants in the meeting will be able to access the video to view, but only owners of the video will be able to download the recording.b). Recordings will be available on Microsoft Stream for a period of 30 days after the encoding period. After this time, the video will be purged. It is strongly recommended that users download a copy of the video for archival purposes before the 30 days has expiredRecording a meeting within MS Teamshttps:///files/pr_app_uni_cdoc/doc/Microsoft_Teams_Recording_Downloading _Meetings.pdf.1.Open your presentation slides2.Start MS Teams meeting and share your slides. Click on “Share your desktop” button next tomicrophone button on the Teams menu bar. Select the presentation slides app window.3.Start recording following instructions in “Recording a meeting within MS Teams Tutorial”.4.Start your presentation. Once done, end the recording.5.The recording will be available under the Posts tab. The initiator of the meeting will receive anemail with the link to the meeting.6.Click on the recording link in email. Or go to recording under “Team/Posts” and choose“Open in Microsoft Stream” from pop up menu (see tutorial in step 3). The recording will be opened in Microsoft Stream. Download the video following the instructions in “Recording a meeting within MS Teams Tutorial”.7.Edit the recording using a video production application and upload it to OneDrive as describedabove.Using MacOS•Screen recording (embedded in MacOS Mojave or later): https:///en-us/ HT208721•Video editing and production (iMovie, embedded in MacOS):https:///video-tutorials/getting-started-imovie/•Use an existing iMovie theme: https:///2017/09/30/using-themes-in-imovie/Using MS Windows•Screen capture (built into Windows 10): https:///how-to/how-to-capture-video-clips-in-windows-10 (To exit capture mode: Windows+I → gaming →game bar off.)•Video editing and production (Movie Maker, free for Windows users):https:///en-us/p/movie-maker-10free/9mvfq4lmz6c9?activetab=pivot:overviewtab•Tutorial: https:///computing/how-to-use-windows-movie-maker/ Other Video Capture and Editing softwareThe Snagit software from Techsmith (https:///screen-capture.html) provides screen capture, webcam recording, and video editing in an inexpensive package for Windows or MacOS. There is a 30-day free trial, which might be long enough to allow you to complete your project video. The software is available to students at an education price of about $30. There’s a list of additional screen capture software here:https:///blog/10-best-screen-recording-software-for-windows-free-and-paidAbout PowerPoint and VideosThe default resolution for wide-screen PowerPoint is 1280×720. If you want 1920×1080, in the “Design” tab, select “Side size” and enter 1920px for width and 1080px for height. PowerPoint will convert pixels to inches for you. This must be the first thing you do. If you try to change the slide size after you’ve added content, you risk having your content distorted.Before recording your PowerPoint, on the “Transitions” tab, select “Fade,” then click “apply to all.” Leave the options at their default values. Don’t try to use the more complex transitions; they’ll distract from your presentation.KSU PowerPoint templates are available here: https:///downloads.php PowerPoint has a mechanism for producing video from slide shows. You show the slides, capture the narration with a microphone, then save the whole thing. Finally, you can use “save as” to save the captured presentation as a video. This is a last-resort approach because 1) there’s an icon of a speaker on every slide that contains sound and 2) the output video file is unnecessarily huge. The narrator has to pause while changing slides because sound is recorded on a per-slide basis and anything spoken during a slide transition is lost.There’s nothing wrong with using PowerPoint with your video; just avoid PPT’s video features. Instead, record your slide show using a screen recording mechanism.AcknowledgementsThanks to Dr. Lei Li, who provided the original draft of this document.Thanks to Ava Podrazhansky for example 2-c above.Drs. Bob Harbort and Bob Brown contributed to editing.。
S CIENTIFIC PHYSICS Drillachse 产品说明书

3B SCIENTIFIC ® PHYSICSBedienungsanleitung11/15 Alf1 Kreisscheibe2 Querstab3 Aufnahme für Probekörper4 Libelle5 Gabel mit Schneckenfeder6 Haltestab7 MassenBei Überdrehen der Feder besteht die Gefahr, dass die Probekörper wegen der hohen Flieh-kraft weggeschleudert werden.Probekörper nicht mehr als 360° maximalauslenken (180° ist empfehlenswert). Die Drillachse mit den zugehörigen Zubehörtei-len dient zur Untersuchung von Drehschwin-gungen und zur Bestimmung von Trägheitsmo-menten verschiedener Probekörper aus der Schwingungsdauer.Die Drillachse besteht aus einer zweifach kugel-gelagerten Welle, die durch eine Schneckenfe-der an eine Gabel angekoppelt ist. Ein Haltestab ermöglicht Aufbau in einem Stativfuß oder einer Tischklemme. Eine an der Gabel angebrachte Libelle dient zur waagrechten Ausrichtung der Drillachse. Als Probekörper dienen ein Querstab mit verschiebbaren Massestücken und eine Kreisscheibe mit einer zentrischen und acht exzentrischen Bohrungen für Experimente zur Bestimmung von Trägheitsmomenten bei ex-zentrischen Drehachsen und zurBestätigung des Stei ner’schen Satzes.1 Welle mit Gabel, Schneckenfeder, Haltestab und Aufnahme für Probekörper 1 Querstab2 Massen1 Kreisscheibe Richtmoment der Feder: 0,028 Nm/rad Höhe der Drillachse: ca. 200 mm Querstab: Stablänge: 620 mm Masse:ca. 135 g Massestücke: je 260 g Kreisscheibe: Durchmesser: 320 mm Masse: 495 g Bohrungen:9Abstand der Bohrungen: 20 mmSatz Probekörper zur Drillachse 1008663Fig. 1 Satz Probekörper zur Drillachse1 Holzkugel,2 Aufnahmeteller,3 Vollzylin-der, 4 Holzscheibe, 5 HohlzylinderDas Zubehör zur Drillachse besteht aus zwei Zylindern mit nahezu identischer Masse, jedoch unterschiedlicher Masseverteilung, einem Auf-nahmeteller für die Zylinder, einer Holzscheibe sowie einer Holzkugel.Hohlzylinder (Metall):Außendurchmesser: 90 mmHöhe: 90 mmMasse: ca. 425 g Vollzylinder (Holz):Durchmesser: 90 mmHöhe: 90 mmMasse: ca. 425 g Aufnahmeteller:Durchmesser: 100 mmMasse: ca. 122 g Holzscheibe:Durchmesser: 220 mmHöhe: 15 mmMasse: ca. 425 gTrägheitsmoment: 0,51 kgm2 Holzkugel:Durchmesser: 146 mmMasse: ca. 1190 gTrägheitsmoment: 0,51 kgm2Zur Bestimmung der Trägheitsmomente verschie-dener Probekörper werden diese auf eine kugel-gelagerte Achse gesetzt, an der eine Schnecken-feder mit dem Richtmoment D angreift. Aus der Schwingungsdauer T des Drehpendels ergibt sich das Trägheitsmoment J.T2=224DJ T=⋅πDie experimentell ermittelten Werte bestätigen die Ergebnisse, die die Theorie für einen Körper der Masse m liefert, dessen Masseelemente Δm im Abstand r z um eine feste Achse rotieren:n22zz1dmzJ m r r==∆⋅=∑⎰∙Drillachse im Stativfuß aufbauen und mit Hilfe der Libelle horizontal ausrichten.∙Schrauben an den Massestücken, die die Kugelrasten gegen den Stab drücken nicht betätigen. (Schrauben sind so justiert, dass sich die Massestücke verschieben lassen und dass sie gegen die Zentrifugalkraft geh-altert werden.)∙Versuchsanordnung immer so auslenken, dass die Feder zusammengedrückt und nicht aufgebo-gen wird.∙Zu Beginn des Schwingungsvorgangs ist eine Auslenkung von 180° (max. 360°) empfeh-lenswert.∙Die Schwingungsdauer aus mehreren Mes-sungen für z.B. 5 Schwingungen durch Mit-telwertbildung bestimmen.∙Den genauen Wert des zur Bestimmung des Trägheitsmoments J aus der Schwingungs-dauer T erforderlichen Richtmoments D auf der Drillachse oder in der Bedienungsanlei-tung vermerken.Zur Durchführung der Experimente sind folgen-de Geräte zusätzlich erforderlich bzw. empfeh-lenswert:1 Satz Probekörper zur Drillachse 10086631 Stativfuß, 3-Bein, 185 mm 10028361 Digitale Stoppuhr 10028111 Präzisionskraftmesser 1 N 1003104 8.1 Bestimmung des Richtmoments D∙Stab ohne Massen auf die Drillachse ste-cken.∙1 N Kraftmesser so am Stab anbringen, dass er senkrecht daran angreift.∙ In Abständen r von 10 cm, 15 cm und 20 cmvon der Stabmitte die Kräfte F messen, die erforderlich sind, um den Stab um α = 180° aus der Gleichgewichtslage zu drehen.Drehmoment: r F M ⋅=Richtmoment: MD =αFig. 2Bestimmung des Richtmoments8.2 Abhängigkeit des Trägheitsmomentes Jvom Abstand r , in dem eine Masse m um eine feste Achse rotiert∙ Stab ohne Massen auf die Drillachse ste-cken.∙ Trägheitsmoment J (Stab) ermitteln.∙ Massen symmetrisch in Abständen von r = 5cm, 10 cm, 15 cm, 20 cm und 25 cm von der Stabmitte anordnen.∙ Trägheitsmoment J (Stab + Massen) be-stimmen.∙ J (Massen) = J (Stab + Massen) - J (Stab) er-rechnen.Fig. 3Abhängigkeit des Trägheitsmomentes J vom Abstand r8.3 Vergleich der Trägheitsmomente vonZylin- dern gleicher Masse jedoch unterschiedlicher Massenverteilung 8.3.1 Holzscheibe (HS)∙ Holzscheibe (HS) auf die Drillachse stecken. ∙ Trägheitsmoment J (HS) ermitteln.Fig. 4Bestimmung des Trägheitsmomentes einer Holz- scheibe8.3.2 Vollzylinder (VZ) und Hohlzylinder (HZ) ∙ Aufnahmeteller (T) auf die Drillachse ste-cken.∙ Trägheitsmoment J (T) bestimmen.∙ Zylinder auf den Aufnahmeteller (T) setzen. ∙ Trägheitsmomente J (VZ + T) und J (HZ + T)ermitteln.∙ Durch Differenzbildung Trägheitsmomentefür Voll- und Hohlzylinder errechnen. J (VZ) = J (VZ + T) – J (T) J (HZ) = J (HZ + T) – J (T)Fig. 5Vergleich der Trägheitsmomente von Zylin-dern8.4 Trägheitsmoment einer Kugel (K) ∙ Kugel (K) auf die Drillachse stecken. ∙ Trägheitsmoment J (K) ermitteln.Ein Vergleich der Kugel mit der Holzscheibe (siehe 8.3.1.) ergibt, dass sie gleiche Träg-heitsmomente besitzen.Kugeln (K) und Holzscheiben (HS) haben glei-che Trägheitsmomente, wenn für ihre Massen m und Radien R gilt:224()()()()5m HS R HS m K R K ⋅=⋅3B Scientific GmbH ∙ Rudorffweg 8 ∙ 21031 Hamburg ∙ Deutschland ∙ Fig. 6Bestimmung des Trägheitsmomentes einer Kugel8.5 Abhängigkeit des Trägheitsmoments Jvom Abstand a zwischen Rotations- und Schwer-punktachse, Bestätigung des Steiner ’schen Satzes∙ Kreisscheibe auf die Drillachse stecken undhorizontal justieren.∙ Kreisscheibe um ihre Schwerpunktachse (a= 0) rotieren lassen.∙ Trägheitsmoment J 0 ermitteln.∙ Trägheitsmomente J a für die Abstände a = 2cm, 4 cm, 6 cm......16 cm zwischen Rotati-ons- und Schwerpunktachse bestimmen. ∙ Nach jeder Änderung von a Kreisscheibehorizontal justieren.∙ Quotienten a 02konstant J Ja -= bilden.Damit ist der Steiner ’sche Satz 2a 0J J ma =+be-stätigt.Fig. 7Bestätigung des Steiner’schen Satzes。
ScienceDirect使用指南 PPT课件

2009ScienceDirect与NextBio合作,扩展新功能
点击一个关键 词,弹出的窗 口将为您提供 上百万条相关 结果,不仅限 于 ScienceDirect 的内容,以便 您更深入的了 解和这个关键 词相关的资源。
返回主菜单
2009ScienceDirect与NextBio合作,扩展新功能
检索来自某机 构的所有文章
返回主菜单
获取与研究主题相关的文献
返回主菜单
检索语言与检索技巧
AND OR AND NOT
默认算符,要求多个检索词同时出现在文章中 检索词中的任意一个或多个出现在文章中 后面所跟的词不出现在文章中
通配符 *
通配符 ?
W/n PRE/n “”
{} ()
取代单词中的任意个(0,1,2…)字母 如transplant* 可以检索到transplant, transplanted, transplanting… 取代单词中的1个字母 如wom?n 可以检索到woman, women 两词相隔不超过n个词,词序不定 quick w/3 response 两词相隔不超过n个词,词序一定 quick pre/2 response 宽松短语检索,标点符号、连字符、停用字等会被自动忽略 “heart-attack”17835 精确短语检索,所有符号都将被作为检索词进行严格匹配 {c++} {heart-attack} 91 定义检测词顺序,例:(remote OR satellite) AND education
返回主菜单
追踪最新/最热门的文章 ▪
查看被引用次数最高 的20篇文章
返回主菜单
2009ScienceDirect与NextBio合作,扩展新功能
Xcelsius培训教程

Xcelsius教程版本:1.0日期:2009年07月18日文档控制本文件的目的仅为提供信息,并不构成任何合同或具法律约束力的文件的基础。
发布的这份文件并不保证内含信息是否正确或者是否将保持正确,也不保证使用其中的信息将确保对相关服务或设备的操作正确无误。
文件内容如有改动,恕不另行通知。
修订历史一、Xcelsius介绍 (5)1.1 Xcelsius工具说明 (5)1.2 Xcelsius版本介绍 (5)1。
3 Xcelsius的向后兼容性 (5)1。
4 Xcelsius系统介绍 (6)1.5 Xcelsius工作原理的说明 (6)二,Xcelsius的使用 (7)三、Xcelsius开发的一般性步骤 (9)3.1 添加电子表格数据 (9)3.2 选择链接到部件的数据源。
(9)3。
3 预览和发布可视化文件 (10)四、Xcelsius开发中主要部件功能的介绍 (10)4。
1 统计图部件 (10)4.1。
1 折线图 (11)4.1.2 饼图 (12)4.1。
3 OHLC 统计图和阴阳烛图 (12)4。
1.4条形图和柱形图 (12)4.1。
5 堆积柱形图和堆积条形图 (13)4。
1。
6 组合图 (13)4。
1.7 气泡图 (14)4.1。
8 XY 散点图 (14)4.1.9 面积图 (14)4。
1.10 堆积面积图与面积堆积图 (15)4.1.11雷达图和填充式雷达图 (15)4。
1。
12树图 (16)4.2 容器部件 (16)4。
2。
1面板容器 (16)4.2.2选项卡集 (17)4.3 选择器部件 (17)4。
3.1 折叠式菜单 (18)4。
3。
2 复选框 (18)4.3.3 组合框 (18)4.3。
4过滤器 (18)4.3.5 鱼眼图片菜单 (19)4。
3。
6 滑动图片菜单 (19)4.3.7 图标 (19)4.3。
8 标签式菜单 (19)4。
3。
9 列表框 (20)4。
3。
10 列表视图 (20)4。
coursegrading使用指南
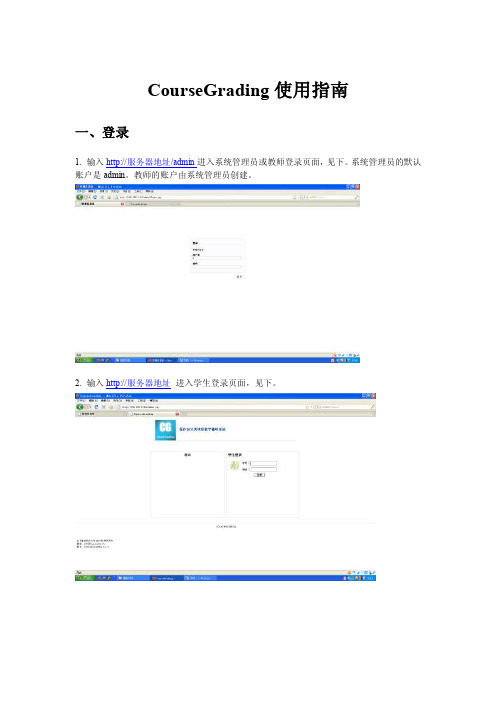
CourseGrading使用指南一、登录1. 输入http://服务器地址/admin进入系统管理员或教师登录页面,见下。
系统管理员的默认账户是admin。
教师的账户由系统管理员创建。
2. 输入http://服务器地址进入学生登录页面,见下。
二、系统管理:创建课程和教师账户1.先创建课程。
下一步创建教师后,可把该课程的管理权限授予给他/她。
当然,换个顺序也没问题,只是要记得授予教师管理课程的权限。
依次点击进入“系统管理→课程设置→增设课程”,最后到达“创建新课程”的页面,见下。
输入课程名称,点击“创建”按钮即完成。
创建新课程完成后,进入课程概览页面。
2.创建教师账户依次点击进入“系统管理→管理员与权限→添加管理人员”,走到如下页面。
输入登录账号,密码等,设定“角色和权限”(特别注意向任课教师授予管理某一课程的权限),点击“创建”按钮。
点击“创建”按钮后,进入“系统管理人员概览”页面。
三、作为授课教师创建学生名单1. 创建学生分类登录后的界面如下,注意左上角的课程名称是课程管理的入口。
点击要管理的课程。
依次点击进入“学生 学生分类”,在分类列表中点击“新建子类”下的图标,即进入如下页面。
这里使用的例子不太好——把课程名称取作“程序设计b4班”。
这对应了一个班而不是一门课,这使得子类有点不好理解。
实际上CourseGrading系统是拿子类对应班级的。
输入学生分类(通常对应班级)的“标识名”,提交。
可成批导入学生名单2.录入/导入学生点击“录入学生”,进入如下页面,可逐个录入学生的信息。
也可成批导入,见上图。
点击保存后,可录入下一个学生。
四、作为教师建题库和布置作业1. 建题库布置作业的前提是系统内有作业题目。
依次点击进入“作业 录入作业题目”,选择作业题目类别,下面以“编程题”作为示例。
选择“编程题”类别,进入以下窗口。
输入要求填写的各项目,其中题目描述中给出的栏目属建议,不是必须的,只要达到不会使学生产生歧义即可。
Rocsicence Slide中文教程
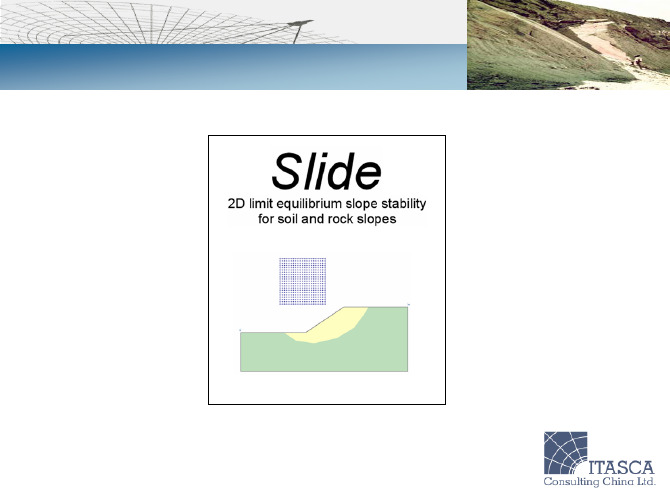
分析方法
Slide程序共提供九种安全系数计算方法:
•Ordinary / Fellenius •Bishop Simplified •Janbu Simplified •Janbu Corrected •Spencer •Corps of Engineers #1 •Corps of Engineers #2 •Lowe-Karafiath •GLE (General Limit Equilibrium) / Morgenstern-Price (the implementation of the GLE method in Slide is essentially equivalent to the Morgenstern-Price method)
部分条带法稳定条件
修正Janbu法: 修正Janbu法结果是在Janbu法的基础上乘与一个修正系数f0, 以考虑条件力的影响(Janbu法认为条件力为0):
Janbu Corrected Safety Factor = * Janbu Simplified Safety Factor
其中修正系数是关于坡体形状,土体强度的函数:
外部边界
材料边界
3. 水位线:任意形状多义线,为孔压计算定义自由液面 • 水位线位于外部边界之外的部分可模拟积水 • 一个模型中只能定义一条水位线
注意情况: • 如果定义了Ru系数或者孔压网格,则水位线仅仅定义 了浸润面,但不参与孔压计算 • 当地下水方法采用有限单元法,水位线失效
4. 压力线:任意多义线,用于孔压计算 • 一个模型中最多可有20条压力线,不同的材料区域可 使用不同的压力线 水位线与压力线: • 水位线与压力线两种方法计算孔压方案相同 • 压力线不能形成积水荷载 • 水位线允许用户定义干湿密度,但压力线不能 • 水位线与孔压网格联合使用,则水位线以上孔压网格 孔压为零
silvaco教程-5页精选文档

§4 工艺及器件仿真工具SILVACO-TCAD本章将向读者介绍如何使用SILV ACO公司的TCAD工具ATHENA来进行工艺仿真以及A TLAS来进行器件仿真。
假定读者已经熟悉了硅器件及电路的制造工艺以及MOSFET 和BJT的基本概念。
4.1 使用ATHENA的NMOS工艺仿真4.1.1 概述本节介绍用A THENA创建一个典型的MOSFET输入文件所需的基本操作。
包括:a. 创建一个好的仿真网格b. 演示淀积操作c. 演示几何刻蚀操作d. 氧化、扩散、退火以及离子注入e. 结构操作f. 保存和加载结构信息4.1.2 创建一个初始结构1定义初始直角网格a. 输入UNIX命令:deckbuild-an&,以便在deckbuild交互模式下调用A THENA。
在短暂的延迟后,deckbuild主窗口将会出现。
如图 4.1所示,点击File目录下的Empty Document,清空DECKBUILD文本窗口;图4.1 清空文本窗口b. 在如图4.2所示的文本窗口中键入语句go Athena ;图4.2 以“go athena”开始接下来要明确网格。
网格中的结点数对仿真的精确度和所需时间有着直接的影响。
仿真结构中存在离子注入或者形成PN结的区域应该划分更加细致的网格。
c. 为了定义网格,选择Mesh Define菜单项,如图4.3所示。
下面将以在0.6μm×0.8μm 的方形区域内创建非均匀网格为例介绍网格定义的方法。
图4.3 调用ATHENA网格定义菜单2 在0.6μm×0.8μm的方形区域内创建非均匀网格a. 在网格定义菜单中,Direction(方向)栏缺省为X;点击Location(位置)栏并输入值0;点击Spacing(间隔)栏并输入值0.1;b. 在Comment(注释)栏,键入“Non-Uniform Grid(0.6um x 0.8um)”,如图4.4所示;c. 点击insert键,参数将会出现在滚动条菜单中;图4.4 定义网格参数图 4.5 点击Insert键后d. 继续插入X方向的网格线,将第二和第三条X方向的网格线分别设为0.2和0.6,间距均为0.01。
- 1、下载文档前请自行甄别文档内容的完整性,平台不提供额外的编辑、内容补充、找答案等附加服务。
- 2、"仅部分预览"的文档,不可在线预览部分如存在完整性等问题,可反馈申请退款(可完整预览的文档不适用该条件!)。
- 3、如文档侵犯您的权益,请联系客服反馈,我们会尽快为您处理(人工客服工作时间:9:00-18:30)。
sicily course使用指南一、普通使用二、管理界面附录附录一Problem实例一、普通使用1.使用浏览器访问sicily系统(http://soj.me) 使用管理帐号(例如《数据结构与算法》课程组管理账号dsa)登陆。
进入到sicily主界面(图1)。
图1 sicily主界面2.点击主界面的Courses菜单,进入如下Courses主界面(图2):图2 Course界面选择course,如:Course ID = 12,Course Name = "数据结构与算法实验(教师专用)"或者直接通过以下url访问:http://soj.me/course_detail.php?course_id=123.“数据结构与算法实验(教师专用)”course界面如下(图3):图3 “数据结构与算法实验(教师专用)”course界面Course Detail列出课程基本信息。
Current Exercises下列出了该course的所有exercises。
exercise一般对应于course的某一章或者某个专题。
4.在course界面下,点击某一exercise,即可进入如下exercise界面(图四):图4 exercise界面本界面列出某个exercise下的所有Problem。
5.在exercise界面下,点击某一problem,即可进入如下problem界面(图5):图5 Problem界面6.在Problem界面下,看清题意和输入输出要求,完成代码编写、测试后,点击”Submit”按钮,进入problem submit界面如下(图6):图6 problem submit界面在Language下拉菜单选择代码语言(默认为GNU C++ 4.4.3),将代码粘贴到Source文本框,按"Submit"按钮提交。
7.系统接受提交后返回处理结果,如下图(图7):图7 Problem提交结果处理结果含义如下:Waiting: Your program is being judged or waiting to be judged.Accepted (AC): Congratulations! Your program has produced the correct output!Presentation Error (PE): Your program's output format is not exactly the same as required by theproblem, although the output is correct. This usually means the existence of omitted or extra blank characters (white spaces, tab characters and/or new line characters) between any two non-blank characters, and/or blank lines (a line consisting of only blank characters) between any two non-blank lines. Trailing blank characters at the end of each line and trailing blank lines at the of output are not considered format errors. Check the output for spaces, blank lines, etc. against the problem's output specification.Wrong Answer (WA): Your program does not produce the correct output. Special judge programs will possibly return Wrong Answer in place of Presentation Error for simplicity and robustness.Runtime Error (RE): Your program has failed during the execution. Possible causes include illegal file access, stack overflow, out of range in pointer reference, floating point exception, division by zero and many others. Programs that stay not responding for a long time (not consuming CPU cycles) may also be considered to have encountered runtime errors.Time Limit Exceed (TLE): The total time your program has run for has exceeded the limit.Memory Limit Exceed (MLE): The maximum amount of memory that your program has used has exceeded the limit.Output Limit Exceed (OLE): Your program has produced too much output. Currently the limit is twice the size of the file containing the expected output. The most common cause of this result is that your programs falls into an infinite loop containing some output operations.Compile Error (CE): The compiler fails to compile your program. Warning messages are not considered errors. Click on the judge's reply to see the warning and error messages produced by the compiler.No such problem: Either you have submitted with a non-existent problem id or the problem is currently unavailable (probably reserved for upcoming contests).Restricted Function: Your program has used some restricted function, e.g., freopen() or fopen().二、管理界面1. 使用浏览器访问sicily系统(http://soj.me) 使用数据结构与算法课程组管理账号dsa登陆。
进入到sicily主界面(图1)。
2. 点击主界面的Management菜单,进入如下Management主界面(图8):图8 Mangement主界面3. Mangement主界面(图8)中,选择View Courses,进入View Courses(图9),可见到用当前登录账号dsa创建的所有Course。
图9 View Course界面选择”Delete”,可以删除对应的course。
选择”Edit”,可以编辑Course基本信息。
4. View Course界面(图9)中,点击某个具体course名称,可进入该course的Course Management界面(图10)。
图10 Course Management界面本界面最下方的Current Registrantions部分列出已注册本课程的用户列表,对不希望存在于本course的用户,管理者可以将其Kick out。
Current Exercises部分列出本course中所有exercise。
对某个Exercise,点击”Delete”可以删除该exercise;点击“View Standing”可以查看该课程用户做题的情况; 点击”Edit”可以编辑exercise信息,其中包括权限设置(图11)。
5. Course Management界面(图10)中,点击某个Exercise的”Edit” Operation,可以进入Edit Exercise界面(图11)。
图11 Edit Exercise界面6. Course Management界面(图10)中,点击某个Exercise的名称,可以进入Edit Exercise 界面(图12)。
图12 Exercise Problems Management界面本界面Current Problems部分列出本Exercise中所有problem。
7. Edit Problem界面图12 Edit Problem界面附录附录一Problem实例此附录通过实例解释如何添加一个Problem。
Probl em 1 一般Probl emProblem Title A-B完整题目至少需要包含以下3个文件。
/* Source file: source.cpp标程*/#include <iostream>using namespace std;int main()int A, B;cin >> A >> B;return A-B;}/* Input file: in.txt测试数据(输入)*/100 9/* Output file: out.txt测试数据(对应输入)*/91实例2 需要Special Judge的Probl emProblem Title A+B完整题目至少需要包含以下4个文件。
/* Source file: source.cpp标程*/int add(int a, int b){return a+b;}/* Framework file: framework.cpp测试时framework中的代码会与用户提交的实现代码(如source.cpp)结合在一起编译,然后进行测试。
