OS2012_UNIT 0
奥美晨曦系列微波传感器说明书

OS100 SERIES Mini-Infrared Transmitter e-mail:**************For latest product manuals: Shop online at User’s G ui d e***********************Servicing North America:U.S.A. Omega Engineering, Inc.Headquarters: Toll-Free: 1-800-826-6342 (USA & Canada only)Customer Service: 1-800-622-2378 (USA & Canada only)Engineering Service: 1-800-872-9436 (USA & Canada only)Tel: (203) 359-1660 Fax: (203) 359-7700e-mail:**************For Other Locations Visit /worldwideThe information contained in this document is believed to be correct, but OMEGA accepts no liability for any errors it contains, and reserves the right to alter specifications without notice.Table of ContentsSection ...................................................................PageSafety Warnings and IEC Symbols (iii)Caution and Safety Information (iii)Section 1 Introduction ....................................................................1-1Section 2Installation ......................................................................1-12.1 Unpacking and Inspection ......................................1-12.2 Electrical Connection ..............................................2-1Section 3Operation ........................................................................3-13.1 Main Board ................................................................3-13.2 Ambient Temperature ..............................................3-23.3 Atmospheric Quality ................................................3-33.4 Measuring Temperature ..........................................3-33.5 Alarm Setting ............................................................3-43.6 Adding Extension Cable...........................................3-4Section 4 Laser Sight Accessory ...................................................4-14.1 Warning and Cautions .............................................4-14.2 Operating the Laser Sight Accessory .....................4-1Section 5 Specifications .................................................................5-15.1 General .......................................................................5-15.2 Laser Sight Accessory (OS100-LS) ..........................5-2Section 6Emissivity Table .............................................................6-1iTable of FiguresFigure Description Page2-1Power Supply & Analog Output Connections ..........2-12-2 Alarm Output Connection ............................................2-13-1 Main PC Board ...............................................................3-23-2 Sensor..............................................................3-2Housing3-3 Optical Field of View .....................................................3-43-4Setting the Temperature Engineering Unit..................3-43-5Mounting Bracket OS100-MB .......................................3-53-6Water Cooling Jacket, OS100-WC ................................3-53-7Typical Water Cool Jacket Assembly ...........................3-53-8Air Purge Collar, OS100-AP..........................................3-63-9DIN Rail Mounting Adapter, OS100-DR ....................3-63-10NEMA-4 Aluminum Enclosure ....................................3-64-1Laser Sighting Accessory, OS100-LS ............................4-24-2Laser Warning Label ......................................................4-2iiSafety Warnings and IEC SymbolsThis device is marked with international safety and hazard symbols in accordance with IEC 1010. It is important to read and follow all precautions and instructions in this manual before operating or commissioning this device as it contains important information relating to safety and EMC. Failure to follow all safety precautions may result in injury and or damage to your calibrator. IEC symbols DescriptionCaution and Safety Information• If the equipment is used in a manner not specified in this manual, the protection provided by the equipment may be impaired.• The installation category is one (1).• There are no user replaceable fuses in this product• The output terminals of this product are for use with equipment (digital meters, chart recorders, etc,) which have no accessible five parts. Such equipment should comply with all the applicable safety requirements.• Do not operate the equipment in flammable or explosive environments.• All connections to the thermometer should be made via a shielded cable, 24 AWG stranded wire with the following ratings: 300V , 105°C (221°F), PVC insulation.• Power must be disconnected before making any electrical connections.• The power supply used to power the thermometer should be VDE or UL approved with the following ratings: 12 to 24vdc @150mA with overload protection of 500mA.iiiCaution, refer to accompanying documentsDirect Current Laser SymbolFrame or ChassisNOTES: ivSection 1 - IntroductionThe low cost OS101 mini-infrared transmitter provides non-contacttemperature measurement for industrial applications. The unit measures atemperature range of -18 to 538°C (0-1000°F) and provides a linear analogoutput of either 4-20 mA, 0-5 VDC, K type TC, 1 mV/°C, or 1 mV/°F.The new OS102 mini-infrared transmitter has all the functions of OS101plus a built-in LED display that shows the measured temperature indegrees F or degrees C which is switchable in the field.The miniature sensor head design 2.5 cm dia. x 6.3 cm Length (1" x 2.5") isideal for measuring temperature in confined, and hard to reach places.The aluminum sensor head as well as the rugged electronic housing (Diecast Aluminum) are NEMA-4 rated.The sensor head is connected to the electronic housing via a 1.82 m (6 feet)shielded cable as standard. The unit provides field adjustable alarmoutput.Section 2 - Installation2.1UnpackingRemove the packing list and verify that you have received all yourequipment. If you have any questions about the shipment, please callCustomer Service at:1-800-622-2378 or 203-359-1660. We can also be reached on the internet:e-mail:**************When you receive the shipment, inspect the container and equipment forany signs of damage. Note any evidence of rough handling in transit.inspection. After examination and removing contents, save packing material and carton in theevent reshipment is necessary.The following items are supplied in the box:• The infrared transmitter including the sensor head and the 1.82 m(6 feet) shielded cable• User's Manual• Mounting Nut1-1The following describes the ordering information:OS102 or OS101 - MA- *,**, where The following optional accessories are available:Here are the Features of OS101 and OS102 infrared transmitters:2.2Electrical Connection Sensor Head Cable - The Sensor head is pre-wired to a 1.8 m (6 feet)shielded cable. Plug & lock-in the male connector to the mating female connector on the aluminum housing.Power & Output Connection - Open the cover of the main aluminum housing. Slide the cable through the strain relief and connect the wires to the terminal block on the board as shown in Fig. 2-1. For Alarm output connection, refer to Fig. 2-2.2-1MA - 4/20 mA output V1 - 0 to 5 VDC output K - Thermocouple output, K type MV - Millivolt output C - 1 mV/°C output F - 1 mV/°F output HT- High temperature sensor head3-1Figure 2-2. Alarm Output Connection Section 3 - Operation3-1Main BoardThe Main Board is shown in Fig. 3-1. Here are the important components on the board:(1) - Terminal Block for Power & Output connections(2) - Single Turn Potentiometer to adjust Emissivity in tenths (0.x_)(3) - Single Turn Potentiometer to adjust Emissivity in hundreds (0._x)(4) -Slide switch to select between real time (Normal Operation) and alarm set point(5) - Alarm set point adjust, P4(6) - Sensor Head connection(7) - Input Zero adjust, P3(8) - Input Span adjust, P2(9) - Output Zero adjust, P5(10) - Output Span adjust, P6Figure 3-1. Main PC Board3.2Ambient TemperatureThe Sensing head can operate in an ambient temperature of 0 to 70°C (32to 158°F). The Sensing head in the high temperature model (-HT) can operate in an ambient temperature of 0 to 85°C (32 to 185°F) without any cooling required. The Sensing head can operate up to 200°C (392°F) using the water cool jacket accessory OS100-WC (See Fig. 3-6).There is a warm up period of 3 minutes after power up. After the warm up period, temperature measurement can be made.When the ambient temperature around the sensor head changes abruptly,the sensor head goes through thermal shock. It takes a certain amount of time for the sensor head to stabilize to the new ambient temperature. For example, it takes about 30 minutes for the sensor head to stabilize going from 25°C to 50°C (77 to 122°F) ambient temperature.The sensor head dimensions are shown in Fig. 3-2.Figure 3-2. Sensor Housing3-23-33.3Atmospheric QualityEnvironments with smoke, dust, and fumes dirty up the optical lens, and cause erroneous temperature readings. To keep the surface of the optical lens clean, the air purge collar accessory is recommended, OS100-AP , See Fig. 3-7.3.4Measuring TemperatureBefore starting to measure temperature, make sure that the following check list is met:ߜ The power and analog output connections are made (Fig. 2-1).ߜThe sensor head is connected to the main unit.ߜThe slide switch (SW1) on the main board is set to real time (Fig. 3-1).ߜThe target is larger than the optical field of view of the sensor head (Fig. 3-3).ߜThe emissivity adjustment on the main board is set properly (Fig. 3-1).ߜThe output load is within the product specification.On OS102 transmitters, follow these additional steps:ߜ The temperature display is set to °F or °C (Fig. 3-4)ߜ For 4-20mA output models, make sure an output load is added, ie. 250ohms.Figure 3-3. Optical Field Of ViewFigure 3-4. Setting the Temperature Engineering Unit3.5Alarm SettingThe unit provides 0-100% alarm set point adjustment. Here is an exampleof an alarm setting.• An OS101-MA(4/20 mA output), the alarm is to be set at 400°Ftemperature.• Connect the alarm output as shown in Fig. 2-2.• Set the slide switch (SW1) on the main board to the Alarm position.• Measure the analog output, and set the Potentiometer P4 until theoutput reads 10.4 mA which is 40% (400°F) of the temperature range.40 x (20-4)[10.4mA=+ 4]100• Set the slide switch (SW1) back to the Real Time position.• If the temperature reading is below the alarm set point, the alarmoutput stays high, otherwise it goes low.On the OS102, you can set the alarm set point directly based on thetemperature display.3.6Adding Extension CableYou can add extension cable between the Sensor Head and the mainelectronic housing up to 15.2 m (50 feet). After adding the extension cable,the Zero input potentiometer, P3 may be re-adjusted. (See Fig. 3-1, forproper analog output reading)The following figures show the mounting bracket (OS100-MB), Watercooling jacket (OS100-WC), Air purge collar (OS100-AP), DIN RailMounting adapter (OS-100-DR), and the main aluminum enclosure. TheDIN Rail Mounting adapter (OS100-DR) is mounted to the bottom of themain aluminum enclosure using two 4-40 screws.A typical water cool jacket assembly is shown in Fig. 3-7, on the following page.1. Mounting Nut2. Mounting Bracket3. Water Cool Jacket4. Sensor Head3-4Figure 3-5. Mounting Bracket OS100-MBFigure 3-6. Water Cooling Jacket, OS100-WCFigure 3-7. Typical Water Cool Jacket Assembly3-5Figure 3-8. Air Purge Collar, OS100-APFigure 3-9. DIN Rail Mounting Adapter, OS-100-DRFigure 3-10. NEMA-4 Aluminum Enclosure3-6Section 4 - Laser Sight Accessory4.1Warning and Cautionsbelow:•Use of controls or adjustments or performance of procedures other than those specified here may result in hazardous radiation exposure.• Do not look at the laser beam coming out of the lens or view directly with optical instruments - eye damage can result.• Use extreme caution when operation the laser sight accessory • Never point the laser accessory at a person • Keep out of the reach of all children4.2Operating the Laser Sight AccessoryThe laser sight accessory screws onto the front of the sensor head. This accessory is only used for alignment of the sensor head to the target area.After the alignment process, the accessory has to be removed from the front of the sensor head before temperature measurement.The laser sight accessory is powered from a small compact battery pack (included with the accessory). Connect the battery pack to the accessory using the cable provided. Aim at the target, and turn on the battery power using the slide switch on the battery pack. Adjust the sensor head position so that the laser beam points to the center of the target area. Turn off the battery pack, and remove the laser sighting accessory from the sensor head. See Fig. 4-1 for reference.4-14-2Figure 4-2. Laser Warning LabelSection 5 - Specifications5.1 - GeneralTemperature Range-18 to 538°C (0 to 1000°F)Accuracy @ 22°C (72°F)±2% of Rdg. or 2.2°C (4°F) whichever is ambient temperature & greateremissivity of 0.95 or greaterOptical Field of View6:1 (Distance/Spot Size)Repeatability±1% of Rdg.Spectral Response 5 to 14 micronsResponse Time150 msec (0 to 63% of final value)Emissivity Range0.1 to 0.99, adjustableOperating Ambient TemperatureMain Transmitter0 to 50°C (32 to 122°F)Sensor Head0 to 70°C (32 to 158°F)Sensor Head (-HT Model)0 to 85°C (32 to 185°F)Sensor Head with OS100-WC(Water Cooling Jacket)0 to 200°C (32 to 392°F)Operating Relative Humidity Less than 95% RH, non-condensingWater Flow Rate for OS100-WC0.25 GPM, room temperatureThermal Shock About 30 minutes for 25°Cabrupt ambient temperature change Warm Up Period 3 minutesAir Flow Rate for OS100-AP 1 CFM (0.5 Liters/sec.)Power12 to 24 VDC @ 100 mAAnalog OutputsMV-F 1 mV/°FMV-C 1 mV/°CK K Type TC - OS101 onlyMA 4 to 20 mAV10 to 5 VDCOutput Load requirementsMin. Load (0 to 5VDC) 1 K-OhmsMax. Load (4 to 20 mA)(Supply Power - 4 )/20 mATransmitter Housing NEMA-4 & IP65, Die Cast AluminumSensor Head Housing NEMA-4 , AluminumAlarm Output Open Drain, 100 mAAlarm Set Point0 to 100% , Adjustable via P4Alarm Deadband14°C (25°F)5-15-25.1 - General Con’t.DimensionsSensor Head25.4 OD. x 63.5 mm L(1" OD. x 2.5" L)Main Housing, OS10165.5 W x 30.5 H x 115.3 mm L(2.58" W x 1.2" H x 4.54" L)Main Housing, OS10265.5 W x 55.9 H x 115.3 mm L(2.58" W x 2.2" H x 4.54" L)Weight 272 g (0.6 lb)5.2Laser Sight Accessory (OS100-LS)Wavelength (Color)630 - 670 nm (Red)Operating Distance (Laser Dot)Up to 9.1 m (30 ft.)Max. Output Optical Power Less than 1 mW at 22°F ambienttemperature.European Classification Class 2, EN60825-1/11.2001Maximum Operating current45 mA at 3 VDCFDA Classification Complies with 21 CFR 1040.10,Class II Laser ProductBeam Diameter 5 mmBeam Divergence< 2 mradOperating Temperature0 to 50°C (32 to 122°F)Operating Relative Humidity Less than 95% RH, non-condensingPower Switch ON / OFF , Slide switch on the BatteryPackPower Indicator Red LEDPower Battery Pack, 3 VDC (Consists of two 1.5VDC AA size Lithium Batteries) Laser Warning Label Located on the head sight circumferenceIdentification Label Located on the head sight circumferenceDimensions38 DIA x 50.8 mm L(1.5" DIA x 2" L)Section 6 - Emissivity Table6-1Material Emissivity (ε)Aluminum – pure highly polished plate . . . . . . . . . . . . . . . . . . . . . . . . 0.04 to 0.06Aluminum – heavily oxidized . . . . . . . . . . . . . . . . . . . . . . . . . . . . . . . 0.20 to 0.31Aluminum – commercial sheet . . . . . . . . . . . . . . . . . . . . . . . . . . . . . . . . . . . . 0.09Brass – dull plate. . . . . . . . . . . . . . . . . . . . . . . . . . . . . . . . . . . . . . . . . . . . . . 0.22Brass – highly polished, 73.2% Cu, 26.7% Zn. . . . . . . . . . . . . . . . . . . . . . . . . 0.03Chromium – polished. . . . . . . . . . . . . . . . . . . . . . . . . . . . . . . . . . . . . 0.08 to 0.36Copper – polished. . . . . . . . . . . . . . . . . . . . . . . . . . . . . . . . . . . . . . . . . . . . . 0.05Copper – heated at 600°C (1112°F). . . . . . . . . . . . . . . . . . . . . . . . . . . . . . . 0.57Gold – pure, highly polished or liquid. . . . . . . . . . . . . . . . . . . . . . . . . 0.02 to 0.04Iron and steel (excluding stainless)– polished iron . . . . . . . . . . . . . . . . 0.14 to 0.38Iron and steel (excluding stainless)– polished cast iron. . . . . . . . . . . . . . . . . . . 0.21Iron and steel (excluding stainless)– polished wrought iron . . . . . . . . . . . . . . . 0.28Iron and steel (excluding stainless)– oxidized dull wrought iron . . . . . . . . . . . . 0.94Iron and steel (excluding stainless)– rusted iron plate . . . . . . . . . . . . . . . . . . . 0.69Iron and steel (excluding stainless)– polished steel. . . . . . . . . . . . . . . . . . . . . . 0.07Iron and steel (excluding stainless)– polished steel oxidized at600°C (1112°F). . . . . . . . . . . . . . . . . . . . 0.79Iron and steel (excluding stainless)– rolled sheet steel . . . . . . . . . . . . . . . . . . . 0.66Iron and steel (excluding stainless)– rough steel plate . . . . . . . . . . . . . 0.94 to 0.97Lead – gray and oxidized . . . . . . . . . . . . . . . . . . . . . . . . . . . . . . . . . . . . . . . 0.28Mercury . . . . . . . . . . . . . . . . . . . . . . . . . . . . . . . . . . . . . . . . . . . . . 0.09 to 0.12Molybdenum filament . . . . . . . . . . . . . . . . . . . . . . . . . . . . . . . . . . . . 0.10 to 0.20Nickel – polished . . . . . . . . . . . . . . . . . . . . . . . . . . . . . . . . . . . . . . . . . . . . . 0.07Nickel – oxidized at 649 to 1254°C (1200°F to 2290°F). . . . . . . . . . . 0.59 to 0.86Platinum – pure polished plate . . . . . . . . . . . . . . . . . . . . . . . . . . . . . . 0.05 to 0.10Platinum – wire . . . . . . . . . . . . . . . . . . . . . . . . . . . . . . . . . . . . . . . . 0.07 to 0.18Silver – pure and polished . . . . . . . . . . . . . . . . . . . . . . . . . . . . . . . . . 0.02 to 0.03Stainless steel – polished . . . . . . . . . . . . . . . . . . . . . . . . . . . . . . . . . . . . . . . . 0.07Stainless steel – Type 301 at 232 to 942°C (450°F to 1725°F). . . . . . . 0.54 to 0.63Tin – bright . . . . . . . . . . . . . . . . . . . . . . . . . . . . . . . . . . . . . . . . . . . . . . . . . 0.06Tungsten – filament . . . . . . . . . . . . . . . . . . . . . . . . . . . . . . . . . . . . . . . . . . . . 0.39Zinc – polished commercial pure . . . . . . . . . . . . . . . . . . . . . . . . . . . . . . . . . . 0.05Zinc – galvanized sheet. . . . . . . . . . . . . . . . . . . . . . . . . . . . . . . . . . . . . . . . . 0.23M E T A L S6-2Material Emissivity (ε) Asbestos Board . . . . . . . . . . . . . . . . . . . . . . . . . . . . . . . . . . . . . . . . . . . . . . .0.96 Asphalt, tar, pitch . . . . . . . . . . . . . . . . . . . . . . . . . . . . . . . . . . . . . . .0.95 to 1.00 Brick– red and rough . . . . . . . . . . . . . . . . . . . . . . . . . . . . . . . . . . . . . . . . . .0.93 Brick– fireclay . . . . . . . . . . . . . . . . . . . . . . . . . . . . . . . . . . . . . . . . . . . . . . .0.75 Carbon– filament . . . . . . . . . . . . . . . . . . . . . . . . . . . . . . . . . . . . . . . . . . . . .0.53 Carbon– lampblack - rough deposit . . . . . . . . . . . . . . . . . . . . . . . . . .0.78 to 0.84 Glass- Pyrex, lead, soda . . . . . . . . . . . . . . . . . . . . . . . . . . . . . . . . . .0.85 to 0.95 Marble– polished light gray . . . . . . . . . . . . . . . . . . . . . . . . . . . . . . . . . . . . .0.93 Paints, lacquers, and varnishes– Black matte shellac . . . . . . . . . . . . . . . . . . . .0.91 Paints, lacquers, and varnishes– aluminum paints . . . . . . . . . . . . . . . .0.27 to 0.67 Paints, lacquers, and varnishes– flat black lacquer . . . . . . . . . . . . . . .0.96 to 0.98 Paints, lacquers, and varnishes– white enamel varnish . . . . . . . . . . . . . . . . . .0.91 Porcelain– glazed . . . . . . . . . . . . . . . . . . . . . . . . . . . . . . . . . . . . . . . . . . . . .0.92 Quartz– opaque . . . . . . . . . . . . . . . . . . . . . . . . . . . . . . . . . . . . . . . .0.68 to 0.92 Roofing Paper . . . . . . . . . . . . . . . . . . . . . . . . . . . . . . . . . . . . . . . . . . . . . . .0.91 Tape– Masking . . . . . . . . . . . . . . . . . . . . . . . . . . . . . . . . . . . . . . . . . . . . . .0.95 Water . . . . . . . . . . . . . . . . . . . . . . . . . . . . . . . . . . . . . . . . . . . . . . . .0.95 to 0.96 Wood– planed oak . . . . . . . . . . . . . . . . . . . . . . . . . . . . . . . . . . . . . . . . . . . .0.90 NONMETALSNOTES:6-3NOTES: 6-4OMEGA’s policy is to make running changes, not model changes, whenever an improvement is possible. T his affords our customers the latest in technology and engineering.OMEGA is a trademark of OMEGA ENGINEERING, INC.© Copyright 2017 OMEGA ENGINEERING, INC. All rights reserved. T his document may not be copied, photocopied, reproduced, translated, or reduced to any electronic medium or machine-readable form, in whole or in part, without the prior written consent of OMEGA ENGINEERING, INC.FOR WARRANTY RETURNS, please have the following information available BEFORE contacting OMEGA:1. P urchase Order number under which the product was PURCHASED,2. M odel and serial number of the product under warranty, and3. Repair instructions and/or specific problems relative to the product.FOR NON-WARRANTY REPAIRS, consult OMEGA for current repair charges. Have the following information available BEFORE contacting OMEGA:1. Purchase Order number to cover the COST of the repair,2. Model and serial number of the product, and 3. Repair instructions and/or specific problems relative to the product.RETURN REQUESTS/INQUIRIESDirect all warranty and repair requests/inquiries to the OMEGA Customer Service Department. BEFORE RET URNING ANY PRODUCT (S) T O OMEGA, PURCHASER MUST OBT AIN AN AUT HORIZED RET URN (AR) NUMBER FROM OMEGA’S CUST OMER SERVICE DEPART MENT (IN ORDER T O AVOID PROCESSING DELAYS). The assigned AR number should then be marked on the outside of the return package and on any correspondence.T he purchaser is responsible for shipping charges, freight, insurance and proper packaging to preventbreakage in transit.WARRANTY/DISCLAIMEROMEGA ENGINEERING, INC. warrants this unit to be free of defects in materials and workmanship for a period of 25 months from date of purchase. OMEGA’s WARRANTY adds an additional one (1) month grace period to the normal two (2) year product warranty to cover handling and shipping time. This ensures that OMEGA’s customers receive maximum coverage on each product.If the unit malfunctions, it must be returned to the factory for evaluation. OMEGA’s Customer Service Department will issue an Authorized Return (AR) number immediately upon phone or written request. Upon examination by OMEGA, if the unit is found to be defective, it will be repaired or replaced at no charge. OMEGA’s WARRANT Y does not apply to defects resulting from any action of the purchaser, including but not limited to mishandling, improper interfacing, operation outside of design limits, improper repair, or unauthorized modification. T his WARRANT Y is VOID if the unit shows evidence of having been tampered with or shows evidence of having been damaged as a result of excessive corrosion; or current, heat, moisture or vibration; improper specification; misapplication; misuse or other operating conditions outside of OMEGA’s control. Components in which wear is not warranted, include but are not limited to contact points, fuses, and triacs.OMEGA is pleased to offer suggestions on the use of its various products. However, OMEGA neither assumes responsibility for any omissions or errors nor assumes liability for any damages that result from the use of its products in accordance with information provided by OMEGA, either verbal or written. OMEGA warrants only that the parts manufactured by the company will be as specified and free of defects. OMEGA MAKES NO OTHER WARRANTIES OR REPRESENTATIONS OF ANY KIND WHATSOEVER, EXPRESSED OR IMPLIED, EXCEPT THAT OF TITLE, AND ALL IMPLIED W ARRANTIES INCLUDING ANY W ARRANTY OF MERCHANTABILITY AND FITNESS FOR A PARTICULAR PURPOSE ARE HEREBY DISCLAIMED. LIMITATION OF LIABILITY: The remedies of purchaser set forth herein are exclusive, and the total liability of OMEGA with respect to this order, whether based on contract, warranty, negligence, indemnification, strict liability or otherwise, shall not exceed the purchase price of the component upon which liability is based. In no event shall OMEGA be liable for consequential, incidental or special damages.CONDITIONS: Equipment sold by OMEGA is not intended to be used, nor shall it be used: (1) as a “Basic Component” under 10 CFR 21 (NRC), used in or with any nuclear installation or activity; or (2) in medical applications or used on humans. Should any Product(s) be used in or with any nuclear installation or activity, medical application, used on humans, or misused in any way, OMEGA assumes no responsibility as set forth in our basic WARRANT Y /DISCLAIMER language, and, additionally, purchaser will indemnify OMEGA and hold OMEGA harmless from any liability or damage whatsoever arising out of the use of theProduct(s) in such a manner.Where Do I Find Everything I Need forProcess Measurement and Control?OMEGA…Of Course!Shop online at TEMPERATUREM U Thermocouple, RTD & Thermistor Probes, Connectors,Panels & AssembliesM U Wire: Thermocouple, RTD & ThermistorM U Calibrators & Ice Point ReferencesM U Recorders, Controllers & Process MonitorsM U Infrared PyrometersPRESSURE, STRAIN AND FORCEM U Transducers & Strain GagesM U Load Cells & Pressure GagesM U Displacement TransducersM U Instrumentation & AccessoriesFLOW/LEVELM U Rotameters, Gas Mass Flowmeters & Flow ComputersM U Air Velocity IndicatorsM U Turbine/Paddlewheel SystemsM U Totalizers & Batch ControllerspH/CONDUCTIVITYM U pH Electrodes, Testers & AccessoriesM U Benchtop/Laboratory MetersM U Controllers, Calibrators, Simulators & PumpsM U Industrial pH & Conductivity EquipmentDATA ACQUISITIONM U Communications-Based Acquisition SystemsM U Data Logging SystemsM U Wireless Sensors, Transmitters, & ReceiversM U Signal ConditionersM U Data Acquisition SoftwareHEATERSM U Heating CableM U Cartridge & Strip HeatersM U Immersion & Band HeatersM U Flexible HeatersM U Laboratory HeatersENVIRONMENTALMONITORING AND CONTROLM U Metering & Control InstrumentationM U RefractometersM U Pumps & TubingM U Air, Soil & Water MonitorsM U Industrial Water & Wastewater TreatmentM U pH, Conductivity & Dissolved Oxygen InstrumentsM3572/1217。
Windows Server 2012 操作系统部署和服务器虚拟化Hype-V部署配置

*注:计算机型号不同,可能开机选择启动设备的快捷键不同,通常情况下均是 F12
5 / 65
Microsoft OEM ROK Windows Server 2012 操作系统部署和服务器虚拟化专题实验手册 10) 系统将自动进入到区域选择界面,在这个界面将确定计算机的安装界面语言和区域 设置,保持默认即可。
9)
在‘确认安装所选内容’页面,单击‘指定备用源路径’。
3 / 65
Microsoft OEM ROK Windows Server 2012 操作系统部署和服务器虚拟化专题实验手册 10) 弹出‘添加角色和功能向导’的‘指定备用源路径’对话框。在‘路径’右侧的文 本框中输入‘步骤一中的 DVD 驱动器盘符:\Sources\SxS\’,单击‘确定’。
11) 在‘确认安装所选内容’页面,单击‘安装’。 12) 安装成功后,单击‘关闭’。 2. Windows7-USB-DVDTools 此工具用来制作 USB 安装 盘 2) 安装步骤都选择默认设置,安装完成后,会在桌面出现如下图标: 1) 找到位于 E:\LabData\Windows7-USB-DVD-Tool.exe 文件,双击运行安装。
7) 8) 9)
在‘选择功能’页面,单击‘下一步’。 在‘Hyper-V’页面,单击‘下一步’。 在‘创建虚拟交换机’页面,单击‘下一步’。
10) 在‘虚拟机迁移’页面,单击‘下一步’。 11) 在‘默认存储’页面,将‘虚拟机硬盘文件’和‘虚拟机配置文件’的路径改成 ‘D:\Hyper-V\’,单击‘下一步’。
microsoftoemrokwindowsserver2012操作系统部署和服务器虚拟化专题实验手册2065microsoftoemrokwindowsserver2012操作系统部署和服务器虚拟化专题实验手册2165microsoftoemrokwindowsserver2012操作系统部署和服务器虚拟化专题实验手册2265microsoftoemrokwindowsserver2012操作系统部署和服务器虚拟化专题实验手册2365microsoftoemrokwindowsserver2012操作系统部署和服务器虚拟化专题实验手册24安装集成服务可以提高速度也可以使你的鼠标在虚拟机与物理机之间自由切在windowsserver2008r2虚拟机连接窗口菜单栏中单击操作选择插入集成服务安装盘
Windows2012中文标准版服务器版操作系统
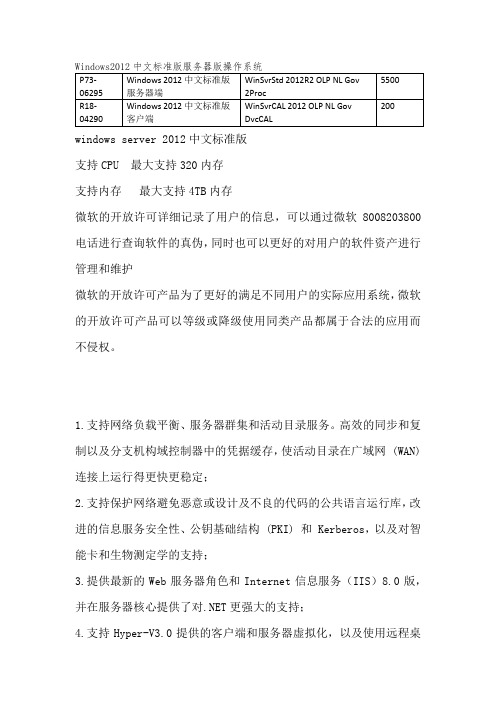
windows server 2012中文标准版支持CPU 最大支持320内存支持内存最大支持4TB内存微软的开放许可详细记录了用户的信息,可以通过微软8008203800电话进行查询软件的真伪,同时也可以更好的对用户的软件资产进行管理和维护微软的开放许可产品为了更好的满足不同用户的实际应用系统,微软的开放许可产品可以等级或降级使用同类产品都属于合法的应用而不侵权。
1.支持网络负载平衡、服务器群集和活动目录服务。
高效的同步和复制以及分支机构域控制器中的凭据缓存,使活动目录在广域网 (WAN) 连接上运行得更快更稳定;2.支持保护网络避免恶意或设计及不良的代码的公共语言运行库,改进的信息服务安全性、公钥基础结构 (PKI) 和 Kerberos,以及对智能卡和生物测定学的支持;3.提供最新的Web服务器角色和Internet信息服务(IIS)8.0版,并在服务器核心提供了对.NET更强大的支持;4.支持Hyper-V3.0提供的客户端和服务器虚拟化,以及使用远程桌面服务的演示虚拟化5.能够管理任意大小的工作负载,具有动态的可伸缩性以及全面的可用性和可靠性6.支持VHD方式的虚机启动和部署7.具备实时迁移功能,在无须额外存储支持的情况下能够在两台运行着Hyper-V的计算机上移动一台虚拟机,而不中断其它任何服务8.支持DirectAccess;9.支持BranchCache;10.支持活动目录的域服务和权限管理服务11.支持远程桌面服务和虚拟桌面;12.支持PowerShell命令行管理和基于脚本的自动化管理;.NET 深度集成,使用 XML Web 服务实现了前所未有的软件集成水平,离散的构造块应用程序通过Internet 相互连接在一起并且连接到其他较大的应用程序上;13.可以通过 XML Web 服务快速和可靠地构建、承载、部署和使用安全和连接的解决方案;14. XML Web 服务提供基于行业标准构建的可重用组件,可以从其他应用程序调用功能,与应用程序的开发方式、运行应用程序的操作系统或平台或用于访问应用程序的设备无关;15. 每套操作系统可在两个CPU授权上部署任意个虚拟服务器,负责进行系统安装,虚拟服务器安装调试。
m2012

M2012IntroductionM2012 is an advanced software system that provides a wide range of tools and features for businesses and individuals. This document will provide an overview of the capabilities and benefits of M2012, explaining how it can be used to simplify everyday tasks and improve overall efficiency.FeaturesM2012 offers a comprehensive set of features that cater to various needs. Some of the key features include:1. Task ManagementM2012 provides a powerful task management system that enables users to create, assign, and track tasks. With customizable priority levels and due dates, users can easily manage their workload and ensure timely completion of tasks. The intuitive user interface allows for seamless navigation and quick access to task details, making the overall process more efficient.2. Customer Relationship Management (CRM)M2012 includes a robust CRM module that helps businesses maintain and nurture their customer relationships. The CRM module allows users to store customer information, track interactions, manage sales leads, and generate reports. By centralizing customer data and providing valuable insights, M2012 enhances customer engagement and helps in driving business growth.3. Document ManagementM2012 offers a comprehensive document management system that enables users to securely store, organize, and share files. With version control and permissions management, users can collaborate effectively and have full control over access to sensitive documents. The search functionality allows for quick retrieval of documents, eliminating the need for manual searching and saving valuable time.4. Project CollaborationM2012 facilitates seamless collaboration on projects through its dedicated project management module. Users can create and assign tasks, track progress, and communicate with team members all within the system. The real-time notification feature ensures that everyone stays updated on project developments, enhancing coordination and improving overall project efficiency.5. Reporting and AnalyticsM2012 includes a robust reporting and analytics module that provides valuable insights into business performance. Users can generate customized reports, visualize data through charts and graphs, and analyze trends. By leveraging these features, businesses can make data-driven decisions and optimize their operations for better results.BenefitsImplementing M2012 into your business workflow can result in several key benefits, including:1. Increased ProductivityBy streamlining various processes and providing a centralized platform, M2012 eliminates the need for multiple tools and systems. This consolidation allows users to save time and focus on their core responsibilities, ultimately driving productivity improvements.2. Enhanced CollaborationM2012’s collaborati on features enable team members to easily communicate, share files, and collaborate on projects in real-time. This eliminates delays caused by the exchange of emails or the use of separate collaboration tools, fostering a more seamless and efficient work environment.3. Improved Customer EngagementThe CRM module in M2012 helps businesses deliver personalized experiences to their customers. By storing crucial customer information and tracking interactions, businesses can better understand customer needs and preferences, leading to improved customer engagement and loyalty.4. Data-Driven Decision MakingThe reporting and analytics module in M2012 provides valuable insights into business performance. By analyzing trends and visualizing data, businesses can make informed decisions and optimize their strategies for better results.5. Time and Cost SavingsM2012 eliminates the need for manual and repetitive tasks, saving users valuable time. By reducing administrative overhead and improving process efficiency, businesses can achieve cost savings and allocate resources more effectively.ConclusionM2012 is a powerful software system that offers a wide range of features to streamline workflows and enhance productivity. With its task management, CRM, document management, project collaboration, and reporting capabilities, businesses can simplify everyday tasks, improve customer engagement, and make data-driven decisions. By implementing M2012, businesses can unlock new levels of efficiency and achieve better results in less time.。
OSUNIT 文件系统的实现
件都需要在该目录中
进行线性检索。 单级目录结构的特点是实现简单,但当目录中含有大量目录项时,要查找一个文件相当费
时,且它无法解决文件重名问题,这对用户是很不方便的。因此,这种目录结构只用在单用户 环境中。
文件的物理组织 文件目录的结构 文件的共享 磁盘空间的管理 文件的访问控制 文件系统的注册与挂载 内核的文件管理机制
§1 文件的物理组织
◆连续结构 ◆链接结构 ◆索引结构
一个文件的空间在逻辑上可看成是连续的,即一个文件由若干连续的盘块所组成。但在磁 盘上可以有多种方式来组成一个文件,换言之,文件有多种物理的存储结构,常用的是:连 续结构、链接结构、索引结构。
USER2的UFD
…
… 图9-6 二级目录结构
普通文件 … …
一个MFD和若干并列的UFD便构成了二级目录结构。当要访问一个文件时,先根据用户名 检索MFD,找出相应的UFD;再用文件名检索UFD,找出对应的FCB,从而就可以得到文件 的具体物理地址。
二级目录结构基本上克服了单目录结构的缺点,其优点如下:
一个目录由若干等长的目录项(记录)组成,目录本身也作为文件来处理,它是一种等长 记录式文件。
目录项的组成有两种方式:FCB目录项和名号目录项。
1. FCB目录项 这是简单直观的目录项组成方式,目录项就是FCB,即一个目录由若干顺序排列的FCB所
构成。当用路径名和文件名访问某个文件时,文件系统对目录进行线性检索,找到文件名对 应的FCB,就可获取该文件的物理位置等信息,完成文件名到文件物理位置的映射。
文件的物理存储结构决定了文件的逻辑地址空间到文件的物理地址空间的映射方法。
Windows Server 2012 R2 快速入门指南说明书
For more information about the installation options, what is included with each option, how to switch between them, and related features such as the Minimal Server Interface and Features on Demand, see Windows Server Installation Options at /fwlink/p/?LinkId=242140.
Automated Installation You can automate Windows Server installation by using the tools and documentation in the Windows Assessment and Deployment mating deployment eliminates the need for any user interaction during installation. In addition, you can configure different options within the operating system, such as Internet Explorer settings and network settings.
The two installation options are available for most Windows Server editions. Not all server roles and features are available in all editions. For details about the roles and features available in each Windows Server edition, see /fwlink/p/?LinkId=251499
JUNOS OS主分区损坏,从备分区启动的修复方法
JUNOS OS主分区损坏,从备分区启动的修复方法以JUNIPER EX交换机为例说明:设备亮经灯,使用命令show chassis alarms去查看,得到以下信息:Alarm:The following alarm message is generated:user@switch> show chassis alarms1 alarms currently activeAlarm time Class Description2011-02-17 05:48:49 PST Minor Host 0 Boot from backup rootWarning:********************************************************************* ************ **** WARNING: THIS DEVICE HAS BOOTED FROM THE BACKUP JUNOS IMAGE **** **** It is possible that the primary copy of JUNOS failed to boot up ** ** properly, and so this device has booted from the backup copy. **** **** Please re-install JUNOS to recover the primary copy in case **** it has been corrupted. **** *********************************************************************** *********以上信息,说明OS从一个备份的分区启动了,需要修复才能正常。
以下为验证方法:To verify if the primary partition is rebuilt, run one of the following show commands. The same commands also inform about which partition is the current active partition.show system storage partitionsSample output:root> show system storage partitionsfpc0:--------------------------------------------------------------------------Boot Media: internal (da0)Active Partition: da0s1aBackup Partition: da0s2a <-- this is the backup sliceCurrently booted from: backup (da0s2a) <-- shows booted from that slicePartitions information:Partition Size Mountpoints1a 184M altroots2a 184M /s3d 369M /var/tmps3e 123M /vars4d 62M /configs4e unused (backup config)ORshow system snapshot media internalSample output:root> show system snapshot media internalInformation for snapshot on internal (/dev/da0s1a) (primary) Creation date: Feb 24 11:32:07 2012JUNOS version on snapshot:jbase : 10.4I20120224_1123_bshekarjcrypto-ex: 10.4I20120224_1123_bshekarjdocs-ex: 10.4I20120224_1123_bshekarjkernel-ex: 10.4I20120224_1123_bshekarjroute-ex: 10.4I20120224_1123_bshekarjswitch-ex: 10.4I20120224_1123_bshekarjweb-ex: 10.4I20120224_1123_bshekarjpfe-ex42x: 10.4I20120224_1123_bshekarInformation for snapshot on internal (/dev/da0s2a) (backup) <-- provides info for this slice/partition the switch booted off of and the date the file system was createdCreation date: Feb 14 05:42:42 2012 <-- if less than alarm date then customer should snapshot (it is a good way to confirmJUNOS version on snapshot:jbase : 11.2-20120214.0jcrypto-ex: 11.2-20120214.0jdocs-ex: 11.2-20120214.0jkernel-ex: 11.2-20120214.0jroute-ex: 11.2-20120214.0jswitch-ex: 11.2-20120214.0jweb-ex: 11.2-20120214.0jpfe-ex42x: 11.2-20120214.0以下是修复方法:Step-by-step recovery procedure for this situation:1.Copy the Junos image from the backup partition to the primary partition,by using the following snapshot command:request system snapshot media internal slice alternateNote: This step ensures that you have consistent images on both theprimary and backup partitions.2.The above command ensures that the alternate partition is repaired,without requiring a reboot. You can verify both the partitions by usingthe following command:show system storage partitions3.The command used in step 1 will only repair the partition and not clearthe alarm. So, you will still see the following alarm:root> show system alarms2 alarms currently activeAlarm time Class Description2012-03-02 13:01:03 UTC Minor Host 0 Boot from backuproot <-- shows date stamp of alarm4.To get rid of the above alarm, use the following command to ensure thatthe switch boots from the primary partition:request system reboot slice alternate media internalThe system, after the above command is executed, will reboot from the primary partition. The alarm or the warning message will no longer be displayed.5. The following commands are issued to verify the Junos image installed on each slice:user@switch>show system snapshot media internal slice 1user@switch>show system snapshot media internal slice 2操作1、备份配置文件2、开启WEB访问root@TEST# set system services web-management http3、升级系统4、备份系统user@switch>request system snapshot slice alternate 升级后快照备份系统5、如果从备份分区启动的需要从主分区启动user@switch>request system reboot slice alternate media internal 系统从主分区启动保存当前配置为救援配置,消除alarm 告警>run request system configuration rescue save 升级系统之后备份一下系统:request system snapshot slice alternate消除管理端口告警set chassis alarm management-ethernet link-down ignore端口捆绑set chassis aggregated-devices Ethernet device-count 10set interface fe-0/0/0 fastether-options 802.3ad ae0set interface fe-0/0/1 astether-options 802.3ad ae0set interface ae0 aggregated-rther-options lacp activeset interface ae0 unit 0 family init address 10.10.10.1/24当NAT 地址与外网口地址在同一网段时,必须设置ARP 代理set security nat proxy-arp interface ge-0/0/1.0 address 172.21.1.1 to 172.21.1.100消除management-ethernet link-down 的告警set management-ethernet link-down ignore 消除Rescue configuration is not set 告警request system configuration rescue save 磁盘分区损坏—配置会丢,提前拷出配置request system snapshot media internal slice alternaterequest system reboot slice alternate media internal junos升级requset system software add ftp://192.168.1.2/文件名no-copy reboot 修改web 页面timeout 时间set system services web-management session idle-timeout 10强制所有正在登陆的账号退出request system logout user all。
en12680-2012中文

《en12680-2012中文》一、引言EN12680-2012中文是欧洲标准化组织发布的一项关于工业自动化生产系统及集成相关标准的中文版本。
该标准为工业自动化系统的设计、生产、安装和维护提供了具体的规范和指导,旨在促进国际间工业产品和服务的贸易,并为全球范围内的生产企业提供了统一的标准。
二、标准内容1. 范围:EN12680-2012中文涵盖了工业自动化生产系统及其集成的所有相关方面,包括但不限于设备和工具的自动化、工艺控制系统的集成以及生产系统中的安全和可靠性等方面。
2. 基本原则:该标准遵循了一系列基本原则,包括统一性、可追溯性、数据一致性、可拓展性和高效性等,以确保工业自动化生产系统在设计、生产、安装和维护过程中能够达到国际间的一致性和可靠性要求。
3. 分类:标准对工业自动化生产系统进行了细致的分类,以便于在实际生产中更好地应用和执行。
4. 要求:EN12680-2012中文对工业自动化生产系统及其集成提出了一系列具体的要求,其中包括了技术要求、环境要求、安全要求和维护要求等,以保障系统在使用过程中的可靠性和安全性。
三、标准意义1. 国际贸易:EN12680-2012中文是国际间工业产品和服务贸易的重要依据之一,在全球范围内具有广泛的应用和认可度。
2. 生产效率:该标准的实施可以提高工业自动化生产系统的设计、生产、安装和维护效率,推动生产企业的技术水平和竞争力。
3. 产品质量:通过遵循EN12680-2012中文的规范要求,生产的工业自动化系统及其集成能够保证产品质量的稳定和可靠。
四、标准应用1. 设计:在工业自动化生产系统的设计过程中,可以根据EN12680-2012中文的指导要求进行设计方案的制定和优化。
2. 生产:在系统生产过程中,生产企业可以根据该标准的规范要求进行产品的生产和质量控制。
3. 安装与维护:在系统安装与维护的过程中,工程技术人员可以根据该标准提出的要求进行操作和管理,以确保系统的正常运行和安全使用。
最新外研版九年级上册英语精品课件:-Module 1 Wonders of the world-Unit 1
2019/9/6
25
单击此处编母版标题样式
4. But in my opinion, man-made
• 单w击on此d处er编s 辑ar母e 版m文or本e样ex式citing than n•a第tu二r级al ones. 但是• 第, •三在第级四我级 看来, 人造奇观比自然奇 观更激动• 第人五级心。
Mount Qomolangma
• 单击此处编辑母版文本样式
• 第二级
• 第三级
• 第四级 • 第五级
2019/9/6
The Empire State Building
8
单击此处编母版标题样式
Stonehenge
• 单击此处编辑母版文本样式
• 第二级
• 第三级
• 第四级 • 第五级
2019/9/6
单击此处编母版标题样式
3. That sounds great, though I think Victoria
Falls in Africa is even more fantastic. • 单听击起此来处很编神辑奇母版,文但本我样认式为非洲的维多利亚
瀑• 布第•二更第级三壮级观。 维多利•亚第四•瀑级第五布级 位于非洲赞比西河中游, 赞比 亚与津巴布韦接壤处, 是世界上最壮观的 瀑布之一。瀑布上的水雾形成的彩虹景色
单击此处编母版标题样式
Module 1
• 单击此处编辑母版文本样式
I•t第’s•二第m级三级ore than 2,000 years old.
• 第四级 • 第五级
Unit 1
2019/9/6
安装与配置Windows Server 2012(教学设计)
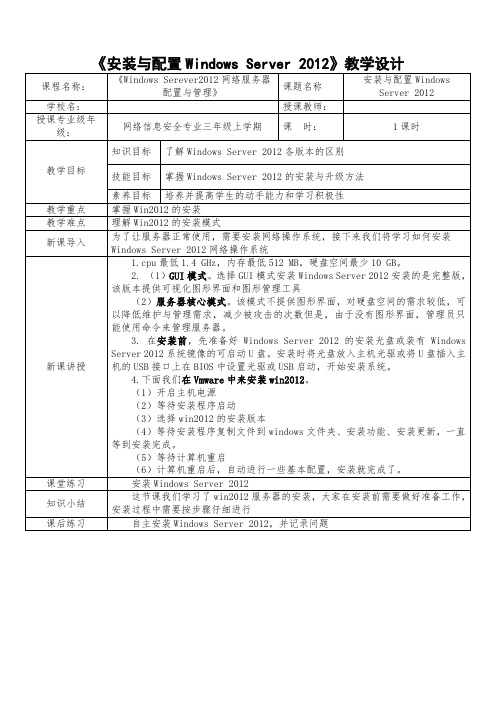
4.下面我们在Vmware中来安装win2012。
(1)开启主机电源
新课讲授
1.cpu最低1.4 GHz,内存最低512 MB,硬盘空间最少10 GB。
2. (1)GUI模式。选择GUI模式安装Windows Server 2012安装的是完整版,该版本提供可视化图形界面和图形管理工具
(2)服务器核心模式。该模式不提供图形界面,对硬盘空间的需求较低,可以降低维护与管理需求,减少被攻击的次数但是,由于没有图形界面,管理员只能使用命令来管理服务器。
《安装与配置Windows Server 2012》教学设计
课程名称:
《Windows Serever2012网络服务器配置与管理》
课题名称
安装与配置Windows Server 2012
学校名:
授课教师:
授课专业级年级:
网络信息安全专业三年级上学期
课 时:
1课时
教学目标
知识目标
了解Windows Server 2012各版本的区别
课后练习
自主安装Windows Server 2012,并记录问题
(2)等待安装程序启动
(3)选择win2012的安装版本
(4)等待安装程序复制文件到windows文件夹、安装功能、安装更新,一直等到安装完成。
(5)等待计算机重启
(6)计算机重启后,自动进行一些基本配置,安装就完成了。
课堂练习
安装Windows Server 2012
《大学计算机基础》第2章-计算机系统(2012)OK【OK】
在计算机世界中 也存在等级差别!
28
2.2 计算机软件系统
2.2.1 软件概念
2.2.2 软件分类
29
2.2.1 软件概念
计算机软件 计算机软件是为运行、管理和维护计算机而编制的
各种指令、程序和文档的总称。
指令 程序 文档
软件
软件是计算机的灵魂, 是人机之间的接口
30
软件概念
基本概念
程序 程序是按照一定顺序执行的、能够完成某一任务的指 令集合。
将1传送至AL寄 Int a =1; 存器 将2传送至BL 寄 Int b =2; 存器
2
MOV BL, 2
3
4 5
将寄存器BL的内 容与寄存器AL的 Int c = a+b; ADD AL, BL 内容相加,结果 保存在AL中 将寄存器AL中的 MOV [06H], AL 内容传送到内存 地 址 为 06H 的 存 储单元中 HLT 停止操作
11
2.1.3 存储器
存储器——帮助计算机记忆信息
存储器是存取程序和数据的部件。 类型划分:依据CPU是否可以直接访存将存储器划 分为内存和外存。
随机存储器
内存
只读存储器 高速缓冲存储器
存储器
硬盘
外存
光盘
快速闪存
12
存储器—内存
(1)内存
内存可以被CPU直接访问。内存容量小、速度快、掉电后 RAM信息全部消失。
2.1.4 输入设备
2.1.5 输出设备
2.1.6 硬件连接
4
计算机硬件系统
什么是计算机?
计算机是能按照人的要求接受和存储信息,自动进行数据处 理和计算,并输出结果信息的机器系统。
noi linux2.0 用法

noi linux2.0 用法Linux是一种开放源代码的操作系统,具有高度的可定制性和灵活性。
在Linux系统下,有许多版本可供选择,其中NOI Linux2.0是一款基于Linux 内核的特定版本。
本文将介绍NOI Linux2.0的基本用法,并逐步解释如何使用该版本的Linux操作系统。
第一部分:NOI Linux2.0的安装和配置1. 下载和制作NOI Linux2.0安装媒介:首先,从NOI Linux官方网站下载NOI Linux2.0的ISO文件。
接下来,使用制作启动盘的软件(如Rufus或UNetbootin)将ISO文件写入可启动的USB驱动器中。
2. 安装NOI Linux2.0:将制作好的USB驱动器插入计算机,并在开机时按下相应的键(通常是F12),选择从USB设备启动。
进入NOI Linux2.0的安装界面后,按照提示进行安装。
用户可以选择完全覆盖现有操作系统,或在新分区上进行安装。
3. 基本配置:安装完成后,重新启动计算机。
首次进入NOI Linux2.0系统时,会要求用户进行基本配置,例如选择系统语言、设置时区和键盘布局等。
根据个人需求完成配置后,系统将进入一般用户桌面。
第二部分:NOI Linux2.0的基本界面和功能1. 桌面环境:NOI Linux2.0默认使用GNOME桌面环境,其具有直观的用户界面和丰富的功能。
用户可以在桌面的任务栏中找到各种常用应用程序的图标,并通过单击图标来启动相应的应用程序。
2. 文件管理:NOI Linux2.0配备了一个名为Nautilus的文件管理器,可以通过点击桌面上的“文件”图标或从应用程序菜单中选择“文件”来打开。
Nautilus 可以方便地浏览和管理文件和文件夹,用户可以通过复制、剪切和粘贴等操作来管理和组织文件。
3. 应用程序和软件包管理:NOI Linux2.0预装了一些常用的应用程序,例如文本编辑器、终端模拟器、浏览器等。
os启动过程

操作系统启动过程:引导阶段(以xp系统为例,2000和2003大致相同)在引导阶段中,windows xp将会依次经历初始引导加载器阶段、操作系统选择阶段、硬件检测阶段以及配置选择阶段这四个小的阶段。
初始引导加载器阶段1、设置内存使用模式:初始引导加载器阶段中,ntldr将为windows nt系统把计算机的微处理器从实模式转换为32位平面内存模式。
对基于x86cpu的计算机来说,第一次启动的时候总是进入所谓的实模式(realmode)。
在实模式下cpu的某些特性不能完全发挥,这是因为它要保证同8位或16位的cpu(如8086、8088)相兼容。
这时系统会为ms-dos或win 9x这样的16位系统预留640kb 大小的内存空间,其余的内存都被看做是扩展内存。
而实模式下由于系统规格的限制,无法对大容量内存进行直接存取,而必须通过分段的方式完成。
对于32位的windows nt系统来说,8位或16位的cpu 显然是无用的。
对于32位的windows nt系统来说,ntldr首先会将cpu切换到32位的模式,从而确保windows xp的正常,然后设置cpu的运行使用32位的平面内存模式。
在cpu的32位模式下,可以对大容量内存进行直接存取,可以将所有内存都视为可用内存,而彻底抛弃了原先在8位或16位下分段存取内存的不便。
这也是为什么32位模式称作平面(flat)内存模式的原因。
2、启动文件系统:ntldr执行适当的小型文件系统驱动程序(ntldr 中包含相应的代码,能够帮助windows xp完成对ntfs或fat格式的磁盘进行读写。
从而能够读取、访问和复制文件。
),这时ntldr可以识别每一个用ntfs或fat格式的文件系统分区,至此初始引导加载器阶段结束。
操作系统选择阶段当初始引导加载器阶段结束后将会进入操作系统选择阶段,ntldr在活动分区根目录寻找并加载boot.ini文件。
举例:boot.ini中,包含以下内容:[boot loader]timeout=5default=multi(0)disk(0)rdisk(0)partition(4)\windows [operating systems]multi(0)disk(0)rdisk(0)partition(4)\windows="windo ws xp media center edition" /noexecute=optin /fastdetectmulti(0)disk(0)rdisk(0)partition(3)\winnt="microsoft windows 2000 advanced server" /fastdetectc:\bootsect.dos="windows 98 se"c:\chain0="mac os x 86pc"c:\ghldr="一键ghost v2006.03.12"其中,multi(0)表示磁盘控制器,disk(0)rdisk(0)表示磁盘,partition(x)表示分区。
OSENTERCRITICAL()

第一章:范例--------------------------------------------------------------------------------------------------------71.00 安装 µC/OS-II------------------------------------------------------------------------------------------71.01 INCLUDES.H--------------------------------------------------------------------------------------------81.02不依赖于编译的数据类型----------------------------------------------------------------------------81.03全局变量--------------------------------------------------------------------------------------------------9和 OS_EXIT_CRITICAL()----------------------------------101.04 OS_ENTER_CRITICAL()1.05基于PC的服务----------------------------------------------------------------------------------------111.05.01字符显示---------------------------------------------------------------------------------------111.05.02花费时间的测量------------------------------------------------------------------------------111.05.03其他函数---------------------------------------------------------------------------------------111.06 应用 µC/OS-II 的范例------------------------------------------------------------------------------121.07例1-------------------------------------------------------------------------------------------------------131.07.01 main()-------------------------------------------------------------------------------------------131.07.02 TaskStart()--------------------------------------------------------------------------------------151.07.03 TaskN()-----------------------------------------------------------------------------161.08 例2-------------------------------------------------------------------------------------------------171.08.01 main()-------------------------------------------------------------------------------------------181.08.02TaskStart()--------------------------------------------------------------------------------------191.08.03 TaskN()-----------------------------------------------------------------------------------------191.09例3-------------------------------------------------------------------------------------------------------221.09.01 main()-------------------------------------------------------------------------------------------221.09.02任务---------------------------------------------------------------------------------------------231.09.03注意---------------------------------------------------------------------------------------------26 第二章实时系统概念--------------------------------------------------------------------------------------------28前后台系统(Foreground/Background System)---------------------------------------------28 代码的临界段-------------------------------------------------------------------------------------------29 资源-----------------------------------------------------------------------------------------------------------29 共享资源---------------------------------------------------------------------------------------------------29 多任务-------------------------------------------------------------------------------------------------------29 任务-----------------------------------------------------------------------------------------------------------29 任务切换(Context Switch or Task Switch)---------------------------------------------31 内核(Kernel)--------------------------------------------------------------------------------------31 调度(Scheduler)-------------------------------------------------------------------------------------31 不可剥夺型内核(Non-Preemptive Kernel)--------------------------------------------------32 可剥夺型内核--------------------------------------------------------------------------------------------33 可重入性(Reentrancy)---------------------------------------------------------------------------33 时间片轮番调度法----------------------------------------------------------------------------------35 任务优先级-----------------------------------------------------------------------------------------------352.14静态优先级-------------------------------------------------------------------------------------35动态优先级-----------------------------------------------------------------------------------------------35 优先级反转-----------------------------------------------------------------------------------------------35 任务优先级分配--------------------------------------------------------------------------------------37 互斥条件---------------------------------------------------------------------------------------------------38 关中断和开中断------------------------------------------------------------------------------------38测试并置位-------------------------------------------------------------------------------------------39 禁止,然后允许任务切换------------------------------------------------------------------------40 信号量(Semaphores)------------------------------------------------------------------------------40 死锁(或抱死)(Deadlock (or Deadly Embrace))-----------------------------------44 同步-----------------------------------------------------------------------------------------------------------44 事件标志(Event Flags)------------------------------------------------------------------------46 任务间的通讯(Intertask Communication)----------------------------------------46 消息邮箱(Message Mail boxes)----------------------------------------------------------47 消息队列(Message Queue)--------------------------------------------------------------------48 中断-----------------------------------------------------------------------------------------------------------48 中断延迟---------------------------------------------------------------------------------------------------49 中断响应---------------------------------------------------------------------------------------------------49 中断恢复时间(Interrupt Recovery)--------------------------------------------------50 中断延迟、响应和恢复--------------------------------------------------------------------------50 中断处理时间-------------------------------------------------------------------------------------------50 非屏蔽中断(NMI)------------------------------------------------------------------------------------51 时钟节拍(Clock Tick)--------------------------------------------------------------------------53 对存储器的需求--------------------------------------------------------------------------------------55 使用实时内核的优缺点--------------------------------------------------------------------------56 实时系统小结-------------------------------------------------------------------------------------------56第三章内核结构--------------------------------------------------------------------------------------------------58临界段(Critical Sections)------------------------------------------------------------------------------------58 任务-------------------------------------------------------------------------------------------------------------58 任务状态-------------------------------------------------------------------------------------------------------60 任务控制块(Task Control Blocks, OS_TCBs)-------------------------------------------------------61 就绪表(Ready List)--------------------------------------------------------------------------------------63 任务调度(Task Scheduling)-----------------------------------------------------------------------------66 给调度器上锁和开锁(Locking and UnLocking the Scheduler)---------------------------------------67 空闲任务(Idle Task)------------------------------------------------------------------------------------------68 统计任务-------------------------------------------------------------------------------------------------------68 μC/OS中的中断处理---------------------------------------------------------------------------------------72 时钟节拍-------------------------------------------------------------------------------------------------------75 μC/OS-Ⅱ初始化---------------------------------------------------------------------------------------------78 μC/OS-Ⅱ的启动---------------------------------------------------------------------------------------------78 获取当前μC/OS-Ⅱ的版本号-----------------------------------------------------------------------------81 OSEvent()函数--------------------------------------------------------------------------------------------82 第四章任务管理--------------------------------------------------------------------------------------------------83建立任务,OSTaskCreate()--------------------------------------------------------------------------------83 建立任务,OSTaskCreateExt()----------------------------------------------------------------------------87 任务堆栈-------------------------------------------------------------------------------------------------------89 堆栈检验,OSTaskStkChk()-------------------------------------------------------------------------------91 删除任务,OSTaskDel()------------------------------------------------------------------------------------94 请求删除任务,OSTaskDelReq()-------------------------------------------------------------------------96改变任务的优先级,OSTaskChangePrio()--------------------------------------------------------------98 挂起任务,OSTaskSuspend()----------------------------------------------------------------------------100 恢复任务,OSTaskResume()----------------------------------------------------------------------------102 获得有关任务的信息,OSTaskQuery()---------------------------------------------------------------103时间管理-----------------------------------------------------------------------------------------------------------105任务延时函数,OSTimeDly()---------------------------------------------------------------------------105 按时分秒延时函数 OSTimeDlyHMSM()-------------------------------------------------------------106 让处在延时期的任务结束延时,OSTimeDlyResume()--------------------------------------------108 系统时间,OSTimeGet()和OSTimeSet()-------------------------------------------------------------109第六章 任务之间的通讯与同步--------------------------------------------------------110事件控制块ECB-------------------------------------------------------------------------------------------111 初始化一个事件控制块,OSEventWaitListInit()----------------------------------------------------115 使一个任务进入就绪态,OSEventTaskRdy()--------------------------------------------------------116 使一个任务进入等待某事件发生状态, OSEventTaskWait()---------------------------------------118 由于等待超时而将任务置为就绪态, OSEventTO()-------------------------------------------------118 信号量--------------------------------------------------------------------------------------------------------118 建立一个信号量, OSSemCreate()---------------------------------------------------------------119 等待一个信号量, OSSemPend()------------------------------------------------------------------120 发送一个信号量, OSSemPost()------------------------------------------------------------------122 无等待地请求一个信号量, OSSemAccept()---------------------------------------------------123 查询一个信号量的当前状态, OSSemQuery()-------------------------------------------------123 邮箱-----------------------------------------------------------------------------------------------------------124 建立一个邮箱,OSMboxCreate()----------------------------------------------------------------125 等待一个邮箱中的消息,OSMboxPend()-------------------------------------------------------126 发送一个消息到邮箱中,OSMboxPost()-------------------------------------------------------128 无等待地从邮箱中得到一个消息, OSMboxAccept()----------------------------------------129 查询一个邮箱的状态, OSMboxQuery()---------------------------------------------------------129 用邮箱作二值信号量-------------------------------------------------------------------------------130 用邮箱实现延时,而不使用OSTimeDly()-----------------------------------------------------131 消息队列-----------------------------------------------------------------------------------------------------132 建立一个消息队列,OSQCreate()---------------------------------------------------------------135 等待一个消息队列中的消息,OSQPend()------------------------------------------------------136 向消息队列发送一个消息(FIFO),OSQPost()----------------------------------------------138 向消息队列发送一个消息(后进先出LIFO),OSQPostFront()--------------------------140 无等待地从一个消息队列中取得消息, OSQAccept()---------------------------------------141 清空一个消息队列, OSQFlush()----------------------------------------------------------------142 查询一个消息队列的状态,OSQQuery()-------------------------------------------------------142 使用消息队列读取模拟量的值-------------------------------------------------------------------143 使用一个消息队列作为计数信号量-------------------------------------------------------------144内存管理----------------------------------------------------------------------------------------------------146内存控制块--------------------------------------------------------------------------------------------------147 建立一个内存分区,OSMemCreate()------------------------------------------------------------------148 分配一个内存块,OSMemGet()-------------------------------------------------------------------------150 释放一个内存块,OSMemPut()-------------------------------------------------------------------------151 查询一个内存分区的状态,OSMemQuery()----------------------------------------------------------152 Using Memory Partitions------------------------------------------------------------------------------153 等待一个内存块--------------------------------------------------------------------------------------------154第八章移植µC/OS-Ⅱ--------------------------------------------------------------------------------1578.00 开发工具-----------------------------------------------------------------------------------------1598.01 目录和文件-------------------------------------------------------------------------------------1598.02 INCLUDES.H-----------------------------------------------------------------------------------1598.03 OS_CPU.H--------------------------------------------------------------------------------------1608.03.01 与编译器相关的数据类型-------------------------------------------------------1618.03.02 OS_ENTER_CRITICAL()和OS_EXIT_CRITICAL()-----------------------1618.03.04 OS_TASK_SW()-------------------------------------------------------------------1628.04 OS_CPU_A.ASM------------------------------------------------------------------------------1638.04.01 OSStartHighRdy()------------------------------------------------------------------1638.04.02 OSCtxSw()--------------------------------------------------------------------------1638.04.03 OSIntCtxSw()-----------------------------------------------------------------------1648.04.04 OSTickISR()-------------------------------------------------------------------------1668.05 OS_CPU_C.C-----------------------------------------------------------------------------------1678.05.01 OSTaskStkInt()----------------------------------------------------------------------1678.05.02 OSTaskCreateHook()--------------------------------------------------------------1698.05.03 OSTaskDelHook()------------------------------------------------------------------1708.05.04 OSTaskSwHook()------------------------------------------------------------------1708.05.05 OSTaskStatHook()------------------------------------------------------------------1708.05.06 OSTimeTickHook()----------------------------------------------------------------170 第九章 µC/OS-II在80X86上的移植----------------------------------------------------------------------1759.00 开发工具-----------------------------------------------------------------------------------------1779.01 目录和文件-------------------------------------------------------------------------------------177 9.02 INCLUDES.H文件----------------------------------------------------------177 9.03 OS_CPU.H文件----------------------------------------------------------------1789.03.01 数据类型------------------------------------------------------------------------------------1809.03.02 代码临界区---------------------------------------------------------------------------------180方法1--------------------------------------------------------------------------------------------------------180 方法2--------------------------------------------------------------------------------------------------------1809.03.03 堆栈增长方向----------------------------------------------------------------------1819.03.05 时钟节拍的发生频率-------------------------------------------------------------1819.04 OS_CPU_A.ASM---------------------------------------------------------------1819.04.02 OSCtxSw()------------------------------------------------------------------------1839.04.03 OSIntCtxSw()-------------------------------------------------------------------1859.04.04 OSTickISR()---------------------------------------------------------------------1889.05 OS_CPU_C.C----------------------------------------------------------------------1929.06 内存占用-----------------------------------------------------------------------------------------1969.07 运行时间-----------------------------------------------------------------------------------------197 第十章从 µC/OS 升级到 µC/OS-II-----------------------------------------------------------------------209目录和文件--------------------------------------------------------------------------------------------------209 INCLUDES.H----------------------------------------------------------------------------------210 OS_CPU.H----------------------------------------------------------------------------------------210 与编译有关的数据类型s---------------------------------------------------------------------------210 OS_ENTER_CRITICAL()和OS_EXIT_CRITICAL()---------------------------------------212 OS_STK_GROWTH------------------------------------------------------------------------------------212 OS_TASK_SW()--------------------------------------------------------------------------------------213 OS_FAR------------------------------------------------------------------------------------------------213 OS_CPU_A.ASM---------------------------------------------------------------------------213OSStartHighRdy()-------------------------------------------------------------------------------213 OSCtxSw()-------------------------------------------------------------------------------------------214 OSIntCtxSw()--------------------------------------------------------------------------------------214 OSTickISR()----------------------------------------------------------------------------------------215 OS_CPU_C.C----------------------------------------------------------------------------------215 OSTaskStkInit()---------------------------------------------------------------------------------215 OSTaskCreateHook()----------------------------------------------------------------------------218 OSTaskDelHook()---------------------------------------------------------------------------------219 OSTaskSwHook()----------------------------------------------------------------------------------219 OSTaskStatHook()-------------------------------------------------------------------------------220 OSTimeTickHook()-------------------------------------------------------------------------------220 总结-----------------------------------------------------------------------------------------------------------220第11章参考手册------------------------------------------------------------------------------------------------222 OSInit( )------------------------------------------------------------------------------------------------------223 OSIntEnter( )------------------------------------------------------------------------------------------------223 OSIntExit( )--------------------------------------------------------------------------------------------------225 OSMboxAccept( )------------------------------------------------------------------------------------------226 OSMboxCreate( )-------------------------------------------------------------------------------------------227 OSMboxPend( )---------------------------------------------------------------------------------------------228 OSMboxPost( )----------------------------------------------------------------------------------------------230 OSMboxQuery( )-------------------------------------------------------------------------------------------231 OSMemCreate( )--------------------------------------------------------------------------------------------233 OSMemGet( )-----------------------------------------------------------------------------------------------235 OSMemPut( )------------------------------------------------------------------------------------------------236 OSMemQuery( )--------------------------------------------------------------------------------------------237 OSQAccept( )-----------------------------------------------------------------------------------------------238 OSQCreate( )------------------------------------------------------------------------------------------------240 OSQFlush( )-------------------------------------------------------------------------------------------------242 OSQPend( )--------------------------------------------------------------------------------------------------243 OSQPost( )---------------------------------------------------------------------------------------------------244 OSQPostFront( )--------------------------------------------------------------------------------------------246 OSSchedLock( )--------------------------------------------------------------------------------------------249 OSSchedUnlock( )------------------------------------------------------------------------------------------250 OSSemAccept( )--------------------------------------------------------------------------------------------251 OSSemCreate( )---------------------------------------------------------------------------------------------252 OSSemPend( )-----------------------------------------------------------------------------------------------253 OSSemPost( )-----------------------------------------------------------------------------------------------255 OSSemQuery( )---------------------------------------------------------------------------------------------256 OSStart ( )----------------------------------------------------------------------------------------------------257 OSStatInit ( )------------------------------------------------------------------------------------------------258 OSTaskChangPrio( )---------------------------------------------------------------------------------------259 OSTaskCreate( )---------------------------------------------------------------------------------------------260 OSTaskCreateExt( )----------------------------------------------------------------------------------------264 OSTaskDel( )------------------------------------------------------------------------------------------------269 OSTaskDelReq( )-------------------------------------------------------------------------------------------270 OSTaskQuery( )---------------------------------------------------------------------------------------------272 OSTaskResume( )-------------------------------------------------------------------------------------------274 STaskStkChk( )----------------------------------------------------------------------------------------------275 OSTaskSuspend( )------------------------------------------------------------------------------------------276 OSTimeDly( )-----------------------------------------------------------------------------------------------278 OSTimeDlyHMSM( )--------------------------------------------------------------------------------------278 OSTimeDlyResume( )--------------------------------------------------------------------------------------280 OSTimeGet( )-----------------------------------------------------------------------------------------------281 OSTimeSet( )------------------------------------------------------------------------------------------------282 OSTimeTick( )----------------------------------------------------------------------------------------------283 OSVersion( )-------------------------------------------------------------------------------------------------284OS_ENTER_CRITICAL( )和OS_EXIT_CRITICAL( )---------------------------------------------285 第12章配置手册------------------------------------------------------------------------------------------------286 OS_MAX_EVENTS---------------------------------------------------------------------------------------288 OS_MAX_MEM_PARTS---------------------------------------------------------------------------------288 OS_MAX_QS-----------------------------------------------------------------------------------------------288 OS_MAX_TASKS-----------------------------------------------------------------------------------------288 OS_LOWEST_PRIO---------------------------------------------------------------------------------------288 OS_TASK_IDLE_STK_SIZE----------------------------------------------------------------------------289 OS_TASK_STAT_EN--------------------------------------------------------------------------------------289 OS_TASK_STAT_STK_SIZE----------------------------------------------------------------------------289 OS_CPU_HOOKS_EN------------------------------------------------------------------------------------290 OS_MBOX_EN---------------------------------------------------------------------------------------------290 OS_MEM_EN-----------------------------------------------------------------------------------------------290 OS_Q_EN----------------------------------------------------------------------------------------------------290 OS_SEM_EN------------------------------------------------------------------------------------------------290 OS_TASK_CHANGE_PRIO_EN------------------------------------------------------------------------290 OS_TASK_CREATE_EN---------------------------------------------------------------------------------291 OS_TASK_CREATE_EXT_EN--------------------------------------------------------------------------291 OS_TASK_DEL_EN---------------------------------------------------------------------------------------291 OS_TASK_SUSPEND_EN-------------------------------------------------------------------------------291 OS_TICKS_PER_SEC------------------------------------------------------------------------------------2911第一章:范例在这一章里将提供三个范例来说明如何使用 µC/OS-II。
2012_放射性同位素3-Re-Os
Creaser et al.,2002
(C) Exshaw Formation samples with TOC values< 5% .
Creaser et al.,2002
用 HF–BF3 法分离有机 质时,Re发 生丢失
用王水法溶解 富有机碳沉积 岩全岩中有机 碳的Re、Os时, 其它组分(碎屑) 的Re、Os也被 溶解
= 0.023% = 1.600% = 1.510% = 13.286% = 16.251%
= 26.369%
= 40.957%
含Re体系中187Os的增长可表示为(Hirt et al., 1963):
187
187Os Os 186 186 Os Os i
为避免 该问题 ,现多 采用 187Os/188Os比值 (如Fehn et al., 1986; Dickin et al., 1992) (见下式)。
187
Os 187 Os 188 188 Os Os i
187
Re t (e 1) 188 Os
这里的例子为与引用文献一致仍用187Os/186Os。
187
Re t (e 1) 186 Os
式中衰变常数 =(1.6660.017)10-11a-1 Shirey & Walk(1998) 。其形式与Rb-Sr体系 相似。
Hirt et al.(1963)首先用 187Os/186Os来表 示Os同位素的组成,后来Luck & Allegre (1983)和许多其他研究者沿用了这一传统形 式。
在假定Os同位素初始比值的前提Байду номын сангаас,从单个 样品的分析数据可以计算出其模式年龄。 或者测定一套符合等时线条件的样品,用等 时线法计算年龄和初始比值。
英语人教版(2024)版七年级初一上册Starter Unit 2 Section A 教学课件

0 0
tip: Find the open syllables
辅+元+辅+无音e 辅+元
辅+元+辅
closed syllables
0 0
/ei/
/i:/
/ai/ /əu/ /ju:/
辅+元+辅+无音e 辅+元
辅+元+辅+无音e 辅+元+辅+无音e 辅+元
Starter Unit 2
Section A Pronunciation
0 0
Today, we will learn the sounds of these 5 vowel letters in words.
Find these 5 vowel letters.
Aa
Ee
Ii
Oo
Uu
0 0
Today, we will learn the sounds of these 5 vowel letters in words.
Pay attention to the sound.
什么叫“元音字母在单词中发本身的音”?
Aa
Ee
_/_e_ɪ_/
_/_i_:/_
age
he
cake
these
Ii
Oo
Uu
_/_a_ɪ/_
/əʊ/
____
/ju:/
____
fine
no
use
0 0
bike
those
cute
st258服务器安装2012系统教程
st258服务器安装2012系统教程st258服务器机械硬盘XX服务器装系统教程,以及raid配置问题和解决方案。
安装系统步骤:首选打开XX服务器,按下F12进去Boot启动选项,因为我们要利用U盘安装系统,所以这里选择USBstorage。
XXst258,服务器至强四核e2124,3.4ghz/16g/2块1tb,raid 适用XX的电脑市场占有率非常高,无论是什么电脑,如果系统发生故障,都需要重新安装系统。
如果XX电脑出现系统故障,一些用户不知道如何重新安装系统。
这是因为XX电脑的u盘启动、设定很繁琐,主板也很新。
XX(lenovo)st558,服务器主机,4u双路塔式gpu计算,升级版,双颗4210r本文介绍从U盘安装中兴新支点操作系统(NewStart)的方法,采用U盘制作软件Rufus来安装NewStartDev201707x86_64,即中兴新支点桌面操作系统V364位(201707)。
安装准备工作准备好一个空白U盘,最小要求容量为4G,推荐用8G。
XXst58服务器及配件XX服务器ThinkServer第五代机器不再随机配送导航光盘,而是把导航光盘的功能集成到了主板上(www。
zuqiuog。
com)202284。
这个功能可能很多人都不知道。
我这次就给大家介绍下如何用服务器集成的“部署”功能来做磁盘阵列及安装操作系统。
XXst258服务器及配件浏览并选择驱动所在光盘或者文件夹;点击对应ThinkSystemRAID/HBA驱动程序,再点击下一步加载;然后即可发现卷和硬盘,可新建分区并下一步开始安装操作系统。
XX(lenovo)thinksystem,st258,塔式服务器主机,3.XXThinksystemST258入门级塔式服务器,满足普通办公应用需求。
os i两层和三层的pdu 封装关系

在计算机网络中,OSI模型和TCP/IP模型是两种常见的网络协议模型。
其中,OSI模型将通信协议的通信过程分为七个层次,而TCP/IP模型将其分为四个层次。
其中,PDU(Protocol Data Unit)是数据在不同层次间传输的基本单位,而封装则是指数据从应用层到物理层的传输过程。
让我们简要探讨OSI模型和TCP/IP模型的不同。
OSI模型由国际标准化组织(ISO)制定,包括物理层、数据链路层、网络层、传输层、会话层、表示层和应用层。
而TCP/IP模型则包括网络接口层(或网络接入层)、网际层、运输层和应用层。
在这两种模型中,PDU在每个层次上都有不同的称呼,比如在OSI模型中,PDU在数据链路层上称为帧,在网络层上称为数据包,在传输层上称为段,在TCP/IP模型中,PDU在网络接口层上称为帧,在网际层上称为数据包,在运输层上称为段。
OSI模型和TCP/IP模型在层次划分上存在一定差异。
接下来,让我们深入探讨两层和三层的PDU封装关系。
在OSI模型中,两层的PDU封装关系是指数据链路层和网络层之间的关系,而三层的PDU封装关系是指网络层和传输层之间的关系。
在两层的PDU封装关系中,数据链路层的PDU(帧)包含了网络层的PDU(数据包)以及必要的控制信息,从而实现了数据的传输和链路控制。
而在三层的PDU封装关系中,网络层的PDU(数据包)包含了传输层的PDU (段)以及必要的控制信息,实现了数据的传输和路由选择。
在实际网络通信中,PDU的封装和解封装过程涉及到了各个层次的协议和数据处理,其中不同层次的协议需要相互配合,实现数据的正确传输和交换。
在传输数据时,应用层的数据会通过TCP或UDP协议传递到传输层,然后再通过IP协议传递到网络层,最终通过数据链路层传递到物理层。
在接收端,数据则是按照相反的过程进行解封装和传递。
这些封装和解封装的过程,需要各个层次的协议相互配合,以达到数据传输的目的。
无论是OSI模型还是TCP/IP模型,PDU的封装关系都是网络通信中的重要概念。
- 1、下载文档前请自行甄别文档内容的完整性,平台不提供额外的编辑、内容补充、找答案等附加服务。
- 2、"仅部分预览"的文档,不可在线预览部分如存在完整性等问题,可反馈申请退款(可完整预览的文档不适用该条件!)。
- 3、如文档侵犯您的权益,请联系客服反馈,我们会尽快为您处理(人工客服工作时间:9:00-18:30)。
LOGO
Thank you
紧张!愉悦!合作!
LOGO
理论教学内容
● ● ● ● ● ● ● ● ● ● 操作系统概论 进程与线程 CPU管理 进程的通信与同步 死锁 内存管理 设备管理 文件系统 操作系统安全 Linux使用入门
LOGO
实践环节
操作系统是一门理论与实践紧密结合的课程,操作系 统的理论性极强,必须通过实验加深对其理论的理解。本 课程对操作系统原理的主要内容都针对性地设置了专题实 验,有一定难度,但它们是本课程必不可少的重要环节。 实验平台是Linux操作系统。Linux是当今的主流操 作系统之一,是“自由”软件。本人认为Linux是操作系 统课程实验的最佳平台。实验题目、具体内容、步骤及指 导见本人编写的《操作系统原理实验2012》。 实验以小组为单位,但要求每人都要撰写实验报告, 可用电子文档形式提交。 需要说明的是,由于本课程安 排的实验机时较少(16机时),一些实验在机时内完成 不了,需要同学们利用课余时间继续进行。实验报告就是 本课程要求大家提交的作业。
一切宏观事务的大型软件系统。
简言之,OS是计算机系统的核心,是掌控计算机上
LOGO
为什么要学习OS?
我们已明确了OS的重要性,但仅仅因为很重要就一 定要学习它吗?世界上重要的事情多去了,难道我们都 要学习吗?即使是计算机专业的学生,不学OS也照样 可以编程写软件。那我们为什么要学呢?当然我们可以 有一千个理由,在这里仅提出两个。 1. OS都是由软件界中的Top精英们开发的,它的 优秀设计和经典思路是计算机科学知识的荟精集萃,会 给我们以激浊扬清的思考,对OS的掌握程度,决定着 计算机专业学习者的发展水平及方向。 举例说:
LOGO
实验报告一般内容: 1.姓名、学号、组号、提交日期 2.实验题目 3.实验目的 4.实验内容 (1)子题目和要求 (2)实现要求的命令行及命令执行结果 或 (3)源程序、测试数据及运行结果 (4)结果分析 5.实验体会:实验中遇到的问题及解决过程,实验中 产生的错误及原因分析、实验中得到的主要收获及体会。
LOGO
(1) OS的功能在很多 IT 领域都使用。如果你做并 发程序的开发——Web Service、分布式系统和网络 , 你会发现,这些领域大量使用了OS的概念和技术。如 果你学好了OS,你就可以对你要做的事情更加有信心。 (2) OS的技巧也在很多领域使用,如抽象、缓存、 并发等。如数据结构和程序设计就大量使用了抽象, 记得抽象数据类型和抽象类吗?很多地方都用缓存, 你做Web要不要用缓存呢?这些你都得做。如果学好 了OS,你就掌握了这些内容,触类旁通,你学习别的 东西时就会容易多了。
比尔盖茨 乔布斯 Larry Page
LOGO
什么是操作系统?
操作系统=Operating System(OS)
Operating ?
LOGO
Operating system
实际意味着什么呢
?
Operating Surgeon 外科主刀大夫:是医疗手术过程中至高无上的权威,是
LOGO
教材与参考书
★《操作系统教程(第三版)》,陈松年(上海交大) 主编,电子工业出版社,2011.4 ●《计算机操作系统(第三版)》,汤子瀛等,西安 电子科技大学出版社 ●《操作系统原理(第四版)》,庞丽萍,华中科技 大学出版社,2008 ●《计算机操作系统实验与实践》,秦明、李波,清 华大学出版社,2010.9 ●《Linux操作系统实验教程》,费翔林(南大)主编, 高等教育出版社,2009.4 ※以本人的课件为主。
掌控整个手术过程、具有精湛技术和敏锐判断力的中心人物。
Operating Person 操刀手,关键人:操控/掌控事情的人。 Operating system=掌控计算机运行的一种软件 系统,计算机系统里的一切事情均由OS动态掌控的。
LOGO
正如任何一种有效的系统都会有一个核心机构存在, 该核心管理着系统的一切资源,掌控着系统的正常运转。 OS就是计算机系统中的核心机构,它是计算机软件 精英们设计的一种大型和极其复杂的软件系统,用于代 替人并以人的思维方式来自动管理计算机上的所有软、 硬资源,掌控在计算机系统上可能发生的一切事情,维 持计算机系统的有序且有效的运转。
的,你就得学习OS。
LOGO
虽然学习OS很有趣,但并不是所有人都有这样的 感觉,因为OS的特点是概念多、抽象和涉及面广,而 从整体实现上看,其思想和技术又往往难于理解。历史 证明,对很多人来说学习OS是一件很痛苦的事情。不 过我希望我们在一起学习这门课程对大家来说是一件乐 事,难道窥探计算机系统的奥秘不是一件激动人心的事 吗?
LOGO
操作系统原理
冯耀霖
E-mail: fengyaolin5@
LOGO
引
言ห้องสมุดไป่ตู้
▲什么是操作系统 ▲为什么要学习操作系统 ▲教材和参考书 ▲理论教学内容 ▲实践环节
LOGO
CPU是计算机系统的心脏,操作系统是计 算机系统的大脑。半个世纪以来,操作系统吸 引了世界上一大群最热情、最有智慧的杰出人 才、集中了人类现代创造性思维活动的精髓。 操作系统是软件世界的万花筒、博览会,是软 件王国中的一顶璀璨的皇冠。能够有机会走进 操作系统这个神奇、复杂而又充满诱惑的大千 世界,理解其中的基本概念、结构和奥妙的管 理机制是十分幸运的。
LOGO
2. 更重要的是OS真的很有意思。对于一个计算机 专业的人来说,难道你不想知道自己写的程序到底是如 何在计算机上运行的吗?
很多人买车后第一件事是什么?打开前盖。打开前盖看到的 是什么呢?马达、变速箱。为什么第一件事要打开前盖呢?因为 好奇这辆车是怎么开动的。 那么,对于一个计算机特别是软件专业的人来说,有没有在看 到一台计算机的时候,想过为什么计算机能进行计算?为什么计 算机系统能有条不紊的运转?多数人恐怕没有打开过计算机外壳。 不过,没有打开过也不用遗憾,因为即使你把计算机后盖打开, 还是不能明白计算机是怎么运转的,此时只看到一堆硬件:主板、 芯片、插件、布线等,而这些硬件并不会告诉你太多有关计算机 运转的信息。如果真的想知道计算机系统到底是怎么运转
