Open vSwitch操作手册
实验2:OpenvSwitch虚拟交换机实践

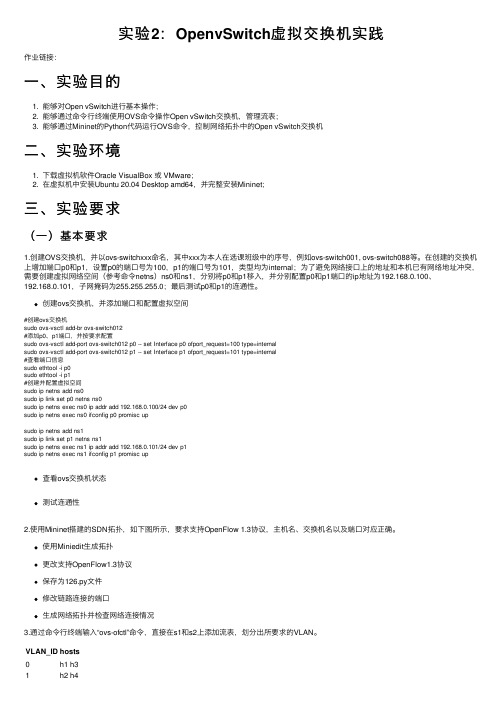
实验2:OpenvSwitch虚拟交换机实践作业链接:⼀、实验⽬的1. 能够对Open vSwitch进⾏基本操作;2. 能够通过命令⾏终端使⽤OVS命令操作Open vSwitch交换机,管理流表;3. 能够通过Mininet的Python代码运⾏OVS命令,控制⽹络拓扑中的Open vSwitch交换机⼆、实验环境1. 下载虚拟机软件Oracle VisualBox 或 VMware;2. 在虚拟机中安装Ubuntu 20.04 Desktop amd64,并完整安装Mininet;三、实验要求(⼀)基本要求1.创建OVS交换机,并以ovs-switchxxx命名,其中xxx为本⼈在选课班级中的序号,例如ovs-switch001, ovs-switch088等。
在创建的交换机上增加端⼝p0和p1,设置p0的端⼝号为100,p1的端⼝号为101,类型均为internal;为了避免⽹络接⼝上的地址和本机已有⽹络地址冲突,需要创建虚拟⽹络空间(参考命令netns)ns0和ns1,分别将p0和p1移⼊,并分别配置p0和p1端⼝的ip地址为192.168.0.100、192.168.0.101,⼦⽹掩码为255.255.255.0;最后测试p0和p1的连通性。
创建ovs交换机,并添加端⼝和配置虚拟空间#创建ovs交换机sudo ovs-vsctl add-br ovs-switch012#添加p0、p1端⼝,并按要求配置sudo ovs-vsctl add-port ovs-switch012 p0 -- set Interface p0 ofport_request=100 type=internalsudo ovs-vsctl add-port ovs-switch012 p1 -- set Interface p1 ofport_request=101 type=internal#查看端⼝信息sudo ethtool -i p0sudo ethtool -i p1#创建并配置虚拟空间sudo ip netns add ns0sudo ip link set p0 netns ns0sudo ip netns exec ns0 ip addr add 192.168.0.100/24 dev p0sudo ip netns exec ns0 ifconfig p0 promisc upsudo ip netns add ns1sudo ip link set p1 netns ns1sudo ip netns exec ns1 ip addr add 192.168.0.101/24 dev p1sudo ip netns exec ns1 ifconfig p1 promisc up查看ovs交换机状态测试连通性2.使⽤Mininet搭建的SDN拓扑,如下图所⽰,要求⽀持OpenFlow 1.3协议,主机名、交换机名以及端⼝对应正确。
ovs常用命令

OVS常用命令概述Open vSwitch(OVS)是一种开源的虚拟交换机软件,用于实现软件定义网络(SDN)。
OVS提供了一系列的命令,用于管理和配置交换机。
本文将介绍OVS常用命令的用法及其相关参数。
OVS命令的基本语法OVS命令的基本语法如下所示:ovs-ofctl <命令> <选项> <交换机名称> <参数>其中,ovs-ofctl是使用OVS命令的基本命令,<命令>是具体的操作命令,<选项>是命令的可选参数,<交换机名称>是需要操作的交换机名称,<参数>是对应命令的参数。
OVS命令的常用操作本节将介绍OVS命令的常用操作,包括添加流表、修改流表、删除流表等。
添加流表使用ovs-ofctl命令可以向交换机添加流表。
添加流表的命令如下:ovs-ofctl add-flow <交换机名称> <流表规则>其中,<流表规则>是要添加的流表规则,可以指定流表的匹配字段、动作等。
修改流表使用ovs-ofctl命令可以修改交换机上已有的流表。
修改流表的命令如下:ovs-ofctl mod-flow <交换机名称> <旧流表规则> <新流表规则>其中,<旧流表规则>是要修改的旧流表规则,<新流表规则>是修改后的新流表规则。
删除流表使用ovs-ofctl命令可以删除交换机上的流表。
删除流表的命令如下:ovs-ofctl del-flows <交换机名称> [<流表规则>]其中,<流表规则>是要删除的流表规则,如果不指定则删除交换机上的所有流表。
OVS命令的实例应用本节将通过实际的案例,展示OVS命令的实际应用情况。
示例一:添加流表假设我们需要向名为sw0的交换机添加一条流表规则,匹配源IP地址为10.0.0.1的数据包,并将其输出到端口1。
OpenvSwitch完全使用手册

OpenvSwitch完全使用手册本文主要参考Overview of functionality and components以及Frequently AskedQuestions以及结合自己的理解。
/index.php/openv-switch-full-guide/1 什么是OpenvSwitchOpenvSwitch,简称OVS是一个虚拟交换软件,主要用于虚拟机VM环境,作为一个虚拟交换机,支持Xen/XenServer, KVM, and VirtualBox多种虚拟化技术。
OpenvSwitch还支持多个物理机的分布式环境。
在这种某一台物理机器的虚拟化环境中,一个虚拟交换机(vswitch)主要有如下两个作用:∙传递虚拟机VM之间的流量∙以及实现VM和外界网络的通信如下图所示:整个OVS代码用C写的。
目前有以下功能:∙Standard 802.1Q VLAN model with trunk and access ports∙NIC bonding with or without LACP on upstream switch∙NetFlow, sFlow(R), and mirroring for increased visibility∙QoS (Quality of Service) configuration, plus policing∙GRE, GRE over IPSEC, VXLAN, and LISP tunneling∙802.1ag connectivity fault management∙OpenFlow 1.0 plus numerous extensions∙Transactional configuration database with C and Python bindings∙High-performance forwarding using a Linux kernel module2 OpenvSwitch的组成OVS的核心组件包括 ovsdb-server,ovs-vswitchd,ovs kernel module。
OpenVSwitch配置总结

一、安装OVSsudo apt-get install openvswitch-controller openvswitch-switch openvswitch-datapath-source(与网上之前的资料相比,没有安装openvswitch-brcompat,提示没有这个包。
笔者目前的使用来看没有问题,可能是linux内核或OVS版本变化造成的,不再需要安装?)二、配置OVS虚拟OpenFlow交换机1.新建一个桥(交换机),命名为s1:sudo ovs-vsctl add-br s1注意:进行OVS设置时很容易造成虚拟交换机与物理交换机构成二层环路(比如虚拟交换机包含两块网卡,而这两块网卡都连接到物理交换机上,就是一个环路),一旦有广播报文,比如ARP请求,就会引发广播风暴,使网络瘫痪。
因此,应该把虚拟交换机开启STP支持,避免广播风暴:ovs−vsctl set bridge 交换机名stp_enable=true2.启动要添加到虚拟交换机s1上的物理端口(物理网卡,这里是eth0和eth3)。
如果ifconfig里已经有了,那就不用重新启动了。
sudo ifconfig eth3 upsudo ifconfig eth0 up3.添加物理端口到虚拟交换机s1:sudo ovs-vsctl add-port s1 eth3sudo ovs-vsctl add-port s1 eth04.设置IP:OpenFlow交换机与控制器连接需要用到TCP连接,因此交换机需要设置IP。
但当把物理端口添加到虚拟交换机上之后,这些物理端口上原先的IP设置将失效(IP属于三层,而交换机工作在二层),无法与外界进行三层的互联。
解决方法是添加一个类型为internal的端口,然后设置IP和路由(本例是添加一个名为veth3的虚拟端口):首先,如果原先端口有设置IP,应将其重置:sudo ifconfig eth3 0然后添加虚拟端口:sudo ovs-vsctl add-port s1 veth3sudo ovs-vsctl set interface veth3 type=internal这时如果执行ifconfig就会发现多了一个名为veth3的端口。
Openvswitch配置手册.en

Netfilter Workshop, Seville, Spain
Simon Horman <simon@> Horms Solutions Ltd., Tokyo
October 2010
Open vSwitch源自ServerOpen vSwitch Datapath Open vSwitch Controller
Forward to a port or ports, mirror Encapsulate and forward to controller Drop
3 4
And returns the packet to the datapath Subsequent packets are handled directly by the datapath
Isolated
May only communicate with endpoints on promiscuous ports e.g.: Hosts that only require access to the gateway
Private VLANs — Domain View
P C1 C2 I
Open vSwitch Concepts
A switch contains ports A port may have one or more interfaces
Bonding allows more than once interface per port
Packets are forward by flow
A rate and burst can be assigned to an Interface Conceptually similar to Xen’s netback credit scheduler # ovs-vsctl set Interface tap0 ingress_policing_rate=100000 # ovs-vsctl set Interface tap0 ingress_policing_burst=10000 Simple Appears to work as expected
安装和配置Open vSwitch

Ubuntu12.04-alternate上安装ovs-1.9.3参考INSTALL.DebianOpen vSwitch各版本及所支持的内核Open vSwitch Linux kernel------------ -------------1.4.x2.6.18 to3.21.5.x2.6.18 to3.21.6.x2.6.18 to3.21.7.x2.6.18 to3.31.8.x2.6.18 to3.41.9.x2.6.18 to3.81.10.x2.6.18 to3.81.11.x2.6.18 to3.82.0.x 2.6.32 to3.102.1.x 2.6.32 to3.112.2.x 2.6.32 to3.14安装必要的编译支持sudo apt-get intall build-essentialsudo apt-get intall libssl-devsudo apt-get intall openssl下载openvswitch-1.9.3.tar.gz,解压到Home文件夹cd openvswitch-1.9.3安装必要的依赖库参照debian/control文档的Build-Depends部分来安装所有依赖库,如:sudo apt-get intall debhelper运行dpkg-checkbuilddeps可查看尚未安装的依赖库运行:fakeroot debian/rules binary编译,并执行一些单元测试(时间略长)。
完成后生成各种.deb包。
使用dpkg -i 包名安装上述生成的包,只需安装几个核心包先装datapath-dkms包,再装common包,然后装switch包。
装完之后ovs就自动被加载至内核,可用lsmod | grep openvswitch确认。
初始化ovsdb数据库:ovs-vsctl --no-wait init上述步骤执行完毕后就可参考OpenvSwitch安装及配置.pdf的第六部分进行ovs的配置和操作。
OpenvSwitch使用笔记

OpenvSwitch使用笔记Open vSwitch使用笔记这篇笔记老早就写了,其中有大段引用,出处已然忘记。
贴出来,希望对大家有些帮助。
1. Open vSwitch介绍1.1虚拟化网络架构图1.2 Open vSwitch功能介绍2. 安装,启动,关闭2.1 源码安装2.2 apt安装2.3 启动脚本2.4 关闭脚本2.5 virsh启动3. 配置,使用3.1流规则3.2VLAN3.3 sflow3.4接入物理机4. 遇到的问题4.1找不到opevswitch_mod.ko和 brcompatd.ko内核模块怎么办?4.2 Xen无法创建虚拟机?4.3关于兼容模块brcompatd.ko4.4 tap和vif的区别4.5深入认识tap和tun4.6当没有内核支持的时候,如何使用ovs?4.7什么叫虚拟边缘网络?4.8关于软交换(待续)4.9网络设备虚拟化(待续)4.10网桥能有IP么?1.1虚拟化网络架构图:1.2 Open vSwitch功能介绍:Open vSwitch的目标,是做一个具有产品级质量的多层虚拟交换机。
通过可编程扩展,可以实现大规模网络的自动化(配置、管理、维护)。
它支持现有标准管理接口和协议(比如netFlow,sFlow,SPAN,RS 下文将会介绍几个配置实例:安全方面的VALN,流量监控方面的sflow,访问控制方面的openflow。
2.1 源码安装[root@localhost ~]# tar –xzvf openvswitch-1.1.0pre2.tar.gz进入解压后目录,输入以下命令配置Open vSwitch工程,生成Makefile文件。
[root@localhost ~]# ./configure --with-linux=/lib/modules/`uname -r`/build–with- linux:生成内核模式的Open vSwitch时需指定的内核源码编译目录指定OpenvSwitch的安装位置加参数:–prefix=/…如有其他问题可参考源码根目录下的帮助文件:INSTALL.Linux编译、链接、生成和安装Open vSwitch,命令如下,make install目录只安装Open vSwitch除内核模块外的其他所有模块,如ovs-vsctl、ovs-vswitchd、ovs-ofctl等编译、链接、生成和安装Open vSwitch,命令如下,make install目录只安装Open vSwitch除内核模块外的其他所有模块,如ovs-vsctl、ovs-vswitchd、ovs-ofctl等[root@localhost ~]# make[root@localhost ~]# make install卸载原有虚拟网桥模块,命令如下,如果Xend正常启动,将自动加载linux虚拟网桥模块bridge.ko。
openvswitch 参数

一、OpenvSwitch 简介OpenvSwitch 是一个用于虚拟化的开源软件交换机,它可以在虚拟化环境中提供网络连接,可用于构建和管理虚拟化网络。
它支持多层交换功能、QoS 等多种网络功能,可以与虚拟化评台(如KVM、Xen、VMware等)进行集成,提供虚拟机间和虚拟机与物理网络之间的通信。
二、OpenvSwitch 参数介绍1. Bridge 参数在 OpenvSwitch 中,Bridge 是一个虚拟的二层交换机,它用于连接不同的端口和虚拟机,通过设置 Bridge 参数可以对其进行配置和管理。
- stp 参数:STP(Spanning Tree Protocol)是一种用于防止网络环路的协议,可以通过设置该参数来启用或者禁用 STP 功能。
- f本人l-mode 参数:当 Bridge 下的所有端口都失效时,可以通过设置 f本人l-mode 参数来决定 Bridge 的行为,可以选择 secure 或者 standalone 模式。
2. Port 参数在 OpenvSwitch 中,Port 是 Bridge 的具体端口,用于连接外部网络或虚拟机,通过设置 Port 参数可以对其进行配置和管理。
- tag 参数:可以为 Port 设置 VLAN 标签,用于实现 VLAN 的隔离和区分。
- trunks 参数:可以为 Port 设置可以通过的 VLAN ID,从而实现多个 VLAN 的通信。
3. Controller 参数Controller 是 OpenvSwitch 的控制器,用于控制交换机的行为,通过设置 Controller 参数可以对其进行配置和管理。
- controller 参数:可以设置 OpenvSwitch 的控制器,以实现交换机的远程控制和管理。
- controller-rate 参数:可以控制控制器的速率,用于限制控制器的数据流量。
4. QoS 参数OpenvSwitch 支持 QoS(Quality of Service),可以通过设置 QoS 参数来对网络流量进行控制和调度。
OpenvSwitch安装及配置

Open vSwitch 安装及配置一、 O pen vSwitch 简介1.1概述Open vSwitch 是一个高质量的、多层虚拟交换机,使用开源Apache 2.0许可协议,由Nicira Networks 开发,主要实现代码为可移植的C 代码。
它的目的是让大规模网络自动化可以通过编程扩展,同时仍然支持标准的管理接口和协议(例如NetFlow, sFlow, SPAN, RSPAN, CLI, LACP , 802.1ag )。
此外,它被设计位支持跨越多个物理服务器的分布式环境,类似于VMware 的vNetwork 分布式vswitch 或Cisco Nexus 1000 V 。
Open vSwitch 支持多种linux 虚拟化技术,包括Xen/XenServer , KVM ,和 VirtualBox 。
1.2模块介绍当前最新代码包主要包括以下模块和特性:ovs-vswitchd 主要模块,实现switch 的daemon ,包括一个支持流交换的Linux 内核模块; ovsdb-server 轻量级数据库服务器,提供ovs-vswitchd 获取配置信息;ovs-brcompatd 让ovs-vswitch 替换Linux bridge ,包括获取bridge ioctls 的Linux 内核模块; ovs-dpctl 用来配置switch 内核模块;一些Scripts and specs 辅助OVS 安装在Citrix XenServer 上,作为默认switch ; ovs-vsctl 查询和更新ovs-vswitchd 的配置;ovs-appctl 发送命令消息,运行相关daemon ;ovsdbmonitor GUI 工具,可以远程获取OVS 数据库和OpenFlow 的流表。
此外,OVS 也提供了支持OpenFlow 的特性实现,包括ovs-openflowd :一个简单的OpenFlow 交换机;ovs-controller :一个简单的OpenFlow 控制器;ovs-ofctl 查询和控制OpenFlow 交换机和控制器;ovs-pki :OpenFlow 交换机创建和管理公钥框架;ovs-tcpundump :tcpdump 的补丁,解析OpenFlow 的消息;1.3运行原理内核模块实现了多个“数据路径”(类似于网桥),每个都可以有多个“vports”(类似于桥内的N.J.C.H端口)。
OpenSwitch OPX 安装指南说明书

OpenSwitch OPX Installation Guide with Enhancement PackageRelease 2.1.02017 - 7 Rev. A021 Getting started (4)2 Installation (5)3 Automatic installation (7)4 Manual installation (8)5 Install enhancement package (9)6 Log into switch (10)7 Support resources (11)Contents3Getting started OpenSwitch OPX is implemented using a standard Linux distribution—Debian Jessie. OpenSwitch OPX is binary-compatible with Debian Linux packages.Linux kernel Unmodified Linux kernel included with Debian distribution provides a robust base to support current state-of-the-art and future networking.Linux IP stack Rich feature set provided by the Linux standard IP stack without vendor-specific changes.Linux tools Standard Linux system administration tools are factory-installed in OpenSwitch OPX, or can be easily installed from standard Debian repositories.Convergence of networking, servers, and storageThe use of Linux as an operating system provides a solid foundation for the convergence of networking, server, and storage solutions. OpenSwitch OPX allows you to easily deploy the management and orchestration solutions that are typically available for Linux servers and storage systems.ProgrammabilityOpenSwitch OPX provides an object-centric API for application development—implement your own applications using a well-defined object model and set of programmatic APIs. The object model is defined using the YANG modeling language, and OpenSwitch OPX APIs support Python and C/C++. A set of standard Debian software development packages is provided to allow you to develop applications for OpenSwitch OPX.Open platform abstractionOpenSwitch OPX implements a new, open object-centric application programming interface called the control plane service (CPS) application programming interface (API). The CPS API allows customer-developed applications to be independent of any underlying hardware or software technology. OpenSwitch OPX internally uses the switch abstraction interface (SAI) which Dell and partner companies contributed to the Open Compute Project. The SAI API allows OpenSwitch OPX to be independent of any network processor/switch hardware technology. See for more information about SAI.System hardware integration with standard Linux APIsOpenSwitch OPX integrates standard Linux networking APIs with the hardware functionality provided by networking devices—system and network processors. You can download and use open source software (such as Quagga and Nagios) on any OpenSwitch OPX platform. Disaggregated hardware and softwareOpenSwitch OPX provides an environment in which hardware and software are fully modular. You can select the software modules you want to install, and the hardware platforms you would like to use for your networking needs.4Getting startedInstallation You can install OpenSwitch OPX using an industry-standard open network install environment (ONIE) software image with auto-discovery, manually, or from a USB device. See for detailed information about ONIE installation.ONIE supports two types of installation:•Automatic (zero-touch) installation — ONIE discovers network information including the DHCP server, connects to an image server, options to point to the server for the image, and downloads and installs an image automatically.•Manual installation — Manually configure your network information if a DHCP server is not available (see Manual installation). System setupVerify that the system is connected correctly before installation:•Connect a serial cable and terminal emulator to the console serial port — required serial port settings are 115200, 8 data bits, and no parity.•Connect the Management port to the network if you prefer downloading an image over a network. To locate the Console port and the Management port, see the Getting Started Guide shipped with your switch or the platform-specific Installation Guide at/support.Install OpenSwitch OPXIf there is a current OS installed, power up the switch to access the ONIE boot menu. The boot menu displays on the console.+--------------------------------------------------------+|*ONIE: Install OS || ONIE: Rescue || ONIE: Uninstall OS || ONIE: Update ONIE || ONIE: Embed ONIE || ONIE: Diag ONIE |+--------------------------------------------------------+Available ONIE modes:•Install OS — Installs an OpenSwitch OPX image.•Rescue — Reboots the system into ONIE for repair, debugging, and forensics.•Uninstall OS — Deletes the contents of all disk partitions except ONIE.Installation5•Update ONIE — Installs a new ONIE version.•Embed ONIE — Formats an empty disk and installs ONIE.•Diag ONIE — Runs system diagnostics.CAUTION: During an automatic or manual OpenSwitch OPX installation, if an error condition occurs that results in anunsuccessful installation, perform Uninstall OS first to clear the partitions if there is an existing OS on the switch. If the problem persists, contact Dell EMC Technical Support if you have purchased the support binary.6InstallationAutomatic installation You can automatically (zero-touch) install an OpenSwitch OPX image on an ONIE-enabled device. Once the device successfully boots to ONIE: Install OS, auto-discovery obtains the hostname, domain name, Management interface IP address, as well as the IP address of the DNS name server(s) on your network from the DHCP server and DHCP options. The ONIE automatic-discovery process locates the stored software image, starts installation, then reboots the device with the new software image.If a USB drive is inserted, auto-discovery searches the USB storage supporting FAT or EXT2 file systems. It also searches SCP, FTP, or TFTP servers with the default DNS name of the ONIE server. DHCP options are not used to provide the server IP, and the auto-discovery method repeats until a successful software image installation occurs and reboots the device.Automatic installation7Manual installation You can manually install an OpenSwitch OPX software image if a DHCP server is not available. If the IP address for the Management port(eth0) is not automatically discovered, ONIE sets the IP address to 192.168.3.10. You must manually configure the Management port and configure the software image file to start installation.1Save the OpenSwitch OPX software image on an SCP/TFTP/FTP server.2Power up the device and select ONIE Rescue for manual installation.3(Optional) Stop the DHCP discovery if the device boots to ONIE Install.onie-discovery-stop4Configure the IP addresses on the Management port, where x.x.x.x represents your internal IP address. Once you configure the Management port, the response should be up.ifconfig eth0 x.x.x.x netmask 255.255.0.0 up5Install the software on the device. The installation command accesses the OpenSwitch OPX software from the provided SCP, TFTP, or FTP URL, creates partitions, verifies installation, and reboots itself.onie-nos-install image locationThe OpenSwitch OPX installer image creates several partitions, including OPX-A (active and default) and OPX-B (standby). After installation completes, the system automatically reboots and loads OpenSwitch OPX.Install OpenSwitch OPX manuallyONIE:/ # onie-nos-install ftp://x.x.x.x/PKGS_OPX-2.1.0.XX-installer-x86_64.binWhere x.x.x.x represents the location to download the image file from, and xxP represents the version number of the software to install. Install using USB driveYou can manually install the OpenSwitch OPX software image using USB media. Verify that the USB storage device supports a FAT or EXT2 file system. Plug the USB storage device into the USB storage port on the device.1Power up the system to automatically boot with the ONIE: Rescue option.2(Optional) Stop the ONIE discovery process if the device boots to ONIE: Install.onie-discovery-stop3Create a USB mount location on the system.mkdir /mnt/media4Mount the USB media plugged in the USB port on the device.mount —t vfat /dev/sdb /mnt/media5Install the software from the USB, where /mnt/media specifies the path where the USB partition is mounted.onie-nos-install /mnt/media/image_fileThe ONIE auto-discovery process discovers the image file at the specified USB path, loads the software image, and reboots.8Manual installationInstall enhancement package You can optionally purchase an OPX enhancement package which allow you to obtain Dell EMC support.1Sign in to the Dell Digital Locker (DDL) using your account credentials, or create a new account.2Locate the product name with the entitlement ID and order number.3Check that the service tag of the purchased device displays in the Assigned to field on the Product page. If the Assigned to: field is empty, continue to the next step.4Click Key Available for Download.NOTE: A license file downloads as a zip file — delete this file as it is not required.5Enter the 7-digit service tag in the Bind to:field to bind the enhancement package to the switch, enter the service tag again, select how you want to download the license, then click Submit.6Select the Available Downloads tab, select OPX_EP_<release_number>.deb, then click Download.7Save the file locally or to a remote server.8Install the package and include the path to the file.$ dpkg -i OPX-EP_releaseNumber.deb9Reboot the switch.Install enhancement package9Log into switch The first time OpenSwitch OPX starts, use admin for both the user name and password to log in.Debian GNU/Linux 8 OPX ttyS0OPX login: adminPassword:Linux OPX 3.16.0-4-amd64 #1 SMP Debian 3.16.43-2+deb8u2 (2017-06-14) x86_64The programs included with the Debian GNU/Linux system are free software;the exact distribution terms for each program are described in theindividual files in /usr/share/doc/*/copyright.Debian GNU/Linux comes with ABSOLUTELY NO WARRANTY, to the extentpermitted by applicable law.admin@OPX:~$10Log into switch7Support resources The Dell Networking Support site provides a range of documents and tools to assist you with effectively using Dell Networking devices. Through the support site you can obtain technical information regarding Dell Networking products, access software upgrades and patches, download available management software, and manage your open cases. The Dell Networking support site provides integrated, secure access to these services.To access the Dell Networking Support site, go to /support/. To display information in your language, scroll down to the bottom of the page and select your country from the drop-down menu.•T o obtain product-specific information, enter the 7-character service tag or 11-digit express service code of your switch and click Submit.T o view the service tag or express service code, pull out the luggage tag on the chassis or enter the show chassis command from the CLI.•T o receive additional kinds of technical support, click Contact Us, then click T echnical Support.To access system documentation, see /manuals/.To search for drivers and downloads, see /drivers/.To participate in Dell community blogs and forums, see /community.Support resources11。
openvswitch配置

ovs-vsctl add-br OVS-test //添加名OVS-test的网桥
ovs-vsctl del-br OVS-test //删除名OVS-test的网桥
ovs-vsctl list-br 列出全部网桥
ovs-vsctl list-ports OVS-test //列出网桥包含的port, port是添加到网桥上的端口,可以是聚合口,Interface是物理接口
ovs-ofctl add-flow OVS-test "cookie=0xC, priority=3010, tcp,in_port=5,dl_vlan=3002,nw_src=192.168.254.27,nw_dst=192.168.0.0/16,tp_src=22, actions=mod_vlan_vid:4092,output:6"
ovs-vsctl set port ens192 tag=309 //ens192 access vlan 309
ovs-vsctl set port ens192 trunk=4092 // ens192 trunk vlan 3,4,5
ovs-vsctl set port ens224 trunk=4092 // ens192 trunk vlan 3,4,5
ovs-ofctl show OVS-test //查看接口ID
openvswitch 规则

openvswitch 规则在计算机网络中,OpenvSwitch(OVS)是一种开源的多层虚拟交换机软件。
它允许网络管理员通过软件定义网络(SDN)的原则来管理和控制网络流量。
在OpenvSwitch中,规则(Rules)是控制交换机行为的一种方式,可以用来限制流量、实现流量重定向等。
下面将介绍OpenvSwitch规则的使用方法。
要创建和管理OpenvSwitch规则,可以使用命令行工具ovs-ofctl(OpenFlow Control)。
通过该工具,可以向OVS交换机添加、修改和删除规则,并且可以指定规则的匹配条件和动作。
要添加规则,可以使用以下命令:ovs-ofctl add-flow <switch名称> <匹配条件> <动作>匹配条件是指指定流量的特征,可以根据报文的IP地址、端口号、协议等进行匹配。
动作是指对匹配到的流量进行的处理,例如将流量重定向到指定的端口,或者限制流量的带宽。
例如,要在OpenvSwitch中添加一条规则,将源IP地址为10.0.0.1的流量重定向到端口2,可以使用以下命令:ovs-ofctl add-flow myswitch ip_src=10.0.0.1,actions=output:2同样地,可以使用ovs-ofctl命令来修改和删除规则。
要修改规则,可以使用ovs-ofctl mod-flow命令,指定要修改的规则的匹配条件和新的动作。
要删除规则,可以使用ovs-ofctl del-flows命令,指定要删除的规则的匹配条件。
总结:OpenvSwitch规则是控制交换机行为的重要方式,可以通过命令行工具ovs-ofctl来添加、修改和删除规则。
规则的匹配条件和动作可以根据需要来指定,以实现对网络流量的精确控制和管理。
OpenvSwitch操作手册

目录1、Open vSwitch各模块简要介绍如下: (1)2、基于Open vSwitch 的OpenFlow 实践(ubuntu 14.04) (1)2.1 OpenvSwitch安装 (1)2.2 OpenFlow 命令 (2)2.4修改数据包 (5)2.5重定向数据包 (6)2.6修改vlan tag (6)3、Open vSwitch连接到OpenDaylight (8)4、Open vSwitch常用操作 (9)1、OVS各模块简要介绍如下:ovs-vswitchd:主要模块,实现switch的daemon,包括一个支持流交换的Linux内核模块;ovsdb-server:轻量级数据库服务器,提供ovs-vswitchd获取配置信息;ovs-dpctl:用来配置switch内核模块;一些Scripts and specs 辅助OVS安装在Citrix XenServer上,作为默认switch;ovs-vsctl:查询与更新ovs-vswitchd的配置;ovs-appctl:发送命令消息,运行相关daemon。
OVS提供了支持OpenFlow的特性实现,包括:ovs-ofctl:查询与控制OpenFlow交换机与控制器;ovs-pki:OpenFlow交换机创建与管理公钥框架;ovs-tcpundump:tcpdump的补丁,解析OpenFlow的消息。
2、基于Open vSwitch 的OpenFlow 实践(ubuntu 14.04)1.OpenFlow 命令如何创建交换机?2.如何将一个端口添加到交换机上?3.如何查看ovs结构?2.1 OpenvSwitch安装查看ubuntu版本:Ubuntu 14.04的OVS 版本,已经是2.02,所以默认安装就可以。
不过不同的发行版,ovs 的名字会有点不同。
安装。
的字样。
执行OVS 中最重要的组件是ovs-vswitchd ,它实现了OpenFlow 交换机的核心功能,并且通过netlink 协议直接与OVS 的内核模块进行通信。
【个人总结系列-14】OpenvSwitch使用及XEN使用总结

OpenvSwitch使用及XEN使用总结1.1 OpenvSwitch(OVS)的使用⏹OVS网桥管理命令:⏹ovsdb数据库操作:ovsdb是一个非常轻量级的数据库,与其说它是一个数据库,不如说它是一个提供增删查改等功能的临时配置缓存,之所以这么说,是因为ovsdb数据库的根本就未使用多少数据库技术,如SQL语言查询、存储过程等等。
ovsdb 数据库通过模式文件“openvswitch-1.1.0pre2/vswitchd/vswitch.ovsschema”,如要定制ovsdb数据库,可通过更改vswitch.ovsschema 文件实现。
数据库操作的一般格式为:ovs-vsctl list/set/get/add/remove/clear/destroy table record column [value]默认情况下ovsdb中有以下数据表:bridge、controller、interface、mirror、netflow、open_vswitch、port、qos、queue、ssl、sflow。
即table可为上面的任一个。
record为数据表中name字段的值,column为数据表任一个字段的字段名,value字段值。
基本操作:(1)查看bridge数据表中的所有记录(2)获得bridge数据表_uuid字段的值(3)设置bridge数据表datapath_type字段的值(4)清除bridge数据表flood_vlans字段的值ovs-vsctl remove bridge xenbr0 flood_vlans 23或者ovs-vsctl clear bridge xenbr0 flood_vlans(5)删除uuid为69ee0c09-9e52-4236-8af6-037a98ca704d的qos记录ovs-vsctl destroy qos 69ee0c09-9e52-4236-8af6-037a98ca704d1.2 XEN的使用对于Xen的操作通常通过virt-manager图形化管理即可,常用的xen命令有:。
open vswitch的工作流程

一、概述Open vSwitch(OVS)是一个用于虚拟化网络的开源软件交换机。
它通过软件定义网络(SDN)的方式,实现了对网络流量的灵活控制和管理。
在Open vSwitch中,所有网络流量都会经过交换机进行处理和转发,因此了解其工作流程对于理解和使用Open vSwitch至关重要。
二、转发流程在Open vSwitch中,数据包经过以下几个步骤进行处理和转发:1. 接收数据包当数据包到达交换机时,首先会被交换机的物理或虚拟端口所接收。
2. 网络流处理接收到数据包后,交换机会根据其目标MAC位置区域进行流表匹配。
如果匹配成功,则根据流表中配置的操作执行相应的动作,如转发到特定端口、执行安全策略等。
3. 数据包处理交换机会根据流表中的指令对数据包进行处理,如修改源MAC位置区域、修改VLAN标签等。
4. 转发数据包经过处理后的数据包会被转发到目标端口,继续传输。
5. 数据包统计交换机会对转发的数据包进行统计,包括流量量、丢包率等信息。
三、流表管理流表是Open vSwitch中非常重要的概念,它定义了对数据包的处理规则和动作。
流表由控制器通过OpenFlow协议下发给交换机,并且可以动态修改和更新。
流表包括以下几个重要的字段:1. 匹配字段用于匹配数据包的特征,如源MAC位置区域、目标MAC位置区域、IP位置区域、端口号等。
2. 动作字段定义了当数据包匹配成功时,要执行的动作,如转发到特定端口、丢弃、执行安全策略等。
3. 优先级字段用于定义流表的优先级,当数据包匹配多条流表时,会按照优先级高低依次匹配。
流表的管理和下发是Open vSwitch中的核心功能之一,通过动态更新流表可以实现对网络流量的实时控制。
四、控制平面Open vSwitch的控制平面由一个或多个控制器负责管理和控制。
控制器负责向交换机下发流表、接收交换机的统计信息和事件通知、处理网络拓扑变化等功能。
控制器可以通过OpenFlow协议与交换机进行通信,完成网络的管理和控制。
ovs 常用命令

ovs 常用命令OVS(Open vSwitch)是一种开源的虚拟交换机,常用于构建软件定义网络(SDN)和网络功能虚拟化(NFV)环境。
本文将介绍一些常用的OVS命令,帮助读者更好地理解和使用OVS。
1. ovs-vsctl:这是OVS的主要管理工具,用于配置和管理OVS的交换机和端口。
可以使用该命令来创建、删除和修改虚拟交换机、端口、流表等。
例如,创建一个名为br0的虚拟交换机可以使用以下命令:```ovs-vsctl add-br br0```2. ovs-ofctl:这是OVS的OpenFlow控制器命令行工具,用于配置和管理OpenFlow协议相关的功能。
可以使用该命令来查看和修改流表、查询交换机状态等。
例如,查看br0上的流表可以使用以下命令:```ovs-ofctl dump-flows br0```3. ovs-dpctl:这是OVS的数据路径控制器命令行工具,用于配置和管理OVS的数据路径。
可以使用该命令来查看和修改数据路径的配置信息。
例如,查看br0上的数据路径信息可以使用以下命令:```ovs-dpctl show br0```4. ovs-appctl:这是OVS的应用程序控制器命令行工具,用于控制和管理OVS的各个应用程序。
可以使用该命令来查看和修改应用程序的状态和配置信息。
例如,查看OVS的版本信息可以使用以下命令:```ovs-appctl version```5. ovs-ofctl dump-ports:这个命令用于查看虚拟交换机上的端口信息。
可以使用该命令来查看端口的状态、速率、传输统计等。
例如,查看br0上的端口信息可以使用以下命令:```ovs-ofctl dump-ports br0```6. ovs-vsctl add-port:这个命令用于向虚拟交换机添加物理端口或者虚拟端口。
可以使用该命令将物理网卡连接到虚拟交换机,或者将虚拟机的虚拟网卡连接到虚拟交换机。
OpenWRT with OpenvSwitch刷路由器教程

5 启动 openvswitch
/etc/init.d/vswitch start
6 openvswitch 中 bridge 配置
配置网桥端口和协议,和连接控制器啥的,就参见 OVS 的操作吧。
1.安装依赖
升级组件包 sudo apt-get update 安装编译需要的组件 sudo apt-get install gcc g++ binutils patch bzip2 flex bison make autoconf gettext texinfo unzip sharutils subversion libncurses5-dev ncurses-term zlib1g-dev subversion git gawk asciidoc libz-dev
2.获取 Openwrt 源码并添加 OVS
获取 openwrt 源码 git clone git:///openwrt.git 进入代码目录 cd openwrt/ 更新最新代码 ./scripts/feeds update –a 安装最新组件 ./scripts/feeds install –a 更新版本号 feeds.conf 更新 ./scripts/feeds update openvswitch 安装 ./scripts/feeds install -a -p openvswitch 添加一个 patch wget https:///pichuang/7372af6d5d3bd1db5a88/raw/4e2290e3e184288de762 3c02f63fb57c536e035a/openwrt-add-libatomic.patch -q -O - | patch -p1 svn up 添加 openwrt 代码连接 echo 'src-git openvswitch git:///pichuang/openvwrt.git' >>
Openvswitch研发白皮书v1.4

技术文件技术文件名称:OVS安装部署维护使用说明书技术文件编号:版本:V1.4共XX页(包括封面)拟制审核批准修改记录目录(包括封面) (1)1引言 (3)1.1编写目的 (3)1.2术语、定义 (3)1.3缩略语 (3)1.4参考资料 (3)1.4.1きりんさん日記: / (3)1.4.2Openvswitch-1.4.1中README.RHEL (3)1.4.3《Network Warrior》中文版 (3)2安装 (3)2.1安装概述 (3)2.2环境配置 (3)2.3部署流程 (4)2.3.1 CentOS 6.2编译环境的安装及部署 (4)2.3.2 CentOS6.2 下Openvswitch编译安装及部署 (4)2.3.3 Ubuntu12.04 下Openvswitch编译安装及部署 (7)2.3.4 NoX 的编译与安装部署 (8)3常用虚机操作 (9)3.1创建和启动虚拟机 (9)3.1.1 创建虚拟机 (9)3.1.2 启动虚拟机 (9)3.2VLAN配置 (9)3.2.1 Host VLAN配置(以vlan 号61为例) (9)3.2.2 虚机VLAN配置 (10)3.2.3 虚机VLAN测试 (11)3.3GRE配置与测试 (13)3.3.1 Host 上的GRE配置 (13)3.3.2 GRE隧道的测试 (14)3.4GRE+VLAN配置与测试 (14)4疑难问题 (15)1引言1.1编写目的本文档编写目的是详细描述产品OVS安装部署方法,预期的读者和阅读建议预期的读者和阅读建议参见表1.1。
表1.11.2术语、定义本文使用的专用术语、定义见表1.2。
表1.2 术语1.3缩略语本文使用的专用缩略语见表1.3,缩略语已按其第1个字母顺序排列。
1.4参考资料1.4.1きりんさん日記: /1.4.2Openvswitch-1.4.1中README.RHEL1.4.3《Network Warrior》中文版2安装2.1安装概述本安装教程主要涉及在CentOS6.2环境下对Openvswitch1.4.1进行编译以及安装,并用Openvswitch(简称OVS)接管Linux系统的网络服务,同时配置VLAN,并对虚拟机进行VLAN划分。
- 1、下载文档前请自行甄别文档内容的完整性,平台不提供额外的编辑、内容补充、找答案等附加服务。
- 2、"仅部分预览"的文档,不可在线预览部分如存在完整性等问题,可反馈申请退款(可完整预览的文档不适用该条件!)。
- 3、如文档侵犯您的权益,请联系客服反馈,我们会尽快为您处理(人工客服工作时间:9:00-18:30)。
目录1、Open vSwitch各模块简要介绍如下: (1)2、基于 Open vSwitch 的 OpenFlow 实践(ubuntu 14.04) (1)2.1 OpenvSwitch安装 (1)2.2 OpenFlow 命令 (3)2.4修改数据包 (9)2.5重定向数据包 (10)2.6修改vlan tag (11)3、Open vSwitch连接到OpenDaylight (14)4、Open vSwitch常用操作 (17)1、OVS各模块简要介绍如下:ovs-vswitchd:主要模块,实现switch的daemon,包括一个支持流交换的Linux内核模块;ovsdb-server:轻量级数据库服务器,提供ovs-vswitchd获取配置信息;ovs-dpctl:用来配置switch内核模块;一些Scripts and specs 辅助OVS安装在Citrix XenServer上,作为默认switch;ovs-vsctl:查询和更新ovs-vswitchd的配置;ovs-appctl:发送命令消息,运行相关daemon。
OVS提供了支持OpenFlow的特性实现,包括:ovs-ofctl:查询和控制OpenFlow交换机和控制器;ovs-pki:OpenFlow交换机创建和管理公钥框架;ovs-tcpundump:tcpdump的补丁,解析OpenFlow的消息。
2、基于Open vSwitch 的OpenFlow 实践(ubuntu 14.04)1.OpenFlow 命令如何创建交换机?2.如何将一个端口添加到交换机上?3.如何查看ovs结构?2.1 OpenvSwitch安装查看ubuntu版本:Ubuntu 14.04的OVS版本,已经是2.02,所以默认安装就可以。
不过不同的发行版,ovs 的名字会有点不同。
本次实验我们选择openvswitch-switch安装。
成功安装时在命令行可看到openvswich-switch start/running的字样。
执行查看OVS运行情况OVS中最重要的组件是ovs-vswitchd,它实现了OpenFlow交换机的核心功能,并且通过netlink协议直接和OVS的内核模块进行通信。
交换机运行过程中,ovs-vswitchd还会将交换机的配置、数据流信息及其变化保存到数据库ovsdb中,因为这个数据库由ovsdb-server直接管理,所以ovs-vswitchd需要和ovsdb-server通过UNIX socket机制进行通信以获得或者保存配置信息。
数据库ovsdb的存在,使得OVS交换机的配置能够被持久化存储,即便设备被重启后相关的OVS配置仍旧能够存在。
查看OVS版本,ubuntu默认的OVS版本是2.0.2。
查看OVS 支持的OpenFlow 协议的版本,其中0x1代表OpenFlow1.0,0x4代表OpenFlow1.32.2 OpenFlow 命令创建一个OVS交换机创建一个端口p0,设置端口p0 的OpenFlow 端口编号为100。
设置网络接口设备类型为”internal”。
创建一个name space:ns0,把p0端口接入到ns0里,并且配置ip地址192.168.1.100/24重复步骤创建p2查看创建的交换机信息,获得dpid,端口openflow端口编号。
获取openflow端口编号查看datapath 的信息互ping测试。
查看mac地址,然后运行。
有253个table;查看交换机中的所有流表项。
执行时如果出现图示错误,将openvswitch-switch重启一次。
输出如下信息:表示此时actions=NORMAL表示ovs采用匹配MAC地址的形式转发包。
2.3流规则管理每条流规则由一系列字段组成,分为基本字段、条件字段和动作字段三部分。
基本字段包括:•生效时间duration_sec•所属表项table_id•优先级priority、•处理的数据包数n_packets•空闲超时时间idle_timeout 等空闲超时时间idle_timeout 以秒为单位,超过设置的空闲超时时间后该流规则将被自动删除,空闲超时时间设置为0 表示该流规则永不过期,idle_timeout 将不包含于ovs-ofctl dump-flows brname 的输出中。
条件字段包括:•输入端口号in_port•源目的mac 地址dl_src/dl_dst•源目的ip 地址nw_src/nw_dst•数据包类型dl_type•网络层协议类型nw_proto这些字段可以任意组合,但在网络分层结构中底层的字段未给出确定值时上层的字段不允许给确定值,即一条流规则中允许底层协议字段指定为确定值,高层协议字段指定为通配符(不指定即为匹配任何值),而不允许高层协议字段指定为确定值,而底层协议字段却为通配符(不指定即为匹配任何值),否则,ovs-vswitchd 中的流规则将全部丢失,网络无法连接。
动作字段包括正常转发normal、定向到某交换机端口output:port、丢弃drop、更改源目的mac 地址mod_dl_src/mod_dl_dst 等,一条流规则可有多个动作,动作执行按指定的先后顺序依次完成。
2.4修改数据包屏蔽所有进入OVS 的以太网广播数据包屏蔽STP 协议的广播数据包修改数据包,添加新的OpenFlow 条目,修改从端口p0 收到的数据包的源地址为9.181.137.1从端口p0(192.168.1.100)发送测试数据到端口p1(192.168.1.101),就是没啥响应。
新开一个终端,进入根目录,执行如下指令。
等几分钟,会出现如下结果。
说明下发的OpenFlow流生效了,端口p0收到的数据包源地址被修改了。
2.5重定向数据包这个时候你从p2里,如上图所示。
2.6修改vlan tag删除网桥,并新建。
具体步骤可参照前面的内容。
在创建好ovs -switch 网桥后,并添加p0,p1,p2端口后,可以继续如下实验。
执行指令,记录下p0,p1,p2的mac 地址,方便后续实验使用。
修改端口 p1 的 VLAN tag 为 101,使端口 p1 成为一个隶属于 VLAN 101 的端口现在由于端口 p0 和 p1 属于不同的 VLAN ,它们之间无法进行数据交换。
我们使用 ovs-appctl ofproto/trace 生成一个从端口 p0 发送到端口 p1 的数据包,这个数据包不包 含任何 VLAN tag ,并观察 OVS 的处理过程在第一行输出中,“Flow:”之后的字段描述了输入的流的信息。
由于我们没有指定太多信反过来从端口p1 发送数据包,由于p1 现在是带有VLAN tag 101 的Access 类型的端口,所以数据包进入端口p1 之后,会被OVS 添加VLAN tag 101 并发送到端口p03、OVS连接到OpenDaylight新创建一个ubuntu 14.04的虚拟机。
设置ovs的控制器为OpenDaylight,192.168.202.137 就是OpenDaylight虚拟机的IP。
设置OVS 的连接模式为secure 模式执行指令,查看网桥。
若有如下流表:执行:此时是ping不通的。
如下指令查看流表,此时为空流表。
则需要手动添加流表。
查看此时ovs-switch中的流表。
然后用p0 ping p1,就能够通。
用如下网址登入OpenDaylight的GUI,在Topology中就可以看到拓扑信息。
4、OVS常用操作:1.添加网桥:ovs-vsctl add-br 交换机名2.删除网桥:ovs-vsctl del-br 交换机名3.添加端口:ovs-vsctl add-port 交换机名端口名(网卡名)4.删除端口:ovs-vsctl del-port 交换机名端口名(网卡名)5.连接控制器:ovs-vsctl set-controller 交换机名tcp:IP地址:端口号6.断开控制器:ovs-vsctl del-controller 交换机名7.列出所有网桥:ovs-vsctl list-br8.列出网桥中的所有端口:ovs-vsctl list-ports 交换机名9.列出所有挂接到网卡的网桥:ovs-vsctl port-to-br 端口名(网卡名)10.查看open vswitch的网络状态:ovs-vsctl show11.查看Open vSwitch 中的端口信息(交换机对应的dpid,以及每个端口的OpenFlow 端口编号,端口名称,当前状态等等):ovs-ofctl show 交换机名12.修改dpid:ovs-vsctl set bridge 交换机名other_config:datapath-id=新DPID13.修改端口号:ovs-vsctl set Interface 端口名ofport_request=新端口号14.查看交换机中的所有Table:ovs-ofctl dump-tables ovs-switch15.查看交换机中的所有流表项:ovs−ofctl dump−flows ovs-switch16.删除编号为100 的端口上的所有流表项:ovs-ofctl del-flows ovs-switch“in_port=100”17.添加流表项(以“添加新的OpenFlow 条目,修改从端口p0 收到的数据包的源地址为9.181.137.1”为例):ovs-ofctl add-flow ovs-switch “priority=1idle_timeout=0,in_port=100,actions=mod_nw_src:9.181.137.1,normal”18.查看OVS 的版本信息:ovs-appctl –version19.查看OVS 支持的OpenFlow 协议的版本:ovs-ofctl –version。
