ASUS 随机软件(3)
ASUS CREATOR CENTER 用户指南说明书
1CREATOR CENTER for Creation NOTEBOOK2ContentsAbout CREATOR CENTER (4)CREATOR CENTER Basics (5)Main Screen (5)Information Bar (5)Main Menu (6)Sub Menu (6)Creative Applications Optimization (7)Creator Mode (7)How to Enable Creator Mode (8)User Scenario (9)Selecting User Scenario (9)General Settings (10)Monitor (11)True Color (12)True Color Preset Options (12)Mystic Light (13)Voice Command (16)Noise Cancellation (21)Duet Display (22)Create a New Screen Profile (23)Activating Duet Screen Capture (23)Gaming Gear (24)Product Registration (25)Live Update (26)System Info (27)Microsoft APP (28)Battery Master (29)Calibrating Battery (29)Backup (30)Notices (31)Copyright (31)Revision History (31)3ContentsAbout CREATOR CENTER∙Optimize performance for creative applications.∙System performance tuning—you can choose overclock or silent.∙Monitor system information.∙Adjust the best display settings for your eyes.∙Register your MSI products.∙Control LED light effects and synchronize effects to your devices.∙Use utilities to control special features.∙Set the charging method and calibrate the battery.∙Backup system.⚠ImportantTHE SOFTWARE FEATURES IN THIS USER GUIDE VARY BY PRODUCT.THE SCREENSHOTS FOR THE UI IN THIS USER GUIDE ARE FOR REFERENCE ONLY AND THE ACTUAL UI DESIGN MAY VARY.4About CREATOR CENTER5CREATOR CENTER Basics CREATOR CENTER Basics Main Screen⚠Important The screenshots for the UI in this user guide are for reference only and the actual UI design may vary.Operation PanelInformation Bar Display System Profile Picture/Login/ Logout Display Creator Mode Status.Main MenuSub Menu Information Bar Display MSI product currently in use. Click to enter the control page.Display mode currently applied. Switch between different modes by selecting a mode from the drop-down menu.6CREATOR CENTER BasicsSub MenuMain MenuHomeMy DeviceSupportToolsSettingCollapse Button7Creative Applications Optimization Creative Applications OptimizationThe Creator Mode feature will optimize the computer system, monitor, cooler and other peripherals to provide the best experience while using creative applications.Creator Mode Creator Mode main switchSelect Creator Mode in the sub menu to enter Creator Mode control panel You can drag and drop to set the priority List software that supported by creator modeEdit the software listRefresh the software listAdd software to the software listCreator Mode selection User Priority Mode: User-defined software priority Real-Time Mode: Automatically optimize software performance.8Creative Applications OptimizationHow to Enable Creator Mode You can enable the Creator Mode for Processor Affinity, System Performance and Application Priority while using creative applications.1.Go to Home > Creator Mode, and turn on Creator Mode main switch.Turn on Creator Mode main switch2.Select User Priority Mode or Real-Time Mode.Check the box Check the boxor3. Run the application.⚠ImportantIn order to apply the settings, the creator mode must be enabled before running the software.9User Scenario User Scenario Selecting User Scenario The CREATOR CENTER has default scenarios and customized preset options.1. Go to Home > User Scenario.2. Select one of the options. ▪Extreme Performance – A configuration that boosts the highest possible performance. ▪Balanced - MSI recommended settings for average users. ▪Silent - A configuration that allows system to run smoothly with minimum loading. ▪Super Battery - A power-saving mode that lowers the power consumption forbasic needs.Adjust Panel Brightness, Keyboard Brightness and Fan Speed for each scenario.Click to reset to defaultGeneral SettingsYou can enable/disable some general settings in this panel.⚠ImportantThe features in the General Settings vary by product.Windows Key - Click to enable or disable the Windows key on the keyboard. Switch Key - Click to switch the Windows key and the Fn key on the keyboard. WebCam - Click to enable or disable the webcam.Display OverDrive - Only available on certain displays. Once enabled, the response time of the will be overclocked.USB Lighting - Control the USB port lighting mode.GPU Switch - Click to switch the MSHybrid Graphics Mode and the Discrete Graphics Mode.Crosshair Display - Click to enable or disable the Crosshair Display. Click the gear icon to open the True Color control and choose the type of crosshair and its color.10General Settings11Monitor Monitor Monitor feature provides a custom hardware monitor gadget to display the system status.Click to free up memory Click to clean up the disk Select Monitor in the sub menu to enter Monitor page12True ColorTrue Color With True Color function, you can adjust the best screen gamma, saturation, brightness and contrast settings for your eyes.The Ture Color feature supports games in windowed mode.Select True Color in the sub menu to enter True Color control panelSelect the quick screen color optionTrue Color Preset Options When you click the preset option, the screen settings will be immediately applied to your computer. The detailed options are as follows: ⚠Important The features in the True Color vary by product. ▪Gamer - For playing games. ▪Anti-Blue - For reducing the amount of blue light that is emitted from the display to reduce eye fatigue. ▪sRGB - For accurate color when viewing images on websites. ▪Designer - For design applications.▪Office - For office and productivity applications.▪Movie - For watching movies. ▪AdobeRGB - For accurate color when viewing images and other media created in the Adobe RGB color space. ▪Display P3 - For accurate color in wide-gamut cinema mode. ▪Customize - For the True Color 3 application setting.13Mystic Light Mystic Light Mystic Light feature allows you to control LED light effects of MSI & partner products. For some earlier products, you can go to product download page to download the applicable LED control software. ⚠ImportantThe Mystic Light feature is only available when MSI Gear devices are connected.When you click the Apply button, the LED effect settings can be saved to Profile1~3, and you can switch to different settings by clicking Profile1~3.Device synchronizationClick to access Ambient Link All Synchronization LED item drop-down menu Light effect, LED color, speed and brightness lever selectors Apply buttonVoice Command14Mystic Light∙Device synchronization - In this section, you may synchronize LED light effect to your devices.Chain icon - indicates the device has been synchronized.Broken-chain icon - indicates thedevice is not synchronized.Device icon - click it to change LED effect setting for this device. When the device icon turns blue, it indicates the device you’re currently setting.▪Individual - You can also change settings for one single device. To do that, click the chain icon and the color will turn gray as below.▪To synchronize devices - Click the chain icon above device icon. When the chain icon turns blue, it indicates that the device has synchronized LED effect settings with other devices.▪All synchronization - Click the big chain icon on the left side of all the devices.Click the big chain icon∙LED item drop-down menu - Click it to select the LED item on the device. The LED effects vary depending on your LED item selection.15Mystic Light ∙Light effect drop-down menu Click it to select LED light effects. Please note that the options about light effects would be more or less depending on the devices you have. It will only list the light effects which are available for all applicable devices.∙LED Color selector - In this section, you may select the color for one single light effect (Stack, Breathing, Flashing etc.).The outer arc is a custom color picker and the inner arc is the default color picker that cannot be changed. You can simply change the LED color by clicking on the color on the outer or inner arc. To store a custom color, click one of the color slotson the outer arc to store the color of your choice.Use the Hue Circle to choose the color you want. The color you choose will be displayed on the center circle.You can specify a color by editing an RGB (red, green, blue) color value between 0 and 255.Drag the brightness slider up to increase brightness or drag down to decrease brightness. ∙Effect speed and brightness levelDrag the sliders to adjust the LED light effect for switching speed and light brightness.Please note that these function will only be available if your device supports it.Voice CommandMystic Light allows you to use your voice to change LED effects.⚠ImportantThe Voice Command feature is only available for the Notebook with the Per Key RGB keyboard or connected to MSI Gear devices.To start Voice Command, you need to install Windows 10 Speech Voices.1. Go to Windows Settings, and select Time & Language.2. Select Add a preferred language, then add English and the voice packages.3. Change your default speech options to English by selecting Speech.16Mystic Light17Mystic Light How to Control Mystic Light via Voice Command Go to Home > Mystic Light, and click setting in the upper right corner. Enable Voice Command and then you can change the LED style by saying Hey Lucky.Click hereEnable Voice CommandA list of Hey Lucky commands Click to open the list of Hey Lucky commands18Mystic LightAmbient Link With the Ambient Link feature, it will provide visual color feedback on Philips Hue and Nanoleaf depending on what is happening in games. To use Ambient Link, you need to follow the instructions below to complete the link setup.⚠ImportantThe Ambient Link feature is only available for the Notebook with the Per Key RGB keyboard or connected to MSI Gear work Requirements ∙The router is broadcasting a 2.4GHz network. ∙The Wi-Fi network is using WPA/WPA2 security.∙The router is configured for any of the Wi-Fi modes a/b/g/n.Philips Hue Setup (optional)1. Plug in your Hue bridge and it will automatically power up.2. Connect it to the router LAN port.3. Wait for the two lights to come on and you are good to go. (Left is power light and center is local network Nanoleaf Setup (optional) ∙The router is compatible with Bonjour (mDNS).Click to enter the Ambient Link control panelSelect Mystic Light in the sub menu to enter Mystic Light menu19Mystic Light Ambient Link Control PanelGame Mode and Ambient Mode can only be activated one at a time on the Ambient Link control panel.∙Game Mode tab Click to synchronize/ non-synchronize the game Synchronization main switch Click to access the game control panelBack Select Game Event, color and brightnessPreview the effect Apply changes20Mystic Light∙Ambient Mode tab∙Ambient Link tabClick to select an effect asbackground lightClick to switch to PhilipsHue and Nanoleaf Status indicator Click to detectdevicesClick tosynchronize Re-synchronize Removethe device Adjust orientation orpositionApply changesPreview the effectON/OFF backgroundlight & musicDrag the slider to adjust lightbrightness21Noise Cancellation Select Noise Cancellation in the sub menu to enter MSI Sound Tune panel Enable/ Disable Speaker Noise Cancellation.Enable/ Disable Microphone Noise Cancellation.Select Microphone (MSI Sound Tune) in the communication software.Select Speaker (MSI Sound Tune) in the communication software.Noise Cancellation The AI-powered noise cancellation is trained through a deep neural network (DNN), the model is generated with more than 500 million data, simulates the way the human brain works. When a sound is heard, the model automatically recognizes and separates the vocal sound from background noises. Hence, filtering out all the unwanted noise. This feature greatly improves the users’ communication experience.22Duet DisplayDuet Display Duet turns your iOS device & Android phone, tablet, or Chromebook into the most advanced extra display, and offers unparalleled performance and display quality.Click to open the Duet Display introduction window Duet Display InstructionsiOS mode Scan the QR code to download Duet Coach app on your iOS device and follow the app instructions to mirror screen.Screen Profiles Hotkey SettingClick to review the screen profile for 5 seconds Click to remove the screen profileCreate a New Screen Profile1. Connect to a second display.2. Click the New button.3. Enter the name of this new profile and click the Apply button.4. Drag through the portion of the display you want to capture.5. Click the Next Segment button to set maximum 3 segments.6. Click the Done button.Activating Duet Screen Capture1. Connect to a second display.2. Check the hotkey setting of the screen profile and remember it.3. Run the application.4. Press the hotkey and the selected portion will be projected on to the second display.23Duet Display24Gaming GearGaming Gear This panel allows you to control MSI’s gaming gear and supported third-party devices. ⚠ImportantThe Gaming Gear feature is only available when MSI Gear devices are connected.Select Gaming Gear in the sub menu to enter Gaming Gear menu Supported devices will be displayed here. Click the device to enter the control panel of the device.25Product Registration Product RegistrationRegister your MSI product to get exclusive updates, quicker service and product support.Login to your MSI account on this My Devices tab. If you don’t have an MSI account, please click the Join MSI Member button or use Facebook/ Google Plus to login.Click the Product Register button and fill in the product registration form.Select My Device in the sub menuto register your product26Live UpdateLive UpdateLive Update feature allows you to scan system and download the latest drivers and utilities. With Live Update, you don’t need to search the drivers on websites. Live Update will download the appropriate drivers automatically. Some software/ drivers will be installed automatically after downloading, please follow the instructions of the installer.To use Live Update:1. Connect your computer to the internet. 2.Go to Support > Live Update.Select which item you want to update Click to scan the systemUtility and driver listClick to install27System Info System Info The System Info provides information about OS, Product Name, Serial Number and Software information.To open System Info:1. Go to Support > System Info.To export system information:1. Go to Support > System Info.2. Click Export System Info button in the upper right corner.3. Browse to the location where you want to save the new text file, and then click Save.To send the serial number to MSI online customer service:1. Go to Support > System Info.2. Click Content Transfer button in the upper right corner.3. Follow customer service’s instructions, and enter 5-digit encryption code.System InformationClick to export system information to a text file.Click to send the serial number of the laptop to MSI online customer service.28Microsoft APPMicrosoft APPThe Microsoft App feature detects installed drivers and displays a relative Microsoft application download links.To install Microsoft App:1. Go to Support > Microsoft App.2. Click the Get it from Microsoft icon on the right side of the item.3.Download and install the application from Microsoft Store.Click to install29Battery Master Battery Master Battery Master is a function tab related to battery maintenance such as RemainBattery Percentage, Battery Health Option, and Battery Calibration.Battery Health Option - Select the battery charging capacity Remain battery percentage Click to calibrate the batteryCalibrating Battery We recommends doing Battery Calibration every 3 months to have the best battery life.1. Go to Tools > Battery Master.2. Click the Battery Calibration icon.3. Follow the instructions on the Battery Calibration screen to connect to the power adapter, install the battery and close the other windows.4. Click Start.30BackupBackupBackup utility designed to backup the recovery image to a USB flash disk or ISO files. They can be used to recover the system to manufacturer’s default settings when it is needed.⚠ImportantUsage of this application on any product with no authorization may be prohibited.Select to create arecovery USB flashdiskSelect to create anISO image fileAfter choosing the type ofbackup, click Next to start thebackup process.NoticesThe MSI logo used is a registered trademark of Micro-Star Int’l Co., Ltd. All other marks and names mentioned may be trademarks of their respective owners. No warranty as to accuracy or completeness is expressed or implied. MSI reserves the right to make changes to this document without prior notice.Copyright© Micro-Star Int’l Co.,Ltd. 2020 All rights reserved.Revision HistoryVersion 1.0, 2020/11, First release31Notices。
PintosProject3 virtual memory
Pintos Project 3: Virtual Memory (1)Jung-Sang Ahn Min-Sub Lee Juyoung Lee Division of Computer Science, KAISTPurpose§ To implement virtual memory on Pintos• • • • • Page table management Swap in/out page from swap disk Stack growth Lazy loading Memory mapped fileCS330 Project2Why should we use VM?§ To use memory larger than physical(real) memory § To protect user program’s memory area (isolation)• Each programs cannot access others’ memory.§ To make user programming easy (abstraction)• Regardless of physical memory size.§ Etc..CS330 Project3Why should we use VM?Internet Explorer 150 MB Photo Shop 300 MB Word 100 MB HWP 100 MBOperating SystemOops!!Physical Memory256 MBCS330 Project4Why should we use VM?§ OS lies to each processes!• “Why so serious? You have 4GB your own memory.” • And OS knows that most of processes won’t use entire 4GB…§ VM makes it possible• Maps from user memory to physical memory. • If there is excess memory usage, evict it to secondary storage (in common, hard-disk).CS330 Project5Page MappingProcess 1’s Address Space (4 GB) Virtual Memory Process 2’s Address Space (4 GB) Mapping Table Physical MemoryHard DiskCS330 Project6Page Mapping§ Page• A continuous region of virtual memory processing. • Usually 4 KB (12-bit offset) in length. • Frame in physical memory.CS330 Project7Page Table Management§ 32-bit address translation31 Virtual Address 20-bit Page Number 11 12-bit Page Offset 0Page TablePhysical AddressFrame NumberPage OffsetCS330 Project8Page Table Management§ Page table size• • • • • • • Page number: 20-bit value A page table can have 2^20 (about 1 million) entries. Each entry: 4-byte (32-bit) Thus, one page table needs 4MB memory. In common, there are more than 50 processes in OS. 4MB x 50 = 200MB for page table. Jesus!§ Solution: 2-level page table• Level 1: page directory / level 2: page table • Only valid page tables are loaded on memoryCS330 Project9Page Table Management20-bit Page Number 10-bit Page Directory Index 10-bit Page Table Index 12-bit Page OffsetPage Directory (unique)Page Table (one of 1024)Page Table EntryPage Directory Entry20-bit Frame Number Page OffsetCS330 Project10About Project 3§ This is the hardest project in the pintos!• Good luck ladies and gentlemen.§ Divided into 2-phases• Phase Phase-1 (3 weeks)– Page table management – Swap-in, swap-out• Phase-2 (2 weeks)– Lazy loading – Stack growth – Memory mapped fileCS330 Project11What to do?§ Current Pintos' VM• 2-level page table is already implemented– pagedir.c, pte.h, *pagedir in struct thread• But incomplete page table management • Nothing is done when page fault occurs (just system failure) • Cannot use virtual memory larger than physical memory§ You should implement..• Supplement page table to manage swap– Hash structure is useful• Swap in/out page– Using current interface is strongly recommended.CS330 Project12Before you start..§ Must read Pintos document carefully!• 4. Project 3: Virtual Memory • A.5. Memory Allocation ~ A.8. Hash Table§ userprog/pagedir.c• Page table management code§ threads/palloc.c• Functions to allocate/free pages • Need to understand relation between user-pool & kernel-pool.CS330 Project13Before you start..§ userprog/exception.c• page_fault()§ threads/pte.h• Need to understand means of each flags– PG_A, PG_W, PG_P, etc..• These flags are useful for finding victim and evicting pages§ device/disk.c• Low level disk read/write functions (using sector number)§ lib/kernel/hash.c, lib/kernel/bitmap.cCS330 Project14Page Table Management§ Implement mapping table• 2-level page table is already implemented– Just direct mapping from VA to PA – Cannot use virtual memory larger than physical memory• You should implement supplemental page table to manage– Use hash structure• Translate from virtual page address to physical frame address– Store this mapping information in also hash table – What is virtual address and what is physical address in Pintos? – How can we catch the moment that a page is allocated?• Why can’t we use current page table implementation?– How does current pintos map from VA to PA? – Read source code very carefully!CS330 Project15Page Table ManagementCurrent implementation in Pintos Memory requests from userPintos’ Page TableYour mission Through Pintos’ Page Table Interfaces: pagedir_set_page(), pagedir_clear_page(), …Your Supplemental Page TableStores all page-mapping (from PA to VA) informationFrame TableManages all on-memory page informationSwap TableTracks usage of swap slots in swap-diskCS330 Project16Page Table Management§ Implement mapping table• Related functions:– pagedir.c» pagedir_set_page, pagedir_get_page, pagedir_clear_page » lookup_page …– palloc.c» palloc_get_multiple, palloc_free_multiple …– most of functions in pagedir.h, bitmap.c and hash.cCS330 Project17Swap-In Swap-Out§ Evict page (Swap-out)• 1. When physical memory is full (how can we know this?) • 2. Find victim page to swap out– Policy is up to you (e.g. LFU, LRU, FIFO, second chance) – But you should consider performance because of timeout.• 3. Write victim page on swap-disk– You should consider that page size is 4 KB but sector size of disk is 512 byte.• 4. Modify PTE (original page table) and (your) page table • 5. Replace new page (if needed) • Related functions:– disk.c» disk_get, disk_read, disk_writeCS330 Project18Swap-In Swap-Out§ Evict page (Swap-out)1. Physical memory is fullPintos’ Page Table6. Modify PTE 5. Update your page tableYour Supplemental Page Table2. Find a victim page 3. Find an empty slotFrame Table4. Swap-outSwap TableSwap-disk19CS330 ProjectSwap-In Swap-Out§ Page fault (Swap-in + Swap-out caused by swap-in)• 1. When page fault occurs • 2. Check that this page is evicted to swap-disk– If invalid page, exit with status -1• 3. If evicted page, read it from disk to physical memory– But!! check that physical memory is full or not. – If full, find victim and evict it before read.• 4. Modify PTE (original page table) and (your) page table • Be careful for thrashing…– Why & when does thrashing occur?• Related functions:– exception.c» page_faultCS330 Project20Swap-In Swap-Out§ Page fault (Swap-in + Swap-out caused by swap-in)1. Page faultPintos’ Page Table6. Modify PTE 2. Check that this page is valid 5. Update your page tableYour Supplemental Page Table3. Find corresponding slotFrame Table(Swap-out may occurs) 4. Swap-inSwap TableSwap-disk21CS330 ProjectAbout Disk Operation§ Pintos has 4 hard-disk devices• • • • There are two numbers that has value 0 or 1. Former is channel number and latter is device number. 0 is master and 1 is slave. swap-disk is 1:1– This is needed when use disk_get§ Creating swap-disk• pintos-mkdisk swap.dsk n– n is size of the disk (MB)• pintos … --swap-disk=nCS330 Project22Tip§ -ul option is very useful• Limit the size of user pool • Easy test for swap in/out • ex> pintos … -ul=16CS330 Project23Etc.§ This project should be built on top of project 2.• Test programs from project 2 should also work with project 3.§ We will not provide project 2 source code for you.• You should complete project 2 perfectly before project 3.§ You must pass 9 tests + userprog tests• tests/vm/pt-bad-addr, tests/vm/pt-bad-read tests/vm/pt-write-code, tests/vm/pt-write-code2 tests/vm/page-linear, tests/vm/page-parallel tests/vm/page-merge-seq, tests/vm/page-merge-par tests/vm/page-shuffleCS330 Project24Etc.§ Unfortunately, there is no file in VM directory.• But in Pintos document…§ Yeah.. you should start from big-bang.• Not means these guys.. right?CS330 Project25Etc.§ TAs• 안정상, jsahn_at_camars.kaist.ac.kr • 이민섭, ssangbuja_at_cps.kaist.ac.kr • 이주영, ljy8904_at_kaist.ac.kr§ We recommend you to use Noah course board.CS330 Project26Submission§ Due date• 11/8 (Sun) Mid-night§ E-mail to ‘cs330_submit@camars.kaist.ac.kr’• Title: [cs330][Team Name] project 3_1 • Contents– Source code (archive of ‘pintos/src’ directory) – You don’t need to submit design documentation yet. – Instead, write README.txt briefly» Write about what you did (your victim policy, contribution, etc.). » Notice your token usage (if you used)§ Cheating will not be tolerated.CS330 Project27。
华硕笔记本电脑自带软件汇总-推荐下载
华硕自带软件汇总~~~~~~~~~~~~~申精!!置顶!研究了几天,为一键恢复后删除一些自带软件做的准备,百度找了好久终于整理出来了~~~希望能帮到各位机友1.CyberLink DVD Suite……………………是一套支援最新高解析蓝光光碟的全方位整合应用软体,以结合讯连科技各项软体功能的优势,确保使用者以更简易的操作方式执行各种功能:包含撷取、编辑、制作、烧录以及播放高解析影片内容。
2.CyberLink LabelPrint……………………轻松制作独具风格光盘卷标与CD封面,是一套快速简易的光盘卷标制作软件, 支持最新lightscribe光盘封面刻录技术, 内含各种丰富范本, 可轻松制作出个人特色的光盘卷标和CD外盒, 您也可...3.CyberLink MediaEspresso………………媒体转换器4.CyberLink Power2GO 威力酷烧6……………………超强烧录软件、无所不烧,支持蓝光光盘(Blu-rayDiscs)、HD DVD、DVD及CD光盘烧录制作动态相片及影片DVD,轻松烧录音乐CD及转录MP3 ,便利的档案搜寻工具,快速找到想烧录的档案资料加密及密码保护功能,保护重要档案与资料夹,完全支持Windwos Vista信息看板(Sidebar)的快速拖、放烧录工具5.CyberLink PowerDirector(威力导演)………………是一套制作CD、DVD电影作品的完全解决方案,可让使用者进行截取、编辑、菜单制作、及刻录电影作品于DVD、VCD、SVCD及MiniDVD光盘,轻松截取影像及编辑影片,同时还拥有独特的光盘制作精灵,让你快速简易地执行影片制作及刻录。
6.Cyberlink powerdvd 10……………………高品质的影音光碟播放程序7.cyberlink Shared files………………估计是什么播放器8.ASUS AI recovery……………………是用来备份你的隐藏分区的以后可以用了恢复系统道理类似于自己做一个Ghost镜像准备几张空白DVD刻录盘开启那个软件按提示放盘进去制作都是自动的9.ASUS LifeFrame3…………………………摄像头应用软件可以制作大头贴10.ASUS Live Update…………………………是在线更新,用于检测ASUS 官网有没有推出新版本的BIOS等ASUS Utility里面的软件11.Asus Vibe………………ASUS Vibe Fun Center是一個線上多媒體影音娛樂服務平台,平台內容包括音樂、遊戲、電台、線上電視、線上影片(電視影集、電影、原創影片)、電子書(雜誌、報紙、書籍)、教學影片、教學有聲書、互動教材等12.ASUS WebStorage………………原为华硕针对Eee PC量身打造的在线储存服务,也就是网络硬盘吧13.ASUS Power4Gear Hydrid………………电源管理软件14.eManual………………就是华硕使用说明15.ATK Package……………………华硕电脑快捷键的驱动安装包16.ATK_Hotkey …………………… 华硕快捷键驱动17.ATKDrv ………………………… 华硕笔记本主板驱动18.ATKMedia……………………… 华硕多媒体开机程序19.ATKOSD2 …………………………华硕快捷键特效软件20.controldeck…………………………是一款系统设置工具。
华硕软件
华硕软件软件作用及链接Q:Splendid作用及链接。
A:作用:splendid是通过调节亮度、对比度、色彩饱和度、色温等多个参数,让您看到的影像色彩更鲜艳!细节更丰富!Splendid软件在桌面上会有个图标,双击打开后可以自动调节。
也可以使用快捷键Fn+C快速的在华硕靓彩的各显示模式间切换。
参考链接:Asus Splendid影像增强技术公用程序版本 V1.02.0031(XP)/Download.aspx?SLanguage=zh-cn&p=3&s=110&m=Splendid&os =17&ft=14&f_name=Splendid_B53E_B53S_Win7_64_Z1020033.zip#Splendid_B53E_B53S_W in7_64_Z1020033.zipAsus Splendid影像增强技术公用程序版本 V1.02.0031(win7)/Download.aspx?SLanguage=zh-cn&p=3&s=110&m=Splendid&os =29&ft=14&f_name=Splendid_Win7_32_Z1020031.zip#Splendid_Win7_32_Z1020031.zipEee Splendid影像增强技术公用程序 XP版:/Download.aspx?SLanguage=zh-cn&p=20&s=1&m=Eee%20PC%201 005HA&os=17&ft=14&f_name=EeeSplendid.zip#EeeSplendid.zipEee Splendid影像增强技术公用程序 windows7 版:/Download.aspx?SLanguage=zh-cn&p=20&s=1&m=Eee%20PC%2010 05HA&os=29&ft=14&f_name=eSplendid-5_1_2_0004.zip#eSplendid-5_1_2_0004.zipQ:SmartLogon作用及链接。
华硕预装软件卸载
华硕笔记本预装软件卸载指南当前的笔记本预装系统中常常包含不少预装软件。
但厂商大都没有对预装的软件进行必要的说明,部分预装软件白白占用用户桌面空间,拖慢开机速度,既没有发挥应有的功能,也让用户不敢贸然删除。
一个个的搜索软件名称,考察是否对自己有用是一项体力活。
笔者结合自己的使用体验和国外论坛的讨论整理了华硕品牌笔记本中的常见预装软件列表,并逐一说明每个软件的功能,给出是否可卸载的建议。
希望可以帮助华硕笔记本的用户获得更清爽、快捷的使用体验。
Wireless Console Utility华硕无线应用控制软件,也有时显示名称为WirelessConsole 2/3。
控制笔记本在wifi和蓝牙无线网络间切换。
删掉并不会影响wifi或蓝牙正常工作,在没有wifi或蓝牙开关快捷键的机型上起到快速开关wifi和蓝牙的作用。
没有蓝牙功能的机型建议卸载此软件。
Multi Frame多视窗分割工具。
组织管理屏幕上打开的多个窗口(效果看图)。
对外接大屏幕显示器,同时打开多个窗口工作的人有用,无外接显示器建议卸载。
VirtualCamera Utility虚拟摄像头工具,可以实现多个程序同时使用摄像头、控制视频分辨率添加特殊效果(类似大头贴的背景)的功能。
删掉不影响摄像头正常工作。
建议卸载。
Splendid号称可以通过改变对比度等“智能”提高显示效果,可以使画面看起来更“艳丽”。
但事实上并不提高显示质量,反而有可能造成颜色失真,加速视觉疲劳。
建议卸载,不过对“艳丽”感兴趣的话可是先试试再决定。
LifeFrame摄像头录像软件,同时具有录音功能。
删掉不影响摄像头正常工作。
除非要用屏幕顶上那130万像素的摄像头玩自拍,否则建议卸载。
Smart Logon面部识别登录软件。
听起来很美好是不是,你往电脑前一坐,不用动一根手指输密码就自动登录到系统里你的账户了。
可惜实际上坑爹,敏感度调低了,随便是谁往前一凑就能认证通过,调高了本尊在座它也不认。
ASUS笔记本自带软件解析解析
一二线的笔记本品牌大都有自带一些方便用户操作的软件,这些软件与多各笔记本多媒硬件相结合,往往会给入门级的用户带来一定程度的便利,研发实力强一些的品牌所做的自带软件甚至得到高端玩家的青睐,比如华硕。
今天,我们就向大家介绍一下华硕几款大名鼎鼎的自带软件都有哪些神通。
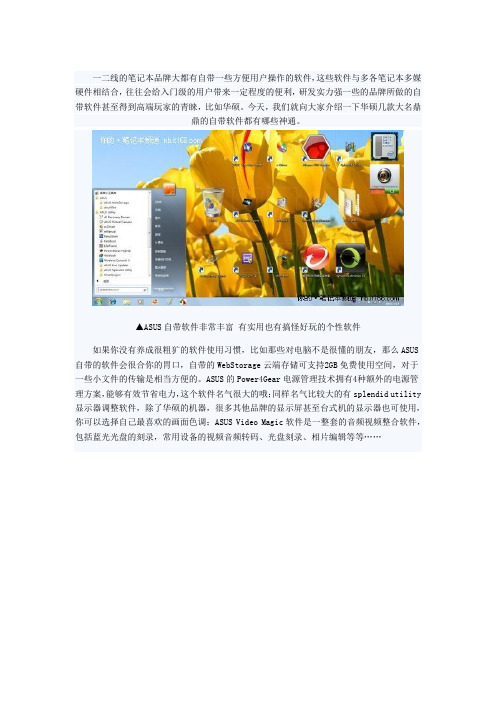
▲ASUS自带软件非常丰富有实用也有搞怪好玩的个性软件如果你没有养成很粗犷的软件使用习惯,比如那些对电脑不是很懂的朋友,那么ASUS 自带的软件会很合你的胃口,自带的WebStorage云端存储可支持2GB免费使用空间,对于一些小文件的传输是相当方便的。
ASUS的Power4Gear电源管理技术拥有4种额外的电源管理方案,能够有效节省电力,这个软件名气很大的哦;同样名气比较大的有splendid utility 显示器调整软件,除了华硕的机器,很多其他品牌的显示屏甚至台式机的显示器也可使用,你可以选择自己最喜欢的画面色调;ASUS Video Magic软件是一整套的音频视频整合软件,包括蓝光光盘的刻录,常用设备的视频音频转码、光盘刻录、相片编辑等等……▲上图所示的图标就是Vibe了,软件全名叫ASUS Vibe Fun Center(本土化做得不够呀)今天,主要向大家介绍一下这款Vibe Fun Center软件,直译过来就是Vibe娱乐中心,事实上它与Windows媒体中心颇有相似之处,不过Vibe只能用来看在线的音频视频,除了音频视频之外,它还集成了杂志、电子书、电台,所有的服务都是基于一个账号,并且在云端(也就是网络上运行)。
看看▲Vibe软件默认界面,东西很多,一屏排不满华硕官方对它的定义吧:vibe是一個線上多媒體影音娛樂服務平台,平台內容包括音樂、遊戲、電台、線上電視、線上影片(電視影集、電影、原創影片)、電子書(雜誌、報紙、書籍)、教學影片、教學有聲書、互動教材等。
您可以使用@vibe享受各式各樣精心挑選的數位多媒體服務。
asus control center express用法-概述说明以及解释
asus control center express用法-概述说明以及解释1.引言1.1 概述ASUS Control Center Express(简称ACCE)是一种功能强大的管理工具,旨在帮助用户更高效地管理和监控其ASUS硬件设备。
作为一种集中式管理解决方案,ACCE提供了广泛的功能和用途,使用户能够通过一个集成的平台轻松管理多个设备。
ACCE旨在满足企业用户的需求,尤其是那些需要同时管理多台ASUS 设备的用户。
通过ACCE,用户可以远程管理和监控其设备,从而提高工作效率并降低管理成本。
该工具提供了直观且易于使用的界面,使用户能够轻松执行设备管理任务。
用户可以通过ACCE执行诸如设备配置、固件更新、故障排除和性能监控等任务,而不需要直接到设备上进行操作。
这大大简化了管理过程,并提供了更高的灵活性和便利性。
此外,ACCE还提供了详细的报告和统计信息,帮助用户了解设备的状态和性能。
用户可以查看设备的硬件信息、网络统计数据和事件日志等,以进行更准确的故障诊断和性能优化。
总而言之,ASUS Control Center Express是一个功能强大且易于使用的管理工具,为用户提供了便利的设备管理和监控功能。
它的出现大大简化了管理过程,提高了企业用户的工作效率。
在未来,我们可以期待ACCE进一步发展壮大,提供更多新的功能和工具,以满足用户日益增长的管理需求。
文章结构部分主要介绍了整篇文章的组织结构和各个部分的内容概述。
本文的整体结构如下:1. 引言1.1 概述:介绍ASUS Control Center Express(以下简称ACCE)的背景和意义。
1.2 文章结构:阐述本文的目录结构和各个部分的内容概述。
1.3 目的:说明本文的写作目的和意义。
2. 正文2.1 ASUS Control Center Express简介:对ACCE进行详细介绍,包括其定义、主要功能和应用场景等。
2.2 ASUS Control Center Express的功能和用途:细分ACCE的各个功能模块,分别介绍其具体用途和实际应用。
华硕笔记本电脑预装软件说明
华硕笔记本预装软件卸载指南当前的笔记本预装系统中常常包含不少预装软件。
但厂商大都没有对预装的软件进行必要的说明,部分预装软件白白占用用户桌面空间,拖慢开机速度,既没有发挥应有的功能,也让用户不敢贸然删除。
一个个的搜索软件名称,考察是否对自己有用是一项体力活。
笔者结合自己的使用体验和国外论坛的讨论整理了华硕品牌笔记本中的常见预装软件列表,并逐一说明每个软件的功能,给出是否可卸载的建议。
希望可以帮助华硕笔记本的用户获得更清爽、快捷的使用体验。
Wireless Console Utility华硕无线应用控制软件,也有时显示名称为WirelessConsole 2/3。
控制笔记本在wifi和蓝牙无线网络间切换。
删掉并不会影响wifi或蓝牙正常工作,在没有wifi或蓝牙开关快捷键的机型上起到快速开关wifi和蓝牙的作用。
没有蓝牙功能的机型建议卸载此软件。
Multi Frame多视窗分割工具。
组织管理屏幕上打开的多个窗口(效果看图)。
对外接大屏幕显示器,同时打开多个窗口工作的人有用,无外接显示器建议卸载。
VirtualCamera Utility虚拟摄像头工具,可以实现多个程序同时使用摄像头、控制视频分辨率添加特殊效果(类似大头贴的背景)的功能。
删掉不影响摄像头正常工作。
建议卸载。
Splendid号称可以通过改变对比度等“智能”提高显示效果,可以使画面看起来更“艳丽”。
但事实上并不提高显示质量,反而有可能造成颜色失真,加速视觉疲劳。
建议卸载,不过对“艳丽”感兴趣的话可是先试试再决定。
LifeFrame摄像头录像软件,同时具有录音功能。
删掉不影响摄像头正常工作。
除非要用屏幕顶上那130万像素的摄像头玩自拍,否则建议卸载。
Smart Logon面部识别登录软件。
听起来很美好是不是,你往电脑前一坐,不用动一根手指输密码就自动登录到系统里你的账户了。
可惜实际上坑爹,敏感度调低了,随便是谁往前一凑就能认证通过,调高了本尊在座它也不认。
华硕ASUSTeK COMPUTER INC. VT168HR系列液晶显示器用户指南说明书
VT168HR系列液晶显示器用户指南ii版权所有© 2021 ASUSTeK COMPUTER INC.保留所有权利。
除了购买者出于备份目的而保留的文档外,未经 ASUSTeK COMPUTER INC.(以下简称“ASUS ”)明确书面许可,不得以任何形式或通过任何方式复制、传播、转录本手册的任何部分,包括其中介绍的产品和软件,也不得将其存储到检索系统中或翻译成任何语言。
在下列情况下,不能享受产品保修或维修服务:(1) 未获得ASUS 书面授权,而修理、修改或改动产品;(2) 产品序列号损毁或缺失。
ASUS “按原样”提供本手册,不提供任何明示或隐含的担保,包括但不限于对于适销性或针对特定目的的适用性的隐含担保或条件。
无论在任何情况下,ASUS 及其董事成员、高级职员、员工或代理不对由于本手册或产品中存在任何缺陷或错误而导致的任何间接、特殊、偶然或必然损失(包括收益损失、业务损失、不能使用或数据丢失、业务中断等)承担任何责任,即使 ASUS 已被告知此类损失的可能性。
本手册中包含的规格和信息仅供一般性参考,可能会随时变更而不另行通知,因此不应构成 ASUS 的承诺。
ASUS 对本手册(包括其中介绍的产品和软件)中可能存在的任何错误不承担任何责任。
本手册中出现的产品名称和公司名称可能分别是或不是相应公司的注册商标或版权,仅用于标示或解释目的,无意侵犯其所有者的权益。
声明 .....................................................................................iii 安全信息................................................................................iv 保养和清洁 .. (vi)1.1欢迎使用! ................................................................1-11.2物品清单 ...................................................................1-11.3组装显示器底座...........................................................1-21.4连接线缆 ...................................................................1-21.5 显示器简介 ................................................................1-31.5.1液晶显示器前部 ...............................................................1-31.5.2液晶显示器后部 ...............................................................1-42.1 拆卸底座/支撑臂(VESA 壁挂安装时) ..............................2-12.2调整显示器 ................................................................2-23.1 触摸操作 ...................................................................3-14.1 OSD (屏幕显示)菜单 ..................................................4-14.1.1如何重新配置 ..................................................................4-14.1.2 OSD 功能介绍 .................................................................4-24.2规格 ......................................................................4-104.3故障排除(常见问题) ................................................4-114.4 支持的时序列表.........................................................4-12联邦通信委员会声明本设备符合 FCC 规则第 15 部分的要求。
【华硕品牌营销】华硕asus随机软件(3)

•ASUS MultiFrame
•窗口切分大幅提高 工作效率!!!
MultiFrame 轻松切分窗口. 最多可以分割四个工作区域. 方便网络浏览和不同文件中的数据同时察看.
•目 录
•防拷贝软件——
•
ASUS Copy
Protect
•ASUS Copy Protect
•ASUS Copy Protect保护您的数据不被非法拷贝。
【华硕品牌营销】华硕 asus随机软件(3)
2020年5月26日星期二
•目 录
•BIOS智能升级技术——
•
ASUS Live
Update
•ASUS Live Update
•安 装•目 录
•ASUS Live UpUpdate图 标
•ASUS Live Update
轻松锁定你的CD ROM, 软驱,移动存储设备和网络驱动盘,保护您的数据安全。
•目 录
•智能网络转换技术——
•
ASUS Net 4
Switch
•ASUS Net 4 Switch
•搭配Net 4 Switch,帮助用户更轻松应对各种网络环境
记录网络设置,在不同网络环境中自由转换 自动选择最佳的网络连接 自动侦测网络故障的原因,并给出解决方案
•目 录
•窗口切分软件——
•
ASUS MultiFrame
•方便地升级您的系统软件和BIOS文件
点击“确定” 连接到 “升级 服务器.”
•系统会呈现最新的软件版本. 检查系统是否有更新的软件点 击 “Check all”.
•ASUS Live Update
线上更•新目程录序,用于更新BIOS、Driver、Utility。
华硕主板附带软件说明
华硕主板附带软件说明LucidLogix Virtu MVP Wizard华硕7系主板支持最新的LucidLogix Virtu MVP混合图形加速技术,可大幅提高多GPU协同处理性能。
经过测试,使用LucidLogix Virtu MVP混合图形加速技术后,能够让平台的图形处理能力提升60%,获得三倍速的多媒体解码性能提升。
Bios Renamer刷新工具Bios Renamer是华硕为自家主板推出的一款可以在USB存储设备上使用的Bios刷新工具,操作十分简单,让初学者都能轻松刷新主板Bios。
使用方法:1.将BIOS文件和Bios Renamer放进同一个文件夹。
2.运行此工具。
3.此时新的BIOS文件就可以用USB BIOS Flash Back进行更新了。
ASUS webstorage华硕旗下的eCareme开发的免费网络硬盘服务,可以为你的电脑上的重要数据文件提供自动备份服务,也可以文件同步及文件共享(可设置密码),功能比较丰富和实用。
AI Charger智能充电软件随着苹果产品在国内大热,身边拿着iPhone 4、iPad的人明显越来越多了。
大家对于苹果产品可以说是又爱又恨,虽然操作很方便,但充电却是个问题,只有连接在苹果电脑(Macbook或iMac)的USB接口时才会充电,普通PC是不行的,也就是经典的“不在充电”问题。
现在这个问题终于得到解决——华硕主板近日发布了一款名为“Ai Charger”的小软件,使普通PC也可以为iPad进行充电。
软件的方法非常简单:下载Ai Charger并安装,然后按照提示重启电脑即可。
值得一提的是,经过测试,此软件并不限于华硕主板,可以说是非常厚道。
AI Suite II整合平台AI Suite II其实就是软件合集,将系统监控。
超频设置、电源管理等众多功能软件集合在了一起,主要包括:ASUS Update、FAN Xpert、GPU Boost、MyLogo、Network iControl、Probe II、System Information、USB 3.0 Boost等软件。
华硕笔记本预装特色软件介绍
衡量一个笔记本电脑厂商的研发实力,除了优秀的工业设计之外,增值的随机软件也是一个非常重要的因素。
例如就拿Thinkpad来说,ThinkPad之所以如此受到笔记本用户特别是行业用户的追捧,除了其机器本身的优异品质外,它强大的笔记本软件技术支持也绝对是功不可没的。
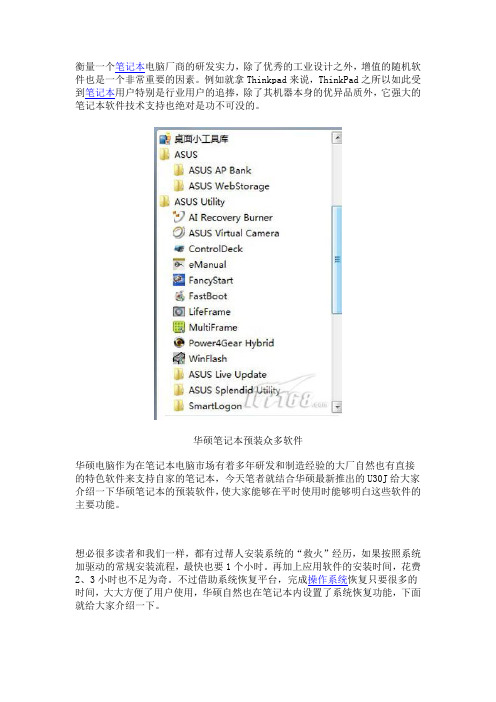
华硕笔记本预装众多软件华硕电脑作为在笔记本电脑市场有着多年研发和制造经验的大厂自然也有直接的特色软件来支持自家的笔记本,今天笔者就结合华硕最新推出的U30J给大家介绍一下华硕笔记本的预装软件,使大家能够在平时使用时能够明白这些软件的主要功能。
想必很多读者和我们一样,都有过帮人安装系统的“救火”经历,如果按照系统加驱动的常规安装流程,最快也要1个小时。
再加上应用软件的安装时间,花费2、3小时也不足为奇。
不过借助系统恢复平台,完成操作系统恢复只要很多的时间,大大方便了用户使用,华硕自然也在笔记本内设置了系统恢复功能,下面就给大家介绍一下。
利用AI Recovery Burner软件就可以制作系统恢复光盘开机后装入刻录好的恢复光盘,再设置为光驱启动即可进入恢复界面华硕恢复系统界面比较简单,除了全盘系统恢复、恢复到第一个分区以及带有两个分区的系统恢复三种方式外,再也没有其他多余的选项。
尤其是带分区操作的恢复形式,代表了绝大部分用户恢复系统时的不同需求。
如系统感染病毒可以使用全盘恢复、只需要恢复C盘时选择第二种方式,第三种方式适合讲究方便的用户。
用户选择一种分区状态后就开始了自动恢复在恢复过程中会提示用户更换恢复光盘,在用时大约38分钟后,此次恢复工作圆满完成。
电源管理软件也是体现一个笔记本品牌软件技术研发实力强大与否的一个关键因素,在电源管理上,华硕也预装了华硕经典的Power4Gear Hybird管理软件。
Power4Gear可以通过笔记本机身上的快捷键快速切换当前的节电模式。
在新一代的华硕笔记本上内置的为最新版的Power4Gear Hybrid新一代的智能省电技术,除了拥有Power4Gear eXtreme的特征,还增加了关闭硬件设备(摄像头、ODD、指纹识别)、效率/省电模式、省电桌面设定。
随机软件使用介绍
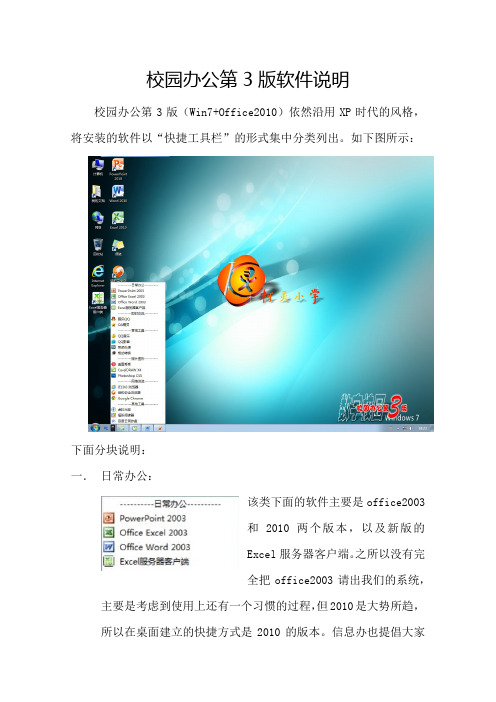
校园办公第3版软件说明校园办公第3版(Win7+Office2010)依然沿用XP时代的风格,将安装的软件以“快捷工具栏”的形式集中分类列出。
如下图所示:下面分块说明:一.日常办公:该类下面的软件主要是office2003和2010两个版本,以及新版的Excel服务器客户端。
之所以没有完全把office2003请出我们的系统,主要是考虑到使用上还有一个习惯的过程,但2010是大势所趋,所以在桌面建立的快捷方式是2010的版本。
信息办也提倡大家使用office2010开展日常工作。
二.即时交流:这类中的两个软件我想就不需要介绍了,地球人都知道了!三.音视工具:里面包括四个软件,前两腾讯的软件我们比较了解。
后面两个可能比较陌生。
利用这四个工具,我们平时需要进行的声音及视频的剪辑、拼接等简单的处理均可完成。
刚刚又增加了一款屏幕录像专家,可以让你轻松把屏幕的操作录成视频。
四.照片图形:从分类的名称可以得知这里的软件都是与“照片图形”有关的。
第一款是大家耳熟能详的“贫民”照片处理工具。
第二款是“图文社”用得非常普遍的平面设计软件,其实操作非常的简单,对于做教室布置非常有用。
最后一款就是传说中的“PS”,在没有美图秀秀之前,PS是照片处理的首先。
五.网络浏览:这类全是浏览器,一共给大家准备了三款浏览器,第一款是系统标配的IE浏览器,不多讲了。
后面二款是猎豹和谷歌,它们有一个最大的特点是可以注册帐号,之后“收藏夹”的内容可以跟着帐号进行“云备份”,只要你用相同的帐号登录,就可以保持相同的收藏夹内容,是不是突然感觉很方便。
还有,不同的浏览器也有各自的特色、技术内核也有所不同,遇到某个网站打不开的时候,你可以换个浏览器试试,或者会有惊喜哦……六.其他工具:这里提示一款很实用的软件——《虚拟光驱》,这个其实大家并不会陌生,早在第1版中我们就开始有了。
但这个使用更方便,而且整合了“制作光盘文件”的功能。
第二款软件是PDF电子文档的阅读器,相关的文件会自动通过该软件打开,一般我们不会主动去使用。
华硕电脑自带程序辣么多,哪些可以利(干)用(掉)?
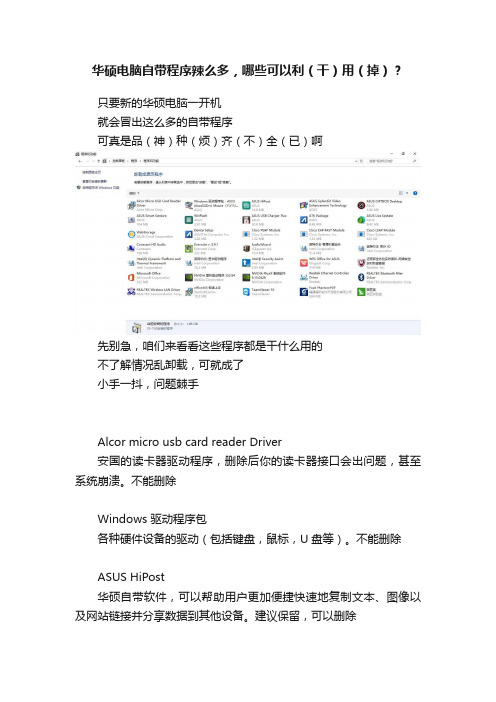
华硕电脑自带程序辣么多,哪些可以利(干)用(掉)?只要新的华硕电脑一开机就会冒出这么多的自带程序可真是品(神)种(烦)齐(不)全(已)啊先别急,咱们来看看这些程序都是干什么用的不了解情况乱卸载,可就成了小手一抖,问题棘手Alcor micro usb card reader Driver安国的读卡器驱动程序,删除后你的读卡器接口会出问题,甚至系统崩溃。
不能删除Windows 驱动程序包各种硬件设备的驱动(包括键盘,鼠标,U盘等)。
不能删除ASUS HiPost华硕自带软件,可以帮助用户更加便捷快速地复制文本、图像以及网站链接并分享数据到其他设备。
建议保留,可以删除ASUS Splendid Video Enhancement Technoloy华硕的炫彩程序,用来调节屏幕色彩非常有用。
它使个人电脑的影像表现大改善,软件内置多种显示模式,软件内置多种显示模式。
不能删除ASUS GIFTBOX desktop是一款Windows新风格应用程序,主要作用是汇总推荐一些热门实用应用程序,点击某一款应用软件后,会自动跳转到Windows应用商店或网页,进行下载。
建议保留,可以删除ASUS Smart Gesture智慧型触控板驱动程序,可识别手掌与手指的接触,避免在打字时不慎造成光标移动。
在笔记本上触摸板上两个手指滑动可以移动页面,三只手指滑动可以切换程序。
不能删除WinFlash是一个用于在 Windows 下面刷新 BIOS 的软件。
不能删除USB charger plus是快速充电的功能,安装了这个软件之后,充电电流增大,您的外接设备如果是手机之类带电池的可以加快充电速度。
不能删除ATK Package华硕热键程序包,删除的话Fn+F9之类的热键功能就失效了,是必须要保留的。
不能删除ASUS Live Update华硕自带的驱动和应用升级软件,联网之后会自动搜索最新驱动并安装。
不能删除ASUS WebStorage华硕的网络储存程序,属于额外增值服务。
驱动与随机软件安装向导使用说明
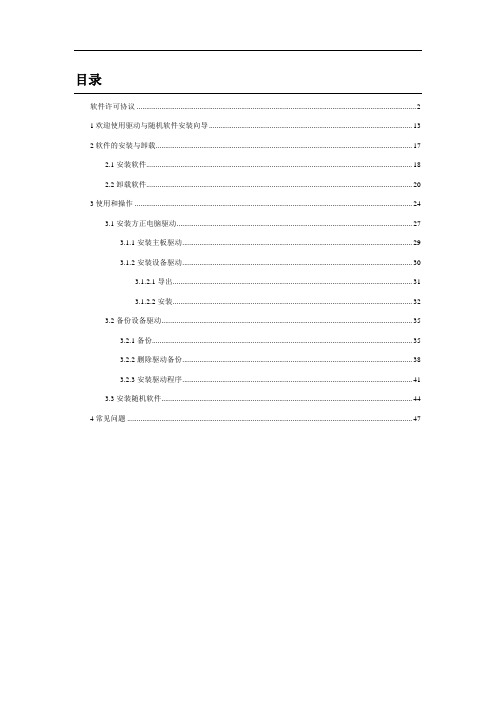
目录软件许可协议 (2)1欢迎使用驱动与随机软件安装向导 (13)2软件的安装与卸载 (17)2.1安装软件 (18)2.2卸载软件 (20)3使用和操作 (24)3.1安装方正电脑驱动 (27)3.1.1安装主板驱动 (29)3.1.2安装设备驱动 (30)3.1.2.1导出 (31)3.1.2.2安装 (32)3.2备份设备驱动 (35)3.2.1备份 (35)3.2.2删除驱动备份 (38)3.2.3安装驱动程序 (41)3.3安装随机软件 (44)4常见问题 (47)软件许可协议北京路模思科技有限公司重要提示━请仔细阅读:请务必仔细阅读和理解本软件最终用户许可协议(《协议》)中规定的所有权利和限制。
您需要仔细阅读并决定接受或不接受本《协议》的条款。
除非或直至您接受本《协议》的条款,否则本软件不得安装在您的计算机上。
您单击“是”按钮,即表示您签名接受本《协议》的条款。
本《协议》是您与北京路模思科技有限公司之间有关随附本《协议》的软件的法律协议。
本软件包括随附的计算机软件,并可能包括相关文档印刷材料。
您一旦安装本“软件”,即表示您同意接受本《协议》各项条款的约束。
如您不同意本《协议》中的条款,您则不可以安装或使用本“软件”。
本“软件”受著作权法及国际著作权条约和其它知识产权法和条约的保护。
本“软件”只许可使用,而不出售。
一.您有如下权利:北京路模思科技有限公司将本软件在中国大陆地区的非专有的使用权授予您。
您可以:1. 在一台计算机上安装、使用、显示、运行(“运行”)本“软件”的一份副本。
2. 为了防止复制品损坏而制作备份复制品。
这些备份复制品不得通过任何方式提供给他人使用,并在您丧失该合法复制品的所有权时,负责将备份复制品销毁。
二.您保证:1. 不在本协议规定的条款之外,使用、复制、修改、租赁或转让本软件或其中的任一部份。
2. 只在一台计算机上使用本软件;一份“软件”许可不得在不同的计算机共同或同时使用。
- 1、下载文档前请自行甄别文档内容的完整性,平台不提供额外的编辑、内容补充、找答案等附加服务。
- 2、"仅部分预览"的文档,不可在线预览部分如存在完整性等问题,可反馈申请退款(可完整预览的文档不适用该条件!)。
- 3、如文档侵犯您的权益,请联系客服反馈,我们会尽快为您处理(人工客服工作时间:9:00-18:30)。
华硕电脑 中国业务总部
The End Thank you~!
华硕电脑 中国业务事业群
华硕电脑 中国业务总部
ASUS Net 4 ຫໍສະໝຸດ witch搭配Net 4 Switch,帮助用户更轻松应对各种网络环境 搭配 ,
记录网络设置, 记录网络设置,在不同网络环境中自由转换 自动选择最佳的网络连接 自动侦测网络故障的原因, 自动侦测网络故障的原因,并给出解决方案
华硕电脑 中国业务总部
目 录
华硕电脑 中国业务总部
ASUS Live Update
方便地升级您的系统软件和BIOS文件 文件 方便地升级您的系统软件和
点击“确定” 点击“确定” 连接到 “升级 服务器. 服务器.”
系统会呈现最新的软件版本. 系统会呈现最新的软件版本. 检查系统是否有更新的软件点 all”. 击 “Check all .
华硕电脑 中国业务总部
目 录
防拷贝软件—— ASUS Copy Protect
华硕电脑 中国业务总部
ASUS Copy Protect
ASUS Copy Protect保护您的数据不被非法拷贝。 保护您的数据不被非法拷贝。 保护您的数据不被非法拷贝
轻松锁定你的CD ROM, 软驱,移动存储设备和网络驱动盘,保护您的数据安全。 轻松锁定你的CD 软驱,移动存储设备和网络驱动盘,保护您的数据安全。
窗口切分软件—— ASUS MultiFrame
华硕电脑 中国业务总部
ASUS MultiFrame
窗口切分大幅提高 工作效率!!! 工作效率!!!
MultiFrame 轻松切分窗口 轻松切分窗口. 最多可以分割四个工作区域 最多可以分割四个工作区域. 四个工作区域 方便网络浏览和不同文件中的数据同时察看. 方便网络浏览和不同文件中的数据同时察看
华硕电脑 中国业务总部
ASUS Live Update
线上更新程序,用于更新BIOS、Driver、Utility。 目 录 省去用户上网也搜索的时间,会对比笔记本已装的 版本,如果发现有更新的版本则提示下载并安装。
华硕电脑 中国业务总部
目 录
智能网络转换技术—— 智能网络转换技术 ASUS Net 4 Switch
目 录
华硕软件报告(3)
华硕电脑 中国业务总部
目 录
BIOS智能升级技术 BIOS智能升级技术—— 智能升级技术 ASUS Live Update
华硕电脑 中国业务总部
ASUS Live Update 安 装目 录
华硕电脑 中国业务总部
ASUS Live Update 启 动目 录
在系统托盘中也有Live Update图标
