SkylineGlobe Server v7.1用户操作手册-2019v1.0
飞龙企业版用户操作说明
飞龙GPS监控系统操作说明一、飞龙GPS数据维护系统(企业版V2.0A)(一)启动程序点击“开始”—>“程序”—>“飞龙GPS监控端(企业版2.0A)”,出现下图:选择“飞龙GPS数据维护系统(企业版V2.0A)运行,或直接双击桌面图标:也可运行该程序,几秒后进入登录界面,首次运行时,用户名sa,密码:sa,登录后进入主界面。
通过菜单选择“系统操作(S)→“登录“,或直接点击快捷工具栏按钮进入登录界面:输入正确的用户名及密码,点击“确定”后可正常登录。
点击“飞龙GPS数据维护系统(企业版2.0A)”选项,出现如下登陆框:点击“确定“进入主操作页面。
(二)数据功能1、静态数据下载用于下载监控车辆的静态信息数据,包括车辆信息、设备信息、司机信息。
通过菜单选择“数据功能(D)→“静态数据下载“,或直接点击快捷按钮进入静态数据下载界面:选择需要下载的数据种类后,点击“下载”可完成静态数据下载功能。
2、动态数据下载用于将保存在上级中心的某监控车辆选定时间段内的历史动态数据下载到本系统数据库,以用于本地数据分析。
通过菜单选择“数据功能(D)→“动态数据下载“,或直接点击快捷按钮进入动态数据下载界面:选择所需的车辆,开始时间及结束时间后,点击“开始下载”,执行动态数据下载功能。
二、飞龙GPS监控端(企业版V2.0A)(一) 启动程序点击“开始”—>“程序”—>“飞龙GPS监控端(企业版2.0A)”,出现下图:选择运行“飞龙GPS监控端(企业版2.0A),或直接双击桌面图标:启动程序几秒后进入主界面:功能输入经维护系统注册的用户名sa及密码sa,后点击登录(二)基本组成飞龙GPS监控端企业版由5部分组成:菜单栏、快捷按钮工具栏、地图信息窗口、监控信息窗口、业务信息窗口(含通信事件、地图鹰眼窗口、接受信息窗口)。
1、菜单栏提供功能操作的菜单选择方式,所有功能均可通过菜单选择的方式操作,另外也可通过快捷工具栏上的按钮或其它快捷操作方式得到。
Sun ONE Application Server Version 7, Update 1 安装指
安装指南Sun ONE Application Server Version 7, Update 1816-6866-102003 年 4 月版权所有 © 2003 Sun Microsystems, Inc., 4150 Network Circle, Santa Clara, California 95054, U.S.A.。
保留所有权利。
本软件包含 Sun Microsystems, Inc. 的保密信息和商业机密。
未经 Sun Microsystems, Inc. U.S 事先明确书面许可,禁止使用、泄露或复制本软件。
政府权利–商业软件。
政府用户必须遵守 Sun Microsystems, Inc. 标准许可证协议的条款以及 FAR 及其补充内容中的适用条款。
使用本软件必须遵守许可证条款的规定。
本软件可能包括由第三方开发的产品。
Sun、Sun Microsystems、Sun 徽标、Java 和 Sun ONE 徽标是 Sun Microsystems, Inc. 在美国和其它国家/地区的商标或注册商标。
UNIX 是在美国和其它国家/地区的注册商标,由 X/Open Company, Ltd. 独家授权。
本产品受美国出口控制法控制,并遵守其它国家/地区的进出口法律。
严禁将本软件直接或间接用于核武器、导弹、生化武器或核潜艇的研制或使用。
严禁出口或转口到美国禁运的国家/地区或美国禁止出口清单中的实体,包括但不限于被禁止的个人和特别指定的国家/地区清单。
目录关于本指南 . . . . . . . . . . . . . . . . . . . . . . . . . . . . . . . . . . . . . . . . . . . . . . . . . . . . . . . . . . . . . . . . . . . . . 7本指南的读者 . . . . . . . . . . . . . . . . . . . . . . . . . . . . . . . . . . . . . . . . . . . . . . . . . . . . . . . . . . . . . . . . . . . . . . . . . . . 7本指南的组织方式 . . . . . . . . . . . . . . . . . . . . . . . . . . . . . . . . . . . . . . . . . . . . . . . . . . . . . . . . . . . . . . . . . . . . . . . 8使用文档 . . . . . . . . . . . . . . . . . . . . . . . . . . . . . . . . . . . . . . . . . . . . . . . . . . . . . . . . . . . . . . . . . . . . . . . . . . . . . . . 9文档惯例 . . . . . . . . . . . . . . . . . . . . . . . . . . . . . . . . . . . . . . . . . . . . . . . . . . . . . . . . . . . . . . . . . . . . . . . . . . . . . . 11一般惯例 . . . . . . . . . . . . . . . . . . . . . . . . . . . . . . . . . . . . . . . . . . . . . . . . . . . . . . . . . . . . . . . . . . . . . . . . . . 11有关目录的惯例 . . . . . . . . . . . . . . . . . . . . . . . . . . . . . . . . . . . . . . . . . . . . . . . . . . . . . . . . . . . . . . . . . . . . 12产品支持 . . . . . . . . . . . . . . . . . . . . . . . . . . . . . . . . . . . . . . . . . . . . . . . . . . . . . . . . . . . . . . . . . . . . . . . . . . . . . . 13更多信息 . . . . . . . . . . . . . . . . . . . . . . . . . . . . . . . . . . . . . . . . . . . . . . . . . . . . . . . . . . . . . . . . . . . . . . . . . . . . . . 13第1章准备安装 . . . . . . . . . . . . . . . . . . . . . . . . . . . . . . . . . . . . . . . . . . . . . . . . . . . . . . . . . . . . . . . . 15关于 Sun ONE Application Server 安装 . . . . . . . . . . . . . . . . . . . . . . . . . . . . . . . . . . . . . . . . . . . . . . . . . . . 16安装组件 . . . . . . . . . . . . . . . . . . . . . . . . . . . . . . . . . . . . . . . . . . . . . . . . . . . . . . . . . . . . . . . . . . . . . . . . . . 16 Sun ONE Application Server . . . . . . . . . . . . . . . . . . . . . . . . . . . . . . . . . . . . . . . . . . . . . . . . . . . . 16管理客户机 . . . . . . . . . . . . . . . . . . . . . . . . . . . . . . . . . . . . . . . . . . . . . . . . . . . . . . . . . . . . . . . . . . . . 18 Sun ONE Message Queue . . . . . . . . . . . . . . . . . . . . . . . . . . . . . . . . . . . . . . . . . . . . . . . . . . . . . . . 18 PointBase . . . . . . . . . . . . . . . . . . . . . . . . . . . . . . . . . . . . . . . . . . . . . . . . . . . . . . . . . . . . . . . . . . . . . 18样例应用程序 . . . . . . . . . . . . . . . . . . . . . . . . . . . . . . . . . . . . . . . . . . . . . . . . . . . . . . . . . . . . . . . . . . 19 Sun ONE Studio 4.0, Enterprise Edition for Java . . . . . . . . . . . . . . . . . . . . . . . . . . . . . . . . . . . . 19 Java 2 Software Development Kit (J2SE) . . . . . . . . . . . . . . . . . . . . . . . . . . . . . . . . . . . . . . . . . . . 19安装方法 . . . . . . . . . . . . . . . . . . . . . . . . . . . . . . . . . . . . . . . . . . . . . . . . . . . . . . . . . . . . . . . . . . . . . . . . . . 20图形界面方法 . . . . . . . . . . . . . . . . . . . . . . . . . . . . . . . . . . . . . . . . . . . . . . . . . . . . . . . . . . . . . . . . . . 20命令行界面方法 . . . . . . . . . . . . . . . . . . . . . . . . . . . . . . . . . . . . . . . . . . . . . . . . . . . . . . . . . . . . . . . .20静音模式 . . . . . . . . . . . . . . . . . . . . . . . . . . . . . . . . . . . . . . . . . . . . . . . . . . . . . . . . . . . . . . . . . . . . . . 21产品的安装版本 . . . . . . . . . . . . . . . . . . . . . . . . . . . . . . . . . . . . . . . . . . . . . . . . . . . . . . . . . . . . . . . . . . . . 21评估版 . . . . . . . . . . . . . . . . . . . . . . . . . . . . . . . . . . . . . . . . . . . . . . . . . . . . . . . . . . . . . . . . . . . . . . . . 21开发版(非评估版) . . . . . . . . . . . . . . . . . . . . . . . . . . . . . . . . . . . . . . . . . . . . . . . . . . . . . . . . . . . . 22安装版本汇总 . . . . . . . . . . . . . . . . . . . . . . . . . . . . . . . . . . . . . . . . . . . . . . . . . . . . . . . . . . . . . . . . . . 233封装模型和目录结构 . . . . . . . . . . . . . . . . . . . . . . . . . . . . . . . . . . . . . . . . . . . . . . . . . . . . . . . . . . . . . . . .23 Solaris 9 上的捆绑安装 . . . . . . . . . . . . . . . . . . . . . . . . . . . . . . . . . . . . . . . . . . . . . . . . . . . . . . . . . . 24UNIX 上基于软件包的安装 . . . . . . . . . . . . . . . . . . . . . . . . . . . . . . . . . . . . . . . . . . . . . . . . . . . . . . 24Microsoft Windows 上的安装及评估版安装 . . . . . . . . . . . . . . . . . . . . . . . . . . . . . . . . . . . . . . . . 25系统要求 . . . . . . . . . . . . . . . . . . . . . . . . . . . . . . . . . . . . . . . . . . . . . . . . . . . . . . . . . . . . . . . . . . . . . . . . . . . . . . 25平台要求 . . . . . . . . . . . . . . . . . . . . . . . . . . . . . . . . . . . . . . . . . . . . . . . . . . . . . . . . . . . . . . . . . . . . . . . . . . 26所需的 Solaris 修补程序 . . . . . . . . . . . . . . . . . . . . . . . . . . . . . . . . . . . . . . . . . . . . . . . . . . . . . . . . . . . . . 27其它要求 . . . . . . . . . . . . . . . . . . . . . . . . . . . . . . . . . . . . . . . . . . . . . . . . . . . . . . . . . . . . . . . . . . . . . . . . . . 28对于所有平台 . . . . . . . . . . . . . . . . . . . . . . . . . . . . . . . . . . . . . . . . . . . . . . . . . . . . . . . . . . . . . . . . . . 29对于 UNIX . . . . . . . . . . . . . . . . . . . . . . . . . . . . . . . . . . . . . . . . . . . . . . . . . . . . . . . . . . . . . . . . . . . . 29对于 Solaris 捆绑版本 . . . . . . . . . . . . . . . . . . . . . . . . . . . . . . . . . . . . . . . . . . . . . . . . . . . . . . . . . . . 30对于 Microsoft Windows . . . . . . . . . . . . . . . . . . . . . . . . . . . . . . . . . . . . . . . . . . . . . . . . . . . . . . . . 30访问文档 . . . . . . . . . . . . . . . . . . . . . . . . . . . . . . . . . . . . . . . . . . . . . . . . . . . . . . . . . . . . . . . . . . . . . . . . . . . . . . 31第2章评估安装 . . . . . . . . . . . . . . . . . . . . . . . . . . . . . . . . . . . . . . . . . . . . . . . . . . . . . . . . . . . . . . . 33安装内容 . . . . . . . . . . . . . . . . . . . . . . . . . . . . . . . . . . . . . . . . . . . . . . . . . . . . . . . . . . . . . . . . . . . . . . . . . . . . . . 34从 Web 站点下载 . . . . . . . . . . . . . . . . . . . . . . . . . . . . . . . . . . . . . . . . . . . . . . . . . . . . . . . . . . . . . . . . . . . . . . . 35针对 UNIX 进行下载 . . . . . . . . . . . . . . . . . . . . . . . . . . . . . . . . . . . . . . . . . . . . . . . . . . . . . . . . . . . . . . . .35针对 Microsoft Windows 进行下载 . . . . . . . . . . . . . . . . . . . . . . . . . . . . . . . . . . . . . . . . . . . . . . . . . . . 35安装评估产品 . . . . . . . . . . . . . . . . . . . . . . . . . . . . . . . . . . . . . . . . . . . . . . . . . . . . . . . . . . . . . . . . . . . . . . . . . . 36在静音模式下安装(非交互式) . . . . . . . . . . . . . . . . . . . . . . . . . . . . . . . . . . . . . . . . . . . . . . . . . . . . . . . . . . 46第3章用于开发的安装 . . . . . . . . . . . . . . . . . . . . . . . . . . . . . . . . . . . . . . . . . . . . . . . . . . . . . . . . . 47安装内容 . . . . . . . . . . . . . . . . . . . . . . . . . . . . . . . . . . . . . . . . . . . . . . . . . . . . . . . . . . . . . . . . . . . . . . . . . . . . . . 48从 Web 下载 . . . . . . . . . . . . . . . . . . . . . . . . . . . . . . . . . . . . . . . . . . . . . . . . . . . . . . . . . . . . . . . . . . . . . . . . . . . 49针对 UNIX 进行下载 . . . . . . . . . . . . . . . . . . . . . . . . . . . . . . . . . . . . . . . . . . . . . . . . . . . . . . . . . . . . . . . .49针对 Microsoft Windows 进行下载 . . . . . . . . . . . . . . . . . . . . . . . . . . . . . . . . . . . . . . . . . . . . . . . . . . . 49安装开发版产品 . . . . . . . . . . . . . . . . . . . . . . . . . . . . . . . . . . . . . . . . . . . . . . . . . . . . . . . . . . . . . . . . . . . . . . . . 50在静音模式下安装(非交互式) . . . . . . . . . . . . . . . . . . . . . . . . . . . . . . . . . . . . . . . . . . . . . . . . . . . . . . . . . . 62如何创建配置文件 . . . . . . . . . . . . . . . . . . . . . . . . . . . . . . . . . . . . . . . . . . . . . . . . . . . . . . . . . . . . . . . . . . 62以静音模式安装 . . . . . . . . . . . . . . . . . . . . . . . . . . . . . . . . . . . . . . . . . . . . . . . . . . . . . . . . . . . . . . . . . . . . 63第4章完成 Solaris 9 捆绑安装 . . . . . . . . . . . . . . . . . . . . . . . . . . . . . . . . . . . . . . . . . . . . . . . . . . . 65关于 Solaris 9 安装 . . . . . . . . . . . . . . . . . . . . . . . . . . . . . . . . . . . . . . . . . . . . . . . . . . . . . . . . . . . . . . . . . . . . . . 66创建管理域 . . . . . . . . . . . . . . . . . . . . . . . . . . . . . . . . . . . . . . . . . . . . . . . . . . . . . . . . . . . . . . . . . . . . . . . . . . . . 66启动管理服务器 . . . . . . . . . . . . . . . . . . . . . . . . . . . . . . . . . . . . . . . . . . . . . . . . . . . . . . . . . . . . . . . . . . . . . . . . 67创建应用程序服务器实例 . . . . . . . . . . . . . . . . . . . . . . . . . . . . . . . . . . . . . . . . . . . . . . . . . . . . . . . . . . . . . . . .68第5章卸载 Sun ONE Application Server 软件 . . . . . . . . . . . . . . . . . . . . . . . . . . . . . . . . . . . . . . 69卸载的内容 . . . . . . . . . . . . . . . . . . . . . . . . . . . . . . . . . . . . . . . . . . . . . . . . . . . . . . . . . . . . . . . . . . . . . . . . . . . . 69卸载 Sun ONE Application Server 软件 . . . . . . . . . . . . . . . . . . . . . . . . . . . . . . . . . . . . . . . . . . . . . . . . . . . 70 4Sun ONE Application Server 安装指南• 2003 年 4 月第6章升级 Sun ONE Application Server 软件 . . . . . . . . . . . . . . . . . . . . . . . . . . . . . . . . . . . . . . 75准备升级 . . . . . . . . . . . . . . . . . . . . . . . . . . . . . . . . . . . . . . . . . . . . . . . . . . . . . . . . . . . . . . . . . . . . . . . . . . . . . . 75升级组件 . . . . . . . . . . . . . . . . . . . . . . . . . . . . . . . . . . . . . . . . . . . . . . . . . . . . . . . . . . . . . . . . . . . . . . . . . . 76要求和限制 . . . . . . . . . . . . . . . . . . . . . . . . . . . . . . . . . . . . . . . . . . . . . . . . . . . . . . . . . . . . . . . . . . . . . . . . 76升级程序如何工作 . . . . . . . . . . . . . . . . . . . . . . . . . . . . . . . . . . . . . . . . . . . . . . . . . . . . . . . . . . . . . . . . . . . . . . 77升级输入文件 . . . . . . . . . . . . . . . . . . . . . . . . . . . . . . . . . . . . . . . . . . . . . . . . . . . . . . . . . . . . . . . . . . . . . . 77升级进程 . . . . . . . . . . . . . . . . . . . . . . . . . . . . . . . . . . . . . . . . . . . . . . . . . . . . . . . . . . . . . . . . . . . . . . . . . . 78备份阶段 . . . . . . . . . . . . . . . . . . . . . . . . . . . . . . . . . . . . . . . . . . . . . . . . . . . . . . . . . . . . . . . . . . . . . . 78安装阶段 . . . . . . . . . . . . . . . . . . . . . . . . . . . . . . . . . . . . . . . . . . . . . . . . . . . . . . . . . . . . . . . . . . . . . . 79重新配置阶段 . . . . . . . . . . . . . . . . . . . . . . . . . . . . . . . . . . . . . . . . . . . . . . . . . . . . . . . . . . . . . . . . . . 79日志文件 . . . . . . . . . . . . . . . . . . . . . . . . . . . . . . . . . . . . . . . . . . . . . . . . . . . . . . . . . . . . . . . . . . . . . . . . . . 79升级日志文件 . . . . . . . . . . . . . . . . . . . . . . . . . . . . . . . . . . . . . . . . . . . . . . . . . . . . . . . . . . . . . . . . . . 79审计文件 . . . . . . . . . . . . . . . . . . . . . . . . . . . . . . . . . . . . . . . . . . . . . . . . . . . . . . . . . . . . . . . . . . . . . . 79升级 Sun ONE Application Server . . . . . . . . . . . . . . . . . . . . . . . . . . . . . . . . . . . . . . . . . . . . . . . . . . . . . . . . 80疑难解答 . . . . . . . . . . . . . . . . . . . . . . . . . . . . . . . . . . . . . . . . . . . . . . . . . . . . . . . . . . . . . . . . . . . . . . . . . . . . . . 81重新启动或中断升级 . . . . . . . . . . . . . . . . . . . . . . . . . . . . . . . . . . . . . . . . . . . . . . . . . . . . . . . . . . . . . . . .81错误情况 . . . . . . . . . . . . . . . . . . . . . . . . . . . . . . . . . . . . . . . . . . . . . . . . . . . . . . . . . . . . . . . . . . . . . . . . . . 82第7章安装后的任务 . . . . . . . . . . . . . . . . . . . . . . . . . . . . . . . . . . . . . . . . . . . . . . . . . . . . . . . . . . . . 83设置 PATH 环境变量 . . . . . . . . . . . . . . . . . . . . . . . . . . . . . . . . . . . . . . . . . . . . . . . . . . . . . . . . . . . . . . . . . . . 83在 UNIX 上设置 PATH 变量 . . . . . . . . . . . . . . . . . . . . . . . . . . . . . . . . . . . . . . . . . . . . . . . . . . . . . . . . . 84设置 Microsoft Windows 环境 . . . . . . . . . . . . . . . . . . . . . . . . . . . . . . . . . . . . . . . . . . . . . . . . . . . . . . . 84设置 Microsoft Windows PATH 变量 . . . . . . . . . . . . . . . . . . . . . . . . . . . . . . . . . . . . . . . . . . . . . 85设置 net 命令 . . . . . . . . . . . . . . . . . . . . . . . . . . . . . . . . . . . . . . . . . . . . . . . . . . . . . . . . . . . . . . . . . . 86查看手册页 . . . . . . . . . . . . . . . . . . . . . . . . . . . . . . . . . . . . . . . . . . . . . . . . . . . . . . . . . . . . . . . . . . . . . . . . . . . . 86启动和停止服务器 . . . . . . . . . . . . . . . . . . . . . . . . . . . . . . . . . . . . . . . . . . . . . . . . . . . . . . . . . . . . . . . . . . . . . . 87使用命令行界面 . . . . . . . . . . . . . . . . . . . . . . . . . . . . . . . . . . . . . . . . . . . . . . . . . . . . . . . . . . . . . . . . . . . . 87使用 start-domain 和 stop-domain . . . . . . . . . . . . . . . . . . . . . . . . . . . . . . . . . . . . . . . . . . . . . . . . 88使用 start-instance 和 stop-instance . . . . . . . . . . . . . . . . . . . . . . . . . . . . . . . . . . . . . . . . . . . . . . . 89获得帮助信息 . . . . . . . . . . . . . . . . . . . . . . . . . . . . . . . . . . . . . . . . . . . . . . . . . . . . . . . . . . . . . . . . . . 89使用管理界面 . . . . . . . . . . . . . . . . . . . . . . . . . . . . . . . . . . . . . . . . . . . . . . . . . . . . . . . . . . . . . . . . . . . . . . 89使用 Microsoft Windows 程序组 . . . . . . . . . . . . . . . . . . . . . . . . . . . . . . . . . . . . . . . . . . . . . . . . . . . . . 90使用 Microsoft Windows 服务 . . . . . . . . . . . . . . . . . . . . . . . . . . . . . . . . . . . . . . . . . . . . . . . . . . . . . . . 91实现 Web 服务器插件 . . . . . . . . . . . . . . . . . . . . . . . . . . . . . . . . . . . . . . . . . . . . . . . . . . . . . . . . . . . . . . . . . . . 92实现 Web 服务客户机 . . . . . . . . . . . . . . . . . . . . . . . . . . . . . . . . . . . . . . . . . . . . . . . . . . . . . . . . . . . . . . . . . . . 92决定 Sun ONE Studio 插件的安装位置 . . . . . . . . . . . . . . . . . . . . . . . . . . . . . . . . . . . . . . . . . . . . . . . . . . . . 92访问样例应用程序 . . . . . . . . . . . . . . . . . . . . . . . . . . . . . . . . . . . . . . . . . . . . . . . . . . . . . . . . . . . . . . . . . . . . . . 93第8章疑难解答 . . . . . . . . . . . . . . . . . . . . . . . . . . . . . . . . . . . . . . . . . . . . . . . . . . . . . . . . . . . . . . . . 95关于日志 . . . . . . . . . . . . . . . . . . . . . . . . . . . . . . . . . . . . . . . . . . . . . . . . . . . . . . . . . . . . . . . . . . . . . . . . . . . . . . 95忘记了用户名或密码 . . . . . . . . . . . . . . . . . . . . . . . . . . . . . . . . . . . . . . . . . . . . . . . . . . . . . . . . . . . . . . . . . . . . 96忘记了管理服务器的端口号 . . . . . . . . . . . . . . . . . . . . . . . . . . . . . . . . . . . . . . . . . . . . . . . . . . . . . . . . . . . . . . 96管理界面连接被拒绝 . . . . . . . . . . . . . . . . . . . . . . . . . . . . . . . . . . . . . . . . . . . . . . . . . . . . . . . . . . . . . . . . . . . . 965服务器无法启动:出现 CGI 错误 . . . . . . . . . . . . . . . . . . . . . . . . . . . . . . . . . . . . . . . . . . . . . . . . . . . . . . . . . 97为文件说明设置限制 . . . . . . . . . . . . . . . . . . . . . . . . . . . . . . . . . . . . . . . . . . . . . . . . . . . . . . . . . . . . . . . .97更改内核参数 . . . . . . . . . . . . . . . . . . . . . . . . . . . . . . . . . . . . . . . . . . . . . . . . . . . . . . . . . . . . . . . . . . . . . . 97卸载失败后的清除工作 . . . . . . . . . . . . . . . . . . . . . . . . . . . . . . . . . . . . . . . . . . . . . . . . . . . . . . . . . . . . . . . . . . 98在 UNIX 上 . . . . . . . . . . . . . . . . . . . . . . . . . . . . . . . . . . . . . . . . . . . . . . . . . . . . . . . . . . . . . . . . . . . . . . . . 98在 Microsoft Windows 上 . . . . . . . . . . . . . . . . . . . . . . . . . . . . . . . . . . . . . . . . . . . . . . . . . . . . . . . . . . . 99对于 Microsoft Windows — SNMP 子代理安装失败 . . . . . . . . . . . . . . . . . . . . . . . . . . . . . . . . . . . . . . . . 100对于 Microsoft Windows —具有启动消息的命令窗口不出现。
SkylineGlobe v7.0产品技术白皮书

Skyline基本功能
1Skyline功能展示1.1基础功能1.1.1三维交互浏览系统可以通过鼠标、键盘、操纵杆、控制面板或者任意组合方式来控制飞行的速度、高度视角,使得用户可以灵活、便捷的在三维场景中浏览漫游,操作简单,易于使用。
随着鼠标的移动显示到达的地域名称、状态栏坐标切换显示。
地图缩放通过鼠标滚轮滚动方式或者左下方的工具条来自由缩放三维影像地球,可以从不同的高度来浏览窗口,并且可以直接定位到房屋、街道、城市、国家、全球的高度。
平移通过鼠标的点按动作,根据鼠标移动的方向,实现对三维地球任意方向的平移; 拖动通过鼠标的点按动作,根据鼠标移动的方向,实现对三维地球任意方向的拖拽;旋转通过点击旋转按钮,让用户以屏幕中心点为中心,做三百六十度环绕飞行,可从不同的角度查看目标,以便更加全面的查看对象属性;指北当三维地球处于任何倾斜状态时,指北功能能够实现对影像在3D窗口中的上方为地形的北方;居中通过鼠标双击三维地球上的某一兴趣点,向该兴趣点移近,并使该兴趣点自动在三维窗口居中显示;倾斜状态回正状态快照:系统提供了快速截图工具,可以对三维窗口进行快速捕捉和存储,将三维地形窗口的影像保存为BMP、JPG等格式的图片,便于传阅、分析和保存。
如图所示。
同时,用户可以自定义设置图片的尺寸,便于输出高分辨率的用于打印制图用的图片。
定点漫游系统可以选择预先定义的路径进行飞行漫游;也可以自定义路径进行飞行漫游,并可以控制飞行过程中的观看速度、角度和姿态。
图层控制系统可以按图层管理数据,并按图层对数据进行加载和卸载。
快速定位系统提供对重点区域进行快速定位功能;我的收藏系统用户可以设定及编辑兴趣点,保存在数据库中,下次登陆时仍然可以访问到,同时,用户可以加载已保存在服务器上的标绘信息。
1.1.2系统管理系统管理包括用户管理、参数设置、日志管理、数据备份和恢复等功能。
具体如下:1)用户管理提供设置窗口设置访问综合应急相关地理空间信息服务平台的用户管理功能,包括增加、删除、修改用户角色、设置每个用户角色的用户名、用户口令、用户权限等。
Dell OpenManage Server Administrator 7.1 用户指南说明书
Dell OpenManage Server AdministratorVersion 7.1用户指南注和小心注:“注”表示可以帮助您更好地使用计算机的重要信息。
小心:“小心”表示可能会损坏硬件或导致数据丢失,并说明如何避免此类问题。
____________________本文中的信息如有更改,恕不另行通知。
©2012Dell Inc.保留所有权利。
未经 Dell Inc. 书面许可,严禁以任何形式复制这些材料。
本文中使用的商标:Dell™、DELL 徽标、PowerEdge™、PowerVault™ 和 OpenManage™ 是Dell Inc. 的商标。
Microsoft®、Windows®、Internet Explorer®、Active Directory®和 Windows Server®是 Microsoft Corporation 在美国和/或其他国家/地区的商标或注册商标。
EMC®是EMC Corporation 的注册商标。
Java®是 Oracle 和/或其附属公司的注册商标。
Novell®和SUSE®是 Novell, Inc. 在美国和其他国家或地区的注册商标。
Red Hat®和 Red Hat Enterprise Linux® 是 Red Hat, Inc. 在美国和其他国家或地区的注册商标。
VMware®是 VMware Inc 在美国和/或其他管辖区域的注册商标,ESX Server®是 VMware Inc 在美国和/或其他管辖区域的商标。
Mozilla®和 Firefox®是 Mozilla Foundation 的注册商标。
Citrix®、Xen®、XenServer®和 XenMotion®是 Citrix Systems, Inc. 在美国和/或其他国家或地区的注册商标或商标。
Global Mapper V7中文使用说明
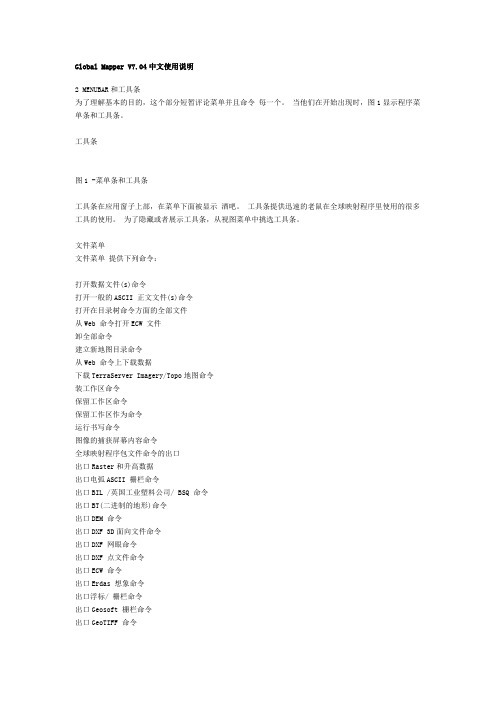
Global Mapper V7.04中文使用说明2 MENUBAR和工具条为了理解基本的目的,这个部分短暂评论菜单并且命令每一个。
当他们在开始出现时,图1显示程序菜单条和工具条。
工具条图1 -菜单条和工具条工具条在应用窗子上部,在菜单下面被显示酒吧。
工具条提供迅速的老鼠在全球映射程序里使用的很多工具的使用。
为了隐藏或者展示工具条,从视图菜单中挑选工具条。
文件菜单文件菜单提供下列命令:打开数据文件(s)命令打开一般的ASCII 正文文件(s)命令打开在目录树命令方面的全部文件从Web 命令打开ECW 文件卸全部命令建立新地图目录命令从Web 命令上下载数据下载TerraServer Imagery/Topo地图命令装工作区命令保留工作区命令保留工作区作为命令运行书写命令图像的捕获屏幕内容命令全球映射程序包文件命令的出口出口Raster和升高数据出口电弧ASCII 栅栏命令出口BIL /英国工业塑料公司/ BSQ 命令出口BT(二进制的地形)命令出口DEM 命令出口DXF 3D面向文件命令出口DXF 网眼命令出口DXF 点文件命令出口ECW 命令出口Erdas 想象命令出口浮标/ 栅栏命令出口Geosoft 栅栏命令出口GeoTIFF 命令全球映射程序栅栏命令的出口出口Gravsoft 栅栏命令出口Idrisi 命令出口JPG 命令更平坦的Heightfield 命令的出口出口Optimi 地形命令出口PLS-CADD XYZ 文件命令出口PNG 命令出口RockWorks 栅栏命令出口STL 命令出口冲浪者栅栏(ASCII 形式)命令出口冲浪者栅栏(二进制的非形式)命令出口冲浪者栅栏(二进制的v7 形式)命令出口Terragen 地形文件命令出口VRML 命令出口XYZ 栅栏命令出口ZMap和栅栏文件命令出口向量数据出口电弧Ungenerate 命令出口CDF 命令出口CSV 命令出口DGN 命令出口DLG-O 命令出口DXF 命令出口Garmin TRK(PCX5)文件命令出口Garmin WPT(PCX5)文件命令出口GOG(综合覆盖物图形)命令出口GPX 命令出口KML/KMZ 命令出口InRoads ASCII 命令出口置地广场图形命令出口洛伦斯USR 命令出口MapGen 命令出口MapInfo MIF/MID 命令出口MatLab 命令出口苔藓命令出口NIMA ASC 命令出口PLS-CADD XYZ 文件命令出口Shapefile 命令简单的ASCII 正文文件命令的出口出口冲浪者十亿命令出口SVG 命令出口海啸OVR 命令批Convert/Reproject产生轮廓命令打印命令打印预演命令打印安装命令出口命令打开数据文件(s)命令打开数据文件(s)命令允许用户打开附加数据文件进主要全球映射程序意见。
Acronis Backup Cloud Version 7 系統管理員指南说明书
系統管理員指南目錄1系統管理員指南 (4)1.1關於本文件 (4)1.2關於備份服務 (4)1.2.1帳戶和群組 (4)1.2.2元件 (5)1.2.3支援的網頁瀏覽器 (7)1.3逐步說明 (7)1.3.1啟用系統管理員帳戶 (8)1.3.2存取備份服務 (8)1.3.3建立群組 (8)1.3.4建立合作夥伴帳戶 (9)1.3.5建立客戶帳戶 (10)1.3.6建立服務使用報告 (11)1.4進階案例 (13)1.4.1透過群組原則部署代理程式 (13)1.4.2限制Web 介面的存取權 (14)2使用指南 (15)2.1關於備份服務 (15)2.2軟體需求 (15)2.2.1支援的網頁瀏覽器 (15)2.2.2支援的作業系統和環境 (15)2.2.3支援的Microsoft SQL Server 版本 (17)2.2.4支援的Microsoft Exchange Server 版本 (17)2.2.5支援的Microsoft SharePoint 版本 (17)2.2.6支援的虛擬化平台 (18)2.2.7與加密軟體的相容性 (20)2.3支援的檔案系統 (21)2.4啟用帳戶 (22)2.5存取備份服務 (22)2.6安裝軟體 (22)2.6.1準備 (22)2.6.2Proxy 伺服器設定 (24)2.6.3Linux 套件 (26)2.6.4安裝代理程式 (28)2.6.5更新代理程式 (29)2.6.6解除安裝代理程式 (29)2.7備份主控台檢視畫面 (30)2.8備份 (31)2.8.1備份計劃速查表 (33)2.8.2選擇要備份的資料 (34)2.8.3選擇目的地 (38)2.8.4排程 (39)2.8.5保留規則 (41)2.8.6複寫 (41)2.8.7加密 (42)2.8.8手動啟動備份 (43)2.8.9備份選項 (43)2.9復原 (57)2.9.1復原快速鍵清單 (57)2.9.2建立可開機媒體 (58)2.9.3復原電腦 (59)2.9.4復原檔案 (65)2.9.5復原系統狀態 (68)2.9.6復原ESXi 設定 (68)2.9.7復原選項 (69)2.10備份的相關作業 (74)2.10.1備份索引標籤 (74)2.10.2從備份掛載磁碟區 (75)2.10.3刪除備份 (75)2.11備份計劃相關操作 (76)2.12保護行動裝置 (76)2.13保護應用程式 (81)2.13.1必要條件 (82)2.13.2資料庫備份 (83)2.13.3應用程式感知備份 (84)2.13.4復原SQL 資料庫 (85)2.13.5復原Exchange 資料庫 (87)2.13.6復原Exchange 信箱和信箱項目 (88)2.14保護Office 365 信箱 (91)2.14.1選擇Office 365 信箱 (92)2.14.2復原Office 365 信箱及信箱項目 (92)2.15虛擬機器的進階作業 (93)2.15.1從備份執行虛擬機器(立即復原) (93)2.15.2虛擬機器的複寫 (95)2.15.3管理虛擬化環境 (100)2.15.4電腦移轉 (100)2.15.5VMware 用代理程式- 不透過LAN 備份 (101)2.15.6VMware 用代理程式- 必要權限 (103)2.15.7Windows Azure 和Amazon EC2 虛擬機器 (105)2.16疑難排解 (105)3辭彙表 (107)1系統管理員指南1.1關於本文件此文件適用對象是那些提供備份服務給用戶的夥伴們,以及想要使用備份服務的用戶公司管理人員。
Skyline Terraexplorer Pro系统操作手册中文

系统平台操作手册一、TerraExplorer Pro简介 (2)二、TerraExplorer Pro菜单 (3)1、File (3)2、Edit(第九章第二节) (4)3、View (6)4、Navigation (6)5、Layers (9)6、Creat (12)7、Measurements(第十八章) (15)8、Tools(第十九章) (16)collaboration (16)Extract terrain (16)GPS tracking (18)Duplicate Objects (18)Free hand drawing (18)Build power Aid (18)Multiple coordinate system (19)Mil-std-2525b (19)Make point cloud model (19)Data library (19)Snapshot (19)Save snapshot to file (19)Snapshot size (19)Project setting (19)Options (20)9、Help (22)三、TerraExplorer Pro工具栏(操作方法参考菜单中creat的操作方法) (23)Project: (23)measurements (23)Layer (24)2D Objects (24)3D—Objects (24)dynamic object (25)route (25)四、对象操作 (25)绑定(第九章最后一节) (25)一、TerraExplorer Pro简介TerraExplorer Pro:它是一个桌面应用程序,使得用户可以浏览分析空间数据,并可以对其进行编辑。
也可以在上面添加二维或者三维的物体、路径、场所以及地理信息文件。
TerraExplore与TerraBuilder 所创建的地形库相连接,并且可以在网络上直接加入GIS图层。
SkylineGlobeServerv7.0用户操作手册
SkylineGlobeServerv7.0⽤户操作⼿册SkylineGlobe Server ⽤户操作⼿册V7.0⽬录1介绍 (1)1.1关于本操作⼿册 (1)1.2使⽤在线帮助 (1)1.3关于 SkylineGlobe Server (SGS) (1)1.4产品功能 (2)1.5SkylineGlobe 产品 (3)2⼊门 (6)2.1SkylineGlobe Server v7.0新功能 (6)2.2软件和硬件要求 (7)2.3许可机制 (7)2.4安装SkylineGlobe Server (8)2.5安装后的操作 (17)2.6卸载SkylineGlobe Server (18)2.7启动SkylineGlobe Server Manager (19)2.8登录 (20)2.9注销 (20)3基本概念 (21)3.1什么是SkylineGlobe Server (21)3.2什么是SkylineGlobe Server Manager (22)3.3SkylineGlobe Server Manager页⾯ (23)3.4什么是Terrain Service(地形服务) (28)3.5什么是Feature Service(⽮量服务) (28)3.6什么是Maps Service(栅格服务) (29)3.7什么是 3D Mesh Service (3DML) (29)3.8什么是Point Cloud Service(点云服务) (30)3.9什么是TerraExplorer for Web (TE4W) (30)4SkylineGlobe Server Settings(SkylineGlobe Server设置) (31)4.1关于 SkylineGlobe Server Settings(SkylineGlobe Server设置) (31)4.2设置SkylineGlobe Server(SkylineGlobe Server 设置) (32)4.3设置 TerraExplorer for Web (38)5监控SkylineGlobe Server (40)5.1关于监控SkylineGlobe Server (40)5.2监控服务器和服务 (41)5.3启动和停⽌SkylineGlobe Server (43)5.4启动和停⽌服务 (43)5.5监控 Fusers (43)5.6搜索、查看消息 (44)6数据源处理 (45)6.1关于数据源处理 (45)6.2添加数据源 (46)6.3编辑数据源 (54)6.4扫描数据源 (54)6.5移除数据源 (54)6.6将TerraGate / SFS迁移到SkylineGlobe Server (54)7图层处理 (57)7.1关于图层处理 (57)7.2搜索图层 (58)7.3服务器端数据源发布和更新的图层 (58)7.4编辑图层属性 (60)7.5添加 / 编辑图层的别名 (62)7.6从SkylineGlobe Server中删除图层 (63)8⽤户管理 (63)8.1关于⽤户管理 (63)8.2搜索⽤户 (64)8.3添加⽤户并设置⽤户属性 (64)8.4编辑⽤户属性 (66)8.5删除⽤户 (68)8.6搜索⽤户组 (69)8.7添加⽤户组 (69)8.8编辑⽤户组属性 (71)8.9删除⽤户组 (71)9DirectConnect(直连) (71)9.1关于DirectConnect(直连) (71)9.2什么是TerraBuilder Fuser (72)3.9为DirectConnect(直连)创建TerraBuilder⼯程⽂件 (72) 9.4管理TerraBuilder Fuser (74)9.5DirectConnect性能问题 (76)10性能提⽰和指南 (77)10.1关于性能提⽰和指南 (77)10.2硬件注意事项 (77)10.3为⽮量图层设定合适的区块宽度 (77)10.4精度级别 (77)10.5直连 (78)1 介绍1.1 关于本操作⼿册SkylineGlobe Server⽤户⼿册包含所有关于SkylineGlobe Server组件和功能的使⽤信息。
星河可视化智控平台(标准版)用户手册说明书

VICP星河可视化智控平台(标准版)用户手册目录1 概述 (1)平台简介 (1)平台获取 (1)设备要求 (1)平台安装 (1)平台授权 (1)2 设备连接 (2)3 配置设备信息 (3)配置拼接器设备信息 (3)配置媒体服务器信息 (6)添加音频控制器 (9)进入系统 (12)4 多媒体控制 (12)主界面介绍 (12)添加图层 (13)修改图层属性 (14)删除图层 (15)切换图层媒体 (15)播放节目 (16)播放控制 (16)切换媒体服务器 (16)5 大屏控制 (17)主界面介绍 (18)图层操作 (19)5.2.1 添加图层 (19)5.2.2 调整图层属性 (19)5.2.3 删除图层 (20)5.2.4 切换图层输入源 (20)5.2.5 图层反控 (21)场景操作 (23)5.3.1 加载场景 (23)5.3.2 场景轮巡 (24)屏幕控制 (25)切换视频拼接器 (26)6 环境控制 (26)7 IPC管理 (27)添加IPC摄像头 (28)控制IPC摄像头 (28)编辑IPC摄像头 (29)8 音频控制 (29)调整音量 (30)配置音频矩阵 (30)9 信息发布 (31)10 导入工程 (33)导入到I P AD系统 (33)导入到安卓系统 (35)导入到W INDOWS系统 (36)11 FAQ (36)如何查询媒体服务器的IP信息? (36)如何获取媒体服务器的端口信息? (37)1 概述平台简介VICP星河可视化智控平台(标准版)是诺瓦针对工程固装展览展厅、会议室、会议中心、媒体中心、指挥控制中心和智慧城市数据中心等多媒体、音视频和环境控制综合应用场景下设计研发的一款可视化集中管控平台,可以对大屏拼接显示系统、多媒体播控系统、音频系统、外设环境系统统一管理和控制。
它不仅具备不同设备的集中管控,同时能够实现全面可视化操作,所见即所得,提升现场控制的准确性和针对性,还具备良好的界面设计和用户体验,使用简单、操作流畅,其人性化的交互设计及灵活的操控体验可为用户提供一个更加智能高效的操控环境。
Gorilla IVAR VMS快速用户手册说明书

VMS Quick User Manual Copyright©2019 Gorilla Technology Group, Inc
15
settings.
Figure 3 – Enable analytics events
VMS Quick User Manual Copyright©2019 Gorilla Technology Group, Inc
1
4
Enter the username and password you created during the registration process. Click Login.
Milestone Quick User Manual
Gorilla IVAR™
Document Version: 1.8 | Software Version 1.8 | Editor: Technical Writing Team | Copyright © 2019
1
Login to XProtect Management Client, right click Analytic Events and click New Event
2
14
• Check events from IVAR
Figure 14 – Alarm Manager
VMS Quick User Manual Copyright©2019 Gorilla Technology Group, c
2
©2000-2019 Gorilla Technology Group. All rights reserved. Gorilla Technology, Gorilla Technology Group, the Gorilla Technology Group logo, and Gorilla Technology Group are trademarks or registered trademarks of Gorilla Technology Group in the United States and in other countries. Google Maps™ is a trademark of Google, Inc. All other trademarks are the property of their respective owners.
SkyLine v1.9 用户和安装手册说明书
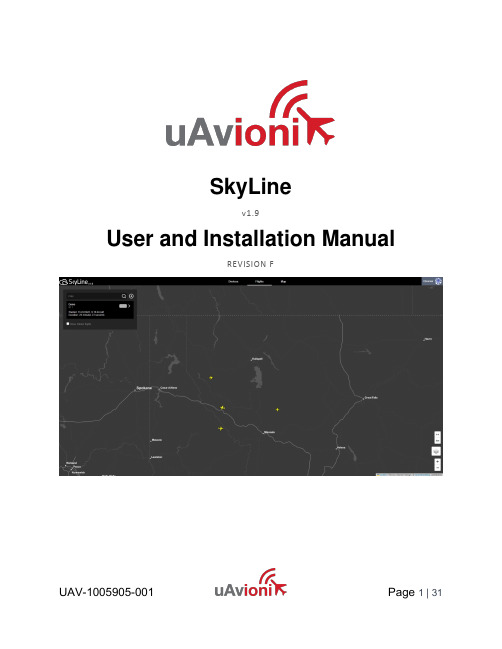
SkyLinev1.9User and Installation ManualREVISION F© 2022 uAvionix Corporation. All rights reserved.uAvionix Corporation300 Pine Needle LaneBigfork, MT 59911https:///https:///support/Except as expressly provided herein, no part of this guide may be reproduced, transmitted, disseminated, downloaded or stored in any storage medium, for any purpose without the express written permission of uAvionix. uAvionix grants permissions to download a single copy of this guide onto an electronic storage medium to be viewed for personal use, provided that the complete text of this copyright notice is retained. Unauthorized commercial distribution of this manual or any revision hereto is strictly prohibited.uAvionix® is a registered trademark of uAvionix Corporation and may not be used without express permission of uAvionix.1 Revision History2 Warnings / DisclaimersAll device operational procedures must be understood prior to operation. uAvionix is not liable for damages arising from the use or misuse of this product.3 Limited WarrantyuAvionix products are warranted to be free from defects in material and workmanship for one year from purchase. For the duration of the warranty period, uAvionix, at its sole option, will repair or replace any product which fails under normal use. Such repairs or replacement will be made at no charge to the customer for parts or labor, provided that the customer shall be responsible for any transportation cost.This warranty does not apply to cosmetic damage, consumable parts, damage caused by accident, abuse, misuse, water, fire or flood, damage caused by unauthorized servicing, or product that has been modified or altered.IN NO EVENT, SHALL UAVIONIX BE LIABLE FOR ANY INCIDENTAL, SPECIAL, INDIRECT OR CONSEQUENTIAL DAMAGES, WHETHER RESULTING FROM THE USE OF, MISUSE OF, OR INABILITY TO USE THE PRODUCT OR FROM DEFECTS IN THE PRODUCT. SOME STATES DO NOT ALLOW THE EXCLUSION OF INCIDENTAL OR CONSEQUENTIAL DAMAGES, SO THE ABOVE LIMITATIONS MAY NOT APPLY TO YOU.Warranty ServiceWarranty repair service shall be provided directly by uAvionix.4 Contents1Revision History (3)2Warnings / Disclaimers (4)3Limited Warranty (5)5Introduction (7)6SkyLine User Interface (UI) (8)6.1SkyLine UI Map (9)6.1.1Map Layers (9)6.1.2Measure Tool (9)6.2Devices Tab (10)6.3Flights Tab (11)6.4Admin Tab (Users) (12)Roles (12)6.4.1 (12)Email Alias (12)6.4.2 (12)7Device Registration (13)7.1Ground Radio (13)7.2Air Radio (17)7.3pingStation (19)8SkyLine Operation (22)8.1Create Flight (22)8.2Flight Operation (26)8.3Connect Ground Control Station (28)8.4End Flight (31)9Support (31)5 IntroductionSkyLine is an enterprise command and control infrastructure management service for critical UAS and UAM applications used to manage Control and Non-Payload Communications (CNPC) solutions. CNPC links provide Command and Control (C2) functionality of a UAS, and specifically exclude payload data that does not serve the CNPC function. SkyLine is what is known by RTCA DO-377A1 as a C2 link Communications Service Provider (C2CSP) platform.SkyLine is a cloud-based solution which communicates in real-time to all components of the CNPC link system (including all ARS and GRS) and provides real-time telemetry, health and status, radio performance statistics to a remote pilot in command (RPIC), flight crew, or other operations personnel. SkyLine has many additional features including data storage, detect and avoid (DAA) functionality, and frequency allocations.SkyLine is available as an application/service from uAvionix or as an API for integration into Uncrewed Traffic Management (UTM) or Ground Control Station (GCS) platforms.When SkyLine is used with multiple GRS, SkyLine manages make-before-break (MBB) functionality to allow roaming of a single ARS from one GRS to another in a safety-case compliant manner.SkyLine leverages uAvionix radios, autopilots, and software for seamless mission operation and monitoring. To accompany this installation manual, reference your uAvionix radio manual, SkyLine GRS IM (UAV-1006973-001) and SkyLine ARS IM (UAV-1006972-001).1 Safety-of-flight information is any information/data sent to or received from the UA that is necessary to ensure the UAS is operated/operating in a manner that protects people and/or property from harm due to unintentional events.6 SkyLine User Interface (UI)The SkyLine UI is where the user has access to manage their SkyLine network and perform flight operations. The SkyLine UI is accessible by opening a web browser and entering the SkyLine domain name assigned to you by uAvionix. Example below:http://{YOUR_SKYLINE_TENANT}/From the Main UI, the user can add devices, view existing device status, view previous flights, change user permissions, and change map type and overlays.6.1 SkyLine UI MapThe SkyLine Map is available in the Flights Tab (see Section 6.2) and dedicated Maps Tab. From the map the user can view active and inactive ground devices, monitor ADS-B traffic, and view active flight statistics. 6.1.1 Map LayersMap layers and filters can be changed by selecting the layers button in the bottom right corner of the map. Layers are in two categories Base and Overlay. Base layers are the background of the map. There can be only one base layer active. Overlay layers are drawn on top of the base layer. Overlays can be turned on and off by toggling the checkboxes.6.1.2 Measure ToolThe measure tool located just above the layers tool. This tool allows for drawing multiple points and measuring the distance between them. The ↦icon will turn the measure tool on. Pressing it again will remove the measurements and turn the tool off. The button below will change the units of measure. While on each click on the map will add a point to measure. Clicking on the last point again will stop the current line. Shift+Click on a point to remove it.6.2 Devices TabThe Devices tab allows the user to view, add, remove, and edit devices by clicking on any device in the browser.6.3 Flights TabThe “Flights” tab opens the Flights browser which shows past flights and active flights. In the flights list, new flights can be created (see Section 8) and clicking on a flight will go to its live or replay view.6.4 Admin Tab (Users)The SkyLine UI can be set up for anonymous access or restricted access with users. Users can login through Microsoft or Google on a specific email domain.6.4.1 Roles•Observer – Allows the user to view and read information but not to alter anything•Contributor – Allows the user to edit devices and flights, but not start or end flights.•Flight Operator – Allows the user to start and end flights, but not create them.•Admin – Allows all permissions including user editing6.4.2 Email AliasEmail Aliases are for users that have alternate email addresses and want to login under those secondary addresses.7 Device Registration7.1 Ground RadioReference SkyLine GRS IM (UAV-1006973-001) Ground Radio System (GRS) installation procedures. When the Ground Radio System is installed and successfully connected to a network, the device will automatically be registered in SkyLine for use.GRS settings are accessed via web browser from a PC or mobile device on the same Local Area Network (LAN) as the powered Ground Radio. The IP address of the Ground Radio is assigned by the DHCP server and is the base URL. The MAC address for the Ground Radio is printed on the product label.1. Navigate to the settings page.http://###.###.###.###/NOTE: “###.###.###.###” is the IP address of the GRS.2. Set the SkyLine WebSocket URL using your SkyLine installationURL. Replace {YOUR_SKYLINE_TENANT} with the SkyLine tenant provided by uAvionix. This url can also be found on the “New Device”section of the Devices tab.ws://api.{YOUR_SKYLINE_TENANT}/grs3. Press the “Save” button.4. When the GRS is registered into SkyLine, you can view the devicestatus on SkyLine under the Devices tab. Active devices have a green icon while inactive devices have no background.5. Device connection can also be verified from the Map. All GRS thathave been connected to SkyLine will be represented by a towersymbol. These symbols are located in the last known GPS position of the GRS. Active GRS will be indicated by having a green dotassociated with the symbol.7.2 Air RadioReference SkyLine ARS IM (UAV-1006972-001) for Airborne Radio System (ARS) installation procedures. Ensure the ARS is in range of the ground radio and can acquire a GPS fix.1. Launch SkyLine UI in a compatible web browser:http://{YOUR_SKYLINE_TENANT}/2. Navigate to the “Devices” tab then press the “+” Icon.3. Enter the Name, Radio ID, Frequency, and press “Save.”a. The Name can be changed. It is for display only.b. The Radio ID can be found on the ARS device label. It mustmatch exactly when put into SkyLine. Radio ID’s must beginwith “0x”c. For SkyLink radios only, enter the ARS frequency. Referencethe SkyLine ARS IM (UAV-1006972-001) to find the ARSfrequency. The frequency box will only be available when usinga SkyLink5060 ARS.d. For muLTElink devices it is recommended that you power thedevice, and it will automatically register to your system. Ifneeded the system will allow you to manually enter the device,but you must first add the attached radios.4. You can view successful registration by finding the new device in thedevices list. ARS systems will be noted with a diamond symbol next to their name.Note: An ARS will always show as DISCONNECTED unlessit is an LTE device.7.3 pingStationWith a uAvionix pingStation, live ADS-B air traffic can be displayed in SkyLine. Reference the pingStation 3 User and Installation Guide (UAV-1005950-001) for pingStation installation and setup. The IP address of the pingStation is assigned by the DHCP server and is the base URL. The MAC address for the pingStation is printed on the product label.1. Navigate to the pingStation settings page.http://###.###.###.###/NOTE: “###.###.###.###” is the IP address of the pingStation.2. Input the following settings in the settings page then click “Update.”a. Output Format: UDP JSONb. UDP Target IP Address or Hostname: air-c. UDP Target Port: 70003. ADS-B Traffic will be displayed in SkyLine as an airplane symbol.Click on the airplane symbol to display additional information on the selected traffic.8 SkyLine Operation8.1 Create Flight1. Select the “Flights” tab then in the flight list click the plus symbol inthe upper right corner.2. In the dialogue box enter a name forthe flight. Then from the dropdownselect the Aircraft that will be used forthe flight. Finally, from the list of active Ground Radios, select all the GRS’ that will be used for the flight.muLTElink will show the status of theLTE connection as well as providing aGRS selection dropdown for each ARS on the Aircraft3. You will notice as GRS are selected, an orange operating area willpopulate on the map. The boundary can be modified to match the flight’s actual operating area by clicking and dragging the corners of the boundary. This boundary only affects the supplemental recording of information (like ADS-B, Radar).4. Click “Create Flight” when ready. The flight has now been created.When ready to begin the flight click “Start Flight” on the new dialogue box. Only the Flight Operator Access Role can start and end flights.5. The flight status will change to “Active” when the flight is active.8.2 Flight OperationObserver access role can view a flight while it is in progress.When the flight is active, the GRS and the aircraft used for the flight will appear on the SkyLine UI Map when a link has been established. GRS will appear as the same tower symbol with a green dot. The Aircraft will appear on the map as a blue diamond.When a GRS receives messages from the aircraft, a binding line between the two devices will appear. These lines will be either green, yellow, or red in color based on the signal strength. A blue binding line indicates that the aircraft is linked to that GRS. When the device roams, the blue line will switch to the next linked GRS.Expand/Collap se Flight CardFlight Name and IDCurrent Flight State. Possible Values:· CREATED · INITIALIZING · ACTIVE · ENDEDWill showReplaying when not viewing live data Everything in the brown area shows a historical view of the data. All gray areasare live data.Shows GCS connection statusShow/hide ARS statsClicking these willshow detailed information aboutthe deviceBlue indicates Lead GRS8.3 Connect Ground Control StationWhen a flight is active, a Ground Control Station (GCS) WebSocket (WS), TCP Host, and TCP port will be active through SkyLine. Use this information to connect to your GCS. An example using Mission Planner is shown below.1. Open ArduPilot Mission Planner and in the communication drop downmenu in the upper right corner, select TCP or WS, then press“Connect.”2. From the SkyLine mission, copy the “GCS TCP Host” or “GCS W SURL” depending on your communication type.a. TCP: enter the host and press OK, then enter the port andpress OK.b. WS: enter the entire “GCS WS URL” and press OK.3. Mission Planner will now connect and display aircraft telemetry data.8.4 End FlightOnce the flight operations have completed, you can end the flight by pressing “End Flight” in flight window. This will release the ground and aircraft radios from the mission and return them to a Standby state.9 SupportFor support visit https:///support/UAV-1005905-001 Page 31 | 31。
TerraExplorer Pro v7.0用户操作手册-2019v1.0
4.1
启动界面 ......................................................................................................................... 13
4.2
界面布局 ......................................................................................................................... 13
3.1
TerraExplorer 7.0.1 版本新特性 .......................................................................................8
3.1.1 栅格图层改进 ............................................................................................................ 8
3.2.6 分析工具..................................................................................................................10
3.2.7 使用 SkylineGlobe Server– 发布工具 .....................................................................10
1.1
关于本手册 ....................................................................................................................... 1
skyline_API详细使用说明手册
</tr>
</table>
<OBJECT ID= "TE" CLASSID="CLSID:3a4f9191-65a8-11d5-85c10001023952c1"
></OBJECT>
</body>
</html> (2)Save 方法 :只能保存 fly 工程,mpt 工程不能保存 C#: objTerraExplorer = new TerraExplorerClass(); objTerraExplorer.Save();
对全部高中资料试卷电气设备,在安装过程中以及安装结束后进行高中资料试卷调整试验;通电检查所有设备高中资料电试力卷保相护互装作置用调与试相技互术关,系电,通力根1保过据护管生高线产中敷工资设艺料技高试术中卷0资不配料仅置试可技卷以术要解是求决指,吊机对顶组电层在气配进设置行备不继进规电行范保空高护载中高与资中带料资负试料荷卷试下问卷高题总中2体2资,配料而置试且时卷可,调保需控障要试各在验类最;管大对路限设习度备题内进到来行位确调。保整在机使管组其路高在敷中正设资常过料工程试况1卷中下安,与全要过,加度并强工且看作尽护下可1都关能可于地以管缩正路小常高故工中障作资高;料中对试资于卷料继连试电接卷保管破护口坏进处范行理围整高,核中或对资者定料对值试某,卷些审弯异核扁常与度高校固中对定资图盒料纸位试,置卷编.工保写况护复进层杂行防设自腐备动跨与处接装理地置,线高尤弯中其曲资要半料避径试免标卷错高调误等试高,方中要案资求,料技编试术写5、卷交重电保底要气护。设设装管备备置线4高、调动敷中电试作设资气高,技料课中并3术试、件资且中卷管中料拒包试路调试绝含验敷试卷动线方设技作槽案技术,、以术来管及避架系免等统不多启必项动要方高式案中,;资为对料解整试决套卷高启突中动然语过停文程机电中。气高因课中此件资,中料电管试力壁卷高薄电中、气资接设料口备试不进卷严行保等调护问试装题工置,作调合并试理且技利进术用行,管过要线关求敷运电设行力技高保术中护。资装线料置缆试做敷卷到设技准原术确则指灵:导活在。。分对对线于于盒调差处试动,过保当程护不中装同高置电中高压资中回料资路试料交卷试叉技卷时术调,问试应题技采,术用作是金为指属调发隔试电板人机进员一行,变隔需压开要器处在组理事在;前发同掌生一握内线图部槽纸故内资障,料时强、,电设需回备要路制进须造行同厂外时家部切出电断具源习高高题中中电资资源料料,试试线卷卷缆试切敷验除设报从完告而毕与采,相用要关高进技中行术资检资料查料试和,卷检并主测且要处了保理解护。现装场置设。备高中资料试卷布置情况与有关高中资料试卷电气系统接线等情况,然后根据规范与规程规定,制定设备调试高中资料试卷方案。
远古V7.1系统业务手册

V7.1远古流媒体系统常用功能操作手册(其他详细使用说明参考使用手册)目录一、系统安装 (2)1、硬件环境要求(推荐配置) (2)2、支撑软件环境要求 (2)3、流媒体系统安装 (3)二、初始化配置 (4)1、前后台登录方式 (4)2、登录与免登录模式 (4)3、内容栏目名称管理 (5)4、服务器上传路径设置 (6)5、内容管理员权限分配 (8)6、域名设置、端口映射设置 (9)三、服务器管理 (10)1、IP优先禁止区域设置 (10)2、服务器状态监控 (12)三、用户管理 (14)1、用户的管理 (14)2、用户权限控制 (14)四、内容上传发布 (15)内容上传操作 (15)五、直播管理 (20)1、直播频道管理 (20)2、采集发布 (21)六、广告管理 (24)1、广告节目编辑 (24)2、广告策略管理 (27)七、虚拟运营管理 (28)多个站点添加操作 (28)八、常见维护操作 (30)1 、流媒体系统IP变更 (30)2、数据库备份还原操作 (30)3、页面服务器备份还原操作 (34)4、流服务器备份还原操作 (34)一、系统安装1、硬件环境要求(推荐配置)服务器INTEL XEON 5120 (双核),2G内存,1000M网卡10000转SCSI/SAS硬盘或者磁盘阵列Windows Server 2003 服务器,TCP/IP协议Internet信息服务(IIS)采集工作站Core 2 Duo E6400,1G M内存,100M网卡,256M显存独立显卡,声卡Windows 2000/2003/XP,TCP/IP协议IE 6.0或以上版本DirectX 9.0或以上版本客户端Core 2 Duo E6400,512M内存,100M网卡,128M显存独立显卡,声卡Windows XP/Vista,TCP/IP协议IE 6.0或以上版本DirectX 9.0或以上版本2、支撑软件环境要求数据库服务器SQL2000+sp4/SQL2005企业版WEB服务器安装jdk-6u5-windows-i586-p.exe安装apache-tomcat-6.0.10.exe设置系统变量:可将下面代码复制至记事本,保存为.BAT文件,执行即可。
skyline说明
Your site here
TerraBuilder
支持的数据格式
Image Data: TIFF, GeoTIFF (.TIFF, .ITIFF) Windows Bitmap (.BMP) ERDAS IMAGINE (.IMG) User defined binary raw MRSid compressed (.SID) ER-Mapper (.ECW) NIMA formats: CIB ADRG CADRG
1、新建路径 2、开始播放路径 3、停止录制 4、路径起始位置 5、后退
6、前进 7、路径最终位置 8、开始 9、通过点位,控制路径 10、导出AVi文件
Your site here
3、加载图层
1、添加适量图层
2、添加影像
1 2
3、添加dem
3
4、shape文件属性表
4 5
5、创建金字塔文件
1 2
3
4 5
1、添加地面动态对象 2、添加空间动态对象 3、添加动态路径 注:模型存储路径: Skyline\terraExplorer Pro \tools\Data-Library\3D-Objects
Your site here
创建对象- Route
1 2
3
4 5
Elevation Data: TIFF, GeoTIFF (.TIFF, .ITIFF) Windows Bitmap (.BMP) ERDAS IMAGINE (.IMG) User defined binary raw ASCII - X, Y, Z or Z (regular grid) NIMA formats: DTED
Skyline_Builder操作指南
北京东方道迩信息技术有限责任公司 黎志能
目
的
了解Skyline soft软件体系构架; 了解TerraBuilder的使用流程; 熟悉TerraBuilder的使用操作;
友情提示
使用好TerraBuilder的关键在于: 遥感数据的前期处理 细心细心再细心
添加数据 创建文件金字塔 生成MPT 布局1、2、3 信息树方式排列1、2 数据显示级别1、2、3
编辑工具栏
裁切多边形外部的数据 裁切多边形内部的数据 去除背景值 填充颜色 对象选择 放大、缩小、移动工具
当前编辑数据居中显示 所有全部数据居中显示 上(下)一个编辑节点 当前编辑节点居中 距离测量 面积测量
TerraBuilder 系列
单机版 企业版
企业版允许用户在若干台电脑和多个CPU中同时分担生 成大量3D数据集的负荷 企业版 + Direct Connect + Gate的使用,能使用户不 用生成MPT下,实时连接数据或数据库,实时发布三维 数据集
TerraBuilder支持的数据格式
影像数据格式: 影像数据格式:
新建工程
添加数据
数据编辑
调 色 查 临 接 边 动 数 据 移 景 值 、 正 背 …… 检 纠 去 除
生成MPT/TBP
TerraBuilder界面
菜单栏 工具栏 信息树 数据状态及 修改 数据类型窗 口 边框显示 主窗口 状态栏
常规工具栏
新建工程 打开工程 存盘 保存当前状态 回去前期保存的状态 工程设置
文件格式
MPT:(Multiple resolution data ) 多分辨率数据地表集。TB生成的三维数据集,提供给Pro 的应用参考三维场景。 MPU: (MIP Uncompressed ) 非压缩多源结构数据层。TB读取数据生成的金字塔层结 构数据。 TBP:(TerraBuilder Project files) TerraBuilder的工程索引文件。 FLY: TerraExplorer Pro的工程索引文件。
- 1、下载文档前请自行甄别文档内容的完整性,平台不提供额外的编辑、内容补充、找答案等附加服务。
- 2、"仅部分预览"的文档,不可在线预览部分如存在完整性等问题,可反馈申请退款(可完整预览的文档不适用该条件!)。
- 3、如文档侵犯您的权益,请联系客服反馈,我们会尽快为您处理(人工客服工作时间:9:00-18:30)。
SkylineGlobe Server 用户操作手册V7.1目录1介绍 (1)1.1关于本操作手册 (1)1.2使用在线帮助 (1)1.2.1启动帮助 (1)1.3关于 SkylineGlobe Server (SG Server) (1)1.4产品功能 (2)1.5SkylineGlobe 产品 (3)1.5.1TerraExplorer (4)1.5.2TerraBuilder (4)1.5.3SkylineGlobe Server (5)2入门指南 (6)2.1SkylineGlobe Server v7.1新特性 (6)2.1.1并发用户机制 (6)2.1.2SkylineGlobe浮动许可服务(SFLS) (7)2.1.3用户组中最大并发用户数 (7)2.1.4统计报告 (7)2.1.5浏览/编辑权限 (7)2.1.6TE4W权限选项 (7)2.1.7分布式SkylineGlobe Server地形服务网络 (7)2.1.8增强数据上传能力 (7)2.2TerraExplorer for Web v7.1新特性 (7)2.2.1视域分析工具 (7)2.2.2等高线图 (8)2.2.3坡度图 (8)2.2.4面积量测工具的改进 (9)2.2.5支持带地面图层的3D模型 (9)2.2.6改进的相对地表模式 (10)2.2.7显著地增加了对要素图层样式的支持 (10)2.2.8要素图层属性表 (10)2.2.9增强对高程图层的支持 (11)2.2.10图形用户界面(GUI)和可用性 (11)2.2.11支持IE 11 (11)2.2.12API (11)2.3SkylineGlobe Server v7.0.1新特性 (11)2.3.1新的数据库支持 (11)2.3.2服务器端文件夹自动扫描 (11)2.3.3自定义认证层 (12)2.3.4高效管理无用文件资源 (12)2.3.5删除图层的管理改进 (12)2.3.6TE4W设置管理 (12)2.3.7缓存管理器改进 (12)2.3.8Bug解决和稳定性 (12)2.4软件和硬件要求 (12)2.5许可机制 (13)2.5.1本地硬件保护(HASP加密锁) (13)2.5.2SkylineGlobe浮动许可服务器 (13)2.5.3工作站独立软件许可 (14)2.5.4许可管理器 (14)2.6安装SkylineGlobe Server (14)2.7安装后的操作 (18)2.7.1添加SkylineGlobe Server安装文件夹的访问权限 (19)2.7.2管理SG Server安全 (19)2.7.3运行TerraBuilder Fuser (20)2.7.4设置公共URL (20)2.7.5从TerraGate和SFS导入配置文件 (20)2.8卸载SkylineGlobe Server (20)2.9启动SkylineGlobe Server管理器 (21)2.10登录 (22)2.11注销 (22)3基本概念 (23)3.1什么是SkylineGlobe Server (23)3.2什么是SkylineGlobe Server 管理器 (24)3.3SkylineGlobe Server 管理器页面 (25)3.3.1主页 (25)3.3.2数据源 (26)3.3.3图层 (27)3.3.4设置 (27)3.3.5用户 (28)3.3.6报告 (29)3.3.7消息 (29)3.4什么是地形服务 (30)3.5什么是直连服务 (30)3.6什么是矢量服务 (31)3.7什么是地图服务 (31)3.8什么是3DML (32)3.9什么是点云服务 (32)3.10什么是TE4W (32)4SkylineGlobe Server设置 (33)4.1关于 SkylineGlobe Server 设置 (33)4.2SkylineGlobe Server (34)4.3设置 TerraExplorer for Web (38)4.3.1设置TerraExplorer for Web (38)4.3.2创建其他自定义配置文件 (40)4.3.3TE4W可支持的TE Pro中的数据 (40)5监控SkylineGlobe Server (41)5.1关于监控SkylineGlobe Server (41)5.2监控服务器和服务 (41)5.3启动和停止SkylineGlobe Server (44)5.4启动和停止服务 (44)5.5监控 Fusers (44)5.6搜索、查看消息 (45)6数据源处理 (45)6.1关于数据源处理 (45)6.2.1SG_扫描数据源属性 (48)6.2.2SG_上传数据源属性 (49)6.2.3Oracle Spatial 数据源属性 (50)6.2.4PostgreSQL数据源属性 (51)6.2.5SQL Server 数据源属性 (53)6.2.6添加ArcSDE 数据源 (54)6.3编辑数据源 (55)6.4扫描数据源 (56)6.5授予浏览/编辑权限 (56)6.6移除数据源 (57)6.7将TerraGate / SFS迁移到SkylineGlobe Server (57)6.7.1启用SG Server处理TerraGate和SFS的旧请求 (58)7图层处理 (60)7.1关于图层处理 (60)7.2搜索图层 (60)7.3服务器端数据源发布和更新的图层 (61)7.4编辑图层属性 (62)7.5添加 / 编辑图层的别名 (66)7.6授予查看/编辑权限 (66)7.7从SkylineGlobe Server中删除图层 (67)7.8管理SkylineGlobe Server中删除的图层 (67)7.9在Cesium客户端加载3D Tiles (67)8用户管理 (69)8.1关于用户管理 (69)8.2搜索用户 (69)8.3添加用户并设置用户属性 (70)8.4编辑用户属性 (71)8.5删除用户 (72)8.6搜索用户组 (73)8.7添加用户组 (73)8.8编辑用户组属性 (74)9生成数据统计报告 (76)9.1关于数据报告 (76)9.2生成报告 (76)10直连 (77)10.1关于直连 (77)10.2发布直连TBP工程文件至SkylineGlobe Server (77)10.3更新TBP工程文件 (78)10.4什么是TerraBuilder Fuser (78)10.5管理TerraBuilder Fuser (78)10.5.1启动 Fuser (78)10.5.2登录时自动启动Fuser (78)10.5.3停止fuser (79)10.5.4使用 Fuser作为Windows服务 (79)10.6使用老版本的TBP工程文件 (79)10.6.1为直连创建TerraBuilder工程文件 (80)10.6.2设置TerraBuilder工程文件(TBP) (80)10.6.3更新 TerraBuilder工程 (81)10.7直连性能问题 (81)11性能提示和指南 (82)11.1关于性能提示和指南 (82)11.2硬件注意事项 (82)11.3为矢量图层设定合适的区块宽度 (82)11.4精度级别 (82)11.5直连 (83)12自定义TE4W (84)12.1综述 (84)12.2自定义 (84)12.3URL参数 (84)12.4本地化 (85)12.6添加TE4W工具 (86)12.7定义 (91)12.7.1使用Cesium API (91)12.7.2使用SGWorld API (92)12.8使用SGWorld (92)12.8.1Creator (92)12.8.2TerraExplorerObject (97)12.8.3Analysis (97)12.8.4ViewshedObject (98)1介绍1.1关于本操作手册SkylineGlobe Server用户手册包含所有关于SkylineGlobe Server组件和功能的使用信息。
使用本手册用户需具有基础的计算机操作能力,包括服务器应用程序的管理。
如果用户需要执行这些任务的帮助,请参阅操作系统附带的文档。
1.2使用在线帮助SkylineGlobe Server还包含HTML格式的完整帮助文档。
1.2.1启动帮助从SkylineGlobe Server管理器菜单中,选择帮助。
1.3关于 SkylineGlobe Server (SG Server)SkylineGlobe Server v7是一种私有云解决方案,为发布、存储、管理和流方式传输3D空间数据提供了一整套Web服务。
SkylineGlobe Server能够为用户的所有空间数据提供流式传输服务,包括地形(MPT / TBP),栅格(WMS / WMTS),矢量(WFS / WFS-T),3D网格(3DML,3D Cesium)和点云(CPT,3D Cesium)。
服务器上的所有数据都被编号,因此客户端可以轻松找到所需的特定已发布图层。
用户的数据由多个安全层保证安全,包括将每个用户组限制预定义的数据文件夹,以及强大的用户身份验证机制。
SkylineGlobe Server将之前的TerraGate和SFS产品重新打包成统一的服务器技术和管理界面,从而完整地控制和管理3D地理空间数据生命周期。
SkylineGlobe Server可以配置为单个服务器,也可以配置为新的或现有的服务器集群的一部分。
服务器集群是彼此通信的服务器集合,以便向客户端提供具有更高可用性的数据。
个人地理空间图层和完整的工程可以通过TerraExplorer或其他SkylineGlobe客户端应用程序直接上传并发布到云服务器,从而简化了用户的工作流程,并在初始安装后无需任何服务器端登录。
通过简单的发布操作,TerraExplorer客户端可以随时使用数据:包括桌面端、移动端和Web端以及标准的地理空间应用程序。
存储在服务器上的文件以及服务器端数据库中的地理空间图层也可以通过SG Server中的扫描方式来选择图层并发布。
服务器内置完整的用户访问控制系统,通过用户、组和管理角色控制服务器端存储和客户端的读/写权限。
1.4产品功能网络发布流服务▪地形服务——MPT和TBP(直连)▪地图服务(栅格)—— WMS和WMTS服务(影像和高程)▪矢量服务——WFS、WFS-T▪3D网格服务——3DML、3D切片(Cesium)▪点云——CPT、3D切片(Cesium)▪工程——TerraExplorer桌面端、移动端和Web端上传和目录服务▪数据上传和存储——发布和上传来自TerraExplorer或其他SkylineGlobe客户端应用程序的数据▪高级目录——自动或手动提取源数据和地理空间数据▪搜索查询——先进的数据图层和工程搜索选项网络管理——在web界面中管理所有服务、目录数据库和用户事务。
