IBM-LDAP安装实施步骤
Zimbra系统安装过程

目录目录 (1)Zimbra系统的安装过程 (2)前言、系统架构及DNS (2)一、安装环境 (4)1.1操作系统 (4)2.1 Zimbra版本 (5)3.1需要安装的软件包 (5)4.1修改文件 (5)二、安装Zimbra LDAP,实现主从复制 (5)1.1安装一个主的LDAP,两个从的LDAP (5)2.1安装第一个从的LDAP (11)3.1安装第二个从的LDAP (16)三、安装Zimbra MailStore (21)1.1安装 (21)2.1安装 (32)3.1安装其他邮箱服务器 (42)四、安装zimbra MTA (43)1.1安装mta01 (43)2.1安装mta02 (48)五、安装proxy (48)1.1安装 (48)六、归档组件及服务器的安装 (54)1.1安装zimbra-archiving组件 (54)2.1在其他服务器上安装zimbra-archiving组件 (58)3.1在上执行以下命令 (59)4.1在上执行以下命令 (59)5.1安装archive01服务器 (59)七、安装LVS (68)1.1安装ipvsadm (68)2.1负载服务器 (69)3.1 mta服务器 (70)4.1测试 (70)Zimbra系统的安装过程前言、系统架构及DNS1、系统架构vCPU vRAM vDISK OS IP1:DNS 1 512M 20G Centos 5.6 192.168.13.20 2:LVS 1 512M 20G Centos 5.6 192.168.13.21 3:ldap-master 2 1G 50G Centos 6.3 192.168.13.32 4:ldap-replica 2 1G 50G Centos 6.3 192.168.13.33 5:mail (jetty, mysql) 2 1G 50G Centos 6.3 192.168.13.30 6:mail-archive 2 1G 50G Centos 6.3 192.168.13.31 7:proxy (nginx),mta 2 1G 50G Centos 6.3 192.168.13.34 8:proxy (nginx),mta 2 1G 50G Centos 6.3 192.168.13.35 9:Zimbra-VIP 192.168.13.242、安装DNS# yum install bind3、配置DNS# vi /etc/named.conf输入以下内容:options {directory "/var/named";pid-file "/var/named/named.pid";forwarders { 202.101.224.67; 202.101.224.68; };allow-query { any; };};zone "." IN {type hint;file "named.root";};zone "0.0.127.in-addr-arpa" IN {type master;file "named.local";allow-update { none; };};zone "" IN {type master;file "";allow-update { none; };};zone "13.168.192.in-addr-arpa" IN {type master;file "named.13.168.192";allow-update { none; };};# cp /usr/share/doc/bind-9.3.6/sample/var/named/named.root /var/named/ # vi /var/named/named.local输入以下内容:$TTL 3h0.0.127.in-addr.arpa. IN SOA . admin@. (1 ; Serial3h ; Refresh after 3 hours1h ; Retry after 1 hours1w ; Expire after 1 week1h ) ; Negative caching TTL of 1 hour1.0.0.127.in-addr.arpa. IN PTR localhost.# vi /var/named/输入以下内容:$TTL 3h. IN SOA . admin@. (1 ; Serial3h ; Refresh after 3 hours1h ; Retry after 1 hours1w ; Expire after 1 week1h ) ; Negative caching TTL of 1 hour . IN NS .. IN MX 10 mail. IN A 192.168.13.20www IN A 192.168.13.24mail IN A 192.168.13.24zldapmaster IN A 192.168.13.32zldapreplica IN A 192.168.13.33zproxymta01 IN A 192.168.13.34zproxymta02 IN A 192.168.13.35zmailstore IN A 192.168.13.30zmailstore-archive IN A 192.168.13.31# vi /var/named/named.13.168.192输入以下内容:$TTL 3h13.168.192.in-addr.arpa. IN SOA . admin@. (1 ; Serial3h ; Refresh after 3 hours1h ; Retry after 1 hours1w ; Expire after 1 week1h ) ; Negative caching TTL of 1 hour 13.168.192.in-addr.arpa. IN NS .226.1.168.192.in-addr.arpa. IN PTR .4、启动DNS# /usr/sbin/named -g &注:-g显示启动时的日志,一边分析启动过程出现错误的原因。
TDS V6.3安装过程(个人实测安装,仅用作学习交流)
IBM TDS V6.3安装过程(个人实测安装,仅用作学习交流)一、安装准备VMWare虚拟环境安装1.准备Windows Server 2003 R2 Datacenter X64 Edition Service Pack 2系统2.资源配置:内存4G,硬盘:40G,CPU:2.0GHz(2颗)3.主机名:lss01; IP地址:172.1.1.109;255.255.0.0;172.1.1.11;DNS:172.1.1.11;添加DNS后缀:;工作组:workgroup;域控制器:;本机未加入域。
配置完成,重启虚拟机。
跳过portal安装,安装DB2。
二、安装1.安装解压缩软件2.安装DB2 V9.7(1)DB2 企业服务器版本9.7(安装新产品)(2)准备安装(下一步)(3)使用DB2 Enterprise Server Edition V9.7 5765-F41(下一步)(4)接受许可条款(下一步)(5)典型安装(下一步)(6)选择“在此计算机上安装DB2 Enterprise Server Edition并将设置保存在相应文件中”,响应文件名:c:\Documents and settings\Administrator\My Documents\PROD_ESE.rsp(下一步)(7)选择安装文件夹,安装目录:D:\Program Files\IBM\SQLLIB\(下一步)(8)为“DB2管理服务器”设置用户信息。
用户信息(域:无-使用本地账户;用户名:db2admin;密码:********),勾选”对其余DB2服务使用同一个账户“(下一步)(9)配置DB2实例。
DB2实例:DB2 默认配置(10)准备DB2工具目录勾选默认下一步(11)设置DB2服务器以发送通知取消勾选下一步(12)启用操作系统安全性勾选默认下一步(13)核对安装配置信息并创建响应文件完成(14)开始安装过程(15)完成(16)启动DB2(17)创建DB2数据库打开DB2命令编辑器,输入创建数据库的命令后点执行:Create database timdb alias timdb using codeset UTF-8 territory US;(18)打开DB2控制中心,在建立的TIMDB数据库上右键点击,选择”权限“选项,打开TIMDB数据库权限面板,添加用户,将DB2ADMIN用户添加到TIMDB数据库的用户中,点击”全部授予“,授予DB2ADMIN用户在TIMDB数据库的操作及管理权限。
ldap第一天编译安装LDAP+ldapadmin

ldap第⼀天编译安装LDAP+ldapadmin⼀.环境Server:基于CentOS-7-x86_64-1511Server IP: 172.18.12.203⼆.软件获取OpenLDAPOpenLDAP 2.4.44:BDBberkeley-db-5.1.29 (OpenLDAP当前与6.x版本不兼容,READEME中明确写出兼容4.4~4.8或5.0~5.1):LDAP Administrtorldapadmin 2015.2:三.准备1. 关闭selinux;2. 打开防⽕墙tcp 389 / 636端⼝。
# tcp 389 是openldap 明⽂传输端⼝,tcp 636是ssl加密传输的端⼝。
# centos7默认⾃带firewalld服务,可以停⽤之后安装iptables。
四.安装OpenLDAP1.依赖包[root@localhost ~]# yum install *ltdl* -y# 涉及libtool-ltdl与libtool-ltdl-devel,如不安装,在编译时报错:configure: error: could not locate libtool ltdl.h2.安装BDB[root@localhost ~]# cd /usr/local/src/[root@localhost src]# tar -zxvf db-5.1.29.tar.gz[root@localhost src]# cd db-5.1.29/build_unix/[root@localhost build_unix]# ../dist/configure --prefix=/usr/local/berkeleydb-5.1.29[root@localhost build_unix]# make[root@localhost build_unix]# make install#必须在解压包的build_unix⽬录中编译安装,否则会报错。
IBM-服务器阵列配置及安装系统
PXE网启安装法这一次我采用了WEB BIOS来配置阵列,用光盘引导盘配置阵列虽然简单,但是如果想随心所欲的配置的,这一种方法比较好,可以配置成复合型阵列.一.启动WebBIOS启动WebBIOS有两种方法1。
配置有ServeRaid MR 5000阵列卡的服务器,在开机自检的过程中会有CTRL+H的提示。
按下CTRL+H组合键后会出现阵列卡配置界面2.开机按F1进入UEFI配置界面选择System Settings—〉Adapters and UEFI Drivers,可以看到配置的阵列卡,按回车选中后,按1进入WebBIOS二.配置RAID0,RAID1,RAID5 1。
在WebBIOS中选择配置向导Configuration Wizard2.选择New Configuration,选择后会清除现有阵列卡上的所有阵列信息;如果此时阵列卡上已经配置了其他阵列,此处请选择Add Configuration。
选择Yes确定3.选择手动配置Manual Configuration4.选择要配置在阵列中的硬盘,按Add to Array从左边的Drivers中选到右边的Driver Groups中,配置RAID1需要2块硬盘,配置RAID5至少需要3块硬盘.5.选好硬盘后,选择Accept DG后点击Next7.在左侧的ArrayWithFreeSpace中选中刚刚做好的Disk Groups按Add to SPAN添加到右侧的span中,然后选择Next8。
Virtual Disk配置界面,选好Virtual Disk参数后,点选Accept接受配置,最后选择Next。
·RAID Level中可以选择要配置的RAID级别;·右侧的Possible RAID Level中显示可能的RAID级别的磁盘容量,比如示例中三个73G 的硬盘配置raid0容量约为200G,而如果配置RAID5容量约为134G;·Select size选项中可以修改Virtual Disk的容量,通常这个值设定为该磁盘组RAID级别的最大容量。
IBM服务器系统安装教程
IBM服务器系统安装教程步步图解 IBM服务器系统安装傻瓜教程用IBM引导盘装系统前请备份你服务器硬盘上的所有资料,因为整个安装过程相当于把硬盘重新分区~~一定要记住,备份所有资料~~在给服务器安装操作系统的时候会用到两张光盘,第一张是引导盘,第二张是我们的操作系统光盘,要先把引导盘放进去,进行一些安装过程的设置和驱动的安装,如果直接把操作系统光盘放进去安装的话,之后还要再装驱动,很麻烦的。
找出IBM安装光盘服务器的安装与PC的安装基本相同,但也有不同。
我们就把这台服务器当成是新机来安装。
也就是说不管硬盘中的数据了,如果您的硬盘中有别的数据,请自行备份。
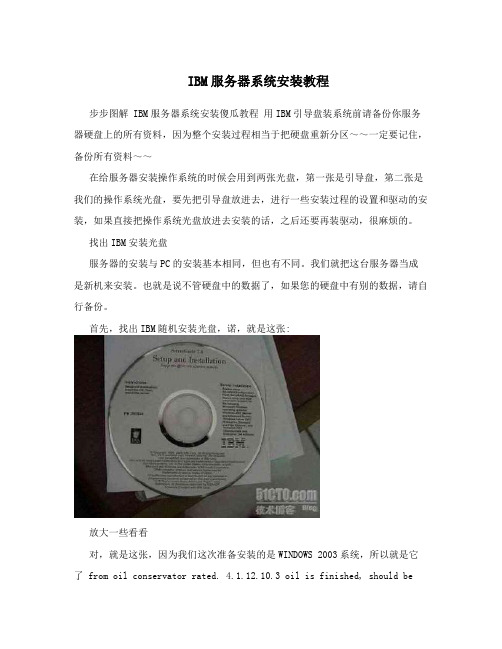
首先,找出IBM随机安装光盘,诺,就是这张:放大一些看看对,就是这张,因为我们这次准备安装的是WINDOWS 2003系统,所以就是它了 from oil conservator rated. 4.1.12.10.3 oil is finished, should beset aside for 24 hours. 4.1.12.10.4 can be replaced after the transformer, cooling unit, gas relays and pressure release valve devices, exhaust gas related sites multiple times. 4.1.13 electric overall construction process chart, see next page. Turn off the security system, access to the site had to wear a helmet, aerial work have to fasten your seat belt. Using power tools, the shell shall be reliable grounding to prevent electric shock, do the construction site security, preventing mounted electrical components and material damage, such as lost,electrical simulation test and operation of the transmission, and carry out the operation and the tone system; ongoing safety and quality education, improving safety awareness to ensure smooth and safe, high quality finish. 4.3 projects 4.3.1 quality assurance measurespreparation of construction organization design and construction program. Careful review of the drawings, in-depth understanding of site, construction workers doing construction gives the low-down, prior to construction as far as possible the problems right. 4.3.2 compliancewith specifications, in accordance with the drawings, encountered in the process of unclear are not free to change, must inform the unilateral changes by the design department to modify. 4.3.3 site full-time quality inspector and team part-time Inspector on construction quality of electrical installation check, nonconforming areas for correctiveactions in a timely manner until it reaches the required. 4.3.4installed in well construction record, done self-inspection, mutual,total work quality appraisal work, improve the quality of workers and ensure the project progress in order将那张光盘插入服务器的DVDROM中,启动服务器。
LDAP概念和原理介绍
LDAP概念和原理介绍相信对于许多的朋友来说,可能听说过LDAP,但是实际中对LDAP的了解和具体的原理可能还⽐较模糊,今天就从“什么是LDAP”、“LDAP的主要产品”、“LDAP的基本模型”、“LDAP的使⽤案例”四个⽅⾯来做⼀个介绍。
我们在开始介绍之前先来看⼏个问题:1. 我们⽇常的办公系统是不是有多个?2. 每个系统之间是不是都有独⽴的账号密码?3. 密码多了,有时候半天想不起来哪个密码对应哪个系统?4. 每次新项⽬的开发,都需要重新开发和维护⼀套⽤户密码?5. 维护多套系统的⽤户是不是⾮常头疼?So,如今⼤家再也不⽤为上⾯的的问题头疼了,因为“LDAP统⼀认证服务”已经帮助⼤家解决这些问题了。
那么相信⼤家对“LDAP统⼀认证服务”是⼲嘛的已经有⼀个⼤概的了解了吧?那我们开始今天要讲解的内容吧!⼀、什么是LDAP?(⼀)在介绍什么是LDAP之前,我们先来复习⼀个东西:“什么是⽬录服务?” 1. ⽬录服务是⼀个特殊的数据库,⽤来保存描述性的、基于属性的详细信息,⽀持过滤功能。
2. 是动态的,灵活的,易扩展的。
如:⼈员组织管理,电话簿,地址簿。
(⼆)了解完⽬录服务后,我们再来看看LDAP的介绍:LDAP(Light Directory Access Portocol),它是基于X.500标准的轻量级⽬录访问协议。
⽬录是⼀个为查询、浏览和搜索⽽优化的数据库,它成树状结构组织数据,类似⽂件⽬录⼀样。
⽬录数据库和关系数据库不同,它有优异的读性能,但写性能差,并且没有事务处理、回滚等复杂功能,不适于存储修改频繁的数据。
所以⽬录天⽣是⽤来查询的,就好象它的名字⼀样。
LDAP⽬录服务是由⽬录数据库和⼀套访问协议组成的系统。
(三)为什么要使⽤LDAP是开放的Internet标准,⽀持跨平台的Internet协议,在业界中得到⼴泛认可的,并且市场上或者开源社区上的⼤多产品都加⼊了对LDAP的⽀持,因此对于这类系统,不需单独定制,只需要通过LDAP做简单的配置就可以与服务器做认证交互。
TAM安装过程

1版本信息Tivoli Access Manager V6.1.1 2安装was安装Was不能启用安全性;安装HTTPserver安装Web服务插件3安装TDSIBM DB2 = 未安装目录名= C:\IBM\SQLLIBIBM Global Security Kit = 正在更新目录名= C:\Program Files\ibm\gsk7IBM Tivoli Directory Server = 未安装目录名= C:\IBM\LDAP\V6.1DB2 管理员标识(也用作实例名)= db2admin DB2 管理员密码= db2admin创建DB2 管理员(如果不存在)= 否Directory server 数据库主目录= C:DB2 数据库名称= amdb加密种子值= 0123456789012管理员标识= cn=root管理员密码=root用户定义的后缀= dc=scal,dc=com本地主机名= kissme非SSL 端口= 389SSL 端口= 636带有完整路径的SSL 密钥文件= C:\IBM\LDAP\V6.1\lib\am_key.kdb 创建SSL 密钥文件= 是SSL 密钥文件密码= admin证书标签= PDLDAP支持Federal Information Processing Standards(FIPS)= 否4安装AMMRIBM Global Security Kit = 正在更新目录名= D:\ibm\gsk7\IBM Tivoli Directory Client = 已配置目录名= C:\IBM\LDAP\V6.1IBM Tivoli Security Utilities = 未安装目录名= C:\Tivoli\TivSecUtlIBM Tivoli Access Manager runtime = 未安装目录名= C:\Tivoli\Policy Director启用Tivoli Common Directory 进行日志记录= 否LDAP 服务器主机名= kissmeLDAP 服务器端口= 389启用与注册表服务器的SSL = 是带有完整路径的SSL 密钥文件= C:\IBM\LDAP\V6.1\lib\am_key.kdb SSL 密钥文件密码= admin证书标签= PDLDAPSSL 端口= 636IBM Tivoli Access Manager Policy Server = 未安装目录名= C:\Tivoli\Policy DirectorTivoli Access Manager 管理员密码=adminPolicy Server SSL 端口= 7135SSL 证书的生命周期(天)= 1460SSL 连接超时(秒)= 7200LDAP 管理员DN = cn=rootLDAP 管理员密码= root管理域名= DefaultLDAP 管理域位置DN = dc=scal,dc=com用户和组跟踪信息格式= 最小启用Federal Information Processing Standards(FIPS)= 否5安装AMMACLD6安装AMADK7安装amjrte8安装amproxy9安装amrte 此安装可省略10安装amwpmIBM WebSphere Application Server = 已配置目录名= C:\IBM\WebSphere\AppServer节点名= kissmeNode01本地主机名= kissme本地管理员标识= AdministratorIBM Tivoli Access Manager Runtime for Java = 已安装目录名= C:\Tivoli\Policy DirectorPolicy Server 主机名= kissmePolicy Server SSL 端口= 7135JRE 目录= C:\IBM\WebSphere\AppServer\java\jre IBM Tivoli Access Manager Web Portal Manager = 未安装目录名= C:\Tivoli\Policy DirectorPolicy Server 主机名= kissmePolicy Server SSL 端口= 7135Policy Server 管理员标识= sec_masterPolicy Server 管理员密码= adminTivoli Access Manager 域= Default该Access Manager 域包含Authorization Server = 否对IBM WebSphere Application Server 启用SSL = 否主机名= kissme端口= 888011安装amwebarsthe Access Manager Attribute Retrieval Service12安装amwpi(失败)Tivoli Access Manager plug-in for Web servers (install_amwpi)正在初始化InstallShield Wizard...正在搜索Java(tm) 虚拟机....正在搜索(TAM EZ) Java 1.5X by IBM Corporation正在验证(TAM EZ) Java 1.5X by IBM Corporation.......IBM Tivoli Directory Server Instance V6.1 - db2admin 服务正在启动 .......IBM Tivoli Directory Server Instance V6.1 - db2admin 服务已经启动成功。
LDAP使用手册
LDAP使用手册1.LDAP介绍LDAP就是一种目录,或称为目录服务。
LDAP的英文全称是Lightweight Directory Access Protocol,即轻量级目录访问协议,是一个标准化的目录访问协议,它的核心规范在RFC中都有定义[16][17]。
LDAP基于一种叫做X.500的标准,X.500是由ITU-T和ISO定义的目录访问协议,专门提供一种关于组织成员的电子目录使得世界各地因特网访问权限内的任何人都可以访问该目录。
在X.500目录结构中,需要通过目录访问协议DAP,客户机通过DAP查询并接收来自服务器目录服务中的一台或多台服务器上的响应,从而实现对服务器和客户机之间的通信控制。
然而DAP需要大量的系统资源和支持机制来处理复杂的协议。
LDAP仅采纳了原始X.500目录存取协议DAP的功能子集而减少了所需的系统资源消耗,而且可以根据需要进行定制。
在实际的应用中,LDAP比X.500更为简单更为实用,所以LDAP技术发展得非常迅速。
目前在企业范围内实现的支持LDAP的系统可以让运行在几乎所有计算机平台上的所有应用程序从LDAP目录中获取信息,LDAP目录中也可以存储各种类型的数据,如:电子邮件地址、人力资源数据、公共密匙、联系人列表,系统配置信息、策略信息等。
此外,与X.500不同,LDAP支持TCP,这对当今Internet来讲是必须的。
目前己有包括微软、IBM在内的几十家大型软件公司支持LDAP技术。
1997年发布了第三个版本LDAPV3[17],它的出现是LDAP协议发展的一个重要转折,它使LDAP协议不仅仅作为X.500的简化版,同时提供了LDAP协议许多自有的特性,使LDAP协议功能更为完备,安全性更高,生命力更为强大。
1.1组成LDAP的四个模型组成LDAP的四个模型是:信息模型,命名模型,功能模型,安全模型。
1.1.1信息模型LDAP信息模型定义能够在目录中存储的数据类型和基本的信息单位。
IBM+PortalV6.0+-+安装指南

IBM Portal V6.0安装指南1、Portal V6介质包一览2、安装步骤运行W-SETUP 目录中的install.bat ,按以下步骤执行初学者可以点击“启动信息中心”按钮获取帮助目录产品压缩包名称W-SetupWebSphere Portal V6.0and Workplace Web Content Management V6.0-Portal Install V6.0Multilingual C93LQML W-1WebSphere Portal V6.0and Workplace Web Content Mgmt V6.0-WebSphere Application Server Network Deployment for Windows,V6.0.2.9MultilingualC93LWML W-2WebSphere Portal V6.0and Workplace Web Content Mgmt V6.0-WebSphere Process Server for WIndows,V6.0.1.1MultilingualC93LRML W-3WebSphere Portal V6.0and Workplace Web Content Mgmt V6.0-Portal Server (Disc 1of 2),V6.0MultillingualC93LSML W-4WebSphere Portal V6.0and Workplace Web Content Mgmt V6.0-Portal Server (Disc 2of 2),V6.0MultillingualC93M4ML W-5WebSphere Portal V6.0and Workplace Web Content Mgmt V6.0-Personalization,V6.0MultillingualC93LUML W-6WebSphere Portal V6.0and Workplace Web Content Mgmt V6.0-IBM Tivoli Directory Server for WIndows V6.0MultilingualC93LXML W-7WebSphere Portal V6.0and Workplace Web Content Mgmt V6.0-IBM Tivoli Directory Server Fixpack for Windows V6.0.0.1MultilingualC93LYML W-8WebSphere Portal V6.0and Workplace Web Content Mgmt V6.0-DB2UDB Enterprise Server Edition for Windows,V8.2.5MultilingualC93LVML W-9WebSphere Portal V6.0and Workplace Web Content Mgmt V6.0-Edge Components for WebSphere Application Server Network Deployment for Windows,V6.0MultilingualC93LZML W-10WebSphere Portal V6.0and Workplace Web Content Mgmt V6.0-WebSphere Application Server Toolkit for Windows,V6.0Multilingual C93M0ML接受许可证协议选择标准安装或客户化安装指定WebSphere Application Server(WAS)的安转路径指定节点名和主机名指定WAS的管理员表示符和口令,例如:wasadmin或者wpsadmin选择是否安装WebSphere Process Server,若要使用Portal6中新的工作流功能请选择“是”指定Portal的安装路径指定Portal的管理员表示符和口令,例如:wpsadmin选择是否将WAS和Portal作为Windows的服务来启动安装确认提示如果没有将安装文件放在第一章所指定的目录中,将会出现目录选择提示开始安装整个安装过程将持续1-1.5个小时,安装完成验证Portal,通过浏览器打开http://portal:10038/wps/portal输入用户名和口令3、配置Web Content Management停止Portal Server编辑/PortalServer/config目录下的wpconfig.properties文件,设置管理员口令PortalAdminPwd=passw0rdOpen a command prompt.Go to the/PortalServer/configRun the following command:Windows:WPSconfig.bat configure-wcm-authoring确认已成功执行登陆Portal,在启动菜单中可见“Web内容”,点击启动—Web内容在Web Content Management页面包含了管理和创作在配置中,可以对库选择,预览选项,用户界面选项,富文本格式选项进行设置在内容预览页面中可以查看创作的结果Note:关于WCM使用及开发请参阅Portal开发文档4、配置数据库以DB2为例,配置步骤如下:如果你使用DB2Fix Pack10或者DB2Fix Pack11或者DB2Fix Pack12,你必须在迁移数据库之前完成以下步骤:1.找到文件:*UNIX:/home/db2inst1/sqllib/cfg/db2cli.ini*Windows:db2home/sqllib/db2cli.ini2.编辑文件,在文件的最后添加下列参数:DB2Fix Pack10或者DB2Fix Pack11:[COMMON]DYNAMIC=1DB2Fix Pack12:[COMMON]ReturnAliases=0注意:在文件的最后必须添加一个空行.我们会创建下列7个表实例●release●community●customization●wmmdb●jcrdb●fdbkdb●lkmddb找到下列文件,并在修改参数之前创建一个备份拷贝●portal_server_root/config/wpconfig.properties●portal_server_root/config/wpconfig_dbdomain.properties●portal_server_root/config/wpconfig_dbtype.properties编辑修改以下参数:Properties File Property Valuewpconfig-dbtype.properties Db2.DbLibrary<DB2_HOME>/java/db2java.zip wpconfig-dbdomain.properties release.DbType db2release.DbName wpsreldbrelease.DataSourceName wpreldbDSrelease.DbUrl jdbc:db2:wpsreldbrelease.DbUser db2adminrelease.DbPassword passw0rdcustomization.DbType db2customization.DbName wpscusdbcustomization.DataSourceName wpcusdbDScustomization.DbUrl jdbc:db2:wpscusdbcustomization.DbUser db2usercustomization.DbPassword passw0rdcommunity.DbType db2community.DbName wpscomdbcommunity.DataSourceName wpcomdbDScommunity.DbUrl jdbc:db2:wpscomdbcommunity.DbUser db2admincommunity.DbPassword passw0rdjcr.DbType db2jcr.DbName wpsjcrdbjcr.DataSourceName wpjcrdbDSjcr.DbUrl jdbc:db2:wpsjcrdbjcr.DbUser db2adminjcr.DbPassword passw0rdwmm.DbType db2wmm.DbName wpswmmdbwmm.DataSourceName wpwmmdbDSwmm.DbUrl jdbc:db2:wpswmmdbwmm.DbUser db2adminwmm.DbPassword passw0rdfeedback.DbType db2feedback.DbName wpsfbkdbfeedback.DataSourceName wpfdbkdbDSfeedback.DbUrl jdbc:db2:wpsfbkdbfeedback.DbUser db2adminfeedback.DbPassword passw0rdlikeminds.DbType db2likeminds.DbName wpslmdblikeminds.DbDataSourceName lmdbDSlikeminds.DbUrl jdbc:db2:wpslmdblikeminds.DbUser db2adminlikeminds.DbPassword passw0rd打开命令窗口,转到路径<WP_ROOT>\config执行:WPSconfig create-local-database-db2确认成功执行后,接着执行:WPSconfig database-transfer 整个过程持续1个小时左右启动Portal Server,即可访问5、启用LDAP(支持realm)"realm"的概念是指特定的用户访问特定的门户配置。
IBM Content Manager OnDemand LDAP Sync 用户指南说明书
IBM Content Manager OnDemandLDAP Sync10/18/2018Rob RussellSoftware Engineer - Content Manager OnDemandThis article walks through the basics of how to setup, configure and run the Content Manager OnDemand LDAP Sync command.What is IBM Content Manager OnDemand LDAP Sync?Content Manager OnDemand LDAP Sync (ARSLSYNC) is a new Content Manager OnDemand command that allows for the synchronization of users and groups between LDAP-compliant directory servers and Content Manager OnDemand. Users, groups, and a user’s group membership can be pulled directly from an LDAP-compliant directory server and imported into Content Manager OnDemand. This alleviates the need for the manual creation of users/groups within Content Manager OnDemand. Prerequisites: This document addresses functionality that is only available in Content Manager OnDemand for Multiplatforms Versions 10.1.0.2 and later. For iSeries and zSeries this feature is available at Version 10.1.0.3 or later.OVERVIEWPrior to Version 10.1.0.2, Content Manager OnDemand only supported authentication to LDAP.Content Manager OnDemand V10.1.0.2 introduces a new command (ARSLSYNC) which can be configured to run as either a Windows scheduled task, a Unix cron job, or manually from a properly configured Content Manager OnDemand command prompt.LDAP Sync includes the following functionality:∙Sync users from LDAP to Content Manager OnDemand∙Sync groups from LDAP to Content Manager OnDemand∙Sync group membership from LDAP to Content Manager OnDemand∙Ignore lists for both users and groups∙Creation of a viewable success/failure System Log messages (including manifest file)∙Ability to run in preview mode only∙Option to run with verbose outputTo conform to Content Manager OnDemand user and group naming standards, any special characters from LDAP will be converted to the underscore (_) character. This includes the following characters: ∙asterisk ( *)∙percent ( %)∙plus ( +)∙left bracket ( [)∙right bracket ( ])∙double quote ( ")∙blankFor example, an LDAP user with a samAccountName of ‘cmod admin’ will be imported into Content Manager OnDemand as ‘cmod_admin’. Although this scenario is not common, you should confirm with your LDAP administrator that this conversion will not result in the attempted creation of duplicate IDs.Preparing your systemThe first step in configuring your system to run ARSLSYNC is to ensure LDAP Authentication and Password Case Sensitivity is enabled in the Content Manager OnDemand Administrator client. Refer to the Content Manager OnDemand Knowledge Center for detailed instructions on how to configure LDAP Authentication.IBM Content Manager OnDemand for Multiplatforms V10.1.0 documentationAdd new configuration parametersARSLSYNC introduces the following new parameters:ARS_LDAP_SERVER_TYPE(required) [AD, SUN, OPEN]: Specifies the type of LDAP repository being configured. Only a single server can be configured per Content Manager OnDemandinstance.ARS_LDAP_USER_FILTER (required): Used to query LDAP for users that will be imported into Content Manager OnDemand.For example: (&(objectclass=user)( objectclass=CMODUSER))ARS_LDAP_GROUP_FILTER (required): Used to query LDAP for groups that will be importedinto Content Manager OnDemand.For example: (objectclass=group)ARS_LDAP_GROUP_MAPPED_ATTRIBUTE (required): Used to create the Content ManagerOnDemand group name.ARS_LDAP_IGN_GROUPS: This parameter specifies the user IDs that Content ManagerOnDemand ignores when syncing.You can specify up to 10 group IDs, delimited by a comma.ARS_LDAP_IGN_USERIDS: This parameter specifies the user IDs that Content ManagerOnDemand ignores when syncing. If the parameter does not exist or you do not specify avalue, Content Manager OnDemand defaults to ADMIN.You can specify up to 10 user IDs, delimited by a comma. If you specify a list of user IDs and you want to include ADMIN, you must specify it on the list.To ease with the configuration, these parameters can be added directly to the ARS.CFG file on UNIX platforms. Windows customers can use the OnDemand Configurator to add these new parameters. Simply select the Parameters button from the instance Properties tab and add any entries needed. This alleviates the need from modifying the Windows registry directly.Once the parameters have been entered, you must restart the ARSSOCKD process in order for the changes to take effect.Sample LDAP configuration with LDAP Sync parameters (Active Directory)ARS_LDAP_SERVER= ARS_LDAP_PORT= 3268ARS_LDAP_USE_SSL= FALSEARS_LDAP_BASE_DN= dc=ondemand,dc=yourdomain,dc=localARS_LDAP_BIND_ATTRIBUTE= sAMAccountNameARS_LDAP_MAPPED_ATTRIBUTE= sAMAccountNameARS_LDAP_ALLOW_ANONYMOUS= FALSEARS_LDAP_BIND_MESSAGES_FILE=ARS_LDAP_IGN_USERIDS=ADMINARS_LDAP_SERVER_TYPE=ADARS_LDAP_USER_FILTER=(objectclass=user)ARS_LDAP_GROUP_FILTER=(objectclass=group)ARS_LDAP_GROUP_MAPPED_ATTRIBUTE=CNARS_LDAP_IGN_GROUPS=CMOD_ADMINS,CMOD_USERADMINSUsageThe ARSLSYNC command must be run as the instance owner. The command usage requires either Sync (-s) or Preview (-t). In preview mode, no changes are made to the server. This should be used during the configuration of ARSLSYNC. Once you are satisfied that your filters are set correctly, you can proceed to run the command in Sync mode.Usage: arslsync [-I <od_inst>] [-s | -t] [-v]Version: 10.1.0.2-h <od_inst> OnDemand Instance Name (same as -I)-I <od_inst> OnDemand Instance Name (same as -h)-s Sync-t Preview-v Verbose-1 <trace_file> Trace file-2 <trace_level> Trace levelARSLSYNC introduces the following two new System Log messages:ARS0460I – LDAP Synchronization SuccessARS0461I – LDAP Synchronization FailedBoth message are viewable from within the System Log. The messages will contain a manifest of any changes made to the system.ARSLSYNC also includes a verbose option (-v) which will output any objects that already exist in Content Manager OnDemand and will remain unchanged.。
IBM安装操作系统
IBMXSystemServerGuide8.41服务器系统安装引导盘IBMXSystemServerGuide8.41支持操作系统:32位:MicrosoftWindows2003/2003R2(Enterprise,Standard,WebandDataCenterUV) MicrosoftSmallBusinessServer2003/2003R2(Standard/PremiumEdition)MicrosoftWindows2008(Enterprise,Standard,WebandDataCenter)64位:MicrosoftWindows2003/2003R2(Enterprise,Standard,andDataCenterUV) MicrosoftWindows2008(Enterprise,Standard,DataCenter,EssentialBusinessServer,SmallBusinessServerandHPCEdition) MicrosoftWindowsServer2008R2(Enterprise,Standard,Web,DataCenter,andHPCEdition)支持服务器系列:IBMBladeCenterLS20(8850)IBMBladeCenterLS21(7971)IBMBladeCenterLS22(7901)IBMBladeCenterLS41(7972)IBMBladeCenterLS42(7902)IBMBladeCenterHS12(8014,8028,1916)IBMBladeCenterHS20(8843,1883)IBMBladeCenterHS21(8853,1885)IBMBladeCenterHS21XM(7995,1915)IBMBladeCenterHS22(7870,1936,7809)IBMBladeCenterHS22V(7871,1949)IBMBladeCenterHX5(7872,1909)IBMBladeCenterS(8886)IBMeServerxSeries260(8865)IBMeServerxSeries366(8863)IBMeServerxSeries460(8872)IBMSystemx3100(4348)IBMSystemx3105(4347)IBMSystemx3200(4362,4363)IBMSystemx3200M2(4367,4368)IBMSystemx3200M3(7327,7328)IBMSystemx3250(4364,4365,4366)IBMSystemx3250M2(4190,4191,4194)IBMSystemx3250M3(4251,4252,4261)IBMSystemx3350(4192,4193)IBMSystemx3400(7973,7974,7975,7976)IBMSystemx3400M2(7846,7837)IBMSystemx3400M3(7378,7379)IBMSystemx3455(7984,7986,7940,7941)IBMSystemx3500(7977)IBMSystemx3500M2(7839)IBMSystemx3500M3(7380)IBMSystemx3550(7978,1913)IBMSystemx3550M2(7946,4198)IBMSystemx3550M3(7944,4254)IBMSystemx3610(7942)(RAIDsupportrequiresBIOSlevel1.01Aorabove)IBMSystemx3620M3(7376)IBMSystemx3630M3(7377)IBMSystemx3650(7979,1914)IBMSystemx3650M2(7947,4199)IBMSystemx3650M3(7945,4255)IBMSystemx3650T(7980)IBMSystemx3655(7985,7943)IBMSystemx3690X5(7148,7149)IBMSystemx3755(8877,7163)IBMSystemx3800(8865,8866)IBMSystemx3850(8864,7365,7362)IBMSystemx3850M2(7141,7144,7233,7234)IBMSystemx3850X5(7145)IBMSystemx3950(7366,8878,7363,8872)IBMSystemx3950M2(7141,7233,7234)IBMSystemx3950X5(7146)IBMSystemiDataplexdx360M2(7321,7323,6830)IBMSystemxiDataPlexdx360M3(6391)下载地址:32位:64位:设置和配置概述:使用ServerGuide设置和安装CD时,您不需要安装软盘。
IBM Security AppScan Source V 9.0.3.7 安装和管理指南说明书
迁移到 AppScan Source 的当前版本 . . . . . . 11 从 V9.0.2 迁移 . . . . . . . . . . . . 11 从 V9.0 迁移 . . . . . . . . . . . . . 12 从 V8.7 迁移 . . . . . . . . . . . . . 13
IBM SDK for Java 8 下载、安装和设置指南(Linux)以运行 IBM MQ Jav

Download, install and setup of IBM SDK for Java 8 in Linuxto run MQ Java/JMS client applicationshttps:///support/pages/node/6202414Date last updated: 27-Apr-2020Angel Rivera –*************.comIBM MQ Support+++ ObjectiveThe objective of this tutorial is to show all the steps to download, install and setup IBM SDK (Software Development Kit) for Java 8 in Linux (RHEL 7.6), in order to work with IBM MQ Client applications that use Java or JMS.For illustration purposes, the version MQ 9.1.5 CD (Continuous Delivery) will be used. Why? Because it is the latest one at the time this tutorial is written.In addition, it is important for you to see concrete real file names instead of using generic file names.Furthermore, a Linux x86 64-bit VM will be used and it is using RHEL 7.6:+ROOT+ : /# cat /etc/redhat-releaseRed Hat Enterprise Linux Server release 7.6 (Maipo)The default installation directory will be used:/opt/ibm/java-x86_64-80+++ Which are the MQ requirements for working with Java applications?If you have a Linux Host (physical server, VM, …) you will need to have 2 things in order to run MQ Java/JMS Client applications:a) MQ jar filesb) A Java Runtime Environment (JRE) or a Java Software Development Kit (SDK)+++ How to get the MQ jar files?There are several methods for getting the MQ jar files:1) You could install the rpm filesets for MQ, which are provided by downloading:- The MQ Server package from IBM Passport Advantagehttps:///support/pages/downloading-ibm-mq-version-915-continuous-deliveryDownloading IBM MQ Version 9.1.5 Continuous DeliveryPart Number DescriptionCC0AGML IBM MQ V9.1.5 Continuous Delivery Release for Linux on x86 64-bit eImage - The MQ Client package from IBM Fix Centralhttps:///mq91cdclientsMQ 9.1 Clients for CD and LTS (including Java-InstallRA, Install-Java-All, Redist)You will download a tar.gz file and after you unpack it, you will see several filesets. The filesets of interest for this tutorial are:MQSeriesJava-9.1.5-0.x86_64.rpm (REQUIRED)MQSeriesJRE-9.1.5-0.x86_64.rpm (OPTIONAL)1.a) What is the difference between the above filesets?1.a.1) MQSeriesJava-9.1.5-0.x86_64.rpm (REQUIRED)The *Java*.rpm fileset provides the MQ Classes for Java, the MQ Classes for JMS, binary executables, utilities, etc.You will need these files for compilation and runtime.The following environment variables from the MQ utility “setmqenv” are set: MQ_JAVA_INSTALL_PATH=/opt/mqm/javaMQ_JAVA_LIB_PATH=/opt/mqm/java/lib641.a.2) MQSeriesJRE-9.1.5-0.x86_64.rpm (OPTIONAL)The *JRE*.rpm fileset provides a Java Runtime Environment.It is an OPTIONAL component to install.When do you want to install it and use it?There are customers who do NOT have installed a JRE or an SDK in their system, but if the customer wants to use the Java-based MQ GUI for GSKit (for SSL/TLS), then the customer can use the JRE provided by MQ.The default installation directory is specified by the following environment variable from the MQ utility “setmqenv”:MQ_JRE_PATH=/opt/mqm/java/jre64/jreNotice that the SDK is NOT provided by MQ, that is, you CANNOT compile Java/JMS programs with the JRE provided by MQ: you will need to download and install a compatible SDK (which also will include its own JRE).It is possible to have multiple JREs in the system. The one that is used at runtime is the one selected at runtime (using environment variables, PATH settings, etc).2) Instead of installing the MQ Java/JRE filesets, you could install a set of files (*.jar files) that have a smaller footprint because they are subsets from the filesets in option 1. https:///mq91cdjavaclientMQ 9.1 JMS and Java 'All Client'This is for Standalone MQ Client applications.https:///mq91cdRAMQ 9.1 Resource Adapter for use with Application ServersThis is NOT for Standalone MQ client applications.https:///mq91cdredistclientsMQ 9.1 Redistributable client (C and .NET; JMS and Java)This is used when you want to package your own application AND you want to include some of the MQ jar files.+++ Which IBM SDK to download?The version of the JRE provided by MQ depends on the version/fixpack level of MQ.The following article has the mapping:/support/docview.wss?uid=swg27038676Levels of JRE and GSkit and LDAP bundled with WebSphere MQFor example, in the table, the row for MQ 9.1.5 has the following:IBM MQ V9.1 CD GSKit Level JRE Level IBM Security Directory ServerClient Level9.1.5 (Windows, Linux, AIX)8.0.55.13 8.0.6.5 6.4.0.20From the column titled “JRE Level” we can see that the level is: 8.0.6.5Which means that it is within the Java version: Java 8.0If you use Google and search for “JRE 8.0.6.5” the top hits will provide you the sites where you can download the SDK (which includes the JRE), for example:https:///javasdk/downloads/sdk8/IBM DeveloperDownloads - Java 8IBM SDK, Java T echnology Edition, Version 8Java SDK8 last updated: 8.0.6.7 - 31 March 2020IBM® SDK, Java T echnology Edition, Version 8 contains the latest virtual machine technology from IBM. Downloads contain the latest IBM fixes and Oracle updates to the Java SE 8 application programming interfaces (APIs).This release contains the latest virtual machine technology from IBM.++ Downloading the desired IBM SDKNotice that at the time this tutorial was written, the latest downloadable version is 8.0.6.7. There were 4 downloads for IBM x86 64-bit.The item that is highlighted is the one that was used for this tutorial.Linux on AMD64/EMT64TSDKInstallable package (InstallAnywhere as root)(File name: ibm-java-x86_64-sdk-8.0-6.7.bin, Size: 159MB)Simple unzip with license (InstallAnywhere root not required)(File name: ibm-java-sdk-8.0-6.7-x86_64-archive.bin, Size: 159MB)JREInstallable package (InstallAnywhere as root)(File name: ibm-java-x86_64-jre-8.0-6.7.bin, Size: 129MB)Simple unzip with license (InstallAnywhere root not required)(File name: ibm-java-jre-8.0-6.7-x86_64-archive.bin, Size: 129MB)Download the file:ibm-java-x86_64-sdk-8.0-6.7.binIt is a good practice to have a dedicated directory for the “downloads” and in this case, it is:/downloadsA dedicated subdirectory for the “java” download files is created:/downloads/javaThus, the full path name of the file in the target host is:: /downloads/java# lsibm-java-x86_64-sdk-8.0-6.7.binFor the installation step you need to login as user “root”.The downloaded file is a “binary executable” file and thus, you need to ensure that it has the proper “execute” permissions:+++ROOT+++ : /# cd /downloads/java+++ROOT+++ : /downloads/java# chmod 755 *.bin# ls -ltotal 162308-rwxr-xr-x 1 root root 166200534 Apr 27 14:23 ibm-java-x86_64-sdk-8.0-6.7.binExecute the bin file and follow the prompts and accept the defaults:# ./ibm-java-x86_64-sdk-8.0-6.7.binPreparing to install...Extracting the JRE from the installer archive...Unpacking the JRE...…Choose Locale...----------------1- Bahasa Indonesia2- Català3- Deutsch->4- English5- Español6- Français7- Italiano8- PortuguêsCHOOSE LOCALE BY NUMBER: 4…Press Enter to continue viewing the license agreement, or enter "1" toaccept the agreement, "2" to decline it, "3" to print it, or "99" to go backto the previous screen.: 1Respond to each prompt to proceed to the next step in the installation. If you want to change something on a previous step, type 'back'.You may cancel this installation at any time by typing 'quit'.PRESS <ENTER> TO CONTINUE:Choose Install Folder---------------------Where would you like to install?Default Install Folder: /opt/ibm/java-x86_64-80ENTER AN ABSOLUTE PATH, OR PRESS <ENTER> TO ACCEPT THE DEFAULT:Product Name:IBM® 64-bit SDK for Linux®, v8.0Install Folder:/opt/ibm/java-x86_64-80Disk Space Information (for Installation T arget):Required: 256,935,865 BytesAvailable: 228,828,958,720 BytesPRESS <ENTER> TO CONTINUE:Congratulations. IBM® 64-bit SDK for Linux®, v8.0 has been successfullyinstalled to:/opt/ibm/java-x86_64-80PRESS <ENTER> TO EXIT THE INSTALLER:Now let’s take a quick look at the default directory where the code was installed: +++ROOT+++ : /downloads/java# cd /opt/ibm/java-x86_64-80# lsbin demo include lib notices.txt release src.zip copyright docs jre license_en.txt readme.txt sample _uninstall # ls binappletviewer java javaw jdmpview policytool tnameserv ControlPanel javac javaws jjs rmic unpack200extcheck javadoc jconsole jrunscript rmid wsgenidlj javah jcontrol keytool rmiregistry wsimportjar javap jdb native2ascii schemagen xjcjarsigner java-rmi.cgi jdeps pack200 serialver# ls jrebin lib plugin# ls jre/binclassic j9vm jcontrol keytool pack200 tnameservControlPanel java jdmpview kinit policytool unpack200ikeycmd javaw jextract klist rmidikeyman javaws jjs ktab rmiregistry++ Setup of JAVA environment variables for the user “mqm”Ok! So far, so good!But what is next?It is a good practice to create some environment variables inside the .bashrc (or .profile) in order to facilitate the compilation and runtime tasks when using Java.Login as user “mqm” (or another user who is going to use MQ Java/JMS)Edit the .bashrc or similar profile script:## Java Development Kit or Java Runtime Environment.## Basic variables for Javaexport JAVA_HOME=/opt/ibm/java-x86_64-80export JAVA_BINDIR=$JAVA_HOME/bin# Add Java to the PATHexport PATH=$JAVA_BINDIR:$PATHIt is suggested that you create a shell script that helps you invoke the MQ utility “setmqenv” and does few other things for properly setting the environment.# Name: set-mq-915# Purpose: to setup the environment to run MQ 9.1.5. /opt/mqm/bin/setmqenv -n Installation1# Additional MQ directories for the PATHexportPATH=$PATH:$MQ_INSTALLATION_PATH/java/bin:$MQ_INSTALLATION_PATH/samp/bin:$MQ_INSTALLATION_ PATH/samp/jms/samples:# Add local directory for running Java/JMS programsexport CLASSPATH=$CLASSPATH:.# Display the full fix pack leveldspmqver -f 2# endLogout and login in order to refresh the shellInvoke the shell script. Notice that you need to use: dot + space + script name****************:/home/mqm$ . set-mq-915****************:/home/mqm$ which java/opt/ibm/java-x86_64-80/bin/java****************:/home/mqm$ java -versionjava version "1.8.0_241"Java(TM) SE Runtime Environment (build 8.0.6.7 - pxa6480sr6fp7-20200312_01(SR6 FP7)) IBM J9 VM (build 2.9, JRE 1.8.0 Linux amd64-64-Bit Compressed References20200219_440062 (JIT enabled, AOT enabled)OpenJ9 - 3088245OMR - eb95a4dIBM - 83517b6)JCL - 20200310_01 based on Oracle jdk8u241-b07****************:/home/mqm$ set | grep -i javaCLASSPATH=/opt/mqm/java/lib/com.ibm.mq.jar:/opt/mqm/java/lib/com.ibm.mqjms.jar: /opt/mqm/java/lib/com.ibm.mq.allclient.jar:/opt/mqm/samp/wmqjava/samples:/opt/m qm/samp/jms/samples:.JAVA_BINDIR=/opt/ibm/java-x86_64-80/binJAVA_HOME=/opt/ibm/java-x86_64-80MQ_JAVA_DATA_PATH=/var/mqmMQ_JAVA_INSTALL_PATH=/opt/mqm/javaMQ_JAVA_LIB_PATH=/opt/mqm/java/lib64MQ_JRE_PATH=/opt/mqm/java/jre64/jrePATH=/opt/mqm/bin:/opt/ibm/java-x86_64-80/bin:/usr/lib64/qt-3.3/bin:/usr/local/bin:/bin:/usr/bin:/usr/local/sbin:/usr/sbin:/usr/local/bin:/home/mqm /bin:.:/sbin:/opt/mqm/java/bin:/opt/mqm/samp/bin:/opt/mqm/samp/jms/samples:/ho me/mqm/.local/bin:/home/mqm/binLet’s try now to run one of the MQ JMS samples. The attempt will fail, but the objective is to illustrate that the Java runtime will be OK and that the MQ jar files can be found! Many novice MQ Java/JMS users struggle a lot in getting the setup right!****************:/home/mqm$ ls /opt/mqm/samp/jms/samplesinteractive JmsJndiBrowser.class JmsJndiProducer.javaJmsBrowser.class JmsJndiBrowser.java JmsProducer.classJmsBrowser.java JmsJndiConsumer.class JmsProducer.javaJmsConsumer.class JmsJndiConsumer.java simpleJmsConsumer.java JmsJndiProducer.class****************:/home/mqm$ java JmsProducerNo arguments! Mandatory arguments must be specified.Usage:JmsProducer -m queueManagerName -d destinationName [-h host -p port -l channel] [-u userid -w passWord]+++ end。
IBM Directory Server - 目录服务器简介
IBM Directory Server目录服务器简介LDAP 概述LDAP的英文全称是Lightweight Directory Access Protocol,一般都简称为LDAP。
它是基于X.500标准的,但是简单多了并且可以根据需要定制。
与X.500不同,LDAP支持TCP/IP,这对访问Internet是必须的。
现在LDAP技术不仅发展得很快而且也是激动人心的。
在企业范围内实现LDAP 可以让运行在几乎所有计算机平台上的所有的应用程序从LDAP目录中获取信息。
LDAP目录中可以存储各种类型的数据:电子邮件地址、邮件路由信息、人力资源数据、公用密匙、联系人列表,等等。
通过把LDAP目录作为系统集成中的一个重要环节,可以简化员工在企业内部查询信息的步骤。
通过使用LDAP 协议,客户机将查询发送给LDAP 服务器(从技术上讲,LDAP 没有“读”功能;客户机通过将搜索请求发送给服务器来“读”目录项)。
服务器检查客户机权限(即,客户机有权访问数据库吗?可以读被请求的树吗?可以将信息写入数据库吗?可以删除项吗?),然后返回请求信息。
几乎所有的现代编程语言都有LDAP API,这意味着几乎任何一个软件都可以支持LDAP。
IBM Directory Server LDAP目录服务器的优势现在该说说IBM Directory Server LDAP目录服务器(简称:IDS)到底有些什么优势了,现在IDS的流行是很多因数共同作用的结果。
LDAP协议是跨平台的和标准的协议,因此应用程序就不用为LDAP目录放在什么样的服务器上操心了。
实际上,LDAP得到了业界的广泛认可,因为它是Internet 的标准。
产商都很愿意在产品中加入对LDAP的支持,因为他们根本不用考虑另一端(客户端或服务端)是怎么样的。
因为可以用同样的协议、客户端连接软件包和查询命令与IBM Directory Server LDAP目录服务器进行交互。
portal群集安装文档

Portal群集安装手册一、安装准备安装环境如下:两台Portal服务器+一台Oracle服务器+AD LDAP服务器其中:192.168.1.134 服务器安装以下软件:IBM WebSphere PortalIBM WebSphere Network DeploymentIBM Http Web Server192.168.1.135 服务器安装以下软件:IBM WebSphere PortalIBM Http Web Server而解析为192.168.1.134.数据库服务器:192.168.1.159 sid:bpm二、Portal1安装步骤1、执行install.sh2、选择Portal Enable 版本Wpadmin/password3、安装完成。
4、升级Portal升级WAS安装WAS 升级程序IBM Update Installer for WebSphere Software 之后,运行安装程,启动升级程序界面升级portal安装CF4 package三、Portal2的安装1、 执行安装脚本2、升级WAS的补丁。
参考Portal1的升级3、升级Portal的补丁。
参考Portal1的升级四、安装ND 部署平台使用IL-2的安装盘,执行如程序:按照WAS升级的方法升级ND.五、安装IBM HTTP ServerPortal2主机安装执行脚本Ihsadmin/password在Portal2服务器上安装,需要把Web 服务器定义为webserver2.把configurewebserver2.sh 复制到/websphere/appserver/bin在WebSphere/AppServer/bin目录修改configurewebserver2.sh文件如下部分,把主机名替换为门户的主机名,保持一致../wsadmin.sh $PROFILE_NAME_PARAMETER $WSADMIN_USERID_PARAMETER $WSADMIN_PASSWORD_PARAMETER -f $WAS_HOME/bin/configureWebserverDefinition.jacl webserver2 IHS '/home/WebSphere/HTTPServer' '/home/WebSphere/HTTPServer/conf/httpd.conf' 80 MAP_ALL '/home/WebSphere/HTTPServer/Plugins' unmanaged -node linux 8008 ihsadmin $IHS_ADMIN_PASSWORD_PARAMETER在/WebSphere/wp_profile/bin目录执行. ./setupCmdLine.sh 初始化环境确认门户系统已经启动,确保server1已经启动.改变目录到/websphere/AppServer/bin目录执行如下脚本: ./configurewebserver2.sh结束,重新启动门户,不启动server1.类似方法创建portal1服务器的IBM Web Server.六、迁移数据库1、迁移数据库前的准备# Locate the following files and create a backup copy of each before changing any values:* wp_profile_root/ConfigEngine/properties/wkplc.properties* wp_profile_root/ConfigEngine/properties/wkplc_dbdomain.properties* wp_profile_root/ConfigEngine/properties/wkplc_dbtype.properties* If you are transferring from a database other than Derby: wp_profile_root/ConfigEngine/properties/wkplc_sourceDb.propertiesDefault values are listed in these files. Unless otherwise noted, all values are of type alphanumeric text string. Print out the steps below for reference before modifying the properties files. Make sure to enter the appropriate values for each instance of each property. In wkplc_dbdomain.properties, most properties are repeated for each domain.# Use a text editor to open the properties file wkplc_dbdomain.properties and modify the values to correspond to your environment.1). For dbdomain.DbType, type oracle.2). For dbdomain.DbName, type the name of the WebSphere Portal domaindatabase.Note: This value is also the database element in the dbdomain.DbUrl property.3). For dbdomain.DbSchema, type the schema name of the database domain.Note: Review your target database management system documentation to define a valid schema name. Some database management systems have schema name restrictions that you need to understand. The dbdomain.DbName should be the same value used for the dbdomain.DbSchema4). For dbdomain.DataSourceName, type the name of the data source thatWebSphere Portal uses to communicate with its databases. Do not use the following reserved words:* releaseDS* communityDS* customizationDS* jcrDS* lmdbDS* feedback5). For dbdomain.DbUrl, type the database URL used to access the WebSpherePortal database with JDBC. The value must conform to the JDBC URL syntax specified by the database.Note:* The database element of this value should match the value of DbName.* For Oracle RAC only, the WebSphere Portal server must explicitly connect to one RAC node during database transfer. You need to specify the information of one Oracle RAC node as if it is the only database server. For example, the Oracle database URL should look like the following: jdbc:oracle:thin:@PRIMARY_NODE_HOSTNAME:1521:PRIMARY_NODE_INSTANCENAME.When database transfer is completed, the WebSphere Portal server will be configured to use this single database server.6). For dbdomain.DbUser, type the user ID for the database configuration user.7). For dbdomain.DbPassword, type the password for the databaseconfiguration user.8). For dbdomain.DbConfigRoleName, type the name of the group for databaseconfiguration users. Database rights are granted to this group instead of individuals. The user specified for dbdomain.DbUser must be assigned to this group.9). Optional: For dbdomain.DbRuntimeUser, type the user ID of the databaseuser that should be used by WebSphere Portal to connect to the database at runtime. If no value is specified for this setting, the database configuration user will be used to connect to the databases at runtime.10). If dbdomain.DbRuntimeUser is specified, you must setdbdomain.DbRuntimePassword to be the password of the runtime database user.11). For dbdomain.DbRuntimeRoleName, type the name of the group fordatabase runtime users. Database rights are granted to this group instead of individuals.The user specified for dbdomain.DbRuntimeUser must be assigned to this group.12). Optional: For dbdomain.DBA.DbUser, type the database administrator userID for privileged access operations during database creation. If you do not need this parameter, you can either accept the default value or leave blank.13). Optional: For dbdomain.DBA.DbPassword, type the database administratorpassword for privileged access operations during database creation. If you do not need this parameter, you can either accept the default value or leave blank.14). For dbdomain.DbHome, type the root location for the database.Note: This value is used to specify the location to create the tablespaces.# Save and close the file.# Update the following properties in the file wkplc_dbtype.properties.1. For oracle.DbDriver, type the name of the Oracle JDBC driver class.2. For oracle.DbLibrary, type the directory and name of the .jar file thatcontains the JDBC driver class.3. For oracle.JdbcProviderName, type the name of the JDBC provider thatWebSphere Portal uses to communicate with its databases.# Save and close the file.Example:#wkplc_dbtype.properties文件oracle.DbDriver=oracle.jdbc.OracleDriveroracle.DbLibrary=/home/WebSphere/lib/ojdbc6.jaroracle.JdbcProviderName=wpdbJDBC_oracle# wkplc_dbdomain.properties文件feedback.DbType=oraclefeedback.DbName=bpmfeedback.DbSchema=fdusrfeedback.DataSourceName=fdDSfeedback.DbUrl=jdbc:oracle:thin:@:1521:bpmfeedback.DbUser=fdusrfeedback.DbPassword=fdusrfeedback.DbConfigRoleName=WP_PZN_CONFIG_USERSfeedback.DbRuntimeRoleName=WP_PZN_RUNTIME_USERSlikeminds.DbType=oraclelikeminds.DbName=bpmlikeminds.DbSchema=lmusrlikeminds.DataSourceName=lmDSlikeminds.DbUrl=jdbc:oracle:thin:@:1521:bpmlikeminds.DbUser=lmusrlikeminds.DbPassword=lmusrlikeminds.DbConfigRoleName=WP_PZN_CONFIG_USERSlikeminds.DbRuntimeRoleName=WP_PZN_RUNTIME_USERSrelease.DbType=oraclerelease.DbName=bpmrelease.DbSchema=relusrrelease.DataSourceName=relDSrelease.DbUrl=jdbc:oracle:thin:@:1521:bpmrelease.DbUser=relusrrelease.DbPassword=relusrrelease.DbConfigRoleName=WP_BASE_CONFIG_USERSrelease.DbRuntimeRoleName=WP_BASE_RUNTIME_USERScommunity.DbType=oraclecommunity.DbName=bpmcommunity.DbSchema=comusrcommunity.DataSourceName=comDScommunity.DbUrl=jdbc:oracle:thin:@:1521:bpmcommunity.DbUser=comusrcommunity.DbPassword=comusrcommunity.DbConfigRoleName=WP_BASE_CONFIG_USERScommunity.DbRuntimeRoleName=WP_BASE_RUNTIME_USERScustomization.DbType=oraclecustomization.DbName=bpmcustomization.DbSchema=cususrcustomization.DataSourceName=cusDScustomization.DbUrl=jdbc:oracle:thin:@:1521:bpm customization.DbUser=cususrcustomization.DbPassword=cususrjcr.DbType=oraclejcr.DbName=bpmjcr.DbSchema=jcrusrjcr.DataSourceName=jcrdbDSjcr.DbUrl=jdbc:oracle:thin:@:1521:bpmjcr.DbUser=jcrusrjcr.DbPassword=jcrusrjcr.DbConfigRoleName=WP_JCR_CONFIG_USERSjcr.DbRuntimeRoleName=WP_JCR_RUNTIME_USERS# Update the WasPassword value in the wkplc.properties file. This value is the password forthe WebSphere Application Server security authentication used in your environment.# Save and close the file.2、创建用户六个用户:ComUsrCususrRelusrJcrusrFdusrLmusr分别授予resource,connect权限,互相之间能查看表、视图等权限。
IBM X3650M2 安装指南
ServerGuide 引导安装指南适用于当前IBM System X部分机型设置和配置概述:使用ServerGuide 设置和安装CD 时,您不需要安装软盘。
可以使用CD 配置任何支持的IBM 服务器型号。
安装程序提供了安装服务器型号所需要的任务列表。
在装有ServeRAID 适配器或具有RAID 能力的集成SAS 控制器的服务器上,您可以在配置阵列的阶段来创建逻辑驱动器。
注意:1、使用ServerGuide光盘安装会清除硬盘上的分区和数据,如果还有要保留的数据请先备份或选择其他安装方式, 2、ServerGuide光盘并不包含操作系统程序,请客户自己准备一张正版Windows操作系统光盘。
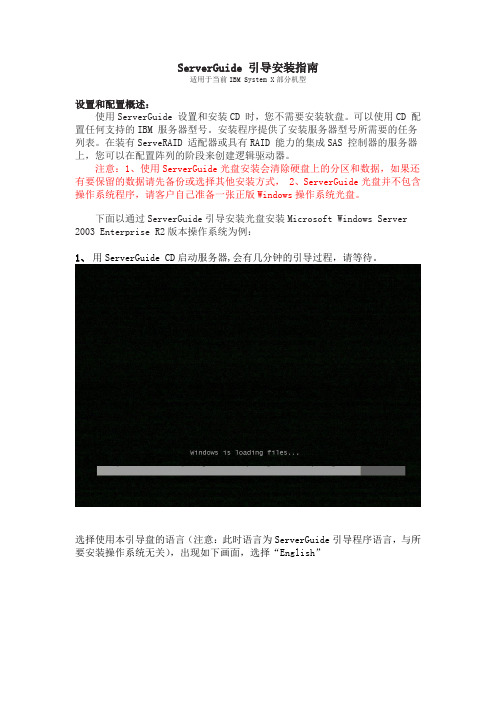
下面以通过ServerGuide引导安装光盘安装Microsoft Windows Server 2003 Enterprise R2版本操作系统为例:1、用ServerGuide CD启动服务器,会有几分钟的引导过程,请等待。
选择使用本引导盘的语言(注意:此时语言为ServerGuide引导程序语言,与所要安装操作系统无关),出现如下画面,选择“English”2、选择键盘布局的画面,在这里选择“United States”,然后点击”NEXT”:3、出现许可协议界面,阅读许可协议内容,点击“I accept”继续即可:中文用户可以在Language选项中选择Chinese 阅读中文协议.4、查看概述以了解ServerGuide 功能,请在使用前仔细查看相关使用说明,点击“NEXT”继续:5、在这里可以选择您要安装的操作系统,选择后点击“NEXT”:6、设置正确的日期和时间后点击“NEXT”:(1)、如果是没有配置过阵列的服务器则如下图所示:列卡支持及硬盘数量足够的情况下,在Select RAID Level的选项下会有一些可以配置的阵列级别可选。
如果不需要配置阵列,可以选择上图中间的“Bypass RAID Configuration”选项,然后点击“NEXT”继续。
在debian上安装LDAP服务器

在debian上安装LDAP服务器#apt-get install slapd ldap-utilsReading package lists... DoneBuilding dependency tree... DoneThe following extra packages will be installed:libiodbc2 libldap-2.3-0The following NEW packages will be installed:ldap-utils libiodbc2 libldap-2.3-0 slapd0 upgraded, 4 newly installed, 0 to remove and 13 not upgraded.Need to get 1328kB/1758kB of archives.After unpacking 4694kB of additional disk space will be used.安装过程中提示输入LDAP管理员密码(我的机器域名系统运行正常,所以没有提示输入域名等信息)安装完成后,重新配置:#dpkg-reconfigure slapd接下来就是域名信息,管理员密码,数据库我选择BDB接着是询问在移除slapd的时候是否移除数据库(Do you want your database to be removed when slapd is purged? )选择:no接下来询问是否删除旧的数据(There are still files in /var/lib/ldap which will probably break the configuration process. If you enable this ││ option, the maintainer scripts will move the old database files out of the way before creating a new database. ││││ Move old database?)如果是新安装,选择:yes是否接受ldapv2( Allow LDAPv2 protocol? )选择:no现在SLAPD已经成功运行了:dell3:/etc/postfix# ps aux|grep ldapopenldap 27127 0.0 0.5 17972 2896 ? Ssl 15:53 0:00 /usr/sbin/slapd -g openldap -u openldaproot 27147 0.0 0.1 1640 536 pts/4 S+ 15:54 0:00 grep ldapdell3:/etc/postfix#为了更好的融合你的服务器,请安装migrationtools# apt-get install migrationtools安装完成后,常用的融合都已经有perl或shell的脚本,你可以选择执行,也可以执行所有#cd /usr/share/migrationtools#lsdell3:/usr/share/migrationtools# lsmigrate_aliases.plmigrate_all_offline.shmigrate_hosts.plmigrate_protocols.plmigrate_all_netinfo_offline.shmigrate_all_online.shmigrate_netgroup.plmigrate_rpc.plmigrate_all_netinfo_online.shmigrate_automount.plmigrate_netgroup_byhost.plmigrate_services.plmigrate_all_nis_offline.shmigrate_base.plmigrate_netgroup_byuser.plmigrate_slapd_conf.plmigrate_all_nis_online.shmigrate_common.phmigrate_networks.plmigrate_all_nisplus_offline.shmigrate_fstab.plmigrate_passwd.plmigrate_all_nisplus_online.shmigrate_group.plmigrate_profile.pl如果ldap系统已经在运行,migrate_all_online.sh可以整合运行所有的脚本,否则可以运行migrate_all_offline.sh在运行脚本前,行检查migrate_common.ph文件,这是一个能用配置:你需要更改你的DNS像下面一样:# Default DNS domain$DEFAULT_MAIL_DOMAIN = "";# Default base$DEFAULT_BASE = "dc=netsafe,dc=qa,dc=net";现在运行脚本:dell3:/usr/share/migrationtools# ./migrate_all_online.shEnter the X.500 naming context you wish to import into: [dc=netsafe,dc=qa,dc=net] (如果刚已经改过配置,直接回车)Enter the hostname of your LDAP server [ldap]: dell3Enter the manager DN: [cn=admin,dc=netsafe,dc=qa,dc=net]:Enter the credentials to bind with: (在这里输入前面设定的LDAP管理员密码)Do you wish to generate a DUAConfigProfile [yes|no]? no如果运行出现类似错误:ldap_add: Already exists (68)/usr/bin/ldapadd: returned non-zero exit status: saving failed LDIF to /tmp/nis.27784.ldif请不要惊慌,到/tmp目录下,重新用以下命令运行:dell3:/tmp# ldapadd -x -c -D "cn=admin,dc=netsafe,dc=qa,dc=net" -f nis.27784.ldif -W反复运行,直到没有错误为止。
