S600说明书
S600 流量计算机中文手册
1.4 CONFIG 600 LITE
Config 600 Lite 软件(可选)是 Config 600 专业软 件的一个子软件, 用于上载和下载预先开发好的组态文 件及应用程序。 Config 600 Lite 通过 Config 600 软件可实现如下功能:
2001 年 4 月
关于本手册
(1-4)概述
16
数字输入
12
数字输出
3
频率输入
2
双脉冲输入
4 单脉冲输入
5
可编程脉冲输出
Daniel FloBoss S600
图 1-3 智能 I/O 板
FloBoss S600 包括下列软件特性:
• 编辑批量控制功能:设定一个批量值,通过组态完成批量结束报警和批量 到达报警。
• 最多可以提供 12 个用户定义的周期报告。同时还可提供维护、批处理和瞬 时(即时)报告。气体,液体和标定等应用采用不同的报告格式。报告可以 在本地打印。
• 每个用户都可以从 10 个安全级别中得到一个密码并获得相应的操作权限。
• 在启动过程中进行限流功能,防止出现电流尖脉冲导致过载电流。
• S600 的外壳是由点焊镀锌低碳钢制造的。其电源接线端子内置于外壳的后 面。
Daniel FloBoss S600
vi
2001 年 4 月
Daniel FloBoss S600
概述(1-1)
概述
1.1 关于本手册
本手册介绍了 FloBoss S600 流量计算机(FloBoss S600 )、IPL 600 软件(用于 向 FloBoss S600 传输应用程序)以及 Config 600 软件(用于开发 FloBoss S600 应用)。本手册介绍了如何安装程序并说明了如何操作该系统,包括输入和修 改数据。同时还提供了基本的维护和故障处理等内容。
S600说明书

德众尚杰S600示例说明书S600目录一、注意事项 (3)二、产品特点 (3)三、按键的功能说明 (4)四、基本操作 (6)五、设置 (7)六、收音机功能操作 (13)七、GPS卫星导航功能操作 (14)八、光碟播放基本操作 (14)九、U盘,SD卡播放操作 (16)十、虚拟多碟(可选功能) (17)十一、IPOD播放(可选功能) (18)十二、蓝牙免提系统操作 (19)十三、蓝牙音乐播放(A2DP) (20)十四、AVIN(辅助源输入)操作 (20)十五、移动电视操作 (20)十六、行车记录仪操作 (20)十七、安装GPS天线 (20)十八、常见故障排除向导 (21)S600一、注意事项为了您的安全,请尽量不要在驾驶时观看视频和操作机器;开车时请将音量调到能清楚听到外界声音的水平。
开始操作前,请详细阅读本手册以及系统的其他手册,了解本使用手册和机器上的相关安全提示和警告标识,阅读完之后放在随手可及的地方以备随时参考。
●首先请注意交通安全。
●如您在操作本系统遇到困难时,请将车停放在安全的地方后操作。
●勿让儿童操作本机器,以免造成人身伤害或机器损坏。
●在使用卫星导航功能时请遵照交通规则驾驶。
●请不要在禁止使用电子设备或严禁明火的地方使用,如:加油站、酒厂、电磁强干扰地区等,否则可能造成危险。
●不要自行保养、维护、安装本机器。
在接通电源的情况下请勿安装或维修本机,由未受过电子设备或车辆附件安装训练或缺乏经验的人员安装及维修本机器非常危险。
●不要把本机器贮藏或安装在阳光直射的地方,也不要将其置于其他有害物质环境里,特别是液晶屏。
如果安装的时候,液晶屏正好处于空调器通风道附近,请保证凉风或者热风不要直接吹到机器上,否则可能损坏机器,甚至对汽车或者人身产生伤害。
●切勿用一些尖锐的物体刮划显示屏,不要拿硬物大力按压显示屏,否则会造成显示屏或触摸屏的损坏。
●为了保证机器正常运转,防止火灾或电击发生,请不要将机器暴露在潮湿的空气中,更不能将液体洒落机器上。
狗特拉YS600犬吠抑制器用户手册说明书

Owner’s Manual BUILT RELIABLEBy DogtraNo Bark CollarsOwner's ManualPlease read this manual thoroughlybefore using the YS600.1Product Safety and Health Statement1. The YS600 is intended to prevent the barking of dogsonly. It is NOT intended for use on people or on animalsother than dogs. Dogtra does not assume any liability for theimproper use of the YS600.2. Leaving the YS600 in the same position on a dog’s neckfor extended periods of time can cause skin irritation. Toprevent this, occasionally reposition the unit so the contactpoints are moved to a different location on the dog’s neck.ALWAYS check your dog’s neck for signs of skin irritationwhen using the YS600.3. A proper fit is necessary for the YS600 to work optimally.Both contact points must be in contact with your dog’s skinat all times for a consistent stimulation. A loose fitting collarcan cause the contact points to rub against the skin and causeirritation.4. The YS600 is not intended for use on dogs weighing lessthan 35 pounds or less than 6 months of age.5. Please remove the YS600 before playing with your dog. Theactivity may cause your dog to bark, which could lead him/her to associate playing with the electrical stimulation.6. Closely monitor your dog’s activity and stimulationoutput while using the YS600. When removing the YS600from your dog’s neck, make sure your dog is not barking andin a calm or stable condition.2T able of ContentsAt a Glance ....................................................... Main Features .................................................... Overview .......................................................... How to Use the On/Off & Intensity Dial .................. The LED Indicator .............................................. Operating Modes ................................................. The Persistent Bark Indicator................................ Testing the YS600 ............................................... Charging the Battery .......................................... Collar Fitting ................................................... Troubleshooting Guide ...................................... Warranty and Repair Information .........................4 4 5 6 7 7 8 910 11 12 1434At a GlanceMain FeaturesYS600No Bark CollarBattery charger Owner’s ManualContoured Design Receiver/Collar Intensity Levels 1-10Persistent Bark Indicator Accelerometer Bark Sensor Non-Stimulating High Performance PagerFor Dogs as Small as 35 lbs.Low to High Power StimulationEnhanced Contact Points Fully Waterproof2-Hour Rapid Charge BatteriesOverviewLED Indicator LightOn/Off andIntensity DialSensorContact PointsBattery ChargingReceptacle &Rubber PlugCollar Strap56How to Use the On/Off & Intensity Dial- The On/Off Intensity Dial is used to turn the No Bark Collar on/off and to select the stimulation intensity level.- Set the dial to “.” to turn off the No Bark Collar.- Set the dial to “P” for non-stimulating vibration only mode.- The No Bark Collar has stimulation levels 1 (lowest) through 10 (highest). Each stimulation level begins with a vibration and is followed by the stimulation.- Set the dial to “T” to test the No Bark Collar. See Testing the YS600 on page 9 to check if your unit is working properly.NOTICEWhen first using the YS600 No Bark Collar, it is recommended to start at the lowest stimulation intensity level. If your dog continues to bark, gradually increase the stimulation intensity level. Closely monitor you dog’s reaction to find the rightstimulation level for you dog.7The LED IndicatorThe LED indicator will flash for 1 second when the YS600has been turned on, and every 4 seconds afterwards. If your dog does not bark for over 30 seconds, the LED indicator will turn off and the YS600 will go into a sleep mode to conserve battery life. It will reactivate when your dog barks and a vibration/correction needs to be made.Before going into Sleep mode, the LED light flashes green when the battery is fully charged and turns to amber when the battery life is getting low.When the LED indicator emits a blinking red light, the battery needs to be recharged.Operating Modes1. Non-Stimulating High Performance Pager (P)- The YS600 will vibrate twice when your dog barks. It will not send a stimulation when set to “P”.2. Stimulation Intensity Levels (1-10)- The YS600 will vibrate once followed by stimulation when your dog barks.* There is a 15 second delay between stimulation on levels1-10 and vibration on P mode.The Persistent Bark IndicatorThe Persistent Bark Indicator activates when the unit isturned off and when there has been excessive barking.1. Without excessive barking:– The LED will glow red for 2 seconds when the unit isturned off.2. With excessive barking:– The LED will blink green for 10 seconds when the unit isturned off.– Excessive barking may indicate that the stimulationintensity level is set too low.* Before increasing the stimulation intensity level, check to see that the collar has a proper fit and both contact points aretouching your dog’s neck.89T esting the YS6001. Turn the dial to “T”. The LED indicator will blink once every 4 seconds.2. Use the cap end of a ballpoint pen and scratch between the contact points. The unit is working properly when it vibrates twice.* The sensor is set to high sensitivity on test mode to activate more easily. The test mode will only produce a non-stimulating vibration.10Charging the Battery1. Open the rubber plug on the YS600 and connect the charger to the battery charging receptacle as shown in the picture.2. Plug the charger into an electrical power outlet (110V).3. While the battery is recharging, the LED will stay on red. The LED light will become green when the battery is completely recharged (the battery is fully charged after 2 hours). Note: Only use Dogtra approved Lithium Polymer Battery chargers designed for the YS600. Non-Dogtra chargers couldpotentially damage the unit.Collar FittingIt is important to have a proper fit. A loose fit will provide an inconsistent stimulation and the unit will move around on your dog’s neck, which may cause irritation. With a proper fit, you should be able to fit a finger or two snugly between the contact points and your dog’s skin. The unit should stay in place and notbe able to slide around your dog’s neck.* CautionRemove all other collars when using the No Bark Collar. Additional collars or buckles that rub against the No Bark Collarmay inadvertently activate the unit.11Troubleshooting Guide1. My dog is not reacting to the collar.- Make sure the receiver/collar is turned on.- Be sure the strap is on the dog tight enough so that bothcontact points are touching the dog’s skin.- The contact points may be too short for your dog’s thick orlong coat. To place an order for longer contact points, pleasecontact Dogtra or a Dogtra dealer. If you are already usinglonger contact points, you may need to trim the hair on thedog’s neck, so that both contact points are touching the dog’s skin.- The intensity level may be too low for your dog. Increase thestimulation until your dog responds.2. My YS600 is not holding a charge.- The charging pin may be damaged. A metal pin inside thecharging port should stand straight up and firm in the center. If the pin is wobbly, broken or missing, you will need to send theunit in to the repairs department.- The charging port must be clean prior to charging, clean outany dirt with a cotton swab and some rubbing alcohol. If yourdog was in salt-water, be sure to rinse the receiver and charging port with clean water.- For Dogtra units over two years old from the purchasedate, the batteries may need to be replaced. You can replacethem yourself by contacting Dogtra for a replacementbattery. Damages incurred to the unit due to improper batteryinstallations are not covered under the warranty. Dogtrastrongly recommends sending the unit in for inspection.123. My dog has skin irritation.- This may be due to an improper fit or from wearing the unit too long. If your dog exhibits signs of skin irritation, consult with a veterinarian. Once the dog’s skin returns to a normal condition, continue to use the collar and check your dog’s neck each time you use the unit.13WARRANTY AND REP AIR INFORMA TION 1-Y ear Comprehensive WarrantyDogtra Company provides the original purchaser with a 1-YEAR W ARRANTYfor the iQ Pet Series, eF-3000 Gold, RR Deluxe, YS300, YS500, and YS600. Thewarranty begins from the date of purchase. For the first year, coverage is for Parts,Labor, and Accessories.After the first year, the cost of Parts, Accessories, Labor fees, and Shipping feesincurred are the customer’s responsibility. Labor fees will be variable dependingon the extent of the work required.To Qualify for the Dogtra WarrantyAll products must be registered and/or a proof of purchase is required to initiaterepair work under warranty. To register your Dogtra product, log onto our websiteat , click on the warranty registration link, and fill out the requiredinformation. Registration must be completed within 30 days of purchase. If you donot have access to a computer, you can call our toll free number at 1-888-811-9111, and one of our customer service representatives will register the product foryou. If you were unable to register your product within 30 days of purchase, wewill accept all products for repair with a proof of purchase. We stronglyrecommend keeping the original receipt. If your product is not registered and aproof of purchase is not available at the time of service, Dogtra will estimate theage of the unit by the serial number. Serial number estimates can differ from theactual purchase date. A serial number estimate is the only method of determiningan approximate date of purchase without product registration or a proof of purchase.Not Covered Under WarrantyDogtra DOES NOT offer warranty for products that have been bought secondhand or as a resold product.Dogtra DOES NOT replace defective units or provide refunds for products purchased from us after 30 days from the date of purchase.Dogtra DOES NOT cover the cost of shipping outside of the Continental United States.Issues of replacement and refunds on units purchased less than 30 days from anauthorized dealer must be addressed to the dealer directly. If the products purchased from an authorized dealer are after 30 days from the date of purchase, please send the units to Dogtra for service and repair.Dogtra DOES NOT cover the cost of repairs and replacements due to misuse by the owner or dog, improper maintenance, and/or lost units. Any water damage on theWater Resistant Transmitters of the 175NCP, 180NCP, 200NCP Series, 1400NCPSeries, 1500NCP Series, and iQ Pet Series, and the Water Resistant Receivers of the RRS, RRD, and RR Deluxe, will not be covered. All replacement costs for either the transmitter or receiver will be the owner’s responsibility.The warranty is void if the unit has been altered or an unauthorized person has14damaged the unit while attempting repair work.Battery replacement by the customer during the first year of the 2-year Limited Lifetime Warranty is not recommended. If the customer chooses to replace the batteries, any damage to the unit during the change-out by the owner will void the warranty.The removal of serial numbers from any Dogtra products will void the warranty.Dogtra reserves the right to retain and discard any parts or accessories that have been found damaged upon replacement and repair.Procedure for Repair WorkIf the unit is malfunctioning, please refer to the “Troubleshooting Guide” in the Owner’s Manual and call customer service at 1-888-811-9111, for technical support, before sending it to Dogtra for Service.The cost of shipping products under warranty back to Dogtra is the customer’s responsibility. Dogtra is not responsible for units damaged or lost in transition to Dogtra. Dogtra is not responsible for loss of training time or inconvenience whilethe unit is in for repair work. Dogtra does not provide loaner units or any form of compensation during the repair period.A copy of the sales receipt showing the purchase date may be required before warranty work is initiated.Please include a brief explanation outlining the problem and include your name, address, city/state/zip code, daytime phone number, evening phone number, andemail address. Or you can visit our website at for a service request form. If the repair costs are not covered under warranty, we will call you for payment information and authorization. For any questions concerning your Dogtra products,call us toll free at 1-888-811-9111, M-F 8:30AM - 4:00PM, Pacific Standard Time, or************************** for specific repair inquiries.Send repair units to :Dogtra Company / Repairs22912 Lockness Avenue,Torrance, CA 90501U.S.A.The diagrams and representations in the manual may differ slightly from the actual product depending on the model type.15。
ISGTM Summit Series S600热敏打印机说明说明书

ISGTM Summit Series S600 —High performance and productionA powerful, full featured, high performance printer, the ISGTM Summit Series S600 thermal printer offers excellent value. Its low profi le handles an 8” outer diameter label roll and delivers fast throughput. You do not need to experience any “down time” either; just plug in a standard keyboard to print wristbands or labels when your main HIS system is unavailable. The S600 is perfect for healthcare applications, including patient wristbands and a variety of labels (pharmacy, laboratory, materials management and more). ISG Summit Series thermal printers feature Printer Application Language (PALTM). Now you don’t need to get a different software-specifi c printer for every application in your facility. Replace your old dot-matrix, thermal, inkjet, laser, embosser or line printers with a PAL-enabled ISG Summit Series printer today.Industrial-Strength Construction• All metal construction to withstand tough productionenvironments• Designed for ease of use - (ribbon and label loading) • Easily adjustable printhead pressure and media sensors • Full 8” Outer Diameter (OD) roll media capacityStandard Features• Powerful and versatile “PAL” plus other popular emulations • Easy to read LCD display • Parallel, serial, and USB ports • Both 203 and 300 dpi models •Internal LAN optionThe Power of PAL TMPrinter Application Language (PAL) is a dynamic, fully functional programminglanguage that interprets and accepts existing data streams from a host system without host reprogramming. A custom PAL program can be prepared for each of your unique applications and then preloaded into your ISG Summit Series thermal printer.PAL programs enable label printing by fi lling in the variable fi elds using your current data stream — allowing you to update legacy labels/wristbands with bar codes, lines, graphics or scaled fonts to meet newcompliance standards.PRINTER SPECIFICATIONS:Printer Model S600Print Speed203 dpi 2 to 6 ips 300 dpi 2 to 4 ips Resolution203 dpi (8 dots/mm) 300 dpi (12 dots/mm) Command Set 203 dpi: PAL, EZPL, DPL300 dpi: PAL, EZPLResident Fonts San Serif and OCRB with smooth Scaling Font and BarcodeRotation0, 90, 180, 270 degreesBar CodeSymbologies Code 39, Code93, Code 128UCC, Code 128subsets A.B.C., Codabar, Interleaved 2 of 5,EAN-8, EAN-13, EAN-128,UPC-A, UPC-E,EAN and UPC 2(5) digits add-on, RSS2-D Bar CodeSymbologies PDF-417, DataMatrixMax Print Width 203 dpi 0.25” (6mm) to 4.25” (108mm)300 dpi 0.25” (6mm) to 4.09” (104mm) Print Length 203 dpi (max.) 39” (990mm)300 dpi (max.) 18” (457mm)Printing Method Thermal transfer and Direct thermalMedia Size Min width: 1” (25.4mm)Max width: 4.4” (116mm)Media Diameter (max.): 8” OD (203mmOD) with 1”, 3” core (25mm, 76mm)Media Thickness: 0.002” - 0.01” (0.06mm -0.25mm)Media Type Roll and label (continuous, die-cut, fan-fold,ticket etc, tag is option)Sensors Label gap, paper end, ribbon near end, blackmark, peel-off (option)R ibbon Max Length: 984 ft. (300m)Width: 1” - 4.33” (25.4mm - 110mm) Memory2MB DRAM, 2MB Flash(1MB onboard Flash optional)Software PAL Windows driversCommunicationInterface RS232 and Centronics Parallel Ports, USB Physical/Electrical Dimension: 11.85” (W) x 16.54” (D) x9.49” (H)(301mm (W) x 420mm (D) x 241mm (H))Net Weight: 29 lbs (13kg)Electrical: 100-240V universal switchingpower supply Cabinet Metal constructionwith view windowOperation Panel LCD display (122 x 32 pixel), LED(power, error, online), switch (pause, feed,menu)Operating Temp. 40° to - 104°F (-5° to - 40°C)Storage Temperature14° to - 140°F (-10° to - 60°C)Agency Approval CE, FCC Class A, UL, CUL, TUVStand-Alone KDU KU-007 plus keyboard display unit Options Flash memory expansion module up to8MB, Peeler, Cutter, Internal LAN, Realtime clockWarranty One year Parts and Labor, Return to DepotSix months PrintheadAccessories Warranty One Year parts, Includes CD,Ribbon for TT, USB cable and Quick StartGuideIdentification Systems Group:Nationwide Network of ID Systems ExpertsIdentification Systems Group (ISG) Dealers are experts inidentification and card personalization applications. An elitegroup of professionals, ISG Dealers understand the changingidentification market and products – and will help you deliver asuccessful ID program. Experienced technical experts and salesteams provide local service and support – responding quicklyto your unique personalization needs. For expert advice andoutstanding support (before and after sale), the ISG Dealer inyour area can help!ISG is a trademark of Identifi cation Systems Group. Names and logos on samples are fictitious. Any similarity to actual names, trademarks or tradenames is coincidental. Specifications subject to change without notice.© 2007 Identification Systems Group. All rights reserved. S600-0907。
S600 用户手册.pdf_1697476651.985484说明书
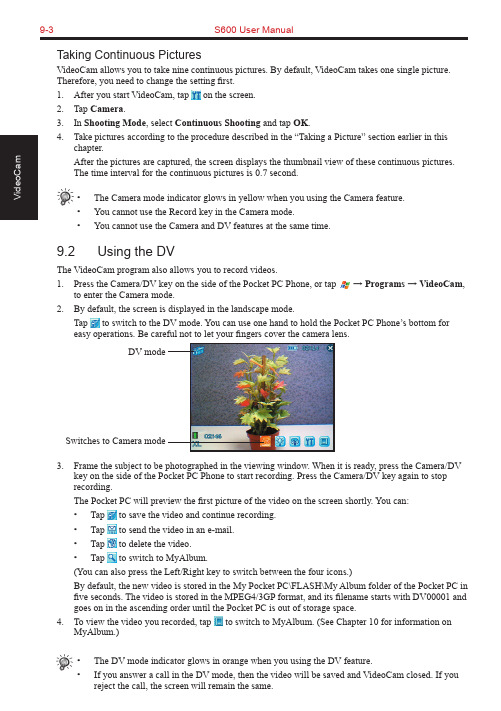
9-3S600 User ManualTaking Continuous PicturesVideoCam allows you to take nine continuous pictures. By default, VideoCam takes one single picture. Therefore, you need to change the setting first.1. After you start VideoCam, tap on the screen.2. Tap Camera.3. In Shooting Mode, select Continuous Shooting and tap OK.4. Take pictures according to the procedure described in the “Taking a Picture” section earlier in thischapter.After the pictures are captured, the screen displays the thumbnail view of these continuous pictures.The time interval for the continuous pictures is 0.7 second.• The Camera mode indicator glows in yellow when you using the Camera feature.• You cannot use the Record key in the Camera mode.• You cannot use the Camera and DV features at the same time.9.2 Using the DVThe VideoCam program also allows you to record videos.1. Press the Camera/DV key on the side of the Pocket PC Phone, or tap → Programs → VideoCam,to enter the Camera mode.2. By default, the screen is displayed in the landscape mode.Tap to switch to the DV mode. You can use one hand to hold the Pocket PC Phone’s bottom foreasy operations. Be careful not to let your fingers cover the camera lens.3. Frame the subject to be photographed in the viewing window. When it is ready, press the Camera/DVkey on the side of the Pocket PC Phone to start recording. Press the Camera/DV key again to stop recording.The Pocket PC will preview the first picture of the video on the screen shortly. You can:• Tap to save the video and continue recording.• Tap to send the video in an e-mail.• Tap to delete the video.• Tap to switch to MyAlbum.(You can also press the Left/Right key to switch between the four icons.)By default, the new video is stored in the My Pocket PC\FLASH\My Album folder of the Pocket PC in five seconds. The video is stored in the MPEG4/3GP format, and its filename starts with DV00001 and goes on in the ascending order until the Pocket PC is out of storage space.4. To view the video you recorded, tap to switch to MyAlbum. (See Chapter 10 for information onMyAlbum.)• The DV mode indicator glows in orange when you using the DV feature.• If you answer a call in the DV mode, then the video will be saved and VideoCam closed. If youreject the call, the screen will remain the same.DV modeSwitches to Camera modeS600 User Manual 9-49.3 Changing VideoCam Settings In the Camera/DV mode, you can tap on the screen to access the setting items.Standard SettingsOn the Setting screen, tap Standard .ItemDescription Backlight for PreviewSets whether to turn on the backlight for picture/video preview.Preview Image or VideoSets whether to keep the preview for five seconds before the next shooting.Glitter Frequency While using VideoCam, please setup Glitter Frequency according to your environment for improving the preview quality of the VideoCam.Camera SettingsOn the Setting screen, tap Camera .ItemDescription Scene ModeSelects the desired scene mode: Standard, Nightshot, Portrait, Grayscale, Sepia, or Document.ResolutionSelects the desired image resolution: 1280*1024 (High), 640*480 (Normal), 320*240 (Basic), or 176*144 (Compact).Self-TimerSets the time lag between releasing the shutter and shooting the picture. The options are 5 sec, 10 sec or 15 sec.FlashTurns on or off the flash.White BalanceChanges the setting for white balance.Shooting ModeSelects the single or continuous shooting.Filename recountResets the filename counter, starting from DSC00001.FolderSelects the storage location for the picture.9-5S600 User ManualDigital Video SettingsOn the Setting screen, tap Digital Video.Item DescriptionScene Mode Selects the desired scene mode: Standard, Nightshot, Grayscale or Sepia. Resolution Selects the desired image resolution: Large, High Quality; Large, Long Time;Small, High Quality; Small, Long Time.Self-Timer Sets the time lag between releasing the shutter and shooting the picture. Theoptions are 5 sec, 10 sec or 15 sec.Format Selects the desired video format: MP4:MPEG4+ACC, MP4:MPEG4+AMR,3GP:MPEG4+AMR, or 3GP:H.263+AMR.Silent Shooting Allows you to record only images without sounds.Filename recount Resets the filename counter, starting from DV00001.Image size setting Allows you to set the size limit for recorded videos.FolderSelects the storage location for the videos.Chapter 10Using MyAlbum10.1 Starting MyAlbum10.2 Opening a Picture or Video10.3 Editing Pictures10.4 Using the FaceMagic Feature10.5 Using Effects10.6 Tools Options10.7 View Modes10-2S600 User Manual10.1 Starting MyAlbumThe MyAlbum program is very useful for viewing picture and video files. The supported formats include: .bmp, .png, .wpng, .jpeg, .gif, .3gp and .mpeg4.To start MyAlbum, you can:⏹ Tap → Programs → MyAlbum .⏹ Tap in the Camera/DV mode.The startup screen of MyAlbum displays the file list.The top of the screen displays the name of the current folder (the default setting is the My Pocket PC\FLASH\My Album folder) and the sorting method (the default setting is Name ). The middle of the screen displays the information about the picture: the preview of the pictures on the left; the filename, resolution, saving time, file format and file size on the right.In this mode, you can tap on the command bar to switch to the Camera/DV mode.• You can tap the options on the command bar for advanced features. See the later sections in the chapter.10.2 Opening a Picture or VideoTo have a closer view of a picture or video, tap the specific thumbnail view in the Report mode of MyAlbum.Below is the screen of an opened picture:Total number of filesNumber of current fileS600 User Manual10-3In this mode, you can:⏹ Press the Left/Right key to browse for the previous/next file of the current folder, press the Up/Down key to zoom in/out of the image.⏹ Tap to zoom in on the picture.⏹ Tap to zoom out on the picture.⏹ Tap to zoom the picture to best fit the screen.⏹ Tap to rotate the picture at 90 degrees.⏹ Tap to switch to full screen.⏹ Tap to return to the Report mode.• You can tap the options on the command bar for advanced features. See the later sections in the chapter.10.3 Editing PicturesTap Edit on the command bar to cut, copy, paste, rename or deletethe selected or opened file.10.4 Using the FaceMagic FeatureTap Face → FaceMagic on the command bar allows you to createspecial changes on the person’s expression. On the positioning screen, tap Reset , and follow the screen tips to perform positioningon the person’s face.After positioning, tap FaceMagic → Morph (as an example). Thescreen displays the expression items and the adjustment bar for you to customize and create special effects.You can also tap FaceMagic → Comic or Avatar for more specialexpression effects.10-4S600 User Manual10.5 Using EffectsTap Effect on the command bar to create special effects on the selected or opened picture. The picture with effects will be saved as a new file with “-1” added to the filename.Painting1. Tap Effect → Painting.2. You can paint on the picture.Or, tap A to add text on the picture. Tap the screen, and a editing cursor will appear. You can start to enter the texts and change the text’s font, font size and color.3. Press the OK key or tap OK to save the changes as a new file.Effect1. Tap Effect → Effect.2. Tap the desired effect: Normal, Black/White, Sepia, Emboss,Blue or Mosaic.3. Press the OK key or tap OK to save the changes as a new file.Selecting Normal will not save the picture as a new file.Frame1. Tap Effect → Frame.2. Tap the desired picture frame from the option bar at the bottomof the screen. The screen will display the applied picture forviewing immediately. You can tap the arrows on both sides ofthe option bar for more frame options.3. Press the OK key or tap OKto save the changes as a new file.S600 User Manual10-5Stamp1. Tap Effect → Stamp .2. Tap the desired stamp from the option bar at the bottom of the screen. The screen will display the applied picture for viewing immediately. You can tap the arrows on both sides of the option bar for more stamp options.3. Press the OK key or tap OK to save the changes as a new file.Adjustment1. Tap Effect → Adjustment .2. Tap the list to select the item for adjustment: Brightness, Contrast, Saturation, Smart Color, Portrait, Landscape and Document.3. Adjust the value by tapping and draging on the adjustment bar. Tap Edit → Apply to apply the change.Tap Default restores the default values.4. Tap OK to save the changes.Note1. Tap Effect → Note .2. You can enter note text in the box, or tap the recording button to create a recording as a note. The added text or recording will be saved as a stand-alone file.3. Tap OK to save the note.4. The in the list mode indicates that a note has been added tothe picture.10-6S600 User Manual10.6 Tools OptionsTap Tools on the command bar to:⏹MMSSend an MMS message including the selected picture.⏹E-MailSend an email message including the selected picture.⏹IRUses the infrared to beam information.⏹WallpaperSets the selected picture as the theme picture on the Today screen.10.7 View ModesMyAlbum provides four view modes for viewing picture and video files.⏹Large mode⏹Middle mode⏹Small mode⏹Report mode (default mode)Chapter 11 Media Content11.1 Starting Media Content11.2 Media Content Items11-2S600 User Manual11.1 Starting Media ContentA Media hot key is located on your Pocket PC Phone. Press this key to access Media Content for games, music, Album, Windows Media Player, Java program and wallpaper setting function.The main page of Media Content is shown to the right.11.2 Media Content ItemsGAMEOn the main page of Media Content, tap GAME to quickly access the game list.Tap the desired item to start playing the game.For information on games, see Section 12.12.MUSICOn the main page of Media Content, tap MUSIC to quickly access the contents in the My Pocket PC\FLASH\My Music folder.Tap the desired item for playback. Your Pocket PC Phone will use Windows Media Player to play the selected item.For information on Windows Media Player, see Section 12.5.S600 User Manual11-3ALBUMOn the main page of Media Content, tap ALBUM to quickly startMyAlbum.For information on MyAlbum, see Chapter 10.MEDIA PLAYEROn the main page of Media Content, tap MEDIA PLAYER toquickly start Windows Media Player.For information on Windows Media Player, see Section 12.5.JAVAOn the main page of Media Content, tap JA V A to quickly start theJava program.For information on Java, see Section 12.7.11-4S600 User ManualWALLPAPEROn the main page of Media Content, tap WALLPAPER to quickly access the setting items of the Today screen.⏹Tap Appearance to change the theme picture of the Todayscreen.⏹Tap Items to set the items to be diaplayed on the Todayscreen. You can also set the time for the Pocket PC Phone to automatically return to the Today screen after a period of inactivity (3 hours by default).For information on Settings, see Chapter 6.Chapter 12 More Programs12.1 Microsoft ActiveSync12.2 Pocket Word12.3 Pocket Excel12.4 MSN Messenger12.5 Windows Media Player12.6 Pictures12.7 JA V A12.8 File Explorer12.9 Calculator12.10 Pocket MSN12.11 IE Favorites12.12 Games12-2S600 User Manual12.1 Microsoft ActiveSyncWith Microsoft ActiveSync on both your desktop computer and Pocket PC Phone, you can exchange information between a desktop computer or server and your Pocket PC Phone. To synchronize your Pocket PC Phone with your desktop computer, you must install ActiveSync on the desktop computer. Using ActiveSync, you can:⏹ Synchronize information between your Pocket PC Phone and desktop computer or server so that you have the latest information in all locations.⏹ Change synchronization settings and synchronization schedule.⏹ Copy files between your Pocket PC Phone and desktop computer.⏹ Back up and restore device information.⏹ Add/remove programs to/from your Pocket PC Phone.Installing Microsoft ActiveSyncAn Microsoft Companion CD is supplied with your Pocket PC Phone. You need to use the CD to install ActiveSync on the desktop computer before perfoming synchronization.Follow this procedure:1. Turn on the desktop computer.2. Insert the Companion CD into the CD-ROM drive of the desktop computer.3. On the first screen, click the arrow to enter the main screen and click Start Here .4. On the next screen, click Install ActiveSync 3.x on the left column.5. On the next screen, click Install to start installation.6. When prompted, connect one end of the USB cable to the converter, and then connect the converter to the USB port on the bottom of your Pocket PC Phone.7. Connect the other end of the USB cable to the USB port of the desktop computer.8. The Add New Hardware Wizard should automatically install the USB driver. (If you need to specify the location of the driver, click Browse and select the CD-ROM drive containing the Companion CD.)9. Follow the on-screen instructions to establish a partnership between your Pocket PC Phone and your desktop computer. Select the types of information for synchronization. After your first synchroniza-tion, the data you have stored on your desktop computer such as Calendar, Contacts and Tasks arecopied to your Pocket PC Phone. → → →→ → • If you do not establish a standard partnership with the desktop computer, then you cannot perform synchronization between two devices, and you will need to select a desired partnershipevery time you connect to the desktop computer.S600 User Manual12-3Connecting to Your Desktop ComputerYou can connect your Pocket PC Phone to a desktop computer in several ways:⏹ Use the USB cable or an optional cradle.⏹ Use the IR port in place of using a cable. (For complete instructions on connecting to your desktop computer by infrared, see the ActiveSync Help on your desktop computer.)⏹ Use a network or dial-up connection.Synchronizing with Your Desktop Computer1. Connect your Pocket PC Phone to your desktop computer.2. On your Pocket PC Phone, tap → ActiveSync .3. Tap to start synchronization.Setting up Remote SynchronizationSynchronizing Remotely with a Desktop Computer1. Make sure that the desktop computer is powered on.2. Connect to the corporate network. (See Chapter 13 for more information.)3. On the Pocket PC Phone, tap → ActiveSync .4. Tap Tools → Options → PC .5. In When syncing remotely with a PC , select your computername in the Use this PC list.6. Select one or both of the items: Use mobile schedule to sync with this PC and Sync with this PC during manual sync .7. Tap OK.12-4S600 User ManualSynchronizing Remotely with a Server1. Make sure that the server is powered on.2. Connect to the Internet. (See Chapter 13 for more information.)3. On the Pocket PC Phone, tap → ActiveSync .4. Tap Tools → Options → Server .5. Select the types of information, such as Calendar, Contacts, or Inbox, that you want to synchronize with the server.6. To change synchronization settings, such as the amount synchronized, select the type of information and tap Settings . Note that there are no synchronization settings for Contacts.7. In Sync with this server , enter the name of the Microsoft Exchange server to which you want to connect.8. Tap Options → Connection .9. Enter your user name, password, and domain name. If you want to perform automatic synchronization, select Save password .10. Tap OK .Synchronizing AutomaticallyWith ActiveSync, you can schedule automatic synchronization between your Pocket PC Phone and a server every time when an item arrives or is changed at the server. Your Pocket PC Phone is informed of that event and synchronizes automatically to retrieve those items, making your device always ing ActiveSync, you can schedule synchronization of your device on two separate schedules.⏹ Use the peak times schedule to synchronize during working hours or other times when you have higher mail volumes.⏹ Use the off-peak schedule to synchronize during times when you have lower mail volumes.⏹ When you are roaming, you can synchronize manually to reduce roaming charges, or you can synchronize using the mobile schedules.To set up the schedule for automatic synchronization:1. Make sure not to connect your Pocket PC Phone to the desktop computer.2. On the Pocket PC Phone, tap → ActiveSync .3. Tap Tools → Options → Mobile Schedule .4. To synchronize periodically during peak times, select the frequency of synchronization in the Peak times list.To synchronize periodically during off-peak times, select the frequency of synchronization in the Off-peak times list. To synchronize while roaming, select a frequency in the Roaming list.5. To set the days and hours for peak times, tap Peak Times .6. Tap OK.。
联想 昭阳S600系列 说明书
SLIM机型第十一章联想昭阳S600系列第十一章 联想昭阳S600系列联想昭阳S600系列是联想笔记本电脑家族的新成员,是全功能的多媒体笔记本电脑。
采用Intel公司的高性能PIII处理器,配合12.1英寸TFT显示屏,色彩鲜艳、图象清晰、画面逼真; PCI音效卡、麦克风以及内置24速光驱,使您尽享多彩的多媒体世界,并采用智能锂电池,是未来办公的新趋势。
一.联想昭阳S600系列产品概述联想昭阳S600产品主要特点1、联想昭阳S600为Slim机型(超薄机型),属中档偏高机型。
造型优雅时尚,仅有B5纸张大小,银白色镁铝合金外壳,重量仅为1.69kg,快捷功能键的设置,使用更加轻松方便。
2、 产品特色:光驱内置的超薄机型;光驱 / 备用电池 / 盖板互换。
采用独特的屏幕反转功能设置和180度的屏幕展开,不仅视角大,而且特别是在进行演示时,可以在不必将笔记本电脑机身掉转,就可以实现让在对面的用户能够看到屏幕的正向画面。
特制鼠标板,可在触控板上实现滚屏功能,简单到用手在触控板的右边侧和下边侧上进行滑动,就可以让屏幕上的画面实现横向和竖向的滚动。
联想昭阳S600同时在底部机壳上采用了一层柔性的皮质薄膜,当笔记本电脑放在倾斜面上起到防滑的作用;并且具有较好隔热功效,而且当用户在较长时间膝上使用时,不用担心由于底部温度高而产生不适的感觉。
二.联想昭阳S600系列产品硬件配置联想昭阳S600系列产品硬件配置机型名称 联想昭阳S600机型 联想昭阳S601机型项目 内容 说明主机 HITACHI 83CA0L NBBIOS版本 1.04UA Phoneix BIOS4.0 Release6.0CPU系统处理器 Intel Mobile PIII450 MHz Intel Mobile PIII450 MHzCPU封装 μBGA2芯片组 Intel 440BX第十一章 联想昭阳S600系列一级高速缓存32KB二级高速缓存256KB L2 Cache On Die内存内存/最大内存64M SDRAM/MAX 256M SDRAM 底板加装内存类型 PC-100 SDRAM内存插槽数 2个图形系统显示芯片 Trident Cyber 9525 DVD最大支持分辨率显示内存 2.5MB SDRAM显存类型显示屏 12.1” TFT LCD 1024×768×64k XGA声音系统声音芯片 Yamaha YMF744B扬声器 内置(1个)麦克风 内置(1个)调制解调器 XIRCOM WINSWIFT 56K FAX/MODEM 内置PCMCIAPCMCIA控制器TI PCI 1410 PCMCIA控制器驱动器硬盘容量/最大容量 6G 10G 2.5” / 9.5mm(薄型)笔记本专用光盘驱动器 MATSHITA CR-271 24速光驱 内置/ 可拆换为备用电池或盖板软盘驱动器 外置 通过连线与主机连接,并口连线与软驱共用一个端口第十一章 联想昭阳S600系列外部接口PCMCIA插槽 1×TYPE II串行口 无并行口 1个 外接电线键盘接口 PS/2接口鼠标键盘共用 鼠标接口PS/2接口显示器接口 1个USB接口 2个扩展坞 无红外端口 无音频接口 麦克风、线路输入和音频输出视频输出 无其他接口 1个 连接软驱或并口连线(无法同时使用) ,不建议热插拔电池类型 PCX-AB5900 锂电池容量 1700 mAh电压输出范11.1 V围标准电池供电1小时左右 / 备用电池可供电1小时电池使用时间AC适配器适配器类型 DELTA ADP-45LH(16V,2.8A)100--240V电压输入范围工作频率 50--60Hz16v电压输出范围电流输出范2.8A围第十一章 联想昭阳S600系列 键盘 83键WIN95/98键盘触控板 鼠标触控板机型尺寸 270 x 222 x 25 mm机型重量 1.69 Kg 包括标准电池和光驱随机附件 光驱槽盖板 / 软驱连线 / 并口连线操作系统 中文Windows 98SE随机软件WINDOWS 98 SE 安装引导软盘昭阳拨号程序安装软盘S600系列屏幕翻转功能 驱动程序 V1.0Microsoft Windows98中文版第二版(包括光盘和Windows98 中文版入门)昭阳驱动V5.0光盘随机资料 S600 NB说明书 V1.1联想昭阳笔记本电脑用户档案卡联想电脑保修证书(NB V1.0)联想电脑装箱单163帐号套件(信封/帐号)其他特性 该机型随机带一个手包(无背带)及一个资料包备用电池需要单独购买该机型无红外通讯设备和串行通讯端口注意事项第十一章 联想昭阳S600系列三.产品结构示意图1. 右侧示意图1. 键盘 9. 外接麦克风插孔2. 快捷键 10. 软驱接口/并口接口3. 光驱 11. PCMCIA插槽4. 触控板按键 12. MODEM接口5. 触控板 13. USB接口6. 休眠键 14. PS/2接口7. 指示灯 15. 内置麦克风8. 耳机插孔 16. LCD显示器 17.面板锁闩12 345678910 1112 13 14151617第十一章 联想昭阳S600系列2.各部件视图图2-3 各部件视图四.系统操作1. 使用触控鼠标板(Touch Pad)Touch Pad (触控鼠标板)是一种触摸敏感的指示设备, 它可以实现一般鼠标的所有功能。
MD-S600压力控制器说明手册
智能型压力开关/压力控制器Intelligent Pressure switch/controller产品使用手册版本号201312(01)智能数显压力开关使用说明该款数显压力开关通过高精度仪表放大器放大压力信号,通过高速MCU采集并处理数据,内置温度传感器进行温度补偿,是检测压力、液位信号,实现压力、液位监测和控制的高精度设备。
广泛使用在化工、机械、水文、电力、环保等测量气体、液体压力的自动化系统中。
因为调节方便灵活,安装简单,可以替代大部分使用液位开关的场合。
一、特点:1.采用高精度AD和高速微处理器,全数字化设计;2.4位数码管显示当前压力或液位;压力或液位可以根据自己的需要设置;3.三个单位可以根据客户需要选择:Bar,KP,MPa/PSI;4.可以设置高低压力或液位报警点,并通过继电器或光耦输出给控制设备;5.输出双路继电器(单刀双掷)开关量;6.带4-20mA/0-10V/输出/基于RS485的MODBus通信可以选择。
7.采用高精度压力传感器,比机械压力开关精度高,迟滞小,稳定可靠;8.调节无死区,可以在整个量程范围内任意设定继电器动作压力点;9.防护等级:IP65,可以用在环境恶劣的场合;二、技术参数:量程范围-1bar~1000bar供电电压12~35V DC(24V DC校准电压)输出继电器容量220VAC/3A,24VDC/5A精度±0.5%FS负载电阻(电流输出)≥250Ω报警点设置范围全量程段可以设置监测点,防波动回差设置使用温度-20℃—85℃采样速率10次/秒(可以根据客户需要定制要求的速度)接口螺纹M20*1.5或客户定制三、操作说明:1、面板说明面板示意图如下:增加/×键:E键:减少/Ø键Bar:压强单位KPa:压强单位MPa/PSI:压强单位OUT1:第一路报警指示(AH)OUT2:第二路报警指示(AL)2、字符说明:(AH)第1路报警(高位报警设置)(AL)第2路(低位报警设置)(Unit)单位转换(oA)密码设置(ALo1)第1路(高位报警点报警方式)(ALo2)第2路低位报警点报警方式(HYA1)第1路高位报警点报警灵敏度(回差值)(HYA2)第2路低位报警点报警灵敏度(回差值)(dELy)继电器测试(QUIT)退出菜单选项(oooo)零点AD值校准设置(FULL)量程上限对应AD值校准设置(--FU)量程下限对应AD值校准设置(-_Ad)校准量程下限对应AD值设置(FUAd)校准量程上限对应AD值设置(i_--)量程下限对应的电流输出设置(i_FU)量程上限对应的电流输出设置(UP-0)高于零点显示为零点范围设置(dn-0)低于零点显示为零点范围设置(oo)零点AD保存值查看(oS)量程上限AD保存值查看(n-oo)量程下限AD保存值查看(U-SL)MP/PSI单位选定(in-d)显示小数点位置选择(u-r)测量量程下限(F-r)测量量程上限(in-A)零点修正设定值(Fi)满度修正设定值(FLtr)数字滤波时间常数值(oA1)报警设定值受密码控制选择(bout)故障代用值(oP)变送输出信号选择(bA-L)变送输出下限设置(bA-H)变送输出上限设置(bA-A)零点变送输出设定(bAFi)量程上限变送输出设定(nAFi)量程下限变送输出设定(ErrL)传感器零点故障变送输出设定值(ErrH)传感器满度故障变送输出设定值(oL)传感器检测值过高或过压显示(Err)传感器检测值过低或欠压显示(E2rr)读写存储器数据错误提示(addr)MODBus通信从机地址设置(bAUd)MODBus通信波特率设置3、按键说明:①:长按”E”键两秒为进入或退出各设置选项菜单功能键,如果进入某选项只是查看而不进行设置,则可长按“E”键两秒退出该选项的设置。
DANAHER MOTION CARTRIDGE DDR S300 S600 直接驱动系统 说明书

CARTRIDGE DDR ™S300/S600 直接驱动系统为何采用直接驱动?使用简便,性能增强,生产效率提高通过直接驱动解决方案,可简化机器设计,消除噪音较大的机械传动以及这种传动所伴随的性能限制。
通过直接耦合转矩电机与负载,可以显著提高机器的生产能力,这是受柔性制约的机械传动所无法达到的。
由于无需调节传动带或皮带轮,并且无需对减速器进行润滑,因此免除了高昂的维护成本。
机器能够持续运转,可为客户机器提供优秀的生产能力。
为何采用模块化 DDR ?模块化(Cartridge )DDR (直接驱动旋转)是直接驱动解决方案的下一发展方向!目前,直接驱动技术的优点已在越来越多的应用中凸显。
多轴承对准已不再是问题,因为模块化的设计可更加方便地集成到机器中,并利用现有的轴承结构!现在,您可以通过一个安装形式类似于常规伺服电机那样的装置来实现直接驱动的优点。
常规电机系统常规伺服系统配有机械传动机构,限制了伺服性能和可靠性。
常规电机通常需要大量的设计工作(由于传动系统的使用),需要大量的传动带/皮带轮调节和更换工作以及繁多的维修保养工作 - 所有这些均需要时间和金钱。
集成成本• 因传动柔度而产生的定位不准确;• 减速器/传动带/支架的装配和对准;• 因柔度和回程间隙而造成的伺服调节困难;• 皮带轮安装和张力调节;• 适合惯性匹配的特大型电机;• 额外部件 – 离合器、输出轴反馈装置;•电机/减速器安装支架;• 零部件较多• 采购和物料清单; • 库存与检查• 协调多个交货期生命周期成本• 机器维护• 传动带张紧和更换 • 减速器润滑和更换• 由于齿轮磨损而导致回程间隙提高• 现场故障解决成本• 非定期停机时间• 传动带断裂• 传动带打滑• 减速器故障• 因柔性和稳定时间而导致生产能力降低常规电机系统CARTRIDGE DDR™ 解决方案CARTRIDGE DDR ™ 电机此种结构可实现与负载的刚性耦合,从而消除了与联轴器、传动带和齿轮箱等相关的问题。
DANAHER S300 S600 伺服驱动器 说明书
Helping you build a better machine, fasterS300 & S600 伺服驱动器2新形象,老品牌Danaher Motion 以其丰富的运动控制系统和零部件产品,为客户提供了独一无二的解决方案甄选机会,以满足其特定的应用需求。
六十多年来,通过诸如 Dover 、Kollmorgen 、Pacific Scientific 、Portescap 及 Thomson 等一直得到客户信赖的品牌,在半导体、航空和国防、非公路用机动设备、包装、医疗和机器人技术等各种领域,我们的产品创新始终不断地改善着复杂制造过程的效率和生产力。
另外,Danaher Motion 通过 Motion Engineering (MEI ),以其业内领先的多轴运动平台和用于超可靠机器性能的 SynqNet 通讯网络,提供强大的集成运动控制解决方案。
从软件到控制器,从通讯网络到驱动器和I/O 设备,从机械产品到机电一体化产品,Danaher Motion 始终不断地挑战着自己,设计出或标准的、或定制的解决方案,以满足最苛刻的应用需求。
我们先进的运动控制产品家族和专门应用技术只是我们的优势的一部分。
通过全球服务和支持体系,我们的现场服务工程师和支持团队可以在任何需要的时候提供帮助。
这也是 Danaher 公司从不放弃的以客户为中心的政策的一部分。
正因为如此,越来越多的设计工程师开始使用 Danaher Motion 的产品,来满足他们在运动控制方面的要求。
Danaher Motion 的价值理念• 专业应用技能• 广泛和创新的运动控制产品和系统• 以客户为中心• 量身定做的产品和服务• 在全球范围始终站在运动控制的最前列• 出色的运营管理Danaher Motion 介绍S300 & S600 伺服驱动器3持续改善 - Danaher 的方针在美国丹纳赫集团(Danaher Corporation ),我们充满热情地持续改进我们的工作,以便为我们的客户带来持续增长的价值。
S600 User Manual.pdf_1697477566.7996674说明书
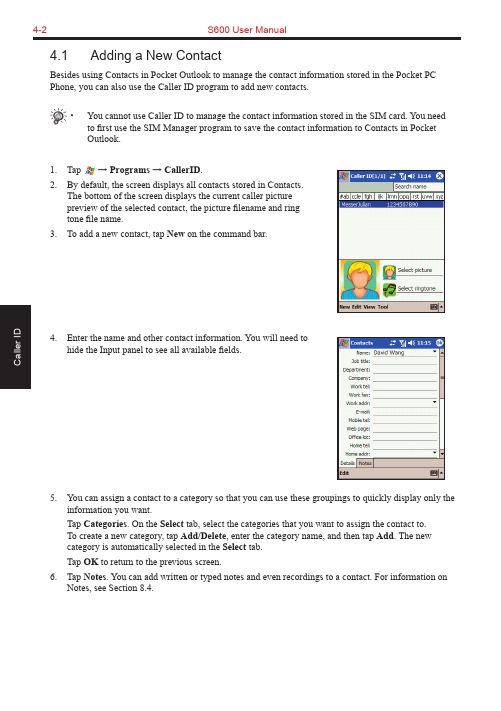
4-2S600 User Manual4.1 Adding a New ContactBesides using Contacts in Pocket Outlook to manage the contact information stored in the Pocket PC Phone, you can also use the Caller ID program to add new contacts.• You cannot use Caller ID to manage the contact information stored in the SIM card. You need to first use the SIM Manager program to save the contact information to Contacts in PocketOutlook.1. Tap → Programs → CallerID.2. By default, the screen displays all contacts stored in Contacts.The bottom of the screen displays the current caller picturepreview of the selected contact, the picture filename and ringtone file name.3. To add a new contact, tap New on the command bar.4. Enter the name and other contact information. You will need tohide the Input panel to see all available fields.5. You can assign a contact to a category so that you can use these groupings to quickly display only theinformation you want.Tap Categories. On the Select tab, select the categories that you want to assign the contact to.To create a new category, tap Add/Delete, enter the category name, and then tap Add. The new category is automatically selected in the Select tab.Tap OK to return to the previous screen.6. Tap Notes. You can add written or typed notes and even recordings to a contact. For information onNotes, see Section 8.4.S600 User Manual4-37. Tap OK to return to the contact list. The new contact isadded to the list.4.2 Setting a Caller Ring Tone• The sound formats supported by the Pocket PC Phone include: Polyphonic, Monophonic, MIDI, AMR, WA V , MP3 and WMA.Assigning a Ring Tone1. Tap → Programs → CallerID .2. Select the contact to assign a ring tone.3. Tap the music note icon at the lower right of the screen. You can also tap Edit → Select picture .4. Tap the arrow next to RING list to display the sound fileson the Pocket PC Phone, and select the desired file. You can tap the Playback button for playback, and tap the Stop button to stop playback.5. Make sure that you have selected the RING item, and thentap OK .6.The selected sound file is displayed on the screen.4-4S600 User ManualCanceling the Ring Tone Setting1. Tap → Programs → CallerID.2. Select the contact to cancel a ring tone.3. Tap the music note icon at the lower right of the screen.4. Clear the RING item, and then tap OK.4.3 Setting a Caller Picture• The picture formats supported by the Pocket PC Phone include: JPEG, PNG, BMP, GIF, MPEG4, GIFF and 3GP.Assigning a Picture1. Tap → Programs → CallerID.2. Select the contact to assign a picture.3. Tap the picture icon at the lower right of the screen.You can also tap Edit → Select picture.4. Tap the icon next to Picture name to browse the pictures onthe Pocket PC Phone.5. In Search, select the storage location of pictures; in File type,select the file type of pictures. Then tap Search.S600 User Manual4-56. A picture list appears on the screen. Select the desired picture file, and tap OK .7. The preview of the selected picture appears at the upper-left of the screen with its filename on the right.Tap OK .8. The selected picture file is displayed at the lower-left of the screen, and its filename is displayed on the right.Canceling the Picture Setting1. Tap → Programs → CallerID .2. Select the contact to assign a picture.3. Tap Edit → Delete selected picture .4. Tap Yesto confirm.4-6S600 User Manual4.4 Managing ContactsEditing a Contact1. Tap → Programs → CallerID.2. Select the contact to edit, and tap Edit → Edit.3. Make the changes and tap OK.Deleting a Contact1. Tap → Programs → CallerID.2. Select the contact to delete, and tap Edit → Delete.3. Tap Yes to confirm.View ModesCaller ID provides four view modes for displaying the contactinformation.⏹Index label⏹Preview⏹Details⏹Display contact name onlyBy default, the index label appears at the top of the screen for you toquickly access a contact. The center of the screen displays the nameand default contact number of the selected contact.To view the detailed contact information, tap View → Details on thecontact list. Tap OK to close the details screen.4.5 Changing SettingsOn the contact list screen, tap Tool → Option. You can select or clear the display of caller picture upon anincoming call.Chapter 5 Recording Messages5.1 Recording Messages in Notes5.2 AMR Recorder5-2S600 User Manual5.1 Recording Messages in NotesIn any program where you can write or draw on the screen, you can also quickly capture thoughts, reminders and phone numbers by recording a message. The recordings will be saved as .wav files in the\My Documents folder on the Pocket PC Phone.You can record a message when the Record button appears on the command bar. In Pocket Word, use the recording function by the View menu.Creating a Recording1. Hold your Pocket PC Phone’s microphone near your mouth orother source of sound.2. Hold down the Record key. When you hear the beep, begin yourrecording.3. Keep holding down the Record key during the recording.4. Release the key when you are finished. You will hear two beeps.5. The new recording is stored as a stand-alone recording if no noteis open. Tap the recording file to play back.• The recording indicator glows in red when a recording is in process.• You can use the Record/Playback toolbar for recording and playback.• Tap → Settings → Personal → Input → Options to select the recording format.Recording FormatsYour Pocket PC Phone supports several formats for voice notes. The formats vary in both the quality of the recording and the size of the sound file. When selecting a recording format, you should consider the quality you need as well as how much storage memory the recording will use on your Pocket PC Phone.Not all recording formats are compatible with other software or computers. If you will share your record-ings with others or transfer a recording to your desktop computer, be sure to choose a recording format that is supported by the software used to play recordings on the other computer.The PCM format offers the highest quality recording and is compatible with all Pocket PC Phone models, other Windows-powered mobile devices and desktop computers that use Windows operating systems. The GSM 6.10 format is compatible with all Pocket PC Phone models and other Windows-powered mobile devices, but may not work with desktop computers.To select a recording format, tap → Settings → Personal →Input → Options to select a recording format. The list of recordingformats on your Pocket PC Phone indicates the sample rate, whetherthe format is stereo or mono and how much storage memory isrequired per second of recording. You may need to experiment withdifferent sample rates and formats to determine which format bestsuits your needs.S600 User Manual5-35.2 AMR RecorderBesides the built-in recording program described in the previous section, you can also use the AMR Recorder program to record messages. AMR Recorder will save the recordings as AMR files in the \My Device\Flash\Recording folder on the Pocket PC Phone.1. Tap → Programs → AMR Recorder .2. Hold your Pocket PC Phone’s microphone near your mouth or other source of sound. Then tap the icon to start recording.3. To stop recording, tap the icon. The recording will appear on the list. (To delete a recording, tap and hold the file on the list, and then tap Delete .)•The recording indicator glows in red when a recording is in process.• If the earphone is already connected to the Pocket PC Phone, then the recording will receive sounds from the speaker on the earphone.You can change the following settings in AMR Recorder:⏹ To chnage the storage location of the recording files, tap Tools → Settings .⏹ To change the recording quality, tap Tools → Microphone En-vironment Setting . When finished, tap OKto save the change.Fast backwardPlayback progressTap to play back Adjusting playback volumeFast forwardChapter 6 Customizing Your Pocket PC Phone6.1 Changing Personal Settings6.2 Changing System SettingsS600 User Manual 6-26.1Changing Personal Settings Tap → Settings → Personal .TodayTap Appearance to select a desired theme for the background. You can also tap Beam to exchange favorite themes with your friends.Tap Items to select the information you want displayed on the Today screen. You can also select a period of time (3 hours by default) for your Pocket PC Phone to automatically return to the Today screen.MenusThis item allows you to customize what appears on the Start menu. On the program list, the selected items will appear on the Start menu, and the unselected items appear in Programs.You can also select the displayed items when tapping New on theToday screen. ButtonsThis item assigns programs to the hardware buttons and set the repeat rate of the Up/Down direction keys.PasswordThis item allows you to set a password for security.1. Tap → Settings → Personal → Password.2. Check the Prompt if device unused item and select a value toset the time for the Pocket PC Phone to prompt for passwordafter idling.3. Select the type of password you would like to use. You canset a four-digit password or a long password containinga combination of at least seven characters, numbers orpunctuation.4. Tap the numbers or characters to set your password.5. To keep a hint for yourself in case you forget your password, tapPrompt and enter the prompt for password.6. Tap OK .Owner InformationThis item allows you to enter your personal information.Sounds & NotificationsThis item sets the conditions and types of the sounds, system volume and methods of notifications.Input This item sets up items related to Block Recognizer, soft keyboard, Letter Recognize, Transcriber inputmethods and voice recording format.PhoneThis item changes the phone-related settings. See Section 3.8 for detailed information. 6.2 Changing System SettingsTap → Settings → System .Ring ToneThis item sets the ring tone file. The screen displays all sound files stored on the Pocket PC Phone with the format of AMR ( .awb),MIDI ( .rmi, .mmf, .mid), MP3, WA V, and WMA.Regional SettingsThis item specifies the region of your location and the formats of the number, currency, time and date.BacklightThis item adjusts the brightness of the display and sets the automatic turnoff for power saving purposes.Certificates You may add/delete the public key certificates to/from your Pocket PC Phone. These certificates help establish your identity when you are logging into a secured network, such as a corporate network. Certificates also help establish the identity of other computers, such as servers, with which you connect. This helps prevent unauthorized users from accessing your Pocket PC and information.You can store two types of certificates on your Pocket PC: Personal Certificates that establish youridentity, and Root Certificates that establish the identity of servers with which you connect.Managing Certificates1. Tap → Settings → System → Certificates .2. The list displays the names of the certificate issuers andthe expiration date.3. To view more information about a certificate, tap it in thelist.4. To delete a certificate, tap and hold it in the list and then tap Delete . Clock & AlarmsThis item allows you to change the date and time and to set alarms.Remove ProgramsThis item allows you to remove programs you have added to the RAM of your Pocket PC Phone. See Section 7.5 for moreinformation.。
S600 S600 伺服纠偏系统操作手册说明书
S600伺服纠偏系统操作手册郑重声明首先,真诚地感谢广大客户选用恩睿斯科技(重庆)有限公司的产品。
为了充分发挥本设备的性能,请务必在使用前先阅读本使用说明书。
请将本说明书保管于指定的场所,以便必要时能立即取出查阅。
本说明书适合快速上手,疏漏在所难免,文意有不明确、错误以及遗漏的地方,请与我们联系。
对于本说明书的应用结果,我们不承担与此无关的责任,请谅解。
Solemnly declareFirst of all, sincerely thank the vast number of customers choose en media technology (chongqing) co., LTD. Products. In order to give full play to the performance of this equipment, please read this instruction manual before use. Please send this manual custody in designated places, so that when it is necessary to immediately remove the inspection. This manual is suitable for quick learning, omission is inevitable, unclear Wen Yiyou, errors and omissions, please contact us. For the application of this manual as a result, we don't have nothing to do with this responsibility, please understand.安全须知为了安全使用本产品,再次声明,在安装和使用之前,请务必详细阅读本说明书,一定要注意安全,正确使用本产品,并遵守本说明书中的各种规定。
超声波流量计说明书

Mark II
CPU 主板 电源板
本安接口板 现场接线板 诊断和接口板
四、CUI软件
DANIEL CUI是基于Windows操作系统的软件,可为用户呈 现:流速剖面、各声道的声速、增益、信噪比
连接PC机与超声流量计之间的RS232(以太网)通讯电缆, 在PC机中运行“Daniel CUI MARK III”软件,点击 “connect(连接)”按钮,建立PC机与超声流量计之间 的通讯。
声波是如何产生的 ?
当振动体与介质相接触时,便产生声波
声波的频率 (Hz)
单位时间内通过某一给定点的声波的数量叫 声波的频率
声波的速度
速度是指声波通过某一介质的速率(米/秒, 英 尺/秒), 它是独立于频率的一个概念
介质的弹性越大,声波传播的速度越快 介质的密度越大, 声波传输的速度越慢 如果气体的密度已知的话,声波的速度是可以
如果某声道探头脏了,那么探头的能量就会被大大削弱, 此时流量计可以通过探头的反馈信号得知能量损耗较大,结 果就会增加此声道的增益,从而增加能量,能够克服由于探 头脏污而导致的能量损失。
Signal to noise ratios:信噪比,指的是超声波流量计的信 号和噪声的比值,信噪比越大,则说明超声波流量计的工作 情况越好。
当管道中有气体流过时,传感器1和传感器2所发射的超声波 脉冲分别被传感器2和传感器1接受,由于超声波脉冲在气流 中传播速度受到气流的影响,导致超声波脉冲顺流传播的速 度要比逆流时快,在超声波声道长度内,其顺流、逆流方向 的传播时间分别为:
ts
L
cvcos
tn
L
cvcos
ICCO消费S600

东莞市西奥计算机智能科技有限公司S600消费机使用说明书2008年12月01日VER 1.1目录第一章产品概述 (3)1.1系统特点 (3)1.2消费机外观介绍 (3)1.2.1 外型介绍 (3)1.2.2 各部分功能说明 (4)1.2.3 键盘介绍 (4)1.2.4 键盘功能说明 (4)1.3相关配置 (5)1.4消费机参数及特征 (5)1.4.1 消费机参数 (5)1.4.2 功能特征 (6)第二章设备安装 (6)2.1设备连接 (6)2.1.1 接口定义 (6)2.1.2 RS-232通讯线制作、连接 (7)2.1.3 RS485通讯线制作、连接 (7)2.1.4 RS-485网络接线方法 (7)2.1.5 TCP/IP网络接线方法 (8)2.2外接设备 (8)2.2.1 密码小键盘 (8)2.2.2 微型打印机 (9)第三章操作设置 (9)3.1消费模式 (9)3.1.1 消费模式说明 (9)3.1.2 消费模式设置 (10)3.2参数设置 (10)3.2.1 时段定额金额设置 (10)3.2.2 时段限次设置 (10)3.3消费操作 (11)3.3.1 不定额消费操作 (11)3.3.2 定额消费操作 (11)3.3.3 计次消费操作 (12)3.3.4 菜单消费操作 (12)3.3.5 回退操作 (12)第四章出纳机 (12)4.1出纳机功能 (12)4.2出纳机使用方法 (13)第五章补贴机 (13)5.1补贴机功能 (13)5.1.1 补贴机参数 (13)5.1.2 补贴模式 (13)5.1.3 辅助功能 (13)5.2补贴机使用方法 (13)第六章软件设置 (14)6.1控制参数功能及设置 (14)6.1.1 自由间隔 (14)6.1.2每次消费限额 (14)6.1.3每日消费限额 (15)6.1.4卡最低余额 (15)6.1.5日次数限制 (15)6.1.6消费分组 (15)6.1.7卡有效期 (15)6.2控制参数使用 (15)6.2.1 消费时段检查 (16)6.2.2 消费打卡分组功能 (16)6.2.3 卡有效期检查 (16)6.2.4 订餐功能检查 (16)6.3消费时段 (16)6.4菜单编号设置 (17)第七章消费系统加密 (18)7.1基本信息设置 (18)7.2卡加密 (19)7.3消费机加密 (22)第一章 产品概述S600系列消费机是西奥科技有限公司自主研发的新一代IC 卡消费系统,产品采用先进的生产工艺、独有的IMD 模具,多种消费模式,配合出纳机、补贴机、自助终端等,组成功能全面的消费系统,满足工厂、学校、企事业单位、小区等公共消费场所,取代饭票、现金交易等,极大的方便了现场使用。
S600设置调试指导
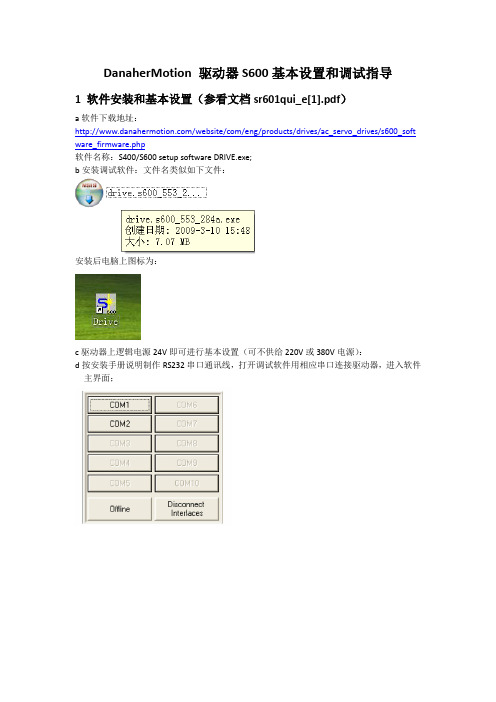
DanaherMotion 驱动器S600基本设置和调试指导1 软件安装和基本设置(参看文档sr601qui_e[1].pdf)a软件下载地址:/website/com/eng/products/drives/ac_servo_drives/s600_soft ware_firmware.php软件名称:S400/S600 setup software DRIVE.exe;b安装调试软件:文件名类似如下文件:安装后电脑上图标为:c驱动器上逻辑电源24V即可进行基本设置(可不供给220V或380V电源):d按安装手册说明制作RS232串口通讯线,打开调试软件用相应串口连接驱动器,进入软件主界面;下传配置文件:首先去掉软使能:按下面的SW Disable(F12)按键;从磁盘读文件图标;然后按照提示操作下载;e 点击主界面右上角Basic Setup按钮进入驱动器基本设置界面,对驱动器进行再生电阻和供电电压及驱动器地址等设置;f 点击主界面右下角电机设置按钮进行电机的选择设置:从电机库中选择使用的电机,并选择是否带抱闸;g 点击feedback按钮,设置反馈类型和相关数据:h 打开OPMODE下的下拉菜单,选择所需的操作模式:2调试指导:(参看S400_600_tuning_e.pdf)经上述设置后,基本可运行电机了,但根据具体的负载情况,运动指标等需对控制环路进行调试,以调试速度环为例(通常需调速度环):a 点动点机:确认各项设置正确后,操作模式OPMODE选为0:Digital Speed,点击主界面右下方Enable按钮使能驱动器,然后点击工具栏中显示器标志按钮进入命令行操作方式,输入指令J 100然后回车则电机应该以100rpm的速度转动,初始速度可设置得低些如10rpm,可用指令V然后回车来查看实际速度是否为10rpm。
b点击Speed按钮弹出速度环参数界面,可对相应参数察看和设置,点击工具栏中绿色的示波器图标弹出运动曲线记录界面;c 在示波器界面中选择典型的运动方式如reversing,设置相应运动参数如速度,运行时间等,然后启动运动,记录所需观察的曲线,判断系统性能和应该如何调节,然后在速度环中调节参数,重新观察运动曲线,判断所作参数改变对性能产生的影响,然后重新确定该如何调解参数,重复调节参数和观察曲线,直到认为达到要求;d 速度环主要调解参数如下:KP:速度环的比例增益,增益越大,刚性越强,但太大时电机会振荡,所以调节时须注意逐步增大;Tn:速度环积分时间常数,通常在10-100之间,积分时间常数越小,积分作用越强,系统动态和稳态跟踪会更好,但阶跃响应超调会变大,当积分时间常数太小时如2-5,也会引起电机振荡,有响声,积分时间常数设成0时为关掉积分项;PID-T2:为一阶滤波器常数,通常在0-1之间,此参数可用来虑掉干扰波动和噪声,但当设置过大时会降低响应速度;PI-PLUS:为速度环前馈参数,默认为1为不加前馈,当加前馈时其值通常为0.65左右,需根据调试效果来确定;Setp.Ramp:为速度指令的加减速时间,其含义为当速度从0加速到所设定的速度限制值时的时间,如下图中速度限制值设定为600rpm,则其含义为加速度为10ms加速到600rpm;Overspeed:用来设定超速报警限制,当速度超过此值时驱动器报警,停止电机运行;注:软件中各界面都可通过按F1键来获得在线帮助,得到界面中个参数的意义,范围,如何设置等;把鼠标放在相应的位置也可显示此处的参数ASCII命令名称,可在软件帮助文档中找到其意义,范围和如何设置等信息(参看文档S600_drivesoftware_manual_srhmi_e.pdf 和ASCII 600 D.chm):附1:固件FW更新升级(参看download_e.pdf):a 安装固件下载软件,软件下载地址为:/website/com/eng/products/drives/ac_servo_drives/s600_soft ware_firmware.php软件名称:Servostar 300/400/600/700 Firmaware and Motor Database Download Tool;下载后文件为:安装后计算机界面图标为:b 打开软件,选择对应的驱动器类型图标S600,选择要下载的固件文件例6rel.668,选择固件版本大于4.0,勾上enable binary transfer前面的选择框;c 确保驱动器主电源断开(220V或380V交流电没供),然后点击download按钮开始下载固件,此时会出现下载进度条,大约10分钟左右能下载完,下载成功后重新启动驱动器即可使用。
LEMARK S600 Series 说明书
复印提示...................................................................................................................................51 进行复印...................................................................................................................................51 复印照片...................................................................................................................................51 复印 ID 卡.................................................................................................................................52 复印双面文档............................................................................................................................52 放大或缩小图像........................................................................................................................52 调整复印质量............................................................................................................................53 使复印结果较浅或者较深..........................................................................................................53 使用打印机操作面板进行逐份复印............................................................................................53 在一页纸上复制图像.................................................................................................................54 将多页文档复印到一张纸上......................................................................................................54 进行双面复印............................................................................................................................55 取消复印作业............................................................................................................................56
s600 楼宇自控系统方案说明书

楼宇自控系统方案一、前言1.1 概述XX大厦位于XX。
该大厦是集酒店、商场及写字楼于一体的多功能综合性大厦,大厦建成后将具有一流的建筑结构和布局、完善的服务设施和良好便利的交通条件、先进的自动化办公设备及通信设施。
大厦设计楼高xx层、地下xx层。
建筑面积共xx平方米。
1.2 S600系统简介S600 APOGEE 是以集散理论为基础的成熟的楼宇自动化系统。
它具有结构灵活、适应性强、扩展方便、软件优化设备运行、操作简单等特点,很适合于改造工程需分阶段开通、设备分散、施工周期长等特点。
S600 APOGEE 是基于WINDOWS NT 平台的系统软件包,可直接进入大厦的计算机网络集成系统,与其他进入集成系统的各子系统进行信息交换,并是集成系统中重要的环节,这也是该系统开放性的充分表现。
西门子--兰吉尔是全球楼宇自动化领域著名的制造商,S600 APOGEE是公认的具有号召力的产品。
可靠和实际是公司一贯的追求。
我们将秉承这一光辉的传统竭尽全力提升业主的投资。
二、系统总则1、 SIEMENS-LANDIS & STAEFA的产品是按照国际质量标准生产和制造的,选购的设备也同样是符合这一标准,完全能够满足业主的技术要求。
2、 在楼宇自动化控制领域,我们有多年设计、安装、调试的丰富经验和良好信誉。
在全球各地(包括中国在内), 我们有无数的成功工程项目是我们能力的象征。
产品从大到小, 均能提供给业主最为满意的品质。
3、 我们本着务实和节约的原则, 努力地提供给业主一套可行和有效经济的控制系统。
对方案中不现实的地方加以修正, 对缺漏的地方加以补充。
4、 S600 APOGEE 是与全球同步投放市场的最新一代楼宇自动化控制系统, 是在WINDOWS NT平台上运行的全新系统, 开放性和兼容性是这套系统开发之初的主导思想, 是适应楼宇控制市场网络化这一方向的必然产物。
能够与智能大厦的诸多系统进行通讯或参与整个大厦的管理。
s600流量计算机操作规程

s600流量计算机操作规程FloBoss S600 流量计算机操作维护手册1. 面板操作1.1 功能键设置 F Keys前面板键盘上部有四个黄色的功能键 F1,F4~每个功能键可以设置成需要频繁浏览页面的快捷方式。
设置方法如下:1.1.1 直接进入到需要频繁显示的页面,1.1.2 按“.”键,1.1.3 按一个功能键~显示页面被赋值。
一旦一个功能键被赋值~则不能改变~但是可以重新对功能键赋值~以显示不同的页面。
1.2 方向和菜单键Vector and Menu Keys4个方向键位于“MENU”键的下面~用4个方向键可以浏览显示框、选择需要查看的参数或记录~或者进行数据修改。
在数据显示页~用或键分别查看前一页或后一页~当前显示页的页码数在页面底部的状态行指示。
在垂直移动查看其它显示行时~数据记录总是在那个行的第一个显示单元显示。
当输入或修改数据时~用键可作为删除/退格键使用。
按“MENU”键将返回到上一级菜单。
如在数据显示页面~按“MENU”键将回到母菜单,按“MENU”键接着按键~不管当前处于哪级菜单~都将返回到主菜单。
1.3 报警操作键Alarm Light and Keys在“F”键和“MENU”键之间是报警灯和“View”、“Accept”键。
在正常运行期间和无报警动作时~报警灯显示绿色,当有报警产生时~报警灯变为红色并闪烁~直到报警事件分别用“Accept”键和“View”键被确认和查看。
在报警未确认之前~报警数据和时间交替显示。
若有多个报警事件时~以事件时间顺序显示。
除非报警故障被排除~否则报警灯一直呈红色。
如果报警灯显示黄色~说明显示屏、键盘故障~或者是前面板与CPU模块之间通讯失败。
1.4 数字键Numeric Keys键盘下部分数字“0,,”、小数点“.”和减号“-”键组成~其功能是:——数字0,,用来输入和修改数据~引导显示矩阵。
——负号“-”用来定义FloBoss S600的默认显示页的快捷方式。
- 1、下载文档前请自行甄别文档内容的完整性,平台不提供额外的编辑、内容补充、找答案等附加服务。
- 2、"仅部分预览"的文档,不可在线预览部分如存在完整性等问题,可反馈申请退款(可完整预览的文档不适用该条件!)。
- 3、如文档侵犯您的权益,请联系客服反馈,我们会尽快为您处理(人工客服工作时间:9:00-18:30)。
德众尚杰S600示例说明书S600目录一、注意事项 (3)二、产品特点 (3)三、按键的功能说明 (4)四、基本操作 (6)五、设置 (7)六、收音机功能操作 (13)七、GPS卫星导航功能操作 (14)八、光碟播放基本操作 (14)九、U盘,SD卡播放操作 (16)十、虚拟多碟(可选功能) (17)十一、IPOD播放(可选功能) (18)十二、蓝牙免提系统操作 (19)十三、蓝牙音乐播放(A2DP) (20)十四、AVIN(辅助源输入)操作 (20)十五、移动电视操作 (20)十六、行车记录仪操作 (20)十七、安装GPS天线 (20)十八、常见故障排除向导 (21)S600一、注意事项为了您的安全,请尽量不要在驾驶时观看视频和操作机器;开车时请将音量调到能清楚听到外界声音的水平。
开始操作前,请详细阅读本手册以及系统的其他手册,了解本使用手册和机器上的相关安全提示和警告标识,阅读完之后放在随手可及的地方以备随时参考。
●首先请注意交通安全。
●如您在操作本系统遇到困难时,请将车停放在安全的地方后操作。
●勿让儿童操作本机器,以免造成人身伤害或机器损坏。
●在使用卫星导航功能时请遵照交通规则驾驶。
●请不要在禁止使用电子设备或严禁明火的地方使用,如:加油站、酒厂、电磁强干扰地区等,否则可能造成危险。
●不要自行保养、维护、安装本机器。
在接通电源的情况下请勿安装或维修本机,由未受过电子设备或车辆附件安装训练或缺乏经验的人员安装及维修本机器非常危险。
●不要把本机器贮藏或安装在阳光直射的地方,也不要将其置于其他有害物质环境里,特别是液晶屏。
如果安装的时候,液晶屏正好处于空调器通风道附近,请保证凉风或者热风不要直接吹到机器上,否则可能损坏机器,甚至对汽车或者人身产生伤害。
●切勿用一些尖锐的物体刮划显示屏,不要拿硬物大力按压显示屏,否则会造成显示屏或触摸屏的损坏。
●为了保证机器正常运转,防止火灾或电击发生,请不要将机器暴露在潮湿的空气中,更不能将液体洒落机器上。
机器只能播放12厘米的碟片,并且每次只能播放一张碟片。
请不要将8厘米的碟片或者其它物品塞入机器。
二、产品特点Can-Bus:支持原车总线系统,实现原车完美兼容支持OPS、智能倒车轨迹、倒车视频三屏叠加显示功能,倒车结束后自动返回到纯OPS界面,车速达到15KM/H会自动返回到播放界面(需要原车CAN-BUS支持)支持车门状态提示:车门开关,后备箱、引挚盖开启时,会在导航系统上显示开启状态(需要原车CAN-BUS支持)支持方向盘控制功能:音量加减、静音、上下曲、接听与挂断电话、转播放模式等(需要原车CAN-BUS支持)支持仪表盘信息屏显示导航工作状态功能(需要原车CAN-BUS支持).支持原车空调显示功能,并显示车外温度(需要原车CAN-BUS支持).内置收音FM、AM功能内置蓝牙免提功能:支持电话本下载、蓝牙音乐播放、去电、来电仪表盘显示电话号码功能(需要原车CAN-BUS支持)内置DVD功能,兼容:CD-DA、CD-ROM、CD-RW、VCD、DVD-ROM支持IPHONE4以上音乐播放与充电功能(可选)支持原车USB对插功能(可选)支持HD-SD卡多媒体播放功能,触屏播放控制,支持MP3/MP4/WMA/JPG4X60W超强高保真功放系统内置GPS导航,精准的导航定位能力,让您的旅途不再迷茫。
三、基本操作,按键的功能说明。
S600 3.1、开关机与音量调节在关机状态下,短按面板左旋钮,可打开机器电源,开机状态下长按面板左旋钮,可关闭机器电源。
音量调节:顺时针、逆时针旋转动左旋钮,调节系统音量大小,当逆时针旋转动为0时,屏显为静音,再次顺时针旋转,可取消静音;短按左旋钮,可实现静音,再次短按左旋钮,可取消静音。
3.2、MENU(主菜单)3.2-1,在其它功能模式下,短按MENU键,可回到主菜单(图一)。
在主菜单屏幕上,点击相应的功能按钮,可进入该功能。
其中,碟片、SD、USB、IPOD、外部输入需插入或连接相关设备方可进入,电视功能需安装电视模块方可以执行该功能。
3.2-2,MENU键也为快捷键.长按住面板MEUN键5秒钟会出现校屏界面.(当触摸偏移的时候,需要进行此操作).图一3.3、RADIO(收音模式)按面板上RADIO键,会转到收音模式,若再次按下RADIO时,会在FM1,FM2,FM3,AM1AM2,之间进换行3.4、TONE(音效设置)可根据自的要求来设置适合于自己的声音效果。
(详细参看5.1通用设置)3.5、DIMM屏幕亮度调整按面板上DIMM键,分为三级,亮,柔和,关屏.当大灯开启着,屏暮亮度会自动选择柔和(因为只有晚上才会开大灯),大灯关闭后,屏幕会自动变为最亮一级;你可以通过DIMM来关闭屏幕听音乐.3.6、NAVI(导航模式)短按面板按键NAVI,系统进入导航模式。
(当机器插入导航地图卡并设置好路径时,此操作有效,否则会提示“请插入导航卡’);点击确认就转到当前收听模式.比如我现在前台是收音界面,后台是导航界面.我需要转到收音,再按一下NAVI,就转到收音界面.导航声音开关:短按面板右上方导航声音开关键,都可实现单独导航声音的开和关。
3.7、DISC(碟片模式)入碟播放出视频后,点屏幕会调出菜单功能,进行操作。
如果机器中装有碟片,在非碟片播放模式下短按面板按键DVD,可直接切换到碟片播放模式,如果机器中无碟片,则按下此键无效。
碟片快捷控制::按此钮为碟片入碟/退碟。
3.8、MEDIA CD,SD,MP3,iPhone(多媒体模式)短按面板按键MEDIA,系统可以切换到媒体源播放。
如果系统已经在媒体播放模式,如果机器没有插入或者接入相关设备,该选项卡无效,此时不可点选。
选项卡文字显示为橙色,表示机器接有该设备,并且处于读取当前设备状态。
S6003.8-1随机:不按规则,自曲的播放.3.8-2重复,重复当前的歌曲.3.8-3文件夹:点击进入选曲界面3.8-4本导航支持苹果公司iPod,iPhone,(数据线可选),当插上iPhone的时候,会自动播放iPhone歌曲与充电。
3.9、PHONE蓝牙电话短按面板键PHONE,系统进入蓝牙电话操作界面(如下图)。
按其它键,退出蓝牙电话并执行其它功能。
3.10、屏幕的触摸与显示区域。
3.11、蓝牙麦克风,在蓝牙通话时使用3.12、在播放音乐时为上下曲控制,在收音模式时,可进行扫描电台。
3.13、出入碟口处。
3.14、出入仓键在播放碟片换碟时使用。
3.15、导航声音开关键当在听音乐并导航的时候,可按此开关,按一下,导航声音关掉只出音乐的声音,再接一下打开导航声音。
3.16、左旋钮在关机状态,按一下开机,在播放声音的过程中按一下,是静音,长按三秒会自动关机。
S600 3.17、右旋钮在收音状态下,按一下是自动搜台并存储,旋转对电台频率进行微调;当在播模式下,按一下是暂停,再按一下是播放。
3.18、复位孔当程序错乱时,可用细小坚硬物按此孔程序会恢复出厂设置。
3.19、左边存储卡孔导航地图口3.20、右边存储卡孔多媒体口SD卡需要放专用卡座。
如果SD卡位置插错,会导致操作无效.3.21、USB,iPod线,3G上网(可选)本机配有两个USB接口,每个接口分别都支持USB音视频播放,iPod/iphone音乐播放,3G上网功能。
3.22、电视功能(备选)当机器装配有数字电视模块的时候,点击主界面”移动电视”,可进入数字电视收看模式。
3.23、屏幕校准在使用过程中,如果出现触摸屏偏移的情况,需要进行触摸屏校准。
长按MENU键,可以进入触屏校准程序。
四、基本操作4.1、系统复位4.1-1、用户在第一次使用本机时,请长按复位“RESET”键3秒以上,使机子恢复到出厂设置。
4.1-2、出现由不当操作引起的死机等非正常工作现象时,请长按复位“RESET”键3秒以上,本机即可恢复正常。
注:由于面板上的复位键较小,请使用笔尖或类似的尖头物体点按此键。
4.2、启动/关闭主机在ACC开关处于开启状态下,按主机面板“POWER”按键打开电源;将光碟插入碟槽,机器将自动开启,开启后进入读碟模式;开机时,长按主机面板“POWER”按键开关,或者熄火拔出车钥匙都将关闭本机电源。
4.3、音量调整旋转主机面板上的音量旋钮(或触摸音量图标调出音量进度条可拖动音量)可调节本机音量的大小。
4.4、静音开关按面板上的“MUTE”键可使系统静音,再按一次或者调节音量则可以恢复声音。
(或调出音量进度条,触摸音量图标静音状态显示)4.5、背光灯开关短按面板或遥控器上的背关灯开关“DIMM”键,可开启或关闭本机显示屏的背光灯。
4.6、倒车摄像头车辆挂倒档后,无论机器处于开机或关机状态,显示屏都会立即切换到倒车摄像头画面。
4.7、播放源选择4.7-1短按主机面板上或者遥控器上的“MEDIA”按键可在SD、USB、光碟播放模式间切换。
S600 4.7-2短按主机面板上的“MENU”键可在主页和当前模式界面进行切换。
4.7-3在主页界面时,轻触不同的功能图标进入相应的界面,各功能的详细操作请见以后的章节。
左右轻触滑动主页可实现多个主页之间切换。
4.8、光碟ESP电子防震功能本机具有电子防震功能,因此车子即使行驶在路况不是很好的路段而振动时,本机的音频视频播放也不会受多大影响,当然防震时间的长短也会因播放不同光碟而异。
以下抗震时间仅供参考:DVD碟:约5秒;CD/VCD碟:约10秒;MP3:约150秒。
4.9、模式和播放位置记忆关闭本机电源,然后再重新开机,系统将恢复到原来关机前的模式。
如果是收音,会继续收听之前记忆的电台,如果是音乐或者视频,会继续从上次中断的位置恢复播放。
五、设置5.1在触摸屏上点击主界面的设置图标“”进入系统设置界面,点击对应的选项条来进入对应的设置选项,可以上下拖动选项条来找到所需要的设置项。
注意:设置项中开关滑动条说明。
[]此时为开启状态。
[]此时为关闭状态。
5.2、背景壁纸1-1、背景选择点击背景壁纸选项进入到背景设置界面,如下图:用户可以按住后左右拖动图片来选择喜欢的背景。
1-2、自定义背景S600为了满足您更高需求,本机支持您将自己的照片等图片设置为背景。
自定义背景的图片必须符合下述条件,图片宽度介于800-1000像素之间,高度必须是480像素,图片格式必须是JPG格式。
图片必须存放到导航SD卡的根目录下。
点击“用户自定义”进入到自定义背景界面,系统会自动搜索导航SD卡中符合条件的图片,点击“更新”按钮将当前选择的图片设置为背景注意:为了获得更好的效果,请您先在电脑上合理裁剪图片大小后,存入导航SD卡,再进行以上操作。
5.2.通用设置5.2-1、按键Beep选择开启或关闭按键的Beep音5.2-2、倒车时静音选择倒车时音响是否静音。
